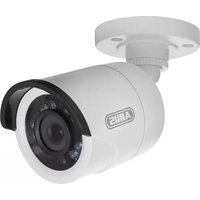
HDCC42500 - Surveillance Camera ABUS - Free user manual and instructions
Find the device manual for free HDCC42500 ABUS in PDF.


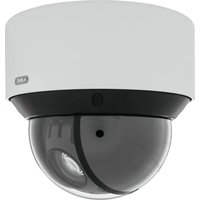
| Product type | HD surveillance camera |
| Brand | Abus |
| Model | HDCC42500 |
| Resolution | 1920 x 1080 pixels (Full HD) |
| Viewing angle | 90° |
| Night vision | Yes, up to 30 meters |
| Power supply | 12 V DC / Power over Ethernet (PoE) |
| Power consumption | 5 W |
| Dimensions (L x H x D) | 75 x 65 x 130 mm |
| Weight | 350 g |
| Protection rating | IP67 |
| Operating temperature | -20°C to 50°C |
| Connectivity | Ethernet RJ45, PoE compatible |
| Main functions | Motion detection, microSD recording, live streaming |
| Mounting | Wall or bracket mount |
| Maintenance and cleaning | Clean with a soft, dry cloth |
| Security | SSL/TLS encryption, password-protected access |
| Spare parts and repairability | Contact Abus after-sales service |
| Warranty | 2 years |
Frequently Asked Questions - HDCC42500 ABUS
User questions about HDCC42500 ABUS
0 question about this device. Answer the ones you know or ask your own.
Ask a new question about this device
Download the instructions for your Surveillance Camera in PDF format for free! Find your manual HDCC42500 - ABUS and take your electronic device back in hand. On this page are published all the documents necessary for the use of your device. HDCC42500 by ABUS.
USER MANUAL HDCC42500 ABUS
natural_image
Exterior view of a white ABUS surveillance camera (no text or symbols visible on body)natural_image
Exterior view of a white ABUS surveillance camera (no text or symbols visible on body)Bedienungsanleitung
Version 04/2015
CE
natural_image
Diagram of a mechanical device with a cylindrical component and a base, no text or symbols present
natural_image
Pure technical diagram of a mechanical assembly without any text, numbers, or symbolsnatural_image
Exterior view of a white ABUS surveillance camera (no text or symbols visible on body)User manual
Version 03/2015
CE
English translation of the original German user manual. Retain for future reference.
Introduction
Dear customer,
Thank you for purchasing this product.
This device complies with the requirements of the applicable EU directives. The declaration of conformity can be obtained from:
To ensure this condition is maintained and that safe operation is guaranteed, it is your obligation to observe this user manual.
Read the entire user manual carefully before putting the product into operation, and pay attention to all operating instructions and safety information.
All company names and product descriptions are trademarks of the corresponding owner. All rights reserved.
If you have any questions, please contact your specialist installation contractor or specialist dealer.

Disclaimer
This user manual has been produced with the greatest of care. Should you discover any omissions or inaccuracies, please contact us in writing at the address provided on the back of the manual.
ABUS Security-Center GmbH & Co. KG assumes no liability for technical and typographical errors, and reserves the right to make changes to the product and user manuals at any time and without prior notice.
ABUS Security-Center GmbH is not liable or responsible for direct or indirect damage resulting from the equipment, performance and use of this product.
No forms of guarantee are assumed for the contents of this document.
Explanation of symbols
 | The triangular high voltage symbol is used to warn of the risk of injury or health hazards (e.g. caused by electric shock). |
 | The triangular warning symbol indicates important notes in this user manual which must be observed. |
 | This symbol indicates special tips and notes on the operation of the device. |
Important safety information
 | All guarantee claims are invalid in the event of damage caused by non-compliance with this user manual. We cannot be held liable for resulting damage. |
 | We cannot be held liable for material or personal damage caused by improper operation or non-compliance with the safety information. All guarantee claims are void in such cases. |
The following safety information and hazard notes are not only intended to protect your health, but also to protect the device from damage. Please read the following points carefully:
- There are no components inside the product that require servicing. Dismantling the product invalidates the CE certification and the guarantee/warranty.
- The product may be damaged if it is dropped, even from a low height.
- Install the device so that the image sensor is not exposed to direct sunlight. Pay attention to the installation instructions in the corresponding section of this user manual.
- The device is designed for indoor and outdoor use (IP66).
Avoid the following adverse conditions during operation:
- Moisture or excess humidity
• Extreme heat or cold - Direct sunlight
- Dust or flammable gases, vapours or solvents
• Strong vibrations
• Strong magnetic fields (e.g. next to machines or loudspeakers) - The camera must not be installed on unstable surfaces.
General safety information:
- Do not leave packaging material lying around. Plastic bags, sheeting, polystyrene packaging, etc. can pose a danger to children if played with.
- The video surveillance camera contains small parts which could be swallowed and must be kept out of the reach of children for safety reasons.
- Do not insert any objects into the device through the openings.
- Only use replacement devices and accessories that are approved by the manufacturer. Do not connect any non-compatible products.
- Please pay attention to the safety information and user manuals for the other connected devices.
- Check the device for damage before putting it into operation. Do not put the device into operation if you identify any damage.
- Adhere to the normal voltage limits specified in the technical data. Higher voltages could destroy the device and pose a health risk (electric shock).
Safety information
- Power supply: Note the information provided on the type plate for supply voltage and power consumption.
- Overloading
Avoid overloading electrical sockets, extension cables and adapters, as this can result in fire or electric shock.
- Cleaning
Only use a damp cloth to clean the device. Do not use corrosive cleaning materials.
Disconnect the device from the power supply before cleaning.
Warnings
Observe all safety and operating instructions before putting the device into operation for the first time.
-
Observe the following information to avoid damage to the power cable and plug:
-
Do not pull the cable when disconnecting the device from the power – always take hold of the plug.
-
Ensure that the power cable is positioned as far away as possible from any heating equipment, as this could otherwise melt the plastic coating.
-
Follow these instructions. Non-compliance with these instructions could lead to electric shock:
-
Never open the housing or power supply unit.
-
Do not insert any metallic or flammable objects into the device.
• Use surge protection to prevent damage caused by overvoltage (e.g. in electrical storms). -
Disconnect defective devices from the power immediately and contact your specialist dealer.
 | When installing the device in an existing video surveillance system, ensure that all devices have been disconnected from the mains power circuit and low-voltage circuit. |
 | If in doubt, have a specialist technician carry out assembly, installation and connection of the device. Improper or unprofessional work on the power supply system or domestic installations puts both you and others at risk.Connect the installations so that the mains power circuit and low-voltage circuit always run separately from each other. They should not be connected at any point or become connected as a result of a malfunction. |
Unpacking the device
Handle the device with extreme care when unpacking it.
| If the original packaging has been damaged, you must start by inspecting the device. If the device shows signs of damage, return it in the original packaging and inform the delivery service. |
Contents
- Intended use....26
- Scope of delivery 26
- Features and functions ......26
- Camera description 27
- Mounting/installation....27
5.1. Mounting the camera 27
5.2. Orientation of the camera....28
5.3. Power supply....29
5.4. Connecting the video cable....29
5.5. Cable-controlled DWDR function 29 - On-screen display....30
6.1. Opening the on-screen display 30
6.2. Description of the on-screen display....30 - Maintenance and cleaning 37
7.1. Maintenance....37
7.2. Cleaning....37 - Disposal....37
- Technical data....38
1. Intended use
This camera is designed for both daytime and night-time use. It provides video images in full HD resolution. The output signal is provided in HD-TVI format. This allows the use of a conventional coaxial cable for signal transmission. It is used for video surveillance in conjunction with a recording device. The device is designed for indoor and outdoor use.
2. Scope of delivery
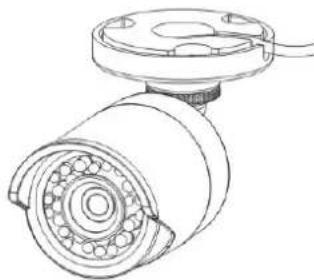 |  |
| Outdoor HD-TVI mini tube IR 1080p | Safety information |
 | |
| Installation tool |
3. Features and functions
• Full HD 1080p resolution: 1920 x 1080 @ 25 fps
• Transmission via conventional CCTV infrastructure (up to 500 m via RG6 cable)
• 3.6 mm fixed lens
• 1/3 inch CMOS image sensor
• IR LEDs for night vision
• 3D DNR for noise-free images
- DWDR function to compensate for image contrasts
• Weatherproof camera housing (IP66)
- On-screen display for camera configuration (control via DVR via coaxial cable)
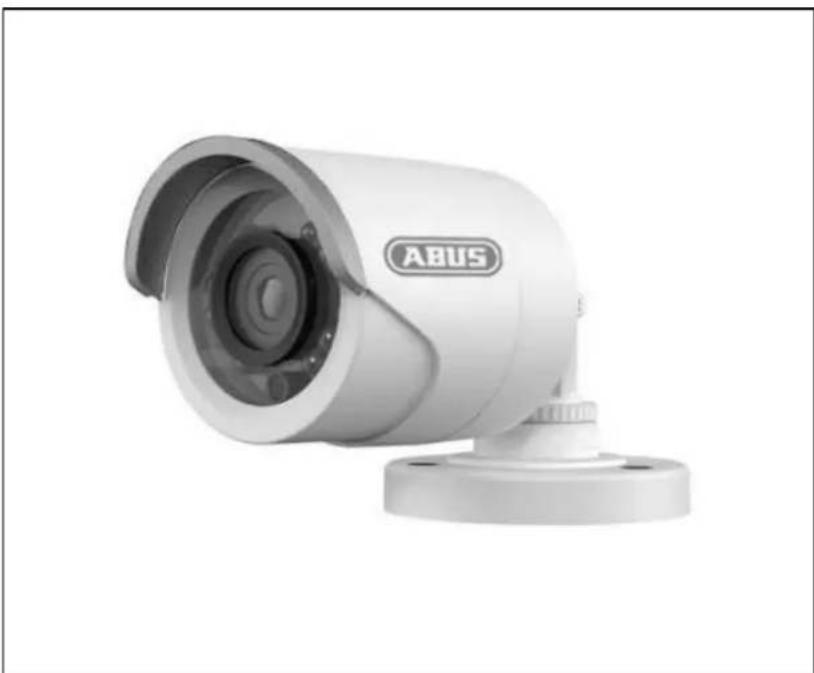
4. Camera description

| 1 | IR LEDs |
| 2 | Lens |
| 3 | Camera housing with sun shade |
| 4 | Camera mount |
| 5 | Connecting cable with function: DWDR on/off |
| 6 | Analogue video output (BNC, for service purposes, labelled 'CVBS') |
| 7 | Power supply connection (5.5 x 2.1 mm, barrel connector) |
| 8 | HD-TVI video output (BNC, labelled 'TVI') |
5. Mounting/installation
5.1. Mounting the camera

IMPORTANT!
The camera must be disconnected from the power supply during installation.
Use screw anchors and screws that are appropriate to the surface to fix the camera in place. Drill appropriately sized holes for the screw anchors used. An opening is provided on the base plate of the camera mount for cabling at the side.

natural_image
Diagram of a mechanical device with a cylindrical component and a base, no text or symbols present
natural_image
Pure technical diagram of a mechanical assembly without any text, numbers, or symbols5.2. Orientation of the camera
| Carefully loosen the three fixing screws (see images #1, #2, #3). Then orient the camera as required. | |
 | #1: Pivot 360°#2: Tilt 90°#3: Rotation 90° |


5.3. Power supply
| IMPORTANT!Before starting installation, ensure that the power supply voltage and the rated voltage of the camera are identical. | ||
 | 12 V DC, barrel connector, 5.5 x 2.1 mm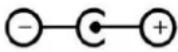 | |
The cameras require a 12 V DC power supply. The polarity of the DC voltage supply must be observed!
5.4. Connecting the video cable
In order to transmit the HD-TVI video signal from the camera to a recorder, an RG59 or RG6 type coaxial cable with BNC connector (male) must be connected to the connection labelled 'TVI'. The cable length to the next device must not exceed 500 m (RG6) or 300 m (RG59).
An RG59 or RG6 type coaxial cable can be connected to the analogue video output (labelled 'CVBS'). The cable length to the next device must not exceed 100 m.
 | To ensure optimum quality of the HD-TVI signal transmission, it is important that the cable is neither kinked nor crushed at any point, and that its radius is adequate (min. bending radius 6 cm).Damage to the cable or porosity as a result of ageing can have a negative impact on the quality of the signal or image (e.g. shadowing around the edges). |
5.5. Cable-controlled DWDR function
The wide dynamic range function enhances the image quality in the event of high contrasts in the video image. This camera's wide dynamic range function can be activated and deactivated via an external contact (by on-screen display, only via ABUS HD-TVI DVR).
To activate the DWDR function, connect both connections of the external contact together.
If the DWDR function is not used or is controlled by the on-screen display of the HD-TVI DVR, both contacts should be isolated to prevent short-circuit, contact with other housing parts and electrical potential.
6. On-screen display
6.1. Opening the on-screen display
This camera's on-screen display can only be opened via the ABUS HD-TVI DVR. Please consult the user manual for the ABUS HD-TVI DVR.
6.2. Description of the on-screen display
MENU
- VIDEO OUT PAL
- LANGUAGE GER
- MAIN MENU ↓
| Function Description | |
| VIDEO OUT Video | standard settingPAL:Video output and service monitor output are set to the 50 Hz standard (e.g. 720p50, 1080p50 or PAL)NTSC:Video output and service monitor output are set to the 60 Hz standard (e.g. 720p60, 1080p60 or NTSC) |
| LANGUAGE Setting | for the language of the on-screen displayLanguage selection:Use the LEFT and RIGHT buttons to select the language.Then press the ENTER button to apply the selected language. |
| MAIN MENU Advanced | camera settingsPress the ENTER button to open the advanced camera settings menu. |
MAIN MENU
HDCC62510, HDCC72510
MAIN MENU
- SMART FOCUS ↓
- SCENE INDOOR
- APERTURE MANUAL
- EXPOSURE ↓
- BACKLIGHT OFF
- WHITE BAL. ATW
- DAY&NIGHT EXTERN.
- NOISE RED. ↓
- SPECIAL ↓
- SET ↓
- RESET ↓
- OUTPUT ↓
HDCC32500, HDCC42500
MAIN MENU
- SCENE INDOOR
- APERTURE MANUAL
- EXPOSURE ↓
- BACKLIGHT OFF
- WHITE BAL. ATW
- DAY&NIGHT EXTERN.
- NOISE RED. ↓
- SPECIAL ↓
- SET ↓
- RESET ↓
- OUTPUT ↓
SMART FOCUS
HDCC62510, HDCC72510 only
| Function Description | |
| SMART FOCUS The Smart Focus function shows a numerical value for the focus setting. The higher the value, the better the focus for the current environmental conditions. It must be ensured that a focus value set during the day is checked to ensure its usability at night.Pressing the ENTER button again takes you back to the previous menu screen. |
SCENE
| Function Description | |
| SCENE | Selection of scene type, which applies certain pre-settings in the camera settings. Selection:INDOOR: Indoors without significant differences in brightness in the imageOUTDOOR: Outdoors (with good reflection properties or residual light)INDOOR1: Indoors with significant differences in brightness in the imageLOW-LIGHT: Outdoors (with poor reflection properties or no residual light) |
APERTURE
| Function Description | |
| APERTURE Lens type setting. | Manual (fixed): HDCC62510, HDCC72510: Zoom and focus settings are performed manually on the lens itself)HDCC32500, HDCC42500: The lens focus setting has already been configured at the factory and cannot be changed. |
| For this model, no setting options are available for this item! | |
EXPOSURE
| Function Description | |
| SHUTTER Exposure time setting | AUTO: Automatic adjustment of the exposure time to the environmental conditions.1/25~1/50,000: Fixed exposure time |
| AGC Setting for max. gain value (upper limit) used by the camera (0~15). The camera selects the gain value automatically. | |
| SENSITIVITY Continuous exposure setting. Longer exposure times for each image make the resulting image lighter. However, the longer the exposure time, the lower the frame rate.OFF: Continuous exposure deactivatedAUTO (2x~30x): Continuous exposure activated, with value for upper limit | |
| BRIGHTNESS Basic image brightness setting (1~100) | |
| D-WDR Software enhancement of the contrast ratio in the image. Dark areas are brightened, whilst trying to not increase the brightness of existing light areas.OFF: Function deactivatedON: Function activated | |
| DEMIST | This function enhances the image quality in the event of a misty camera view.OFF: Function deactivatedON: Function activatedPOS/SIZE: Reference area size and position settingDEGR. Intensity levels for the function |
| RETURN | Return to previous menu screen |
BACKLIGHT
| Function Description | |
| OFF | Deactivate all backlight or contrast treatment |
| WDR | Wide dynamic range function. Contrast treatment of the video image through double exposure (short and long exposure) of the image.GAIN (LOW/MEDIUM/HIGH): Intensity of the functionWDR BRIGHT (0~60): Move basic setting on a brightness scaleWDR OFFSET (0~60): Change basic gain factor |
| BLC Backlight compensation. The function displays light areas of the video image darker, whilst maintaining the brightness of dark areas.GAIN (LOW/MEDIUM/HIGH): Intensity of the functionAREA (POSITION/SIZE): Setting of the reference area for the calculation. Press ENTER to change the position with the control buttons. Press ENTER again to change the size with the control buttons.STANDARD: Press ENTER to reset all parameters of the BLC function to the factory settings. | |
| HSBLC This function marks areas above a certain brightness level black. This function may be used, for example, solely at night for oncoming vehicle headlights. In this case, the headlights will be marked black. The registration plates next to the headlights will then be more easily identifiable.SELECTION (AREA 1~4): Selection of one of max. four areas. The function is applied in this area.DISPLAY (ON/OFF): Activate/deactivate the area. Press ENTER once or twice to adjust the position and size with the control buttons.LEVEL (0~100): Brightness threshold over which a pixel is marked black.MODE (PERMANENT/NIGHT-TIME ONLY): Permanent activation of the function or only when in night modeMASKING (ON/OFF): Activate or deactivate all areas.STANDARD: Press ENTER to reset all parameters of the HSBLC function to the factory settings. | |
| RETURN Return to previous menu screen | |
WHITE BALANCE
| Function | Description |
| ATW | Auto tracking white balanceWhite balance is performed by the camera automatically and continuously updated. |
| AWC -> SET | With this function, white balance is performed once after pressing the ENTER button and stored permanently. |
| MANUAL Manual setting of the white balanceBLUE (0~100): Proportion of blue in video imageRED (0~100): Proportion of red in video image | |
| RETURN Return to previous menu screen | |
DAY&NIGHT
| Function | Description |
| EXTERN. | The day/night switching (ICR/IR) is controlled by the photo sensor integrated into the camera (switching threshold: 5–15 Lux)IR LED (ON/OFF): The integrated IR LEDs can be deactivated in night mode if required. |
| COLOUR The camera stays in colour mode permanently. The infrared cut filter is constantly in front of the lens, and the IR LEDs are constantly off. | |
| B/W The camera stays in black/white mode permanently. The infrared cut filter is constantly separated from the lens. The IR LEDs are switched on and off automatically by the photo sensor. | |
| RETURN Return to previous menu screen | |
NOISE REDUCTION
| Function Description | |
| 2DDNR Noise reduction function, optimised for static picture content | |
| ON: Function activatedOFF: Function deactivated | |
| 3DDNR Noise reduction function, optimised for movement (image to image view) | |
| ON: Function activatedOFF: Function deactivated | |
| RETURN Return to previous menu screen | |
SPECIAL
| Function Description | |
| TITLE OFF: Deactivate title overlay in video imageON: Activate title overlay in video image, if a title has been assigned. Press the ENTER button to go to the submenu.Use the control buttons to navigate the cursor to the desired character. All available characters are displayed. Press ENTER to select the character.← Move the cursor on the title line to the left← Move the cursor on the title line to the rightCLR Clear the entire title linePOS Change the position of the title overlay. Select POS, then press ENTER and use the control buttons. Pressing ENTER again takes you back to the previous menu level.END Exit the menu | |
| D-EFFECT | This menu item provides a number of digital functions for modifying the video image.FREEZE: Freeze the video imageMIRROR: Horizontal mirroring and vertical rotation (horizontal and vertical mirroring) functions are available.D-ZOOM: Digital zoom in the video image. Zoom factor setting.S/N: Modify the section in the video image with active digital zoom.SMART D-ZOOM: Automatic digital zoom in a selected area of the video image, triggered by the camera's internal motion detection.SELECTION: Two areas can be configured for the automatic digital zoom function. The selection is made using the left/right buttons.DISPLAY: Activate/deactivate the preview frame. The position of the area can be changed using the ENTER button.SENSITIVITY: Sensitivity for motion detection.D-ZOOM: Zoom factor setting after detecting motion in the configuredarea.TIME: Duration of the automatic digital zoom. Afterwards, full-screen mode is reactivated.STANDARD: Reset all settings made to the SMART D-ZOOM function.The SMART D-ZOOM function becomes active only after exiting the camera menu.NEGATIVE IMAGE: Display the video image as a negative. |
| MOTION The camera's internal motion detection is integrated into the processor platform by default. This camera type does not have an interface (e.g. alarm output) to allow this function to be used.OFF: Deactivate the functionON: Activate the functionAREA SELECTION (1~4): Selection of area (max. four)AREA DISPLAY (ON/OFF): Activate/deactivate the preview frame. The position and size of the area can be changed using the ENTER button.SENSITIVITY (0~100): Sensitivity for motion detection.MOTION IND. (OFF/ON): A mark is displayed in the corresponding area in the live view when motion is detected.STANDARD: Reset all settings made to this function. | |
| PRIVATE ZONES | This function allows private zones to be set up in the video image to protect areas that are not to be monitored.AREA SELECTION (1~8): Selection of an area for the configurationAREA DISPLAY (OFF/INV./COLOUR/MOSAIC): Selection of marking type.Press ENTER for:POSITION: Change the position of the maskSIZE: Change the size of the maskCOLOUR (0~15): Colour selection (only for marking type COLOUR)RATIO/TRANSPARENCY (0~3): Intensity of the colour display (transparency)STANDARD: Reset all settings made to this function. |
| DEFECT Function | for correcting defective pixels in the image sensorLIVE (ON/AUTO/OFF): Active continuous correction of pixelsSTATIC DPC (ON/OFF): Static correction of defective pixels on restart |
| RETURN | Return to previous menu screen |
SET
| Function | Description |
| SHARPNESS | Edge and surface sharpness setting (modification of the video image by the software) (0~15) |
| MONITOR | Adjustment of the camera signal to the output device or to the next connected device.LCD: Optimisation for LCD monitorsGAMMA: Automatic or fixed gamma value settingBLUE GAIN (0~100): Blue value settingRED GAIN (0~100): Red value settingCRT: Optimisation for CRT monitorsBLACK VALUE (-30~+30): Black value settingBLUE GAIN (-30~+30): Blue value settingRED GAIN (-30~+30): Red value setting |
| LSC | (OFF/ON): |
| RETURN Return to previous menu screen | |
RESET
| Function Description | |
| FACTORY SET. (RESET): Reset all camera settings in the main menu to the factory settings | |
| RETURN Return to previous menu screen |
EXIT
| Function Description |
| RETURN Exit the on-screen display |
7. Maintenance and cleaning
7.1. Maintenance
Regularly check the technical safety of the product, e.g. check the housing for damage.
If it appears to no longer be possible to operate the device safely, stop using the product and secure it to prevent unintentional use.
It is likely that safe operation is no longer possible in the event that:
- the device shows signs of visible damage
- the device no longer works correctly.

Please note:
You do not need to perform any maintenance on the product. There are no components to service and nothing inside the product to check. Never open it.
7.2. Cleaning
Clean the product with a clean, dry cloth. The cloth can be dampened with lukewarm water to remove stubborn dirt.

Do not allow any liquids to enter the device.
Do not use any chemical cleaning products as they could damage the surface of the housing and screen (discolouration).
8. Disposal

Important: EU Directive 2002/96/EC regulates the proper return, treatment and recycling of used electronic devices. This symbol means that in the interest of environmental protection, the device must be disposed of separately from household or industrial waste at the end of its service life in accordance with applicable local legal guidelines. Used devices can be disposed of at official recycling centres in your country. Obey local regulations when disposing of material. Further details on returns (also for non-European countries) can be obtained from your local authority. Separate collection and recycling conserves natural resources and ensures that all the provisions for protecting health and the environment are observed when recycling the product.
9. Technical data
| Model number HDCC42500 | |
| Image sensor 1/3 inch progressive scan CMOS | |
| Camera type Mini tube | |
| Resolution | 1080p25, |
| Pixels (effective) 1920 (H) x 1080 (V) | |
| Lens 3.6 mm, fixed lens | |
| Horizontal angle of view 80.9° | |
| Day/night switching Electromechanical IR cut filter | |
| Minimum illumination (colour) 0.1 Lux | |
| Minimum illumination (B/W) 0.01 Lux (image integration on) | |
| Minimum illumination (IR) 0 Lux | |
| Image integration 2x-16x | |
| Noise reduction 2D DNR, 3D DNR | |
| Electronic shutter control | 1/25 s to 1/50,000 s |
| Camera control On-screen display (OSD) (only via ABUS HD-TVI DVR) | |
| Backlight compensation | WDR (on/off) |
| Privacy masking 8 freely configurable masks | |
| Digital zoom | Yes |
| Video system | HD-TVI |
| IR LEDs | 12 |
| IR range | 10 m |
| Connections | Video signal (HD-TVI, BNC), video signal (FBAS, BNC), power supply (DC), 2-pin (for WDR on/off) |
| Power supply | 12 V DC ± 10% |
| Power consumption | Max. 340 mA (max. 4 W) |
| Operating temperature | -20°C-+60°C |
| Humidity | Max. 90% |
| Dimensions (H x∅) | 59.1 x 89.6 mm |
| Weight | 400 g |

The IR range is strongly dependent on the environmental conditions. If the area in the camera's field of view reflects poorly or if there are no objects within the max. illumination range, the brightness of the video image at night may be too low. This will result in poor usability of the video image.
In addition, when installing the camera it must be ensured that no objects are located in close proximity to the camera's field of view (e.g. roof gutter or wall). These objects can reflect back the IR light, resulting in circular fading on the video image in the opposite direction to the object.
HDCC42500
natural_image
Exterior view of a white ABUS surveillance camera (no text or symbols visible on body)natural_image
Technical line drawing of a mechanical component with no visible text or symbols
natural_image
Pure technical diagram of a mechanical assembly without any text, numbers, or symbolsnatural_image
Exterior view of a white ABUS surveillance camera (no text or symbols visible on body)natural_image
Technical line drawing of a mechanical component with no visible text or symbols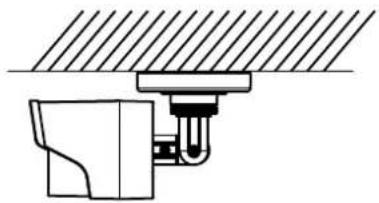
natural_image
Pure technical diagram of a mechanical assembly without any text, numbers, or symbolsnatural_image
Exterior view of a white ABUS surveillance camera (no text or symbols visible on body)natural_image
Technical line drawing of a mechanical component with no visible text or symbols
natural_image
Pure technical diagram of a mechanical assembly without any text, numbers, or symbolsnatural_image
Exterior view of a white ABUS surveillance camera (no text or symbols visible on body)Instrukcja obsługi
Wersja 04/2015
CE
natural_image
Technical line drawing of a mechanical component with no visible text or symbols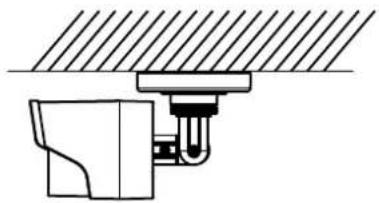
natural_image
Pure technical diagram of a mechanical assembly without any text, numbers, or symbolsnatural_image
Exterior view of a white ABUS surveillance camera (no text or symbols visible on body)natural_image
Technical line drawing of a mechanical component with no visible text or symbols
natural_image
Technical line drawing of a mechanical assembly with no visible text or symbolsThese operating instructions are published by ABUS Security-Center GmbH & Co.KG, Linker Kreuthweg 5, 86444 Affing, Germany. No reproduction (including translation) is permitted in whole or part e.g. photocopy, microfilming or storage in electronic data processing equipment, without the express written consent of the publisher.
The operating instructions reflect the current technical specifications at the time of print. We reserve the right to change the technical or physical specifications.
© Copyright 04/2015 by ABUS Security-Center
- Bedienungsanleitung
- User manual
- Introduction
- Disclaimer
- Explanation of symbols
- Important safety information
- The following safety information and hazard notes are not only intended to protect your health, but also to protect the device from damage. Please read the following points carefully:
- Safety information
- Warnings
- Unpacking the device
- Contents
- Intended use
- Scope of delivery
- Features and functions
- Camera description
- Mounting/installation
- Mounting the camera
- IMPORTANT!
- Orientation of the camera
- Power supply
- Connecting the video cable
- Cable-controlled DWDR function
- On-screen display
- Opening the on-screen display
- Description of the on-screen display
- MENU
- MAIN MENU
- SMART FOCUS
- SCENE
- Maintenance and cleaning
- Maintenance
- Please note:
- Cleaning
- Disposal
- Technical data
- HDCC42500
- Instrukcja obsługi
Brand : ABUS
Model : HDCC42500
Category : Surveillance Camera