
APPIP03HDP2P - Surveillance Camera Approx - Free user manual and instructions
Find the device manual for free APPIP03HDP2P Approx in PDF.


| Product type | IP surveillance camera |
| Brand | Approx |
| Model | APPIP03HDP2P |
| Resolution | 1080p (1920 x 1080 pixels) |
| Night vision | Yes, infrared up to 10 meters |
| Viewing angle | 90° diagonal |
| Connectivity | Wi-Fi 2.4 GHz / Ethernet RJ45 |
| Power supply | AC adapter 5V / 2A |
| Dimensions | Approximately 10 x 7 x 7 cm |
| Weight | Approximately 200 g |
| Storage | microSD card up to 128 GB (not included) |
| Audio | Built-in microphone and speaker (two-way audio) |
| Motion detection | Yes, with push alerts |
| Mobile app | Compatible with iOS and Android via dedicated app |
| Installation | Indoor (or outdoor with shelter, IP rating not specified) |
| Care and cleaning | Clean with a soft dry cloth. Do not use abrasive products. |
| Security | Data encryption, password access |
| Spare parts and repairability | Contact Approx after-sales service. No standard spare parts available. |
| General information | Manual available for free download at notice-facile.com |
Frequently Asked Questions - APPIP03HDP2P Approx
User questions about APPIP03HDP2P Approx
0 question about this device. Answer the ones you know or ask your own.
Ask a new question about this device
Download the instructions for your Surveillance Camera in PDF format for free! Find your manual APPIP03HDP2P - Approx and take your electronic device back in hand. On this page are published all the documents necessary for the use of your device. APPIP03HDP2P by Approx.
USER MANUAL APPIP03HDP2P Approx
Introduction and product description
Thank you for choosing the IP HD PNP camera APPIP03HDP2P
The APPIP03HDP2P has been developed with HD resolution to monitor a private home, office, shop or any other room both day and night in excellent quality. Its PnP technology enables automatic installation without configuring your router to access the camera externally.
It incorporates a micro SD slot with which you can insert micro SD cards and record directly to the storage and access to real-time video over the Internet on a desktop or laptop or Smartphone, with their own applications.
The APPIP03HDP2P includes 2 audio channels to communicate by voice in both directions as well as other practical functions and many alarm functions. All this makes it an excellent solution in the field of video surveillance
- APPIP03HDP2P
- Installation Cd
- Power Adaptor
- Quick installation guide
- Wall support
- Screws and wall plugs
Make sure your package contains the elements described above. If you find something is missing or damaged, please contact your dealer.
System Requirements
- Router with a LAN connection available (for installation)
• Computer or Smartphone
• Electrical outlet
Hardware installation for RJ-45 connection
For its first installation connect the camera to the router as shown in the following figure.
Connect a RJ-45 cable between the output Lan of the router and the Lan input of the camera, then connect the power adapter into an electrical outlet in your home and the DC input of the camera.

Smartphone Software EYECLOUD installation and configuration
Access to Google Play Store from Android or Apple Store on iPhone, download and install it on your smartphone.

You can see the application icon in the list of applications on your smartphone, run it. The first thing you need is to create an account and register. Insert your email and enter a password to register.
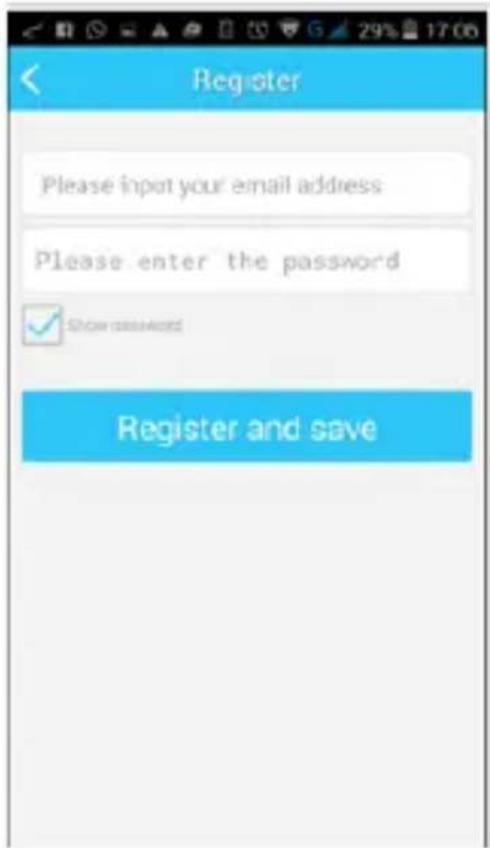
English
Click the + button in the top left corner, press in Scanning and scan the QR code on the back of the camera, the data will be entered automatically.

natural_image
Cartoon cat illustration with a star and sun, no text or symbols present

Insert the password (default password) Default 888888.
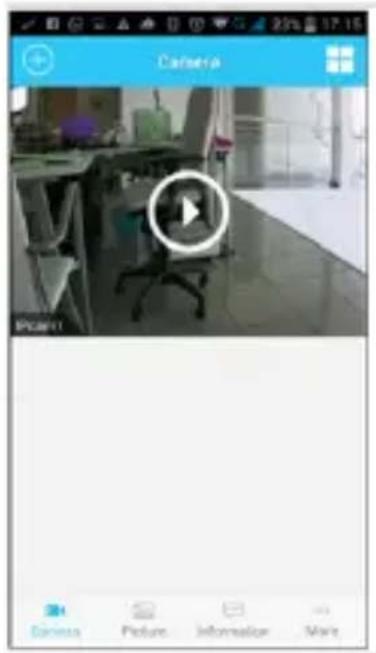
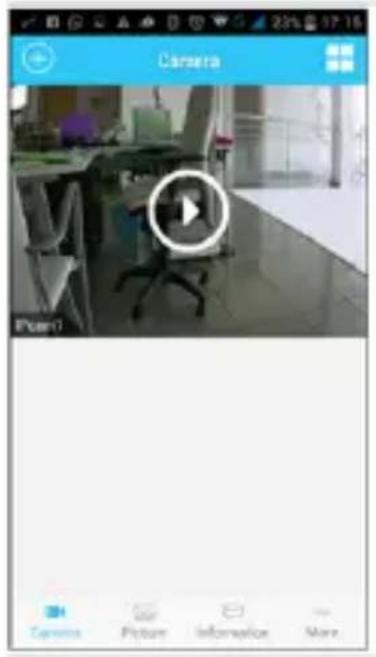
You can check the state (status) of the camera is on line, click on the camera and automatically displayed. If you click on the camera image, you can access it. And if you click operation, you will have access to all functions.
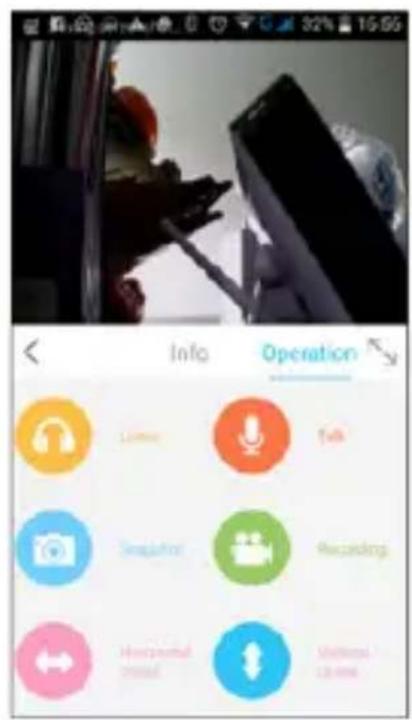
Software PC installation
Insert the installation CD in your drive and double-click on the icon in My Computer or My PC, double-click in the drive where you placed the CD and run autorun.exe.
Install the software EyeCloud Client PC.
Once installed you the IP camera icon appears Eye Cloud.

Run it and you will see the following picture. You should enter the same account and password created earlier.
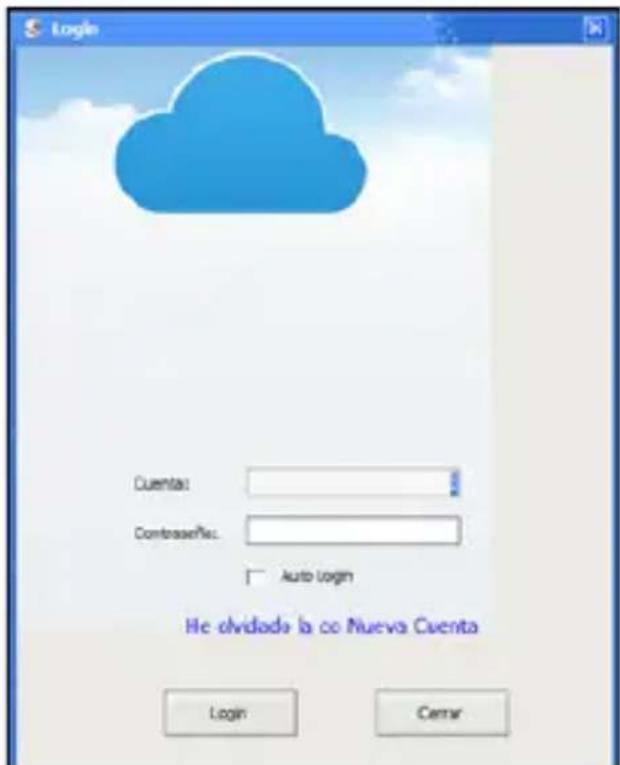
If you have added in your Smartphone cameras they will appear later in the PC without adjusting anything.
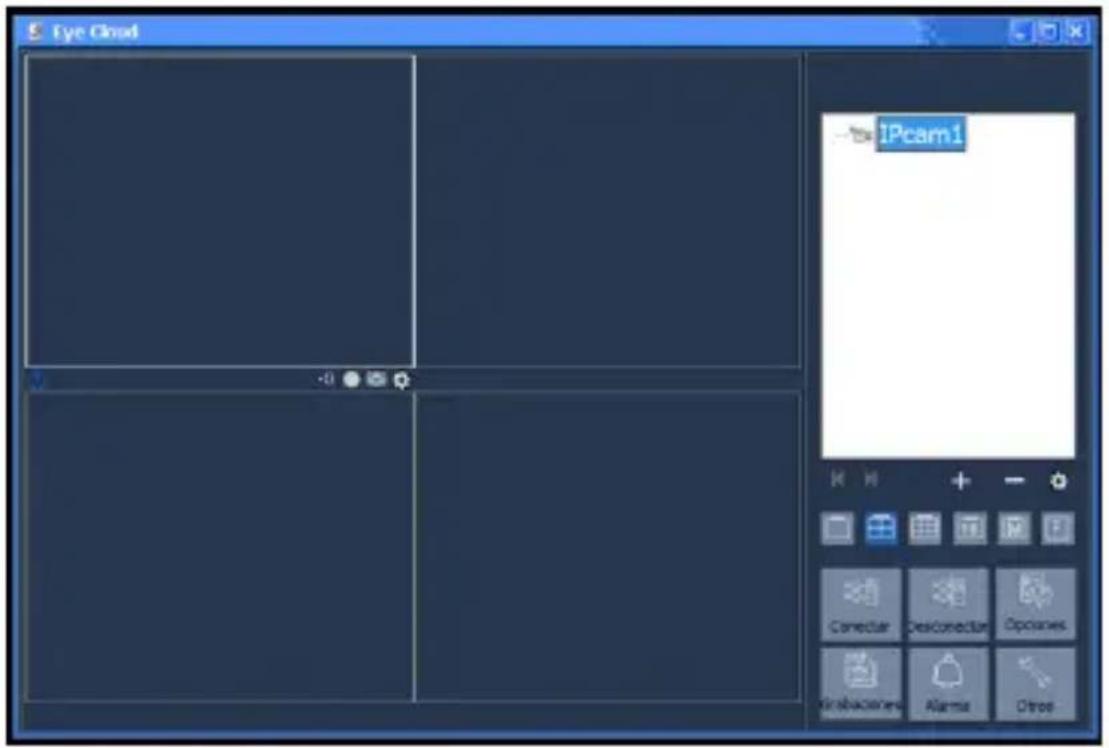
If you don't have any added or want to add new cameras click the + button to add devices and the following picture.

Click Find to locate the camera on your local network.

Select the found camera and press the OK button.

English
Press the Set button Wi-Fi if you want to establish a wireless connection.

Click the Search button to search for wireless networks and enter the Wi-Fi password.
Finally, the following message will appear if everything was set up correctly.

Press the ok button to complete the configuration.
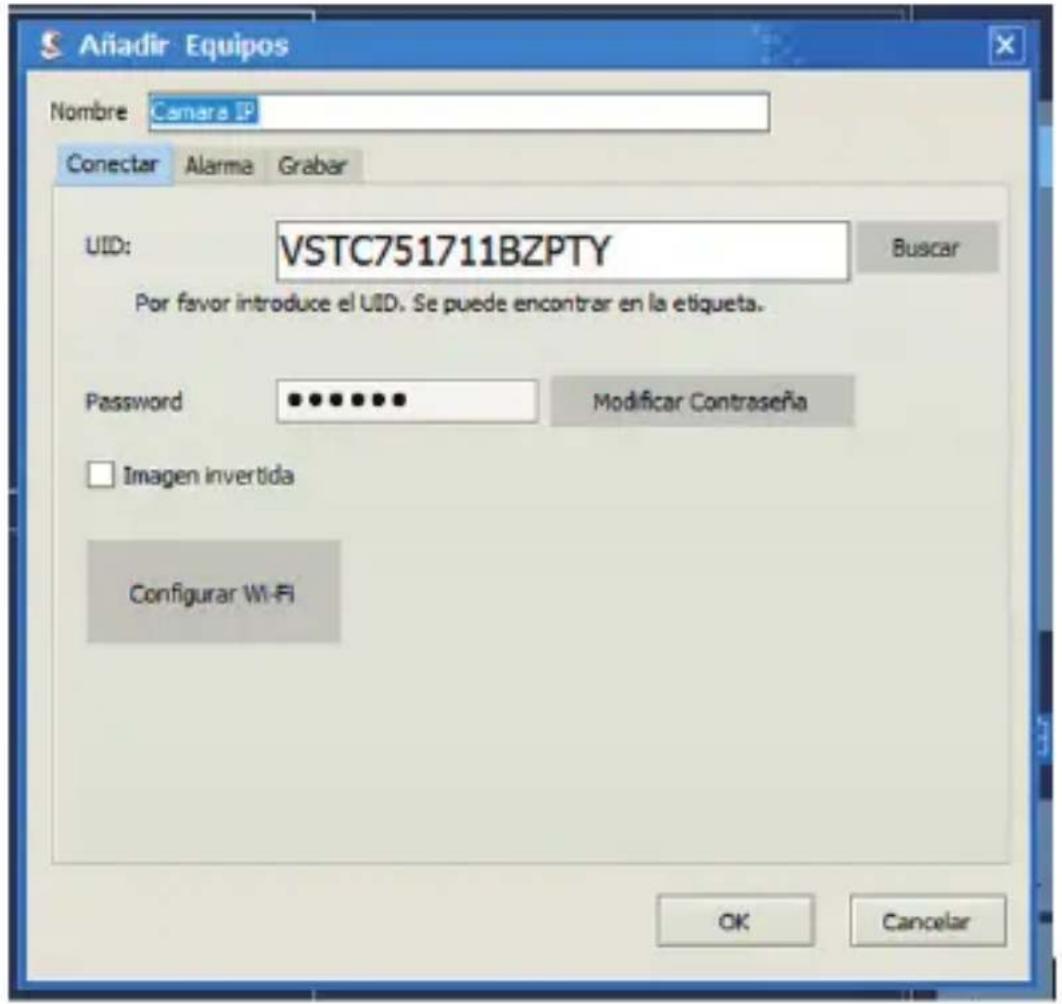
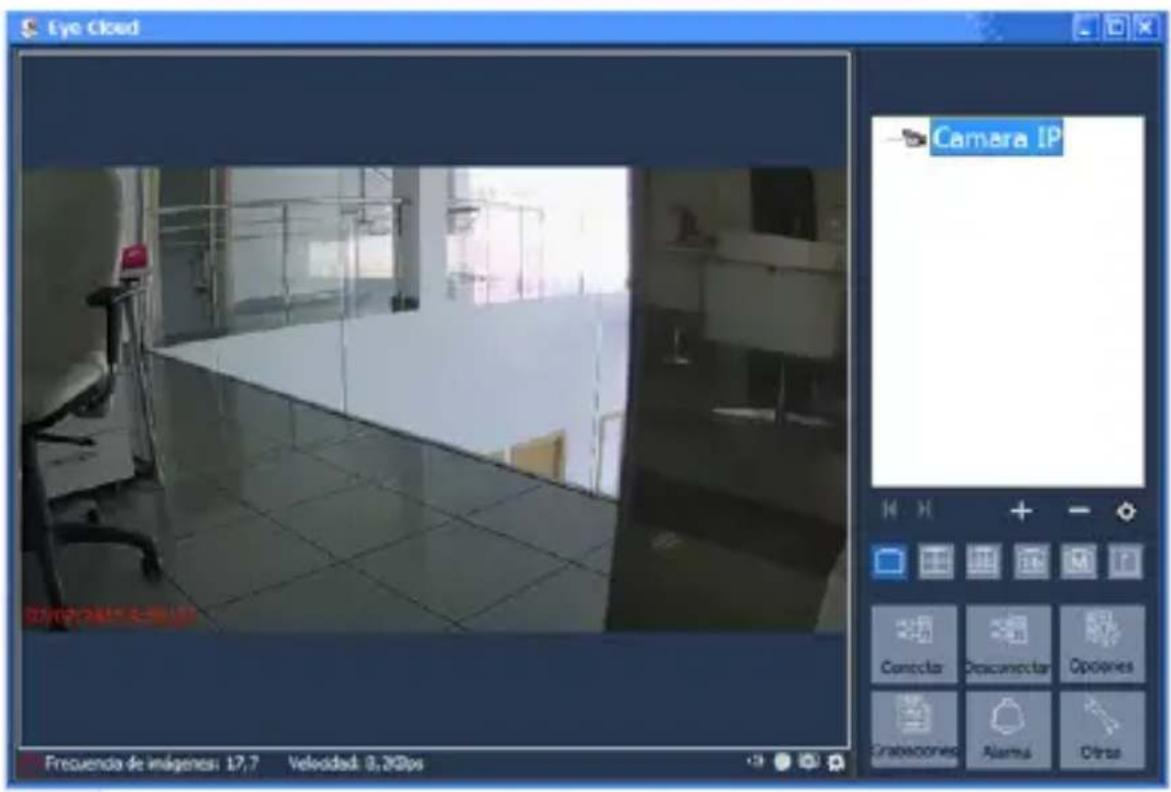
Enter the default password 888888. The following image will appear and press the Connect button

You can view the image offered by the camera.
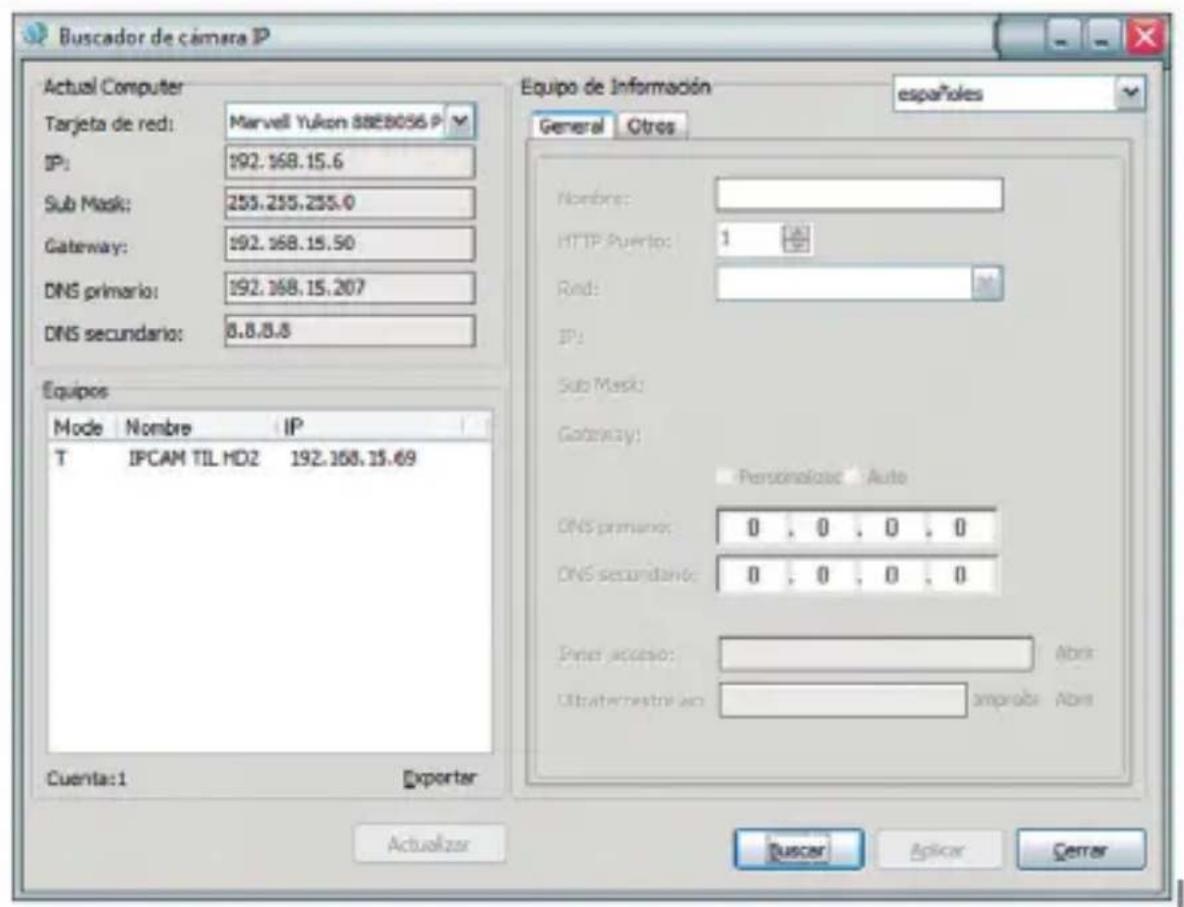
Note: If you cannot find the camera in your Wi-Fi network, run the application included in the installation CD-find app, and set it in your network range.
Enter the ip camera in your web browser, followed by a colon and the port. Example: 192.168.1.17:82.
![http://www.108.com <|vision_start|> 安装到 Web/Download C:\Program Files\Microsoft\Adobe\2003\108.10.2019 安装到 Web/Download C:\Program Files\Microsoft\Adobe\2003\108.10.2019 安装到 Web/Download C:\Program Files\Microsoft\Adobe\2003\108.10.2019 安装到 Web/Download C:\Program Files\Microsoft\Adobe\2003\108.10.2019 安装到 C:\Program Files\Microsoft\Adobe\2003\108.10.2019 安装到 Web/Download C:\Program Files\Microsoft\Adobe\2003\108.10.2019 安装到 Web/Download C:\Program Files\Microsoft\Adobe\2003\108.10.2019 安装到 Web/Download C:\Program Files\Casdaq\Microsoft\Adobe\2003\108.10.2019 安装到 Web/Download C:\Program Files\Casdaq\Microsoft\Adobe\2003\108.10.2019 安装到 Web/Download C:\Program Files\Casdaq\Microsoft\Adobe\2003\108.10.2019 安装到 Web/Download C: C:\Program Files\Casdaq\Microsoft\Adobe\2003\108.10.2019 安装到 Web/Download C:\Program Files\Casdaq\Microsoft\Adobe\2003\108.10.2019 安装到 Web/Download C:\Program Files\Casdaq\Microsoft\Adobe\2003\108.10.2019 C:\Program Files\Casdaq\Microsoft\Adobe\2003\108.10.2019 C:\Program Files\Casdaq\Microsoft\Adobe\2003\108.10.2019 C:\Program Files\Casdaq\Microsoft\Adobe\2003\108.10.2019 C:\Program Files\Casdaq\Microsoft\Adobe\nC:\Program Files\Casdaq\Microsoft\nC:\Program Files\Casdaq\nC:\Program Files\Casdaq\nC:\Program Files\Casdaq\nC:\Program Files\Casdaq\nC:\Program Files\Casdaq\nC:\Program Files\Casdaq\nC:\Program Files\Casdaq\nC:\Program Files\Casdaq\nC:\Program Files\Casdaq\nC:\Program Files\Casdaq\nC:\Program Files\Casdaq\nC:\Program Files\Casdaq\nC:\Program Files\Casdaq\nC:\Primer\vcs.dwg.cns.dwg.cns.dwg.cns.dwg.cns.dwg.cns.dwg.cns.dwg.cns.dwg.cns.dwg.cns.dwg.cns.dwg.cns.dwg.cns.dwg.cns.dwg.cns.dwg.cns.dwg.cns.dwg.cns.dwg.cns.dwg.cns.dwg.cns.dwg.cns.dwg.cns.dwg.cns.dwg.cns.dwg.cns.dwg.cms.dwg.cms.dwg.cms.dwg.cms.dwg.cms.dwg.cms.dwg.cms.dwg.cms.dwg.cms.dwg.cms.dwg.cms.dwg.cms.dwg.cms.dwg.cms.dwg.cms.dwg.cms.dwg.cms.dwg.cms.dwg.cms.dwg.cms.dwg.cms.dwg.cms.dwg.cms.dwg.cms.dwg.cms.dwg.cns.dwg.cms.dwg.cms.dwg.cms.dwg.cms.dwg.cms.dwg.cms.dwg.cms.dwg.cms.dwg.cms.dwg.cms.dwg.cms.dwg.cms.dwg.cms.dwg.cms.dwg.cms.dwg.cms.dwg.cms.dwg.cms.dwg.cms.dwg.cms.dwg.cms.dwg.cms.dwg.cms.dwg.cns.dwg.cns.dwg.cns.dwg.cns.dwg.cns.dwg.cns.dwg.cns.dwg.cns.dwg.cns.dwg.cns.dwg.cns.dwg.cns.dwg.cns.dwg.cns.dwg.cns.dwg.cns.dwg.cns.dwg.cns.dwg.cns.dwg.cns.dwg.cns.dwg.cns.dwg.cns.dwg.cns.dwg.cngc.hsd.hsd.hsd.hsd.hsd.hsd.hsd.hsd.hsd.hsd.hsd.hsd.hsd.hsd.hsd.hsd.hsd.hsd.hsd.hsd.hsd.hsd.hsd.hsd.hsd.hsd.hsd.hsd.hsd.hsd.hsd.hsd.hsd.hsd.hsd.hsd.hsd.hsd.hsd.hsd.hsd.hsd.hsd.hsd.hsd.hsd.hsd.hsd.hsd.hsd.hd.hsd.hsd.hsd.hsd.hsd.hsd.hsd.hsd.hsd.hsd.hsd.hsd.hsd.hsd.hsd.hsd.hsd.hsd.hsd.hsd.hsd.hsd.hsd.hsd.hsd.hsd.hsd.hsd.hsd.hsd.hsd.hsd.hsd.hsd.hsd.hsd.hsd.hsd.hsd.hsd.hsd.hsd.hsd.hsd.hsd.hsd.hsd.hsd.hsd.hcd.hsd.hsd.hsd.hsd.hsd.hsd.hsd.hsd.hsd.hsd.hsd.hsd.hsd.hsd.hsd.hsd.hsd.hsd.hsd.hsd.hsd.hsd.hsd.hsd.hsd.hsd.hsd.hsd.hsd.hsd.hsd.hsd.hsd.hsd.hsd.hsd.hsd.hsd.hsd.hsd.hsd.hsd.hsd.hsd.hsd.hsd.hsd.hsd.hsd.hpd.mch.mch.mch.mch.mch.mch.mch.mch.mch.mch.mch.mch.mch.mch.mch.mch.mch.mch.mch.mch.mch.mch.mch.mch.mch.mch.mch.mch.mch.mch.mch.mch.mch.mch.mch.mch.mch.mch.mch.mch.mch.mch.mch.mch.mch.mch.mch.mch.mch.mch.mchg.mch.mchg.mchg.mchg.mchg.mchg.mchg.mchg.mchg.mchg.mchg.mchg.mchg.mchg.mchg.mchg.mchg.mchg.mchg.mchg.mchg.mchg.mchg.mchg.mchg.mchg.mchg.mchg.mchg.mchg.mchg.mchg.mchg.mchg.mchg.mchg.mchg.mchg.mchg.mchg.mchg.mchg.mchg.mchg.mchg.mchg.mchg.mchg.mchg.mchg.mchg.mgg.fmm.fmm.fmm.fmm.fmm.fmm.fmm.fmm.fmm.fmm.fmm.fmm.fmm.fmm.fmm.fmm.fmm.fmm.fmm.fmm.fmm.fmm.fmm.fmm.fmm.fmm.fmm.fmm.fmm.fmm.fmm.fmm.fmm.fmm.fmm.fmm.fmm.fmm.fmm.fmm.fmm.fmm.fmm.fmm.fmm.fmm.fmm.fmm.fmm.fmm.frm.fmm.fmm.fmm.fmm.fmm.fmm.fmm.fmm.fmm.fmm.fmm.fmm.fmm.fmm.fmm.fmm.fmm.fmm.fmm.fmm.fmm.fmm.fmm.fmm.fmm.fmm.fmm.fmm.fmm.fmm.fmm.fmm.fmm.fmm.fmm.fmm.fmm.fmm.fmm.fmm.fmm.fmm.fmm.fmm.fmm.fmm.fmm.fmm.fmm.fmfe[fsm]fsm[fsm]fsm[fsm]fsm[fsm]fsm[fsm]fsm[fsm]fsm[fsm]fsm[fsm]fsm[fsm]fsm[fsm]fsm[fsm]fsm[fsm]fsm[fsm]fsm[fsm]fsm[fsm]fsm[fsm]fsm[fsm]fsm[fsm]fsm[fsm]fsm[fsm]fsm[fsm]fss[fsm]fss[fss]fss[fss]fss[fss]fss[fss]fss[fss]fss[fss]fss[fss]fss[fss]fss[fss]fss[fss]fss[fss]fss[fss]fss[fss]fss[fss]fss[fss]fss[fss]fss[fss]fss[fss]fss[fss]fss[fss]fss[foss]fss[fss]fss[fss]fss[fss]fss[fss]fss[fss]fss[fss]fss[fss]fss[fss]fss[fss]fss[fss]fss[fss]fss[fss]fss[fss]fss[fss]fss[fss]fss[fss]fss[fss]fss[fss]fss[fss]fss[fos]fss[fos]fos[fos]fos[fos]fos[fos]fos[fos]fos[fos]fos[fos]fos[fos]fos[fos]fos[fos]fos[fos]fos[fos]fos[fos]fos[fos]fos[fos]fos[fos]fos[fos]fos[fos]fos[fos]fos[fos]fos[fos]flos[ ]](/content/2026/06/1271164/images/3f0f3954cfcef891d3a84c17deb3787764c5d2ce4c7569137ac236923f69f5e0.jpg)
For username type admin and password 888888.

Run the icon according to your browser.

The web environment, in which has full access to all camera functions opens..

Technical support
For more information on installing and configuring this product go to our website www.approx.es support section or write an email to soporte@approx.es.
Español


Soporte técnico
Français
Support technique
SAFETY, MAINTENANCE AND RECYCLING INSTRUCTIONS
- Caution: Never open the device. The internal parts are shock hazard.
- Do not install this unit near water, for example, in a wet basement, in an unprotected outdoor installation, or any area classified as a wet location.
- Do not insert objects of any kind into this unit through openings as they may touch voltage points and short out parts that could result in fire or electric shock.
- Do not spill any liquid on the unit. Danger of short circuits.
- Always use cables approved by the manufacturer.
- Before connecting make sure the voltage of the country of origin: 230VAC maximum.
- The adapter is 5VDC / ^2 A maximum. Never use other, it could be dangerous for explosions.
- To mount on ceiling or wall, always contact a professional, risk of falls from heights
- Clean the product with a soft dry cloth. Always with the device turned off!
- Follow local regulations for disposing of the product.
aqprox
EC DECLARATION OF CONFORMITY
We declare under our sole responsibility that the product:
Brand name: APPROX IBERIA S.L.
Model no: APPIP03HDP2P
Product description: Wireless HD IP Camera
The measurements shown in this test report were made in accordance with the procedures given in the:
- RoHS DIRECTIVE: 2011/65/EU
- RTTE DIRECTIVE: 1999/5/EC
- LVD DIRECTIVE: 2006/95/EEC
To which this declaration is based on with full conformance to the following European norms and standards:
- ETSI EN 300 328 V.1.7.1 (2006-10)
- ETSI EN301 489-1 V.1.9.2 (2011-09)
- ETSI EN301 489-17 V2.2.1 (2012-09)
- EN 62479: 2010
- EN 60950-1: 2006 + A11: 2009 + A1: 2010 + A12: 2011
- EN 62311: 2008
Signed July 8, 2015

Jose Luis Ruiz Gómez
Director
APPROX IBERIA SL.
ADD: Polígono Industrial Guadalquivir
Gelves (Sevilla), Spain.
Website: www.approx.es

Importado por / Imported by:
APPROX IBERIA S. L.
CIF: B-91202499
Soporte técnico / Technical support:
soporte@approx.es
MADE IN PRC
The content of this guide is subject to typographical errors
aqprox
approx.es


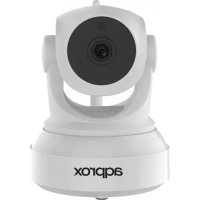
Brand : Approx
Model : APPIP03HDP2P
Category : Surveillance Camera