
GNS 200/150 - Grinder GUDE - Free user manual and instructions
Find the device manual for free GNS 200/150 GUDE in PDF.


| Product type | Garden shredder |
| Brand | Güde |
| Model | GNS 200/150 |
| Motor power | 2000 W |
| Supply voltage | 230 V / 50 Hz |
| Maximum cutting capacity | 150 mm diameter |
| Dimensions (L x W x H) | 500 x 350 x 650 mm |
| Weight | 25 kg |
| Housing material | Robust steel |
| Cutting system type | Rotating hardened steel blades |
| Main functions | Shredding of branches, trimmings and green waste |
| Maintenance and cleaning | Clean after each use, sharpen blades periodically |
| Safety | Safety switch, thermal protection, protective cover |
| Spare parts and repairability | Blades, power cable, ON/OFF button available |
| General information | 2-year warranty, domestic use |
Frequently Asked Questions - GNS 200/150 GUDE
User questions about GNS 200/150 GUDE
0 question about this device. Answer the ones you know or ask your own.
Ask a new question about this device
Download the instructions for your Grinder in PDF format for free! Find your manual GNS 200/150 - GUDE and take your electronic device back in hand. On this page are published all the documents necessary for the use of your device. GNS 200/150 by GUDE.
USER MANUAL GNS 200/150 GUDE
natural_image
Blue and black Gude GNS 200/150 industrial grinding machine with visible cutting edge and base (no text or symbols on the device itself)
ENGLISH Please read the instructions carefully before starting the machine.
natural_image
Three icons: a cardboard box with an upward arrow, a blue circular icon with an 'E' and 'D' symbol, and a black wrench and screwdriver (no text or labels)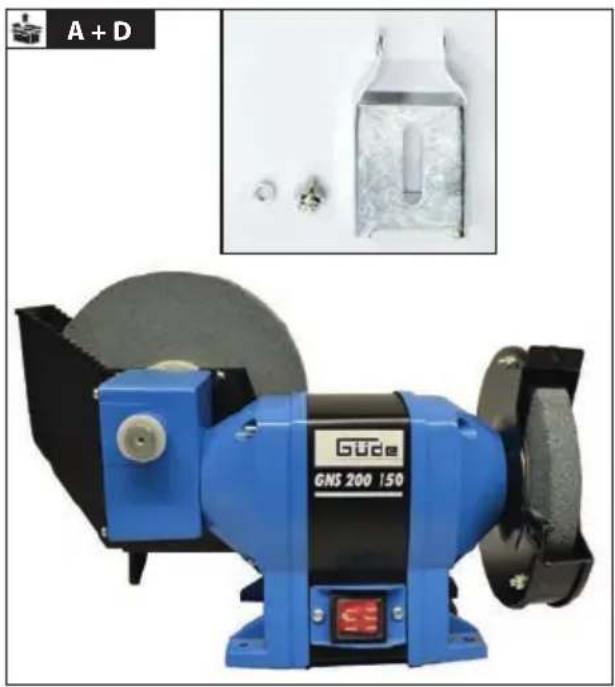
natural_image
Blue industrial cutting machine labeled GNS 200 150, with inset showing a cylindrical component (no visible text or symbols on the machine itself)
natural_image
Blue Gude industrial cutting machine with mechanical components and a warning symbol (no readable text or symbols)

natural_image
Blue industrial cutting machine labeled 'GNS 200 150' with a green checkmark overlay (no readable text or symbols on the machine itself)| 1 | DE Montage | SI Montaža |
| GB Assembly | HR Montaža | |
| FR Montage | BG Монтаж | |
| IT Montaggio | RO Montaj | |
| NL Montage | BA Montaža | |
| CZ Montáž | ||
| SK Montáž | ||
| HU Szerelés |
natural_image
Three icons: a cardboard box with an upward arrow, a blue circular icon with an 'E' and plug symbol, and a black wrench tool (no text or labels)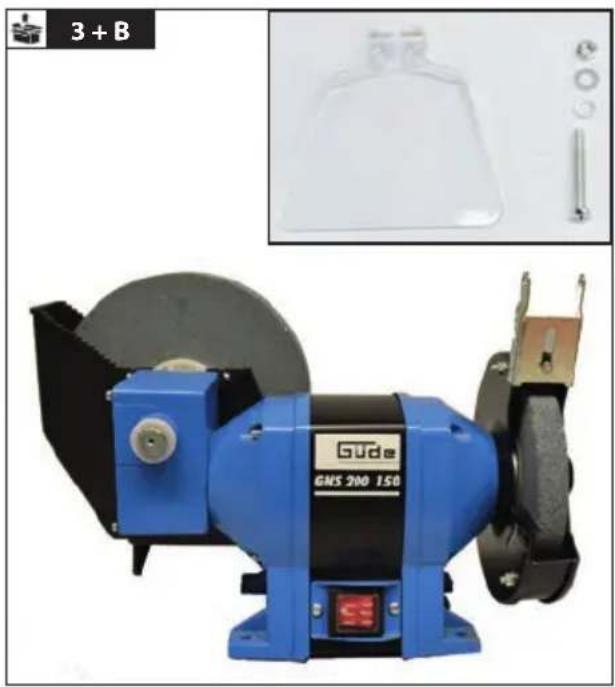
natural_image
Blue Gude GNS 200 150 milling machine with a circular cutter blade and base mount (no visible text or symbols on the machine itself)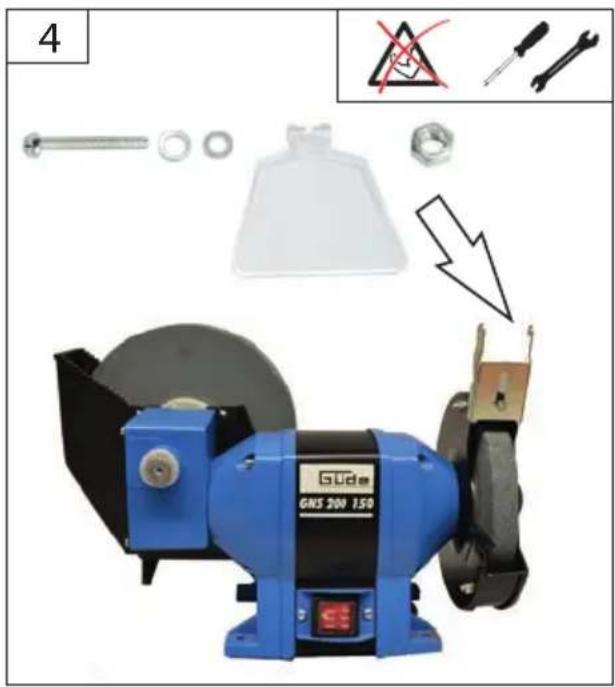
natural_image
Product photo of a blue Gede CNC milling machine with tools and a warning symbol (no readable text or labels)
natural_image
Close-up of a blue industrial machine with mechanical components and directional arrows indicating motion (no readable text or symbols)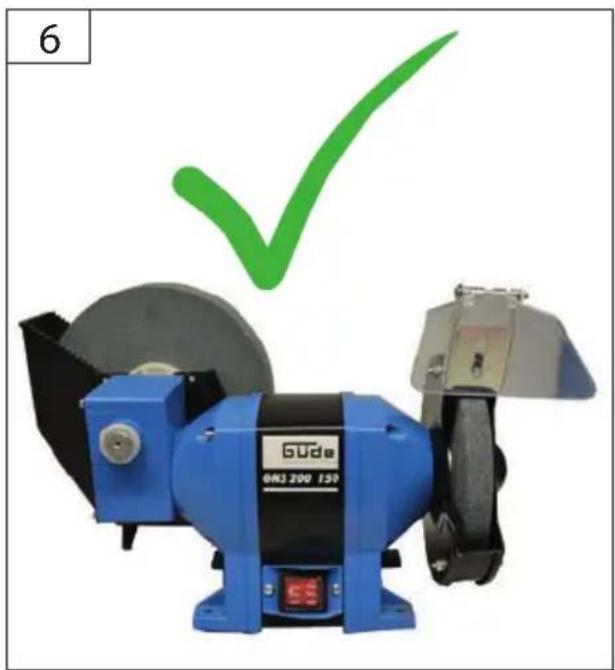
natural_image
Blue Gudie 200 150 milling machine with a green checkmark overlay (no text or symbols on the machine itself)DE Montage SI Montaža
GB Assembly HR Montaža
FR Montage BG Монтаж
IT Montaggio RO Montaj
NL Montage BA Montaža
CZ Montáž
SK Montáž
HU Szerelés

natural_image
Two black screwdrivers with different end caps (no text or symbols)
natural_image
Blue industrial cutting machine with a circular cutterhead and mechanical components, shown alongside an inset image of a mechanical assembly (no visible text or symbols)
natural_image
Product photo of a blue GVB 200 152 milling machine with various tools and components (no visible text or symbols)
natural_image
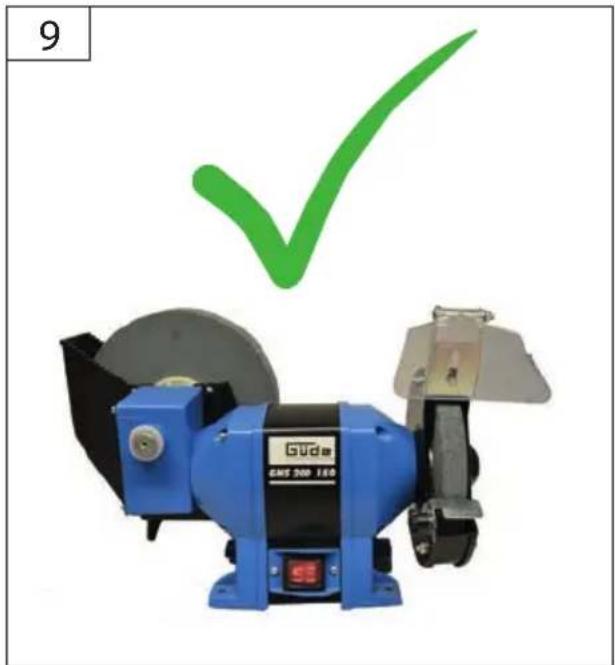
Blue industrial cutting machine with a green checkmark above it, no visible text or symbols on the machine itself.
DE Montage
GB Assembly
FR Montage
IT Montaggio
NL Montage
CZ Montáž
SK Montáž
HU Szerelés
SI Montaža
HR Montaža
BG Монтаж
RO Montaj
BA Montaža


natural_image
Two black screwdrivers with different end caps (no text or symbols)
natural_image
Close-up of a blue industrial electrical switch component with a red indicator box (no visible text or symbols)4 x

natural_image
Illustration of various mechanical components including a bolt, nut, and cross-section (no text or symbols)2

flowchart
graph TD
    A["Device"] --> B["Process Step"]
    B --> C["Product"]
    style A fill:#f9f,stroke:#333
    style B fill:#ccf,stroke:#333
    style C fill:#cfc,stroke:#333
1

natural_image
Line drawing of a vintage camera with lens and external components (no text or symbols)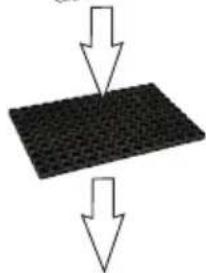
natural_image
Two arrows pointing downward to a textured rectangular block, no text or symbols present


DE Abrichten
SI Ravnjanje
GB Levelling
HR Ravnanje
FR Dégauchissage
BG Сравнение
IT Diamantatura
RO Comparatie
NL Dressen
BA Ravnanje
CZ Srovnávání
SK Zrovnávanie
HU Összehasonlítás


TIPP
Art.-Nr. 55537

natural_image
Three dark gray rectangular objects with a small black cross symbol above them, no text or symbols present.
natural_image
Close-up of a hand using a tool to adjust or install a mechanical component, no visible text or symbols.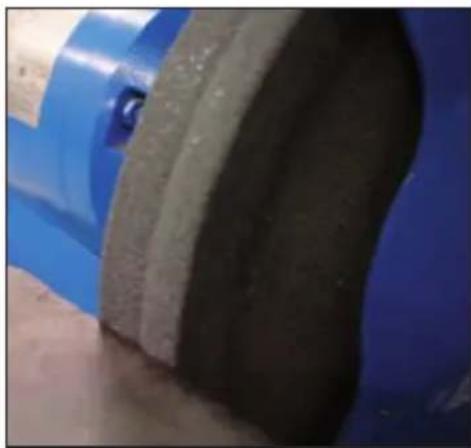
natural_image
Close-up of a blue industrial pipe joint with a dark central component (no visible text or symbols)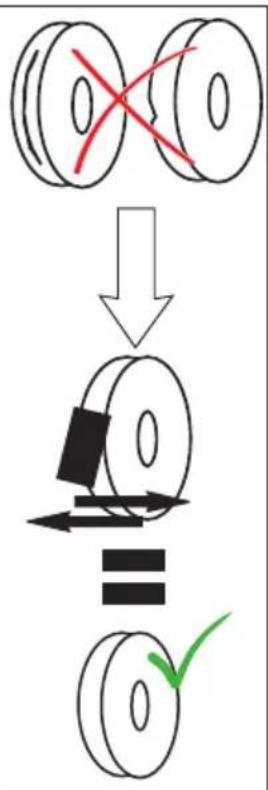
flowchart
graph TD
    A["Two circular components with red X mark"] --> B["Assembly of a black rectangular component"]
    B --> C["Check for the final part with green checkmark"]

natural_image
Close-up of a blue mechanical component with a gray circular base and black textured outer ring (no text or symbols visible)

natural_image
Green checkmark symbol on white background (no text or symbols)| 3 | DE | Schleifscheibenwechsel | SI | Kolo spremembe |
| GB | change grinding wheel | HR | Kotač promjena | |
| FR | Changement de roue | BG | Wheel промяна | |
| IT | Ruota cambiamento | RO | Roata schimbare | |
| NL | Wheel verandering | BA | Kotač promjena | |
| CZ | Kola změna | |||
| SK | Kolesá zmena | |||
| HU | Kerék változás |

natural_image
Five safety symbols and warning icons: a blue circular icon with a camera symbol, a screwdriver, a warning triangle, a gray circle with crossed lines, and a black cross (no text or labels)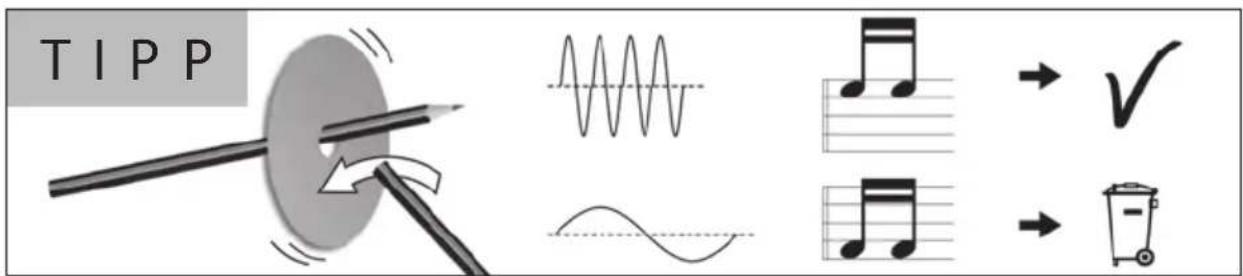


GB change grinding wheel
natural_image
Close-up of a mechanical component with circular grooves and a blue base, showing rotational arrows (no text or symbols)
natural_image
Close-up of a mechanical component with a blue handle and black base, showing a circular arrow indicating rotation (no text or symbols)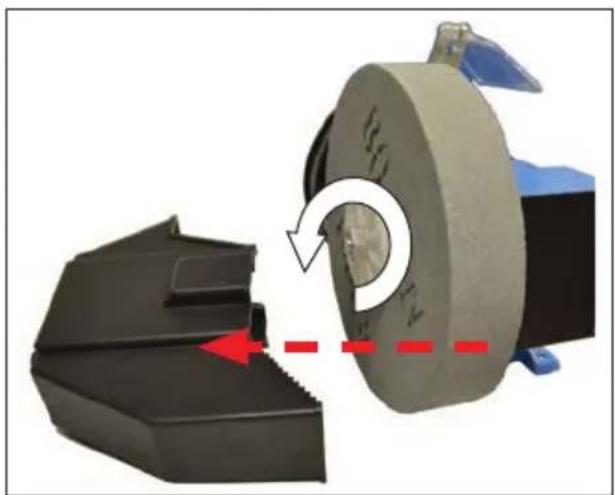
natural_image
3D mechanical assembly diagram showing a gear-like component being cut with a red arrow indicating rotation (no text or symbols)
natural_image
3D mechanical component diagram showing a stepped block and a circular housing with a circular inset showing a head silhouette (no text or symbols)
natural_image
Close-up of a mechanical component with blue and black parts, showing a circular arrow indicating rotation or motion (no text or symbols)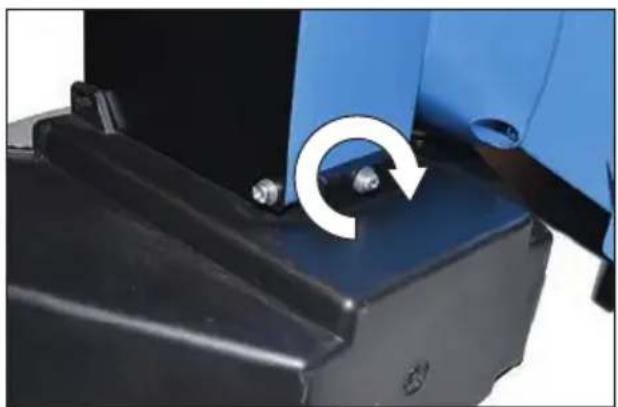
natural_image
Close-up of a blue-handled robotic arm interacting with a black mechanical component, showing a circular arrow indicating rotation (no text or symbols visible)| 4 | DE | Betrieb | SI | Delovanje |
| GB | Operation | HR | Rad | |
| FR | Fonctionnement | BG | Pábota | |
| IT | Esercizio | RO | Functionare | |
| NL | Gebruik | BA | Rad | |
| CZ | Provoz | |||
| SK | Prevádzka | |||
| HU | Üzemeltetés |





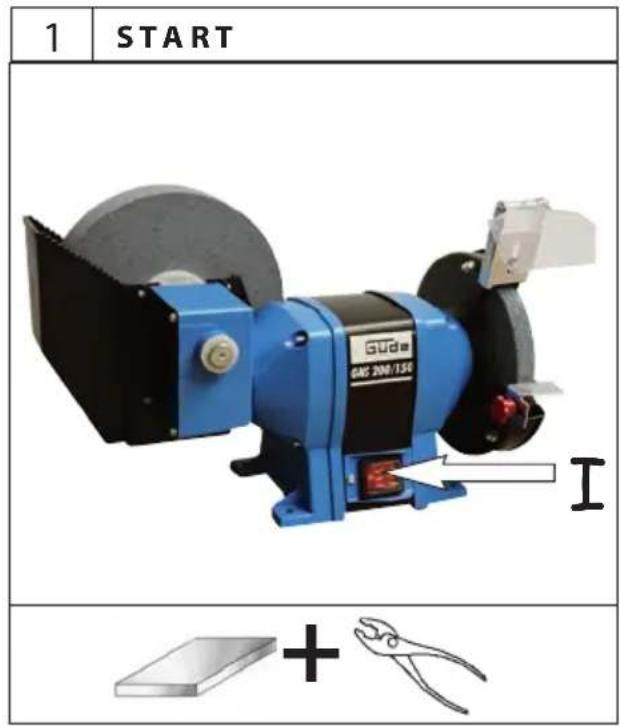

natural_image
Close-up of metal welding with sparks flying, no visible text or symbols

DE Betrieb
GB Operation
FR Fonctionnement
IT Esercizio
NL Gebruik
CZ Provoz
SK Prevádzka
HU Üzemeltetés
SI Delovanje
HR Rad
BG Работа
RO Functionare
BA Rad







chemical
Chemical reaction setup showing hydrogen peroxide (H₂O) formation from a blue mechanical component
natural_image
Close-up of a blue industrial machine with a gray circular component and three droplets on top (no text or symbols visible)
5
GB Transport / storage
FR Transport / Stockage
NL Transport / Bewaring
natural_image
Mechanical assembly diagram showing a GND 200 150 tool and its internal components (no text or symbols present)

natural_image
Interior view of a room with a blue industrial machine inside a transparent enclosure (no text or symbols visible)


Technische Daten
Nass- TrockenschleiferGNS 200/150
Artikel-Nr. 40350
Grinding/sharpening machine combinationGNS 200/150
A-No 40350
Service connection 230 V\~50 Hz
Max. Power ....350 W (P1/S2/30 min.)
Idle speed 2950 min -1
Grinding wheel dimensions K36....150x20 mm
K80....200x40 mm
Engine shaft diameter ....12,7 mm/20 mm Weight ....8,8 kg
Noise and Vibration Information
Sound pressure level LpA1),2) .....76dB (A) Guaranteed sound power level LWA2) .....86 dB (A)
Wear ear protectors!
1) Measured according to EN ISO 11202:1995/AC:1997, under load, Uncertainty K=3 dB (A)
2 The values stated are emission values and as such do not necessarily constitute values which are safe for the workplace. Al- though there is a correlation between emission levels and environmental impact levels, whether further precautions are neces- sary cannot be derived from this. Factors influencing the actually present environmental impact level in the workplace include the characteristics of the work area and other noise sources, i.e. the number of machines and other neighbouring work process- es. The permitted workplace values can likewise vary from country to country. This information is intended to assist the user in estimating hazards and risks.
Read and understand the operating instructions before using the appliance. Abide by all the safety measures stated in the service manual. Act responsibly toward third parties.
In case of any doubts about connection and operation refer please to our customer center


Specified Conditions Of Use
Double grinding machines for removing frays, grinding and sharpening of steel and steel alloy workpiecesDo not use this product in any other way as stated for normal use. Respecting technical data and safety precautions.Not observing general regulations in force and
instructions from this manual does not make the manufacturer liable for damages.
Power tool description
- Water tank
- Work table installation opening
- O OFF switch
- Workpiece support
- abrasive wheel K36
- Grinding wheel with magnifier
- Wet-abrasive wheel K80
- Adapter
Residual risks
Danger of injury!
Never put your hands to the abrasive wheel area.
Risk of injury for fingers and hands due to rotating abrasive wheels in case of unprofessional guiding or supporting of the workpiece being ground.
In spite of compliance with all relevant design regulations, dangers may still present themselves when the machine is operated, e.g.
- work piece parts being thrown off,
- parts of damaged tools being thrown off,
- noise emissions,
- dust emissions.
Emergency procedure
Conduct a first-aid procedure adequate to the injury and summon qualified medical attendance as quickly as possible. Protect the injured person from further harm and calm them down. For the sake of eventual accident, in accordance with DIN 13164, a workplace has to be fitted with a first-aid kit. It is essential to replace any used material in the first-aid kit immediately after it has been used.
If you seek help, state the following pieces of information
- Accident site
- Accident type
- Number of injured persons
- Injury type(s)
Requirements for operating staff
The operating staff must carefully read the Operating Instructions before using the appliance.
Qualification Apart from the detailed instructions by a professional, no special qualification is necessary for appliance using.
Minimum age Persons over 16 years of age can only work on the appliance. An exception includes youngsters trained in order to reach knowledge under supervision of the trainer during occupational education.
Training Using the appliance only requires corresponding training by a professional or the Operating Instructions. No special training is necessary.
The operator is responsible for accidents or risks to third parties.
Symbols

Warning/caution!

Read the Operating Instructions!

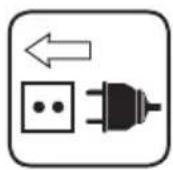
Before carrying out any work on the machine, disconnect the plug from the socket.

Wear eye protective goggles! Wear ear protectors!

Wear a respirator!

Wear protective gloves!

Wear safety shoes with steel reinforcement!

No touching inside

Protect against humidity Never expose tool to rain.

Forbidden operation for persons with chainlet
Do not operate the power tool when wearing a tie

Forbidden operation for persons with long hair.

Protect against humidity

Protect against frost

Keep children and bystanders away while operating a power tool.

Warning against dangerous electric voltage

Keep bystanders in safe distance from the appliance (at least 5m)

Warning against thrown-off items

Warning against risk of drawing-in

Any damaged or disposed electric or electronic devices must be delivered to appropriate collection centres.

Protect against humidity

This side up
General Power Tool Safety Warnings

Warning
Read all safety warnings and all instructions. Failure to follow the warnings and instructions may result in electric shock, fire and/or serious injury.
Save all warnings and instructions for future reference.
The term „power tool“ in the warnings refers to your mains-operated (cordepower tool or battery-operated (cordless) power tool.
1) Work area safety
a) Keep work area clean and well lit. Cluttered or dark areas invite accidents.
b) Do not operate power tools in explosive atmospheres, such as in the presence of flammable liquids, gases or dust. Power tools create sparks which may ignite the dust or fumes.
c) Keep children and bystanders away while operating a power tool. Distractions can cause you to lose control.
2) Electrical safety
a) Power tool plugs must match the outlet. Never modify the plug in any way. Do not use any adapter plugs with earthed (groundepower tools. Unmodified plugs and matching outlets will reduce risk of electric shock.
b) Avoid body contact with earthed or grounded surfaces, such as pipes, radiators, ranges and refrigerators. There is an increased risk of electric shock if your body is earthed or grounded.
c) Do not expose power tools to rain or wet conditions. Water entering a power tool will increase the risk of electric shock.
d) Do not abuse the cord. Never use the cord for carrying, pulling or unplugging the power tool. Keep cord away from heat, oil, sharp edges or moving parts. Damaged or entangled cords increase the risk of electric shock..
e) When operating a power tool outdoors, use an extension cord suitable for outdoor use. Use of a cord suitable for outdoor use reduces the risk of electric shock.
f) If operating a power tool in a damp location is unavoidable, use a additional residual current device (RCprotected supply. Use of an RCD reduces the risk of electric shock.
3) Personal safety
a) Stay alert, watch what you are doing and use common sense when operating a power tool. Do not use a power tool while you are tired or under the influence of drugs, alcohol or medication. A moment of inattention while operating power tools may result in serious personal injury.
b) Use personal protective equipment. Always wear eye protection. Protective equipment such as dust mask, non-skid safety shoes, hard hat, or hearing protection used for appropriate conditions will reduce personal injuries.
c) Prevent unintentional starting. Ensure the switch is in the off-position before connecting to power source and/or battery pack, picking up or carrying the tool. Carrying power tools with your finger on the switch or energising power tools that have the switch on invites accidents.
d) Remove any adjusting key or wrench before turning the power tool on. A wrench or a key left attached to a rotating part of the power tool may result in personal injury.
e) Do not overreach. Keep proper footing and balance at all times. This enables better control of the power tool in unexpected situations.
f) Dress properly. Do not wear loose clothing or jewellery. Keep your hair, clothing and gloves away from moving parts. Loose clothes, jewellery or long hair can be caught in moving parts.
g) If devices are provided for the connection of dust extraction and collection facilities, ensure these are connected and properly used. Use of dust collection can reduce dust-related hazards.
4) Power tool use and care
a) Do not force the power tool. Use the correct power tool for your application. The correct power tool will do the job better and safer at the rate for which it was designed.
b) Do not use the power tool if the switch does not turn it on and off. Any power tool that cannot be controlled with the switch is dangerous and must be repaired.
c) Disconnect the plug from the power source and/or the battery pack from the power tool before making any adjustments, changing accessories, or storing power tools. Such preventive safety measures reduce the risk of starting the power tool accidentally.
d) Store idle power tools out of the reach of children and do not allow persons unfamiliar with the power tool or these instructions to operate the power tool. Power tools are dangerous in the hands of untrained users.
e) Maintain power tools. Check for misalignment or binding of moving parts, breakage of parts and any other condition that may affect the power tool's operation. If damaged, have the power tool repaired before use. Many accidents are caused by poorly maintained power tools.
f) Keep cutting tools sharp and clean. Properly maintained cutting tools with sharp cutting edges are less likely to bind and are easier to control.
g) Use the power tool, accessories and tool bits etc. in accordance with these instructions, taking into account the working conditions and the work to be performed. Use of the power tool for operations different from those intended could result in a hazardous situation.
5) Service
a) Have your power tool serviced by a qualified repair person using only identical replacement parts. This will ensure that the safety of the power tool is maintained.
Safety instructions Grinding/sharpening machine combination
Operation is only allowed with a additional safety switch against stray current (RCD max. stray current of 30mA).
The machine must be plugged to 230 V with 16 A fuse.
Wear ear protectors. Exposure to noise can cause hearing loss.
Wear protective glasses
WARNING The dust produced when using this tool may be harmful to health. Do not inhale the dust. Use a dust
absorption system and wear a suitable dust protection mask. Remove deposited dust thoroughly, e.g. with a vacuum cleaner.
The machine must be set during operation on a horizontal, flat surface or be mounted with vibration because working when sharpening with water (eg one workbench).
Switch the machine off and unplug it when unattended.
⚠️ Check all screw and plug-in connections and protective equipment if firm and tightened properly and whether all moving parts are running smooth whenever the appliance is to be put into operation.
The protective equipment on the appliance is strictly prohibited to be disassembled, changed, used in conflict with the designation and it is prohibited to attach any protective equipment of other manufacturers.
The appliance must not be used if damaged or safety equipment is defective. Replace any worn-out and damaged parts.
Any defect on the power tool, including on the protective equipment or abrasive wheel must be reported to a safety engineer immediately after it is identified.
Before use check machine, cable, and plug for any damages or material fatigue. Repairs should only be carried out by authorised Service Agents.
Make sure the abrasive wheel is fitted properly before pressing the O Off button.
To make sure the work is safe, use equipment such as power tool supports, magnifying glass, workpiece holder, etc.
Removing sawdust and chippings from the machine when running is strictly prohibited.
Choose the abrasive wheel suitable for the given work piece.
Abrasive wheels not corresponding to the characteristics given in these Operating Instructions may not be used.
The maximum revolutions given on the abrasive wheel must be respected.
Familiarise with the safety procedures for cleaning, maintenance and regular removal of sawdust and dust to reduce the risk of fire.
Make sure the flange used is suitable for the given purpose of use, as specified by the manufacturer.
The power tool must immediately be switched off if it gets blocked. Unplug the power tool and remove the stuck workpiece.
At frequent intervals, check the adjustment of the protection against sparks and set the abrasive wheel wear properly. Keep the distance between the protection against sparks and the abrasive wheel small if possible
(max. 2 mm).
At regular intervals, check the workpiece support adjustment and set the abrasive wheel wear properly.
Do not grind with a cold abrasive wheel. Let the abrasive wheel run idle for one minute before starting your work. Do not grind on the side surfaces of the wheel. Grind on the front side only.
Do not apply the coolant directly on the abrasive wheel. The coolant may affect the adhesion of the abrasive wheel and cause its failure.
Abrasive wheel to be levelled on the front side only.
High temperatures are present when grinding. Do not touch the workpiece before it has sufficiently cooled down.
IMPORTANT NOTICE
The engine is automatically switched off when overloaded. The engine can be switched on again after it has cooled down (various times).
Hold the workpieces firmly using the holder (e.g. by pliers) to prevent injuries.
IMPORTANT NOTICE
When using the wet grinding disc please note that the water is drained after use by using the bleed nipple from the container, otherwise soak the wheel with water and if it is given dissolves or unbalanced.
Maintenance
⚠️ Before carrying out any work on the machine, disconnect the plug from the socket.
WARNING The machine must not be used under any circumstances if the machine or the safety devices are damaged.
Repairs and works specified in these Instructions may only be performed by qualified authorised staff.
At all times, keep the machine, ventilation slots, in particular, clean. The sawdust ejection and/or dust ex-hauster should be cleaned at regular intervals. Never spray water on the machine!
Use only original accessories and original spare parts.
Only a regularly maintained and treated appliance can serve as a satisfactory aid. Insufficient maintenance and care can lead to unforeseen accidents and injuries.
Never clean the machine and its components with solvents, flammable or toxic liquids. Us only a damp cloth making.
Apply environment-friendly oil to all moving parts.
If necessary, a list of spare parts can be found at www.guede.com.
Guarantee
Warranty period of 12 months applies to commercial use and 24 months applies to private use and commences on the day of purchase of the device. The guarantee solely covers inadequacies caused by material defect or manufacturing defect. Original payment voucher with the sales date needs to be submitted for any claim in the guarantee period.
The guarantee does not cover any unauthorised use such as appliance overloading, use of violence, damage as a result of any unauthorised interference or caused by foreign items. Failing to follow the operating and assembly instructions and common wear are also not included in the guarantee.
Service
Do you have any technical questions? Any claim? Do you need any spare parts or operating instructions? We will quickly help you and without needles bureaucracy at our web pages at www.guede.com in the Servicing part. Please help us be able to help you. In order to identify your device in case of claim we need the serial No., product No. and year of production. All this data can be found on the type label. Please enter it here for future reference
Serial No.
Art. No
Year of production
Important information for the customer
Please be sure to know that returning the product in or after the warranty period must be made in the original packaging.
⚠️ DÔLEŽITÉ UPOZORNENIE
Pri preťažení sa motor automaticky vypne. Po chladnutí (nie vždy rovnako dlhom) je možné motor opät zapnút. Obrobky držte pevne pomocou držiaka (napr. kliešte), aby sa zabránilo úrazom.
⚠️ DÔLEŽITÉ UPOZORNENIE
Mokro in suho mlinčekGNS 200/150
EC-DECLARATION OF CONFORMITY
We, hereby declare the conception and construction of the below mentioned appliances correspond - at the type of construction being launched - to appropriate basic safety and hygienic requirements of EC Directives. In case of any change to the appliance not discussed with us the Declaration expires.
DECLARATION CE DE CONFORMITE
PROHLASENI O SHODE EU
2006/95/EC 2004/108/EC
2009/105/EC 1907/2006/EC
2011/65/EC ROHS 2009/142/EC
89/686/EEC (PPE) 1935/2004/EC
□ □
2006/42/EC
Annex IV
Notified Body:
Type Ex. Cert.-No.:
2000/14/EC_2005/88/EC
Noise: guaranteed LWA dB (A)
97/6 8/EC_
Emission No.:


- Technische Daten
- Nass- TrockenschleiferGNS 200/150
- Grinding/sharpening machine combinationGNS 200/150
- Noise and Vibration Information
- Specified Conditions Of Use
- Power tool description
- Residual risks
- Danger of injury!
- Emergency procedure
- Requirements for operating staff
- Symbols
- General Power Tool Safety Warnings
- Warning
- Save all warnings and instructions for future reference.
- 1) Work area safety
- 2) Electrical safety
- Safety instructions Grinding/sharpening machine combination
- IMPORTANT NOTICE
- Maintenance
- Guarantee
- Service
- Important information for the customer
- ⚠️ DÔLEŽITÉ UPOZORNENIE
- Mokro in suho mlinčekGNS 200/150
- EC-DECLARATION OF CONFORMITY
- DECLARATION CE DE CONFORMITE
- PROHLASENI O SHODE EU
Brand : GUDE
Model : GNS 200/150
Category : Grinder