
1EVF15 - Projection screen Avtek - Free user manual and instructions
Find the device manual for free 1EVF15 Avtek in PDF.


| Product type | Tripod projection screen |
| Brand | Avtek |
| Model | 1EVF15 |
| Screen diagonal | 100 inches (254 cm) |
| Screen format | 4:3 |
| Dimensions (width x height) | 203 cm x 152 cm |
| Weight | 8.5 kg |
| Power | None (manual screen) |
| Surface type | Matte, gain 1.0 |
| Coating | Anti-glare, washable |
| Height adjustable | Yes, with telescopic tripod |
| Cleaning | Soft dry cloth, no chemicals |
| Maintenance | Regular dusting, avoid moisture |
| Safety precautions | Do not pull on the screen, stabilize the tripod |
| Spare parts available | Leg, housing, replacement screen |
| Repairability | Screen and mechanism replaceable |
| Warranty | 2 years |
Frequently Asked Questions - 1EVF15 Avtek
User questions about 1EVF15 Avtek
0 question about this device. Answer the ones you know or ask your own.
Ask a new question about this device
Download the instructions for your Projection screen in PDF format for free! Find your manual 1EVF15 - Avtek and take your electronic device back in hand. On this page are published all the documents necessary for the use of your device. 1EVF15 by Avtek.
USER MANUAL 1EVF15 Avtek
Framed Projection Screen
(Rys. 1)

(Rys. 2)






Uwaga!
Nie wolno...

Thank you for choosing our screen.
Please read through the user manual before using the screen. Correct usage and maintenance will insure a long life for the product.
User instructions
■ Dust, dirt and scratches on the projection surface will affect the picture quality, take note of the points below to prevent this:
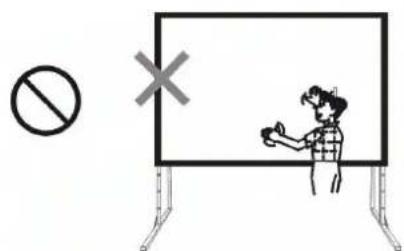
- Do not touch the projection surface with hands.
- Do not write or draw on the projection surface.
- Do not use fingers or sharp objects to point on the projection surface, this will damage the screen fabric.
- Use a soft damp cloth to clean the projection surface, do not use chemical cleaning agents or alcohol. Use clean water.
■ After using the screen, disassemble the screen and store it in the box provided.
■ To avoid accidental damage and injury the screen should only be operated by adults.
Product Description
■ Design:
The aluminium frame is designed to be light weight and easily operated. This makes it easy to carry, assemble and disassemble.
■ Screen Fabric:
The screen fabric is attached to the rectangular frame and held in place by several press studs, which ensure an evenly stretched and perfectly flat surface.
Projection fabric has a viewing angle of 100° and a gain of 1.0.
Can be folded many times with out damage or distortion.
■ Assembly:
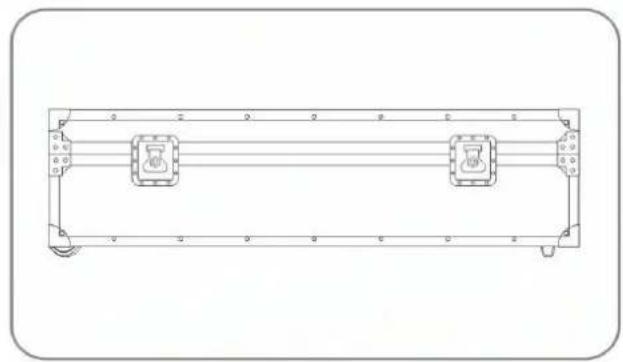
The screen can be assembled in 3 minutes and with out the use of tools. When not in use the screen is stored in an impact resistant carrying case.
■ Ideal for:
Business meetings, churches, schools, family centers and industrial training rooms. Correct use of the projection screen will ensure better results. For projection assemble and view the screen as indicated in Fig. 1 & 2.
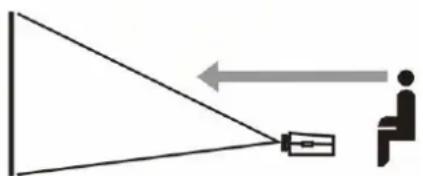
(Fig. 1)

(Fig. 2)
Content and accessories list: When unpacking the screen, check that all the parts from the appropriate list are there. Use the parts as instructed by the user manual.
Part list
| FOLD 500 | |||
| Part | Part number | Quantity | |
| Screen fabric | 2 | 1 | Pcs |
| Folding legs | 3 | 2 | Pcs |
| Screen fabric bag | 4 | 1 | Pcs |
| Hand screws M8X80 | 5 | 12 | Pcs |
| Hand screws M8X50 | 5 | 2 | Pcs |
| User manual | 6 | 1 | Pcs |
| QC PASS | 7 | 1 | Pcs |
| Fabric bag carton box | 8 | 1/2 | Pcs |
| Aluminum storage box | 9 | 2 | Pcs |
| Folding frame | 10 | 2 | Pcs |
| Connecting pole | 11 | 4 | Pcs |
| Hand screw M8X16 | 12 | 16 | Pcs |
| Service card | 13 | 1 | Pcs |
Part list
| FOLD 240, 300, 360, 400 (4:3); FOLD 180, 220, 280, 340, 380 (16:9) | |||
| Part | Part number | Quantity | |
| Folding frame | 1 | 1 | Pcs |
| Screen fabric | 2 | 1 | Pcs |
| Folding legs | 3 | 2 | Pcs |
| Screen fabric bag | 4 | 1 | Pcs |
| Hand screws M8X50 | 5 | 8/10 | Pcs |
| User manual | 6 | 1 | Pcs |
| QC Pass | 7 | 1 | Pcs |
| Fabric bag carton box | 8 | 1 | Pcs |
| Aluminum storage box | 9 | 1 | Pcs |
| Service card | 13 | 1 | Pcs |
Note: The part lists above are subject to change without prior notice.
Start diagrams
- Folding frame

- Screen fabric - front projection

- Left and right folding legs

- Screen fabric bag
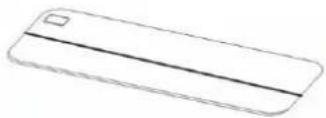
- Hand screw M8X80, M8X50

- User manual

- QC PASS

- Fabric bag carton
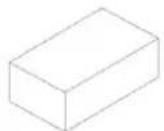
- Aluminum storage

- Folding frame
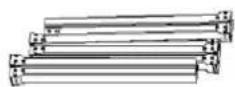
- Connecting pole

- Hand screw M8X16

Assembly instructions
- Take the frame out of the box and place it on a flat surface, Unfold the longer sections first, (Fig. 3 + 4)


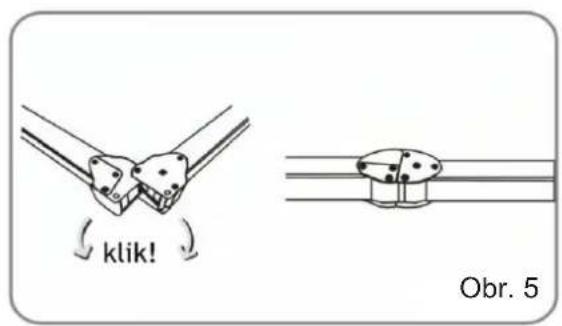
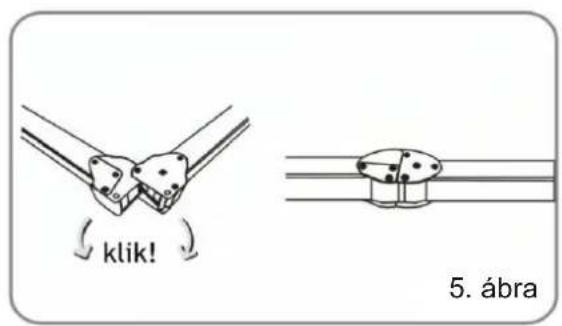
- Unfold the frame until the latch on the hinge "clicks" into place. Repeat the procedure for the shorter sections. (Fig. 5 + 6)

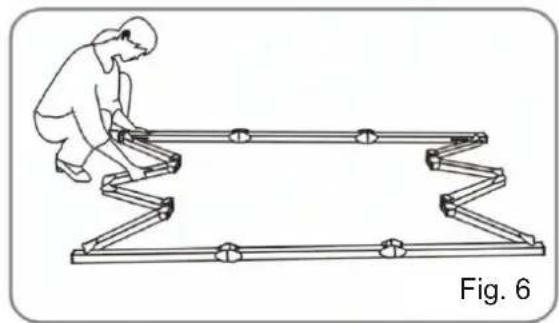
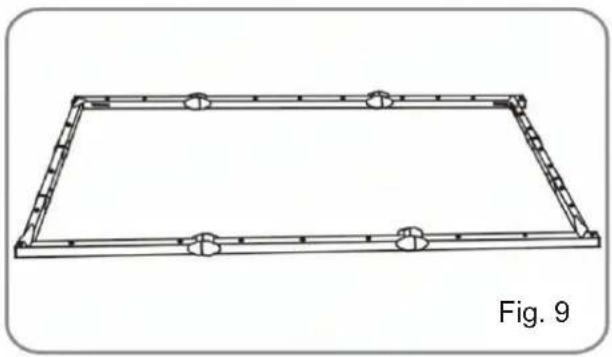
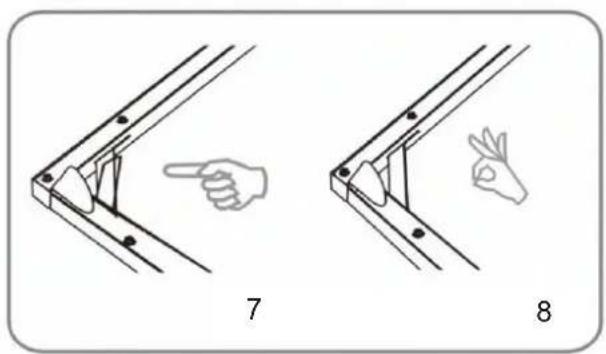
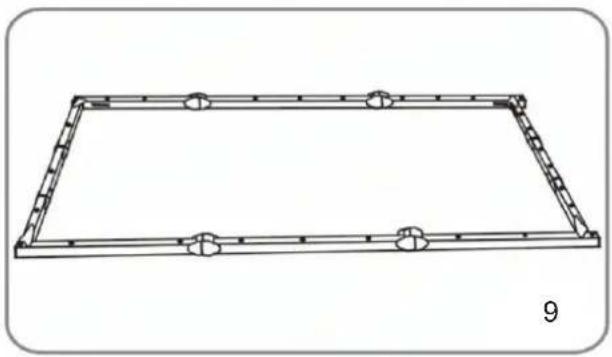
- Make sure all 4 corners of the frame are at 90° and the hinged support bar is straight and not bent, (Fig. 7 - 9)

Attach the upper frame to the lower frame and fasten two frames with M8X16 screws. (Fig. A-B)
FOLD 500
250" Assembly instructions

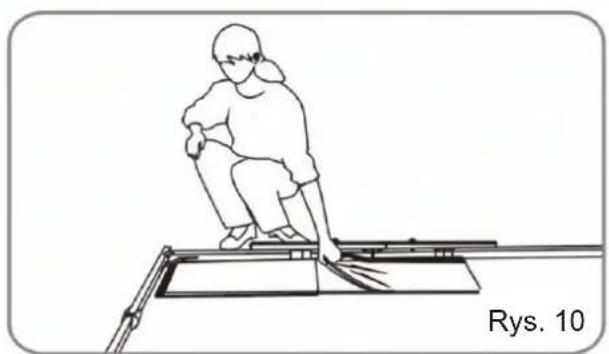
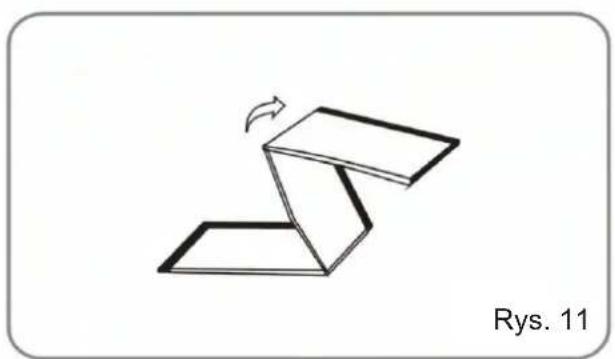
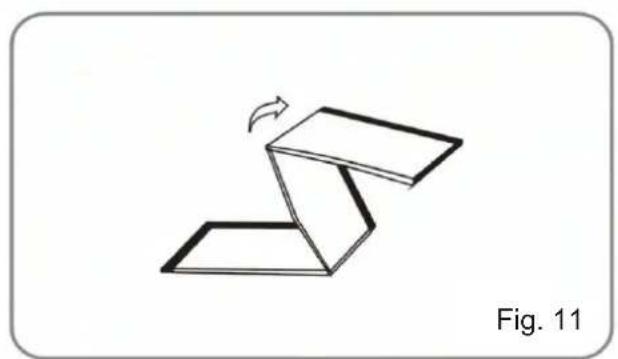
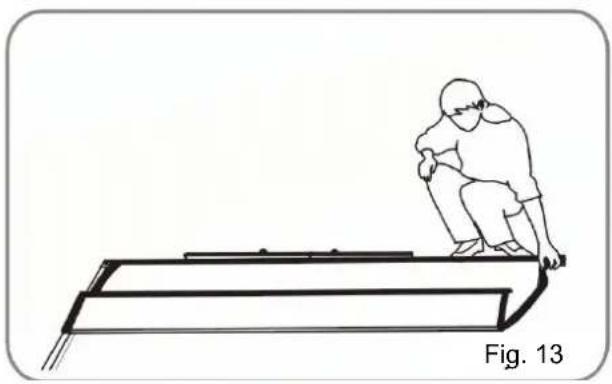
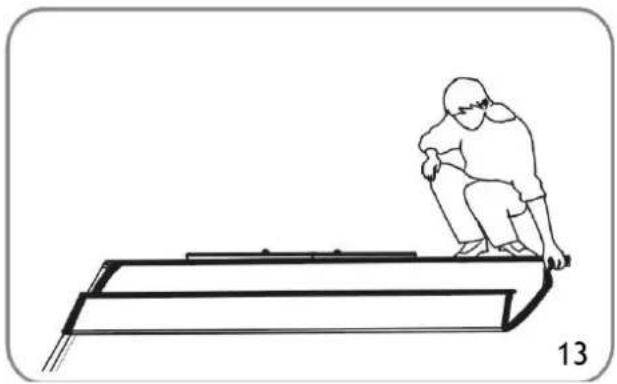
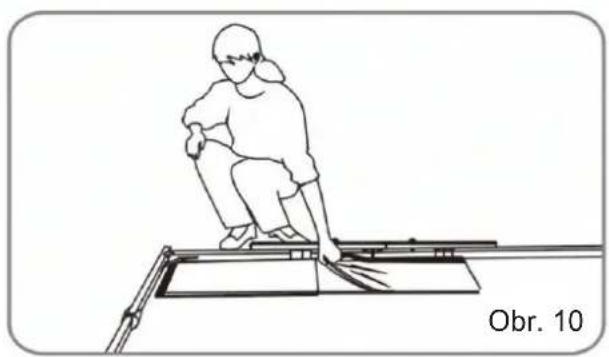
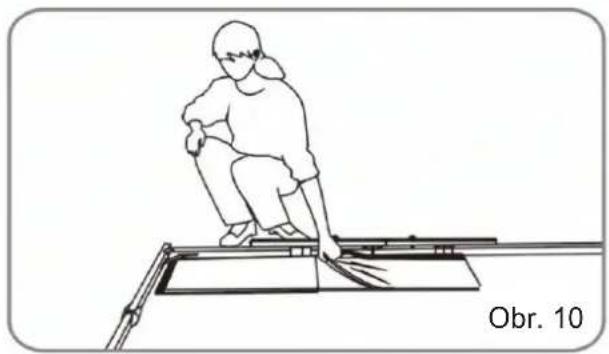
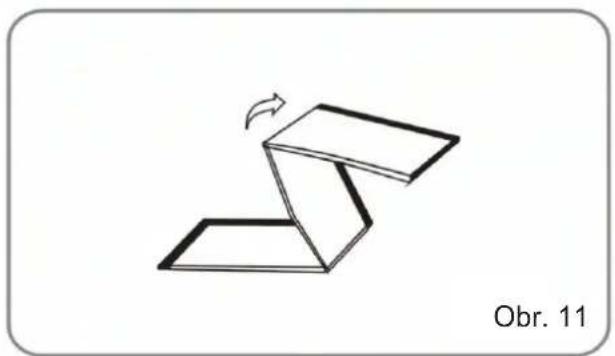
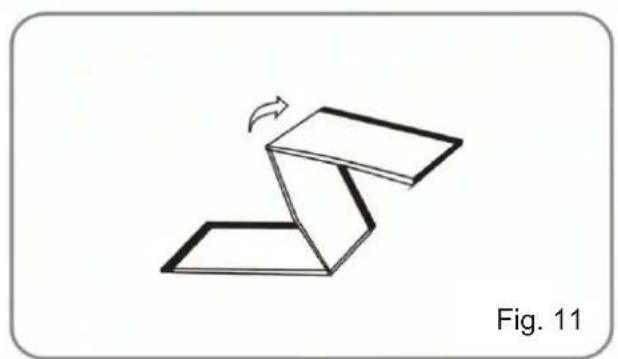
- Take the screen fabric out of the bag and put it inside the frame next to the corner. Unfold as shown in the diagram. (Fig. 10 + 11).


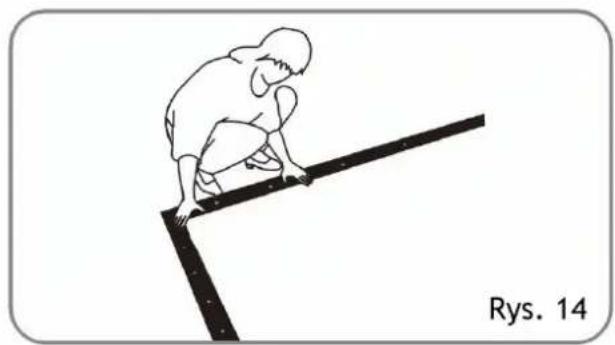
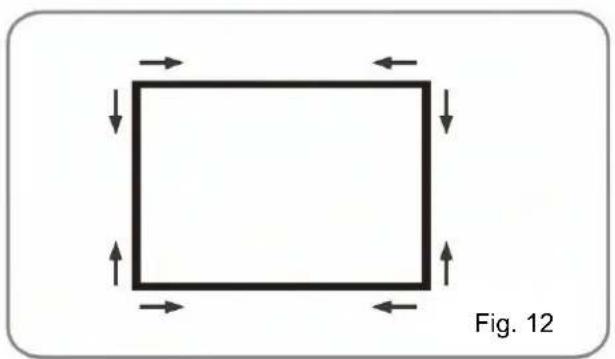
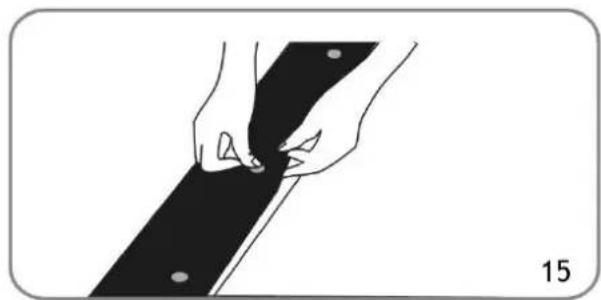
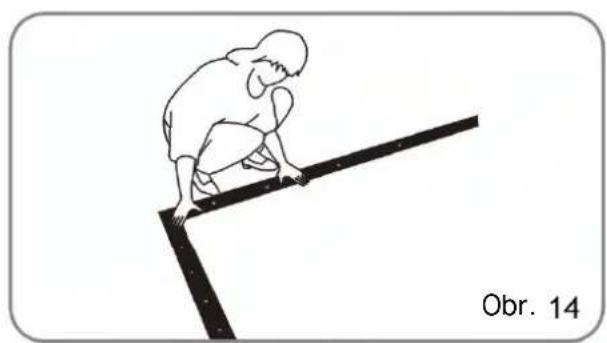
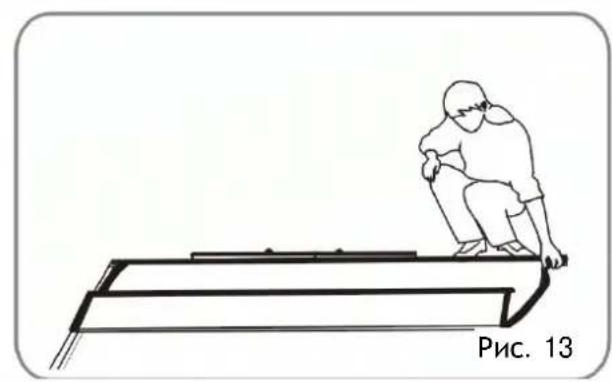
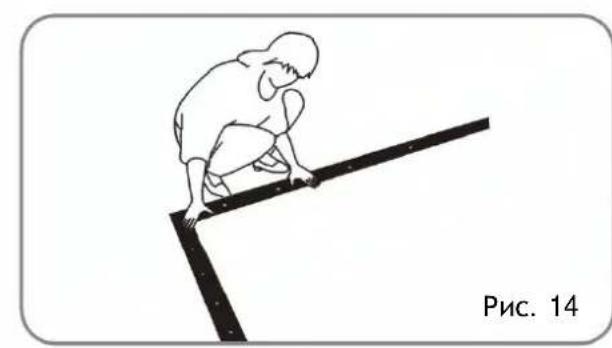
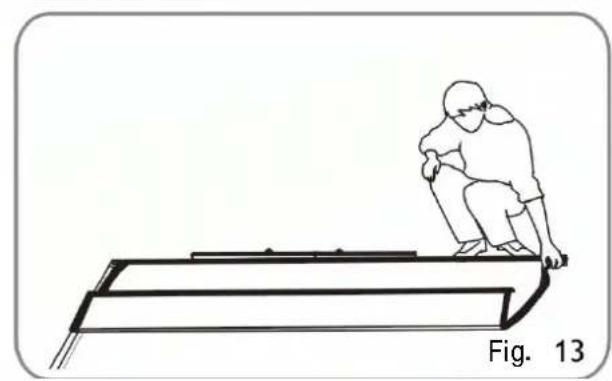
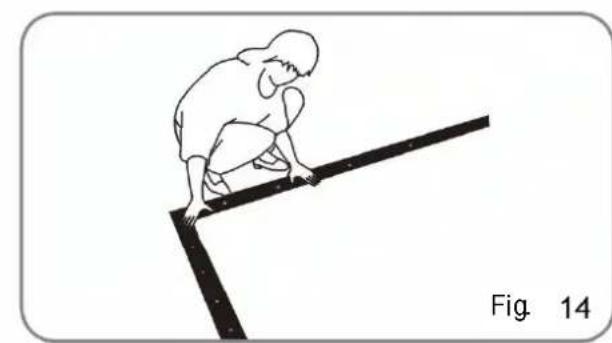
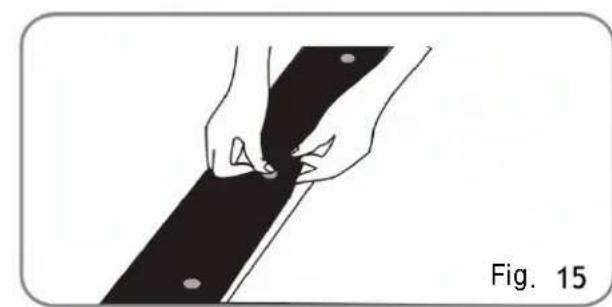
- Once the screen fabric is fully unfolded, secure it to the frame by the press studs. Secure the press studs in the order shown in Fig. 1 2-15.


- Jake the folding legs out of the box and unfold as shown in Fig. 1 6. and make sure the hinges click into place.

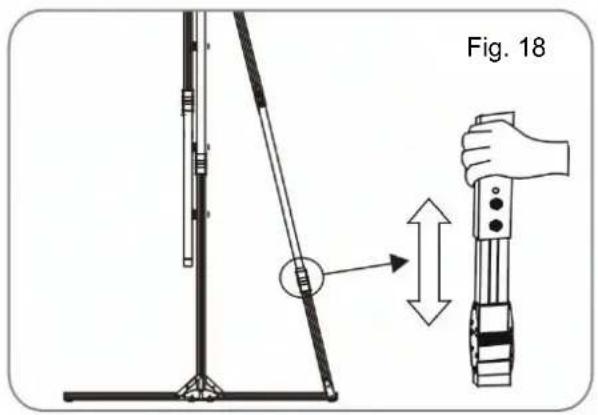
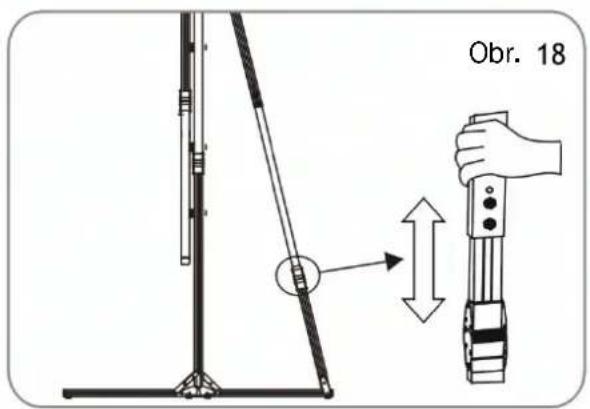
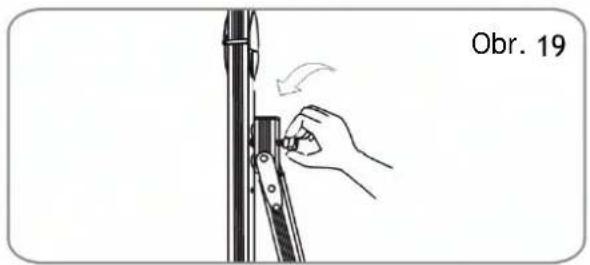
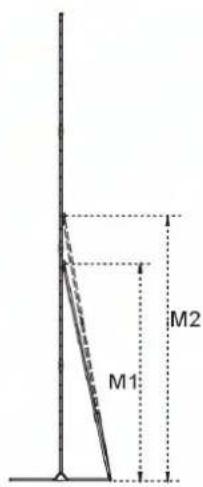
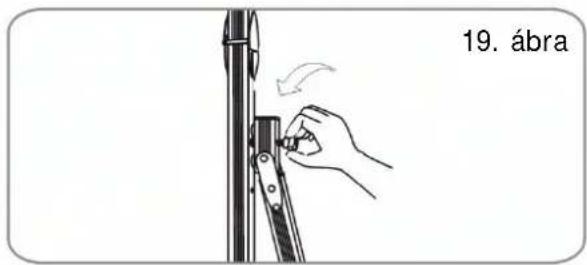
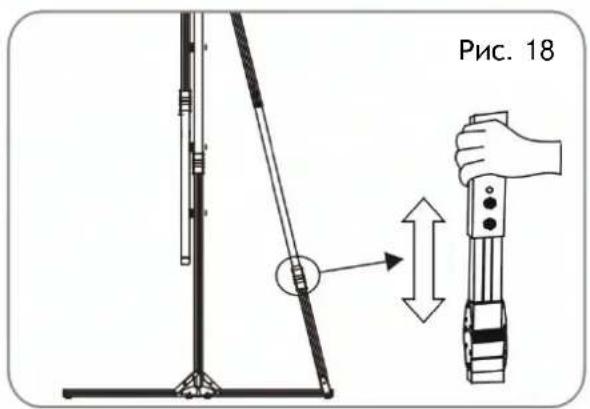
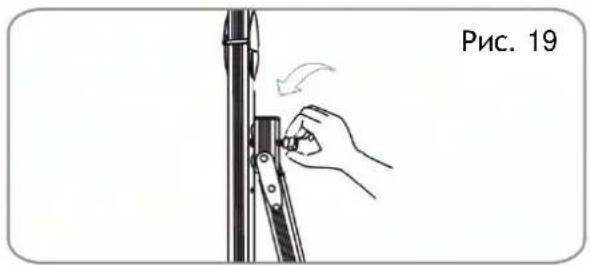
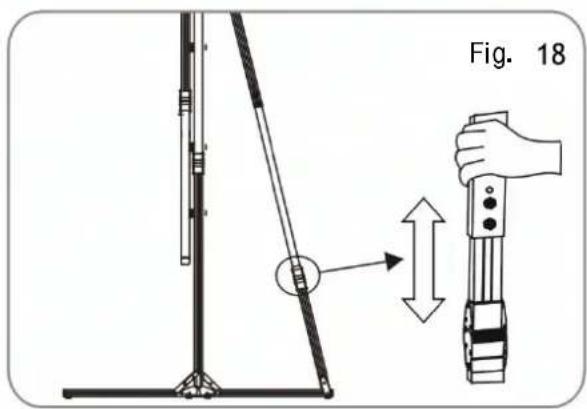
- Once the legs are locked in place use the hand screws to secure the support leg to the vertical leg in an appropriate position. The support leg can be adjusted to an appropriate length. If the frame is attached to the legs higher up then the support leg should also be attached higher up. (Fig. 1 7-19)


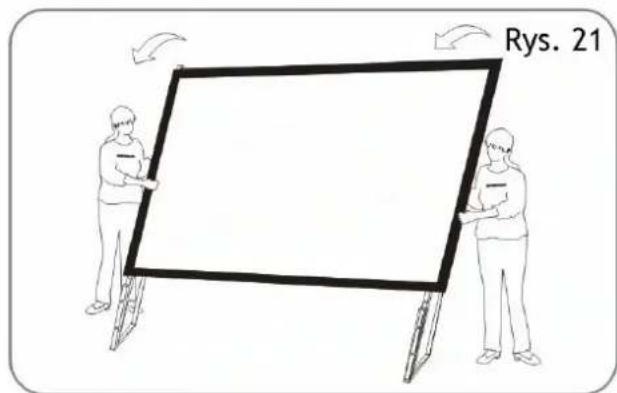
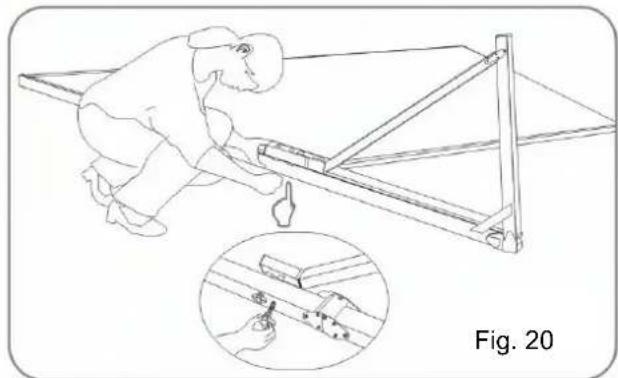
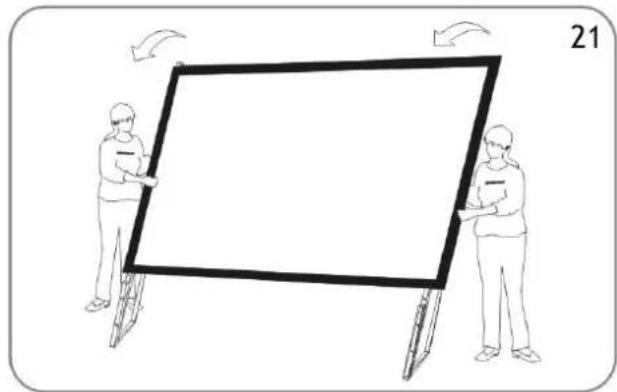
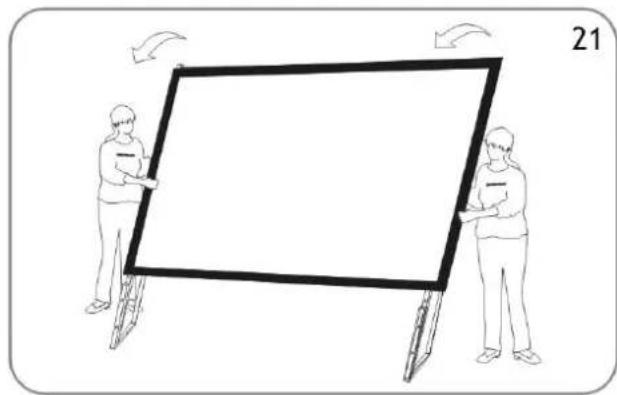
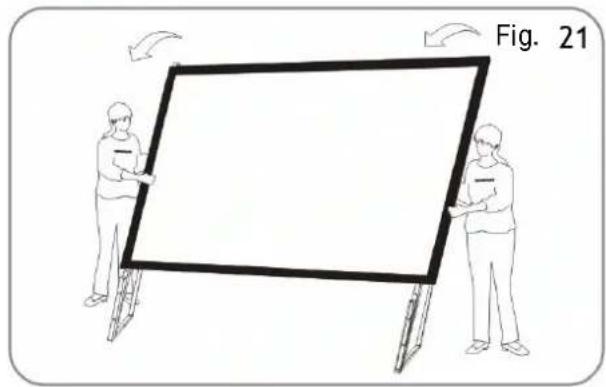
- Lay the frame on the floor and position the legs over the sides of the frame. Use the hand screws to attach the frame to the legs just little before tighten two sides of them firmly.(Fig. 20 + 21)

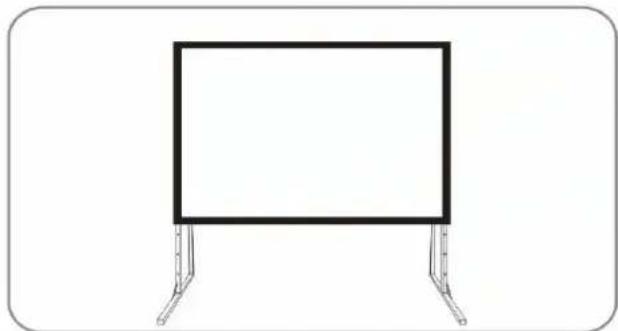
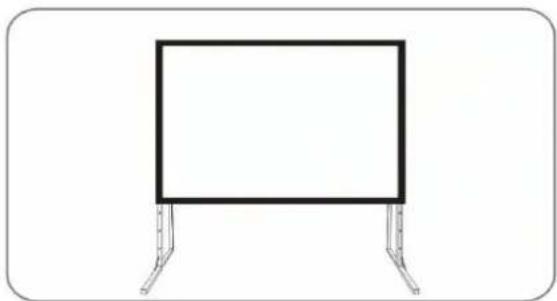
- When the frame is in the vertical position fold the front facing feet of the legs out. Assembly is complete and the projection screen will be stable on a flat surface. (Fig. 22)

- After using the screen disassemble the screen and store it in the box provided.
To disassemble the screen, implement the assemble procedure in reverse order.
Safety Notice

Misuse of the screen may cause damage to the screen, or injury to persons.

The projection screen must be set up on a stable surface where there is sufficient space. Failure to do so may cause the screen to fall over causing damage to the screen and injury to persons.

Do not hang things from the screen or climb on it. Doing so may cause the screen to fall off and damage the screen and cause injury.

After using the projection screen disassemble the screen and store it in the box provided. This will protect it from dust, dirt and accidental damage.

Do not disassemble the screen. Doing so may damage the screen and may cause injury. If the screen needs to be repaired contact the dealer from which the screen was purchased.
Note: If the screen is faulty or is damaged in any way do not try to repair the projection screen yourself. Contact customer service to arrange for it to be repaired. The projection screen parts and specifications are subject to change with out prior notice.
Screen Specifications
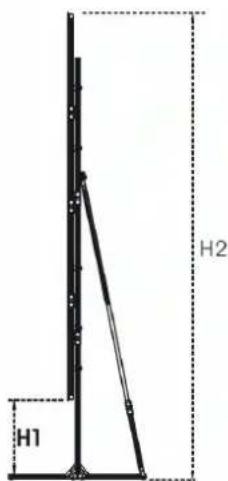
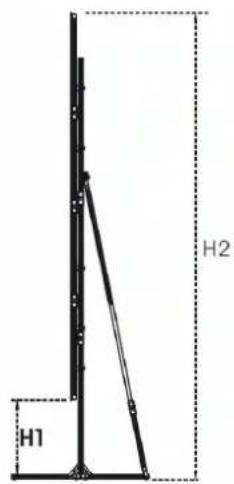
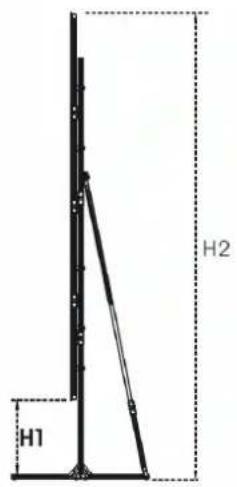
| Model | Ratio | Alu-minium size | Gain | Projection area W*H (mm) | Total Width L (mm) | Total Height F (mm) | B1 (mm) | B2 (mm) | C1 (mm) | C2 (mm) | Height H2 (mm) | Height H1 (mm) | Support leg height. M (mm) | |||
| max | min | max | min | M1 | M2 | |||||||||||
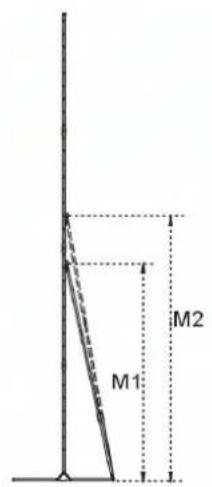
| 240 | 4:3 | 32*32 | 1,0 | 2438*1828 | 2638 | 2028 | 100 | 100 | 100 | 100 | 3425 | 2225 | 1393 | 193 | / | / |
| 300 | 4:3 | 32*32 | 1,0 | 3048*2286 | 3248 | 2486 | 100 | 100 | 100 | 100 | 4028 | 2678 | 1540 | 190 | 1660 | 2260 |
| 360 | 4:3 | 32*32 | 1,0 | 3658*2743 | 3858 | 2943 | 100 | 100 | 100 | 100 | 4256 | 3206 | 1312 | 262 | 1660 | 2260 |
| 400 | 4:3 | 32*32 | 1,0 | 4064*3048 | 4264 | 3248 | 100 | 100 | 100 | 100 | 4330 | 3430 | 1086 | 186 | 1660 | 2260 |
| 500 | 4:3 | 32*64 | 1,0 | 5080*3810 | 5280 | 4010 | 100 | 100 | 100 | 100 | 5538 | 4188 | 1530 | 180 | 1660 | 2260 |
| 180 | 16:9 | 32*32 | 1,0 | 2032*1143 | 2192 | 1323 | 80 | 80 | 80 | 80 | 2234 | 1634 | 934 | 334 | / | / |
| 220 | 16:9 | 32*32 | 1,0 | 2438*1372 | 2638 | 1572 | 100 | 100 | 100 | 100 | 2294 | 1844 | 724 | 274 | / | / |
| 280 | 16:9 | 32*32 | 1,0 | 3048*1727 | 3248 | 1927 | 100 | 100 | 100 | 100 | 2769 | 2169 | 849 | 249 | / | / |
| 340 | 16:9 | 32*32 | 1,0 | 3658*2057 | 3858 | 2257 | 100 | 100 | 100 | 100 | 3614 | 2714 | 1354 | 454 | / | / |
| 380 | 16:9 | 32*32 | 1,0 | 4064*2286 | 4264 | 2486 | 100 | 100 | 100 | 100 | 4101 | 3261 | 1621 | 721 | 1660 | 2260 |


Notice
Do Not...
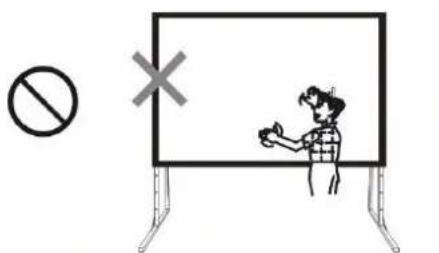
Do not touch the projection surface with hands.

Do not use chemical cleaning agents to clean the projection surface.

Do not draw or write on the projection surface.

Do not disassemble the screen.
Correct...
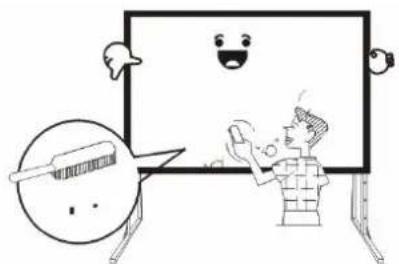
Use a soft cloth or brush to clean the projection surface..

Use water and a soft cloth to clean the screen.

After using the screen disassemble the screen and store it in the box provided.

(Abb. 1)

(Abb. 2)










Achtung!
Nicht...

(dessin 1)

(dessin 2)

FOLD 500
Instruction d'installation version 250"






Attention!
Il est interdit...


Obr. 1
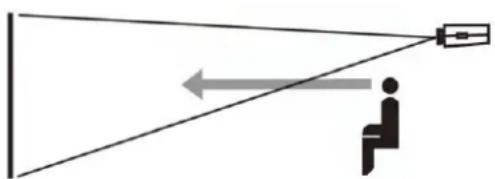
Obr. 2








Pozor!
Nesmí se...

Obr. 1

Obr. 2
- Ručná skrutka M8X80, M8X50








Pozor!
Nesmie sa...
Po projekčnej ploche nepíšte ani nekreslite.


- ábra

- ábra



FOLD 500
A 250" változat




Figyelem!
Nem szabad...
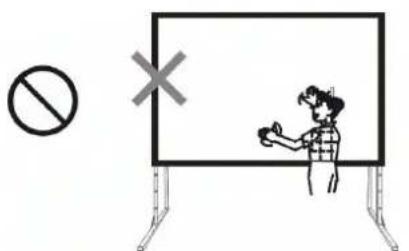
Рис. 1

Рис. 2





Внимание!
Нельзя...

Fig. 1
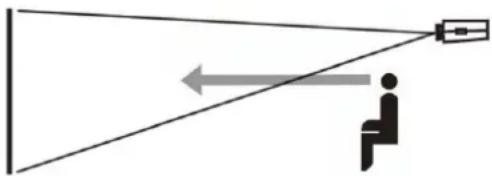
Fig. 2




Atentie!
Este interzisă...


avtek
http://www.avtek.eu


Brand : Avtek
Model : 1EVF15
Category : Projection screen