
SCOUT RX1 - Robot vacuum MIELE - Free user manual and instructions
Find the device manual for free SCOUT RX1 MIELE in PDF.
| Product Type | Robot Vacuum |
| Brand | MIELE |
| Model | SCOUT RX1 |
| Dimensions (height) | 88 mm |
| Weight | Approximately 3.5 kg (estimated) |
| Operating Voltage | 14.8 V |
| Battery Type | Rechargeable Lithium-Ion |
| Runtime | Approximately 2 hours |
| Charging Time | Approximately 120 minutes |
| Cleaning Modes | Auto, Spot, Corner, Turbo |
| Sensors | Anti-collision, anti-drop, infrared, camera |
| Included Accessories | 2 side brushes, 2 replacement filters, remote control, charging base, power adapter, cable, magnetic strip |
| Dustbin Capacity | Approximately 400 ml (estimated) |
| Cylindrical Brush | Yes, replaceable |
| Exhaust Filter | Replacement every 3 months |
| Sensor Maintenance | Clean with dry cotton swab |
| Obstacle Crossing Height | 20 mm (adjustable to 6 mm) |
| Delayed Start (Timer) | Yes, adjustable |
| Sound Notification | Can be disabled |
| Warranty | 24 months |
| After-Sales Service | 0974 501 000 (non-premium call) |
Frequently Asked Questions - SCOUT RX1 MIELE
User questions about SCOUT RX1 MIELE
0 question about this device. Answer the ones you know or ask your own.
Ask a new question about this device
Download the instructions for your Robot vacuum in PDF format for free! Find your manual SCOUT RX1 - MIELE and take your electronic device back in hand. On this page are published all the documents necessary for the use of your device. SCOUT RX1 by MIELE.
USER MANUAL SCOUT RX1 MIELE
Warning and Safety instructions 34
Guide to the appliance 39
Caring for the environment 41
Functions and features of the robot vacuum cleaner 42
Accessories supplied 42
Preparing for use 42
Insert the side brushes 42
Remove the protective foil 42
Place the batteries in the remote control 42
Switch on the robot vacuum cleaner 42
Connect the base station 42
Charge the rechargeable battery 43
Set the time of day 43
Define the area to be vacuumed 44
Use 44
Switching on and off 44
Starting vacuuming 44
Finish vacuuming: if vacuuming started from the base station 45
Finish vacuuming: if vacuuming started from somewhere in the room 45
Manually controlled vacuuming 45
Interrupting vacuuming 45
Manual navigation (without vacuuming) 45
Directing the robot vacuum cleaner to the base station 45
Finishing vacuuming manually 46
Vacuuming modes 46
Selecting the vacuuming mode 46
Setting the timer 47
Deactivating the timer 48
Deactivating the acoustic signals 48
Reducing the maximum crossing over height 48
Maintenance 49
Purchasing accessories 49
Ordering the correct accessories 49
Emptying the dust box 49
Cleaning the dust box 49
Replacing the exhaust filter 50
Cleaning the roller brush 50
Cleaning the side brushes 51
Cleaning the seal on the dust box 51
Replacing the seal on the dust box 51
Cleaning the front wheel 52
Cleaning the sensors 52
Changing the batteries in the remote control 52
Replacing the rechargeable battery. 52
Storage 53
Cleaning and care 53
Problem solving guide 54
Fault messages 57
After sales service 58
Guarantee 58
Electrical connection for the UK 58
Copyright and licences 59
This robot vacuum cleaner complies with current safety requirements. Inappropriate use can, however, lead to personal injury and damage to property.
To avoid the risk of accidents and damage to the robot vacuum cleaner, please read these instructions carefully before using it for the first time. They contain important information on its safety, operation and maintenance.
Keep these instructions in a safe place and ensure that new users are familiar with the content. Pass them on to any future owner.
Correct application
This robot vacuum cleaner is intended for cleaning flooring in domestic households and similar working and residential environments.
The robot vacuum cleaner is not intended for outdoor use.
The robot vacuum cleaner must only be used for domestic household purposes to vacuum dry floor surfaces. Any other usage, modification or alteration is not supported by the manufacturer and could be dangerous.
The robot vacuum cleaner can only be used by people with reduced physical, sensory or mental capabilities, or lack of experience or knowledge, if they are supervised whilst using it or have been shown how to use it in a safe way and understand and recognise the consequences of incorrect operation.
Safety with children
Children under 8 years of age must be kept away from the robot vacuum cleaner unless they are constantly supervised.
Children 8 years and older may only use the robot vacuum cleaner unsupervised if they have been shown how to use it safely and recognise and understand the consequences of incorrect operation.
Children must not be allowed to clean or maintain the robot vacuum cleaner unsupervised.
Please supervise children in the vicinity of the robot vacuum cleaner and do not let them play with it.
- Keep the rechargeable battery and the batteries for the remote control out of the reach of children.
Technical safety

The Robot vacuum cleaner operates at 14.8 V.
It is classified as a class III appliance.
Class III appliances are supplied by a safety extra-low voltage (SELV) power source where the voltage is low enough to protect users from the risk of electrical shock.
Before using the robot vacuum cleaner and the accessories supplied, check for any visible signs of damage. Do not use a damaged appliance or damaged accessories.
Ensure that the connection data on the data plate of the robot vacuum cleaner and the base station (voltage and frequency) match the mains electricity supply exactly.
The mains electrical plug must be fitted with an appropriate fuse.
Reliable and safe operation of this robot vacuum cleaner can only be assured if its docking station has been connected to the mains electricity supply.
While the robot vacuum cleaner is under guarantee, repairs should only be undertaken by a Miele authorised service technician. Otherwise the guarantee will be invalidated.
Repairs should only be carried out by a Miele authorised service technician. Repairs and other work by unqualified persons can cause considerable danger to users.
en - Warning and Safety instructions
Make sure that the mains electrical cable is not damaged, bent or twisted. Do not place any heavy items on top of it.
Do not let the robot vacuum cleaner travel over the mains cable or other cables.
Switch the robot vacuum cleaner off with the OFF switch on the side before cleaning / maintaining it. Also switch it off in this way if it is operating unusually.
- Only use the parts supplied (mains cable, power supply unit and base station) to charge the rechargeable battery.
Batteries can leak corrosive fluids. Avoid contact with the eyes and skin. In the event of contact, rinse thoroughly with water and seek medical advice.
- Do not stick any labels on the base station infrared transmitter. Do not place any items in front of it.
Do not cover the robot vacuum cleaner's sensors or the camera in the display.
Do not immerse the robot vacuum cleaner or the parts supplied in water. Clean all parts with a dry or slightly damp cloth only.
Correct use
Do not use the robot vacuum cleaner without the exhaust filter fitted.
Remove all breakable or lightweight items from the floor and make sure that the robot vacuum cleaner cannot become entangled in cords, curtains, fringes or similar.
Animals must be kept away from the robot vacuum cleaner. Do not allow animals to stand or sit on the robot vacuum cleaner.
- Do not use the robot vacuum cleaner to vacuum up anything which has been burning or is still glowing e.g. cigarettes, ashes or coal, whether glowing or apparently extinguished. Do not use it in the vicinity of a fireplace.
Do not use the robot vacuum cleaner to vacuum up any water, liquid or damp dirt. Wait until any freshly cleaned or shampooed carpets or floor coverings are completely dry before attempting to vacuum.
Do not use the robot vacuum cleaner to vacuum toner dust. Toner, such as that used in printers and photocopiers, can conduct electricity.
- Do not use the robot vacuum cleaner to vacuum up any inflammable or combustible liquids or gases and do not use it in areas where such substances are stored.
Do not allow loosely fitting clothes or long hair near the roller brush or other moving parts of the robot vacuum cleaner.
Handling the rechargeable battery and remote control batteries:
- Do not drop or throw the rechargeable battery. For safety reasons do not continue to use a rechargeable battery which has been dropped or damaged.
- Keep the rechargeable battery or the batteries away from naked flames or other heat sources. Do not heat the rechargeable battery or batteries or place them in direct sunlight.
Do not dismantle the rechargeable battery. - Do not cause a short circuit by bridging the contacts of the rechargeable battery or the batteries, either unintentionally or deliberately.
- Do not allow the rechargeable battery or the batteries to come into contact with liquids.
- Never continue to use the rechargeable battery if you notice an unusual smell from it, if liquid is leaking from it, it is significantly overheating or if it is discoloured or deformed. Dispose of the rechargeable battery immediately.
Do not attempt to recharge the remote control batteries.
en - Warning and Safety instructions
- Disposing of batteries: Remove the rechargeable battery from the robot vacuum cleaner and the batteries from the remote control. Insulate metal contacts prior to disposal to avoid a short circuit. Dispose of the rechargeable battery and the batteries from the remote control in a designated collection/recycling bin for batteries. Do not dispose of them with the normal household waste.
Accessories
Only use genuine accessories with the "Original Miele" logo on them. Otherwise the manufacturer cannot guarantee the safety of the product.
Miele cannot be held liable for damage caused by incorrect use or operation or by non-compliance with these Warning and Safety instructions.
Illustrations A, B and C for this section are on the pull-out pages in the back of these operating instructions.
A - Robot vacuum cleaner and base station
Top of the robot vacuum cleaner
① Camera
② Display
③ Sensors (collision protection)
④ Impact protection
⑤ ON/OFF switch
⑥ Power supply unit socket
⑦ Dust box
⑧ Dust box release button
Bottom of the robot vacuum cleaner
⑨ Side brushes
10 Battery compartment
⑪ Front wheel
Sensors (toppling protection)
13 Charging contacts
14 Drive wheels
15 Data plate
16 Roller brush holder
⑰ Roller brush
18 Dust box seal
Base station
① Power supply unit storage compartment
② Power supply unit socket (not visible)
③ Infrared transmitter
④ Charging contacts
⑤ Cleaning brush storage compartment
⑥ Contact indicator
B and C - remote control and display
B - Remote control
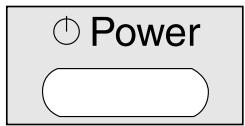
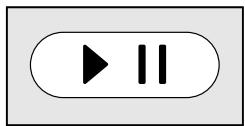
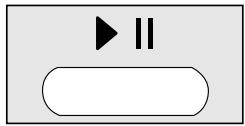
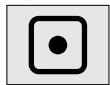
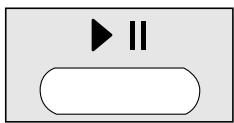
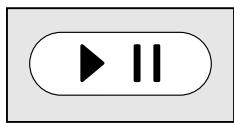
① Start / Pause button (▶ II)
② Timer button
③ Spot vacuuming mode button
④ Corner vacuuming mode button
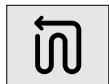
⑤ Base button
⑥ OK confirmation button with direction buttons around it
⑦ Turbo vacuuming mode button
Auto standard vacuuming mode button
⑨ Clock button
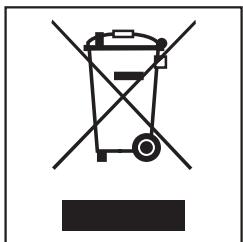
10 Power button
① Battery compartment cover
C - Display
① Camera
② Rechargeable battery status indicator
③Clock display
④ Spot vacuuming mode indicator
⑤ Corner vacuuming mode indicator
(6) Vacuuming mode selection sensor
⑦ Start / Pause sensor
Turbo vacuuming mode indicator
⑨ Auto standard vacuuming mode indicator
⑩ Timer indicator
Disposal of packing material
The packaging is designed to protect the robot vacuum cleaner from damage during transportation. The packaging materials used are selected from materials which are environmentally friendly for disposal and should be recycled.
Recycling the packaging reduces the use of raw materials in the manufacturing process and also reduces the amount of waste in landfill sites. Ensure that any plastic wrappings, bags, etc. are disposed of safely and kept out of the reach of babies and young children. Danger of suffocation.
Disposing of your old appliance
Electrical and electronic equipment often contain valuable materials. They also contain materials which, if handled or disposed of incorrectly, could be potentially hazardous to human health and to the environment. They are, however, essential for the correct functioning of your appliance. Please do not therefore dispose of it with your household waste.
Please dispose of it at your local community waste collection / recycling centre, or contact your dealer for advice.
The lithium-ion rechargeable battery is located in the battery compartment on the bottom of the robot vacuum cleaner. Remove the rechargeable battery from the robot vacuum cleaner and the batteries from the remote control. Dispose of the rechargeable battery and the batteries in a designated collection bin for batteries.
Ensure that the vacuum cleaner presents no danger to children while being stored for disposal.
Functions and features of the robot vacuum cleaner
The robot vacuum cleaner is suitable for the daily cleaning of short pile carpets, fitted carpets and hard flooring.
Please observe the flooring manufacturer's cleaning and care instructions.
The robot vacuum cleaner is fitted with a camera and various sensors. During operation, the room plan as well as the items present in the room are recorded. The robot vacuum cleaner uses this data to create an efficient vacuuming plan of the surfaces to be vacuumed, which it can then vacuum autonomously.
Accessories supplied
- Two side brushes
- Two replacement exhaust filters
- Remote control / two batteries
- Base station, including a cleaning brush
- Power supply unit with connector
- Mains connection cable with plug
- Magnetic strip
Preparing for use
Diagrams 1 - 13 for this section are at the end of these operating instructions.
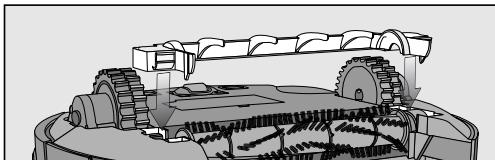
Insert the side brushes (dia. 01)
Place the robot vacuum cleaner upside down on a level, clean surface.
Do not lift the robot vacuum cleaner by the area around the dust box as it can come loose.
Press the two side brushes supplied firmly but carefully onto the pins provided. Ensure that they match up correctly with the L and R markings.
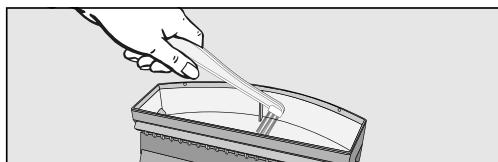
Remove the protective foil (dia. 02)
- Remove the protective foil from the base station and from the top of the robot vacuum cleaner.
Place the batteries in the remote control (dia. 03)
Remove the battery compartment cover.
Insert the two batteries supplied, making sure the polarity is correct.
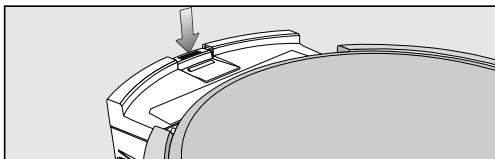
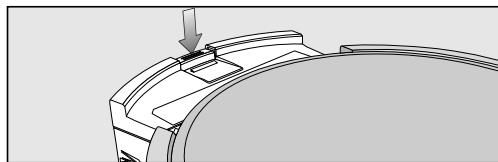
Switch on the robot vacuum cleaner (dia. 04)
Press the ON switch on the side of the robot vacuum cleaner.
The rechargeable battery status and the Auto standard vacuuming mode indicators will light up in the display.
After approx. 60 seconds the robot vacuum cleaner will switch into standby. The battery status indicator will continue to light up.
The robot vacuum cleaner is reactivated by pressing any button on the remote control or one of the two sensors in the robot vacuum cleaner display.
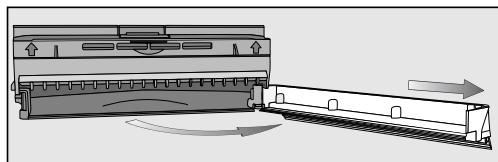
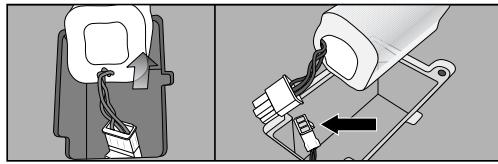
Connect the base station (dia. 05 - 09)
- Open the storage compartment at the back of the base station (dia. 05).
Insert the power unit connector supplied into the socket at the top of the storage compartment (dia. 06)
- Connect the mains connection cable to the power supply unit and the mains plug to an electrical socket (dia. 07).
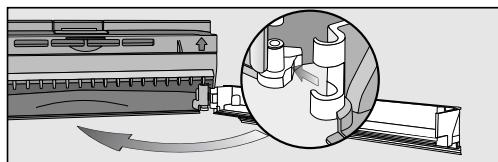
The contact indicator will light up red on the base station.
Stow the power supply unit in the storage compartment in the base station and feed the mains connection cable through the slot (dia. 08).
- Place the base station on a level surface against a free wall. Ensure that there is an obstacle free distance of at least 1.5m in front and 0.5m to the right and left of the base station (dia. 09).
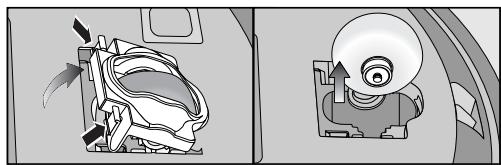
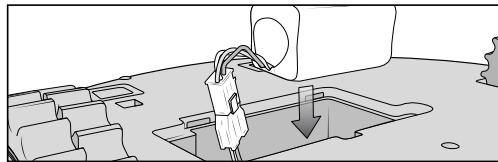
Charge the rechargeable battery (dia. 10)
The rechargeable battery is supplied not fully charged. It needs to be charged fully before first use.
The battery can also be charged when the robot vacuum cleaner is switched off (OFF switch). In this case, the vacuum cleaner indicators will not react.
- Connect the robot vacuum cleaner correctly to the charging contacts on the base station.
Do not lift the robot vacuum cleaner by the area around the dust box as it can come loose.
The base station contact indicator will go out as soon as the robot vacuum cleaner has been positioned correctly. The battery will charge and the battery status indicator will flash in the display.
The charging process takes up to 120 minutes and is complete when the battery status indicator in the display lights up green. You can then vacuum for up to two hours.
You can also charge the battery without using the base station directly via the power supply unit.
Insert the power supply unit connector into the socket on the side of the robot vacuum cleaner (dia. 11).
- Connect the mains connection cable to the power supply unit and the mains plug to an electrical socket (dia. 07).
Rechargeable battery status indicator in the display
Red charged capacity approx. 0% -20%
Or- charged capacity approx.
ange 20% - 50%
Green charged capacity approx. 50% - 100%
Set the time of day (dia. 12)
Use the remote control to set the clock.
Press the Clock button for three seconds.
The hour indicator will flash in the clock display on the robot vacuum cleaner.
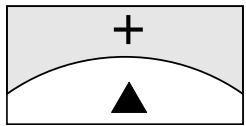
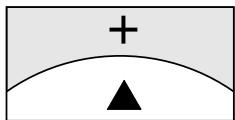
Press the + or - direction button to set the current hour.
Press the OK button to confirm your selection.
The minutes indicator will flash in the clock display on the robot vacuum cleaner.
Press the + or - direction button to set the current minutes.
Press the OK button to confirm your selection.
If you want to alter the time of day, proceed as described above.
Define the area to be vacuumed (dia. 13)
The robot vacuum cleaner is 88 mm high. Any items which are to be vacuumed under should have a minimum clearance of 90 mm.
You can define any areas which the robot vacuum cleaner should not have access to.
- Place the magnetic strip supplied with the groove facing downwards on the floor.
The robot vacuum cleaner will not cross over the magnetic strip.
Adhesive strips are supplied for permanent fixing.
Additional magnetic strips are available to order from Miele or online at www.miele-shop.com.
Use
Always watch the robot vacuum cleaner when it is vacuuming new surroundings for the first time. This way you will be able to detect and remove any problematic obstacles or define the area they are in with the magnetic strip.
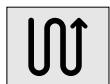
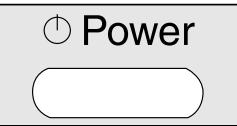
Switching on and off
Press the Power button on the remote control.
The display will be activated.
Starting vacuuming
There are two ways to start vacuuming in the Auto standard vacuuming mode.
Option 1 (Remote control)
Press the button.
Option 2(Display)
Press the II sensor in the display.
The area to be vacuumed will be cleaned.
Finish vacuuming: if vacuuming started from the base station
The robot vacuum cleaner will return to the base station automatically and recharge.
The robot vacuum cleaner will return to the base station and recharge even when there is low battery capacity. II will appear in the clock display. The robot vacuum cleaner will then continue vacuuming from the point at which it was interrupted.
Finish vacuuming: if vacuuming started from somewhere in the room
The robot vacuum cleaner will return to its starting point and switch into standby.
The robot vacuum cleaner will stand still when there is low battery capacity. You should then recharge it.
Manually controlled vacuuming
You can use the direction buttons on the remote control to vacuum a particular area of the room.
While the robot vacuum cleaner is vacuuming, press and hold one of the direction buttons.
The robot vacuum cleaner will turn in the desired direction.
Press and hold the + direction button.
The robot vacuum cleaner will travel in the desired direction and continue to vacuum.
Interrupting vacuuming
Press the button on the remote control.
Press the button again to continue vacuuming.
Manual navigation (without vacuuming)
You can use the direction buttons on the remote control to direct the robot vacuum cleaner to a specific area of the room.
Press and hold one of the direction buttons.
The robot vacuum cleaner will travel in the desired direction without vacuuming.
You cannot direct the robot vacuum cleaner manually to the base station in order to recharge it.
Directing the robot vacuum cleaner to the base station
Press the Base button on the remote control.
The robot vacuum cleaner will travel to the base station and recharge. The base station contact indicator will go out.
Finishing vacuuming manually

Power
Press the Power button on the remote control.
The robot vacuum cleaner will switch into standby automatically after approx. 60 seconds. The display will be deactivated. The battery capacity status indicator will continue to light up.
You can switch the robot vacuum cleaner into standby before 60 seconds is up by pressing the Power button again.
The robot vacuum cleaner is reactivated by pressing any button on the remote control or one of the two sensors in the robot vacuum cleaner display.
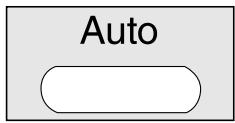
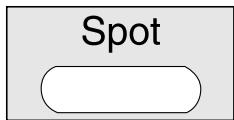
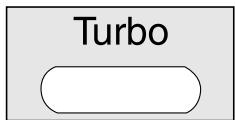
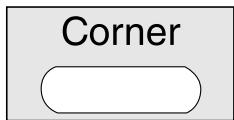
Vacuuming modes
There are four different vacuuming modes.
Auto
Standard vacuuming mode for normally soiled flooring.
Spot
Targeted vacuuming of an area approx. 1.8 × 1.8 ~m around the selected starting point of the robot vacuum cleaner.
Corner
For vacuuming normally soiled flooring (see Auto). Additional edge vacuuming after returning the starting point.
Turbo

For vacuuming lightly soiled flooring with a short vacuuming duration.
Selecting the vacuuming mode
Press the Power button on the remote control.
There are two ways of selecting the vacuuming mode.
Option 1 (Remote control)
Press the button for the vacuuming mode you want. The corresponding vacuuming mode symbol will light up in the display.
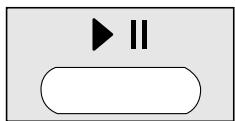
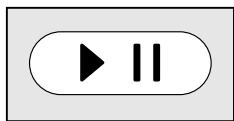
To start vacuuming, press the button on the remote control or the sensor in the display.
Option 2(Display)
Press the sensor repeatedly until the symbol for the vacuuming mode you want lights up.
To start vacuuming, press the button on the remote control or the sensor in the display.
Setting the timer
(only possible if the clock has been set)
If you would like the robot vacuum cleaner to start at the same time every day, you can save the start time and vacuuming mode you want to memory.
You can also use the robot vacuum cleaner to vacuum in the dark. However, please be aware that vacuuming may be less thorough. The camera needs light to enable it to navigate without restriction.
Use the remote control to set the timer.
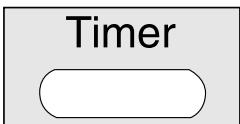
Press the Timer button for at least three seconds.
The Timer ① and the hour indicators will flash in the display.
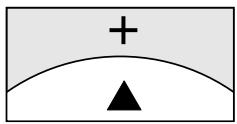

Press the + or - direction button to set the hour you want.
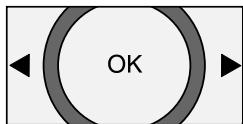
Press the OK button to confirm your selection.
The Timer ① and the minutes indicators will flash in the display.

Press the ^+ or - direction button to set the minutes you want.
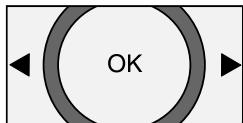
Press the OK button to confirm your selection.
- On the remote control, press the button for the vacuuming mode you want or the direction buttons until the symbol for the vacuuming mode you want flashes.
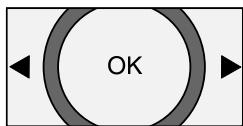
Press the OK button to confirm your selection.
The settings will be displayed for approx. three seconds. The robot vacuum cleaner will now start to vacuum at the same time each day.
The Timer indicator lights up to show that the timer has been activated.
To alter the entries, proceed as described previously.
Deactivating the timer
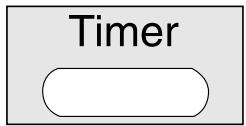
Press the Timer button on the remote control briefly.
The Timer indicator will go out.
Activating the timer / displaying a set start time
Press the Timer button on the remote control briefly.
The Timer indicator ① lights up, the set start time is shown briefly and the robot vacuum cleaner will start vacuuming at the set start time.
Deactivating the acoustic signals
The acoustic signals are activated as standard. You can deactivate and then reactivate them.

Press the OK button on the remote control for at least three seconds.
OFF will appear briefly in the clock display.
Acoustic signals for fault messages cannot be deactivated.
Reducing the maximum crossing over height
The robot vacuum cleaner is set as standard so that it can negotiate a height of up to 20 mm.
This allows it to vacuum carpets, cross over thresholds, etc.
If you would like to reduce this height (down to approx. 6mm ) in order to protect chair or table legs, or lamps for example, you can deactivate the factory default setting.

Press the Base button on the remote control for at least three seconds.
LO will appear in the clock display.
Press the Base button again for at least three seconds if you want to reactivate the maximum crossing over height of 20mm . HI will appear in the clock display.
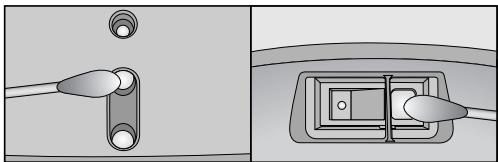
Maintenance
Before any maintenance work switch the robot vacuum cleaner off with the OFF switch on the side.
Only use genuine accessories with the "Original Miele" logo on them. This will ensure that the suction power of the robot vacuum cleaner is maintained, giving the best possible cleaning results.
Purchasing accessories
Original Miele accessories can be ordered from Miele, your Miele retailer or online at:

Ordering the correct accessories
Original Miele accessories are identified by the "Original Miele" logo on the packaging.

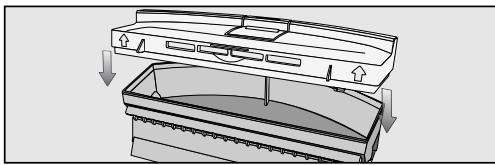
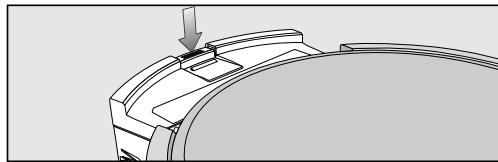
Emptying the dust box
Empty the dust box of the robot vacuum cleaner after each use.
Press the dust box release button and remove the dust box.
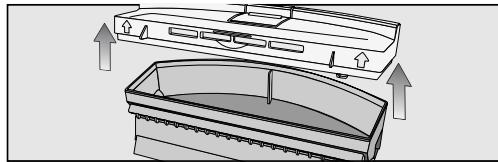
Remove the lid from the dust box.
Empty the dust box.
The contents of the box can be disposed of with the normal household waste, providing it contains general household dust only.
Cleaning the dust box
Clean the dust box of the robot vacuum cleaner after each use.
There is a storage compartment for the cleaning brush on the top of the base station.
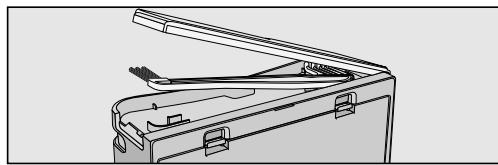
- Open the storage compartment and remove the cleaning brush.
Clean the dust box with the brush end of the cleaning brush.

Clean the bottom of the lid and also the filter grille using the brush end of the cleaning brush.
- Close the lid of the dust box making sure it clicks into place.
Replace the dust box in the robot vacuum cleaner, making sure it clicks into position.
Replacing the exhaust filter
Replace the exhaust filter in the robot vacuum cleaner after approx. three months. Two replacement exhaust filters are supplied.
The exhaust filter is in the bottom of the dust box lid.
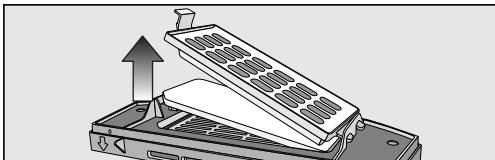
Unclip the filter grille and replace the exhaust filter.
- Close the filter grille making sure it clicks into position.
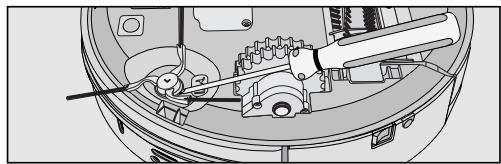
Cleaning the roller brush
- Remove the dust box and place the robot vacuum cleaner upside down on a level, clean surface.
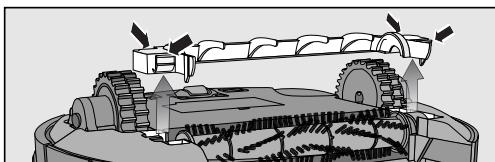
Remove the roller brush cover.
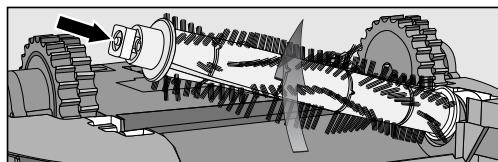
- Remove the roller brush, taking care not to lose the square guide.
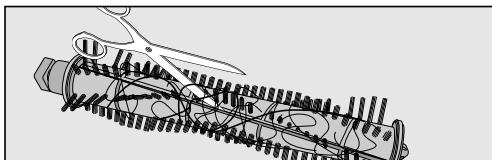
Use scissors to cut any threads or hairs which have wound around the roller brush. There is a groove on the roller to guide you.
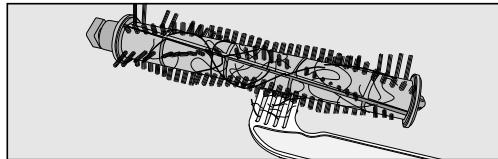
Remove the threads and hairs with the comb end of the cleaning brush.
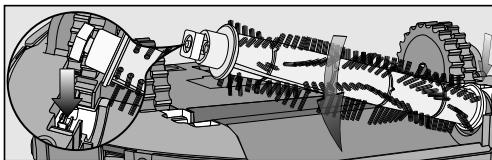
- Replace the roller brush. Make sure you position it carefully and that the square guide is attached.
Lock the cover making sure it clicks into position.
- Replace the dust box in the robot vacuum cleaner, making sure it clicks into position.
In order to continue to achieve the best possible cleaning results replace the roller brush with a new one after approx. two years.
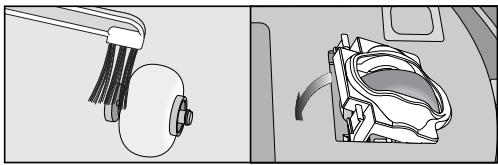
Cleaning the side brushes
- Place the robot vacuum cleaner upside down on a level, clean surface.
Do not lift the robot vacuum cleaner by the area around the dust box as it can come loose.
- Lift off the side brushes using a flat head screwdriver, for example.
Remove the threads and hairs with the comb end of the cleaning brush.
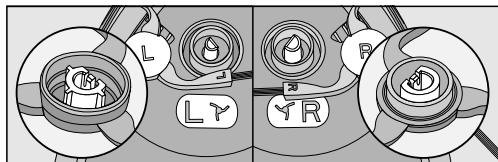
Press the two side brushes firmly but carefully onto the pins provided. Ensure that they match up correctly with the L and R markings.
In order to continue to achieve the best possible cleaning results replace the side brushes with new ones after approx. one year.
Cleaning the seal on the dust box
Press the dust box release button and remove the dust box.
Clean the seal on the bottom of the dust box with a damp cloth.
Replace the dust box in the robot vacuum cleaner, making sure it clicks into position.
In order to continue to achieve the best possible cleaning results replace the seal with a new one after approx. one year.
Replacing the seal on the dust box
Press the dust box release button and remove the dust box.
- Unclip the seal from the dust box and carefully swing it out until it detaches from the dust box.
- Attach the new seal to the side and clip it into position.
- Replace the dust box in the robot vacuum cleaner, making sure it clicks into position.
Cleaning the front wheel
- Place the robot vacuum cleaner upside down on a level, clean surface.
Do not lift the robot vacuum cleaner by the area around the dust box as it can come loose.
Unclip the cover.
Remove the front wheel.
- Remove any threads and hairs and clean the front wheel with the brush end of the cleaning brush.
- Replace the front wheel and close the cover making sure it clicks into position.
Cleaning the sensors
- Carefully clean the sensors on the side and the bottom of the robot vacuum cleaner using a dry cotton wool bud.
Changing the batteries in the remote control
The remote control requires two 1.5 V (AAA) batteries.
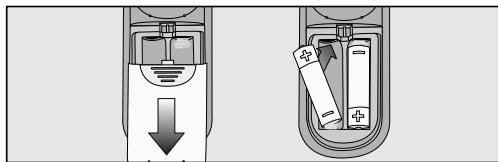
Remove the battery compartment cover.
- Replace the batteries making sure the polarity is correct.
Replacing the rechargeable battery
Keep a spare original Miele lithium-ion rechargeable battery to hand for your Scout RX1.
Place the robot vacuum cleaner upside down on a level, clean surface.
Do not lift the robot vacuum cleaner by the area around the dust box as it can come loose.
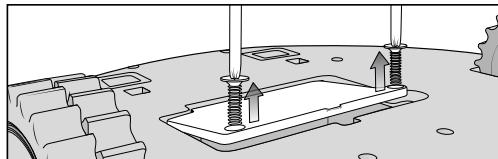
■ Unscrew the cover of the rechargeable battery compartment on both sides with a cross-headed screwdriver.
Carefully remove the rechargeable battery, pressing the lug on the contact to release it.
Insert the new rechargeable battery.
- Replace the cover of the rechargeable battery compartment.
- Dispose of the old rechargeable battery in a designated collection/recycling bin for batteries.
Storage
Before storing the robot vacuum cleaner, switch it off with the OFF switch on the side.
If the robot vacuum cleaner is not going to be used for a long period of time, make sure it is stored in a well ventilated, cool place.
Cleaning and care
Maintaining the robot vacuum cleaner and accessories
Before cleaning the robot vacuum cleaner, switch it off with the OFF switch on the side.
The robot vacuum cleaner and all plastic accessories can be cleaned with a dry or a slightly damp cloth, or with a proprietary cleaner suitable for plastic.
Do not use abrasive cleaning agents, glass cleaning agents, all-purpose cleaners or oil-based conditioning agents.
Do not immerse the robot vacuum cleaner or any accessories supplied with it in water.
Problem solving guide
Before trying to solve any problems with the robot vacuum cleaner, switch it off with the OFF switch on the side.
| Problem | Cause and remedy |
| The robot vacuum cleaner switches itself off after it has been switched on using the Power button. | The rechargeable battery is not sufficiently charged. ■ Recharge it. |
| The robot vacuum cleaner does not react. | The robot vacuum cleaner is switched off. ■ Press the ON switch on the side of the robot vacuum cleaner to switch it on. |
| The batteries in the remote control have been inserted incorrectly. ■ Make sure the polarity is correct. | |
| The batteries in the remote control are dead. ■ Replace the batteries. | |
| The signal between the infrared transmitter on the vacuum cleaner and the remote control is broken. ■ Clean both parts carefully with a soft, dry cloth and make sure that no items disrupt the signal. | |
| The remote control is too near to the robot vacuum cleaner or too far away from it. ■ Increase or decrease the distance and when using the remote control direct it towards the robot vacuum cleaner. | |
| The cleaning result is poor. | The dust box is full. ■ Empty and clean the dust box. |
| The roller brush is dirty. ■ Clean the roller brush. | |
| The dust box seal is dirty. ■ Clean the dust box seal. | |
| The exhaust filter is dirty. ■ Replace the exhaust filter. | |
| The roller brush has worn out. ■ Replace the roller brush. | |
| The dust box seal has worn out. ■ Replace the dust box seal. | |
| The side brushes have worn out. ■ Replace the side brushes. | |
| The robot vacuum cleaner is not charging. | The base station / robot vacuum cleaner is not connected to the electricity supply correctly. ■ Connect the base station exactly as described in these operating instructions. Do the same for the robot vacuum cleaner, see "Preparing for use - Charge the rechargeable battery". |
| The robot vacuum cleaner does not return to the base station after vacuuming. | The Auto standard vacuuming mode was started somewhere in the room. ■ The robot vacuum cleaner will return to its starting point. |
| The Spot vacuuming mode has been selected. ■ The robot vacuum cleaner will return to its starting point. | |
| There is insufficient light for the robot vacuum cleaner to navigate. ■ Provide sufficient lighting. | |
| The base station is not connected correctly. ■ Connect the base station exactly as described in these operating instructions. | |
| The sensors on the robot vacuum cleaner are dirty. ■ Clean the sensors carefully using a dry cotton wool bud. | |
| The signal between the infrared transmitter on the base station and the vacuum cleaner is broken. ■ Clean both parts carefully with a soft, dry cloth and make sure that no items disrupt the signal. | |
| Obstacles on the floor which is to be vacuumed can impede navigation. ■ Watch the robot vacuum cleaner during vacuum-ming. ■ Remove any obstructions. ■ Define the area they are in with the magnetic strip. ■ Reduce the maximum crossing over height, see "Use - Reducing the maximum crossing over height". |
Fault messages
Before resolving any faults with the robot vacuum cleaner, switch it off with the OFF switch on the side.
Fault messages are shown in the clock indicator of the robot vacuum cleaner's display.
| Problem | Cause and remedy |
| F 1 | "Wheel raised" ■ Place the robot vacuum cleaner on a level floor surface. |
| F 2 | "Dirty sensors" ■ Clean the sensors. This fault message will also appear if the side brushes are not fitted. In this case, fit the side brushes. |
| F 3 | "Dust box" ■ Replace the dust box in the robot vacuum cleaner, making sure it clicks into position. |
| F 4 | "Drive wheels overloaded" ■ Check whether the drive wheels have become dirty. Remove any threads and hairs. |
| F 5 | "Brushes overloaded" ■ Check whether the roller brush and the side brushes have become dirty. Clean the roller brush and the side brushes. |
| F 6 | "Motor overloaded" ■ Empty and clean the dust box. Replace the exhaust filter. |
| F 7 | "Internal system fault" ■ Switch the robot vacuum cleaner off and then back on again (press the ON/OFF switch on the side). |
| F 8 | "Front wheel dirty" ■ Check the front wheel for debris. Remove any threads and hair and clean the front wheel. |
After sales service
In the event of a fault that you cannot easily remedy, please contact your Miele Dealer or Miele (see end of booklet for contact details).
Please note that telephone calls may be monitored or recorded for training purposes (UK only).
Guarantee
In the U.K. the appliance is guaranteed for 2 years from the date of purchase. However, you must activate your cover by calling 0330 160 6640 or registering online at www.miele.co.uk.
For information on the appliance guarantee specific to your country please contact Miele. See end of booklet for contact details.
Electrical connection for the UK
All electrical work should be carried out by a suitably qualified and competent person in strict accordance with current national and local safety regulations (BS 7671 in the UK). The voltage and frequency are given on the data plate located underneath the vacuum cleaner. Please ensure that these match the household mains supply. The fuse rating is quoted on the plug. The appliance is supplied with a cable and moulded plug ready for connection to a 230-240 V/50 Hz a.c. single phase supply.
Non-rewireable plugs BS 1363
The fuse cover must be re-fitted when changing the fuse, and if the fuse cover is lost the plug must not be used until a suitable replacement is obtained. The colour of the correct replacement cover is that of the coloured insert in the base of the plug, or the colour that is embossed in words on the base of the plug, (as applicable to the design of plug fitted). Replacement fuses should be ASTA approved to BS1362 and have the correct rating. Replacement fuses and fuse covers may be purchased from your local electrical supplier.
Accessories
Copyright and licences
Miele uses software to operate and control the robot vacuum cleaner.
The copyright authorisation from Miele and other relevant software suppliers must be respected.
Miele and their suppliers reserve the rights to the software components.
In particular the following are prohibited:
- copying and distribution,
modifications and derivations, - decompilation, reverse engineering, disassembling and other such reductions of software.
Components which fall under GNU General Public Licence and further Open Source licences are integrated into the software.
An overview of the integrated Open Source components and a copy of the current licence can be obtained at www.miele.com/device-software-licences. You will need to enter the specific product name.
Miele will provide the source code for all components of software licensed under the GNU General Public Licence and comparable Open Source licences.
For source code requests, please email info@miele.com.
aran- carica ca. 20% - 50%
cione
verde carica ca. 50% - 100%
Acertar as horas (fig. 12)
Utilize o commande para acertar as ho-ras.
My Office Is Merkezi, No. 13/A
34746, Atasehir/ISTANBUL
Tel.: 0216 687 18 00
Fax: 02165808667
Müsteri Hizm.: 444 11 22
E-Mail: info@miele-tr.com
www.miele.com.tr
Fairacres, Marcham Road
Abingdon, Oxon, OX14 1TW
Customer Contact Centre Tel: 0330 160 6600
E-mail: mielecare@miele.co.uk
Internet: www.miele.co.uk
Australia
Miele Australia Pty. Ltd.
ACN 005 635 398
ABN 96005635398
1 Gilbert Park Drive, Knoxfield, VIC 3180
Tel: 1300464353
Internet: www.miele.com.au
China
Miele (Shanghai) Trading Ltd.
1-3 Floor, No. 82 Shi Men Yi Road
Jing' an District
200040 Shanghai, PRC
Tel: +86 21 6157 3500, Fax: +86 21 6157 3511
E-mail: info@miele.cn, Internet: www.miele.cn
Miele (Hong Kong) Limited
41/F - 4101, Manhattan Place
23 Wang Tai Road
Kowloon Bay, Hong Kong
Tel: (852) 2610 1331, Fax: (852)2610 1013
Email: mielehk@miele.com.hk
India
Miele India Pvt. Ltd.
Ground Floor, Copia Corporate Suites
Plot No. 9, Jasola
New Delhi - 110025
Tel: 011-46 900 000, Fax: 011-46 900 001
E-mail: customercare@miele.in, Internet: www.miele.in
Ireland
Miele Ireland Ltd.
2024 Bianconi Avenue
Citywest Business Campus, Dublin 24
Tel: (01) 461 07 10, Fax: (01) 461 07 97
E-Mail: info@miele.ie, Internet: www.miele.ie
Manufacturer: Miele & Cie. KG
Carl-Miele-Straße 29, 33332 Gutiersloh, Germany

Malaysia
Miele Sdn Bhd
Suite 12-2, Level 12
Menara Sapura Kencana Petroleum
Solaris Dutamas No. 1, Jalan Dutamas 1
50480 Kuala Lumpur, Malaysia
Phone: +603-6209-0288
Fax: +603-6205-3768
New Zealand
Miele New Zealand Limited
IRD 98463631
Level 2, 10 College Hill
Freemans Bay, Auckland 1011, NZ
Tel: 0800 464 353
Internet: www.miele.co.nz
Singapore
Miele Pte. Ltd.
163 Penang Road
04-03 Winsland House II
Singapore 238463
Tel: +65 6735 1191, Fax: +65 6735 1161
E-Mail: info@miele.com.sg
Internet: www.miele.sg
South Africa
Miele (Pty) Ltd
63 Peter Place, Bryanston 2194
P.O. Box 69434, Bryanston 2021
Tel: (011) 875 9000, Fax: (011) 875 9035
E-mail: info@miele.co.za
Internet: www.miele.co.za
United Arab Emirates
Miele Appliances Ltd.
P.O.Box 114782
Gold & Diamond Park, Sheikh Zayed Road
Building 6 / Offices Nos. 6-214 to 6-220
Dubai
Tel: +971-4-341 84 44
Fax: +971-4-341 88 52