
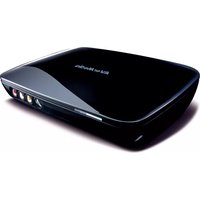
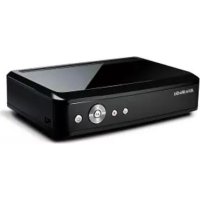
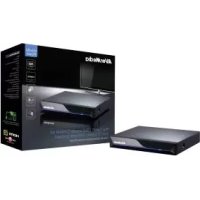
C875 - Media player AVERMEDIA - Free user manual and instructions
Find the device manual for free C875 AVERMEDIA in PDF.


| Product Type | Video Capture Card |
| Brand | AVerMedia |
| Model | C875 |
| Dimensions (L x W x H) | 10 cm x 6 cm x 2 cm |
| Weight | 100 g |
| Power Supply | USB 5V |
| Maximum Capture Resolution | 1080p at 30 fps |
| Connectivity | HDMI Input/Output |
| Main Functions | Video capture, streaming, recording |
| Maintenance and Cleaning | Clean with a soft, dry cloth |
| Safety | Do not expose to moisture or extreme temperatures |
| Spare Parts and Repairability | Contact AVerMedia customer service |
| Compatible Software | RECentral, Open Broadcaster Software (OBS) |
| Operating System | Windows, macOS |
Frequently Asked Questions - C875 AVERMEDIA
User questions about C875 AVERMEDIA
0 question about this device. Answer the ones you know or ask your own.
Ask a new question about this device
Download the instructions for your Media player in PDF format for free! Find your manual C875 - AVERMEDIA and take your electronic device back in hand. On this page are published all the documents necessary for the use of your device. C875 by AVERMEDIA.
USER MANUAL C875 AVERMEDIA
This device complies with Part 15 of the FCC Rules. Operation is subject to the following two conditions: (1) this device may not cause harmful interference, and (2) this device must accept any interference received, including interference that may cause undesired operation.
Federal Communications Commission Statement
NOTE- This equipment has been tested and found to comply with the limits for a Class B digital device, pursuant to Part 15 of the FCC Rules. These limits are designed to provide reasonable protection against harmful interference in a residential installation. This equipment generates, uses and can radiate radio frequency energy and, if not installed and used in accordance with the instructions, may cause harmful interference to radio communications. However, there is no guarantee that interference will not occur in a particular installation. If this equipment does cause harmful interference to radio or television reception, which can be determined by tuning the equipment off and on, the user is encouraged to try to correct the interference by one or more of the following measures:
- Reorient or relocate the receiving antenna.
- Increase the separation between the equipment and receiver.
- Connect the equipment into an outlet on a circuit different from that to which the receiver is connected.
- Consult the dealer or an experienced radio/television technician for help.
CAUTION ON MODIFICATIONS
To comply with the limits for the Class B digital device, pursuant to Part 15 of the FCC Rules, this device must be installed in computer equipment certified to comply with the Class B limits. All cables used to connect the computer and peripherals must be shielded and grounded. Operation with non-certified computers or non-shielded cables may result in interference to radio or television reception. Changes and modifications not expressly approved by the manufacturer could void the user's authority to operate this equipment.
ICES-003
This Class B digital apparatus complies with Canadian ICES-003.
The mark of crossed-out wheeled bin indicates that this product must not be disposed of with your other household waste. Instead, you need to dispose of the waste equipment by handing it over to a designated collection point for the recycling of waste electrical and electronic equipment. For more information about where to drop off your waste equipment for recycling, please contact your household waste disposal service or the shop where you purchased the product.
Disclaimer
All the screenshots in this documentation are only example images. The images may vary depending on the product and software version. Information presented in this documentation has been carefully checked for reliability; however, no responsibility is assumed for inaccuracies. The information contained in this documentation is subject to change without notice.
Copyright
©2013 by AVerMedia Technologies, Inc. All rights reserved.
No part of this document may be reproduced or transmitted in any form, or by any means (Electronic, mechanical, photocopy, recording, or otherwise) without prior written permission of AVerMedia Technologies, Inc. Information in this document is subject to change without notice. AVerMedia Technologies, Inc. reserves the right to modify, change, improve or enhance its products and to make changes in the content without obligation to notify any person or organization of such changes. Please visit www.avermedia.com to get the updates of the operation and use of AVerMedia products. "AVerMedia" is a trademark and logo of AVerMedia Technologies, Inc. Other trademarks used herein for description purpose only belong to each of their companies. Made in Taiwan (Expect Accessories). Picture shown may vary from actual product
Package Contents
A. Live Gamer Portable
B. Quick Installation Guide
C. Protective Bag
D. HDMI Cable
E. Component Video / Stereo Audio Dongle Cable
F. 3.5mm Audio Cable
G. PlayStation 3 Cable
H. Mini USB Cable
Hardware

English - 1
Installation (PC Mode)
Step 1: Slide the switch on the front of the device to the LEFT. The LED indicator glows solid BLUE when the device is ready.
Step 2: According to your video/audio source, choose one of the connections below.
Step 3: Download and install the latest driver and RECentral from gamerzone.avermedia.com
Connect to Your Game Console – PlayStation 3 / XBOX
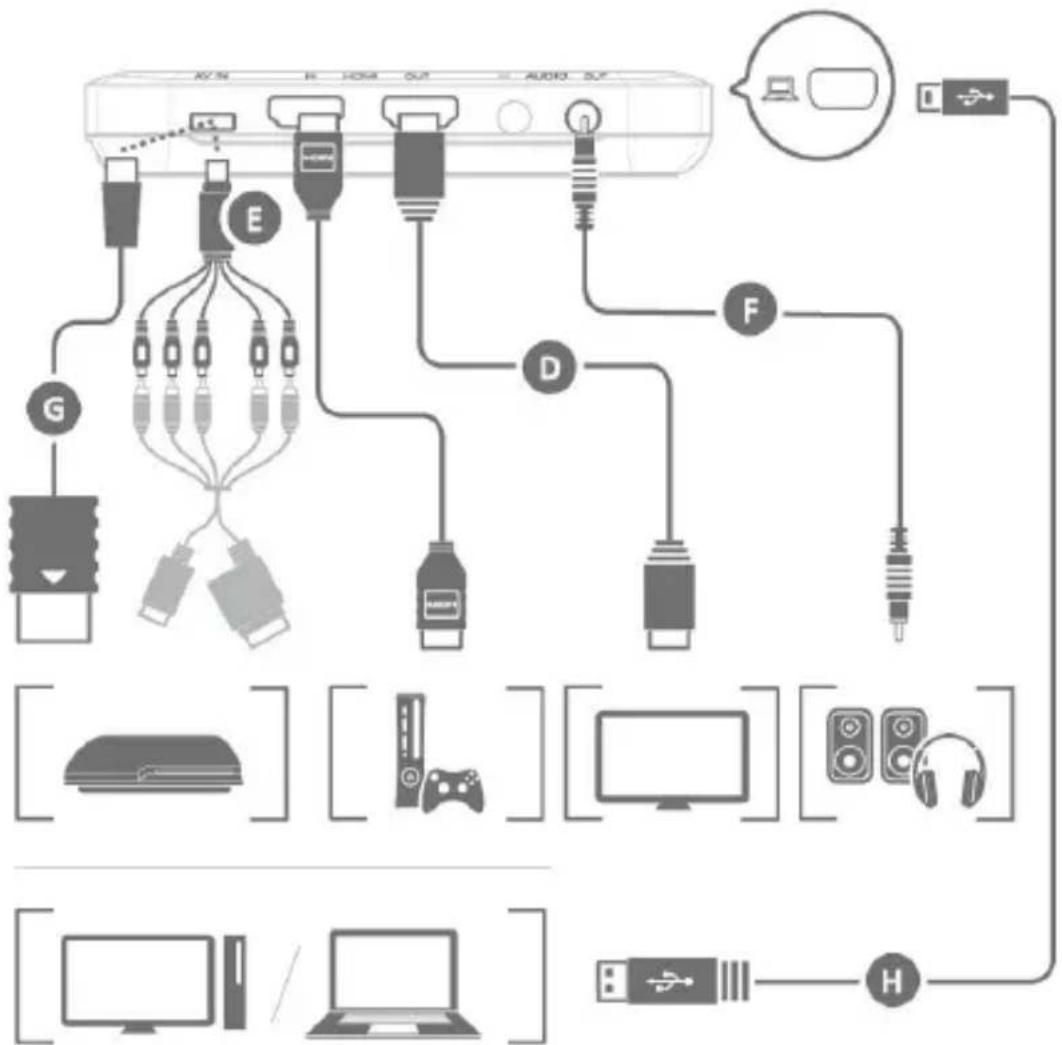

- Only the items marked with alphabets are supplied.
- It is optional to connect to speakers/headphone.
Connect to Your Gaming PC – Desktop / Laptop

flowchart
graph TD
    A["AC/IN"] --> B["D"]
    B --> C["HDMI OUT"]
    B --> D["DVI"]
    D --> E["HDMI IN"]
    D --> F["AUDIO"]
    E --> G["F"]
    G --> H["USB"]
    H --> I["H"]
    I --> J["USB"]
    style A fill:#f9f,stroke:#333
    style J fill:#ccf,stroke:#333

PLEASE DO NOT USE HDMI SPLITTERS TO BYPASS COPY PROTECTION.

- When using a laptop, if you want to output source, please duplicate the displays to avoid no image on screen. To know more, please refer to the FAQ on gamerzone.avermedia.com
- To capture from the other computer, please connect the computer of your video source to the HDMI IN port on the Live Gamer Portable.
- For a computer without an HDMI Port, use a DVI to HDMI cable or converter for connection. Also connect your PC or laptop to the device (AUDIO IN) via the 3.5mm Audio Cable.
LED Indicators
| Status | PC Mode | PC-Free Mode |
| Booting | Flashes Blue clockwise in circle | Flashes Red clockwise in circle |
| Standby | Glows solid Blue | Glows solid Red |
| Activating RECentral | Flashes Blue clockwise in circle at a quick pace | --- |
| Recording | Glows Red with a breathing pattern | Glows Red with a breathing pattern |
| Streaming | Glows Blue with a breathing pattern | --- |
| Warning | Flashes Red at a quick pace | |
| Error | Flashes Red/Blue alternatively at a quick pace | |
Installation (PC-Free Mode)
Step 1: Slide the switch on the front of the device to the RIGHT. The LED indicator glows solid RED when the device is ready.

- For the first-time using, in order to get correct time displayed for recordings, please connect Live Gamer Portable to your computer on which the driver is installed under the PC Mode to auto update time.
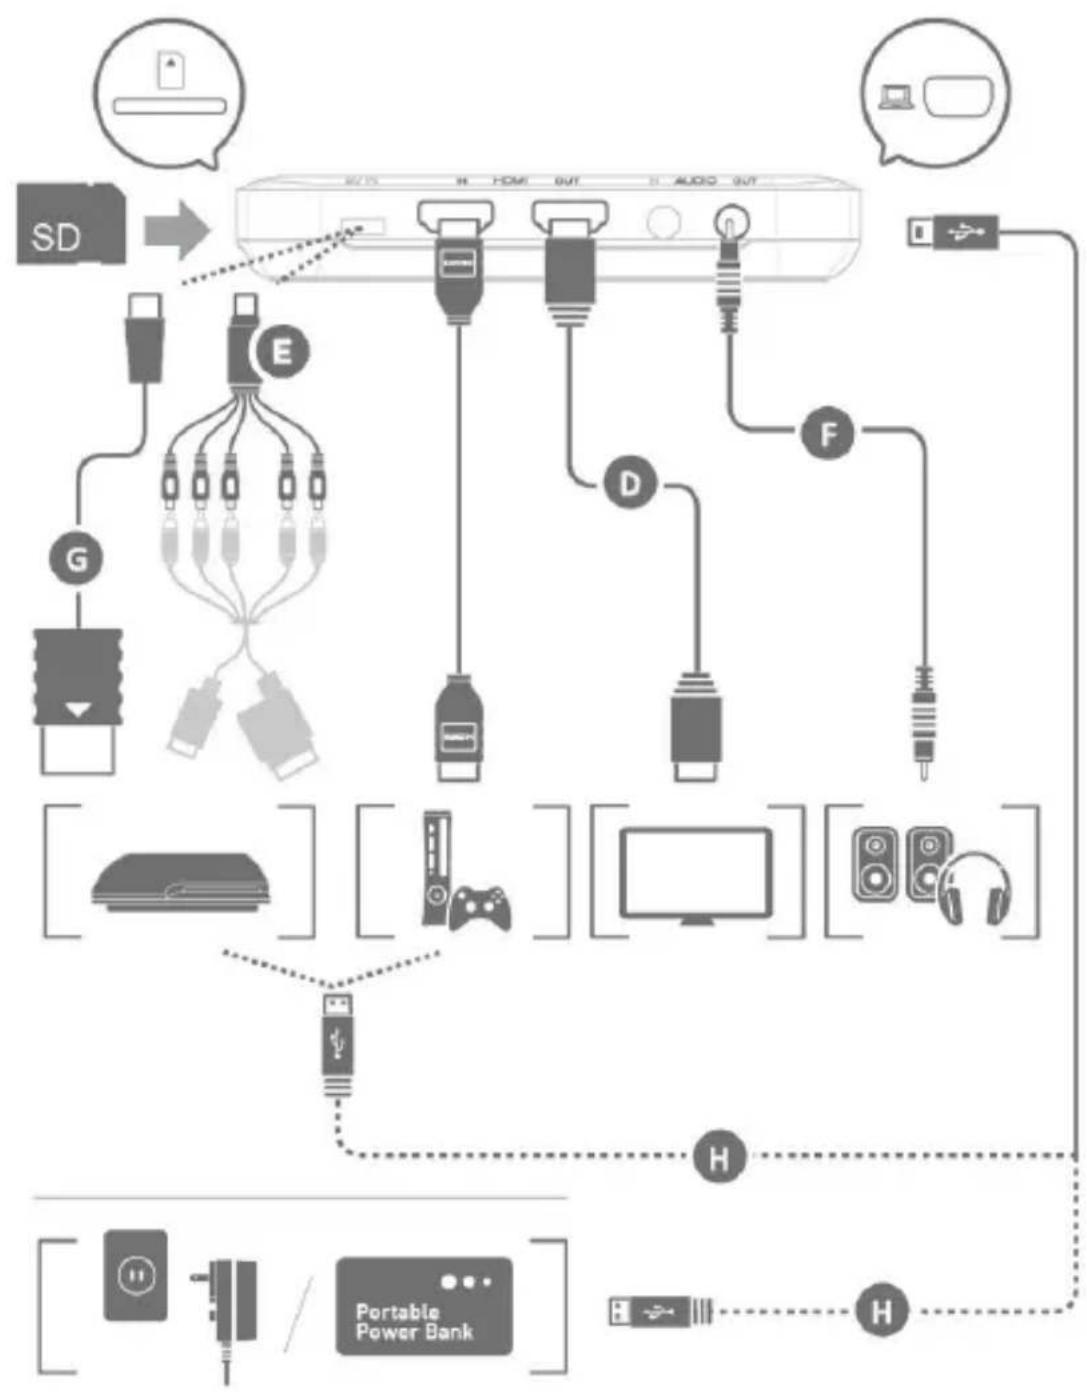
Step 2: According to your video/audio source, choose one of the connections below.

- When two or more sources are hooked up at the same time, Live Gamer Portable will auto-detect the input source with priority order of 3.5mm Audio > Component > HDMI. To select HDMI as the input source, please remove the component cable.
Connect to Your Game Console - PlayStation 3 / XBOX
flowchart
graph TD
    A["SD"] --> B["Home Device"]
    B --> C["Device 1"]
    B --> D["Device 2"]
    B --> E["Device 3"]
    B --> F["Device 4"]
    B --> G["Device 5"]
    B --> H["Device 6"]
    B --> I["Device 7"]
    B --> J["Device 8"]
    B --> K["Device 9"]
    B --> L["Device 10"]
    B --> M["Device 11"]
    B --> N["Device 12"]
    B --> O["Device 13"]
    B --> P["Device 14"]
    B --> Q["Device 15"]
    B --> R["Device 16"]
    B --> S["Device 17"]
    B --> T["Device 18"]
    B --> U["Device 19"]
    B --> V["Device 20"]
    B --> W["Device 21"]
    B --> X["Device 22"]
    B --> Y["Device 23"]
    B --> Z["Device 24"]
    B --> AA["Device 25"]
    B --> AB["Device 26"]
    B --> AC["Device 27"]
    B --> AD["Device 28"]
    B --> AE["Device 29"]
    B --> AF["Device 30"]
    B --> AG["Device 31"]
    B --> AH["Device 32"]
    B --> AI["Device 33"]
    B --> AJ["Device 34"]
    B --> AK["Device 35"]
    B --> AL["Device 36"]
    B --> AM["Device 37"]
    B --> AN["Device 38"]
    B --> AO["Device 39"]
    B --> AP["Device 40"]
    B --> AQ["Device 41"]
    B --> AR["Device 42"]
    B --> AS["Device 43"]
    B --> AT["Device 44"]
    B --> AU["Device 45"]
    B --> AV["Device 46"]
    B --> AW["Device 47"]
    B --> AX["Device 48"]
    B --> AY["Device 49"]
    B --> AZ["Device 50"]

- Only the items marked with alphabets are supplied.
- It is optional to connect to speakers/headphone.
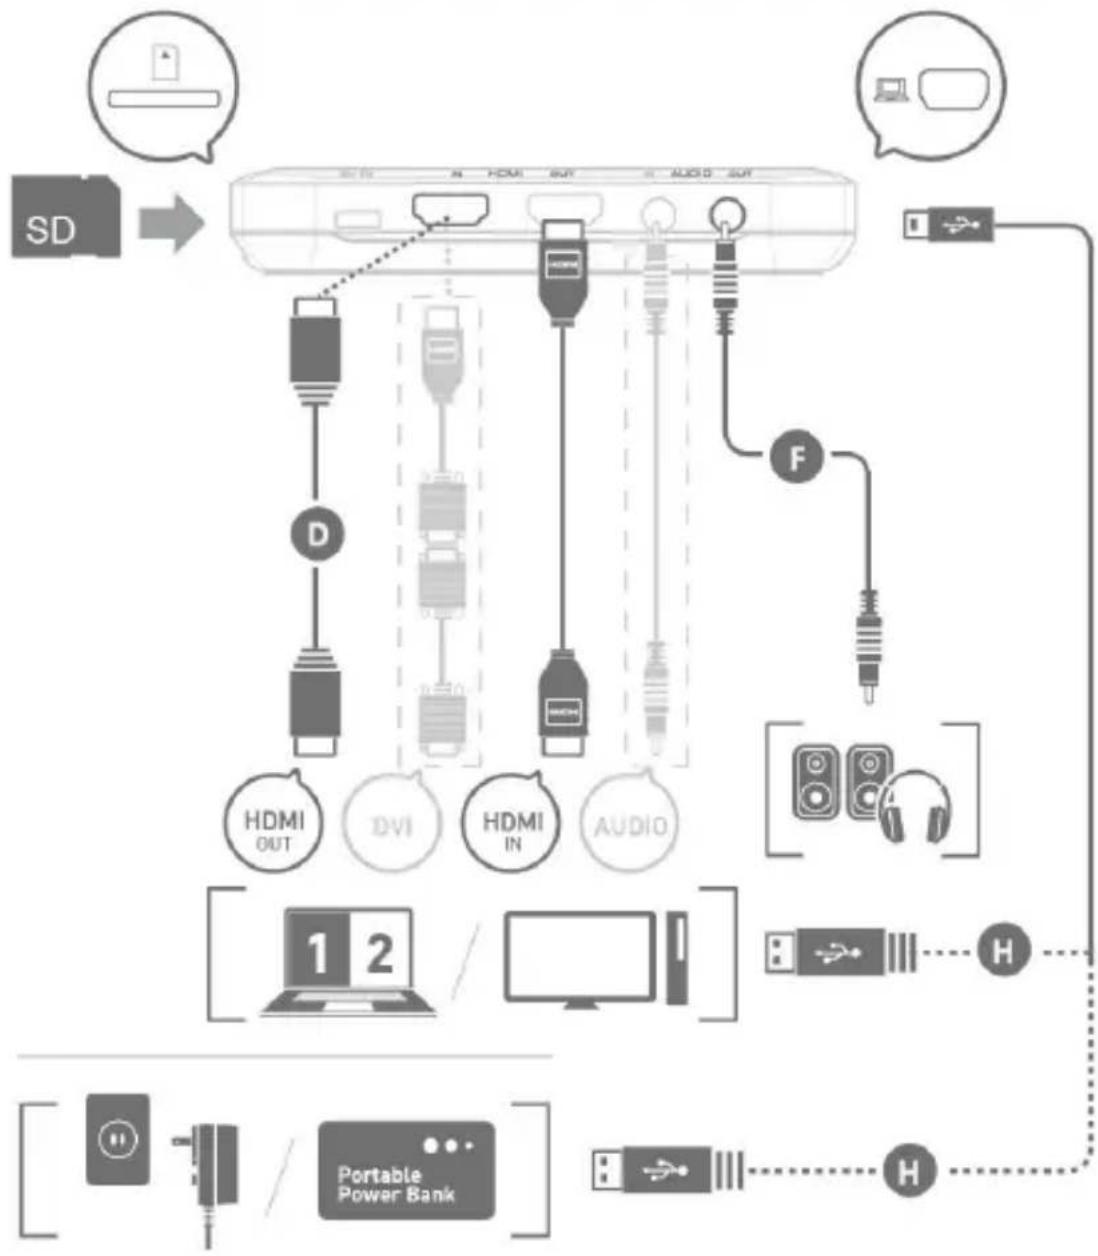
Connect to Your Gaming PC – Desktop / Laptop
flowchart
graph TD
    A["SD"] --> B["Device"]
    B --> C["Home"]
    C --> D["Diode"]
    C --> E["Inverter"]
    C --> F["Audio"]
    C --> G["USB"]
    B --> H["D"]
    H --> I["HDMI OUT"]
    H --> J["BVI"]
    H --> K["HDMI IN"]
    H --> L["AUDIO"]
    C --> M["F"]
    M --> N["Speaker"]
    M --> O["Headphones"]
    P["Portable Power Bank"] --> Q["USB"]
    P --> R["H"]
    S["External Device"] --> T["USB"]
    S --> U["H"]

- When using a laptop, if you want to output source, please duplicate the displays to avoid no image on screen. To know more, please refer to the FAQ on gamerzone.avermedia.com
- For a computer without an HDMI Port, use a DVI to HDMI cable or converter for connection. Also connect your PC or laptop to the device (AUDIO IN) via the 3.5mm Audio Cable.
Contenu de la boîte
Installation (mode PC)
Installation (mode sans PC)
- Federal Communications Commission Statement
- CAUTION ON MODIFICATIONS
- ICES-003
- Disclaimer
- Copyright
- Package Contents
- Installation (PC Mode)
- Connect to Your Game Console – PlayStation 3 / XBOX
- Connect to Your Gaming PC – Desktop / Laptop
- PLEASE DO NOT USE HDMI SPLITTERS TO BYPASS COPY PROTECTION.
- Installation (PC-Free Mode)
- Contenu de la boîte
- Installation (mode PC)
- Installation (mode sans PC)
Brand : AVERMEDIA
Model : C875
Category : Media player