RO6663 11 INTENSIUM - Vacuum Cleaner ROWENTA - Free user manual and instructions
Find the device manual for free RO6663 11 INTENSIUM ROWENTA in PDF.
User questions about RO6663 11 INTENSIUM ROWENTA
0 question about this device. Answer the ones you know or ask your own.
Ask a new question about this device
Download the instructions for your Vacuum Cleaner in PDF format for free! Find your manual RO6663 11 INTENSIUM - ROWENTA and take your electronic device back in hand. On this page are published all the documents necessary for the use of your device. RO6663 11 INTENSIUM by ROWENTA.
USER MANUAL RO6663 11 INTENSIUM ROWENTA
- This appliance is for domestic use only; in the event of inappropriate use that does not comply with the instructions, the company shall take no liability and the warranty shall be null and void.
SAFETY RECOMMENDATIONS
For your safety, this appliance complies with all enforceable standards and regulations (Low Voltage Directives, Electromagnetic Compatibility, Environment, etc.).
1. Conditions of use
Your vacuum cleaner is an electrical device: it must be used under normal conditions of use.
Use and store the appliance out of reach of children.
Never leave the appliance operating without supervision.
Do not hold the sucker attachment or tube close to your eyes and ears.
Do not use your vacuum cleaner on the wet surfaces, water or liquids of whatever kind, hot substances, extremely fine substances (plaster, cement, ash...), large sharp objects (broken glass), products that are harmful (solvents, paint strippers ...), corrosive (acids, cleaning fluids...), flammable and explosive (petroleum or alcohol-based).
Never immerse the appliance in water, do not spray water onto the appliance and do not store it outdoors.
Do not use the appliance: if it has fallen and has visible damage or appears to be working abnormally. In this
- Read the instructions for use carefully before using your appliance for the first time: in the event of any use that does not comply with the instructions, Rowenta shall accept no liability.
case, do not open the appliance, but send it to the closest Approved Service Centre or contact the Rowenta Consumer Service (see contact information on the last page).
2·Power supply
Check that the power voltage for your vacuum cleaner corresponds to that of your mains installation.
Disconnect the appliance by removing the plug from the wall socket, not by pulling on the cord: immediately after use, before each change of accessory, before each cleaning, maintenance or filter change operation.
Do not use the appliance if the power cord is damaged. To avoid danger, the whole reel and power cord unit of your vacuum cleaner must be replaced by an Approved Service Centre because special tools are needed to carry out any repairs safely.
3·Repairs
Repairs are to be performed only by specialists with original spare parts.
Repairing an appliance oneself may constitute a danger to the user.
DESCRIPTION
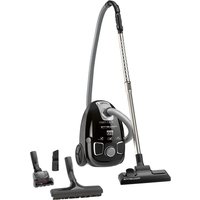
1 Lid of the vacuum cleaner
2 Lid opening button
3 Front
4 Separation system
a Separator with cones
b Air/dust separation grid
c Separation compartment
5 Dust compartment
6 Dust compartment filling maximum level
7 Dust compartment housing
8 Dust compartment opening button
9 Dust compartment joints
10 Carrying handle
11 Suction opening
12 On/Off pedal
13 Cord winder pedal
14 Parking position
15 Rollers
16 HEPA filter housing
17 HEPA filter capsule (RS-RT3186)
18 Air outlet grid
19 Black foam filter (RS-RT3184)
20 Microfilter (RS-RT3185)
Accessories
21 Flexible pipe with extra-long power nozzle and mechanical power regulator
22 Crevice tool
23 Telescopic crevice tool
24 Brush
25 Upholstery nozzle
26 Accessory clip
27 Telescopic tube
28 Extension tubes
29 All floor nozzle
30 Delta nozzle
31 Parquet nozzle
32 Turbobrush
33 Mini Turbobrush*
1·Unpacking
Unpack your appliance, keep your warranty card and read the instructions for use carefully before using your appliance for the first time.
2·Tips and precautions
Before each use, the cord should be unwound completely. Make sure that it does not get stuck or run against sharp edges.
If you are using an extension cord, make sure it is in perfect condition and that it is suitable for the power of your vacuum cleaner. Never unplug the appliance by pulling on the cord.
Do not move the vacuum cleaner by pulling on the cord, the appliance must be moved by its carrying handle. Do not use the cord or the flexible hose to lift the appliance.
Stop and disconnect your vacuum cleaner after each use. Always stop and unplug your vacuum cleaner before maintenance or cleaning.
This appliance is not designed to be used by people (including children) with a physical, sensory or mental impairment, or people without
knowledge or experience, unless they are supervised or given prior instructions concerning the use of the appliance by someone responsible for their safety.
Children must be supervised to ensure that they do not play with the appliance.
Your vacuum cleaner is equipped with a protective device that prevents the engine overheating. In some cases (using the power nozzle on chairs, seats...), the protective device is triggered and the vacuum cleaner may emit an unusual noise which is not at all serious.
Use only original Rowenta accessories and filters.
Make sure all the filters are in place.
Never operate the vacuum cleaner without the filtration system (foam, microfilter and filter).
Never put the foam and the microfilter into the vacuum cleaner before they are completely dry.
In the event that you find it difficult to obtain accessories and filters for this vacuum cleaner, contact the Rowenta customer service (see contact information on the last page).
USE
1. Assembly of the parts of the appliance
Clip the nozzle of the hose into the suction inlet located on the front of the vacuum cleaner (fig.1). To remove it, unclip the nozzle and pull.
Attach the accessory clip to the power nozzle (fig.2) and fix the accessories to it (fig.2).
Assemble the telescopic tube or extension tubes. Adjust it to the desired length (fig.3).
Fit the desired accessory to the end of the tube (fig.4).
- For rugs and carpets: use the nozzle in the retracted brush position or the turbobrush* - (animal hair).
- For parquet and smooth floors: use the nozzle in brush position or, for a better result, use the parquet nozzle*.
- For corners and areas which are difficult to reach: us the crevice tool*.
- For furniture: use the upholstery nozzle*.
ATTENTION Always stop and unplug your vacuum cleaner before changing accessories.
2. Connecting the cord and starting the appliance
Unwind the power cord completely, plug your vacuum cleaner in and press the On / Off pedal
ATTENTION Never operate the vacuum cleaner without the filtration system (foam, microfilter and filter).
(fig.5).
Adjust the suction power with the mechanical power regulator* on the power nozzle: open the slider on the power nozzle to manually reduce suction power, e.g.: on fragile
surfaces... (fig.6).
3. Storing and transporting the appliance
After use, stop your vacuum cleaner by pressing the On / Off pedal and unplug it (fig.7). Rewind the power cord by pressing the cord winder pedal (fig.8).
CLEANING AND MAINTENANCE
The air we breathe contains particles that may be allergens: mite larvae and droppings, mould, pollen, smoke and animal residues (hair, skin, saliva, urine). The smallest particles penetrate deep into the respiratory system where they can cause inflammation and cause lung impairment.
HEPA filters (High Efficiency Particulate Air) are used to filter out the smallest particles.
With the HEPA filter, the air released back into the room is healthier than the air that is vacuumed.
IMPORTANT Always stop and unplug your vacuum cleaner before maintenance or cleaning. Regularly check and clean all of your vacuum cleaner and the various filters.
ATTENTION Never operate the vacuum cleaner without the filtration system (foam, microfilter and filter).
1. Empty the dust compartment (5)
Empty the dust box after each use as follows: Take the dust compartment by the handle and pull it (fig.11).
Press the dust compartment opening button (fig.12) and then empty it (fig.13).
Clean the edges of the dust compartment with a cloth (fig.14).
Put the dust compartment back in place (fig.15).
ATTENTION Never exceed the maximum level given on the dust compartment.
Carry your vacuum cleaner easily thanks to its carry handle (10). Do not carry your vacuum cleaner by the dust compartment handle (fig.9).
When you store your vacuum cleaner, place the tube in his housing at the rear of your appliance (fig.10).
2·Clean the dust compartment joints
Remove the dust compartment (fig.11). Clean the dust compartment joints with a cloth (fig.14).
Replace the dust compartment (fig.15).
3·Clean the black foam filter (19)
IMPORTANT Every 6 months or when the suction is no longer satisfactory, wash the black foam filter.
Press the lid opening button (fig.16). Tilt the lid back cover (fig.17).
Remove the black foam filter (fig.18) then wash and wring it (fig.19). Leave it to dry for at least 12 hours before putting it back.
ATTENTION Leave the black foam filter to dry and make sure it is thoroughly dry before putting it back in the appliance.
Replace the black foam filter and close the lid.
4 • Clean the microfilter (20)
IMPORTANT Every 3 months, wash the microfilter.
Press the button to open the lid (fig.16). Tilt the lid back (fig.17).
Remove the black foam filter (fig.18) and then remove the microfilter (fig.20).
Wash the microfilter (fig.21). Leave it to dry for at least 12 hours before putting it back.
ATTENTION Leave the microfilter to dry and make sure it is thoroughly dry before putting it back in the appliance.
Replace the microfilter and the black foam filter and close the cover.
5 • Clean the HEPA filter (17)
IMPORTANT If after cleaning the black filter foam and microfilter, your vacuum cleaner does not resume its previous performances, clean the HEPA filter. Otherwise, clean the HEPA filter once a year.
Unlock the air outlet grid on the side of the appliance by rotating it slightly to the left (fig.22) and remove it by pulling it (fig.23). Remove the HEPA filter from its housing (fig.24). Clean the HEPA filter by knocking it gently over a dustbin (fig.25). Put it back in its housing. Replace the air outlet grid and lock it by rotating it slightly clockwise.
IMPORTANT If the HEPA filter is damaged, replace it. The HEPA filter is available in Authorised Service Centres.
6·Clean the separator (4)
Open the lid of the vacuum cleaner (fig.16- 17).
Press the separator button (fig.26) and remove the separation system (fig.27).
Remove the separation compartment (4c) by turning it slightly to the left (fig.28) then separate the two components (fig.29).
Remove the separation grid (4b) (fig.30).
Wash the components (4a + 4b + 4c) in clear water.
Leave them to dry for 6H (fig.31).
Put the parts of the filtration system (4) back in place:
- replace the separation grid (4b) on the separator (4a) (fig.32)
- replace the separation compartment (4c) on the unit (4a + 4b) (fig.33-34)
- then replace the entire separation system (4a + 4b + 4c) in the vacuum (fig.35) and close the lid.
7·Clean your vacuum cleaner
Wipe the body of the vacuum cleaner and the accessories with a soft damp cloth, then dry using a dry cloth.
Wash the dust compartment with water, then dry with a dry cloth.
IMPORTANT Do not use detergents or any corrosive or abrasive products. The transparency of the dust compartment and/or the front and/or lid may change over time. This does not affect performance.
ATTENTION Do not wash the vacuum lid under water. Clean it with a soft damp cloth.
IMPORTANT As soon as your vacuum cleaner stops performing efficiently, and before making any checks, stop it by pressing on the On/Off pedal.
If your vacuum cleaner does not start
- The appliance is not powered. Make sure the appliance is properly connected.
If there is no suction
- An accessory, the tube, the flexible hose, the separator (4a), the air/dust separation grid (4b) or the separation compartment (4c) are blocked: unblock them.
- The black foam filter (19) is saturated: clean it.
- The microfilter (20) is saturated: clean it.
- The HEPA filter (17) is saturated: clean it by tapping it over a dustbin. If the HEPA filter is damaged, replace it.
If your vacuum cleaner is not vacuuming properly or is making a whistling noise
- An accessory, the tube, the flexible hose, the separator (4a), the air/dust separation grid (4b) or the separation compartment (4c) are partially blocked: unblock them.
- The dust compartment is full: empty it and wash it.
- The vacuum cleaner lid is not properly positioned: close the lid tightly.
- The dust compartment is poorly positioned: put it back properly.
- The mechanical power regulator* on the power nozzle is open: close it.
If the separator is filled
- The dust is accumulating in the separator compartment (4c): make sure nothing is blocking the duct between the separator compartment and the dust compartment. Make sure nothing is obstructing the inlets to the dust compartment.
- The inlets to the dust compartment are obstructed: remove the dust compartment and empty it.
Clean the dust compartment joints.
If the floor nozzle is difficult to move
- Close the mechanical power regulator* on the power nozzle.
If the power cord does not wind up completely
- The cord slowed down as it was winding up: bring the cord back out and press the cord winder pedal again.
If the problem persists, take your vacuum cleaner to the nearest Rowenta Approved Service Centre. See the list of Rowenta Approved Service Centres or contact the Rowenta Consumer Service (see contact information on the last page).
| ACCESSORIES* | USE | INSTALLATION OF THE ACCESSORY | WHERE TO BUY IT |
| Flexible pipe with High Control power nozzle and 3-position power regulator | To set the suction power, 3 positions: Soft - High - Turbo | Connect the flexible hose on the vacuum cleaner. | Rowenta Approved Service Centres (see list of addresses attached) |
| Brush | For cleaning furniture. | Fit the brush to the end of the power nozzle. | |
| Crevice tool | For corners and areas which are difficult to reach | Fit the crevice tool or telescopic crevice tool to the end of the power nozzle. | |
| Upholstery nozzle | For cleaning furniture. | Fit the upholstery nozzle to the end of the tube or the power nozzle. | |
| Parquet nozzle | For fragile floors. | Fit the parquet nozzle to the end of the tube. | |
| Delta nozzle | For cleaning carpets, rugs and smooth floors. | Fit the Delta nozzle to the end of the tube. | |
| Turbobrush | To remove threads and animal hair embedded in rugs and carpets. | Fit the turbobrush to the end of the tube. | |
| Mini turbobrush | For deep cleaning of upholstery fabrics. | Fit the mini turbobrush to the end of the tube. |
ENVIRONMENT
- In accordance with existing regulations, any appliance that is out of service must be rendered permanently inoperable: disconnect and cut the power cord before discarding the appliance.

Environmental protection first!
① Your appliance contains valuable materials which can be recovered or recycled.
Leave it at a local civic waste collection point so that it can be recycled.
GARANZIA
Pn60b He npedh3aHneH I nCnObn5oBAnH yIiAAMB (BkIOUyA dete) c noHnJHexHbIMn hN3uYeCKMMn, YcBCTBHeHHm I mY mCTBHeHHm CnOcOHeTm I mN
IICNOJIb3OBAHNE
1·C6opka nblneocacnyctaHOBka hacaIOK
BCTabte KOHcE r6KoR OShaHa BO BcBaMbOaee OtBepTme, paCnIoJKeHHoe B nepeHne JauCh nPi6bopa (fig.1).
YTObObOTOCIOAHHHTB UaHr, HAKMITE HA 3aUeJIKN HA eFO HAKOHcEHHIke NOTRHTHEUaHr.
3aafKcHcPyte 3aKIMn IAHACNOJ nIOHTHYOY pkykTOKI (fig.2) 3akpeniTE HA HEM hAcADJIq (fig.2).
CmOnTHnpyIte TeneCKOnHuecKyo Tpy6Ky* IINy ydInnHTeBHe ty6Kn.YCTaHOBITE NOxODAyUo BAM dnnHy (fig.3).
UctahOBInTe Tpe6yEmyH HacAky Ha KOHeu Tpy6kn (fig.4).
ДичТСКИ KOBOPB И KOBOPBXN NOKPBITN INCINONBYITE HACADKY CUpaHNOH BNYRU SEKTOKI IINI TYPbOSETKY * (ДядУДANЕЗМЕРСТ XIBOTBHx).
Дулбогорпakета и паддхи полов : Исторытейнадауку с bvydibnyutnoш ecTKO, утоны дobьсячero рez�унтата, улд утуановite наcadду вчstknрakета".
Дул b6opkn By rnyan B n TpyHNOdOCTyINbX MEcTAX. nolbyIeHTBcIeNeJeoH NAcADKOJI
-ДИАЧТКМЕБИ:ПОЛБУМТЕСВ.HACADFКДРДИСТКIMESEMNA"
BHIMAHINE! Npeed Tm KaK CMeHInb HacAdKy, 063aTeBnO octaHOBITE pa6Ory nbIeCoca n OTKIIIOHITE erO or3NeKTPOcETNI.
Ecnn nblneoc He BkIIOuaETc
Плборбnpкнокичс Кэлркетсгп.YбдгпсьВ TOM,ТЮ тьнecoc npвиьнhoнКонокичс.
Ecnn nblncoc He BcacbBaet Bo3dyx
3acopnnb hacaKa, Tpy6Ka, n6Knn shaHr, cenapatop (4a), ceta OtdenHn B03yaXoT nbIn (4b) nn konTeHnep cenapaun (4c): ydAnite 3actpBwMn myCOP.
- 3a6nt Φnltp (19): ounctnte ero.
3a6nt MmKpoΦnIbTp (20):OuNCTnte ero.
3a6nTfNbTp HEPA (17):OounCTnte ero, depxeraero Hnd Bedpom nIy Mycopa nocTyKuBra no HeMy. B cnUyae nobpeqdenni fNbTpRa HEPA eoHoeXoIMINO 3aEMHNTb.
Ecnn cnaanacb moohtcb BcabaBnna, bpncoc ndaet npn pabote wym mn bcnt
- ActiHIO 3acopnIinb HacaKa, Tpy6ka, Rn6Km IunAnr, cenapatop (4a), cetka OTenEnHH Bo3Dyxa OT nbIn (4b) nnn KOnTeHep Cenapauin (4c): ydaJIte 3acptPbIwM myCOP.
KohtehepbIbnec6OpBNH 3aONHnE ydanne codepKHMoe nPOMOE KOHTHEp. - Henpavilinbho yctahonbohena Kpbilka nbInecoca: KaK cnqydtakporte KbpiKhky.
HenpaBilbHO yCTAHOBEN KOHTeHepnIbIe6OpHN: yCTaHOBInTe ero HndJeXaIIM6ob3Am. - OTpkbT MEHAXeUeCKNey peryIANToM OMOHCTHO BCaBcBAHN B03Dyxa"h A kyPORTKe: 3akpOte erO.
B cnyuae hanoJIeHnIe cenapaTopa
- Yachutnyk bTliny hakalnIbAOTc B KOHTHepe cenapaun (4c): 6yBeNTce, yTo kaHAn MeKdy KOHTHePOM cenapaun N KOHTHEPOMbIbnecOpHNOM HUHem He zacopEn. Y6BeNTce, yTO BXOdHbe OTBepCTmN KOHTHePa-bIbnecOpHNa HUHem He zacopEnbY
3acopnncb BXOhIbe OTBepTnKoHTHePAHnbc6OpHnKa:INBNEKeITe KOHTHePepNtIe6OpHmN uDanlte erO codepJXMOE.
YonnntctyeynnohtneBhne npoknadko KONTEHepa-nbIe6OOPHa.
EcnHcTbIaH hacaJa nepemEuaeTcH c TpyDn
OTKPOITME MEXAHNECKM 的 perynTAP TO MOUHCTO BCaBcBANB03Dyxa"Ha pyKORTke.
Ecn He do KOHc cMaTbIbAeTc hHyp nTuHa
• CMaTbBIAHNe UShya 3aMeJrTeCHa bXOJe BOTcEK ДЯ NOE xpaHENH: paaMOTaJIe SHyP 3aBOHO IN HAKMITE Na HeJaJIb CMaTbBAIOUe MEOxAHM3Na
Ecnn yctpahnB HenonadKn He ydaetc, DocabtBe Bau bInecoc B 6nJxaiuynyonHOMOeHHbI cepBHCbI cenTp hPmbl Rowenta. O3aKoMBTeB co cNCKOM
yonHOMOeHHbIX cepBnChbIX ueHTPOB fmpMb1 Rowenta nn Xe obpatntecb B otDen o6cnjxnbAHnNotpe6ntenei fmpMb1 Rowenta (cm. KOhtakTHyo INhOpmauNHO naocneDnei cTpaHnue).
Iyo no Do yobuhoBeKeHO CEpeBHO IeHTpy fIMM Rowenta (IMB. KontrahyH IHoPMouJIaO hOctAHIN TcRPIJ).
2·EneKtpnHeXnIBeHnH
Nepenipre, 606p060a ha npnyra ninoococ 3briana c h npyro y Baasien enekptompekxi.
BiiKJIOHuaTe PnIaAD BID ENEKTPOMepeKei, HE TAYHUY npiu IbOMy 3a HUwRbNMeHHN, BIMAAOMH6 BeONePeBHe bIOBmK 3pO3EeTKiO. ODAy3 npo3AkiHHENPi BOPOTNI, KOKKHO p43y neped 3MIHOH NAcadOK, a TAKOX KEPNE opeJIaJIIMM 3N UHNJIeJIaTI TaDfJIYIbO 6a ZAMHI fIIbTpa.
He KoprviTyTeBc PnpiAdoM, RkUO pNOIOKJDEKeHO shyD HKBHNEHbIHyp KJbENHbI PA3OM 3 npTtPOe mIg IBOABOTMAHvHORO 3MOYBAHBN OOBHEH M3AONHOBHNC TINbIK B Y NOBHOABdKHYOE CEPbOHCY MUENTPI, TOM yIO, 3a4aNDYHNKHEHr HEzEneNK, bSyb-kyR peMOHT Heo6xIDHO 3dJIChOBATn 3a DOnPOMORO CneIaJIbHO HhCTMyPTy.
3·PemOH
PENMOI NTBOHINHI NOPOBDIMTNIBKIIΦAIXUBI,3BVKOPHCHTAHMR3TAPACHXACTHN BUPHOHKHIA
CamaTchnna 306bPdEBMOHTBYaTI PnHIAJ MOE BINBHNTbc HBe32eHHOHOI DfONKbHA.
ONIC
1 Kpnska nnilococy
2 Khonka BiKpmbaHnKpnk
3 PpeHnaHeB
4 Cuntema finhtpaui a KoHcHm cenapatop, 0o BHKOpncTOBye cIKJIOHNy texHONlORIO
B Citka BiodokemplnoBHANOB NOBtprBbI Nnny C konTeHHeN cepaaiy
5 KOHTeHep-nnno36ipHNK
6 MakcHMMahnBipHEB 3aONOBENHHKOTKeHNbHINnO3bIPHKNA
7 Bičík KONTěnHepa-nino36ipHnka
8 Khonka BiDkPnBaHHa KOHTeHepa-nnO36ipHnKa
9 YuinbHIOBaIbnipOKnKn KOHTeHEpa-nno36ipHnka
10 Pyka dIra TpaHcnOpTyBaHHa
11 OTBip BCMOKTyBaHH
12 PedaIb yBIMKHeHHB/UMKHeHH
13 PedaB abTOMaTHORO 3MOTyBaHHaHpyaXnVBHeHH
14 Na3 dans φikcaui trpy6kn niq cac napkybaHHa
15 POnuKn
16 BiDcik nla fInbtpa HEPAA
17 Kaceta 3 Φινήτρομ HEPA (RS-RT3186)
18 PewiTka OTbpy BxOdy nobitpr
19 YopHn nopncn fInbTp (RS-RT3184)
20 Mikpophiinbp (RS-RT3185)
PpinaeXhOCTi
21 Nyukhkin shanHr i3 noDOKBHeOy pKoRTkOoTa 3 a perytIPORnOTNOYKCHOTICBMVTOAHNBOHNTP8
22 1nnHnHa hacdaKa
23 TeneckoniuHa uinHHa HacdKa
24 Liirka
25 HacaKaIyIuIeHnMe6nib
26 Pnpctpi dny kpinneHH npnlaa
27 Teileckoniuha Tpy6ka
28 POnobkByaBnHi Tpy6Kn*
29 YHIBEpcanbHa HacdKa dna nIiNOr 6yJb-akoro Tnny
30 Hacanka《Delta》
31 Hacaikdnyuennnnapkety
32 Typ6ouitka*
33MiHi-Typ6ouiTka*
*B 3aIexHOcti BiD MoIeI:
Lc e, a6o npnnaDra dna neBnX moDenei, a6o J npnnaDra, jKe MoKHa npn6aTu NDaTkoBO.
1-Po3nakyBaHHa
Ipeid TMM KOKOPKCTBYATMBCPMPICTPOEM BNEPIEe,3HIMtBn kaybavbnl MATEpri Ta YauNIOPOHTa IHCPTykuio 3 eknuTAAUQ;36eparitaTe BAU rapaHTNIuTANO.
IpekoHaTeCBA TOMy,IO BcIbtpnBCTaHOBHeHa Micue.
YjKOHOMy p3i He KOpNCTyTneCnPiNOCOCM, JAKIO HE BCTAHOBNEHO CTmETy fInbTpcaII (npOCTNI fInbTp, MikoPdInbTp ta InbTp).
JyXHMOYpa3IheBCTAOBNIOJIteHA MCIUE NOPNCTHΦbIbT a MIKOpDJIbT,doKHOI BNOHCTIOHE BEXHOCHYTO.
KIOO Bn 33a3HeTe TpyDnouHbY npri6abHH pnpnaadj HfNtprB JIa BauoM oMei nnococcy, 3eBraTaeCb do BIDIny 06cNryobuBHH CnoKnbuaBcip MPPm Rowenta (INb. KOtakTHy IHopmaQaHbO a octAHnni CTOpHJI).
2·Пдклюechнha shhya
KINBJIeHHa Ta BBIMKHeHHa npuJaDy
POMOTAJTE NOBHCIO UHYP KJMBENHHI, NIDKJIOUHTNINOCO Do ENEPTOMPEKJI HAIHTCHIE NEAIBY BVMIKHENHH/BMIMKHENHH (fig.5).
YB4A! Y JxodHomy pa3i He KOpNCTyTecea nnococom, kIoo He BCtAHOBnEO CNTcEMy fInbtpaui (nopNctH om btp, mKpOphiInbtp Ta fInbtp).
Bidperyioite notyHKi3b BCMKtYBaHHNIOBip3a 2DionOMOIOE MEXHNIORO peryrNToPA"ha pyKoHTU; BIDPKnIOe KnanAH nob3yHKoBOrO peryrNToPA ta BCTAHOBiTe PnpdATHy NOTyHKi3b BCMKTOBAHHN BpyHu, HapriNKlad: pni MuichENHIObePexHO,aki Notpe6bOtBepeKmNBOrO CTaBHeHn ToIo (fig.6).
3·36epiragHHn TpaHcnpOpTyBaHH npuJaDy
yaiyaiyaiyaiyaiyaiyaiyaiyaiyaiyaiyaiyaiyaiyaiyaiyaiyaiyaiyaiyaiyaiyaiyaiyaiyaiyaiyaiyaiyaiyaiyaiyaiyaiyaiyaiyaiyaiyaiyaiyaiyaiyaiyaiyaiyaiyaiyaiyaiyaiyAI
jaii jaii yj. HEPA jaii jaii jaii jaii jaii jaii jaii jaii jaii jaii jaii jaii jaii jaii jaii jaii jaii jaii jaii jaii jaii jaii jaii jaii jaii jaii jaii jaii jaii jaii jaii jaii jaii jaii
(23.5) 100000000000000000000000000000000000000000000000000000000000000000000000
suaaal aauu jsl y g jy HEPA jial kllj xjle lHEPA jial qiae paa
(4) j_all _2^* .6
(17,16)
(27 Jall) Jall bji jai (26 Jall) jalll jj gl bial
(29 J) (28 J) (4C)
(30 4b)
acl (4a+4b+4c)
(31 JS) 6dai j
:1g0g! (4) jilai jilai jilai
(32) (4a) jal (4b) all
aaii aaii iiaii iiaii iiaii iiaii iiaii iiaii iiaii iiaii iiaii
AaJd Aabai aai Jauucl Jaule 1
yaiyaiyaiyaiyaiyaiyaiyaiyaiyaiyaiyaiyaiyaiyaiyaiyaiyaiyaiyaiyaiyaiyaiyaiyaiyaiyaiyaiyaiyaiyaiyaiyaiyaiyaiyaiyaiyaiyaiyaiyaiyaiyaiyaiyaiyaiyaiyaiyaiyaiy
jlll jlll jlll jlll jlll jlll jlll jlll jlll jlll jlll jlll jlll jlll jlll jlll jlll jlll jlll jlll jlll jlll jlll jlll jlll jlll jlll jlll jlll jlll jlll jlll jlll jlll jill l l l l l l l l l l l l l l l l l l l l l l l l l l l l l l l l l l l l l l l l l l l l l l l l l l l l l l l l l l l l l l l l l l l l l l l l l l l l l l l l l l l l l l l l l l l l l
i 1
j 1
(5) ( \left{ \begin{array}{l} \text{可分 }\left{ \begin{array}{l} \text{可分 }\left{ \begin{array}{l} \text{可分 }\left{ \begin{array}{l} \text{可分 }\left{ \begin{array}{l} \text{可分 }\left{ \begin{array}{l} \text{可分 }\left{ \begin{array}{l} \text{ 可分 }\left{ \begin{array}{l} \text{可分 }\left{ \begin{array}{l} \text{可分 }\left{ \begin{array}{l} \text{可分 }\left{ \begin{array}{l} \text{可分 }\left{ \begin{array}{l} \text{可分 }\left{ \begin{array}{l} \end{array}\right. \ \text{可分 }\left{ \begin{array}{l} \text{可分 }\left{ \begin{array}{l} \text{可分 }\left{ \begin{array}{l} \text{可分 }\left{ \begin{array}{l} \text{可分 }\left{ \begin{array}{l} \text{可分 }\left{ \begin{array}\text{可分 }\left{ \begin{array}{l} \text{可分 }\left{ \begin{array}{l} \text{可分 }\left{ \begin{array}{l} \text{可分 }\left{ \begin{array}{l} \text{可分 }\left{ \begin{array}{l} \text{可分 }\left{ \begin{array}{r} \text{可分 }\left{ \begin{array}{l} \text{可分 }\left{ \begin{array}{l} \text{可分 }\left{ \begin{array}{l} \text{可分 }\left{ \begin{array}{l} \text{可分 }\left{ \begin{array}{l} \text{可分 }\left{ \begin{aligned} \text{可分 }\left{ \begin{aligned} \text{可分 }\left{ \begin{aligned} \text{可分 }\left{ \begin{aligned} \text{可分 }\left{ \begin{aligned} \text{可分 }\left{ \begin{aligned} \text{可分 }\left{ \begin{aligned} \text{可分 }\left{\text{可分 }\left{\text{可分 }\left{\text{可分 }\left{\text{可分 }\left{\text{可分 }\left{\text{可分 }\left{\text{可分 }\left{\text{可分 }\left{\text{可分 }\left{\text{可分 }\left{\text{可分 }\left{\text{可分 }\left{\text{可
jlll lll 5 jlll gill sll kail lalil u o eaiy iie lai jllle
(11)
(13J) 12
(14)
(15)
jaii oie jie jie jie jie jie jie jie jie jie jie jie jie jie jie jie jie jie jie jie jie jie jie jie jie jie jie
jllg jg gall gaii cia 2
(14 J) jai aai aai bai yai jai gai e gai gai gai gai (11 J) jai ai e gai
(15)
(19) 2gwiyjgiwii jilai Juii .3
AaAs Jaaalil 6 Jaaiiie 6 Jaaii jaii i aia
(18 JS) (17 JS) (16 JS)
AlljLJ 12d j. (19)
jlll al ae jai jia gaiy las aay ay sli yolai ay gaiy jialdi jilpl
aalll gie 1 aaiy 1 2 y
(20) 4
3Jgai jiai
jll jil g jil (18 JS) d jil (17 JS) cill jil (16 JS) cill jil j
AilS aI 12 20
jglall aelj l jg yis les 2y 1 yuie j gdl jilil d jil p
e 1
i 1
jll jll jlll llll lllllllllllllllllllllllllllllllll
Culu! g cuiai .2
1000000000000000000000000000000000000000000000000000000000000000000000000000000000000000000000000000
jgljll jzaii aji sb
cill 1jz jus .1
(1J) jaiia aiaa aiaaa aiaaa aiaaa
aaii aiee aieae ae eae
(2J) 4e clalall jz (2 J) wJdJaiclll
(3K) dJgR JyBbJy. *JyJyJyJyJyJyJy
(4)
()
jlll jlll jlll jlll) jlll ldl i y aayy ayy aayy aay
:La. yaiy baii o jay aai aiai baiai yaiy cie i: ayai gie yaiy gaiy *gaiyai aiai yaiy aai yaiy
(6.5) ...
auiyjgaiiuiuicai juyj 3
(7) (1)
(8J) jySll allll alw gge baiuall yjSll allll jss
(9 J) jll oie g jiai jai jiljai (10) jai jai jai jai jai jai jai jai
(10)
yaiyaiyaiyaiyaiyaiyaiyaiyaiyaiyaiyaiyaiyaiyaiyaiyaiyaiyaiyaiyaiyaiyaiyaiyaiyaiyaiyaiyaiyaiyaiyaiyaiyaiyaiyaiyaiyaiyaiyaiyaiyaiyaiyaiyaiyaiyaiyai
aJdJdJd
(..aill jilg, aaiu bllge kll aai gill jilg, jiaai lal jiln jil) Jaiaiai ayjaii jaiy jaiai jaiai jai
Jusunl log.1
Ae 1
Jlalil Jgliae jLaiabgsaill Jlaaii
a a a a a a a a a a a a a a a a a a a a a
ailllll (...blllllll) 8 bllllllllg i g slally aullj. ...
.(jgsllg jyjjlllclaiuie gajil) jiai jiaaiyaiaiai (...cibbia.jalai)
jiall jia jia jia yao yao yao jiall jao
a a a a a a a a a a a a a a a a a a a a a a a a a a a
jillll jilii jilil ljj
Jy 1 1 1 1 1 1 1 1 1 1 1 1 1 1 1 1 1 1 1 1 1 1 1
Jaaa Jaa aaii aaiia aai i aaiii aaii
clayill.3
aaii aiee iiai aieae iieae iieae iieae iieae iieae iieae iieae iieae iieae iieae iieae iieae iieae iieae iieae iieae iieae iieae iieae iieae iieae iieae iieae iieae iieae iieae iieae iieae iieae iieae iieae iieae iieae i ieae
algal
0181 2.18
(RS-RT3184) 19
(RS-RT3185) 20