
KD-LH401 - Car radio JVC - Free user manual and instructions
Find the device manual for free KD-LH401 JVC in PDF.


| Product Type | Car Stereo |
| Brand | JVC |
| Model | KD-LH401 |
| Dimensions (W x H x D) | 178 x 50 x 160 mm (1 DIN standard) |
| Weight | Approx. 1.2 kg |
| Power Supply | 12 V DC (vehicle battery) |
| Output Power | 50 W x 4 (max) |
| CD Player | Yes, compatible CD-R/RW |
| Radio Tuner | FM/AM with RDS |
| Auxiliary Input (AUX) | 3.5 mm front panel jack |
| USB Port | Yes, MP3/WMA playback |
| Equalizer | Presets and manual (5 bands) |
| Display | Backlit LCD screen |
| Remote Control | Included (with batteries) |
| Care and Cleaning | Soft, dry cloth; avoid chemicals |
| Safety | Protective fuse (10 A); anti-theft code |
| Spare Parts | Available through JVC after-sales service or authorized dealers |
| Repairability | Service manual available; repair by professional possible |
| General Information | User manual downloadable free from notice-facile.com |
Frequently Asked Questions - KD-LH401 JVC
User questions about KD-LH401 JVC
0 question about this device. Answer the ones you know or ask your own.
Ask a new question about this device
Download the instructions for your Car radio in PDF format for free! Find your manual KD-LH401 - JVC and take your electronic device back in hand. On this page are published all the documents necessary for the use of your device. KD-LH401 by JVC.
USER MANUAL KD-LH401 JVC
For installation and connections, refer to the separate manual.
INSTRUCTION MANUAL
INSTRUCTION MANUAL
IMPORTANT FOR LASER PRODUCTS
- CLASS 1 LASER PRODUCT
- CAUTION: Do not open the top cover. There are no user serviceable parts inside the unit; leave all servicing to qualified service personnel.
- CAUTION: Visible and invisible laser radiation when open and interlock failed or defeated. Avoid direct exposure to beam.
- REPRODUCTION OF LABEL: CAUTION LABEL, PLACED OUTSIDE THE UNIT.
| CAUTION : Visible and invisible laser radiation when open and interlock failed or defeated. AVOID DIRECT EXPOSURE TO BEAM. (e) | ADVARSEL : Synlig og usynlig laserstråling når maskinen er åben eller interlocken fejler. Undgå direkte eksponering til stråling. (d) | VARNING : Synlig och osynlig laserstrålnning når den öponas och spärren är urkopplad. Betrakta ej strålen. (s) | VARO : Avattaessa ja suojalukhus ohtetuna tai vialisena oiet ahtina näkyvälle ja näkymättömälle lasersäte lylle. Våta säleen kohdistumista suoara Insesi. (f) |
Caution:
If the temperature inside the car is below 0°C, the movement of animation and text scroll will be halted on the display to prevent the display from being blurred. (LOW TEMP.) indicator appears on the display. When the temperature increases, the operating temperature is resumed, and these functions will start working again.
CAUTION on Volume Setting:
Discs produce very little noise compared with other sources. If the volume level is adjusted for the tuner, for example, the speakers may be damaged by the sudden increase in the output level. Therefore, lower the volume before playing a disc and adjust it as required during playback.
Note:
For security reasons, a numbered ID card is provided with this unit, and the same ID number is imprinted on the unit's chassis. Keep the card in a safe place, as it will help the authorities to identify your unit if stolen.
How to reset your unit
Press the reset button on the control panel using a ball-point pen or a similar tool.
This will reset the built-in microcomputer.

Note:
Your preset adjustments—such as preset channels or sound adjustments—will also be erased.
CAUTION:
NEVER insert your finger in between the control panel and the unit, as it may get caught or hurt.
(See page 54.)

CONTENTS
How to reset your unit 2
LOCATION OF THE BUTTONS ...... 4
Control panel 4
Illumination Navigation for easy operations 4
Remote controller 5
Preparing the remote controller .... 6
BASIC OPERATIONS ...... 7
Turning on the power 7
Canceling the display demonstration ..... 8
Setting the clock 9
RADIO OPERATIONS .... 10
Listening to the radio 10
Storing stations in memory 12
Tuning in to a preset station 14
Changing the display pattern 15
RDS OPERATIONS ...... 16
What you can do with RDS 16
Other convenient RDS functions and adjustments 21
DISC OPERATIONS ...... 23
About MP3 and WMA discs 23
Playing a disc 23
Locating a track or a particular portion on a disc 26
Selecting a folder and a track using the name lists 28
Selecting the playback modes 29
Prohibiting disc ejection 30
Changing the display pattern 31
SOUND ADJUSTMENTS 32
Adjusting the sound 32
Selecting preset sound modes (iEQ: intelligent equalizer) 33
Storing your own sound modes 35
Selecting the display theme 36
GRAPHIC DISPLAYS 37
Downloading images and animations ..... 38
Deleting unwanted files 41
Activating the downloaded images and animations 43
OTHER MAIN FUNCTIONS 45
Changing the general settings (PSM) ..... 45
Selecting the dimmer mode 50
Changing the display color 51
Assigning names to the sources 53
Changing the control panel angle 54
Detaching the control panel 55
CD CHANGER OPERATIONS .... 56
Playing discs 56
Selecting a disc/folder/track using the name lists 59
Selecting the playback modes 60
EXTERNAL COMPONENT OPERATIONS ... 62
Playing an external component 62
Changing the display pattern 62
DAB TUNER OPERATIONS ...... 63
Tuning in to an ensemble and one of the services 63
Storing DAB services in memory 65
Tuning in to a preset DAB service 66
What you can do more with DAB 67
Changing the display pattern 70
TROUBLESHOOTING 71
MAINTENANCE 74
Handling discs 74
SPECIFICATIONS 75
BEFORE USE
*For safety....
- Do not raise the volume level too much, as this will block outside sounds, making driving dangerous.
- Stop the car before performing any complicated operations.
*Temperature inside the car....
If you have parked the car for a long time in hot or cold weather, wait until the temperature in the car becomes normal before operating the unit.
Control panel

1 Control dial 2 (standby/ton attenuator) button 3 TP/PTY (traffic programme/programme type) button 4 Display window 5 ▲ (up) button 6 FM/AM DAB button 7 ▲ (eject) button
(angle) button
8 |◀◀ ▼/▶▶| ^ buttons 9 SEL (select) button 10 DISP (display) button 11 Number buttons 12 M MODE button 13 Remote sensor 14 ▼ (down) button 15 CD/CD-CH (CD changer) button 16 (control panel release) button
Illumination Navigation for easy operations
If you use M MODE or SEL (select), the display and some controls (such as the number buttons, ◀◀◀ ▼/▶▶▶ ▲, ▲/▼, and control dial) enter the corresponding control mode, then the controls start flashing to lead you to the next operational steps. (Illumination Navigation)
- The display shows how these buttons function during this period.
Ex.: When you press number button 1 after pressing M MODE, to operate the FM tuner.

To use these controls for original functions again, wait until the controls stop flashing without using these controls.
- Pressing M MODE again also restores original functions. However, pressing SEL (select) makes the unit enters a different mode.
Remote controller
![graph TD A["1"] --> B["ATT"] B --> C["OVI"] C --> D["U"] D --> E["5"] D --> F["6"] G["2"] --> H["R"] H --> I["SRC"] I --> J["F"] J --> K["D"] L["3"] --> M["D"] M --> N["S"] O["4"] --> P["SOUND"] P --> Q["S"] R["7"] --> S["VOLUME"] S --> T["-"] U["RM-RK60"] --> V["JVC"]](/content/2026/06/1254897/images/5b4b675a8500203f6f1605de5e2409cc3b82f75ab6e90ad571ac347a6f9532ec.jpg)
1• Turns on the unit if pressed when the unit is turned off. - Turns off the unit if pressed and held for a few seconds. - Drops the volume level in a moment if pressed briefly. Press again to resume the volume. 2• Searches for stations while listening to the radio. - Selects services while listening to the DAB tuner if pressed briefly. - Searches for ensembles while listening to the DAB tuner if pressed for more than one second. - Fast-forwards or reverses the track if pressed and held while listening to a disc. - Skips to the beginning of the next track or goes back to the beginning of the current (or previous) tracks if pressed briefly while listening to a disc.
3• Selects the preset stations (or service) while listening to the radio (or the DAB tuner).
Each time you press the button, the preset station (or service) number increases, and the selected station (or service) is tuned in.
- Skips to the first track of the previous folder while listening to an MP3 disc or a WMA disc. Each time you press the button, you can move to the previous folder and start playing the first track.
- While playing an MP3 disc on an MP3-compatible CD changer;
- Skips to the previous disc if pressed briefly.
- Skips to the previous folder if pressed and held.
Note: While playing a CD on a CD changer, this always skips to the previous disc.
4 Selects the sound mode (iEQ: intelligent equalizer).
Each time you press the button, the sound mode (iEQ) changes.
5• Selects the band while listening to the radio (or the DAB tuner).
Each time you press the button, the band changes.
- Skips to the first track of the next folder while listening to an MP3 disc or a WMA disc.
Each time you press the button, you can move to the next folder and start playing the first track.
- While playing an MP3 disc on an MP3-compatible CD changer;
– Skips to the next disc if pressed briefly. - Skips to the next folder if pressed and held.
Note: While playing a CD on a CD changer, this always skips to the next disc.
6 Selects the source.
Each time you press the button, the source changes.
7 Functions the same as the control dial on the main unit.
Note: These buttons do not function for the preferred setting mode (PSM) adjustment.
Preparing the remote controller
Before using the remote controller:
- Aim the remote controller directly at the remote sensor on the main unit. Make sure there is no obstacle in between.

Remote sensor
- Do not expose the remote sensor to strong light (direct sunlight or artificial lighting).
Installing the battery
When the controllable range or effectiveness of the remote controller decreases, replace the battery.
1. Remove the battery holder.
1) Push out the battery holder in the direction indicated by the arrow using a ball-point pen or a similar tool. 2) Remove the battery holder.

2. Place the battery.
Slide the battery into the holder with the + side facing upwards so that the battery is fixed in the holder.

Lithium coin battery (product number: CR2025)
3. Return the battery holder.
Insert again the battery holder by pushing it until you hear a clicking sound.

WARNING:
- Store the battery in a place where children cannot reach. If a child accidentally swallows the battery, consult a doctor immediately.
- Do not recharge, short, disassemble, or heat the battery or dispose of it in a fire. Doing any of these things may cause the battery to give off heat, crack, or start a fire.
- Do not leave the battery with other metallic materials. Doing this may cause the battery to give off heat, crack, or start a fire.
- When throwing away or saving the battery, wrap it in tape and insulate; otherwise, the battery may start to give off heat, crack, or start a fire.
- Do not poke the battery with tweezers or similar tools. Doing this may cause the battery to give off heat, crack, or start a fire.
CAUTION:
DO NOT leave the remote controller in a place (such as dashboards) exposed to direct sunlight for a long time. Otherwise, it may be damaged.
KD-LH401 is equipped with the steering wheel remote control function.
If your car is equipped with the steering wheel remote controller, you can operate this receiver using the controller.
- See the Installation/Connection Manual (separate volume) for connection to utilize this function.

Turning on the power
1 Turn on the power.

Note on One-Touch Operation:
When you select a source in step 2 below, the power automatically comes on. You do not have to press this button to turn on the power.
2 Select the source.
• To operate the FM/AM tuner, press FM/AM DAB. To operate the DAB tuner, press and hold FM/AM DAB.
![graph LR A["FM/AM"] --> B["TUNER"] B --> C["DAB*"]](/content/2026/06/1254897/images/7786208670465482b21674d82ba835b951b2fb5d62e92b9bbb874641b96f15a6.jpg)
* Without connecting the DAB tuner, you cannot select "DAB" as the source.
• To operate the CD player (CD), CD changer (CD-CH), or external component (LINE IN), press CD/CD-CH repeatedly.

1 Without loading the CD, you cannot select "CD" as the source. 2 Without connecting the CD changer, you cannot select "CD-CH" as the source. 3 To select "LINE IN" as the source, select "Line In" for the "Ext Input" setting on page 49.
3 Adjust the volume.

To increase the volume
To decrease the volume
Volume level appears.

Current sound mode (iEQ) (see page 33)
4 Adjust the sound as you want. (See pages 32–35.)
Note:
While playing a source, you can select the display theme of your preference. For details, see “Selecting the display theme” on page 36.
NOTICE:
The illustrations of the display used in this manual are mainly of the initial setting when shipped from the factory. If you have changed the display patterns or some PSM items, the actual displays you see will be different.
To drop the volume in a moment
Press briefly while listening to any source. "ATT" starts flashing on the display, and the volume level will drop in a moment. To resume the previous volume level, press the button briefly again.
- If you turn the control dial, you can also restore the sound.
To turn off the power
Press and hold for more than one second.
- If you turn off the power while listening to a disc, disc play will start from where playback has been stopped previously, next time you turn on the power.
Canceling the display demonstration
When shipped from the factory, display demonstration has been activated, and starts automatically when no operations are done for about 20 seconds.
- It is recommended to cancel the display demonstration before you use the unit for the first time.
To cancel the display demonstration, follow the procedure below:
1 Press and hold SEL (select) for more than 2 seconds so that one of the PSM items appears on the display. (PSM: see pages 46 and 47.)

The next-step-operation buttons start flashing.
2 Press number button 1 to select "MOVIE"—Movie category of the PSM settings.
The "Graphics" setting screen appears on the display.

3 Select "Off."


4 Finish the setting.

To activate the display demonstration, repeat the same procedure and select "Int Demo" or "All Demo" in step 3.
- For more details, see "To show the graphics on the display—Graphics" on page 48.
Setting the clock
You can also set the clock system to either 24 hours or 12 hours.
1 Press and hold SEL (select) for more than 2 seconds so that one of the PSM items appears on the display. (PSM: see pages 46 and 47.)

The next-step-operation buttons start flashing.
2 Press number button 2 to select "CLOCK"—Clock category of the PSM settings.
The "Clock Hr" (hour) setting screen appears on the display.

3 Adjust the hour.

4 Set the minute.
1 Select "Clock Min" (minute). 2 Adjust the minute.
1
2
5 Set the clock system.
1 Select "24H/12H." 2 Select "24Hours" or "12Hours."
1
2
6 Finish the setting.

To check the clock time when the unit is turned off, press D DISP.

The power turns on and the clock time is shown for about 5 seconds, then the power turns off.

Listening to the radio
You can use either automatic searching or manual searching to tune in to a particular station.
Searching for a station automatically: Auto search
1 Select the band (FM1 - 3, AM).

Each time you press the button, the band changes as follows:

Selected band appears.

Lights up when receiving an FM stereo broadcast with sufficient signal strength.
Note:
This receiver has three FM bands (FM1, FM2, FM3). You can use any one of them to listen to an FM broadcast.
2 Start searching for a station.

To search for stations of higher frequencies
To search for stations of lower frequencies
When a station is received, searching stops.
To stop searching before a station is received, press the same button you have pressed for searching.
Searching for a station manually: Manual search
1 Select the band (FM1 - 3, AM).

Each time you press the button, the band changes as follows:

Note:
This receiver has three FM bands (FM1, FM2, FM3). You can use any one of them to listen to an FM broadcast.
2 Press and hold ▶▶| ∧ or ◀◀◀ ∨ until “Manual Search” starts flashing on the display.


3 Tune in to a station you want while "Manual Search" is flashing.

To tune in to stations of higher frequencies
To tune in to stations of lower frequencies
- If you release your finger from the button, the manual mode automatically turns off after about 5 seconds.
- If you hold down the button, the frequency keeps changing (in 50 kHz intervals for FM and 9 kHz for AM—MW/LW) until you release the button.
If the sound quality decreases and the stereo effect is lost while listening to an FM station
In some areas, adjacent stations may interfere with each other. If this interference occurs, this unit can automatically reduce this interference noise (the initial setting when shipped from the factory). However, in this case, the sound quality will be degraded and the stereo effect will also be lost.
If you do not want to degrade the sound quality and to lose the stereo effect, rather than to eliminate the interference noise, see "To change the FM tuner selectivity—IF Filter" on page 49.
When an FM stereo broadcast is hard to receive:
Set the FM reception mode to "Mono On."
1 Press M MODE while listening to an FM stereo broadcast.

"Mode" appears on the display. The next-step-operation buttons start flashing.
2 Press number button 1 to select "Mono On" while "Mode" is still on the display.
Each time you press the button, "Mono On" or "Mono Off" appears alternately.

The display returns to the source indication screen.

The MONO indicator appears.
The sound you hear becomes monaural, but reception will be improved.
Storing stations in memory
You can use one of the following two methods to store broadcasting stations in memory.
• Automatic preset of FM stations: SSM (Strong-station Sequential Memory) • Manual preset of both FM and AM stations
FM station automatic preset: SSM
You can preset 6 local FM stations in each FM band (FM1, FM2, and FM3).
1 Select the FM band (FM1 – 3) you want to store FM stations into.

Each time you press the button, the band changes as follows:

2 Start automatic preset.
1 Press M MODE.

"Mode" appears on the display.
The next-step-operation buttons start flashing.
2 Press and hold number button 5 while "Mode" is still on the display.

“SSM” appears, then disappears when automatic preset is over.
Local FM stations with the strongest signals are searched and stored automatically in the band number you have selected (FM1, FM2, or FM3). These stations are preset in the number buttons — No.1 (lowest frequency) to No.6 (highest frequency).
When automatic preset is over, the station stored in number button 1 will be automatically tuned in.
Manual preset
You can preset up to 6 stations in each band (FM1, FM2, FM3, and AM) manually.
Ex.: Storing FM station of 92.5 MHz into the preset number 1 of the FM1 band.
1 Select the band (FM1 – 3, AM) you want to store stations into (in this example, FM1).

Each time you press the button, the band changes as follows:

2 Tune in to a station (in this example, of 92.5 MHz).

To tune in to stations of higher frequencies
To tune in to stations of lower frequencies

3 Press and hold the number button (in this example, 1) for more than 2 seconds.

The display pattern automatically changes to the small animation display (see page 15).


Preset number appears.

4 Repeat the above procedure to store other stations into other preset numbers.
Notes:
- A previously preset station is erased when a new station is stored in the same preset number.
- Preset stations are erased when the power supply to the memory circuit is interrupted (for example, during battery replacement). If this occurs, preset the stations again.
Tuning in to a preset station
You can easily tune in to a preset station. Remember that you must store stations first. If you have not stored them yet, see "Storing stations in memory" on pages 12 and 13.
Selecting a preset station directly
1 Select the band (FM1 - 3, AM).

Each time you press the button, the band changes as follows:

2 Select the number (1 - 6) for the preset station you want.

Selecting a preset station using the preset station list
If you forget what stations are stored in which preset numbers, you can check the preset station list, then select your desired station.
1 Select the band (FM1 - 3, AM).

Each time you press the button, the band changes as follows:

2 Press and hold ▲ (up) or ▼ (down) until the preset station list for the current band (FM1, FM2, FM3, or AM) appears on the display.

The current station will be highlighted on the display.

Ex.: When you select the preset station number 1 of the FM1 band
Notes:
- You can show the other FM band preset station lists (FM1, FM2, or FM3) by pressing ▲ (up) or ▼ (down).
- If a preset station is an FM RDS station with PS (programme station) signal, PS name will be shown instead of the station frequency.
3 Select the number (1 - 6) for the preset station you want.

Changing the display pattern
By pressing D DISP, you can change the information shown on the display.
Each time you press the button, the display patterns change as follows:

- When receiving an AM or non FM RDS-station
Large animation display

Current sound mode (iEQ) (see page 33)
Appears only when selecting a preset station.
Small animation display 1

Clock time
Small animation display 2*

* Only for non FM RDS-station
Clock time display

- When receiving an FM RDS-station (see the following pages)
Large animation display

Current sound mode (iEQ) (see page 33)
PS name
Small animation display 1

Clock time
Small animation display 2

PTY code appears.
Clock time display

What you can do with RDS
RDS (Radio Data System) allows FM stations to send an additional signal along with their regular programme signals. For example, the stations send their station names, as well as information about what type of programme they broadcast, such as sports or music, etc.
Another advantage of RDS function is called "Enhanced Other Networks." By using the Enhanced Other Networks data sent from a station, you can tune in to a different station of a different network broadcasting your favorite programme or traffic announcement while listening to another programme or to another source such as CD.
By receiving the RDS data, this unit can do the following:
- Tracing the same programme automatically (Network-Tracking Reception) • TA Standby Reception or your favorite programme • PTY (Programme Type) search
- Programme search • And some other functions
Tracing the same programme automatically (Network-Tracking Reception)
When driving in an area where FM reception is not good, the tuner built in this unit automatically tunes in to another RDS station, broadcasting the same programme with stronger signals. So, you can continue to listen to the same programme in its finest reception, no matter where you drive. (See the illustration on page 22.)
Two types of the RDS data are used to make Network-Tracking Reception work correctly — PI (Programme Identification) and AF (Alternative Frequency).
Without receiving these data correctly from the RDS station you are listening to, Network-Tracking Reception will not operate.
To use Network-Tracking Reception
You can select the different modes of network-tracking reception to continue listening to the same programme in its finest reception. When shipped from the factory, "AF" is selected.
- AF: Network-Tracking Reception is activated without Regionalization. With this setting, the unit switches to another station within the same network when the receiving signals from the current station become weak. (In this mode, the programme may differ from the one currently received.) The AF indicator lights up.
- AF Reg: Network-Tracking Reception is activated with Regionalization. With this setting, the unit switches to another station, within the same network, broadcasting the same programme when the receiving signals from the current station become weak. The REG indicator lights up.
- Off*: Network-Tracking Reception is deactivated. Neither the AF nor the REG indicator lights up. * You can select only when "DAB AF" is set to "Off." (See page 47 for details.)

AF or REG indicator lights up.
Note:
If a DAB tuner is connected and Alternative Reception (for DAB services) is activated, Network-Tracking Reception is also activated ("AF") automatically. On the other hand, Network-Tracking Reception cannot be deactivated without deactivating Alternative Reception. (See page 69.)
1 Press and hold SEL (select) for more than 2 seconds so that one of the PSM items appears on the display. (PSM: see pages 46 and 47.)

2 Press number button 4 to select "TUNER"—Tuner category of the PSM settings.
The "PTY Stnby" (standby) setting screen appears on the display.

3 Select "AF-Regn'l" (alternative frequency/regionalization reception).


4 Select the desired mode—"AF," "AF Reg," or "Off."

5 Finish the setting.

Using TA Standby Reception
TA Standby Reception allows the unit to switch temporarily to the Traffic Announcement (TA) from the current source (another FM station, CD, or other connected components).
- See also "Road Traffic News Standby Reception (TA Standby Reception)" on page 67.

Press TP/PTY to activate TA Standby Reception.
Each time your press the button, this function is turned on and off alternately.

TP indicator appears. (either lights up or flashes)
Note: TA Standby Reception will not work if you are listening to an AM station.
■When the current source is FM, the TP indicator either lights up or flashes.
- If the TP indicator lights up, TA Standby Reception is activated. If a station starts broadcasting a traffic announcement, “Traffic News” appears on the display, and this unit automatically tunes in to the station. The volume changes to the preset TA volume level (see page 21) and the traffic announcement can be heard.
- If the TP indicator flashes, TA Standby Reception is not yet activated since the station being received does not provide the signals used for TA Standby Reception. To activate TA Standby Reception, you need to tune in to another station providing these signals. Press ▶▶| ∧ or |◀◀ √ to search for such a station.
When a station providing these signals is tuned in, the TP indicator stops flashing and remains lit. Now TA Standby Reception is activated.
■When the current source is other than FM, the TP indicator lights up.
If a station starts broadcasting a traffic announcement, “Traffic News” appears on the display, and this unit automatically changes the source and tunes in to the station.
Using PTY Standby Reception
PTY Standby Reception allows the unit to switch temporarily to your favorite programme (PTY: Programme Type) from any source except AM stations.
- See also "Using PTY Standby Reception" on page 69.
To select your favorite PTY code for PTY Standby Reception
When shipped from factory, PTY Standby Reception has been set to search for "News" programmes.
You can select your favorite programme type for PTY Standby Reception.
1 Press and hold SEL (select) for more than 2 seconds so that one of the PSM items appears on the display. (PSM: see pages 46 and 47.)

2 Press number button 4 to select "TUNER"—Tuner category of the PSM settings.
The "PTY Stnby" (standby) setting screen appears on the display.

3 Select one of the twenty-nine PTY codes. (See page 22.)

Selected code name appears on the display and is stored into memory.
4 Finish the setting.

To set PTY Standby Reception
If a DAB tuner is connected, the following operations will set PTY Standby Reception for both the FM tuner and DAB tuner. (See page 69.)
1 Press M MODE while listening to an FM broadcast.

"Mode" appears on the display. The next-step-operation buttons start flashing.
2 Press number button 3 to activate PTY Standby Reception while "Mode" is still on the display. Each time you press the button, PTY Standby Reception turns on and off alternately.

Ex.: When the currently selected PTY code for PTY Standby Reception is "News"

The display returns to the source indication screen.

PTY indicator appears.
(either lights up or flashes)
The PTY indicator either lights up or flashes.
- If the PTY indicator lights up, PTY Standby Reception is activated. If a station starts broadcasting the selected PTY programme, this unit automatically tunes in to the station.
- If the PTY indicator flashes, PTY Standby Reception is not yet activated since the station being received does not provide the signals used for PTY Standby Reception. To activate PTY Standby Reception, you need to tune in to another station providing these signals. Press ▶▶▶ ▲ or ◀◀◀ ▼ to search for such a station.
When a station providing these signals is tuned in, the PTY indicator stops flashing and remains lit. Now PTY Standby Reception is activated.
Note:
After turning on PTY Standby Reception, you can change the source without canceling PTY Standby Reception. If a station starts broadcasting the selected PTY programme, this unit automatically changes the source and tunes in to the station.
- If you change the source to AM, PTY Standby Reception will be temporarily canceled.
- You can only deactivate the PTY Standby Reception when the source is FM.
Searching for your favorite programme
You can search for any one of the PTY codes. In addition, you can store your 6 favorite programme types in the number buttons. When shipped from the factory, the following 6 programme types have been stored in the number buttons (1 to 6).
- See also "Searching for your favorite service" on page 69.
To store your favorite programme types, see below and page 20.
To search for your favorite programme type, see page 20.
| 1 | 2 | 3 |
| Pop M | Rock M | Easy M |
| 4 | 5 | 6 |
| Classics | Affairs | Varied |
To store your favorite programme types
1 Press and hold TP/PTY for more than 2 seconds while listening to an FM station.

The last selected PTY code appears.

Ex.: If you have selected "Pop M" previously
2 Select one of the twenty-nine PTY codes. (See page 22.)

Selected code name appears on the display.
3 Press and hold the number button for more than 2 seconds to store the PTY code selected into the preset number you want.

Selected preset number flashes for a while.
4 Press and hold TP/PTY for more than 2 seconds to exit this mode.

To search for your favorite program type
1 Press and hold TP/PTY for more than 2 seconds while listening to an FM station.

The last selected PTY code appears.

Ex.: If you have selected "Pop M" previously
2 To select one of your favorite program types

or
To select any one of the twenty-nine PTY codes

or


Ex.: When "Rock M" is selected
How to use the ▲ (up) or ▼ (down) button
By pressing ▲ (up) or ▼ (down) repeatedly, you can show the list of your preset PTY codes and all twenty-nine PTY codes (six PTY codes at a time). First, the list of your stored PTY codes appears, then all twenty-nine PTY codes (six PTY codes at a time) appear in sequence.
Press the number button to select your desired PTY code on the list currently shown on the display.
3 Start PTY search for your favorite program.


- If there is a station broadcasting a program of the same PTY code as you have selected, that station is tuned in.
- If there is no station broadcasting a programme of the same PTY code as you have selected, the station will not change.
Note:
In some areas, the PTY search will not work correctly.
Other convenient RDS functions and adjustments
Automatic selection of the station when using the number buttons
Usually when you press the number button, the preset station is tuned in.
However, when the preset station is an RDS station, something different will happen. If the signals from that preset station are not sufficient for good reception, this unit, using the AF data, tunes in to another frequency broadcasting the same programme as the original preset station is broadcasting. (Programme search)
- The unit takes some time to tune in to another station using programme search.
To activate programme search, follow the procedure below.
- See also “Changing the general settings (PSM)” on page 45.
1 Press and hold SEL (select) for more than 2 seconds so that one of the PSM items appears on the display.
2 Press number button 4 to select "TUNER"—Tuner category of the PSM settings.
3 Press ▶▶| ∧ or ◀◀▼ to select "P(Programme)-Search."
4 Turn the control dial clockwise to select "On." Now programme search is activated.
5 Press SEL (select) to finish the setting.
To cancel programme search, repeat the same procedure and select "Off" in step 4 by turning the control dial counterclockwise.
Setting the TA volume level
You can preset the volume level for TA Standby Reception. When a traffic programme is received, the volume level automatically changes to the preset level.
- See also “Changing the general settings (PSM)” on page 45.
1 Press and hold SEL (select) for more than 2 seconds so that one of the PSM items appears on the display.
2 Press number button 4 to select "TUNER"—Tuner category of the PSM settings.
3 Press ▶▶▶▲ or ◀◀◀▼ to select "TA Volume."
4 Turn the control dial to set to the desired volume.
You can set it from "Volume 0" to "Volume 30" or "Volume 50" (depending on the amplifier gain control setting: see page 49).
5 Press SEL (select) to finish the setting.
Automatic clock adjustment
When shipped from the factory, the clock built in this unit is set to be readjusted automatically using the CT (Clock Time) data in the RDS signal.
If you do not want to use automatic clock adjustment, follow the procedure below.
- See also “Changing the general settings (PSM)” on page 45.
1 Press and hold SEL (select) for more than 2 seconds so that one of the PSM items appears on the display.
2 Press number button 2 to select "CLOCK"—Clock category of the PSM settings.
3 Press ▶▶▶ ▲ or ◀◀◀ ▼ to select "Auto Adj" (adjustment).
4 Turn the control dial counterclockwise to select "Off."
Now automatic clock adjustment is canceled.
5 Press SEL (select) to finish the setting.
To reactivate clock adjustment, repeat the same procedure and select "On" in step 4 by turning the control dial clockwise.
Note:
You must stay tuned to the same station for more than 2 minutes after setting "Auto Adj" to "On."
Otherwise, the clock time will not be adjusted. (This is because the unit takes up to 2 minutes to capture the CT data in the RDS signal.)
PTY codes
News: News
Affairs: Topical programmes expanding on current news or affairs
Info: Programmes which impart advice on a wide variety of topics
Sport: Sport events
Educate: Educational programmes
Drama: Radio plays
Culture: Programmes on national or regional culture
Science: Programmes on natural science and technology
Varied: Other programmes like comedies or ceremonies
Pop M: Pop music
Rock M: Rock music
Easy M: Easy-listening music
Light M: Light music
Classics: Classical music
Other M: Other music
Weather: Weather information
Finance: Reports on commerce, trading, the Stock Market, etc.
Children: Entertainment programmes for children
Social: Programmes on social activities
Religion: Programmes dealing with any aspect of belief or faith, or the nature of existence or ethics
Phone In: Programs where people can express their views either by phone or in a public forum
Travel: Programs about travel destinations, package tours, and travel ideas and opportunities
Leisure: Programs concerned with recreational activities such as gardening, cooking, fishing, etc.
Jazz: Jazz music
Country: Country music
Nation M: Current popular music from another nation or region, in that country's language
Oldies: Classic pop music
Folk M: Folk music
Document: Programs dealing with factual matters, presented in an investigative style
The same program can be received on different frequencies.
Program 1 broadcasting on frequency A
Program 1 broadcasting on frequency B
![graph TD A["Car"] --> B["Programme 1 casting on frequency B"] B --> C["Programme 1 broadcasting on frequency B"] C --> D["Wave pattern with arrows indicating signal flow"] style A fill:#f9f,stroke:#333 style D fill:#bbf,stroke:#333](/content/2026/06/1254897/images/b53446d5ad8043e8c8e9717f77e3a956e90b52afef8c2820e1a59230d2b8e31c.jpg)
Program 1 broadcasting on frequency C
Program 1 broadcasting on frequency E
Program 1 broadcasting on frequency D

This unit has been designed to reproduce CDs, CD-Rs (Recordable), CD-RWs (Rewritable), and CD Texts.
This unit is also compatible with MP3 and WMA discs. For details about these discs, refer to “A Guide to MP3/WMA” (separate volume).
About MP3 and WMA discs
MP3 and WMA (Windows Media® Audio) "tracks" (the word "file" is not used to indicate MP3 or WMA files, "track" is used in this manual) are recorded in "folders."
During recording, the tracks and folders can be arranged in a way similar to arranging files and folders of computer data.
"Root" is similar to the root of a tree. Every track and folder can be linked to and be accessed from the root.
![graph TD A["ROOT"] --> B["01"] A --> C["05"] B --> D["02"] C --> E["1"] C --> F["2"] D --> G["03"] D --> H["10"] D --> I["11"] D --> J["12"] E --> K["04"] E --> L["4"] E --> M["5"] E --> N["8"] E --> O["9"] style A fill:#f9f,stroke:#333 style B fill:#ccf,stroke:#333 style C fill:#ccf,stroke:#333 sty…](/content/2026/06/1254897/images/828d4a1e97b4b2506093ef9c23addf39a52e71c68607671a028fd6a076cb564c.jpg)
Playing a disc
1 Open the control panel.

Note on One-Touch Operation:
When a disc is already in the loading slot, pressing CD/CD-CH turns on the unit and starts playback automatically.
2 Insert a disc into the loading slot.

The unit draws the disc, the control panel goes back to the previous position (see page 54), and playback starts automatically.
All tracks will be played repeatedly until you stop playback.
Note:
For details on playable discs and other related information, see page 74.
About mistracking:
Mistracking may result from driving on extremely rough roads. This does not damage the unit and the disc, but will be annoying.
We recommend that you stop disc play while driving on such rough roads.
- Microsoft and Windows Media are either registered trademarks or trademarks of Microsoft Corporation in the United States and/or other countries.
Display indications when inserting an audio CD or a CD Text:

Total track number and total playing time of the inserted CD


Current track and elapsed playing time
Notes:
- MP3 or WMA discs require a longer readout time. (It differs due to the complexity of the folder/track configuration.)
- The unit cannot read or play an MP3 track without the extension code ".mp3", and a WMA track without the extension code ".wma".
Display indications when inserting an MP3 or a WMA disc:

Total folder and track numbers


MP3 indicator*


Current folder/track and elapsed playing time
* WMA or MP3 indicator lights up depending on the first detected track.
To stop play and eject the disc
Press ▲ (eject).
Disc play stops and the control panel moves down. The disc automatically ejects from the loading slot. The source changes to the previously selected source.
- If you change the source or turn the power off, disc play also stops (without ejecting the disc). Next time you select "CD" as the source or turn the power on, disc play starts from where playback has been stopped previously.
To return the control panel to its previous position, press ▲ (eject) again.
- If you keep the loading slot fully open for about 1 minute, (beeps sound when the "Beep" setting is turned "On"—see page 49) the control panel automatically returns to its previous position.
Be careful not to get the disc or your finger caught in between the control panel and the unit.
Notes:
- If the ejected disc is not removed for about 15 seconds, the disc is automatically inserted again into the loading slot to protect it from dust. (Disc play will not start this time.)
- You can eject the disc even when the unit is turned off.
What is ImageLink?
When an MP3 or a WMA folder includes an image file edited by Image Converter (supplied in the CD-ROM), you can show the image on the display while the tracks in the folder are played back. - While reading an image file, no sounds come out ("Image Link" is shown on the display during this period).
![graph TD A[" "] --> B["Album 1 (Folder 1)"] B --> C["Music001.mp3"] B --> D["Music002.mp3"] B --> E["Music003.mp3"] B --> F["Photo1.jml"] A --> G["Album 2 (Folder 2)"] G --> H["Music004.wma"] G --> I["Music005.mp3"] G --> J["Music006.wma"] G --> K["Photo2.jml"] G --> L["Photo3.jml"]](/content/2026/06/1254897/images/7cb2f1cb389c517fccebf5e7f7754b2d93d42269d722f4f60f6293fc109b8343.jpg)
Display window
Display window
If there are more than one file in a folder, a file with younger playback order number will be shown on the display (in the above example, "Photo2.jml" will be used for Album 2).
To activate ImageLink, follow the procedure below:
- See also "Changing the general settings (PSM)" on page 45.
1. Press and hold SEL (select) for more than 2 seconds so that one of the PSM items appears on the display. 2. Press number button 1 to select "MOVIE"—Movie category of the PSM settings. The "Graphics" setting screen appears on the display. 3. Turn the control dial to select "ImageLink." 4. Press SEL (select) to finish the setting. ImageLink starts functioning when the next folder starts playing.
Note:
ImageLink will not work in the following cases:
- If no file is included in an MP3/WMA folder.
- If Intro Scan is activated.
- If the source is changed to any other than "CD," or
- If you turn off then on the unit while "Image Link" is shown on the display.
Locating a track or a particular portion on a disc
To fast-forward or reverse the track

Press and hold ▶▶, ∧ while playing a disc, to fast-forward the track.
Press and hold ◀◀◀, while playing a disc, to reverse the track.
Note:
During this operation on an MP3 or a WMA disc, you can only hear intermittent sounds. (The elapsed playing time also changes intermittently on the display.)
To go to the next or previous tracks

Press ▶▶▶ briefly, while playing a disc, to go ahead to the beginning of the next track.
Each time you press the button consecutively, the beginning of the next tracks is located and played back.
Press ◀◀◀ briefly, while playing a disc, to go back to the beginning of the current track. Each time you press the button consecutively, the beginning of the previous tracks is located and played back.
To go to a particular track directly (Only for CD and CD Text discs)
Press the number button corresponding to the track number to start its playback.

• To select a track number from 01 – 06: Press 1 (7) – 6 (12) briefly. - To select a track number from 07 – 12: Press and hold 1 (7) – 6 (12) for more than one second.
To go to a track quickly
1 Press M MODE while playing a disc.

"Mode" appears on the display. The next-step-operation buttons start flashing.

See page 38 for this function.
2 Press ▲ (up) or ▼ (down) while "Mode" is still on the display.

To skip 10 tracks* forwards to the last track
To skip 10 tracks* backwards to the first track
* First time you press ▲ (up) or ▼ (down) button, the track skips to the nearest higher or lower track with a track number of multiple ten (ex. 10th, 20th, 30th).
Then each time you press the button, you can skip 10 tracks (see "How to go to the desired track quickly" below).
• After the last track, the first track will be selected, and vice versa.
Note:
If the current playing disc is an MP3 or a WMA disc, tracks are skipped within the same folder.
How to go to the desired track quickly
• Ex. 1: To select track number 32 while playing track number 6

- Ex. 2: To select track number 8 while playing track number 36

To go to a particular folder directly (Only possible for MP3 or WMA disc)
IMPORTANT:
To directly select the folders using the number button(s), it is required that folders are assigned 2 digit numbers at the beginning of their folder names. (This can only be done during the recording of CD-Rs or CD-RWs.) Ex.: If folder name is "01 ABC"
→Press 1 to go to Folder 01 ABC. If folder name is "1 ABC," pressing 1 does not work.
If folder name is "12 ABC"
→Press and hold 6 (12) to go to Folder 12 ABC.
Press the number button corresponding to the folder number to start playing the first track in the selected folder.

- To select a folder number from 01 - 06: Press 1 (7) - 6 (12) briefly.
- To select a folder number from 07 – 12: Press and hold 1 (7) – 6 (12) for more than one second.
Notes:
- If "No Music" appears on the display after you have selected a folder, it means that the folder does not contain any MP3 or WMA tracks.
- You cannot directly select a folder with a number greater than 12.
To select a particular track in a folder, press
▶▶| ∧ or ◀◀ ▼ after selecting the folder.
To skip to the next or previous folder (Only possible for MP3 or WMA disc)

Press ▲ (up) while playing a disc to skip to the next folder.
Each time you press the button consecutively, the next folder is located and the first track in the folder starts playing.
Press ▼ (down) while playing a disc to skip back to the previous folder.
Each time you press the button consecutively, the previous folder is located and the first track in the folder starts playing.
Note:
If the folder does not contain any MP3 or WMA tracks, it is skipped.
Selecting a folder and a track using the name lists
The following operations are only possible when playing an MP3 or a WMA disc.
You can show the folder name and track name lists on the display while playing a disc. Then, select a folder or a track you want to start playback with.
Selecting a folder and start playback
1 Press and hold ▲ (up) or ▼ (down) so that the folder name list of the inserted disc appears on the display.

The current playing folder will be highlighted on the display.
Current folder number

Notes:
- The display can show only six names at a time. You can show the other names on the next lists by pressing ▲ (up) or ▼ (down).
- If you press ▶▶|∧ or |◀◀∨, the track name list of the current playing folder appears. Each time you press the button, the folder name list and track name list appear alternately.
- Only folders with MP3 or WMA tracks will be listed.
2 Select the number (1 - 6) for the folder you want to play.

Selecting a track and start playback
1 Press and hold ▲ (up) or ▼ (down) so that the folder name list of the inserted disc appears on the display.

The current playing folder will be highlighted on the display.
Current folder number

2 Press ▶▶| ∧ or ◀◀◀ ∨ to show the track name list of the current folder.

The current playing track will be highlighted on the display.
Current track number

Each time you press the button, the folder name list and track name list appear alternately.
Note:
The display can show only six names at a time. You can show the other names on the next lists by pressing ▲ (up) or ▼ (down).
3 Select the number (1 - 6) for the track you want to play.

Selecting the playback modes
To play back tracks at random (Random Play)
You can play back all tracks on the disc (or a folder for MP3 and WMA discs) at random.
1 Press M MODE while playing a CD.

"Mode" appears on the display. The next-step-operation buttons start flashing.
2 Press number button 3 repeatedly while "Mode" is still on the display.

Each time you press the button, random play mode changes as follows:
For audio CD and CD Text discs:
Random Disc ↔ Random Off
For MP3 and WMA discs:
![graph LR A["→ Random Folder"] --> B["→ Random Disc"] B --> C["→ Random Off"] C --> C](/content/2026/06/1254897/images/9fc84d7a7e4b7c35d335142c709df0fe0385e9774c97eef529e34b14dbc8508e.jpg)
| Mode | Active indicator | Plays at random |
| Random All tracks of the Folder* (folder random) current folder, then indicator lights tracks of the next up. folder and so on. | ||
| Random (disc all tracks on the Disc random) indicator disc. lights up. | ||
* "Random Folder" can be used for MP3 and WMA discs only.
To cancel random play, select "Random Off" by pressing number button 3 repeatedly or press number button 4 in step 2.
To play back tracks repeatedly (Repeat Play)
You can play back the current track (or a folder for MP3 and WMA discs) repeatedly.
1 Press M MODE while playing a CD.

"Mode" appears on the display. The next-step-operation buttons start flashing.
2 Press number button 2 repeatedly while "Mode" is still on the display.

Each time you press the button, repeat play mode changes as follows:
For audio CD and CD Text discs:
Repeat Track ↔ Repeat Off
For MP3 and WMA discs:
![graph LR A["Repeat Track"] --> B["Repeat Folder"] B --> C["Repeat Off"] C --> A](/content/2026/06/1254897/images/2f1b28b25e36d16d86f62dd847934c1cf068d116868cc2ed7bd9e3a2e7329d7d.jpg)
| Mode | Active indicator | Plays repeatedly |
| Repeat Track | J RFT(track repeat) indicator lights up. | The current (or specified) track. |
| Repeat Folder* | Q RFT (folder repeat) indicator lights up. | All tracks of the current (or specified) folder of the disc. |
* "Repeat Folder" can be used for MP3 and WMA discs only.
To cancel repeat play, select "Repeat Off" by pressing number button 2 repeatedly or press number button 4 in step 2.
To play back only intros (Intro Scan)
You can play back the first 15 seconds of each track sequentially.
1 Press M MODE while playing a CD.

"Mode" appears on the display. The next-step-operation buttons start flashing.
2 Press number button 1 repeatedly while "Mode" is still on the display.

Each time you press the button, intro scan mode changes as follows:
For audio CD and CD Text discs:
Intro Track ↔ Intro Off
For MP3 and WMA discs:
![graph LR A["Intro Track"] --> B["Intro Folder"] B --> C["Intro Off"]](/content/2026/06/1254897/images/5cf73eb7f2b02063cee3309164ecae46578af20ead8cd9e1d444e3d2864b036b.jpg)
| Mode | Active Plays the beginnings indicator (15 seconds) of |
| Intro (track tracks on the Track intro) indicator disc. lights up. | |
| Intro The first track of every Folder* (folder intro) folder of the disc. indicator lights up. |
* "Intro Folder" can be used for MP3 and WMA discs only.
To cancel intro scan, select "Intro Off" by pressing number button 1 repeatedly or press number button 4 in step 2.
Prohibiting disc ejection
You can prohibit disc ejection and can lock a disc in the loading slot.
While pressing SEL (select), press and hold ▲ (eject) for more than 2 seconds.


"No Eject" flashes on the display for about 5 seconds, and the disc is locked and cannot be ejected.

If you press ▲ (eject) again, the control panel moves down but the disc is not ejected. "No Eject" flashes on the display.
To cancel the prohibition and unlock the disc
While pressing SEL (select), press and hold ▲ (eject) again for more than 2 seconds.
"Eject OK" flashes on the display for about 5 seconds, and the disc is unlocked.

Changing the display pattern
By pressing D DISP, you can change the information shown on the display.

If the information cannot be shown at a time, it will scroll on the display. See also "To select the scroll mode for disc information and the DAB text—Scroll" on page 48. Some characters or symbols will not be shown (will be blanked or substituted) on the display.
Each time you press the button, the display patterns change as follows:
While playing an audio CD or a CD Text disc:![graph TD A["Original display"] --> B["CD TRK 01 00'03" 1:28 FLAT"] B --> C["Clock time"] C --> D["Titanic TRK 01 00'03" 1:28 FLAT"] D --> E["Never an A TRK 01 00'03" 1:28 FLAT"] E --> F["Titanic J01 Never a 1:28 FLAT"] F --> G["Clock"]](/content/2026/06/1254897/images/640cc3c2eff227c1d529a0bfac9b35db4aadda4f1f6ca487ae451de9a1b2247d.jpg)
Notes:

- When the disc title/performer is shown, the (disc) indicator lights up. When the track title is shown, the (track) indicator lights up.
- If no name is assigned to the audio CD, "NO NAME" will appear. To assign a name to an audio CD, see page 53.
- If no disc title/performer or no track title is recorded for the CD Text, "NO NAME" will appear.
While playing an MP3 or a WMA disc when "Tag" is set to "Off":![graph TD A["Original display"] --> B["CD 01 FOLDER TRACK 00'03" MP3 FLAT 1:28"] B --> C["Clock time"] C --> D["2dx_3 01 FOLDER TRACK 00'03" MP3 FLAT 1:28"] D --> E["1973.mp3 01 FOLDER TRACK 00'03" MP3 FLAT 1:28"] E --> F["2dx_3 01 FOLDER TRACK 1973.m MP3 FLAT 1:28"] F --> G["Current t…](/content/2026/06/1254897/images/d3bf75739f6c5047332a85e50018c1324aeb09ee6768babdbd34e543ca1c429b.jpg)
Notes:
- When the folder name is shown, the (folder) indicator lights up. When the track name is shown, the (track) indicator lights up.
- If "Tag" is set to "On" (see pages 48 and 49), ID3 tag information will appear on the display if the disc has an ID3 tag. The album name/performer with disc) indicator appear on the display instead of the folder name; while track title with track) indicator appear instead of the track name.
Adjusting the sound
You can set the speaker output balance, subwoofer output level, and input level of each source.
- There is a time limit in doing the following procedure. If the setting is canceled before you finish, start from step 1 again.
1 Select the item you want to adjust.

The next-step-operation buttons start flashing. Each time you press the button, the adjustable items change as follows:
![graph TD A["iEQ"] --> B["Fad/Bal"] B --> C["Sub Out"] C --> D["Vol Adj"] D --> E["Theme"] E --> F["Canceled"] F --> A style A fill:#f9f,stroke:#333 style B fill:#ccf,stroke:#333 style C fill:#cfc,stroke:#333 style D fill:#fcc,stroke:#333 style E fill:#cff,stroke:#333 style F fill:#ffc,stroke:#333 st…](/content/2026/06/1254897/images/57fae1c3d10a38cf4d99c596be3b4ac3bb45c7bef56a7f477c3983f16c0aa865.jpg)
- For iEQ (sound mode) settings, see pages 33 – 35.
- For THEME (display theme) settings, see page 36.
| Indication To do: Range | ||
| Fad Adjust the front R06 (Rear only)and rear speaker |balance. F06 (Front only) | ||
| Bal Adjust the left L06 (Left only)and right speaker |balance. R06 (Right only) | ||
| Sub Out Adjust the 00 (min.)subwoofer output|12 (max.)level and cutofffrequency level. | ||
| Vol Adj | Adjust and storethe input levelof each source. | -12 (min.)|+12 (max.) |
2 Make adjustments.
• To adjust fader and balance—Fad, Bal: You can make these two adjustments at the same time. - If you are using a two-speaker system, set the fader level to "00."

- Press ▲ (up) or ▼ (down) to adjust the fader.
- Press ▶▶| ∧ or ◀◀◀ √ to adjust the balance.

- To adjust subwoofer output—Sub Out: This takes effect only when a subwoofer is connected.

To increase the level
To decrease the level

You can also set an appropriate cutoff frequency level according to the subwoofer connected.
- Press ▶▶▶ ▲ or ◀◀◀ ▼ to select "Low," "Mid," or "High."
Low: Frequencies higher than 50 Hz are cut off to the subwoofer.
Mid: Frequencies higher than 80 Hz are cut off to the subwoofer.
High: Frequencies higher than 115 Hz are cut off to the subwoofer.
• To adjust the input level of each source —Vol Adj:
You can separately store this setting for each source except FM. Before making an adjustment, select an appropriate source for which you want to make an adjustment.
Once you have adjusted it, it is memorized, and you will not need to adjust the volume level each time you change the source.
Adjust the input level to match it to the FM sound level.
- You cannot make an adjustment if the source is FM. "FIX" will appear.

To increase the level
To decrease the level

Selecting preset sound modes (iEQ: intelligent equalizer)
You can select a preset sound mode (iEQ: intelligent equalizer) suitable to the music genre.
- There is a time limit in doing the following procedure. If the setting is canceled before you finish, start from step 1 again.
Available sound modes:
FLAT (No sound mode is applied)
H.ROCK (Hard Rock)
R & B (Rhythm and Blues)
POP (Popular music)
JAZZ (Jazz music)
DANCE (Dance music)
Country (Country music)
REGGAE (Reggae)
CLASSIC (Classical music)
USER 1, USER 2, USER 3
1 Press SEL (select) once.

The last selected sound mode is called up.
The next-step-operation buttons start flashing.

Ex.: If you have selected "Flat" previously
Each time you press the button, the adjustable items change as follows:
![graph TD A["iEQ"] --> B["Fad/Bal"] B --> C["Sub Out"] C --> D["Vol Adj"] D --> E["Theme"] E --> F["Canceled"] F --> A style A fill:#ccc style B fill:#ccc style C fill:#ccc style D fill:#ccc style E fill:#ccc style F fill:#ccc subgraph Cancelled G["iEQ"] H["SEL"] I["SEL"] J["Theme"] K["Vol Adj"] end](/content/2026/06/1254897/images/bd401a534e5370995954dc6b3e0631fe8cc6942f821eb3314917f0b91bbe4bae.jpg)
- For SEL (basic sound) settings, see pages 32 – 33.
- For THEME (display theme) settings, see page 36.
2 Press the number button to select the sound mode you want.
- This unit has two sound mode selection screens. To move to the other screen, press ▲ (up) or ▼ (down).


To cancel the sound mode, select "FLAT" in step 2.
Notes:
- You can adjust the preset sound modes temporarily. However, your temporary adjustments will be reset when you select another sound mode. - For details about the preset settings of each sound mode, see table below.
To exit from the sound mode selection screen, press SEL (select) repeatedly or wait for about 5 seconds.
Sound modes (preset frequency level settings)
The list below shows the preset frequency level settings for each sound mode.
Sound Preset equalizing values
Storing your own sound modes
You can adjust the sound modes to your preference and store your own adjustments in memory (USER 1, USER 2, and USER 3).
- There is a time limit in doing the following procedure. If the setting is canceled before you finish, start from step 1 again.
1 Press SEL (select) once.

The last selected sound mode is called up. The next-step-operation buttons start flashing.

Ex.: If you have selected "Country" previously
2 Select the sound mode you want to adjust.

- This unit has two sound mode selection screens. To move to the other screen, press ▲ (up) or ▼ (down).
3 Enter the sound adjustment mode.

The following sound mode adjustment screen appears on the display.

4 Make adjustments as you like.

1) Press ▶▶| ∧ or ◀◀◀ ∨ to select the frequency band—60Hz, 150Hz, 400Hz, 1kHz, 2.4kHz, 6kHz, 12kHz. 2) Press ▲ (up) or ▼ (down) to adjust the level of the selected band within the range of -05 to +05. 3) Repeat steps 1) and 2) to adjust the other frequency bands.
5 Store the adjustment you made.

The confirmation message appears—whether you want to store the adjustment.

If you want to cancel the adjustments, press D DISP.
6 Select one of the user sound modes (USER 1, USER 2, or USER 3) you want to store into.


Ex.: When you select "User 1"
Selecting the display theme
You can select the theme of the display during playback.
- There is a time limit in doing the following procedure. If the setting is canceled before you finish, start from step 1 again.
1 Select "THEME".

Each time you press the button, the adjustable items change as follows:
![graph TD A["iEQ"] --> B["Fad/Bal"] B --> C["Sub Out"] C --> D["Vol Adj"] D --> E["Theme"] E --> F["Canceled"] style A fill:#f9f,stroke:#333 style B fill:#ccf,stroke:#333 style C fill:#cfc,stroke:#333 style D fill:#fcc,stroke:#333 style E fill:#cff,stroke:#333 style F fill:#ffc,stroke:#333](/content/2026/06/1254897/images/048db35cc0f3de378c90da6267ae15686695fd7e4319f38f23e09175cba9b591.jpg)
The last selected theme appears on the display.
The next-step-operation button starts flashing.
- For SEL (basic sound) settings, see pages 32 – 33.
- For iEQ (sound mode) settings, see pages 33 – 35.
2 Select the display theme you want.

As you turn the control dial, the themes change as follows:
![graph TD A["View1"] --> B["View2"] B --> C["Off"] C --> D["Shake"] D --> E["Meter"] E --> C style A fill:#f9f,stroke:#333 style B fill:#f9f,stroke:#333 style C fill:#ccf,stroke:#333 style D fill:#cfc,stroke:#333 style E fill:#fcc,stroke:#333](/content/2026/06/1254897/images/4c5c1011ec940f850fdd644cf5d5455306756eab8822792c8ca7b632bf440ad0.jpg)
Note:
View 1 and View 2 have positive pattern display and negative pattern display (see right column). Either positive or negative pattern display is automatically selected depending on the “LCD Type” setting (see page 48).
View 1:
A scenery display appears.
- Positive pattern display:

- Negative pattern display:

View 2:
A scenery display appears.
- Positive pattern display:

- Negative pattern display:

Meter:
The left and right audio level meters appear.
- If the small animation display is selected, only one audio level meter can be shown.

Shake:
The speaker on the display vibrates as input audio level changes.

Off:
Cancels the display theme.
With the supplied Image Converter CD-ROM, you can edit your own favorite pictures and use them as the opening screen, ending screen, and graphic screen while playing a source.
Loved Ones
What is Image Converter?
Image Converter is JVC's original software used to create customized images for display on your JVC Car Audio.
Here is a basic procedure for making a CD-R that includes still images (pictures) and animations (movies) using Image Converter.
In this manual, we only explain how to export the files (still images and animations) to the built-in memory of this unit—step 5 below.
- For the other processes (from steps 1 to 4 below), refer to Image Converter's Operation Guide (PDF files included in the "Manual" folder of the supplied CD-ROM).
![graph LR A["Import of images"] --> B["Image retouching and editing"] B --> C["Writing onto a CD-R"] C --> D["Play back on your car audio"] D --> E["CD-R"] E --> F["KD-LH401"] G["WEB"] --> H["Convert"] I["Digital Camera\nDigital Video Camera"] --> H J["CD-ROM"] --> H H --> K["Computer with keyboard"]…](/content/2026/06/1254897/images/a16915c1184a0a8aafd7675ec1296f0f456dadfd89fba7339c577fdcd67a63b0.jpg)
1 Install / Start the program
Install Image Converter on your PC.
2 Import the images
Import the source images from the Image Converter CD-ROM or from other equipment like a digital camera or a digital video camera.
3 Retouch and edit the images
Retouch the images like trimming or adjusting color, editing the animation effect, and adding the texts.
4 Write your images onto a CD-R
Write the animations or the still images you made with Image Converter using your CD-R writing software.
You have to write the images you made onto a CD-R to enjoy the images on your Car Audio.
• To write data onto a CD-R, refer also to the instruction of your CD-R writing software.
5 Enjoy the animations or the still images you made on your Car Audio
Export the images to your JVC Car Audio from the CD-R you made.
Downloading images and animations
Before starting the following procedure, prepare a CD-R including still images (pictures) and animations (movies).
- The supplied Image Converter CD-ROM includes sample images and animations, so you can use this disc for your first trial.
IMPORTANT:
- Still images (pictures) should have , and animations (movies) should have as their extension code in their file names.
- Downloading a file can be done only while selecting "CD" as the source; on the other hand, deleting a file can be done while selecting any source.
- Before you download or erase the files, observe the following:
- Do not download a file while driving.
- Do not turn off the ignition key of the car while downloading or erasing a file.*
- Do not detach the control panel while downloading or erasing a file.*
* If you do it, the file download and erasure will not be done correctly. In this case, perform the same procedure again.
- If you have already downloaded an animation for “Opening,” “Ending,” or “Movie,” downloading a new animation deletes the previously stored animation.
- It takes a long time for the unit to download an animation.
- About 6 to 7 seconds for a still image (one frame).
- About 3 to 4 minutes for an animation of 30 frames.
- About 10 minutes for an animation of 90 frames.
- While a station (or service for the DAB tuner) is being tuned in by one of the Standby Reception modes such as TA or PTY, you cannot download or delete a file. On the other hand, while you are downloading or deleting a file, Standby Reception mode will not work to have this unit tune in a station (or service). It only works after download or deletion is over.
1 Open the control panel.

2 Insert a CD-R with the files (images and animations you made with Image Converter) into the loading slot.

The unit draws the disc, the control panel goes back to the previous position (see page 54).
- If the disc includes playable audio files such as MP3 tracks, playback starts automatically.
3 Press M MODE after the disc is detected.

"Mode" appears on the display. The next-step-operation buttons start flashing.

4 Press number button 6 to show the download selection screen.


5 Select (highlight) one of the listed items for which you want to download a file.

- Opening: Opening screen To download an animation to be shown after the unit is turned on. (You can store only one animation consisting of a maximum of 30 frames.)
- Ending: Ending screen To download an animation to be shown before the unit is turned off. (You can store only one animation consisting of a maximum of 30 frames.)
- Picture: Graphic screen* To download a still image to be shown if no operation is done for about 20 seconds. (You can store 90 still images—one frame each.)
- Movie: Graphic screen* To download an animation to be shown if no operation is done for about 20 seconds. (You can store only one animation consisting of a maximum of 90 frames.) * Graphic screen will appear only if the "Graphics" setting is set to one of the following—"UserMovie," "UserSlide," or "UserPict." (see page 48).
If you want to cancel the procedure, press number button 5, the download selection screen goes off.
6 Show the name list of the folder included in the inserted CD-R.

"File Check...." appears for a while, then the folder list* appears.

The currently selected folder will be highlighted on the display.
* You can assign your own names when editing a CD-R.
Notes:
- On this list, the folders including the target files— files for "Picture" and files for the others—are shown.
- The display can show only six names at a time. You can show the other names on the next lists by pressing ▲ (up) or ▼ (down).
- If a disc inserted does not include any and files, beeps sound and you cannot go to the next step.
If you want to cancel the procedure, press D DISP.
7 Select (highlight) a folder in which a file you want is included.

8 Show the name list of the files included in the selected folder.

Each time you press the button, the lists on the display change as follows:
![graph LR A["Folder name list"] <--> B["File name list"]](/content/2026/06/1254897/images/c5643498944c1a457e5aa8727bef00fc3e600e249c5b2269f4fd0caea261a15b.jpg)

Ex.: When you have selected "Picture" in step 5
Note:
The display can show only six names at a time. You can show the other names on the next lists by pressing ▲ (up) or ▼ (down).
9 Select (highlight) a file you want to download.
![graph TD A["1"] --> B["2"] B --> C["3"] C --> D["4"] D --> E["5"] E --> F["6"] style C stroke:#000,stroke-width:2px Note: Arrow pointing downward from C to E](/content/2026/06/1254897/images/0f401386764fd7311be3545afa0f4e93d3928c9cba8923e7147f97ca386337dc.jpg)
The file name appears, and the unit will ask you "Download OK?"
10 If it is OK, press number button 1 to start downloading.

Downloading starts, and "Downloading..." appears on the display. If it is over, the file name list appears again.
If it is not OK, press number button 5, the file selection screen appears again. Repeat from step 8 again.
11 Repeat steps 8 to 10 if you are downloading files for "Picture" and want to store more files.
12 Finish the download procedure.

To download a file for another item listed on the download selection screen, repeat from step 3 again.
Notes:
- If you try to store the 91st image for picture screen, "Picture Full" appears and you cannot start downloading. In this case, delete unwanted files before downloading.
- If the total frame number of the downloaded animations exceeds the following number, the exceeding frames are ignored.
- For opening and ending screens: 30 frames
- For movie screen: 90 frames
Deleting unwanted files
- When "BACK" is shown on the display above number button 5, you can go back to the previous screen by pressing number button 5.
To delete all the stored files at a time
1 Press M MODE while playing any source.

"Mode" appears on the display. The next-step-operation buttons start flashing.
2 Press number button 6 to show the download selection screen.


3 Press ▲ (up) or ▼ (down) to select (highlight) all the listed items.


4 Press number button 4.

The unit asks you "All File Delete OK?"
5 Press number button 4 again.

"Now Deleting..." appears while erasing the files. When erasure is over, the download selection screen appears again.
6 Press number button 5 to resume the source indication screen.

To delete the files stored for “Opening,” “Ending,” “Picture (all stored images at a time),” and “Movie”
1 Press M MODE while playing any source.

"Mode" appears on the display. The next-step-operation buttons start flashing.
2 Press number button 6 to show the download selection screen.

3 Press ▲ (up) or ▼ (down) to select (highlight) one of the listed items.


Appears when "Picture" is selected (highlighted)
4 To delete the file stored in "Opening," "Ending," and "Movie," press number button 3.

The file name of the previously stored animation appears, and the unit asks you "Delete OK?"
To delete all the files stored in "Picture" at a time, press number button 4.

The unit asks you "All Picture Delete OK?"
5 To delete the file stored in "Opening,"
"Ending," and "Movie," press number button 3 again.

To delete all the files stored in "Picture" at a time, press number button 4 again.

"Now Deleting..." appears while erasing all the stored files. When erasure is over, the download selection screen appears again.
6 Press number button 5 to resume the source indication screen.

To delete the stored files for "Picture" (one by one)
1 Press M MODE while playing any source.

"Mode" appears on the display. The next-step-operation buttons start flashing.
2 Press number button 6 to show the download selection screen.

3 Press ▲ (up) or ▼ (down) to select (highlight) "Picture."


4 Press number button 3.

The unit shows the name list of the stored files.
Note:
The display can show only six names at a time. You can show the other names by pressing ▲ (up) or
▼ (down) repeatedly.
5 Press the number buttons for the file you want to delete.

Selected file name appears, and the unit asks you "Delete OK?"
6 Press number button 3 to start erasure.

"Now Deleting..." appears while erasing the selected file. When erasure is over, the name list of the stored file appears again.
7 To delete more files, repeat from steps 5 and 6.
8 Press D DISP to resume the source indication screen.

Activating the downloaded images and animations
Activating the animations stored for opening and ending screens
After the unit turns on or before the unit turns off, you can see preset animations on the display. These are called opening screen and ending screen. You can use your own edited animations for these opening and ending screens.
- Before performing the following procedure, make sure that "KeyIn CFM" is set to "On"; otherwise, the animations may not be shown. (See page 48.)
- If no animation is stored in "Opening" and "Ending," "Opening" and "Ending" cannot be selected as a PSM item.
1 Press and hold SEL (select) for more than 2 seconds so that one of the PSM items appears on the display. (PSM: see pages 46 and 47.)

2 Press number button 1 to select "MOVIE"—Movie category of the PSM settings.
The "Graphics" setting screen appears on the display.

3 Select "Opening" (opening screen setting) or "Ending" (ending screen setting).


Ex.: When you select "Opening"
4 Select "User."


- Default: Factory-preset animation is used.
- User: Your own edited animation is used.
5 Finish the setting.

Activating the graphic screen using either picture or movie
Using this setting, you can change the graphic displays. These graphic screens appear if no operation is done for about 20 seconds.
- If no image is stored in "Picture," or no animation in "Movie," "UserPict.," "UserMovie" and "UserSlide" cannot be selected for the "Graphics" setting.
1 Press and hold SEL (select) for more than 2 seconds so that one of the PSM items appears on the display. (PSM: see pages 46 and 47.)

2 Press number button 1 to select "MOVIE"—Movie category of the PSM settings.
The "Graphics" setting screen appears on the display.

3 Select "UserMovie," "UserSlide," or "UserPict."


Ex.: When you select "UserPict."
- UserMovie: Your edited animation stored in "Movie" is activated as your graphic screen.
- UserSlide: Your edited still images stored in "Picture" are activated and shown in sequence as your graphic screen.
- UserPict.: One of your edited still image stored in "Picture" is activated as your graphic screen. Select one of the stored images (see the next column).
4 Finish the setting.

To cancel all graphic displays, select "Off" in step 3.
Note:
For the "Graphics" setting, you can also select "Int Demo," "All Demo," and "ImageLink." - See pages 8 and 48 for "Int Demo" and "All Demo." - See pages 25 and 48 for "ImageLink."
Selecting a still image for graphic display—User Picture
You cannot select "UserPict." as a PSM item in the following cases:
- If no image is stored in "Picture," or
- "UserPict." is not selected for the "Graphics" setting (see the left column).
1 Press and hold SEL (select) for more than 2 seconds so that one of the PSM items appears on the display. (PSM: see pages 46 and 47.)

2 Press number button 1 to select "MOVIE"—Movie category of the PSM settings.
The "Graphics" setting screen appears on the display.

3 Select "UserPict."

File name of the current selected image also appears.

4 Select a file you want.


5 Finish the setting.

Changing the general settings (PSM)
You can change the items listed on the table on pages 46 and 47 by using the PSM (Preferred Setting Mode) control.
- The PSM items are grouped into six categories—MOVIE, CLOCK, DISP (display), TUNER, AUDIO, and COLOR.
Basic Procedure
Ex.: To change "Contrast"
1 Press and hold SEL (select) for more than 2 seconds so that one of the PSM items appears on the display. (See pages 46 and 47.)

The next-step-operation buttons start flashing.

Ex.: If you have selected "Graphics" previously
2 Press number button (in this example, 3) to select one of the PSM categories.
The first-listed item in the selected category appears.

3 Select the PSM item you want to adjust.


- By pressing ▶▶▶ ▲ or ▶◀◀ ▼ repeatedly, you can also move to another category.
4 Adjust the PSM item selected.


5 Repeat steps 2 to 4 to adjust the other PSM items if necessary.
6 Finish the setting.

Preferred Setting Mode (PSM) items
The PSM items are grouped into six categories—MOVIE, CLOCK, DISP (display), TUNER, AUDIO, and COLOR.
| Indications | Selectable values/items | Factory-preset See settings | see page | ||
| MOVIE | Graphics Movie demonstration | See page 48 for details | Int Demo | 8, 25, 48 | |
| KeyIn CFM Key-in confirmation | On | Off | On | 48 | |
| Opening*1 Opening animation | Default | User | Default | 43 | |
| Ending*1 Ending animation | Default | User | Default | 43 | |
| UserPict.*2 User Picture | From the stored files | First stored | 44 | ||
| CLOCK | Clock Hr Hour adjustment | 0 - 23 (1 - 12) | 0 (0:00) | 9 | |
| Clock Min Minute adjustment | 00 - 59 | 00 (0:00) 9 | |||
| 24H/12H 24 hours or 12 hours | 12Hours | 24Hours | 24Hours | 9 | |
| Auto Adj Automatic clock adjustment | Off | On | On 21 | ||
| DISP (display) | Scroll Scroll mode | Once Auto ↔↑ Off ↔↑ | Once | 48 | |
| Dimmer Dimmer mode | Auto Off ↔↓ Time Set ↔ On | Auto | 50 | ||
| From-To*3 Dimmer time setting | Any time - Any time | 18 - 7 | 50 | ||
| Contrast Contrast | 1 - 10 | 5 | 48 | ||
| LCD Type Display type | Positive ↔ Negative↑ Auto ↔ | Auto | 48 | ||
| Font Type Font type | 1 | 2 | 1 | 48 | |
| Tag Tag display | Off | On | On | 48, 49 | |
*1 Displayed only after a downloadable file is stored in memory. *2 Displayed only after a downloadable file is stored in memory and while selecting "UserPict." for "Graphics." *3 Displayed only when "Dimmer" is set to "Time Set."
| Indications Selectable values/items | Factory-preset See settings page | ||||
| TUNER | PTY Stnby PTY Standby | 29 programme types (see page 22) | News | 18 | |
| AF-Regn'l Alternate frequency/Regionalization reception | AF ↔ AF Reg↑→ Off*4 ← | AF | 16, 17 | ||
| TA Volume Traffic announcement volume | Volume 0 – Volume 30 or 505 | Volume 20 | 21 | ||
| P-Search Programme search | Off | On | Off | 20 | |
| IF Filter Intermediate frequency filter | Wide | Auto | Auto | 49 | |
| DAB AF*6 Alternative frequency search | Off | On | On | 69 | |
| Announce*6 Announcement standby | 9 announcement types (see page 68) | Travel | 68 | ||
| AUDIO | Beep Key-touch tone | Off | On | On | 49 |
| Ext Input*7 External component | Changer | Line In | Changer | 49 | |
| Telephone Telephone Muting | Off ↔ Muting1↑→ Muting2 ← | Off | 49 | ||
| Amp.Gain Amplifier gain control | HighPower | LowPower | HighPower | 49 | |
| COLOR | All SRC Selected source | See page 51 for details | Every | 51 | |
| User User color selection | Day | Night | Day 52 | ||
| R Red | 00 – 11 | Day: 07/Night: 05 | 52 | ||
| G Green | 00 – 11 | Day: 07/Night: 05 | 52 | ||
| B Blue | 00 – 11 | Day: 07/Night: 05 | 52 | ||
| SlotLight Slot lights | On | Off | On | 49 | |
*4 Displayed only when "DAB AF" is set to "Off."
*5 Depending on the amplifier gain control setting. (See page 49 for details.)
*6 Displayed only when DAB tuner is connected.
*7 Not displayed when the current source is "CD-CH" or "LINE IN."
To show the graphics on the display — Graphics
You can change the graphics shown on the display. These graphics appear if no operation is done for about 20 seconds (except for "ImageLink").
- Int Demo: Display demonstration (animation) and playback source indication appears alternately (see page 8).
- All Demo: Display demonstration (animation) appears (see page 8).
- UserMovie: Your edited animation appears (see pages 43 and 44).
- UserSlide: Your edited still images appears in sequence (see pages 43 and 44).
- UserPict.: One of your edited still image appears (see pages 43 and 44).
- ImageLink: To show a still image while playing back an MP3/WMA track (see page 25).
- Off: Cancels all graphic display above.
Note:
You can select "UserMovie," "UserSlide," and "UserPict." only after downloading the appropriate files in memory. (See pages 43.)
To turn the source animation on the display on or off — KeyIn CFM
When changing the source, the display shows the source animation. You can turn on or off the source animation on the display.
- On: Turns on the source animation.
- Off: Cancels the source animation.
To select the scroll mode for disc information and the DAB text—Scroll
You can select the scroll mode for disc information and for the DAB radio text (DLS: Dynamic Label Segment).
- Once: While showing the disc information: scrolls the disc information only once. While showing the DAB text: scrolls the detailed DAB text. Auto: While showing the disc information: repeats the scroll (in 5-second intervals).
While showing the DAB text: scrolls the detailed DAB text.
Off: While showing the disc information: cancels scroll mode. While showing the DAB text: shows only headline if any.
To adjust the display contrast level —Contrast
Adjust the display contrast (1 - 10) to make the display indications clear and legible.
To select the display illumination pattern —LCD Type
You can select the display illumination patterns according to your preference.
Auto: Positive pattern will be selected during the day time (depending on the “Dimmer” setting); on the other hand, negative pattern will be used during the night time (depending on the “Dimmer” setting).
- Positive: Positive (normal) pattern of the display.
- Negative: Negative pattern of the display.
To select the font on the display—Font Type
You can change the font types used on the display. Select either "1" or "2" according to your preference.
To turn the tag display on or off—Tag
An MP3/WMA track can contain track information called "ID3 Tag" where its album name, performer, track title, etc. are recorded. There are two versions: ID3v1 (ID3 Tag version 1) and ID3v2 (ID3 Tag version 2). If both ID3v1 and ID3v2 are recorded on a disc, ID3v2 information will be shown.
- On: Turns on the ID3 tag display while playing MP3/WMA tracks.
- If an MP3/WMA track does not have ID3 tags, folder name and track name appear.
Note:
If you change the setting from "Off" to "On" while playing an MP3/WMA track, the tag display will be activated when the next track starts playing.
- Off: Turns off the ID3 tag display while playing MP3/WMA tracks. (Only the folder name and track name can be shown.)
To change the FM tuner selectivity —IF Filter
In some areas, adjacent stations may interfere with each other. If this interference occurs, noise may be heard.
- Auto: When this type of interference occurs, this unit automatically increases the tuner selectivity so that interference noise will be reduced. (But the stereo effect will also be lost.)
- Wide: Subject to the interference from adjacent stations, but sound quality will not be degraded and the stereo effect will not be lost.
To turn the key-touch tone on or off—Beep
You can deactivate the key-touch tone if you do not want it to beep each time you press a button.
- On: Activates the key-touch tone.
- Off: Deactivates the key-touch tone.
To select the external component to use —Ext Input
You can connect the external component to the CD changer jack on the rear using the Line Input Adapter KS-U57 (not supplied).
To use the external component as the playback source through this unit, you need to select which component—CD changer or external component—to use.
- Changer: To use the CD changer. • Line In: To use the external component other than CD changer.
Note:
For connecting the Line Input Adapter KS-U57 and the external component, refer to the Installation/Connection Manual (separate volume).
To select the telephone muting—Telephone
This mode is used when a cellular phone system is connected. Depending on the phone system used, select either "Muting1" or "Muting2," whichever mutes the sounds from this unit.
- Muting1: Selects this if this setting can mute the sounds while using the cellular phone.
- Muting2: Selects this if this setting can mute the sounds while using the cellular phone.
- Off: Cancels the telephone muting.
To select the amplifier gain control —Amp.Gain
You can change the maximum volume level of this unit. When the maximum power of the speakers is less than 50 W, select "LowPower" to prevent them from being damaged.
- LowPower: You can adjust the volume level from "Volume 00" to "Volume 30."
Note:
If you change the setting from "HighPower" to "LowPower" while listening at a volume level more than 30, the unit automatically changes the volume level to "Volume 30."
- HighPower: You can adjust the volume level from "Volume 00" to "Volume 50."
To turn the slot light on or off—SlotLight
You can turn off the slot light if you do not want the illumination each time you insert/eject the disc or when you change the control panel angle.
• On: Activates the illumination. - Off: Deactivates the illumination.
Selecting the dimmer mode
You can dim the display at night automatically or as you set the timer.
Note:
Auto Dimmer equipped for this unit may not work correctly on some vehicles, particularly on those having a control dial for dimming. In this case, select any other than “Auto.”
1 Press and hold SEL (select) for more than 2 seconds so that one of the PSM items appears on the display. (See pages 46 and 47.)

The next-step-operation buttons start flashing.
2 Press number button 3 to select "DISP"—Display category of the PSM settings.

3 Press ▶▶| ∧ or ◀◀▽ to select "Dimmer."


4 Set the dimmer mode as you like.


• Auto: Activates Auto Dimmer. When you turn on the car head lights, the display automatically dims. - Off: Cancels Auto Dimmer. - On: Always dims the display. - Time Set: Used to set the timer for the dimmer mode.
Note:
Selecting "Auto" or "Time Set" may change the display pattern to the "Negative" or "Positive" pattern if "LCD Type" is set to "Auto."
- If you select "Time Set," go to the following steps to set the timer.
- If you select any other than "Time Set," go to step 7 to finish the setting.
5 Select "From-To" to set the timer for the dimmer mode.


6 Set the timer.
1 Turn the control dial to select the start time. 2 Press ▶▶ once. 3 Turn the control dial to select the end time.
7 Finish the setting.

Changing the display color
You can set the display color using the PSM control. You can select your favorite color for each source (or for all sources).
You can also create your own colors, and set them as the display color.
Setting the desired color for each source
Once you have set the color for each source (or for all sources), the display illuminates in the selected color when the source is selected.
1 Press and hold SEL (select) for more than 2 seconds so that one of the PSM items appears on the display. (See pages 46 and 47.)

The next-step-operation buttons start flashing.
2 Press number button 6 to select "COLOR"—Color category of the PSM settings.

3 Select the source that you want to set the display color for.

![graph LR A["All SRC*1"] <--> B["CD"] B <--> C["Changer (or Line In)"] D["DAB*2"] <--> E["AM"] E <--> F["FM"]](/content/2026/06/1254897/images/ceb1a55c2c73a7f6bacad0443b6bb9c8dba55cef8338f5f5fd6dd0aaa27c9ef6.jpg)
*1 When you select "All SRC," you can use the same color for all the sources. *2 Displayed only when DAB tuner is connected.
4 Select the display color.

As you turn the control dial, the colors change as follows:
Every 1 □ Aqua □ Sky □ Sea □ Leaves □ Grass □ Apple □ Rose □ Amber □ Honey □ Violet □ Grape □ Pale □ User 2 □ (back to the beginning)
* When you select "Every," the color changes every 2 seconds (changing to every color listed above except "User"). *2 When you select "User," the user-edited colors—"Day" and "Night" will be applied. (See page 52.)
5 Repeat steps 3 and 4 to select the color for each source (except when selecting "All SRC" in step 3).
6 Finish the setting.

Creating your own color—User
You can create your own colors—"Day" and "Night," and select them as the display color for any desired source.
- Day: Can be used as your user color during the day time*.
- Night: Can be used as your user color during the night time*. * Depends on the "Dimmer" setting. (See page 50.)
1 Press and hold SEL (select) for more than 2 seconds so that one of the PSM items appears on the display. (See pages 46 and 47.)

The next-step-operation buttons start flashing.
2 Press number button 6 to select "COLOR"—Color category of the PSM settings.

3 Select "User" as a color.

The user color will be applied to the currently selected source (the one shown on the upper portion of the display. In this example "All SRC").
To select which source to apply your user color to, select the target source first by pressing ▲ (up) or ▼ (down), before selecting "User" in this step.
4 Select the user color adjustment screen.

One of the user color adjustment screens appears.
"User Day" or "User Night" is shown on the left side of the display.

5 Select "Day" or "Night" which you want to make an adjustment for.


6 Adjust the selected user color.
1) Press ▶▶| ∧ or ◀◀◀ ▽ to select one of three primary colors—“R” (red), “G” (green), and “B” (blue).

2) Press ▲ (up) or ▼ (down) to adjust the selected primary color. You can adjust within the range of 00 to 11. 3) Repeat steps 1) and 2) to adjust the other primary colors.
7 Repeat steps 5 and 6 to adjust the other user colors—"Day" or "Night."
8 Finish the setting.

Assigning names to the sources
You can assign names to CDs (both in this unit and in the CD changer) and the external component (LINE IN).
After assigning a name, it will appear on the display when you select the source.
| Sources | Maximum number of characters |
| CDs/CD-CH* Up to 32 | characters (up to 40 discs) |
| External component Up to 8 characters (LINE IN) |
* You cannot assign a name to a CD Text or an MP3/WMA disc.
1 Select a source you want to assign a name to.

When you select a source, the power automatically comes on.
2 While pressing D DISP, press and hold SEL (select) for more than 2 seconds.
The next-step-operation buttons start flashing.


Ex.: When you select CD as the source
3 Select the character set you want while the first character position is flashing.

Each time you press the button, the character set changes as follows:
![graph TD A["Â (A - Z: capital)"] --> B["â (a - z: small)"] C["â (Accented letters: lower case)"] --> D["â (Accented letters: upper case)"] B --> E["∅ (0 - 9: numbers, and symbols)"] D --> E](/content/2026/06/1254897/images/afb023f4fa89420d47d4ec4bea0dacfbac7d4ffe45d662fcb10a7aeb3829b906.jpg)
4 Select a character.

- About the available characters, see page 73.
5 Move the cursor to the next (or previous) character position.

6 Repeat steps 3 to 5 until you finish entering the name.
7 Finish the procedure while the last selected character is flashing.

To erase the entered characters
To erase all the characters at a time, press and hold D DISP for more than 1 second as described in the procedure above.
Notes:
- When you try to assign a name to the 41st disc, "Name Full" appears and you cannot enter the text entry mode. In this case, delete unwanted names before assignment.
- When the CD changer is connected, you can assign names to CDs in the CD changer. These names can also be shown on the display if you insert the CDs in this unit.
Changing the control panel angle
You can change the angle of the control panel to four positions.
1 Press and hold (angle) until the angle adjustment screen appears.

Time countdown indicator Angle Adj. 1

There is a time limit in doing the following procedure. While time countdown indicator appears, do the following procedure.
2 Press (angle) repeatedly to adjust the angle to the position you want.

Notes:
- If you turn the power off, the control panel automatically returns to the closed position. Next time you turn on the power, the control panel moves to its previous position.
- Do not press (angle) while downloading an animation or a picture; otherwise downloading will fail.
- When the unit reads disc information, you cannot change the control panel angle.
CAUTION:
NEVER insert your finger between the control panel and the unit, as it may get caught or hurt.

The control panel angle changes as follows:
![graph TD A["Adj. 1"] --> B["→"] B --> C["Adj. 2"] C --> D["↓"] D --> E["Adj. 3"] E --> F["←"] F --> G["Adj. 4"]](/content/2026/06/1254897/images/5ead01ffd40abec7c7c91dfc6c2e0da4186ade5d0edf7a0c20e90e48585c8f55.jpg)
Detaching the control panel
You can detach the control panel when leaving the car.
When detaching or attaching the control panel, be careful not to damage the connectors on the back of the control panel and on the panel holder.
Detaching the control panel
Before detaching the control panel, be sure to turn off the power.
1. Unlock the control panel.

2. Lift and pull the control panel out of the unit.

3. Put the detached control panel into the provided case.

Attaching the control panel
1. Insert the left side of the control panel into the groove on the panel holder.

2. Press the right side of the control panel to fix it to the panel holder.

Note on cleaning the connectors:
If you frequently detach the control panel, the connectors will deteriorate.
To minimize this possibility, periodically wipe the connectors with a cotton swab or cloth moistened with alcohol, being careful not to damage the connectors.

Connectors

We recommend that you use the JVC MP3-compatible CD changer with your unit.
By using this CD changer, you can play back your original CD-Rs (Recordable) and CD-RWs (Rewritable) recorded either in audio CD format or in MP3 format.
- You can also connect other CH-X series CD changers (except CH-X99 and CH-X100). However, they are not compatible with MP3 discs, so you cannot play back MP3 discs.
- You cannot use the KD-MK series CD changers with this unit.
Before operating your CD changer:
- Refer also to the Instructions supplied with your CD changer.
- If no discs are in the magazine of the CD changer or the discs are inserted upside down, "No Disc" will flash on the display. If this happens, remove the magazine and set the discs correctly.
- If no magazine is loaded in the CD changer, "No Magazine" flashes on the display. If this happens, insert the magazine in the CD changer.
- If "Reset 01" – "Reset 08" flashes on the display, something is wrong with the connection between this unit and the CD changer. If this happens, check the connection and make sure the cords are connected firmly. Then, press the reset button of the CD changer.
Note:
You cannot control and play any WMA disc on the CD changer.
Playing discs
Select the CD changer (CD-CH).

Each time you press the button, the source changes as described on page 7.
When you select a source, the power automatically comes on.
- When the current disc is an MP3 disc:
Playback starts from the first folder of the current disc once file check is completed.
![graph TD A["Selected disc number"] --> B["CD-CH 01"] B --> C["File Check FLAT"] C --> D["CD-CH 01 DISC"] D --> E["MP3 indicator MP3"] style A fill:#f9f,stroke:#333 style B fill:#ccf,stroke:#333 style C fill:#cfc,stroke:#333 style D fill:#fcc,stroke:#333 style E fill:#cff,stroke:#333](/content/2026/06/1254897/images/1c46a6891fe633bed9eced1f6ff2678c5b9f4ed3bdb174def0e7741cf4d72979.jpg)
- When the current disc is a CD:
Playback starts from the first track of the current disc.
Selected disc number

Current track and elapsed playing time
Notes:
- When you press CD/CD-CH, the power automatically comes on. You do not have to press ⏻/I ATT to turn on the power.
- If you change the source, CD changer play also stops. Next time you select "CD-CH" as the source, disc play starts from where playback has been stopped previously.
To change the display pattern
By pressing D DISP, you can change the information shown on the display.

Each time you press the button, the display patterns change.
- For details, see page 31.
To go to a particular disc directly
Press the number button corresponding to the disc number to start its playback (while the CD changer is playing).

- To select a disc number from 01 - 06: Press 1 (7) - 6 (12) briefly.
- To select a disc number from 07 – 12: Press and hold 1 (7) – 6 (12) for more than one second.
To fast-forward or reverse the track

Press and hold ▶▶▶1, ▲ during play, to fast-forward the track.
Press and hold ◀◀◀, during play, to reverse the track.
Note:
During this operation on an MP3 disc, you can only hear intermittent sounds. (The elapsed playing time also changes intermittently on the display.)
To go to the next or previous tracks

Press ▶▶▶ ▲ briefly during play, to skip ahead to the beginning of the next track. Each time you press the button consecutively, the beginning of the next tracks is located and played back.
Press ◀◀◀ Briefly during play, to skip back to the beginning of the current track.
Each time you press the button consecutively, the beginning of the previous tracks is located and played back.
This operation is only possible when using a JVC MP3-compatible CD changer (CH-X1500).
To go to a track quickly
1 Press M MODE while playing a disc.

"Mode" appears on the display. The next-step-operation buttons start flashing.

See page 38 for this function.
Ex.: When the current disc is an MP3 disc
2 Press ▲ (up) or ▼ (down) while "Mode" is still on the display.

To skip 10 tracks* forwards to the last track
To skip 10 tracks* backwards to the first track
* First time you press ▲ (up) or ▼ (down) button, the track skips to the nearest higher or lower track with a track number of multiple ten (ex. 10th, 20th, 30th).
Then each time you press the button, you can skip 10 tracks (see "How to go to the desired track quickly" on the right column).
• After the last track, the first track will be selected, and vice versa.
Note:
If the current playing disc is an MP3 disc, tracks are skipped within the same folder.
How to go to the desired track quickly
• Ex. 1: To select track number 32 while playing track number 6

• Ex. 2: To select track number 8 while playing track number 36

To skip to the next or previous folder (only for MP3 discs)

Press ▲ (up) while playing an MP3 disc to go to the next folder. Each time you press the button consecutively, the next folder is located, and the first track in the folder starts playback.
Press ▼ (down) while playing an MP3 disc to go to the previous folder.
Each time you press the button consecutively, the previous folder is located, and the first track in the folder starts playback.
Selecting a disc/folder/track using the name lists
If you forget what discs are loaded in the CD changer, you can show the disc name list and select a disc in the list shown on the display. • The display can show only six names at a time.
1 While playing a disc, press and hold ▲ (up) or ▼ (down) until a disc name list appears on the display.

Selected disc number
Note:
If a disc has a disc title (CD Text) or an assigned disc name, it will be shown on the display. However, if the disc has not been played before, its disc number will appear.
2 Press ▲ (up) or ▼ (down) to show the other disc name list, if necessary.

3 Select the number (1 - 6) for the disc you want to play.

While playing an MP3 disc, you can also show the folder name list(s) and track name list(s) on the display, then select a folder or track.
1 While playing an MP3 disc, press and hold ▲ (up) or ▼ (down) until a disc name list appears on the display.
2 Press ▶▶| ∧ or ◀◀◀ ∨ to show a folder name list of the current disc or track name list of the current folder. Each time you press the button, the lists on the display change as follows:
![graph LR A["Disc name list"] --> B["Folder name list"] B --> C["Track name list"] C --> A](/content/2026/06/1254897/images/d6d6d36a5c1a995d347ad0765c2ade473c068899b78c73bce28bb0801a7209a7.jpg)
Current folder number
Ex.: When folder name list is selected
Current track number
Ex.: When track name list is selected
Note:
The display can show only six items at a time. You can show the other names on the next lists by pressing ▲ (up) or ▼ (down).
3 Press the number button for the disc, folder, or track you want to play.
Selecting the playback modes
To play back tracks at random (Random Play)
1 Press M MODE during play.

"Mode" appears on the display. The next-step-operation buttons start flashing.
2 Press number button 3 repeatedly while "Mode" is still on the display.

Ex.: When you select "Random Disc" while playing an MP3 disc
Each time you press the button, random play mode changes as follows:
For MP3 discs:
![graph LR A["Random Folder"] --> B["Random Disc"] C["Random Off"] <--_D["Random All"] B --> C D --> C](/content/2026/06/1254897/images/b353cd0681c2911b4e2b2e4cd1dd4cb1403e0617952df2a2ac53118eaf56a0df.jpg)
For CDs:

| Mode | Active indicator | Plays at random |
| Random All tracks of the Folder* (folder random) current folder, then indicator tracks of the next lights up. folder and so on. | ||
| Random All tracks of Disc (disc random) the current (or indicator lights specified) disc. up. | ||
| Random All tracks of All (all random) all discs inserted in indicator lights the magazine. up. | ||
* "Random Folder" is only applicable for MP3 disc.
Note:
MP3 indicator also lights up if the current playing disc is an MP3 disc.
To cancel random play, select "Random Off" by pressing number button 3 repeatedly or press number button 4 in step 2.
To play back tracks repeatedly (Repeat Play)
1 Press M MODE during play.

"Mode" appears on the display. The next-step-operation buttons start flashing.
2 Press number button 2 repeatedly while "Mode" is still on the display.

Ex.: When you select "Repeat Track" while playing an MP3 disc
Each time you press the button, repeat play mode changes as follows:
For MP3 discs:
![graph LR A["Repeat Track"] --> B["Repeat Folder"] B --> C["Repeat Disc"] C --> D["Repeat Off"] D --> A](/content/2026/06/1254897/images/7cbc99ac1c79c8979d9b7dff31e3ed9fc693c0ec265bf1980e9dd061b46866c4.jpg)
For CDs:
![graph LR A["Repeat Track"] --> B["Repeat Disc"] B --> C["Repeat Off"]](/content/2026/06/1254897/images/ae642a633c292fd9a7cf51336eadddd32c403a65a807601f08531d7967fcbc9d.jpg)
| Mode | Active indicator | Plays repeatedly |
| Repeat (track the current (or Track repeat) specified) track. indicator lights up. | ||
| Repeat (folder tracks of the Folder* repeat) indicator current (or lights up. specified) folder of the current disc. | ||
| Repeat (disc A#tracks of Disc repeat) indicator the current (or lights up. specified) disc. |
* "Repeat Folder" is only applicable for MP3 disc.
Note:
MP3 indicator also lights up if the current playing disc is an MP3 disc.
To cancel repeat play, select "Repeat Off" by pressing number button 2 repeatedly or press number button 4 in step 2.
To play back only intros (Intro Scan)
1 Press M MODE during play.

"Mode" appears on the display. The next-step-operation buttons start flashing.
2 Press number button 1 repeatedly while "Mode" is still on the display.

Ex.: When you select "Intro Track" while playing an MP3 disc
Each time you press the button, intro scan mode changes as follows:
For MP3 discs:
![graph LR A["Intro Track"] --> B["Intro Folder"] B --> C["Intro Disc"] C --> D["Intro Off"] D --> A](/content/2026/06/1254897/images/1019bffa97fe7df16e422df09532311a5c0eac4d3d203e88953e3ddb10ce13c3.jpg)
For CDs:

| Mode | Active indicator | Plays the beginnings (15 seconds) of |
| Intro Track (track intro) indicator lights up. | INT | All tracks of the current disc. |
| Intro Folder* | INT (folder intro) folder indicator lights up. | The first track of every der of the current disc. |
| Intro Disc intro) indicator the lights up. | INT (disc) | The first tracks of inserted discs. |
* "Intro Folder" is only applicable for MP3 disc.
Note:
MP3 indicator also lights up if the current playing disc is an MP3 disc.
To cancel intro scan, select "Intro Off" by pressing number button 1 repeatedly or press number button 4 in step 2.

Playing an external component
You can connect the external component to the CD changer jack on the rear using the Line Input Adapter KS-U57 (not supplied).
Preparations:
- For connecting the Line Input Adapter KS-U57 and the external component, refer to the Installation/Connection Manual (separate volume).
- Before operating the external component using the following procedure, select the external input correctly. See "To select the external component to use—Ext Input" on page 49.
1 Select the external component (LINE IN).
![graph LR A["CD/CD-CN"] --> B["CD"] B --> C["CD-CH (or LINE IN)"]](/content/2026/06/1254897/images/7f1f484873cee2fb30f8172b77bbff197da758c718b476761997ed09fd1e1021.jpg)

- If "LINE IN" does not appear on the display, see page 49 and select the external input ("LINE IN").
Note on One-Touch Operation:
When you press CD/CD-CH, the power automatically comes on. You do not have to press the power button.
2 Turn on the connected component and start playing the source.
3 Adjust the volume.

4 Adjust the sound as you want. (See pages 32 – 35.)
Changing the display pattern
By pressing D DISP, you can change the information shown on the display.

Each time you press the button, the display patterns change as follows:


We recommend that you use DAB (Digital Audio Broadcasting) tuner KT-DB1500 or KT-DB1000 with your unit.
If you have another DAB tuner, consult your JVC IN-CAR ENTERTAINMENT dealer.
• Refer also to the Instructions supplied for your DAB tuner.
What is DAB system?
DAB is one of the digital radio broadcasting systems available today. It can deliver CD quality sound without any annoying interference and signal distortion.
Furthermore, it can carry text, pictures, and data.
In contrast to FM broadcast, where each programme is transmitted on its own frequency, DAB combines several programmes (called “services”) to form one “ensemble.”
In addition, each "service"—called "primary service"—can also be divided into its components (called "secondary service").
With the DAB tuner connected with this unit, you can enjoy these DAB services.
Tuning in to an ensemble and one of the services
A typical ensemble has 6 or more programmes (services) broadcast at the same time. After tuning in to an ensemble, you can select a service you want to listen to.
Before you start....
Press FM/AM DAB briefly if CD, CD changer, or external component is the current source.
1 Select the DAB tuner.

Each time you press and hold the button, the DAB tuner and the FM/AM tuner are alternately selected.
FM/AM ↔ DAB

2 Select the DAB band (DAB1, DAB2, or DAB3).

Each time you press the button, the DAB band changes as follows:

Note:
This receiver has three DAB bands (DAB1, DAB2, DAB3). You can use any of them to tune in to an ensemble.
3 Start searching for an ensemble.

To search for ensembles of higher frequency
To search for ensembles of lower frequency
When an ensemble is received, searching stops.
To stop searching before an ensemble is received, press the same button you have pressed for searching.
4 Select a service (either primary or secondary) you want to listen to.

To select the next service (If a primary service has some secondary services, they are selected before the next primary service is selected.)
To select the previous service (either primary or secondary)
To tune in to a particular ensemble without searching
Before you start....
Press FM/AM DAB briefly if CD, CD changer, or external component is the current source.
1 Press and hold FM/AM DAB to select the DAB tuner as the source. 2 Press FM/AM DAB repeatedly to select the DAB band (DAB1, DAB2, or DAB3). 3 Press and hold ▶▶| ∧ or |◀◀ √ for more than one second. 4 Press ▶▶▶ | ∧ or |◀◀ ∨ repeatedly until the ensemble you want is reached. - If you hold down the button, the frequency keeps changing until you release the button. 5 Press ▲ (up) or ▼ (down) to select a service (either primary or secondary) you want to listen to.
When surrounding noises interfere with your listening while driving
If this happens, especially when you are listening at a low volume level, you can reinforce the sounds to improve your listening.
For this purpose, some services provide Dynamic Range Control signals together with their regular program signals.
1 Press M MODE while listening to a DAB service.

"Mode" appears on the display. The next-step-operation buttons start flashing.
2 Press number button 1 repeatedly to activate the DRC function while "Mode" is still on the display.

Each time you press the button, the DRC function will be set as follows:
![graph LR A["DRC 1"] --> B["DRC 2"] B --> C["DRC 3"] C --> D["DRC Off"] D --> A](/content/2026/06/1254897/images/c23cd8ae90a12d2eedddb871c6b5a5fb69f927a989a7cef0d81819c68f679583.jpg)
As the number increases, the DRC effect level also increases.


DRC indicator appears.
- The DRC indicator will be highlighted (DRC) when the unit receives DRC signals from the tuned service.
To cancel the DRC effect, select "DRC Off."
To restore the FM/AM tuner
Press and hold FM/AM DAB again.
Storing DAB services in memory
You can preset up to 6 DAB services in each DAB band (DAB1, DAB2, and DAB3) manually.
Before you start....
Press FM/AM DAB briefly if CD, CD changer, or external component is the current source.
1 Select the DAB tuner.

Each time you press and hold the button, the DAB tuner and the FM/AM tuner are alternately selected.
FM/AM ↔ DAB
2 Select the DAB band (DAB1, DAB2, or DAB3).

Each time you press the button, the DAB band changes as follows:

3 Tune in to an ensemble you want.

4 Select a service of the ensemble you want to listen to.

To select the next service
To select the previous service
5 Press and hold the number button (in this example, 1) you want to store the selected service into for more than 2 seconds.


The display pattern automatically changes to the non-animation display and the preset number flashes (then the previous display pattern resumes).
6 Repeat the above procedure to store other DAB services into other preset numbers.
Notes:
- You can only preset primary DAB services. If you store a secondary service, its primary service will be stored instead.
- A previously preset DAB service is erased when a new DAB service is stored in the same preset number.
- Preset DAB services are erased when the power supply to the memory circuit is interrupted (for example, during battery replacement). If this occurs, preset the DAB services again.
Tuning in to a preset DAB service
You can easily tune in to a preset DAB service. Remember that you must store services first. If you have not stored them yet, see "Storing DAB services in memory" on page 65.
Before you start....
Press FM/AM DAB briefly if CD, CD changer, or external component is the current source.
1 Select the DAB tuner.

Each time you press and hold the button, the DAB tuner and the FM/AM tuner are alternately selected.
FM/AM ↔ DAB
2 Select the DAB band (DAB1, DAB2, or DAB3).

Each time you press the button, the DAB band changes as follows:

3 Select the number (1 - 6) for the preset DAB service (primary) you want.

Note:
If the selected primary service has some secondary services, pressing the same number button repeatedly will tune in to the secondary services.
Selecting a preset service using the preset service list
If you forget what services are stored in what preset number, you can check the preset service list, then select your desired service on the list.
1 Select the DAB tuner.

Each time you press and hold the button, the DAB tuner and the FM/AM tuner are alternately selected.
FM/AM ↔ DAB
2 Select the DAB band (DAB1, DAB2 or DAB3).

Each time you press the button, the DAB band changes as follows:

3 Press and hold ▲ (up) or ▼ (down) until the preset service (primary service) list for the current band (DAB1, DAB2, or DAB3) appears on the display.


Ex.: When you select the preset service (primary service) number 1 of the DAB1 band
Note:
You can show the other DAB band preset service (primary service) lists (DAB1, DAB2, or DAB3) by pressing ▲ (up) or ▼ (down).
4 Select the number (1 - 6) for a service you want.

What you can do more with DAB
With the DAB tuner connected, you can use the following convenient functions.
- Road Traffic News Standby Reception (TA Standby Reception)
- Standby Reception of 9 types of Announcement signals • PTY Standby Reception
- PTY search
- Tracing the same program (service) automatically while driving where the same DAB ensemble is not received
Road Traffic News Standby Reception (TA Standby Reception)
Road Traffic News Standby Reception (TA Standby Reception) allows the unit to switch temporarily to the traffic announcement from the current source (another service, FM, CD, or other connected components).
- Operations are exactly the same as explained on pages 17 and 18 for FM RDS stations. You cannot use Road Traffic News Standby Reception (TA Standby Reception) separately for the DAB tuner and for the FM tuner.
To use TA Standby Reception, see page 17.
To set the TA volume level, see page 21.
Using Announcement Standby Reception
Announcement Standby Reception allows the unit to switch temporarily to your favorite service (Announcement type).
To select your favorite announcement type for Announcement Standby Reception
When shipped from the factory, Announcement Standby Reception has been set to search for "Travel" services.
You can select your preferred announcement type for Announcement Standby Reception.
- If you do not want to change the announcement type (from "Travel" to another one), go to page 68.
1 Press and hold SEL (select) for more than 2 seconds so that one of the PSM items appears on the display. (PSM: see pages 46 and 47.)

2 Press number button 4 to select "TUNER"—the Tuner category of the PSM settings.
The "PTY Stnby" (standby) setting screen appears on the display.

3 Select "Announce" (announcement).


4 Select one of the 9 announcement types. (See page 68.)

The selected announcement type appears on the display and is stored into memory.
5 Finish the setting.

To activate Announcement Standby Reception
1 Press M MODE while listening to a DAB service.

"Mode" appears on the display. The next-step-operation buttons start flashing.
2 Press number button 2 repeatedly to activate Announcement Standby Reception while "Mode" is still on the display.
Each time you press the button, Announcement Standby Reception turns on and off alternately.

Ex.: When the currently selected announcement type for Announcement Standby Reception is "Travel"

The display returns to the source indication screen.

ANN indicator appears. (either lights up or flashes)
The ANN (announcement) indicator either lights up or flashes.
- If the ANN indicator lights up, Announcement Standby Reception is activated.
If a service starts broadcasting a programme of the selected announcement type, this unit automatically tunes in to the service.
- If the ANN indicator flashes, Announcement Standby Reception is not yet activated since the service being received does not provide the signals used for Announcement Standby Reception.
To activate Announcement Standby Reception, you need to tune in to another service providing these signals. Press ▶▶▶ ▲ or ◀◀◀ ▼ to search for such a service (ensemble).
When a service providing these signals is tuned in, the ANN indicator stops flashing and remains lit. Now Announcement Standby Reception is activated.
How Announcement Standby Reception works:
If a service of the selected Announcement type starts broadcasting while the Announcement Standby Reception is activated, the selected announcement type appears and the unit tunes into the service.
Note:
After turning on Announcement Standby Reception, you can change the source without canceling Announcement Standby Reception. If a service starts broadcasting the selected announcement type, this unit automatically changes the source and tunes in to the service.
Announcement type
Travel: Programmes about travel destinations, package tours, and travel ideas and opportunities
Warning: Warnings about earthquakes, tsunami, etc.
News: News
Weather: Weather information
Event: Information about events, concerts, etc.
Special: Special programmes expanding on current news or affairs
Rad Inf: Radio information
Sports: Sport events
Finance: Reports on commerce, trading, the Stock Market, etc.
Using PTY Standby Reception
PTY Standby Reception allows the unit to switch temporarily to your favorite programme (PTY: Programme Type) from any source except AM stations.
- Operations are exactly the same as explained on pages 18 and 19 for FM RDS stations. You cannot use PTY Standby Reception separately for the DAB tuner and for the FM tuner.
- PTY Standby Reception works for the DAB tuner only using a Dynamic PTY, but not a Static PTY.
To select your favorite PTY code for PTY Standby Reception, see page 18.
To set PTY Standby Reception, see pages 18 and 19.
- You can set PTY Standby Reception when the source is either "FM" or "DAB."
Searching for your favorite service
You can search for any one of the PTY codes (either Dynamic or Static PTY).
In addition, you can store your 6 favorite programme types in the number buttons (see pages 19 and 20).
- Operations are exactly the same as explained on pages 19 and 20 for FM RDS stations. However, you cannot store PTY codes in the number buttons separately for the DAB tuner and for the FM tuner.
To store your favorite programme (service) types, see pages 19 and 20.
To search for your favorite programme (service) type, see page 20.
- Search will be performed on the DAB tuner only.
Tracing the same programme automatically (Alternative Reception)
You can keep listening to the same programme.
- While receiving a DAB service:
When driving in an area where a service cannot be received, this unit automatically tunes in to another ensemble or FM RDS station, broadcasting the same programme.
- While receiving an FM RDS station:
When driving in an area where a DAB service is broadcasting the same programme as the FM RDS station is broadcasting, this unit automatically tunes in to the DAB service.
To use Alternative Reception
When shipped from the factory, Alternative Reception is activated.
- See also “Changing the general settings (PSM)” on page 45. 1 Press and hold SEL (select) for more than 2 seconds so that one of the PSM items appears on the display. 2 Press number button 4 to select "TUNER"—Tuner category of the PSM settings. 3 Press ▶▶▶ ▲ or ◀◀◀ ▼ to select "DAB AF" (alternative frequency). 4 Turn the control dial to select the desired mode.
- On: Traces the programme among DAB services and FM RDS stations —Alternative Reception. The AF indicator lights up on the display (see page 16).
- Off: Alternative Reception is deactivated.
5 Press SEL (select) to finish the setting.
Note:
When Alternative Reception (for DAB services) is activated, Network-Tracking Reception (for RDS stations: see page 16) is also activated automatically. On the other hand, Network-Tracking Reception cannot be deactivated without deactivating Alternative Reception.
Changing the display pattern
By pressing D DISP, you can change the information shown on the display.
Each time you press the button, the display patterns change as follows:

Large animation display
Text indicator*

Ensemble label (name) display
Ensemble label and Frequency Clock time Channel number

Service label (name) display
Service label PTY code *2
Clock time display
Dynamic Label Segment (DLS) display*4

*1 TEXT indicator: implies the current service received is providing DLS (Dynamic Label Segment—DAB radio text information). *2 Each service can have several PTY codes. If a service has several PTY codes, they will be shown in turn. *3 Ensemble label (primary service) indicator: The different indicator ( 2nd ) will be displayed when the secondary service is selected. *4 Dynamic Label Segment (DLS) will be displayed. See “To select the scroll mode for disc information and the DAB text—Scroll” on page 48.
What appears to be trouble is not always serious. Check the following points before calling a service center.
| Symptoms | Causes | Remedies | |
| General | Sound cannot be heard from the speakers. | The volume level is set to the minimum level. | Adjust it to the optimum level. |
| Connections are incorrect. | Check the cords and connections. | ||
| This unit does not work at all. | The built-in microcomputer functions incorrectly due to noise, etc. | Press the reset button on the control panel. (Your preset adjustments will also be erased.) (See page 2.) | |
| “Panel Connect Error” appears on the display. | The control panel is not attach correctly and firmly. | Remove the control panel, wipe the connectors, then attach it again. (See page 55.) | |
| When “Reset P00” to “Reset P44” appears on the display. | There is something blocking the control panel movement. | Press the reset button on the control panel. (See page 2.) If the reset button does not work, check the installation. (Ex. you have used a screw which is longer than specified.) | |
| Tuner | SSM (Strong-station Sequential Memory) automatic preset does not work. | Signals are too weak. | Store stations manually. |
| Static noise while listening to the radio. | The aerial is not connected firmly. | Connect the aerial firmly. | |
| Disc Playback | Disc cannot be played back. | Disc is inserted upside down. | Insert the disc correctly. |
| CD-R/CD-RW cannot be played back.Tracks on the CD-R/CD-RW cannot be skipped. | CD-R/CD-RW is not finalized. | Insert a finalized CD-R/CD-RW.Finalize the CD-R/CD-RW with the component which you used for recording. | |
| Disc cannot be ejected. | Disc is locked. | Unlock the disc. (See page 30.) | |
| Disc cannot be recognized (“No Disc,” “Loading Error,” or “Eject Error” flashes on the display.) | The CD player may function incorrectly. | While pressing ⬆/I ATT (standby/on attenuator), press and hold ▲ (eject) for more than 2 seconds to eject the disc.Before re-inserting a disc, wait for several seconds. | |
| Disc sound is sometimes interrupted. | You are driving on rough roads. | Stop playback while driving on rough roads. | |
| Disc is scratched. | Change the disc. | ||
| Connections are incorrect. | Check the cords and connections. | ||
| “No Disc” flashes on the display. | No disc in the loading slot. | Insert a disc into the loading slot. | |
| Disc is inserted incorrectly. | Insert the disc correctly. | ||
| MP3/WMA Playback | Disc cannot be played back. | No MP3/WMA tracks are recorded on the disc. | Change the disc. |
| MP3/WMA tracks do not have the extension code <.mp3> or <.wma> in their file names. | Add the extension code <.mp3> or <.wma> to their file names. | ||
| MP3/WMA tracks are not recorded in the format compliant with ISO 9660 Level 1, Level 2, Romeo, or Joliet. | Change the disc.(Record MP3/WMA tracks using a compliant application.) | ||
| "Not Support" appears and tracks skip. | Tracks are not encoded in an appropriate format. | Insert a disc that contains tracks encoded in an appropriate format. | |
| WMA tracks are copy-protected. | This is normal. Copy-protected tracks cannot be played back. | ||
| Noise is generated. | The track played back is not an MP3/WMA track (although it has the extension code <.mp3> or <.wma>). | Skip to another track or change the disc. (Do not add the extension code <.mp3> or <.wma> to non-MP3 or WMA tracks.) | |
| A longer readout time is required. ("File Check" keeps flashing on the display). | Readout time varies due to the complexity of the folder/track configuration. | Do not use too many hierarchies and folders. | |
| Tracks cannot be played back as you have intended them to play. | Playback order is determined when the tracks are recorded. | Insert a disc that contains tracks encoded in an appropriate format. | |
| Elapsed playing time is not correct. | This sometimes occurs during play. This is caused by how the tracks are recorded on the disc. | —— | |
| "No Files" flashes on the display. | The current disc does not contain any MP3/WMA track. | Insert a disc that contains MP3/WMA tracks. | |
| "No Music" appears on the display. | The current folder does not contain any MP3/WMA tracks. | Select another folder that contains MP3/WMA tracks. | |
| Onlyand/orfiles are recorded on the disc. | Insert a disc that contains MP3 or WMA tracks. | ||
| Correct characters are not displayed. (e.g. album name) | This unit can only display alphabets (capital: A-Z, small: a -z), numbers, and a limited number of symbols, and some accented letters (see page 73). | —— | |
| ·Download does not seem to finish. | You are trying to download an animation of many frames. | This is normal (see page 38). | Graphics |
| ·Animation does not move. | Temperature in the car compartment is very low—(LOW TEMP.) indicator appears. | Wait until the operating temperature resumes—until (LOW TEMP.) indicator goes off. | |
| ·“Movie” category settings in the PSM do not take effect. | |||
| ·No indication appears on the display at all. | The built-in microcomputer may function incorrectly due to noise, etc. | Press the reset button on the control panel. (Your preset adjustments will also be erased.) (See page 2.) | |
| ·“No Disc” flashes on the display. | No disc is in the magazine. | Insert discs into the magazine. | CD Changer |
| Discs are inserted upside down. | Insert discs correctly. | ||
| ·“No Magazine” flashes on the display. | No magazine is loaded in the CD changer. | Insert the magazine. | |
| ·“Reset 08” flashes on the display. | This unit is not connected to the CD changer correctly. | Connect this unit and the CD changer correctly and press the reset button of the CD changer. | |
| ·“Reset 01” – “Reset 07” flashes on the display. | —— | Press the reset button of the CD changer. | |
| ·The CD changer does not work at all. | The built-in microcomputer may function incorrectly due to noise, etc. | Press the reset button on the control panel. (Your preset adjustments will also be erased.) (See page 2.) | |
Available characters
In addition to the alphabets (A - Z, a - z), you can use the following characters to assign names to CDs (both in this unit and in the CD changer) and external component (LINE IN). (See page 53.)
• These characters can be also used to show other information such as disc title/performer, RDS, and DAB on the display.
Accented letters Numbers and symbols
Upper case Lower case
This unit has been designed to reproduce CDs, CD-Rs (Recordable), CD-RWs (Rewritable), and CD Texts.
- This unit is also compatible with MP3 and WMA discs.
How to handle discs
When removing a disc from its case, press down the center holder of the case and lift the disc out, holding it by the edges.
from its case, press down the center holder of the case and lift the disc out, holding it by the edges.
Center holder

• Always hold the disc by the edges. Do not touch its recording surface.
When storing a disc into its case, gently insert the disc around the center holder (with the printed surface facing up).
- Make sure to store discs into the cases after use.
To keep discs clean
A dirty disc may not be played correctly. If a disc does become dirty, wipe it with a soft cloth in a straight line from center to edge.

To play new discs
New discs may have some rough spots around the inner and outer edges. If such a disc is used, this unit may reject the disc.
To remove these rough spots, rub the edges with a pencil or ball-point pen, etc.

Moisture condensation
Moisture may condense on the lens inside the CD player in the following cases:
• After starting the heater in the car. - If it becomes very humid inside the car.
Should this occur, the CD player may malfunction. In this case, eject the disc and leave the unit turned on for a few hours until the moisture evaporates.
When playing a CD-R or CD-RW
Before playing back CD-Rs or CD-RWs, read their instructions or cautions carefully.
- Use only "finalized" CD-Rs or CD-RWs.
- Some CD-Rs or CD-RWs may not be played back on this unit because of their disc characteristics, and for the following reasons:
– Discs are dirty or scratched. – Moisture condensation on the lens inside the unit. – The pickup lens inside the unit is dirty.
- CD-RWs may require a longer readout time since the reflectance of CD-RWs is lower than that of regular CDs.
- CD-Rs or CD-RWs are susceptible to high temperatures or high humidity, so do not leave them inside your car.
- Do not use the following CD-Rs or CD-RWs:
- Discs with stickers, labels, or protective seal stuck to the surface. – Discs on which labels can be directly printed by an ink jet printer.
Using these discs under high temperatures or high humidity may cause malfunctions or damage to discs. For example,
- Stickers or labels may shrink and warp a disc.
- Stickers or labels may peel off so discs cannot be ejected.
– Print on discs may get sticky.
Read instructions or cautions about labels and printable discs carefully.
CAUTIONS:
- Do not insert 8 cm discs (single CDs) into the loading slot. (Such discs cannot be ejected.)
- Do not insert any disc of unusual shape—like a heart or flower; otherwise, it will cause a malfunction.
- Do not expose discs to direct sunlight or any heat source or place them in a place subject to high temperature and humidity. Do not leave them in a car.
- Do not use any solvent (for example, conventional record cleaner, spray, thinner, benzine, etc.) to clean discs.
Warped disc

Sticker

Sticker residue
Disc

Stick-on label
AUDIO AMPLIFIER SECTION
Maximum Power Output:
Front: 50 W per channel
Rear: 50 W per channel
Continuous Power Output (RMS):
Front: 19 W per channel into 4 Ω, 40 Hz to 20 000 Hz at no more than 0.8% total harmonic distortion.
Rear: 19 W per channel into 4 Ω, 40 Hz to 20 000 Hz at no more than 0.8% total harmonic distortion.
Load Impedance: 4 Ω (4 Ω to 8 Ω allowance)
Equalizer Control Range:
Frequencies: 60 Hz, 150 Hz, 400 Hz, 1 kHz, 2.4 kHz, 6 kHz, 12 kHz
Level: ±10 dB
Frequency Response: 40 Hz to 20 000 Hz
Signal-to-Noise Ratio: 70 dB
Line-Out Level/Impedance:
5.0 V/20 kΩ load (full scale)
Output Impedance: 1 kΩ
Other terminals:
SUBWOOFER
Changer control
Steering wheel remote input
TUNER SECTION
Frequency Range:
FM: 87.5 MHz to 108.0 MHz
AM: (MW) 522 kHz to 1,620 kHz
(LW) 144 kHz to 279 kHz
[FM Tuner]
Usable Sensitivity: 11.3 dBf (1.0 μV/75 Ω)
50 dB Quieting Sensitivity: 16.3 dBf (1.8 μV/75 Ω)
Alternate Channel Selectivity (400 kHz): 65 dB
Frequency Response: 40 Hz to 15,000 Hz
Stereo Separation: 30 dB
Capture Ratio: 1.5 dB
[MW Tuner]
Sensitivity: 20 μV
Selectivity: 35 dB
[LW Tuner]
Sensitivity: 50 μV
CD PLAYER SECTION
Type: Compact disc player
Signal Detection System: Non-contact optical pickup (semiconductor laser)
Number of channels: 2 channels (stereo)
Frequency Response: 5 Hz to 20 000 Hz
Dynamic Range: 96 dB
Signal-to-Noise Ratio: 98 dB
Wow and Flutter: Less than measurable limit
MP3 decoding format:
MPEG1/2 Audio Layer 3
Max. Bit Rate: 320 Kbps
WMA (Windows Media® Audio) decoding format:
Max. Bit Rate: 192 Kbps
GENERAL
Power Requirement:
Operating Voltage:
DC 14.4 V (11 V to 16 V allowance)
Grounding System: Negative ground
Allowable Operating Temperature: 0°C to +40°C
Dimensions (W × H × D):
Installation Size (approx.):
182 mm × 52 mm × 159 mm
Panel Size (approx.):
188 mm × 58 mm × 12 mm
Mass (approx.):
1.6 kg (excluding accessories)
Design and specifications are subject to change without notice.
| 1 | 2 | 3 |
| Pop M | Rock M | Easy M |
| 4 | 5 | 6 |
| Classics | Affairs | Varied |
Repeat Track ↔ Repeat Off
Off (Aus):
Connections

1 kHz, 2.4 kHz, 6 kHz, 12 kHz
Level: ±10 dB
Dimensions (W × H × D):
Installation size (approx.):
182 mm × 52 mm × 159 mm
| 1 | 2 | 3 |
| Pop M | Rock M | Easy M |
| 4 | 5 | 6 |
| Classics | Affairs | Varied |
Off (out of service):
Ex.: When "UserPict." is chosen
Adj. 2


Adj. 4
Adj. 3

Connectors

Dimensions (W × H × D):
Note:
GRAPHIC DISPLAYS 37
Lithium
coin cell battery
(Product number:
CR2025)
Increase volume
Decrease volume
6 Complete the setting

| 1 | 2 | 3 |
| Pop M | Rock M | Easy M |
| 4 | 5 | 6 |
| Classics | Affairs | Varied |
Educate: Educational programs
→ Random Folder → Random Disc —— Random Off ←
Repeat Track ↔ Repeat Off
→ Repeat Track → Repeat Folder Repeat Off
Off:
What is Image Converter?
3 Select "Opening" (start screen setting) or "Ending" (stop screen setting).


For example: With "UserPict." selected
5
Complete the setting.

Connectors

1 kHz, 2.4 kHz, 6 kHz, 12 kHz
Level: ±10 dB
11.3 dBf (1.0 μV/75 Ω)
Stereo separation: 30 dB
Capture range: 1.5 dB
[MW stations]
Sensitivity: 20 μV
Having TROUBLE with operation?
Please reset your unit
Refer to page of How to reset your unit
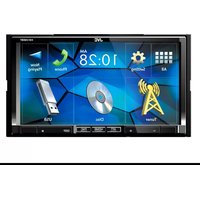
- IMPORTANT FOR LASER PRODUCTS
- CAUTION
- CAUTION ON VOLUME SETTING
- NOTE
- HOW TO RESET YOUR UNIT
- CONTENTS
- LOCATION OF THE BUTTONS
- BASIC OPERATIONS
- RADIO OPERATIONS
- RDS OPERATIONS
- DISC OPERATIONS
- SOUND ADJUSTMENTS
- GRAPHIC DISPLAYS
- OTHER MAIN FUNCTIONS
- CD CHANGER OPERATIONS
- EXTERNAL COMPONENT OPERATIONS
- DAB TUNER OPERATIONS
- TROUBLESHOOTING
- MAINTENANCE
- SPECIFICATIONS
- BEFORE USE
- FOR SAFETY
- TEMPERATURE INSIDE THE CAR
- CONTROL PANEL
- ILLUMINATION NAVIGATION FOR EASY OPERATIONS
- REMOTE CONTROLLER
- PREPARING THE REMOTE CONTROLLER
- INSTALLING THE BATTERY
- REMOVE THE BATTERY HOLDER
- PLACE THE BATTERY
- RETURN THE BATTERY HOLDER
- WARNING
- TURNING ON THE POWER
- TURN ON THE POWER
- NOTE ON ONE-TOUCH OPERATION
- SELECT THE SOURCE
- ADJUST THE VOLUME
- ADJUST THE SOUND AS YOU WANT. (SEE PAGES 32–35.)
- NOTICE
- TO DROP THE VOLUME IN A MOMENT
- TO TURN OFF THE POWER
- CANCELING THE DISPLAY DEMONSTRATION
- SETTING THE CLOCK
- LISTENING TO THE RADIO
- SEARCHING FOR A STATION AUTOMATICALLY: AUTO SEARCH
- SELECT THE BAND (FM1 - 3, AM)
- START SEARCHING FOR A STATION
- SEARCHING FOR A STATION MANUALLY: MANUAL SEARCH
- PRESS AND HOLD ▶▶| ∧ OR ◀◀◀ ∨ UNTIL “MANUAL SEARCH” STARTS FLASHING ON THE DISPLAY
- TUNE IN TO A STATION YOU WANT WHILE "MANUAL SEARCH" IS FLASHING
- IF THE SOUND QUALITY DECREASES AND THE STEREO EFFECT IS LOST WHILE LISTENING TO AN FM STATION
- WHEN AN FM STEREO BROADCAST IS HARD TO RECEIVE
- STORING STATIONS IN MEMORY
- FM STATION AUTOMATIC PRESET: SSM
- SELECT THE FM BAND (FM1 – 3) YOU WANT TO STORE FM STATIONS INTO
- START AUTOMATIC PRESET
- MANUAL PRESET
- SELECT THE BAND (FM1 – 3, AM) YOU WANT TO STORE STATIONS INTO (IN THIS EXAMPLE, FM1)
- TUNE IN TO A STATION (IN THIS EXAMPLE, OF 92.5 MHZ)
- PRESS AND HOLD THE NUMBER BUTTON (IN THIS EXAMPLE, 1) FOR MORE THAN 2 SECONDS
- REPEAT THE ABOVE PROCEDURE TO STORE OTHER STATIONS INTO OTHER PRESET NUMBERS
- NOTES
- TUNING IN TO A PRESET STATION
- SELECTING A PRESET STATION DIRECTLY
- SELECT THE NUMBER (1 - 6) FOR THE PRESET STATION YOU WANT
- SELECTING A PRESET STATION USING THE PRESET STATION LIST
- PRESS AND HOLD ▲ (UP) OR ▼ (DOWN) UNTIL THE PRESET STATION LIST FOR THE CURRENT BAND (FM1, FM2, FM3, OR AM) APPEARS ON THE DISPLAY
- CHANGING THE DISPLAY PATTERN
- WHAT YOU CAN DO WITH RDS
- TRACING THE SAME PROGRAMME AUTOMATICALLY (NETWORK-TRACKING RECEPTION)
- TO USE NETWORK-TRACKING RECEPTION
- USING TA STANDBY RECEPTION
- WHEN THE CURRENT SOURCE IS OTHER THAN FM, THE TP INDICATOR LIGHTS UP
- USING PTY STANDBY RECEPTION
- TO SELECT YOUR FAVORITE PTY CODE FOR PTY STANDBY RECEPTION
- TO SET PTY STANDBY RECEPTION
- SEARCHING FOR YOUR FAVORITE PROGRAMME
- TO STORE YOUR FAVORITE PROGRAMME TYPES
- OTHER CONVENIENT RDS FUNCTIONS AND ADJUSTMENTS
- AUTOMATIC SELECTION OF THE STATION WHEN USING THE NUMBER BUTTONS
- SETTING THE TA VOLUME LEVEL
- AUTOMATIC CLOCK ADJUSTMENT
- PTY CODES
- THE SAME PROGRAM CAN BE RECEIVED ON DIFFERENT FREQUENCIES
- ABOUT MP3 AND WMA DISCS
- PLAYING A DISC
- ABOUT MISTRACKING
- DISPLAY INDICATIONS WHEN INSERTING AN AUDIO CD OR A CD TEXT
- DISPLAY INDICATIONS WHEN INSERTING AN MP3 OR A WMA DISC
- TO STOP PLAY AND EJECT THE DISC
- TO RETURN THE CONTROL PANEL TO ITS PREVIOUS POSITION, PRESS ▲ (EJECT) AGAIN
- WHAT IS IMAGELINK
- LOCATING A TRACK OR A PARTICULAR PORTION ON A DISC
- TO FAST-FORWARD OR REVERSE THE TRACK
- TO GO TO THE NEXT OR PREVIOUS TRACKS
- TO GO TO A PARTICULAR TRACK DIRECTLY (ONLY FOR CD AND CD TEXT DISCS)
- TO GO TO A TRACK QUICKLY
- HOW TO GO TO THE DESIRED TRACK QUICKLY
- TO GO TO A PARTICULAR FOLDER DIRECTLY (ONLY POSSIBLE FOR MP3 OR WMA DISC)
- IMPORTANT
- TO SKIP TO THE NEXT OR PREVIOUS FOLDER (ONLY POSSIBLE FOR MP3 OR WMA DISC)
- SELECTING A FOLDER AND A TRACK USING THE NAME LISTS
- SELECTING A FOLDER AND START PLAYBACK
- SELECT THE NUMBER (1 - 6) FOR THE FOLDER YOU WANT TO PLAY
- SELECTING A TRACK AND START PLAYBACK
- SELECT THE NUMBER (1 - 6) FOR THE TRACK YOU WANT TO PLAY
- SELECTING THE PLAYBACK MODES
- TO PLAY BACK TRACKS AT RANDOM (RANDOM PLAY)
- TO PLAY BACK TRACKS REPEATEDLY (REPEAT PLAY)
- TO PLAY BACK ONLY INTROS (INTRO SCAN)
- PROHIBITING DISC EJECTION
- TO CANCEL THE PROHIBITION AND UNLOCK THE DISC
- ADJUSTING THE SOUND
- SELECT THE ITEM YOU WANT TO ADJUST
- MAKE ADJUSTMENTS
- SELECTING PRESET SOUND MODES (IEQ: INTELLIGENT EQUALIZER)
- AVAILABLE SOUND MODES
- PRESS SEL (SELECT) ONCE
- PRESS THE NUMBER BUTTON TO SELECT THE SOUND MODE YOU WANT
- SOUND MODES (PRESET FREQUENCY LEVEL SETTINGS)
- STORING YOUR OWN SOUND MODES
- SELECT THE SOUND MODE YOU WANT TO ADJUST
- ENTER THE SOUND ADJUSTMENT MODE
- MAKE ADJUSTMENTS AS YOU LIKE
- STORE THE ADJUSTMENT YOU MADE
- SELECT ONE OF THE USER SOUND MODES (USER 1, USER 2, OR USER 3) YOU WANT TO STORE INTO
- SELECTING THE DISPLAY THEME
- SELECT "THEME
- SELECT THE DISPLAY THEME YOU WANT
- VIEW
- METER
- SHAKE
- OFF
- WHAT IS IMAGE CONVERTER
- HERE IS A BASIC PROCEDURE FOR MAKING A CD-R THAT INCLUDES STILL IMAGES (PICTURES) AND ANIMATIONS (MOVIES) USING IMAGE CONVERTER
- INSTALL / START THE PROGRAM
- IMPORT THE IMAGES
- RETOUCH AND EDIT THE IMAGES
- WRITE YOUR IMAGES ONTO A CD-R
- ENJOY THE ANIMATIONS OR THE STILL IMAGES YOU MADE ON YOUR CAR AUDIO
- DOWNLOADING IMAGES AND ANIMATIONS
- OPEN THE CONTROL PANEL
- INSERT A CD-R WITH THE FILES (IMAGES AND ANIMATIONS YOU MADE WITH IMAGE CONVERTER) INTO THE LOADING SLOT
- PRESS M MODE AFTER THE DISC IS DETECTED
- PRESS NUMBER BUTTON 6 TO SHOW THE DOWNLOAD SELECTION SCREEN
- SELECT (HIGHLIGHT) ONE OF THE LISTED ITEMS FOR WHICH YOU WANT TO DOWNLOAD A FILE
- SHOW THE NAME LIST OF THE FOLDER INCLUDED IN THE INSERTED CD-R
- SELECT (HIGHLIGHT) A FOLDER IN WHICH A FILE YOU WANT IS INCLUDED
- SHOW THE NAME LIST OF THE FILES INCLUDED IN THE SELECTED FOLDER
- SELECT (HIGHLIGHT) A FILE YOU WANT TO DOWNLOAD
- IF IT IS OK, PRESS NUMBER BUTTON 1 TO START DOWNLOADING
- REPEAT STEPS 8 TO 10 IF YOU ARE DOWNLOADING FILES FOR "PICTURE" AND WANT TO STORE MORE FILES
- FINISH THE DOWNLOAD PROCEDURE
- DELETING UNWANTED FILES
- TO DELETE ALL THE STORED FILES AT A TIME
- TO DELETE THE FILES STORED FOR “OPENING,” “ENDING,” “PICTURE (ALL STORED IMAGES AT A TIME),” AND “MOVIE
- TO DELETE THE FILE STORED IN "OPENING
- TO DELETE THE STORED FILES FOR "PICTURE" (ONE BY ONE)
- ACTIVATING THE DOWNLOADED IMAGES AND ANIMATIONS
- ACTIVATING THE ANIMATIONS STORED FOR OPENING AND ENDING SCREENS
- ACTIVATING THE GRAPHIC SCREEN USING EITHER PICTURE OR MOVIE
- PRESS NUMBER BUTTON 1 TO SELECT "MOVIE"—MOVIE CATEGORY OF THE PSM SETTINGS
- SELECT "USERMOVIE," "USERSLIDE," OR "USERPICT
- FINISH THE SETTING
- SELECTING A STILL IMAGE FOR GRAPHIC DISPLAY—USER PICTURE
- PRESS AND HOLD SEL (SELECT) FOR MORE THAN 2 SECONDS SO THAT ONE OF THE PSM ITEMS APPEARS ON THE DISPLAY. (PSM: SEE PAGES 46 AND 47.)
- SELECT "USERPICT
- SELECT A FILE YOU WANT
- CHANGING THE GENERAL SETTINGS (PSM)
- BASIC PROCEDURE
- PREFERRED SETTING MODE (PSM) ITEMS
- TO SHOW THE GRAPHICS ON THE DISPLAY — GRAPHICS
- TO TURN THE SOURCE ANIMATION ON THE DISPLAY ON OR OFF — KEYIN CFM
- TO SELECT THE SCROLL MODE FOR DISC INFORMATION AND THE DAB TEXT—SCROLL
- TO ADJUST THE DISPLAY CONTRAST LEVEL —CONTRAST
- TO SELECT THE DISPLAY ILLUMINATION PATTERN —LCD TYPE
- TO SELECT THE FONT ON THE DISPLAY—FONT TYPE
- TO TURN THE TAG DISPLAY ON OR OFF—TAG
- TO CHANGE THE FM TUNER SELECTIVITY —IF FILTER
- TO TURN THE KEY-TOUCH TONE ON OR OFF—BEEP
- TO SELECT THE EXTERNAL COMPONENT TO USE —EXT INPUT
- TO SELECT THE TELEPHONE MUTING—TELEPHONE
- TO SELECT THE AMPLIFIER GAIN CONTROL —AMP.GAIN
- TO TURN THE SLOT LIGHT ON OR OFF—SLOTLIGHT
- SELECTING THE DIMMER MODE
- CHANGING THE DISPLAY COLOR
- SETTING THE DESIRED COLOR FOR EACH SOURCE
- CREATING YOUR OWN COLOR—USER
- ASSIGNING NAMES TO THE SOURCES
- TO ERASE THE ENTERED CHARACTERS
- CHANGING THE CONTROL PANEL ANGLE
- PRESS AND HOLD (ANGLE) UNTIL THE ANGLE ADJUSTMENT SCREEN APPEARS
- PRESS (ANGLE) REPEATEDLY TO ADJUST THE ANGLE TO THE POSITION YOU WANT
- THE CONTROL PANEL ANGLE CHANGES AS FOLLOWS
- DETACHING THE CONTROL PANEL
- ATTACHING THE CONTROL PANEL
- NOTE ON CLEANING THE CONNECTORS
- PLAYING DISCS
- SELECT THE CD CHANGER (CD-CH)
- WHEN THE CURRENT DISC IS A CD
- TO CHANGE THE DISPLAY PATTERN
- TO GO TO A PARTICULAR DISC DIRECTLY
- TO SKIP TO THE NEXT OR PREVIOUS FOLDER (ONLY FOR MP3 DISCS)
- SELECTING A DISC/FOLDER/TRACK USING THE NAME LISTS
- PLAYING AN EXTERNAL COMPONENT
- PREPARATIONS
- SELECT THE EXTERNAL COMPONENT (LINE IN)
- TURN ON THE CONNECTED COMPONENT AND START PLAYING THE SOURCE
- ADJUST THE SOUND AS YOU WANT. (SEE PAGES 32 – 35.)
- WHAT IS DAB SYSTEM
- TUNING IN TO AN ENSEMBLE AND ONE OF THE SERVICES
- BEFORE YOU START
- SELECT THE DAB TUNER
- SELECT THE DAB BAND (DAB1, DAB2, OR DAB3)
- START SEARCHING FOR AN ENSEMBLE
- SELECT A SERVICE (EITHER PRIMARY OR SECONDARY) YOU WANT TO LISTEN TO
- TO TUNE IN TO A PARTICULAR ENSEMBLE WITHOUT SEARCHING
- WHEN SURROUNDING NOISES INTERFERE WITH YOUR LISTENING WHILE DRIVING
- TO RESTORE THE FM/AM TUNER
- STORING DAB SERVICES IN MEMORY
- TUNE IN TO AN ENSEMBLE YOU WANT
- SELECT A SERVICE OF THE ENSEMBLE YOU WANT TO LISTEN TO
- PRESS AND HOLD THE NUMBER BUTTON (IN THIS EXAMPLE, 1) YOU WANT TO STORE THE SELECTED SERVICE INTO FOR MORE THAN 2 SECONDS
- REPEAT THE ABOVE PROCEDURE TO STORE OTHER DAB SERVICES INTO OTHER PRESET NUMBERS
- TUNING IN TO A PRESET DAB SERVICE
- SELECT THE NUMBER (1 - 6) FOR THE PRESET DAB SERVICE (PRIMARY) YOU WANT
- SELECTING A PRESET SERVICE USING THE PRESET SERVICE LIST
- SELECT THE DAB BAND (DAB1, DAB2 OR DAB3)
- PRESS AND HOLD ▲ (UP) OR ▼ (DOWN) UNTIL THE PRESET SERVICE (PRIMARY SERVICE) LIST FOR THE CURRENT BAND (DAB1, DAB2, OR DAB3) APPEARS ON THE DISPLAY
- SELECT THE NUMBER (1 - 6) FOR A SERVICE YOU WANT
- WHAT YOU CAN DO MORE WITH DAB
- ROAD TRAFFIC NEWS STANDBY RECEPTION (TA STANDBY RECEPTION)
- USING ANNOUNCEMENT STANDBY RECEPTION
- TO SELECT YOUR FAVORITE ANNOUNCEMENT TYPE FOR ANNOUNCEMENT STANDBY RECEPTION
- TO ACTIVATE ANNOUNCEMENT STANDBY RECEPTION
- HOW ANNOUNCEMENT STANDBY RECEPTION WORKS
- ANNOUNCEMENT TYPE
- TO SELECT YOUR FAVORITE PTY CODE FOR PTY STANDBY RECEPTION, SEE PAGE
- SEARCHING FOR YOUR FAVORITE SERVICE
- TO STORE YOUR FAVORITE PROGRAMME (SERVICE) TYPES, SEE PAGES 19 AND
- TO SEARCH FOR YOUR FAVORITE PROGRAMME (SERVICE) TYPE, SEE PAGE
- TRACING THE SAME PROGRAMME AUTOMATICALLY (ALTERNATIVE RECEPTION)
- TO USE ALTERNATIVE RECEPTION
- AVAILABLE CHARACTERS
- ACCENTED LETTERS NUMBERS AND SYMBOLS
- HOW TO HANDLE DISCS
- WHEN REMOVING A DISC FROM ITS CASE, PRESS DOWN THE CENTER HOLDER OF THE CASE AND LIFT THE DISC OUT, HOLDING IT BY THE EDGES
- TO KEEP DISCS CLEAN
- TO PLAY NEW DISCS
- MOISTURE CONDENSATION
- WHEN PLAYING A CD-R OR CD-RW
- CAUTIONS
- AUDIO AMPLIFIER SECTION
- TUNER SECTION
- CD PLAYER SECTION
- GENERAL
- OFF (AUS)
- OFF (OUT OF SERVICE)
- [MW STATIONS]
- HAVING TROUBLE WITH OPERATION
- PLEASE RESET YOUR UNIT
Brand : JVC
Model : KD-LH401
Category : Car radio