
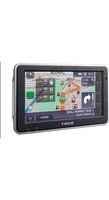
NVX-P1 - GPS Navigator SONY - Free user manual and instructions
Find the device manual for free NVX-P1 SONY in PDF.


| Product type | GPS Navigator |
| Brand | Sony |
| Model | NVX-P1 |
| Dimensions (approx.) | 12 x 8 x 2 cm |
| Weight (approx.) | 200 g |
| Power type | Rechargeable lithium-ion battery, 12V adapter |
| Screen | Color touch screen (approx. 4.3 inches) |
| Main functions | Road navigation, points of interest (POI), route calculation, voice guidance |
| Maps | Preloaded maps (Western Europe) |
| Connectivity | USB port for updates |
| Map updates | Via PC and dedicated software |
| Language options | Multilingual (French, English, etc.) |
| Storage | Internal memory (capacity not specified) |
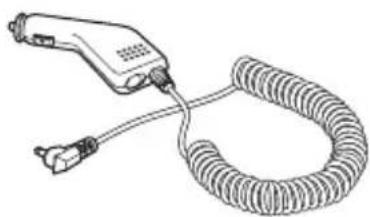
| Included accessories | Windshield mount, USB cable, cigarette lighter charger |
| Care and cleaning | Clean with a soft, dry cloth; avoid abrasive products |
| Safety | Do not expose to moisture or extreme temperatures |
| Spare parts and repairability | Parts not specified; repair by Sony authorized center |
| General information | Manual available in PDF at notice-facile.com |
Frequently Asked Questions - NVX-P1 SONY
User questions about NVX-P1 SONY
0 question about this device. Answer the ones you know or ask your own.
Ask a new question about this device
Download the instructions for your GPS Navigator in PDF format for free! Find your manual NVX-P1 - SONY and take your electronic device back in hand. On this page are published all the documents necessary for the use of your device. NVX-P1 by SONY.
USER MANUAL NVX-P1 SONY
Personal Navigation System
Operating Instructions ____ GB
Bedienungsanleitung ____ DE
Mode d'emploi FR
Istruzioni per l'uso IT
Gebruiksaanwijzing NL
Manual de instrucciones ____ ES
Bruksanvisning ____ SE
Betjeningsvejledning ____ DK
Wichtig!
- Contents of this manual are written for users with knowledge of using the Microsoft® Windows® operating system. For details about computer operation, refer to the manual for the computer.
- Illustrations in this manual may differ from the actual device.
- Countries/regions are indicated by national flag icons.

natural_image
Symbol of a trash bin crossed with no text or numbers, representing waste sorting or disposal (no text present)Disposal of Old Electrical & Electronic Equipment (Applicable in the European Union and other European countries with separate collection systems)
This symbol on the product or on its packaging indicates that this product shall not be treated as household waste. Instead it shall be handed over to the applicable collection point for the recycling of electrical and electronic equipment. By ensuring this product is disposed of correctly, you will help prevent potential negative consequences for the environment and human health, which could otherwise be caused by inappropriate waste handling of this product. The recycling of materials will help to conserve natural resources. For more detailed information about recycling of this product, please contact your local city office, your household waste disposal service or the shop where you purchased the product.

Applicable accessory: Car battery adaptor
No guarantee for lost data or damaged data
Sony does not provide any guarantee for lost or damaged data.
Caution
IN NO EVENT SHALL SONY BE LIABLE FOR ANY INCIDENTAL, INDIRECT OR CONSEQUENTIAL DAMAGES OR OTHER DAMAGES INCLUDING WITHOUT LIMITATION LOSS OF PROFITS, LOSS OF REVENUE, LOSS OF DATA, LOSS OF USE OF THE PRODUCT OR ANY ASSOCIATED EQUIPMENT, DOWNTIME, AND PURCHASER'S TIME RELATED TO OR ARISING OUT OF THE USE OF THIS PRODUCT, ITS HARDWARE AND/OR ITS SOFTWARE.
Welcome!
Thank you for purchasing this Sony Personal Navigation System. Before operating this system, read this manual thoroughly and retain it for future reference.
FEATURING:
- Plug & Play capability
- 2.0 GB HDD with pre-installed 21 western European countries/area maps (Andorra, Austria, Belgium, Denmark, Finland, France, Germany, Ireland, Italy, Liechtenstein, Luxembourg, Monaco, Netherlands, Norway, Portugal, San Marino, Spain, Sweden, Switzerland, United Kingdom, Vatican)
- 8 languages selectable for the voice guidance and on-screen display
• 3.8-inch high quality display
• Advanced 12 ch parallel GPS receiver
• High-quality speaker
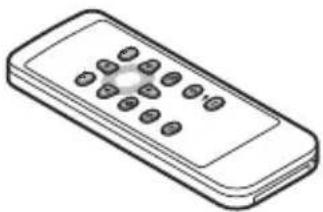
• Card remote commander supplied
• Maximum 200 memory points storable - Tens of thousands of POIs pre-installed
Table of contents
Important notice....4
Getting started
Checking the contents 6
Installing the unit. 7
Location of controls....8
Turning the unit on 10
Starting up the navigation ..... 10
Checking GPS status .... 10
Basic operations
Main menu operations ..... 11
Keyboard operations ..... 11
Route searching
Setting the destination and starting guidance....12
Setting the destination in other ways. . . . . . 13
Guidance displays 13
Setting the destination from the 2D map display....15
Registering Favourites and your home . . . . 15
Adding waypoints on the route — Multi-stop Trip. 16
Avoiding an area....16
Using the 2D pop-up menu ..... 17
Route demonstration 17
System settings
— Preferences....18
Using NVX-P1 Desktop
Installing and running NVX-P1 Desktop 19
Creating custom POIs — POI Editor.... 19
Updating the unit 20
Installing maps on the unit 20
Advanced features of NVX-P1 Desktop... 21
Additional information
Precautions 21
Maintenance 21
Specifications 22
Troubleshooting 23
Index 24
Important notice
To avoid the risk of injury or accident, read the following warning before installing and operating the unit.
On safety
- Observe actual traffic regulations, such as oneway streets, while driving with the route guidance.
- Comply with your local traffic laws and regulations.
- Do not watch the unit while driving. It is dangerous and may cause a traffic accident.
- For your safety, the warning message is displayed. After reading the warning message, select "Accept," then press OK to confirm that you understand.
- For your safety, do not mount or remove the unit from the holder while driving.
- When mounting the unit in the holder, remove any supplied accessories, such as USB cable, etc. from the unit. They may fall or their cables may interfere with driving, causing a traffic accident or injury.
- Be sure to take the unit out of the car when leaving your car to prevent theft or high temperature damage inside the car.
- When the car battery adaptor is not in use, disconnect it from the cigarette lighter socket, as battery drain may still occur even with ignition OFF.
- Do not place anything other than the specified the unit in the holder.
- Do not allow any liquid or foreign objects to enter the unit.
- Do not disassemble or modify the unit.
On installation
- Before installing the unit, please check your local traffic laws and regulations.
- Make sure you install the unit properly according to the installation instructions. Improper installation may result in a fire or an electric shock.
- Before installation, be sure to turn the ignition switch to the OFF position or take out the key. Installing the unit with the ignition on may cause the battery to drain or a short circuit.
- For information about the polarity, battery voltage and location of the airbag of your car, please consult your car dealer.
-
Do not damage any pipes, tubes, the fuel tank or electric wiring when installing the unit, as a fire or accident may result. If you drill a hole in car panels, make sure that any hidden car parts will not be damaged.
-
Do not use any nuts or bolts for critical devices such as steering linkage, fuel supply or braking systems. This can cause a fire or an accident.
• Take care to prevent the cords and wires from getting tangled or crimped in the moving portion of a seat rail. - Do not use any car battery adaptor other than the one supplied.
Installing location
- Do not install the holder where:
- it will obstruct the driver's view when the holder is mounted in the car, or the unit is in the holder.
- it will obstruct the operation of the airbag system.
- it will obstruct the operation of the vehicle, especially the steering wheel, shift lever, or brake pedal.
– it will be subjected to heat/high temperature. - Please consult a qualified technician or service personnel if you cannot attach the holder to the car securely.
On GPS
GPS (Global Positioning System) satellites continuously emit signals for positioning anywhere on the earth. As a GPS aerial receives these signals, users can be informed of their location (latitude, longitude and altitude). Information must be received from 3 satellites in order to obtain two-dimensional fixes (latitude and longitude), and 4 satellites are required for three-dimensional positioning (latitude, longitude and altitude). As GPS satellites are controlled by the U.S. Department of Defense, a deliberate margin of error between a few metres (a few feet) and 10 metres (32.8 ft) exists. As a result, the GPS navigation system may include an error of between 10 metres (32.8 ft) and about 200 metres (656.2 ft), depending on the circumstances.
As GPS information is obtained using signal from satellites, it may be impossible or difficult to obtain the information in the following locations:
- Tunnel or underground

• Under a highway

- Between high buildings
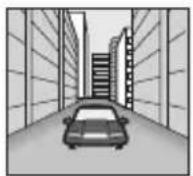
- Between tall trees with dense foliage

On the software
Read the following conditions carefully before use.
• Copyright laws prohibit reproducing the software or the software manual in whole or in part or renting the software without the permission of the copyright holder.
- In the event a problem occurs with this software as a result of defective manufacturing, SONY will replace it at SONY's option or issue a refund. However, SONY bears no other responsibility.
- The software provided with this product cannot be used with equipment other than that which it is designated for use with.
- Please note that, due to continued efforts to improve quality, the software specifications may be changed without notice.
- Roads and names on the map may differ from actual roads and names.
- The warranty does not extend to an exchange or refund due to some typographical errors and omissions, or any other discrepancy in layout found in the software.
- In no way may the map data be copied and used, in whole or in part, without permission of the copyright holder.
- Contents are subject to change without notice. By using the unit, you are agreeing to be bound by the above.
On trademarks
- Microsoft and Windows are registered trademarks of Microsoft Corporation.
- All other trademarks are trademarks of their respective owners.
Getting started
Checking the contents
Check the package contents.
- Navigation unit (1)

natural_image
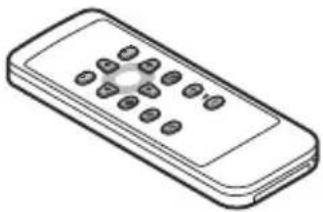
Line drawing of a handheld electronic device with a screen and buttons (no text or symbols)• Card remote commander (1)

natural_image
Line drawing of a remote control device with buttons (no text or symbols)• Car battery adaptor (1)

natural_image
Line drawing of a handheld electric shock absorber with coiled cord (no text or symbols)- AC power adaptor (1)
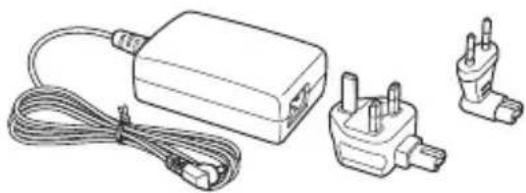
natural_image
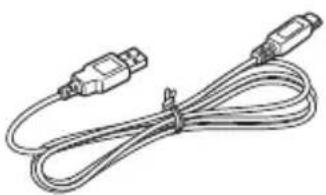
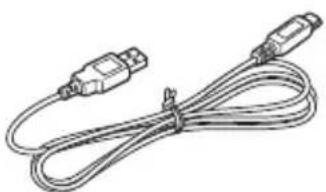
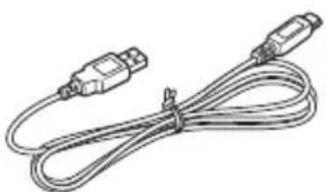
Line drawing of a portable electronic device with two plug outlets and a coiled cable (no text or symbols)- USB cable (1)
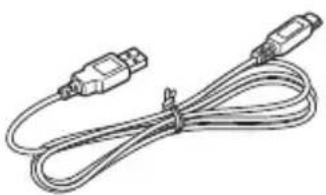
natural_image
Line drawing of a USB cable with two connectors (no text or symbols)- Parts for installation
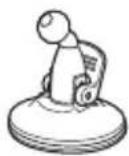
Suction cup /ball joint (1)
Locking nut (1)


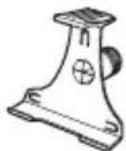
Holder (1) Alcohol swab (1)

- Carry case (1)
- Operating Instructions (1)
- CD-ROMs: NVX-P1 software/this manual PDF (1), map data (3)
Installing the unit
Before you start, choose the position on the windshield that is clearly visible to the driver without obstructing the road view, and make sure all surfaces are clean and dry.
Suction mount
1 Slip the locking nut over the ball joint with the flat side facing upwards.

2 Snap the cup joint of the holder onto the ball joint and half tighten the locking nut.

3 Clean and dry the surface of the suction cup with the alcohol swab, hold it firmly against the windscreen, then press the lever.

natural_image
Mechanical assembly diagram showing a rotating component with rotational arrows (no text or symbols)4 Align the 2 slots on the underside of the unit with the tabs on the holder and push to snap the unit into place.

5 Pull the GPS receiver out to a horizontal position.

6 Set the angle and tighten the locking nut firmly.
Location of controls
Front:

4
E
Rear:

Card remote commander:

The corresponding buttons on the card remote commander control the same functions as those on the unit.
1 Display window
2 Receptor for the card remote commander
3 OK button
To select the highlighted menu option, text or command.
4/ (zoom/brightness) buttons
To change the amount of map area shown (press); adjust the screen brightness (press and hold).
5 ESC (escape) button
To cancel an operation, delete the last text character, return to previous display (press); delete a line of text (press and hold).
6①/(power/menu) button
To display the main menu (press); turn the unit on/off (press and hold).
7 (volume) +/- buttons
To hear the next voice guidance (press); adjust the guidance volume level (press and hold).
8 (page) button
To change map displays, proceed to next display.
9 ←/↑/→/↓ buttons
To select items, scroll up/down, move round a map.
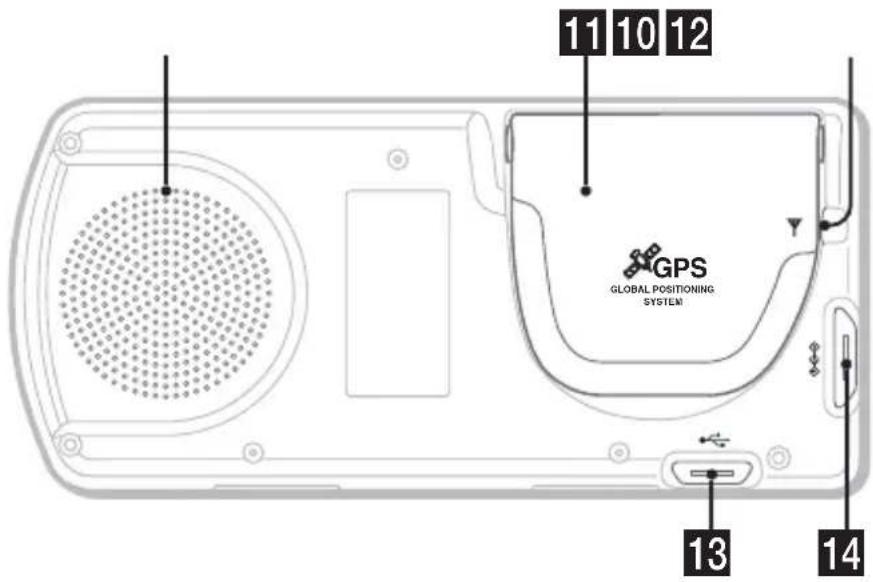
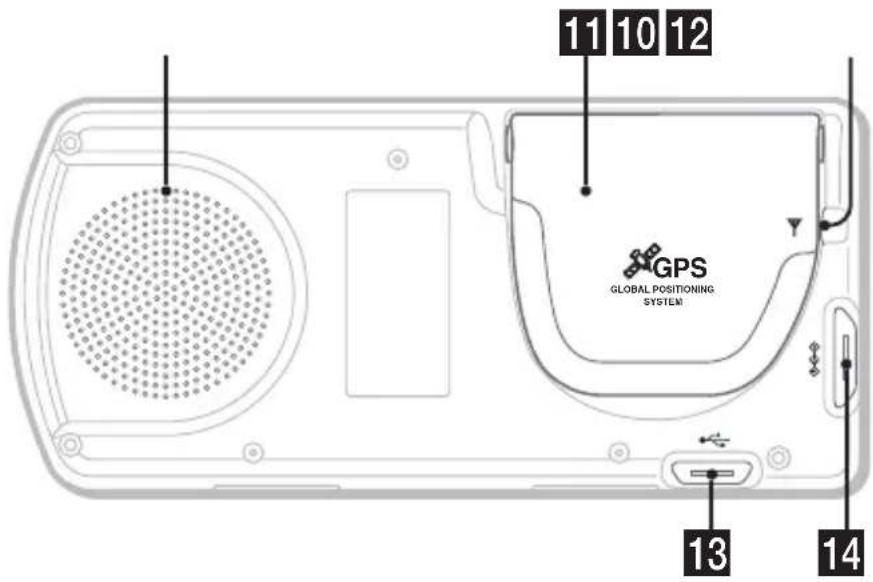
10Speaker
Outputs guidance and warnings.
11 GPS receiver
To receive signals from GPS satellites (pull out to the horizontal position).
12 External aerial jack
To connect external GPS aerial (not supplied).
13 USB jack
To connect to a computer with the USB cable.
14 Power jack
To connect the power adaptor.
Turning the unit on
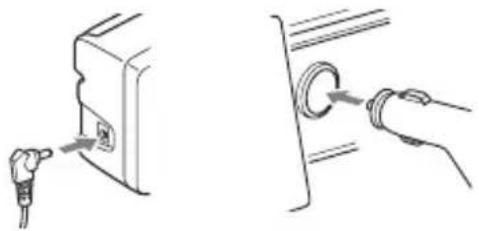
1 Plug the car battery adaptor into the power jack of the unit, and the other end into the car cigarette lighter socket.
natural_image
Two-step diagram showing a device being inserted into a cable, with no text or symbols present.2 Pull out the GPS receiver to a horizontal position to receive GPS signal, then press ① for 1 second.
Tip
You can connect the unit to a mains outlet using the supplied AC power adaptor.
Turning the unit off
1 Push down the GPS receiver until it clicks into place.
2 Press and hold ①.
The message appears.
3 Press OK.
Starting up the navigation
1 After turning the unit on, select the desired language using ←/↑/→/↓, press OK, then press □.
The warning display appears.
2 Read the warning display, select "Accept" using / , then press OK.
The tutorial displays appear.
3 Press repeatedly to proceed.
The main menu display appears.
Tip
You can set not to show the language selection display or tutorial displays when turning the unit on in the following 2 ways:
- Select "Do not show on startup" on each display.
- Set from the "Preferences" display (page 18).
Checking GPS status
You can check the GPS status from the road map displays.

GPS strength indicator*
* Lights up in green and indicates signal strength. Lights up in red when signal has been lost.
Basic operations
Common procedures to operate the system are explained.
Main menu operations
You can set items in the main menu by the following procedure.
1 Press
The main menu appears.

2 Press ↑/↓ to select the desired item, then press OK.

3 Press ←/↑/→/↓ to select the desired setting item, then press OK.
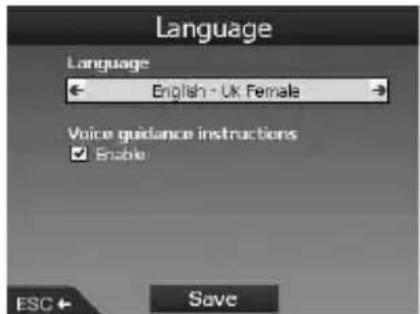
4 Make the desired setting.
Press ←/↑/→/↓ to select the desired setting or input characters/numbers, then press OK.
During menu operation:
To return to the previous display, press ESC.
Tip
The "Route Information" option is available only when a route has been calculated. For details, see "Route Information display" on page 14.
Keyboard operations
The keyboard display appears when you need to enter text.
There are 3 modes for the keyboard display: alphabet, alternate and number/symbol. Each display can be shown as follows.
- Number/symbol - select "123" and press OK.
- Alternate - press, for select "Alt" and press OK.
- Alphabet - press Or select "ABC" and press OK.
Example: Alphabet display
Candidates
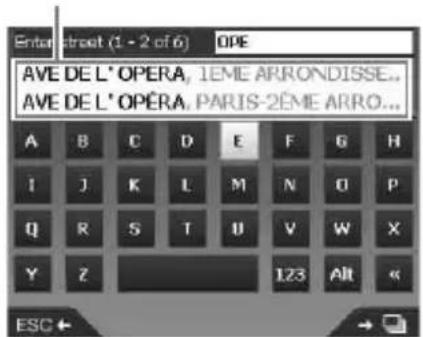
To enter/delete a text
To enter, select a character using /// and press OK. Repeat this operation to complete.
To delete an input character, press ESC, or select “<<” and press OK.
To delete a line, press and hold ESC.
To select a candidate
Use ←/↑/→/↓ and press OK.
To see the list of all candidates, press The list of candidates appears in matching order with the closest matches at the top.
Route searching
The system searches for routes automatically after setting the destination.
The following contents are featured.
- Setting the destination easily by area/street names, postal codes, etc.
– Saving the desired points as Favourites. - Setting up to 14 waypoints for a Multi-stop Trip.
- Setting areas that you want to avoid.
Setting the destination and starting guidance
The procedure for searching for the route and starting the route guidance is explained. Setting the destination by the address is introduced as an example here. For details on setting the destination in other ways, see “Setting the destination in other ways” on page 13.
For your safety, enter the destination information before starting a journey.
1 Press

2 Select "Go To" → "Address or POI" using ↑/↓ and OK.
The “Select country” display* appears. * Appears only the first time. Thereafter, you will need to select “Change country” in the destination display to change the country again.

3 Select the desired country using ↑/↓, then press OK.
4 Select "Find area" in the destination display using ↑/↓, then press OK.
Other items:
"Find street"
Searches for routes by street name. Proceed from step 6.
"Find postal code"
Searches for routes by postal code. Input the postal code.
"Find Point of Interest"
Searches for routes to a POI, such as restaurant, hotel, etc., from the category list. For details, see “Setting the destination in other ways” on page 13.
5 Input the area name.
For details on how to input the character, see "Keyboard operations" on page 11. If you want to go to the centre of the selected area, select "Go to centre of area," and proceed from step 8.
6 Select "Find street" using ↑/↓, press OK, then input the street name.
7 Select "Find intersection" or "Enter house number" using ↑/↓, press OK, then select the cross street or input the house number.
"Find intersection"/"Enter house number" is selectable only when it is available for the selected street.
Select "Go to centre of street" to go to the centre of the street.
The preview display appears.

8 Select "Go" using ←/↑/→/↓, then press OK.
The 3D map display appears, the route is calculated, and the route guidance starts.
Other items:
2D map display
To display, select the preview display and press OK.
For details, see "2D map display" on page 14.
Save as Favourite
To save the destination as a Favourite, select "Save" and press OK.
For details, see “Registering Favourites and your home” on page 15.
Address search rules
When searching for a route by address, refer to the following rules.
- If a street name contains a date or a number, search by the first number.
- If a street name is a person's name (including at least a first and last name), search by the first name*.
- When searching by postal code in the United Kingdom, input the postal code with spaces and without the last 2 letters.
* In Italy, search by the last name.
Setting the destination in other ways
You can also set the destination and search for routes by the following methods.
After pressing ▲ select the items in the following order using ←/↑/→/↓ and OK.
My Home
Searches for routes to your home when it is registered. For details on registering your home, see “Registering Favourites and your home” on page 15.
“Go To” → “My Home”
POI
Searches for routes to a POI, such as restaurant, hotel, etc., from the category list.
“Go To” → “Address or POI” → “Find Point of Interest” → “Select POI” → the desired POI name → “Go”
Favourites
Searches for routes to a registered point. For details on saving a point as a Favourite, see “Registering Favourites and your home” on page 15.
“Go To” → “Favourites” → the desired Favourite → “Go”
Recent
Searches for routes by recently searched destination.
“Go To” → “Recent” → the desired destination → “Go”
Nearest POI
Searches for routes to the nearest POI, such as restaurant, hotel, etc. The category list appears listed in order of distance from your current position.
“Go To” → “Nearest POI” → “Select POI” → the desired POI name → “Go”
Tip
You can narrow down the POI search by selecting "Find Point of Interest" after inputting area name or postal code.
Guidance displays
Once a route has been calculated, you can show the following displays.
Each time you press □ the display pattern changes as follows:
2D map → 3D map → Next Turn* → Next 4 Turns* → ...
* Appears only when it is set to be displayed from the "Preferences" display (page 18).
Basic information on the display
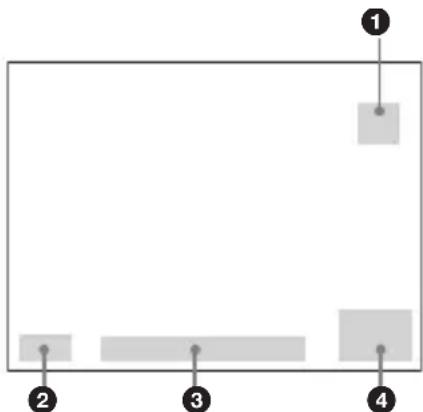
①North oriented compass
② GPS strength indicator
③Current location
4 Speed/Time/Heading/Distance to turn/ Distance to go/ETA (Estimated Time of Arrival)/Time to go*
* Press ←/→ repeatedly to change the display item.
continue to next page →
2D map display
Always oriented north and shows your current position (if GPS signal is received) and surrounding street names. If a route is calculated, the route and turns are highlighted.

Press OK to display the cross-hair, press it again to display the pop-up menu.
3D map display
Oriented to the current heading with an adjustable horizon.
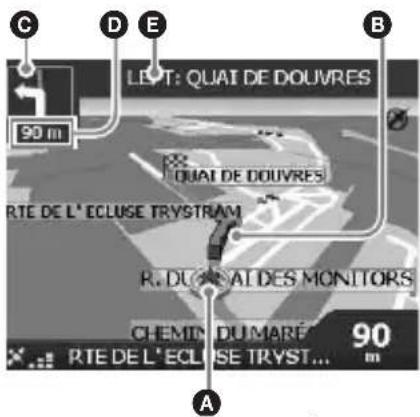
Adjust the viewing angle using / .
Next Turn display
Displays the information of the next turn, such as the direction and distance.

Next 4 Turns display
Displays the next 4 turns and their directions, street names and distances.

Tip
If you make a wrong turn, the route is re-directed. While the route is re-calculated, “?” appears in the upper left of the 3D map or Next Turn display.
A Current position
BNext turn
©Direction to next turn
D Distance to next turn
ENext turn instruction
FMap of the next turn
Other guidance displays
Route Information display
Provides information about your current route and allows you to skip a waypoint or cancel a route. After pressing 🔒, select “Route Information” → the following items using ←/↑/→/↓ and OK.
Show route
Shows the entire route on the 2D map display.
Instruction list
Shows the list of next turn instructions of the entire route. Press ☐ to cycle through the list.
Summary
Shows the addresses of departure point (“From”) and the destination (“To”), “Estimated time” and “Distance.” On a multiple destination trip, the information relates to the next destination point.
Skip Next Dest.
For details, see "To skip a waypoint during the route guidance" on page 16.
Cancel Route
Select this when you want to cancel the route.
Setting the destination from the 2D map display
You can set the destination directly from the 2D map display using the pop-up menu.
1 Press ⚙, select "Map" using ↑/↓, then press OK.
The 2D map display appears.
Use ⊕/⊖ to zoom in/out the map, and ←/↑/→/↓ to move around the map.
2 Press OK to show the cross-hair on the map.
To hide, press ESC.
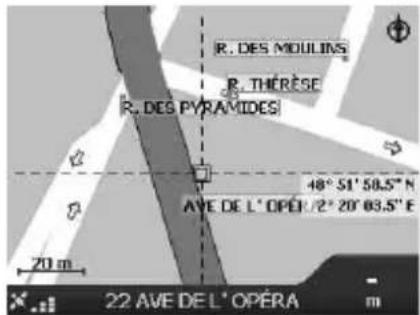
3 Place the intersection of the cross-hair on a destination point using ←/↑/→/↓.
The street is highlighted and the street name appears.
4 Press OK to show the pop-up menu.

5 Select "Navigate to" to set the street as the destination by pressing OK.
The 3D map display appears, the route is calculated, and the route guidance starts.
Registering Favourites and your home
You can save up to 200 destinations as Favourites and one of which as "My Home."
1 Search for the address to save as a Favourite.
For details, see "Setting the destination and starting guidance" on page 12.
2 In the preview display, select "Save" using ←/↑/→/↓, then press OK.

If you do not need to change the name, proceed from step 5.
3 Select "Name" using ↑/↓, then press OK.
4 Change the Favourite name and select "Enter" to complete.
For details on using the keyboard, see "Keyboard operations" on page 11.
5 Select "Save as Favourite" using ↑/↓, then press OK.
Select "Save as My Home" when you want to save the point as your home.
To display the Favourites list
Press ⬆, select "Go To" → "Favourites" using ↑/↓ and OK.
Tip
You can also save a Favourite by the 2D pop-up menu (page 17).
Other Favourites operations
After pressing select "Go To" and the items in the following order using /// and OK.
Editing the Favourite name
“Favourites” → the Favourite that you want to rename → “Name” → the new name → “Save” → “Save” → “Save as Favourite”
Deleting a Favourite
“Favourites” → the unwanted Favourite → “Delete” → “Yes”
Navigating to a Favourite
“Favourites” → the desired Favourite → “Go”
Navigating to your home
"My Home"
Adding waypoints on the route
— Multi-stop Trip
You can set up to 14 waypoints for a Multi-stop Trip, and save the trip as a Favourite.
1 Press, select "Multi-stop Trip" using ↑/↓, then press OK.

2 Select "Add" using /// , press OK, then search for the waypoint by address, POI, etc.
For details, see “Setting the destination and starting guidance” on page 12.
3 In the preview display, select "Add to Trip" using /// , then press OK.
The waypoint is listed in the “Multi-stop Trip” display.
Repeat step 2 and 3 to continue adding waypoints.
4 Select "Go" using ←/↑/→/↓, then press OK.
The 3D map display appears, the route is calculated, and the route guidance starts.
Tip
You can also add a waypoint using the 2D pop-up menu. For details, see "Show details" on page 17.
To skip a waypoint during the route guidance
Press ⚠, select “Route Information” → “Skip Next Dest.” using ←/↑/→/↓ and OK.
Other Multi-stop Trip operations
Various operations are available from the “Multi-stop Trip” display by selecting the items in the following order using /// and OK.
Saving as a Favourite
"Save" → "Save as Favourite"
The saved Multi-stop Trip is displayed as “TRIP TO …” in the Favourites list (page 15).
Deleting a waypoint
The unwanted waypoint in the list → “Delete from Trip”
To delete all waypoints, select "Clear."
Changing the order of waypoints
The waypoint to move from the list → “Move” → the desired position
Avoiding an area
You can specify an area on the map to be avoided and calculate an alternative route in doing so. You can save up to 10 areas.
Note
If there is no alternative route around a specified area to avoid, you will be routed through it.
1 Press ⬆, select "Map" using ↑/↓, then press OK to show the 2D map display.
2 Show the cross-hair by pressing OK, then place the intersection of the cross-hair over the area to avoid using /// .
3 Show the pop-up menu by pressing OK, select "Add Avoid Area" using ↑/↓, then press OK.

4 Correct the size and position of the area using /// , then press OK to complete.
To delete an Avoid Area
Select the Avoid Area that you want to delete →
"Delete Avoid Area" in the pop-up menu using /// and OK.
You can delete all Avoid Areas at once from the "Preferences" display (page 18).
Using the 2D pop-up menu
You can use the pop-up menu to access navigational functions from the 2D map.
In the 2D map display, show the cross-hair by pressing OK, locate the desired point using
←/↑/→/↓, then press OK to show the pop-up menu.
Select the following items using /// and OK.
Navigate To
Sets the selected point as the destination, calculates a route from the current position, and starts the route guidance.
Set as Start Location
Sets the selected point as the departure point.
Add to Favourites
Saves the selected point as a Favourite (page 15).
Show details
Shows the “Address Details” display from which you can view details of the selected point; add it to Multi-stop Trip; save it as a Favourite; set it as a destination.
Add Avoid Area
For details, see “Avoiding an area” on page 16.
Delete Avoid Area
For details, see “To delete an Avoid Area” on page 16.
Nearest POI
Searches for routes to the nearest POI, such as restaurant, hotel, etc. The category list appears listed in order of distance from your current position.
Route demonstration
The route to the destination can be demonstrated.
1 Press
2 Select "Preferences" → "Routing" using ↑/↓ and OK.
3 Press twice.
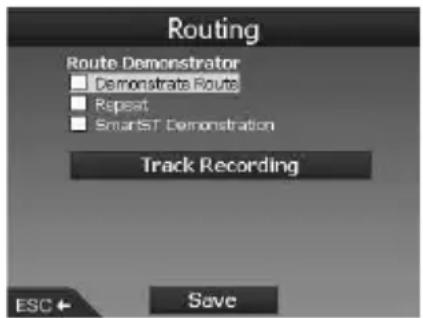
4 Select "Demonstrate Route" → "Save" using ↑/↓ and OK.
5 Set the departure point.
For details, see “Set as Start Location” on page 17.
If GPS signal is received, you do not need to set the departure point unless you want to start elsewhere.
6 Set the destination.
When you set by address, POI, etc., from the main menu, see “Setting the destination and starting guidance” on page 12.
When you set from the 2D map display and the pop-up menu, see “Setting the destination from the 2D map display” on page 15.
The route demonstration starts.
Once the demonstration is complete, it returns to a normal mode.
To repeat the route demonstration mode
Select "Repeat" in step 4.
To exit the route demonstration
Follow step 1 to 3, uncheck "Demonstrate
Route," then select "Save" using ↑/↓ and OK.
System settings
— Preferences
The various settings related to the system and the memory are configurable.
After pressing ⚠, select “Preferences” → the items below using ←/↑/→/↓ and OK, then press “Save” to complete (if selectable). Press to cycle through the displays if needed.
Routing
Route Type ^*1
To set the preference of route type to either quickest or shortest when calculating a route.
Preference for motorways\*1
To set the preference for using motorways when calculating a route.
Preference for urban roads\*1
To set the preference for using urban roads when calculating a route.
Road use
To avoid toll roads, unsealed roads or ferries.
Warn when route includes,
To warn you when the route includes toll roads, unsealed roads or ferries.
Route Demonstrator (page 17)
Language
Language
To select the desired language for the on-screen display, the voice guidance and voice scheme.
Voice guidance instructions
To activate/deactivate the voice guidance.
Maps
Display
To adjust the settings on display, such as auto zoom, map colour scheme, map colours, etc.; activate/deactivate the Next Turn/Next 4 Turns display.
Internal Memory
To activate maps.
Points of Interest
To show/hide a POI type icon(s) on the map displays and POI type(s) in the category list.
Safety Alerts
Active POI
To have audio/visual warning when custom POIs ^*2 are within a selected radius of your location, which are not necessarily on your route.
Safety
To have audio warning when travelling at or above designated speed; visual warning when main menu is accessed in a moving car; audio/visual warnings when the GPS signal is lost.
My Data
My POI
To display the custom POI files ^*2 list and activate/deactivate them.
Clear Data
To delete all data of recently searched destinations, Favourites, Avoid Areas.
More Preferences
GPS status
To display the GPS status with the latitude, longitude, north-pointing compass, the heading in degrees and the strength of each satellite with a bar chart.
Measurements
To change the setting of position format; set the local time offset using UTC (Universal Time - also known as Greenwich Mean Time)* 3; select 12/24-hour clock indication; select distance units from kilometers/miles.
Startup
To select whether to show the tutorial/language selection display when turning on the unit; show the tutorial displays.
About
To display the unit information, such as version, etc.
*1 Select "Set default" to restore the default settings.
*2 You can install custom POIs on the unit using the NVX-P1 Desktop (page 19).
*3 When GPS signal has been lost.
Using NVX-P1 Desktop
You can install NVX-P1 Desktop on your computer to manage maps and custom POIs, obtain software updates.
Installing and running NVX-P1 Desktop
1 Insert the NVX-P1 Application CD into your computer and follow the prompts to install the application.
NVX-P1 Desktop runs.
Thereafter, access from the start menu.
Creating custom POIs
— POI Editor
You can create custom POIs using the POI Editor in 2 ways.
- Create your own POI files.
– Use compatible POI files downloaded from the Internet.
You can save up to 25 custom POI files on the unit.
Creating a custom POI file
1 Select "Map" menu on the NVX-P1 Desktop → "Points of Interest" → "File" → "New Text File."
2 Enter the file name within 8 characters in the "File Name" field, then click "OK."
3 Select "Edit" menu on the "POI Editor" window "New."
4 Enter a description of the POI, latitude and longitude on the "Degrees, Minutes, Seconds" tab, then click "OK" to save the POI.
Repeat step 2 to 4 to continue adding POIs.
5 Select "File" menu on the "POI Editor" window, and click "OK" to save the POI file.
Tip To edit the name of created custom POI file, follow step 1 and 2 above.
Importing a custom POI file
1 Download a POI file from the Internet and save it on your computer.
2 Select "Map" menu on the NVX-P1 Desktop → "Points of Interest" → "File" → "Open Text File."
3 Select the POI file from your local or network drive, then click "OK."
Saving custom POI files to the unit
1 Connect the unit to your computer with the USB cable, and run NVX-P1 Desktop.
2 Select "Map" menu on the NVX-P1 Desktop → "Points of Interest" → "File" → "Save to device."
3 Adjust the POI settings as required by selecting the following items.
"Active"
To activate the POI. If it is not selected, only the “POI Visibility Level” and “Icon File” will be configured.
"Visual Alert"/"Audio Alert"
To activate the visual/audio warning when the POI is within a selected radius of your location.
“Metric”/“Imperial”
To choose the unit of distance for the POI.
"Distance"
To set the distance from the POI at which the visual/audio warning should display/sound.
“POI Visibility Level”
To indicate the priority of the POI when one or more POIs are in the same area.
"Icon File"*
To display a custom POI type icon on the map. Default icon will be used when it is not selected.
* The file must be a bitmap graphic with a minimum of 6 × 6 pixels and maximum of 32 × 32 pixels.
4 Click "OK" and follow the prompts.
The custom POI file is saved to the unit.
To delete custom POI files from the unit Select "Map" on the NVX-P1 Desktop → "Points of Interest" → "File" → "Manage POI files" → "File Name"/"Size" of the unwanted POI → "Delete" → "OK."
Updating the unit
You can update the unit software to the most recent version using the NVX-P1 Desktop. Make sure that your computer has an Internet connection available.
1 Connect the unit and your computer with the USB cable, and run NVX-P1 Desktop.
2 From the "Setup" menu, select "Update software" → "Check for updates on the web."
3 Download the update for your region to your computer, if available.
Updating is complete.
Installing maps on the unit
You can install additional maps on the unit using the NVX-P1 Desktop. Purchase a Map Product Key and activate it with NVX-P1 Desktop. Make sure that your computer has an Internet connection available.
1 Connect the unit and your computer with the USB cable.
2 Run NVX-P1 Desktop and insert a Map CD into your computer.
The available maps appear.
3 Click the map that you want to install on the unit.
The map that is already activated is indicated with different colour. In that case, proceed from step 6.
4 Follow the prompts to activate your Map Product Key.
5 Click the map that you want to install on the unit.
The map is selected. Repeat step 3 to 5 if you have another Map Product Key to activate.
6 Click "Add to" to install all maps listed in the "Selected" section of the "Desktop Selected Maps" tab on the unit.
The selected maps are installed on the unit.
Tip
Maps are of population areas and not of political areas such as countries or states. You may need to install multiple maps to cover the desired geographical area.
To remove maps from the unit
From the NVX-P1 Desktop, open “Maps on the unit,” click the map that you want to delete, and select “Remove from NVX-P1” from the pop-up menu.
Advanced features of NVX-P1 Desktop
The following items are available on the NVX-P1 Desktop.
City/town search
You can display the centre of a selected city/town in the map display.
Select "Map" menu → "Find City" → enter the city/town name → double click the city/town name in the list.
Map colour and texture adjustment
You can adjust the settings of map colours, map border colour, map border width, crosshatch texture. You can also set to show the globe texture*.
Select “Desktop tab” → “Settings” → “Colours” → “Desktop Colours.”
Map layers
You can install map layers on the unit. The selectable layers are POIs, bodies of water and parks, and land contours (topography). Select “Desktop tab” → “Settings” → “Layers.”
Backups
You can back up the preference settings, the data of Favourites and “My Home” on the unit. Select “File” menu → “Backup” → “New Backup” → “OK.”
To delete, select "File" menu "Backup" the unwanted backup "Delete" "OK."
To restore, select "File" menu "Restore" the desired backup "OK."
* Visible only if the map has no colour or crosshatch texture.
Additional information
Precautions
If your car has been parked in direct sunlight, allow the unit to cool off before operating it.
Moisture condensation
On a rainy day or in a very damp area, moisture condensation may occur inside the unit. Should this occur, the unit will not operate properly. In such a case, wait for about an hour until the moisture has evaporated.
To maintain the performance
Be careful not to splash juice or other soft drinks onto the unit.
Maintenance
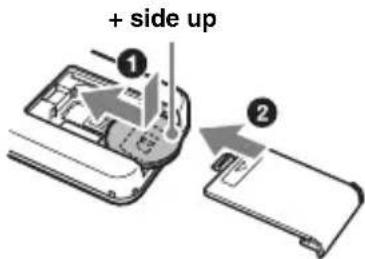
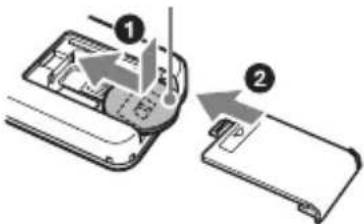
Replacing the lithium battery of the card remote commander
Under normal conditions, the battery will last approximately 1 year. (The service life may be shorter, depending on the conditions of use.) When the battery becomes weak, the range of the card remote commander becomes shorter. Replace the battery with a new CR2025 lithium battery. Use of any other battery may present a risk of fire or explosion.

continue to next page →
Notes on the lithium battery
- Keep the lithium battery out of the reach of children. Should the battery be swallowed, immediately consult a doctor.
- Wipe the battery with a dry cloth to assure a good contact.
- Be sure to observe the correct polarity when installing the battery.
- Do not hold the battery with metallic tweezers, otherwise a short-circuit may occur.
WARNING
Battery may explode if mistreated. Do not recharge, disassemble, or dispose of in fire.
Fuse replacement
When replacing the fuse, be sure to use one matching the amperage rating stated on the original fuse. If the fuse blows, check the power connection and replace the fuse. If the fuse blows again after replacement, there may be an internal malfunction. In such a case, consult your nearest Sony dealer.

Warning
Never use a fuse with an amperage rating exceeding the one supplied with the unit as this could damage the unit.
Specifications
Navigation unit
Operating temperature: 0 °C to 55 °C (32 °F to 131 °F)
Storage temperature: -40^ to +85^ (-40^ to +185^)
Dimensions: Approx. 165 × 76 × 43.7 mm ( 6.5 × 3.0 × 1.7 in) (w × h × d)
Mass: Approx. 370 g (13.1 oz)
Power requirements: 12 V DC car battery (negative earth)
Connection terminal: External aerial jack Power jack USB jack
GPS receiver
Location method: All in view method Maximum number of tracking satellites: 12 satellites
Speaker
Maximum power output: 0.25 W
Optional accessory
External GPS Antenna: VCA-39
Design and specifications are subject to change without notice.

- Lead-free solder is used for soldering all the parts including circuit component electrodes.
- Halogenated flame retardants are not used in printed wiring boards.
Troubleshooting
The following checklist will help you remedy problems you may encounter with your unit. Before going through the checklist below, check the connection and operating procedures.
The operation buttons do not function.
The operation may take time while a map is displayed.
The unit does not turn on.
→Check that the ignition switch is in the ON position.
→Check the connection between the car battery adaptor and cigarette lighter socket.
→If the ambient temperature is very high, the protection circuit may activate and prevent the unit from turning on. Allow the unit to cool off, and turn it on.
→Check the fuse in the car battery adaptor.
The remote does not function.
- There are obstacles between the card remote commander and the remote receptor on the unit.
- The distance between the card remote commander and the unit is too far.
- The card remote commander is not pointed at the remote receptor on the unit.
- The batteries in the card remote commander are weak. For details, see “Replacing the lithium battery of the card remote commander” on page 21.
GPS signal cannot be received.
- The system cannot receive GPS signals due to an obstruction.
→Move your car somewhere clear.
• GPS signal reception is low.
→Check the GPS signal values.
→An external GPS aerial (not supplied) may be required for a heated or heat reflective windscreen. - There is an obstacle in front of the GPS receiver.
→Install the unit where the signal is not interrupted by the body of the car, etc. For details on the unit installation, see “Installing the unit” on page 7.
→Check that the GPS receiver is pulled out to a horizontal position. For details, see “Installing the unit” on page 7. - Signal may not be received if a window film is attached. In that case, use an external GPS aerial (not supplied).
The car position on the map does not match the current road.
The error margin of the signal from the GPS satellites is too large. A maximum error margin of a few hundred metres can exist.
The guidance patterns cannot be changed by pressing ☐.
The current car position does not appear on the route right after guidance started.
→Wait until the current car position appears on the road map.
The voice guidance cannot be heard.
The volume is set too low.
→Press and hold ▲ + on the unit or card remote commander.
The LCD becomes very bright/dark.
The internal temperature of the unit is regulated by automatically adjusting the brightness of the LCD, depending on whether the ambient temperature is very high or low. In extreme temperatures beyond the adjustable range, a message will appear, and the warm up mode will be turned on, or the power will be turned off.
Index
Numerics
2D map 14, 15
2D pop-up menu 17
3D map 14
A
About 18
Active POI 18
Add
Avoid Area 16
To Favourites 15, 17
To Trip 16
Waypoint 16
Address 12
Auto zoom 18
Avoid
Area 16
Ferries 18
Toll roads 18
Unsealed roads 18
C
Cancel Route 14
Card remote commander 8
Clear Data
Avoid Areas 18
Favourites 18
Recent 18
D
Delete
Avoid Area 16
Custom POI 19
Favourite 15
Text 11
Waypoint 16
Display 18
Distance units 18
F
Favourite
Delete 15
Edit name 15
Navigate to 13, 15
Register 15
Ferries
Avoid 18
Warn 18
Find
Area 12
Intersection 12
Point of Interest 12
Postal code 12
Street 12
Fuse 22
G
Go To 12
GPS 4
GPS status 10, 18
Guidance displays 13
H
House number 12
|
Instruction list 14
Internal Memory 18
K
Keyboard 11
L
Language 18
Latitude 18
Longitude 18
M
Main menu 11
Map 15, 16
Map colour scheme 18
Map colours 18
Maps 18
Measurements 18
More Preferences 18
Multi-stop Trip
Add 16
Save 16
My Data 18
My Home 13, 15
My POI 18
N
Navigate To 17
Nearest POI 13, 17
Next 4 Turns 14
Next Turn 14
NVX-P1 Desktop 19
P
POI (Points of Interest) 13, 18
POI Editor 19
Position format 18
Preference for motorways 18
Preference for urban roads 18
Preferences 18
R
Recent 13
Road use 18
Route Demonstrator 17
Route Information 14
Route Type 18
Routing 18
S
Safety 18
Safety Alerts 18
Save as
Favourite 15, 17
My Home 15
Select country 12
Set as Start Location 17
Show details 17
Show route 14
Skip Next Dest. 14
Startup 18
Summary 14
T
Time 18
Toll roads
Avoid 18
Warn 18
Tutorial displays 18
U
Unsealed roads
Avoid 18
Warn 18
V
Voice guidance 9
Voice guidance instructions 18
Volume 9
W
Warn
Custom POI 18
Ferries 18
GPS loss 18
Main menu operation 18
Speed 18
Toll roads 18
Unsealed roads 18
Waypoint
Add 16
Clear 16
Delete 16
Move 16
Skip 16
natural_image
Symbol of a trash bin crossed with no text or numbers, representing waste sorting or disposal (no text present)natural_image
Line drawing of a rectangular electronic device with a screen and keypad (no text or symbols)natural_image
Line drawing of a remote control device with keypad (no text or symbols)- Autobatterieadapter (1)
natural_image
Line drawing of a handheld medical or electrical device with coiled cable (no text or symbols)- Netzteil (1)

natural_image
Line drawing of a portable electronic device with two plug outlets and a coiled cable (no text or symbols)- USB-Kabel (1)

natural_image
Line drawing of a USB cable with two connectors (no text or symbols)- Montageteile
Saugnapf /Kugelgelenk (1)
natural_image
Mechanical assembly diagram showing a rotating component with a curved arrow indicating rotation (no text or symbols)Rückseite:

natural_image
Two-step diagram showing a tool inserting into a device into a cable (no text or symbols present)natural_image
Simple diagram with four numbered gray squares and arrows pointing to specific positions (no text or symbols)natural_image
Symbol of a trash bin crossed with no text or numbers, representing waste sorting or restriction (no text present)natural_image
Line drawing of a handheld electronic device with a screen and control knob (no text or symbols)natural_image
Line drawing of a remote control device with buttons (no text or symbols)natural_image
Line drawing of a handheld electric shock absorber with coiled cord (no text or symbols)natural_image
Line drawing of a portable electronic device with two plug outlets and a coiled cable (no text or symbols)• Câble USB (1)
natural_image
Line drawing of a USB cable with two connectors (no text or symbols)natural_image
Mechanical assembly diagram showing a rotating component with a curved arrow indicating rotation (no text or symbols)Arrière :

Mini-télécommande :

natural_image
Illustration showing a hand inserting a cable into a device (left) and inserting a cable with a ring (right), both without any text or symbols.Pôle + vers le haut

natural_image
Symbol of a trash bin crossed with no text or numbers, representing waste sorting or restriction (no text present)natural_image
Line drawing of a handheld electronic device with a screen and keypad (no text or symbols)natural_image
Line drawing of a remote control device with buttons (no text or symbols)natural_image
Line drawing of a handheld electric shock absorber with coiled cord (no text or symbols)natural_image
Line drawing of a portable electronic device with two plug outlets and a coiled cable (no text or symbols)• Cavo USB (1)
natural_image
Line drawing of a USB cable with two connectors (no text or symbols)natural_image
Mechanical assembly diagram showing a rotating component with a curved arrow indicating rotation (no text or symbols)Parte posteriore:

natural_image
Two-step diagram showing a hand inserting a cable into a device and then connecting to a ring (no text or symbols present)natural_image
Simple diagram with four numbered rectangular blocks and a vertical line, no text or symbols present①Bussola orientata a Nord
"POI Visibility Level"
Selezionare “Map” in NVX-P1 Desktop → “Points of Interest” → “File” → “Manage POI files” → “File Name”/“Size” del PDI che si desidera eliminare → “Delete” → “OK”.
natural_image
Symbol of a trash bin crossed with no text or labelsnatural_image
Line drawing of a handheld electronic device with a screen and keypad (no text or symbols)• Kaartafstandsbediening (1)
natural_image
Line drawing of a remote control device with keypad (no text or symbols)- Accuadapter (1)

natural_image
Line drawing of a handheld electric shock absorber with coiled cord (no text or symbols)- Netspanningsadapter (1)

natural_image
Line drawing of a portable electronic device with two plug outlets and a coiled cable (no text or symbols)• USB - kabel (1)

natural_image
Coiled cable with two USB connectors (no text or symbols visible)natural_image
Mechanical assembly diagram showing a rotating component with a curved arrow indicating rotation (no text or symbols)Achterkant:
natural_image
Illustration showing a hand inserting a cable into a device (left) and inserting a cable with a ring (right), both without any text or symbols.natural_image
Simple diagram with four numbered rectangular blocks and vertical arrows, no text or symbols presentSelecteer "Herhaal" in stap 4.
"POI Visibility Level"
Selecteer "Map" in NVX-P1 Desktop → "Points of Interest" → "File" → "Manage POI files" → "File Name"/"Size" van de ongewenste POI → "Delete" → "OK".
Route Demonstrator 18
Route-informatie 15
Routing 19
s
Samenvatting 15
Selecteer land 12
Soort route 19
natural_image
Symbol of a trash bin crossed with no text or numbers, representing waste sorting or disposal (no text present)natural_image
Line drawing of a handheld electronic device with a screen and keypad (no text or symbols)• Control remoto de tarjeta (1)

natural_image
Line drawing of a remote control with keypad (no text or symbols)natural_image
Line drawing of a handheld electric shock absorber with coiled cord (no text or symbols)natural_image
Line drawing of an electronic device with two plug outlets and a cable, no text or symbols present• Cable USB (1)
natural_image
Line drawing of a USB cable with two connectors (no text or symbols)natural_image
Mechanical assembly diagram showing a rotating component with a curved arrow indicating rotation (no text or symbols)Parte trasera:
natural_image
Two-step diagram showing a hand inserting a cable into a device, with no text or symbols present.natural_image
Simple diagram with four labeled points (1, 2, 3, 4) and two gray squares inside a rectangle (no text or symbols)“POI Visibility Level”
"Colours" → "Desktop Colours".
Capas de mapas
Lado + hacia arriba
natural_image
Symbol of a trash bin crossed with no text or labelsnatural_image
Line drawing of a handheld electronic device with a screen and control panel (no text or symbols)• Fjärrkontroll (1)
natural_image
Line drawing of a remote control device with keypad (no text or symbols)natural_image
Line drawing of a handheld electric shock absorber with coiled cord (no text or symbols)• Nätadapter (1)

natural_image
Line drawing of a portable electronic device with two plug outlets and a coiled cable (no text or symbols)• USB - kabel (1)

natural_image
Line drawing of a USB cable with two connectors (no text or symbols)- Monteringsdetaljer
Sugkopp/ kulled (1)
Låsmutter (1)

Hållare (1) Duk fuktad med alkohol (1)

natural_image
Mechanical assembly diagram showing a rotating component with a curved arrow indicating rotation (no text or symbols)natural_image
Illustration showing two steps: one of a cable being inserted into a socket, the other of a cable being inserted into a socket (no text or symbols present)natural_image
Simple diagram with four numbered rectangular blocks and a small square, no text or symbols present"POI Visibility Level"
Välj "Desktop tab" → "Settings" → "Colours" → "Desktop Colours".
Kartlager
natural_image
Symbol of a trash bin crossed with no text or numbers, representing waste sorting or disposal (no text present)natural_image
Line drawing of a handheld electronic device with a screen and keypad (no text or symbols)natural_image
Line drawing of a remote control device with buttons (no text or symbols)- Batteriadaptor til bil (1)

natural_image
Line drawing of a handheld electric shock absorber with coiled cord (no text or symbols)• Vekselstrømsadapter (1)

natural_image
Line drawing of a portable electronic device with cables and two terminal plugs (no text or symbols)- USB - kabel (1)

natural_image
Line drawing of a USB cable with two connectors (no text or symbols)natural_image
Mechanical assembly diagram showing a rotating component with a curved arrow indicating rotation (no text or symbols)Bagpå:

Kortfjernbetjening:

natural_image
Two-step diagram showing a cable being inserted into a device, with no text or symbols present.natural_image
Simple diagram with four numbered points and shaded rectangular blocks (no text or symbols)"POI Visibility Level"
If you have any questions or for the latest support information on navigation, visit the website below:
http://www.sonydigital-link.com/navigation/

- Personal Navigation System
- Wichtig!
- Disposal of Old Electrical & Electronic Equipment (Applicable in the European Union and other European countries with separate collection systems)
- No guarantee for lost data or damaged data
- Caution
- Welcome!
- FEATURING:
- Table of contents
- Getting started
- Basic operations
- Route searching
- System settings
- Using NVX-P1 Desktop
- Additional information
- Important notice
- On safety
- On installation
- Installing location
- On GPS
- On the software
- On trademarks
- Checking the contents
- Installing the unit
- Suction mount
- Location of controls
- Turning the unit on
- Turning the unit off
- Starting up the navigation
- Checking GPS status
- Main menu operations
- Press
- Keyboard operations
- To enter/delete a text
- To select a candidate
- Setting the destination and starting guidance
- Select "Go" using ←/↑/→/↓, then press OK.
- Address search rules
- Setting the destination in other ways
- My Home
- POI
- Favourites
- Recent
- Nearest POI
- Tip
- Guidance displays
- 2D map display
- 3D map display
- Next Turn display
- Next 4 Turns display
- Other guidance displays
- Route Information display
- Show route
- Instruction list
- Summary
- Skip Next Dest.
- Cancel Route
- Setting the destination from the 2D map display
- Registering Favourites and your home
- Other Favourites operations
- Editing the Favourite name
- Deleting a Favourite
- Navigating to a Favourite
- Navigating to your home
- Adding waypoints on the route
- — Multi-stop Trip
- To skip a waypoint during the route guidance
- Other Multi-stop Trip operations
- Saving as a Favourite
- Deleting a waypoint
- Changing the order of waypoints
- Avoiding an area
- Note
- To delete an Avoid Area
- Using the 2D pop-up menu
- Navigate To
- Set as Start Location
- Add to Favourites
- Show details
- Add Avoid Area
- Delete Avoid Area
- Route demonstration
- To repeat the route demonstration mode
- To exit the route demonstration
- — Preferences
- Routing
- Route Type *1
- Preference for motorways\*1
- Preference for urban roads\*1
- Road use
- Warn when route includes,
- Route Demonstrator (page 17)
- Language
- Voice guidance instructions
- Maps
- Display
- Internal Memory
- Points of Interest
- Safety Alerts
- Active POI
- Safety
- My Data
- My POI
- Clear Data
- More Preferences
- GPS status
- Measurements
- Startup
- About
- Installing and running NVX-P1 Desktop
- Creating custom POIs
- — POI Editor
- Creating a custom POI file
- Importing a custom POI file
- Saving custom POI files to the unit
- Click "OK" and follow the prompts.
- Updating the unit
- Installing maps on the unit
- To remove maps from the unit
- Advanced features of NVX-P1 Desktop
- City/town search
- Map colour and texture adjustment
- Map layers
- Backups
- Precautions
- Moisture condensation
- To maintain the performance
- Maintenance
- Replacing the lithium battery of the card remote commander
- Notes on the lithium battery
- WARNING
- Fuse replacement
- Specifications
- Navigation unit
- GPS receiver
- Speaker
- Optional accessory
- Troubleshooting
- The operation buttons do not function.
- The unit does not turn on.
- The remote does not function.
- GPS signal cannot be received.
- The car position on the map does not match the current road.
- The guidance patterns cannot be changed by pressing ☐.
- The voice guidance cannot be heard.
- The LCD becomes very bright/dark.
- Index
- Numerics
- A
- C
- D
- F
- G
- H
- |
- K
- L
- M
- N
- P
- R
- S
- T
- U
- V
- W
- Capas de mapas
- Kartlager
Brand : SONY
Model : NVX-P1
Category : GPS Navigator