
DV-5300HD - Camcorder SILVERCREST - Free user manual and instructions
Find the device manual for free DV-5300HD SILVERCREST in PDF.


| Product Type | Digital HD Camcorder with Digital Camera |
| Model | SilverCrest DV-5300HD |
| Image Sensor | 1/3.2 inch CMOS, 5 MP |
| Lens | F3.2, f=5.1mm |
| Optical / Digital Zoom | None / 4x digital (not available in 1080p, QVGA, Macro mode) |
| Display | 7.6 cm (3.0 inch) TFT, 960 x 240 pixels, 16:9 |
| Video Resolution | 1080p (1920x1080) @ 30fps, 720p @ 30fps, WVGA @ 60fps, QVGA @ 120fps |
| Photo Resolution | 3M (2048x1536), 5M (2592x1944), 16M (4608x3456 interpolation) |
| Storage Media | Internal 128 MB (partly used by firmware), SD/SDHC card up to 16 GB |
| Watertightness | IPX8, up to 3 meters depth, max 60 minutes |
| Battery | Lithium-ion rechargeable type PAC-0040, 3.7 V, 1100 mAh |
| Charger | Type DJ04V20500A, 100-240 V AC, 50-60 Hz, 0.07 A |
| Dimensions (W x H x D) | 54.7 x 67.5 x 121 mm |
| Weight | 280 g ± 5 g (without battery) |
| White Balance | Auto, Sunny, Cloudy, Tungsten, Fluorescent, Special Diving mode |
| Exposure Compensation | -2.0 EV to +2.0 EV |
| Self-Timer | Off, 5 sec, 10 sec |
| LED Light | Effective range < 1 m, On/Off |
| PC Interface | USB 2.0 (High Speed) |
| AV Output | NTSC / PAL selectable |
| HDMI Output | Yes (HDMI cable included) |
| Included Accessories | Charger, battery, USB/AV cable, HDMI cable, 2 GB SD card, software CD, bag, manual |
Frequently Asked Questions - DV-5300HD SILVERCREST
User questions about DV-5300HD SILVERCREST
0 question about this device. Answer the ones you know or ask your own.
Ask a new question about this device
Download the instructions for your Camcorder in PDF format for free! Find your manual DV-5300HD - SILVERCREST and take your electronic device back in hand. On this page are published all the documents necessary for the use of your device. DV-5300HD by SILVERCREST.
USER MANUAL DV-5300HD SILVERCREST
with HDMI connection
GB User manual and service information
SE Digital HD-videokamera med HDMI-anslutning
natural_image
Red and black HD video camera with visible lens and control buttons (no text or symbols on body)DV-5300HD

English....2
Svenska....56
Dansk 108
Before using this device for the first time, please read the following instructions carefully, even if you are familiar with the use of electronic devices.
Please keep this manual safe for future reference. If you pass on the device to someone else, be sure to always include these instructions.
This symbol in the following text indicates possible hazards resulting from the use of the device that can lead to personal injury or material damage.
Registered trademarks
IBM, IBM PC, PS/2 are registered trademarks of IBM Corporation or IBM Deutschland GmbH.
USB is a registered trademark of USB Implementers Forum, Inc.
Microsoft and Windows are registered trademarks of Microsoft Corporation in the United States of America and/or other countries.

HIGH-DEFINITION MULTIMEDIA INTERFACE

The SDHC logo is a brand of SD-3C, LLC.
Contents
1 Supplied items....5
2 Safety instructions....6
2.1 General precautions ....6
2.2 Intended use....6
2.3 Notes on conformity....7
2.4 Legal stipulations....7
2.5 Operating environment/Environmental conditions .....7
2.6 Operational safety 8
2.7 Cleaning 12
2.8 Repair....13
2.9 Disposal of old devices....13
3 Technical data....14
4 Product description....16
4.1 Features....16
4.2 System requirements for the "TotalMediaHDCam" software....16
4.3 Operating elements and connections .....17
5 Start-up and configuration....19
5.1 Step 1: Charge the battery....19
5.2 Step 2: Insert the SD card and battery ....20
5.3 Step 3: Switch on the camcorder and configure the basic settings....21
5.3.1 Switching the camcorder on and off .....21
5.3.2 Opening the configuration menu .....22
5.3.3 Configuration menus 23
5.4 Step 4: Install the "TotalMedia™ HDCam" software....25
English
6 Operation....27
6.1 Before you start....27
6.2 Copyright information ....27
6.3 Recording videos....28
6.3.1 Video recording screen....29
6.3.2 Video recording menu 30
6.4 Video playback 33
6.4.1 Video playback screen 34
6.4.2 Video playback menus 35
6.5 Taking pictures....37
6.5.1 Photo recording screen 38
6.5.2 Photo recording menus 39
6.6 Photo playback....42
6.6.1 Photo playback screen 43
6.6.2 Photo playback menus....44
6.7 Uploading recordings to a PC....46
6.8 Diving with the camcorder 47
6.8.1 Diving Mode 47
6.8.2 Important notes 47
6.9 Connecting the camcorder to a TV or computer....50
6.9.1 Connecting to a TV (AV cable)....50
6.9.2 Connecting to a TV (HDMI cable)....51
6.9.3 Connecting to a PC (USB cable)....51
7 Troubleshooting 52
8 Warranty information and hotline numbers....53
1 Supplied items
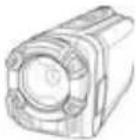 | 1 x camcorder DV-5300HD |
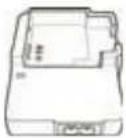 | 1 x charger DJ04V20500A,SCOPE TECHNOLOGY CO., LTD. |
 | 1 x lithium ion rechargeable battery type PAC-0040,PAC ELECTRONICS CO., LTD. |
 | 1 x mains cable |
 | 1 x bag |
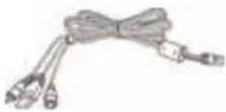 | 1 x USB/AV cable |
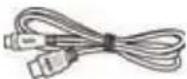 | 1 x HDMI cable |
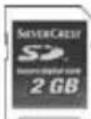 | 1 x SD card (2 GB) |
 | 1 x "TotalMediaHDCam" CD |
 | 1 x user manual |
2 Safety instructions
2.1 General precautions
- Keep electrical devices out of the reach of children! Never allow children to use electrical devices unsupervised. They cannot always recognise possible hazards.
- Small parts can be life-threatening if swallowed. Also note that there is a risk of suffocation if air passages are blocked by the plastic packaging.
- New devices may emit a slight odour during the first few hours of operation. This is normal and disappears after a short time. Until then ventilate the room regularly.
2.2 Intended use
The camcorder is an information technology device. It is used as intended if it is solely used for recording and playback of movies or pictures. Any other use is not in keeping with its intended purpose.
The manufacturer does not assume any liability if the device ...
• is not used as intended.
- is damaged or modified prior to connection and use.
The camcorder may only be used for private purposes. It is not to be used for industrial or commercial purposes.
2.3 Notes on conformity
The camcorder meets the basic requirements and other relevant regulations of the EMC Directive 2004/108/EC as well as the Low Voltage Directive 2006/95/EC. The EC Declaration of Conformity can be found at the end of this manual.
Compliance with these standards is no longer guaranteed in the event of unauthorised modification or changes to the device. The manufacturer does not accept liability for any damage incurred as a result.
Only use accessories specified by the manufacturer.
2.4 Legal stipulations
• Manufacturer: TARGA GmbH, Postfach 2244, D-59482 Soest
- The warranty period is 3 years from the purchase date. The warranty conditions are given at the end of this manual. In case of warranty claims, have your proof of purchase ready and call our hotline (the number is given in the warranty conditions).
2.5 Operating environment/Environmental conditions
- The camcorder can be used at temperatures ranging from 0 °C to 40 °C (32 °F to 104 °F).
- Protect the camcorder and its accessories against dust, heat and direct sunlight. Prevent vibration, shocks and impact. Take special care never to drop the camcorder, as it could be damaged.
- Never store the camcorder and its accessories in a hot place. High temperatures can shorten the service life of electronic devices, damage the batteries and deform or melt plastic components.
Watertightness
- The camera is watertight to a maximum depth of 3 metres (IPX8). Do not use the camera underwater for longer than 60 minutes to ensure that it remains watertight.
- The supplied accessories are not watertight. The camcorder is not dust-tight.
- This camcorder is only watertight when immersed in fresh or salt water; this does not apply to cleaning agents, chemicals or pool water etc., and such liquids must be wiped from the device immediately.
- The watertight sealing material can be replaced (subject to charge). To ensure effective watertightness, the sealing material should be replaced annually.
- It is essential to read the safety information in the section "Diving with the camcorder".
2.6 Operational safety
- Always read and observe the instructions and information in the documentation supplied with your TV or computer before connecting the camcor-der.
- If the camcorder is exposed to extreme temperature fluctuations, condensation can lead to the accumulation of moisture which can cause a short circuit. In this case wait until the device has reached ambient temperature before use.
- Never place any burning objects such as candles or any objects containing liquids such as vases, cups or glasses next to the camcorder.
- Keep the camcorder away from high-frequency and magnetic interference sources (e.g. TVs, mobile phones, loudspeakers) to prevent malfunctions.
- Never open the battery compartment while recording movies or photos, as saved image data could be corrupted as a result.
- Should water accidentally penetrate the camcorder or problems occur during underwater use:
— Remove the camcorder from the water immediately.
— Dry the camcorder.
— Have the camcorder repaired by qualified experts, service or maintenance technicians.
Cables
Always hold cables by the plug and never pull on the cable itself. Never touch the mains cable with wet hands as this may cause an electric shock.
Never place the device itself, furniture or other heavy objects on the cables and ensure that the cables are not kinked, especially near the plugs and the connection sockets.
Never make knots in any of the cables or tie them together with other cables. All cables should be positioned so that nobody can trip over them and they cannot cause an obstruction. A damaged mains cable can cause fire or an electric shock. Inspect the mains cable from time to time. Do not use adapter plugs or extension cables that do not comply with applicable safety standards, and do not make any alterations to the mains cable or mains plug!
LCD screen
If the LCD screen becomes scratched or damaged in any way, take special care to ensure that no liquid is discharged from the screen.
If liquid has escaped, follow the instructions below:
- If the liquid comes into contact with your skin, wipe it off with a clean cloth and rinse the area of contact with large amounts of water.
- If the liquid comes into contact with your eyes, wash them with running water for at least 15 minutes and then go to a hospital immediately.
- If you swallow the liquid, first rinse your mouth with water, then drink a large amount of water and induce vomiting. Go to a hospital as soon as possible.
Battery type PAC-0040, PAC ELECTRONICS CO., LTD.
- Only use the battery type which is supplied with your camcorder. Other battery types could damage the camcorder and void the warranty.
- Ensure that the battery is inserted correctly. If the battery is inserted incorrectly, the product can be damaged and fire can break out.
- Remove the battery if you do not use the camera for a prolonged period of time to prevent the discharge of fluid from the battery.
- Remove the battery immediately if it becomes crushed or damaged, as this can result in discharge of the battery fluid and therefore abnormal expansion of the battery.
Charger type DJ04V20500A, SCOPE TECHNOLOGY CO., LTD.
- Only connect the charger to the mains power supply if the voltage stated on the rating plate complies with the voltage of your mains socket (the rating plate is attached to the underside of the charger). Incorrect voltage can cause irreparable damage to the charger and the battery.
- To completely disconnect the charger from the mains power supply, always remove the mains plug from the mains socket. For this reason the charger should be positioned so that direct and unobstructed access to the mains socket is ensured and the mains plug can be immediately pulled out in an emergency.
- To prevent the risk of fire, always disconnect the mains plug from the mains socket if a battery is not being charged.
- For safety reasons disconnect the charger from the mains socket if you are absent for a prolonged period of time and also if there is the risk of a thunderstorm.
- Ensure that
— air can always circulate freely around the charger (do not place the charger on a thick carpet or a bed, and always leave at least 10 cm clearance on all sides).
— contact with sprayed and dripping water and corrosive liquids is prevented and the charger is never operated near water; in particular it should never be immersed (do not place any objects filled with liquids such as vases or drinks on or near the charger).
— the charger is not subjected to any extreme temperature fluctuations, as this may result in moisture caused by condensation and therefore a short circuit.
— the charger is never subjected to excessive shocks and vibrations.
2.7 Cleaning
Disconnect the camcorder from all connected devices before cleaning it.
If soiled, clean the camcorder with a dry cloth, and moisten the cloth slightly to remove stubborn dirt. Do not use any solvents, corrosive or gaseous cleaning agents. Ensure that no moisture penetrates the device.
Remember to remove dirt and sand from the watertight seal and the opposite contact surface. Dirt and sand can scratch the surface and affect the water-tightness.

natural_image
Illustration of a hand using a tool to adjust or install a device into a component (no text or symbols visible)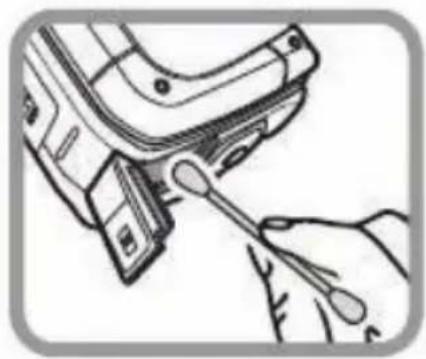
natural_image
Illustration of a hand using a tool to adjust or install a mechanical component (no text or symbols visible)2.8 Repair
The camcorder must be repaired if fluid has penetrated inside the housing, if the housing is damaged or if the camcorder no longer works.
If smoke is produced, or there are any unusual sounds or odours, disconnect the mains plug of the charger from the mains socket immediately. In these cases use of the charger is not permitted until it has been inspected by a specialist technician.
Never open the housing. Any repairs should be carried out exclusively by qualified specialist, service or maintenance personnel!
2.9 Disposal of old devices

The Waste Electrical and Electronic Equipment Directive (WEEE) 2002/96/EC stipulates that it is no longer permitted to dispose of old electrical and electronic devices as municipal waste. Only dispose of this product at a collection point for old devices in your area.
Defective batteries should not be disposed of with household waste. They must be taken to a collection point for old batteries.
Proper disposal in this manner will prevent harm to the environment and human health hazards.
For further information about proper disposal contact your local authorities, waste disposal office or the shop where you bought the device.
3 Technical data
Camcorder
| Image sensor 1/3.2 inch CM | MOS 5 MP sensor |
| Active pixels 5 megapixels | |
| Storage media | Internal: Flash memory with 128 MB (partly occupied by firmware)SD card: 2 GB (SD cards up to SDHC with 16 GB are supported) |
| Colour effects Natural / black & white / sepia | |
| Lens F3.2; f = 5.1 mm | |
| Focus range Normal: 1.5 m | to infinityMacro: 20 cm to 21 cm |
| Photo Formats: JPEG (EXIF 2.2) / DCF,Resolution: 3M / 5M / 16M (firmware interpolation) | |
| Video clips (movies) H.264 | (AVI); resolution:QVGA at 120 fps720p at 30 fpsWVGA at 60 fps1080p at 30 fps |
| Zoom Video: 4 x digital zoom *Photo: 4 x digital zoom ** No zoom with 1080p resolution and QVGA as well as in Macro Mode | |
| Screen TFT; 7.6 cm (3.0"); | 960 x 240 pixels; 16:9 format |
| LED light Effective range: < | 1 mMode: On / Off |
| White balance | Auto / Sunny / Cloudy / Tungsten / Fluorescent / Special Diving Mode |
| Exposure compensation -2.0 EV to +2.0 EV | |
| Self-timer Off / 5 s / 10 s | |
| PC interface USB 2.0 (high-speed) | |
| AV output format NTSC / PAL | |
| Shutter | Electronic shutterVideo: 1/15 s to 1/2000 sPhoto: 2 s to 1/4000 s |
| Auto Power Off Off / 1 min. | / 5 min. |
| Power supply | Lithium ion battery type PAC-0040; PAC ELECTRONICS CO., LTD. (3.7 V; 1100 mAh) |
| Dimensions (W x H x D) 54 | 7 x 67.5 x 121 mm |
| Weight 280 g +/- 5 g (without battery) | |
| Watertightness Up to a depth of 3 m; 60 minutes max. | |
| Operating temperature 0 °C | to 40 °C |
Charger
| TypeManufacturer | DJ04V20500ASCOPE TECHNOLOGY CO., LTD. |
| Power supply 100 to 240 V | AC; 50 to 60 Hz |
| Power consumption 0.07 A | max. |
| Dimensions (W x H x D) 63 | x 25 x 90 mm |
| Weight 65 g (without mains | cable) |
| Operating temperature 0 °C | to 35 °C |
4 Product description
4.1 Features
The camcorder has a wide range of features and numerous functions:
• Digital HD camcorder
• Digital camera (max. 16 megapixels)
- USB mass storage
- 4 x digital zoom (except for resolution of 1080p and QVGA as well as in Macro Mode)
- Watertight up to a depth of 3 metres (IPX8)
- "TotalMediaHDCam" software for uploading your photos and movies to a PC, for editing videos and creating photo albums
4.2 System requirements for the "TotalMediaHDCam" software
The "TotalMediaHDCam" software can be installed on a PC with the following specifications:
- Operating system: Windows® 7 / Vista / XP
- Intel® / AMD dual core CPU or higher
- Minimum 1 GB RAM
- At least one DirectX9 graphics card (DirectX10 recommended)
• CD or DVD drive for installing the software
• USB 1.1 connection or higher
• Minimum 2 GB free hard disk space
4.3 Operating elements and connections
 | A: LensB: LED light; can be switched on and off while recording videos or before taking photos with the navigation button on the right (L).C: LCD monitor; rotatable by 270° |
 | D: Zoom buttons; enlarge or reduce image.E: Microphone for capturing the surrounding sound when recording videos.F: Macro switch; position:for close-up photos,for portrait and landscape photography. |
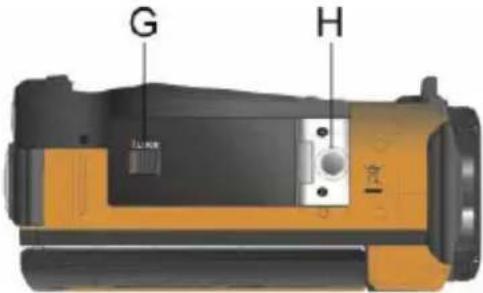 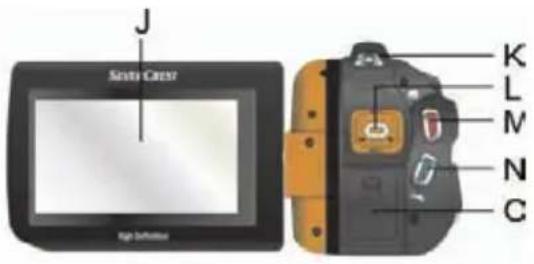 | G: Battery compartment cover concealing the battery and the SD card.H: Tripod connection for screwing a tripod to the camcorder.J: LCD screenK: LED; lights up green when the cam-corder is switched on, lights up red when the battery power starts to fade.L: Navigation buttons;4-way control for menu navigation as well as a central button for selecting elements and for confirmation.M: Record button (shutter release)N: Diving Mode; switch on special underwater white balance.O: Interface cover concealing the HDMI and USB sockets. |
 | P: On/off button; the camcorder is switched on as soon as the LCD monitor is opened; it switches off automatically when the LCD monitor is closed. The camcorder can be switched on and off with the "P" button when the LCD monitor is open.Q: PLAYBACK, playback buttonR: MENU, menu button; opens the menu of the current mode.S: MODE, mode button; switches between the "Movie", "Photo" or "Set" modes.T: DISP, display button, shows/hides screen information (symbols). |
5 Start-up and configuration
This section describes the basic functions such as how to switch on the camera, insert the battery and the memory cards and configure the basic settings.
5.1 Step 1: Charge the battery
The battery may only be charged with the supplied charger or with an original replacement charger. In the event of non-compliance the battery can be destroyed. This can cause a fire.
Note: The battery is also charged when the camcorder is connected to a functioning computer by means of its USB interface.
The battery charging time is approx. 180 minutes when using the charger and approx. 240 minutes when using a USB connection.

natural_image
Diagram of a device with an attached plug and power outlet, showing no text or symbols- Place the battery in the charger.
- Connect the charger to an easily accessible mains socket with the mains cable.
The LED on the charger lights up orange while the battery is charging. When the battery is fully charged the LED lights up green.
The charging time depends on the output capacity of the battery and the charging conditions.
5.2 Step 2: Insert the SD card and battery
The camcorder is equipped with an internal memory with a capacity of 128 MB. Part of this memory is occupied by the firmware of the camcorder. The supplied SD card (2 GB) serves as a mass storage medium for photos, videos or other files.
Please note:
The supplied SD card is already formatted. If you would like to use a different SD card, it must be formatted (refer to Section "5.3.3 Configuration menus", "Formatting the memory").
An SD card can be write-protected by means of a sliding mechanism on the left-hand side of the card:
Sliding tab up: The SD card is not write-protected; recordings can be saved on the SD card.
Sliding tab down: The SD card is write-protected; it is not possible to save recordings on the SD card.
The camcorder requires a lithium ion rechargeable battery. Only use the supplied battery or batteries which are recommended by the manufacturer or your dealer.
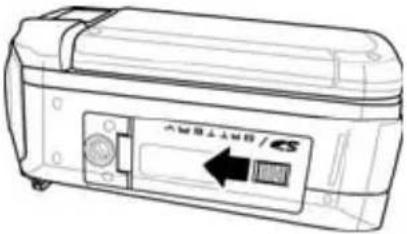 | 1. To open the battery compartment push the latch forwards. |
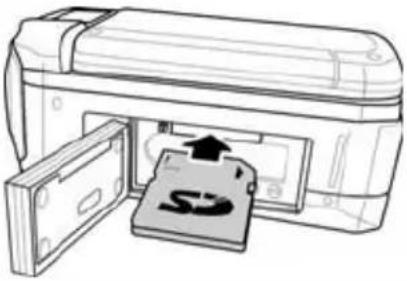  | 2. Insert the SD card until it engages.To remove the SD card press it down until it is released and can be pulled out.3. Push the battery in until it engages.Unlock the battery to remove it. It is then ejected and can be removed. |
 | 4. Close the cover of the battery compartment, press the cover down firmly onto the housing and push the latch backwards until you hear a click.⚠️ To ensure the watertightness of the cam-corder, always make sure that the cover of the battery compartment is closed correctly. |
5.3 Step 3: Switch on the camcorder and configure the basic settings
Before using the camcorder it is necessary to configure several basic settings such as the date and time as well as the language and the "beep function".
5.3.1 Switching the camcorder on and off
The camcorder is switched on as soon as the LCD monitor is opened; it switches off automatically when the LCD monitor is closed.
The camcorder can be switched on and off with the on/off button (P) when the LCD monitor is open.
5.3.2 Opening the configuration menu
Condition: The camcorder is switched on
Basic operation
Date / Time

Date / Time

-
Press the MODE button (S) until the menu is shown on the display.
-
Use the left/right/up/down navigation buttons (L) to select the required menu (here "Date/Time").
-
Press the centre navigation button (L) to open the menu.
-
Use the left/right navigation buttons (L) to select the setting you wish to change (here the year "2010").
-
Use the up/down navigation buttons (L) to select the required setting.
-
Press the centre navigation button (L) to return to the menu overview.
5.3.3 Configuration menus
 | Setting the date and timeSetting the date;from left to right: Year, month, daySetting the time;from left to right: Hour, minute, second |
 | Switching the beep on and offWhen the beep is switched on, a melody is played when the camcorder is switched on and off and a beep sounds each time a button is pressed (confirmation tone). |
 | Auto Power Off (standby mode)Here you can specify whether the camcorder automatically switches to power-saving standby mode when it is not in use and the time after which standby mode should be activated.OFF: Standby mode deactivated1 min: Standby mode is activated if no button is pressed for 1 minute.5 min: Standby mode is activated if not button is pressed for 5 minutes. |
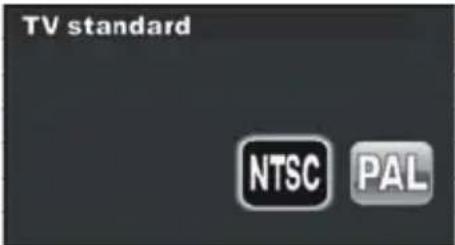 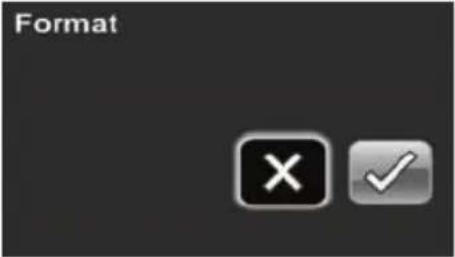 | TV standardUse this item to select the TV standard of your country.NTSC: Common in the United States and JapanPAL: Common in most European countriesThis setting only applies to the video output, not to image output in HDMI mode.Formatting the memory⚠️ All data are deleted on the storage medium when it is formatted. When "✓" is selected and you press the centre navigation button (L), formatting is started without a security confirmation.✓: Format SD card or internal memory if no SD card is insertedX: Cancel formatting |
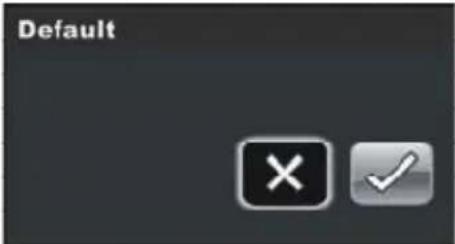 | Default✓: Restore factory settingsX: Cancel the function |
 | Selecting the screen languageSelect the screen language here. |
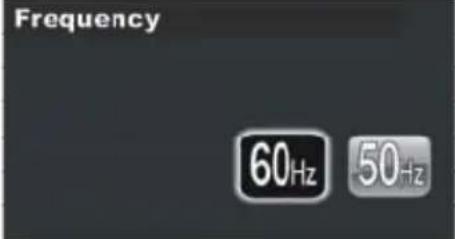 | FrequencyHere you select the mains frequency of your power network to suppress the flickering of fluorescent lights during recording. In Europe the standard mains frequency is 50 Hz, in the United States 60 Hz. |
5.4 Step 4: Install the "TotalMedia™ HDCam" software
The TotalMedia™ HDCam software from ArcSoft is a computer programme which combines media management, playback functions and tools for viewing, linking, printing and writing.
The software is provided on the supplied CD.
Always connect your camcorder to the PC before inserting the CD in your CD or DVD drive. Otherwise the software cannot detect the camcorder and it cannot be installed.
Proceed as follows:
- Connect the camcorder to the PC with the supplied USB/AV cable.

natural_image
Illustration of a desktop computer connected to a cable, showing a close-up of the cable being inserted into a tower (no text or symbols present)English
- Switch the camcorder on by opening the LCD monitor.
The following message then appears on your PC screen after a short time: "Found new hardware".
If the camcorder is not detected, remove and reinsert the USB connector. You can also try using a different USB socket on your PC.
- Place the "TotalMediaHDCam" CD in your CD/DVD drive.
The installation wizard normally starts automatically. If it does not start automatically, proceed as follows:
— Open the file browser (Explorer) (right-click on [Start] → "Explorer" menu).
— Click the icon of your CD or DVD drive in My Computer.
— \~ Start installation by double-clicking the "TotalMediaHDCam.exe" file.
The software is then automatically installed and started.
- The language of the user interface is selected in the "Options" menu (at the top right in the programme window) and the "Preferences" menu item (top menu item).
Information on the software functions is given in the corresponding online help which is also opened with the "Options" menu.
6 Operation
6.1 Before you start
Before you start recording properly, make some test recordings.
Check if your camcorder works properly before recording at important occasions (for example a wedding or a trip abroad). Additional losses caused by a malfunction of this product (for example photo costs or loss of profit resulting from low photographic quality) are not the responsibility of the manufacturer and will not be compensated.
6.2 Copyright information
Observe any "Photography prohibited" signs. Such signs mean that it is prohibited to record any live performances, improvisations or exhibitions, even for private use. Saving any images or data on storage media is subject to copyright law restrictions.
6.3 Recording videos
When recording videos proceed as follows:
- To switch on the camcorder open the LCD monitor (C).
- To select Video (Movie) Mode, press the MODE button (S) until a movie camera (☐) appears at the top left of the screen.
- Start the video recording by pressing the record button (M).
To change the video settings you can ...
— Enlarge or reduce the image with the zoom buttons (D) (not in the resolutions 1080P and QVGA or in Macro Mode).
— Change the white balance with the left navigation button (L).
— Switch the LED light on and off with the right navigation button (L).
— Press the macro switch (F) to activate the Macro Mode.
- Stop video recording by pressing the record button (M).
6.3.1 Video recording screen

| Item | Symbol Description |
| 1 |  Shows that the camcorder is in Video Mode (Movie). Shows that the camcorder is in Video Mode (Movie). |
| 2 |  Shows that Macro Mode is activated. Shows that Macro Mode is activated. |
| 3 |  Shows the current white balance setting. Shows the current white balance setting. |
| 4 |  Shows that Night Mode is activated. Shows that Night Mode is activated. |
| 5 |  Shows the current Effect Mode setting. Shows the current Effect Mode setting. |
| 6 |  Shows the set zoom factor in relation to the maximum zoom factor. Shows the set zoom factor in relation to the maximum zoom factor. |
| 7 |  Shows the remaining battery power. Shows the remaining battery power. |
| 8 |  Shows the current resolution. Shows the current resolution. |
| 9 |  Shows the recording time. Shows the recording time. |
| 10 |  Shows the current exposure value. Shows the current exposure value. |
| 11 |  Shows the remaining available memory space on your card / your internal memory. Shows the remaining available memory space on your card / your internal memory. |
| 12 |  Shows whether a memory card is inserted or whether files are saved on the internal memory. Shows whether a memory card is inserted or whether files are saved on the internal memory. |
6.3.2 Video recording menu
Condition:
• The camcorder is switched on
• Video Mode is set (
Basic operation

- Press the MENU button (R).
The menu is shown on the display. - Use the left/right/up/down navigation buttons (L) to select the required menu (here "White balance").
- Press the centre navigation button (L) to open the menu.

-
Use the left/right navigation buttons (L) to select the required setting.
-
Press the centre navigation button (L) to return to the menu overview.
| Video recording menus | |
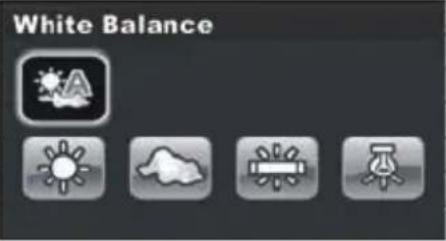 | White balanceAdjust the white balance.Auto:When this option is selected, the camcorder automatically adjusts the white balance.Sunny:Select this option if you record videos or photos in daylight.Cloudy:Select this option if you record videos or photos on cloudy days.Fluorescent:Select this option for indoor recording with fluorescent lighting.Tungsten:Select this option for normal indoor lighting. |
  | ResolutionSetting the resolution. The higher the resolution, the more memory is required.1080P:Select this option for setting a resolution of 1920 x 1080.720P:Select this option for setting a resolution of 1280 x 720.WVGA:Select this option for setting a resolution of 848 x 480.QVGA:Select this option for setting a resolution of 320 x 240.Note:The digital zoom is not supported in 1080p and QVGA modes. No sound is recorded in the QVGA mode.EffectChanging the recording effect.Natural: Select this option for colour recordings.Black & white: Select this option for creating a black & white effect.Sepia: Select this option for recording in shades of brown. |
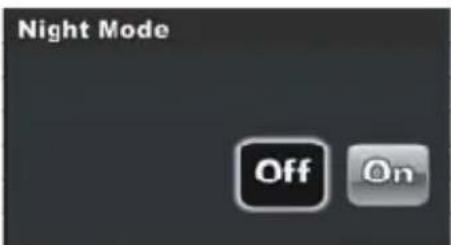 | Night ModeNight Mode can be activated for better results in dark conditions.Off: Night Mode deactivatedOn: Night Mode activated |
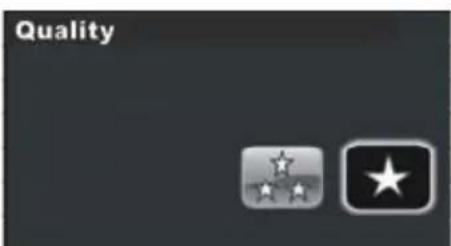 | QualitySetting the video quality. A file with a high quality requires more memory than a file with a normal quality.Three stars: Select this option to set a high quality (only available if an SD card is inserted).One star: Select this option to set a normal quality. |
6.4 Video playback
For video playback proceed as follows:
- To switch on the camcorder open the LCD monitor (C).
- To select Video Mode, press the playback button (Q).
- Scroll through your video recordings with the left/right navigation buttons (L).
- Start playback by pressing the centre navigation button (L).
During playback you can ...
— Fast forward by holding down the right navigation button (L).
— Fast rewind by holding down the left navigation button (L).
— Adjust the volume by pressing the up/down navigation buttons (L) .
— Interrupt playback (pause) by pressing the zoom button "W" (D). Press the zoom button "W" again to resume playback.
- Stop playback by pressing the centre navigation button (L).
6.4.1 Video playback screen
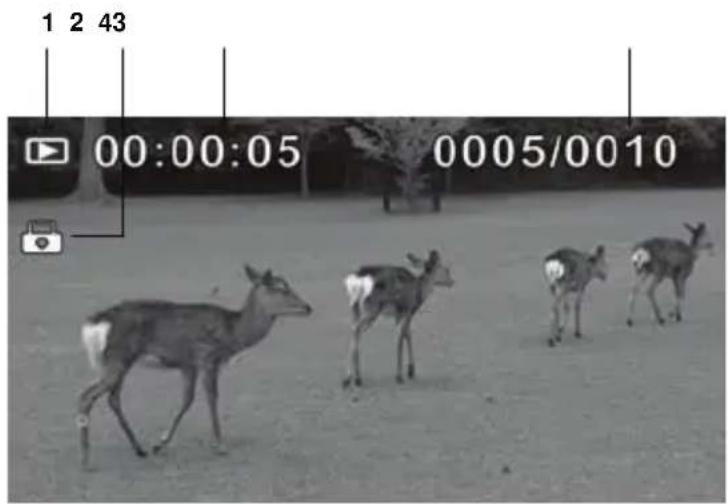
| Item | Symbol Description |
| 1 |  Shows that the camcorder is in Playback Mode. Shows that the camcorder is in Playback Mode. |
| 2 |  Shows that the file is protected. Shows that the file is protected. |
| 3 |  Shows the recording time. Shows the recording time. |
| 4 |  Shows the number of the current video / all videos. Shows the number of the current video / all videos. |
6.4.2 Video playback menus
Condition:
• The camcorder is switched on
• Video Playback Mode is set ( ▶)
Basic operation

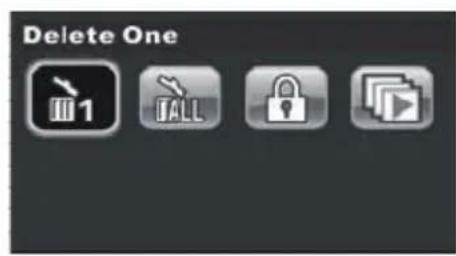
- Press the MENU button (R). The menu is shown on the display.
- Use the left/right/up/down navigation buttons (L) to select the required menu (here "Delete One").
- Press the centre navigation button (L) to open the menu.
- Use the left/right navigation buttons (L) to select the required function.
- Press the centre navigation button (L) to execute the function.
Video playback menus
 | Delete OneDeletes an individual file.After selecting the function use the left/right navigation buttons (L) to select the file you want to delete. Press the centre navigation button (L) to delete the file. |
 | Delete AllDeletes all recorded files.= Cancel the delete function.= Delete file |
 | ProtectProtects files against accidental deletion.After selecting the function use the left/right navigation buttons (L) to select the file you want to protect. Press the centre navigation button (L) to protect the file.A protected recording is marked with a symbol ([IMAGE]).You can cancel protection by executing the same function on the protected file. |
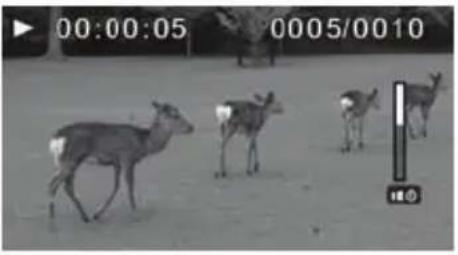 | AutoplayAutomatic playback of the saved files.Press the centre navigation button (L) to cancel autoplay. |
6.5 Taking pictures
To take a picture proceed as follows:
- To switch on the camcorder open the LCD monitor (C).
- To select Photo Mode, press the MODE button (S) until a photo camera (☐) appears at the top left of the screen.
- Press the record button (M) to take a photo.
To adjust the photo settings you can ...
— Enlarge or reduce the image with the zoom buttons (D) (not in the resolutions 1080P and QVGA or in Macro Mode).
— Change the white balance with the left navigation button (L).
— Switch the LED light on and off with the right navigation button (L).
— Press the macro switch (F) to activate the Macro Mode.
6.5.1 Photo recording screen

| Item | Symbol Description |
| 1 |  Shows that the camcorder is in Photo Mode. Shows that the camcorder is in Photo Mode. |
| 2 |  Shows that Macro Mode is activated. Shows that Macro Mode is activated. |
| 3 |  Shows the current white balance setting. Shows the current white balance setting. |
| 4 |  Shows that Night Mode is activated. Shows that Night Mode is activated. |
| 5 |  Shows the current Effect Mode setting. Shows the current Effect Mode setting. |
| 6 |  Shows the set zoom factor in relation to the maximum zoom factor. Shows the set zoom factor in relation to the maximum zoom factor. |
| 7 |  Shows the total number of all photos you have taken. Shows the total number of all photos you have taken. |
| 8 |  Shows the remaining battery power. Shows the remaining battery power. |
| 9 |  Shows that the self-timer is activated. Shows that the self-timer is activated. |
| 10 |  Shows the current resolution. Shows the current resolution. |
| 11 |  Shows the current exposure value. Shows the current exposure value. |
| 12 |  Shows whether a memory card is inserted or whether files are saved on the internal memory. Shows whether a memory card is inserted or whether files are saved on the internal memory. |
6.5.2 Photo recording menus
Condition:
• The camcorder is switched on
- Photo Mode is set ( )
Basic operation

- Press the MENU button (R).
The menu is shown on the display. - Use the left/right/up/down navigation buttons (L) to select the required menu (here "White balance").
- Press the centre navigation button (L) to open the menu.

-
Use the left/right navigation buttons (L) to select the function which you want to change.
-
Press the centre navigation button (L) to return to the menu overview.
| Photo recording menus | |
 | White balanceAdjust the white balance when taking pictures and under certain light conditions.Auto:When this option is selected, the cam-corder automatically adjusts the white balance.Sunny:Select this option if you record videos or photos in daylight.Cloudy:Select this option if you record videos or photos on cloudy days.Fluorescent:Select this option for indoor recording with fluorescent lighting.Tungsten:Select this option for normal indoor lighting. |
  | ResolutionSetting the resolution. The higher the resolution, the more memory is required.3M:Select this option for setting a resolution of 2048 x 1536.5M:Select this option for setting a resolution of 2592 x 1944.16M:Select this option for the maximum resolution (4608 x 3456).EffectChanging the recording effect.Natural: Select this option for colour re-cordings.Black & white: Select this option to create a black & white effect.Sepia: Select this option for recording in shades of brown. |
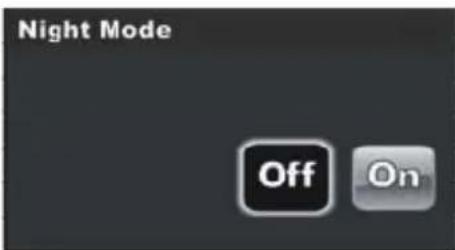 | Night ModeNight Mode can be activated for better results in dark conditions.Off: Night Mode deactivatedOn: Night Mode activated |
 | Self-timerWith the self-timer you can take photos after a specified delay.Off: Select this option to deactivate the self-timer.5 sec.: Select this option to set a delay of five seconds.10 sec.: Select this option to set a delay of ten seconds.Note: The self-timer switches off automatically when it has been triggered once (Off). If you want to take another photo with the self-timer, it is necessary to set the delay again in this menu. |
Photo recording menus

Quality
Setting the video quality. A file with a high quality requires more memory than a file with a normal quality.
Three stars: Select this option to set a high quality (only available if an SD card is inserted).
One star: Select this option to set a normal quality.
6.6 Photo playback
For photo playback proceed as follows:
- To switch on the camcorder open the LCD monitor (C).
- To select Photo Mode, press the MODE button (S) until a photo camera (☐) appears at the top left of the screen.
- Scroll through your recorded photos with the left/right navigation buttons (L).
- Start photo playback by pressing the centre navigation button (L).
- Press the right navigation button (L) to scroll to the next image. Press the left navigation button (L) to scroll to the previous image.
6.6.1 Photo playback screen

natural_image
Black-and-white photo of deer in a grassy field with trees and a tree trunk, no visible text or symbols| Item | Symbol Description | |
| 1 |  | Shows that the camcorder is in Playback Mode. |
| 2 |  | Shows that the file is protected. |
| 3 | 0005/0010 | Shows the number of the current photo / the total number of photos. |
6.6.2 Photo playback menus
Condition:
• The camcorder is switched on
• Photo Playback Mode is set
Basic operation

- Press the MENU button (R). The menu is shown on the display.
- Use the left/right/up/down navigation buttons (L) to select the required menu (here "Delete One").
- Press the centre navigation button (L) to open the menu.

-
Use the left/right navigation buttons (L) to select the required function.
-
Press the centre navigation button (L) to execute the function.
| Photo playback menus | |
 | Delete OneDeletes an individual file.After selecting the function use the left/right navigation buttons (L) to select the file you want to delete. Press the centre navigation button (L) to delete the file. |
 | Delete AllDeletes all recorded files. |
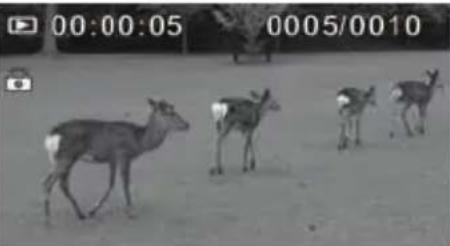 | ProtectProtects files against accidental deletion.After selecting the function use the left/right navigation buttons (L) to select the file you want to protect. Press the centre navigation button (L) to protect the file.A protected recording is marked with a symbol ([IMAGE]).You can cancel protection by executing the same function on the protected file. |
 | AutoplayAutomatic playback of the saved files.Press the centre navigation button (L) to cancel autoplay. |
6.7 Uploading recordings to a PC
Proceed as follows:
natural_image
Illustration of a desktop computer setup with cable and monitor, showing connection to tower (no text or symbols)-
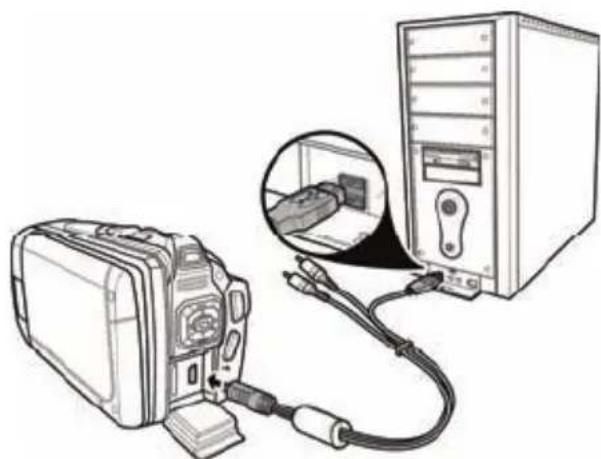
Connect the camcorder to the PC with the supplied USB-AV cable.
-
Switch the camcorder on by opening the LCD monitor.
The following message then appears on your PC screen after a short time: "Found new hardware".
If the camcorder is not detected, remove and reinsert the USB connector. You can also try using a different USB socket on your PC.
You can then access the camcorder memory from your PC in the same way as any other removable storage medium (USB stick, external hard disk etc.)
You can manage and edit your recordings with the "TotalMedia™ HDCam" programme. The programme is provided on the CD supplied with the device (refer to Section "5.6 Step 4: Install the TotalMedia™ HDCam software").
6.8 Diving with the camcorder
6.8.1 Diving Mode
The Diving Mode takes underwater conditions into account and automatically adjusts the white balance. All other settings remain unchanged.
To activate Diving Mode, press the Diving Mode button (N).

natural_image
Black-and-white photo of a person running away from a boat, surrounded by debris and rocks (no visible text or symbols)6.8.2 Important notes
Watertightness
- The camera is watertight to a maximum depth of 3 metres (IPX8).
- Do not use the camera underwater for longer than 60 minutes to ensure that it remains watertight.
- This camera is only watertight when exposed to fresh water or salt water; this does not apply to cleaning agents, chemicals or pool water etc., and such liquids must be wiped off the device immediately.
Before opening the cover of the battery compartment (G) and the interfaces (O) it is essential to wait until the camera is completely dry. When opening the covers, have an absorbent cloth to hand to remove water and dirt from around the covers. Ensure that the cover faces downwards when it is opened.
Before diving:
Only check the following points indoors:
- Check the area around the interfaces (battery/SD card and HDMI/USB socket); remove dirt, sand and other particles.
- Ensure that the covers of the battery compartment (G) and the interfaces (O) are not scratched or broken and that they are firmly closed.
- Also check that the camera is not cracked or broken.
During diving:
- Never expose the camcorder to ...
— a water depth of more than 3 metres.
— high water pressure.
— water at a temperature outside the range of 0^ to 40^ C.
— any impact or shock; this could open the cover of the battery compartment (G) and the interfaces (O).
- Never immerse the camera in water for longer than 60 minutes.
After diving:
Clean the camera immediately after using it underwater. Proceed as follows:
- Ensure that the covers of the battery compartment (G) and the interfaces (O) are not scratched or broken and that they are firmly closed. Also check that the camera is not cracked or broken.
- Wash the camcorder under running tap water.
- Immerse the camcorder in fresh water (not salt water) for two to three minutes to remove any salt deposits.
- Remove the camcorder from the water and shake it several times.
- Wipe the camera and lens carefully with a clean cloth. Ensure that the cloth is lint-free and that it does not contain any salt deposits.
- When the camcorder is dry, clean the seals of the battery compartment (G) and the interfaces (O) with a moistened cotton bud. Ensure that the cover faces downwards when it is opened and cleaned.
- Store the camcorder in a well-ventilated, cool place so that it can dry in the air; avoid direct sunlight and unprotected areas.
6.9 Connecting the camcorder to a TV or computer
Always read and observe the instructions and information in the documentation supplied with your TV or computer before connecting the cam-corder.
6.9.1 Connecting to a TV (AV cable)
You can connect the camcorder to a TV with the supplied USB/AV cable to view photos and videos.

natural_image
Illustration of a vintage camera setup with connected cables and a monitor, showing a close-up inset of two audio jack components (no text or symbols present)6.9.2 Connecting to a TV (HDMI cable)
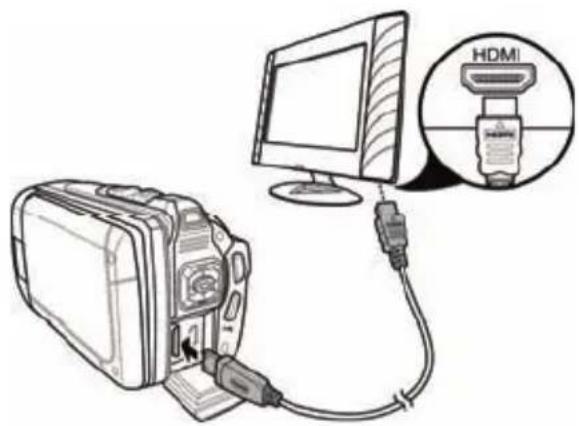
Alternatively you can connect the camcorder to a TV with the supplied HDMI cable.
6.9.3 Connecting to a PC (USB cable)
Connect the camcorder to a PC with the supplied USB/AV cable.

natural_image
Illustration of a computer setup with a monitor connected to a tower via cable, showing a magnified view of the tower's internal components (no text or symbols present)7 Troubleshooting
| Fault Possible cause Solution | ||
| The camcorder cannot be switched on. | The battery is not correctly inserted.The battery is empty. | Insert the battery correctly.Charge the battery. |
| The camcorder suddenly switches off. | The Auto Power Off function is activated.The battery in the cam-corder is empty. | Switch the device on again.Change the battery. |
| The recorded image was not saved. | The power supply failed before the image was saved. | Replace the battery im-mediately when the bat-tery LED lights up red. |
| The camcorder switches off while a photo is be-ing recorded with the self-timer. | The battery in the cam-era is empty. | Change the battery. |
| The image is out of fo-cus. | The motif was not in the area of focus. | Take a photo in the available area of focus and select either Normal or Macro Mode. |
| It is not possible to use the memory card. | The memory card is write-protected.The memory card con-tains non-DCF images from other camcorders. | Remove the write protec-tion on the memory card.Format the memory card. Save the data elsewhere before you format the memory card. |
| None of the buttons work. | There was a short cir-cuit when the camera was connected to an-other device. | Remove the battery from the camera and replace it once more. |
8 Warranty information and hotline numbers
36 month warranty from date of purchase

UK
Important warranty information
SILVERCREST®
Dear Customer,
Thank you for purchasing a Silvercrest product.
We ask you to read carefully through the enclosed documentation or online help before putting your Silvercrest product into service. If you have a problem, which can not be solved in this way, please contact our hotline.
In case that trouble solving over the telephone is not possible, our hotline will arrange the service depending on the fault of the device. This will contain the elimination of defects by production and material at no charge.
Up-to-date information and answers to the most frequently asked questions are available on the internet from: www.silvercrest.cc
Please note that the warranty period for rechargeable batteries is 12 months.
This guarantee is valid in United Kingdom.
Your statutory guarantees from the seller are in addition to this warranty and are not limited by it.
BT

36
month warranty
Hotline number
0207 - 36 50 744
(Please have your serial number at hand!)
Manufacturer:
TARGA GmbH
Postfach 22 44
D-59482 3oesi
www.silvercrest.cc
36 month warranty from date of purchase

Ireland
Important warranty information
SILVERCREST®
Dear Customer,
Thank you for purchasing a Silvercrest product.
We ask you to read carefully through the enclosed documentation or online help before putting your Silvercrest product into service. If you have a problem, which can not be solved in this way, please contact our hotline.
In case that trouble solving over the telephone is not possible, our hotline will arrange the service depending on the fault of the device. This will contain the elimination of defects by production and material at no charge.
Up-to-date information and answers to the most frequently asked questions are available on the internet from: www.silvercrest.cc
Please note that the warranty period for rechargeable batteries is 12 months.
This guarantee is valid in Ireland.
Your statutory guarantees from the seller are in addition to this warranty and are not limited by it.
BT

36
month warranty
Hotline number
01 - 242 15 83
(Please have your serial number at hand!)
Manufacturer:
TARGA GmbH
Postfach 22 44
D-59482 Soest
www.silvercrest.cc
natural_image
Illustration of a hand using a screwdriver to adjust or install a device into a rectangular component (no text or symbols visible)
natural_image
Line drawing of a hand using a tool to adjust or install a mechanical component (no text or symbols visible)2.8 Reparation
natural_image
Diagram of a device with an attached plug and power outlet, showing no text or symbols
natural_image
Diagram of a printer with an open slot and a CD inside, showing internal components (no text or symbols)natural_image
Illustration of a desktop computer connected to a tower, showing cable and socket connection (no text or symbols)Svenska
natural_image
Black-and-white photo of deer in a field with time and date indicators (no readable text or symbols)natural_image
Black-and-white photo of deer in a grassy field with trees and a tree trunk, no visible text or symbolsnatural_image
Black-and-white photo of deer in a snowy landscape with a digital overlay showing time and date (no readable text or symbols)natural_image
Illustration of a desktop computer connected to a tower via cable, showing cable routing and a magnified view of the tower (no text or symbols present)natural_image
Black-and-white photo of a person running away from a boat, surrounded by debris and rocks (no visible text or symbols)natural_image
Illustration of a computer setup with cable and monitor, showing connections to two microphones (no text or symbols present)6.9.2 Ansluta till en TV (HDMI-kabel)
6.9.3 Ansluta till en PC (USB-kabel)
natural_image
Illustration of a computer setup with a monitor connected to a tower via cable, showing a magnified view of the tower's internal components (no text or symbols present)natural_image
Illustration of a hand using a screwdriver to adjust or install a device into a slot (no text or symbols visible)
natural_image
Line drawing of a hand using a tool to adjust or install a mechanical component (no text or symbols visible)2.8 Reparation
natural_image
Diagram of a device with an attached plug and power outlet, showing no text or symbolsnatural_image
Illustration of a computer setup with a hard drive connected to a tower, showing cable and socket connection (no text or symbols)Dansk
natural_image
Black-and-white photo of deer in a grassy field with trees and a tree trunk, no visible text or symbolsnatural_image
Illustration of a desktop computer setup with cable and monitor, showing connection to tower (no text or symbols)natural_image
Black-and-white photo of a person running away from a boat, surrounded by debris and rocks (no visible text or symbols)6.8.2 Vigtigt!
Vandtæthed
natural_image
Illustration of a computer setup with cable and connector, showing a monitor connected to a device (no text or symbols present)natural_image
Illustration of a computer setup with a cable and monitor, showing a close-up of the internal components (no text or symbols present)7 Fejlafhjælpning
EC-Declaration of Conformity
Address:
Targa GmbH
Lange Wende 41
59494 Soesl, Germany
Product:
Camcorder
Model:
Silvercrest DV-5300HD
The product complices with the requirements of the following European directives:
2004/108/EC
Electromagnetic Compatibility
2006/95/EC
Low Voltage
Compliance was proved by the application of the following standards:
EMC:
EN 55024:1998 + A1: 2001 + A2: 2003
EN 55022:2006
EN 61000-3-2:2006
EN 61000-3-3:1995 + A1:2001 + A2:2005
Safety:
EN 60950-1:2006 + A11:2009
Year of CE marking: 2010

Soest, 8 ^th of October 2010
Matthias Klauke, Managing Director


- Registered trademarks
- Contents
- Supplied items....5
- Safety instructions....6
- Technical data....14
- Product description....16
- Start-up and configuration....19
- English
- Operation....27
- Supplied items
- Safety instructions
- General precautions
- Intended use
- Notes on conformity
- Legal stipulations
- Operating environment/Environmental conditions
- Watertightness
- Operational safety
- Cables
- LCD screen
- If liquid has escaped, follow the instructions below:
- Battery type PAC-0040, PAC ELECTRONICS CO., LTD.
- Charger type DJ04V20500A, SCOPE TECHNOLOGY CO., LTD.
- Cleaning
- Repair
- Disposal of old devices
- Technical data
- Product description
- Features
- System requirements for the "TotalMediaHDCam" software
- Operating elements and connections
- Start-up and configuration
- Step 1: Charge the battery
- Step 2: Insert the SD card and battery
- Please note:
- Step 3: Switch on the camcorder and configure the basic settings
- Switching the camcorder on and off
- Opening the configuration menu
- Basic operation
- Configuration menus
- Step 4: Install the "TotalMedia™ HDCam" software
- Operation
- Before you start
- Copyright information
- Recording videos
- Video recording screen
- Video recording menu
- Condition:
- Video playback
- Video playback screen
- Video playback menus
- Video playback menus
- Taking pictures
- Photo recording screen
- Photo recording menus
- Photo recording menus
- Quality
- Photo playback
- Photo playback screen
- Photo playback menus
- Uploading recordings to a PC
- Diving with the camcorder
- Diving Mode
- Important notes
- Before diving:
- During diving:
- After diving:
- Connecting the camcorder to a TV or computer
- Connecting to a TV (AV cable)
- Connecting to a TV (HDMI cable)
- Connecting to a PC (USB cable)
- Warranty information and hotline numbers
- month warranty from date of purchase
- Important warranty information
- SILVERCREST®
- Please note that the warranty period for rechargeable batteries is 12 months.
- Reparation
- Svenska
- Ansluta till en TV (HDMI-kabel)
- Ansluta till en PC (USB-kabel)
- Dansk
- Vigtigt!
- Vandtæthed
- EC-Declaration of Conformity
Brand : SILVERCREST
Model : DV-5300HD
Category : Camcorder