KH 1115 - Coffee machine SILVERCREST - Free user manual and instructions
Find the device manual for free KH 1115 SILVERCREST in PDF.
| Product type | Coffee machine |
| Brand | SILVERCREST |
| Model | KH 1115 |
| Color | Black and silver |
| Material | Plastic, glass (thermos) |
| Power supply | 220-240 V~ 50 Hz |
| Power | 1000 W |
| Water tank capacity | Up to 10 large cups / 15 small cups |
| Coffee type | Ground coffee (medium to fine grind) |
| Filter | Paper filter size 1x4 |
| Carafe | Insulated thermos with lid, capacity not specified |
| Main functions | Automatic shut-off, lockable lid, lever pouring, operation indicator light |
| Safety | Automatic shut-off after brewing, overheat protection, do not immerse |
| Maintenance | Regular descaling, cleaning of removable lid (silicone seal, spring) |
| Included accessories | Measuring spoon, instruction manual |
| Warranty | 3 years |
Frequently Asked Questions - KH 1115 SILVERCREST
User questions about KH 1115 SILVERCREST
0 question about this device. Answer the ones you know or ask your own.
Ask a new question about this device
Download the instructions for your Coffee machine in PDF format for free! Find your manual KH 1115 - SILVERCREST and take your electronic device back in hand. On this page are published all the documents necessary for the use of your device. KH 1115 by SILVERCREST.
USER MANUAL KH 1115 SILVERCREST
natural_image
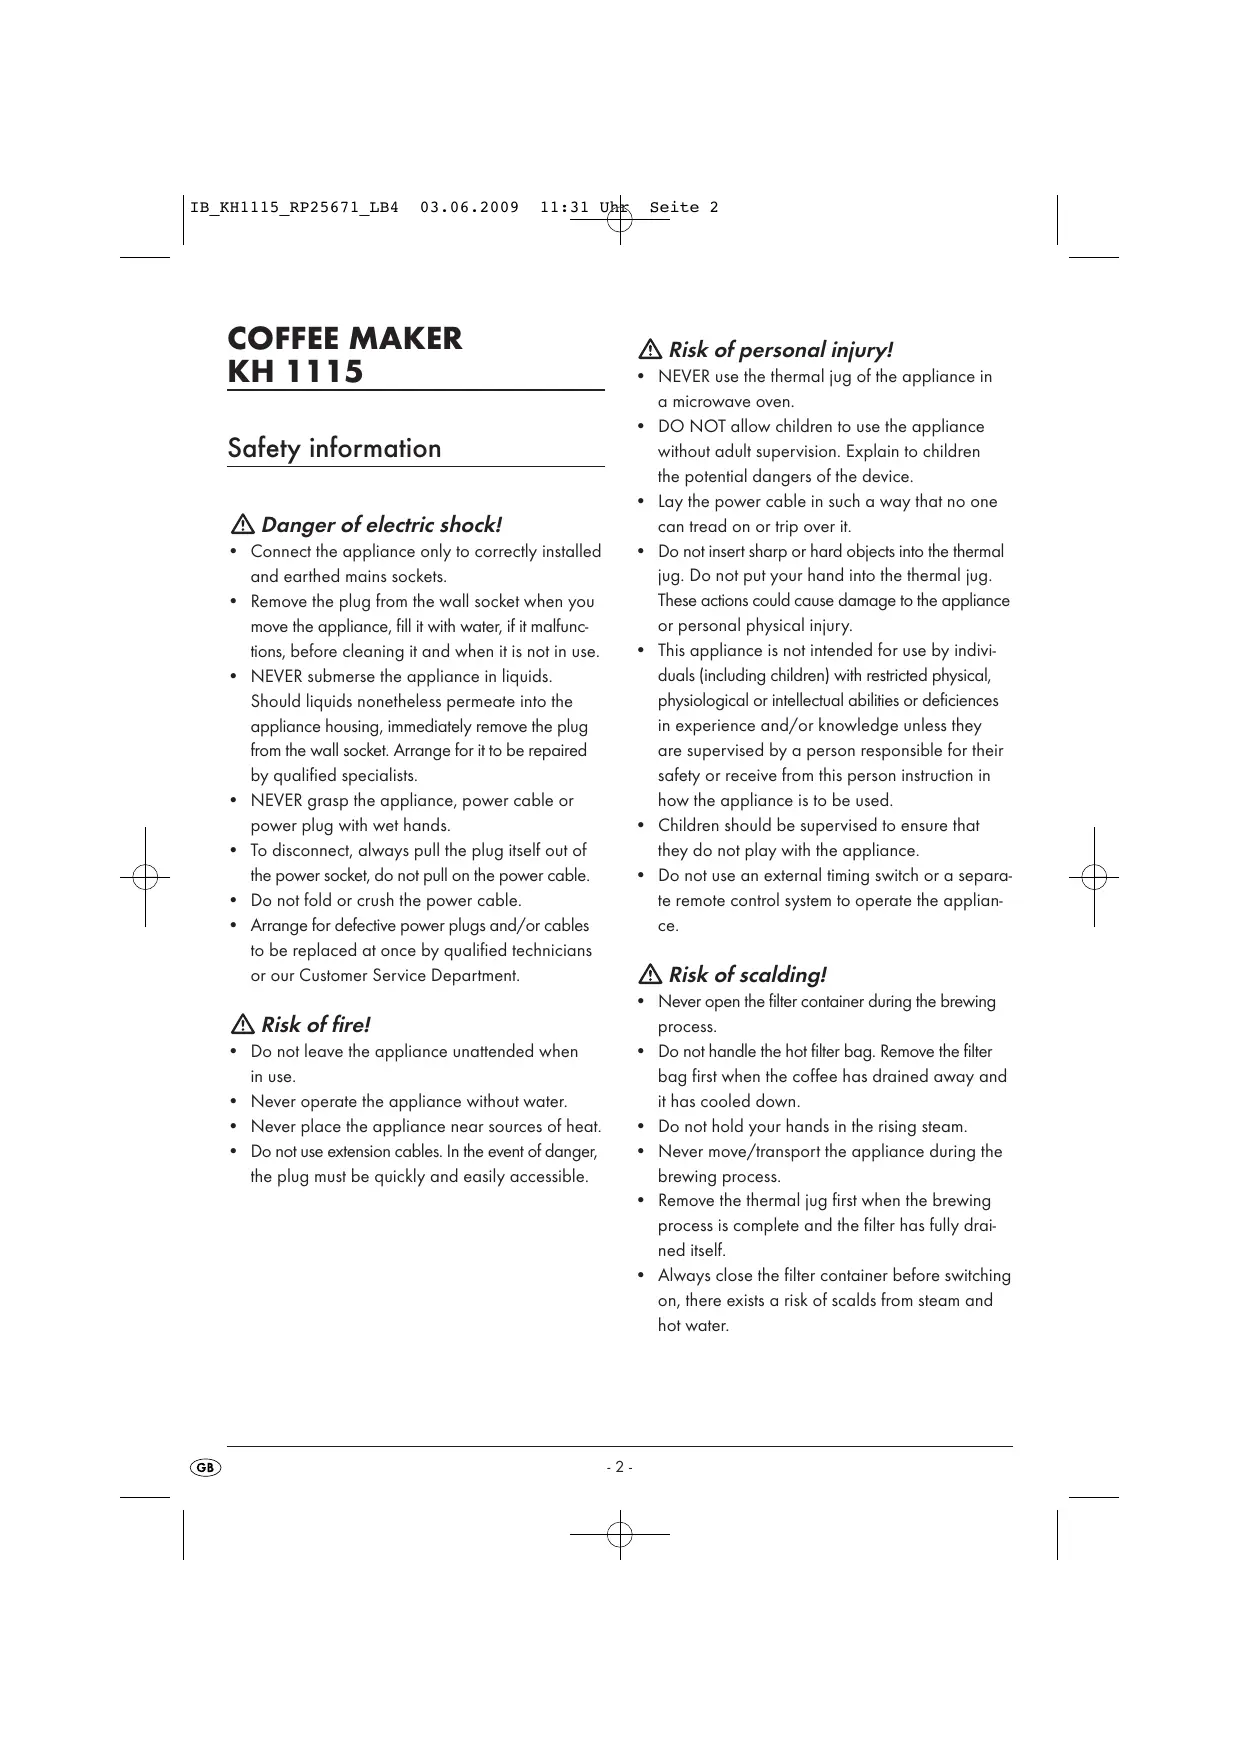
Exterior view of a SilverCraft beer press with black and silver shades, placed on a green surface with coffee beans and a teacup (no text or symbols on the device itself)GB Coffee Maker Operating instructions
PL
Ekspres do kawy
Instrukcja obstugi
HU Kávéfőző
Használati utasítás
SI Kavni aparat
Navodila za uporabo
CZ Kávovar
Návod k obsluze
SK Kávovar
Návod na obsluhu
HR Aparat za kavu
Upute za upotrebu
DE Kaffeemaschine
AT Bedienungsanleitung
CH
natural_image
Close-up of a silver coffee maker with black handle and label (no visible text or symbols on the device itself)CONTENT
PAGE
Safety information 2
Items supplied 3
Correct usage 3
Appliance description 3
Technical data 3
Before the First Use 3
Placement 3
Using the thermal jug 4
Opening / Closing the lid ....4
Pouring coffee 4
Preparing coffee 4
Cleaning and care 5
Cleaning the lid 5
Scale removal 6
Troubleshooting 6
The coffee maker is not working: 6
The coffee is too strong/too weak:....6
Disposal 6
Warranty & Service 6
Importer 7
Safety information
⚠️ Danger of electric shock!
- Connect the appliance only to correctly installed and earthed mains sockets.
- Remove the plug from the wall socket when you move the appliance, fill it with water, if it malfunctions, before cleaning it and when it is not in use.
- NEVER submerse the appliance in liquids. Should liquids nonetheless permeate into the appliance housing, immediately remove the plug from the wall socket. Arrange for it to be repaired by qualified specialists.
- NEVER grasp the appliance, power cable or power plug with wet hands.
- To disconnect, always pull the plug itself out of the power socket, do not pull on the power cable.
- Do not fold or crush the power cable.
- Arrange for defective power plugs and/or cables to be replaced at once by qualified technicians or our Customer Service Department.
⚠️ Risk of fire!
- Do not leave the appliance unattended when in use.
- Never operate the appliance without water.
- Never place the appliance near sources of heat.
- Do not use extension cables. In the event of danger, the plug must be quickly and easily accessible.
⚠️ Risk of personal injury!
- NEVER use the thermal jug of the appliance in a microwave oven.
- DO NOT allow children to use the appliance without adult supervision. Explain to children the potential dangers of the device.
- Lay the power cable in such a way that no one can tread on or trip over it.
- Do not insert sharp or hard objects into the thermal jug. Do not put your hand into the thermal jug. These actions could cause damage to the appliance or personal physical injury.
- This appliance is not intended for use by individuals (including children) with restricted physical, physiological or intellectual abilities or deficiencies in experience and/or knowledge unless they are supervised by a person responsible for their safety or receive from this person instruction in how the appliance is to be used.
- Children should be supervised to ensure that they do not play with the appliance.
- Do not use an external timing switch or a separate remote control system to operate the appliance.
⚠️ Risk of scalding!
- Never open the filter container during the brewing process.
- Do not handle the hot filter bag. Remove the filter bag first when the coffee has drained away and it has cooled down.
- Do not hold your hands in the rising steam.
- Never move/transport the appliance during the brewing process.
- Remove the thermal jug first when the brewing process is complete and the filter has fully drained itself.
- Always close the filter container before switching on, there exists a risk of scalds from steam and hot water.
To avoid damage to the appliance!
- Fill the water tank of the appliance exclusively with freshly drawn mains water.
Items supplied
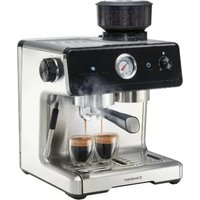
• Coffee Maker KH 1115
- Thermal jug with lid
- Measuring spoon
- Operating Instructions
Before taking the appliance into use check to ensure that all of the items listed have been supplied and that there are no visible signs of damage.
Correct usage
The coffee maker is intended exclusively for brewing coffee. This coffee maker is intended exclusively for use in private households. Do not use it commercially.
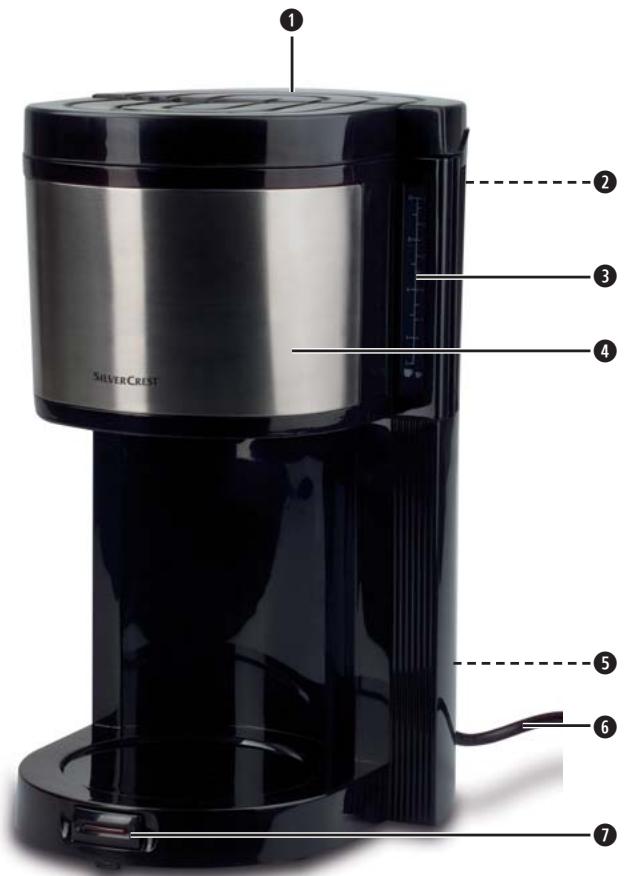
Appliance description
① Water tank
② Measuring spoon holder
3 Scale
4 Filter holder
⑤ Cable shaft
⑥ Power cable with power plug
⑦ Switch with integrated indicator lamp
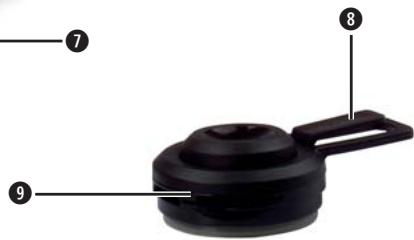
8 Pouring lever
9 Lid
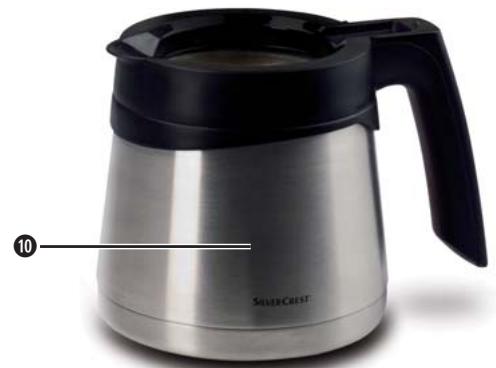
10 Thermal jug
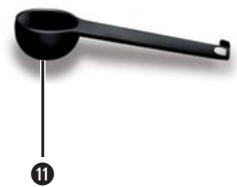
⑪ Measuring spoon
Technical data
| Mains voltage: | 220 - 240 V~ 50 Hz |
| Power consumption: | 1000 W |
| Coffee filter bags: | Size 1x 4 |
Before the First Use
Before the first use, pass a volume equal to 8 large cups of water through the appliance twice. Do not insert a filter bag and do not use any coffee powder.
Clean the appliance (see chapter "Cleaning and care").
Placement
→ Position the coffee maker on a dry and level surface.
Connect the plug 6 with a wall power socket. Ensure that the plug 6 is easily accessible in an emergency.
(i) Note:
Should the coffee maker, after its connection with the power source, be found to be switched on, wait for ca. 45 seconds. It will switch itself off.
Hang the measuring spoon ⑪ from the measuring spoon holder ②. It will then always be at hand.
Using the thermal jug
Opening / Closing the lid
To open the thermal jug 10, turn the lid 9 so far to the side that the arrow on the lid 9 points to the symbol 📋. You can now lift the lid 9 upwards.
⚠️ Risk of personal injury!
Should you want to remove the lid ⑨ directly after the brewing process, ensure that you hold the lid ⑨ so that the hot condensed water, which can collect on the lid ⑨, is not able to run onto your hand. Risk of scalding!
To close the lid ⑨, place it so that the arrow on the lid ⑨ points to the symbol 📋. Then turn it so far back that the arrow on the lid ⑨ points to the symbol 📋. The lid ⑨ is now secured and cannot fall off.
Pouring coffee
You do not have to remove the lid ⑨ from the thermal jug ⑩ to pour coffee.
With the lid ⑨ secured, press on the pouring lever ⑧ and hold it down. You can now pour out the coffee.
When you have finished pouring, release the pouring lever 8.
Preparing coffee
Swing out the filter holder 4 and insert a filter bag (Size 1x4) with the sides folded. Put coffee powder into it (medium to fine ground). For one cup of coffee you will require about one measuring spoon 11 of coffee powder. Subject to taste, the amount of coffee powder can vary.
Fill the water tank ① with the required amount of water. For this, use the scale ③ on the water tank ①.
(i) Note:
- Never fill it with water for more than 10 large cups/ 15 small cups. Pay heed to the Max marking in the water tank. The appliance can overflow. Before use, check to ensure that the thermal jug 10 is empty. - Before every brewing process, rinse the thermal jug 10 with hot mains water. This will ensure that the coffee remains hot for longer.
Place the thermal jug 10 in the coffee machine. Press the switch 7 to start the brewing process. The red indicator lamp glows. The coffee maker switches itself off automatically when the brewing process has ended.
(i) Note:
You cannot stop the brewing process manually. All of the water that is in the water tank ① passes through the coffee maker. Should you wish to stop the brewing process you must disconnect the plug ⑥ from the power socket.
→ You can extract the thermal jug 10 and serve the coffee when the red indicator light has extinguished.
① Tip:
Should you wish to keep the coffee warm in the thermal jug 10 for an extended period, remove the thermal jug 10 from the coffee maker when the brewing process is finished. When the thermal jug 10 is standing in the coffee maker the lid 9, due to the brewing mechanism, is pressed down. As soon as the brewing process is complete, hot air escapes through the lid 9. The coffee cools faster. When the thermal jug 10 is removed from the coffee maker, the lid 9 closes itself automatically. The coffee stays hot for longer.
i Note:
After you pour water in the water tank ① for further brewing processes, allow the coffee machine to cool down for approx. 1 minute.
Cleaning and care
Always remove the plug 6 from the power socket before cleaning the appliance.
⚠️ Risk of electric shock!
Before you clean the coffee maker you MUST remove the plug ⑥ from the power socket.

NEVER submerge the Coffee Maker in water. The appliance could become damaged!
⚠️ Risk of burns!
Always wait until the coffee maker has cooled down before cleaning it.
For cleaning, remove the lid ⑨ from the thermal jug ⑩ (see chapter "Using the thermal jug").
Do not use household detergents or sharp/pointed objects to remove soiling. These could damage the appliance.
Wipe the housing of the coffee maker and the thermal jug 10 with a soft cloth lightly moistened with a soapy solution.
→ After every brewing process remove the filter bag from the filter bag holder ④.
Remove the filter and rinse the filter bag holder and the thermos jug 10 under running water.
If you do not intend to use the coffee maker for an extended period, pack the power cable into the cable shaft ⑤.
Cleaning the lid
To clean the lid ⑨, it must be dismantled:
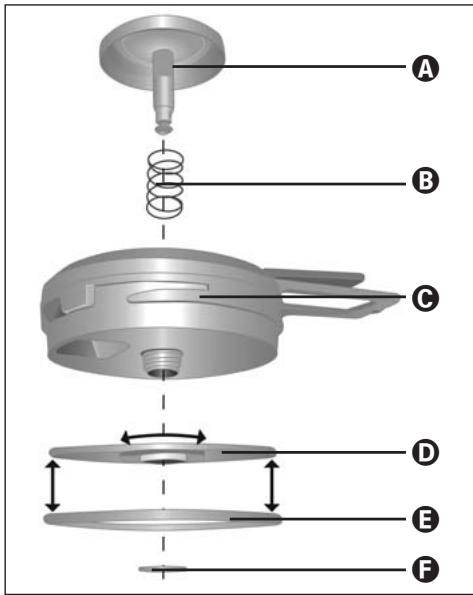
Carefully pull the silicon disc F from the lower part of the inflow lid A. Hold the inflow lid A firmly, as this will be pressed up by the spring B.
→ You can now remove the inflow lid Ⓐ and the spring Ⓑ.
→ Unscrew the securing disc D from the lid C.
Release the silicon ring E from the securing disc D.
→ Clean all parts in a mild soapy solution and dry them well.
To reassemble the lid ⑨ proceed in the reverse order.
(i) Note:
On reassembly, ensure that the side on the securing disc D with the two ribs points towards the lid C.
Scale removal
Regularly remove scale from the coffee maker, subject to the local water quality and appliance usage. Use only descaling agents that are suitable for coffee makers.
Place the scale removal product in the water tank ①.
→ Fill it with enough water for max. 8 large cups.
→ Press the switch ⑦ to start the descaling process. The red indicator lamp glows.
→ Wait until the solution has completely run through the Coffee Maker.
→ After descaling, rinse the coffee maker through twice, each time using 8 large cups of clean water.
Troubleshooting
The coffee maker is not working:
The appliance is not switched on. Press the switch ⑦ to switch the appliance on.
The plug 6 is not inserted into a power socket. Connect the appliance with the mains. Push the power plug into the wall socket.
The appliance is defective. In this case, contact Customer Services.
The coffee is too strong/too weak:
There is too little/too much water in the water tank ①. Fill it with the correct amount of water.
It is filled with too much/too little coffee powder.
Fill it with less/more coffee powder.
The coffee powder is too finely/too coarsely ground. Select a different grade of grinding for your coffee powder.
Disposal

Do not dispose of the appliance in your normal domestic waste. This product is subject to the European guideline 2002/96/EC.
Dispose of the appliance through an approved disposal centre or at your community waste facility. Observe the currently applicable regulations. In case of doubt, please contact your waste disposal centre.

Dispose of all packaging materials in an environmentally responsible manner.
Warranty & Service
The warranty for this appliance is for 3 years from the date of purchase. This appliance has been manufactured with care and meticulously examined before delivery. Please retain your receipt as proof of purchase date. Should a claim need to be made under the warranty, please make contact by telephone with our service department. Only in this way can a post-free despatch for your goods be assured.
The warranty covers ONLY claims for material and manufacturing defects, not for wearing or consumable or for damage to fragile components. This product is for private use only and is not intended for commercial applications.
The warranty will become void in the event of abusive and improper handling, use of force and internal tampering not carried or approved by our authorized service branch. Your statutory rights are not restricted in any way by this warranty.
GB DES Ltd
Units 14-15
Bilston Industrial Estate
Oxford Street
Bilston
WV14 7EG
Tel.: 0870/787-6177
Fax: 0870/787-6168
e-mail: support.uk@kompernass.com
IE Kompernass Service Ireland
Tel: 1850 930 412 (0,082 EUR/Min.)
Standard call rates apply. Mobile operators may vary.
e-mail: support.ie@kompernass.com
Importer
KOMPERNASS GMBH
BURGSTRASSE 21
44867 BOCHUM, GERMANY
www.kompernass.com
Oprezno povlačenjem skinite silikonsku ploču F sa donjeg dijela ulijevnog poklopca A. Pridržite ulijevni poklopac A, jer njega opruga B gura prema gore.
Nakon toga možete ulijevni poklopac A i oprugu B skinuti.
→ Odvrnite ploču za zatvaranje D sa poklopca C.
Odvojite silikonski prsten E od ploče za zatvaranje D.
Očistite sve dijelove u blagoj sapunskoj lužini i dobro ih osušite.
Prilikom sastavljanja poklopca ⑨ postupite obrnutim redoslijedom.
i Napomena:
Obratite pažnju na to, da prilikom montaže strana sa dva rebra na ploči za zatvaranje D bude prema poklopcu C okrenuta.
Odstranjivanje vapnenih naslaga
47623 Kevelaer, Germany
Tel.: +49 (0) 180 5 008107