35 E - Camera KONICA MINOLTA - Free user manual and instructions
Find the device manual for free 35 E KONICA MINOLTA in PDF.

User questions about 35 E KONICA MINOLTA
0 question about this device. Answer the ones you know or ask your own.
Ask a new question about this device
Download the instructions for your Camera in PDF format for free! Find your manual 35 E - KONICA MINOLTA and take your electronic device back in hand. On this page are published all the documents necessary for the use of your device. 35 E by KONICA MINOLTA.
USER MANUAL 35 E KONICA MINOLTA
text_image
MODEL-E SUSERS ROKKOR 1:28 f=45mm No.1244 CHIKO 01-03-07 01-03-08 01-03-09 01-03-10 01-03-11 01-03-12 01-03-13 01-03-14 01-03-15 01-03-16 01-03-17 01-03-18 01-03-19 01-03-20 01-03-21 01-03-22 01-03-23 01-03-24 01-03-25 01-03-26 01-03-27 01-03-28 01-03-29 01-03-30 01-03-31 01-03-32 01-03-33 01-03-34 01-03-35 01-03-36 01-03-37 01-03-38 01-03-39 01-03-40 01-03-41 01-03-42 01-03-43 01-03-44 01-03-45 01-03-46 01-03-47 01-03-48 01-03-49 01-03-50 01-03-51 01-03-52 01-03-53 01-03-54 01-03-55 01-03-56 01-03-57 01-03-58 01-03-59 01-03-60 01-03-61 01-03-62 01-03-63 01-03-64 01-03-65 01-03-66 01-03-67 01-03-68 01-03-69 01-03-70 01-03-71 01-03-72 01-03-73 01-03-74 01-03-75 01-03-76 01-03-77 01-03-78 01-03-79 01-03-80 Model-EMinolta-35
Model E

text_image
CHIYOKOINSTRUCTIONS
FOR USING
CHIYODA'S PRODUCTS
Minolta-35 for 35 mm. film
Minolta-Memo for 35 mm. film
Minolta-Flex for No. 120 film
Minolta-Semi for No. 120 film
Konan-16 Automat for 16mm. film
Lenses
Shutters
Optical Glasses
natural_image
Architectural sketch of a large multi-story building with multiple windows and balconies, no visible text or symbols.DIRECTIONS FOR USING YOUR MINOLTA-35
Welcome to the family of 35 mm. camera photographers.
Make your MINOLTA-35 a constant companion, learn to use it well, treat it like a friend, and it will give years of faithful service. It will record faithfully forever the thrills you experience to-day—recalling memories of days long past eventually.
OBSERVE THESE UNIQUE FEATURES:
Built-in Self-Timing Device
Built-in Flash Synchronization
The Superb ROKKOR Lens
Compactness and Smooth Operation
Ease of Film Loading
Coupled Range-finder and Viewer
Automatic film Advance control
Double exposure preventive control
Depth of Field Indicator
KNOW YOUR CAMERA
CAPACITY: Picture size 24×34.5mm.
36 exposures on Standard 35mm. film
STANDARD LENS: Interchangeable Standard Lens SUPER ROKKOR 1:2.8 45mm. is an ultra-sharp lens designed for general purpose—perfectly corrected for all optical aberration, and fully coated on all glass-to-air surfaces, to insure crisp, sparkling negatives capable of maximum enlargement and is highly recommended for color photography as well as for Black-and-White. It is mounted to focus without pulling out the lens tube.
COUPLED RANGE-FINDER AND VIEWER: Enables quick automatic focusing with utmost ease. One common eye-piece for Range and View-Finder is adjustable for far-sighted users.
SHUTTER: Focal Plane Shutter operates at T.B. 1 1/2 1/4 1/8 1/25 1/35 1/50 1/100 1/200 1/500 second.
SELF-TIMER: Built-in Self-Timing Device enables you to take photos of yourself without asking the aid of another person.
FLASH SYNCHRONIZER: Flash bulb works simultaneously with the shutter by means of connecting battery case of Minolta Flash Unit to the contact-maker built-in the camera.
AUTOMATIC FILM WINDING: Film is advanced by one frame, and the number of the exposure is indicated on the dial, as the shutter is wound, all in one turn of the knob. Double exposures are not possible.
EASY FILM LOADING: Hinged back of camera body is most convenient for loading film and dusting the interior.
INTERCHANGEABLE LENSES: (Coupled to range-finder)
Super Rokkor Coated F2.8 85mm.
Tele Rokkor Coated F5.6 110mm.
Tele Rokkor Coated F4 135mm.
SIZE: Compact 31×75×135mm. (1"¼×2"7/8×5"¾)−800grm (28ounces) Weight
BODY: Attractive, sturdy, die-cast, light metal alloy, is covered with leather to produce a beautiful camera body with satin chrome trimming.
text_image
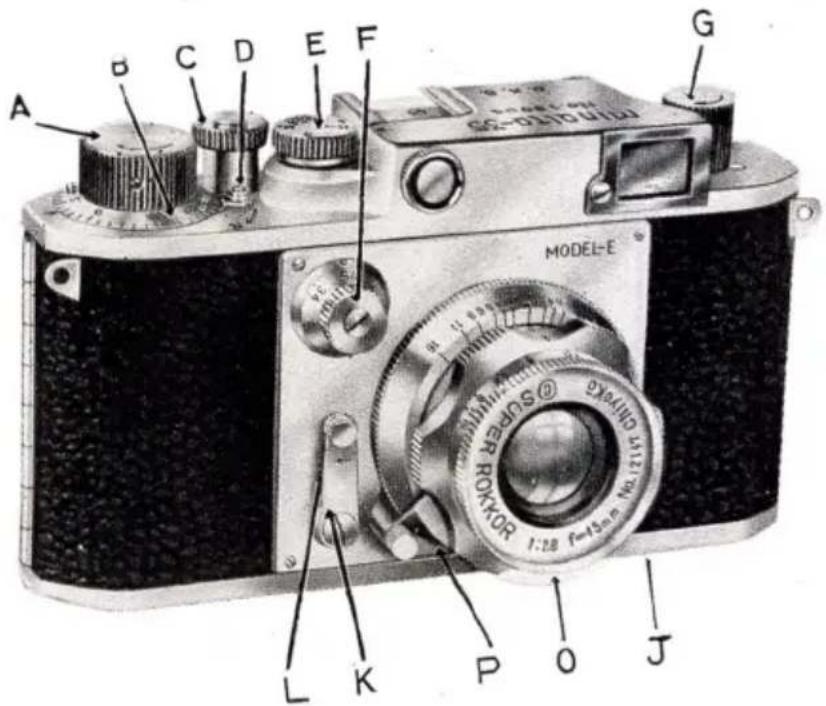
A B C D E F G MODEL-E SUPPORT RHYOR 1:28 F=15mm No.1214 P O J L KA. Winding Knob
B. Counter Dial
C. Release Button
D. Rewind Lever
E. Rapid Shutter Dial
F. Slow Shutter Dial
G. Rewind Knob
H. Rewind Shaft
- Terminal for Flash Synchronizer
J. Lock Button
K. Self-timer Lever
L. Starting Button for Self-timer
M. Take-up Spool
N. Spring Clip
O. Iris Stop Ring
P. Focusing Ring
Q. Full-view Range Finder
R. Sprocket Gear

text_image
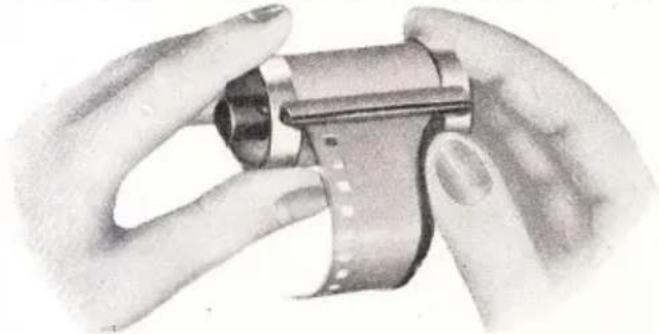
M10010-35 N9120220 Q G H I E C A B R M NLOADING FILM
- Turn the REWIND LEVER (D) to the position marked "R".
- Open the camera by pressing the LOCK BUTTON (J).
- Pull out the REWIND KNOB (G) until it stops.
- Put the film cassette in the camera, and engage the REWIND SHAFT (H) into the cassette, replacing the REWIND KNOB.

natural_image
Illustration of hands holding a metallic object with a clip, no visible text or symbols
natural_image
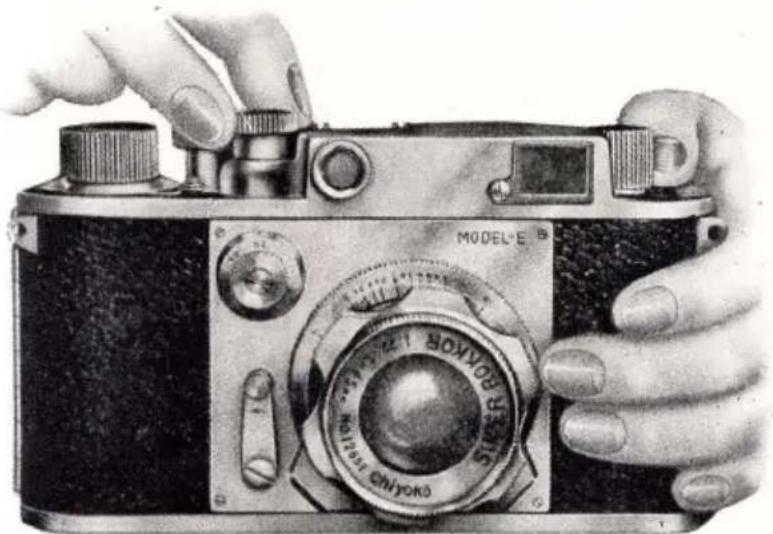
Illustration of a hand adjusting a vintage camera with a key inserted (no text or symbols visible)- Turn the WINDING KNOB (A) and arrange the TAKE-UP SPOOL (M), so that the SPRING CLIP (N) is in a position ready to receive the end of film.
- Pull out the film about 4 inches, and bend its end about half an inch, making a hook, emulsion surface outside.
- Insert the hook of film into the Spring Clip (N), and give one complete turn to the TAKE-UP SPOOL (M) so that the film is securely fastened.
natural_image
Close-up of hands holding a metallic cylindrical object, no visible text or symbols
natural_image
Illustration of two hands exchanging a handheld device, one with a smartphone attached (no visible text or symbols)
natural_image
Cross-sectional view of a digital camera showing internal components and casing (no visible text or symbols)- Close the camera, pushing the back cover to its original position until it is locked.
- Replace the REWIND LEVER (D) to the original position.
- Turn the WINDING KNOB (A) in clock-wise direction until it stops (do not force,) and press the RELEASE BUTTON (C). Then, give one more turn to the WINDING
KNOB and press the RELEASE BUTTON once again.

text_image
58 0 2.6 11 6 4 2.8 5.6 8 1 Ra-35 9 40 R 35 15 25 20 15 10 5 2 1 0 -50 -35 -20 -10 -50 -35 -20 -10 -50 -35 -20 -10 -50 -35 -20 -10 -50- Set the COUNTER DIAL (B) at figure "O", turning the dial in either direction with thumb and forefinger, the WINDING KNOB being kept unmoved.
- The Camera is now ready to take pictures.
CONTROLLING SHUTTER SPEED
The speed of shutter (focal plane) is controlled by two dials;
Rapid Dial (E) and Slow Dial (F).
The RAPID DIAL (E) controls shutter speed from 1/25 to 1/500 second and B, or Bulb exposure. To operate it, lift the dial and turn it to bring the desired speed indication at the arrow marked on the camera body.
CAUTION: When the RAPID DIAL is used, be sure that the SLOW DIAL is set at "25".
Do not interfere the rotation of Dial with finger, while pressing the RELEASE BUTTON.
The SLOW DIAL (F) controls shutter speed from 1 to 18 second and T, or Time exposure. To operate it, set the RAPID DIAL (E) at "25", and then turn the SLOW DIAL, bringing the desired speed indication at the line marked on the base.
natural_image
Illustration of a vintage camera with hands adjusting the lens (no text or symbols visible)CAUTION: Unless the RAPID DIAL is set at "25", the SLOW DIAL will not operate. When the SLOW DIAL is set at "T", the Shutter Release Button will act only for opening the shutter. To close it, turn the Dial a little. It must be remembered that both the RAPID DIAL and SLOW DIAL should always be set after winding up the focal plane shutter, which is done automatically as you turn the Winding Knob (A).
FIXING LENS STOP
Iris Stop, or "f" Stop, is operated by turning the IRIS STOP RING (O). The desired "f" value will be seen on the helicoid body of lens.
CAUTION: Do not force the Ring beyond its limit of movement.

text_image
SUPER ROYOKOR 1.2857 No.12857 ChiyokōFOCUSING
Minolta-35 is equipped with automatic focusing device, and there is no need of meas-
uring the distance for bringing the subject into focus.
Just look through the FULL-VIEW RANGE, FINDER (Q), and you will find in the center, double image of the subject if it is out of focus. Turn the FOCUSING RING (P) in either direction until the double images join into one. The subject is now on the focus of mechanical precision.
CAUTION: Do not force the FOCUSING RING at either end.
Turning the Eye-piece Ring to the left is adjustable for far-sighted users.

natural_image
Black-and-white photo of two people in front of a circular moon (no text or symbols visible)
natural_image
Black-and-white portrait of a woman with a hat, against a plain background (no text or symbols visible)DEPTH OF FIELD GUIDE
The "f" value marked on the washer-ring of lens body is the scale for judging the Depth of Field at each Lens Stop.
Depth of Field is definable as that distance between the nearest place and farthest place at which subject will be sharply defined in pictures. The larger the lens stop the shallower the Depth of Field, and the more critical focusing must be made on the principal subject. For example see diagram:
If the focus range of an objective is found to be 8 feet, and the lens stop is set at 8, the Depth of Field will range from 6 to 12 feet. That is, subject 6 to 12 feet from the camera will be in focus. With a lens stop of 16 the Depth of Field widens and subjects from 5 to 20 feet will be in focus.
DEPTH OF FIELD TABLE FOR MINOLTA-35
Depth of Field figures in feet and inches for various lens openings and distance settings.
Infinity on the scale is marked ∞
| Lens focused at feet | Lens stopped down to | ||||||
| f 2.8From To | f 4From To | f 5.6From To | f 8From To | f 11From To | F 16From To | ||
| ≈ | 162'9'' ≈ | 114' ≈ | 81'4'' ≈ | 56'11'' ≈ | 41'5'' ≈ | 28'5'' ≈ | |
| 50' | 38'5'' 71'8'' | 34'11'' 88'1'' | 31'2'' 128'7'' | 26'11'' 375'1'' | 22'7'' ≈ | 18'5'' ≈ | |
| 20' | 17'11'' 22'8'' | 17'2'' 24'1'' | 16'2'' 26'3'' | 14'12'' 30'3'' | 13'8'' 37'6'' | 12' 62'4'' | |
| 15' | 13'10'' 16'5'' | 13'4'' 17'2'' | 12'9'' 18'2'' | 12' 20' | 11'2'' 22'11'' | 10' 30'2'' | |
| 10' | 9'6'' 10'7'' | 9'3'' 10'10'' | 9' 11'3'' | 8'7'' 11'11'' | 8'2'' 12'10'' | 7'7'' 14'10'' | |
| 8' | 7'8'' 8'5'' | 7'6'' 8'7'' | 7'4'' 8'9'' | 7'1'' 9'2'' | 6'10'' 9'8'' | 6'5'' 10'9'' | |
| 6' | 5'10'' 6'2'' | 5'9'' 6'4'' | 5'8'' 6'5'' | 5'6'' 6'7'' | 5'4'' 6'10'' | 5'1'' 7'4'' | |
| 4' | 3'11'' 4'1'' | 3'10'' 4'2'' | 3'10'' 4'2'' | 3'9'' 4'3'' | 3'9'' 4'4'' | 3'7'' 4'6'' | |
EXPOSING
The shutter is released by means of pushing the RELEASE BUTTON (C).
Proper care has to be taken for pushing the button, lest the camera should shake during exposure. Flexible wire release can be screwed on the button, by removing the cover of button.

natural_image
Black-and-white photo showing a vintage camera with 'ROKKOR' branding and a child watching from a camera (no readable text or symbols)SELF-TIMING DEVICE:
When automatic release of the shutter is desired, turn the Self-Timing Lever (K) to the left until it stops and push the STARTING BUTTON (L) behind it to the right. Then the shutter will be off automatically after about 10 seconds.
FLASH SYNCHRONIZATION:
When using the Minolta Flash Unit Ub or B. C. B. attach one end of electric cord to the Flash Synchronizer (1). The flash lamp and shutter works in perfect synchronization.

natural_image
Illustration of a vintage camera with a circular dial and external housing (no text or symbols)EXPOSURE GUIDE:
Excellent exposure guides are normally inclosed with roll film. Observe these closely for best results.
Use of a reliable exposure meter will insure superior pictures regularly.

natural_image
Vintage mini-cyc and radio typewriter with a circular lens and control knobs (no visible text or symbols)Thus, you go on snapping, picture after picture turning the Winding Knob, setting the Shutter Dial, fixing Lens Stop, focusing and pressing the Shutter Release. At each winding of film, the COUNTER DIAL (B) will record the number of pictures exposed. It will work up to 36 pictures when the maximum length of film is loaded in the cassette.
REWINDING AND UNLOADING FILMS
- Turn the Rewind Lever (D) to the position marked "R".
- Pull out the Rewind Knob (G) until it stops, and turn it until, the entire film is rewound into the cassette.
- Open the back cover, and take off the cassette.
ACCESSORIES FOR MINOLTA-35
INTERCHANGEABLE LENSES
| Standard Super Rokkor Coated | F 2.8 | 45 mm. |
| Super Rokkor Coated | F 2.8 | 85 mm. |
| Tele Rokkor Coated | F 5.6 | 110 mm. |
| Tele Rokkor Coated | F 4 | 135 mm. |
LENS SHADE
The Lens Shade is screwed on the lens mount. It is needed for exposures against the light.
FILTER Three colors a set in celuloid case.
FLASH UNIT
Minolta Flash Unit Type Ub.....4 penlites used.
Minolta B. C. B.....22.5 V Battery and condensor used.
natural_image
Black-and-white photograph of a large, seated Buddha statue in an outdoor setting with people gathered on steps (no visible text or symbols)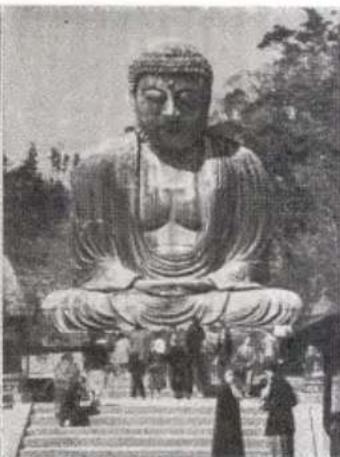
natural_image
Black-and-white photograph of a large Buddha statue in a seated pose, surrounded by people and trees (no visible text or symbols)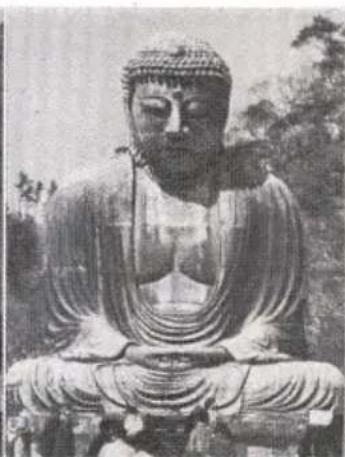
natural_image
Black-and-white photograph of a seated Buddha statue with detailed robes and headwear, surrounded by trees (no visible text or symbols)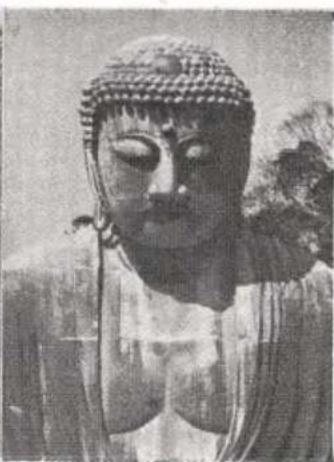
natural_image
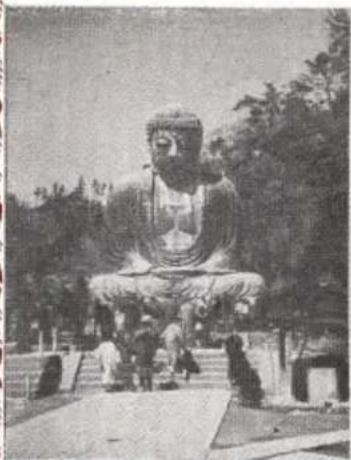
Black-and-white photograph of a Buddha statue with detailed facial features and headdress (no visible text or symbols)EACH TAKEN WITH THE MINOLTA-35
| SUPER | ROKKOR | SUPER | ROKKOR | TELE | ROKKOR | TELE | ROKKOR |
| F 2.8 | 45mm | F 2.8 | 85mm | F5.6 | 110mm | F 4 | 135mm |
| Weight | 5 ounces | Weight | 13 ounces | Weight | 9 ounces | Weight | 18 ounces |
| Length | 1.5 inches | Length | 3 inches | Length | 3 inches | Length | 4 inches |

text_image
Rokkor Lens Series minolta-3 No.15026 C.K.S. TELE ROKKOR
natural_image
Black-and-white landscape photo showing a rural field with a small house, trees, and a winding path (no visible text or symbols)New golf-link at Karuizawa
Taken by Mr. T. Iwahara
Made with Super Rokkor Lens F2.8 f-85mm
Exposure at 6.30 a. m. on May, 21st, 1950, was 1/50 sec. at f8.
The Plus×film was developed in DK-20
CONVENIENT EXPOSURES LIST
Season: Spring or Autumn.
Iris Dial: F 8
Weather: Fine
Film used: Panchro Film.
| SUBJECT | TIME | 6-6 | 7-5 | 8-4 | 9-3 | 10-2 | 11-1 |
| Sea Shores, High Mountains | 1/75 | 1/100 | 1/200 | 1/500 | 1/1000 | 1/1000 | |
| Distant Landscape | 1/35 | 1/50 | 1/100 | 1/200 | 1/200 | 1/200 | |
| Ordinary Landscape | 1/25 | 1/35 | 1/50 | 1/100 | 1/200 | 1/200 | |
| Bright Street Scene | 1/4 | 1/8 | 1/25 | 1/50 | 1/100 | 1/100 | |
| Near Landscape | 1/2 | 1/4 | 1/8 | 1/25 | 1/50 | 1/50 | |
| Light dark landscape, Portrait under eaves | 1 | 1/2 | 1/4 | 1/8 | 1/8 | 1/8 | |
| Inner bright chamber, Portrait by window | 3 | 2 | 1 | 1/2 | 1/4 | 1/4 |
REMARKS: Left side figures in the column of time denote A. M. while these at right side mean P. M.
Time of exposures other than mentioned in the above should by briefly as follows:-
About 2 times of the above under bright cloudy weather.
2 in winter season.
„ 1/2 „ in summer season.
or can be adjusted by regulating iris dial at the following ratio:-
F 3.5 4 5.6 (8) 11 16
Ratio 1/5 1/4 1/2 1 2 4 times