CCHF1072WAIRFRY - Oven CORBERO - Free user manual and instructions
Find the device manual for free CCHF1072WAIRFRY CORBERO in PDF.

User questions about CCHF1072WAIRFRY CORBERO
0 question about this device. Answer the ones you know or ask your own.
Ask a new question about this device
Download the instructions for your Oven in PDF format for free! Find your manual CCHF1072WAIRFRY - CORBERO and take your electronic device back in hand. On this page are published all the documents necessary for the use of your device. CCHF1072WAIRFRY by CORBERO.
USER MANUAL CCHF1072WAIRFRY CORBERO
natural_image
Simple line drawing of a cabinet with two handles and a blank front panel (no text or symbols)CCHF1072NAIRFRY
CCHF1072WAIRFRY
Built-in Oven - User Manual
Querido/a Cliente,
natural_image
Illustration showing a packet dropping into a container with food items, and a checkmark symbol (no text or labels)natural_image
Two-panel illustration showing a fan installation with fish inside a cage and a fish inside a water tank, both without any text or symbols.natural_image
Two identical diagrams showing a grid with three bread slices, one marked with a checkmark (no text or symbols)natural_image
3D rendering of a mechanical housing with internal components and no visible text or symbols
natural_image
Illustration of a microwave oven with a checkmark indicating inspection (no text or symbols present)natural_image
Symbol of a trash bin crossed with two crossed lines and a solid black rectangle below (no text or labels)text_image
Technical diagram of an oven with numbered components for identification1-Panel de Control 5- Ventilador
natural_image
Two-panel illustration showing a hand pressing a circular button on a panel, with a curved arrow indicating rotation (no text or symbols)text_image
8:8:8° ← - + OKtext_image
13:30° ← - + OKtext_image
▶ 08:30° ← - + OKtext_image
12:00 ← - + OKtext_image
00:00 ← - + OKtext_image
06:15° ← - + OKtext_image
▶ 82:00° ○ ○ ○
text_image
Handwritten-style symbols with arrows and letters, including a left-turn icon and a plus sign with 'OK' in the right.natural_image
Simple line drawing of a rectangular container with a small droplet inside, no text or symbols present.natural_image
Illustration of a packet with snowflake symbols and scattered coins (no text or labels)
natural_image
Illustration of a container with two food items inside, marked with droplets (no text or symbols)natural_image
Exterior view of a modern office building (no signage)
natural_image
Cross-sectional view of a mechanical device with a fish inside, showing internal components and a fan blade (no text or symbols)natural_image
Illustration of two bread rolls on a griddle plate with a checkmark below (no text or symbols)natural_image
3D rendering of a mechanical device with internal components and housing (no visible text or symbols)
natural_image
Illustration of an oven with a door and side panel, showing a checkmark (no text or symbols present)natural_image
Symbol of a trash bin crossed with two diagonal lines, no text or labels presenttext_image
Technical diagram of an oven with numbered components for identification1-Painel de controle 5-Ventilador
natural_image
Hand pressing a button on a computer monitor (no text or symbols visible)natural_image
Hand pressing a button on a computer monitor (no text or symbols visible)text_image
8:8:8 ↑ ← → II← - + OK
text_image
▶ 8:3:30° E I I
text_image
12:00 ← - + OKtext_image
00:00° ← - + OKtext_image
▶ 00:30° ← - + OKtext_image
12:00 ← - + OKtext_image
00:00 ← - OKtext_image
00:30" II ← - + OKtext_image
8:30° ← - + OKtext_image
12:00 ← - + OKtext_image
00:00° ← - + OKtext_image
16:15° ← - + OKtext_image
8:20' 11 ← - + OKtext_image
12:10° ← - + OKtext_image
80.08° K K
text_image
12:00 ← - + OKtext_image
88:88° ← - + OKtext_image
12:00 ← - + OKtext_image
9:00 ← - + OKtext_image
8:03 ← - + OKtext_image
12:00 ← - + OKtext_image
9:00'° ← - + OKtext_image
9:00 ← - + OKnatural_image
Technical line drawing of a rectangular metal frame structure with vertical supports and a labeled component 'a' (no text or symbols beyond label)
natural_image
Line drawing of a metal rack with a circular component on top, no text or symbols present
natural_image
Technical line drawing of a multi-tiered storage rack with metal frame and grid structure (no text or symbols)natural_image
Simple line drawing of a rectangular container with a small droplet inside (no text or symbols)Dear Our Precious Customer,
Thank you for choosing a product. We would like you to be satisfied with our product, which has been produced in our highly qualified, technological and modern facilities.
You can use your oven with pleasure and confidence for many years by performing required maintenance and showing necessary care. Read the whole manual. Retain the manual during use of the product. If you hand the product over to someone else, give them the manual as well.
This Operating Manual is prepared for multiple models. Some of the features mentioned may not be available in your product.
| Symbol Meaning | |
 | Important Information |
 | Warning - Caution |
 | Risk of Electric Shock |
 | Risk of Fire |
- Important Safety Warnings △ 72
General Warnings 72
Electrical Hazard 73
Risk of Injury....74
Intended Use 74
2.2.Environmental Protecti 75
Saving Energy 75
Compliance With WEEE Regulation and Disposal of The Product 76
Technical Specifications 76
- Introducing the Appliance .....77
General Overview....77
Control Panel....78
Heating Types and Functions....79
- Use of the Oven 80
First use....81
Clock Setting 81
First Heating 82
Daily Use 82
Using the Digital Timer 83
Alarm Setup 86
5..Accessorie 88
Use of Accessories 89
- Turnspit (Chicken Rotisserie)....91
7.7.Cooking Recommendation 92
- Maintenance and Cleaning 📋 95
Steam Cleaning Feature....95
Removing And Attaching The Oven Door....96
Removing And Attaching The Glasses 97
Removing And Attaching The Wire Racks....98
Replacing the Oven Lamp....99
9.Troubleshooting 99
Read the manual carefully before installation and use of the appliance. The appliance shall not be covered under warranty in case of an incorrect installation or use performed by a person other than a specialist.

General Notes
- Follow the safety related instructions.
- Also read other documents that are provided together with the appliance.
- The user manual may be convenient for more than one model.
- Keep it in an easily accessible place for a future use.
- Disconnect all the energy connections before installation, maintenance and repair operations.
- If the appliance is damaged, do not operate it.
- If there is protective gelatin on the panel or cover of your device, please remove it.
- Keep the children under 8 years old and the pets away during and after use of the appliance.
- It is dangerous for the children under 8 years old to touch the appliance without an adult supervision and to use it on their own.
- Keep the packaging materials out of reach of the children, dispose them in a place where they cannot reach.
- Do not bring damp package into contact with the mouth. Keep it out of reach of the children.
- The appliance should not be maintained and cleaned as long as the children are not under the supervision of the adults.
- The appliance is only intended for cooking. Do not use the appliance for the purposes such as heating the room.
- While the oven is hot, tray and accessories may become hot; use oven gloves or a similar apparatus when you place and remove them.
- Do not use steam cleaner for cleaning the appliance.
- Keep the surrounding area of all the compartments, where there is an air circulation, open.
- If you would use an oily baking paper, absolutely do not bring the paper into contact with the base of the oven.
- Do not prepare food with strong alcoholic drinks. Alcohol vaporates at a high temperature, it may catch and cause fire in case of contact with hot surfaces.
- Check whether the appliance is turned off or not after use.
- Keep the cooking duration under control.
Electrical Hazard
There is a risk of electrocution.
- The appliance should be repaired by an authorized service if it is damaged.
- In case of any damage, turn off the appliance, cut off the electricity.
- Due to the risk of electric shock, do not wash the appliance by spraying or pouring water on it.
- If the lamp would be replaced, disconnect the appliance from the electrical outlet in order to avoid electric shock.
- Our company is not responsible from any damage that would arise for the reason that the appliance is used without connecting it in accordance with local regulations.
• Absolutely do not use the plug with wet hands.
- In order to disconnect the appliance from the electrical outlet, plug it out by holding the plug, not the cable.
- While the appliance operates, its rear surface also gets warm. The electrical connections should not come into contact with the rear surface.
- Unplug the appliance during operations such as cleaning, repair and maintenance.
- Do not pass the connection cables over the hot surface. If the cables melt, they may cause a short circuit or a fire.
Do not try to extinguish the fire with water.
- Disconnect the appliance from the electrical outlet and try to cover the fire with an instrument such as a fire blanket in order to prevent the fire from coming into contact with the air.
Risk of Injury
- If there is a crack on the oven door glass or it is exposed to an impact, the glass may break and splatter.
- In order to clean the oven door glass, do not use harsh and abrasive cleaners or metal scrapers.
- Do not touch the heating/power elements.
- The hinges of the appliance door may jam the door during movement. Do not hold the section which contains hinges.
- Never leave combustible materials or oxidizers in the appliance.
- Do not heat glass jars and canned food. Created pressure may cause the jar to explode.
- Do not put the tray close to combustible materials or oxidizers after cooking.
- The oven door may consist of 2, 3 or 4 glasses. Do not use the oven door with a removed glass.
- The user should not carry the oven on his/her own without gloves.
Intended Use
- The appliance is intended for cooking. Do not use it for purposes such as heating.
- The appliance has been designed for domestic use. Use it only in a closed area.
- The oven can be used for defrosting, frying or grilling the food.
- Do not use the oven for drying purposes by hanging a towel or clothes on its handle.
2. Environmental Protection
Saving Energy
To learn what should be done while cooking a food in the oven, first of all, we need to talk about pre-heating. You should apply pre-heating only when it is required. Pay attention not to apply pre-heating for more than 10 minutes.
- Before cooking, put the frozen food in the oven after you leave them at the room temperature or defrost them in the microwave oven.

natural_image
Illustration of a packet with snowflake patterns and scattered coins, no text or symbols present
natural_image
Illustration of a container with two food items inside, marked with droplets (no text or symbols)- Do not leave unnecessary accessories in the cooking compartment.

natural_image
Exterior view of a modern office building (no signage)
natural_image
Cross-sectional view of a mechanical device with a fish inside, showing internal components and a fan blade (no text or symbols)- You can cook more than one food on the wire rack at the same time. Thereby, you save heat.


natural_image
Illustration of two bread rolls inside a wire rack with a checkmark below (no text or symbols)- The oven door causes heat loss every time it is opened. For this reason, you should not open the oven door unless it is highly necessary. When you need to open the oven door, pay attention to close it as soon as possible.

natural_image
3D rendering of a mechanical housing with internal components and spherical elements (no text or symbols visible)
natural_image
Illustration of a microwave oven with a square vent and a checkmark symbol (no text or labels)Compliance With WEEE Regulation and Disposal of The Product

natural_image
Symbol of a trash bin crossed with two crossed lines, no text or labels presentDispose of the old product in a way not harming the environment. On this product, there is a symbol (WEEE), which indicates that electrical and electronic equipment wastes should be collected separately. This means that the equipment should be handled in accordance with 2002/96/EC EU Directive for recycling or dismantling in order to minimize the impacts of it on the environment.
For further information, please refer to local or regional authorities.
The electronic products, which are submitted for controlled waste collection, pose a potential hazard in terms of both environmental health and human health due to the harmful materials they contain.
You can consult with your authorized dealer or the garbage collection centre of your municipality about how you can dispose of the product. Before disposing of the product, unplug the power cord and break the cover lock, if present, to protect children from danger.
| Technical Features | |
| Voltage/Frequency 220-240V~50/60 Hz | |
| Cable Length With F Type Plug 3 x 1.50 | x 1500 mm |
| External Sizes (height/width/depth) 595 | mm/595 mm/547 mm |
| Main Oven Multi-oven | |
| Lamp Power 25 W | |
| Thermostat | 50-Max°C |
| Lower Heater 1200 W | |
| Upper Heater 1100 W | |
| Turbo Heater 2000 W | |
| Grill 2450 W | |
Essential: Energy label information have been indicated according to EN 60350-1 / IEC 60350-1 standards for domestic type electric ovens. The values are determined according to standard load, lower-upper heater or fan supported heating (if any) functions.
The properties are subject to change without giving a prior notice in order to increase the quality of the product.
3. Introducing the Appliance
General Overview

text_image
Technical diagram of an oven with numbered components for identification1-Control Panel 5-Fan
2-Air Vents* 6-Fan Protection Sheet **
3-Oven Illumination*** 7-Cover
4-Racks**** 8-Handle
*Air Vents may be open/closed depending on your model.
It may not be available depending on your **FPS model.
The position of the ***Oven Illumination may vary.
****Racks may vary depending on your model. Wire rack is demonstrated as an example.
Control Panel
Signal Lamp

text_image
Function Knob Signal Lamp Mechanical Timer Temperature Knob Function Knob Digital Timer Temperature KnobFunction Button
Heating/cooking type is adjusted with function selection button.
You also need to set temperature button to a value with function selection button.
Otherwise, the product will not start to heat.
Temperature Button
It allows you to select the temperature of the oven. The cooking is started by selecting the function type.
Mechanical Timer
It allows you to determine the time for the food to be cooked. The function and temperature knob must also be set.
Digital Timer
It is an electronic timer which makes the food to be cooked prepared at the time you desire.
Signal Lamp
It is the lamp which indicates that the oven is heated. It goes out when the oven reaches to the adjusted temperature.
Turning Off The Electric Oven
Switch the function and temperature buttons to zero (turned off) position.
The functions, which are available on the table, may vary in the different appliances, they may not be available in every model.
*The related energy value in the fan supported cooking mode has been indicated based on this function. The performed tests have been based on TS EN 60350 standard and (EV) No 66/2014 regulation.
Heating Types And Functions
 | Fan Supported Lower and Upper Heating | Lower + Upper Heating and Fan are turned on. It is convenient for the food such as meat, cakes, biscuits. By the help of fan, the air circulation is performed in a controlled way and evenly within the oven. |
 | Lower and Upper Heating | The food are heated in the same way downwards and upwards. Upper and Lower heating are turned on. It is convenient for the food such as cakes, pastries. |
 | * Fan Supported Big Grill | The grill and fan operates together. The fan distributes the hot air evenly. It is convenient for cooking large sized meat dishes, |
 | Big Grill | It is convenient for grilling and frying big and medium portion meals. It heats the whole area under the heater. |
 | Turnspit | Meat, chicken, etc. foods lined up on the skewers are cooked evenly fried. |
 | *Fan Supported Small Grill | Small grill and fan are turned on. You can cook your food, which require to be cooked for a long time, by saving energy. Its cooking duration is longer than other functions. It is not recommended for leavened food. “This mode is the highest mode for energy efficiency.” |
- | ||
 | Turbo Fan | Turbo heater shall step in and cook your meal evenly with hot air by the help of fan. |
 | Turbo Fan + Lower Resistor | Turbo fan and lower heating are turned on. It is convenient for cooking pizza. |
 | Lower Heating | Only Lower heating is turned on. If the bottom of the meal, which is being cooked, needs to be fried, use the programme towards the end of the cooking. Also use this function for Steam Cleaning. |
 | Defrosting | The fan circulates the air around the meal and defrost the frozen food such as meat, bread and cake. |
 | Oven Illumination | It helps to illuminate the inside of the oven. When you switch it to the oven illumination position, the heaters and the fan do not operate. The light will remain on as long as the oven operates. |
Pop-out Button Use

natural_image
Hand pressing a circular button on a whiteboard (no text or symbols visible)- In the models with a pop-out button, the button should be on the outside in order to apply the setting. (This button is optional.)
- Remove the button out by pressing on it as shown in the picture.
- You can adjust the button by turning it when it is outside.

natural_image
Hand pressing a button on a computer monitor (no text or symbols visible)Use of Mechanical Timer

text_image
M 90 80 70 60 10 20 30 40 50It allows you to set the time for the food to be cooked. You can set it by selecting the temperature and type of cooking, turning the cooking time clockwise. When the time is up, it warns with a ringing sound. If you wish, you can start cooking by selecting the temperature and type of cooking without selecting a time by setting it to M mode.
4. Use of The Oven

text_image
8:8:88 || || =
 | “In progress” indicator Pause indicator | ||
 | Cooking duration indicator Back button | ||
 | Cooking completion indicator OK button | ||
 | Clock setting indicator Time increasing button | ||
 | Alarm indicator Time decreasing button |
First Use
Clock Setting
Apply the clock setting before starting to use the oven.
All numbers light up and go out for 2 seconds after establishing the power connection. 12:00 appears on the screen.
①-/+ buttons, you can change the time more quickly.
Firstly, the minute is entered and it is confirmed with OKutton and you switch to the clock.
As the minute field flashes, when you press on button for a short time, the clock setting shall be terminated without recording any data. In order to return to the minute field while performing the clock setting, press on button for a short time.
As long as the clock data are not confirmed, the screen shall stay as the setting screen.
① In case of a power failure, the time of the day is cancelled and you should apply the setting again.

text_image
12:00 ← - + OKFirstly, select the minute with -/+ OK button.

text_image
12:30 ← - + OKAfter that, select the clock and confirm it with OK button.

text_image
13:30 ← - + OKThe time of the day appears.
The clock is set and Ⓤ indicator disappears.
The brightness on the screen decreases 1 minute after the setting is applied. Afterwards, you can change the time of the day from 'Settings Mode'.
First Heating
 | Remove the labels and take out the accessories before using the oven. |
 | Wipe the oven with a damp cloth and dry it. Refer to “Maintenance and Cleaning” section and review it detailedly. |
 | Perform the first heating in order to remove the new appliance smell. Operate the oven at the Lower + Upper position, while its door is closed, for 200°/30 min. Then, ventilate the room. |
 | You need to be careful while opening the oven's door because vapour may arise after heating. Place the accessories. Your oven is ready to use. |
The surfaces become warmer than normal during the first operation. For this reason, do not touch the oven and keep the children away.
Daily Use
- In order to start cooking, adjust the thermostat button of the oven and the suitable temperature (Cooking Recommendations) for the food.
- Preheat the oven, if pre-heating is desired.
• After cooking, leave the oven to cool down while its door is open.
When the cooking duration ends, remember to turn off the oven's function and temperature button.
Use of Digital Timer

text_image
88:88 ← - + OKIt is an electronic timer which makes the food to be cooked prepared at the time you desire. You should adjust the cooking duration of the meal and the time when you desire it to be prepared.
Automatic Cooking Programme
After selecting the temperature and function, which are suitable for the meal you put in the oven, you shall start the cooking immediately by adjusting the cooking duration. In order to adjust the cooking duration;

text_image
12:00 ← - + OK|→| press and hold OK button until .... indicator appears.

text_image
00:00 ← - OKFirstly, select the minute with -/+ buttons and activate the clock by pressing on OK button. (e.g.; 40 minutes)

text_image
▶ 00:30° ← - + OKwith OK button, move forward until the screen above appears and start the cooking.
- The time, which is set on the screen, starts to count down.
Adjust the temperature and the function you desire. The oven shall cook for 40 minutes beginning from the moment you confirm the time.
- When the adjusted time is up appears on the screen, indicator flashes and it gives an audible alarm for 2 minutes. In order to turn off the alarm, press on OK button. After turning it off, the time of the day appears on the screen.
- When the cooking ends, switch the temperature and the function to the closed position and turn off the oven.
In order to complete the cooking before the adjusted time and cancel the selected time, long press on button. The time of the day appears on the screen.
Pause Mode
When the screen indicates the time of the day and you long press button, the time of the day and symbol appear and the oven switches to pause mode. In this case, you cannot cook. When you press on button for a short time in order to exit the mode, symbol appears and is deactivated.
Operation continues while the commutator is turned on.
Setting The Cooking Ending Time Forward →
This programme is used provided that you desire your meal to be prepared in the upcoming time. It starts with delay. After the delay ends, the cooking starts and adjusted cooking time completes in the end.
By entering cooking duration;

text_image
12:00 ← - + OK|→| press and hold OK button until indicator appears.

text_image
00:00 ← - + OKFirstly, select the minute with -/+ buttons and activate the clock by pressing on OK button.

text_image
00:30 ← - OKAfter selecting the time, confirm it with OK button and proceed to →l mode.

text_image
8:30 ← - + OKFor cooking completion, after selecting the minute and the hour, move forward with OK button until the cooking screen appears.

text_image
0:13:00 ← - + OKCooking screen;
Cooking screen; The time left until the end of the cooking.
Oven time indicates the remaining time on the screen by subtracting the time of the day from the ending time and it starts to count down.
We set our oven to start cooking at 01:00 p.m., cook for 30 minutes and end the cooking at 01:30 p.m. When the cooking ends, indicator flashes and it gives an audible alarm for 2 minutes. In order to turn off the alarm, press on or OK button.
When the cooking ends, switch the temperature and the function to the closed position and turn off the oven.
without entering cooking time;

text_image
12:00 ← - + OK|→| press and hold OKutton until indicator appears.

text_image
00:00 ← - + OKWithout entering the cooking duration, move forward with OK button and proceed to →|mode.

text_image
15:15' → ← - + OKFor cooking completion, after selecting the minute and the hour, move forward with OK button until the cooking screen appears.

text_image
13:15Cooking screen;
Cooking screen; The time left until the end of the cooking.
Manual Cooking Mode
You can start cooking immediately without adjusting the duration by selecting the temperature and the function which are suitable for your meal. The oven does not turn off automatically and you should observe it.
In case of a power failure, your oven shall be deactivated and the clock shall be reset. You should adjust the time of the day again when the power is back on.
Alarm Setup 😊
Alarm can be set at any time. You can use it as a warning or reminder.
The alarm indicator shall go out after the alarm rings for 2 minutes. Until the |→| indicator appears, press and hold OK button.

text_image
12:00 ← - + OKOK with button ☑ move forward until the indicator appears.

text_image
12:30 ← - + OKFirstly, select the minute with -/+ buttons, by pressing on OK button, select the hour and confirm it with OK button.

text_image
12:10 ← - + OKAfter the duration is adjusted, the screen indicates the time of the day.
Turning Off The Alarm
The alarm shall ring for 2 minutes after the adjusted time is up. In order to turn off the alarm, you can press on OK or button. After turning it off, the time of the day appears on the screen.
Setting Mode
Alarm Tune Setting (AL)

text_image
12:00 - + OKLong press ← and OK . buttons together and enter the menu.

text_image
8:00 ← - OKWith -/+ buttons, proceed to RL option and confirm it with OK button.

text_image
80.02 ← - + OKWith -/+ buttons, select the level you desire and confirm it with OK button.
Changing The Time (CL)

text_image
12:00 - + OKLong press ← and OK . buttons together and enter the menu.

text_image
8:8:8" → ← - OKWith -/+ buttons, proceed to [L] option and confirm it with OK button.

text_image
13:00 ← - + OKSelect the minute and the hour with -/+ buttons and confirm it with OK button.
Changing The Tone (So)

text_image
12:00 - + OKLong press ← and OK . buttons together and enter the menu.

text_image
9:00' 11 ← - OKWith -/+ buttons, proceed to SoO1 option and confirm it with OK button.

text_image
9803 ← - + OKWith -/+ buttons, select the level you desire and confirm it with OK button.
Changing The Brightness of The Screen (Sc)

text_image
12:00 ← - + OKLong press ← and OK . buttons together and enter the menu.

text_image
6:01 ← - OKWith -/+ buttons, proceed to Sc01 option and confirm it with OK button.

text_image
5:00 ← - + OKWith -/+ buttons, select the level you desire and confirm it with OK button.
5.Accessories
The accessories, which are provided based on the model of the appliance, vary. The accessories, which are mentioned in the user manual, may not be available in the product.
Use the original accessories, which are designed for the appliance.
 | Standard TrayIt is intended for frozen food, cakes, large sized meat dishes, pastries. |
 | Wire RackIt is intended for cake and soufflé moulds and for placing the food to be fried on the rack. |
 | Deep TrayYou can use it for stews, fried food in large pieces and for collecting the dripping oils when you grill the food. |
 | Telescopic RailTelescopic rails can be pulled completely out of the oven.Control your meals by easily moving your tray and wire grill. |

text_image
1 2 3 4 5 6
natural_image
Technical line drawing of a rectangular metal frame structure with vertical supports and a labeled component 'a' (no text or symbols beyond label)
natural_image
Technical line drawing of a metal rack with a circular component on top (no text or symbols)
natural_image
Technical line drawing of a multi-tiered rack structure with metal frame and support brackets (no text or symbols)There are models with wire and self adjusting racks. Wire rack has 6 cooking rack.
Accessories should be placed between two racks and the side with a inclination should face the door of the appliance.
The cavities on the wire rack prevent it from falling off the racks and ensure the safety.
You can use the tray as a drip tray for grilled food and meat dishes by placing the tray and the rack together.
Use of Telescopic Rail
 | Push the rails completely inside without placing the tray and wire grid on them. Accessories must be between the front and rear overhangs of the rails. |
 | |
 | If you are going to cook with more than one tray, there should be a level of distance with the rail system. |
6.Turnspit (Chicken Rotisserie)
This feature is optional. It may not be available on your device.
 | If there is an accessory in your oven, remove the skewer (a) in the accessories from its rack (b). |
  | Unloose and remove V (dovetail) shaped sheet iron's (c) screw (d). |
| Center the food to be grilled on the skewer and fix V shaped sheet iron so that it shall not come loose and tighten its screw. (Max. chicken-2.5 kg) | |
 | Insert the skewer into the gearbox (e), which is available on the rack. Make sure that it is inserted. |
- After closing the oven's door, operate the thermostat temperature at the maximum temperature at the rack position.
- In order to collect the dripping oils, place the tray on the base and add a small amount of water to the tray.
7.Cooking suggestions
You can see the details of the food, which we have tested in our laboratories and whose cooking values have been determined by us, in the table. The cooking times may vary depending on the grid voltage, the nature and the amount of the material to be cooked and the temperature. By trying out, you can change the values to achieve different tastes and the results, which are suitable for your palatal delight. The lowest rack of the oven is the 1st rack.
* It is recommended to apply 10 min. pre-heating.
| Food | The accessory to be used | Cooking function | Rack position | Temperature (°C) | Cooking duration (min) |
| Cake in a tray Standard Tray |  | 2-3 | 170 | 25...30 | |
 | 3 | 170 | 20...25 | ||
| Cake in a mould | Cake Mould |  | 2 | 170 | 25...30 |
 | 2 | 180 | 35...40 | ||
| Cookie Standard Tray 2 170 20...2 |  | ||||
| Small cakes | Standard Tray 3 | 160  | 1 - 5 160 30...35 | ||
| Standard Tray Deep Tray |  | ||||
| Phyllo based pastry | Standard Tray |  | 2 | 200 | 40...45 |
 | 2 | 190 | 25...30 | ||
| Standard Tray Deep Tray |  | 15 | 190 50...55 | ||
| Pizza Standard Tray |  | 2 200 10...15 | |||
 | 2 200 - 220 10...15 | ||||
Pastry Standard Tray 2 200 25...3  | |||||
| Fish Standard Tray |  | 3 | 200 | 30...40 | |
 | 3 | 200 | 20...30 | ||
| Lasagna | Glass on the wire rack/ rectangular |  | 2 190 20...25 | ||
| Chicken drumstick | Standard Tray |  | 2-3 | 220 | 50...55 |
 | 2-3 | 220 | 40...45 | ||
| Whole chicken (2 kg) | Standard Tray |  | 2-3 | 30min max, then 60min 190 | 90...95 |
 | 2-3 | 25min max, then 50min 190 | 75...80 | ||
 | 3 | 25min max, then 45 min 200 | 75...80 | ||
| Entrecôte Standard Tray 3 |  | 25min max, then 20min 190 | 45...50 | ||
| Sponge cake | Standard Tray 3 |  | 1 - 5 190 8...13 | ||
| Standard Tray Deep Tray |  | ||||
Grilling Table
| Food | The accessory to be used | Cooking function | Rack position | Temperature (°C) | Cooking duration (min) |
| Lamb chops Wire rack 4...5 max. | 25.  | ||||
| Chicken in pieces | Wire rack 4...5 ma 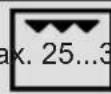 0 0 | ||||
| Fish Wire rack 4...5 max. 20...25 |  | ||||
| Sandwich loaf Wire rack 4...5 max. 1. |  |
* It is recommended to apply 5 min. pre-heating.
Turnspit Table
| Food | The accessory to be used | Cooking function | Rack position | Temperature (°C) | Cooking duration (min) |
| Chicken roast (2kg) | chicken flip set 2 |  | max. | 100...110 | |
| Lamb bud (part) | chicken flip set 2 |  | 30 min max, then 70min 190 | 100...110 | |
| Turkey (parted) | chicken flip set 2 |  | 35min max, then 175min 190 | 210...220 |
* Do not preheating.
8. Maintenance and Cleaning
Before starting to perform maintenance and cleaning, disconnect the appliance from the electrical outlet against the risk of electric shock.
⚠️ Before performing maintenance, make sure that the appliance is cold. You can extend the lifetime of the appliance by performing regular maintenance and cleaning. You can remove the door, the glass and the racks for cleaning.
 CleaningRecommendations CleaningRecommendations | Do not use scratching, abrasive tools such as knives, brushes on the internal and frontal parts, trays and other parts of the appliance. Clean and dry the appliance with warm water and soapy, soft cloth. |
 AccessoryCleaning AccessoryCleaning | Clean and dry the accessories thoroughly after use.Do not wash the accessories in the dishwasher. |
 Daily Use Daily Use | The appliance should be cleaned thoroughly after use. The wastes, accumulated oils may cause fire. |
Steam Cleaning

natural_image
Simple line drawing of a container with a droplet inside, no text or symbols presentThe dirt can be wiped easily by softening them after cooking. Remove all the accessories (if there is a wire rack) from the oven. Place the single tray on the lowest base by adding some water in it and by selecting Lower Heating function, □ operate the oven at for 100°/20 minutes. At the end of the operation, wipe the inside of the oven with a damp cloth or sponge.
Removing The Oven Door
| Step 1 Open the oven door fully. | |
| Step 2 Push the hinge locks in the direction of arrow and unlock them. |  |
| Step 3 Close the oven door until it is brought to the position in line with the hinge lock.Pull it outwards in the direction of arrow. |  |
Attaching The Oven Door
| Step 4 Place the appliance door into the hinges in the direction of the arrow. |  |
| Step 5 Open the appliance door fully and switch the hinge locks to the closed position in the direction of arrow. Close the oven door. |  |
Removing The Glasses
The number of the glasses may vary according to the model.
| Step 1 Open the oven door halfway. | ||
| Step 2 By pressing on the right and left side of the upper plastic section, pull it upwards. |  | |
| Step 3 Firstly, pull the internal glass, then the middle glass outwards in the direction of the arrow. |  | |
Attaching The Glasses
| Step 4 Open the oven door halfway and firstly, push the interim glass, then the internal glass in the direction of the arrow. |  |
| Step 5 Make sure that the glass is inserted into the housing of the lateral plastic section correctly. |  |
| Step 6 Place the upper plastic section in a way that you can hear the click sound and close the appliance's door. |  |
Removing The Wire Racks
The racks may be hot, do not touch the racks when they are hot. Wait for them to cool down.
The cleaning process of the oven's side walls may vary depending on the appliance model. This feature may not be available in your appliance.
| Step 1 Firstly, lift the rack carefully from the front hanger (1) in the direction of the arrow and remove it (2). |  |
| Step 2 Afterwards, pull the whole rack out in the direction of the arrow. |  |
Attaching The Wire Racks
| Step 3 Center the racks and firstly, place the rear hanger (1) and press on it (2). |  |
| Step 4 Then, press on the front hanger. Thereby, the rack would be attached. |  |
Replacing the Oven Lamp
Due to the hazard of electric shock, make sure that the power is out before replacing the lamp. The lamp may be hot, wait for it to cool down.
| Step 1 Open the oven door fully. | ||
| Step 2 Turn the glass door counterclockwise and remove it. |  | |
| Step 3 Pull the oven lamp out in thedirection of the arrow and replace it.Reattach the glass door. |  | |
9.Troubleshooting
The malfunctions mentioned here are the situations that may occur usually. You can solve these problems easily without interfering with the product yourself.
① If the problem cannot be solved despite the instructions, call the dealer or the
Authorized Service where you have bought the appliance from. In this case, never try to repair the appliance on your own.
| Problem Reason Solution | ||
| The appliance does not operate. | The appliance may not be plugged in. | Make sure that the appliance is plugged in. |
| The fuse may have blown or be broken. | Check the fuses in the fuse box. If the fuse has blown, engage it. | |
| While the appliance operates, steam comes out. | The oven is used for the first time. | Steam may come out during operation. This is not a malfunction. |
| The outside of the oven becomes too hot during cooking. | It is in a place, which is not well-ventilated. | Apply the spaces, which are indicated in the installation manual. |
| The oven does not cook properly. | The oven door may open too much during cooking. | Do not open the door too much to ensure that the internal temperature does not decrease. |
| The cooling fan still operates after the cooking ends. | It operates for a while in order to ventilate the inside of the oven. | This is not a malfunction. |
| Metal sounds come while the appliance gets warm or cools down. | The sounds, which are heard because the parts expand as a result of the heat, are normal. | This is not a malfunction. |
| The door is not closed entirely. | The leftovers may be stuck inside the oven and on the door. | Clean the oven. |
| The oven does not heat. | The door may have remained open.The function or the temperature may not have been adjusted.The power may not be supplied. | Check the door and make sure that it is closed entirely.Switch the oven to a specified temperature and/or the function. |
CERTIFICATE OF GUARANTEE
The presentation of the purchase invoice accompanied by this guarantee certificate is essential.
Covered Risks.
This appliance is guaranteed against any malfunction, provided that it is intended for domestic use, proceeding to its repair within the warranty period and only by the authorized SAT network.
Our Corberó appliances have the manufacturer's legal warranty that covers any breakdown or defect for 36 months, from the invoice date of January 1, 2022. If necessary, we take care of any possible incident whenever it is due to a defective component or manufacturing fault. Warranty Exceptions
Warranty Exceptions
- That the date of the certificate does not coincide with the date of sale of the original invoice.
. Faults produced by blow, by fall or any other cause of force majeure.
. If the device has been manipulated by unauthorized personnel. - Faults produced or derived as a consequence of improper use, installation defects, or modifications to the device that alter its operation.
- Start-up, maintenance, cleaning, components subject to wear, lamps, aesthetic parts, oxidation, plastics, rubbers, housings and crystals.
- Microwave ovens (with the exception of built-in ones) and tabletop ovens in the event of any incident of operation, they must be taken to the nearest technical service by the customer. They are not collected or repaired at home.
- Electric thermos guarantee. 3-year warranty including travel and labor costs that correspond to the repair of the product, having to have maintenance once every 12 months. Especially if you have installed a gas appliance, keep in mind as the owner of the installation, the obligation to carry out a complete review of the equipment, (according to Royal Decree 238 / 2013, of April 5. RITE. IT3, M. Lo thermos electrical and boilers that include hot water storage tanks, for the benefit of the Guarantee to apply, it is mandatory that the magnesium anode is operational and that it performs the protection function adequately. For this, it is recommended that the anode be checked biannually by the Official Service and is renewed when necessary Periodicity that must be annual in those areas with critical waters (CaCO3 content greater than 200mg / L , that is, from 20^ of hardness) Deposits without the correct state of the protection anode are not covered by the warranty Regardless of the type of tank or product, all heating or DHW overpressure valves must be channeled to avoid damage and n the house due to water discharges. The product warranty does not cover damages caused by not channeling the water spilled by this valve.
"THESE EXCEPTIONS VOID THE WARRANTY, THE REPAIR BEING CHARGED TO THE CUSTOMER"
Period covered in devices according to the law of guarantees in the sale of consumer goods Current law is "RD 7/2021"
Official Technical Service: 911 08 08 08
QX


natural_image
Simple line drawing of a cabinet with two handles and a blank front panel (no text or symbols)
natural_image
Icon of two crossed wrench and screwdriver tools (no text or symbols)Built-in Oven - Installation Manual
flowchart
graph LR
    A["Hand Icon"] --> B["Palm Palm Icon"]

flowchart
graph LR
    A["!"] --> B["book icon with 'i'"]
    style A fill:#fff,stroke:#000
    style B fill:#fff,stroke:#000

flowchart
graph LR
    A["Person crossed out"] --> B["Person carrying box"]
Tamaños de Aparato
1

text_image
444 577 595 595 547 595 *20/**21 Tamanatural_image
Technical diagram showing a mechanical assembly with two views of a device, no visible text or symbolsCable neutro = N → Azul
Cable de fase = L → Marrón

text_image
Amarillo N E Lflowchart
graph LR
    A["Hand Icon"] --> B["Palm Palm Icon"]

flowchart
graph LR
    A["!"] --> B["book icon with 'i'"]
    style A fill:#fff,stroke:#000
    style B fill:#fff,stroke:#000

flowchart
graph LR
    A["Person crossed out"] --> B["Person carrying one box"]
natural_image
Technical diagram of a mechanical assembly with two views (dashed and solid) showing internal components and alignment, no text or symbols present.flowchart
graph LR
    A["Hand Icon"] --> B["Hand Glove Icon"]

flowchart
graph LR
    A["!"] --> B["book icon i"]

flowchart
graph LR
    A["Person crossed out"] --> B["Group of two people carrying boxes"]
Appliance Dimensions
1

text_image
444 577 595 595 547 595 *20/**21 8 95 ThThe dimensions mentioned in the image are in mm.
*20mmGlassPanel ** 21 mm Inox Panel
2

3


text_image
60 320 180 1154

text_image
35 500 30 35 500 30 min. 35 min. 55

text_image
min. 90
text_image
min. 456

natural_image
Technical diagram of a mechanical assembly with two views (dashed and solid) showing internal components and alignment, no text or symbols present.Check the suitability of the electrical wiring to make the appliance ready for use. If it is not suitable, call a plumber and have him make the required arrangements. You shall use the appliance safely when you install the appliance as described in the installation manual. The person, who installs the appliance, is responsible for the malfunctions occurred due to incorrect installation.
⚠ The customer is responsible for preparing the place where the appliance would be put and the electrical wiring.
⚠️ Our manufacturing company is not responsible for the problems that may occur due to the operations performed by the people other than the authorized ones and the warranty shall be deemed as invalid.
- Carry the appliance together with at least two people. Lift the appliance while carrying so it does not damage the floor.
- The appliance should be checked after its package is opened. In case of a damage, it should not be installed.
- The components may be sharp, wear protective gloves during installation
- The appliance should be installed in accordance with the rules related to the electricity and gas mentioned in the local standards.
- The dimensions mentioned in the image, are in mm.
- Kitchen cabinets should be on the same level with the appliance and fixed.
- Do not mount the appliance in a decoration or closed furniture. It is dangerous due to overheating.
- The furniture, where the installation would be applied, (min. 100°C) should be made of durable material.
- It is not recommended to install the appliance close to the cooler. The performance of these appliances should be impacted negatively due to the heat.
Electricity Connection and Safety
⚠️ Power grid should be disconnected during installation. Do not turn it on until the installation ends.
- The appliance should be installed correctly by the authorized service technician in accordance with the specified instructions.
- Do not pass the connection cables over the hot surface. When the cables melt, they may cause a short circuit or a fire.
- If the cables are damaged, they should be replaced by an electrician.
- They should be plugged into a (grounded) outlet in the grounding system in accordance with the rules.
If there is not a suitable outlet, call the electrician and have your electrical wiring checked.
- Make sure that your plug is grounded.
- The company is not responsible for the damages incurred by the ungrounded outlets where the appliance is plugged in.
- If the product has a cable and a plug; an electrical connection is established by plugging the appliance in a grounded outlet.
- If the product has a cable but not a plug; coding should be performed by an expert suitably.
Grounding cable = E → Green - Yellow
Neutral cable = N → Blue
Phase cable = L → Brown

text_image
N E LInstalling Below Counter (Figure 2)
- The cabinet should be in compliance with the dimensions mentioned in figure 2.
- You need to unload the rear compartment of the cabinet in the dimensions mentioned in figure 2 for necessary ventilation.
Installing Into A Tall Cabinet (Figure 3)
- The cabinet should be in compliance with the dimensions mentioned in figure 3.
- You need to unload the rear compartment of the cabinet in the dimensions mentioned in the figure for necessary ventilation.
• Moreover, if there is a back panel in the tall cabinet, it should also be removed.
Ventilation (Figure 4)
In order for you to get better efficiency from your oven, there
should be adequate cold air intake. Leave suitable spaces according to the dimensions mentioned in Figure 4.
Installing On The Corner (Figure 5)
- The installation should be in compliance with the specified dimensions to perform the installation mentioned in Figure 5 and to be able to open the appliance door.
Fixing The Appliance (Figure 6)
- Center the appliance and push it completely into the furniture.
• Power cable should not be bent under the oven and between the oven and the furniture. - Open the appliance door.
• Fix the appliance with the screws provided along with it. - Screw the appliance into the holes, which are shown in figure 6.
• Make sure that the oven is fixed. Otherwise, there is a risk of tilting during use.
Last Checks
- Turn on the electricity after performing the installation.
- Read the user manual for using the appliance.
Removing The Appliance
- Turn off the electricity.
- Remove the fixing screws.
- Lift the appliance together with at least two people by pulling it out.
Future Carrying Procedures
While carrying the appliance in the future;
- Retain the original box of the appliance. In case there is no original box, tape and wrap it with a bubble packaging or a thick cardboard tightly.
- If there is an accessory in it, place a cardboard in the size of the oven door so the oven door is not damaged. Tape the door to prevent it from opening.
⚠️ Do not lift the oven by holding its handle or door.
⚠️ Do not place an item on the product, carry it uprightly.
QX


text_image
FRY ART
natural_image
Black rectangular tray with a hexagonal grid pattern, no visible text or symbolsnatural_image
Line drawing of a rectangular tray with a mesh pattern, no text or symbols presentUso de FryArt
natural_image
Interior view of a vehicle air conditioner unit showing fan, grille, and vent (no text or symbols visible)natural_image
3D rendering of a rectangular tray with a grid pattern, no text or symbols visibleUso do FryArt
natural_image
Interior view of a server rack with visible fan and ventilation grilles (no text or symbols)COOKING WITH FRY ART
Thanks to its special tray, Fryart allows you to cook your food healthier with little or no oil.
Perforated surface of its tray ensures fast air flow, making food crispy outside and tender inside.

For getting the most out of this feature of the product, please pay due attention to the tips and tricks given in this manual
Safety
Do not use the tray of FryArt in other ovens. Otherwise, there is a risk that it will not fit properly and may fall and get stuck. It must fit between the two racks and the sloping side must face towards the appliance door.

natural_image
3D rendering of a rectangular tray with a mesh pattern, no text or symbols visibleDo not use the FryArt tray for roasting on the stove top.
Since the tray will be hot after cooking, make sure to use heat-resistant gloves.

natural_image
Interior view of a vehicle air conditioner unit showing fan, grille, and vent (no text or symbols visible)Use of FryArt
Select FRY AR function on that control panel to cook your food.
Select the appropriate temperature for your dish from the cooking table. Preheat, if necessary. Please do not leave the tray of FryArt in the cooking chamber while preheating.
Lightly grease your FryArt tray with butter. This will prevent the food from
sticking. Do not neglect this process when drying fruits and vegetables. Depending on your food, place a deep tray under the FryArt tray to avoid oil dripping onto the floor of the oven. Do not use tray of your FryArt with cooking paper, aluminum foil or cooking bags. Otherwise, it will block the air flow vents and reduce efficiency of the cooking mode.
Cleaning
Before first use, clean the tray with soap and warm water and dry thoroughly. The tray is coated with an easy-to-clean enamel known as ETC. However, this is not a non-stick coating. We recommend you to lightly grease the tray with butter before cooking to prevent your food from sticking. When cleaning the tray, do not use scratching and abrasive objects such as knives, brushes or metal wool to avoid damaging the enamel-coated surface.
Cooking Tables
Fresh food:
Fresh food needs to be lightly oiled before cooking. You can do this by using a brush or spray. You can repeat this process towards the end of cooking. If you are cooking vegetables, we do not recommend adding salt at the preparation stage.
Adding salt can cause food to release water and remain soft.
The consistency of the potato during cooking also depends on the type of potato. Fresh potatoes (i.e. with high water content) cannot reach the desired crunchiness. Potatoes having high starch content give better results.
| OPERATING FUNCTION | RACK POSITION | TEMPERATURE (°C) | PRE-PEATING DURATION (minute) | FOOD WEIGHT (g) | COOKING DURATION (minute) | |
| Potato 3(middle) | 220...40 | 20...25 | ||||
| Stick pastry | FRY ART | 3(middle) | 190 10 600 | 20...25 | ||
| Fried dumplings | FRY ART | 3(middle) | 190 | 10 | 600 | 20...25 |
| Falafel | FRY ART | 3(middle) | 190 10 600 | 20...25 | ||
| Crunchy chicken wings | FRY ART | 3(middle) | 220 10 600 | 25...30 |
Frozen food:
Foods such as French fries, onion rings and nuggets are industrially processed foods. They usually contain a certain amount of fat because they have undergone a pre-cooking process. These foods usually do not require the addition of oil. If you consider that the food you are cooking is dry, you can apply a small amount of oil with a spray the next time you cook it.
Since frozen foods also contain salt, we do not recommend adding extra salt during cooking. Adding salt may cause the food to release water and remain soft. If you need to add salt, do so after removing the food from the oven while it is still cooked.
Cooking time of the foods varies. If you are cooking different foods together in one tray, add the ones that require longer cooking times (e.g. potatoes) first, and the ones that cook faster (e.g. onion rings) after 10 minutes. For fried potatoes, small slices fry faster because they have a lower mass. We recommend sorting them before use.
Do not overfill the FryArt tray. If the air flow vents are blocked, cooking performance may become instable. Frozen foods should be cooked before thawing. Foods expected to thaw will lose taste due to premature evaporation of the water inside.
| OPERATING FUNCTION | RACK POSITION | TEMPERATURE (°C) | PRE-PEATING DURATION (minute) | FOOD WEIGHT (g) | COOKING DURATION (minute) | |
| French Fries 3(middle) | 220 | 18 | 600 | 20...25 | ||
| Nugget 3(middle) | 220 | 10 | 600 | 20...25 | ||
| Potato Croquette 3(middle) | 220 | 10 | 600 | 10...15 | ||
| Onion Rings 3(middle) | 220 | 10 | 600 | 10...15 | ||
| Frozen Pizza 3(middle) | 190 | 10 | - | 10...15 | ||
| Frozen Pastry 3(middle) | 190 | 10 | 600 | 20...25 | ||
| Kibbeh 3(middle) | 190 | 10 | 600 | 15...20 |
Healthy foods:
When drying fruits and vegetables, the slice thickness is important. Slice the fruits 1 cm thickness. If they are thicker, the time will extend and the drying will not be even. Vegetables containing much water (zucchini, cucumber, etc.) can be sliced thicker.
Lightly grease your FryArt tray with salt-free butter before starting the drying process. It will prevent the food from sticking, improving taste of the food as well.
During drying, we recommend you vent the steam inside every two hours by opening the door. It will improve performance of the drying process.
Dried vegetables and fruits always retain some residual moisture. Hence, do not forget to store the processed food in the refrigerator or in a dry environment to prevent spoilage.
| OPERATING FUNCTION | RACK POSITION | TEMPERATURE (°C) | PRE-PEATING DURATION (minute) | FOOD WEIGHT (g) | COOKING DURATION (minute) | |
| Fruit Drying 3(middle) | 80 - 6 hours | |||||
| Vegetable Drying | 8(middle) | 80 - - 6-8 hours | ||||
| Meat Drying | 3(middle) | 80 - - 8 hours | ||||
Your Recipe
Ingredients
Your Recipe
Ingredients
CERTIFICADO DE GARANTÍA
The presentation of the purchase invoice accompanied by this guarantee certificate is essential.
Covered Risks.
This appliance is guaranteed against any malfunction, provided that it is intended for domestic use, proceeding to its repair within the warranty period and only by the authorized SAT network.
Our Corberó appliances have the manufacturer's legal warranty that covers any breakdown or defect for 36 months, from the invoice date of January 1, 2022. If necessary, we take care of any possible incident whenever it is due to a defective component or manufacturing fault. Warranty Exceptions
Warranty Exceptions
- That the date of the certificate does not coincide with the date of sale of the original invoice.
• Faults produced by blow, by fall or any other cause of force majeure.
• If the device has been manipulated by unauthorized personnel. - Faults produced or derived as a consequence of improper use, installation defects, or modifications to the device that alter its operation.
- Start-up, maintenance, cleaning, components subject to wear, lamps, aesthetic parts, oxidation, plastics, rubbers, housings and crystals.
- Microwave ovens (with the exception of built-in ones) and tabletop ovens in the event of any incident of operation, they must be taken to the nearest technical service by the customer. They are not collected or repaired at home.
Electric thermos guarantee. 3-year warranty including travel and labor costs that correspond to the repair of the product, having to have maintenance once every 12 months. Especially if you have installed a gas appliance, keep in mind as the owner of the installation, the obligation to carry out a complete review of the equipment, (according to Royal Decree 238 / 2013, of April 5. RITE. IT3, M. Lo thermos electrical and boilers that include hot water storage tanks, for the benefit of the Guarantee to apply, it is mandatory that the magnesium anode is operational and that it performs the protection function adequately. For this, it is recommended that the anode be checked biannually by the Official Service and is renewed when necessary Periodicity that must be annual in those areas with critical waters (CaCO3 content greater than 200mg / L , that is, from 20^ of hardness) Deposits without the correct state of the protection anode are not covered by the warranty Regardless of the type of tank or product, all heating or DHW overpressure valves must be channeled to avoid damage and n the house due to water discharges. The product warranty does not cover damages caused by not channeling the water spilled by this valve.
"THESE EXCEPTIONS VOID THE WARRANTY, THE REPAIR BEING CHARGED TO THE CUSTOMER"
Period covered in devices according to the law of guarantees in the sale of consumer goods Current law is "RD 7/2021"