
AN-52 - TV Stand SHARP - Free user manual and instructions
Find the device manual for free AN-52 SHARP in PDF.
User questions about AN-52 SHARP
0 question about this device. Answer the ones you know or ask your own.
Ask a new question about this device
Download the instructions for your TV Stand in PDF format for free! Find your manual AN-52 - SHARP and take your electronic device back in hand. On this page are published all the documents necessary for the use of your device. AN-52 by SHARP.
USER MANUAL AN-52 SHARP
LCD Color TV Table Stand
CAUTION:This product (AN-65ST1 · AN-52ST1) is only to be used for the LCD TV as follows.
Using the Stand for another product could cause an accident.
To Ensure Safe and Correct Use. E-1
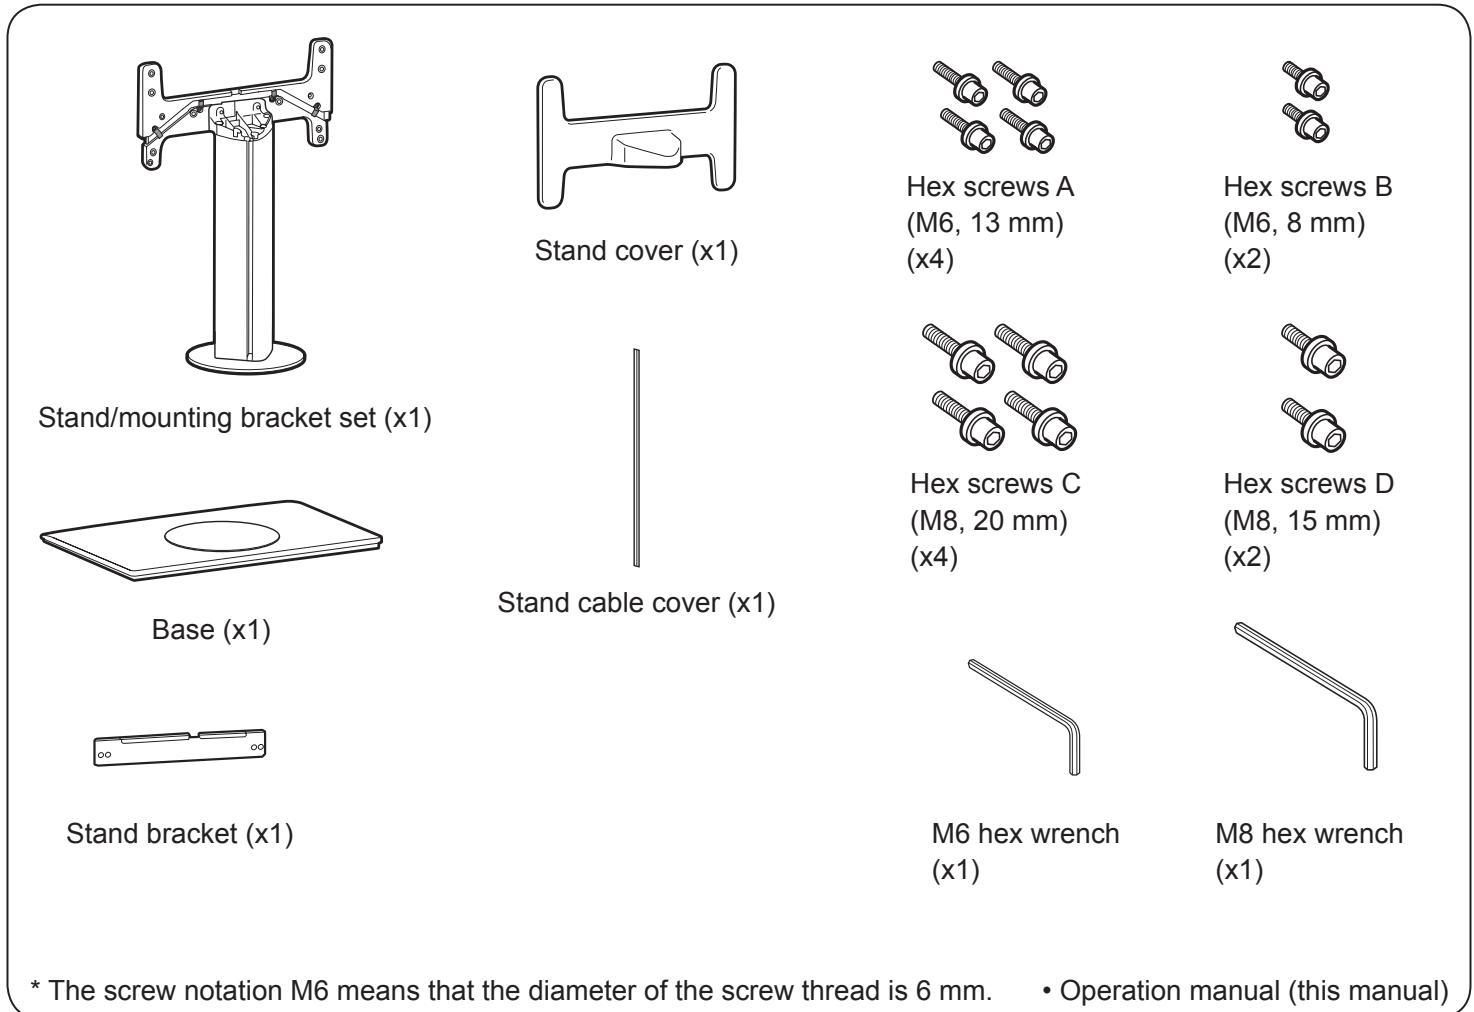
Package Contents. E-2
Assembling the Table Stand. E-2
Attaching the Table Stand to the LCD Color TV. E-3
Outside Dimension Drawing. E-5
Table des matieres
This operation manual and the product use various displays and labels to ensure safe use.
Ignoring these displays and labels and incorrectly using the product could have results as classified below. Please read the following warning symbol information before reading the rest of this section, and be sure to strictly observe all instructions.

Warning
Not following these instructions could result in death or serious injury.

Caution
Not following these instructions could result in injury or property damage.
Meaning of symbol
The symbol indicates something that care should be taken with.
The symbol
indicates something that should not be done.
The symbol
! indicates something that must be done.
| Warning | Caution |
| Do not put the unit in an unstable location. • Do not put the table stand on a wobbly table or in other unstable locations. The stand may fall down or fall over, causing injury. | Always disconnect all cables before moving the table stand. ● Before moving the table stand, turn the LCD color TV off, and ensure that the power cord has been unplugged from the power socket and that antenna cords, cords connecting the TV to other devices, and fall prevention brackets have all been removed. Failure to do so may damage the cord and cause a fire or electric shock. |
| Do not do anything that could damage the power cord. • Do not put heavy objects on the LCD color TV power cord. Ensure that the cord is not trapped under the table stand. Doing so may damage the cord and cause a fire or electric shock. Avoid covering the cord with a rug or similar object, as you or someone else may inadvertently place something heavy on it without realizing. | |
| Do not use a damaged power cord. • If the LCD color TV power cord is damaged (e.g. if wires are exposed or broken) ask the dealer for a replacement. Continuing to use a damaged power cord may cause a fire or electric shock. • Do not damage, alter, bind up, forcibly bend, twist, pull, or heat the LCD color TV power cord. Doing so may damage the cord and cause a fire or electric shock. | Installation ● When assembling and installing the table stand, follow the instructions in this operation manual correctly. Failure to do so may cause the table stand to fall down or fall over, resulting in injury or damage. |
| Do not disassemble or modify the table stand. ● Do not disassemble or modify the table stand any more than necessary. Doing so may cause the table stand to fall down or fall over, resulting in injury. |
Assembling the Table Stand
Preparations
- Before attaching the table stand, remove all cables from the LCD color TV.
1 Attach the stand/mounting bracket set to the base. (You can use the packing material to facilitate the process. Refer to "Assembling the Table Stand by Using the Packing Material" on page E-4.)
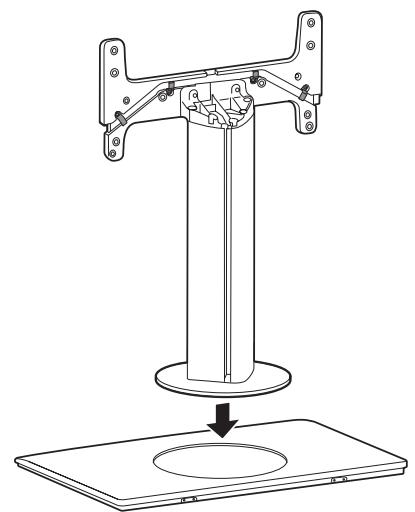
Fix the stand to the base using 4 included M6 hex screws (A). (Use the included M6 hex wrench.)

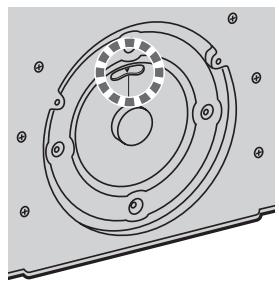
1
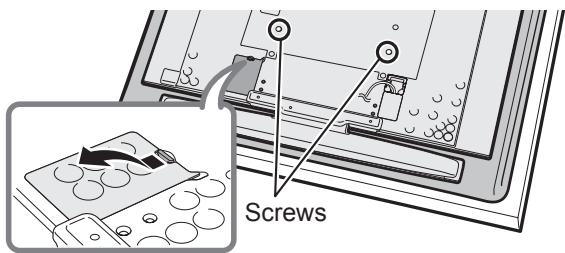
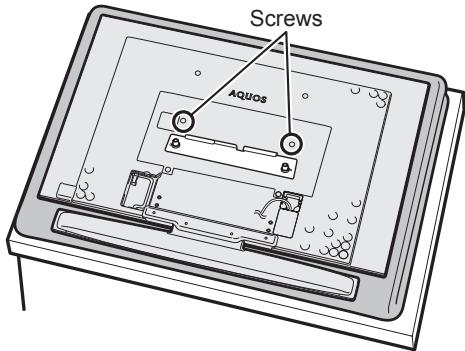
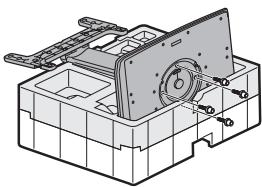
Remove the 2 screws indicated and the terminal cover from the back of the LCD color TV. (Store the screws in a safe place after removing them.)
2
Attach the stand bracket to the back of the LCD color TV using 2 included M8 hex screws (D).
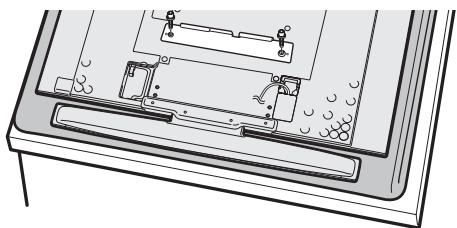
- Only for the case of a 52-inch LCD color TV, you need to remove 2 more screws.

- Place the LCD color TV on a blanket or other thick, soft cloth during installation.
3
Hook the stand bracket attached to the LCD color TV over the mounting bracket on the stand and attach it temporarily.
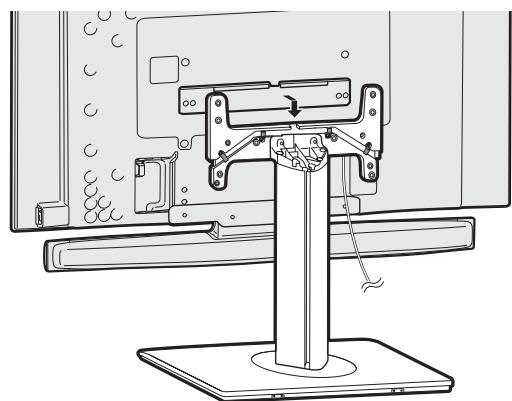

- Take care not to get the power cord caught between the brackets.
- As the LCD color TV is only temporarily attached at this stage, do not lay it down.
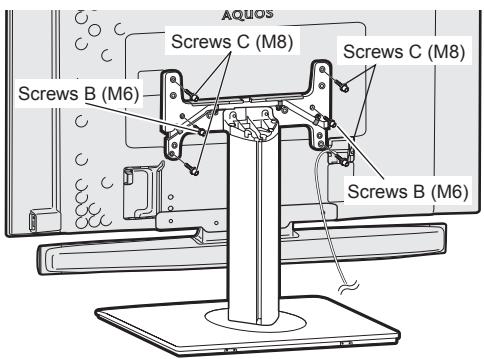
4
Firmly attach the stand using 2 M6 hex screws (B) and 4 M8 hex screws (C). (Use the M6 and M8 hex wrenches respectively.)
5
Connect the cables, reattach the terminal cover, and attach the power cord cover included with the LCD color TV to the back of the LCD color TV.

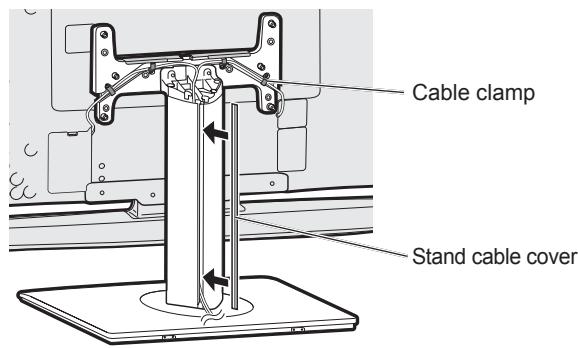
6
Feed the cables through the groove in the stand and attach the included stand cable cover. (Organize the cables with the cable clamps on the stand.)
7
Attach the included stand cover to the stand.
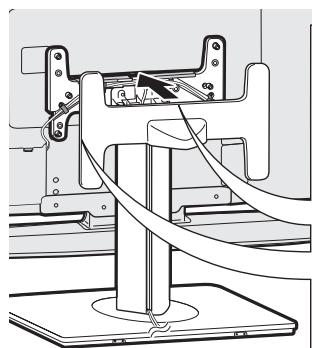
When you attach options, you can remove this cover and run the cable through the groove.
- Adjusting the angle of the TV
- The stand can be swiveled vertically 20^ to either side. Hold the stand firmly when adjusting the angle.
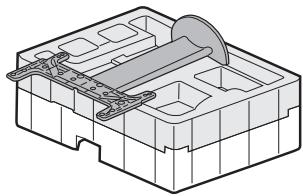
Assembling the Table Stand by Using the Packing Material
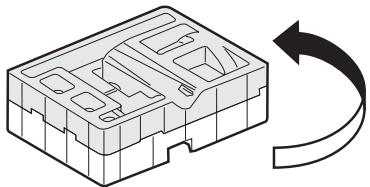
1
Remove all parts and accessories from the packing material.

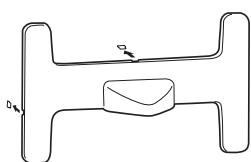
2
Engage the two parts of the material and place them upside-down.
3
Set the stand/mounting bracket set in the appropriate grooves in the material.
4
Set the base in the groove and attach it to the stand/mounting bracket set.
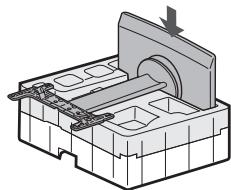
Align the marks of the stand/mounting bracket set to the line on the bottom of the base.
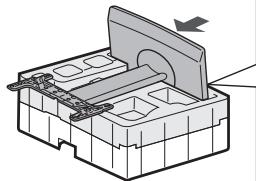
5
Fix the stand to the base using 4 included M6 hex screws (A). (Use the included M6 hex wrench.)
AN-65ST1
Weight: 24.5kg
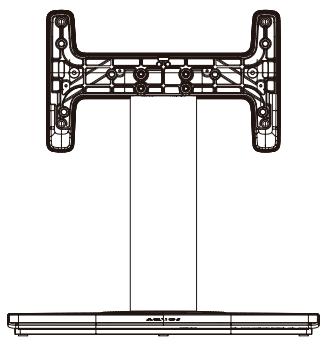
Front
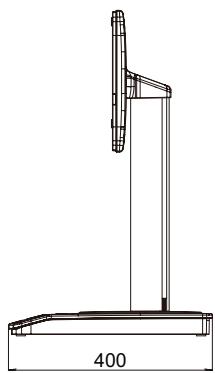
Side
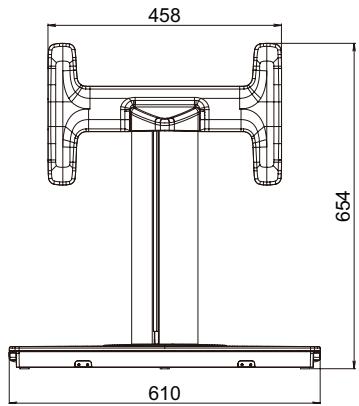
Rear
AN-52ST1
Weight: 17.5 kg
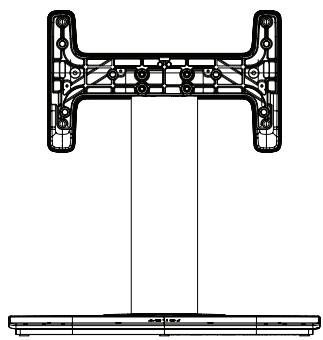
Front
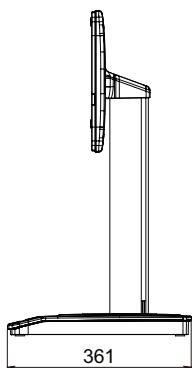
Side
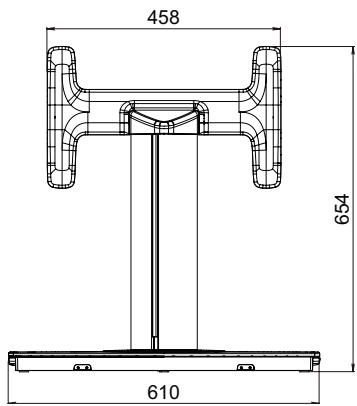
Rear
PRINTED WITH SOY INK