
ARP 100 - Synthesizer AKAI - Free user manual and instructions
Find the device manual for free ARP 100 AKAI in PDF.


| Product type | Radio alarm clock with projector |
| Brand | AKAI |
| Model | ARP 100 |
| Mains power supply | 230 V, 50 Hz, 5 W |
| Backup batteries | 3 CR2025 batteries (3 V) |
| Radio frequency bands | AM 530-1600 kHz, FM 87.5-108 MHz |
| Output power | 350 mW into 8 Ω |
| Speaker | Impedance 8 Ω |
| Display | Digital LED (date, time, alarms, temperature) |
| Projection | Clock projected onto ceiling or wall, adjustable focus |
| Alarm functions | 2 independent alarms, wake-up by radio or buzzer, repeat (snooze 9 min) |
| Sleep function | Timer from 1 to 90 min (automatic radio shut-off) |
| Thermometer | Indoor temperature (0 °C to +50 °C / 32 °F to 122 °F) |
| Infrared sensor | To display alarms, activate sleep or snooze |
| Audio input | AUDIO IN jack (3.5 mm) |
| Antenna | FM: extendable wire; AM: internal |
| Dimensions (approx.) | 200 x 120 x 80 mm (estimate) |
| Weight (approx.) | 0.5 kg (estimate) |
| Maintenance | Clean with a soft, slightly damp cloth; do not use solvents |
| Safety | Do not expose to moisture, shocks or extreme temperatures; unplug before cleaning |
| Repairability | Do not open yourself; contact a professional (warranty void if opened) |
Frequently Asked Questions - ARP 100 AKAI
User questions about ARP 100 AKAI
0 question about this device. Answer the ones you know or ask your own.
Ask a new question about this device
Download the instructions for your Synthesizer in PDF format for free! Find your manual ARP 100 - AKAI and take your electronic device back in hand. On this page are published all the documents necessary for the use of your device. ARP 100 by AKAI.
USER MANUAL ARP 100 AKAI
2 NOTICE D'EMPLOI
17 INSTRUCTION MANUAL

ARP-100
Lire attentivement la notice avant d'utiliser l'appareil Before operating this product, please read user manual completely

- BOUTON FONCTION "REGLAGES" ("SET)
- BOUTON FONCTION "ALARME"
- SELECTEUR ALARME 1 -BUZZER/RADIO
- SELECTEUR ALARME 2 -BUZZER/RADIO
- SELECTEUR AFFICHEUR TEMPERATURE ^ C / F^
- CAPTEUR INFRAROUGE
- TOUCHE RECHERCHE ARRRIERE
- TOUCHE RECHERCHE AVANT
- TOUCHE MARCHE/ARRET (Mode alarme"OFF")
- TOUCHE FONCTION SNOOZE/SLEEP
- AFFICHEUR LED
- ECHELLE GRADUEE FM
- PRISE ENTREE AUDIO
- BOUTON VOLUME
- SELECTEUR DE BANDE
- BOUTON RECHERCHE DES STATIONS
- BOUTON "RESET" (REMISE A ZERO)
- CAPTEUR TEMPERATURE
- CORDON ALIMENTATION
- FIL ANTENNE FM
- PLAQUE ARRIERE
- TRAPPE PILE
-
HAUT PARLEUR
-
BOUTON REGLAGE "MINUTES" (projection)
- BOUTON REGLAGE "HEURES" (projection)
- BOUTON REGLAGE HORLOGE (projection)
- BOUTON MISE AU POINT DE LA PROJECTION
- BOUTON ACTVATION/DESACTIVATION ("ON/OFF") DE LA PROJECTION
29.PROJECTEUR - CAPTEUR INTENSITE
ALIMENTATION
Plug the AC power cord to a household outlet AC source. This unit is equipped with a battery back up system, it requires a 3 x 3Volt CR2025 Flat Lithium battery (Not included). Insert the battery in the battery compartment, making certain that the positive and negative (+ and -) battery terminals are attached to the corresponding terminals on the plate in the battery compartment. If an AC power failure occurs, the clock automatically switches to the battery power supply, the clock and timer memory continue running. When the AC power resumes, the clock switches back to AC again.
GETTING STARTED
Press the reset button (17) locates on the back of unit after AC plug in.
- The unit will display full segment for 2 seconds, then it will enter the normal mode.
- Display will lighten up.
1. TIME AND CALENDAR SETTING
A. Setting Time and Calendar – Press Mode Set button (1) in normal mode and keep depress over 2 second to enter Time Set mode, after enter the setting mode, press Mode Set button (1) to change the mode cycle as follows :
Normal Year Month Day 12/24H RTC Hour RTC Min Normal
Action (during data adjustment):
- Press button (7) to adjust data backward
- Press button (8) to adjust data forward
- Keep depress or button for 2 second to enable auto forward
a. Year Set Mode
Initial Value : 2006
Year Range : 2000 to 2099
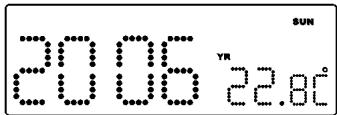
Display Show Year Set Mode
b. Month Set Mode

Display Show Month Set Mode
c. Day Set Mode

Display Show Day Set Mode
Remark : Weekday will recalculate when year, month or day is adjusted
d. 12/24H Set Mode
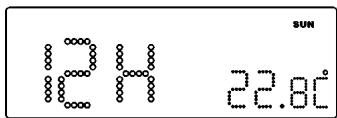
Display Show 12/24H Set Mode
(Select 12H)

Display Show 12/24H Set Mode (Select 24H)
e. RTC Hour Set Mode

Display Show Hour Set Mode
f. RTC Min Set Mode

Display Show Min Set Mode
Remark : Second will reset for every minute adjustment
B. Setting Alarm 1 and Alarm 2 - Press Alarm set button (2) during normal mode and keep depress over 2 second to enter alarm set mode, after enter the setting mode, press Alarm set button (2) to change the mode cycle as follows :
Normal AL1 Hour AL1 Min AL1 Weekend Alarm AL2 Hour AL2 Min AL2 Weekend Alarm Normal
Action (during data adjustment):
- Press按钮(7)to adjust data backward
- Press▶ button (8) to adjust data forward
- Keep depress or button for 2 second to enable auto forward
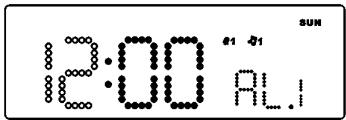
Display Show Setting Alarm 1 Hour

Display Show Setting Alarm 1 Min
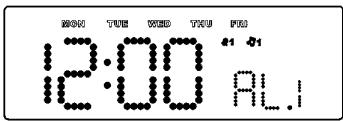
Display Show Setting Alarm 1
Weekend Alarm – Mon to Fri

Display Show Setting Alarm 1
Weekend Alarm - Mon to Sun

Display Show Setting Alarm 1
Weekend Alarm - Mon to Sat

Display Show Setting Alarm 2 Hour

Display Show Setting Alarm 2 Min

Display Show Setting Alarm 2
Weekend Alarm – Mon to Fri

Display Show Setting Alarm 2
Weekend Alarm – Mon to Sun

Display Show Setting Alarm 2Weekend Alarm – Mon to Sat
2. SETTING ALARM OUTPUT AND ALARM ON/OFF
A. Change the alarm Output
Press AL1 (3) / AL 2 (4) button to Music position to select wake up by Radio, set to Buzzer position to select wake up by Buzzer, set to Alarm Off position to disable all alarm.

Display Show Alarm 1 wake up by Buzzer
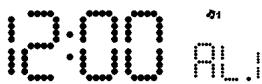
Display Show Alarm 1 wake up by Radio

Display Show Alarm 2 wake up by Buzzer

Display Show Alarm 2 wake up by Radio
B. Buzzer Pattern
1st 8 second output 1 beep, 2nd 8 second output 2 beep, 3rd 8 second output 4 beep, after that continue output beep tone, the same pattern repeat at next minute again.
3. ALARM DURATION AND SNOOZE FUNCTION
Alarm Duration - Buzzer Alarm or Radio Alarm will continue output for 30 minutes if no key press, then it will stop automatically and wait for same alarm time on next day.
Action for Snooze :
- During alarming, press SNOOZE button (10) will enable snooze function, Buzzer Alarm or Radio Alarm will stop.
- Snooze Interval is 9 minute (not include second offset)
- Snooze will continue unless press On/Off (Alarm Off) button (9) to Alarm Off or Buzzer Alarm or Radio Alarm stop automatically after 30 minutes
4. CHANGE DISPLAY CONTENT
Press button (8) during normal can switch to display year, after 5 second timeout and return back to display date and month.

Display Show Year
5. CHANGE DISPLAY CONTENT
Press button (7) during normal can switch to display Month and day, after 5 second timeout and return back to display time.
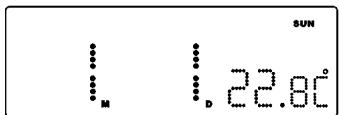
Display Show Month and Day
6. SLEEP FUNCTION
During Radio on mode, press Snooze/Sleep button (10) to turn on Sleep mode, the Sleep time will keep flashing by 5 second, within 5 second and press Sleep button can change the duration from 90 min - 10 min. Press on/off button (9) to cancel sleep function.

Display Show Setting Sleep Duration

Display Show Under Sleep Mode (Radio Now Turn On)
DST - Daylight Saving Time
Press button (7) and hold for 3 seconds to toggle on and off DST Function
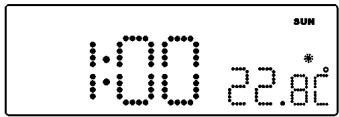
Display Show turn DST icon On
7. THERMOMETER FUNCTION
Remark: Temperature Range for Indoor: 0 to +50^ or 32 to 122^
RADIO OPERATION
- Press the on/off button (9) to turn radio on
- Select AM or FM band using the wave band switch (15)
- Select the Station using the tuning control (16)
- Turn the volume control (14) to adjust volume as required
- Press the on/off button (9) to turn radio off.
Note :
- The AM band use an internal directional aerial. Rotate the radio for best reception.
- Ensure that the FM cord antenna (20) is completely unrolled and extended for best FM reception.
RESET
- The reset button (17) is located on the back of unit. Use a ballpoint pen to press it whenever you change the batteries, or unit is not performing as expected. This will return all settings to default value, and you will lose any stored data (alarm and clock settings).
CAUTION
- No naked flame sources, such as lighted candles, should be placed on the apparatus.
- Do not place the unit in closed bookcases or racks without proper ventilation.
- To prevent fire or shock hazard, do not expose unit to rain or any type of moisture.
- The unit should not be exposed to direct sunlight, very high or low temperature, moisture, vibrations or placed in a dusty environment.
- Do not use abrasive, benzene, thinner or other solvents to clean the surfaces of the unit. To clean, wipe it will mild non-abrasive detergent solution and clean soft cloth.
- Never attempt to insert wires, pins or other such objects into the vents or opening of the unit.
- Do not place the unit near the light on table lamp. The light will affect the reception of the infrared sensor function.
SPECIFICATIONS
Frequency range : AM 530 – 1600 kHz
FM 87.5 - 108 MHz
Output power : 350mW
Speaker impedance : 8 ohm
Battery backup : 9V (3 x 3V CR2025 Flat Lithium battery)
Not included)
Power source : AC 230V ~ 50 Hz, 5 watts
WARNING : To reduce the risk of fire or electric shock do not expose this appliance to rain or moisture.
NOTE : Do not connect FM antenna to outside antenna.
Dripping warning : "The product shall not be exposed to dripping or splashing and that no objects filled with liquids, such as vases, shall be placed on the product."
Ventilation warning : "The normal ventilation of the product shall not be impeded for intended use."
Disconnect device warning : Main plug is used as the connection, so it should always remain ready operate.
INFRARED SENSOR FUNCTION
- The radio Off mode, infrared display alarm 1 and alarm 2 time
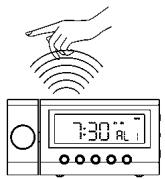
- Hand on top of sensor (6) within 1 second to show the alarm 1 time.

-
Hand on top of sensor (6) within 1 second to show the alarm 2 time.
-
The radio On mode, use the infrared sensor to turn sleep function on

- Hand on top of sensor (6) within 2 seconds to turn the sleep on, the word "Slp" showing on the LED display. Sleep time from 10-90 minutes. (Refer to page 9 for require sleep time adjustment). Press (9) to cancel sleep function.
- The alarm On mode, use the infrared sensor to turn snooze function on

- Hand on top of sensor (6) within 1 second snooze off for 9 minutes.
THE LED DIGITAL CLOCK AND THE PROJECTION CLOCK MUST BE SET SEPARATELY
TIME SETTING FOR PROJECTION UNIT
- To preset the HOURS, press simultaneously the HOUR Button (25) and the TIME button (26). Keep them pressed until the hour digits to be preset are displayed.
- To preset the MINUTES, press simultaneously the MINUTE button (24) and TIME button (26). Keep them pressed until the minute digits to be preset are displayed.
- Focus setting: Adjust the projection clock brightness/focus by turning the brightness/focus adjustment wheel (27) until the projected time is clearly shown on the ceiling or wall.
NOTE: PROJECTS TIME IMAGE ON THE CEILING OR WALL OF A DARKENED ROOM.
MAXIMUN PROJECTION DISTANCE IS 3-9 FEET.
End of Life Disposal

Warning! This logo set on the product means that the recycling of this apparatus comes within the framework of the Directive 2002/96/CE of January 27, 2003 concerning the Waste of Electrical and Electronic Equipment (WEEE). This symbol means that used electrical and electronic products should not be mixed with general household waste. There is a separate collection system for these products.
If you want to dispose of this equipment, please do not use the ordinary dust bin!
- The presence of dangerous substances in the electrical and electronic equipments can have potential consequences on the environment and human health in the cycle of reprocessing this product.
- Therefore, at the end of its lifetime, this product shall not be disposed with other nonrecycled waste. Used electrical and electronic equipment must be treated separately and in accordance with legislation that requires proper treatment, recovery and recycling of used electrical and electronic equipment.
- Local authorities and resellers have set special procedures for the purpose of collecting and recycling this product (please contact your local authority for further details). You have the obligation to use the selective waste collection systems put in place by your local authority.
- If your used electrical or electronic equipment has batteries or accumulators, please dispose of these separately beforehand according to local requirements.
- By disposing.of this product correctly you will help ensure that the waste undergoes the necessary treatment, recovery and recycling and thus prevent potential negative effects on the environment and human health which could otherwise arise due to inappropriate waste handling.

This unit complies with European Council Directive 2006 / 95 CE (Electromagnetic Compatibility & Low Voltage Directives)
AKAI
www.akai-france.com

ARP-100
- ARP-100
- ALIMENTATION
- GETTING STARTED
- TIME AND CALENDAR SETTING
- SETTING ALARM OUTPUT AND ALARM ON/OFF
- ALARM DURATION AND SNOOZE FUNCTION
- CHANGE DISPLAY CONTENT
- CHANGE DISPLAY CONTENT
- SLEEP FUNCTION
- DST - Daylight Saving Time
- THERMOMETER FUNCTION
- RADIO OPERATION
- Note :
- RESET
- CAUTION
- SPECIFICATIONS
- INFRARED SENSOR FUNCTION
- THE LED DIGITAL CLOCK AND THE PROJECTION CLOCK MUST BE SET SEPARATELY
- TIME SETTING FOR PROJECTION UNIT
- End of Life Disposal
- If you want to dispose of this equipment, please do not use the ordinary dust bin!
- AKAI
Brand : AKAI
Model : ARP 100
Category : Synthesizer