010-084 - Uncategorized Meec Tools - Free user manual and instructions
Find the device manual for free 010-084 Meec Tools in PDF.

User questions about 010-084 Meec Tools
0 question about this device. Answer the ones you know or ask your own.
Ask a new question about this device
Download the instructions for your Uncategorized in PDF format for free! Find your manual 010-084 - Meec Tools and take your electronic device back in hand. On this page are published all the documents necessary for the use of your device. 010-084 by Meec Tools.
USER MANUAL 010-084 Meec Tools
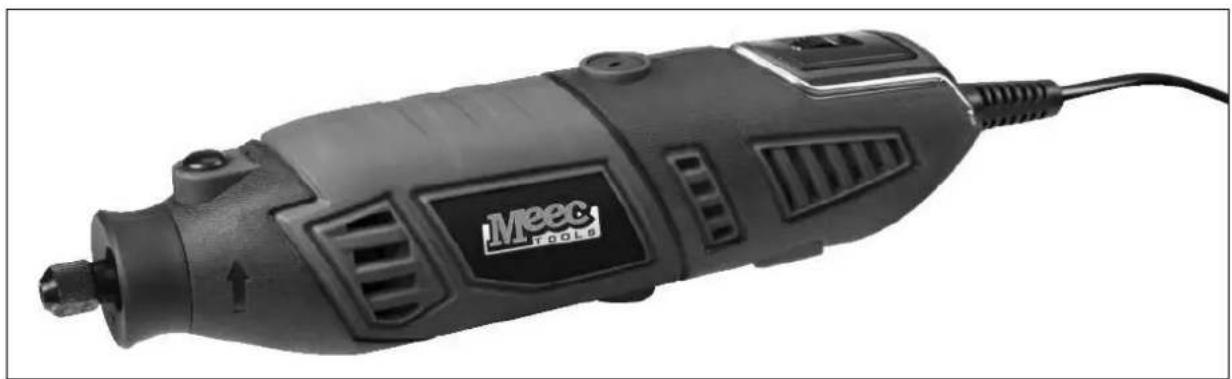
Operating Instructions for Grinding/Engraving Set
010-084
natural_image
Exterior view of a Meec Tools electric drill (no text or symbols visible on body)SV Bruksanvisning i original
NO Bruksanvisning i original
EN Operating instructions in original
SÄKERHETSANVISNINGAR
natural_image
Technical line drawing of a mechanical component with no visible text or symbols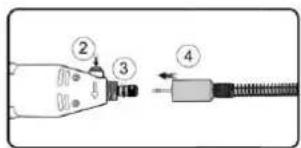
natural_image
Diagram of a handheld electronic device with coiled cable and connector (no text or symbols)natural_image
Diagram of a mechanical device with a rotating component and labeled point A (no text or symbols beyond label)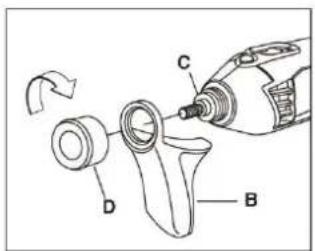
natural_image
Line drawing of a hand holding a handheld electronic device (no text or symbols)natural_image
Technical line drawing of a mechanical component with numbered callouts (no text or symbols)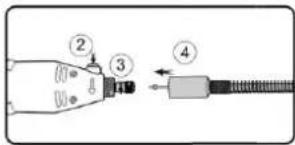
natural_image
Diagram of a handheld electronic device with coiled cable and connector (no text or symbols)natural_image
Diagram of a mechanical device with a cylindrical component and a rotating arrow, no text or symbols present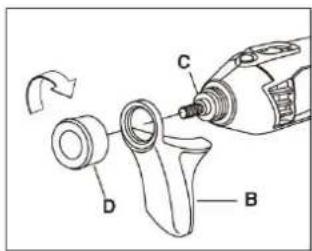
natural_image
Line drawing of a hand holding a handheld electronic device (no text or symbols visible)natural_image
Technical line drawing of a mechanical component with no visible text or symbols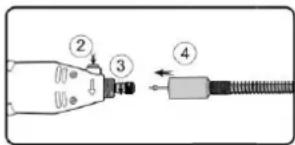
natural_image
Diagram of a handheld electric shock absorber with labeled component (no text or symbols present)natural_image
Diagram of a mechanical device with a rotating component and labeled point A (no text or symbols beyond label)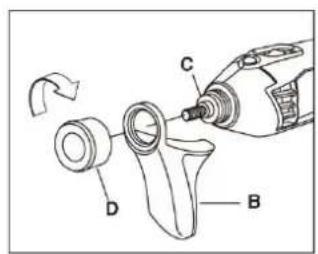
natural_image
Line drawing of a hand holding a handheld electronic device (no text or symbols visible)Read the Operating Instructions carefully before use.
Save these instructions for future reference.
Always take basic safety precautions when using the tool to safeguard against the risk of fire, electric shock and/or personal injury.
- Keep the work area clean. Cluttered workbenches increase the risk of accidents and injuries.
- Keep the workplace environment safe. Do not use power tools in damp or wet areas.
- Do not expose power tools to rain or moisture. Make sure the work area is well lit.
- Avoid the risk of electric shock. Avoid body contact with earthed surfaces such as pipes, radiators, cookers and refrigerators.
- Keep children and onlookers at a safe distance. Keep onlookers away from the work area. Do not allow onlookers to touch the tool or extension cord.
- Put away tools that are not being used. When not in use, store the tool in a dry place out of the reach of children.
- Do not force the tool. The tool does the job better and safer when used at the rate for which it was designed.
- Use the correct tool. Do not try to force a small tool to do work that requires a more powerful tool. Only use the tool for its intended purpose.
- Wear suitable clothing. Do not wear loose-fitting clothing or jewellery. They can get caught in moving parts. Rubber gloves and non-slip shoes are recommended when working outdoors. Wear a hair net if you have long hair.
- Wear safety glasses. Wear a dust filter mask if the work produces a lot of dust.
- Be careful with the power cord. Never carry the tool by the power cord. Do not pull the power cord to unplug the plug. Keep the power cord away from heat, oil and sharp edges.
- Secure the workpiece. Secure the workpiece with a clamp, clips or vice. This is safer than using your hands and means you have both hands free to operate the tool.
- Do not overreach. Always maintain a firm footing and good balance.
- Take care of the tool. Keep tools sharp and clean for better and safer work. Follow the instructions for lubrication and the replacement of accessories. Keep the handles clean, dry and free from oil and grease.
- Always unplug the power cord before servicing, and before changing accessories (e.g. bits).
- Remove Allan keys/spanners etc. Always check that Allan keys/spanners etc. have been removed from the tool before switching it on.
- Avoid accidental starting. Never carry a power tool with your finger on the switch when it is plugged in. Check that the power switch is in the OFF position before plugging in the power cord.
- If using the tool outdoors, only use an extension cord approved for outdoor use.
- Stay alert. Observe care at all times. Use your common sense. Never use power tools if you are tired or under the influence of drugs, alcohol or medication.
- Check for damaged parts. If a guard or some other part has been damaged, carefully check before using the tool that it will work properly and as intended. Make sure that moving parts are properly adjusted and do not jam, and that no parts are incorrectly fitted or damaged. Check for other factors that could affect functionality.
- Do not use power tools in explosive environments, such as in the vicinity of flammable liquids, gases or dust. Power tools produce sparks that can ignite dust and fumes.
Special safety instructions
- Unplug the power cord before making adjustments or replacing accessories.
- Switch off the tool immediately if an accessory jams.
- Regulatory check that the chuck is properly tightened, especially when working for a long time with the same accessory.
• Always unplug the power cord when the tool is not in use.
- Do not dismantle the tool or try to repair it – risk of electric shock.
- Never leave the tool unattended when switched on.
- Do not use or store power tools in damp or wet areas.
TECHNICAL DATA
| Rated voltage | 230 V ~ 50 Hz |
| Output | 170 W |
| Speed (no load) | 8000-35000 rpm |
| Chuck | Max. 3.2 mm |
| Sound pressure level, LpA | 73 dB(A), K=3 dB |
| Sound power level, LwA | 74 dB(A), K=3 dB |
| Vibration level | 3.7 m/s ^2 , K=1.5 m/s ^2 |
Always use hearing protection!
The declared vibration value, which has been measured by a standardised test method, can be used to compare different tools with each other and for a preliminary assessment of exposure.
Warning: The actual vibration level when using power tools may differ from the specified maximum value, depending on how the tool is used. It is therefore necessary to determine which safety precautions are required to protect the user, based on an estimate of exposure in actual operating conditions (taking into account all stages of the work cycle, e.g. the time when the tool is switched off and when it is idling, in addition to the start-up time).
USE
Intended use
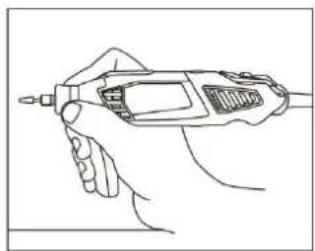
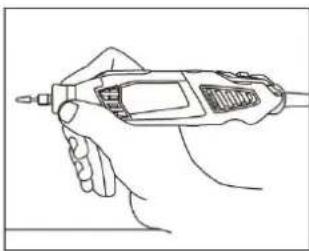
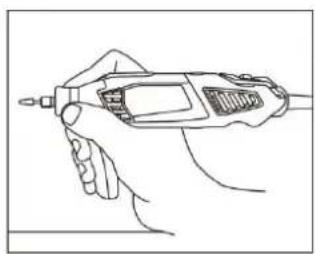
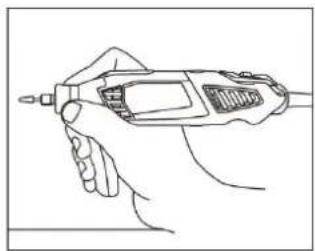
The tool is intended for drilling, grinding and polishing, engraving, cutting and removing rust, even in confined spaces. The tool can be used on most metals, glass, wood and ceramic materials. Work smoothly, and do not press too hard. Use low speed for large accessories, e.g. for polishing, and high speed for smaller accessories, e.g. for engraving. Hold the tool like a pen when grinding and engraving.
Starting/Stopping
Never start or stop the tool when the accessory is in contact with the workpiece. Grip the tool firmly and move the power switch to the ON position. The tool will start and run continuously until the power switch is put in the OFF position. The speed can be changed while the tool is running.
Adjusting the speed
The tool speed can be adjusted. Do not adjust the speed while the accessory is in contact with the workpiece. The speed control is placed on the back end of the tool. Turn the control to adjust the speed. Use low speed for polishing etc., and high speed for drilling and cutting.
Fitting accessories
Switch off the tool and unplug the power cord before replacing accessories. Press in the lock button on the front of the tool and unscrew the chuck anticlockwise. Insert a suitable chuck for the accessory you want to use. Turn the chuck nut over the chuck and insert the shank of the accessory into the chuck as far as it goes. Tighten the chuck nut. Do not use pliers.
Tips
- The tool gets hot when in use. Switch it off and allow to cool, if necessary.
- Lubruicate the spindle regularly.
- Do not press the tool sideways, this will reduce its precision.
- For best results, avoid forcing the tool.
- When drilling in metal, mark out the drilling point with a punch to prevent the drill sliding to one side.
- Insert the tool shaft as far as it goes into the chuck, and firmly tighten the chuck.
- Use low speed for polishing, and high speed for engraving.
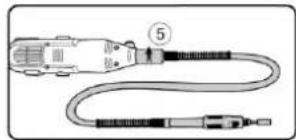
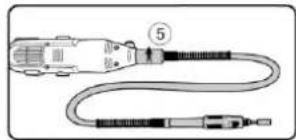
Fitting flexi drive accessories
Unscrew the chuck nut from the tool anticlockwise. Partly unscrew the lock nut from the spindle. Pull out the flexible shaft a little from the flexi drive accessory. Insert the flexi drive shaft as far as it goes into the tool spindle. Keep the spindle lock button pressed in and turn the spindle lock nut clockwise. Tighten the
nut with a spanner. Screw the threaded end of the flexi drive shaft on the accessory and tighten anticlockwise.
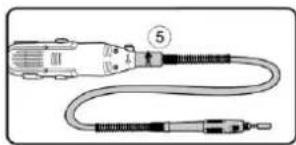
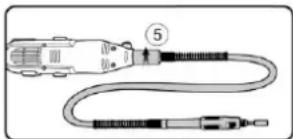
Replacing the flexi drive insert and accessories
Flexi drive inserts and accessories are replaced in the same way as for the actual tool. Lock the spindle by turning it so that the hole in the shaft comes in line the hole in the flexi drive handle. Insert a 3 mm drill in the hole to lock the shaft.

natural_image
Technical line drawing of a mechanical component with no visible text or symbols
natural_image
Diagram of a handheld cable or connector with labeled parts (no text or symbols present)Fitting a bench vice
We recommend using a bench vice together with flexi drive.
- Unscrew the locking screw on the vice so that you can fasten the vice to the workbench. Place the vice on the workbench and tighten the screw.
- Place the telescopic arm in the vice and pull out to the required length.
- Hang the tool on the telescopic arm at the ring on the back end of the tool. The vice can be fitted permanently to be bench with two screws.
Handle for precision work
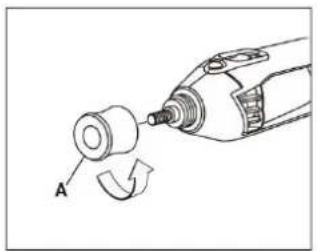
- Remove the cap (A) from the end of the tool and put to one side. The cap should be put back on when not in use (fig. 1).
- Move the handle (B) to the required position over the sleeve (C) and lock with the nut (D) supplied with the handle (fig. 2). Check before use that the handle fits firmly.
The handle is intended to improve performance during precision work. Hold the tool like a pen between your thumb and forefinger. You may need to practice to achieve perfect results.
natural_image
Diagram of a mechanical device with a cylindrical component and a curved arrow indicating rotation (no text or symbols)
natural_image
Line drawing of a hand holding a handheld electronic device (no text or symbols)Jula reserves the right to make changes. In the event of problems, please contact our service department.
www.jula.com

Care for the environment!
Must not be discarded with household waste! This product contains electrical or electronic components that should be recycled. Leave the product for recycling at the designated station e.g. the local authority's recycling station.
CE
EC DECLARATION OF CONFORMITY
EG FÖRSÄKRAN OM ÖVERENSSTÄMMELSE
EF SAMSVARSERKLÆRING
DEKLARACJA ZGODNOŚCI WE

Jula AB, Box 363, SE-532 24 SKARA, SWEDEN
Electromagnetic Compatibility Directive 2004/108/EC
EN 55014-1:2006+A1+A2, EN 55014-2:1997+A1+A2
EN 61000-3-2:2006+A1+A2, EN 61000-3-3:2008
RoHS Directive 2011/65/EU
This product was CE marked in year -12