USP-1095D - Cooker Unit - Free user manual and instructions
Find the device manual for free USP-1095D Unit in PDF.


| Product Type | Freestanding Cooker |
| Brand | Unit |
| Model | USP-1095D |
| Width | 60 cm (standard) |
| Height | 85-90 cm (adjustable feet) |
| Depth | 60 cm |
| Weight | Approx. 55 kg |
| Power Supply | 220-240 V ~ 50/60 Hz |
| Energy Source | Electric (convection oven, ceramic hob) |
| Oven Type | Multifunction with grill |
| Number of Cooking Zones | 4 (ceramic) |
| Cleaning | Manual cleaning with mild detergents; oven door removable |
| Safety Features | Child lock, automatic shut-off, residual heat indicators |
| Spare Parts Availability | Available via authorized service centers |
| Repairability | Repairable by qualified technicians; parts such as heating elements and thermostats replaceable |
| Energy Efficiency Class | A (typical for this category) |
| Noise Level | < 50 dB |
| Manual Languages | EN, RU, KK, and others on request |
Frequently Asked Questions - USP-1095D Unit
User questions about USP-1095D Unit
0 question about this device. Answer the ones you know or ask your own.
Ask a new question about this device
Download the instructions for your Cooker in PDF format for free! Find your manual USP-1095D - Unit and take your electronic device back in hand. On this page are published all the documents necessary for the use of your device. USP-1095D by Unit.
USER MANUAL USP-1095D Unit
INSTRUCTION MANUAL
ENGLISH
ELECTRIC PRESSURE COOKER USP-1095D
Thank You for buying this UNIT product! READ ALL THE INSTRUCTIONS BEFORE USING
CONTENTS OF THE INSTRUCTION MANUAL
SAFETY NOTICES....3
APPLIANCE DESCRIPTION 5
BEFORE USE....6
FIXING AND TAKING OFF THE LID....6
APPLIANCE USE....7 STEAMER FUNCTION
STEAMER FUNCTION....8 CLEANING....9
TROUBLESHOOTING....9
SPECIFICATIONS....9
SAFETY NOTICES
- When using electrical appliances, basic safety precautions should always be followed to reduce the risk of fire, electric shock, and/or injury to persons, including the following:
- Never use the utensils along with inflammable products or in a humid location.
- The amount of water and food added to the Inner Pot should be determined in line with step 2 of Appliance Use. • Never damage the Sealing Gasket or replace it with other rubber gaskets or tension gasket.
- Never twist the Inner Steel Ring with hand or other tools by force. If the Steel Ring slips off the place, stop using it and replace the Lid. • Never put any weight on the Relief Valve or replace it with other substitutes.
- The bottom of Inner Pot and Heating Plate surface should be kept clean. Never heat the Inner Pot on other thermal sources or have it replaced with others pots.
- The Inner Pot is covered with ceramic anti-sticking coating. To avoid scratch, wooden or plastic ladles are recommended.
- The maximum period for heat preservation is 24 hours. However, the duration less than 6 hours is recommended to ensure delicious taste.
- If there is large amount of steam escaping form the edge of the Lid during cooking, remove the plug immediately and send the utensil to authorized service station for maintenance.
- During moving the appliance it is recommended to hold the Ears instead of the Handle for safety.
- Never disassemble the utensil by yourself or replace with accessories other than assembled
- During cooking, in case of alarm sound is heard and one of the following malfunction codes is displayed, stop using the appliance immediately and send it to an authorized service station for maintenance.
| Display code E1 | E2 E3 E4 | |||
| The problem Open circuit of the sensor | Short circuit of the sensor | Over-temperature Disable signal switch | ||
WARNING!
- In the condition of steam release, keep your face away from the Relief Valve to avoid an accident.
- Do not touch the hot Lid immediately after cooking to avoid scald.
- For safety never cover the Lid edge with towel.
- Never attempt to open the Lid by force if there is pressure inside. It is dangerous.
- After cooking, before opening the lid, first cut the power.
KEEP THIS INSTRUCTION MANUAL!
ENGLISH
FEATURES
The electric pressure cooker is a new-generation cooker developed with the latest technology. It combines the advantages of a conventional pressure cooker, an electric cooker, a braising cooker, and a steamer. Featuring programmable temperature and pressure control, this appliance boasts a new and distinctive structure and appearance.
It is an ideal choice for preparing fast, healthy, and delicious meals every day and serves as a perfect basis for ordinary cooking methods.
It has the following features:
Multifunction and easy operation
- This model of pressure cooker combines the functions of a rice cooker, a steamer, and a pressure cooking pan. With the help of this appliance, you can cook rice, porridge, and soup, and you can stew, steam, and braise. You don't have to adjust time or pressure rate; just touch the button for a certain product, and the appliance will work automatically. After cooking finishes, you'll hear a sound, and the cooker will start keeping warm automatically.
- 24-hour postponed start: if you don't want to start cooking at once but after some time, you can use the postponed start function. When the set time is up, it will start cooking automatically.
- Memory function: in case of a sudden power cut during cooking, it will resume the former process automatically when power is restored.
Fast cooking: time and energy saving
- Fast cooking with high pressure (high temperature) is determined by different types of food. An optimal cooking method is chosen for each food type, saving more time and energy. It reduces cooking time by 15% and energy by 20% compared with conventional cooking.
- It reduces cooking time by as much as 40% and energy by as much as 45% compared with conventional electric cooking when braising.
Preserves nutrition, makes food more delicious and healthy
- When oxygen is mixed with food during heating it destroys vitamins. Hermetic cooking with this pressure cooker conserves nutrition and ensures more delicious food as no oxygen is let in during cooking.
- Cooking at high temperatures (110-115°C) is more healthy. • No escaping steam and overflowed food, keeps your kitchen clean.
Optimized structure: safe operation
- Safety set for opening or closing the Lid. When the Lid fails to fit the Inner Pot well, the Inner Pot can not get to high pressure. If there is pressure inside, the Lid can not be opened.
- Safety pressure regulator. If pressure (temperature) control is out of work and the pressure inside is over the maximum working pressure, the Relief Valve will switch to "steam release" automatically for safety.
- Safety pressure release set. If pressure regulator is out of work and the pressure inside is over the maximum working pressure the pressure release set will release pressure from the edge of the Lid to avoid burst.
- Safety temperature-limiting set. In case the Inner Pot is empty the power will be cut automatically. • Safety over-temperature set. In case of over-temperature, the power will be automatically cut.
- Magnetic protective device – if the lid is not covered well the appliance will not work and will make the warning sound (except the function "Cooking without lid").
- Connective lid – the construction of the lid allows to have the lid clipped to the body of the appliance when it's open.
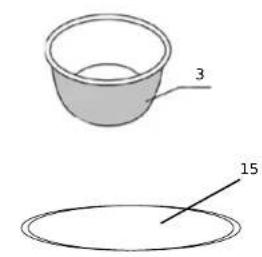
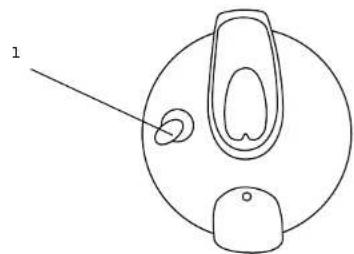
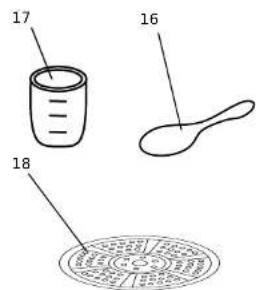
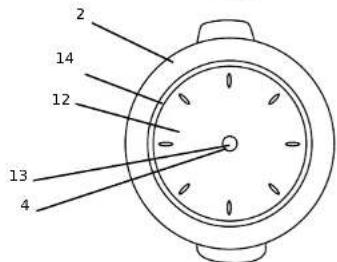
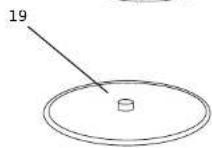
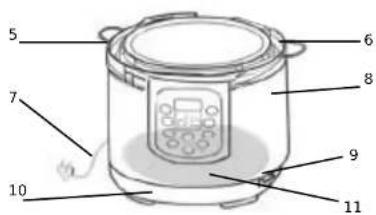
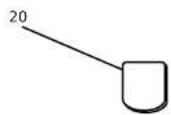
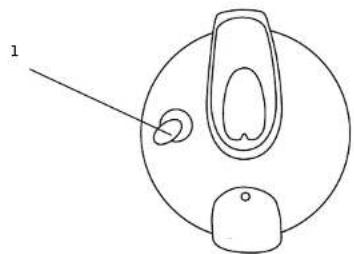
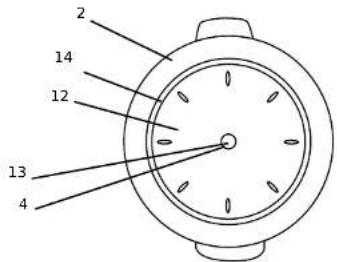
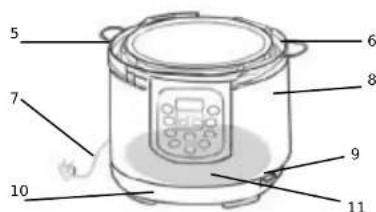
APPLIANCE DESCRIPTION
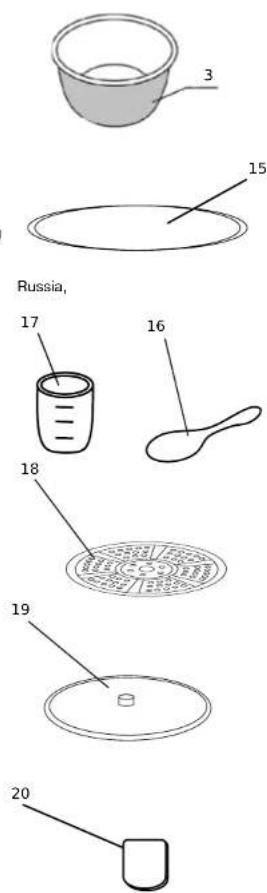
- Pressure control valve 2 Plastic lid
- Ceramic inner pot
- Relief valve
- Plastic rim
- Control panel
- Power cord
- Steel body
- Ladle holder
- Plastic base
- Heating plate
- Removable disk
- Nut for fixation of the lid
- Silicone ring
- Spare silicone ring
- Ladle
- Measuring cup
- Steamer
- Cover for the inner pot
- Container for collection of condensate
Control Panel Buttons
| Button name What for Programmed | time, minutes | Comments | |
| Отмена/Поддержаниетепла | Canceling the settings/Keeping warm | - Press once – cancels thesettings; press twice –starts keeping warm | |
| Рис Cooking rice | 12 | ||
| Каша Cooking porridge 5 The program can used for cooking oatmeal. Cook-ing buckwheat takes 10minutes. | |||
| Мясо | Cooking meat | 20 | Cooking a chicken meattakes 15 minute. Cookingpilaf takes 30 minutes in thismode. |
| Рыба | Cooking fish | 10 | |
| Выпечка/жаркаCooking pies and frieddishes | - Floating valve should be setto "выпуск пара." Mode isprogrammed to self-timing.The cooking process isinterrupted by pressing the"Отмена" button. | ||
| Холодец | Cooking jellied meat | 58 | |
| Разогрев | Heating up | 8 | |
| Бобовые | Cooking all kinds of beans | 40 | |
ENGLISH
ENGLISH
| Установка времени | Time setting/Postponed start timer setting | Cooking time setting: the gap is 1 min; Postponed start timer setting – the gap is 30 mins | If you press it before any other button – you will set the postponed start timer; if you press it after choosing any cooking program – you will set the time of cooking |
| Multi-Mode Cooking different dishes 18 Can set yourself time and cook any dishes in this mode, has no postponed start function. Put the valve to the "вынуск пара" position. Can set yourself time and cook any dishes in this mode. | |||
| Пароварка Steam -cooking 15 Pour the water and put the steamer inside | |||
BEFORE USE
Remove the packing materials from the inside and outside of the appliance and from the accessories.
- Place the cooker on a flat, dry surface.
- Wash all parts that may come into contact with food, including the inner pot, measuring cup, ladle, and steamer, in warm soapy water, then rinse and dry.
- Wipe the inside and outside of the appliance and the lid with a wet sponge, then with a clean, dry cloth.
- Before connecting the cooker to the power supply, check that the voltage indicated on the appliance corresponds to your main supply (220-240 V, 50-60 Hz).
- Do not immerse the appliance in water or any other liquid!
FIXING AND REMOVING THE LID
Removing the lid:
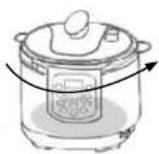
- Place the appliance on a flat, dry surface. Turn the lid counterclockwise around its axis and lift it up.
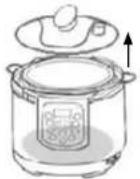
Fixing the lid:
- Place the lid down and turn it clockwise around its axis.
- It is important that the lid is turned completely during cooking, because there is a blocked valve inside the lid which, otherwise, will not allow the cooking process to start.
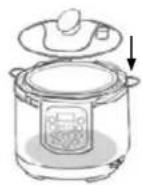
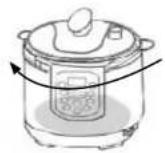
APPLIANCE USE
- Open the Lid turning it counter-clockwise to the clamping position and then lift it.
- Take out the Inner Pot and fill it with the food and water. Make sure the cooker must never be filled more than 4/6 full or less than 1/6 full.
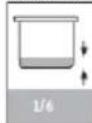
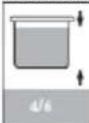
When cooking food that expands, do not fill the pot more than 3/6 full.
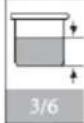
Note: to cook the food evenly, it's necessary to dip it into the water.
- Clean the Inner Coating and the Heating Plate with a slightly wet cloth before cooking: be sure there are no foreign particles left in the Inner Coating or on the surface of the Heating Plate.
- Take the Pot with food and water inside carefully and put it into the appliance. Then turn the Inner Pot slightly to fit it well with the Heating Plate.
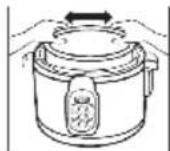
- Close the Lid: for this, put the Sealing Gasket on the Inner Steel Ring. Make sure they are fitting well (see the sketch on page 2).
Then close the Lid turning it clockwise till a sound of clamping is heard. 6. Fix the pressure Relief Valve in the position ("герметично") as the picture shows. Note: the Valve has two positions – "герметично" and "выпуск пара". 7. Switch the power on - the display shows "00:00". Now you should preset cooking parameters on
ENGLISH ENGLISH
the panel.
Timer setting (skip this step if you don't need to postpone the time of starting cooking). In case you want to postpone the time of cooking, then before choosing any program press the Button "Taimer отложенного старта" as many times as needed. The figures show the time of the delay, for example, if you see "00:30" - it means that cooking will start in 30 minutes. The maximum time setting is 24 hours.
Choose the menu according to different recipes.
Press one of the Menu Buttons in relation to the food you're cooking (press "Pnc" Button for rice cooking, for example) and the indicator of this button lights up.
If necessary, you can change the time of cooking with the "Установка времени приготовления" button after choosing the appropriate program button.
Note: you should remember that the programmed time is approximate and you can specify it according to your preferences.
Note: in case the kitchen-stuff doesn't belong to any group in the menu, you should choose a similar group.
The time of cooking (programmed)
This time is indicated after you choose the exact type of food button and means the time of cooking after the pressure inside achieves working state. It doesn't include the time until achieving working pressure.
After time setting, wait for some seconds and the process will start.
• Pressure holding process begins when pressure inside is high enough.
- When pressurizing is over, you'll hear 3 sound signals, they indicate the end of cooking and the start of keeping warm process.
- Press the Cancel/Keep Warm Button to cancel parameter setting or current working status. 8. Take out the food in the following steps:
Turn the Relief Valve to "steam release" position to release steam.
Note: When cooking fluid food, such as porridge, to avoid squirting up, remember not to release the steam immediately after 3 sound signals. Let the pressure cooker cool down naturally or use the cooling system. Otherwise the fluid food may squirt and result in damage.
- Remove the plug from the socket.
- Turn the Handle counterclockwise; open it and take the food out.
Attention!
When the food is ready and the function "keeping warm" is switched, the pressure inside is high, the protection devices don't let open the Lid immediately. In order to speed up cooling down, you can use the cooling system to cool it and make the pressure down soon, especially when the food is fluid.
- Unplug the device.
Turn the regulator to reduce the pressure to the "vent of steam" position.
The lid will unlock when internal temperature and pressure are reduced.
STEAMER FUNCTION
The appliance can be used as a steamer. For this purpose, use the special accessory that came with the appliance – the steamer.
- Add some water (up to the 1/6 scale) into the inner pot. Place the steamer with the food into the inner pot and close the lid.
- Turn the relief valve to the "Sealed" position. Power on the appliance with the power cord.
- Select the "Steam" button.
- Cooking time is up to your preferences – control the cooking time according to your food or menu. Use the "Time Setting" button for this.
- Press the "Cancel/Warm" button if you want to stop the cooking process.
CLEANING
- Unplug the appliance before cleaning and wait until it has cooled to room temperature. Remove the inner pot and clean it with a sponge or non-metal soft brush, then dry it with a towel.
- Wipe the inner surface of the appliance with a soft cloth.
- Clean the outer surface of the appliance with a soft, slightly damp towel. Never immerse it in water or run water over it. Remove the water collector and clean it with a damp towel. Put it back as shown in the picture.
- Clean the sealing gasket, relief valve, and floating valve with soapy water, then dry them with a towel. After cleaning, reassemble the parts.
Attention! For your safety, remember that when the appliance is on, it must not come into contact with water or other liquids, especially the cord and the base of the appliance.
You must not dip the appliance into the water to avoid electric shock, fire or injuring. Never wash the appliance in a dishwasher!
TROUBLESHOOTING
| NO. | A Problem The Cause The Solution | ||
| 1 Difficult to close the Lid The sealing gasket is not fixed well | Fix the sealing gasket well | ||
| 2 Difficult to open the Lid The pressure inside is too high Let the steam out turning the relief valve left or right | |||
| 3 Steam leaks off the Lid There isn't a sealing gasket in the Lid | Put the sealing gasket into the Lid (see "Appliance use" paragraph) | ||
| The sealing gasket isn't clean Clean the Sealing Gasket | |||
| The sealing gasket is damaged or deformed Change a broken or de-formed Sealing Gasket to a new one in a UNIT service center | |||
| The Lid isn't fixed properly Fix the Lid properly | |||
| 4 Indicating lights are not on | The appliance isn't powered on Check the power cord and the plug | ||
| Some other problems Send the appliance to a UNIT service center | |||
| 5 E1 | Open circuit of the sensor Send the appliance to a UNIT service center | ||
| E2 | Short circuit of the sensor | ||
| E3 | Over-temperature | ||
| E4 | Disable signal switch | ||
SPECIFICATIONS
| Model | Rated Voltage | Power | Capacity | Diameter | Working Pressure |
| USP-1095D | 220-240V | 1100 W | 6L | 22 cm | 0-70 kPa |
ENGLISH
RUSSIAN
| Max Pres-sure | Keeping warm Temperature | Pre-set Time Pressure-keeping Time | Max keep warm Time | Lifetime |
| 90 kPa 70-80°C | 0-24 hours 1-60 min | 0-24 hours 20000 cycles | but not more than 5 years from the date of the purchase |
The head office of the manufacturer: «UNIT Handelsgesellschaft G.m.b.H.» 131, Gersthofer Str., A-1180, Vienna, Austria
Exported by: «UNIT Electronics (H. K.) Limited» 3905 Two Exchange Square, 8 Connaught
Place.
Central,
Hong
The Manufacturer's representative in Russia:
Unit Production Ltd, 109147, 34/10, Marksistskaya str.,
tel. +7 (495) 748 09 17, email: www.unit.ru
Moscow,
Made in People's Republic of China (P.R.C.)
This appliance is to be stored and used under the following conditions: temperature - not less than +5°C; relative humidity - not higher than 80%; aggressive impurities in the air: not allowable.
As the Manufacturer is constantly working on the improvement of its products, the design and technical specifications are subject to change without prior notice.
www.unit.ru
Kong
Russia,
This device is intended for use in the household.
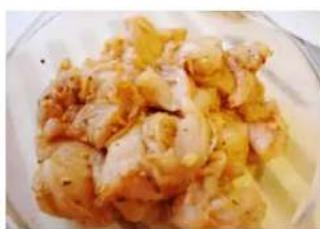
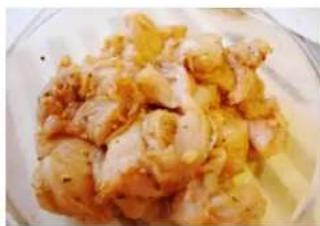
Margarine - 60 g
Salt - to taste


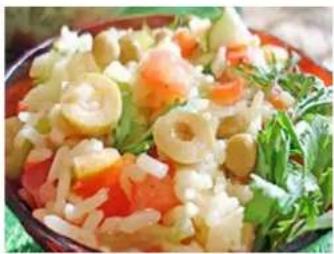
Risotto
Ingredients:
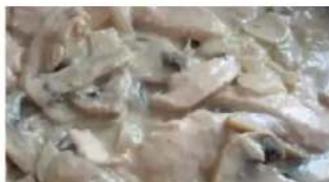
Mayonnaise - 1 jar


Sour cream - 1 cup
Potatoes - 1 kg
Salt - to taste

Stewed cabbage
Ingredients:

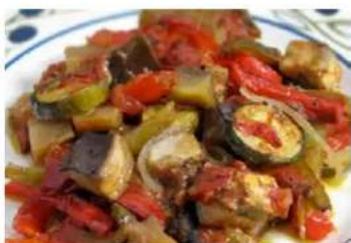

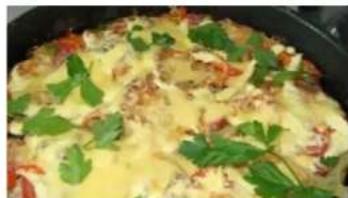
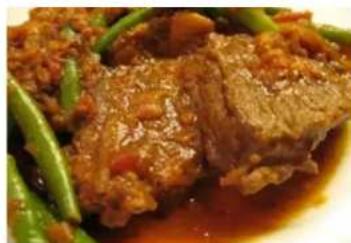
Azu
Ingredients


- ENGLISH
- ELECTRIC PRESSURE COOKER USP-1095D
- THANK YOU FOR BUYING THIS UNIT PRODUCT! READ ALL THE INSTRUCTIONS BEFORE USING
- CONTENTS OF THE INSTRUCTION MANUAL
- SAFETY NOTICES
- WARNING
- KEEP THIS INSTRUCTION MANUAL
- FEATURES
- MULTIFUNCTION AND EASY OPERATION
- FAST COOKING: TIME AND ENERGY SAVING
- PRESERVES NUTRITION, MAKES FOOD MORE DELICIOUS AND HEALTHY
- OPTIMIZED STRUCTURE: SAFE OPERATION
- APPLIANCE DESCRIPTION
- BEFORE USE
- FIXING AND REMOVING THE LID
- REMOVING THE LID
- FIXING THE LID
- APPLIANCE USE
- ENGLISH ENGLISH
- THE PANEL
- CHOOSE THE MENU ACCORDING TO DIFFERENT RECIPES
- THE TIME OF COOKING (PROGRAMMED)
- ATTENTION
- STEAMER FUNCTION
- CLEANING
- RUSSIAN
- THIS DEVICE IS INTENDED FOR USE IN THE HOUSEHOLD
- RISOTTO
- INGREDIENTS
- STEWED CABBAGE
- AZU
Brand : Unit
Model : USP-1095D
Category : Cooker