USB 2.0 Frontpanel 3.5 - Panneau avant USB Equip - Free user manual and instructions
Find the device manual for free USB 2.0 Frontpanel 3.5 Equip in PDF.

| Product Type | Front Panel USB Hub |
| Brand | Equip |
| Model | USB 2.0 Frontpanel 3.5 |
| Category | USB Front Panel |
| Form Factor | 3.5-inch Drive Bay |
| Dimensions (W x H x D) | 102 x 25 x 100 mm (approx.) |
| Weight | 50 g |
| Power Supply | Powered via USB motherboard header (5V) |
| USB Ports | 2 x USB 2.0 Type-A |
| Data Transfer Speed | Up to 480 Mbps (USB 2.0) |
| Internal Connector | 9-pin USB 2.0 header |
| Internal Cable Length | Approx. 30 cm |
| Material | ABS Plastic, Steel Panel |
| Color | Black |
| Compatibility | PC cases with 3.5-inch bay |
| Installation | Screwless or screw mount, plug-and-play |
| Operating Temperature | 0°C to 50°C |
| LED Indicator | Power/Activity LED (blue) |
| Included Items | Front panel unit, mounting screws, cable |
| Warranty | 1 year |
Frequently Asked Questions - USB 2.0 Frontpanel 3.5 Equip
User questions about USB 2.0 Frontpanel 3.5 Equip
0 question about this device. Answer the ones you know or ask your own.
Ask a new question about this device
Download the instructions for your Panneau avant USB in PDF format for free! Find your manual USB 2.0 Frontpanel 3.5 - Equip and take your electronic device back in hand. On this page are published all the documents necessary for the use of your device. USB 2.0 Frontpanel 3.5 by Equip.
USER MANUAL USB 2.0 Frontpanel 3.5 Equip
natural_image
Close-up of a USB drive with attached cable and ports, no visible text or symbols on the device itself.USB 2.0 Frontpanel 3.5
english
Index
1.0 Trademarks 3
2.0 Introductions 3
3.0 Package contents 3
4.0 Hardware Requirements 3
5.0 System Support 3
6.0 How to install your Card Reader to drive bay 4
7.0 Pin assignment of USB Cable 5
8.0 Driver installations 7
8.1 Windows 98 driver installation 7
8.2 Windows 98SE driver installation 10
8.3 Windows ME driver installation 14
8.4 Windows 2000 driver installation 18
8.5 Windows XP driver installation 22
9.0 How to use your memory cards 26
10.0 How to format your memory cards 27
11.0 Indicator description 27
12.0 Booting from CF Memory Card 28
13.0 How to swap your front bezel 29
14.0 Application of media I/O 29
1.0 Trademarks
All names and products mentioned below are registered trademarks of their respective companies.
2.0 Introductions
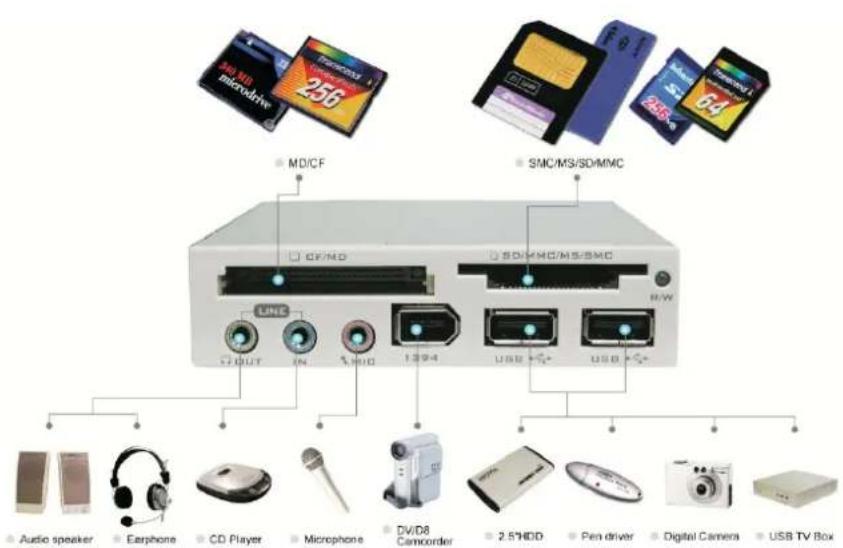
The advantage of 3.5" USB2.0 internal Multi I/O Card Reader is to provide a better solution to read or write files for variety of memory cards. It provides tow media slots for Secure Digital card, Multi Media card, Compact Flash™, IBM® Micro drive, Smart Media™, Memory stick and Memory stick pro memory storage cards.
In addition to the Card Reader, it provides a variety of practical media I/O pass through ports such as USB, Firewire, Line-in, Line-out, Microphone connectors. Which allows direct access all in front of your computer.
3.0 Package contents
• 3.5" Internal card reader
- Driver disc with manual
4.0 Hardware requirements
- IBM® PC computer with one available 3.5inch drive bay.
- On-board Firewire..USB host connector.
5.0 System Support
- Windows® 98/SE, Windows®2000, Windows® ME, Windows® XP or Mac OS.
- Linux OS kernel versions 2.4.x or later.
6.0 How to Install Your Card Reader to drive Bay
CAUTION

- Electrostatic discharge can damaged electronic components. Be sure you are properly grounded before begging any procedure.
-
You can touch a metal part of the computer's chassis or power supply unit to discharge any static charge that may have built up inside your body.
-
Turn your computer off and disconnect the power cord.
- Remove the cover of your computer. (Refer to your computer's hardware reference manual and follow the instructions to removing the cover)
- Remove 3.5inch plastic cover on your PC's front panel.
- Put this device with all cables into the 3.5inch drive bay.
- Mount device firmly in both tracks of drive bay by four screws (ISO 30*4mm).
- Select a free PCI slot and remove the metal bracket cover.
- Put the media cables out the chassis, which are all for the outside jack connection.
- Connect external audio jacks.
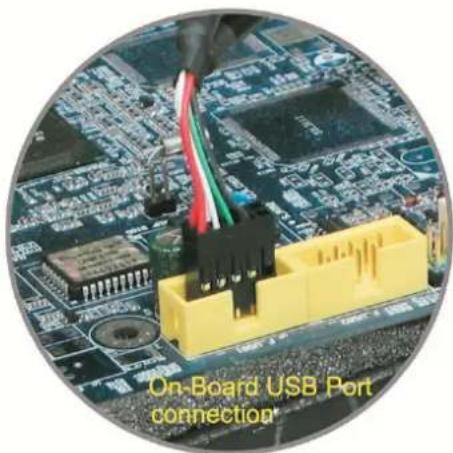
- Connect inner on-board USB and Firewire pass through connector that is a standard ten pin male header on your motherboard.
(Please refer to the following USB pin assignment description and check your computer's on-board pin assignment that is the same definition. You can refer to your computer's hardware reference manual.)
- When you complete all installation, please re-check all cables connection again.
Because incorrect connection will result damage to the exist device.
- Recover your computer and apply the power cord again.
natural_image
Close-up of a yellow USB port connection module with wiring and connectors on a circuit board (no readable text or symbols)7.0 Pin assignment of USB Cable
• Dual USB cable pin assignment

text_image
KEY P10-P9 P2-P1| 2*5 Pin Housing | Wire color | Pass through USB port | Pass through USB port |
| P1▲ | rot | - | VCC |
| P2 | rot | VCC | - |
| P3 | weiß | - | D- |
| P4 | weiß | D- | - |
| P5 | grün | - | D+ |
| P6 | grün | D+ | - |
| P7 | schwarz | - | GND |
| P8 | schwarz | GND | - |
| P9 | NC | - | - |
| P10 | STOPPER KEY | ||
- Single-row USB cable pin assignment

text_image
P5 P1| 5 Pin Housing | Wire color | Card reader |
| P1▲ | rot | VCC |
| P2 | weiß | D- |
| P3 | grün | D+ |
| P4 | schwarz | GND |
| P5 | - | NC |
▲ This mark identify as the pin1 of USB cable end connector
- IEEE1394 cable pin assignment

| 2*5 Pin Housing | Defined |
| P1▲ | TPA- |
| P2 | TPA+ |
| P3 | GND |
| P4 | GND |
| P5 | TPB- |
| P6 | TPB+ |
| P7 | VCC |
| P8 | VCC |
| P9 | GND |
| P10 | STOPPER KEY |
8.0 Driver Installation
The card reader need to install application driver for showing media icon on your Windows, you can find the software program in bundle disk and follow next steps to complete the driver installation.
NOTE
All the driver installation steps may be a little different from this guide when you are using a new upgrade version of OS, in this situation please follow the Windows prompt steps to complete the installation procedure.
• 8.1 Windows 98 driver installation
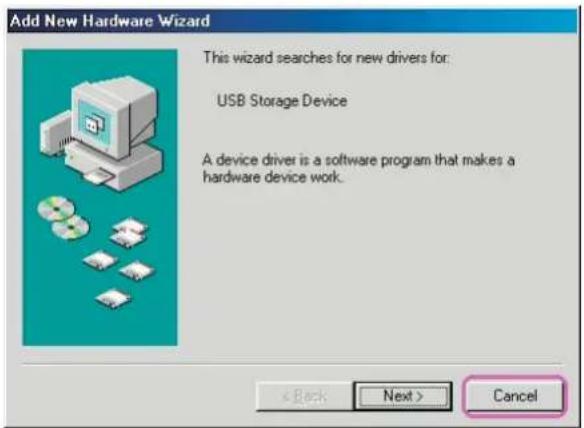
- Turn on your computer, Windows will detect the addition of new hardware and display the following message.
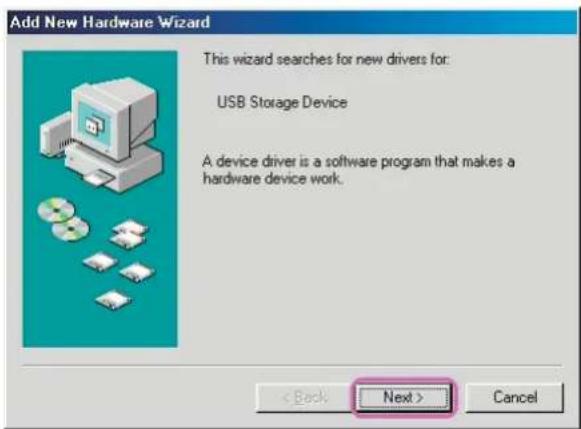
text_image
Add New Hardware Wizard This wizard searches for new drivers for: USB Storage Device A device driver is a software program that makes a hardware device work. < Back Next > Cancel- Click „Next“ button to continue.

text_image
Add New Hardware Wizard What do you want Windows to do? • Search for the best driver for your device. [Recommended] • Display a list of all the drivers in a specific location, so you can select the driver you want. < Back Next > Cancel- Click „Browse“ to specify the driver location.
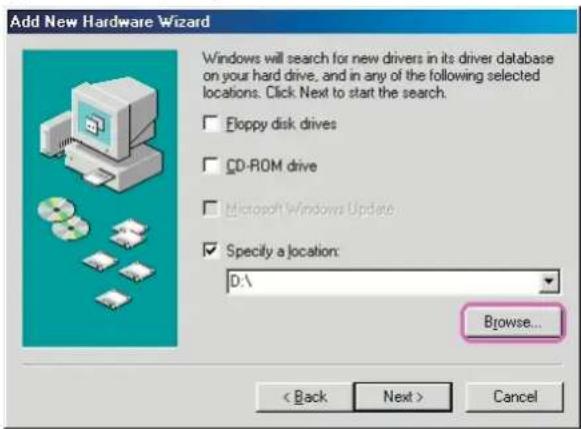
text_image
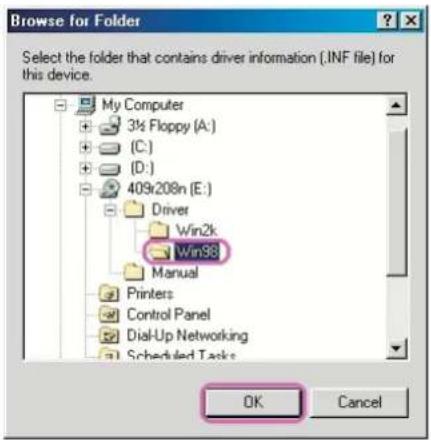
Add New Hardware Wizard Windows will search for new drivers in its driver database on your hard drive, and in any of the following selected locations. Click Next to start the search. □ Floppy disk drives □ CD-ROM drive □ Microsoft Windows Update ☑ Specify a location: D:\ Browse... < Back Next > Cancel- Insert your driver disc into the CD-ROM drive and path to „Driver\Win98“, Click „OK“ to next.
text_image
Browse for Folder Select the folder that contains driver information (.INF file) for this device. My Computer 3½ Floppy (A:) (C:) (D:) 409x208n (E:) Driver Win2k Win98 Manual Printers Control Panel Dial-Up Networking Scheduled Tasks OK Cancel- Click „Next“ button to continue.

text_image
Add New Hardware Wizard Windows will search for new drivers in its driver database on your hard drive, and in any of the following selected locations. Click Next to start the search. Eloppy disk drives CD-ROM drive Microsoft Windows Update Specify a location: E:\Driver\Win98 Browse... < Back Next > Cancel- Click „Next“ button to continue.

text_image
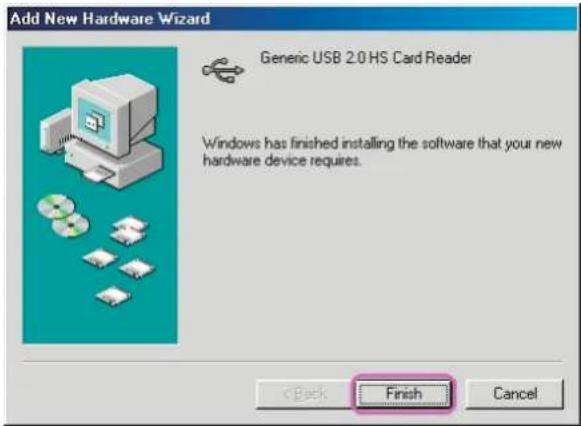
Add New Hardware Wizard Windows driver file search for the device: Generic USB 2.0 HS Card Reader Windows is now ready to install the best driver for this device. Click Back to select a different driver, or click Next to continue. Location of driver: E:\DRIVER\WIN98\USBCRDRV.INF < Back Next > Cancel- Click „Finish“ button to complete driver installation.
text_image
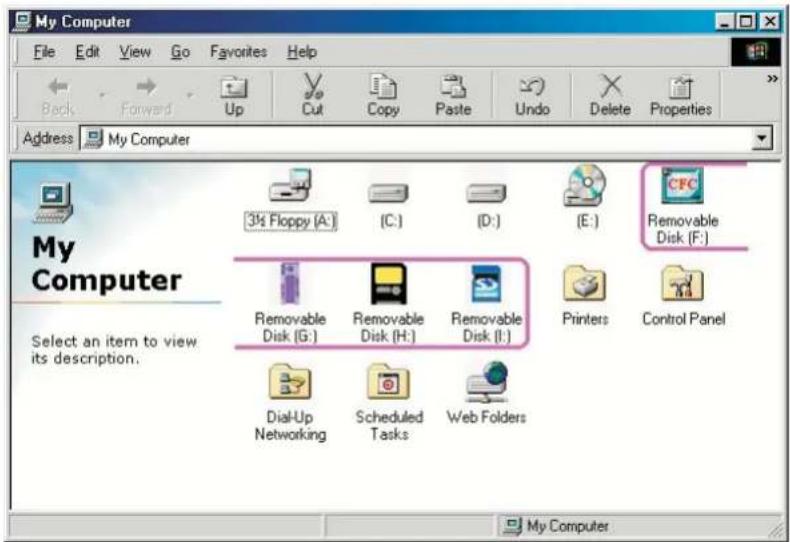
Add New Hardware Wizard Generic USB 2.0 HS Card Reader Windows has finished installing the software that your new hardware device requires. < Back Finish Cancel- Windows will detect reader and display four „Removable Disk“ icons in My Computer, now you can insert your memory card for application. If you have any problem of using media card, please refer to next „How to use your media memory card” section.

text_image
My Computer File Edit View Go Favorites Help Back Format Up Out Copy Paste Undo Delete Address My Computer 36 Flapca (A) (C) (D) 40s208n (E:) My Computer Select an item to view its description. Renovable Disk [F] Renovable Disk [G] Renovable Disk [H] Renovable Disk [I] Printers Control Panel Dial-Up Not matching Scheduled Tasks 0 objects My Computer- Windows® 98SE driver installation
- Turn on your computer, Windows will detect the addition of new hardware and display the following message. Click „Cancel“ button to close this windows.
text_image
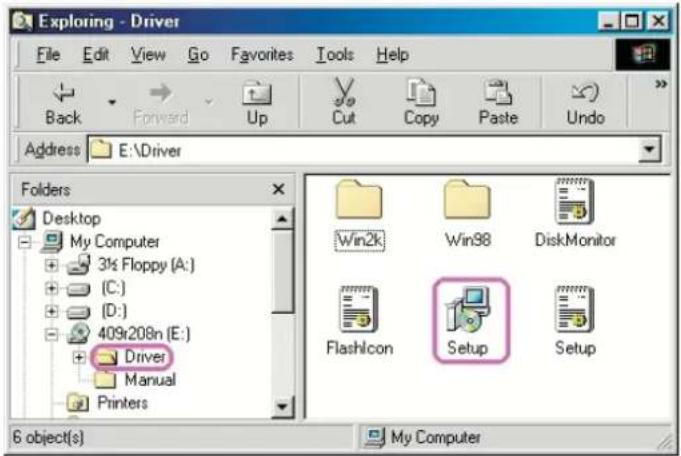
Add New Hardware Wizard This wizard searches for new drivers for: USB Storage Device A device driver is a software program that makes a hardware device work. < Back Next > Cancel- Insert your driver disc into the CD-ROM drive and path to „Driver“, double click „setup“ icon.
text_image
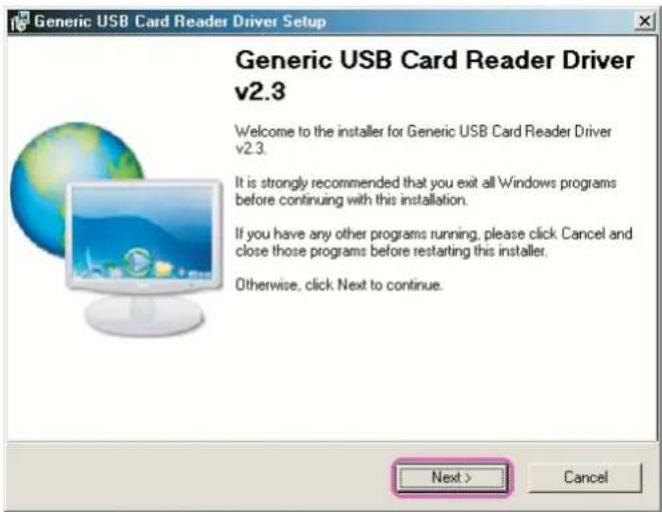
Exploring - Driver File Edit View Go Favorites Tools Help Back Forward Up Cut Copy Paste Undo Address E:\Driver Folders Desktop My Computer 3½ Floppy (A:) (C:) (D:) 409x208n (E:) Driver Manual Printers Win2k Win98 DiskMonitor FlashIcon Setup Setup 6 object(s) My Computer3. Click „Next“ button to continue.

text_image
Generic USB Card Reader Driver Setup Generic USB Card Reader Driver v2.3 Welcome to the installer for Generic USB Card Reader Driver v2.3. It is strongly recommended that you exit all Windows programs before continuing with this installation. If you have any other programs running, please click Cancel and close those programs before restarting this installer. Otherwise, click Next to continue. Next > Cancel4. Click „Next“ button to continue.

text_image
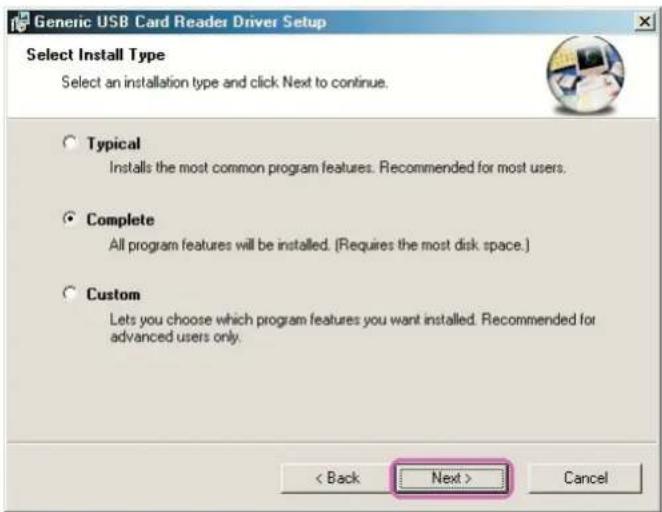
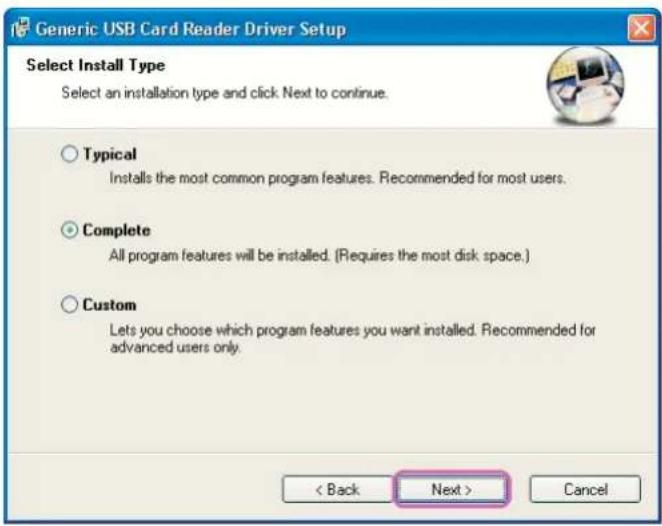
Generic USB Card Reader Driver Setup Select Install Type Select an installation type and click Next to continue. Typical Installs the most common program features. Recommended for most users. Complete All program features will be installed. (Requires the most disk space.) Custom Lets you choose which program features you want installed. Recommended for advanced users only. < Back Next > Cancel- Click „Next“ button to continue.

text_image
Generic USB Card Reader Driver Setup Installation Folder Select an installation folder and click Next to continue. The software will be installed in the folder listed below. To install to a different folder, either type in a new path, or click Change to browse for an existing folder. Install Generic USB Card Reader Driver to: C:\Program Files\Generic\USB Card Reader Driver v2.3 Change... Space required on drive: 1.1 MB Space available on selected drive: 9723 MB < Back Next > Cancel- Click „Next“ button to continue.

text_image
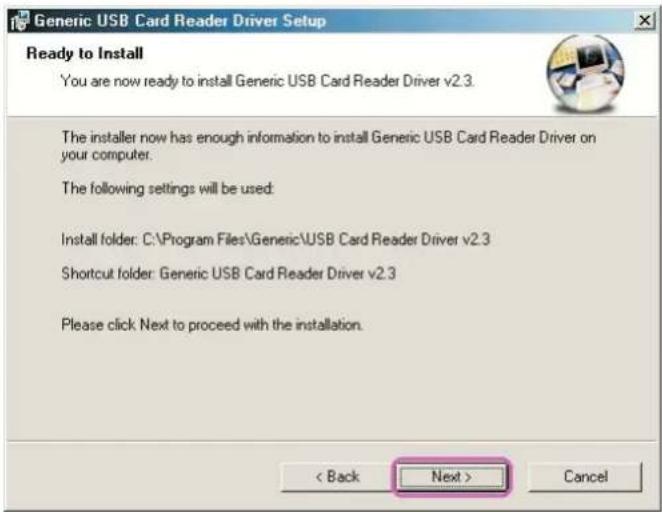
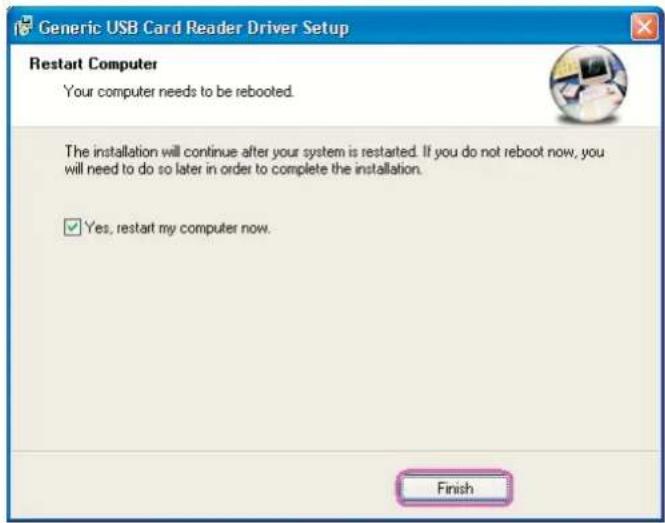
Generic USB Card Reader Driver Setup Ready to Install You are now ready to install Generic USB Card Reader Driver v2.3. The installer now has enough information to install Generic USB Card Reader Driver on your computer. The following settings will be used: Install folder: C:\Program Files\Generic\USB Card Reader Driver v2.3 Shortcut folder: Generic USB Card Reader Driver v2.3 Please click Next to proceed with the installation. < Back Next > Cancel- This window shows you that driver has completely installed. You need to restart your computer, Click „Finish“ button.

text_image
Generic USB Card Reader Driver Setup Restart Computer Your computer needs to be rebooted. The installation will continue after your system is restarted. If you do not reboot now, you will need to do so later in order to complete the installation. ✓ Yes, restart my computer now. Finish- Reboot your system, Windows will detect reader and display four recognizable media icons in "My Computer", now you can insert your memory card for application. If you have any problem of using media card, please refer to the next "How to use your media memory card" section.
text_image
My Computer File Edit View Go Favorites Help Back Forward Up Cut Copy Paste Undo Delete Properties Address My Computer 3½ Floppy (A:) (C:) (D:) (E:) CFC Removable Disk (F:) 31st Floppy (A:) (C:) (D:) (E:) Removable Disk (G:) Removable Disk (H:) Removable Disk (I:) Printers Control Panel Select an item to view its description. Dial-Up Networking Scheduled Tasks Web Folders My Computer- Windows® ME driver installation
- Close all of your exist executing files.
- Insert driver disk into the CD-ROM drive.
- Double click on „Driver“ folder.
- Double click on „Setup“ icon.

text_image
Driver File Edit View Favorites Tools Help Back Search Folders History Address Driver Go Folders Desktop My Documents My Computer 3½ Floppy (A:) Local Disk (C:) Local Disk (D:) 409R208N (E:) Driver Win2k Win98 Manual Win2k Win98 DiskMonitor FlashIcon Setup Setup 6 object(s) [Disk free space: 0 bytes] 1.34 MB My Computer- Click „Next“ button to continue.
text_image
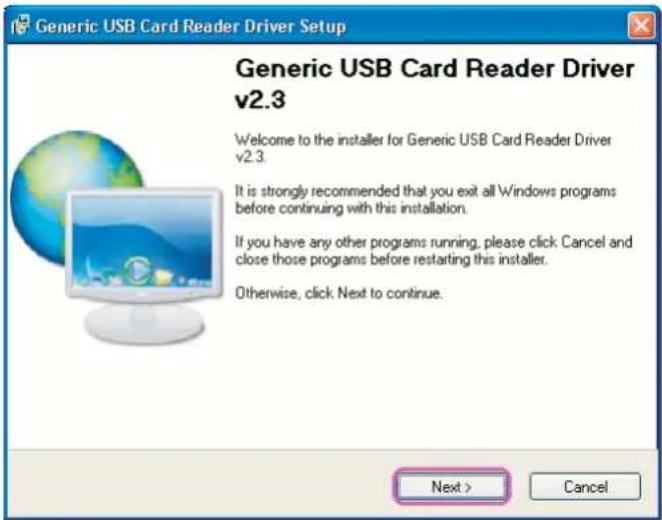
Generic USB Card Reader Driver Setup Generic USB Card Reader Driver v2.3 Welcome to the installer for Generic USB Card Reader Driver v2.3. It is strongly recommended that you exit all Windows programs before continuing with this installation. If you have any other programs running, please click Cancel and close those programs before restarting this installer. Otherwise, click Next to continue. Next > Cancel- Click „Next“ button to continue.

text_image
Generic USB Card Reader Driver Setup Select Install Type Select an installation type and click Next to continue. Typical Installs the most common program features. Recommended for most users. Complete All program features will be installed. (Requires the most disk space.) Custom Lets you choose which program features you want installed. Recommended for advanced users only. < Back Next > Cancel- Click „Next“ button to continue.

text_image
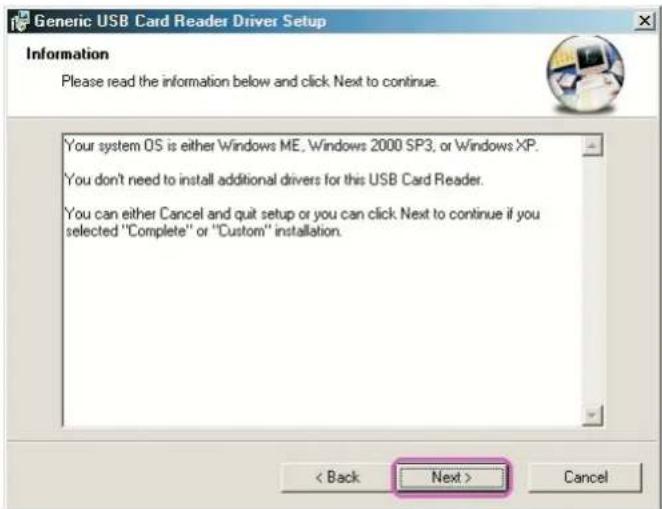
Generic USB Card Reader Driver Setup Information Please read the information below and click Next to continue. Your system OS is either Windows ME, Windows 2000 SP3, or Windows XP. You don't need to install additional drivers for this USB Card Reader. You can either Cancel and quit setup or you can click Next to continue if you selected "Complete" or "Custom" installation. < Back Next > Cancel- Click „Next“ button to continue.
text_image
Generic USB Card Reader Driver Setup Ready to Install You are now ready to install Generic USB Card Reader Driver v2.3. The installer now has enough information to install Generic USB Card Reader Driver on your computer. The following settings will be used: Install folder: C:\Program Files\Generic\USB Card Reader Driver v2.3 Shortcut folder: Generic USB Card Reader Driver v2.3 Please click Next to proceed with the installation. < Back Next > Cancel- This windows shows you that driver has completely installed. You need to restart your computer, click „Finish“ button.

text_image
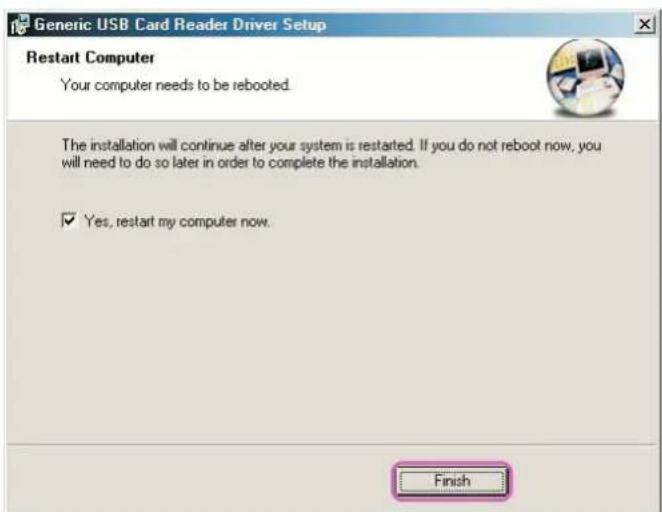
Generic USB Card Reader Driver Setup Restart Computer Your computer needs to be rebooted. The installation will continue after your system is restarted. If you do not reboot now, you will need to do so later in order to complete the installation. ✓ Yes, restart my computer now. Finish- Reboot your system, Windows will detect reader and display four recognizable media icons in "My Computer", now you can insert your memory card for application. If you have any problem of using media card, please refer to the next "How to use your media memory card" section.

text_image
My Computer File Edit View Favorites Tools Help Back Search Folders History Address My Computer Go 3½ Floppy (A:) Local Disk (C:) Local Disk (D:) Compact Disc (E:) CompactFlash (F:) Memory Stick (G:) My Computer Select an item to view its description. Displays the contents of your computer SmartMedia SD/MMC (I:) Control Panel See also: My Documents My Network Places Dial-Up Networking 9 object(s) My Computer- Windows® 2000 driver installation
- Close all of your exist executing files.
- Insert driver disk into the CD-ROM drive.
- Double click on „Driver“ folder.
- Double click on „Setup" icon.

text_image
Driver File Edit View Favorites Tools Help Back Search Folders History Address Driver Go Folders Desktop My Documents My Computer 3½ Floppy (A:) Local Disk (C:) Local Disk (D:) 409R208N (E:) Driver Win2k Win98 Manual 6 object(s) (Disk free space: 0 bytes) 1.34 MB My Computer- Click „Next“ button to continue.

text_image
Generic USB Card Reader Driver Setup Generic USB Card Reader Driver v2.3 Welcome to the installer for Generic USB Card Reader Driver v2.3. It is strongly recommended that you exit all Windows programs before continuing with this installation. If you have any other programs running, please click Cancel and close those programs before restarting this installer. Otherwise, click Next to continue. Next > Cancel- Click „Next“ button to continue.
text_image
Generic USB Card Reader Driver Setup Select Install Type Select an installation type and click Next to continue. Typical Installs the most common program features. Recommended for most users. Complete All program features will be installed. (Requires the most disk space.) Custom Lets you choose which program features you want installed. Recommended for advanced users only. < Back Next > Cancel- Click „Next“ button to continue.
text_image
Generic USB Card Reader Driver Setup Information Please read the information below and click Next to continue. Your system OS is either Windows ME, Windows 2000 SP3, or Windows XP. You don't need to install additional drivers for this USB Card Reader. You can either Cancel and quit setup or you can click Next to continue if you selected "Complete" or "Custom" installation. < Back Next > Cancel- Click „Next“ button to continue.

text_image
Generic USB Card Reader Driver Setup Installation Folder Select an installation folder and click Next to continue. The software will be installed in the folder listed below. To install to a different folder, either type in a new path, or click Change to browse for an existing folder. Install Generic USB Card Reader Driver to: C:\Program Files\Generic\USB Card Reader Driver v2.3 Change... Space required on drive: 1.1 MB Space available on selected drive: 9723 MB < Back Next > Cancel- This windows shows you that driver has completely installed. You need to restart your computer, click „Finish“ button.
text_image
Generic USB Card Reader Driver Setup Restart Computer Your computer needs to be rebooted. The installation will continue after your system is restarted. If you do not reboot now, you will need to do so later in order to complete the installation. ✓ Yes, restart my computer now. Finish- Reboot your system, Windows will detect reader and display four recognizable media icons in "My Computer", now you can insert your memory card for application. If you have any problem of using media card, please refer to the next "How to use your media memory card" section.

text_image
My Computer File Edit View Go Favorites Help Back Forward Up Cut Copy Paste Undo Delete Properties Address My Computer 3½ Floppy (A:) (C:) (D:) (E:) CFC Removable Disk (F:) 31⁄2 Floppy (A:) (C:) (D:) (E:) Removable Disk (G:) Removable Disk (H:) Removable Disk (I:) Printers Control Panel Select an item to view its description. Dial-Up Networking Scheduled Tasks Web Folders My Computer- Windows® XP driver installation
- Close all of your exist executing files.
- Insert driver disk into the CD-ROM drive.
- Double click on „Driver“ folder.
- Double click on „Setup" icon.

text_image
Driver File Edit View Favorites Tools Help Back Search Folders Address E:\Driver Go Folders Desktop My Documents My Computer 3½ Floppy (A:) Local Disk (C:) Local Disk (D:) 409R208N (E:) Driver Win2k Win98 Manual Win2k Win98 DiskMonitor FlashIcon Setup Setup- Click „Next“ button to continue.
text_image
Generic USB Card Reader Driver Setup Generic USB Card Reader Driver v2.3 Welcome to the installer for Generic USB Card Reader Driver v2.3 It is strongly recommended that you exit all Windows programs before continuing with this installation. If you have any other programs running, please click Cancel and close those programs before restarting this installer. Otherwise, click Next to continue. Next > Cancel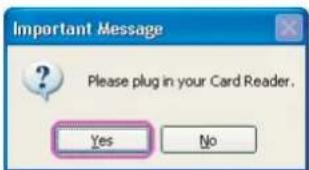
text_image
Important Message ? Please plug in your Card Reader. Yes No- Click „Next“ button to continue.
text_image
Generic USB Card Reader Driver Setup Select Install Type Select an installation type and click Next to continue. Typical Installs the most common program features. Recommended for most users. Complete All program features will be installed. (Requires the most disk space.) Custom Lets you choose which program features you want installed. Recommended for advanced users only. < Back Next > Cancel- Click „Next“ button to continue.

text_image
Generic USB Card Reader Driver Setup Information Please read the information below and click Next to continue. Your system OS is either Windows ME, Windows 2000 SP3, or Windows XP. You don't need to install additional drivers for this USB Card Reader. You can either Cancel and quit setup or you can click Next to continue if you selected "Complete" or "Custom" installation. < Back Next > Cancel- Click „Next“ button to continue.

text_image
Generic USB Card Reader Driver Setup Installation Folder Select an installation folder and click Next to continue. The software will be installed in the folder listed below. To install to a different folder, either type in a new path, or click Change to browse for an existing folder. Install Generic USB Card Reader Driver to: C:\Program Files\Generic\USB Card Reader Driver v2.3 Change... Space required on drive: 120 K Space available on selected drive: 7581 MB < Back Next > Cancel- Click „Next“ button to continue.

text_image
Generic USB Card Reader Driver Setup Ready to Install You are now ready to install Generic USB Card Reader Driver v2.3. The installer now has enough information to install Generic USB Card Reader Driver on your computer. The following settings will be used: Install folder: C:\Program Files\Generic\USB Card Reader Driver v2.3 Shortcut folder: Generic USB Card Reader Driver v2.3 Please click Next to proceed with the installation. < Back Next > Cancel- This windows shows you that driver has completely installed. You need to restart your computer, click „Finish“ button.
text_image
Generic USB Card Reader Driver Setup Restart Computer Your computer needs to be rebooted. The installation will continue after your system is restarted. If you do not reboot now, you will need to do so later in order to complete the installation. ✓ Yes, restart my computer now. Finish- Reboot your system, Windows will detect reader and display four recognizable media icons in "My Computer", now you can insert your memory card for application. If you have any problem of using media card, please refer to the next "How to use your media memory card" section.
text_image
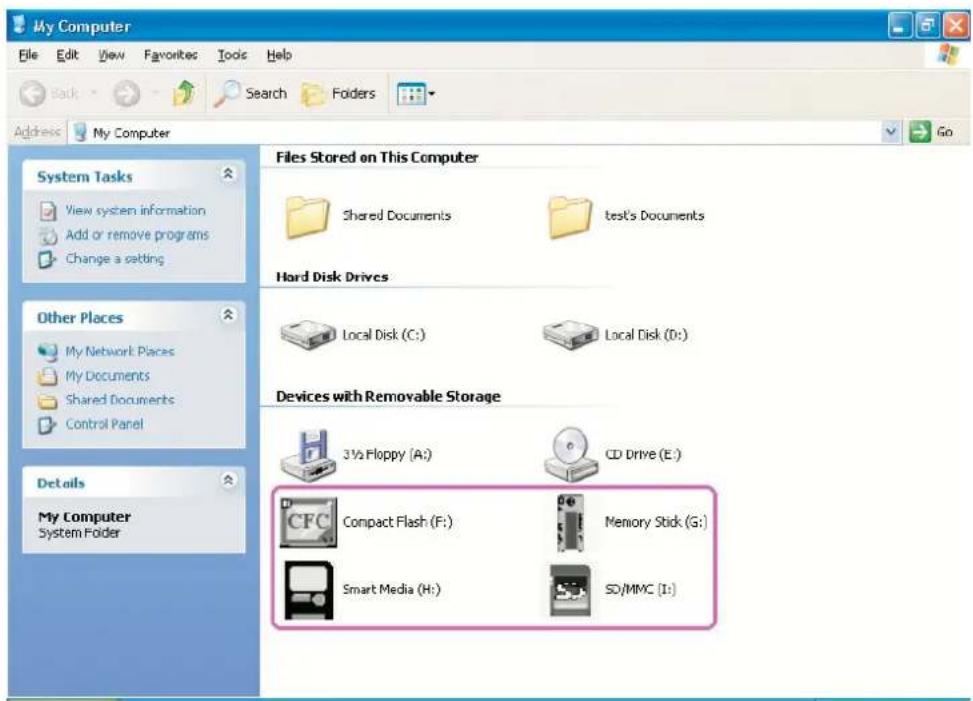
My Computer File Edit View Favorites Tools Help Back Search Folders Address My Computer System Tasks View system information Add or remove programs Change a setting Other Places My Network Places My Documents Shared Documents Control Panel Details My Computer System Folder Files Stored on This Computer Shared Documents test's Documents Hard Disk Drives Local Disk (C:) Local Disk (D:) Devices with Removable Storage 3½ Floppy (A:) CD Drive (E:) Compact Flash (F:) Memory Stick (G:) Smart Media (H:) SD/MMC [I:]9.0 How to use your media memory cards
This internal card reader provides two slots for over ten most popular memory cards application. Left slot is for bozh CF and Micro drive, right side is 4 in 1 slot for SD/MMC/MS/SMC media cards. You must insert each memory card in correct slot and do not attempt to insert the memory card in reverse direction by force. Please refer to the following description.
1. CF/MD slot
This slot placed in top-left on bezel, is labeled as „CF/MC“ which can accept Compact Flash ^TM memory cards type I/II and IBM ^TM mini Micro drive.
2. SD/MMC/MS/SMC slot
This slot placed in top-right on bezel, is labeled as „SD/MMC/MS/SMC“ which can accept Secure Digital cards, Multi Media cards, Smart Media cards, Memory Stick pro etc..
All media card's gold plate must be downward when you insert it except Smart media card is upward.
Refer to the following photo.

natural_image
Exterior view of a file organizer with multiple cards and an Ethernet card, no visible text or symbols on the main components.
flowchart
graph TD
    A["Adapters"] --> B["Sony 64mA"]
    A --> C["MINI ADAPTER"]
    A --> D["E2B 128m"]
    A --> E["MINI E2B35A"]
    B --> F["Adapters with Sony logo"]
    C --> G["Adapters with MINI logo"]
    D --> H["Adapters with E2B 128m"]
    E --> I["Adapters with E2B 128m"]
NOTE
When you are using mini memory card such as Memory stick DUO, mini SD or RS MMC to this reader, you need to utilize an adapter so that the card slot can accept it. Normally the adapter comes with package when you buy a new mini memory card. Otherwise you need to purchase this adapter alone from your local dealer. Refer to the photos above.
10.0 How to format your memory card
You can format the memory card like as format remove disk, but in some memory card such as memory stick and SD card, you must be sure the write protected switch is disable.
11.0 Indicator Description
The card reader provides a R/W (read/write) status indicator for card slot diagnosis. Normally the R/W indicator is off, when data is transmitting between PC and memory card, the R/W LED will turn flash.
CAUTION

- Please do not remove any memory card while data is transmitting between PC and card reader or R/W status LED is flashing, it may result your computer to crash and lost valuable data.
12.0 Booting from CF memory
This reader can boot from CF slot like as Floppy disk drive, but your system BIOS must support and has changed to booting from USB device setting, otherwise you can't boot from this reader. Please see the following example to check your BIOS CMOS setting and change „First Boot Device“ to „USB-HDD“.
NOTE
The BIOS setup utility is constantly update, the following BIOS screen descriptions are for reference purposes only and may not reflect your BIOS screen exactly. We recommend you to refer your motherboard hardware manual to do this change.
- To access the BIOS setup program. Press the „Delete“ key after the computer has run through its POST (Power-On-Self-Test).
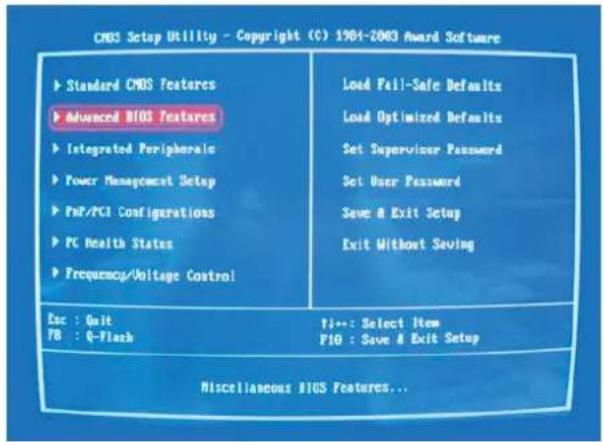
- To select „Advanced BIOS Features“.
text_image
CNOS Setup Utility - Copyright (C) 1964-2003 Award Software ► Standard CMOS Features ► Advanced BIOS Features ► Integrated Peripherals ► Power Management Setup ► PnP/PCI Configurations ► PC Health States ► Frequency/ Voltage Control Load Fail-Safe Defaults Load Optimized Defaults Set Supervisor Password Set User Password Save & Exit Setup Exit Without Saving Esc : Quit TB : Q-Flash TI---: Select Item PIO : Save & Exit Setup Miscellaneous BIOS Features...- Change First Boot Device to „USB-HDD“.

text_image
ChBS Setup Utility - Copyright (C) 1904-2003 Award Software Advanced BIOS Features First Boot Device [USB-HDD] Second Boot Device [Irisppgs] Third Boot Device [HDD-01] Password Check [Setup] Item Help Mean Level # Select Boot Device Priority [Irisppgs] Boot from floppy [LS120] Boot from LS120 [HD0-01] Boot from First HDD [HD0-1] Boot from second HDD 11->None Enter-Select √/76/78-Value F10-Save F5: Previous Values F6: Fail-Safe Defaults ISC:Exit P1:General Help F7: Optimized Defaults13.0 How to swap your front bezel
If you want to change bezel to different color, find a stylus or pin-like tool to press the plastic-clip in both sides and take off the front bezel. Then you can replace another bezel.
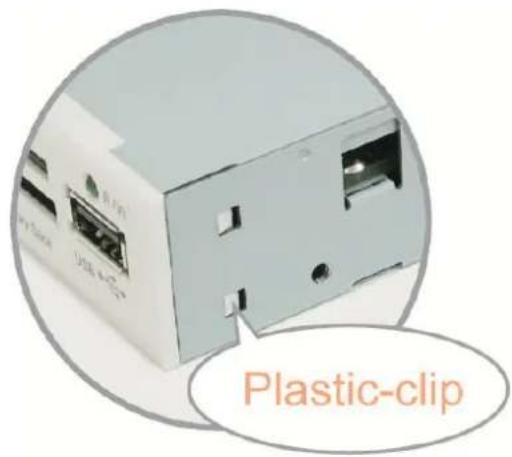
text_image
Plastic-clip14.0 Application of media I/O