
USB 2.0 Data Transfer Cable - Computer Cable Equip - Free user manual and instructions
Find the device manual for free USB 2.0 Data Transfer Cable Equip in PDF.

| Product Type | USB 2.0 Data Transfer Cable |
| Brand | Equip |
| Model | USB 2.0 Data Transfer Cable |
| Category | Computer Cable |
| Interface | USB 2.0 |
| Compatible Operating Systems | Windows XP, Windows Vista |
| Purpose | Data transfer between two computers via Windows Easy Transfer |
| Cable Length | Approximately 1.8 m (6 ft) |
| Connector Type | USB-A male to USB-A male |
| Transfer Speed | Up to 480 Mbps (USB 2.0) |
| Power Source | Bus-powered via USB |
| Weight | Approximately 50 g (1.8 oz) |
| Dimensions | Length: 1.8 m, Diameter: 5 mm (approx.) |
| Features | Plug and Play, supports Windows Easy Transfer for file and setting migration |
| Package Contents | Data transfer cable, driver CD (for Windows XP) |
| Color | Black |
| Maintenance and Cleaning | Wipe with a dry, soft cloth; avoid moisture and harsh chemicals |
| Safety | No specific safety warnings; standard USB device precautions apply |
| Spare Parts and Repairability | Not repairable; replace if defective |
| General Information | Designed for easy transfer of user accounts, files, and settings from an old Windows XP computer to a new Windows Vista computer |
Frequently Asked Questions - USB 2.0 Data Transfer Cable Equip
User questions about USB 2.0 Data Transfer Cable Equip
0 question about this device. Answer the ones you know or ask your own.
Ask a new question about this device
Download the instructions for your Computer Cable in PDF format for free! Find your manual USB 2.0 Data Transfer Cable - Equip and take your electronic device back in hand. On this page are published all the documents necessary for the use of your device. USB 2.0 Data Transfer Cable by Equip.
USER MANUAL USB 2.0 Data Transfer Cable Equip
natural_image
Close-up of a black USB cable with a central connector labeled 'quip', shown against a white background (no text or symbols on the cable itself)USB 2.0 Data Transfer Cable for WIN Vista
english
Installation
- Please install XP driver and select your language for your XP computer.
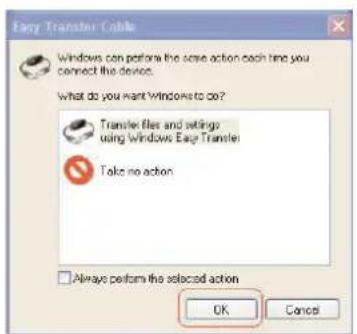
- Insert the equip data transfer cable to your old computer (O.S.: Windows XP) and your new computer (O.S.: Windows Vista), click "OK" of both your old computer and new computer. See Pic 1.
- When "Welcome to Windows Easy Transfer" appears on both your old and new computer click "Next". See Pic 2.
Pic 1 Pic 2

- Both of your old and new computer has been detected see Pic 3.
- After the system has detected both computers double click "All user accounts, files and settings" on the Windows XP computer. See Pic 4.
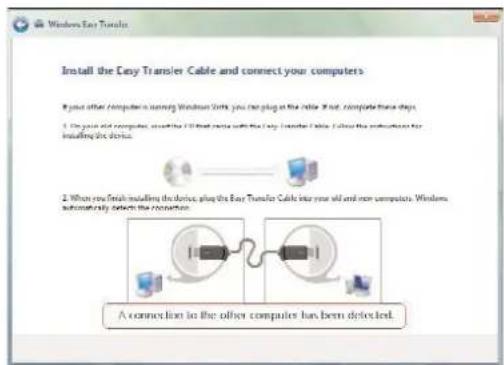
Pic 3
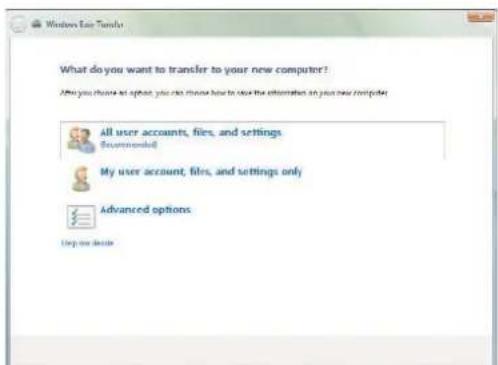
Pic 4
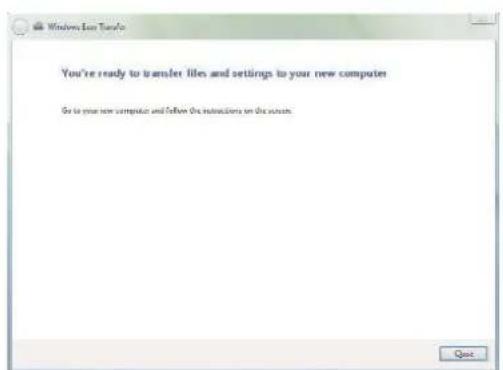
- To transfer all files and settings from the old computer to the new computer please click "Transfer". See Pic 5.
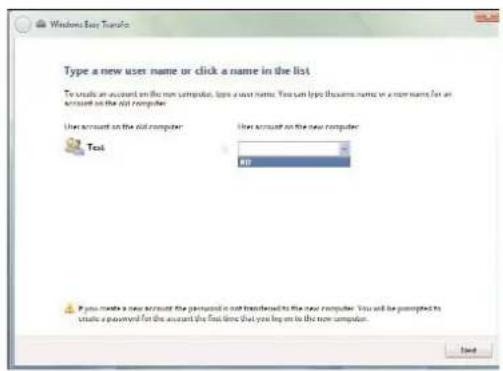
To begin the transfer please follow Pic 6 to Pic 8.

Pic 5
Pic 6

Pic 7
Pic 8
- Wait until the data transfer is completed, then click "Close" to finish "Windows Easy Transfer".
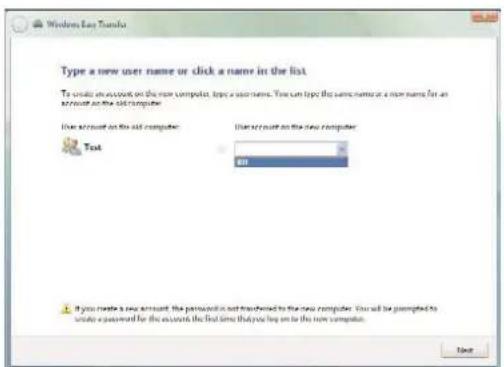
Selected data transfer by using the "Customize" button.
To transfer selected files and settings please click the "Customize" button (see Pic 5) and follow Pic 9 to Pic 13.

Pic 9

Pic 10
Pic 11

Pic 12

Pic 13
- Wait until the data transfer is completed, then click "Close" to finish "Windows Easy Transfer".


Brand : Equip
Model : USB 2.0 Data Transfer Cable
Category : Computer Cable