MW2201 - Microwaves MOULINEX - Free user manual and instructions
Find the device manual for free MW2201 MOULINEX in PDF.
User questions about MW2201 MOULINEX
0 question about this device. Answer the ones you know or ask your own.
Ask a new question about this device
Download the instructions for your Microwaves in PDF format for free! Find your manual MW2201 - MOULINEX and take your electronic device back in hand. On this page are published all the documents necessary for the use of your device. MW2201 by MOULINEX.
USER MANUAL MW2201 MOULINEX
Installing the appliance 13
Preparation 13
Connecting 13
Position 13
Safety instructions 14
Instructions for use 14
Foods 14
Containers and materials 14
Cooking time 16
Resting time 16
The various cooking modes 16
microwave mode 16
grill mode * 16
Combined microwave ^+ grill mode * 17
Adjusting time and power 18
Stopping the oven 18
Cooking guide 18
Cooking with microwaves 18
Reheating 18
Defrosting 18
Cooking with the grill alone / combined microwave + grill * . . . . 19
Cleaning 19
Technical problems 20
Waste disposal requirements 20
Performance testing data 21
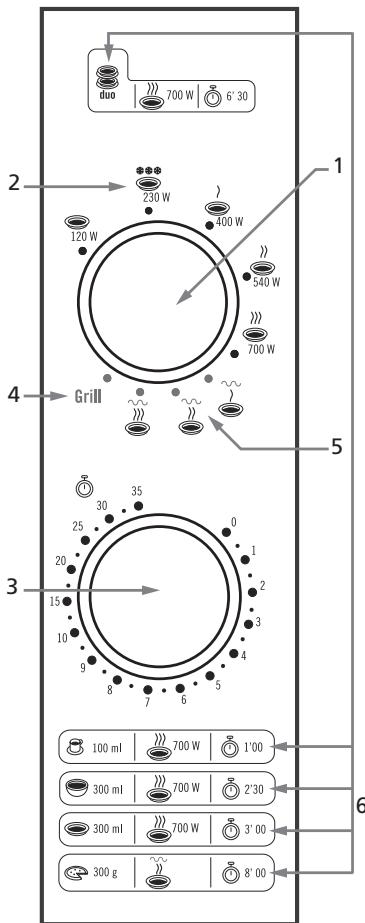
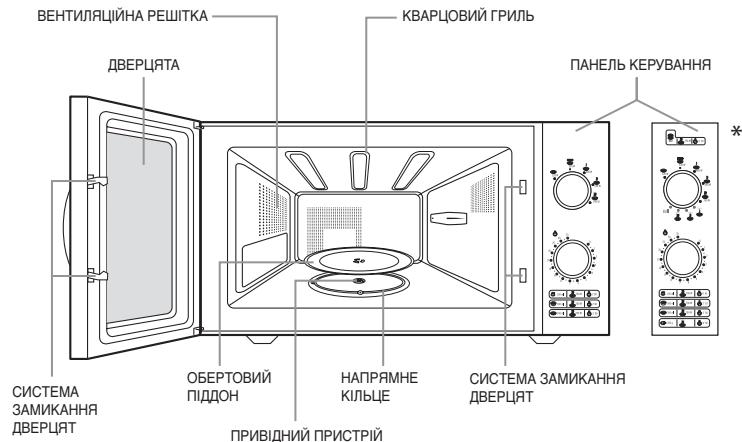
Appliance description
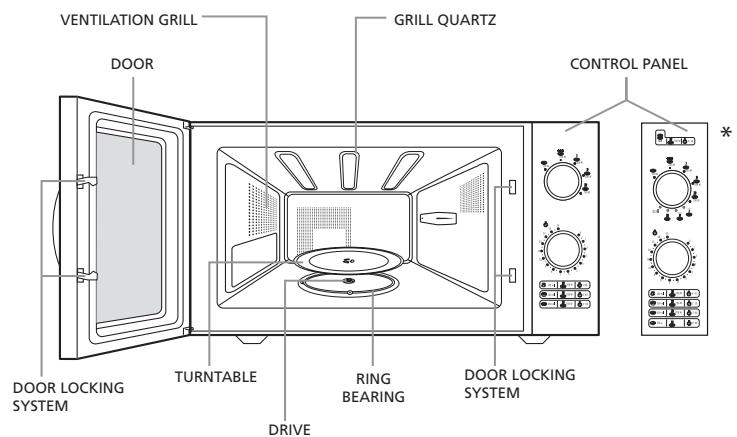
Accessories
Drive
This fixture is located in the middle of the oven, beneath the turntable. It is connected to the motor and drives the turntable round.

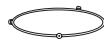
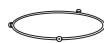
Ring bearing
This component is placed in the middle of the oven, beneath the turntable. It has rollers to support the turntable while leaving it free to rotate.
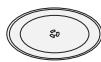
Turntable
This glass plate is placed on the ring bearing in the middle of the oven and must be engaged with the drive. It can be used for all types of cooking. Containers containing food to be cooked or to collect particles and juices produced by food during cooking are placed on the turntable. It is easily removed for cleaning.
DUO rack *
- The DUO function rack can be used to reheat two plates at the same time. Place the first plate under the rack and the second on top.

- In grill or combined cooking mode, this accessory can be used for browning flat dishes. It must be carefully centred on the turntable.
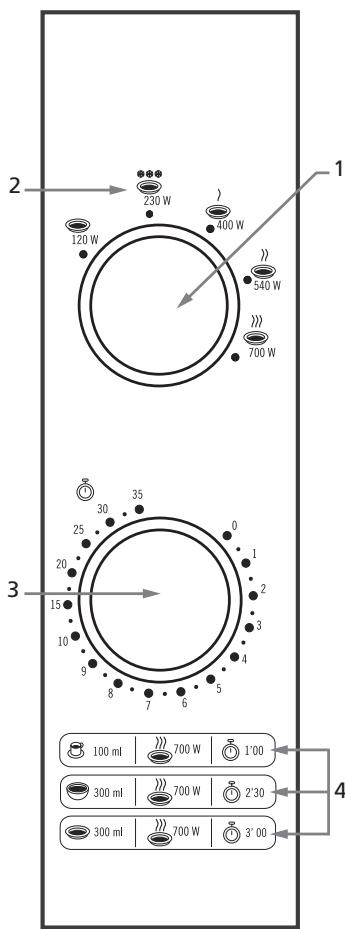
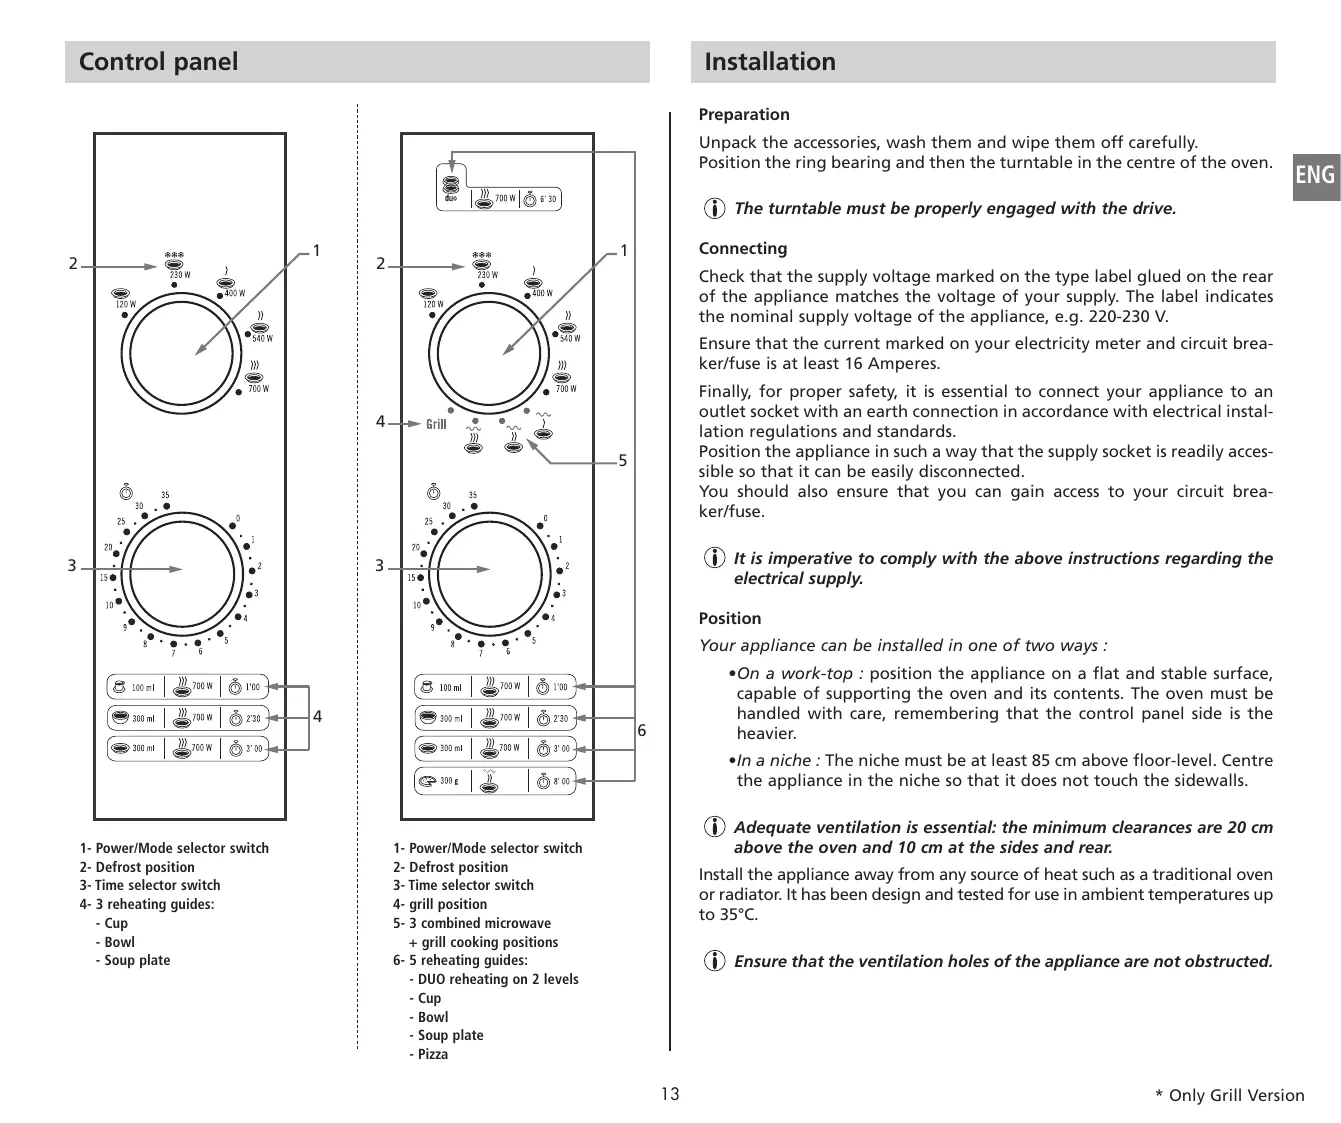
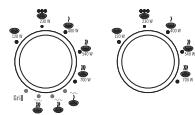
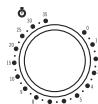
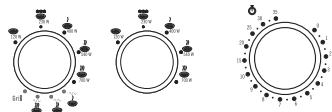
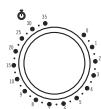
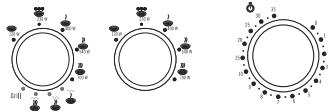
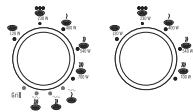
1- Power/Mode selector switch
2- Defrost position
3-Time selector switch
4-3 reheating guides:
- Cup
-Bowl
- Soup plate

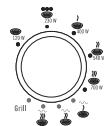
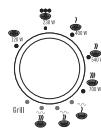
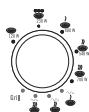
1- Power/Mode selector switch
2- Defrost position
3-Time selector switch
4- grill position
5-3 combined microwave
+ grill cooking positions
6-5 reheating guides:
- DUO reheating on 2 levels
- Cup
-Bowl
- Soup plate
- Pizza
Installation
Preparation
Unpack the accessories, wash them and wipe them off carefully.
Position the ring bearing and then the turntable in the centre of the oven.
The turntable must be properly engaged with the drive.
Connecting
Check that the supply voltage marked on the type label glued on the rear of the appliance matches the voltage of your supply. The label indicates the nominal supply voltage of the appliance, e.g. 220-230 V.
Ensure that the current marked on your electricity meter and circuit breaker/fuse is at least 16 Amperes.
Finally, for proper safety, it is essential to connect your appliance to an outlet socket with an earth connection in accordance with electrical installation regulations and standards.
Position the appliance in such a way that the supply socket is readily accessible so that it can be easily disconnected.
You should also ensure that you can gain access to your circuit breaker/fuse.
It is imperative to comply with the above instructions regarding the electrical supply.
Position
Your appliance can be installed in one of two ways :
- On a work-top : position the appliance on a flat and stable surface, capable of supporting the oven and its contents. The oven must be handled with care, remembering that the control panel side is the heavier.
- In a niche : The niche must be at least 85 cm above floor-level. Centre the appliance in the niche so that it does not touch the sidewalls.
Adequate ventilation is essential: the minimum clearances are 20~cm above the oven and 10~cm at the sides and rear.
Install the appliance away from any source of heat such as a traditional oven or radiator. It has been design and tested for use in ambient temperatures up to 35^ .
Ensure that the ventilation holes of the appliance are not obstructed.
Important safety instructions
Read carefully and keep for future reference.
- Your appliance is for domestic use. It is intended only for cooking, heating and defrosting foods and drinks. Use it only for these purposes.
- This appliance is not designed to be used by persons (including children) of reduced physical, sensorial or mental capacity or persons with no experience or knowledge, unless they are instructed and supervised in the use of the appliance by a person responsible for their safety, supervision or instruction prior to use of the appliance.
- Young children must be supervised to ensure that they do not play with the appliance. Only allow children to use the oven without supervision when adequate instructions have been given so that the child is able to use the oven in a safe way and understands the hazards of improper use.
Beware of the risk of burns.
The accessible parts may become hot during use. It is recommended to keep them out of reach of young children.
- During use, the appliance becomes hot. Be careful not to touch the heating elements inside the oven. The same also applies to the door, the grill element, the inner (cavity) walls, the top surface.
In order to avoid burns when removing containers and accessories from the oven, always use oven gloves. - This appliance is not intended to be operated using an external timer or separate remote control system.
- Do not operate your appliance when empty. This can cause damage. To try out programming the appliance, place a glass of water in the oven. This will absorb the microwaves and protect your oven against damage.
- The door must be free to close properly :
Do not obstruct the door in any way (with oven cloths, oven gloves, over-size dishes etc.). If the door of your appliance is not properly closed, a safety mechanism will prevent its being turned on.
- When cooking in grill mode, any fat splashing the grill element may catch fire. These flames will extinguish themselves and will not have any adverse effect on your appliance if it is regularly maintained.
To avoid fat spitting during cooking, especially when cooking meats and poultry, use dishes in glazed earthenware. Always maintain a minimum gap of 2 cm between the food and the grill element.
- Never obstruct the ventilation holes. This can cause the oven to overheat. If this happens, your appliance will stop automatically and will not start again until it has cooled sufficiently.
- Precautions against exposure to microwaves :
It is hazardous for anyone other than a competent person to carry out any service or repair operation that involves the removal of a cover which gives protection against exposure to microwave energy.
- Never attempt to operate your appliance with the door open, to interfere with the safety door-locking mechanism or to insert anything in this mechanism.
- Never place anything in the way of opening and closing the door.
-
Never allow food or cleaning product residues to accumulate on the door seals. Ensure that the door and its seals remain clean. After use, wipe them with a damp cloth and dry them carefully.
-
It is particularly important that the oven door should close correctly and that there is no defect in :
-
the door, the seals, the hinges,
- the supply cable.
If the door or door seals are damaged, the oven must not be operated until it has been repaired by a competent person.
If the supply cable is damaged, it must be replaced by the manufacturer, its after sales service or some other competent persons in order to avoid any hazard.
- For your safety, this appliance is compliant with the applicable standards and regulations (Low Voltage, Electromagnetic Compatibility, Materials in Contact with Foodstuffs and Environmental Directives).
Never use your oven if it is damaged.
In no case should your oven be adjusted or repaired by anyone other than a qualified microwave appliance repair technician, trained by the manufacturer.
Instructions for use
These instructions have not been devised for the UK market. The recipes have also been devised using flour, yeast and food ingredients not available in the UK. Recipes made using flour and yeast available in the UK may give significantly different results and be unsuccessful.
The following recommendations will help you get the greatest benefit from using your oven. Please read them carefully.
Foods
Forbidden foods
You should never :
- Attempt to fry food – it is impossible to control the temperature of the oil and other fats – fire-risk,
- Eggs in their shell and whole hard-boiled eggs should not be heated in microwave ovens since they may explode, even after microwave heating has ended.
- Attempt to cook food in an intact shell (e.g. chestnuts) or hard skin (tomatoes, potatoes, sausages) – always make a slit.
Food temperatures
The action of microwaves is such that only the food is heated. The container may, therefore, remain cold or cool while the food that it contains is burning hot.
The contents of feeding bottles and baby food jars shall be stirred or shaken and the temperature checked before consumption, in order to avoid burns. Shake feeding bottles well and try a few drops on the back of your wrist to check the temperature.
Preparing food for cooking
Before warming feeding bottles and small pots, remove teats and covers.
Remember to cover the food in order to :
- Avoid any splashing of the oven cavity,
- Retain sufficient moisture for cooking.
Heating liquids
Microwave heating of beverages can result in delayed eruptive boiling, therefore care must be taken when handling the container. In fact, when the temperature reaches boiling point, steam tends to remain trapped in the liquid until it is disturbed.
To avoid this superheating effect and the consequent risk of scalding, always place a plastic spoon in the liquid to be heated.
Containers and materials
Only use ustensils that are suitable for use in microwave ovens.
Below, you will find details of the various types of containers, which can be or must not be used for the chosen cooking method.
microwave mode
Use containers suitable for microwave cooking.
A container can easily be tested for microwave "transparency".
Place the empty container on the turntable together with a glass of water and run the oven for one minute at maximum power.
After one minute:
- If the container is cold, it is "transparent" and can be used for microwave cooking,
- If the container is warm or hot it is absorbent and must not be used for microwave cooking.
Never use hermetically sealed containers.
Liquids and other foods must not be heated in sealed containers since they are liable to explode.
Remember to remove covers and stoppers from feeding bottles, jars, bottles and plastic containers.
Disposable containers
When heating food in plastic or paper containers, keep an eye on the oven due to the possibility of ignition.
If smoke is observed, switch off or unplug the appliance and keep the door closed in order to stifle any flames.
Metal containers
Never use metallic materials and containers for microwave cooking. You can, however, use your appliance to heat or defrost certain preparations in metallic trays, provided the height of the tray does not exceed 4cm , not including the cover.
With regard to the cover, follow the instructions on the package. It will have to be removed or left in place, as the case may be. If not indicated otherwise, play safe and remove it.
Centre the tray(s) on the turntable, leaving at least 1 cm clearance from the oven walls. If there are several trays, space them at least 2 cm apart.
grill mode *
This cooking mode does not require the use of special containers. Use the same kind of heat-proof containers as you would use in a conventional oven.
Never use plastic containers (they may melt) or containers in paper or cardboard (fire-risk).
① Maintain a minimum clearance of 2 cm between the food and the grill element.
Combined microwave + grill mode *
- Containers not permitted in microwave mode are also not permitted in combined mode. Containers not permitted in grill mode are also not permitted in combined mode.
Use only containers that can withstand both microwaves and high temperatures.
Summary of containers and materials permitted and not permitted in microwave mode.
| Materials Containers | Suitable for micro-waves | Remarks |
| METAL | ||
| Aluminium foil | In certain cases | May be used in small quantities to protect certain parts of the food from overcooking. Risk of elec- tric arcing if the foil is too close to the oven walls or you have used too much. |
| Aluminium tray | In certain cases | See “Metal containers”, above |
| Metal sheet | No | Risk of electric arcing and fire |
| Freezer bag ties | No | Risk of electric arcing and fire |
| GLASS | ||
| Heat-resistant glass | Yes | Perfectly suitable |
| Glass with metal-based decora- tion (gold, lead etc.) | No | Risk of electric arcing |
| Fine glassware | No | May break or crack if heated suddenly |
| PLASTIC | ||
| Plastic containers | Yes | Perfectly suitable if the plastic is heat-resistant. Certain plastics may be prone to deformation or discoloration after repeated use. Do not seal closed. |
| Plastic film | Yes | Can be used to retain moisture and prevent spit- ting. The plastic must not touch the food during cooking. Puncture the plastic to allow excess vapour to escape. Use oven gloves to remove the plastic film after cooking (risk of burns from hot vapour escaping from the container). |
| DISPOSABLE CONTAINER MATERIALS FORBIDDEN IN GRILL | ||
| Polystyrene cups or packaging | Yes | Can be used for heating liquids and foods for a short time. Overheating could melt the polystyre- ne, which would then become mixed with the food. |
| Paper bag | No | Fire-risk |
| Paper plates, cups, napkins or absorbent paper. | Yes | May be used for heating and brief cooking |
| Grease-proof paper | Yes | Can be used to retain moisture and prevent spit- ting. Short times cooking. |
| Recycled paper | No | Risk of electric arcing |
| PORCELAIN | ||
| Porcelain containers | Yes | Perfectly suitable except with metal-based deco- ration (gold, lead etc.). |
Cooking time
To determine the right cooking time for your foods, follow the instructions on the packaging of ready-made dishes and deep-frozen products.
In the absence of any precise indication, divide the cooking or reheating time given for a conventional oven by at least three.
In any case, refer to the cooking guide included in these instructions.

Do not programme a cooking time longer than necessary. You will then avoid any risk of overcooking or setting fire to your food.
Resting time
Microwaves act close to the surface and penetrate food to a depth of 2 to 3cm . Once the surface layers are hot, heat penetrates to the centre of the food by conduction, i.e. the hot parts heat the cold parts. This makes it a good idea to allow the food to rest after removing it from the microwave so that the heat can penetrate to the centre.

This makes it a good idea to allow the food to rest after removing it from the microwave so that the heat can penetrate to the centre.
The various cooking modes
Your oven can be used to cook, reheat or defrost all kinds of food. You have the choice of 3 cooking modes:
- microwave mode for
- cooking - reheating,
defrosting, - automatic heating,
- grill mode *,
combined microwave ^+ grill mode *
To select the desired cooking mode use the power/module selector switch.

microwave mode
Use this mode for cooking, heating or defrosting your food.

Only use containers suitable for microwaves.
Cooking - reheating
-
Place the food at the centre of the turntable and close the door.
-
Set the power with the power/model selector switch.

| 120 W | 400 W |
| ( defrosting ) | 540 W |
| 700 W |
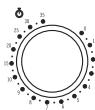
- Set the cooking time with the time selector switch.
① To set times under 1 minute, turn the times knob to 2 minutes and then back to the desired time.
- When the cooking time is selected, the oven will start automatically. The internal lighting will be switched on and the turntable will rotate.
Defrosting
-
Place the food at the centre of the turntable and close the door.
-
Set the power selector switch to the Defrost position.

- Set the cooking time with the time selector switch.
- Defrosting will start.
Reheating guide:
| Quantity | Mode | Time | Resting time | |
| Cup | 100 ml | 700 W | 1' 00 | 1 minute |
| Bowl | 300 ml | 700 W | 2' 30 | 1 minute |
| Soup bowl | 300 ml | 700 W | 3' 00 | 2 minutes |
| Pizza * | 300 g | 700 W | 8' 00 | 2 minutes |
| DUO * | 2 x 300 g | 700 W | 6' 30 | 2 minutes |
- Place the food at the centre of the turntable and close the door.
i In the DUO position, place the first plate in the centre of the turntable. Place the DUO rack over this plate and place the second plate on the DUO rack *.
Make quite sure that both plates are of the same weight and the same type of food.
- Set the power to maximum (700 W) with the power/mode selector switch.
- Set the cooking time with the time selector switch.
- The oven will start.
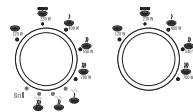
grill mode *
Use this mode to brown food such as gratins or meat by means of your oven's grill element. This cooking mode does not use microwaves.
It is preferable to use the DUO rack when you select grill mode (see details of accessories, p. 12).
In grill mode, use only heat-resistant containers.
Always use oven gloves to handle dishes and accessories in grill mode. Risk of burns.
1st step: preheating the grill
- Turn the power/mode selector switch to grill mode.
- Set the preheat time with the time selector switch.
- The oven will start.
- After the preheat time, the oven will stop. You can now start cooking.
2nd step: cooking in grill mode
- Place the food on the DUO rack and place this in the centre of the turntable. Close the door.

duo
Grill

- Set the cooking time with the time selector switch. The oven will start.
① The grill element may turn on and off during cooking. This is quite normal and prevents overheating.
Combined microwave + grill mode *
Use this mode for rapidly microwave-cooking or reheating food, while it is browned and crisped by the grill.
In combined mode, 3 power levels are available:
| Symbol | Mode | Microwave power |
| ~ | strong grill + gentle microwaves | 800 W - 150 W |
| ~ | medium grill + medium microwaves | 700 W - 200 W |
| ~ | gentle grill + strong microwaves | 600 W - 300 W |
① To be used, preferably, with the DUO rack (details of accessories, p. 12)
Use only containers that can withstand both microwaves and high temperatures.
Always use oven gloves to handle dishes and accessories in combined mode. Risk of burns.
- It is not necessary to preheat the grill in combined mode.
-
Place the food on the DUO rack and place this in the centre of the turntable.
-
Set the power/mode selector switch to the desired combination of grill ^+ microwaves: gentle / medium / strong.
- Set the cooking time with the time selector switch.
- The oven will start.
① The grill element may turn on and off during cooking. This is quite normal and prevents overheating.
ENG
Adjusting time and power
You can change the power or cooking time during cooking time by means of the appropriate selector switch. The oven will automatically use the new setting for the remaining cooking time.
Stopping the oven
Your oven will stop automatically when the time selector switch has finished counting down.
During cooking you can :
- Interrupt cooking by opening the oven door, the oven will stop and will restart when you close the door again,
- Cancel cooking by turning the time selector switch back to 0.
Cooking guide
The times indicated in the cooking tables are given for guidance only. The correct cooking time can vary with the shape, thickness and temperature of the food. The resting times are for use after cooking, heating or defrost- ting.
Cooking with microwaves
Cooking guide for fresh vegetables
Use a Pyrex container, suitable for microwaves. Pour in 2 to 3 tablespoons of cold water for every 250g of vegetables (unless otherwise indicated in the table below). Add the vegetables and cover. Stir once during cooking. At the end of cooking, stir thoroughly, add salt, herbs or butter and cover while resting.
For best results, chop the fresh vegetables.
| Food | Quantity | Power | Cooking time (minutes) | Resting time (minutes) | Instructions |
| Carrots | 250 g | 700 W | 7 | 3 | Cut the carrots evenly into discs. |
| Courgettes | 250 g | 700 W | 7 | 3 | Cut them into discs. Add 2 tablespoons of water or a knob of butter. |
| Potatoes | 250 g 500 g | 700 W | 8 13 | 3 | Peel and cut in two. |
Reheating
After heating liquids, it is advisable to leave the container to stand in the oven for at least 20 seconds. This allows the heat to spread through the liquid and minimised any risk of overflow and scalding. Stir the liquid during and after heating.
Warming guide for baby food.
Before serving, carefully check the temperature of the food.
| Food | Quantity | Power | Cooking time (minutes) | Resting time (minutes) | Instructions |
| Baby food (vegetables and meats) | 190 g | 540 W | 1 | 1 - 2 | Place the food in a ceramic bowl. Cover. After cooking, leave to rest. |
it is possible to heat baby bottles in the microwave, taking care to respect the instructions given on the milk cartons.
Defrosting - power at position
Place the frozen food in a dish. Do not cover.
Ensure that the food does not start to cook during defrosting. If any part of the food should begin to cook, cover it with a small piece of aluminium foil to screen it from the microwaves. If the surface of poultry becomes warm, stop defrosting, leave to stand for 20 minutes before recommencing.
The table below applies for frozen food at a temperature between -18^ and -20^ .
Leave to stand for the full resting time to be sure that defrosting is complete.
At regular intervals during defrosting, turn the food and pour off any water.
Defrosting must be carried out at a power setting : defrosting

| Food | Quantity | Cooking time (minutes) | Resting time (minutes) | Instructions |
| Meat : minced beef | 500 g | 14 | 2 | Place the food on a flat ceramic plate. Protect thin slices with alumi- nium foil. |
| pork steak | 250 g | 9 - 10 | ||
| Fish fillet | 250 g | 7 - 8 | 2 | Place the fish in the middle of a ceramic plate. Place the more fragile pieces under the thicker pieces. Cover the ends with alumi- nium foil. |
| 400 g | 13 - 15 | |||
| Chicken pieces | 500 g | 16 - 19 | 2 | Place them on a plate. Protect fragile parts with aluminium foil. |
| (2 pieces) |
Cooking with grill alone or with combined microwaves ^+ grill *
- Cooking guide for "grill" / "micro grill mode": fresh food
| Food | Quantity | Mode + power | Side 1 Time (min.) | Side 2 Time (min.) | Instructions |
| Sliced bread | 4 slices (25 g) | “grill” mode | 4 | 4 | Place the slices on the DUO rack. |
| Chicken pieces | 500 g | ~ ~ | 15 | 13 | Brush with oil and sprinkle with spices. Place the pieces on a plate on the DUO rack. Leave to stand for 2-3 minutes. |
Cooking guide for "micro grill" mode: frozen food
| Food | Quantity | Mode + power | Cooking time (min.) | Instructions |
| Fish gratin | 400 g | 18 | Use a round, Pyrex dish Place it on the DUO rack. Leave to stand for 2-3 minutes. | |
| Lasagne / Cannelloni / Macaroni | 400 g | 19 | Use a round, Pyrex dish. Place it on the DUO rack. Leave to stand for 2-3 minutes. |
Cleaning
The oven should be cleaned regularly and any food deposits removed.
Cleaning the oven
The following parts of your microwave must be cleaned regularly to avoid any accumulation of food particles and grease :
- The inner and outer surfaces of your appliance,
- The door and its seals,
- The drive, the ring bearing and the turntable.
Failure to maintain the oven in a clean condition could lead to deterioration of the surface that could adversely affect the life of the appliance and possibly result in a hazardous situation..
Make sure that the door closes correctly.
① Do not use abrasive cleaning products or stiff metal scourers to clean the glass door of the oven, as this could scratch the surface and cause the glass to break.
Clean the outer surfaces with a soft cloth and soapy water. Rinse and dry carefully.
Remove any particles or stains inside your appliance or on the ring bearing with a soapy cloth. Rinse and dry carefully.
To help dislodge food particles and eliminate bad smells, put a glass of lemon juice diluted in water on the turntable and run your appliance for 2 minutes at maximum power. The steam will soften the dirty marks. Rince and dry.
The grill element hinges down to make it easier to clean the roof of the oven.
Take care not to allow water to run into the ventilation holes.
Never use abrasive or solvent cleaners.
Clean the door seals carefully, making sure that :
- There is no accumulation of particles,
- Nothing prevents the door from closing properly.
Clean the inside of your appliance after every use with a suitable detergent.
Do not use any steam cleaning equipment.
Always allow your oven to cool down before cleaning it.
Cleaning the accessories
- The glass turntable
- The DUO rack *
Technical problems
Your appliance must not be used if the door or door seals are damaged, for example :
- broken hinges
- damaged seals
- internal deformation
Please contact the after-sales service for any repairs (cf : attached list).
It always takes time to become familiar with a new appliance. If you have one of the problems listed below, try the solutions suggested.
-
The following occurrences are perfectly normal and should give no cause for alarm :
-
condensation inside the oven,
- the escape of air around the door and the outer walls,
- light reflections around the door and on the outer walls,
-
steam escaping from the door or the ventilation holes.
-
If you find that the food is not cooked at all :
-
make sure that you have programmed the timer correctly and have pressed the "Start + 30 s" button,
- make sure that the door closes correctly,
-
make sure that the circuit breaker is not tripped or the fuse blown.
-
The food is overcooked or undercooked :
-
make sure that the programmed cooking time is correct for the food you are cooking,
- make sure that you have chosen the right power level,
- make sure that you have not forgotten to remove the aluminium foil covering the food tray,
- make sure that you are not using an "absorbent" container,
-
make sure that the rear ventilation holes of the appliance are not obstructed.
-
Cracks can be heard or sparks can be seen inside the oven :
-
make sure that you have not used containers with metallic decoration,
- make sure that you have not left a metal utensil (fork etc.) inside the oven,
-
make sure that you have not positioned aluminium foil too close to the oven walls, positioned a metal tray badly or too close to another metal tray or forgotten to remove the metal fastener from a freezer bag.
-
A beep sounds if you press any button on the control panel :
-
make sure that the Child Safety feature is not activated, if it is, deactivate it.
-
The interior lighting does not work, although your oven works normally :
- the bulb is probably blown, your appliance nevertheless remains usable.
If these suggestions do not solve your problem, collect the following information:
- the model and serial number printed on the rear of the oven,
- your guarantee,
- a clear description of your problem.
You should then contact your local dealer or the after-sales service.
Waste disposal requirements
Moulinex endeavours to respect the environment as far as is possible in the manufacture of its packaging. The package is made of 100% recyclable corrugated cardboard.
The plastic parts of the appliance have a marking that indicates the type of material. This enables the parts to be recycled.
You can obtain more detailed information on the disposal of each material from your local authority department with responsibility for waste disposal. This department can also advise you on the disposal of any waste, including used appliances.
Your questions regarding disposal can be addressed to your local waste disposal service or to your Moulinex approved service centre.
Performance testing data
According to standard IEC 60705
The sub-committee of the International Electrotechnical Commission, SC 59H, has developed a standard for comparative heating performance testing of various microwave ovens.
We recommend the following for the model in your possession.
| Test | Load | Approximativetime(minutes) | Power level | Container |
| Egg custard | 750 g | 11 | 700 W | IEC 60705RecommendedContainer |
| Sponge Cake | 475 g | 12 | 540 W | |
| Meatloaf | 900 g | 20 - 22 | 700 W | |
| Defrost | 500 g | 15 - 17 | 180 W |
These data are given for an appliance with a nominal power rating of 700 W.
Technical characteristics
| Model | Compact |
| Supply rating | 230 V ~ 50 Hz |
| Power Consumption : | |
| Maximum power | 1150 W |
| Microwaves | 1150 W |
| Grill | 1000 W |
| Output power | 700 W |
| Frequency | 2450 MHz |
| Dimensions (L x D x H) mm | |
| Outside | 440 x 360 x 260 |
| Inside | 306 x 274 x 208 |
| Weight | |
| gross | 12,3 |
| net | 10,5 |
Índice
- Cup
-Bowl - Soup plate
- DUO reheating on 2 levels.
- Cup
- Bowl
- Soup plate
- Pizza
Instalación
Preparación
No实用性: No utility, no use of the product.
Technical characteristics
| Modelo | Compact |
| Tension nominal | 230 V ~ 50 Hz |
| Consumo de potencia | |
| Potencia máximo | 1150 W |
| Microondas | 1150 W |
| Grill | 1000 W |
| Potencia de salute | 700 W |
| Frecuencia | 2450 MHz |
| Dimensiones (L x D x H) mm | |
| Exterior | 440 x 360 x 260 |
| Interior | 306 x 274 x 208 |
| Peso | |
| Bruto | 12,3 |
| Neto | 10,5 |
Summario
Descrizione 32
Pannello comandi 32
Accessori 33
PerynilpoBkAmoHocTn/ДЛNTeIbHOCTn pnproTOBHeHnA 57
OcTaHOBka MmKpoBOJHOBoI neu 57
PykoBoDCTBO no npiroToBJeHnIO 57
PpiroTOBJIeHne BpeXmme MmKPOBOH 58
PoiDorpeB 58
Pa3mopaxnBaHne 58
PpiroTOBHeHnToBkoHa rpiJe/BcoeTaHHMmKpOBoJHbI+rpNJIb*..58
YnCTka 59
Texnueckne npo6nembl 60
CobetbI no ytni3aun 60
-yaawka
-yaasa
- rny6okar tapenka
1- IpekeIIOUaTeIb MoOIOHOCn/ peKIMa
2-Функцуразмораьань.
3-TaMep
4-Γpnlb
5-Функян KMбинрованого peхиma; MKNKPOBONHbl+rgnlb
6-5 PeKIMbI abTOMaTHueCKOro pa3orpeBa: -fYHKUIN DaOHorO pa3orpeBa I no3BOnJrE 6bICrpo pa3orpeBaT b 2 6Kn OohOBpemehHo
-yaaoka
-yaasa
- rny6okar tapenka
-Пица
YctaHOBka
IoproToBka
Ocbo6oIte Bce npHaJnEJXHocTn npIbopa O T ypaKOBKn, BbIMOnTe N TuaTeJIbHO BbCyuHTe INX.
YcTaHOBInTe BHeue, a 3aTeM BpaUaIOuINsCn IOdHoc B cHTpe NeuN.
BpaaoouinocnoHocdoJXeHNnOHTHOKacatbcnpbOda.
Iopdkluoyehne
Y6eIntecb, yTO HAnpJxHeHne nHTaHnI pIn6opa COOTBeTCTByET pa6OeMy HAnpJxHeHIO BaSeI 3JeKTPocEtN (CM. 3TNIkETky, HAKJIeEHHyO Ha 3aJHeI NaHEI np6opa, HA KOTOpOy kA3aHO HOMHaJIbHoe HAnpJxHeHne: HAnpIMep, 220-230 B).
Y6eIntecb, yTO BaI 3JIeKTPoCteTcHk I BblKIIIOuTaTeIb paCCHTaHbI Ha CINy Toka He MeHee 16 A.
Дяп понов 6e3oNaChocTи npi6bop DoJiKeH B O6BaTeIbHOM nopRJaKe BKJIouaTcB CteByIO pO3eTKy C 3a3eMJIeHnEM, COOTBeTCTByIOUyIO CTaHdApTaM Ha 3JIeKtpo06bOpYOBaHne.
YctaHaBnBaI npi6Op, o6cepebTe Cbo6OHyI DoCTyn K po3ETke, yTo6bl npi6Op MoXHO 6blIO JeKo BvIKHouHTb B IIO6OI MOMENT.
Obecneuthe TaKke Cbo6oHbI DoCTyn K BblKnIOHaTeJIIO.
Bce peKomeHdaaun OTHoCteIbHO 3JeKtpOnuTahn np6opa DoJXhbo co6NIOdaTbc HeyKoCHnteIbHO.
Pazmeuenie
BbIMoKeTe yCTaHOBnTb np6Op:
Ha paoboun cTol: UcTaHOBuTe npBop Ha npOHyU yToUHyU IOBepxHOCTb, cnOCo6HyU BblEpeKATb BEc neu n ee coDEpXmoro. ObaaauTeCb C neybu C octopoxKHOCTbO. ObpaTne BHMaHne, UTO Ta cTOpoha npBopa, HA KOTOPOHaxODITc naHeIb ynpBaJIeHn, TAgKeJIee.
-Bo BCTpoeHHyO Me6JIb:Me6JIb DoJXHa 6bITb pacNoJoxHe Ha BbICote He MeHee 85 cm OT nona. YcTaHOBtpe npIbOp B cHTpe OTBeJeHOro dIra Hero npocTpaHCTBa TAK, YTO6bl OH He KacalC rTeHOK Me6JIi.
ObecneyBc Bc06oHbI OTBOD TENa: MNHMmaJIbHOe pacCTOHNHe Na neybo DOJXHO COCTABJIbT He MeHee 20 cm, a y 6OKOBbIX n 3aDHei CTeHOK - He MeHee 10 cm.
UctaHablmBaIte np6op DoCTaTOH0 daJIeKO OT nCTOHTNIOB TeNla (TaKIN KAK ObHuHaJ DyXOBaI neHb nn 6aTape), NocKoJIbKy OHa 6blJa cKOHCTpyuPObaHa Hn3rOToBJeHa dIra pa6Otbl pRn Tempeatype OkpXaIOSeI cpebl, He npeBbIshaIOSeI 35^
He 3acnoHnIte NoctopOHnMn npedMeTAMN BeHTnJIauHOHHbIe OTBepCTn npnbopa.
Baxkhble nHctpykcuu no 6e3oNaCHOCTN
BhImaTeIbHNo npOuHTte n COxpaHnTe dIy IcNOb3ObaHnBaD aIbHeIeM.
- Мкрволновая песь Альятсп римбором ИСКЛЮЧТЕВО HO 6БТОВО ГИЗHAЗHAЧЕНИNYI p佩徳нэнчehа дд пиготовлиен, pa3огревани И раморжавионуnpodyKTOB ПИТАПИ.
- Heo6xOJIMMO NCKJIQUHTb BO3MOXHOCTb NCIOJIb3OBAHnM MKNPOBOLHOBOI neu IIOJBMN (BKJIOUHae JTei) C ORPAHNUeHbIMN ΦNIHNECKIMN, CEHCOPNAJIbHbIMN UYMCTBEHHbIMN CNOCO6HOCTaMn, A taKke IIOJbMbN 6e3 ONbITA NOJIb3OBAHnM KNOBOLHOBOI NECbIO NMOOTBETCTBYUONX 3HAHIN D IO NOLUYeHNM IMN COOTBeTCTBYUONX INHCTpyKcN OT YELOBeka, OTBeauHOJero 3a INX 6e3ONaCHOCTb.
- JeTN MOrYT NOnb3OBAtBCa NeyBIO 6e3 Ha6NIODeHnco CToPOHbI B3PocNbIX TOnB-KO pN YcNOBm NOnyueHncooTBeTCTByHOuXIN HcTpyKun, TAK YTObSi pe6eHOK yEm NOnb3OBAtBCa NeyBIO 6e3OnaCHO INoHmAl ONaCHOCTb HenpaBnIbHorO eNCNoB3OBAHn.
Bo n36ekaHne pncka noJyehnOxorOB
B npoucece paobtbl MnKPOBONHOB O Neu HekOTOpbIe ee KOMNHOENTbl MOrYT CUNHbHO HaPeBaTcN, NO3ToM y peKoMeHdyeTc MaKcMmaHbHO ORpAunHT b K HmD octyJeTei.
- B npouecce pasobI MKNPOBONHOBAI neb HArpeBaTeCn, no3OMy n36eAraIte KOtakKa Tc HArpeBaTeNbHbIMN 3NeMHTAMn BHyTpN neu. Te Je MepbI npedocToPoxHoCTN OTHOCrTaN K DBePeU MKNPOBONHOBAI neu HArpeBaTeNbHOMy 3NeMeHTy rpnla, a TaKke K BePxHeN bHByTpeHNm N CteHKam Neu.
Bo n36exaHne nOlyeHn OXOROB npn n3BNeueHn KOHTeHepOB n dpyrnx npnHaJnEHXoTeN, BXOJaunx B KOMnKeT M, n3 neu, Bcerda nonb3yTEcB ppeHa3NaueHHbIMn DnA 3TORpyKaBnCaAMn.
- MkhpoBolHOBaey neh Be nped3HaNeHa dIЯ pa6OtbI c BHeuHHMM cpeCTBaMn ynpabJIeHN pexkIMAm np6OtbI neH, Hapmep He BXoJIAuNE B KOMTneKT neH TaJI-Mep IJI np6Op DInCTaHcUHOHorO ynpaJIeHN (II.DY).
6.He BKNIOaHTe MKNPOBOHNOHYo Neb NopoxHeN, NocKOBky 3TO MOKeT npNBcTNe Kee noIOMKe. NOCToHNO DePKeNTbeN CTaKaH c BOIo. Boga nOgIOTnMkPOBOBHLb, ECINs Bbl CNYaHIO BKNIOHTe Neb, KOGda OHa pYctA. - Henb3a nonb3oBaTcBcM MKNpOBoNHOBo NepbIpnOTKpbITOn DBepe. He ocTaBnJIe KaKnx-Jn6o PnpMeTOB MeJy DBepeIe Neu I nepeHne NaHelbU. B TOM Cnyae, cEni DBePcA Neu H ZeKpbIta DoJHKbIM Opa3OM, CneuaNbHO npDeDyCMOTpeHHbI MexaHn3M 6e3oNaChocTn 3abloKnpyet pexm BKluoyenH MKNpOBOHNOBIO Neu.
- Пп рпготовсяни в ржиме "ргль" 6рьзгхира, пп подаши нанограватьнй слг,在 Камо не се и в Ну ожakут НблагорияТНОВ ВИЕДСТВИАМУКИРОПЕСТВИАМУСТВИАМУСТВИАМУСТВИАМУСТВИАМУСТВИАМУСТВИАМУСТВИАМУСТВИАМУСТВИАМУСТВИАМУСТВИАМΥСТВИАМΥСТВИАМΥСТВИАМΥСТВИАМΥСТВИАМΥСТВИАМΥСТВИАМΥСТВИАМΥСТВИАМΥСТВИАМΥСТВИАМΥСТВИАМΥСТВИАМΥСТВИАМΥСTВИАМΥСTВИАМΥСTВИАМΥСTВИАМΥСTВИАМΥСTВИАМΥСTВИАМΥСTВИАМΥСTВИАМΥСTВИАМΥСTВИАМΥСTВИАМΥСTВИАМΥS
Bo n36bexaHne pa36pbI3rNaBHaJxnpa npn npnroTOBHeHHn HnU, oO6eHHo npn npnrTOBHeHHn 6HIOd n3 KypuCbI u Mca, hCnoNb3yTe KepaMuecKyo HnN CTKeAHHYIO Nocdy, 3AkpbBaemy KoPbIKoH. Pn yCTaHOBke B KaMepy NeuKn 6HIOda, npedHa3NaueHHOrO dJa npnr TOBHeHH, Heo6XoIMo npdeymOTpeb MHNMaJIbHOe pacCTOHHe (2cm) MeJy O6paTaBtBAeMbIM npOyKToM u HarpeBaTeNBbIM 3NeMeHTOM rpnIA.
9.He 3akpbIbAte BeHTnJIaUIOHbIe OTBepCTn, NocKoJIbky MmKpOBoJHObaI neYb MoXeT pepePbCry n ABTOMaTHueCKN OTKlnOHuTbcra. OHa 6yDet B Hepa6ooyem COCTOHHN, NOKa DOCTaTOUHO He OXlaDITcR.
10. 3aunTa OT BozdeJeCTBnM NkpoBoHn (CBU):
I JnLHcHe ABJIOUxCScneuaJICTAMN,IpOIN3BOaNTb O6CnyKbAHne IpeMOHT MKNPOBONHOBNeu, BKNIOUaIOUs CHrTne KpbIiKu, 3aUuuaIOSeOT BO3JeCTBnA 3Heprn CBU, onaCHO/
Hn npn KaKnx O6cToaTeBCTbax HeIb3n N0bn3ObaTbCn NebIOp npn OTkpblTOB dBePcI, nOpNTb 6IoKINPOBOHbHe KOHTaTb (3aueJIckn DBePcI) IIN BCTABJrT bTO-1N60B O BTBcPTb 6IoKINPOBOHbX KOHTaKTOB.
- He BCTabJIaTe KaKHX-JIbO ppeMeTOB Mekdy DBepee N pepeHne NaHeIbIO MKNPOBOJHOBOI neH.
He N03B0JIe OCTaTkam NiuN IIN OCAdkam YNCTaIINx CpeDCTB HkaJIINBaTbCn Ha yIIOTHNoOIIIN NOBEXHOCTX. PIOIdepKJBMaIte DBePcUy eE yIIOTHHOUme NOBEXHOCHTB V NCTOM COCTOHIN, POTOpIaR IN NCIOE IICNOJb3OBaHNne CHaHaJIaBnHOH, a 3ATEM MAFKoi CYXOI TPRIKKO.
- Oco6eHNO BaxHo, yTo6bl Dbepua neu HndexHo 3akpbIbIaIacb, n YTO6bl He 6bln nobpeKdEhbl:
-Dbepca,ynlnotteiNneTn DBepubl
- CTeBOH uHyp.
B cnyae kaKnx-1n6o nobpeKeHn DBepu bnn yNnOTHTeNei DBepu b, nCNoIb3OBAHHe MKNpOBONHOBOn neu 3aPpeaaetc, noka e He OTpeMOHTnpuy KBAJINΦuNUPoBaHHb CneuaJIncT.
Bo n36exaHne onaCHOCTn, 3aMeHa NOBpeXdEHORo Ka6eIaONJHc OcyueeCTbTbCpOn3BODHTeJIem, eRo rapaHTnHOJ Cnyx6o nn MaCTepOM, IMeUOIM COOTBeTCTBYUOYKBaIINΦKaUIO.
Hb Kcem Cnyae He NOp3yntecb HncnpaBHO nebyIO.
I Neuchonk HenactpaBaTb HnpeMOHTnpoBaTb TOnBko KBAaHnHnIpObaHHb CneuaNCT no CBY 6OpUyOBaHNIO, NOdTOTOBHeHHOro npOn3BOAnTeJe MmKpOBoHOBo neu.
Ihctpykunno3KcnpyaTaun
BHNMaTeJbHO O3HaKOMbTeCb C peKOMeHdaaunMIM, KOToPbe IOMOryt Bam N3BNeYb MaKcMym BblOdbOT INCNoJIb3OBAHnI DnI PnIroTOBHeHnI nIuN MKNpOBOHOBO neu.
PpIMHeHneM NmKPOBOLHOBOI Neu 3NaUHTeBLHO COKpaUaET BpEMr, Tpe6yEmoe dJa pa3MOpO3KN, NIOgORpeBa n DaJIbHeNse O6paOToK pnoDyKTOB npn IcNoIb3OBAHnn TpaINOnHbIX CnOcO6OB pnproTOBJeHH NIIu.
Ipoodykbl
3aIpeHHeK 6bA6oTKe B MmKpOBoJHOBOJ Peu npOdykTbI PtTaHnI n CnoCobI pInrTOBLeHnI.
EcnnepeD Bamn CTouT 3aadaa Bb6opa cnocoba npiroTOBHeHn PnIc n cncnonb3o-BAHNEM MKNPOBOH, Bam He CneDuYt:
- nItaTbCn POJxAPBbTb PPOyKbTb NITaHn, NOCKoIbKy I3-3a BO3MOxHOCTN B03rOpAHn HEOB3MOxHO KOHTpOJIuPObaTb TempePaTy pMa cNa IIN JxNpOB, NCIOJIb3yeMbX npi XapKe.
pa3ORpeBaTbIaIaB CkOpNpye KaK CbIpIbe,Tak N yXe CBapeHbIe BkpyTuO I3- 3a ONaCHOCTn INB3pIbAHnB TOM YNCLe N POCNe OOKHuHaN HEnOpcPeD CTBEHORo BO3dEChTBn HA HN CCBY. - pItaTbca ObpaTaBbTaB npOdykTb, KOtOpbe MeHOT Bo3dyxHOHePOnHuaeMyo CkOpny, nIOthyO KoKypy uNn OboIoQHy (TomaTb, KapTopeJb, K0JI6aCbI n T.n.) - He 3a6BaBnte DeNaTb B HNX HaDepe3b Nn IpNoKOnbI.
IpoDorpeB npOyKTOB nHTaHn
I JeCTBnE MKNPOBOHn XapaKTePn3YeTCaTeM, YTO OHN Bb3bBAOT HargBaHHe HENOpCEdCTBEHNO NOBpeRAeMOrO 6pb60TKe npOyKtA. Cam KOHTeHep, B KOTOpOM HaxoJITcpa3OrgPeBaEMBI npOdyKT, MoKet PpN 3TOM He HargPeBaTcB,
Hnkorga He HaponnIte Nocdy C codepKmbIMdo KpaEBN BbIbpaIte Nocdy c paCswnpauimcK Berpyx yCTbEM IyI pyeDOTBpaueHry BblneckBaHry JxIKOCTN HApxy npn KIneHH. Kpme TOrO, 6yTbIKn C y3KM rOpIbXkOM npn nepepeBeM MOrTy B3OPBaTbc.
Bcerda npobepaTe TmepaTy DeTCKOro NITaHnI MOnoka nepeTd Tem, KaK daBaTb erO pe6eHky.
Hnkorda He HargpeBaIte 6yblky dIpebeHka CHaedeToH Ha Hee COCKO, TaK KaK 6byIka MoKet B3OpBaTcR npi nepeIpeBe.
PazorpeBaHne XnKoTei
Pn paorpebaHn HnNTKOB cyueCTbyeT onaHocb 3aepzhaHoro 6yphoro BCKnnaHn XnIOKTN. IJI pneoTbpauneHn 3aepxHaHORO 6yphoro BCKnnaHn IN 0B3MOHXO OXORA, B HnNTK CNE dyET NOMEaTb NACTMaccBOY IOXKY NIN CTKJHHy NO NaIOKHy, INpeMeunBaT bX nepeD, BO BPEm IN NCsE HarpeBaHn.
PnIroTOBJIeHne IpOn3BOJNTcC NlOMOuBIOpeyIaTOpA MoUHOCTN
PexkIM MmKpOBoJH
IcnoIb3OBAbT 3OT peXIM IJI npiroTOBHeHn, pa3OrpeBaHn IJI npa3MOpO3Kn IINueBbIX pOdyKToB
I IcnoIb3OBAt Tb TOLbKO NocyU, CToIkyu K Bo3eJeCTBnIO MNIKPOBOIH.
PnroToBJIeHne - pa3OrpeBaHne
2.YCTaHOBtMbAKCMMaJIbHyIO MOUHOCtB (700 Bt) c NOMOuBHOpeyIaTOpaMOUHOCTN.
3.YctahOBINbBpEMcNOMOuHOperyIaTopaBpeMeHn.
4.ПeчвБКЛЮЧаETCA.
Pexkim rpnjra
IcnoIb3ObAtb 3ToT pexnIM IJI NIOJxapnBaHnI Do 30oNTocT KOpOuKn TaKIN NIIeBbIX npOyKTOB, KaN HnIPOBaHNbIe POnyKtbl ININ MACO, C NOMOUsbIO rpiJIneu. B 3tOM pexnme npriroTOBHe nIKPOBONHbI He IcNoJIb3yOTcR.

I Ipn nprirotOBHeHn B peXHMe rpnI npednoHTeIbHO nCNOJb3ObaTb rpInb DUO (noDpO6Hee cm. Ctp. 56).
BpeXmme rpnIa HcNOb3ObaTb TOnbKO JapocToKyu Nocuyd.
I IpnpaobeteBpeKIMepnJIaDmMaHnynpIcMNCocydoI npncno6bneHMnNoIb3ObaTbcN3OInpyUoUMn nepuataKam. IpnycytCTbyet pck o6xecbra.
1-3Tan: npedbapntelbny pa30peB rpn
- BbIbpaTb pexnM rpnIa C nmoIbIpepyIaTopa MoHocTN.
2.CnmooupopeyIaTopaBpeMeHnyCTaHOBtIpeDbapntelbHypa3oRpeB.
3.Пeчв BKJIIOUaTeTcA.
4. По завршени прдварптельно разогрва neч bblKLOUaetca.Tenepb MOKHO pnicTynatb K npiroTOBHeHIO niiu.
2-3Tan: npriroTOBJIeHne nIu BpeXnme rpnra
- NomecTb NiueBle npodykTb Ha peweKty DUO n NomecTb ee B ceHTp BpaiaoUeeroCn noHocA. 3akpbIb DBepy.
2.C nomoIbH peryIaTopa yCTaHOBnTB BpeM npriroTOBneHn. Pecb BKIOUcAeTcra.
Bo Bpem npriroTOBneHn nns rpnb moKet packaIbcs n racHytb.3To COBepeHHo HopMaIbHo, n no3BOJraR n36ExaTb neperpeBa.
KoM6uHnpOBaHHbI peXIM «MnKpOBoJHbI + rpnJIb» *
IcnoB3OBaTb 3OT pexnM dna 6bICTPO npiroTOBHeHnN nn pa3oRpeBaHnN nIeBbIX npOyKTOB C NOMOJIbMO MKNpOBoJH, C NOJyEHm XpyCTaJe 30JOTnCTOn Kopoynk 6laOapar rpnIO neH.
B KOM6HnHpOBaHHoPexKHe IMeIOTe 3 ypoBHa MoUHOCTn:
| Символ | Рек imm | Со�[bet)cTBуюця мошность |
| гриль сильны + мікровол-ны слаб们 | 800 BT- 150 BT | |
| гriль среши + мікровол-ны среши | 700 BT - 200 BT | |
| гriль слаб们 + мікроволны сильны | 600 BT - 300 BT |
I Ipn nprirotobneHn Ha rpnHe npednoHTeJbHo nCNoJb3OBaTb pewetky DUO (npo6hee cm. cTp. 56).
BpeXnme "MnKpOBOJHbI+rgnIb" NcNoIb3OBA TbJbKO JapocToiKyIO nocyU, OndHOBpeMeHHo CToiKyIO K MnKpOBOJHaM.
I Ipn pa6ote B pexnme rpnnaIg MaHnpyaun C nocydoI npncno6bneHnMn noIb3OBaTbcra TepMOH3OJIpyUoumnykabnamn. PnncytCTByeT pck O6xeycbca.
1.Пи рабоTeВКOM6инрованHom ржIMe, HeT Heo6xOДМОCTn pa3OrpeBaTb rPJIb npEiBapITeIbHO.
2. NomecTnTB nIuBbI npOyKtbl Ha peWetKy DUO n NomecTnTB ee B ceHTp BpaauoUeOra NOHoca.
3.C NOMOJIbOppeRyIaTopaMOUHOCTHYcTaHOBnTB JeJIaEMbIKOMbHNHPoBaHHbIPeXIM «MKNPOBOJIbI+PpJIb」-CJIa6bI, CpeDNHmNINCNJIbHbI
4.C NOMOUsbOp epyIaTopa BpemeHnyCTaHOBnTb Bpem.
5.ПeчВКЛIOuaeTcra.
Bo Bpem npiroTOBHeHn nnu rpnb MoKet paKaNrTbCn rachyTB.3To COBepWeHNO HopMaIbHO, nNo3BOJReT N36eKaTb neperpeBa
PerylnpobAHne BpeMeHn MoUHOCTN
MoUHOCtB M BpEMMOryTpeYIIpOBaTbCA BO BpEMnPnIroTOBJIeHNA C NOMOuBo COOTBeTCTByIOxNxpeYJIrTopoB. Pech ABToMaTHueCKn I3MeHReT yCTaHOBKn Ha OCTaBlueecra BpEMn.
BbIKJIOUeHne neu
Ieub aBTOMaTnueckn BbIKNoUaetaTcno NCTeueHm BpeMeH, yctaHOJIeHHOro peryIaTOpom. BoBpMa npiroTOBJeHn Pius nMeetcBO3MOxHoCTb:
- OctaHOBtIb npiroTOBHeHne NiU,OTKpbIB DBepu neu. Pecb BbIKIOHaETcN BkIOHaTcCHOBA pni 3aKpbITm DBepubl.
- OctaHOBnTB nprirotOBJIeHne pIu, yCTaHOBnB peryJnatop BpeMeHN Ha 0.
PekomeHdaaunno npnroTOBJeHNIO nIu
Bpem, yka3aHHoe B tabnue raBnE TcOpHeHTnpoBOHbIM. OHO MOKeT n3MeHrTBcA 3BaNCIMOCtN OT cOpMbI, TOnUINHb I TeMnepatypb I NmUeBbIX npOdyKTOB.OTCTaANHe OcyueteBnTbIb NO OKOHuaHn PnroTOBLeHn, pa3OrpeBa nnpa3MopaaKbAHn.
PnirtoBHeHne NmU BpeXmE MnkpoBOnH
-PeKoMeHndaunn IIO npriroTOBneHHO CBexnx OBOeJ.
NcnoIb3ObaTb cocyd n3 xapocToiKoro cTeKnla, npedHa3HaeeHnyo dI npiroTOBHeHn B MmKpOBOnHObBix neaX HaInTb 2-3 cToNoBbIX loKKx XoJOnHO BoBu Ha 250 r CBeKnx OBOeH (ecnn HnXe He yKa3aHO nHOe). 3aONKtB OBOUH 3aKpbITb KpbIshKo.Bo BpeMa npiroTOBHeHn NOMEuTaB 1 pa3. Po OKOHauHn npiroTOBHeHn nepemEuaTb, Doabntb CoNb, 3eJIeH b nn CInBOUHoe MaCNO I 3aKpbITb Ha BpeMa OTCTaINBaHN. Dn JyUWeRo npiroTOBHeHn Nope3aTb CBeKne OBOUH Na KycOuKN.
-PeKoMeHdaaunIpo pa3oRpeBaHnIO DeTcKO rTaHnA.
I Ipeq KOpMneHnem TuaTeNbHO npOBepuTb TeMnpaTypy NnueBbIX npoDyKToB.
6IOKnOBKn OTKJIIOHcNlacb. Ecnn no nCteuehen 15 MmHyT npnbop No-tpexhemy He pa6oTaet,OTKJIIOUHTe erO t cTeu N 60JIbwe He nbITaIeTec NCnOJIb3OBAtB.
Ecnn 3Tu yka3aHn He NOMOrn Bam CnpaBntbC npo6nemO, noDroTOBbTe cJeNyUoune daHHbIe n DOKyMeHtbl:
Moelb n cepinHbI Homep n3denny, yka3aHHbIe c 3aDHe CTOPObI np60pa
- TapaANTMIO
- YeTkoe onncanHe BaSei npo6JeMbI
Iocne 3TOro 6bpatntecb K MeCTHOMy nOCTaBzIKy IIN B cepBcHbI ueHTp.
Ppabnla ydaJIeHnO tXoIob
Прии n3roTOBLeHInунakOBKn pOOn3BOuNTeIb Марк Moulinex cTapaETc o6nIOaTb npaBnla oxpaHbOkpykaHOSeI cpebl.YnaKOBKa cTeHa n3 roФррOBaHHoro KapToHa, KOTOpBn Ha 100% noDJIeXHT nobTOphoN nepepa60Ke.
Ha nlaactmaccobbie deTani npmbopa haheceha mapkpovba c yka3aHnem Bnu da MaTePnala. 3To no3BONnet B daIbHeiMeM oBeCneHTb NOBTOpyo nepepa60Ky TaKx DeTanei.
Bonee noDpOHyU INHOpMaUIO 6 yTnIN3aUIN KaKDoR MaTePnAra Bb MoKeTe nOnyHTB COOTBeCTByUOxN CnyXbax, OTBeuaOuNX 3a nepepaOToKy OTxoIob NO MeCTy BaWero XnTeJIbCTBa.
Oprahn3aun, KOtOpbIe 3aHmAmOTcA yTuIN3aUne OTOxOIOB, INI COtpydnKc cepBncbIX ueHTPOB KOMpaHIM Moulinex OxOTHO OTBeTAT Ha BaUN BONpocbl.

He 3a6bBaIte o6 oxpahe okpykaIoue I cpeIb!
-ПиИЗROTOВЕн И ВАБЕОп рИБОGA bБЛ И NGПЛьЗВАБИ pa3ЛМЧБIE
цEHьI И ПОДLEЖАЦЕ NOВТОН NOPEPA6OТКе MaTePnAbl.
- OThecnte Im B nyHKT c6opbaBtOpcbIpbI yIN HAnpaBbTe B cepBnChbI ceHTp dIy IocneDuOSe nepepaBoTkn.
Pi3Hi pexmnpiroToyBaHHa 78
Pexim"MikpoxBnIbOba nIu" 78
Pexim "Tpnlb" * 79
KombiHOBaHn peXmM"MikpOxBnIbOba nIu + rpnB" * 79
PeryIIOBaHHaNtOyXHocTi / TpIBaIocTi 80
BumKHeHH neqi 80
IHCtpykci3 npiroToyBaHHa 80
PpiroTyBaHHBpeKmim"MikpoxBnIbOba niv" 80
PidirpiBaHH 80
Po3MopoxyBaHHa 80
PnroTuBaHnB PexKmI TlBKn "TprNlb" a6o B KOMbHOBaHOMy peXmI "MikpoxBnIbOaPiu +prnIb" * 81
OuHJENH 81
Texhihnpo6JIemn 82
IopadnctocOBNo ytnilizaauiynaokBkn i HecnpabHnx npnilaib 82
Dani npo ekcnnyatauii Bnnpo6yBaHHa 82
Onnc npnilaIy
Ppnilaand
PnpBvIaHn npucTpi
LHa hepYXOMa deTalb po3TaWOBa hi nd oBeptOBm nIDOnHOM, noCepeNHi neHi.BoHa 3'EdnHa 3 DnHyHom i nepeda npBIDhe 3ycnIHa oBeptOBn niDOnH.

HannpMne KJIbue
LZIeTajb po3aOboHa nID o6eTobm nIDOnHOM, nocepeunHi nei.
3aB4Kn p03MlueHm Ha hi pOiHKam BOHa NiItpmUe o6epTOBni nIDoh i yMOxJIbIIoE NOrO o6epTaHH.
06eptobni nIDOn
Lccklann nio don po3taowabn nocepein hi nei,Ha hnapmHomy KInbci, i nobHen 6ytu xopctko 3akpinlenn ha npnbIDHomy npncptoi. Ioro moKna BnKOpNCTOBvBaTN dIe Bcx BnDIB npiroTByaHH.Bi nCnykntb Dnpo3MiueHH NOcyHN, BnKOpNCTOBvBAHIX dI npiroTByaHH, i nn 3bnpaHH piHN i TBePnx qactnHOK, kI BiDOKpemNIOUoTBcB iD npOyKTIB niac npiroTByaHH.Bi H dyke IerKO BnMaetbca Dn OunieHH.
Pewtka «DyET»*
-Пи ВИКОпСТанHi Функii «ДУET» рeшітka дaе моЖлВicьд ончасно Niirpiribatni Дbl taripiKN. Перша taripiKa po3Miуеться NiД peшітkoI, дpyra -Ha bεрхиЧастNipeшітkn.
- Y pexnmi "Tpnlb" ce npnilaandiae moKlnBictb niDpym'raHOBATn npOdykTu HeBeNkoBvBCOTu. BOHO MaE po3MiUyBaTncb ToHBO u cHTpi o6eTbOro Tn IdoHa.

Panaelb KepyBaHHa

1- IpepeMkaN noTyXhOcti
Hikon He KopriCTyTecb dI MIKPOXBnIbOBO npriOTyBaHH iXi MeTaJIeBIMN KOHTeHepaM. Ondh Ka MoKTe BHKOPrCTOBYBaTH CBIH NOyTOBn pniCTpI dIra HarpIBaHH A6o po3-MOPOKyBaHH NEBmN PNOyKTB MAtJIuHNx NOTkA pni YMObI, IIO BNCota Notka He nepeBnUc 4 cm, He bPaxOByOnu KpnKHy.
CTOCOBHO KPNiKhn - BVKOHyIe BiIDNOBIdHi IHCTpykiiHa ynakobu. II NOTpiBHO 3HrTn H3aJIuHHTN Ha CBOcMyci, Ja Ke MoTe 6ytN BOKPemomy BUnpAdKy. JkIo npO ce He cKa3aHo, He pR3KUYte I 3HIMITb II.
P03mictiNb IOTOK (IOTKN) B CEHTpi NOBOPOTHORO CTONY, 3aJIINIBUIN IpomixKJAK MIMYM 1 CM Do CTInOK neui. KaIO E Deikibka IOTKIB, MIX HMIIN NOBINH 6yTN IpomixKIMIMYM 2 CM.
Pexim "Tpnlb"
Дпя npriroTuBaHнь в cbyomy peximi cneizaihni nocSy He notpiieBn. BnkopnctOByTe ToIcami nocyd,ЯкN Bn BnKOpncTObYeTe dIpy npriroTuBaHn y 3BuaHni neci, To6To TeNIOCTInknnocyd.
HikonHe BnKOpNCTOByTe PnactKOBn Nocyd (BIn MoKe po3PnAbTncra) abo nanebpOuKapToHHn Nocyd (BIn MoKe 3aHrTaC).
I IpoodykTN cniD po3MiuyBaTH Ha BiDcTaHl He MeHwe 2 cm BiD HarpibaHoro eJeMeNTa rPnJ.
KombioBaHn peJxM npiroToyBaHHa "MikpOxBnIbOba nI+ rpnIb"
Iocyd, kIyN He Do3BONHcTbCByBnKOpNCTOBYBaTN B pexkimi "MikpoxBnIbOba nIu", He Do3BONHcTbCBy BnKOpNCTOBYBaTN I B KOM6iHOBAHOMY pexkimi. Iocyd, BnKOpNCtAHNr KfOTo HE Do3BONHcTbCBy B pexkimi "TpInJb", He MOxHa TAKoX BnKOpNCTOBYBaTN I B KOM6iHOBAHOMY pexkimi.
BukopncToByte TInbKn Nocyd i MaTepiAn, CTiKi Jk Do MikpoxBnIb, TaK i do BucKOiTempepatypn.
Kopotka DoBikka 0do KOhteHepi Ta MaTepiJib, Do3BOJeHX Ta He DO3BOJeHX DnB BnKOpNCTaHH B pexmI "micro" (Mikpo)
TpnbJIcIb npnroTybaHna
IbBn3NaHTn TpBnAicTb pInrOToyBaHHaBnX CtpaB,IOnepKnyTeCb npaD, BmIeHnx Ha ynaKOBkax rTOBnX CtpaB i 3amOpoxEHnx npOdyKTiB.
3a BiDcyTHOCTi YITKIN BKA3IbOK, NOJINIb TpnaHmHi Ha Tpr TpNBAJIcTb PniroTOyBaHHa 60 NiirpiBHaHH, NOTPI6Hy npn BkOpNCtAHHi 3BvauHoi neHi. y Bcx Bnpankax KepyITeCb IHCTpyKUIMM 3 pnproToYBaHH, BKNlaDeHmHi y ciJ bpoWupi.
P3hi pexmnpnroToBaHHa
Baawa niu do3B0nre roTyBatn, niirpiibatni i po3mopoxyBatn 6yIb-aki npo4kT. IaIzboR Bn Moxete Bn6paTn Odni 3 Tpbox pexMIM bnproTyBaHHa:
- Pexkim "Mikpoxbunboba niu"
-Пириотувань -Пдirpiвань
-Po3M0pOxyBaHHH
- ABTomatnue hiirpiBaHH
Pekim "Tpnlb"
KombiHOBaHnI pexim "MikpoxBnIbOba niu+ npIb"
Bn6ip notpi6horo pexkmy npirotoybaHHa
3ДИСHIOETbCЯ 3a DONOMOROЮ NepemNKaHa nOTyXHOCTI.

Pexim "MikpoxbnloBa niu"
Ley pejkm BnKOpncToBvEcTbCnI npiroTyBaHH, niirpiBaHH i po3MopoxyBaHH npodykTIB.
① BnKOpncTObyIte tInbKn nocSy, cTikkn do MikoPoxBnIb.
PnirtoybaHH -PiirpiBaHH
-
Покладын рожукten в центri обертоворо пддаюа i за KMпгтдеверцята.
-
北ictabTe notyXhIcTb 3a donomoroo nepemnkaua notyXhOCTi.
- INCTpykui3 npiroToyBaHnCbIXnx OBOHIB
Bibmblnocdyhny "PipeKc", npdaTHy I nI BnKOpncTahHn B mKpOxBnbohux neaH. HanmiTe 2 - 3 cToLoBI noKxN xOnoHoi BOiHa KoxHi 250 r Oobiv (Akuo B Ta6nui HnKJe 3a3NaHeO iHne). DoaiTe OBOi HnKpnIte NocdyHn. Pid cac npiroTuBaHHn po3MiuaTe 1 pa3. No 3aKiHeuHi npiroTuBaHHn nepemiiAte, doaaiTe CInb, cnuei abo macno I nakprin He na Cac BiDctOBAHn.
Дя ONТIMi3aJIпnprotyBaHHa NOpiXte OBOci Ha WMaTOchKl.