MO28MSWH - Microwaves MOULINEX - Free user manual and instructions
Find the device manual for free MO28MSWH MOULINEX in PDF.
| Product type | Microwave oven |
| Brand | MOULINEX |
| Model | MO28MSWH |
| Supply voltage | 230-240 V ~ 50 Hz |
| Rated input power | 1400 W |
| Microwave frequency | 2450 MHz |
| Capacity | 28 L |
| Control type | Rotary knob and touch keys |
| Display | LED (clock, time, weight, power) |
| Automatic programs | 8 programs (milk/coffee, rice, spaghetti, potatoes, reheating, fish, pizza, popcorn) |
| Automatic defrost | Yes, weight adjustment from 100 g to 1800 g |
| Express defrost | Yes, programmable time up to 45 min |
| Sequential cooking | Yes, 2 stages |
| Express cooking | Yes, Start/Express key (30 s to 10 min) |
| Variable power | 11 levels (0% to 100%) |
| Child lock | Yes (long press on Stop/Cancel) |
| Included accessories | Glass turntable, rotating ring, drive shaft |
| Installation type | Countertop or built-in (min height 85 cm) |
| Required ventilation | 20 cm above, 10 cm on sides and back |
| Cleaning and maintenance | Regular cleaning with soapy water; do not use abrasives or dishwasher for accessories |
| Safety | Door locks, automatic stop if door opened |
Frequently Asked Questions - MO28MSWH MOULINEX
User questions about MO28MSWH MOULINEX
0 question about this device. Answer the ones you know or ask your own.
Ask a new question about this device
Download the instructions for your Microwaves in PDF format for free! Find your manual MO28MSWH - MOULINEX and take your electronic device back in hand. On this page are published all the documents necessary for the use of your device. MO28MSWH by MOULINEX.
USER MANUAL MO28MSWH MOULINEX
Preparation . EG-8
Position EG-8
INSTRUCTIONS FOR USE. EG-8
Foods. EG-8
Containers and materials. EG-9
Cooking time EG-11
Resting time EG-11
SETTING THE TIME EG-12
USING THE AUTOMATIC PROGRAMMES. EG-12
AUTO COOK. EG-12
AUTO DEFROST. EG-13
USING THE MANUAL FUNCTIONS. EG-14
MICRO MODE (microwaves only) EG-14
SPEED DEFROST EG-15
USING THE QUICK START FUNCTION. EG-15
MULTI-STAGE COOKING. EG-16
STOPPING THE OVEN EG-17
ACTIVATING THE CHILD SAFETY EG-17
CLEANING AND MAINTENANCE EG-18
SPECIFICATIONS. EG-19
TROUBLESHOOTING. EG-19
WARNING
IMPORTANT SAFETY INSTRUCTIONS READ CAREFULLY AND KEEP FOR FUTURE REFERENCE.
The microwave oven is intended to be used freestanding only.
This appliance is intended for domestic household use only and should not be used for any other purpose or in any other application, such as for non-domestic use or in a commercial environment.
This appliance can be used by children aged from 8 years and above and persons with reduced physical, sensory or mental capabilities or lack of experience and knowledge if they have been given supervision or instruction concerning use of the appliance in a safe way and understand the hazards involved. Children shall not play with the appliance. Cleaning and user maintenance shall not be made by children unless they are older than 8 and supervised.
If the supply cord is damaged, it must be replaced by the manufacturer, its service agent or similarly qualified persons in order to avoid a hazard.
Do not use harsh abrasive cleaners or sharp metal scrapers to clean the oven door glass
since they can scratch the surface which may result in shattering of the glass.
WARNING: If the door or door seals are damaged, the oven must not be operated until it has been repaired by a competent person.
WARNING: It is hazardous for anyone other than a competent person to carry out any service or repair operation that involves the removal of a cover which gives protection against exposure to microwave energy.
WARNING: Liquids and other foods must not be heated in sealed containers since they are liable to explode.
Microwave heating of beverages can result in delayed eruptive boiling; therefore care must be taken when handling the container.
Only use utensils that are suitable for use in microwave ovens.
When heating food in plastic or paper containers, keep an eye on the oven due to the possibility of ignition.
If smoke is emitted, switch off or unplug the appliance and keep the door closed in order to stifle any flames.
The contents of feeding bottles and baby food jars shall be stirred or shaken and the temperature checked before consumption, in order to avoid burns;
Eggs in their shell and whole hard-boiled eggs should not be heated in microwave ovens since they may explode, even after microwave heating has ended.
The oven should be cleaned regularly and any food deposits removed.
Failure to maintain the oven in a clean condition could lead to deterioration of the surface that could adversely affect the life of the appliance and possibly result in a hazardous situation.
During use the appliance becomes hot. Care should be taken to avoid touching heating elements inside the oven.
The appliance is not intended to be operated by means of an external timer or separate remote-control system.
The door or the outer surface may get hot when the appliance is operating.
- Keep the appliance and its cord out of reach of children less than 8 years.
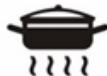
The microwave oven is intended for heating food and beverages. Drying of food or clothing and heating of warming pads, slippers, sponges, damp cloth and similar may lead to risk of injury, ignition or fire.
The appliance must not be placed in a cabinet.
For the details for cleaning door seals, cavities
and adjacent parts, please see section “Cleaning and Maintenance” on page EG-18.
- Keep a free space 20 ~cm minimum above the top surface of the oven.
Group 2, Class B equipment This equipment is Group 2 equipment as it intentionally generates radio-frequency energy for treating material and is designed to be used in domestic premises or an establishment directly connected to the low voltage electricity distribution network supplying buildings used for domestic purposes (Class B).
IMPORTANT SAFETY INSTRUCTIONS
When the microwave oven is switched off, please disconnect it from the supply mains, to do this you must remove the plug from the supply outlet.
The plug shall be the main disconnection device and shall remain accessible at all times.
The microwave oven cannot be operated with the door open due to the safety interlocks built into the door mechanism which switch off the cooking functions when the door is opened. Operating the microwave oven with the door open could result in harmful exposure to microwave energy. It is important not to tamper with the door mechanism.
Do not let water or any other liquid enter the oven through the ventilation slots.
Do not place any object between the oven front face and the door or allow soil or cleaner residue to accumulate on sealing surfaces.
Avoid using straight-sided containers with narrow necks.
Stir any liquid before placing the container back into the microwave oven half way through the heating time.
After heating, always allow standing time, stir or shake the contents and carefully check the temperatures before consumption.
Do not use harsh abrasive cleaners or sharp metal scrapers to clean the oven door glass since they can scratch the surface, which may result in shattering of the glass.
A steam cleaner is not to be used.
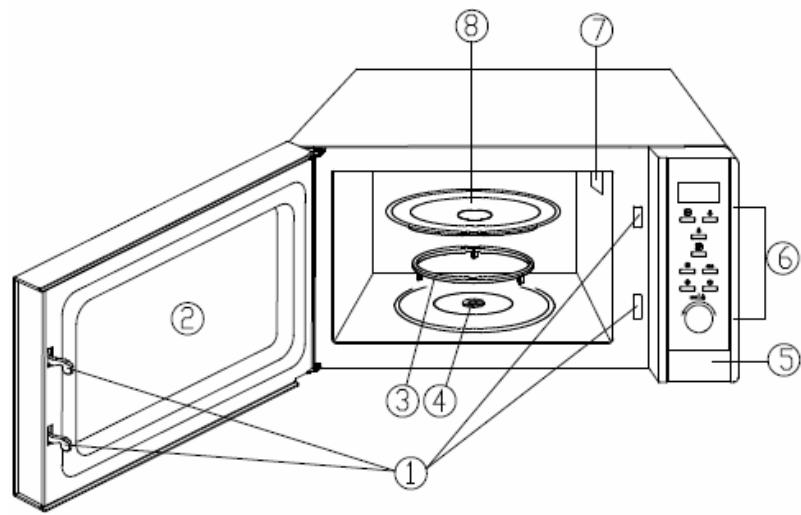
APPLIANCE DESCRIPTION
- Door locking system
- Door
- Ring bearing
- Drive
- Door release button
- Control panel
- Wave guide cover
- Turntable
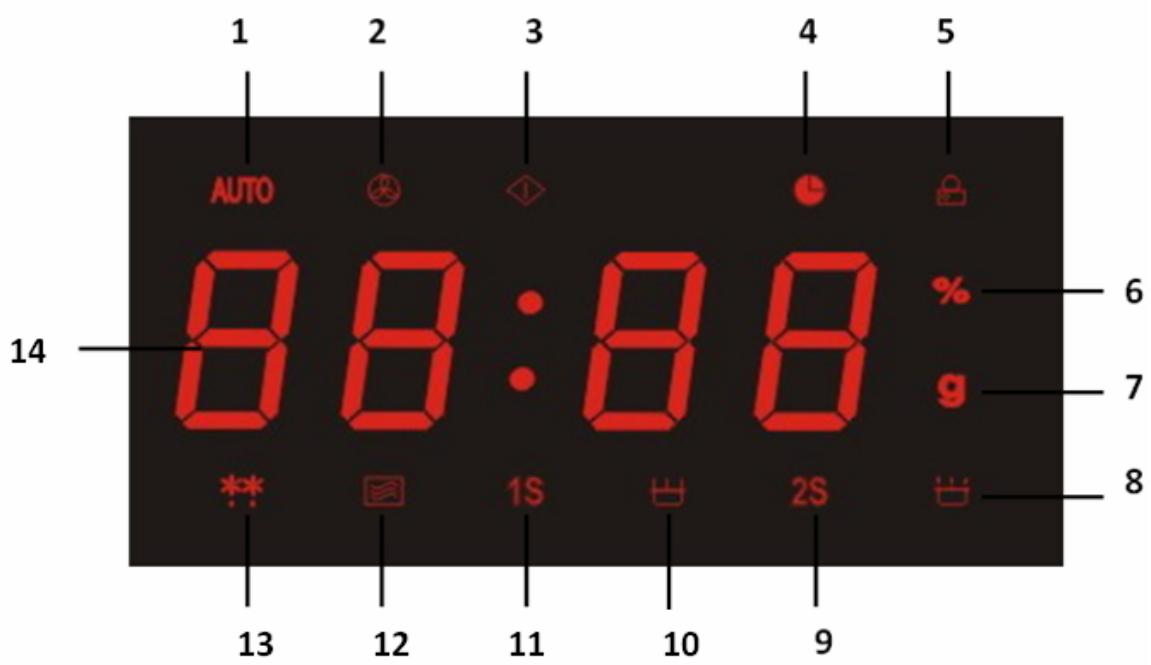
DISPLAY
Symbols:
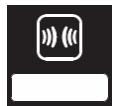
- Automatic program
- Power level 10% to 90%
- Power level 0
- Cooking stage 2
- Time — Weight setting
- Power level 100%
- Clock mode
- Cooking stage 1
- Child safety lock
- Microwave mode
- Power level (%)
- Defrost mode
- Weight (grams)
Display:
- Clock — Time — Weight — Power
CONTROL PANEL
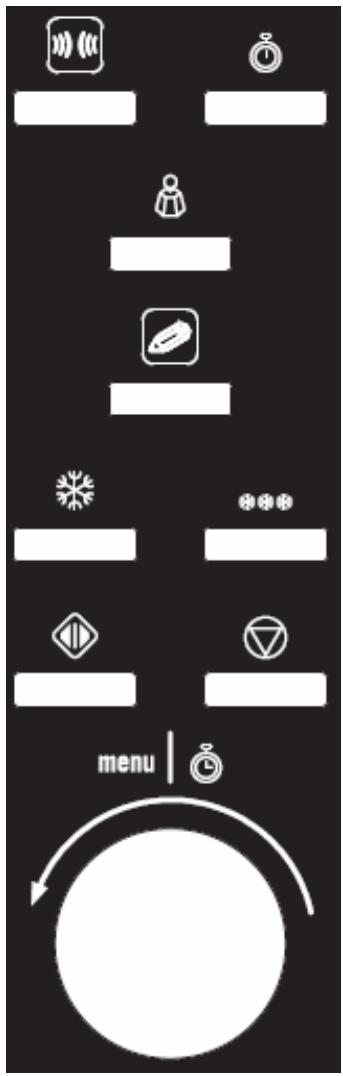
Buttons:

Microwave power setting

Clock

Weight setting

Multi-stage cooking

Speed defrost
Auto defrost

Start and quick start

Stop/Cancel + Child safety control
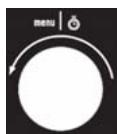
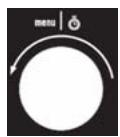
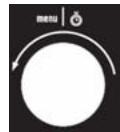
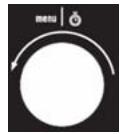
Rotary knob:

Clock and cooking time setting,
Auto cooking menu setting
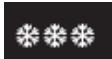
ACCESSIONS
Drive
This fixture is located in the middle of the oven, beneath the turntable. It is connected with the motor and drives the turntable round.
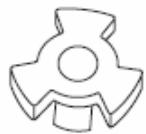
Ring bearing
This component is placed in the middle of the oven, beneath the turntable. It has rollers to support the turntable while leaving it free to rotate.
Turntable
This glass plate is placed on the ring bearing in the middle of the oven and must be engaged with the drive. It can be used for all types of cooking. Containers containing food to be cooked or to collect particles and juices produced by food during cooking are placed on the turntable. It is easily removed for cleaning.
INSTALLATION
Preparation
Unpack the accessories, wash them and wipe them off carefully.
Position the ring bearing and then the turntable in the centre of the oven.
The turntable must be properly engaged with the drive.
Position
Your appliance can be installed in one of two ways:
- On a worktop: Position the appliance on a flat and stable surface, capable of supporting the oven and its contents. The oven must be handled with care, remembering that the control panel side is the heavier.
- In a niche: The niche must be at least 85~cm above floor-level. Centre the appliance in the niche so that it does not touch the sidewalls.
Adequate ventilation is essential: the minimum clearances are 20~cm above the oven and 10~cm at the sides and rear.
Install the appliance away from any source of heat such as a traditional oven or radiator. It has been designed and tested for use in ambient temperatures up to 35^ .
Ensure that the ventilation holes of the appliance are not obstructed.
INSTRUCTIONS FOR USE
The following recommendations will help you get the greatest benefit from using your oven. Please read them carefully.
Your appliance can be used to defrost, reheat and cook foods much faster than is possible with traditional cooking methods.
Foods
Forbidden foods
If you choose a cooking method using microwaves, you should never:
-
Attempt to fry food – it is impossible to control the temperature of the oil and other fats – fire-risk.
-
Attempt to cook or warm up eggs in their shells, hard-boiled eggs with or without their shells or snails – they may explode.
- Attempt to cook food in an intact shell (e.g. chestnuts) or hard skin (tomatoes, potatoes, sausages) – always make a slit.
Food temperatures
The action of microwaves is such that only the food is heated. The container may, therefore, remain cold or cool while the food that it contains is burning hot.
To avoid any risk of burning, always stir before serving and check the temperature carefully before serving – especially to children.
Shake feeding bottles well and try a few drops on the back of your wrist to check the temperature.
Preparing food for cooking
Before warming feeding bottles and small pots, remove teats and covers.
Remember to cover the food in order to:
- avoid any splashing of the oven cavity,
- retain sufficient moisture for cooking.
Heating liquids
When heating liquids, a sudden overflow may occur when you take the container to remove it from the appliance. In fact, when the temperature reaches boiling point, steam tends to remain trapped in the liquid until it is disturbed.
To avoid this superheating effect and the consequent risk of scalding, always place a plastic spoon in the liquid to be heated.
Containers and materials
Below, you will find details of the various types of containers, which can be used or must not be used for the chosen cooking method.
"micro" mode (microwaves)
Use containers suitable for microwave cooking.
A container can easily be tested for microwave "transparency":
Place the empty container on the turntable together with a glass of water and run the oven for one minute at maximum power.
After one minute:
- if the container is cold, it is "transparent" and can be used for microwave cooking,
- if the container is warm or hot it is absorbent and must not be used for microwave cooking.
Never use hermetically sealed containers.
Remember to remove covers and stoppers from feeding bottles, jars, bottles and plastic containers.
Disposable containers
Never leave the appliance to run unsupervised when using disposable containers in plastic, paper or other inflammable materials.
If you see smoke appear, keep the oven door closed and disconnect your appliance.
Metal containers
Never use metallic materials and containers for microwave cooking.
You can, however, use your appliance to heat or defrost certain preparations in metallic trays, provided the height of the tray does not exceed 4cm , not including the cover.
With regard to the cover, follow the instructions on the package. It will have to be removed or left in place, as the case may be. If not indicated otherwise, play safe and remove it.
Centre the tray(s) on the turntable, leaving at least 1 cm clearance from the oven walls. If there are several trays, space them at least 2 cm apart.
Summary of containers and materials permitted and not permitted in "micro" mode
| Materials Containers | Suitable for micro-waves | Remarks |
| METAL | ||
| Aluminium foil | In certain cases | May be used in small quantities to protect certain parts of the food from overcooking. Risk of electric arcing if the foil is too close to the oven walls or you have used too much. |
| Aluminium tray | In certain cases | See “Metal containers”, above |
| Metal sheet | No | Risk of electric arcing and fire |
| Freezer bag ties | No | Risk of electric arcing and fire |
| GLASS | ||
| Heat-resistant glass | Yes | Perfectly suitable |
| Glass with metal-based decoration (gold, lead etc.) | No | Risk of electric arcing |
| Fine glassware | No | May break or crack if heated suddenly |
| PLASTIC | ||
| Plastic containers | Yes | Perfectly suitable if the plastic is heat-resistant. Certain plastics may be prone to deformation or discoloration after repeated |
| use. Do not seal closed. | ||
| Plastic film | Yes | Can be used to retain moisture and prevent spitting. The plastic must not touch the food during cooking. Puncture the plastic to allow excess vapour to escape. Use oven gloves to remove the plastic film after cooking (risk of burns from hot vapour escaping from the container). |
| DISPOSABLE CONTAINER MATERIALS FORBIDDEN IN GRILL MODE | ||
| Polystyrene cups or packaging | Yes | Can be used for heating liquids and foods for a short time. Overheating could melt the polystyrene, which would then become mixed with the food. |
| Paper bag | No | Fire-risk |
| Paper plates, cups, napkins or absorbent paper. | Yes | May be used for heating and brief cooking |
| Grease-proof paper | Yes | Can be used to retain moisture and prevent spitting. Short cooking times. |
| Recycled paper | No | Risk of electric arcing |
| PORCELAIN | ||
| Porcelain containers | Yes | Perfectly suitable except with metal-based decoration (gold, lead etc.). |
Cooking time
To determine the right cooking time for your foods, follow the instructions on the packaging of ready-made dishes and deep-frozen products.
In the absence of any precise indication, divide the cooking or reheating time given for a conventional oven by at least three.
Do not programme a cooking time longer than necessary. You will then avoid any risk of overcooking or setting fire to your food.
Resting time
Microwaves act close to the surface and penetrate food to a depth of 2 to 3cm . once the surface layers are hot, heat penetrates to the centre of the food by conduction, i.e. the hot parts heat the cold parts. This makes it a good idea to allow the food to rest after removing it from the microwave so that the heat can penetrate to the centre.
SETTING THE TIME
You must set the clock after connecting your appliance or after a break in supply.

Press the clock button once or twice.
- The clock can be set in 12hr or 24hr format.
Adjust the hours by turning the rotary knob.
Press the clock button to enter the hours setting.
- The "00" indication for the minutes will be shown on the display.
Adjust the minutes by turning the rotary knob.
Press the clock button to enter the minutes setting.
The clock is now set.
USING THE AUTOMATIC PROGRAMMES
With the automatic programmes, everything is calculated automatically. You simply have to specify the type of food and its weight and the oven will automatically select the cooking mode, the power and appropriate cooking time.
Your oven has 2 types of programme, depending on the desired action:
- AUTO COOK for cooking
- AUTO DEFROST for defrosting
If you use an automatic programme, you cannot change the power or the cooking time.
At the end of cooking, the oven will beep 4 times and "End" will be shown on the display.
AUTO COOK
Automatic cooking programme
8 programmes are available:
1.
2.

3.
4.

5.
6.

7.
8.

| Code | Food/cooking mode |
| 1 | Milk/Coffee (200 ml/cup), 1 to 3 cups |
| 2 | Rice (g), 150 to 600g |
| 3 | Spaghetti (g) 100 to 300g |
| 4 | Potato (230g each) 1 to 3 |
| 5 | Auto Reheat (g) 200 to 800g |
| 6 | Fish (g) 200 to 600g |
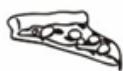
| 7 | Pizza (g) 150 to 450g |
| 8 | Popcorn (99g) |
The result of auto cooking depends on factors such as fluctuation of voltage, the shape and size of food, your personal preference as to the doneness of certain foods and even how well you happen to place food in the oven. If you find the result at any rate not quite satisfactory, please adjust the cooking time a little bit accordingly.
- For rice add cold water before cooking.
- For Spaghetti add boiled water before cooking.
- For potatoes peel the potatoes and cut them into 2 or 3 equal pieces before cooking.
Use
Place the food at the centre of the turntable and close the door. Select the type of food by turning the rotary knob anticlockwise until the number corresponding to the food to be cooked is displayed.
- The number of the programme will be shown on the display, together with "AUTO" symbol.

Select the weight by pressing the weight setting button.
- The weight with the "g" symbol or the number of cups will be shown on the display.
Press the start button.

- The oven will start cooking for a time selected to suit your food perfectly.
AUTO DEFROST
Automatic defrost programme
Use
Place the food at the centre of the turntable and close the door.
Press the auto defrost button.

Select the weight (100 to 1800g ) by pressing the weight setting button.

- The weight will be shown on the display, together with the "g" symbol.
Press the start button.

- The oven will start defrosting for a time selected to suit your food perfectly.
USING THE MANUAL FUNCTIONS
Use the manual functions, you can cook, reheat or defrost all kinds of food. Here, in contrast to the automatic programmes, you must make your own selection of cooking mode, cooking time and power.
1 cooking mode is available:
Micro-Cooking with microwaves
The cooking mode cannot be changed during cooking.
At the end of cooking, the oven will beep 4 times and "End" will be shown on the display.
MICRO MODE (microwaves only)
Use this mode for manual cooking, heating or defrosting of your food. Place the food at the centre of the turntable and close the door.
Set the desired power by pressing the power setting button the required number of times.
| The number of times | Power |
| 1 | 100% |
| 2 | 90% |
| 3 | 80% |
| 4 | 70% |
| 5 | 60% |
| 6 | 50% |
| 7 | 40% |
| 8 | 30% |
| 9 | 20% |
| 10 | 10% |
| 11 | 0% |
The power will be shown on the display, together with the “%” symbol and the
symbol for the microwave cooking mode.
Select the cooking time, using the rotary knob.
- The cooking time will be shown on the display.
The maximum time setting in microwave mode is 95 minutes.
Press the start button.

- The oven will start cooking for the selected time.
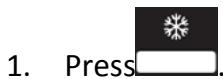
SPEED DEFROST
Use this mode to quickly defrost food.
Place the food at the centre of the turntable and close the door.
Press the speed defrost button.

Select the defrosting time, using the rotary knob.
- The defrosting time will be shown on the display.
The maximum time setting in speed defrost mode is 45 minutes.
Press the start button.

The oven will start defrosting for the selected time.
NOTE: Defrost process divides into three stages, each stage needs 1/3 time, after defrosting 2/3 time the system will sound beeps to remind you to turn over the
food and pause until you press and the system resume.

to enter into the next defrosting stage,
USING THE QUICK START FUNCTION
If you wish to heat food for only a short time, use the "Start and quick start" button.
Place the food at the centre of the turntable and close the door.

Press the "Start and quick start" button.

- The oven will start automatically for 30 seconds at maximum power.
Press a second time the "Start and quick start" button to increase the heating time by 30 seconds to reach 1 minute. After 1 minute, repeatedly press the "Start and quick start" button to set the desired heating time. Each time the "Start and quick start" button is pressed the heating time will be increased by 1 minute. The maximum heating time is 10 minutes.
MULTI-STAGE COOKING
Your oven can be programmed for up to 2 automatic cooking sequences.
Suppose you want to set the following cooking programmes:

- Press

- Select the desired defrosting time, using the rotary knob.

- Select the microwave power level by repeatedly pressing
-
Select the cooking time, using the rotary knob.
-
Press to start cooking.
NOTE: Defrost process divides into three stages, each stage needs 1/3 time, after defrosting 2/3 time the system will sound beeps to remind you to turn over the food
and pause until you press to enter into the next defrosting stage, and the system resume.
Speed defrost can only be set in the first stage of the multi-stage cooking programme.
Auto cook, auto defrost and quick strat cannot be set in the multi-stage cooking programme.
STOPPING THE OVEN
Pause
You can interrupt the operation of the oven at any time to:
- check the progress of cooking,
- turn or stir the food,
- allow the food to rest.
To do this, you can simply open the oven door or press once on the stop/cancel
button.

- The oven will stop and hold the cooking status in memory.
- No change in the display will occur during the pause.
To restart cooking, press the start button.

To cancel the cooking, press the stop/cancel button again.
- The clock time will then reappear on the display.
ACTIVATING THE CHILD SAFETY
Your oven is equipped with a control locking system, which prevents its being started unintentionally or by unsupervised children.
To lock:

Keep the stop/cancel button pressed for 3 seconds.
- The oven will beep to indicate that the controls are locked.
- The "Safety" symbol will appear on the display.
The buttons are locked.
- Any attempt at starting will cause the oven to beep.
To unlock:
Keep the stop/cancel button pressed for 3 seconds.
- The oven will beep to indicate that the controls are unlocked.
- The "Safety" symbol will disappear on the display.
This function is only available when the oven is stopped.
CLEANING AND MAINTENANCE
Disconnect the electrical supply to the oven before cleaning.
General Advice
Frequent cleaning prevents smoke and bad odours during cooking and also sparking in the oven cavity and around the door seal.
Do not let food deposits or grease accumulate inside the oven cavity or on the door seal. If your microwave oven is fitted with a waveguide cover (usually located inside the oven cavity on the right side wall) it must be kept clean at all times, should food deposits or grease be allowed to accumulate on the cover, sparking will occur and may damage your oven invalidating the warranty.
Before any maintenance or cleaning, disconnect the oven from the mains supply and wait for it to cool to room temperature.
Oven Door
Remove any food deposits and grease between the door seal and oven cavity using a damp cloth, it is important to keep this area clean at all times.
Interior Walls
Remove any grease splashes from the oven cavity walls with soap and water, then rinse and dry.
The door seal and oven cavity have to be particularly well cleaned to ensure the door will close properly and to avoid sparking between the oven cavity and door assembly. Do not use abrasive products such as scouring pads which will damage the surfaces of the oven cavity and door.
Only warm soapy water must be used to clean stainless steels surfaces.
Outer Surfaces
To clean the outside surface, use a damp cloth.
Avoid using abrasive products such as scouring pads that may damage the cosmetic surfaces. Make sure water does not seep into the ventilation slots.
Accessories should be washed in warm soapy water by hand.
CAUTION:
Some waveguide covers can be easily damaged take care when cleaning.
Do not wash accessories in a dishwasher.
Cleaning surfaces that come into contact with food
For hygiene safety the glass tray should be cleaned regularly as the item may come into contact with food.
The item should be cleaned with warm soapy water and dried thoroughly.
If the inside of the oven cavity and door seal are not kept perfectly clean there is a danger of damage due to sparking inside the oven cavity invalidating the warranty.
Never scrape the oven cavity walls with sharp objects.
SPECIFICATIONS
Rating input (microwave): 1400W
Voltage: 230 - 240V 50Hz
Microwave frequency: 2450MHz
TROUBLESHOOTING
| Normal Phenomena | |
| Microwave oven interfering TV reception | Radio and TV reception may be affected when the microwave oven is operating. It is similar to the interference of small electrical appliances, like mixer, vacuum cleaner and electric fan. It is normal. |
| Dim oven light | During low power microwave cooking, the oven light may become dim. It is normal. |
| Steam accumulating on door, hot air out of vents | During cooking, steam may come out of food. Most of steam will escape from the vents. But some of them may accumulate on positions like the oven door. It is normal. |
| Oven operation accidentally with no food in. | It is forbidden to operate the appliance without any food inside. It is very DANGEROUS. |
| Problem | Possible Cause | Solution |
| Oven cannot be operated. | Power cord not plugged in tightly. | Unplug the appliance then plug it in again after 10 seconds. |
| There is something wrong with the mains socket. | Test the mains socket by plugging another appliance in. | |
| Oven does not heat up. | Door not closed well. | Close door well. |
| Glass turntable makes noise when microwave oven operates. | Dirty roller rest and oven bottom. | Refer to ‘CLEANING AND MAINTENANCE’ to clean dirty parts. |
We apologise for any inconvenience caused by minor inconsistencies in these instructions, which may occur as a result of product improvement and development.
Kesa Electricals © UK: EC1N 6TE 08 / 04 / 2013
TABLE DES MATIÈRES
AVERTISSEMENTS FR-2
CONSIGNES DE SECURITE IMPORTANTES FR-6
DESCRIPTION DE L'APPAREIL FR-6
AFFICHAGE FR-7
PANNEAU DE CONTROL FR-8
ACCESSIONES FR-9
INSTALLATION.. FR-9
Préparation FR-9
Positionnement FR-9
INSTRUCTIONS D'UTILISATION FR-9
Aliments.. FR-10
ARRÊTER LE FOUR FR-19
ACTIVER LE VERROU ENFANT FR-20
ENTRETIEN ET NETTOYAGE FR-20
SPécifications FR-21
DéPANNAGE FR-22
AVERTISSEMENTS
INSSTRUCTIONS DE SECURITE IMPORTANTES LIRE AVEC ATTENTION ET GARDER POUR DE FUTURES UTILISATIONS
Bague support rotatif
Hotline Darty France
Kesa Electricals © UK: EC1N 6TE 08/04/2013
INHOUD
WAARSCHUWINGEN. NL-2
BELANGRIJKE VEILIGHEIDSVOORSCHRIFTEN.. NL-5
BESCHRIJVING VAN DE ONDERDELEN NL-6
DISPLAY .NL-6
BEDIENINGSPANEEL .NL-7
ACCESSIONES.. NL-7
INSTALLATIE.. NL-8
Voorbereiding.. NL-8
Positie . NL-8
GEBRUKSINSTRUCTIES .NL-8
Voedsel . NL-9
Houlders en materialen NL-9
Kooktijd NL-11
Rusttijd NL-12
DE TIOD INSTELLEN NL-12
DE AUTOMATISCHE PROGRAMMA'S GEBRUIKEN.. NL-12
AUTO COOK. NL-13
AUTO DEFROST.. NL-14
DE MANUELE FUNCTIONS GEBRUIKEN.. NL-14
MICRO MODUS (alleen microgolven) .NL-15
SNEL ONTDOOIERN NL-16
DE SNELLE START-FUNCTIE GEBRUIKEN.. NL-16
MEERFASE KOKEN.. NL-17
DE OVEN STOPPEN. NL-18
DE KINDERBEVEILIGING ACTIVEREN NL-18
REINIGING EN ONDERHOUD. NL-19
SPECIFICATIONS.. NL-20
PROBLEEMOPLOSSING NL-20
WAARSCHUWINGEN
Start and quick start

Stop/Annuleren + kinderbeveiling
Draaiknop:

Kesa Electricals © UK: EC1N 6TE 08/04/2013
INDICE
ATTENZIONE
IMPORTANT ISTRUZIONI DI SICUREZZA. AT-5
DESCRIZIONE DELL'APPARECCHIO. IT-5
DISPLAY. IT-6
PANNELLO DI CONTROLLO IT-7
ACCESSORI. IT-7
INSTALLATION IT-8
Preparazione IT-8
Posizionamento IT-8
Kesa Electricals © UK: EC1N 6TE 08 / 04 / 2013
CONTENIDO
ADVERTENCIAS. ES-2
MEDIDAS DE SEGURIDAD IMPORTANTES ES-5
DESCRIPCION DEL APARATO ES-6
PANTALLA ES-7
PANEL DE CONTROL ES-8
ACCESORIOS ES-8
INSTALLACION ES-9
Kesa Electricals © UK: EC1N 6TE 08 / 04 / 2013
OBSAH
VAROVÁNÍ CZ-2
DULEZITÉ BEZPECNOSTNI POKNY CZ-5
POPIS PRISTROJE CZ-5
DISPLEJ CZ-6
OVLÁDACÍ PANEL CZ-7
Příslušenství CZ-7
INSTALLACE CZ-8
Příprava CZ-8
Poloha .CZ-8
POKNY K POUZITI CZ-8
Potraviny CZ-8
Nádoby a materiaíly CZ-9
Cas vaRENi CZ-11
Klidovy chas. CZ-11
NASTAVENI CASU CZ-11
POUZITI AUTOMATICKYCH PROGRAMU CZ-12
AUTOMATICKÉ VARENÍCZ-12
AUTOMATICKÉ ODMRAZOVÁNÍ CZ-13
POUZITI MANUALNICH FUNKCI CZ-14
MIKRO REžIM (pouze mikrovlny) CZ-14
RYCHLÉ ROZMRAZOVÁNÍ CZ-15
FUNKCE RYCHLEHO STARTU CZ-16
VICEFÁZOVÁ PRÍPRAVA POKRMU CZ-16
VYPNUTI TROUBY CZ-17
AKTIVACE DÉTSKÉ POJISTKY CZ-17
CISTENIA UDRZBA CZ-18
SPECIFIKACE CZ-19
ODSTRANOVIANI PROBLEMU CZ-19
VAROVÁNÍ
Kesa Electricals © UK: EC1N 6TE 08/04/2013
OBSAH
VAROVANIA. SK-2
DOLEZITE BEZPECNOSTNE POKNY SK-5
POPIS ZARIADENIA SK-6
DISPLEJ SK-6
OVLADACI PANEL SK-7
PRÍSLUŠENSTVO SK-7
INŠTALÁCIA. SK-8
Priprava SK-8
Poloha SK-8
NAVOD NA POUZITIE SK-8
Potravyn SK-8
Nádoby a materiaíly SK-9
Čas ohrevu. SK-11
Pokojovýčas. SK-11
NASTAVENIE HODÍN SK-12
POUZITIE AUTOMATICKYCH PROGRAMOV SK-12
AUTO VARENIE SK-12
AUTOMATICKÉ ODMRAZENIE SK-14
POUZITIE MANUALNYCH FUNKCIÉ SK-14
MIKRO REZIM (iba mikrovlny) SK-14
RYCHLE ROZMRAZENIE .SK-15
FUNKCIA RYCHLEHO ZAPNUTIA SK-16
VIACFÁZOVÁ PRÍPRAVA POKRMU. SK-16
VYPNUTIE RURY. SK-17
AKTIVÁCIA DETSKEJ POISTKY SK-17
ČISTENIE A UDRŽBA SK-18
TECHNICKÉ UDAJE SK-19
ODSTRAÑOVANIE PROBLEMOV SK-19
VAROVANIA
DOLEZITÉ BEZPEČNOSTNÉ POKNY PRECÍTAJTE SI TIETO POKNYA USCHOVAJTE ICH NA BUDUCE POUZITIE
Kesa Electricals © UK: EC1N 6TE 08/04/2013
ICIINDEKILER
UYARILAR TR-2
CIHAZ AÇIKLAMASI TR-5
EKRAN TR-6
KONTROL PANELI TR-7
AKSESUARLAR TR-7
KURULUM TR-8
Hazirlik. TR-8
Konum TR-8
KULLANIM TALIMATLARI TR-8
Yiyecekler TR-8
Darty Turkey Limited
Kesa Electricals © UK: EC1N 6TE 08/04/2013