
AP688 - Air purifier WHIRLPOOL - Free user manual and instructions
Find the device manual for free AP688 WHIRLPOOL in PDF.


| Product Type | Air Purifier |
| Brand | Whirlpool |
| Model | AP688 |
| Coverage Area | Up to 500 sq. ft. |
| CADR (Smoke/Dust/Pollen) | 240 / 250 / 260 CFM |
| Filter Type | True HEPA + Activated Carbon + Pre-filter |
| Fan Speeds | 4 (Sleep, Low, Medium, High) |
| Noise Level | 22 – 54 dB |
| Dimensions (H x W x D) | 25.6 x 17.3 x 8.7 inches |
| Weight | 21.6 lbs |
| Power Supply | 120V, 60Hz |
| Power Consumption | 60 Watts (max) |
| Energy Star Certified | Yes |
| Auto Mode | Yes (with air quality sensor) |
| Timer | 1, 2, 4, 8 hours |
| Air Quality Indicator | Color-coded ring (Blue, Green, Orange, Red) |
| Filter Replacement Indicator | Yes |
| Night Mode | Yes (dimmed lights, quiet operation) |
| Ionizer | Optional (can be turned on/off) |
| Warranty | 3 years limited |
Frequently Asked Questions - AP688 WHIRLPOOL
User questions about AP688 WHIRLPOOL
0 question about this device. Answer the ones you know or ask your own.
Ask a new question about this device
Download the instructions for your Air purifier in PDF format for free! Find your manual AP688 - WHIRLPOOL and take your electronic device back in hand. On this page are published all the documents necessary for the use of your device. AP688 by WHIRLPOOL.
USER MANUAL AP688 WHIRLPOOL
Before operating the unit, please read this manual thoroughly, and retain for future reference.


注意

切勿將易燃物品,如香煙等, 靠近本機。
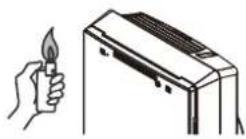

切勿遮蓋出、入風口。


切勿在釋放煙霧殺蟲劑時使用本產品。


![graph LR A["Grid Panel"] --> B["Stacked Panels"] B --> C["Final Box"] C --> D["Final Panel"]](/content/2026/05/1075185/images/f9ca1f93fb6924d98af03d60920f36fab5aee33cae5f0472c4124a96de2bfdfc.jpg)
3.移除3合1濾網的包裝袋。
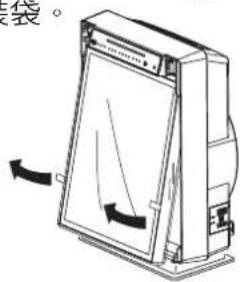
2. 把3合1濾網安回主機
4

面板及運作
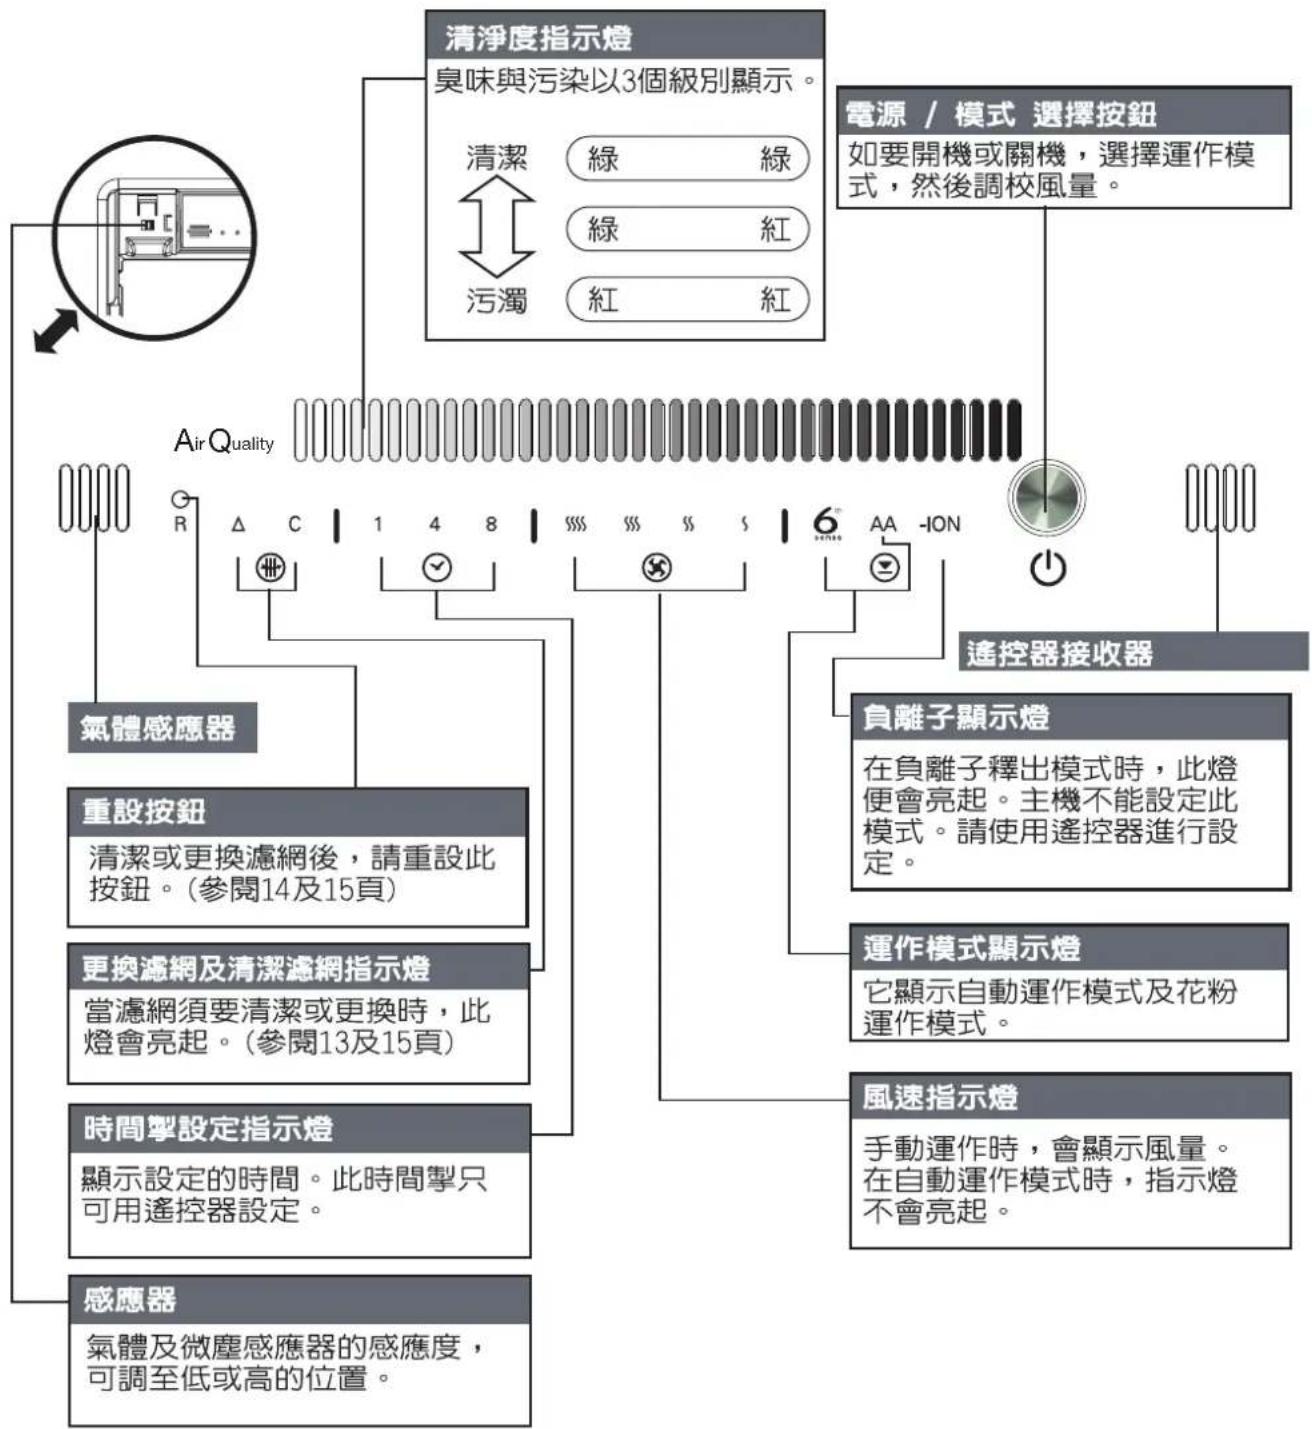

■主機
- 請使用棉花棒小心抹去鏡片上的塵埃。
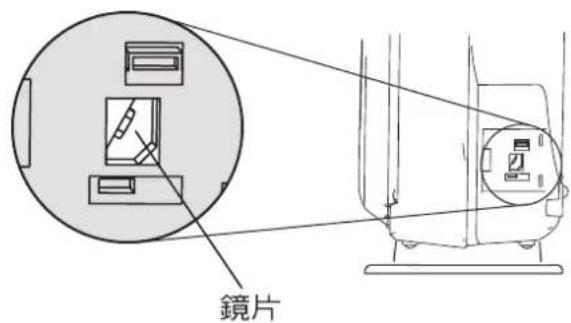
- 把感應器蓋子安裝在主機上。
注意
濾網重設按鈕
注意
惠而浦星級情報站
Star Service Hotline 24069138
www.whirlpool.com.hk
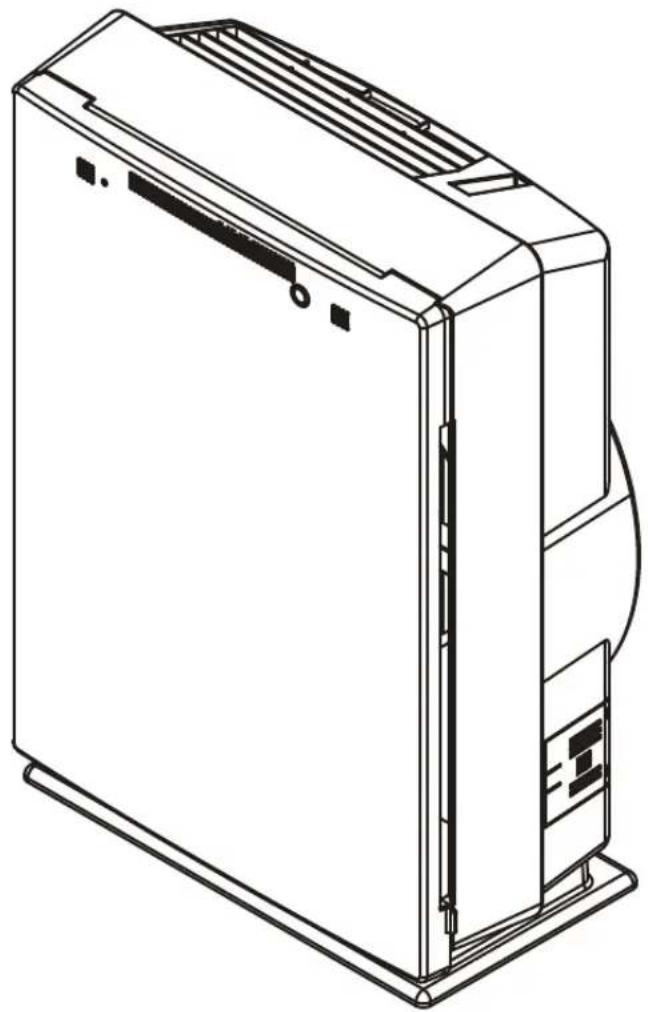
Before operating the unit, please read this manual thoroughly, and retain for future reference.
Please read these safety precautions before using this machine to ensure correct operation. The cautions shown here tell you how to use this unit safely and prevent harm to you and other people. Furthermore, in order to differentiate between the magnitude and severity of the precautions, the effects that may occur if the product is handled incorrectly are divided into "Warnings" and "Cautions". In either case, all of these precautions are important to safety and must be followed at all times.

WARNING
May cause death or serious injury if you don't follow these instructions.

CAUTION
May cause injury or property damage if you don't follow these instructions.

Actions prohibited

Actions Recommended

WARNING

Do not modify the unit. Disassembly and repairs should only be carried out by a qualified technician.

Unplug before cleaning, inspecting or moving the unit. Always grip the mains plug when unplugging.

Do not touch the mains plug or operate with wet hands.

Do not use mains voltage other than that specified. Do not exceed the voltage specified for the mains and the wiring.

Do not operate with damaged power cord or plug or loose electrical outlet.

Do not stop the unit from operating by pulling out the power plug from the electrical outlet.

Do not shorten, damage or process the power cord, or use an extension cord.

Check that there is no dust adhering to the power plug, and insert it securely into the electrical outlet so that it is not loose.

Do not place near a heat source.
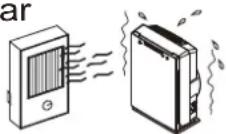

Do not insert your fingers or any other objects into the air outlet.

CAUTION

Do not expose to naked flame, such as cigarettes.


Do not cover the air inlet or outlet.


Do not clean with petrol or thinner or apply insecticide.


Do not use in the vicinity of flammable or corrosive gases or metal dust.

Do not use in wet places such as the bathroom.


Do not operate in the vicinity of smoke-producing insecticide machines.
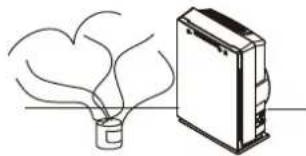

This unit cannot eliminate carbon monoxide. So if a fire is lit in the same room, ensure proper ventilation.

Do not place objects containing water such as vases on top of the unit.

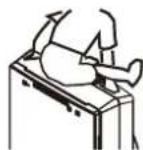
Do not sit on the unit.

Do not use in places where chemicals may be drawn in. (such as hospitals, factories, laboratories and salons)

Do not wash the unit with water.

Do not mount high on wall or shelf.

CAUTION

Do not expose to oily vapours.


Do not use in an unstable position where unit may tilt or fall over.
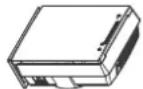

The machine must not be allowed to ingest humidifier steam.

If the power cable is damaged, it must be replaced by the manufacturer, their service agent or other qualified technicians in order to prevent hazards.

Keep the remote in a safe place out of the reach of children. It contains small parts that may cause choking.

If the unit will not be used for a long time, always unplug the power plug from the electrical outlet.
The appliance is not to be used by children or persons with reduced physical, sensory or mental capabilities, or lack of experience and knowledge, unless they have been given supervision or instruction.
Children should be supervised to ensure that they do not play with the appliance.
Parts and Terms
■Front ■Back


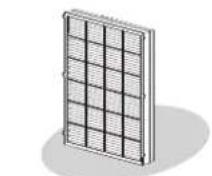
Filter

Remote
Please remove the transparent sheet when using.
■ Filters ■ A CAUTIONES Remove plastic bag of filter before use.
![graph LR A["Grid Panel"] --> B["Stage ①"] B --> C["Stage ②"] C --> D["Stage ③"] D --> E["Final Box"]](/content/2026/05/1075185/images/e80549fa5054f9b975e96ed8d3fad2d5ffc7e5dc50340296c0c0bd72d48a2777.jpg)
Can Clean Pre-filter
(Do not need to be changed)
To remove rough particles like hairs and visible dust.
Nano-silver filter suppresses germ activity.
*HEPA (High Efficiency Particulate Air); removes 99.97% airborne particles. (at 0.3 micron)
* eliminates animal and food smells.
Photocatalyst filter
(Do not need to be changed)
Uses UV light to catch germs, microbes and bacilli and curb viruses.
3-in-1 Filter
2 HEPA filter
③NS deodorizing filter
Preparation Before Using
※Before using be sure to remove the 3-in-1 filter from its bag
Unplug the unit before installing the filter
1. Removing the 3-in-1 filter
* Place the unit in a stable location.
- To remove front coverDepress the finger pieces at bottom of cover to release it, then pull to remove.

- Removing the pre-filter Detach the 6 claws on both sides from holes in main unit.

- Remove 3-in-1 filter bag.
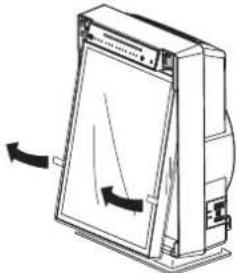
2. Installing the 3-in-1 filter
- Position with front facing outwards. Do not reverse or deform it.
- Installing the pre-filter. Insert the claws on both sides into holes in main unit.
- Installing the front cover. Hook both sides to top of front cover on to main body, then fasten the hooks on bottom.
* The unit does not operate without its front cover.
3. Instructions for use of 3-in-in Filter with Charcoal Filter
* Please remove the plastic of the filter before use.
* You can choose whether use the 3-in-1 Filter only or together with the Charcoal Filter.
③

if you wish to use 3-in-1 Filter with the Charcoal Filter, please stick the 4 single-sided viscose tapes to the 4 corners at the back of 3-in-1 filter.
①

4

After adhering, stick the 3-in-1 filter with Charcoal Filter.
②

In Charcoal Filter package, there is filter with single-sided viscose tapes at the 4 corners and 4 separate single-sided viscose tapes.
5

After assembling, you can install the filter into the main unit.
Installingremotecontrolbattery
Removethetransparentsheetprotectingbatterypower.
The battery is pre-installed in theremote control.
Replacingbattery
- Remove batteryholder from back of remote.
- Insertnewbatterycorrectsideup.
- Replacecover.

Battery + polemust alignwithmarkonholder
Aboutthebattery
OneCR2032batteryisrequired
■ Batterylifetimeisaboutsixmonths.Itneedschangingwhenremotesignalfails.
Asthebatterywillhavebeeninstockforsometime,itslifemaybelessforfirstuse.
■ Incorrect handling of battery may cause electric shock, fire, fluid leakage, heater explosion.
Donotshort-circuit, disassemble, heatitor burnit.
Removewhennotinuseforlongperiods.
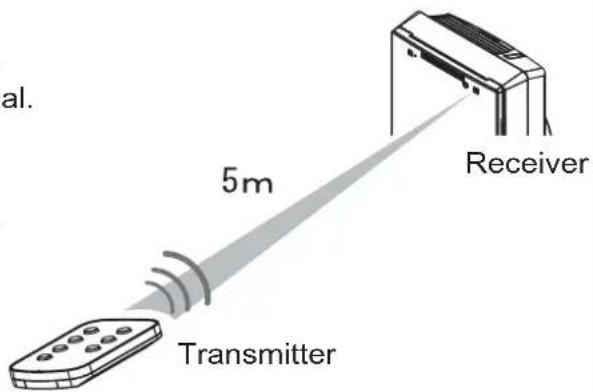
Usingtheremotecontrol
■ Aimtheremoteatthemainunit.
■ Signalrangeisabout5metres(directlyahead).
■ Ensurethereisnoobstacleobstructingthesignal.
■ Signalissentwhenkeyisreleased.
Unitbeepswhensignalisreceived.
■ Ifthereisalightintheway, rangemaybeshorter.
Topreventdamage:
■ Donotjolt.
■ Donotimmerseinwater.
■ Donotplacenearheatorexposetodirectsunlight.
Canbeputonthefloororthedesk.
Donotusetheremotecontrolinthefollowingplaces
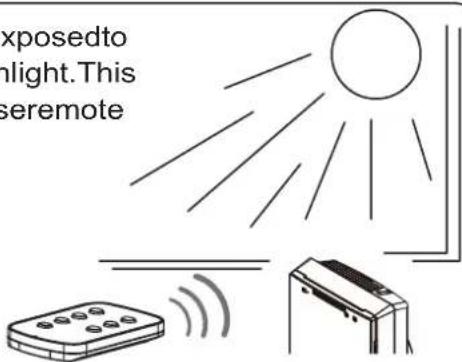
Roomswithfluorescentlight, especiallyinvertertypeThis maycauseremote failure.Keepaway fromthelightortry adifferentdirection.


Roomsexposedto directsunlight. This maycauseremote failure.
Installationhints
Settheunitinlinewithairqualityrequired.
* Inroomswithsmalldustandsmellssuchasssmoke - installover1mabovefloor.
* Inroomswithlargerdust,suchaspollen-installnearfloor.
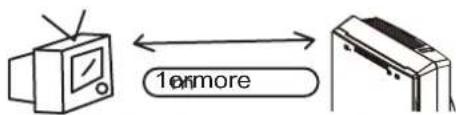
Keepmorethan1metrefromtelevisionand radiotopreventinterference.
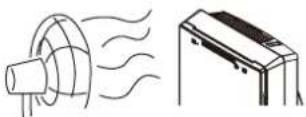
Avoidplaceswithwindblowingonthesensor. Thismaycause malfunction.
Dustsensorison bottomright.Keep awayfromwalls andfurniture.

Donotplacenearcurtains, which may be soiledor cause malfunction.

Chooseawell-ventilatedplace.Airconditioning,as
picturedatright, improvesventilation andenhancesdust sensorperformance.
![graph TD A["Window"] --> B{Circular Cycle} B --> C["Window"] C --> D["Tray"] D --> E["Tray"] E --> F["Tray"] F --> G["Tray"] G --> H["Tray"] H --> I["Tray"] I --> J["Tray"] J --> K["Tray"] K --> L["Tray"] L --> M["Tray"] M --> N["Tray"] N --> O["Tray"] O --> P["Tray"] P --> Q["Tray"] Q --> R["Tray"]…](/content/2026/05/1075185/images/c1666de1aa3ec74bdb3eef28142d533b11fe03ec32e174e251ea40912b28ca0b.jpg)
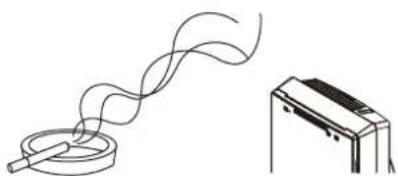
Avoidplacinginthevicinityof smokers,sincesuchfumesquickly disabletheunit.
Panelandoperation
![graph TD A["Cleanness light"] --> B["Smells and dirt are shown in3levels"] B --> C["Clean"] C --> D["Green Green"] C --> E["Green Red"] C --> F["Red Red"] B --> G["Dirty"] B --> H["Red Red"] I["Power/mode key"] --> J["To turn on and off, select operating mode and change airflow."] K["Air Quality"] -…](/content/2026/05/1075185/images/12461edceb98063b244f5afc87bc28e8d784698d3aec7da9ab46ba20a6ab7f2c.jpg)
Followingstableinstallation, insertthemainsplug.
Operationbythemainunit

Pressthepower/modekeyforautomaticoperation.
Sensorstakeabout30secondstostartworking.
Pressthekeyagaintochangeoperationasfollows:
![graph LR A["6th generation"] --> B["AntiAllergy(AA)"] B --> C["Lo(s)"] C --> D["Mid(k)"] D --> E["(###)"] E --> F["Turbo (###)"] F --> G["Stop"] H["Automatic"] --> B I["Manual"] --> C](/content/2026/05/1075185/images/f78d584f1f10b10667cb2d552e189e5e173cb21edee8aefa743e215f9d10ca0d.jpg)

mode: setsairflow according to air quality. (does not switch to turbooperation)
AntiAllergy(AA)mode:alternatesairflowautomatically.
Manualmode:runsatselectedairflowirrespectiveofairquality.
Mainunitcannotsettimer,negativeionsorcleannesslevellight.Useremote.
If sensordetectscleanairqualityfor30minutesconsecutively,'Low'airflowissetandthe UVlightextinguishes.
Sensorsensitivityswitch
Inautomodethedustandgassensorsmonitorairquality. Theserecordqualityinbythe 3stagesofcleannesslightandadjustairflowaccordingly.(Unitoperatesatthehigherof thetworeadings)
Sincesensorsensitivityvariesaccordingtotheconditionoftheroom,adjustsensorsas requiredbetween'Lo'and'Hi'
(Factorysettingis'Lo')
- Dustsensor
Detectsairborneparticlessuchaspollen,domesticdust,tickbodiesanddroppings andsmoke.
Dustquantitydiffersfromvisibledust,sothecleannesslevellightindicationmay appeardifferentfromthatexpected.
- Gassensor
Detectsairbornegasessuchaskitchenrubbish, toilet, petandsmokesmells. (May also reactorapid changes in temperature or humidity)
Thesensormayreactto,forexample,makeup,butthisdoesnotcausefailureofthe unit.
Operation with remote control
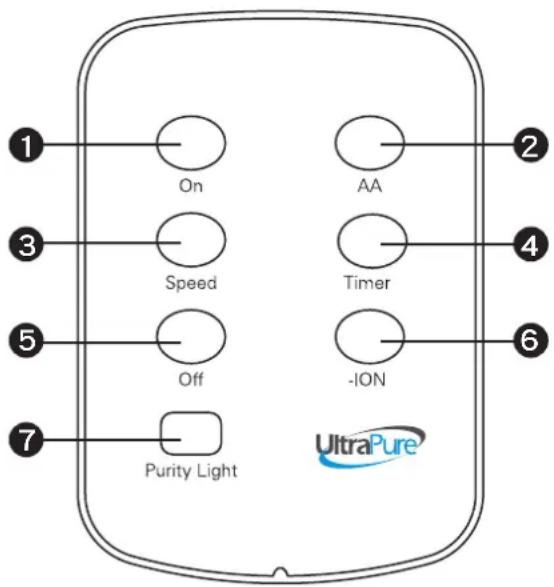
1 ON key
- Press to start automatic mode.
- When first switching on, you will find the cleanness level light flashes for 30 seconds before display appears.
- If the main unit is set to manual, press this key to change to automatic.
2 Anti ALLERGY (AA) key
- Press in automatic or manual mode to start pollen operation.
* The key must be pressed then released immediately.
③ SPEED key
- Press to switch airflow between 'Lo,' 'Mid,' 'Hi' and 'Turbo'.
![graph LR A["Lo()"] --> B["<<"] B --> C["{{{##}}}}<br> C --> D[Turbo(###)M"] D --> A](/content/2026/05/1075185/images/b72983f9173e8e617ba6cb0d20a10f5c5c038f08712af188cbc5e98e7ad1c105.jpg)
- The selected airflow operates irrespective of air quality.
4 TIMER key
- Press to set the time when the machine is intended to stop. Choose between 1, 4 and 8 hours.
- Time changes each time key is pressed.
![graph LR A["1hr 8hr"] --> B["cancel"] B --> C[" "] C --> D[" "] D --> E[" "] E --> F[" "] F --> G[" "] G --> H[" "] H --> I[" "] I --> J[" "] J --> K[" "] K --> L[" "] L --> M[" "] M --> N[" "] N --> O[" "] O --> P[" "] P --> Q[" "] Q --> R[" "] R --> S[" "] S --> T[" "] T --> U[" "] U --> V[" "] V…](/content/2026/05/1075185/images/b8a5b9c89f22c4ed980c6182051303af2de18bb9ac4c0aba5dcc5afb1c737592.jpg)
5 OFF key
- Press to stop the machine.
6 -ION key
- Switches negative ion generation on and off.
7 PURITY LIGHT
- switches cleanness level light on and off if necessary.
Maintenance
Cleaning the unit periodically maintains efficient operation. Proper cleaning function is disrupted by accumulation of dirt, so clean frequently.
WARNING
※Unplug before cleaning.
■ Front cover (onceamonth)
- Unplug from the mains
-
Clean front cover
-
Clean air inlet with vacuum cleaner.
- Remove if dirty (see page 5, 6) and wash in cold water. Wipe with clean cloth and dry before replacing.
■Main unit
- Unplug from the mains.
- Wipe with soft cloth.
WARNING
※ Do not use abrasives, solvent or thinner, since they damage the unit surface.
※ Never pour water on the unit.
■Sensor hole
Sensitivity becomes unstable if this is dirty or blocked.
Remove dust from sensor opening with vacuum cleaner.


Dustsensor
- Removesensorcoveronrightofunit.
①Pushtoreleaselatch
②Pullinarrowdirection
③Pullforwards


- Carefully use as swabtowipetheshiny surface of the helens.

- Replacesensorcoveronunit
* Sensormaymalfunctionwithoutcover.
Filter
-
When cleaning light illuminates, clean the filter. If filter is not cleaned, light stays illuminated about on e month, depending on conditions.
-
Removefrontcover
Gripfingerpiecesonlowerfrontcover, pullto releasehookandraisetoremovefrontcover.

Filtercleaninglight

- Clean the pre-filter
Remove pre-filter from unit and clean with vacuum cleaner, or wash in cold water.
- Clean the 3-in-1 filter
Clean with vacuum cleaner without removing from unit.

CAUTION
Do not apply pressure with vacuum cleaner and do not damage the filter when washing.
- Install the pre-filter
Insert claws on both sides of pre-filter into holes on main unit.
* Take care not to break the belts attached to the HEPA filter.
- Attach the front cover
Fit the top of front cover into top of main unit and push both sides in to lock lower hooks fully.
- If you plug in and switch on and find the cleaning light
illuminated, push the reset button with a pin. When you remove the pin, a sound is produced and the light extinguishes.
Do not push for over 5 seconds (otherwise this changes filter replacement period)


CAUTION
Filter reset button
Cleaning time varies with air quality, so periodic cleaning should be carried out.
FilterReplacement
■ Filterreplacementtime
Whenthefilterisdirty,thelightilluminates.
• Timeuntililluminationdependsonairquality.
- Thestateoffilterissavedevenwhenunitis unpluggedormoved.
Conditionsleadingtoshorterreplacementperiod:
- Sootorthelikeisingested.
- Ifusedinbusyplacessuchasrestaurants, gameshallsandbeautysalons.
- IfTurboorHighmodesarefrequentlyused.

Filterreplacementlight
■ Filterreplacement
Step1: Unplugthemachine.
Step2: Putonmaskandgloves.
Step3: Followfilterremovalprocessonpage6.
Step4: Placedirtyfilterinasealedbaganddiscard.
Step5:Discardglovesandmask.
Step6: Washhandswithsoap.
Afterwardsthemachineshouldbepluggedin.
- Pushfilterresetbuttonformorethan5secondsuntilasoundisheard.
2.Filterreplacementlightextinguishes.
* Remembertoresetthefilter resetbutton

Filterresetbutton
Note
* Iffilterismountedinreverse, theunitwillnotwork. Alsoneverreuseadirtyfilter, otherwiseduststucktoitwillbeemitted.
* Adirtyfiltershouldnotbereusedevenifwashed. Notonlyisthisineffective, butitmaycausemalfunction.
Troubleshooting

WARNING
Do not repair or disassemble without qualified assistance.
When this happens check
| The unit does not work | ·Is there a power failure (perhaps caused by fuse or circuit breaker)? ·Is it plugged in? ·Are filter and front cover securely fitted? |
| Unit does not remove smell or smoke | ·Has filter been removed from bag? ·Has 3-in-1 filter been installed backwards? ·Is filter dirty? ·Is air outlet covered? ·Is the room too large? (Perform manual Turbo operation) ·Do people smoke in the room often? ·Is UV light illuminated? (In case of light failure, please contact manufacturer) ·Operate the machine in a clean room for about eight hours to refresh photocatalyst filter. ·(If large amount of smell has been cleaned, the machine may temporarily be slow to eliminate smells) |
| It does not operate even to remove cigarette smoke | ·Is the unit in a place not allowing smells and cigarette smoke to be easily detected? ·Are gas and dust sensor openings closed or clogged? (clean them by referring to pages 11 and 12) ·Is sensor sensitivity set at 'Lo'? |
| Cleanness light shows dirty, though air seems clean | ·The sensor reacts to cosmetics, perfume, alcohol and insecticide spray. (Change sensitivity setting or room ventilation) ·When connecting to the mains, the cleanness light may show dirty at the beginning because the sensor is not ready. ·This will read normally once the air becomes cleaner. |
| Loud operation noise | ·Is unit set up in an unstable place? ·Is filter very dirty? |
| Remote control doesn't work | ·Is the battery dead? ·Has transparent tape been removed from battery? ·Is the battery wrongly installed? ·Is the unit placed too close to fluorescent lighting? |
When it happens check
| Cleaning light or replacement reminder light illuminates too soon | ·When using in a dirty place other than ordinary domestic situations the light might illuminate early.·Are Turbo and High used frequently? Even if room is clean, if operated on High or Turbo, light illuminates early |
| Foreign objects have entered the unit | ·Switch off and seek help from your service agent. |
| Water has been poured on the unit | ·Switch off and seek help from your service agent. |
* It is normal to notice a slight smell when using a new product.
This causes no physical damage to humans, and the smell will soon fade.
Checking an air purifier after many years of use.
The following are signs of ageing:
■ After switching on the unit, it doesn't operate, or stops intermittently.
■ Fan rotation causes strange noises and vibration.
■ The unit is unusually hot or there is a smell of burning.
■ Other unusual signs.
Unplug and contact the manufacturer.
Specifications
When you connect to the mains, about 2W is required to prime the circuit.
| Voltage | 220-240V 50Hz |
| Current (Turbo/High/Medium/Low) | 100/40/30/20 W |
| Dimensions | 410W x 220D x 583H mm |
| Weight | 7.6 Kg |
components
· AP688 3-in-1 Filter
Model: APF003H
· AP688 Charcoal Filter
Model: APF002C
please indicate which item you require to Whirlpool spare parts department.
Tel: 24063861/24063862
Correct disposal of this product
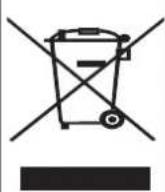
This symbol indicates this product should not be disposed of with other domestic waste anywhere in the EU. To prevent possible damage to the environment or human health from uncontrolled waste disposal, help by recycling responsibly. To return your used unit, please take it to the place where it was purchased, and they will dispose of it safely.

惠而浦星級情報站
Star Service Hotline 24069138
www.whirlpool.com.hk
- 注意
- 3.移除3合1濾網的包裝袋。
- 把3合1濾網安回主機
- 面板及運作
- 主機
- WARNING
- CAUTION
- PARTS AND TERMS
- PREPARATION BEFORE USING
- UNPLUG THE UNIT BEFORE INSTALLING THE FILTER
- REMOVING THE 3-IN-1 FILTER
- INSTALLING THE 3-IN-1 FILTER
- INSTRUCTIONS FOR USE OF 3-IN-IN FILTER WITH CHARCOAL FILTER
- INSTALLINGREMOTECONTROLBATTERY
- REPLACINGBATTERY
- ABOUTTHEBATTERY
- USINGTHEREMOTECONTROL
- TOPREVENTDAMAGE
- DONOTUSETHEREMOTECONTROLINTHEFOLLOWINGPLACES
- INSTALLATIONHINTS
- SETTHEUNITINLINEWITHAIRQUALITYREQUIRED
- PANELANDOPERATION
- SENSORSENSITIVITYSWITCH
- OPERATION WITH REMOTE CONTROL
- 1 ON KEY
- 2 ANTI ALLERGY (AA) KEY
- ③ SPEED KEY
- 4 TIMER KEY
- 5 OFF KEY
- 6 -ION KEY
- 7 PURITY LIGHT
- MAINTENANCE
- FRONT COVER (ONCEAMONTH)
- MAIN UNIT
- SENSOR HOLE
- DUSTSENSOR
- FILTER
- FILTERREPLACEMENT
- FILTERREPLACEMENTTIME
- NOTE
- TROUBLESHOOTING
- SPECIFICATIONS
- COMPONENTS
- CORRECT DISPOSAL OF THIS PRODUCT
Brand : WHIRLPOOL
Model : AP688
Category : Air purifier