
OptiPlex GX270 - Desktop computer DELL - Free user manual and instructions
Find the device manual for free OptiPlex GX270 DELL in PDF.


| Product Type | Desktop Computer |
| Brand | Dell |
| Model | OptiPlex GX270 |
| Regulatory Models | DIIS (Small Desktop), DHP (Small Form-Factor), DIIM (Small Mini-Tower) |
| Power Supply | Internal power supply with fixed-voltage, auto-sensing, or manual voltage selection depending on configuration |
| Built-in Diagnostics | Dell Diagnostics and Dell IDE Hard Drive Diagnostics |
| Operating System Support | Microsoft Windows (tested with Windows XP) |
| User Manual Availability | Electronic documentation on hard drive and on Drivers and Utilities CD |
| Service Tag and Express Service Code | Located on computer |
| Support Website | support.euro.dell.com |
| Cleaning Instructions | Disconnect from power; use a soft cloth dampened with water; do not use liquid or aerosol cleaners |
| Safety Features | Surge suppressor recommended; grounding required; avoid use during electrical storms |
| Serviceability | Service should be performed only by trained technicians; no user-serviceable parts inside |
| Dimensions | Not specified in user manual; typical small desktop form factor |
| Weight | Not specified in user manual |
| Package Contents | Computer, power cable, Drivers and Utilities CD, safety instructions, setup guide |
| Diagnostic Indicators | System lights (front), diagnostic lights (back), system messages, beep codes |
| Regulatory Compliance | EMI compliant; changes not expressly approved by Dell may void user authority to operate |
| Warranty and Repair | Contact Dell for service; use Express Service Code for faster support |
Frequently Asked Questions - OptiPlex GX270 DELL
User questions about OptiPlex GX270 DELL
0 question about this device. Answer the ones you know or ask your own.
Ask a new question about this device
Download the instructions for your Desktop computer in PDF format for free! Find your manual OptiPlex GX270 - DELL and take your electronic device back in hand. On this page are published all the documents necessary for the use of your device. OptiPlex GX270 by DELL.
USER MANUAL OptiPlex GX270 DELL
Dell™ OptiPlex™ Systems
Setup and Quick Reference Guide
Setup and Quick Reference Guide
Notes, Notices, and Cautions

NOTE: A NOTE indicates important information that helps you make better use of your computer.

NOTICE: A NOTICE indicates either potential damage to hardware or loss of data and tells you how to avoid the problem.

CAUTION: A CAUTION indicates a potential for property damage, personal injury, or death.
Information in this document is subject to change without notice. © 2000–2002 Dell Computer Corporation. All rights reserved.
Reproduction in any manner whatsoever without the written permission of Dell Computer Corporation is strictly forbidden.
Trademarks used in this text: Dell, OptiPlex, and the DELL logo are trademarks of Dell Computer Corporation; Microsoft and Windows are registered trademarks of Microsoft Corporation.
Other trademarks and trade names may be used in this document to refer to either the entities claiming the marks and names or their products. Dell Computer Corporation disclaims any proprietary interest in trademarks and trade names other than its own.
November 2002 P/N 94CGN Rev. A07
Contents
About This Guide 5
Finding Information for Your Computer 5
Solving Problems 8
Using the Drivers and Utilities CD 9
Dell Diagnostics 10
When to Use the Dell Diagnostics 10
Starting the Dell Diagnostics 10
Running the Dell IDE Hard Drive Diagnostics ..... 11
CAUTION: Safety Instructions 12
General 12
When Using Your Computer 13
When Working Inside Your Computer 14
Regulatory Information 15
About This Guide
This document contains solving problems and safety and regulatory information about your Dell™ OptiPlex™ computer.
To obtain the latest versions of the documents on your hard drive, see the Dell support website at support.euro.dell.com.
Regulatory model numbers appear throughout this document; their chassis type equivalents are shown below:
Regulatory Model Numbers and Chassis Types
| DIIS = small desktop (SD) chassis |
| DHP = small form-factor (SF) chassis |
| DIIM = small mini-tower (SMT) chassis |
Finding Information for Your Computer
What Are You Looking For? Find it Here
• A diagnostic program for my computer
- Drivers for my computer
• My computer documentation
• My device documentation
Drivers and Utilities CD (also known as the ResourceCD)
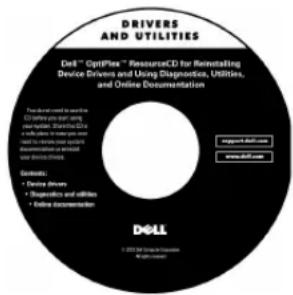
You can use this CD to access documentation, reinstall drivers, or run diagnostics tools.
What Are You Looking For? Find it Here
• Express Service Code and Service Tag Number
- Microsoft ^® Windows ^® License Label (Product Key)
Express Service Code and Product Key

Located on your computer.
• How to reinstall my operating system Operating System CD and Installation Guide


If you reinstall your operating system, use the Drivers and Utilities CD to reinstall drivers for the devices that came with your computer.
• How to remove and replace parts
• Technical specifications
• How to configure system settings
• How to troubleshoot and solve problems
User's Guide icon

Depending on your operating system, double-click the User's Guides icon on your desktop or click the Start button and then click Help and Support to access the electronic documentation stored on your hard drive.
| What Are You Looking For? Find it Here | |
| Latest drivers for my computerAnswers to technical service and support questionsOnline discussions with other users and technical supportDocumentation for my computer | Dell Support websitesupport.euro.dell.comThe Dell Support website provides several online tools, including:Knowledge Base — hints, tips, and online coursesCustomer Forum — online discussion with other Dell customersUpgrades — upgrade information for components, such as memory, the hard drive, and the operating systemCustomer Care — contact information, order status, warranty, and repair informationDownloads — drivers, patches, and software updatesReference — computer documentation, product specifications, and white papers |
| Service call statusTop technical issues for my computerFrequently asked questionsFile downloadsDetails on my computer's configurationService contract for my computer | Dell Premier Support websiteThe Dell Premier Support website is customized for corporate, government, and education customers. This site may not be available in all regions. |
| How to use Windows XPDocumentation for my computer and devices | Windows XP Help and Support Center1 Click the Start button, and then click IHelp and Support.2 Type a word or phrase that describes your problem, and then click the arrow icon.3Click the topic that describes your problem.4Follow the instructions shown on the screen. |
Solving Problems
Dell provides a number of tools to help you if your system does not perform as expected. For the latest troubleshooting information available for your system, see the Dell Support website at support.euro.dell.com. You can also find descriptions of Dell troubleshooting tools in the section titled "Getting Help" in your online User's Guide.
If computer problems occur that require help from Dell, write a detailed description of the error, beep codes, or diagnostics light patterns; record your Express Service Code and Service Tag Number below; and then contact Dell from the same location as your computer.
See "Finding Information for Your Computer" on page 5 for an example of the express service code and service tag numbers.
Express Service Code: ____
Service Tag Number: ____
Your computer includes the following tools that can help you solve a problem:
DELL DIAGNOSTICS — The Dell Diagnostics tests various components in your computer and helps to identify the cause of computer problems. For more information, see "Starting the Dell Diagnostics" on page 10.
THE FOLLOWING FEATURES CAN INDICATE A POSSIBLE FAILURE AND HELP YOU TROUBLESHOOT A COMPUTER PROBLEM. SEE YOUR User's Guide FOR MORE INFORMATION —
SYSTEM LIGHTS — Located on the front of the computer
DIAGNOSTIC LIGHTS — Located on the back of the computer
SYSTEM MESSAGES — Appear on your monitor screen
BEEP CODES — A series of audible beeps emitted by your computer
Using the Drivers and Utilities CD
To use the Drivers and Utilities CD (also known as the ResourceCD) while you are running the Windows operating system:
1 Turn on the computer and allow it to boot to the Windows desktop.
2 Insert the Drivers and Utilities CD into the CD drive.
If you are using the Drivers and Utilities CD for the first time on this computer, the ResourceCD Installation window opens to inform you that the Drivers and Utilities CD is about to begin installation.
3 Click OK to continue.
To complete the installation, respond to the prompts offered by the installation program.
4 Click Next at the Welcome Dell System Owner screen.
5 Select the appropriate System Model, Operating System, Device Type, and Topic.
Drivers for Your Computer
To display a list of device drivers for your computer:
1 Click My Drivers in the Topic pull-down menu.
The Drivers and Utilities CD scans your computer's hardware and operating system, and then a list of device drivers for your system configuration is displayed on the screen.
2 Click the appropriate driver and follow the instructions to download the driver to your computer.
To view all available drivers for your computer, click Drivers from the Topic pull-down menu.

NOTE: To access device drivers and user documentation, you must use the Drivers and Utilities CD while you are running Windows.
Dell Diagnostics
When to Use the Dell Diagnostics
If you experience a problem with your computer, perform the checks in "Solving Problems" in the User's Guide and run the Dell Diagnostics before you contact Dell for technical assistance. Running the Dell Diagnostics may help you resolve the problem without contacting Dell. If you do contact Dell, the test results can provide important information for Dell's service and support personnel.

NOTICE: If your hard drive fails, run the Dell IDE Hard Drive Diagnostics (see "Running the Dell IDE Hard Drive Diagnostics" on page 11).
Starting the Dell Diagnostics
Enter system setup as explained in the User's Guide, review your computer's configuration information, and ensure that the device you want to test displays in system setup and is active.
Start the Dell Diagnostics from either your hard drive or from the Drivers and Utilities CD (also known as the ResourceCD).
Starting the Dell Diagnostics From Your Hard Drive
1 Shut down and restart the computer.
2 When the DELL, ^ logo appears, press
If you wait too long and the Windows logo appears, continue to wait until you see the Windows desktop. Then shut down your computer through the Start menu and try again.
3 When the boot device list appears, highlight Boot to Utility Partition and press
4 When the Dell Diagnostics Main Menu appears, select the test you want to run.
5 Close the test screen to return to the Main Menu screen. To exit the Dell Diagnostics and restart the computer, close the Main Menu screen.

NOTE: If you receive a message stating that no Diagnostics utility partition has been found, follow the instructions to run the Dell Diagnostics from your Drivers and Utilities CD.
Starting the Dell Diagnostics From the Drivers and Utilities CD
1 Insert the Drivers and Utilities CD into the CD drive.
2 Shut down and restart the computer.
When the DELL logo appears, press
If you wait too long and the Windows logo appears, continue to wait until you see the Windows desktop. Then shut down your computer through the Start menu and try again.
3 When the boot device list appears, highlight IDE CD-ROM Device and press
4 Select the IDE CD-ROM Device option from the CD boot menu.
5 Select the Boot from CD-ROM option from the menu that appears.
6 Type 1 to start the ResourceCD menu.
7 Type 2 to start the Dell Diagnostics.
8 Select Run the 32 Bit Dell Diagnostics from the numbered list. If multiple versions are listed, select the version appropriate for your platform.
9 When the Dell Diagnostics Main Menu appears, select the test you want to run.
10 When the tests are completed, remove the CD.
11 Close the test screen to return to the Main Menu screen. To exit the Dell Diagnostics and restart the computer, close the Main Menu screen.
Running the Dell IDE Hard Drive Diagnostics
The Dell IDE Hard Drive Diagnostics is a utility that tests the hard drive to troubleshoot or confirm a hard drive failure.
1 Turn on your computer (if your computer is already on, restart it).
2 When F2 = Setup appears in the upper-right corner of the screen, press
3 Follow the instructions on the screen.
If a failure is reported, see "Hard Drive Problems" in your User's Guide.

NOTE: This feature changes the boot sequence for one time only. On the next start-up, the computer boots according to the devices specified in system setup.
CAUTION: Safety Instructions
Use the following safety guidelines to help ensure your own personal safety and to help protect your computer and working environment from potential damage.
General
- Do not attempt to service the computer yourself unless you are a trained service technician. Always follow installation instructions closely.
- To help prevent electric shock, plug the computer and device power cables into properly grounded electrical outlets. These cables are equipped with 3-prong plugs to help ensure proper grounding. Do not use adapter plugs or remove the grounding prong from a cable. If you must use an extension cable, use a 3-wire cable with properly grounded plugs.

natural_image
Illustration of an electrical outlet connector (no text or symbols)• To help avoid the potential hazard of electric shock, do not use your computer during an electrical storm.
- To help avoid the potential hazard of electric shock, do not connect or disconnect any cables or perform maintenance or reconfiguration of this product during an electrical storm.
- If your computer includes a modem, the cable used with the modem should be manufactured with a minimum wire size of 26 American wire gauge (AWG) and an FCC-compliant RJ-11 modular plug.
- Before you clean your computer, disconnect the computer from the electrical outlet. Clean your computer with a soft cloth dampened with water. Do not use liquid or aerosol cleaners, which may contain flammable substances.
- To help avoid possible damage to the system board, wait 5 seconds after turning off the computer before disconnecting a device from the computer.
- To avoid shorting out your computer when disconnecting a network cable, first unplug the cable from the network adapter on the back of your computer, and then from the network jack. When reconnecting a network cable to your computer, first plug the cable into the network jack, and then into the network adapter.

CAUTION: Safety Instructions (continued)
- To help protect your computer from sudden, transient increases and decreases in electrical power, use a surge suppressor, line conditioner, or uninterruptible power supply (UPS).
- Ensure that nothing rests on your computer's cables and that the cables are not located where they can be stepped on or tripped over.
- Do not push any objects into the openings of your computer. Doing so can cause fire or electric shock by shorting out interior components.
- Keep your computer away from radiators and heat sources. Also, do not block cooling vents. Avoid placing loose papers underneath your computer; do not place your computer in a closed-in wall unit or on a bed, sofa, or rug.
- Do not spill food or liquids on your computer. If the computer gets wet, consult your User's Guide.
When Using Your Computer
As you use your computer, observe the following safe-handling guidelines.

CAUTION: Do not operate your computer with any cover(s) (including computer covers, bezels, filler brackets, front-panel inserts, and so on) removed.
- Your computer is equipped with one of the following:
- A fixed-voltage power supply — Computers with a fixed-voltage power supply do not have a voltage selection switch on the back panel and operate at only one voltage (see the regulatory label on the outside of the computer for its operating voltage).
- An auto-sensing voltage circuit — Computers with an auto-sensing voltage circuit do not have a voltage selection switch on the back panel and automatically detect the correct operating voltage.
- A manual voltage selection switch — Computers with a voltage selection switch on the back panel must be manually set to operate at the correct operating voltage.


When Using Your Computer (continued)

NOTICE: To help avoid damaging a computer with a manual voltage selection switch, set the switch for the voltage that most closely matches the AC power available in your location. For Japan, the voltage selection switch must be set to the 115-V position even though the AC power available in Japan is 100 V. Also, ensure that your monitor and attached devices are electrically rated to operate with the AC power available in your location.
- Before working inside the computer, unplug the computer to help prevent electric shock or system board damage. Certain system board components continue to receive power any time the computer is connected to AC power.
When Working Inside Your Computer
Before you open the computer cover, perform the following steps in the sequence indicated.

CAUTION: Do not attempt to service the computer yourself, except as explained in your online Dell documentation or in instructions otherwise provided to you by Dell. Always follow installation and service instructions closely.

NOTICE: To help avoid possible damage to the system board, wait 5 seconds after turning off the computer before removing a component from the system board or disconnecting a device from the computer.
1 Perform an orderly computer shutdown using the operating system menu.
2 Turn off your computer and any devices connected to the computer.
3 Ground yourself by touching an unpainted metal surface on the chassis, such as the metal around the card-slot openings at the back of the computer, before touching anything inside your computer.
While you work, periodically touch an unpainted metal surface on the computer chassis to dissipate any static electricity that might harm internal components.
4 Disconnect your computer and devices, including the monitor, from their electrical outlets. Also, disconnect any telephone or telecommunication lines from the computer. Doing so reduces the potential for personal injury or shock.
When Using Your Computer (continued)
In addition, take note of these safety guidelines when appropriate:
- When you disconnect a cable, pull on its connector or on its strain-relief loop, not on the cable itself. Some cables have a connector with locking tabs; if you are disconnecting this type of cable, press in on the locking tabs before disconnecting the cable. As you pull connectors apart, keep them evenly aligned to avoid bending any connector pins. Also, before you connect a cable, ensure that both connectors are correctly oriented and aligned.
- Handle components and cards with care. Do not touch the components or contacts on a card. Hold a card by its edges or by its metal mounting bracket. Hold a component such as a microprocessor chip by its edges, not by its pins.

CAUTION: There is a danger of a new battery exploding if it is incorrectly installed. Replace the battery only with the same or equivalent type recommended by the manufacturer. Do not dispose of the battery along with household waste. Contact your local waste disposal agency for the address of the nearest battery deposit site.
Regulatory Information
Electromagnetic Interference (EMI) is any signal or emission, radiated in free space or conducted along power or signal leads, that endangers the functioning of a radio navigation or other safety service or seriously degrades, obstructs, or repeatedly interrupts a licensed radio communications service.
Your Dell computer system is designed to comply with applicable regulations regarding EMI. Changes or modifications not expressly approved by Dell could void the user's authority to operate the equipment.

NOTE: Additional regulatory information regarding your system can be found in your User'sGuide.
Systémy Dell™ OptiPlex™
November 2002 P/N 94CGN Rev. A07
Indhold
Om denne håndbog 39
7 Indtast 2 for at starte Dell Diagnostics.
November 2002 P/N 94CGN Rev. A07
Inhoud

Express Service-code:
Service Tag-nummer: ____
natural_image
Electrical outlet connector with three slots and terminal connectors (no text or symbols)
natural_image
Illustration of an electrical outlet connector (no text or symbols)natural_image
Illustration of an electrical outlet plug with three slots and terminal connectors (no text or symbols)
natural_image
Illustration of an electrical outlet plug with three slots and terminal connectors (no text or symbols)© 2000–2002 Dell Computer Corporation. Forbeholdt alle rettigheter.
November 2002 P/N 94CGN Rev. A07
Innhold
Bruke Drivers and Utilities CD 127
Dell Diagnostics 128
Bruke Drivers and Utilities CD
Drivere for ditt system
Starte Dell Diagnostics fra CD-en Drivers and Utilities ResourceCD
natural_image
Illustration of an electrical outlet plug with three slots and two terminal connectors (no text or symbols)
natural_image
Illustration of an electrical outlet plug with three slots and two terminal connectors (no text or symbols)natural_image
Electrical outlet connector with three slots and terminal connectors (no text or symbols)November 2002 P/N 94CGN Rev. A07
Obsah

natural_image
Illustration of an electrical outlet connector (no text or symbols)November 2002 P/N 94CGN Rev. A07
Vsebina
O priročniku 191
Iskanje informacij za vaš računalnik 191
Reševanje problemov 194
natural_image
Illustration of an electrical outlet plug with three slots and two terminals (no text or symbols)⚠️ OPOZORILO: Varnostna navodila (se nadaljuje)
November 2002 P/N 94CGN Rev. A07
Innehåll
Om denna lathund 207
Hitta information om datorn 207
Problemlösning 210
natural_image
Illustration of an electrical outlet connector (no text or symbols)natural_image
Illustration of an electrical outlet connector (no text or symbols). Boot from CD-ROM 5
.(בְרַעָהוֹרִיָהָה) ResourceCD 1
(Dell 7) Dell Diagnostics 2 7
.
(Dell System Owner) Welcome Dell System Owner (הכלה) Next
4
. Dallas Software Inc. Dell Computer Corporation 2000-2002 ©
Dell Computer Corporation.
- Setup and Quick Reference Guide
- Notes, Notices, and Cautions
- Contents
- About This Guide
- Finding Information for Your Computer
- What Are You Looking For? Find it Here
- Express Service Code and Product Key
- User's Guide icon
- Solving Problems
- Using the Drivers and Utilities CD
- Drivers for Your Computer
- Dell Diagnostics
- When to Use the Dell Diagnostics
- Starting the Dell Diagnostics
- Starting the Dell Diagnostics From Your Hard Drive
- Starting the Dell Diagnostics From the Drivers and Utilities CD
- Running the Dell IDE Hard Drive Diagnostics
- CAUTION: Safety Instructions
- General
- CAUTION: Safety Instructions (continued)
- When Using Your Computer
- When Using Your Computer (continued)
- When Working Inside Your Computer
- Regulatory Information
- Indhold
- Inhoud
- Innhold
- Bruke Drivers and Utilities CD
- Drivere for ditt system
- Starte Dell Diagnostics fra CD-en Drivers and Utilities ResourceCD
- Obsah
- Vsebina
- ⚠️ OPOZORILO: Varnostna navodila (se nadaljuje)
- Innehåll
Brand : DELL
Model : OptiPlex GX270
Category : Desktop computer