
123980 - Security Camera AVIDSEN - Free user manual and instructions
Find the device manual for free 123980 AVIDSEN in PDF.


| Product type | Security camera |
| Brand | Avidsen |
| Model | 123980 |
| Dimensions (L x W x H) | 12 x 8 x 6 cm |
| Weight | 300 g |
| Power supply | 5V DC power adapter (USB cable included) |
| Resolution | 1080p Full HD |
| Night vision | Yes, up to 10 meters |
| Viewing angle | 120° |
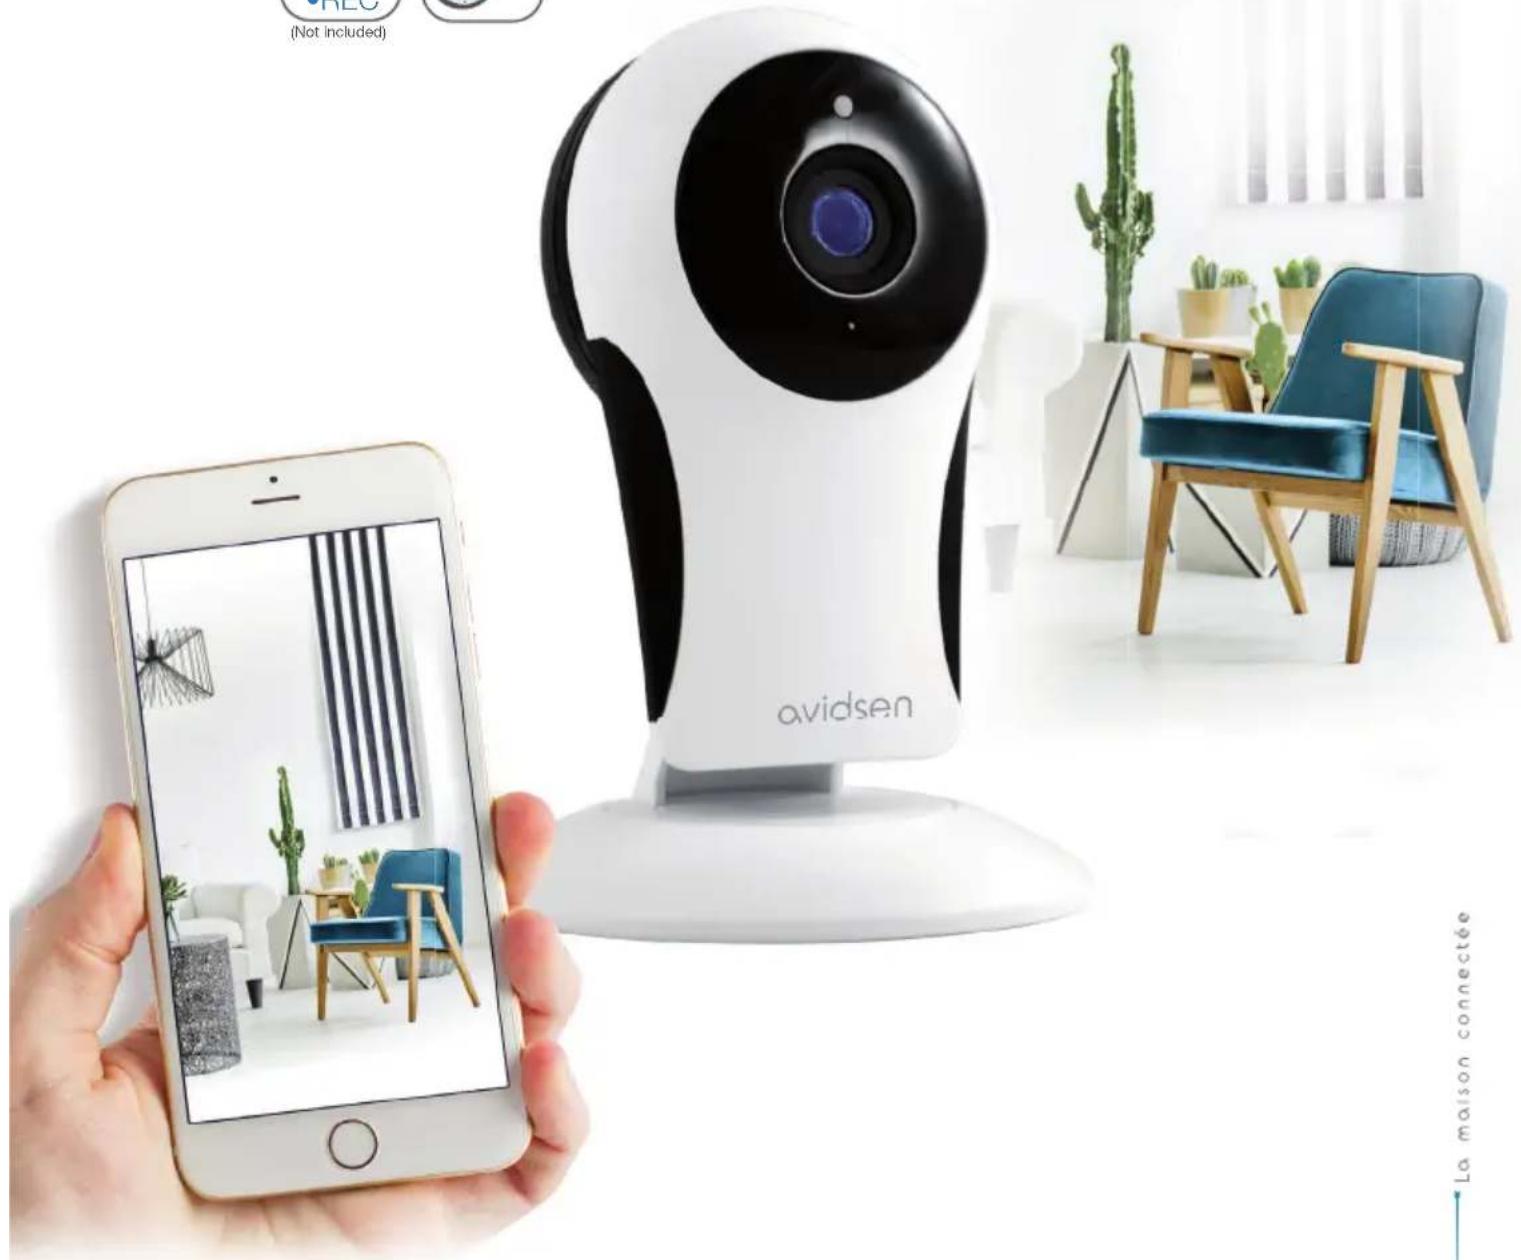
| Motion detection | Yes, with push notifications |
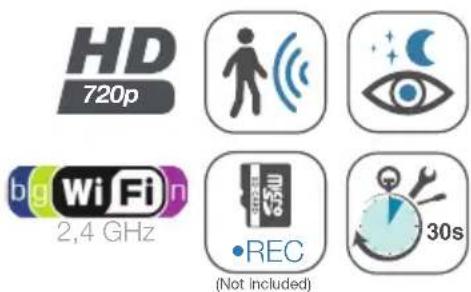
| Storage | microSD card up to 128 GB or cloud (optional subscription) |
| Connectivity | Wi-Fi 2.4 GHz (802.11 b/g/n) |
| Audio | Built-in microphone and speaker (two-way audio) |
| Protection rating | IP65 (weather-resistant) |
| Operating temperature | -10°C to 50°C |
| Installation | Wall or ceiling mount, mounting hardware included |
| Compatibility | Avidsen app (iOS and Android) |
| Warranty | 2 years |
| Maintenance and cleaning | Clean the lens with a soft dry cloth; avoid abrasive products |
| Security | Data encryption, two-factor authentication available |
| Spare parts and repairability | Parts available on request; repair possible by an authorized technician |
Frequently Asked Questions - 123980 AVIDSEN
User questions about 123980 AVIDSEN
0 question about this device. Answer the ones you know or ask your own.
Ask a new question about this device
Download the instructions for your Security Camera in PDF format for free! Find your manual 123980 - AVIDSEN and take your electronic device back in hand. On this page are published all the documents necessary for the use of your device. 123980 by AVIDSEN.
USER MANUAL 123980 AVIDSEN

SOMMAIRE
A - CONSIGNES DE SÉCURITÉ 05
1 - PRÉCAUTIONS D'UTILISATION 05
2 - ENTRETIEN ET NETTOYAGE 05
3 - RECYCLAGE 05
B - DESCRIPTION DU PRODUIT 06
1 - CONTENU DU KIT 06
2 - CAMÉRA 06
3 - ADAPTATEUR SECTEUR 07
C - INSTALLATION 08
1 - INSTALLATION DE LA CAMÉRA 08
2 - INSERTION D'UNE CARTE MICROSD (NON FOURNIE) 08
3 - CONNEXION DE LA CAMÉRA 09
D - CONFIGURATION 10
1 - CONFIGURATION DE LA CAMÉRA ET AJOUT DANS L'APPLICATION 10
2 - ACCÈS À L'ENSEMBLE DES RÉGLAGES 11
2.1 - CONFIGURATION 12
E - UTILISATION 13
1 - VIDÉO EN DIRECT 13
2 - CONSULTATION DES VIDÉOS ENREGISTRÉES PAR LA CAMÉRA 13
F - RÉINITIALISATION 15
G - FAQ 16
H - INFORMATIONS TECHNIQUES ET LÉGALES 17
1 - CARACTÉRISTIQUES TECHNIQUES 17
2 - GARANTIE 18
3 - ASSISTANCE ET CONSEILS 18
4 - RETOUR PRODUIT - SAV 18
5 - DÉCLARATION DE CONFORMITÉ CE 18
1 - PRÉCAUTIONS D'UTILISATION
natural_image
Line drawing of a hand holding a small electronic device with a circular base (no text or symbols)
natural_image
Pure mechanical diagram showing two pulleys with a rotating arrow, no text or symbols present2 - INSERTION D'UNE CARTE MICROSD (NON FOURNIE)
natural_image
Line drawing of a hand holding a small object, possibly a tool or component, with no visible text or symbols.
natural_image
Line drawing of a hand holding a small object, possibly a tool or device, with no visible text or symbols.3 - CONNEXION DE LA CAMÉRA

natural_image
Diagram of a wireless device connected to an electrical outlet via cable, showing signal transmission and wiring (no text or symbols)D - CONFIGURATION
1 - CONFIGURATION DE LA CAMÉRA ET AJOUT DANS L'APPLICATION
5 - DÉCLARATION DE CONFORMITÉ CE
À la directive RED

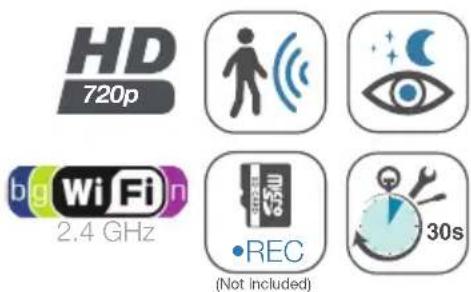
Indoor 720P IP WiFi camera
ref. 123980

CONTENTS
A - SAFETY INSTRUCTIONS 05
1 - OPERATING PRECAUTIONS 05
2 - MAINTENANCE AND CLEANING 05
3 - RECYCLING 05
B - PRODUCT DESCRIPTION 06
1 - KIT CONTENTS 06
2 - CAMERA 06
3 - MAINS ADAPTOR 07
C - INSTALLATION 08
1 - INSTALLING THE CAMERA 08
2 - INSERTING A MICRO SD CARD (NOT INCLUDED) 08
3 - CONNECTING THE CAMERA 09
D - CONFIGURATION 10
1 - CONFIGURING THE CAMERA AND ADDING IT TO THE APP 10
2 - ACCESS TO ALL SETTINGS 11
2.1 - CONFIGURATION 12
E - OPERATION 13
1 - LIVE VIDEO 13
2 - VIEWING VIDEOS RECORDED BY THE CAMERA 13
F - RESETTING 15
G - FAQ 16
H - TECHNICAL AND LEGAL INFORMATION 17
1 - TECHNICAL CHARACTERISTICS 17
2 - WARRANTY 18
3 - HELP AND ADVICE 18
4 - PRODUCT RETURNS/AFTER SALES SERVICE 18
5 - EC DECLARATION OF CONFORMITY 18
A - SAFETY INSTRUCTIONS
1 - OPERATING PRECAUTIONS
- The cameras must not be installed where the lens filter may be vulnerable to scratching and dirt.
- Do not expose the lens to direct sunlight or any reflected light source.
- Do not daisy-chain extension cords and/or multi-socket adapters.
- Do not install near acidic chemicals, ammonia or sources of toxic gases.
- The installation and use of the camera must comply with local laws.
2 - MAINTENANCE AND CLEANING
• Always unplug the product from the mains before carrying out any maintenance.
- Never use abrasive or corrosive substances to clean the products.
- Use a soft, slightly damp cloth.
- Never use an aerosol to spray the product as this may damage the internal workings.
3 - RECYCLING
This logo denotes that devices which are no longer in use must not be disposed of as household waste. They are likely to contain hazardous substances that are dangerous to both health and the environment. Return the equipment to your local distributor or use the recycling collection service provided by your local council.

B - PRODUCT DESCRIPTION
1 - CONTENTS OF THE KIT
natural_image
Simple line drawing of a webcam device with no text or symbols

natural_image
Line drawing of a coiled cable with connectors, no text or symbols present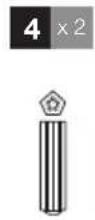
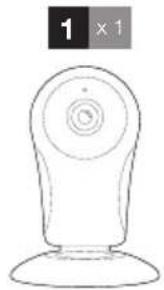
| 1 | Camera |
| 2 | 230V A/C 50Hz mains adaptor / 5V D/C 1A USB |
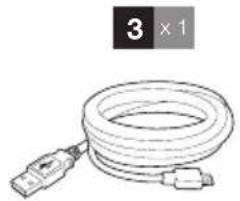
| 3 | USB cable for powering the camera |
| 4 | Wall plugs for attaching the wall mount |
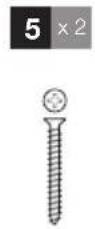
| 5 | Screws for wall-mounting |
2 - CAMERA
Front view Side view Rear view
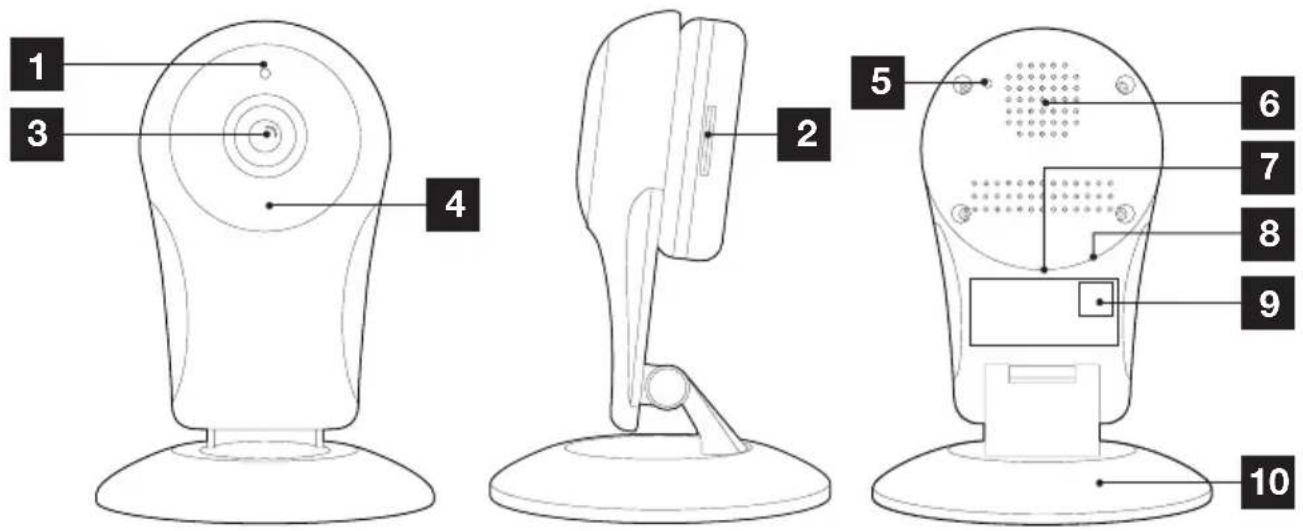
| 1 | Dusk sensor for infra-red lighting control |
| 2 | Space for microSD card (not included) of up to 128GB (on the side) |
| 3 | Camera lens |
| 4 | Infra-red light for night vision(all around the lens) |
| 5 | “Reset” button: reset |
| 6 | Loudspeaker |
| 7 | Micro-USB power socket for mains cable and adapter (supplied) |
| 8 | Positioning of microphone(on the side) |
| 9 | QRCode to be scanned when starting up using the Protect-Home app |
| 10 | Adjustable base |
3 - MAINS ADAPTER
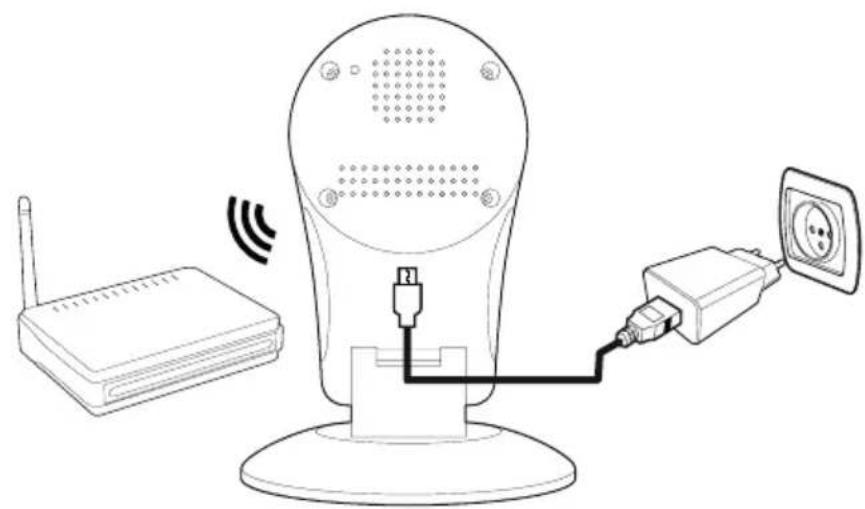
A 230 V AC 50 Hz / 5 V DC 1 A USB mains adapter for powering the camera is included in the kit, as well as the corresponding cable. Do not use other power supplies as they could damage the camera and invalidate the warranty.
C - INSTALLATION
1 - INSTALLING THE CAMERA
- The camera may be attached to a wall, the ceiling or placed on a flat, horizontal surface.
- Mount the camera using suitable screws and wall plugs for the type of surface (the screws and plugs supplied are suitable for solid walls).
• Make sure the camera is properly secured to prevent it from falling.


natural_image
Line drawing of a hand holding a small electronic device with a circular base (no text or symbols)
natural_image
Pure mechanical diagram showing two pulleys with a rotating arrow, no text or symbols present2 - INSERTING A MICRO SD CARD (NOT INCLUDED)
Your camera has a micro SD card slot, which gives it an internal storage memory. The maximum size is 128 GB.
This card is optional, but required if you wish the camera to record independently.

natural_image
Line drawing of a hand holding a small object, possibly a tool or component, with no visible text or symbols.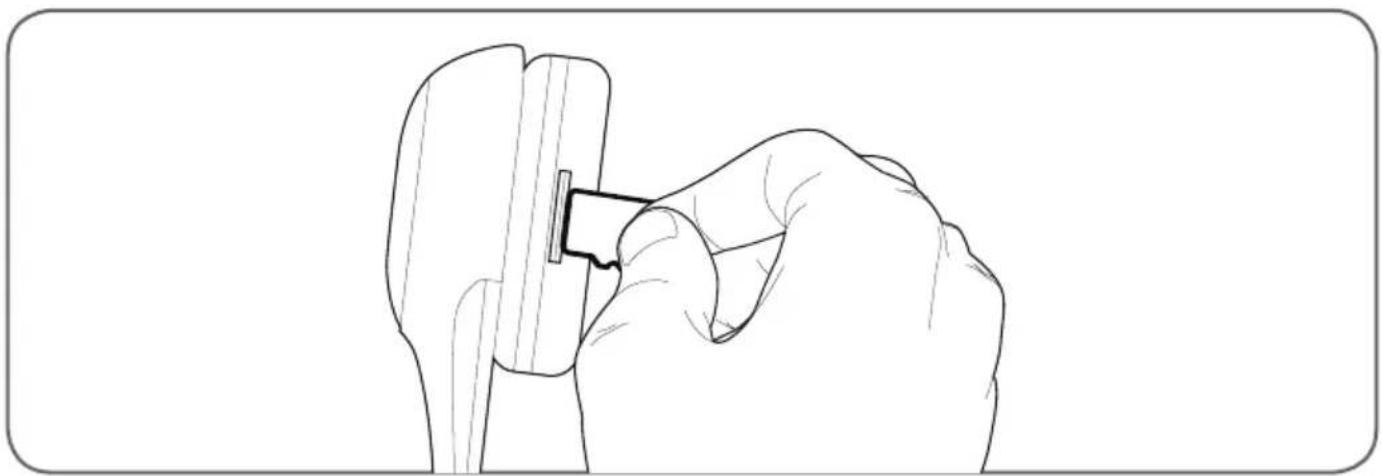
natural_image
Line drawing of a hand holding a small object, possibly a tool or device, with no visible text or symbols.3 - CONNECTING THE CAMERA

natural_image
Diagram of a wireless device connected to an electrical outlet via cable, showing signal transmission and wiring (no text or symbols)D - CONFIGURATION
1 - CONFIGURING THE CAMERA AND ADDING IT TO THE APP
Note: the screenshots displayed have been taken from the Android version of the Protect-Home app. The iPhone version works in exactly the same way.
Download the Protect-Home app on the Appstore or Google Play; then launch the app. Accept the authorisation requests sent by the app if necessary (access to the camera for scanning the QRCode, etc.).
Next, click on the icon , the app opens the camera on your smartphone and invites you to scan the QRCode shown on the camera:
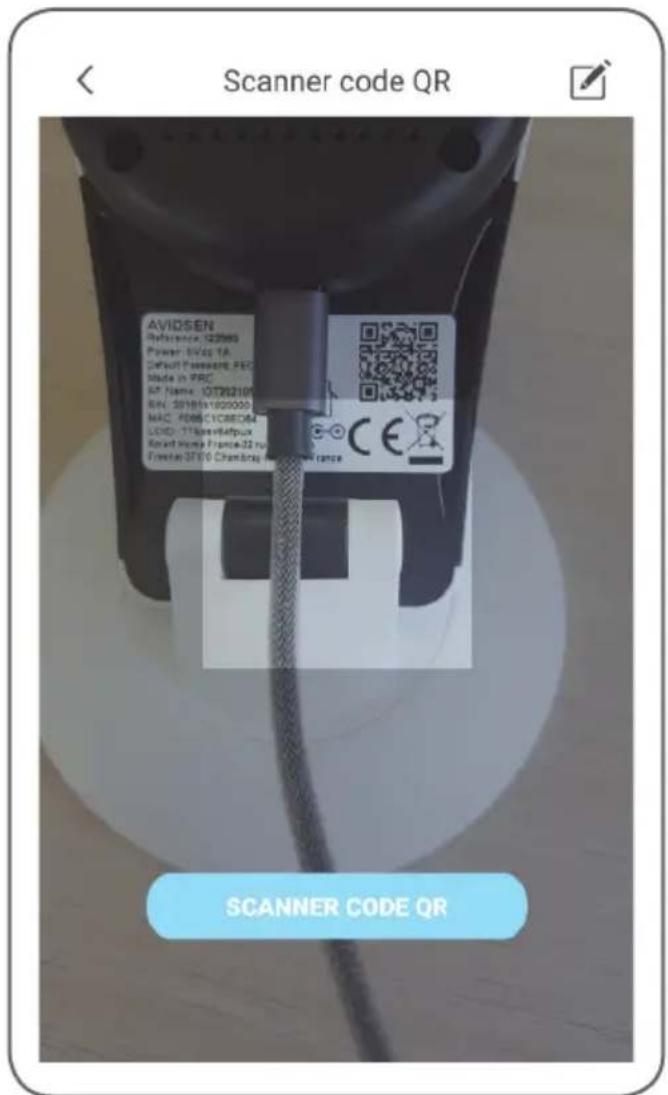
720P WIFI IP CAMERA
At this point, the camera must be powered on and started up. It plays a standby tune when it is ready.
Click on "Ready music played" to continue.
The app then asks you how you wish to configure the camera:
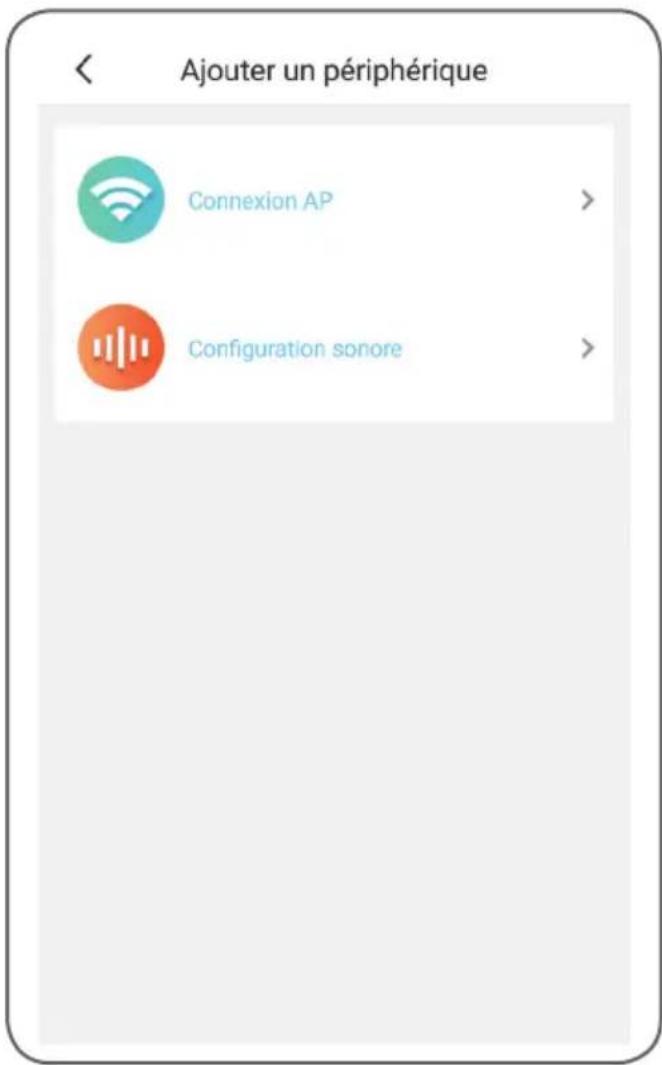
AP connection: via WiFi connection.
Audio configuration: the data will be transmitted by the smartphone loudspeaker.
Select one of the methods to continue (they are equivalent):
D - CONFIGURATION

The app then asks you what network and what key it must send to the camera for internet access.
Important: Camera network compatibility: 2.4 GHz - 20/40 auto - WPA/WPA2.
Not compatible with 5 GHz WiFi, not compatible with WEP encryption.
Please check the WiFi settings of your gateway with your Internet service provider if you experience connection difficulties.
- If you have selected "audio configuration", check that you have activated the sound on your smartphone.
- Position yourself close to your camera with your smartphone (30 cm) to continue.
Click "Next" after indicating the WiFi network to be used and the corresponding key. Your smartphone then sends the instructions to the camera. After a few seconds, once the camera has managed to join the network indicated by your smartphone, the camera plays a tune.
When your smartphone detects the presence of your camera on the network, it asks you which time zone it should use:

The time indicated is inset in the video recordings made by the camera. (Europe: GMT+ 1 hour in winter, GMT+ 2 hours in summer).
2 - ACCESS TO ALL SETTINGS
When first accessing your camera, you will immediately be asked to change its default password:
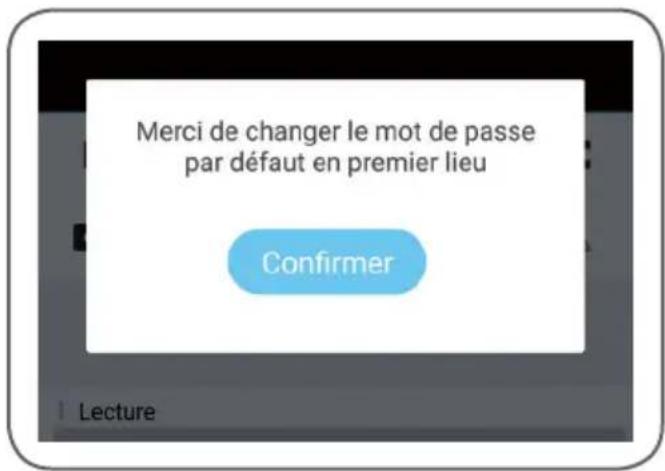
The default password is an 8-letter code indicated on the camera marking at the side of the QRCode. The new password must be a combination of 8 characters consisting of letters and numbers.
2.1 - CONFIGURATION
After clicking on the image of your camera from the camera list, click on the icon ⚙ to access the full configuration of your camera:

| 1 | It is easier if you rename your camera here after pairing |
| 2 | Change of camera access password, which changes when the camera is started up |
| 3 | MicroSD card management (not included) and formatting |
| 4 | Movement detection management: starting/ stopping the recording on the microSD card when a movement is detected in the camera field and activation/de-activation of notifications via the app for increased peace of mind |
| Détecteur de mouvementNe pas déranger | |
| 5 | Vertical inversion of the image for ceiling mounting |
| 6 | Privacy mode: enables the image and sound from the camera to be de-activated from the app (stops all recording and notification at the same time) |
| 7 | Time zone setting to set the time inset in the videos taken by the camera |
| Fuseau horaire gmt+01:00 > | |
| Confirmer | |
| 8 | Current version of the camera firmware |
| 9 | Deletion of the camera: removes the camera from the list of cameras recognized by the app (but does not change the personalised connection password) |
| 1 | It is easier if you rename your camera here after pairing |
| 2 | Change of camera access password, which changes when the camera is started up |
| 3 | MicroSD card management (not included) and formatting |
| 4 | Movement detection management: starting/ stopping the recording on the microSD card when a movement is detected in the camera field and activation/de-activation of notifications via the app for increased peace of mind |
| Détecteur de mouvementNe pas déranger |
| 5 | Vertical inversion of the image for ceiling mounting |
| 6 | Privacy mode: enables the image and sound from the camera to be de-activated from the app (stops all recording and notification at the same time) |
| 7 | Time zone setting to set the time inset in the videos taken by the camera |
| Fuseau horaire | gmt+01:00 |
| Confirmer |
| 8 | Current version of the camera firmware |
| 9 | Deletion of the camera: removes the camera from the list of cameras recognized by the app (but does not change the personalised connection password) |
1 - LIVE VIDEO
From the list of cameras (home screen of the app after start-up), click on the image or name of your camera to display the live video:

| 1 | Access to the camera configuration |
| 2 | Return to the list of cameras recognized by the app |
| 3 | Live video |
| 4 | Video start/stop |
| 5 | Selection of image quality. Please note: high quality requires a better connection in terms of the camera and smartphone. |
| 6 | On/off switch of camera microphone |
| 7 | Switch to landscape format for full screen video display |
| 8 | Not used on this model |
| 9 | Simultaneous display of up to 4 cameras |
| 10 | Smartphone microphone activation to speak through the camera's speaker |
| 11 | Start/stop of video recording (recording onto smartphone memory) |
| 12 | Immediate photo taking (recording onto smartphone memory) |
| 13 | If a MicroSD card is in the camera and video recordings have been taken by the camera, they can be viewed by clicking here. |
2 - VIEWING VIDEOS TAKEN BY THE CAMERA
On the live display screen, click on the area at the bottom of the screen to read the contents of the microSD card (not included) and the recordings made by the camera in your absence. If videos have been recorded on the MicroSD card (not included) inserted into the camera, their presence is indicated as follows:
E - OPERATION
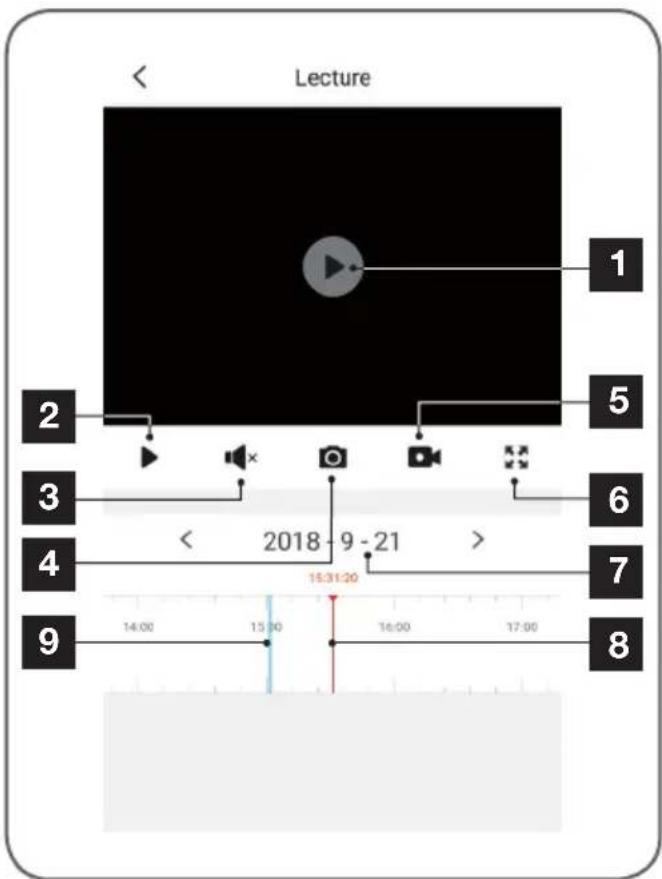
| 1 | When a recorded video is viewed, it appears instead of the live image |
| 2 | Review start/stop |
| 3 | On/off of sound on recorded video |
| 4 | Taking an immediate photo of the recording being viewed (saved to the smartphone memory) |
| 5 | Start/stop of video recording saved to the smartphone memory for the video recording being viewed |
| 6 | Go to full screen |
| 7 | Date being viewed (click on “<” or “>” to change) |
| 8 | The index in red indicates the current viewing time (slide left or right to change the video location or to change video) |
| 9 | The presence of blue coloured lines indicates that videos have been stored on the camera at the corresponding time |
720P WIFI IP CAMERA
If there is a problem, the WiFi configuration may be reset by pressing and holding the Reset button at the back until a beep is heard. Once reset, the camera will start up again. After 30 seconds, it is available for reconfiguration.
Note: Pressing the Reset button does not delete the camera from your app
G - FAQ
| Symptoms Possible causes Solutions | ||
| Unable to install the Protect-Home app on my Android device | You have an out-of-date or incompatible version of Android on your device | Please contact the technical support of your device's manufacturer in order to obtain a recent Android version |
| Google Play checks all the key components needed to run the application properly. If your equipment does not meet the necessary criteria, the installation will not complete | Try the installation on a different Android device | |
| Unable to install the Protect-Home app on my Apple device | The version of iOS on your device is not up to date | Update the operating system on your device. |
| The camera is not detected as being online when wanting to connect it to a smartphone | Camera connection too slow | Temporarily connect your smartphone to the same network as the camera when adding to the app. |
| Cannot connect to camera over local network | Network/power supply issue | Check your network and electrical connections. |
| Network configuration problem | Check your camera's network connection settings | |
| The camera image feed cannot be accessed over the internet. Poor quality or shaky image | Network configuration problem | Check your device settings (box, router) |
| Incorrect video settings | Check the video settings and reduce the quality if necessary | |
| Movement detection is triggered unnecessarily | Unsuitable movement detection settings | Turn the camera |
| The camera is not detected as being online | Camera connection too slow | Temporarily connect your smartphone to the same |
| When wishing to link it to a smartphone | network as the camera when adding it to the app | |
H - TECHNICAL AND LEGAL INFORMATION
1 - TECHNICAL CHARACTERISTICS
| Camera | |
| Power supply | 5V DC / 1A |
| Wireless network interface | WiFi IEEE 802.11 b/g/n 2.4Ghz Compatible WPA/WPA2 |
| Optical sensor | 14'' CMOS |
| Minimum luminous intensity | 0 lux |
| Night vision | Automatic (dusk-to-dawn sensor)Range: 5m |
| Viewing angle | 106° |
| Buttons | WiFi setting reset button |
| Video compression | H.264 |
| Resolution | 1280x720 pixels |
| Audio | Built-in microphone and loudspeaker for two-way audio communication |
| Storage | 1 micro SD card slot up to 128 GB memory for storing video via remote access |
| Operating temperature and humidity | 0°C to 50°C, 10% to 90% RH, non-condensing |
| Dimensions | L80mm x H115mm x D80mm |
| Weight | 95g |
H - TECHNICAL AND LEGAL INFORMATION
2 - WARRANTY
- This product is under warranty for parts and labour for 2 years from the date of purchase. Proof of purchase must be retained for the duration of the warranty period.
The warranty does not cover damage caused by negligence, knocks or accidents.
The warranty will be void if the device is tampered with.
3 - HELP AND SUGGESTIONS
- If, despite the care we have taken in designing our products and drafting these instructions, you do encounter diffi culties when installing your product or you have any questions, we recommend you contact one of our specialists who will be glad to help. - If you encounter operating problems during the installation or a few days afterwards, it is essential that you are in front of your installation when contacting us, so that one of our technicians can diagnose the source of the problem, as it will probably be the result of a setting that is incorrect or an installation that is not to specifi cation. If the problem is caused by the product itself, the technician will give you an RMA number so that you can return the unit to the shop. Without this RMA number, the shop may refuse to exchange the product.
Contact our after sales service team technicians:
0 892 701 369
Monday to Friday, 9AM to 12PM and 2PM to 6PM.

4 - PRODUCT RETURNS - AFTER SALES SERVICE
If, despite the care we have taken in designing and manufacturing your product, it needs to be returned to our customer service centre, you can check the progress of the work on our website at the following address: http://sav.avidsen.com
Avidsen undertakes to keep a stock of spare parts for this product throughout the contractual warranty period.
5 - EC DECLARATION OF CONFORMITY
Per the RED directive
Declaration of conformity with the RED Directive SMART HOME FRANCE
hereby declares that the equipment designated below:
720P HD indoor IP camera 123980
Complies with the RED 2014/53/EU directive and that its conformity has been assessed pursuant to the applicable standards in force:
EN62368-1:2014
EN62479:2010
EN301 489-1 V2.1.1:2017-02
EN301 489-17 V3.1.1:2017-03
EN300 328 V2.1.1:2016-11
Drafted in Tours on 02/10/18
Alexandre Chaverot, CEO
natural_image
Simple hand-drawn sketch of a line with two oval shapes and a diagonal line (no text or symbols)

IP-binnencamera wifi 720P
ref. 123980


INHOUDSOPGAVE
A - VEILIGHEIDSVOORSCHRIFTEN 05
1 - GEBRUIKSVOORSCHRIFTEN 05
2 - ONDERHOUD EN REINIGING 05
3 - RECYCLAGE 05
B - BESCHRIJVING VAN HET PRODUCT 06
1 - INHOUD VAN DE KIT 06
2 - CAMERA 06
3 - LICHTNETADAPTER 07
C - INSTALLATIE 08
1 - INSTALLATIE VAN DE CAMERA 08
2 - EEN MICROSD-KAART PLAATSEN (NIET MEEGELEVERD) 08
3 - AANSLUITING VAN DE CAMERA 09
D - CONFIGURATIE 10
1 - CONFIGURATIE VAN DE CAMERA EN TOEVOEGEN AAN DE TOEPASSING 10
2 - TOEGANG TOT ALLE INSTELLINGEN 11
2.1 - CONFIGURATIE 12
E - GEBRUIK 13
1 - LIVE VIDEO 13
2 - RAADPLEGEN VAN VIDEO'S DIE MET DE CAMERA ZIJN OPGENOMEN 13
F - RESETTEN 15
G-FAQ 16
H - TECHNISCHE EN WETTELIJKE INFORMATIE 17
1 - TECHNISCHE EIGENSCHAPPEN 17
2 - GARANTIE 18
3 - HULP EN TIPS 18
4 - RETOUR PRODUCT - SERVICE NA VERKOOP 18
5 - CE CONFORMITEITSVERKLARING 18
A - VEILIGHEIDSVOORSCHRIFTEN
1 - GEBRUIKSVOORSCHRIFTEN
natural_image
Line drawing of a hand holding a small object, possibly a tool or device, with no visible text or symbols.3 - AANSLUITING VAN DE CAMERA
natural_image
Line drawing of a wireless device with a WiFi, connected to an electrical outlet via a plug and cable (no text or symbols)D - CONFIGURATIE
1 - CONFIGURATIE VAN DE CAMERA EN TOEVOEGEN AAN DE TOEPASSING

INHALT
natural_image
Simple line drawing of a webcam device with no text or symbols
natural_image
Line drawing of a coiled cable with connectors, labeled '3 x 1' (no text or symbols on the diagram itself)

| 1 | Kamera |
| 2 | Netzadapter 230Vac 50Hz / USB5Vdc1A |
| 3 | USB-Kabel zur Stromversorgung derKamera |
natural_image
Line drawing of a hand holding a small object, possibly a tool or device, with no visible text or symbols.
natural_image
Line drawing of a hand holding a small object, possibly a tool or device, with no visible text or symbols.natural_image
Diagram showing a wireless router connected to an electrical outlet via a plug, with no text or symbols present.D - KONFIGURATION
1 - KONFIGURATION DER KAMERA UND HINZUFÜGEN ZUR APP

ES
Cámara IP WiFi interior 720P
ref. 123980




ÍNDICE
natural_image
Line drawing of a hand holding a small electronic device with a circular base (no text or symbols)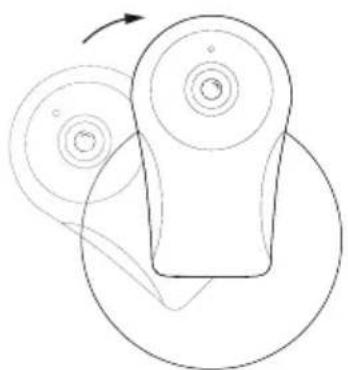
natural_image
Pure mechanical diagram showing two pulleys with a rotating arrow, no text or symbols presentnatural_image
Line drawing of a hand holding a small object, possibly a tool or device, with no visible text or symbols.natural_image
Diagram of a wireless device with a router, switch, and power outlet connected to a socket (no text or symbols present)D - CONFIGURACIÓN


Câmara IP WiFi interna 720P
ref. 123980

ÍNDICE
A - INSTRUÇÕES DE SEGURANÇA 05
natural_image
Line drawing of a hand holding a small electronic device with a circular base (no text or symbols)
natural_image
Pure mechanical diagram showing two pulleys with a rotating arrow, no text or symbols presentnatural_image
Line drawing of a hand holding a small object, possibly a tool or component, with no visible text or symbols.
natural_image
Line drawing of a hand holding a small object, possibly a tool or device, with no visible text or symbols.natural_image
Diagram of a wireless device with a router, switch, and power outlet connected to a socket (no text or symbols present)D - CONFIGURAÇÃO
De segunda a sexta-feiran entre as 9h e as 13h e entre as 14h e as 18h.

Câmara IP interior 720p HD 123980

Telecamera IP Wi-Fi da interno 720P
cod. 123980

INDICE
natural_image
Simple line drawing of a webcam device with no text or symbols

natural_image
Line drawing of a coiled cable with connectors, no text or symbols present

natural_image
Line drawing of a hand holding a device with a circular component (no text or symbols)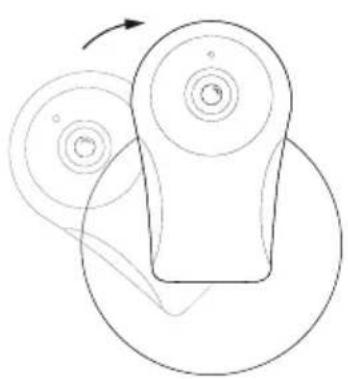
natural_image
Diagram of a mechanical pulley system with rotating components and a curved arrow indicating rotation (no text or labels)2 - INSERIMENTO DELLA SCHEDA MICROSD (NON INCLUSA)
natural_image
Line drawing of a hand holding a small object, possibly a tool or component (no text or symbols present)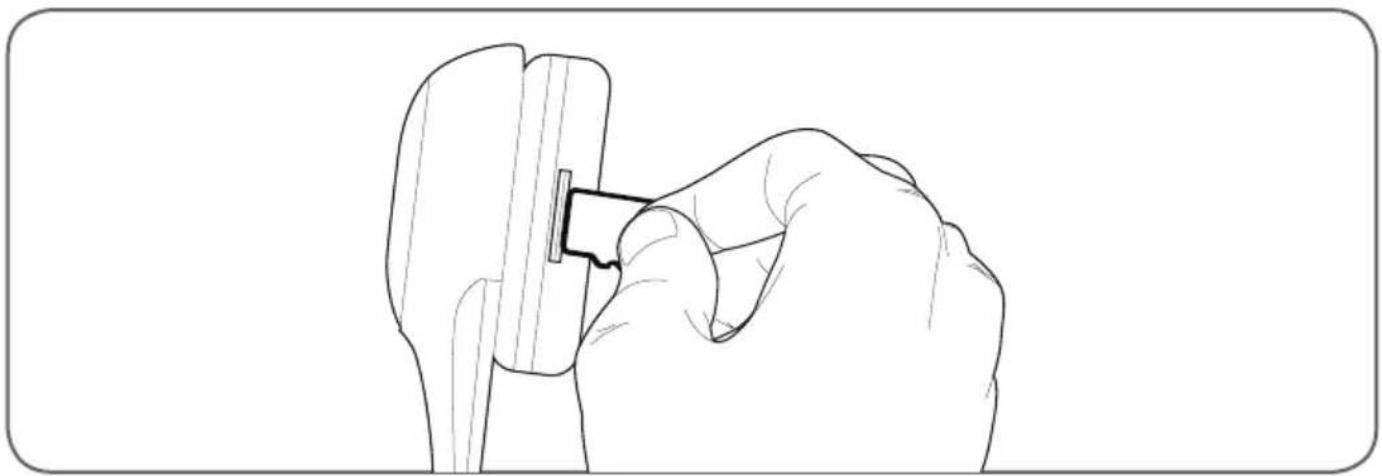
natural_image
Line drawing of a hand holding a small object, possibly a tool or device, with no visible text or symbols.3 - CONNESSIONE DELLA TELECAMERA

natural_image
Diagram showing a wireless router connected to an electrical outlet via cable, with signal waves indicating wireless connection (no text or symbols present)D - CONFIGURAZIONE
1 - COME CONFIGURARE LA TELECAMERA E AGGIUNGERLA NELL'APPLICAZIONE
natural_image
Simple hand-drawn sketch of a signature or mark (no text or symbols)


- SOMMAIRE
- A - CONSIGNES DE SÉCURITÉ 05
- B - DESCRIPTION DU PRODUIT 06
- C - INSTALLATION 08
- D - CONFIGURATION 10
- E - UTILISATION 13
- F - RÉINITIALISATION 15
- G - FAQ 16
- H - INFORMATIONS TECHNIQUES ET LÉGALES 17
- - PRÉCAUTIONS D'UTILISATION
- - INSERTION D'UNE CARTE MICROSD (NON FOURNIE)
- - CONNEXION DE LA CAMÉRA
- D - CONFIGURATION
- - CONFIGURATION DE LA CAMÉRA ET AJOUT DANS L'APPLICATION
- - DÉCLARATION DE CONFORMITÉ CE
- Indoor 720P IP WiFi camera
- CONTENTS
- A - SAFETY INSTRUCTIONS 05
- B - PRODUCT DESCRIPTION 06
- E - OPERATION 13
- F - RESETTING 15
- H - TECHNICAL AND LEGAL INFORMATION 17
- A - SAFETY INSTRUCTIONS
- - OPERATING PRECAUTIONS
- - MAINTENANCE AND CLEANING
- - RECYCLING
- B - PRODUCT DESCRIPTION
- - CONTENTS OF THE KIT
- - CAMERA
- - MAINS ADAPTER
- C - INSTALLATION
- - INSTALLING THE CAMERA
- - INSERTING A MICRO SD CARD (NOT INCLUDED)
- - CONNECTING THE CAMERA
- - CONFIGURING THE CAMERA AND ADDING IT TO THE APP
- 720P WIFI IP CAMERA
- - ACCESS TO ALL SETTINGS
- - CONFIGURATION
- - LIVE VIDEO
- - VIEWING VIDEOS TAKEN BY THE CAMERA
- E - OPERATION
- G - FAQ
- H - TECHNICAL AND LEGAL INFORMATION
- - WARRANTY
- - HELP AND SUGGESTIONS
- - PRODUCT RETURNS - AFTER SALES SERVICE
- - EC DECLARATION OF CONFORMITY
- IP-binnencamera wifi 720P
- INHOUDSOPGAVE
- A - VEILIGHEIDSVOORSCHRIFTEN 05
- B - BESCHRIJVING VAN HET PRODUCT 06
- C - INSTALLATIE 08
- D - CONFIGURATIE 10
- E - GEBRUIK 13
- F - RESETTEN 15
- G-FAQ 16
- H - TECHNISCHE EN WETTELIJKE INFORMATIE 17
- A - VEILIGHEIDSVOORSCHRIFTEN
- - GEBRUIKSVOORSCHRIFTEN
- - AANSLUITING VAN DE CAMERA
- D - CONFIGURATIE
- - CONFIGURATIE VAN DE CAMERA EN TOEVOEGEN AAN DE TOEPASSING
- INHALT
- D - KONFIGURATION
- - KONFIGURATION DER KAMERA UND HINZUFÜGEN ZUR APP
- ES
- Cámara IP WiFi interior 720P
- ÍNDICE
- D - CONFIGURACIÓN
- Câmara IP WiFi interna 720P
- A - INSTRUÇÕES DE SEGURANÇA 05
- D - CONFIGURAÇÃO
- Telecamera IP Wi-Fi da interno 720P
- INDICE
- - INSERIMENTO DELLA SCHEDA MICROSD (NON INCLUSA)
- - CONNESSIONE DELLA TELECAMERA
- D - CONFIGURAZIONE
- - COME CONFIGURARE LA TELECAMERA E AGGIUNGERLA NELL'APPLICAZIONE
Brand : AVIDSEN
Model : 123980
Category : Security Camera