VC3668 - Vacuum Cleaner Khind - Free user manual and instructions
Find the device manual for free VC3668 Khind in PDF.


| Product Type | Canister Vacuum Cleaner |
| Model | VC3668 |
| Brand | Khind |
| Suction Power | 2000 W |
| Dust Capacity | 2.5 L (bag) |
| Filtration System | HEPA filter + exhaust filter |
| Cord Length | 6 m |
| Weight | 5.2 kg |
| Dimensions (L x W x H) | 350 x 260 x 220 mm |
| Voltage | 220-240 V, 50/60 Hz |
| Noise Level | 78 dB(A) |
| Operating Radius | 9 m (cord + hose) |
| Accessories Included | Floor nozzle, crevice tool, dusting brush, upholstery tool |
| Variable Speed Control | Yes (slider on handle) |
| Automatic Cord Rewind | Yes |
| Carrying Handle | Integrated |
| Wheels | 2 front swivel, 2 rear fixed |
| Dust Bag Indicator | Yes (mechanical/visual) |
| Overheat Protection | Auto shut-off |
| Maintenance | Clean filter every 3 months, replace bag when full |
| Repairability | Spare parts available from Khind service centers |
| Certifications | CE, CB, SIRIM |
Frequently Asked Questions - VC3668 Khind
User questions about VC3668 Khind
0 question about this device. Answer the ones you know or ask your own.
Ask a new question about this device
Download the instructions for your Vacuum Cleaner in PDF format for free! Find your manual VC3668 - Khind and take your electronic device back in hand. On this page are published all the documents necessary for the use of your device. VC3668 by Khind.
USER MANUAL VC3668 Khind
Wet & Dry Vacuum Cleaner / 干湿两用吸尘机 /

KHIND®
Enjoy hassle-free customer service
1 Scan E-Warranty QR code or go to http://www.khind.com.my/e-warranty.html
2 Fill-up your details, product information & proof of purchase.
HOTLINE 1800-88-0032
www.khind.com.my
Please read this manual carefully before operating this product. Keep this manual handy for further reference. 请在使用此产品前,详读此说明书。并将之收藏以作日后参考。
This manual is also available online.
P/N:40 51429 00
Safety Precaution Information
[A] Safety Instruction
- Read the instruction manual carefully and follow the instruction closely.
- Use this appliance with specified voltage as stated on the rating label. Before connecting the appliance to AC mains, made sure the voltage specified corresponds to the AC supply to your house.
- Do not handle the plug and the appliance with wet hands.
- Please turn off and unplug the appliance when not in use or before any cleaning and maintenance work. Make sure the power is off before pulling out the plug.
- Do not pull, lift, or carry the appliance by its power cord. Do not excessively bend, stretch, twist, haul and tramp the power cord or place heavy objects on it.
- If the supply cord is damaged, it must be replaced by the manufacturer, its service agent or similarly qualified persons in order to avoid a hazard.
- Use only the accessories parts which are supplied by the manufacturer.
- With any indication of damage or malfunction, please stop using the appliance immediately to avoid hazards. Take it to the authorized service center for repair. Do not attempt to repair or change any parts by yourself.
- This appliance is intended for household use only, commercial use will void warranty.
- Ensure all parts are securely assembled before using the appliance. Refer "Installation" on page 4-5 for guideline.
[B] General Precaution
- This appliance is not intended for use by persons (including children) with reduced physical, sensory or mental capabilities, or lack of experience and knowledge, unless they have been given supervision or instruction concerning use of the appliance by a person responsible for their safety. Children should be supervised to ensure that they do not play with the appliance.
- Keep packaging film away from children - risk of suffocation!
- Do not leave the appliance unattended while it is connected to the main power outlet.
- Do not expose the appliance under direct sunshine or rain.
- Risk of Explosion! Do not operate the appliance near a gas stove, kerosene stove, gas cooker, in any space with an open fire, or in an environment with high temperature.
- Immediately switch the appliance off or pull the power plug if foam forms or liquids escape!
- Do not overturn the appliance in case water goes into the motor and damage the motor.
- Take extra care when cleaning and vacuuming at the staircase area.
[C] Risk of Personal Injury
In order to prevent damage to the product and reduce the risk of fire and personal injury, the following objects are strictly prohibited from being sucked up:
1. Any large or broken object such as glass.
2. Anything that is burning or smoking such as cigarettes, matches or hot ashes.
3. Liquid spills
4. Reactive liquids (solvents, corrosives, detergents).
5. Flammable or explosive substances such as alcohol, thinners etc.
6. Pet litter or anything with pet waste attached.
7. Sharp objects such as pins, needles, toothpicks, coins, metals.
8. Chalk, plastics, food wrap, other wrapping films.
9. Long pieces of string and belts.
Suggestion:
In case of long operation, it is recommended that a short interval of rest is taken after every 30 minutes of usage.

Cleaning & Maintenance
- Before performing cleaning and maintenance, switch OFF the power and unplug from the main switch.
- Do not immerse any part of the appliance into the water or other liquids. (except for those parts and accessories that can be washed with water).
- Do not use scouring pads, abrasive cleaning agents or corrosive solvent to clean the appliance.
- Before each use, please clean the vacuum inlet of the dust container, clean out the hair, cotton fiber and dust. Do not jam the suction of the dust container.
- After cleaning the barrels, filters and related accessories, check if leaks. After each use, clean the filter and do not use a wet filter at all times.
- Check the plug if damage, place the plug.
- Check whether there is something plug the air intake, if any, please clean.
- Carefully put the machine, do not beat.
- Keep the machine dry.
- If filter covered with dust, wash with cold water, if necessary, may also use neutral detergent cleaning, do not use corrosive objects to clean. Do not put entire head directly in the water cleaning.
- Do not let the machine work for a long time, each working time is best in 2 hours, otherwise will reduce the machine life.
- After a long time the filter will be covered the dust, suction will be weakened. To avoid the weakening of suction, always clean the filter.
- If any abnormal vibration or noise or smell, Must immediately stop using the machine, and maintenance.
Replace the battery on Remote Control Hose
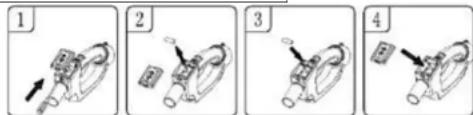
- The battery cover can be opened by pressing the fixed in the front of the battery box with a screw driver. (Fig 1)
- Take out the old batteries from the battery pack. (Fig 2)
- Replace with a new 23A 12V alkaline battery, pay attention to the anode and cathode of the battery when installing. (Fig 3)
- Insert the protruding fixed buckle at the back of the battery cover into the corresponding slot on the battery box, and press the front end of the battery cover can stick it into the battery case. (Fig4) WARNING: The remote control hose is only applicable to 23A 12V alkaline battery. Do not use batteries of other specifications to avoid damaging the remote control hose.
Filter Cleaning
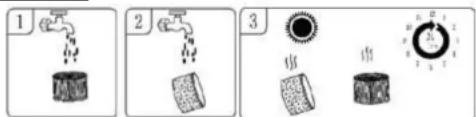
- Periodically check the cleaning filter to maintain performance.
- If the suction very tiny dust, the filter may need more frequent cleaning.
- Wash filter sponge with cold or warm water without the use of detergent. (Fig 1 Fig 2)
- Keep the cleaned parts in a wide area to dry, try to keep dry and dry for at least 24 hours. Do not put the filter in a dishwasher, washing machine, roller dryer, oven, microwave oven, below sun light or open flame. (Fig 3)

Parts Identification Parts Identification
Main Body
① Not applicable in model VC3668
② Standby Button - Turn on / off standby
③ Cleaning Button - Turn on / off water spray button
4 Indicator Light - Indicate standby, function and pairing status
⑤ Suction Button:
1st Press - Turn on suction function with high speed as default speed
2nd Press - Switch from high to low speed
3rd Press - Turn off suction function
6 Top Cover - Contain motor and function buttons
7 Water Pump Outlet Connector - Connect to remote control hose pipe for cleaning function
⑧ Suction Inlet - Connect to remote control hose
9 Barrel Lock - Secure lock the Top Cover with barrel
Pedestal
Caster Wheel
17 Handle
⑬ Air Outlet
14 Power Cord - Connect to power socket
15 Water Pump Inlet Connector - Draw water or detergent from Soap Bucket
16 Soap Bucket - Storage for water or detergent
17 Big Wheel
Accessories
18 Remote Control Hose - Contain Suction and Cleaning Button; and water pipe
19 Aluminium Extension Tube - Extension tube to change from hand to stand configuration
20 Cartridge Filter - Protects motor during dry vacuum by filtering dust and debris
21 Water Sponge - Use to protect motor during wet vacuuming fuctions
② Wet Dry Nozzle - Suitable for normal wet vacuuming applications
23 Carpet Floor Nozzle - Suitable for normal dry vacuuming applications
74 Crevice Nozzle - Suitable for small gap and edge areas
Round Brush - Suitable for small gap or rail areas
26 Large Water Spray Head - Suitable for small area and upholstery
27 Small Water Spray Head - Suitable for small area and upholstery
3 EN
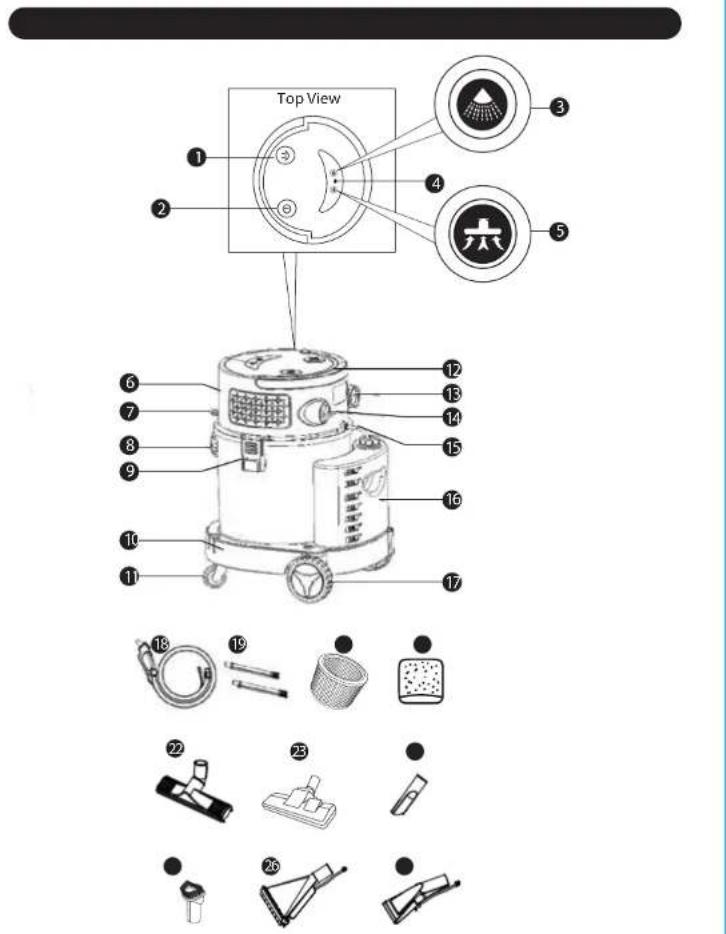
* Pictures are for illustration purpose only.
4 EN
Specifications
| Voltage | 220-240V~50/60Hz |
| Power | 1200W |
| Filtration Type | Cartridge Filter |
| Tank Container Capacity | 20 L |
| Power Cord Length | 5 Meter |
| Vacuum Pressure | 17 kPa |
| Noise Level | 82 dB |
| Net Weight | 8.1kg |
| Product Dimension (LxWxH) | 413 x 365 x 506mm |
'Specifications are subject to change without prior notice.
Installation
A] Product Installation
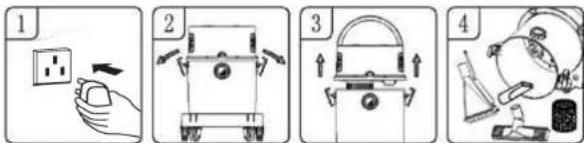
Caution: Make sure that the power cord plug and socket are de-energized when opening or assembling the vacuum cleaner that you purchased.
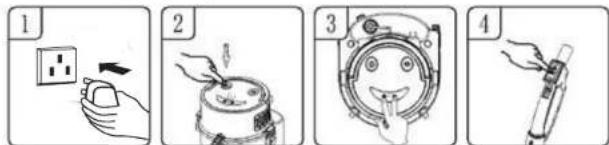
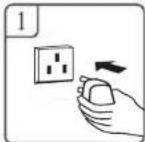
- Make sure the power cord is disconnected from the socket. (Fig 1)
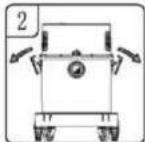
- Loose Clips. (Fig2)
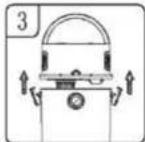
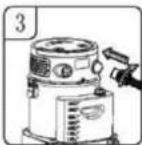
- Raise the top cover from the dust barrel. (Fig 3)
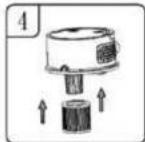
- Take out all the accessories from the dust barrel. (Fig 4)
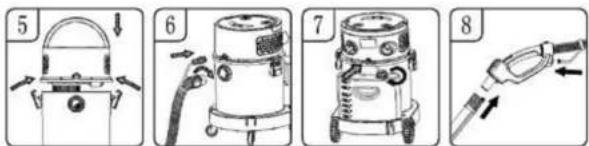
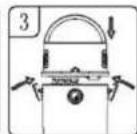
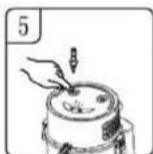
- Place the top cover on the dust barrel that already has a filter assembly and lock it with both sides of the clips. (Fig 5)
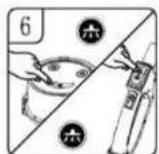
- Align the hose assembly port with the suction inlet and insert it into right and tighten it. (Fig. 6)
Installation
- Tighten the lid of the soap bucket to the right while inserting the water pump inlet on the top cover. (Fig 7)
- Insert the water inlet pipe into the water inlet of remote control hose and connect the aluminium extension tube to the remote control hose.. (Fig 8)
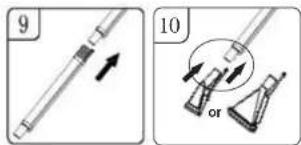
- Connect the two aluminum extension tubes as picture shows. (Fig 9)
- Connect the aluminium extension tube with the brush that you need. For small and large water spray head, you have to insert the water outlet pipe into the joint of aluminium extension tube. (Fig. 10)
B] Remote control pairing setting
Note: Make sure the remote control pairing is completed before start operating the vacuum for first time
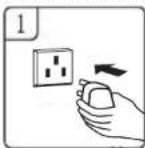
- Make sure the power plug is connected to power supply socket. (Fig 1)
- Press the standby button and the panel's indicator light will be on. (Fig. 2)
- At the same time press the suction button and cleaning button on the top cover, the indicator light will be out. (Fig. 3)
- Press one of the buttons on the remote control hose, the indicator light on the top cover panel will flashes once to return to normal light, and the remote control pairing setting is complete. (Fig 4)
How to Use
A. Operation of vacuuming dust
- Make sure the power cord is disconnected from the socket (Fig 1)
- Loose Clips. (Fig 2)
- Raise the top cover from the dust barrel. (Fig 3)
- Install Cartridge filter and press tightly on the bottom cap basket. (Fig 4)
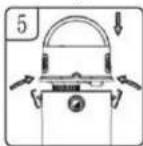
- Place the top cover on a dust barrel, and lock it with both sides of the clips. (Fig5)
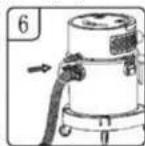
- Align the hose assembly port with the suction inlet port and insert it into right and tighten it. (Fig. 6)
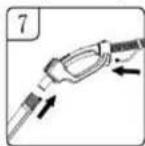
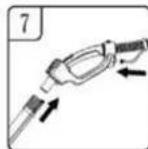
- Insert the water inlet pipe into the water inlet of remote control hose and connect the aluminium
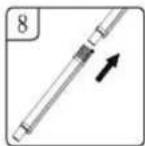
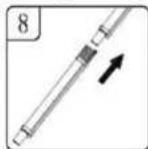
extension tube to the remote control hose. (Fig 7) - You may connect the aluminium extension tube to increase the operation radius. (Fig 8)
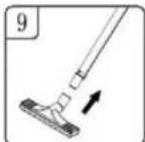
- Connect the aluminium extension tube with the nozzle that you need. (Fig. 9)
-
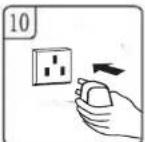
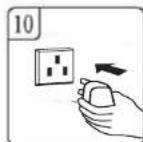
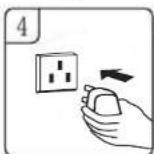
Insert the power cord. (Fig 10)
-
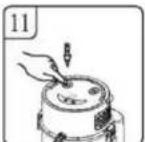
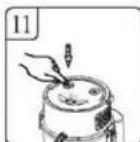
Press the standby button and the indicator light on the panel will lights up. (Fig. 11)
-
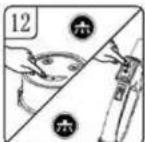
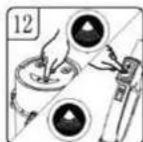
Press the suction button on the top cover panel or remote control hose, then the machine will start to work. Suction mode is divided into high and low levels, press the suction button to switch from high to low level and press again to stop working. (Fig. 12)
How to Use
WARNING: BE SURE TO READ, UNDERSTAND, AND APPLY INFORMATION, ENTITLED 'SAFETY PRECAUTION INFORMATION'. DO NOT VACUUM IN AREAS WITH FLAMMABLE GASES, VAPORS, OR EXPLOSIVE DUSTS IN THE AIR. FLAMMABLE GASES OR VAPORS INCLUDE BUT ARE NOT LIMITED TO; LIGHTER FLUID, SOLVENT TYPE CLEANERS, OIL-BASE PAINTS, GASOLINE, ALCOHOL OR AEROSOL SPRAYS. EXPLOSIVE DUSTS INCLUDE BUT ARE NOT LIMITED TO; COAL, MAGNESIUM, GRAIN OR GUN POWDER. TO REDUCE THE RISK OF HEALTH HAZARDS FROM VAPORS OR DUST, DO NOT VACUUM TOXIC MATERIALS.
B. Operation when dust barrel is full
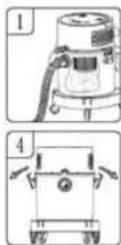
- The dust inside the dust barrel is full. (Fig 1)
- Press the standby button and the indicator light goes off. (Fig. 2)
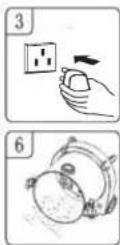
- Unplug the power cord. (Fig3)
- Loose clips. (Fig 4)
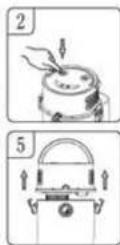
- Raise the top cover from the dust barrel. (Fig 5)
- Pour out the garbage in the dust bucket. (Fig 6)
C. Operation of water cleaning
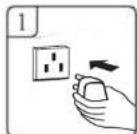
- Make sure the power cord is disconnected from the power supply. (Fig1)
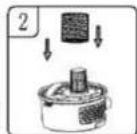
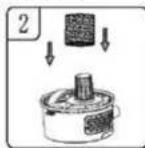
- Cover the bottom cap basket with water sponge and make sure it cover the entire basket. (Fig 2)
- Place the top cover on the dust barrel and lock it with both side of clips. (Fig 3)
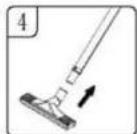
- Install the required suction accessories on the aluminium extension tube. (Fig 4)
How to Use
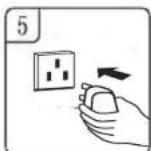
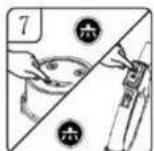
- Insert the power cord. (Fig 5)
- Press the standby button and the indicator light on the panel will lights up. (Fig. 5)
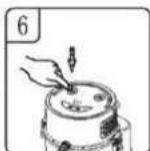
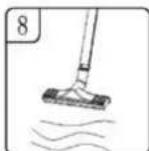
- Press the suction button on the top cover panel or remote control hose, then the machine will start to work. Suction mode is divided into high and low levels, press the suction button to switch from high to low level and press again to stop working. (Fig. 6 & 7)
- When the water is absorbed to the maximum capacity, the safety valve operates, the suction will cut off. (Fig 8)
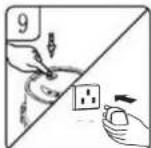
- Turn off the power, disconnect the power cord from the socket. (Fig 9)
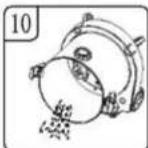
- Pour out the water. (Fig 10).
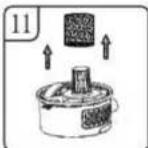
- To ensure the best result of water absorption, please remove the water sponge and hand-wring-dry after drainage. (Fig 10) (Fig 10)
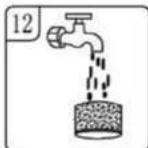
- Wash the water sponge with normal water, hand-wring dry after washing, then it can use again. (Fig 12)
WARNING:
BE SURE TO READ, UNDERSTAND, AND APPLY INFORMATION, ENTITLED 'SAFETY PRECAUTION INFORMATION'. DO NOT VACUUM IN AREAS WITH FLAMMABLE GASES, VAPORS, OR EXPLOSIVE DUSTS IN THE AIR. FLAMMABLE GASES OR VAPORS INCLUDE BUT ARE NOT LIMITED TO: LIGHTER FLUID, SOLVENT TYPE CLEANERS, OIL-BASE PAINTS, GASOLINE, ALCOHOL OR AEROSOL SPRAYS. EXPLOSIVE DUSTS INCLUDE BUT ARE NOT LIMITED TO: COAL, MAGNESIUM, GRAIN OR GUN POWDER. TO REDUCE THE RISK OF HEALTH HAZARDS FROM VAPORS OR DUST, DO NOT VACUUM TOXIC MATERIALS.
How to use
D. Operation of carpet washer cleaning
- Make sure the power cord is disconnected from the power supply (Fig 1)
- Cover the bottom cap basket with water sponge and make sure it cover the entire basket. (Fig 2)
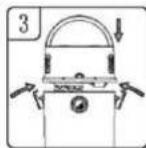
- Place the top cover on the dust barrel and lock it with both side of clips. (Fig 3)
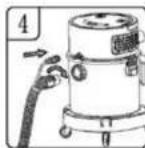
- Align the hose assembly port with the suction inlet port and insert it into right and tighten it. (Fig. 4)
-
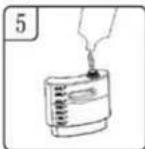
Remove the Soap bucket from the pedestal, then unscrew the lid to the left, and fill it with a clean mixture mixed in an appropriate proportion (Fig 5)
-
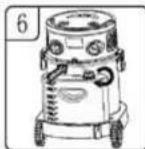
Insert one end of pipe (with elbow) into the water pump inlet joint on the top cover; Place the other end of inlet pipe with the filter into the soap bucket, then tighten the lid to the right. (Fig 6)
- Insert the aluminium extension tube into the remote control hose and connect the water inlet pipe into the connector of the remote control hose. (Fig 7)
- You may connect the aluminium extension tube to increase the operation radius. (Fig 8)
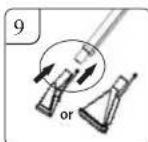
- Connect the large water spray head or small water spray head with aluminium extension tube, insert the water inlet pipe into the connector of the aluminium extension tube. (Fig. 9)
-
Insert the power cord. (Fig 10)
-
Press the standby button and the indicator light on the panel will lights up. (Fig. 11)
- Press the cleaning button on the top cover or remote control hose, the sprinkle head on the large water spray head starts to spray water. If the suction button is pressed again, the machine will spray water and absorb the dirty water after cleaning at the same time. After use, press the standby button to turn it off, then unplug the power plug, empty the sewage in the barrel and clean it for backup. (Fig. 12)
How to use
WARNING:
-
When cleaning carpet, please use low foam cleaner and add appropriate anti-foaming agent mix evenly, otherwise the air outlet will have the possibility of foam eject!
-
It is recommended that users immediately empty the sewage in the vacuum cleaner dust barrel after using 2 buckets of cleaning fluid each time to prevent the liquid in the dust barrel from being too high and causing the possibility of foam spraying out from the air outlet
-
In the cleaning mode, when there is no cleaning fluid in the Soap bucket, please add it in time. Do not idle the water pump to prevent damage to the water pump.
-
When the dust barrel is full or the safety valve is blocked, the sound of the motor will obviously become louder. At this time, the dust barrel should be shut down and emptied immediately
E. Operation of blower
WARNING: always wear safety googles before using blower WARNING: keep by standers clear from blowing debris WARNING: wear a dust mask if blowing creates dust that might be inhaled.
- Make sure the power cord is disconnected from the power supply(Fig 1)
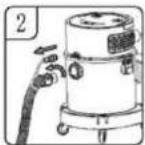
- Unscrew the inserted hose assembly from the suction port with a left-hand rotation. (Fig 2)
- Insert the hose assembly into the air outlet at the back of the head and tighten it with the right hand rotation. (Fig 3)
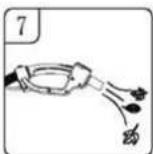
-
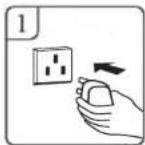
Insert the power cord. (Fig 4)
-
Press the standby button. (Fig. 5)
-
Hold the remote control hose and press suction button, then let the outlet port aimed at the leaves and so on. (Fig. 6)
How to use
F. Operation of accessories
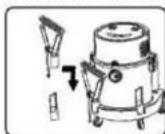
Storage cervice nozzle and multi brush
- Insert the cervice nozzle into the wheel seat.
- Insert the large water spray head into the wheel seat.
Troubleshooting
WARNING! to reduce the risk of electric shock-unplug before troubleshooting.
| Symptom | Corrective ActionPossible Causes | |
| Vacuum will not operate | No power supply. | Check power supply cord, breakers, fuses. |
| Faulty power cord. Unplug and check the power cord. if damaged, have it repaired by a professional. | ||
| Barrel full. Empty barrel. | ||
| Dust comes out from motor cover. | No filter is installed, the filter is not installed in place or the filter is damaged | Re-install and check whether the filter is installed in place. Replace the new filter if any damage is found. |
| Reduced efficiency and motor/speed vibration. | There is a blockage in the nozzle or hose or the barrel inlet or cartridge filter blocked by fine dust | Check nozzle, hose and barrel inlets for blockage. Take off the filter and clean it. Or install new cartridge filter |
| Does not spray cleaning fluid | Cleaning is not selected | Press the cleaning button on the panel or remote control hose |
| Use up the cleaning fluid in the soap bucket | Reinsertion the cleaning fluid | |
| The pipe line is not properly installed | Check whether the water pipe connection is in place correctly and pay attention to check whether the water pipe is knotted. | |
| Foam coming out of the machine head unit outlet | High bubble cleaning fluid was used | Replace the low-bubble cleaning solution and add defoaming agent according to the ratio. |
| Remote control hose failure | The battery in the remote control hose runs out. | Replace the battery in the remote control hose |
| Connection between remote control hose and vacuum cleaner is abnormal | Read the remote learning operation as stated in manual. | |
重要事项
[A] 安全措施
- KHIND®
- Safety Precaution Information
- [A] Safety Instruction
- [B] General Precaution
- [C] Risk of Personal Injury
- Suggestion:
- Cleaning & Maintenance
- Parts Identification Parts Identification
- Main Body
- Accessories
- Installation
- How to Use
- WARNING:
- Operation of carpet washer cleaning
- Operation of blower
- Operation of accessories
- Troubleshooting
- 重要事项
- [A] 安全措施
Brand : Khind
Model : VC3668
Category : Vacuum Cleaner