
ELPSC21 - Video projector EPSON - Free user manual and instructions
Find the device manual for free ELPSC21 EPSON in PDF.
| Product Type | Projection Screen |
| Brand | EPSON |
| Model | ELPSC21 |
| Diagonal | 80 inches (16:9) |
| Total Weight | Approximately 3.8 kg (screen + stand) |
| Screen Weight Only | Approximately 1.9 kg |
| Screen Material | Polyvinyl chloride (PVC) |
| Stand Material | Steel / Aluminum |
| Rod Material | Aluminum |
| Surface Color | White |
| Stand Type | Foldable tripod and wall mount |
| Adjustable Height | Yes, via extension tube and lever |
| Storage Temperature | -10 °C to 50 °C |
| Included Accessories | Screen, stand, 4 rods, stabilizer, tripod, lever, adjuster, extension tube, mounting bracket |
| Maintenance | Clean with a dry cloth or soft brush; do not use water, benzene, or thinner |
| Safety Precautions | Do not install near a heat source, on an inclined surface, or exposed to wind; do not hang on the screen |
| Usage | Image projection from a projector |
Frequently Asked Questions - ELPSC21 EPSON
User questions about ELPSC21 EPSON
0 question about this device. Answer the ones you know or ask your own.
Ask a new question about this device
Download the instructions for your Video projector in PDF format for free! Find your manual ELPSC21 - EPSON and take your electronic device back in hand. On this page are published all the documents necessary for the use of your device. ELPSC21 by EPSON.
USER MANUAL ELPSC21 EPSON
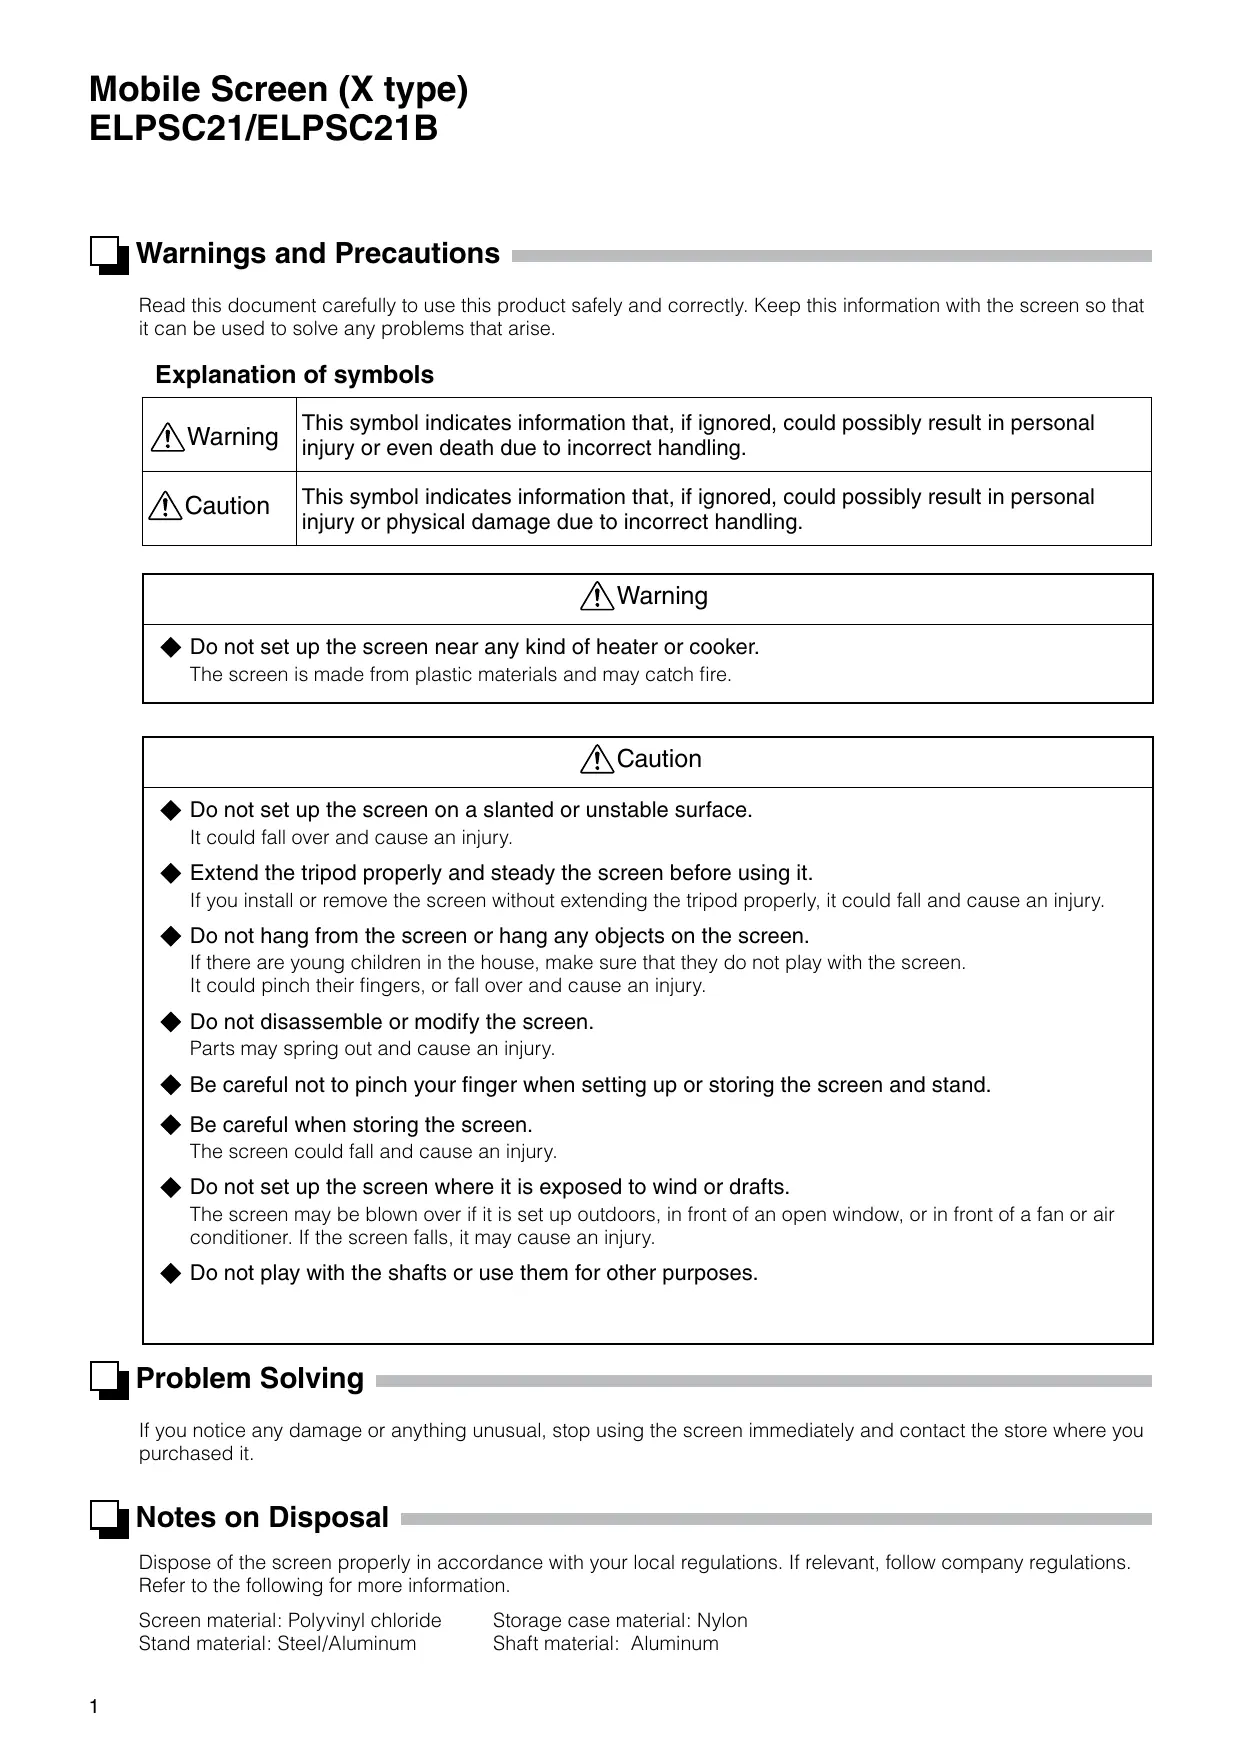
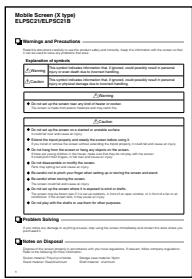
Warnings and Precautions
Read this document carefully to use this product safely and correctly. Keep this information with the screen so that it can be used to solve any problems that arise.
Explanation of symbols
| Warning | This symbol indicates information that, if ignored, could possibly result in personal injury or even death due to incorrect handling. |
| Caution | This symbol indicates information that, if ignored, could possibly result in personal injury or physical damage due to incorrect handling. |
Warning
Do not set up the screen near any kind of heater or cooker. The screen is made from plastic materials and may catch fire.
Caution
Do not set up the screen on a slanted or unstable surface. It could fall over and cause an injury.
Extend the tripod properly and steady the screen before using it. If you install or remove the screen without extending the tripod properly, it could fall and cause an injury.
Do not hang from the screen or hang any objects on the screen. If there are young children in the house, make sure that they do not play with the screen. It could pinch their fingers, or fall over and cause an injury.
Do not disassemble or modify the screen. Parts may spring out and cause an injury.
Be careful not to pinch your finger when setting up or storing the screen and stand.
Be careful when storing the screen. The screen could fall and cause an injury.
Do not set up the screen where it is exposed to wind or drafts. The screen may be blown over if it is set up outdoors, in front of an open window, or in front of a fan or air conditioner. If the screen falls, it may cause an injury.
Do not play with the shafts or use them for other purposes.

Problem Solving
If you notice any damage or anything unusual, stop using the screen immediately and contact the store where you purchased it.

Notes on Disposal
Dispos of the s p i t . Refer to the following for more information.
Screen material: Polyvinyl chloride
Stand material: Steel/Aluminum
Storage case material: Nylon Shaft material: Aluminum
The surface of the screen has been treated with chemicals to improve the images that are reflected on it. The quality of the reflected images decreases if the surface of the screen is scratched or dirty. Note the following points when handling the screen to prevent damaging it.
- Do not touch the white part of the screen with your hands.
- Do not write on the white part of the screen with a pencil, magic marker, or anything else. If you do write on it by accident, it cannot be erased.
- Do not wipe the white part of the screen with a damp cloth, benzene, thinner, or anything else.
- Use a dry cloth or a soft brush to dust the white part of the screen. Make sure you extend the tripod and steady the screen when cleaning it.
- Do not use or store the screen in a dusty area.
- Do not use or store the screen in places that are hot or humid.
-
Store the screen within a range of -10 to 50^ .
-
Do not leave the screen where the temperature may go above 50^ , such as inside a car.
-
When you have finished using the screen, be sure to store it in the storage case to keep the screen in good condition. When rolling up the screen, make sure there are no insects or other things stuck to the white part of the screen.

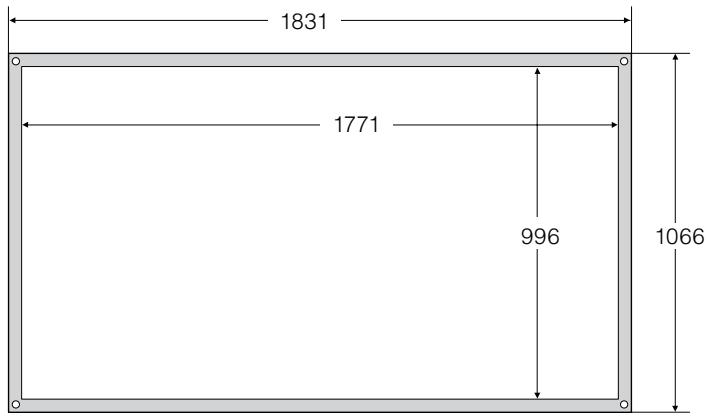
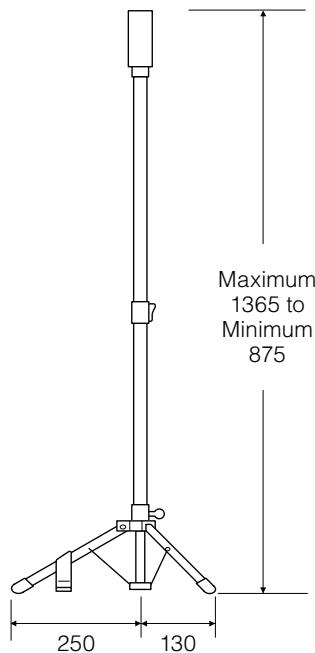
Dimensions (Unit: mm)
Screen size (16:9 80")
Side view
Folded
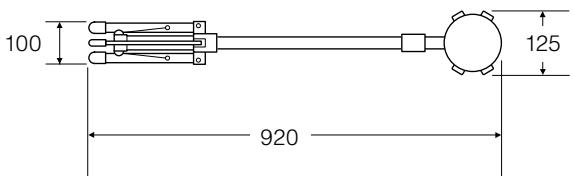
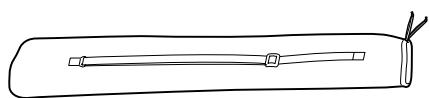
Storage case
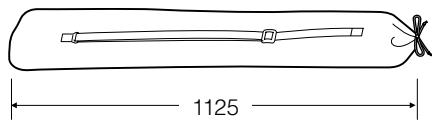
Weight: approx. 3.8kg

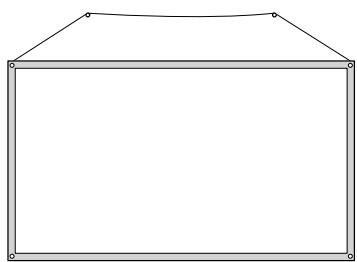
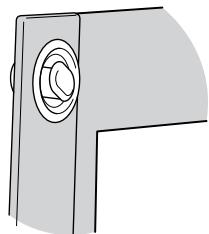
Hanging the Screen
- You can also hang the screen on a wall.
Hang the screen with commercially available straps, wire, string, or other material.
Use materials that can support the weight of the screen.
The weight of the screen is approximately 1.9kg

Caution
Use a safety line to prevent the screen from falling while it is hanging on a wall.
If the screen falls on a person, it may cause an injury.

Included Items

Screen

Stand
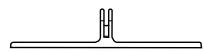
Stabilizer
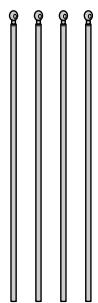
Shafts (four pieces)

Storage case
User's Guide
(this guide)

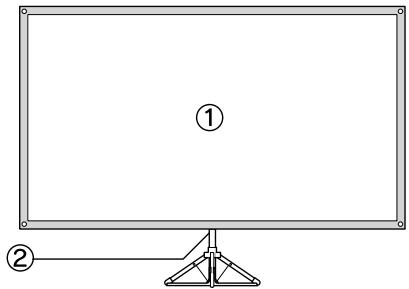
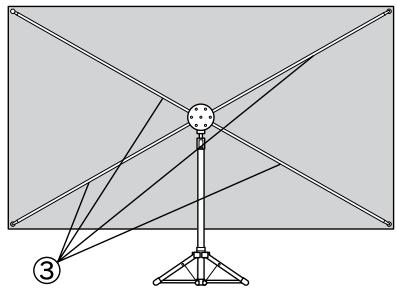
Part Names (Completion drawing)
(4)
Stand parts
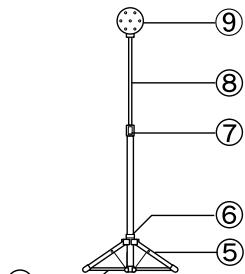
① Screen ② Stand ③ Shafts ④ Stabilizer ⑤ Tripod ⑥ Tripod lever ⑦ Adjuster ⑧ Extension pole ⑨ Holder

Setting Up
Take out the screen, stand, shafts, and stabilizer from the storage case.
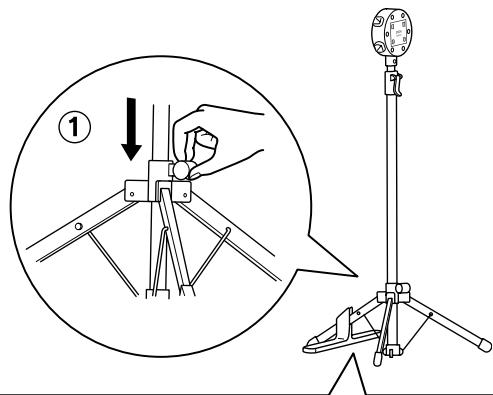
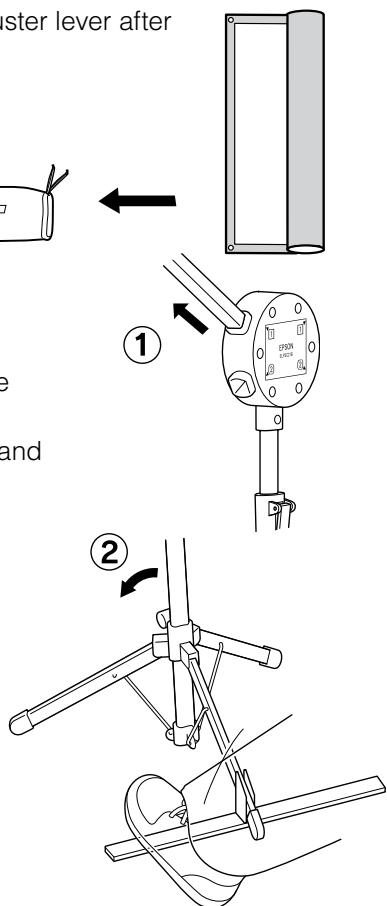
2 Set up the stand.
①Push down the tripod lever and extend the tripod. The tripod lever should be on the rear side of the screen.

Caution
Push the tripod lever all the way down.
If the tripod is not extended completely, it could fall and cause an injury.
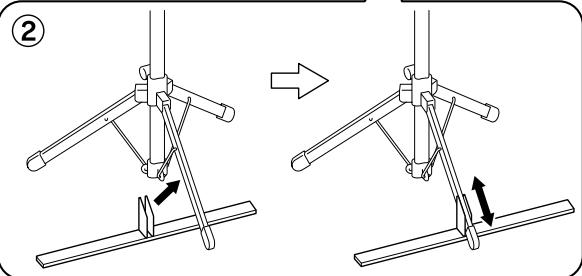
② Attach the stabilizer to the front leg of the tripod. Slide the stabilizer so that both the front leg and the bottom of the stabilizer sit on the floor.
- Make sure you always use the stabilizer. If you set up the screen without using the stabilizer, it may fall and cause an injury.
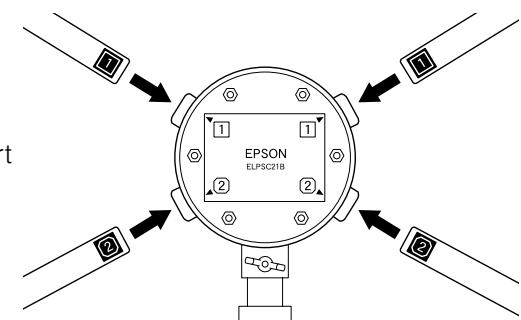
3 Insert the shafts into the holder.
① Match the numbers on the shafts with the numbers on the label on the back of the holder.
② Insert the shafts with the 1 labels into the 1 holes on the holder, and with 2 labels into the 2 holes of the holder. Insert the shafts with all the labels facing the same direction until you hear a click.
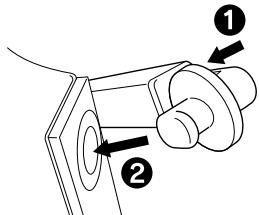
- When hanging the screen on a wall.
① Remove the screw at the junction of the holder and extension pole and remove the holder before inserting the shafts.
② Twist a string or a wire around the upper ends of the top two shafts (label 1).
4
Install the screen.
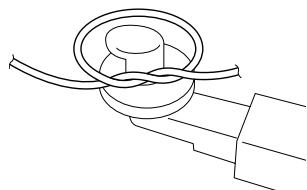
- The screen is wrapped around a core for transportation. Remove the core and discard it.
① Hook the screen on either side of two shafts and spread the screen. The white surface should be in front.
② Hook the screen on the other two shafts. Push the hooks slightly into the shafts to put them into the holes on the screen easily.
- The white part of the screen should be completely dried before shipping. When you use the screen for the first time, you may notice a slight chemical odor. This odor will disappear while you use the screen. If the odor is too strong, open up a window to ventilate the room and allow it to dry for a few days.
5
Adjust the height of the screen.
① Pull up the adjuster lever and slide the extension pole up and down to adjust the height.
* Raise the extension pole slowly when adjusting the height. Be careful not to pull it too far or it may come out.
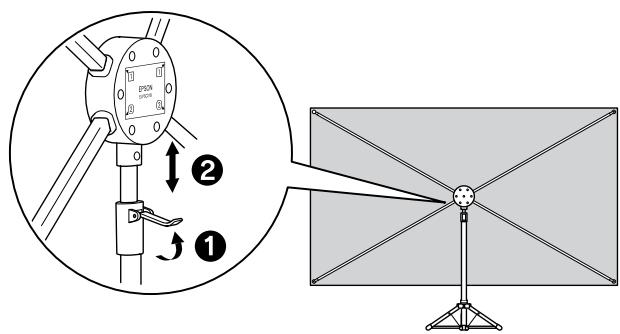
(2)Push down the adjuster lever to secure the extension pole.

Storing
Remove the screen first. If the stand is folded before removing the screen, it could fall and cause an injury.
1
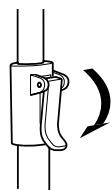
① Pull up the adjuster lever and lower the extension pole. Push down the adjuster lever after lowering the extension pole.
② Remove the shafts in reverse of the way they were installed.
2
Store the screen.
Roll up the screen without wrinkling it and store it in the storage case.
3
Store the stand.
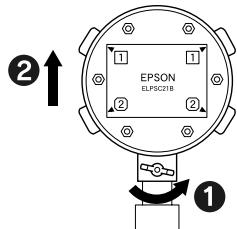
(1) Pull the shafts straight out from the holder. Hold the stand securely with one hand.
② Remove the stabilizer from the tripod. Step on the stabilizer and lean the stand backward so that the stabilizer separates easily.
③Pull up the tripod lever and fold the tripod.
(4) Store the stand first, then the shafts, and stabilizer in that order. Make sure the hooks at the tips of the shafts are facing outward.
- Store the screen, stand, and shafts correctly. If it is not done correctly, the screen could get dirty or damaged.

Explications relatives aux symboles