USER MANUAL El-dorado Plus Sunwind
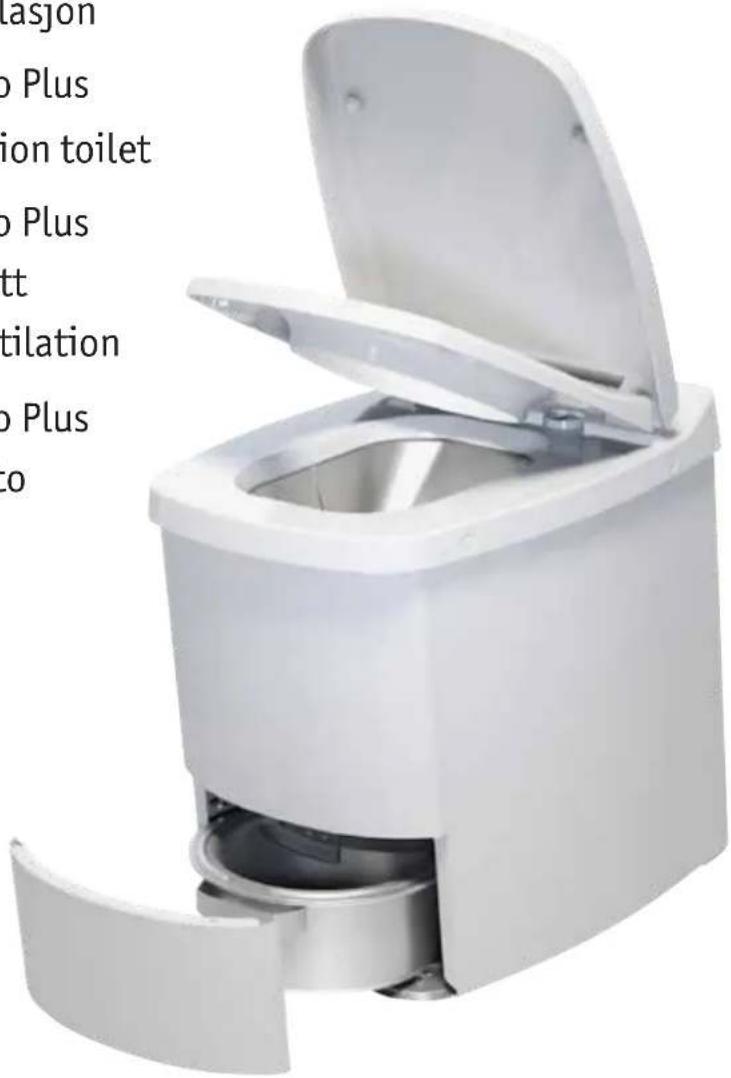
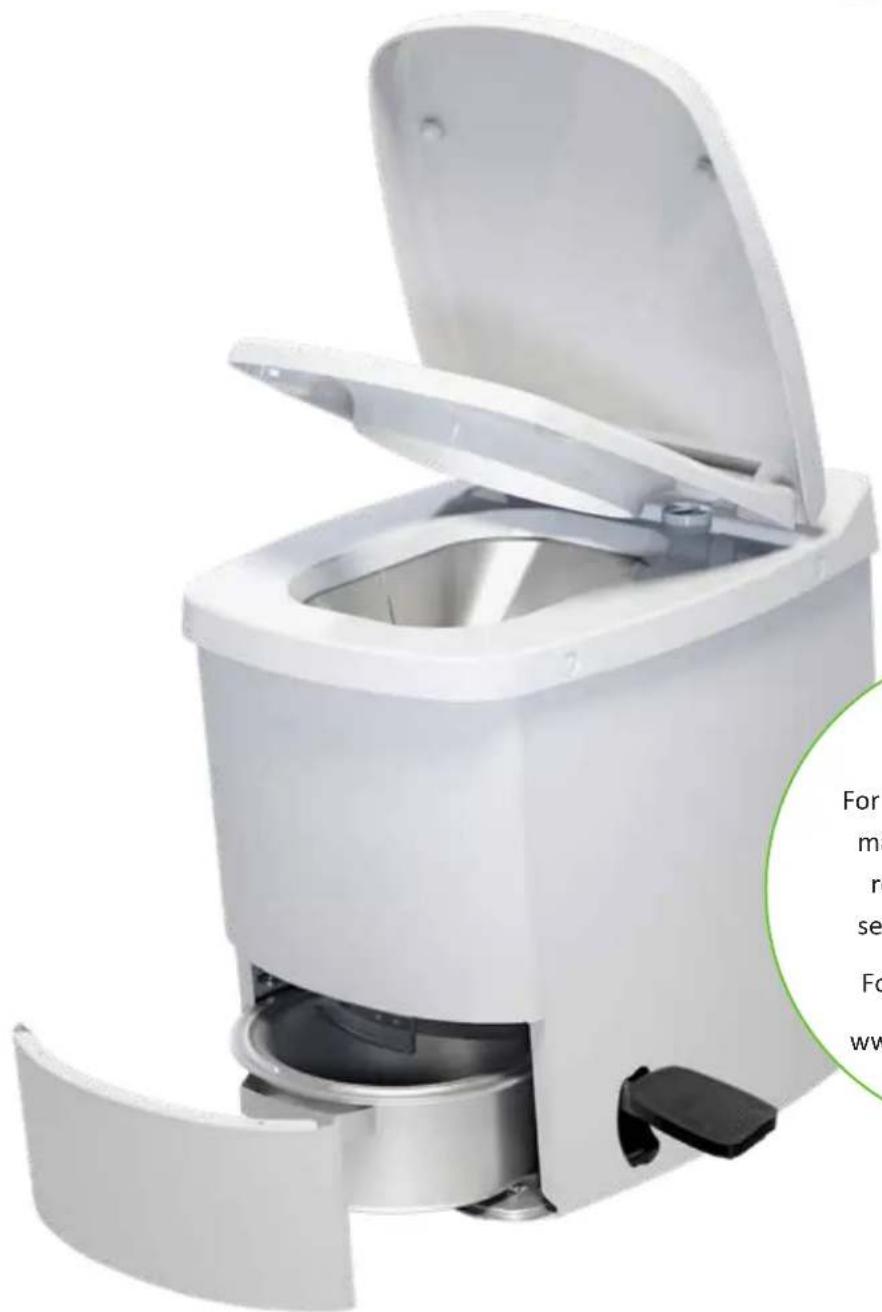
Warranty
For full warranty on your toilet, you or your dealer must register the toilet with the serial number on the internet.
For registration, go to: www.sunwind.no/warranty
CONGRATULATIONS ON YOUR NEW TOILET!
Installation
Maintenance
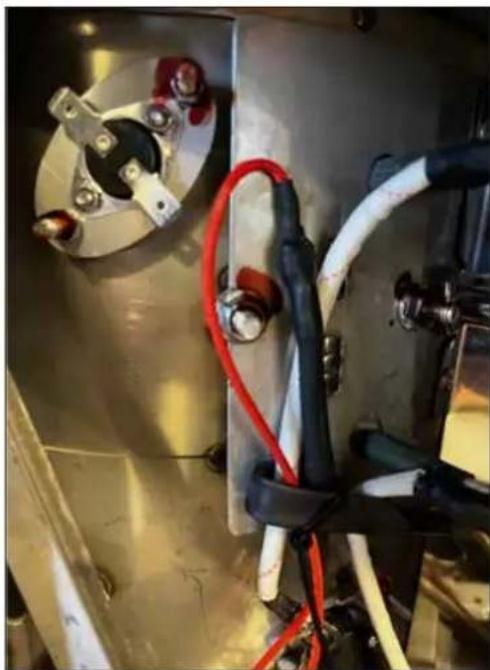
Combustion chamber
Open the buckle/lever.

Pull out the drawer.

5.
Daily use
1.
Insert a bag to ensure all waste falls into the combustion chamber.

Tips
Appendix for service personnel

Warranty
For full warranty on your El-dorado, you or your dealer may register the toilet with serial number on the Web.
For registration please visit: www.sunwind.no/warranty
CONGRATULATIONS ON YOUR NEW TOILET!
The Sunwind combustion toilet's design is founded on established concepts for combustion of excrements. Operational safety and reliability are among the major advantages of this toilet. The toilet is composed of high-quality steel, and electrical components are limited to what is necessary to maintain function and reliability.
The Sunwind combustion toilet is a thoroughly tested and solid product that you will enjoy for several years, if the toilet is installed and used appropriately. Please read the instructions carefully and keep this manual with the toilet for future reference.
Please follow our advice on installation, maintenance, and cleaning. Spare parts are available through our retailers across the country; updated contact information can be found at www.sunwind.no at all times. After installing the toilet, ongoing maintenance mainly consists of rinsing the inner ash pot in hot water a few times per year. Once a year, the fan blades should also be removed and cleaned with regular detergent and hot water. We recommend vacuuming the inside of the toilet once it is open. Please see the paragraph regarding maintenance for further instructions on how to perform this.
Externally, the toilet is cleaned as and when needed.
- To avoid electric shock, always ensure that the toilet is unplugged prior to moving or cleaning it.
- Maintenance must only be performed when the toilet's power plug has been disconnected from the electric socket, and only after it has cooled down.
- Please read the instructions carefully.
- Ensure that the toilet is only plugged into a grounded outlet providing a minimum of 10A.
- Do not use any extension cords, power strips, or multi-outlet adapters.
- When connecting the toilet to a 10A outlet, no other appliances can be connected to the same circuit. Please consult your electrician if in doubt.
- The toilet must be installed indoors.
- Do not cover the toilet.
- Unplug the toilet from the electric socket when it is not being used for an extended period of time. • Take extra care when young children are around.
- Do not let children play with the toilet or operate the toilet on their own.
- Children under the age of 8 should be supervised when using the toilet.
- Should damage to a cable occur, this must be repaired by the manufacturer or by a qualified person.
- The toilet must not be used or placed near flammable materials, gases or liquids.
- The toilet must be placed on an even and stable surface.
- Please be aware that some parts of the toilet may become very hot and cause burns if touched.
- Do not place the toilet within the immediate vicinity of a shower, sink, tub, or pool.
- Never use extension cords, as this may cause heat generation in the cable and cause fires.
- Ensure that the electric cord is not pinched under or behind the toilet.
- The toilet is not intended for use by people with physical or mental disabilities.
- Anyone using the toilet should be instructed on how to use it.
- The toilet is intended for combustion of human faeces and urine only. Never throw any objects or other waste in the toilet.
- The excrement of livestock will not incinerate properly, and will petrify if thrown in the toilet.
- ALWAYS place a bag in the toilet prior to each visit.
- The toilet should be emptied at least once a week; never empty warm ashes along with flammable objects.
- Never attempt to insert your hands or other items into the combustion chamber.
Unpacking
Please be careful when unpacking the toilet. Do not lift the toilet by its seat. Lift the toilet out of the box by grabbing the side plates. We would recommend that two people lift the toilet together.
Prior to installation:
After unpacking the toilet, please ensure that no damage has occurred during transport. Should you find any visible damage to the product, contact your dealer as soon as possible.
Keeping the packaging for future transport of the toilet may be beneficial. Should you wish to discard the packaging, please ensure that it is disposed of appropriately. Keep any plastic packaging away from children.

Please read the entire manual carefully before using the toilet, and keep these instructions for future reference or in case of resale. You can also always find updated information at www.sunwind.no.
Warranty
There is a 5-year warranty on the toilet, and a 2-year warranty on electronics and wear parts. The toilet is intended for use at cabins/second homes; it is NOT suitable for permanent residencies, public assembly halls, workplaces, kindergartens, schools, etc.
The warranty applies from the day of purchase, and only with a valid receipt. The warranty covers manufacturing defects and faulty components. Eventual repairs must be performed by authorised personnel only. Simple maintenance may be performed as instructed by this manual.
Should any malfunction of a Sunwind combustion toilet occur during the warranty period, which is not caused by inappropriate installation, use, or handling, this will be covered by the warranty. The warranty does not apply for damage during transport or due to lightning strikes or other natural disasters. Please contact your dealer or Sunwind Gylling A/S directly should you have a malfunction problem with the toilet.
IMPORTANT!
Should the toilet need servicing, it must be properly cleaned before handing it in.
Function
The Sunwind combustion toilet is designed to combust faeces/urine and paper. Do not dispose of any other items in the toilet. A bag must be inserted prior to each visit. The bag ensures that the waste is sent directly into the combustion chamber, and that good hygiene is maintained. Inserting the bag correctly will also minimise the cleaning required.
The combustion is powered by a 2000W heater located above the combustion chamber. This heating element is thermostatically controlled, and the temperature within the chamber will be approximately 560°C during combustion - each of which lasts for about 75 minutes. After combustion, the heater will be switched off, and the cooling fan will run for as long as necessary.
Should a combustion already be ongoing at the time of the next visit, this combustion will halt, and the time required for the new combustion will be added to remainder of the previous combustion time.
NOTE!
After visits producing minimum amounts of waste, especially when the toilet is used by small children, it may be necessary to pour a small amount of water into the bag, or help the bag slide down towards the combustion chamber once this opens.
The waste will disappear into the combustion chamber automatically, with the aid of gravity, once you initiate a combustion by pressing the button on top of the toilet.
Ventilation
The toilet must have a permanent ventilation through 110 mm ∅ smooth pipes. Use of corrugated pipes will void the warranty. We recommend using a separate ventilation kit (accessory).
NOTE!
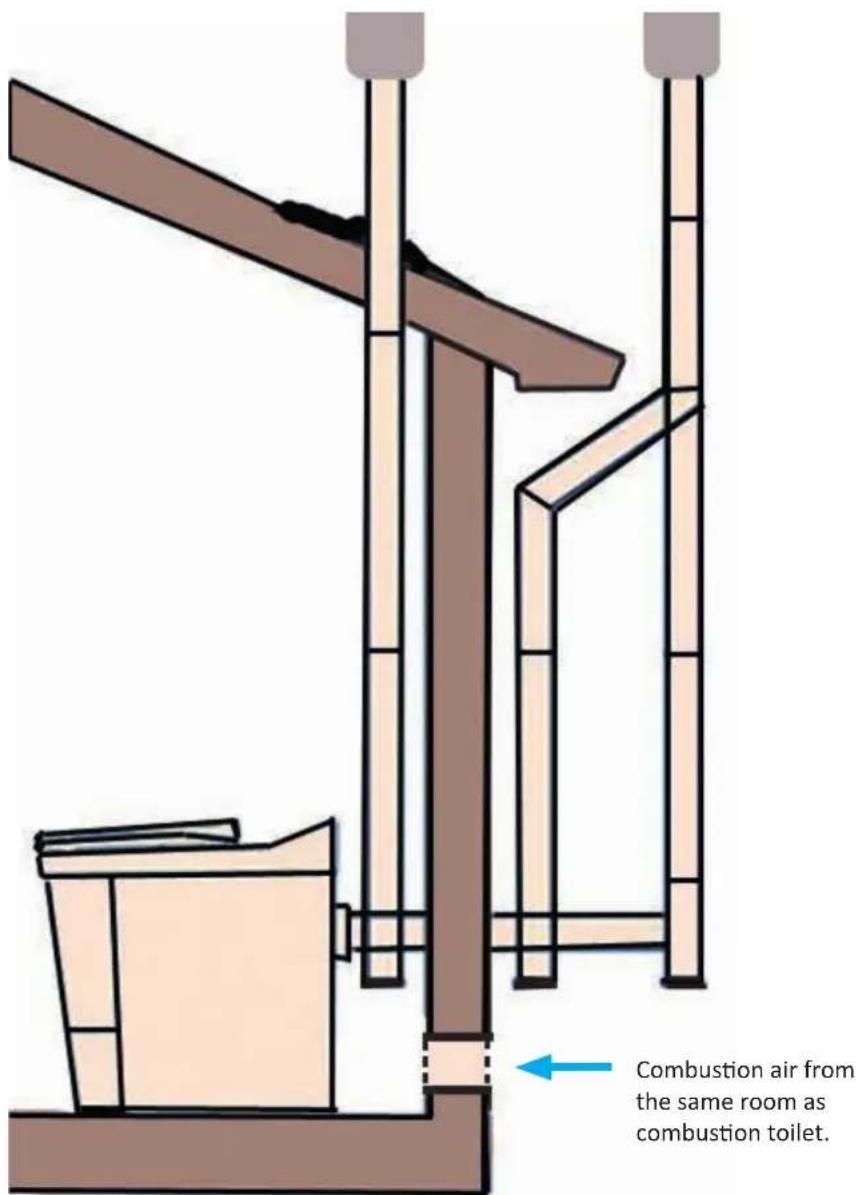
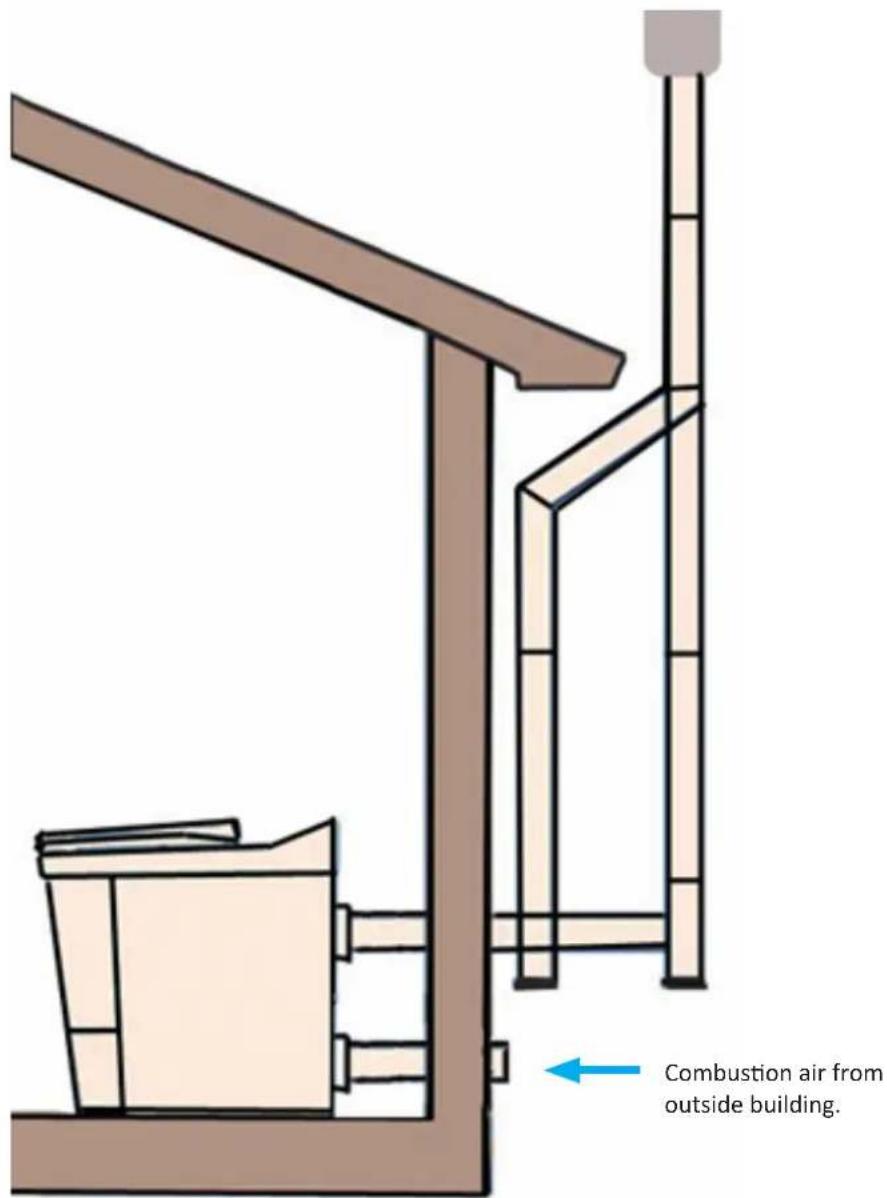
The toilet room must not have any other form of mechanical exhaust if air for the toilet is not taken from outside. If you choose to draw combustion air from the room the toilet is in, it must be equipped with at least one fresh air valve! Best combustion and air circulation is obtained if the valve is located close to and at the same height as the toilet. The ventilation opening must be at least the same diameter as the air outlet (∅ 110 mm).
The package contains:
A toilet, a packet of toilet bags, water bottle, a bag of screws for installation of the toilet, instructions on how to secure the toilet to the wall, and a user's manual. Please ensure that the box has not suffered any damage during transport. Should the box be damaged, please contact the carrier or dealer as soon as possible. The warranty does not cover shipping damage.
Exhaust gases from the toilet must be directed outside. The rules and technical requirements for installation may vary between countries. In Norway, all toilets must be aired over the roof. There are two ways of directing the ventilation above the roof.
The ventilation pipe may be placed straight up through the ceiling of the room where the toilet is installed, or the ventilation pipe may be directed outside through the back wall, and then up over the roof. The top of the ventilation pipe must be at least 60cm above the surface of the roof. Local conditions may vary, and for instance in areas with heavy snowfalls, this must be taken into account so that the pipe is continued higher up from the roof.
A branched pipe should be used for either of the two options; the bottom of this pipe must have a hole (of minimum 3mm) allowing condensed water to escape. Please take this into consideration when installing pipes through indoor ceilings.
The diagram below shows different options for installation:
1.
Cut a piece of 110 mm pipe adapted to the desired horizontal length of pipe. When connecting pipes, use of silicone spray or soap is recommended.
2.
If you are directing the pipe through the wall, you can now insert the pipe into the toilet's vent stub and use a pencil to put a mark on the wall where the hole should be.
3.
Use a 114 mm hole saw to make the hole in the wall. Ensure that you will not hit a stud before you start sawing.
4.
Use sealant to seal around the pipe where it runs through the wall, enabling flexibility of the pipe.
5.
Attach the branched pipe and the bottom plug in this pipe. Remember to drill a hole of at least 3 mm in the bottom plug.
6.
Connect as many lengths of pipe as you need to reach the desired height.
See the separate paragraph if you are planning on directing the pipe through the ceiling.
7.
The pipe must be secured with clamps so that it is stable. Use the brackets supplied in the installation package for attachment to the wall. Should the pipe need to be attached further away from the wall, brackets with distance screws may be bought separately.
8.
Attach the vent top last. Do not use insect nets or suchlike, as this may limit the air supply.
9.
The pipe should run for a maximum of 1 m horizontally, and 6 m vertically. No more than one 90° bend and two 45° bends should be used.
Installing the pipe through the roof
When installing the pipe through the roof, put a mark in the ceiling where the hole should be – after positioning the pipe vertically towards the planned hole. Ensure that you avoid potential rafters. The appropriate diameter of the hole needed will depend on the roof pitch. Start off by drilling through the ceiling with a thin but sufficiently long drill, enabling you to use a hole saw from both sides afterwards. This initially small hole will then also guide the central pilot drill of the hole saw.
When installing the pipe through a tar paper/shingle roof, the cuff supplied in the installation package should be used. The tar paper/shingle should be heated and placed so that it covers the part of the cuff that is above the roof; the lower part of the cuff should be glued in place. Use generous amounts of asphalt glue. For turf roofs with a membrane underlay, professional assistance from a roofer should be sought.
For turfed roofs with tar paper underneath, the pipe is installed in the same way as described for tar paper roofs. The drainage layer covers the tar paper, and should be adjusted so that it lies adjacent to the pipe.
For tile and tile plate roofs, the cuff should also be sealed against the tar paper underlay. Please contact a roofer or a tinsmith to get a metal plate that seals the area between the pipe and the tiles/tile plates.
Mounting the pedal
Mount the pedal to the toilet as shown in the drawings below.

Installation
The toilet is connected to an electric socket; this MUST be a grounded outlet, with a minimum of a 10A slow fuse box. In the event of any other appliances on the same circuit, this should be at least 16A. Alternatively, consult your electrician about installing a separate circuit for the toilet. Avoid any use of extension cords, power strips, or multi-outlet adapters.
Should the floor be slippery so that the toilet may slide during visits, it should be secured to the floor. Remember to ensure that there are no heating cables underneath the brackets where you are securing the toilet. Brackets and screws are enclosed in the box for the toilet.
Unplug the toilet from the electric socket when it is not being used for an extended period of time.
The toilet is now ready for use. Connect the toilet to the electric outlet and ensure that the on/off switch is in the "ON" position. The toilet's combustion should be tested prior to the first visit. To test the toilet, press the combustion button located at the top of the toilet. Completing one combustion takes about 75 minutes, after which the toilet is ready for normal use.

Maintenance
The toilet does require some maintenance that you can perform yourself.
WARNING!
Always unplug the toilet from the electric outlet prior to performing any form of maintenance!
The toilet should be cooled down before performing any maintenance!
Cleaning and daily hygiene
Using a bag not only ensures correct use of the toilet, but also makes cleaning and maintaining good hygiene simple tasks. Wipe the surfaces with a cloth soaked in soapy water as needed. The shutters above the combustion chamber are cleaned in the same way.
Fan
The fan ensures uniform combustion and an odor-free room. All of the combustion air passes through the fan, and over time deposits of soot and ashes will form on the fan blades. The fan should therefore be cleaned once yearly.
Disconnect the toilet from the electric outlet. Loosen the screws around the top of the toilet so that the top can be lifted off. The fan is then loosened by undoing three screws (please see the illustration).
Use a vacuum cleaner or a steel brush to remove the deposits. If left too long without cleaning, the deposits may become excessive and require cleaning with warm water. NB! Never soak the entire fan in water. The blades are removed from the motor shaft using an Allen/hex key before leaving them to soak in warm water for some time, after which they are cleaned using a brush. Dry the parts well afterwards, and reassemble the fan in the reverse order. Ensure that the fan runs freely after installation.
Vent connection
Once a year, the toilet should be disconnected from the vent pipes and the vent stub should be inspected. Should remaining ashes or other foreign objects be found, this should be removed and the stub cleaned by vacuuming.

Odor problems caused by negative pressure
Toilets with balanced ventilation have a function that enables the ventilation fan to run at low speed continuously. If you experience impacts in ventilation pipes or odors in the room, a kit/set can be purchased separately and connected so that the fan runs continuously. It creates a positive draft in the ventilation pipe. See picture of the set and below:


Combustion chamber
The chamber must be emptied at least once a week, even if it is not full, because the ashes will petrify over time after repeated combustions, making it difficult to empty the ashes.
Should the bottom of the pot become filled with petrified ashes, the easiest solution would be to soak this part of the pot in approximately 10 mm boiling water and subsequently initiate a combustion. The boiling water will loosen up the remaining ashes so that the pot can be completely emptied again.
Heating element
The heating element has a durability of 2–5 years, depending on the frequency of which it is used. The element is changed during the periodic service at least every 5 years. Frequent use may shorten the lifetime of this element, which is considered a wear part. We would recommend replacing the element every other year if used frequently, to avoid that it stops working during use.
Function
The toilet is designed to consume a minimum amount of energy. The combustion time and temperature in the chamber have been optimized for the average needs of a family of four. Frequent visits and large amounts of waste may result in incomplete combustion of some paper or, less frequently, excrement.
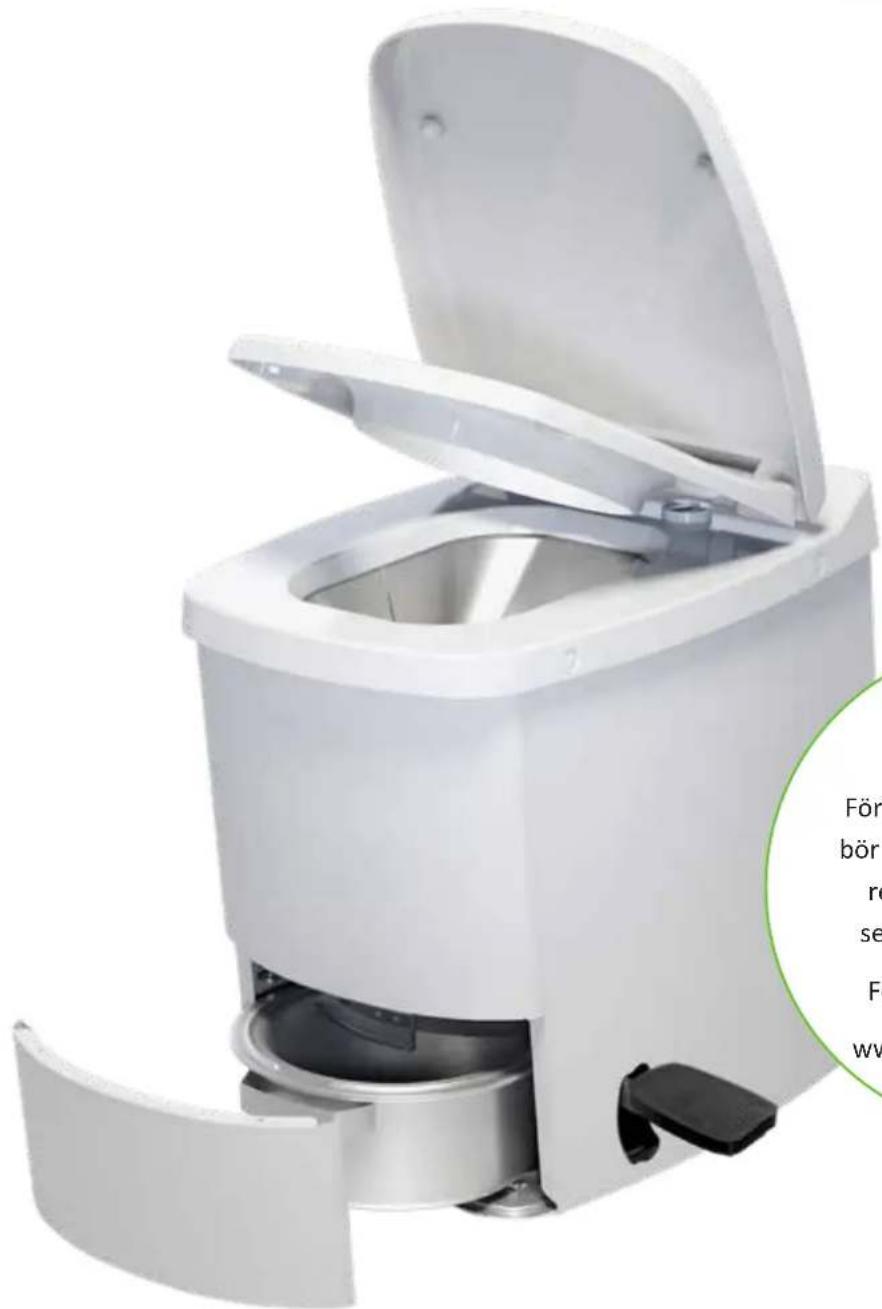
When you press down the pedal on the right, the burner lids will open, and the waste will fall into the combustion chamber. Keep the pedal down until all the waste falls into the combustion chamber. Press the green button to start a combustion cycle. If you find that not all the waste falls into the combustion chamber, you can step on the pedal once to open the two lids again. A combustion cycle takes about 90 minutes. After combustion, the heating element will be turned off and the cooling fan will run until the toilet has cooled down.
If a cycle is already underway when the next visit is made, the toilet will add extra time beyond 90 minutes if the visit is made within the first 30 minutes of the combustion time. When the combustion is complete, the fan will run until the toilet has cooled down sufficiently.
Periodic service
You should bring the toilet in for service at least every 5 years, or every 2-3 years if the toilet is used frequently. Wear parts will then be replaced, and the toilet serviced to optimize its durability. NOTE! Toilets that are brought in for service must be properly cleaned first.
During the periodic service, the workshop will change the heating element and the heat sensors in the combustion chamber. The catalyst will be checked, and the fan will be tested; if needed, the engine will be adjusted.
Please contact your dealer for information about the nearest workshop.
Emptying the ash pot
The pot must be emptied at least once a week, even if it is not full, because the ashes will petrify over time after repeated combustions, making it difficult to empty the pot.
1.
Open the hatch at the front of the toilet as shown below.
2.
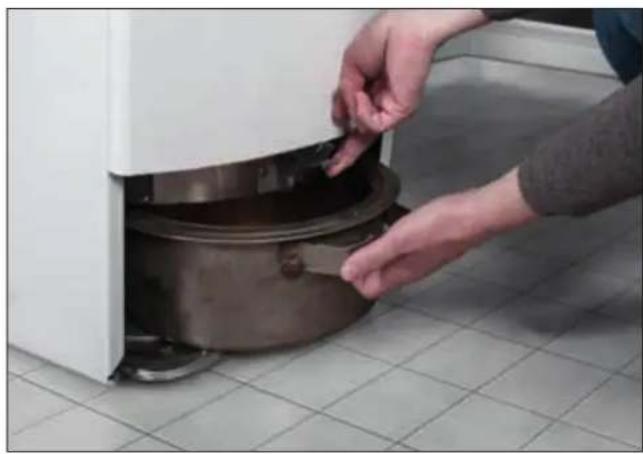
Open the hatch lock to remove the ash pot.
3.
Subsequently pull the pot towards you and empty the ashes in a suitable place.
The ashes may be used as fertilizer, be buried, or be emptied with regular household waste.
NOTE! Never empty warm ashes along with flammable materials!
4.
After emptying the pot, put it back inside the toilet. Ensure that the pot slides all the way into place, and secure it with the hatch locks.

Open the front hatch of the toilet – the hatch is pushed downwards and tilted towards you.

Open the hatch lock.

Pull the pot towards you.

5.
Close the hatch, and the toilet is ready to be used again. We would recommend emptying the pot every time you leave the cabin, though at least once a week.
6.
If there is burned paper residue around the ash pot, this may indicate that parts of a bag has gotten stuck on the top of the combustion chamber. Remove the top of the toilet and clean the paper residue.

Daily use
1.
Always put a bag in the toilet before each visit.
2.
Ensure that the bag has been placed correctly.
3.
After each visit, press down the pedal on the right side. The burner doors will open, and the waste will fall down into the combustion chamber. To start the combustion, press the green button on the top of the toilet.
4.
Ensure that the bag falls into the combustion chamber by pressing down the pedal on the right side of the toilet.
5.
Empty the toilet's ash pot at the time of departure, though at least once a week.


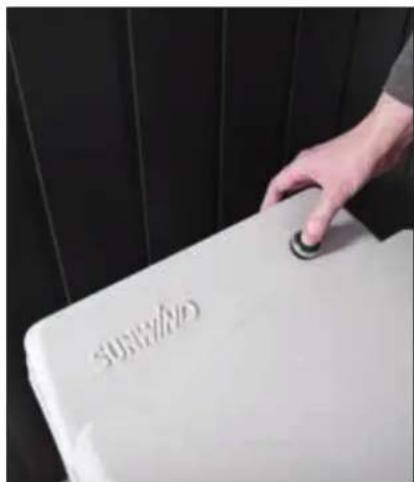
Press down the pedal to open the burner doors. Grab a bag and put the bag in the toilet.
Use of water bottle
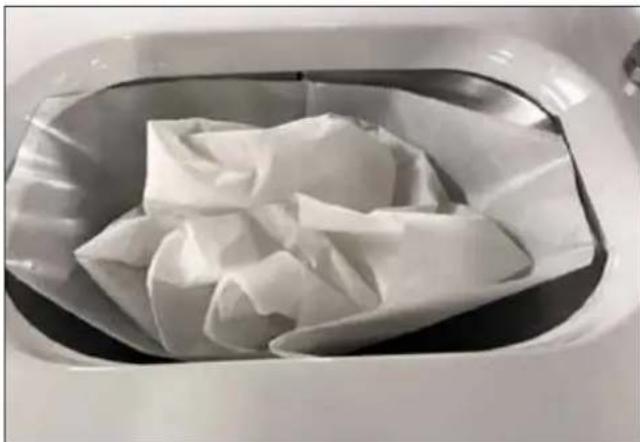
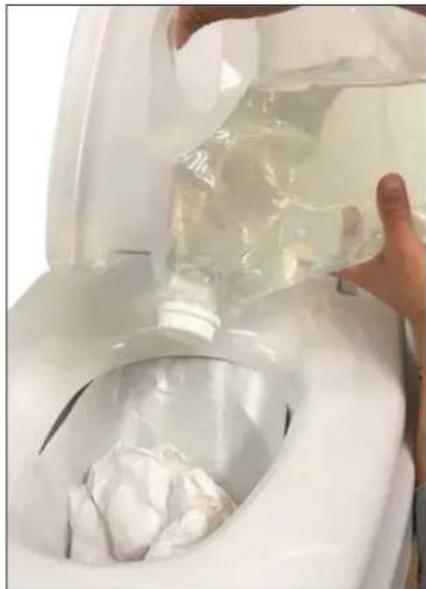
If you use a lot of toilet paper that remains dry in the El-dorado bags, as shown below, the bags may get stuck between the latches when they open and close.
The solution is to pour water onto the paper if there is a lot of paper. The paper will then contract when it gets wet, which will help the bag fall down into the combustion chamber. Pour about 1 dl of water to moisten the paper.
Tip
An alternative to pouring water on the toilet paper would be to throw the paper in a biodegradable bin bag. At the end of the day you can empty the bin by incinerating the bag in the toilet. This can easily be done by placing the bag directly in the ash pot and starting the combustion by pressing the green start button on top of the toilet.
When replacing parts, use only originals.
The parts are designed to withstand high temperatures
and the tough conditions in the toilet.
Service:
Sunwind Gylling AS
Rudssletta 71
1309 Rud
Tlf.: 67 17 13 70
E-mail: post@sunwind.no
www.sunwind.no
Troubleshooting
| Troubleshooting Solution | Possible cause | |
| Overheat thermostat | Bag is stuck or the combustion chamber is not completely closed due to stuck bag. | Unscrew the screws and lift the top off the toilet; check the thermostat in the electrical unit. Remove the ashes or paper that are outside the burning chamber. |
| No combustion | Overheat thermostat or defect element. | Check all thermostats.Check waste tray, if the tray is full, it may cause poor combustion.See separate point about bad combustion. |
| Waste hatch do not open | The lids are out of position.This will normally happen if the toilet is put together in a wrong way. | Step down onto the pedal once more to see if the lids close.If not, disassemble the top of the toilet and check the flaps is connected when the top is mounted again. |
| Bad combustion | To many users due to the capacity of the toilet.The heating element could be broken. This should be changed every 5 year.Bad ventilation – check if there is something blocking the pipes.Catalyst mass can be dense and should be replaced with an interval of 1–2 years, depending on use. | Many visits?Can cause the combustion to become poor. Press the start button to start the combustion once again.Fix the ventilationChange the catalyst-massContact service-place |
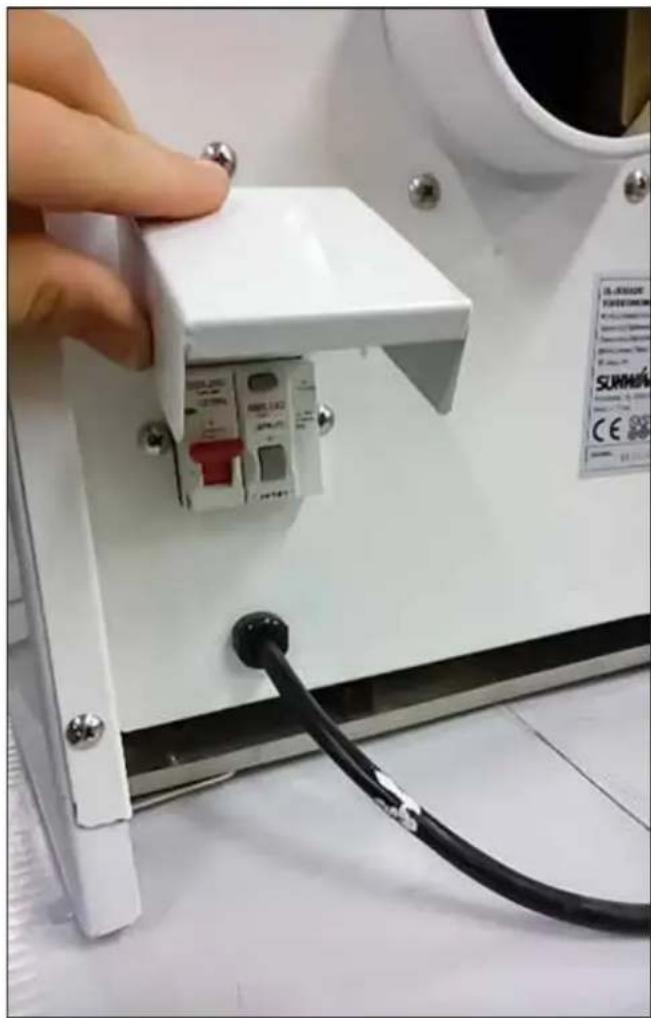
| Toilet is dead on arrival | No function within the toilet, and no light in the button | Check the distribution fuse in your cabinCheck the fuse on the back of the toilet |
Troubleshooting
| Troubleshooting Solution | Possible cause | |
| The cooling fan is running but no combustion | Heat fuse has blownHeat element has gone bustCircuit board error | Reset the automatic fuse. Remove top lid of the toilet assembled with 4 screws.Change heating elementCircuit board may be replaced |
| The cooling fan turns on and off periodically after the combustion | Heat fan will automatically start if the temperature is over the cut off limit | No need for action, this is normal |
| Burnt paper/ash outside the ash pot | One or more of the waste bags has gotten stuck in the lid of burning chamber | Remove top lid of the toilet assembled with 4 screws. Carefully push the lid downwards if there is too much resistance when you unscrew.Remove all visible waste. Assemble again and test. |
| Smell in the toilet room | No fresh air intake, or too small air intake in the toilet roomObstructions in the ventilation ductWaste that has not been properly combusted in the burning chamberToggle clip that holds the burning chamber in the right position is too looseKitchen fan or fireplace sucks air from the toilet room and use the ventilation piping to get enough airflow | Check external ventilation according to this manual's mounting instructionsCheck ventilation for obstructionsCheck that the heating element is working and adjust burning time if necessaryAdjust toggle clip tight enough to hold the ash pot close to the burning chamberInstall more ventilation ducts in your cabin and seal bigger gaps and ducts between toilet room and rest of your living areaDisconnect the thermostat so that the fan runs at low speed all the time for a positive draft in the ventilation pipe. (kit/set purchased separately). |
![graph TD A["thermocouple"] --> B["PCB"] C["thermostat 338F"] --> D["heat element"] E["Thermostat 167F"] --> F["filter"] G["AC220V"] --> H["leakage switch"] I["red light"] --> J["green light"] K["main switch"] --> L["switch for motor"] M["black white red"] --> N["motor for fan"] O["black white red"]…](/content/2026/05/1014523/images/b967283df50aff63fc50f1f0910160096494d023aa6fadf6b6fb0a5ce15413d2.jpg)
When replacing parts, use only originals.
The parts are designed to withstand high temperatures
and the tough conditions in the toilet.
Service:
Sunwind Gylling AS
Rudssletta 71
1309 Rud
Tel.: 67 17 13 70
E-mail: post@sunwind.no
www.sunwind.no
Installation
Maintenance

Combustion chamber
Open the clamp.
Pull out the drawer.

5.
Daily use
1.
Tips
Takuu
Maintenance operations:

Burner housing
Open the latch.

5.
Daily use
1.
Tip
Valid until 18 June 2020
Rev.3 amended 03.2024
We hereby confirm that our model No. 720112 - 720108 - 720110 - 720114 Eldorado combustion/incinerating toilet manufactured up to current standards to be applicable for these type toilets.
The toilet is approved and function tested by Nemko and Intertek and also produced according to LVD, EMC and Rhos directive.
Fuhua Industrial Region, Hesui Industrial Garden
DongFeng Town
Zhongshan City, Guangdong Province
China
Factory
Zhongshan DongFeng Fuhua Electric Appliance Co., Ltd.
Fuhua Industrial Region, Hesui Industrial Garden
DongFeng Town
Zhongshan City, Guangdong Province
China
Project Number
PRJ0029525
Product
Combustion toilet
Model/Type Ref.
720110
Ratings
2300W 10A 230V AC 50Hz
Brand name / Trademark

Principal Characteristics
Cl. I. IPX4
A sample of the product was tested and found to be in conformity with
Safety
This certificate documents conformity with the standards shown, and also applies as license for use of Nemko's name and certification mark. The certificate and license is valid as long as the applicable conditions are complied with, and provided that any changes to the product are notified to Nemko for acceptance prior to implementation.
New standards or amendments to the standards may imply that the product design must be updated and/or that re-testing and re-certification is necessary.
Additional Information
Additional model(s)
See next pages
Signature

Nemko Group AS
Philip Pedersens vei 11
1366 Lysaker, Norway
TEL+4722960330
info@nemko.com
ENTERPRISE NUMBER
NO974404532
Date of Issue
Juan Z Saussey
Certification department
2024-01-15
Working for a more sustainable future
Please do not print

www.dtfunds.com
Page 1 of 2
EL-DORADO PLUS BALANCED VENTILATION FORBRENNINGSTOALETT/POLTTOKÄYMÄLÄ
Modell/model/malli: 720112 • NOBB: 60173419
Spenning/Spänning/Voltage/Jännite: 220 - 240V - 50HZ
Current: 9A
Power: 2300W
IP-class: X4

Rudssletta 71, 1350 Rud, Norway
Made in China



SUNWIND
ENJOY your spare time
Sunwind Gylling AS
Rudssletta 71-75, 1351 Rud, Norway
Tlf: 67 17 13 70
www.sunwind.no
Sunwind Gylling AB