Easy Control 28Z023 - Iron Zelmer - Free user manual and instructions
Find the device manual for free Easy Control 28Z023 Zelmer in PDF.


| Product Type | Steam Iron |
| Model | Easy Control 28Z023 |
| Brand | Zelmer |
| Dimensions (approx) | 30 x 12 x 15 cm |
| Weight | 1.2 kg |
| Power | 2400 W |
| Voltage | 220-240 V ~ 50/60 Hz |
| Water Tank Capacity | 300 ml |
| Soleplate Material | Stainless Steel / Ceramic |
| Cord Length | 2 m |
| Steam Output (continuous) | 35 g/min |
| Steam Boost | 120 g/min |
| Spray Function | Yes |
| Vertical Steaming | Yes |
| Anti-Drip System | Yes |
| Self-Clean Function | Yes |
| Auto Shut-Off | Yes (after 8 min idle) |
| Variable Temperature Control | Yes (dial) |
| Descaling / Anti-Calc | Anti-calc system |
| Storage | Heel rest, cord wrap |
| Safety | Thermal fuse, auto shut-off |
| Maintenance | Descaling every 1-2 months |
Frequently Asked Questions - Easy Control 28Z023 Zelmer
User questions about Easy Control 28Z023 Zelmer
0 question about this device. Answer the ones you know or ask your own.
Ask a new question about this device
Download the instructions for your Iron in PDF format for free! Find your manual Easy Control 28Z023 - Zelmer and take your electronic device back in hand. On this page are published all the documents necessary for the use of your device. Easy Control 28Z023 by Zelmer.
USER MANUAL Easy Control 28Z023 Zelmer
Nalewanie wody
natural_image
Illustration of a steam iron with a flag attached (no text or symbols)natural_image
Illustration of a steam iron with three stylized exhaust flames below (no text or symbols)natural_image
Illustration of a steam iron with five stylized shoe cutouts below (no text or symbols)
natural_image
Illustration of a steam iron with five stylized shoe cutouts below (no text or symbols)UWAGA:
natural_image
Illustration of a steam iron with two stylized shoe designs (no text or symbols)natural_image
Hand pouring liquid into a container (no text or symbols visible)natural_image
Black and white illustration of a steam iron with a paper lamp above it (no text or symbols)natural_image
Illustration of a steam iron with three stylized cloud-like shapes underneath (no text or symbols)natural_image
Illustration of a steam iron with three stylized shoe cutouts below (no text or symbols)natural_image
Illustration of a pair of white bones on a gray fabric or garment (no text or symbols)natural_image
Hand pouring liquid into a container (no text or symbols visible)Čištění a údržba
natural_image
Black and white illustration of a steam iron with a paper support (no text or symbols)natural_image
Illustration of a steam iron with three stylized exhaust flames below (no text or symbols)natural_image
Illustration of a steam iron with two stylized bone-like symbols beside it (no text or labels)natural_image
Hand pouring liquid into a container (no text or symbols visible)Čistenie a údržba
natural_image
Illustration of a steam iron with a flag attached (no text or symbols)A höfok beállítása
natural_image
Illustration of a steam iron with three stylized cloud-like shapes underneath (no text or symbols)natural_image
Illustration of a steam iron with three identical air purifiers below (no text or symbols)natural_image
Illustration of a pair of clothes hanging from an iron (no text or symbols)natural_image
Hand pouring liquid from a metallic container into a circular base (no text or symbols visible)natural_image
3D rendering of a modern electric fan with a canopy and mounting bracket (no text or symbols visible)Reglarea temperaturii
natural_image
Illustration of a steam iron with three stylized exhaust flames below (no text or symbols)natural_image
Illustration of a steam iron with three stylized shoe cutouts below (no text or symbols)natural_image
Illustration of a steam iron with three stylized bone shapes on the side (no text or symbols)natural_image
Hand pouring liquid into a cylindrical container (no text or symbols visible)natural_image
Black and white illustration of a steam iron with a flag on top (no text or symbols)natural_image
Illustration of a steam iron with three stylized exhaust flames below (no text or symbols)natural_image
Illustration of a steam iron with three stylized shoe cutouts below (no text or symbols)natural_image
Illustration of a steam iron with three stylized shoe icons above it (no text or symbols)natural_image
Hand washing a large object from a stand (no text or symbols visible)natural_image
Illustration of a steam iron with a flag above it (no text or symbols)Настройка на температурата
natural_image
Illustration of a steam iron with three stylized exhaust flames below (no text or symbols)natural_image
Illustration of a steam iron with six stylized exhaust flames below (no text or symbols)natural_image
Illustration of a steam iron with decorative smoke outlines (no text or symbols)natural_image
Hand pouring liquid into a cylindrical container (no text or symbols visible)natural_image
Illustration of a steam iron with a flag attached (no text or symbols)natural_image
Illustration of a steam iron with three stylized exhaust flames below (no text or symbols)natural_image
Illustration of a steam iron with three stylized exhaust flames below (no text or symbols)natural_image
Illustration of a steam iron with two separate bollie figures beside it (no text or symbols)Самоочищення праски
natural_image
Hand pouring liquid into a stand (no text or symbols visible)Important safety and handling instructions ....58
Hints for ironing 59
Specifications 59
Get to know your iron 59
How to feel the water 60
Temperature setting 60
Preparation for operation – first ironing 60
After operation 60
Spraying 60
Dry ironing 60
Steam ironing 61
Burst of steam 61
Burst of steam in vertical position 62
Self - cleaning 62
Anti-drip function 63
Auto shut-off feature 63
Auto shut-off in horizontal 63
Auto shut-off in vertical 63
Draining the water 63
Cleaning and maintenance 63
Ecology – Environment protection 63
Dear Clients!
Congratulations on your choice of our appliance, and welcome among the users of Zelmer products.
In order to achieve best possible results we recommend using exclusively original Zelmer accessories. They have been specially designed for this product.
Please read these instructions carefully. Pay your special attention to important safety instructions. Keep this User's Guide for future reference.
Important safety and proper handling instructions
Always keep these basic safety instructions during ironing:
The iron is intended for domestic usage only and you can use it solely according to herewith manual.
Remove any protective films or stickers from the sole plate and the – cabinet.
Unwind and straighten the power cord before usage. -
Unplug before filling or emptying the water tank. —
Fill the water using included vessel for water. —
Empty the tank after each usage.
If the non-detachable part of the cord is damaged, it should be replaced by the producer or at a proper service point or by a qualified person in order to avoid any hazards.
The appliance should be repaired by trained staff only. Improper repair can result in serious hazard for a user. In case of defects we recommend you to contact qualified service desk.
- Do not use the appliance when it is damaged or performs abnormally.
- Do not touch the iron rest during or just after ironing. It is hot!
- Connect the iron to a suitable mains supply outlet 230-240 V, with grounding.
- The appliance generates high temperature. Use it carefully and warn other users against possible hazard.
- Do not use an extension power cord set without grounding!
- Do not add perfumed, vinegar or other chemical liquids into the water tank; they can damage the appliance seriously.
- Do not immerse the appliance in water or any other liquid.
- Do not roll the power cord or supply cord around the iron unit or base console for storage until it has cooled down completely.
- Do not attempt to open the cabinet or dismantle any parts from the appliance.
- Use and place the appliance on a firm and steady surface.
- When placing the iron on its stand, ensure that the surface on which the stand is placed is stable.
-Do not open water inlet during ironing.
- Children should be supervised to ensure that they do not play with the appliance, keep electrical appliances out of reach from Children or infirm persons.
- Keep special care when ironing in presence of children. Do not allow to touch the iron during ironing.
- This appliance is not intended for use by persons (including children) with reduced physical, sensory or mental capabilities, or lack of experience and knowledge, unless they have been given supervision or instruction concerning use of the appliance by a person responsible for their safety.
- Children should be supervised to ensure that they do not play with the appliance.
- The appliance is not intended to be operated by means of an external timer or separate remote-control system.
- Do not leave the appliance unattended when it is connected to a mains supply outlet or it is hot.
- The iron is not to be used if it has been dropped, if there are visible signs of damage or if it is leaking.
- If you do not use the iron, even for short time, switch it off, turning Temperature Dial in anti-clockwise direction to „MIN”.
- If you do not use the iron, even for short time, switch the steam function off, setting the knob on position.
- Never iron and clothes or fabrics that are being worn by human or pets.
Never direct the steam to human or pets. – Use self-cleaning function at least once a month. –
Hints for ironing
- Sort out the articles to be ironed according to the type of fabric. This will minimize the frequency of temperature adjustment for different garments.
- Test ironing a small area on the backside or inside the garment if you are unsure about the type of fabric. Start with a low temperature and increase gradually.
- Wait for about three minutes before ironing heat sensitive fabrics. Temperature adjustment needs certain time to reach the required level no matter it is higher or lower.
- Delicate fabrics such as silk, wool, velour, etc. are best ironed with an ironing cloth to prevent shine marks.
- You may need a few times of press to activate the spray, burst and vertically burst function.
- Read the garment labels and follow the manufacturer's ironing instructions which are often shown by symbols similar to the following:
| Temperature settings | ||
 |  |  |
| ○ Acetate○ Elastics○ Polyamide○ Polypropylene | ○ Cupro ○ Triacetate○ Polyeste ○ Viscose○ Proteins ○ Wool○ Silk | ○ Cotton○ Linen |
Specifications
The iron technical parameters are included at the name plate. The iron is I class appliance, equipped with supplying cord and plug with grounding.
ZELMER iron meets the requirements of effective standards.
The appliance meets the requirements of the following directives:
-Low Voltage Device (LVD) - 2006/95/EC
– Electro- Magnetic Compatibility (EMC) – 2004/108/EC.
The product is marked with CE symbol on the name plate.
Get to know your iron
- Sole plate
- Self-cleaning knob
- Spraying nozzle
- Water inlet cover
- Steam control knob
- Control light:
a) red
b) green - Temperature setting knob
- Dial pointer
- Water Spray Button
- Burst of steam button
- Grommet cord
- Water tank
- Power cord

How to fill the water
Disconnect the iron from mains – supply outlet.
Set the - steam control knob (5) in position.
- Release the water inlet cover (4) and fill water through the water inlet hole.
Fill up to the ' - MAX' level marked on the side of water tank.
- Close the water inlet cover (4).
For best result, it is advisable to use demineralised water or distilled
water. Do not use chemically descaled water or any other liquids.

natural_image
Black and white illustration of a steam iron with a paper lamp above it (no text or symbols)Temperature setting
- Connect the iron to a suitable mains supply outlet.
- The red and green control light (6) glows for a moment and you can hear single sound signal. Then the control lights (6) go off.
- Turn the temperature dial knob (7) and the iron switches on again and you can hear a single sound signal.
- The red control light (6) flashes indicating that the iron heats up or glows when it cools down.
- The red control light (6) goes off and you can hear the sound signal when the required temperature is reached.
- The below mentioned symbols mean the following temperature settings: • (ACRYLIC), •• (SILK & WOOL), ••• (COTTON), MAX (LINEN).
- Turn the temperature dial clockwise selecting: ● (1 dot), ●● (2 dots), ●●● (3 dots) or MAX according to the garment label recommendation.
- Select ●●● or „MAX” temperature setting for steam ironing.
- The appliance is ready for use.
Preparation for operation – first ironing
- Remove any protective films or sticker from the sole plate (1) and the cabinet.
– Unwind and straighten the power cord (13).
– Fill the iron as described in "How to fill water". - Connect the iron to a suitable mains supply outlet.
- The red and green control light (6) glows for a moment and you can hear single sound signal. Then the control lights go off.
- Turn the temperature dial (7) in clockwise direction to ●●● position-control light (6) glows and you can hear a single sound signal.
- The red light glows, off when the required temperature is reached and you can hear a single sound signal.
- Move the steam control knob (5) to ↑ position.
- Steam starts coming out from the holes in the sole plate after putting the iron in horizontal position and after burst of steam knob (10).
– Begin first time ironing with an old towel. - When the water tank is empty and there is no more steam produced; the preparation work is completed. The iron is now ready for proper use.
After operation
- Move the temperature dial (7) in counter-clockwise direction to „MIN"; the iron is switched off.
- Move the steam control knob (5) to ✗ position.
– Disconnect the iron from mains supply outlet. - When the iron gets cool completely, store it vertically in a safe place.
Spraying
- This function can be used any time and is not affect any setting.
- Fill the water tank as described in How to Fill Water.
- Aim the nozzle (5) to the garment.
- Press the spray button (8).
It may be necessary to press the spray button a few times to start this function.

Dry ironing – Always follow the garment manufacturer's ironing instructions mentioned at the garment label.
Connect the iron to a suitable mains supply outlet. -
- The red and green control light (6) glows for a moment and you can hear single sound signal. Then the control lights (6) go off.
- Turn the temperature dial (7) in clockwise direction to ●●● position – control light (6) glows and you can hear a single sound signal.
- The red control light (6) starts flashing indicating that the iron heater is on and you can hear a single sound signal.
- The red control light (6) glows and you can hear the sound signal when the required temperature is reached. The iron is ready for use.
- After operation turn the temperature dial knob (7) in counter clockwise direction to „MIN" position. The iron is switched off.
– Disconnect the iron from mains supply outlet. - When the iron gets cool completely, store it vertically in a safe place.
Steam ironing – Always follow the garment manufacturer's ironing instructions mentioned at the garment label.
- Fill the water tank in as described under "How To Fill Water". Connect the iron to a suitable mains supply outlet.
- The red and green control light (6) glows for a moment and you can hear single sound signal. Then the control lights (6) go off.
- Turn the temperature dial (7) in clockwise direction to ●●● position. (For optimum steam quality, do not use ● or ●● setting for steam ironing).
- The red control light (6) starts flashing indicating that the iron heater is on and you can hear a single sound signal.
- The red control light (6) glows and you can hear the sound signal when the required temperature is reached. The iron is ready for use.
- Move the steam control knob (5) to selected position, in order to set the amount of steam.
- After operation turn the temperature dial knob (7) in counter clockwise direction to „MIN" position. The iron is switched off.
- Move the steam control knob (5) to ✗ position.

natural_image
Illustration of a steam iron with three stylized exhaust flames below (no text or symbols)– Disconnect the iron from mains supply outlet.
- When the iron gets cool completely, store it vertically in a safe place.
Burst of steam – Always follow the garment manufacturer's ironing instructions mentioned at the garment label.
This function provides extra amount of steam to remove stubborn wrinkles at clothes and hanging garments.
- Fill the water tank in as described under "How To Fill Water".
- Connect the iron to a suitable mains supply outlet. See „Preparation for operation”.
- The red and green control light (6) glows for a moment and you can hear single sound signal. Then the control lights (6) go off.
- Turn the temperature dial (7) in clockwise direction to ●●● position.
- The red control light (6) starts flashing indicating that the iron heater is on and you can hear a single sound signal.
- The red control light (6) glows and you can hear the sound signal when the required temperature is reached. The iron is ready for use.
- Move the steam control knob (5) to selected position, in order to set the amount of steam.
- Press the burst of steam button (10) once – steam will shoot from the holes of the soleplate.
- For stubborn wrinkles, wait a few seconds before pressing the burst of steam button (10) again. Most wrinkles can be removed within three presses.
- Move the steam control knob (5) to ✗ position.
– Disconnect the iron from mains supply outlet. - When the iron gets cool completely, store it vertically in a safe place.
ATTENTION:
It may be necessary to press the burst of steam button a few times to start this function.
For optimum steam quality, do not operate the Burst of Steam more than three times after the control light goes off.
When the control light (6) glows do not operate the Burst of Steam more than 3 times.
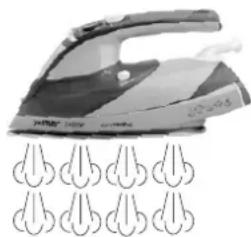
natural_image
Illustration of a steam iron with three stylized shoe cutouts below (no text or symbols)Burst of steam in vertical position – Always follow the garment manufacturer's ironing instructions mentioned at the garment label.
This function provides extra amount of steam to remove wrinkles on delicate garments in hanging position, hanging curtains, or other hanging fabrics.
Warning:
Do not apply steam on any clothes or fabrics that are being worn by human or pets. Never direct the steam to human or pets.
Fill the water tank in as described under "How To Fill Water".
- Connect the iron to a suitable mains supply outlet. See „Preparation for operation“.
- The red and green control light (6) glows for a moment and you can hear single sound signal. Then the control lights (6) go off.
- Turn the temperature dial to ●●● position.
- The red control light (6) starts flashing indicating that the iron heater is on and you can hear a single sound signal.
- The red control light (6) glows and you can hear the sound signal when the required temperature is reached.
—The iron is ready for use.
- Move the steam control knob (5) to ⏻ position.
- Hold the iron between 15 and 30 centimetres away from the garment.
- Press the burst of steam button (10) once – steam will shoot from the holes of the soleplate.
- For stubborn wrinkles, wait a few seconds before pressing the burst of steam button (10) again. Most wrinkles can be removed within three presses.
- After operation move the steam control knob (5) to ✕ position.
- After operation turn the temperature dial knob (7) in counter clockwise direction to „MIN“ position. The iron is switched off.
– Disconnect the iron from mains supply outlet. - When the iron gets cool completely, store it vertically in a safe place.

natural_image
Illustration of a steam iron with two smoke bubbles and a pair of white smoke clouds (no text or symbols)It may be necessary to press the burst of steam button a few times to start this function.
For optimum steam quality, do not operate the burst of steam (10) more than three times after the control light goes off.
Self-cleaning
This function removes the scales and minerals built up in the steam chamber. The iron will remain in the best condition if this function is performed at least once a month or more regularly depending on the hardness of the water used. Usually after more than 8 hours of operation it is necessary to perform the sole plate (1) self-cleaning, then the green control lamp (6) starts flashing.
- Fill the water tank in as described under "How To Fill Water". Fill it up to the half.
- Place the iron on the surface in vertical, resting position.
- Connect the iron to a suitable mains supply outlet. See „Preparation for operation“.
- The red and green control light (6) glows for a moment and you can hear single sound signal. Then the control lights (6) go off.
- Turn the temperature dial (7) in clockwise direction to ●●● position.
- The red control light (6) starts flashing indicating that the iron heater is on and you can hear a single sound signal.
- The red control light (6) glows and you can hear the sound signal when the required temperature is reached.
–The iron is ready for use.
- Wait one cycle; the control light (6) shall glow and go off.
- Turn the temperature dial knob (7) in counter clockwise direction to "MIN" position. The iron is switched off.
– Disconnect the iron from mains supply outlet.
–Hold the iron horizontally over a sink.
- Press and hold the self-cleaning knob (2).
- Steam and boiling hot water will drain from the holes on the soleplate washing away the scales and minerals that have built up inside the steam chamber.
- Gently move the iron back and forth until the water tank is empty.
- When self-cleaning is complete, release the self-cleaning knob (2).
-
Rest your iron back on its heel rest and allow to fully cool down.
-
Wipe the soleplate with a cold damp cloth.
- When the iron gets cool completely, store it vertically in a safe place.
Caution!
Keep skin/body away from the hot water.
Anti-drip system
- The system, which is designed to prevent water escaping from the soleplate when the iron is too cold automatically.
- During use, the anti drip system may emit a loud clicking sound, particularly during heat-up or whilst cooling down. This is perfectly normal and indicates that the system is functioning correctly.
Auto shut-off feature
The Auto shut-off feature will operate automatically when the iron is unattended and it is connected to a mains supply outlet.
Auto shut-off in horizontal
- The iron will switch off automatically after approximately 30 seconds, if it is immobile in the ironing position (horizontal).
- The red and green control light (6) glows in turns and you can hear single sound signal.
- Simply moving the iron, it will back on.
Auto shut-off in vertical
- The iron will switch off automatically after approximately 8 minutes, if it is immobile in the rest position (vertical).
- The red and green control light (6) glows in turns and you can hear single sound signal.
- Simply moving the iron, it will back on.
Note: The iron will take about 60 seconds to reach its previous sole plate (1) temperature.
Draining the water
- Move the steam control knob (5) to ✗ position.
- Disconnect the iron from mains supply outlet.
-
Press the burst of steam button (10), to release any trapped water when the soleplate still hot.
-
Press the spray buttons (9), to release any trapped water.
- Turn the iron upside down and gently shake it to remove the remaining water.
Before storage make sure that steam control knob (7) is in position.
Cleaning and maintenance
Disconnect the iron from mains supply – outlet. The iron should get cool completely – before cleaning. Use a damp cloth and gentle washing – liquid for cleaning.

natural_image
Hand pouring liquid into a container (no text or symbols visible)- Do not use aggressive detergents like cream, milk, paste etc. to clean the casing. They can remove graphic symbols such as: scales, marking, caution signs, etc.
Never use sharp or rough objects to remove the deposits on the sole – plate. - Never use any abrasive, vinegar or descaling agents to clean the iron.
Ecology – Environment protection
Each user can protect the natural environment. It is neither difficult nor expensive.

In order to do it: put the cardboard packing into recycling paper container; put the polyethylene (PE) bags into container for plastic.
When worn out, dispose the appliance to particular disposal centre, because of the dangerous elements of this appliance, which can be hazardous for natural environment.
Do not dispose into the domestic waste disposal!!!
The manufacturer/importer does not accept any liability for any damages resulting from unintended use or improper handling. The manufacturer/importer reserves his rights to modify the product any time in order to adjust it to law regulations, norms, directives, or due to construction, trade, aesthetic or other reasons, without notifying in advance.
- Nalewanie wody
- UWAGA:
- Čištění a údržba
- Čistenie a údržba
- A höfok beállítása
- Reglarea temperaturii
- Настройка на температурата
- Самоочищення праски
- Dear Clients!
- Important safety and proper handling instructions
- Hints for ironing
- Specifications
- Get to know your iron
- How to fill the water
- Temperature setting
- Preparation for operation – first ironing
- After operation
- Spraying
- Dry ironing – Always follow the garment manufacturer's ironing instructions mentioned at the garment label.
- Steam ironing – Always follow the garment manufacturer's ironing instructions mentioned at the garment label.
- Burst of steam – Always follow the garment manufacturer's ironing instructions mentioned at the garment label.
- ATTENTION:
- Burst of steam in vertical position – Always follow the garment manufacturer's ironing instructions mentioned at the garment label.
- Warning:
- Self-cleaning
- Caution!
- Anti-drip system
- Auto shut-off feature
- Auto shut-off in horizontal
- Auto shut-off in vertical
- Draining the water
- Cleaning and maintenance
- Ecology – Environment protection
Brand : Zelmer
Model : Easy Control 28Z023
Category : Iron