
Smart Switch Dual Battery - Hausautomation TESLA - Kostenlose Bedienungsanleitung
Finden Sie kostenlos die Bedienungsanleitung des Geräts Smart Switch Dual Battery TESLA als PDF.


| Produkttyp | Smart Switch mit dualem Batterie-Backup |
| Abmessungen | 90 x 90 x 40 mm |
| Gewicht | 200 g |
| Stromversorgung | 100-240V AC, 50/60Hz |
| Batterietyp | Lithium-Ionen-Akku, zwei Zellen |
| Batteriekapazität | 2000 mAh (insgesamt) |
| Backup-Laufzeit | Bis zu 4 Stunden bei normaler Last |
| Drahtlose Konnektivität | Wi-Fi 2,4 GHz, Bluetooth 4.0 |
| Kompatibilität | Funktioniert mit Alexa, Google Assistant, HomeKit |
| Maximale Last | 10A ohmsch, 5A induktiv |
| Standby-Stromverbrauch | < 0,5W |
| Betriebstemperatur | 0°C bis 40°C |
| Gehäusematerial | Feuerfestes Polycarbonat |
| Hauptfunktionen | Ein/Aus aus der Ferne, Zeitplan, Energieüberwachung, Batterie-Backup |
| Wartung | Mit einem trockenen Tuch abwischen; keine Flüssigkeiten verwenden |
| Sicherheitszertifikate | CE, RoHS, FCC |
| Schutzfunktionen | Überlast, Kurzschluss, Übertemperatur, Tiefentladung |
| Installation | Wandmontage, Neutralleiter erforderlich |
| Garantie | 2 Jahre |
| Ersatzteilverfügbarkeit | Kontaktieren Sie den Tesla-Support; nicht vom Benutzer wartbar |
Häufig gestellte Fragen - Smart Switch Dual Battery TESLA
Benutzerfragen zu Smart Switch Dual Battery TESLA
0 Frage zu diesem Gerät. Beantworten Sie die, die Sie kennen, oder stellen Sie Ihre eigene.
Eine neue Frage zu diesem Gerät stellen
Laden Sie die Anleitung für Ihr Hausautomation kostenlos im PDF-Format! Finden Sie Ihr Handbuch Smart Switch Dual Battery - TESLA und nehmen Sie Ihr elektronisches Gerät wieder in die Hand. Auf dieser Seite sind alle Dokumente veröffentlicht, die für die Verwendung Ihres Geräts notwendig sind. Smart Switch Dual Battery von der Marke TESLA.
BEDIENUNGSANLEITUNG Smart Switch Dual Battery TESLA
TSL-SWI-SCENEZG4/ TSL-SWI-SCENEZG2

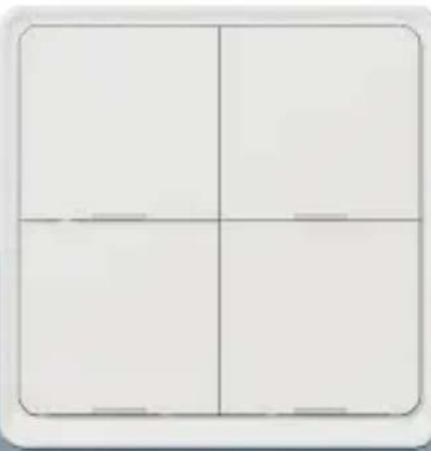
- Fernbetätigung
- Stimmenbetätigung
- Unterstützung der Betätigung im Offline-Modus
- Mechanische Taste mit der LED-Hintergrundbeleuchtung
Vorstellung des Produkts
- Der smarte Umschalter der Szenen ist auf der ZigBee Technologie gegründet, die ein stabiles Netz, eine schnelle Reaktion, ein hohes Sicherungsniveau, eine große Möglichkeit zur Erweiterung und den niedrigen Energieverbrauch anbietet.
- Der smarte Umschalter der Szenen ZigBee kann mit anderen smarten Geräten genutzt werden und so verschiedene Automatisationen des Haushaltes durchführen und Szenen einstellen.
Spezifikation
Batterie: CR2430 3V DC
Kommunikation: Zigbee 3.0
Abmessungen: 86x86x13mm
Betriebsbereich: 25 m (Freiraum)
Betriebstemperatur: -10°C \~ 45°C
Betriebsfeuchtigkeit: <90%RH
Lebensdauer der Batterie: 50k Schaltzyklen
Verbindung und Betrieb
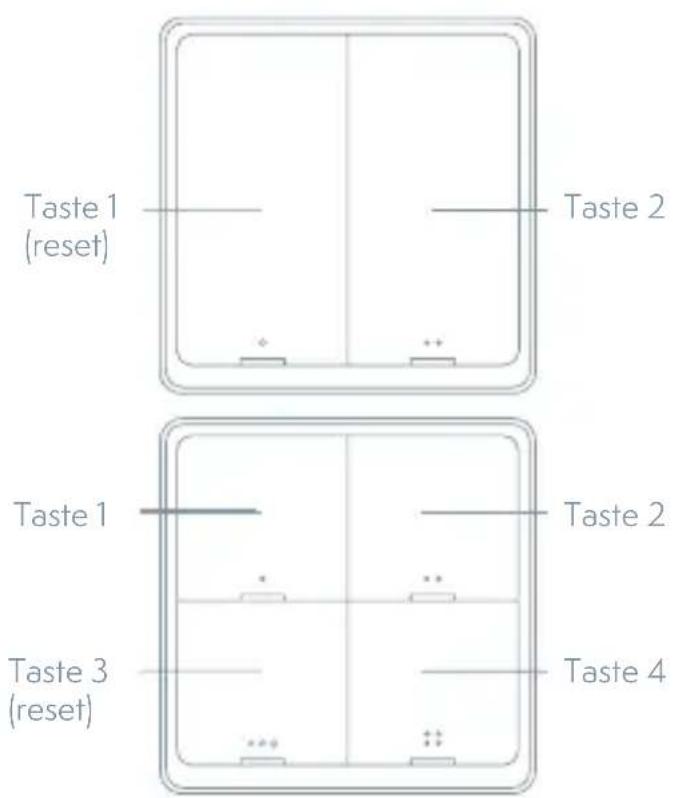
Modus der schnellen Konfiguration
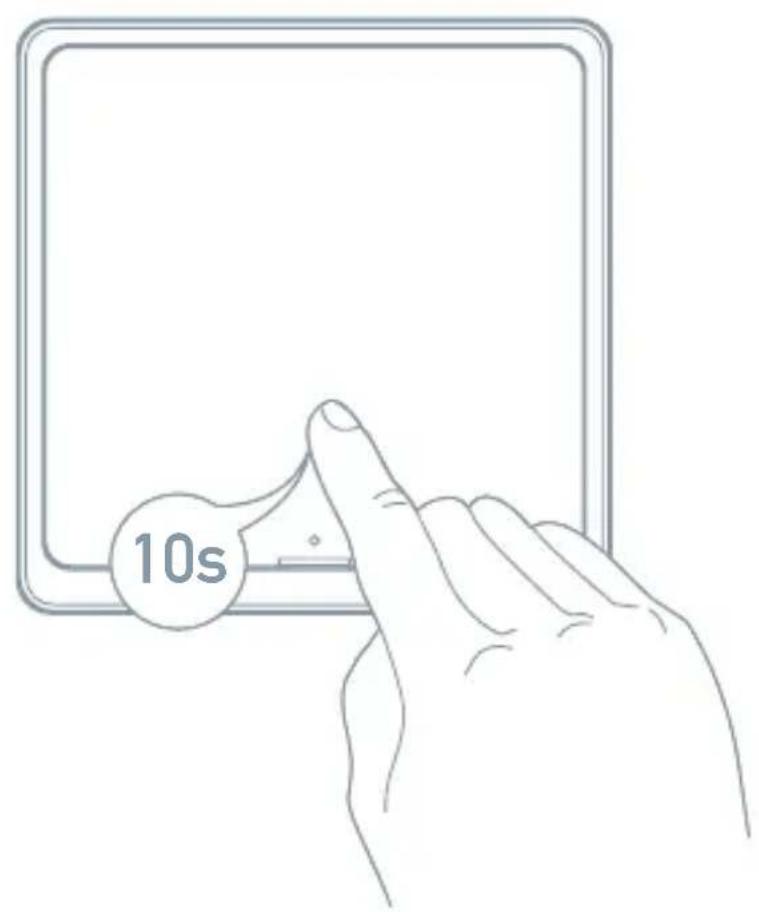
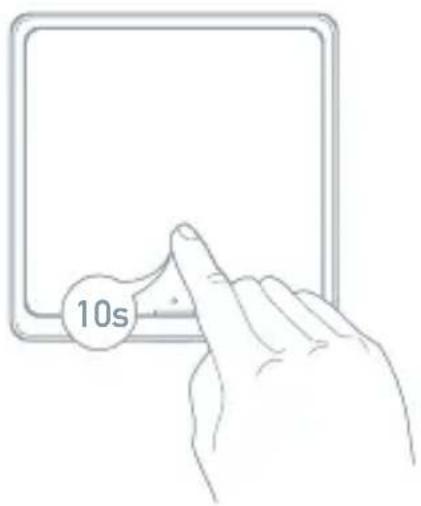
Drücken und halten Sie die Taste des Schalters für 10 Sekunden, bis die LED-Kontrollleuchte beginnt zu blinken, der Schalter wechselt in den Modus der schnellen Konfiguration.
Einlegen/Austausch der Batterien
Vor dem Gebrauch des Produkts gehen Sie nach den Weisungen vor und legen Sie die Batterien ein oder tauschen Sie sie aus.
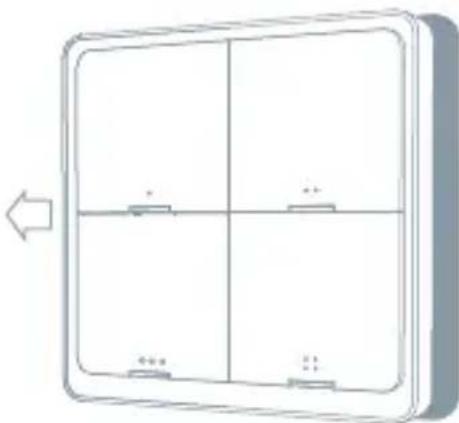
- Schieben Sie das Frontpanel nach links und dadurch öffnen Sie es.
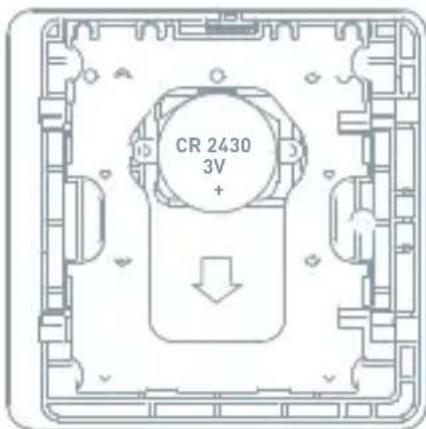
- Nehmen Sie die alte Batterie heraus und drücken Sie nachfolgend eine neue Batterie CR2430 in den Slot hinein.
Nach dem Austausch der Batterie schließt sich der smarte Umschalter der Szenen automatisch an das ZigBee/-Netz an und wechselt in den Normalbetriebsmodus (es ist nicht nötig, irgendwelche Einstellungen in der App durchzuführen).
Umschalten der Szenen mit dem intelligenten Haushalt
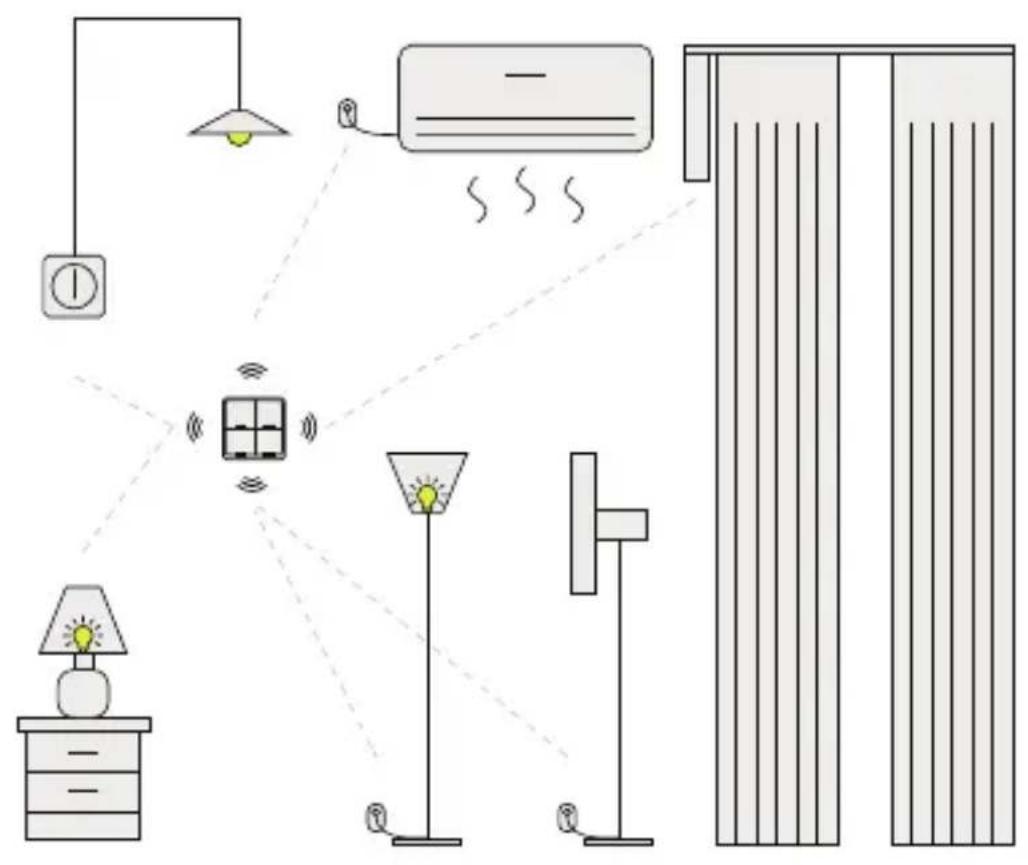
Einstellung wo immer Sie wollen
1 Vorbereitung zum Gebrauch
- Laden Sie die App Tesla Smart von Google Store oder Apple Store in Ihr Smartphone herunter.
- Vergewissern Sie sich, dass Ihr Smartphone an das 2,4GHz-Netz des Routers angeschlossen ist.

2 Fügen Sie das Gerät hinzu (ZigBee)
- Drücken und halten Sie irgendwelche Taste auf dem Schalter, das Gerät wechselt in den Modus der schnellen Konfiguration.
- Wenn Sie in den Paaring-Modus wechseln wollen, öffnen Sie die App und drücken und halten Sie irgendwelche Taste. Öffnen Sie die App und auf Seite „Tesla Smart ZigBee Hub“ („Intelligentes Tor“) klicken Sie auf „Add subdevice“ („Teilgerät hinzufügen“), „LED already blink“ („LED-Kontrollleuchte blinkt“).
- Suchen Sie das Gerät in der Nähe und wählen Sie den „Tesla Smart Switch Quatro Battery“ aus.
- Nach der erfolgreichen Hinzufügung des Geräts klicken Sie auf „DONE“ („FERTIG“).
- Nach dem erfolgreichen Netzanschluss wird die Seite des smarten Tors abgebildet, wählen Sie „Tesla Smart Switch Quatro Battery“ aus und wechseln Sie auf die Seite der Betätigung. Wählen Sie nachfolgend „Add program“ aus und wechseln Sie in den Einstellungsmodus.
- Wählen Sie „Add condition“ aus und wählen Sie die Betätigungsart, z. B. „Ein Klick“, aus. Nachfolgend wählen Sie „Aufgabe hinzufügen“ aus und wählen Sie eine konkrete Handlung aus.
- Wählen Sie das Gerät aus und führen Sie die Aktion durch.
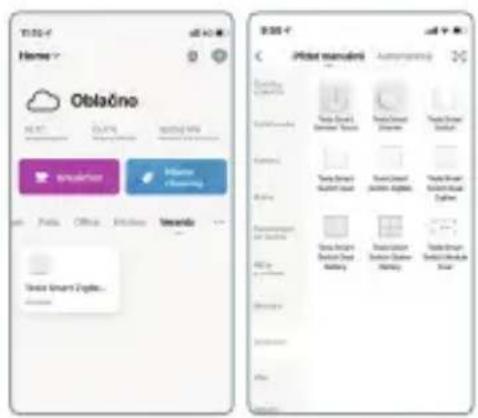
3 Betätigen Sie den Schalter
•Betätigen Sie den Schalter mit Hilfe der App
Reset
Wenn Sie den Schalter zurücksetzen und in den Betrieb der schnellen Konfiguration wechseln wollen, drücken Sie und halten Sie die Reset-Taste für 10 Sekunden.
INFORMATIONEN ÜBER DIE ENTSORGUNG
UND WIEDERVERWERTUNG
Dieses Produkt ist mit einem Symbol für die getrennte Sammlung gekennzeichnet. Das Produkt muss im Einklang mit den Vorschriften für die Entsorgung von elektrischen und elektronischen Geräten (Richtlinie 2012/19/EU über elektrische und elektronische Geräteabfälle) entsorgt werden. Eine Entsorgung über den normalen Hausmüll ist unzulässig. Alle elektrischen und elektronischen Produkte müssen im Einklang mit allen örtlichen und europäischen Vorschriften an dafür vorgesehenen Sammelstellen, die über eine entsprechende Genehmigung und Zertifizierung gemäß den örtlichen und legislativen Vorschriften verfügen entsorgt werden. Die richtige Entsorgung und Wiederverwertung hilft dabei die Auswirkungen auf die Umwelt und die menschliche Gesundheit zu minimieren. Weitere Informationen zur Entsorgung erhalten Sie von Ihrem Verkäufer, der autorisierten Servicestelle oder bei den örtlichen Ämtern.
EU-KONFORMITÄTSERKLÄRUNG
Hiermit erklärt Witty s.r.o., dass der Funkanlagentyp ESW-0ZBA-EU der Richtlinie 2014/53/EU entspricht. Der vollständige Text der EU-Konformitätserklärung ist unter der folgenden Internetadresse verfügbar: teslasmart.com/declaration
Konnektivität: ZigBee IEEE 802.15.4
Frequenzband: 2.400 - 2.480 GHz
Max. Sendeleistung. (EIRP): < 20 dBm

Produzent
Tesla Global Limited


- Vorstellung des Produkts
- Spezifikation
- Verbindung und Betrieb
- Modus der schnellen Konfiguration
- Einlegen/Austausch der Batterien
- Einstellung wo immer Sie wollen
- Vorbereitung zum Gebrauch
- Fügen Sie das Gerät hinzu (ZigBee)
- Betätigen Sie den Schalter
- Reset
- INFORMATIONEN ÜBER DIE ENTSORGUNG
- UND WIEDERVERWERTUNG
- EU-KONFORMITÄTSERKLÄRUNG
- Produzent
Marke : TESLA
Modell : Smart Switch Dual Battery
Kategorie : Hausautomation