
DVD-556 - Lecteur dvd DENON - Notice d'utilisation et mode d'emploi gratuit
Retrouvez gratuitement la notice de l'appareil DVD-556 DENON au format PDF.



| Type de produit | Lecteur DVD |
| Marque | DENON |
| Modèle | DVD-556 |
| Dimensions (L x H x P) | 435 mm x 75 mm x 310 mm (parties saillantes incluses) |
| Poids | 2,3 kg |
| Alimentation | AC 120 V, 60 Hz |
| Consommation électrique | 10 W (veille : 1,0 W) |
| Formats de disques compatibles | DVD-Vidéo, DVD-R/RW, Audio CD, CD-R/RW, MP3, JPEG, WMA |
| Système de couleur | NTSC |
| Sorties vidéo | Composite (1 Vc-c), S-Vidéo (Y : 1 Vc-c, C : 0,286 Vc-c), Composante (Y, Pb/Cb, Pr/Cr : 0,7 Vc-c) |
| Sorties audio analogiques | 2 canaux (L, R) : 2 Vrms |
| Sorties audio numériques | Optique (Toslink) et coaxiale (RCA) |
| Fonctions principales | Balayage progressif, Dolby Digital, DTS, contrôle parental, zoom (x2/x4), répétition (chapitre/titre/plage/tout/A-B), lecture programmée et aléatoire, recherche par temps/chapitre/plage, sélection de langue audio et sous-titres, angle de caméra, réglage de l'image (luminosité, contraste, couleur, gamma, netteté), affichage à l'écran, arrêt sur image, ralenti, pas à pas, économiseur d'écran, arrêt automatique, gradation de l'affichage |
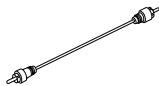
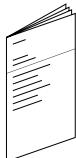
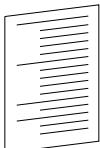
| Accessoires fournis | Télécommande (RC-1009), 2 piles AA (R6P), câble audio, câble vidéo, manuel d'instructions, liste des stations de service, carte de garantie |
| Nettoyage du boîtier | Chiffon doux légèrement humecté d'eau savonneuse douce ; éviter alcool, essence, ammoniaque ou abrasifs |
| Nettoyage des disques | Chiffon doux du centre vers l'extérieur ; ne pas utiliser de solvants |
| Sécurité | Classe de laser 1, protection contre la condensation (attendre 2 heures après un changement de température), débrancher avant nettoyage ou orage |
| Réparabilité | Aucune pièce réparable par l'utilisateur ; confier toute réparation à un personnel qualifié |
| Température de fonctionnement | 5 °C à 35 °C (estimation) |
FOIRE AUX QUESTIONS - DVD-556 DENON
Questions des utilisateurs sur DVD-556 DENON
0 question sur cet appareil. Repondez a celles que vous connaissez ou posez la votre.
Poser une nouvelle question sur cet appareil
Téléchargez la notice de votre Lecteur dvd au format PDF gratuitement ! Retrouvez votre notice DVD-556 - DENON et reprennez votre appareil électronique en main. Sur cette page sont publiés tous les documents nécessaires à l'utilisation de votre appareil DVD-556 de la marque DENON.
MODE D'EMPLOI DVD-556 DENON
DVD VIDEO PLAYER
DVD-556
OPERATING INSTRUCTIONS
MODE D'EMPLOI
INSTRUCCIONES DE FUNCIONAMIENTO
WARNING: TO REDUCE THE RISK OF FIRE OR ELECTRIC SHOCK, DO NOT EXPOSE THIS APPLIANCE TO RAIN OR MOISTURE.
CAUTION
RISK OF ELECTRIC SHOCK DO NOT OPEN

CAUTION:
TO REDUCE THE RISK OF ELECTRIC SHOCK, DO NOT REMOVE COVER (OR BACK). NO USER SERVICEABLE PARTS INSIDE. REFER SERVICING TO QUALIFIED SERVICE PERSONNEL.
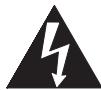
The lightning flash with arrowhead symbol, within an equilateral triangle, is intended to alert the user to the presence of uninsulated “dangerous voltage” within the product’s enclosure that may be of sufficient magnitude to constitute a risk of electric shock to persons.

The exclamation point within an equilateral triangle is intended to alert the user to the presence of important operating and maintenance (servicing) instructions in the literature accompanying the appliance.
IMPORTANT SAFEGUARDS
1) Read Instructions - All the safety and operating instructions should be read before the product is operated.
2) Retain Instructions - The safety and operating instructions should be retained for future reference.
3) Heed Warnings - All warnings on the product and in the operating instructions should be adhered to.
4) Follow Instructions - All operating and use instructions should be followed.
5) Cleaning - Unplug this product from the wall outlet before cleaning. Do not use liquid cleaners or aerosol cleaners. Use a damp cloth for cleaning.
6) Attachments - Do not use attachments not recommended by the product manufacturer as they may cause hazards.
7) Water and Moisture - Do not use this product near water - for example, near a bath tub, wash bowl, kitchen sink, or laundry tub; in a wet basement; or near a swimming pool; and the like.
8) Accessories - Do not place this product on an unstable cart, stand, tripod, bracket, or table. The product may fall, causing serious injury to a child or adult, and serious damage to the product. Use only with a cart, stand, tripod, bracket, or table recommended by the manufacturer, or sold with the product. Any mounting of the product should follow the manufacturer's instructions, and should use a mounting accessory recommended by the manufacturer.
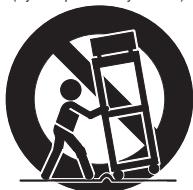
9) A product and cart combination should be moved with care. Quick stops, excessive force, and uneven surfaces may cause the product and cart combination to overturn.
10) Ventilation - Slots and openings in the cabinet are provided for ventilation and to ensure reliable operation of the product and to protect it from overheating, and
PORTABLE CART WARNING (Symbol provided by RETAC)
natural_image
Silhouette of a person climbing a ladder inside a circle (no text or symbols)S3125A
these openings must not be blocked or covered. The openings should never be blocked by placing the product on a bed, sofa, rug, or other similar surface. This product should not be placed in a built-in installation such as a bookcase or rack unless proper ventilation is provided or the manufacturer's instructions have been adhered to.
11) Power Sources - This product should be operated only from the type of power source indicated on the marking label. If you are not sure of the type of power supply to your home, consult your product dealer or local power company. For products intended to operate from battery power, or other sources, refer to the operating instructions.
12) Grounding or Polarization - This product may be equipped with a polarized alternating-current line plug (a plug having one blade wider than the other). This plug will fit into the power outlet only one way. This is a safety feature. If you are unable to insert the plug fully into the outlet, try reversing the plug. If the plug should still fail to fit, contact your electrician to replace your obsolete outlet. Do not defeat the safety purpose of the polarized plug.
13) Power-Cord Protection - Power-supply cords should be routed so that they are not likely to be walked on or pinched by items placed upon or against them, paying particular attention to cords at plugs, convenience receptacles, and the point where they exit from the product.
14) Lightning - For added protection for this product during a lightning storm, or when it is left unattended and unused for long periods of time, unplug it from the wall outlet. This will prevent damage to the product due to lightning and power-line surges.
15) Power lines - An outside antenna system should not be located in the vicinity of overhead power lines or other electric light or power circuits, or where it can fall into such power lines or circuits. When installing an outside antenna system, extreme care should be taken to keep from touching such power lines or circuits as contact with them might be fatal.
16) Overloading - Do not overload wall outlets, extension cords, or integral convenience receptacles as this can result in a risk of fire or electric shock.
17) Object and Liquid Entry - Never push objects of any kind into this product through openings as they may touch dangerous voltage points or short-out parts that could result in a fire or electric shock. Never spill liquid of any kind on the product.
18) Servicing - Do not attempt to service this product yourself as opening or removing covers may expose you to dangerous voltage or other hazards. Refer all servicing to qualified service personnel.
19) Damage Requiring Service - Unplug this product from the wall outlet and refer servicing to qualified service personnel under the following conditions:
a) When the power-supply cord or plug is damaged,
b) If liquid has been spilled, or objects have fallen into the product,
c) If the product has been exposed to rain or water,
d) If the product does not operate normally by following the operating instructions. Adjust only those controls that are covered by the operating instructions as an improper adjustment of other controls may result in damage and will often require extensive work by a qualified technician to restore the product to its normal operation,
e) If the product has been dropped or damaged in any way.
f) When the product exhibits a distinct change in performance - this indicates a need for service.
20) Replacement Parts - When replacement parts are required, be sure the service technician has used replacement parts specified by the manufacturer or have the same characteristics as the original part. Unauthorized substitutions may result in fire, electric shock, or other hazards.
21) Safety Check - Upon completion of any service or repairs to this product, ask the service technician to perform safety checks to determine that the product is in proper operating condition.
22) Heat - The product should be situated away from heat sources such as radiators, heat registers, stoves, or other products (including amplifiers) that produce heat.
Laser Safety
This unit employs a laser. Only a qualified service person should remove the cover or attempt to service this device, due to possible eye injury.
CAUTION: USE OF CONTROLS OR ADJUSTMENTS OR PERFORMANCE OF PROCEDURES OTHER THAN THOSE SPECIFIED HEREIN MAY RESULT IN HAZARDOUS RADIATION EXPOSURE.
CAUTION: VISIBLE AND INVISIBLE LASER RADIATION WHEN OPEN AND INTERLOCK DEFEATED. DO NOT STARE INTO BEAM.
LOCATION: INSIDE, NEAR THE DECK MECHANISM.
FCC WARNING- This equipment may generate or use radio frequency energy. Changes or modifications to this equipment may cause harmful interference unless the modifications are expressly approved in the instruction manual. The user could lose the authority to operate this equipment if an unauthorized change or modification is made.
RADIO-TV INTERFERENCE
This equipment has been tested and found to comply with the limits for a Class B digital device, pursuant to Part 15 of the FCC Rules. These limits are designed to provide reasonable protection against harmful interference in a residential installation. This equipment generates, uses, and can radiate radio frequency energy and, if not installed and used in accordance with the instructions, may cause harmful interference to radio communications. However, there is no guarantee that interference will not occur in a particular installation. If this equipment does cause harmful interference to radio or television reception, which can be determined by turning the equipment off and on, the user is encouraged to try to correct the interference by one or more of the following measures:
1) Reorient or relocate the receiving antenna.
2) Increase the separation between the equipment and receiver.
3) Connect the equipment into an outlet on a circuit different from that to which the receiver is connected.
4) Consult the dealer or an experienced radio/TV technician for help.
This Class B digital apparatus complies with Canadian ICES-003.
CAUTION: TO PREVENT ELECTRIC SHOCK, MATCH WIDE BLADE OF PLUG TO WIDE SLOT, FULLY INSERT.
Non-use periods - Turn off the unit when it is not in use. Unplug the unit from the household AC outlet if it is not to be used for a long time. Unplug the unit during lightning storms.
Please read this operating instructions carefully before using your DVD player, and keep it for future reference.
Important
Use only discs marked with logos listed on page 6.
Power Supply
The main power supply is engaged when the main plug is plugged in a 120V, 60Hz AC outlet. To operate the unit, press the ON/STANDBY button to turn on the unit.
Warning
To avoid fire or electric shock, do not expose this unit to rain or moisture.
WARNING:
LIVE PARTS INSIDE.
DO NOT REMOVE ANY SCREWS.
Installation Location
For safety and optimum performance of this unit:
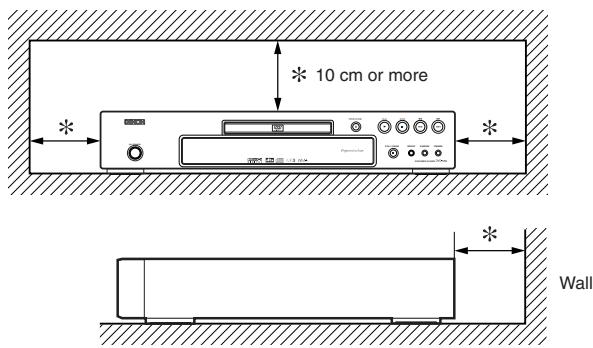
- Do not stand the unit up vertically. Install the unit in a horizontal and stable position. Do not place anything directly on top of the unit. Do not place the unit directly on top of the TV.
- Shield it from direct sunlight and keep it away from sources of intense heat. Avoid dusty or humid places. Avoid places with insufficient ventilation for proper heat dissipation. Do not block the ventilation holes on the sides of the unit. Avoid locations subject to strong vibration or strong magnetic fields.
- Be sure to remove a disc and unplug the AC power cord from the outlet before carrying the unit.
Cautions on Installation
Noise or disturbance of the picture may be generated if this unit or any other electronic equipment using microprocessors is used near a tuner or TV.
If this happens, take the following steps:
• Install this unit as far as possible from the tuner or TV.
- Set the antenna wires from the tuner or TV away from this unit's power cord and input/output connection cords.
- Noise or disturbance tends to occur particularly when using indoor antennas or 300/ ohms feeder wires. We recommend using outdoor antennas and 75/ ohms coaxial cables.
NOTE:
- For heat dispersal, do not install this equipment in a confined space such as a book case or similar unit.
Dew Warning
Moisture condensation may occur inside the unit when it is moved from a cold place to a warm place, or after heating a cold room or under conditions of high humidity. Do not use the DVD Player at least for 2 hours until its inside is dry.
Avoid the Hazards of Electrical Shock and Fire
- Do not handle the power cord with wet hands.
- Do not pull on the power cord when disconnecting it from AC wall outlet. Grasp it by the plug.
- If, by accident, water is spilled on this unit, unplug the power cord immediately and take the unit to our Authorized Service Center for servicing.
Caution
1) Do not attempt to open the cabinet. There are no parts you can service inside. Refer all servicing to qualified service personnel.
2) Slot and openings in the cabinet and at the side or bottom are provided for ventilation. To ensure reliable operation and to protect the unit from overheating these opening must not be blocked or covered. Avoid enclosed spaces such as book cases unless proper ventilation is provided.
3) Keep the unit away from the radiator heat sources.
4) Avoid using near strong magnetic fields.
5) Do not push objects of any kind into this through the cabinet slot as they could touch current carrying parts or short circuit parts resulting in a fire or electric shock.
6) Never spill liquid of any kind on this unit.
If liquid is spilled into the unit, consult qualified service engineer.
7) Use this unit in a horizontal (flat) position only.
8) This equipment is in Stand-by mode when it turns off whilst the power cord is connected.
9) Keep the set free from moisture, water and dust.
10) Handle the power cord carefully. Hold the plug when unplugging the code.
11) All the safety cautions and operating instructions should be read before the DVD player is operated.
12) Use caution not to pinch your finger in the disc slot.
13) Do not put heavy objects on the AC power cord.
14) Keep the AC power cord away from heat appliances.
15) Be sure to remove a disc and unplug the AC power cord from the outlet before carrying the DVD player.
16) Do not put any pressure to the DVD player when carrying.
17) Do not use the DVD player outdoors.
TABLE OF CONTENTS
■ IMPORTANT SAFEGUARDS .... 2
■ PRECAUTIONS .... 3
Laser Safety 3
Important 3
Power Supply 3
Warning. 3
Installation Location....3
Cautions on Installation 3
Dew Warning....4
Avoid the Hazards of Electrical Shock and Fire ..... 4
Caution 4
■ INTRODUCTION....5
About Copyright. 5
Notice for the Progressive Scan Outputs .... 5
Supplied Accessories 5
Symbols Used in this Manual....5
■ ABOUT THE DISCS 6
playable Discs....6
■ FEATURES....7
■ FUNCTIONAL OVERVIEW 8
FRONT PANEL 8
REMOTE CONTROL....8
Tour of the Remote Control 9
Front Panel Display 10
Displays During Operation....10
Loading the Batteries....10
■ CONNECTIONS 11
Description - Rear Panel 11
Connection to an Audio System....12
Connection to a TV (for video) 13
■ DISC PLAYBACK 14
Basic Playback 14
Brightness of the Front Panel Display....14
General Features....14
Disc Menus 14
Title Menu 14
CALLING UP A MENU SCREEN DURING
PLAYBACK 14
Still / Pause 14
Resume....14
Fast Forward / Reverse Search 14
Slow Forward / Slow Reverse 15
Step by Step Playback....15
Zoom....15
Title / Chapter Search 15
By using the SEARCH MODE button ..... 15
By using the SKIP buttons ◀◀◀▶▶I ..... 15
Track Search 15
By using the SEARCH MODE button ..... 15
By using the SKIP buttons ◀◀◀▶▶I ..... 16
Time Search 16
Marker Setup Screen....16
Repeat 16
REPEAT TITLE / CHAPTER....16
REPEAT TRACK / GROUP / ALL 16
A-B REPEAT 16
Program Playback 17
Random Playback 17
MP3 / JPEG / WMA Playback 17
Changing the On-Screen Display....18
Slide Show Mode....19
Dialog Speed....19
Audio Language 20
Subtitle Language 20
Camera Angle 20
Picture Control....20
Stereo Sound Mode....21
Virtual Surround 21
Black Level Setting 21
■ DVD SETUP .... 21
Language Setting 21
Display Setting. 22
Audio Setting....22
Ratings Control 23
RATING LEVEL 23
IF YOU FORGET THE PASSWORD....23
CONTROL LEVELS....23
Others Setting 23
Reset to the Default settings
(except for Ratings Control) 23
Language Code List 24
■ TROUBLESHOOTING GUIDE....25
■ SPECIFICATIONS....26
■ MAINTENANCE 26
The serial number of this product may be found on the back of the DVD player. No others have the same serial number as yours. You should record the number and other vital information here and retain this book as a permanent record of your purchase to aid identification in case of theft. Serial numbers are not kept on file.
| Date of Purchase | |
| Dealer Purchase from | |
| Dealer Address | |
| Dealer Phone No. | |
| Model No. | |
| Serial No. |
About Copyright
Unauthorized copying, broadcasting, public performance and lending of discs are prohibited.
This product incorporates copyright protection technology that is protected by U.S. patents and other intellectual property rights. Use of this copyright protection technology must be authorized by Macrovision, and is intended for home and other limited viewing uses only unless otherwise authorized by Macrovision. Reverse engineering or disassembly is prohibited.
U. S. Patent Nos, 4,631,603, 4,819,098, 4,907,093, 5,315,448 and 6,516,132.
Notice for the Progressive Scan Outputs
Consumers should note that not all high definition television sets are fully compatible with this product and may cause artifacts to be displayed in the picture. In case of picture problems with 525 progressive scan output, it is recommended that the user switch the connection to the ‘standard definition’ output. If there are questions regarding your TV set compatibility with this 525p DVD player, please contact our customer service center.
Supplied Accessories
Please check to make sure the following items are included with the main unit in the carton.
| Remote control......1 | “AA” (R6P) batteries....2 | Audio cable ...... 1 | Video cable...... 1 | Operating Instructions..1 | Service Station List...... 1 | Warranty Card...... 1 |
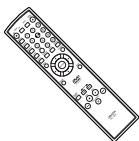 | 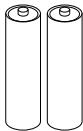 | 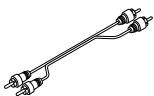 |  |  |  |  |
Symbols Used in this Manual
The following symbols appear below in some headings and notes in this manual, with the following meanings.
DVD : Description refers to playback of DVD-Video discs. (including DVD-R/RW discs)
CD : Description refers to playback of Audio CDs.
MP3 : Description refers to playback of discs formatted with MP3.
JPEG : Description refers to viewing of JPEG discs.
WMA : Description refers to playback of discs formatted with WMA.
A NOTE ABOUT RECYCLING
This product's packaging materials are recyclable and can be reused. Please dispose of any materials in accordance with your local recycling regulations.
Batteries should never be thrown away or incinerated but disposed of in accordance with your local regulations concerning chemical wastes.

Make your contribution to the environment!!!
• Used up batteries do not belong in the dust bin.
- You can dispose of them at a collection point for used up batteries or special waste. Contact your council for details.
playable Discs
| Playable discs | Mark (logo) | Region code | Recorded signals | Disc size | Disc types | |
| DVD-Video*1,2,3,5 |  VIDEO VIDEO |  | or | Digital video(MPEG2) | 12 cm or 8 cm |  |
| DVD-RWDVD-R*1,3,4,5,6,7,8 |  RW RW |  | ||||
 R R |  | |||||
| Audio CD*4,5 |  |  | - | Digital audio | 12 cm or 8 cm |  |
| CD-RWCD-R*4,5,7 |  DIGITAL AUDIO(ReWritable) DIGITAL AUDIO(ReWritable) |  DIGITAL AUDIO Recordable DIGITAL AUDIO Recordable | - | Digital audio MP3 WMA*9 Digital picture(JPEG) |  JPEG, JPEG, | |
 |  | |||||
| [REWritable] | [RE Zwritable] | |||||
| Picture CD |  |  | - | JPEG | 12 cm |  |
 |  | |||||
 |  | |||||
 |  | |||||

is a trademark of DVD Format/Logo Licensing Corporation.
Kodak
Picture CD
COMPATIBLE
is trademark of Eastman Kodak Company.

Windows Media and the Windows logo are trademarks or registered trademarks of Microsoft
Corporation in the United States and/or other countries.
This unit is not compatible with Multiple Bit Rate (MBR: a file that contains the same content encoded at several different bit rates).
If you cannot play back a disc which bears one of the marks above, check the following notes.
*1: This unit conforms to the NTSC color system. Discs recorded in other color systems such as PAL cannot be played back.
*2: Certain DVD discs do not operate as described in this manual due to the intentions of the disc's producers.
*3: Scratched or stained discs may not be played back.
*4: Some discs cannot be played back because of incompatible recording conditions, characteristics of the recorder or special properties of discs.
*5: You can play back discs which bear the marks above. If you use nonstandardized discs, this unit may not play them back. Even if they are played back, the sound or video quality will be compromised.
*6: Only the discs recorded in the video format and finalized can be played back.
Unfinalized discs cannot be played back. Depending on the recording status of a disc, the disc may not be played back at all or normally (the picture or sound may be distorted, etc.).
*7: If there is too much recording space left on a disc (the used portion is less than 55mm across), it may not play back properly.
*8: Do not glue paper or put stickers on to the disc. These may damage the disc, and the unit may not read it correctly.
*9: This player cannot play the disc contents protected by Windows Media Digital Rights Management (DRM).
- NEVER play back the following discs. Otherwise, malfunction may result!
DVD-RAM / CD-I / Photo CD / Video CD / DVD with region codes other than 1 or ALL /
DVD-ROM for personal computers / CD-ROM for personal computers
- On the following disc, the sound MAY NOT be heard.
Super Audio CD
NOTES:
- Only the sound recorded on the normal CD layer can be delivered.
- The sound recorded on the high density Super Audio CD layer cannot be delivered.
- Any other discs without compatibility indications
CAUTION:
- Use caution not to pinch your finger in the disc slot.
- Be sure to remove a disc and unplug the AC power cord from the outlet before carrying the DVD player.
- Progressive Scan system
Unlike conventional interlace scanning, the progressive scan system provides less flickering and images in higher resolution than that of traditional (525i/480i) television signals.
• Dolby Digital Sound
By hooking up this player to a Multi - Channel Dolby Digital decoder, you can enjoy high-quality Dolby Digital 5.1 channel surround sound as heard in the movie theaters.
• DTS (Digital Theater System)
When this player is connected to the DTS decoder, you can enjoy 5.1 channel surround system which reproduces the original sound as truthfully as possible. 5.1 channel surround system is developed by the Digital Theater System, Inc.
- Dialog Speed
Playback in slightly faster or slower speed while keeping the sound quality as in the normal playback. Dialog speed is available only on discs recorded in the Dolby Digital format.
- Still/Fast/Slow/Step playback
Various playback modes are available including still pictures, fast forward/reverse, slow motion and step frames.
- Still Mode
The resolution of pictures while in the still (pause) mode can be adjusted.
- Random Playback for Audio CD, MP3, JPEG and WMA
This player can shuffle the playback order of tracks in random order.
- Program Playback for Audio CD, MP3, JPEG and WMA
You can program the playback order of tracks in a desired order.
• DVD menus in a desired language
You can display DVD menus in a desired language, if available on a DVD.
- Auto Power Off
The power turns off automatically if there is no activity at the player or its remote for more than 30 minutes (refer to page 23).
- Subtitles in a desired language
You can select a desired language for subtitles if that language is available on a disc.
- Selecting a camera angle
You can select a desired camera angle if a disc contains sequences recorded from different angles.
- Choices for audio language and sound mode
You can select a desired audio language and sound mode if different languages and modes are available on a disc.
● Ratings Control (Parental lock)
You can set the control level to limit playback of discs which may not be suitable for children.
● Automatic detection of discs
This player automatically detects if a loaded disc is DVD-Video, Audio CD, MP3, JPEG or WMA.
- Playing back an MP3 disc
You can enjoy MP3 files which are recorded on CD-R/RW.
- Direct Search
You can search the desired title, chapter, and track with numeric button during playback or in stop mode.
- On-screen display
Information about the current operation can be displayed on a TV screen, allowing you to confirm the currently active functions (such as program playback) using the remote control.
- Dimmer
The brightness of the display can be adjusted.
- Screen Saver
The screen saver program starts if there is no activity at the player or its remote for more than 5 minutes. The brightness of the display is darken by 75%. The program is disactivated when there is any activity.
- Picture Control
Picture Control adjusts Brightness, Contrast, Color, Gamma Correction and Sharpness of the specific display.
- Search
Chapter search: Search for a desired chapter.
Title search: Search for a desired title.
Track search: Search for a desired track.
Time search: Search for a desired time point or a title or a track.
- Repeat
Chapter: Repeated playback of a chapter of the disc.
Title: Repeated playback of a title of the disc.
Track: Repeated playback of a track of the disc.
All: Repeated playback of the entire disc. (exclude DVD)
A-B: Repeated playback of a part between two points.
Group: Repeated playback of a folder of the MP3/JPEG/WMA disc being played is possible.
- Zoom
2-time or 4-time magnified screen can be displayed.
- Marker
Electric reference points designated by user can be called back.
- Resume Playback
User can resume playback from the point at which the playback has been stopped even if the power is turned off.
- Component Video Out Jacks
Jacks located on the back of the DVD Player which are used to send high-quality video to a TV via Component Video In Jacks.
- Bit rate indication
• DRC (Dynamic Range Control)
You can control the range of sound volume.
- Displaying a JPEG picture
Kodak Picture CDs can be played back. Still images stored in JPEG format on CD-R/RW can also be played back.
● Reproducing WMA data
You can enjoy WMA files which are recorded on CD-R/RW.
"WMA" (Windows Media Audio) is a new audio codec developed by Microsoft® in the United States of America.
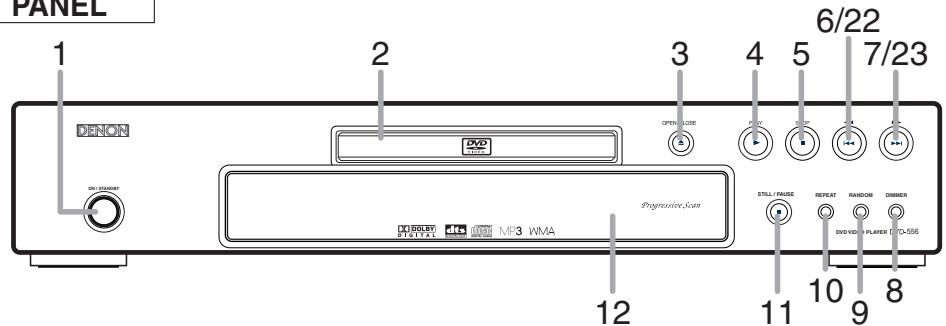
FRONT PANEL
REMOTE CONTROL
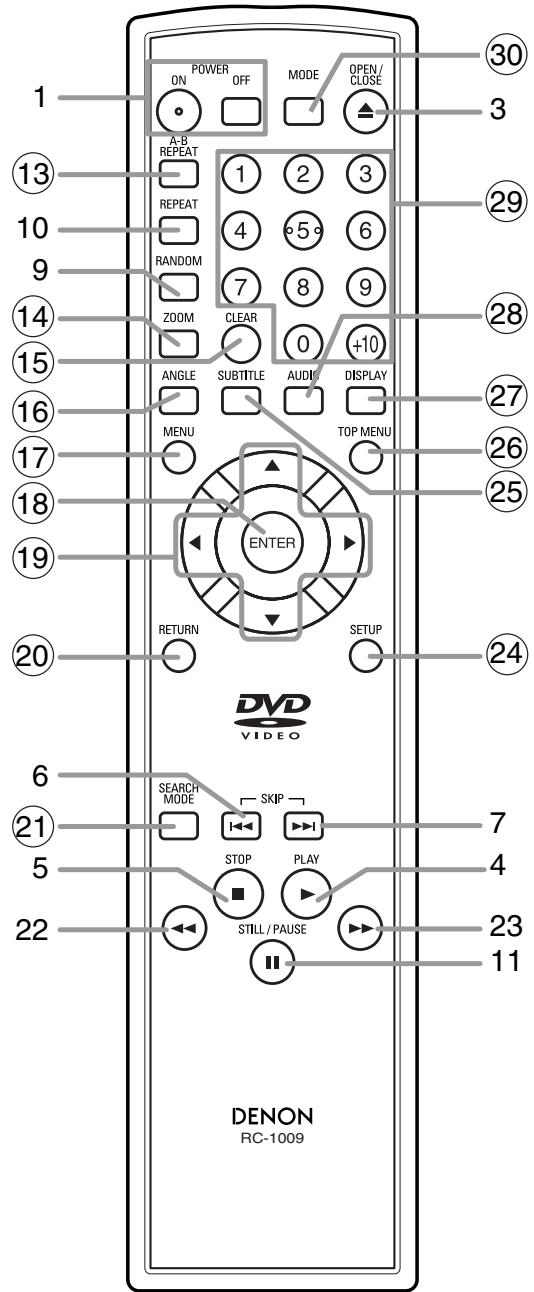
The buttons with circled numbers can only be operated with the remote control.
- ON/STANDBY (POWER ON/OFF) Buttons [page 14]
- Disc loading tray
- OPEN/CLOSE Button [page 14]
- PLAY Button [page 14]
- STOP Button [page 14]
- ◀◀◀(SKIP DOWN) Button [page 15]
- ▶▶▶(SKIP UP) Button [page 15]
- DIMMER Button [page 14]
- RANDOM Button [pages 17]
- REPEAT Button [page 16]
- STILL/PAUSE Button [page 14]
- Display, Remote Sensor Window
- A-B REPEAT Button [page 16]
- ZOOM Button [page 15]
- CLEAR Button [page 15]
- ANGLE Button [page 20]
- MENU Button [page 14]
- ENTER Button [page 14]
- Cursor Buttons [page 14]
- RETURN Button [page 16]
- SEARCH MODE Button [page 15]
- ◀◀(Fast Reverse SEARCH) Button [page 15] Press more than 2 seconds when you use the front panel button for this function.
- ▶▶(Fast Forward SEARCH) Button [page 15] Press more than 2 seconds when you use the front panel button for this function.
- SETUP Button [page 21]
- SUBTITLE Button [page 20]
- TOP MENU Button [page 14]
- DISPLAY Button [page 18]
- AUDIO Button [page 20]
- Numeric Buttons [page 14]
- MODE Button [page 18, 19]
Tour of the Remote Control
Buttons on remote control work in different ways for DVD, Audio CD, MP3, JPEG and WMA :
Refer to the following table for correct use.
| DVD | CD/MP3/JPEG/WMA | |
POWER Buttons | To switch the power between on and standby. | Press this to switch the power between on and standby. |
| A-B REPEAT Button[1Y3B] | To mark a segment between A and B for repeated playback. | To mark a segment between A and B for repeated playback. (CD) |
| REPEAT Button[4E7T] | To repeat playback of a title or chapter. | To repeat playback of a track or disc. (CD)To repeat playback of a track, group or disc. (MP3, JPEG, WMA) |
| RANDOM Button[4G8W] | — | To play back tracks in random order. |
| MODE ButtonMODE[4T4A] | To set Picture Control.To set Black Level on/off.To activate the 3D sound (Virtual surround system).To set Dialog Speed. | To program a specific playback order.To activate the 3D sound (Virtual surround system). (CD, MP3, WMA) |
| ZOOM Button[1TOH] | To magnify part of the picture (x2/x4). | To magnify part of the picture (x2). (JPEG) |
| ANGLE Button[4X9C2] | To access various camera angles on the disc. | — |
| SUBTITLE ButtonSUBTITLE[5x60s] | To access various subtitles on the disc. | — |
| AUDIO ButtonAUDIO[C2Y7] | To access various audio functions on the disc. | To select STEREO, L-ch or R-ch. (CD) |
| DISPLAY ButtonSEPLAN[6x60n] | To display the current disc mode. | To display the current disc mode. |
| SEARCH MODE ButtonSEARCHMINTS[1Y128] | To search for a chapter, title, time or marker.To rapidly return to a location on the disc. | To search for a track.To search for time or a marker. (CD)To return to a location on the disc rapidly. |
OPEN/CLOSE Button[4X9U] | To open or close the disc tray. | To open or close the disc tray. |
| Numeric Buttons1[6x60i]245687[12x6V]39[10] | To select a chapter or title directly. | To select a track directly. |
| CLEA[6x60g]CALL[6x60H] | To clear the markers.To clear the numbers entered incorrectly.To cancel the A point for A-B Repeat. | To clear the markers. (CD)To clear the numbers entered incorrectly.To cancel the A point for A-B Repeat. (CD) |
| MENU ButtonMETHI[1X60G] | To call up the menu on a disc. | To call up the FILE LIST. (MP3, JPEG, WMA) |
| TOP MENU ButtonTOP MENI[1Y138] | To call up the top menu on a disc. | To return to the first item in the highest hierarchy of the FILE LIST. (MP3, JPEG, WMA) |
| ENTER, Cursor Buttons[6x60A] | To move the cursor and determine its position. | To move the cursor and determine its position. |
| RETURN buttonRETURN[4X9A] | To return to the previous operation in the setup menu. | To return to the previous operation in the setup menu. |
| SETUP ButtonSETUP[4=1] | To call up the setup menu. | To call up the setup menu. |
| SKIP Buttons[4X9P] | To skip chapters/titles. | To skip tracks. |
| SEARCH Buttons[1X60C] | To begin fast forward/reverse search or slow forward/slow reverse. | To begin fast forward/reverse search. (CD, MP3, WMA) |
STOP ButtonSTOP | To stop playback. | To stop playback. |
| PLAY Button[1YW72] | To begin playback. | To begin playback. |
| STILL/PALISE ButtonSTRAWHOUSE[11] | To pause playback.To advance playback frame by frame. | To pause playback. |

Front Panel Display
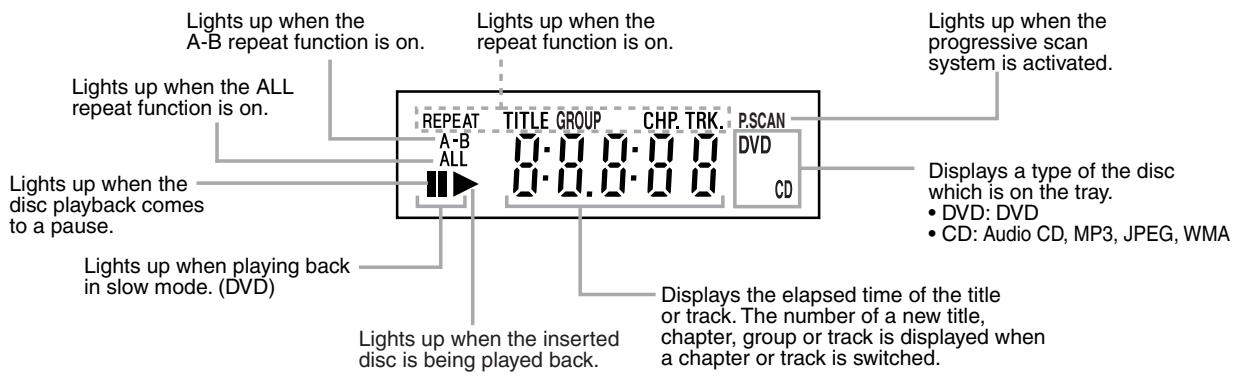
Displays During Operation
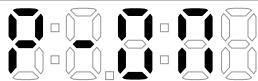 | Power on |
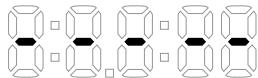 | No disc inserted or cannot read |
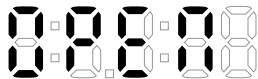 | Tray open |
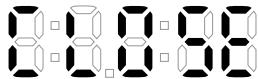 | Tray closed |
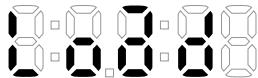 | Loading the Disc |
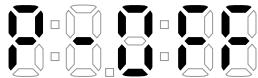 | Power off |
Loading the Batteries
-
Open the battery compartment cover.
-
Insert two "AA" (R6P) batteries, with each one oriented correctly.
-
Close the cover.
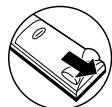
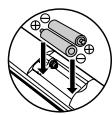
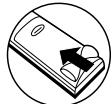
Cautions On Batteries
- Use "AA" (R6P) batteries in this remote control unit.
- Replace the batteries with new ones approximately once a year, though this depends on the frequency with which the remote control unit is used.
- If the remote control unit does not operate within a close proximity of the main unit, replace the batteries with new ones, even if less than a year has passed.
- The included batteries serve only for verifying operation. Replace them with new batteries as soon as possible.
- When inserting the batteries, be careful to do so in the proper direction, following the and marks in the remote control unit's battery compartment.
- To prevent damage or battery fluid leakage:
- Do not mix a new battery with an old one.
- Do not mix two different types of batteries such as alkaline and manganese.
- Do not short-circuit, disassemble, heat or dispose of batteries in flames.
- Remove the batteries when not planning to use the remote control unit for a long period of time.
- If the batteries should leak, carefully wipe off the fluid from the inside of the battery compartment, then insert new batteries.
Description - Rear Panel
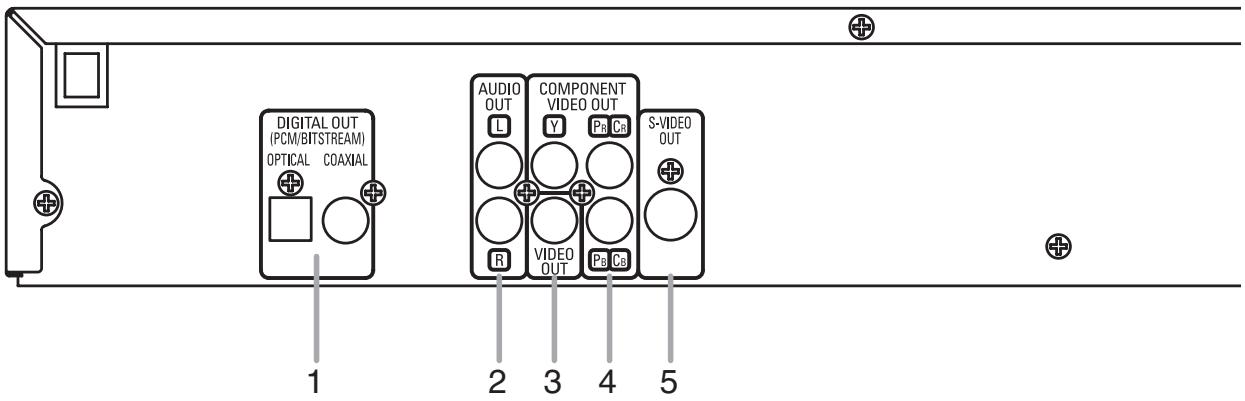
1. DIGITAL OUT Jacks
Use either an optical or coaxial digital cable to connect to an AV amplifier with a built-in decoder (AV control center).
2. AUDIO OUT Jacks
Connect to the Audio input jacks of A/V-compatible TV or wide screen TV, Stereo system.
3. VIDEO OUT Jack
Use a video cable to connect one of the jacks to Video input on your A/V-compatible TV, wide screen TV, or Stereo system.
4. COMPONENT VIDEO OUT Jacks
Use these jacks if you have a TV with Component Video in jacks. These jacks provide C_R/P_R , C_B/P_B and Y video. Along with S-Video, Component Video provides the best picture quality.
5. S-VIDEO OUT Jack
Use the S-Video cable to connect this jack to the S-Video jack on your A/V-compatible TV or wide screen TV for a higher quality picture.
Selecting Progressive Scan (525p/480p or Interlaced 525i/480i) Playback
- If your TV is compatible with progressive scanning (525p/480p), connect the TV to the COMPONENT VIDEO OUT jacks of the DVD player and set “PROGRESSIVE” to “ON” in the display setting. Next, set your TV to the progressive scan mode. Refer to page 22 for instructions on changing the display setting. P.SCAN will appear on the display of the unit.
- If your TV is not compatible with progressive scanning, set “PROGRESSIVE” to “OFF” (refer to page 22). Make sure that P.SCAN on the display of the unit lights off.
- Use a commercially available adaptor if the video input jacks of your TV or monitor is the BNC type.
What is Progressive Scanning?
- Unlike conventional interlace scanning, the progressive scan system provides less flickering and images in higher resolution than that of traditional (525i/480i) television signals.
Manufactured under license from Dolby Laboratories. "Dolby" and the double-D symbol are trademarks of Dolby Laboratories.
“DTS” and “DTS Digital Out” are trademarks of Digital Theater Systems, Inc.
The following shows examples of connections commonly used to connect the DVD player to TV and other components.
If using this DVD player to play back a DVD in a Dolby Digital 5.1 channel surround or DTS surround format, the DVD player outputs a Dolby Digital or DTS data stream from its OPTICAL or COAXIAL DIGITAL OUT jacks. By hooking up the player to a Dolby Digital or DTS decoder, you can enjoy more convincing, realistic ambience with powerful and high-quality surrounding sound of a professional standard which can be heard in movie theaters. Use a commercially available audio optical or coaxial digital cable (not included) for the audio connections.
NOTES:
- Be sure to turn off the power of all components in the system before connecting another component.
- Refer to the Instruction Manuals for your TV, stereo system and any other components to be connected to the DVD player.
Connection to an Audio System
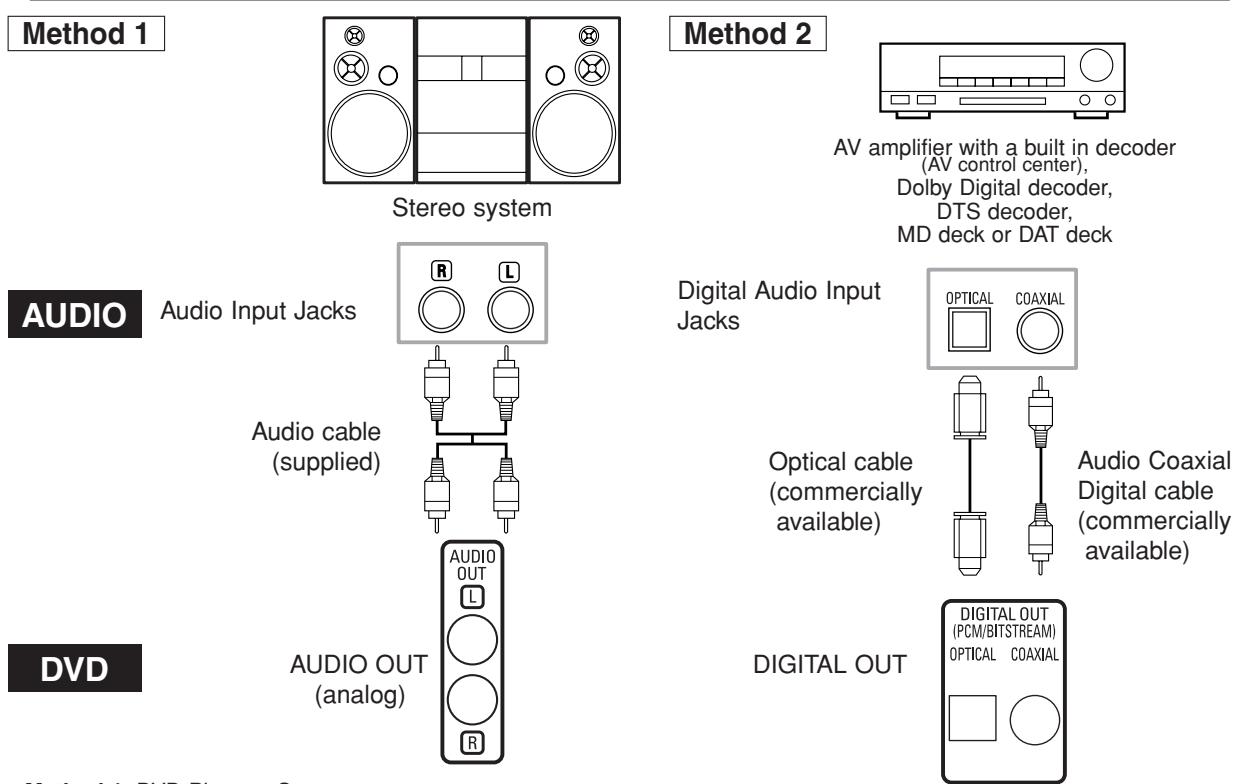
• Method 1 DVD Player + Stereo system
- Method 2 DVD Player + AV amplifier with a built in decoder (AV control center), Dolby Digital decoder, DTS decoder, MD deck or DAT deck
NOTES (for Method 2 only):
- When using an AV amplifier with a built in decoder (AV control center), Dolby Digital, or DTS decoder as shown in the Method 2, set “DOLBY DIGITAL” or “DTS” to “BITSTREAM” accordingly for audio output in the setup mode (refer to page 22). Set it to “PCM” or “OFF” for the decoder that is not used currently. Playing back a DVD using incorrect settings may generate noise distortion, and may also damage the speakers.
- The audio source on a disc in a Dolby Digital 5.1 channel surround format cannot be recorded as digital sound by an MD deck or DAT deck.
- Set “DOLBY DIGITAL” to “PCM” and “DTS” to “OFF” for audio output in the setup mode for connecting to an MD deck or DAT deck (refer to page 22).
- Harsh noise that could harm your ears or the speakers is generated when a DVD recorded in DTS is played while using a decoder, etc., that is not DTS-compatible.
- When playing a copyright-protected 96kHz PCM DVD, the digital sound will be down sampled at 48kHz, even if you set “LPCM SELECT” to “OFF” (refer to page 22).
Optical cable (commercially available)
- Optical cable (commercially available) may be damaged when bent at sharp angles. Ensure cables are coiled in loops with a diameter of 15 cm or more when storing them.
- Use a cable which is 3m or shorter.
- Insert cable plugs firmly into the connectors when making connections.
- If a plug has dust or is dirty, clean it with a soft cloth before inserting it into a connector.
flowchart
graph TD
    A["TV"] --> B["Basic audio"]
    B --> C["Audio Cable (supplied)"]
    B --> D["VIDEO OUT"]
    B --> E["VIDEO OUT"]
    B --> F["S-VIDEO OUT"]
    B --> G["COMPONENT VIDEO OUT"]

    H["TV"] --> I["Basic audio"]
    I --> J["Audio Cable (supplied)"]
    I --> K["VIDEO OUT"]
    I --> L["S-VIDEO OUT"]
    I --> M["COMPONENT VIDEO OUT"]

    N["TV"] --> O["Basic audio"]
    O --> P["Audio Cable (supplied)"]
    O --> Q["VIDEO OUT"]
    O --> R["S-VIDEO OUT"]
    O --> S["COMPONENT VIDEO OUT"]

    T["TV"] --> U["Basic audio"]
    U --> V["Audio Cable (supplied)"]
    T --> W["VIDEO OUT"]
    T --> X["S-VIDEO OUT"]
    T --> Y["COMPONENT VIDEO OUT"]

    Z["TV"] --> AA["Basic audio"]
    AA --> AB["Audio Cable (supplied)"]
    Z --> AC["VIDEO OUT"]
    Z --> AD["S-VIDEO OUT"]
    Z --> AE["COMPONENT VIDEO OUT"]

    AF["TV"] --> AG["Basic audio"]
    AG --> AH["Audio Cable (supplied)"]
    AG --> AI["VIDEO OUT"]
    AG --> AJ["S-VIDEO OUT"]
    AG --> AK["COMPONENT VIDEO OUT"]

    AL["TV"] --> AM["Basic audio"]
    AM --> AN["Audio Cable (supplied)"]
    AL --> AO["VIDEO OUT"]
    AL --> AP["S-VIDEO OUT"]
    AL --> AQ["COMPONENT VIDEO OUT"]

    AR["TV"] --> AS["Basic audio"]
    AS --> AT["Audio Cable (supplied)"]
    AR --> AU["VIDEO OUT"]
    AR --> AV["S-VIDEO OUT"]
    AR --> AW["COMPONENT VIDEO OUT"]

    AX["TV"] --> AY["Basic audio"]
    AY --> AZ["Audio Cable (supplied)"]
    AX --> BA["VIDEO OUT"]
    AX --> BB["S-VIDEO OUT"]
    AX --> BC["COMPONENT VIDEO OUT"]

    BD["TV"] --> BE["Basic audio"]
    BE --> BF["Audio Cable (supplied)"]
    BD --> BG["VIDEO OUT"]
    BD --> BH["S-VIDEO OUT"]
    BD --> BI["COMPONENT VIDEO OUT"]

    BJ["TV"] --> BK["Basic audio"]
    BK --> BL["Audio Cable (supplied)"]
    BJ --> BM["VIDEO OUT"]
    BJ --> BN["S-VIDEO OUT"]
    BJ --> BO["COMPONENT VIDEO OUT"]

    BP["DVD"] --> BQ["AUDIO OUT (analog)"]
    BP --> BR["L"]
    BP --> BS["R"]

    BT["DVD"] --> BT1["AUDIO OUT (analog)"]
    BT --> BT2["L"]
    BT --> BT3["R"]

    BU["DVD"] --> BU1["AUDIO OUT (analog)"]
    BU --> BU2["L"]
    BU --> BU3["R"]

    BV["DVD"] --> BV1["AUDIO OUT (analog)"]
    BV --> BV2["L"]
    BV --> BV3["R"]

    BW["DVD"] --> BW1["AUDIO OUT (analog)"]
    BW --> BW2["L"]
    BW --> BW3["R"]

    BX["DVD"] --> BX1["AUDIO OUT (analog)"]
    BX --> BX2["L"]
    BX --> BX3["R"]

    BY["DVD"] --> BY1["AUDIO OUT (analog)"]
    BY --> BY2["L"]
    BY --> BY3["R"]

    CA["DVD"] --> CA1["AUDIO OUT (analog)"]
    CA --> CA2["L"]
    CA --> CA3["R"]

    CB["DVD"] --> CB1["AUDIO OUT (analog)"]
    CB --> CB2["L"]
    CB --> CB3["R"]

    CC["DVD"] --> CC1["AUDIO OUT (analog)"]
    CC --> CC2["L"]
    CC --> CC3["R"]

    CE["DVD"] --> CE1["AUDIO OUT (analog)"]
    CE --> CE2["L"]
    CE --> CE3["R"]

    CF["DVD"] --> CF1["AUDIO OUT (analog)"]
    CF --> CF2["L"]
    CF --> CF3["R"]

    CG["DVD"] --> CG1["AUDIO OUT (analog)"]
    CG --> CG2["L"]
    CG --> CG3["R"]

    CH["DVD"] --> CH1["AUDIO OUT (analog)"]
    CH --> CH2["L"]
    CH --> CH3["R"]

    CI["DVD"] --> CI1["AUDIO OUT (analog)"]
    CI --> CI2["L"]
    CI --> CI3["R"]

    CJ["DVD"] --> CJ1["AUDIO OUT (analog)"]
    CJ --> CJ2["L"]
    CJ --> CJ3["R"]

    CK["DVD"] --> CK1["AUDIO OUT (analog)"]
    CK --> CK2["L"]
    CK --> CK3["R"]

    CL["DVD"] --> CL1["AUDIO OUT (analog)"]
    CL --> CL2["L"]
    CL --> CL3["R"]

    CM["DVD"] --> CM1["AUDIO OUT (analog)"]
    CM --> CM2["L"]
    CM --> CM3["R"]

    CN["DVD"] --> CN1["AUDIO OUT (analog)"]
    CN --> CN2["L"]
    CN --> CN3["R"]

    CO["DVD"] --> CO1["AUDIO OUT (analog)"]
    CO --> CO2["L"]
    CO --> CO3["R"]

    CP["DVD"] --> CP1["AUDIO OUT (analog)"]
    CP --> CP2["L"]
    CP --> CP3["R"]

    CR["DVD"] --> CR1["AUDIO OUT (analog)"]
    CR --> CR2["L"]
    CR --> CR3["R"]

    CS["DVD"] --> CS1["AUDIO OUT (analog)"]
    CS1 --> CS2["L"]
    CS1 --> CS3["R"]

    CKT["DVD"] --> CK1
    CKT --> CK2
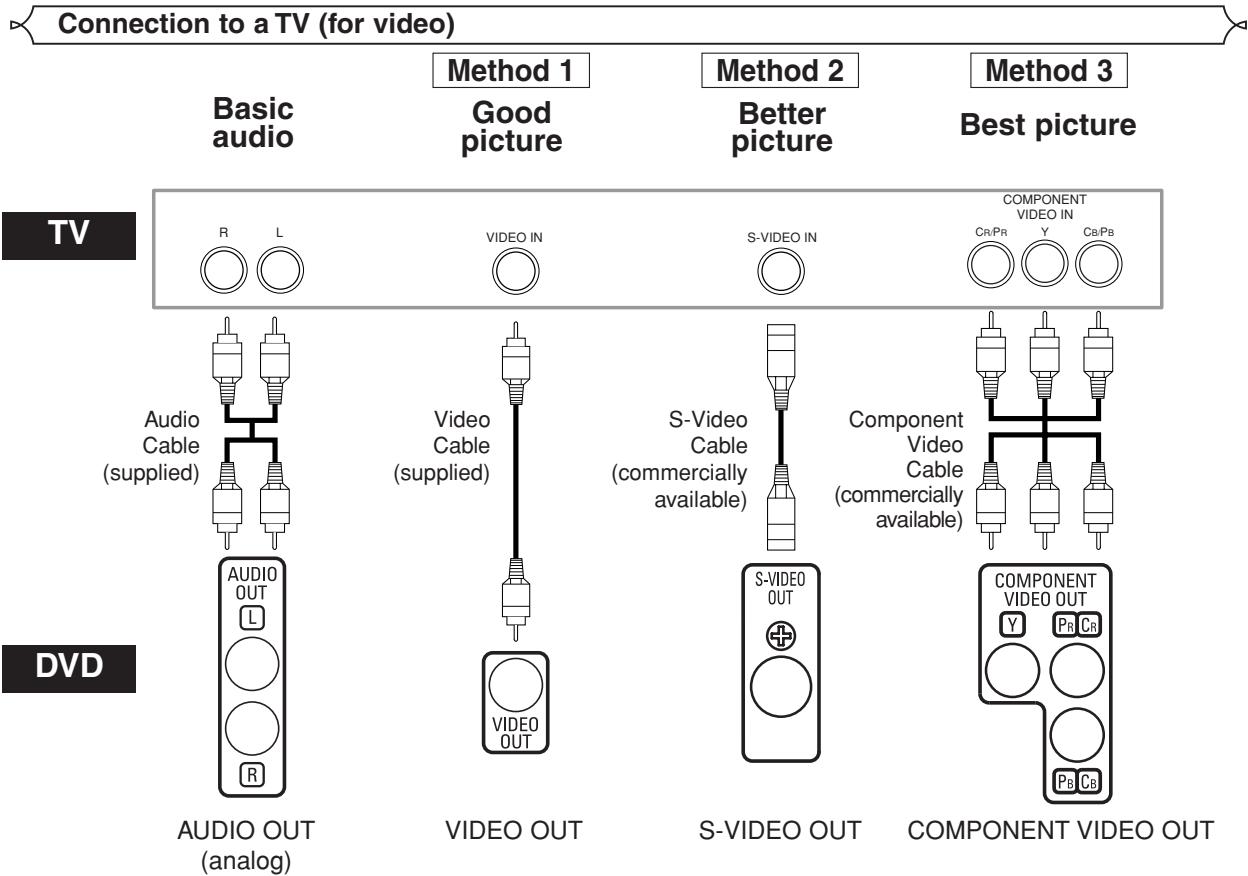
• Method 1 DVD Player + TV with Video Input Jack
• Method 2 DVD Player + TV with S-Video Input Jack
• Method 3 DVD Player + TV with Component Video Jacks
NOTES:
- Connect the DVD player directly to a TV. If the Audio/Video cables are connected to a VCR, pictures may be distorted due to the copy protection system.
• S-Video output connector
The video signals are divided into colour (C) and brightness (Y) signals, achieving a clearer picture.
If the TV is equipped with a S-Video input connector, we recommend connecting it to this unit's S-Video output connector using a commercially available S-Video connection cord.
HOW TO CONNECT TO A TV WITHOUT AUDIO/VIDEO INPUT JACKS
If your TV does not have RCA type audio and video input jacks it is still possible to connect this DVD player to your TV's 75-ohm coaxial antenna terminal using an optional Stereo Audio/Video RF Modulator, not included. Connect the audio and video outputs of the DVD player to the audio and video inputs on the RF Modulator, and then connect the coaxial output of the RF Modulator (usually marked "TO TV") to the 75 ohm coaxial antenna terminal on your TV. Follow the instruction supplied with the RF Modulator for more details.
If your TV's 75 ohm coaxial antenna terminal is already occupied by an antenna or cable box connection, remove that cable from your TV's antenna terminal and reconnect it to the coaxial antenna input terminal of the RF Modulator (usually marked "ANT IN"), then connect the RF modulator to your TV's antenna terminal as described above.
NOTE:
- The picture quality from DVD discs will not be as good if the DVD player is connected to the TV's antenna terminal through an RF Modulator.
Basic Playback
DVD
CD
MP3
JPEG
WMA
Getting started
- Turn on the power of the TV, amplifier and any other components which are connected to the DVD player.
- Make sure the TV and audio receiver (commercially available) are set to the correct channel.
1 Press the POWER ON button.
- "P-ON" will appear briefly on the display panel.
2 Press the OPEN/CLOSE button to open disc loading tray.
3 Place the disc in the tray, with the label facing up.
4 Press the PLAY button.
- The tray will close automatically, then playback will start from the first chapter or track of the disc. If the playback does not start automatically, press the PLAY button.
- When you play back the DVD with a title menu, it may appear on the screen. In this case, refer to "Title menu".
5 Press the STOP button to stop playback.
NOTES:
- A “prohibited icon” may appear at the top-right corner on the TV screen during operation, warning that a prohibited operation has been encountered by the DVD player or the disc.
- With DVDs that use some titles for playback program signals, playback may start from the second title, or it may skip these titles.
- During the playback of two layered disc, pictures may stop for a moment. This happens when the 1st layer switches to the 2nd layer. This is not a malfunction.
- The operation may vary when you play back DVDs with disc menu. Refer to the manual accompanying the disc for details.
Brightness of the Front Panel Display
1 Press the DIMMER button on the front panel to select the desired brightness of the front panel display. (BRIGHT, DIMMER or OFF)
- The default setting is BRIGHT.
NOTES:
- The brightness of the front panel display can be adjusted from the setup menu. Details are on page 23.
- When you turn on the power next time, the brightness of the front panel display will be as set in setup menu.
General Features
DVD
DVD may contain menus to navigate the disc and access special features. Press the appropriate Numeric buttons or use the Cursor buttons (▲ /▼/ ◀/ ▶) to highlight your selection in the DVD main menu and press the ENTER button to confirm.
NOTE:
- Unless otherwise stated, all operations described in this manual are based on remote control use. Some operations can be carried out using the menu bar on the TV screen.
Disc Menus
DVD
1 Press the MENU button.
• The DVD main menu will appear.
2 If the feature is not available, symbol may appear on the TV screen.
3 If disc menu is available on the disc, audio language, subtitle options, chapters for the title and other options will appear for selection.
4 Press the Cursor buttons (▲ / ▼/ ◀/ ▶) to select an item, and the ENTER button to confirm the selection.
Title Menu
DVD
1 Press the TOP MENU button.
• The title menu will appear.
2 If the feature is not available, symbol may appear on the TV screen.
3 Press the Cursor buttons (▲ / ▼/ ◀/ ▶) to select an item, and the ENTER button to confirm the selection.
- Playback will begin at the selected title.
CALLING UP A MENU SCREEN DURING PLAYBACK
DVD
- Press the MENU button to call up the DVD main menu.
- Press the TOP MENU button to call up the title menu.
NOTE:
- Contents of menus and corresponding menu operations may vary among discs. Refer to the manual accompanying the disc for details.
Still / Pause
DVD
CD
MP3
JPEG
WMA
1 During playback, press the STILL/PAUSE button.
- Playback will pause and sound will be muted.
2 To continue playback, press the PLAY button.
NOTE:
- Set "STILL MODE" to "FIELD" on the display menu if pictures in the pause mode are blurred (refer to page 22).
Resume
DVD
CD
MP3
JPEG
WMA
1 During playback, press the STOP button.
- Resume message will appear on the TV screen.
2 Press the PLAY button, play-back will resume from the point at which playback was stopped.
- To cancel résume, press the STOP button twice.
NOTES:
- The resume information be saved even when the power is turned off.
- For MP3, JPEG or WMA, playback will resume from the beginning of the current track.
Fast Forward / Reverse Search
DVD
CD
MP3
WMA
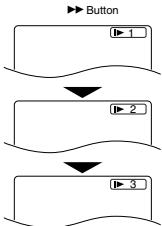
1 During playback, press the ◀◀ or ▶▶ button repeatedly to select a desired forward or reverse speed.
- For DVDs, fast forward or reverse search speed is different depending on the disc. The approximate speed is 1 (x2), 2(x8), 3 (x20), 4 (x50), and 5 (x100).

flowchart
graph LR
    Button1["◀1"] --> Button2["◀2"]
    Button2 --> Button3["◀3"]
    Button3 --> Button4["◀4"]
    Button4 --> Button5["◀5"]

flowchart
graph LR
    A["Button"] --> B["1"]
    B --> C["2"]
    C --> D["3"]
    D --> E["4"]
    E --> F["5"]
- For Audio CDs, MP3 and WMA, the approximate speed is 1 (x2), 2 (x8), and 3 (x16).
- For Audio CDs, MP3 and WMA, sound will be output at any speed of fast forward and reverse search.
2 To return to normal playback, press the PLAY button.
Slow Forward / Slow Reverse
DVD
1 During playback, press the STILL/PAUSE button.
2 Press the ◀◀ or ▶▶ button.
- Slow motion playback will begin and sound will be muted.
3 Press the ◀◀ or ▶▶ button repeatedly to select a desired speed.
- Slow forward or reverse speed is different depending on the disc. Approximate speed is 1 (1/16), 2 (1/8), and 3 (1/2).
4 To return to normal playback, press the PLAY button.
NOTE:
- Set “STILL MODE” to “FIELD” on the Display menu if pictures in the slow playback mode are blurred (refer to page 22).
flowchart
graph TD
    A["Button"] --> B["1"]
    B --> C["Downward Arrow"]
    C --> D["1"]
    D --> E["Downward Arrow"]
    E --> F["1"]
    F --> G["Downward Arrow"]
Step by Step Playback
DVD
1 During playback, press the STILL/PAUSE button.
- Playback will pause and sound will be muted.
2 The disc advances frame by frame each time the STILL/PAUSE button is pressed.
3 To exit step by step playback, press the PLAY button.
NOTE:
- Set “STILL MODE” to “FIELD” on the display menu if pictures in the pause mode are blurred (refer to page 22).
Zoom
DVD | JPEG
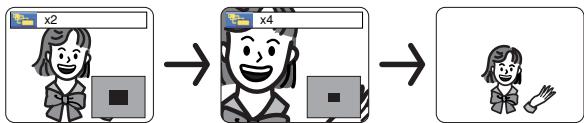
This function allows you to enlarge the video image and to pan through the zoomed image.
1 Press the ZOOM button during playback.
- Playback will continue.
2 Press the ZOOM button repeatedly to select a desired zoom factor: x2, x4 or off.
- Only x2 zoom is available for JPEG.
flowchart
graph LR
    A["x2"] --> B["x4"]
    B --> C["Child Icon"]
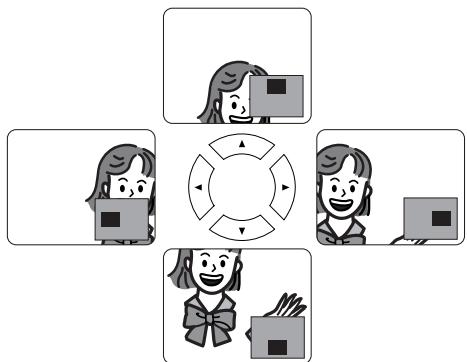
3 Use the Cursor buttons (▲ / ▼ / ◀ / ▶) to move the zoomed picture across the screen.
flowchart
graph TD
    A["Step 1: Data Input"] --> B["Step 2: Processing"]
    B --> C["Step 3: Feedback Loop"]
    C --> D["Step 4: Output"]
    D --> E["Step 5: Display"]
    E --> F["Step 6: Return"]
    F --> A
4 To exit zoom mode, press the ZOOM button.
NOTES:
- Zoom function does not work while disc menu is shown.
- x4 zoom is not available on some discs.
- Navigation screen is not available on JPEG.
- You cannot pan through the zoomed picture on some JPEG files.
Title / Chapter Search
DVD
By using the SEARCH MODE button
1 Press the SEARCH MODE button repeatedly until the chapter search or the title search display appears during playback.
2 Enter the desired chapter/title number with the Numeric buttons.
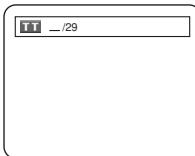
By using the SKIP buttons ◀◀▶▶
During playback, press the SKIP ▶▶▶I button to move to the next chapter. Press it repeatedly to skip to subsequent chapters. Press the SKIP I◀◀ button to go back to the beginning of the current chapter. Press it repeatedly to go to the previous chapters.
- Chapter number will appear briefly on the front display panel.
- If the SKIP ◀◀ or ▶▶ button is pressed while the playback is paused, the playback after skipping to the next chapter will be also paused.
NOTES:
- Depending on the disc being played, the Numeric buttons can be used to search for a desired chapter by entering the chapter number directly. Refer to the manual accompanying the disc.
- The SKIP ◀◀◀ and ▶▶◀I buttons are not available when playback is stopped.
- A disc that does not contain chapters within titles, the SKIP ◀◀ and ▶▶buttons change the titles.
Track Search
CD
MP3
JPEG
WMA
There are two ways to begin playback an Audio CD, MP3, JPEG or WMA disc at a specific track.
By using the SEARCH MODE button
1 Press the SEARCH MODE button.
- The track search display appears.
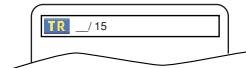
2 Within 30 seconds, select a desired track number using the Numeric buttons.
- For the disc with less than 10 tracks, press the track number directly.
- For discs with 10 or more but less than 100 tracks, to play back a single-digit track, press 0 first, then the track number (e.g. for track 3, press 0, 3). To play back a double-digit track, press the track number.
- For discs with 100 or more tracks, to play back a single- or a double-digit track, press 0 first, then the track number (e.g. for track 3, press 0, 0, 3, and for track 26, press 0, 2, 6). To play back a triple-digit track, press the track number.
- Press the CLEAR button to erase the incorrect input.
NOTE:
- The +10 button can also bring up the track search display except for the disc with less than 10 tracks. For such a disc, track search can be done by just pressing the track number.
By using the SKIP buttons ◀◀▶▶
During playback, press the SKIP ▶▶▶ button to move to the next track. Press it repeatedly to skip to subsequent tracks. Press the SKIP ◀◀◀ button to go back to the beginning of the current track. Press it repeatedly to go to the previous tracks.
- Track number will appear briefly on the front panel display.
- If the SKIP ◀◀ or ▶▶ button is pressed while the play-back is paused, the playback will be paused again after skipping to the next track.
NOTE:
- The SKIP ◀◀◀ and ▶▶◀I buttons are not available when playback is stopped.
Time Search
DVD CD
1 Press the SEARCH MODE button until the time
search screen appears on the TV screen.
2 Within 30 seconds, enter a desired disc time point on the disc with the Numeric buttons.
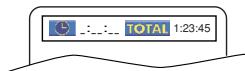
- Playback will start at the specified time.
- For Time Search, "0" appears automatically when there is no need to enter a number. For example, "0:0_:_" appears in the time search screen if the total time of the disc is less than 10 minutes.
3 Press the CLEAR button to erase an incorrect input.
Marker Setup Screen
DVD | CD
You can use markers to memorize your favorite places on a disc.
1 Press the SEARCH MODE button repeatedly until the display screen and Markers appear during playback.
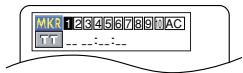
2 Press the Cursor buttons (◀ or ▶) to select 1, 2, 3, 4, 5, 6, 7, 8, 9, or 10 and ensure that “_ : _ : _” appears in the display.
3 When the disc reaches the point you want to remember, press the ENTER button.
- The title or track and elapsed playback time will appear in the TV screen.
4 To return to the Marker later, press the SEARCH MODE button repeatedly during playback and the Cursor buttons (◀ or ▶) to choose a desired marker, then press the ENTER button.
5 Press the SEARCH MODE or RETURN button to exit.
NOTES:
- Opening the disc tray, turning off the power or selecting AC at step 2 and pressing the ENTER button will erase all Markers.
- To clear a marker, using the Cursor buttons (◀ or ▶), position the cursor on to the marker number to be cleared and press the CLEAR button.
- You can mark up to 10 points.
Repeat
- The REPEAT button is available only during playback.
REPEAT TITLE / CHAPTER
DVD
To activate Repeat function, press the REPEAT button during playback.
- The repeat mode changes as described below every time you press the button.

flowchart
graph LR
    A["OFF (repeat off)"] --> B["CHAPTER (current chapter repeat)"]
    B --> C["TITLE (current title repeat)"]
    C --> A
NOTES:
- The Repeat Title/Chapter setting will be cleared when moving to other title or chapter.
- Repeat playback does not function during A-B repeat playback.
- Repeat Title/Chapter is not available with some scenes.
REPEAT TRACK / GROUP / ALL
CD
To activate Repeat function, press the REPEAT button during playback.
- The repeat mode changes as described below every time you press the button.

flowchart
graph LR
    A["OFF (repeat off)"] --> B["TRACK (current track repeat)"]
    B --> C["ALL (entire disc repeat)"]
NOTES:
- In the track repeat, the repeat setting will be cleared when moving to other track.
- Repeat playback does not function during A-B repeat playback.
MP3 JPEG WMA
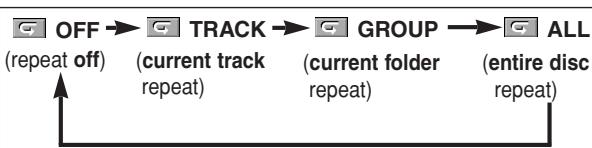
flowchart
graph LR
    A["OFF (repeat off)"] --> B["TRACK (current track repeat)"]
    B --> C["GROUP (current folder repeat)"]
    C --> D["ALL (entire disc repeat)"]
NOTE:
- In the track or group repeat, the repeat setting will be cleared when moving to other track or group.
A-B REPEAT
DVD CD
1 Press the A-B REPEAT button at your chosen starting point.
- A- appears briefly on the TV screen.
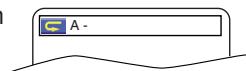
2 Press the A-B REPEAT button again at your chosen end point.
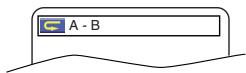
- A-B appears briefly on the TV screen, and the repeat sequence begins.
3 To exit the sequence, press the A-B REPEAT button.
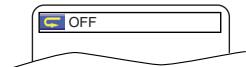
NOTES:
- The A-B Repeat section can only be set within the current title (for DVD), or current track (for Audio CD).
- A-B Repeat is not available with some scenes on DVD.
- To cancel the A point which was set, press the CLEAR button.
- A-B Repeat playback does not function during title, chapter, track or all repeat playback.
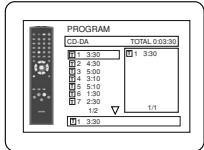
Program Playback
This function allows you to program a playback order of Audio CD, MP3, JPEG or WMA in a desired sequence.
CD
1 In stop mode, press the MODE button.
• The program screen will appear.
2 Press the Cursor buttons (▲ or ▼) to select a track, then press the ENTER button.
- Press the CLEAR button to erase the most recently entered track.
3 Press the PLAY button to start programmed playback.
MP3
JPEG
WMA
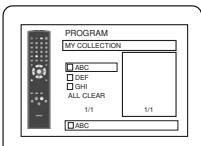
1 In stop mode, press the MODE button.
• The program screen will appear.
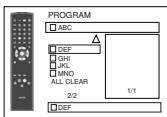
2 Press the Cursor buttons (▲ or ▼) to select a group, then press the ENTER button.
- A track selection screen appears.
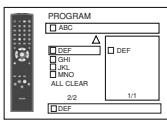
3 Press the Cursor buttons (▲ or ▼) to select a track, then press the ENTER button to save it in a program.
- Press the CLEAR button to erase the most recently entered track.
- The programmed track is displayed in the right-hand screen.
- If the entire program cannot be displayed on the screen, “▼” appears.
- Pressing the Cursor button (◀) will show a list of folders that belong to the hierarchy which is one-level higher than the currently
4 Press the PLAY button to start programmed playback.
- Press the RETURN button, and the stop screen will show up with the program contents in memory.
NOTES:
- Press the STOP button once and then the PLAY button again, playback will restart from the point where the STOP button was pressed. (Program continued.)
- Press the STOP button twice and then the PLAY button again, playback will restart from the first track in the usual way. Your program is still stored until either the disc tray is open or power is turned off.
- Up to 99 tracks can be entered.
- To erase tracks in the program all together, select ALL CLEAR at the bottom of the list at step 2.
- To repeat the current track in the program, press the REPEAT button repeatedly until 📄 TRACK appears during playback. To repeat the entire program press the REPEAT button repeatedly until 📄 ALL appears during playback.
- If eight or more tracks were set in a program, use the SKIP ◀◀ or ▶▶ button to see all the tracks.
- When selecting the folder:
-Press the Cursor button (▶) when you want to go to the next hierarchy.
-Press the Cursor button (◀) when you want to go back to the previous hierarchy (except for the top hierarchy).
- Even if an inserted disc contains mixed MP3, JPEG and WMA files, Program function allows 99 tracks in combination of MP3, JPEG and WMA files.


Random Playback
CD
MP3
JPEG
WMA
This function shuffles the playback order of tracks instead of playback in the original sequence.
1 In stop mode, press the RANDOM button.
- The random screen will appear.
2 Press the PLAY button to start random playback.
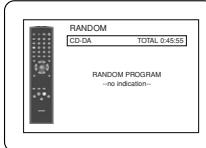
NOTES:
- To repeat the current track in the random selection, press the REPEAT button repeatedly until TRACK appears during playback. To repeat the entire random selection press the REPEAT button repeatedly until ALL appears during playback.
- You cannot go back to the previous track during random playback.
- For a disc containing mixed MP3, JPEG and WMA files, random playback of those files will be performed.
MP3 / JPEG / WMA Playback
MP3
JPEG
WMA
When a CD-R or CD-RW disc with MP3, JPEG or WMA files is inserted in the DVD player and the MENU button is pressed, the file list will appear on display. The number of tracks is also displayed on the front panel.
1 Press the Cursor buttons (▲ or ▼) to select the desired group (folder) or track.
- To return to the previous screen, press the Cursor button (◀).
- If a group (folder) is selected, press the Cursor button (▶) or ENTER button to go on to the track selection screen. Press the Cursor buttons (▲ or ▼) to choose a track, then press the PLAY or ENTER button.
- If a track is selected, press the PLAY or ENTER button to start playing back tracks. The selected track and the subsequent tracks will be played back.
- When selecting the folders
-Press the Cursor button (▶) when you want to go to the next hierarchy.
-Press the Cursor button (◀) when you want to go back to the previous hierarchy (except for the top hierarchy).
- Press the TOP MENU button to return to the first item.
2 Press the STOP button to stop playback.
NOTES:
- Folders are known as Groups; files are known as Tracks.
- A symbol of 📄 is shown on the top of the group name.
- A symbol of 3D is shown on the top of MP3 files
- A symbol of 📄 is shown on the top of JPEG files.
- A symbol of ♪ is shown on the top of WMA files.
• Maximum of 255 folders can be recognized.
• Maximum of 999 files can be recognized. - Up to 8 hierarchies can be recognized.
- If the track extends beyond the scope of screen, a down arrow “▼” appears, indicating that the user can view another part on the previous page. The current page number and the number of total pages are shown on the left of the down arrow “▼”.
- If no MP3, JPEG or WMA files are found in the group, the group is not displayed.
- The DVD player can reproduce data recorded as per ISO 9660 Level 1, Level 2 or Joliet on the disc.
- It can also run a disc on which data is recorded in a multi-session.
- For more details of recording systems, refer to the instruction manual for the CD-R / CD-RW drive or the writing software.
- For MP3 and WMA files recorded in Variable Bit Rate (VBR), the unit may not display the actual elapsed time.
This player recommends the use of files recorded at the following specifications:
| Applicable MP3 file | Remarks | |
| Sampling frequency | 44.1kHz48kHz | • It is prohibited to record MP3 sound on a digital device when the connection is made digitally. |
| Type | MPEG1audio layer 3 | • MP3 files recorded at fixed bit rate of 32 kbps or higher are recommended. |
| Applicable JPEG file | Remarks | |
| Size of image | Upper limit: 6300x5100 dotsLower limit: 32x32 dots | • A JPEG image that extends beyond the screen is reduced so that it will be displayed within the screen. |
| Applicable WMA file | Remarks | |
| Sampling frequency | 44.1kHz48kHz | Those frequencies are applicable to WMA version 9. |
| Bit rate | 48–192kbps | Ensure that the copyright function is set to off when preparing a WMA disc. |
| Type | WMA version 9 | A prohibition “disable” symbol will appear if the user attempts to run a non-reproducible file such as copyright-protected.Recorded in 5.1 channel format cannot be played back. |
Information on MP3, JPEG and WMA discs
- This DVD player can play back images and sounds from data recorded in MP3 and JPEG formats on CD-R and CD-RW discs.
- A file with an extension of “.mp3 (MP3)” is called an MP3 file.
- A file with an extension of “.jpg (JPG)” or “.jpeg (JPEG)” is called a JPEG file.
The DVD player can run an image file conforming to the Exif specification. Exif is a file format, Exchangeable Image File format established by Japanese Electronic Industry Development Association (JEIDA).
- A file with an extension of “.wma (WMA)” is called a WMA file.
- Files whose extension is other than “.mp3 (MP3)”, “.jpg (JPG)” and “.jpeg (JPEG)” or “.wma (WMA)” will not be listed on the MP3, JPEG or WMA menu.
- If the file is not recorded in MP3, JPEG or WMA format, noise may be produced even if the file extension is either ".mp3 (MP3)", ".jpg (JPG)", ".jpeg (JPEG)" or ".wma (WMA)".
- The name of group and track can be displayed up to 25 characters. Unrecognisable characters will be replaced with asterisks. The ninth and deeper hierarchies cannot be displayed.
- Unplayable groups or tracks may be displayed depending on the recording conditions.
- If the TOP MENU button is pressed when a file list is displayed, the first item will be highlighted.
Kodak Picture CD
The DVD player can also run JPEG files stored on Kodak Picture CDs. You can enjoy picture images on the television set by playing back the Picture CDs.
For details of Kodak Picture CD, contact a shop that provide developing service of Kodak Inc.
1 In stop mode, press the MENU button. Kodak
Picture CD menu appears.
- If all menu items cannot be displayed on the screen scope,
“▶▶” appears at the right bottom of the screen, indicating that the user can view remaining items on the next page.
“I◀◀” appears, it indicates that the user can view other items on the previous page. The
track number of the currently h tracks are shown at the center
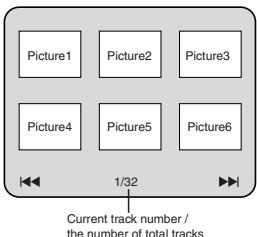
flowchart
graph TD
    A["Picture1"] --> B["Picture2"]
    C["Picture3"] --> D["Picture4"]
    E["Picture5"] --> F["Picture6"]
    G["1/32"] --> H["Current track number / the number of total tracks"]
- If “▶▶” is shown at the right bottom, use the SKIP ▶▶ button to view the next page. If “◀◀” is shown at the left bottom, use the SKIP ◀◀ button to view the previous page. - It may take some time until all menu items are displayed on the menu screen.
2 Press the Cursor buttons (▲ / ▼ / ◀ / ▶), select a desired track to be played back, then press the PLAY or ENTER button.
- If a Kodak Picture CD file is selected, an image will be played back from the selected track and go to the next one in turn.
3 Press the STOP button, to stop playback.
NOTES on JPEG and Kodak Picture CD:
- A track is displayed for 5 or 10 seconds and then the next track is displayed.
- Every press on the Cursor button (▶) will turn the image clockwise by 90 degrees when an image is displayed. A press on the Cursor button (◀) will turn the image counterclockwise by 90 degrees.
- To change the size of the playback image, press the MODE button twice. The size change mode appears on top of the TV screen during playback. Then press the Cursor buttons (◀ or ▶) or ENTER button to switch between NORMAL (100%) and SMALL (95%).
- Progressive JPEGs (JPEG files saved in the progressive format) will not be played back on this DVD player.
- High resolution JPEG files take longer to be displayed.
- The size change mode may have no effect on some files (e.g. files with a small picture size).
NOTES on WMA:
- The DVD player can reproduce data recorded as ISO 9660 level 2 with 31 characters file name included punctuation marks. The name of file can be displayed up to 25 characters.
• Maximum of 8 subfolders can be recognized. - It can also be displayed tag information of WMA at least 64 characters.
- A file with an extension of Joliet as Unicode format in up to 64 characters can be recognized.
- This unit cannot play back copyright protected WMA files.
Changing the On-Screen Display
You can check information about the current disc by pressing the DISPLAY button on the remote control.
DVD
1 Press the DISPLAY button during playback.
- Current chapter number/total chapters, elapsed time and remaining time of the current back status will be displayed.
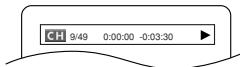
2 Press the DISPLAY button again.
- Current title number/total titles, elapsed time and remaining time of the current title, and current playback status will be displayed.
3 Press the DISPLAY button for the third time.
- The bit rate (the amount of video data currently being read) and current playback status will
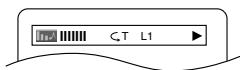
- Current repeat setting appears on the right side of the display bar only when the repeat setting is active. (C: Chapter repeat/ T: Title repeat/A B: A-B repeat)
- If you are playing back a two-layered disc, the layer number will also be displayed. (L0: Layer 0 is played back. L1: Layer 1 is played back.)
4 Press the DISPLAY button again to exit.
CD
1 Press the DISPLAY button during playback.
- Current track number/total tracks, elapsed time and remaining time of the current track, and current playback status will be displayed.
- Current repeat setting appears on the right side of the display bar only when the Repeat setting is active. ( T: Track repeat/ A: All tracks repeat/A B: A-B repeat)
2 Press the DISPLAY button again.
- Current track number/total tracks, elapsed time and remaining time of the entire disc, and current playback status will be displayed.
- Current repeat setting appears on the right side of the display bar only when the Repeat setting is active. ( T: Track repeat/ A: All tracks repeat/A B: A-B repeat)
- When you are playing back a disc in program or random mode, TR PROGRAM (or RANDOM) will be displayed.
3 Press the DISPLAY button again to exit.
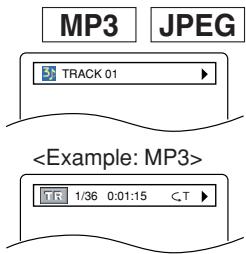
1 Press the DISPLAY button during playback.
- Current file name will be displayed.
2 Press the DISPLAY button.
- Current track number/total tracks and elapsed time (MP3) will be displayed.
- Current repeat setting appears only when the Repeat setting is active.
( T: Track repeat/ A: All (disc) repeat/ G: Group repeat). - When you are playing back a disc with MP3 or JPEG files in program or random mode, TR PROGRAM (or RANDOM) will be displayed.
3 Press the DISPLAY button to exit.
- During program or random playback, each playback status will be displayed when you press the DISPLAY button. Then press the DISPLAY button to exit.
WMA
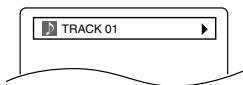
1 Press the DISPLAY button during playback.
- Current file name will be displayed.
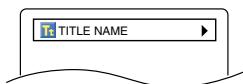
2 Press the DISPLAY button again.
- Title name based on tag information of currently played-back file will be displayed.
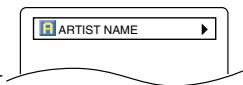
3 Press the DISPLAY button for the third time.
- Artist name based on tag information of currently played-back file will be displayed.
4 Press the DISPLAY button again.
- Current track number/total tracks and elapsed time will be displayed.
- Current repeat setting appears only when the Repeat setting is active.
( ⊙ T: Track repeat/ ⊙ A: All (disc) repeat/ ⊙ G: Group (folder) repeat).
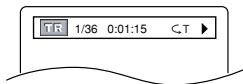
- When you are playing back a disc in program or random mode, TR PROGRAM (or RANDOM) will be displayed.
5 Press the DISPLAY button to exit.
- During program or random playback, each playback status will be displayed when you press the DISPLAY button. Then press the DISPLAY button to exit.
NOTE:
- If the file does not contain tag information, NOT AVAILABLE will be displayed.
Slide Show Mode
JPEG
You can switch to the slide show mode during playback.
1 Press the MODE button during playback.
- The slide show mode screen will appear.
- You cannot change to the slide show mode in stop mode or from the file list screen or the Picture CD menu screen.
2 Press the ENTER button.
• The slide show mode will change.
CUT IN/OUT: The entire image appears in one time.
FADE IN/OUT: The image appears and disappears gradually.
3 Press the MODE button to exit.
Dialog Speed
DVD
Available only on discs recorded in the Dolby Digital format, Dialog Speed plays back in slightly faster or slower speed while keeping the sound quality as in the normal playback.
1 During playback, press the MODE button repeat-
edly until the Dialog Speed setting appears.
- "OFF" appears on the TV screen.
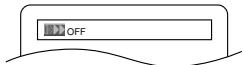
2 Press the ENTER button or the Cursor buttons (◀ or ▶) to switch among ♪ (x1.3), ♪ (x0.8) and OFF.
♪: Plays back approximately at 0.8 times of normal playback.
♪♪ : Plays back approximately at 1.3 times of normal playback.
3 To return to normal playback, press the PLAY button.
NOTES:
- Every time you press the STOP button, the setting will be turned OFF.
- Subtitle can be viewed during this function.
- Picture Control, Black Level and Audio Language setting cannot be changed while using this mode.
• Virtual Surround does not function while using this mode. - This feature may not work at some point on a disc.
- When using digital audio connection (COAXIAL or OPTICAL), the LPCM sound will be output.
- When using the Dialog Speed function with 5.1 channel digital outputting, the analog output sound will be fixed at 2 channel.
- When using digital audio connection, only the Dolby Digital sound will be available.
Audio Language
DVD
The DVD player allows you to select a language (if multiple languages are available) during DVD disc playback.
1 Press the AUDIO button during playback.
2 Press the AUDIO button repeatedly to select your desired language.
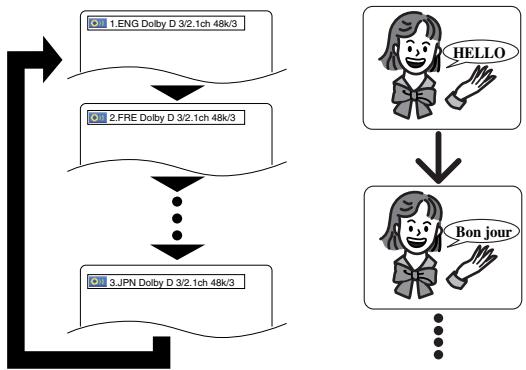
flowchart
graph TD
    A["1.ENG Dolby D 3/2.1ch 48k/3"] --> B["2.FRE Dolby D 3/2.1ch 48k/3"]
    B --> C["..."]
    C --> D["3.JPN Dolby D 3/2.1ch 48k/3"]
    E["HELLO"] --> F["Bon jour"]
    F --> G["..."]
NOTES:
- The sound mode cannot be changed during playback of discs not recorded in double sound.
- Some discs allow to change audio language setting on the disc menu. (Operation varies between discs. Refer to the manual accompanying the disc.)
- Pressing the AUDIO button may not work on some DVDs with multiple audio languages (e.g. DVDs which allow to change audio language setting on the disc menu).
- If you choose a language that has a three-letter language code, the code will be displayed every time you change the Audio Language setting. If you choose any other Languages, ‘---’ will be displayed instead (refer to page 24).
- Audio Language selection cannot be made during Dialog Speed.
- If the disc has no audio language, 'NOT AVAILABLE' will be displayed.
Subtitle Language
DVD
The DVD player allows you to select a subtitle language (if multiple languages are available) during DVD playback.
1 Press the SUBTITLE button during playback.
2 Press the SUBTITLE button repeatedly to select your desired subtitle language.
- The selected language will be displayed on the display bar at the top of the screen.
- Press the Cursor buttons (◀ or ▶) to turn on or off subtitles during playback.
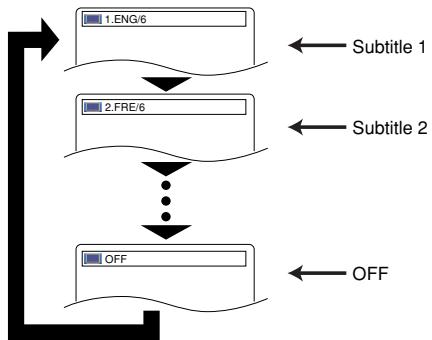
flowchart
graph TD
    A["1.ENG/6"] --> B["2.FRE/6"]
    B --> C["..."]
    C --> D["OFF"]
    style A fill:#f9f,stroke:#333
    style B fill:#ccf,stroke:#333
    style D fill:#cfc,stroke:#333
    note1["Subtitle 1"] --> A
    note2["Subtitle 2"] --> B
    note3["OFF"] --> D
3 To turn off subtitles, press the SUBTITLE button repeatedly until OFF appears.
NOTES:
- Some discs allow subtitle language setting on the disc menu. (Operation varies between discs. Refer to the manual accompanying the disc.)
- Pressing the SÜBTITLE button may not work on some DVDs with multiple subtitle languages (e.g. DVDs which allow subtitle language setting on the disc menu).
- If your desired language is not shown after pressing the SUBTITLE button several times, the disc does not have subtitles in that language.
- If you choose a language that has a three-letter language code, the code will be displayed every time you change the Subtitle Language setting. If you choose any other Languages, ‘---’ will be displayed instead (refer to page 24).
- If the disc has no subtitle language, 'NOT AVAILABLE' will be displayed.
Camera Angle
DVD
Some DVD discs contain scenes which have been shot simultaneously from various angles. You can change the camera angle when the ( ) mark appears on the screen.
1 Press the ANGLE button during playback.
- The selected angle will be displayed on the display bar at the top of the screen.
2 Press the ANGLE button repeatedly to select your desired angle.
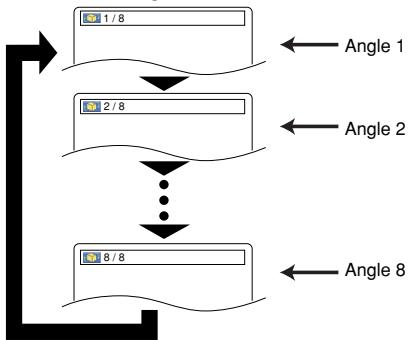
flowchart
graph TD
    A["Block 1/8"] --> B["Arrow"]
    C["Block 2/8"] --> D["Arrow"]
    E["Block 8/8"] --> F["Arrow"]
    G["Angle 1"] --> A
    H["Angle 2"] --> C
    I["Angle 8"] --> E
NOTE:
- If the "ANGLE ICON" setting is "OFF" in the Display menu, the (☐) will not appear.
Picture Control
DVD
Picture Control adjusts Brightness, Contrast, Color, Gamma Correction and Sharpness of the specific display.
1 During playback, press the MODE button.
2 Press the Cursor buttons (▲ or ▼) to switch among items.
3 Press the ENTER button or the Cursor buttons (◀ or ▶) to adjust the selected item to a desired level.
- 6, -5, -4, -3, -2, -1, 0, +1, +2, +3, +4, +5, +6 can be selected.
4 To return to normal playback, press the RETURN button.
NOTES:
- The default settings for all items in Picture Control are "0".
- The setting display will disappear in 10 seconds of no use.
- This function cannot be used during Dialog Speed (refer to page 19).
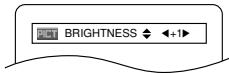
Stereo Sound Mode
CD
1 Press the AUDIO button repeatedly during play-back to select your desired sound mode.
STEREO - both right and left channels are active (stereo)
L-ch - only left channel is active
R-ch - only right channel is active
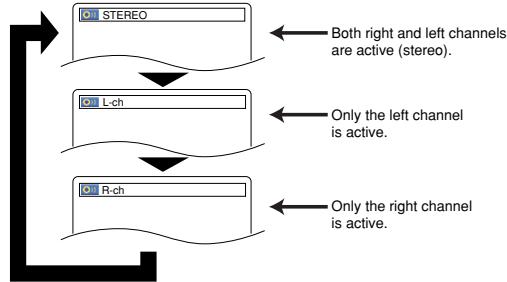
flowchart
graph TD
    A["STEREO"] --> B["L-ch"]
    B --> C["R-ch"]
    D["Both right and left channels are active (stereo)."] --> E["Only the left channel is active."]
    F["Only the right channel is active."] --> G["Only the right channel is active."]
NOTE:
- The STEREO can only be output when playing back DTS CD.
Virtual Surround
DVD
CD
MP3
WMA
You can enjoy surround-sound effect with two speakers.
1 During playback, press the MODE button repeatedly until the Virtual Surround setting appears.
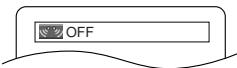
2 Press the ENTER button to set it 1(Natural effect), 2(Emphasized effect) or OFF.
3 Press the RETURN button to exit.
NOTES:
- Select Virtual Surround OFF or lower the volume if the sound is distorted.
- Virtual Surround will not be effective if the sound mode is set to something other than “STEREO” (for Audio CD playback only).
- This function cannot be used during Dialog Speed (refer to page 19).
Black Level Setting
DVD
Adjust the Black Level Setting to make the black parts of the picture as bright as you prefer.
1 During playback, press the MODE button repeatedly until Black Level setting appears.
2 Press the ENTER button to switch ON/OFF. ON (Default) : Makes the dark parts brighter. OFF : Shows the original picture as recorded.
3 Press the RETURN button to exit.
NOTE:
- This function cannot be used during Dialog Speed (refer to page 19).
DVD SETUP
In Setup menu, QUICK mode, CUSTOM mode and INITIALIZE mode (refer to pages 21-23) are available. QUICK mode consists of the setting menus frequently used, and they are accompanied with QUICK mark. You can make all settings in CUSTOM mode.
Language Setting
Language options are not available with some discs.
1 Press the SETUP button in stop mode.
2 Press the Cursor buttons (◀ or ▶) to select CUSTOM, then press the ENTER button.
- The custom mode will appear.
3 Press the Cursor buttons (◀ or ▶) to select LANGUAGE, then press the ENTER button to confirm.
4 Press the Cursor buttons (▲ or ▼) to select an item, then press the ENTER button.
DIALOG (Default : ORIGINAL)
- Sets the audio language.
SUBTITLE (Default : OFF)
- Sets the subtitle language.
DISC MENU (Default : ENGLISH)
- Sets the language for DVD Menu.
OSD (Default : ENGLISH) QUICK
- Sets the language for the On-Screen display.
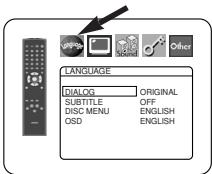
5 Press the Cursor buttons (▲ or ▼) to select a setting, then press the ENTER button.
- If OTHER is selected in the DIALOG, SUBTITLE or DISC MENU, press four-digit number to enter the code for the desired language (refer to the language code list on page 24).
- Only the languages supported by the disc can be selected.
6 Press the SETUP button to exit and activate the new settings.
NOTE:
- Language Setting for DIALOG and SUBTITLE may not be available with some discs. Then use the AUDIO and SUBTITLE buttons. Details are on page 20.
Display Setting
You can change certain aspects of the DVD display screens, still mode setting, the display panel on the front of the DVD player and Progressive settings.
1 Press the SETUP button in stop mode.
2 Press the Cursor buttons (◀ or ▶) to select
CUSTOM, then press the ENTER button.
- The custom mode will appear.
3 Press the Cursor buttons (◀ or ▶) to select DISPLAY, then press the ENTER button to confirm.
4 Press the Cursor buttons (▲ or ▼) to select an item, then press the ENTER button.
TV ASPECT (Default : 4:3 LETTER BOX)
QUICK
- Press the Cursor buttons (▲ or ▼) for an item selection, then press the ENTER button.
- Select 4:3 LETTER BOX for a black bars appears on top and bottom of the screen.
- Select 4:3 PAN & SCAN for a full height picture with both sides trimmed.
- Select 16:9 WIDE if a wide-screen TV is connected to the DVD player.
STILL MODE (Default : AUTO)
- Press the Cursor buttons (▲ or ▼) for an item selection (AUTO, FIELD, or FRAME), then press the ENTER button.
- This function allows you to adjust picture resolution and quality in still mode.
- An individual picture on TV screen is called as “frame”, which consists of two separate images called as “field”. Some pictures may be blurred at the AUTO setting in still mode due to their data characteristics.
- AUTO: Automatically selects the best resolution setting (FRAME or FIELD) based on the data characteristics of the pictures.
- FIELD: Select FIELD when the pictures are still unstable even if AUTO is selected. FIELD stabilizes the pictures, although the picture quality may become coarse due to the limited amount of data.
- FRAME: Select FRAME to display relatively motionless pictures in higher resolution. FRAME improves the picture quality, although it may unstabilize the pictures due to simultaneous output of two field data.
PROGRESSIVE (Default: OFF) QUICK

- Press the Cursor buttons (▲ or ▼) for set PROGRESSIVE to ON or OFF, then press the ENTER button.
- The setting will be effective when you exit the setup screen by pressing SETUP.
- When PROGRESSIVE is ON, P.SCAN appears on the DVD player's display after you exit the setup screen.
• Refer to page 11 for more details.
PROG.MODE (Default: AUTO1)
- Press the Cursor buttons (▲ or ▼) to select a setting (AUTO1, AUTO2, or VIDEO), then press the ENTER button.
- This function allows you to select the image output, depending on the base material (video or film) of the recorded DVD images, when VIDEO OUT is set to COMPONENT PROGRESSIVE.
- AUTO1: Automatically selects the best image output (AUTO2 or VIDEO) based on the information of data stream.
- AUTO2: A combination of the top and bottom fields is output as one-frame image.
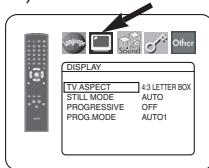
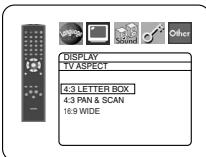
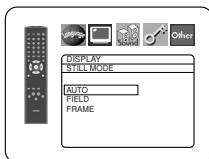
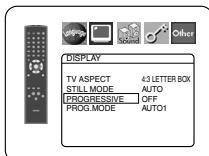
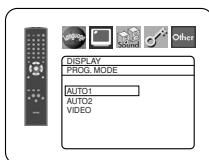
• VIDEO: Either of top or bottom field is output for one-frame image.
5 Press the SETUP button to exit and activate the new settings.
Audio Setting
You can change some Audio settings. It only affects during the playback of DVD discs.
1 Press the SETUP button in stop mode.
2 Press the Cursor buttons (◀ or ▶) to select CUSTOM, then press the ENTER button.
- The custom mode will appear.
3 Press the Cursor buttons (◀ or ▶) to select AUDIO, then the ENTER button to confirm.
4 Press the Cursor buttons (▲ or ▼) button to select an item, then press the ENTER button.
- This menu display contains 2 pages. Press the Cursor button (▼) repeatedly to show the next page.
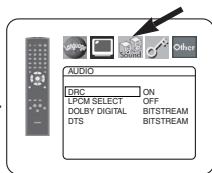
DRC (Dynamic Range Control) (Default : ON)
- DRC function compresses the range of sound volume.
- DRC function is available only on the discs that are recorded in the Dolby Digital format.
LPCM SELECT (Default : OFF)
- Set to ON when outputting in 48kHz (or 44.1kHz).
- This function is available only on digital outputting of a disc recorded in over 96kHz (or 88kHz).
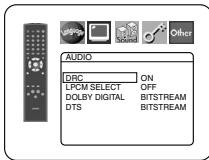
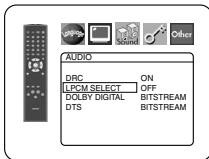
When playing disc with copyright protection
- The sound will be down sampled at 48kHz, even if you set to OFF.
DOLBY DIGITAL
(Default: BITSTREAM)

- Set to BITSTREAM when the player is connected to a Dolby Digital decoder.
- This function is effective only for the COAXIAL and OPTICAL connections.
BITSTREAM:
DOLBY DIGITAL signals are output as Bitstream.
PCM: Convert Dolby Digital to PCM.
DTS
(Default: BITSTREAM)

- Set to BITSTREAM when the unit is connected to a DTS decoder.
BITSTREAM:
DTS signals are output as Bitstream.
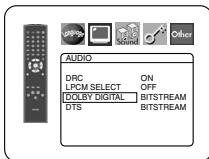
OFF: No DTS sound will be output.
- DTS sound is output only from digital audio outputs.
5 Press the SETUP button to exit and activate the new settings.
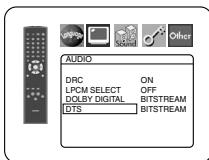
Ratings Control
Ratings Control allows you to set a limit, which prevents your children from viewing inappropriate materials on DVDs. A four-digit password that you establish will give you the control.
RATING LEVEL
You can set a viewing limit through Rating Level. Playback of the discs will stop if the disc's general rating exceeds the limit you set.
1 Press the SETUP button in stop mode.
2 Press the Cursor buttons (◀ or ▶) to select CUSTOM, then press the ENTER button.
3 Press the Cursor buttons (◀ or ▶) to select RATINGS, then press the ENTER button.
4 Press the Numeric buttons to enter your four-digit password.
- When doing this for the first time, enter any four-digit number by pressing the Numeric buttons (express the ENTER button. That nu the password from the second tin your password in case you forget
- If you forget the password, press 4, 7, 3, 7. The original password will be cleared and rating levels will be set to ALL. Enter a new four-digit password, then press the ENTER button.
5 Press the Cursor buttons (▲ or ▼) to select RATING LEVEL, then press the ENTER button.
6 Press the Cursor buttons (▲ or ▼) to select a desired level, then press the ENTER button.
7 Press the SETUP button to exit and activate the new settings.
NOTE:
- This function may not work on some DVDs. Be sure if the RATINGS operates in the way you have set.
To Change the Password:
1) Follow the steps 1 to 4 above.
2) Press the Cursor buttons (▲ or ▼) to select PASSWORD CHANGE, then press the ENTER button.
3) Enter a new four-digit password, then press the ENTER button.
4) Press the SETUP button to exit.
IF YOU FORGET THE PASSWORD
1 Press 4, 7, 3, 7 at step 4.
- Password will be cleared and rating level will be set to ALL.
2 Repeat steps 4 to 7 to re-establish the parental lock.
CONTROL LEVELS
• ALL
Parental lock is cancelled.
- Level 8
DVD software of any grade (adult/general/children) can be played back.
- Levels 7 to 2
Only DVD software intended for general use and children can be played back.
- Level 1
Only DVD software intended for children can be played back, with those intended for adult and general use prohibited.
Others Setting
This function allows you to adjust Angle Icon availability, Auto Power off, brightness of the Player's display panel and slide show mode.
1 Press the SETUP button in stop mode.
2 Press the Cursor buttons (◀ or ▶) to select CUSTOM, then press ENTER.
• The custom mode will appear.
3 Press the Cursor buttons (◀ or ▶) to select Other, then press the ENTER button to confirm.
4 Press the Cursor buttons (▲ or ▼) to select an item, then press ENTER.
ANGLE ICON (Default : ON)
- Press the ENTER button repeatedly to turn ON or OFF.
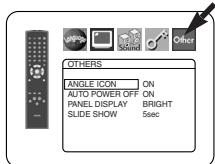
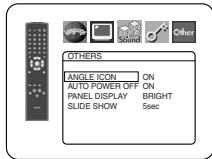
AUTO POWER OFF (Default : ON)
- Press the ENTER button repeatedly to turn ON or OFF.
- It will turn off the DVD player automatically after 30 minutes of no use.
PANEL DISPLAY
(Default : BRIGHT)
- Press the Cursor buttons (▲ or ▼) to select a setting (BRIGHT, DIMMER and AUTO), then press the ENTER button.
- When AUTO is selected, the display dims only during playback.
SLIDE SHOW (Default : 5sec)
- This adjusts the playback speed of the JPEG SLIDE SHOW.
- Press the Cursor buttons (▲ or ▼) to select between 5 sec and 10 sec, then press the ENTER button.
5 Press the SETUP button to exit.
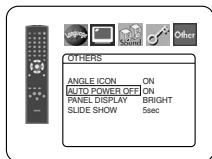
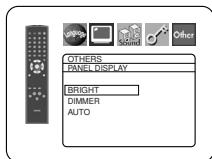
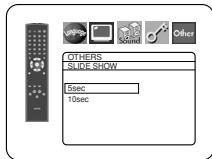
Reset to the Default Settings (except for Ratings Control)
This allows you to return all selections of SETUP (except for RATINGS) to their default settings.
1 Press the SETUP button in stop mode.
2 Press the Cursor buttons (◀ or ▶) to select INITIALIZE, then press the ENTER button.
3 Press the Cursor buttons (▲ or ▼) to select YES, then press the ENTER button.
4 Press the SETUP button to exit.
NOTE:
- If you like to cancel initializing, select NO at step 3.
Language Code List
| Language | Code | Language | Code | Language | Code | Language | Code |
| A-B | Frisian | 5271 | Malay | 5965 | Somali | 6561 | |
| Abkhazian | 4748 | Galician | 5358 | Malayalam | 5958 | Spanish [SPA] | 5165 |
| Afar | 4747 | Georgian | 5747 | Maltese | 5966 | Sundanese | 6567 |
| Afrikaans | 4752 | German [GER] | 5051 | Maori | 5955 | Swahili | 6569 |
| Albanian | 6563 | Greek [GRE] | 5158 | Marathi | 5964 | Swedish [SWE] | 6568 |
| Amharic | 4759 | Greenlandic | 5758 | Moldavian | 5961 | T | |
| Arabic | 4764 | Guarani | 5360 | Mongolian | 5960 | Tagalog | 6658 |
| Armenian | 5471 | Gujarati | 5367 | Nauru | 6047 | Tajik | 6653 |
| Assamese | 4765 | Hausa | 5447 | Nepali | 6051 | Tamil | 6647 |
| Aymara | 4771 | Hebrew | 5569 | Norwegian [NOR] | 6061 | Tatar | 6666 |
| Azerbaijani | 4772 | Hindi | 5455 | O-R | Telugu | 6651 | |
| Bashkir | 4847 | Hungarian [HUN] | 5467 | Occitan | 6149 | Thai | 6654 |
| Basque | 5167 | I-K | Oriya | 6164 | Tibetan | 4861 | |
| Bengali;Bangla | 4860 | Icelandic [ICE] | 5565 | Oromo(Afan) | 6159 | Tigrinya | 6655 |
| Bhutani | 5072 | Indonesian | 5560 | Panjabi | 6247 | Tonga | 6661 |
| Bihari | 4854 | Interlingua | 5547 | Pashto;Pushto | 6265 | Tsonga | 6665 |
| Bislama | 4855 | Interlingue | 5551 | Persian | 5247 | Turkish [TUR] | 6664 |
| Breton | 4864 | Inupiak | 5557 | Polish | 6258 | Turkmen | 6657 |
| Bulgarian | 4853 | Irish [IRI] | 5347 | Portuguese [POR] | 6266 | Twi | 6669 |
| Burmese | 5971 | Italian [ITA] | 5566 | Quechua | 6367 | U-Z | |
| Byelorussian | 4851 | Japanese [JPN] | 5647 | Rhaeto-Romance | 6459 | Ukrainian | 6757 |
| C-E | Javanese | 5669 | Romanian [RUM] | 6461 | Urdu | 6764 | |
| Cambodian | 5759 | Kannada | 5760 | Russian [RUS] | 6467 | Uzbek | 6772 |
| Catalan | 4947 | Kashmiri | 5765 | S | Vietnamese | 6855 | |
| Chinese [CHI] | 7254 | Kazakh | 5757 | Samoan | 6559 | Volapuk | 6861 |
| Corsican | 4961 | Kinyarwanda | 6469 | Sangho | 6553 | Welsh | 4971 |
| Croatian | 5464 | Kirghiz | 5771 | Sanskrit | 6547 | Wolof | 6961 |
| Czech | 4965 | Kirundi | 6460 | Scots Gaelic | 5350 | Xhosa | 7054 |
| Danish [DAN] | 5047 | Korean [KOR] | 5761 | Serbian | 6564 | Yiddish | 5655 |
| Dutch [DUT] | 6058 | Kurdish | 5767 | Serbo-Croatian | 6554 | Yoruba | 7161 |
| English [ENG] | 5160 | L-N | Sesotho | 6566 | Zulu | 7267 | |
| Esperanto | 5161 | Laothian | 5861 | Setswana | 6660 | ||
| Estonian | 5166 | Latin | 5847 | Shona | 6560 | ||
| F-H | Latvian; Lettish | 5868 | Sindhi | 6550 | |||
| Faroese | 5261 | Lingala | 5860 | Singhalese | 6555 | ||
| Fiji | 5256 | Lithuanian | 5866 | Siswat | 6565 | ||
| Finnish [FIN] | 5255 | Macedonian | 5957 | Slovak | 6557 | ||
| French [FRE] | 5264 | Malagasy | 5953 | Slovenian | 6558 |
If you choose a language that has a three-letter language code (written in bracket), the code will be displayed every time you change the Audio or Subtitle Language setting on page 20. If you choose any other languages, ‘---’ will be displayed instead.
If the DVD player does not perform properly when operated as instructed in this Operating Instruction, check the player, consulting the following checklist.
| Problem | Solution | Page |
| No power | -Check if the AC power cord is properly connected.-Unplug the AC power cord once, and wait for 5-10 seconds and then plug it in again. | - |
| No sound or picture | -Check if the TV is turned on.-Check the video connection.-Check the VIDEO/AUDIO cable connections to the TV.-Check if the PROGRESSIVE mode is set correctly. | -131322 |
| Distorted picture | -Sometimes a small amount of picture distortion may appear. This is not a malfunction.-Connect the player directly to the TV. | -13 |
| Completely distorted picture or black/white picture with DVD | -Connect the DVD player directly to the TV.-Make sure the disc is compatible with the DVD player. | 136 |
| No sound or distorted sound | -Adjust the volume.-Check that the speakers are connected correctly. | -12 |
| No audio at digital output | -Check the digital connections.-Check the audio settings. | 1222 |
| No DTS sound output | -Use a DIGITAL OUT jack when outputting the DTS sound. | 12, 22 |
| Picture freezes momentarily during playback | -Check the disc for fingerprints/scratches and clean with a soft cloth during playback wiping from center to edge.-Clean the disc. | 2626 |
| Disc cannot be played | -Clean the disc.-Ensure the disc label is facing up.-Check if the disc is defective by trying another disc.-Cancel Ratings control or change the control level.-Insert a correct disc that plays on this player. | 2614-236 |
| No return to start-up screen when disc is removed | -Reset the player by turning it off, then on again. | - |
| The player does not respond to the remote control | -Aim the remote control directly at the sensor on the front of the player.-Reduce the distance to the player.-Replace the batteries in the remote control.-Re-insert the batteries with their polarities (+/- signs) as indicated. | 8-1010 |
| Buttons do not work or player stops responding | -To completely reset the player, unplug the AC cord from responding the AC outlet for 5-10 seconds. | - |
| Player does not respond to some operating commands during playback | -Operations may not be permitted by the disc.Refer to the instructions of the disc. | 6 |
| DVD player cannot read CDs/DVDs | -Use a commonly available CD/DVD cleaner to clean the lens before sending the DVD player for repair. | 26 |
| Angle does not switch | -The angle cannot be switched for DVDs which do not contain multiple angles. In some cases multiple angles are only recorded for specific scenes. | 20 |
| Playback does not start when the title is selected | -Check the “RATINGS” setting. | 23 |
| The password for rating level has been forgotten | -Enter the default password “4737”, then your forgotten password will be cleared. | 23 |
NOTES:
- Some functions are not available in specific modes, but this is not a malfunction. Read the description in this Operating Instruction for details on correct operations.
- Playback from a desired track and random playback are not available during program playback.
- Some functions are prohibited on some discs.
SIGNAL SYSTEM
NTSC color
APPLICABLE DISCS
(1) DVD-Video Discs
1-layer 12cm single-sided discs, 2-layer 12cm single-sided discs, 2-layer 12cm double-sided discs (1 layer per side) 1-layer 8cm single-sided discs, 2-layer 8cm single-sided discs, 2-layer 8cm double-sided discs (1 layer per side)
(2) DVD-R/DVD-RW
(3) Compact discs (Audio CD)
12cm discs, 8cm discs
(4) CD-R/CD-RW
S-VIDEO OUTPUT
Y output level: 1Vp-p (75Ω/ohms)
C output level: 0.286Vp-p
Output connectors: S connectors, 1 set
VIDEO OUTPUT
Output level: 1Vp-p (75Ω/ohms)
Output connector: Pin jacks, 1 set
COMPONENT OUTPUT
Y output level: 1Vp-p (75Ω/ohms)
P_B / C_B output level: 0.7Vp-p (75Ω/ohms)
PR/CR output level: 0.7Vp-p (75Ω/ohms)
Output connector: Pin jacks, 1 set
AUDIO OUTPUT
Output level: 2Vrms
2 channel (L, R) output connector: Pin jack, 1 set
AUDIO OUTPUT PROPERTIES
(1) Frequency response
1 DVDs (linear PCM) : 4Hz to 22kHz (48kHz sampling)
: 4Hz to 44kHz (96kHz sampling)
2 CDs : 4Hz to 20kHz
(2) S/N ratio : 115dB
(3) Total harmonic distortion : 1kHz CD: 0.004%
(4) Dynamic range : DVD: 100dB
CD: 98dB
DIGITAL AUDIO OUTPUT
Optical digital output: Optical connector, 1 set
Coaxial digital output: Pin jack, 1 set
POWER SUPPLY
AC 120V, 60Hz
POWER CONSUMPTION
10W (Standby: 1.0W)
MAXIMUM EXTERNAL DIMENSIONS
W: 17-3/32" (435mm)
H: 2-61/64" (75mm)
D: 12-13/64" (310mm)
(including protruding parts)
MASS
5.06 lbs (2.3 kg)
REMOTE CONTROL UNIT
RC-1009
Infrared pulse type
Supply: DC 3V, 2 R6P/AA batteries
MAINTENANCE
Cleaning the Cabinet
- Use a soft cloth slightly moistened with a mild detergent solution. Do not use a solution containing alcohol, spirits, ammonia or abrasives.
Cleaning Discs
- When a disc becomes dirty, clean it with a cleaning cloth. Wipe the disc from the center out. Do not wipe in a circular motion.
- Do not use solvents such as benzine, thinner, commercially available cleaners, detergent, abrasive cleaning agents or antistatic spray intended for analogue records.
Cleaning the disc lens
- If the player still does not perform properly when it is operated while referring to the relevant sections and to “TROUBLESHOOTING GUIDE” in this Operating Instruction, the laser optical pickup unit may be dirty. Consult your dealer or an Authorised Service Center for inspection and cleaning of the laser optical pickup unit.
Disc Handling
- Use discs which have the following logos on them.
- Handle the discs so that fingerprints and dust do not adhere to the surfaces of the discs.
• Always store the disc in its protective case when it is not used. - Note that discs with special shapes (heart-shaped discs, octagonal discs, etc.) cannot be played on the this product. Do not attempt to play such discs, as they may damage the player.



VIDEO

R

R W


Recordable


ReWritable

DIGITAL AVOCIO
MP3


ADVERTENCIA: PARA REDUCIR EL RIESGO DE INCENDIO O DESCARGA ELÉCTRICA, NO EXPONGA ESTE APARATO A LA LLUVIA NI A LA HUMEDAD.
PRECAUCIÓN
RIESGO DE DESCARGA ELÉCTRICA. NO ABRIR

PRECAUCIÓN:
PARA REDUCIR EL RIESGO DE QUE SE PRODUZCA UNA DESCARGA ELÉCTRICA, NO QUITE LA TAPA (NI EL PANEL POSTERIOR). EN EL INTERIOR NO HAY PIEZAS QUE DEBA REPARAR EL USUARIO. SOLICITE EL TRABAJO DE REPARACIÓN AL PERSONAL DE SERVICIO CALIFICADO.
El símbolo del rayo con punta de flecha, en el interior de un triángulo equilátero, tiene la finalidad del avisar al usuario de que en el interior del producto hay "tensión peligrosa" sin aislar que puede tener suficiente intensidad como para constituir un riesgo de descarga eléctrica para las personas.

El signo de exclamación en el interior de un triángulo equilátero tiene la finalidad de avisar al usuario de que se adjuntan instrucciones de utilización y mantenimiento (servicio) importantes con el manual que acompaña al aparato.
INSTRUCCIONES DE SEGURIDAD IMPORTANTES
1) Lea las instrucciones - Antes de utilizar el aparato deberán leerse todas las instrucciones de seguridad y manejo.
2) Guarde las instrucciones - Las instrucciones de seguridad y manejo deberán guardarse para consultarlas en el futuro en caso de ser necesario.
3) Cumpla con las advertencias - Deberán seguirse todas las advertencias indicadas en el producto y en las instrucciones de manejo.
4) Siga las instrucciones - Deberán seguirse todas las instrucciones dadas.
5) Limpieza - Desenchufe este producto de la toma de corriente antes de limpiarlo. No utilice limpiadores líquidos ni en aerosol. Para hacer la limpieza utilice un paño húmedo.
6) Aditamentos - No añada nunca ningún aditamento que no haya sido recomendado por el fabricante, porque podrán causar peligros.
7) Agua y humedad - No utilice este producto cerca del agua. Por ejemplo, cerca de una bañera, palangana, fregadero de cocina o lavadora, en un sótano húmedo, o cerca de una piscina, etc.
8) Accesorios - No coloque este producto encima de un carrito, soporte, trípode, ménsula o mesa inestable. El producto puede caerse pudiendo lesionar gravemente a un niño o a un adulto, y también puede estropearse seriamente. Utilícelo solamente con un carrito, soporte, trípode, ménsula o mesa recomendado por el fabricante o vendido con el producto. El montaje del producto deberá realizarse siguiendo las instrucciones del fabricante, y deberán utilizarse los accesorios de montaje recomendados por el mismo.
9) Una combinación de producto y carrito deberá moverse con cuidado. Las paradas repentinas, la fuerza excesiva y las superficies irregulares pueden hacer que la combinación de aparato y carrito se dé vuelta.
10) Ventilación - Las ranuras y aberturas de la caja han sido suministradas para la ventilación, para asegurar un funcionamiento fiable del producto y para protegerlo contra el
recalentamiento. No tape estas aberturas ni permita que queden tapadas al colocar el producto encima de una cama, sofá, alfombra u otra superficie similar. Este producto no deberá colocarse en una instalación empotrada como puede ser un mueble librería o una estantería, a menos que se proporcione la ventilación adecuada y se sigan todas las instrucciones del fabricante.
11) Fuentes de alimentación - Este producto sólo deberá funcionar con el tipo de fuente de alimentación indicada en la etiqueta. Si no está seguro del tipo de alimentación de su hogar, consulte a su concesionario o a la compañía eléctrica local. Para los productos que vayan a funcionar con pilas u otras fuentes de alimentación, lea las instrucciones de manejo.
12) Puesta a tierra o polarización - Este producto está equipado con una clavija polarizada de alimentación de corriente alterna (una clavija que tiene una patilla más ancha que la otra). Esta clavija sólo podrá enchufarse de en la toma de corriente de una forma. Esto es una característica de seguridad. Si no puede enchufar completamente la clavija en la toma de corriente, inténtelo dándola la vuelta. Si sigue sin poder enchufarla, póngase en contacto con un electricista para que le cambie la toma de corriente obsoleta. No anule la función de seguridad de la clavija polarizada.
ADVERTENCIA PARA CARRITO PORTÁTIL (Símbolo proporcionado por RETAC)
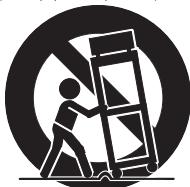
natural_image
Silhouette of a person climbing a ladder inside a circle with a diagonal line (no text or symbols)S3125A
13) Protección del cable de alimentación - El cable de alimentación deberá colocarse en un lugar alejado, donde nadie lo pise ni pueda quedar pellizcado por objetos colocados sobre él o contra él, poniendo mucho cuidado a la clavija, la toma de corriente y al punto por donde sale del aparato.
14) Tormentas eléctricas - Para proteger aún más este producto durante una tormenta eléctrica, o cuando no lo vaya a utilizar durante largos periodos de tiempo, desenchúfelo de la toma de corriente. Esto impedirá que el producto se estropee debido a la tormenta eléctrica y a la sobretensión en la línea de alimentación.
15) Líneas de alimentación eléctrica - Un sistema de antena exterior no deberá instalarse cerca de las líneas de alimentación eléctrica elevadas ni tampoco cerca de luces eléctricas o circuitos de alimentación, ni donde pueda caer sobre esas líneas o circuitos. Cuando instale un sistema de antena exterior, deberá tenerse mucho cuidado para evitar tocar esas líneas o circuitos porque de lo contrario podría producirse un accidente mortal.
16) Sobrecarga - No sobrecargue las tomas de corriente, los cables de extensión o las tomas de corriente integrales porque podrá producirse un incendio o una descarga eléctrica.
17) Entrada de objetos y líquidos - No meta nunca objetos de ningún tipo en este producto a través de las aberturas, porque pueden tocar puntos de tensión peligrosa o cortocircuitar piezas y producirse un incendio o una descarga eléctrica. No derrame nunca ningún líquido encima del producto.
18) Servicio - No intente reparar este producto usted mismo, ya que la abertura o la extracción de las cubiertas puede exponerle a una tensión peligrosa o a otros peligros. Solicite las reparaciones al personal de servicio calificado.
19) Daños que requieren reparaciones - Desenchufe este productor de la toma de corriente y solicite el servicio del personal calificado bajo las condiciones siguientes:
a) Cuando el cable o la clavija de alimentación estén estropeados,
b) Si se ha derramado líquido o han caído objetos en el interior del producto,
c) Si el producto ha quedado expuesto a la lluvia o al agua,
d) Si el producto no funciona normalmente siguiendo las instrucciones de manejo. Ajuste solamente los controles indicados en las instrucciones de manejo, ya que los ajustes incorrectos de otros controles pueden causar daños que con frecuencia requerirán un trabajo extensivo por parte de un técnico calificado para que el producto pueda volver a funcionar normalmente,
e) Si el producto se ha caído o se ha estropeado de cualquier forma.
f) Cuando el producto muestre un cambio considerable en su rendimiento. Esto indica la necesidad de realizar trabajos de mantenimiento.
20) Piezas de recambio - Cuando sea necesario cambiar piezas asegúrese de que el técnico de servicio utilice las piezas de recambio especificadas por el fabricante, o aquellas que tengan las mismas características que las piezas originales. Las sustituciones sin autorización pueden causar un incendio, descarga eléctrica u otros peligros.
21) Comprobación de seguridad - Al completar cualquier trabajo de mantenimiento o reparación en este producto, solicite al técnico de servicio que realice comprobaciones de seguridad para determinar que el producto esté en condiciones de funcionamiento apropiadas.
22) Calor - El producto deberá colocarse alejado de fuentes de calor tales como radiadores, salidas de aire caliente, estufas u otros productos (incluyendo amplificadores) que produzcan calor.
Seguridad del Láser
Esta unidad emplea un láser. Sólo el personal de servicio calificado deberá quitar la cubierta o intentar reparar este aparato, ya que de lo contrario podrían producirse lesiones en los ojos.
PRECAUCIÓN: EL USO DE CONTROLES, AJUSTES O PROCEDIMIENTOS DIFERENTES DE LOS ESPECIFICADOS EN ESTE MANUAL PUEDE PRODUCIR UNA EXPOSICIÓN PELIGROSA A LA RADIACIÓN.
PRECAUCIÓN: CUANDO SE ABRE LA UNIDAD Y SE ANULA EL ENCLAVAMIENTO SE PRODUCE UNA RADIACIÓN LÁSER VISIBLE E INVISIBLE. EVITE MIRAR FIJAMENTE AL RAYO.
UBICACIÓN: EN EL INTERIOR, CERCA DEL MECANISMO DE LA PLATINA.
ADVERTENCIA DE LA FCC- Este equipo puede generar o utilizar energía radioeléctrica. Los cambios o modificaciones hechos en este equipo pueden causar interferencias perjudiciales, a menos que se aprueben expresamente en este manual de instrucciones. El usuario puede perder el derecho a utilizar este equipo si realiza cambios o modificaciones no autorizados.
INTERFERENCIAS EN RADIO O TELEVISIÓN
Este equipo ha sido probado y ha demostrado cumplir con los límites establecidos para un dispositivo digital de la Clase B, de conformidad con el Apartado 15 de las Normas de la FCC. Estos límites han sido designados para proporcionar una protección razonable contra las interferencias molestas en una instalación residencial. Este equipo genera, utiliza y puede radiar energía radioeléctrica, y, si no se instala y utiliza de acuerdo con las instrucciones, puede causar interferencias perjudiciales en las comunicaciones por radio. Sin embargo, no hay garantías de que esto no se produzca en una instalación particular. Si este equipo causa interferencias perjudiciales en la recepción de la radio o la televisión, lo que puede determinarse fácilmente apagando y encendiendo el equipo, al usuario se le recomienda eliminar la interferencia tomando una de las medidas siguientes:
1) Cambie la orientación o la posición de la antena de recepción.
2) Aumente la separación entre el equipo y el receptor.
3) Conecte el equipo a una toma de corriente de un circuito diferente de aquel al que está conectado el receptor.
4) Consulte a un concesionario o técnico en radio/television que tenga experiencia para solicitar su ayuda.
Este aparato digital de la Clase B cumple con la norma ICES-003 de Canadá.
PRECAUCIÓN: PARA IMPEDIR DESCARGAS ELÉCTRICAS, META A FONDO EL CONTACTO ANCHO DE LA CLAVIJA EN EL RECEPTÁCULO ANCHO DE LA TOMA DE CORRIENTE.
Cuando no utilice el aparato - Apáguelo cuando no lo utilice. Desenchúfelo de la toma de CA si no va a utilizarlo durante mucho tiempo. Desenchúfelo durante las tormentas eléctricas.
Lea con mucha atención estas instrucciones antes de utilizar su reproductor de vídeo DVD, y guárdelas para consultarlas en el futuro en caso de ser necesario.
Importante
Utilice sólo discos marcados de logos en la lista de la página 6.
Alimentación
El suministro de alimentación principal se activa cuando la clavija principal se enchufa en una toma de CA, 120 V, 60 Hz. Para utilizar este aparato, presione el botón ON/STANDBY y así encenderlo.
Advertencia
Para impedir incendios o descargas eléctricas, no exponga este aparato a la lluvia ni a la humedad.
ADVERTENCIA: EN EL INTERIOR DEL APARATO HAY PIEZAS QUE ESTÁN BAJO TENSIÓN. NO RETIRE NINGÚN TORNILLO.
Lugar de instalación
Para su seguridad y óptimas prestaciones de esta unidad:
- No pare la unidad verticalmente. Instale la unidad en posición horizontal y estable. No coloque nada directamente encima de la unidad. No coloque la unidad directamente sobre el TV.
- Protégalo de los rayos directos del sol y mantenga lejos de fuentes de calor intenso. Evite lugares con polvo o húmedos. Evite lugares con insuficiente circulación de aire para que se disperce bien el calor. No tape los orificios de salida de aire en los lados de la unidad. Evite lugares expuestos a fuerte vibración o fuertes campos magnéticos.
- Asegúrese de retirar un disco y desenchufar el cable eléctrico de CA del tomacorriente antes de transportar la unidad.
Precauciones en la instalación
Se pueden producir ruidos o la imagen se puede distorsionar si este equipo, o cualquier otro equipo electrónico que utilice microprocesadores, está situado cerca de un sintonizador o de una televisión.
Si este fuera el caso, siga los pasos que se indican a continuación:
- Instale este equipo lo más lejos posible del sintonizador o de la televisión.
- Coloque los cables de la antena del sintonizador o de la televisión lejos del cable de alimentación de este equipo y de los cables de conexión de entrada y salida del mismo.
- Se pueden producir ruidos o distorsiones, sobre todo cuando se utilizan antenas de interior o cables de alimentación de 300 Ω/ohmios. Recomendamos que se utilicen antenas de exterior y cables coaxiales de 75Ω/ohmios.
NOTA:
- Para la dispersión del calor, no instale este equipo en un lugar confinado tal como una librería o unidad similar.
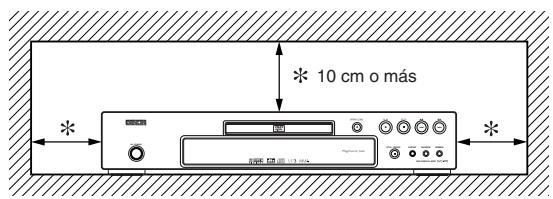
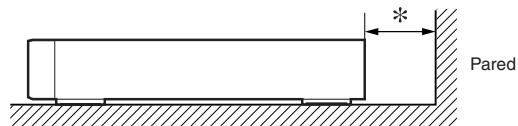
Advertencia acerca del rocío
La condensación de humedad puede ocurrir dentro de la unidad cuando es movido de un lugar frío a un lugar caliente, o después de calentar una habitación fría o bajo condiciones de alta humedad. No utilice el reproductor DVD, por lo menos, por 2 horas hasta que su interior esté seco.
Evite los peligros de descarga eléctrica y fuego
- No toque el cable eléctrico con las manos mojadas.
- No tire del cable eléctrico para desenchufarlo del tomacorriente de CA de la pared. Tome por el enchufe.
- Si se derrama por accidente agua en esta unidad, desenchufe inmediatamente el cable eléctrico y lleve la unidad a nuestro Centro de Servicio Autorizado para el servicio.
Precaución
1) No intente abrir la caja. En el interior no hay piezas que usted pueda reparar. Solicite todas las reparaciones al personal de servicio cualificado.
2) Las ranuras y aberturas de la caja y del costado o de la parte inferior sirven para ventilar el aparato. Para asegurar un funcionamiento fiable y proteger el aparato contra el recalentamiento, estas aberturas no deberán taparse. Evite los espacios cerrados como, por ejemplo, los muebles librería a menos que éstos dispongan de una ventilación apropiada.
3) Mantenga el aparato alejado de las fuentes que generen calor.
4) Evite utilizarlo cerca de campos magnéticos intensos.
5) No meta objetos de ninguna clase dentro la ranura de la caja, ya que podrían tocar partes con corriente o partes en corto circuito resultando en un incendio o sacudida eléctrica.
6) No derrame nunca líquidos de ninguna clase en este aparato. Si se derrama algún líquido en el interior del aparato, consulte a un ingeniero de servicio cualificado.
7) Útilice este aparato en una posición horizontal (plana) solamente.
8) Este equipo se pone en el modo de espera cuando se apaga pero se mantiene conectado el cable de alimentación.
9) Mantenga el equipo libre de humedad, agua y polvo.
10) Maneje el cordón de energía cuidado. Sostenga el enchufe cuando desconecte el cordón de energía.
11) Antes de operar el reproductor de DVD se deben leer todas las precauciones de seguridad y las instrucciones de funcionamiento.
12) Tenga cuidado de no pinchar su dedo dentro de la ranura del disco.
13) No coloque objetos pesados sobre el cable de alimentación de CA.
14) Mantenga el cable de alimentación de CA lejos de dispositivos que emitan calor.
15) Asegúrese de retirar el disco y desconectar el cable de alimentación de CA cuando vaya a transportar el reproductor de DVD.
16) No ejerza ninguna presión sobre el reproductor de DVD cuando lo esté transportando.
17) No utilice el reproductor de DVD al aire libre.
CONTENIDO
■ INSTRUCCIONES DE SEGURIDAD IMPORTANTES .. 2
■ PRECAUCIONES .... 3
Seguridad del Láser 3
Importante....3
Alimentación 3
Advertencia....3
Lugar de instalación 3
Precauciones en la instalación. 3
Advertencia acerca del rocío 4
Evite los peligros de descarga eléctrica y fuego.....4
Precaución 4
■ INTRODUCCIÓN. 5
Acerca del copyright 5
Aviso sobre proyecciones con barrido progresivo ..... 5
Accesorios suministrados 5
Símbolos utilizados en este manual....5
■ ACERCA DE LOS DISCOS....6
Discos que se pueden reproducir....6
■ CARACTERÍSTICAS....7
■ DESCRIPCIÓN DE LAS FUNCIONES....8
PANEL DELANTERO....8
CONTROL REMOTO....8
Descripción del control remoto....9
Pantalla de visualización del panel delantero ..... 10
Visualizaciones durante el funcionamiento....10
Instalación de las pilas. 10
■ CONEXIONES 11
Descripción – panel trasero ..... 11
Conexión a un sistema de audio ..... 12
Conexión a un televisor (para vídeo) ..... 13
■ REPRODUCCIÓN DE UN DISCO ..... 14
Reproducción básica....14 Luminosidad de la pantalla de visualización del panel delantero....14
Funciones generales 14
Menú de disco....14
Menú de títulos 14
Cómo visualizar una pantalla de menú durante la reproducción 14
Imagen fija / Pausa 14
Reanudación....14
Búsqueda en avance rápido / retroceso rápido. ..... 15
Avance lento / Retroceso lento. 15
Reproducción cuadro por cuadro....15
Zoom. 15
Búsqueda de título / capítulo ..... 15
Utilizando el botón SEARCH MODE....15
Utilizando los botones SKIP ◀◀◀▶▶I ..... 15
Búsqueda de pistas....15
Utilizando el botón SEARCH MODE....15
Utilizando los botones SKIP ◀◀◀▶▶I ..... 16
Búsqueda de tiempo 16
Pantalla de ajuste de marcador ..... 16
Repetición....16
REPETICIÓN DE TÍTULO / CAPÍTULO ..... 16
REPETICIÓN DE PISTA / GRUPO / TODO ..... 16
REPETICIÓN A-B 16
Reproducción Programada 17
Reproducción aleatoria 17
Reproducción de archivos MP3 / JPEG / WMA ..... 17
Información en pantalla 19
Modo de presentación....19
Voz en avance rapido 20
Idioma de audio....20
Idioma de subtítulos 20
Angulo de cámara 21
Control de imagen....21
Modo de sonido estereofónico....21
Sonido envolvente virtual....21
Ajuste del nivel del negro....21
■ CONFIGURACIÓN DVD 22
Selección de idioma 22
Ajustes de visualización....22
Ajustes de audio 23
Control acceso 23
NIVEL ACCESO 23
SI OLVIDA LA CONTRASEÑA....23
NIVEL DE CONTROL 23
Ajuste otros 24
Reprograme al ajuste por defecto
(excepto Control acceso)....24
Lista de códigos de idiomas. 24
■ GUÍA PARA LA SOLUCIÓN DE PROBLEMAS.....25
■ ESPECIFICACIONES 26
■ MANTENIMIENTO....26
INTRODUCCIÓN
El número de serie de este producto se encuentra en la parte posterior del reproductor de DVD. No hay ningún otro reproductor que tenga el mismo número de serie que el suyo. Deberá anotar el número de serie y otra información vital en el espacio que se proporciona a continuación y guardar este manual como prueba permanente de su compra; esto le ayudará a identificar el producto en caso de robo. Los números de serie no se guardan en registros.
| Fecha de compra | |
| Comprado al concesionario | |
| Dirección del concesionario | |
| Núm. de teléfono del concesionario | |
| Núm. de modelo | |
| Núm. de serie |
Acerca del copyright
La copia, la emisión, la muestra al público y el préstamo de los discos sin la debida autorización están prohibidos. Este producto incorpora tecnología de protección del copyright que a su vez está protegida por patentes y otros derechos de la propiedad intelectual de los EE.UU. La utilización de esta tecnología de protección del copyright deberá contar con la autorización de Macrovision, y ésta se limitará a casas y otros lugares de visión limitada a menos que Macrovision autorice lo contrario. La inversión de la ingeniería o el desmontaje del aparato están prohibidos.
Patente Nos de EE.UU., 4.631.603, 4.819.098, 4.907.093, 5.315.448 y 6.516.132.
Aviso sobre proyecciones con barrido progresivo
Los consumidores deben tener en cuenta que no todos los televisores de alta definición son totalmente compatibles con este producto y que pueden producirse errores en la señal que distorsionen la imagen. En caso de problemas de imagen con el barrido progresivo de 525 líneas, se recomienda al usuario cambiar la conexión a la salida de “definición estándar”. Si quiere consultar la compatibilidad de un televisor con este modelo reproductor de DVD 525p, póngase en contacto con nuestro centro de atención al cliente.
Accesorios suministrados
Compruebe que los siguientes artículos vienen incluidos en la caja de embalaje junto con la unidad principal.
Control remoto......1 | Pilas “AA”(R6P)......2 | Cable deaudio......1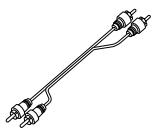 | Cable devídeo......1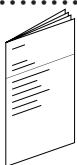 | Instrucciones deFuncionamiento......1 | Lista de centrosde servicio...1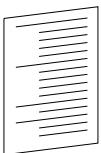 | Tarjeta degarantía......1 |
Símbolos utilizados en este manual
En algunos encabezamientos y notas de este manual aparecen los símbolos que se muestran a continuación, cuyo significado es el siguiente:
DVD
Las descripciones se refieren a la reproducción de discos de DVD de Vídeo (incluyendo discos DVD-R/RW).
Las descripciones se refieren a la reproducción de CD de Audio.
CD
Las descripciones se refieren a la reproducción de discos en formato MP3.
JPEG :
Las descripciones se refieren a la visualización de discos JPEG.
WMA :
Las descripciones se refieren a la reproducción de discos en formato WMA.
MP3
ACERCA DEL RECICLAJE
Los materiales de embalaje de este producto son reciclables y se pueden volver a utilizar. Disponga de estos materiales siguiendo los reglamentos de reciclaje de su localidad.
Las pilas nunca deberán tirarse ni incinerarse. Deberá disponer de ellas siguiendo los reglamentos de su localidad relacionados con los desperdicios químicos.

¡Contribuya a preservar el medio ambiente!
- Las pilas usadas no deben tirarse a la basura.
- Puede desecharlas en depósitos especiales para pilas usadas o residuos especiales. Para más información, consulte a las autoridades locales.
Discos que se pueden reproducir
| Discos que se pueden usar | Marca (logotipo) | Código de región | Señales grabadas | Tamaño del disco | Tipos de disco |
| DVD de Vídeo* 1, 2, 3, 5 |   VIDEO VIDEO | Video digital (MPEG2) | 12 cmu8 cm |  | |
| DVD-RW DVD-R* 1, 3, 4, 5, 6, 7, 8 |   RW RW  K K | ||||
| CD de Audio* 4, 5 |  | - | Audio digital | 12 cmu8 cm |  MP3, JPEG, MP3, JPEG, |
| CD-RW CD-R* 4, 5, 7 |     | - | Digital audio MP3 WMA*9 Digital picture (JPEG) | ||
| Picture CD |  | - | JPEG | 12 cm |

es una marca registrada de DVD Format/Logo Licensing Corporation.

es una marca registrada de Eastman Kodak Company.

Los logotipos de Windows Media y de Windows son marcas o marcas registradas de Microsoft Corporation en Estados Unidos y/o en otros países.
Esta unidad no es compatible con la Múltiple Tasa de Bit (MBR: un archivo que contiene el mismo contenido codificado a varias tasas de bit diferentes).
Si no puede reproducir un disco que tenga una de las marcas anteriores, verifique las siguientes notas.
*1: Este reproductor cumple con la norma del sistema de color NTSC. No es posible reproducir discos grabados en otros sistemas de color como, por ejemplo, PAL.
*2: Algunos discos DVD no funcionan tal como se describe en este manual debido al diseño del fabricante del disco.
*3: Los discos rayados o manchados no pueden reproducirse.
*4: Algunos discos no pueden reproducirse debido a las condiciones de grabación incompatibles, características de la grabadora o propiedades especiales de los discos.
*5: Puede reproducir los discos con las marcas de arriba. Si utiliza discos no normales, esta unidad puede no reproducirlos. Incluso si se reproducen, la calidad del sonido o video pueden verse afectadas.
*6: Sólo los discos grabados en el formato de vídeo o el formato de grabación de vídeo, y finalizados pueden reproducirse. Los discos sin finalizar no pueden reproducirse. Según el estado de grabación de un disco, éste puede no reproducirse de ninguna manera o normalmente (la imagen o sonido puede no ser continua, etc.).
*7: Si queda demasiado espacio de grabación en un disco (la parte usada es de menos de 55 mm en total), puede no reproducirse correctamente.
*8: No pegue papel o ponga etiquetas en el disco. Pueden dañar el disco y la unidad puede no leerlo correctamente.
*9: Este reproductor no puede reproducir un disco cuando el contenido está protegido por la Administración de Derechos de Medios Digitales de Windows (DRM).
- No reproduzca NUNCA los discos siguientes. ¡De lo contrario se podrá producir una falla en el funcionamiento!
DVD-RAM / CD-I / CD con fotos / CD de Vídeo/ DVD con otros códigos de región que 1 u ALL /
DVD-ROM para computadoras personales / CD-ROM para computadoras personales
- En los siguientes discos, el sonido PUEDE NO escucharse.
CD de super audio
NOTAS:
- Sólo el sonido grabado en la capa de CD normal puede escucharse.
- El sonido grabado en la capa de CD de super audio de alta densidad no puede escucharse.
- Cualquier otro disco sin indicaciones de compatibilidad
PRECAUCIÓN:
- Tenga cuidado de no pillarse el dedo en una ranura de disco.
- Asegúrese de extraer el disco y desenchufar el cable de alimentación de CA de la toma de pared antes de transportar el reproductor de DVD.
- Sistema de exploración progresiva
A diferencia de la exploración entrelazada convencional, el sistema de exploración progresiva produce menor oscilación e imágenes con mayor resolución que las señales de television (525i/480i) tradicionales.
- Sonido Dolby Digital
Conectando este reproductor a un decodificador Dolby Digital multicanal, usted podrá disfrutar del sonido envolvente de alta calidad Dolby Digital de 5.1 canales como el escuchado en los cines.
• DTS (Sistema Cinema Digital)
Si conecta este reproductor a un decodificador DTS, puede disfrutar del sonido surround 5.1CH que reproduce el sonido original con toda la fidelidad posible. El sistema surround 5.1CH ha sido desarrollado por Digital Theater System, Inc.
- Voz en avance rapido
La reproducción se puede hacer un poco más rápida o lenta manteniendo la calidad del sonido, como el de la reproducción normal. La voz en avance rapido sólo se encuentra disponible en los discos grabados en el formato Dolby Digital.
- Reproducción de Imagen fija/Avance y retroceso rápido/Cámara lenta/Cuadro por cuadro
Hay varios modos de reproducción disponibles, entre los que se incluye reproducción de imágenes fijas, avance/retroceso rápido, reproducción en cámara lenta y reproducción cuadro por cuadro.
- Modo de Vista Fija
Se ajusta la resolución de las imágenes mientras éstas se muestran en el modo de imagen fija (pausa).
- Reproducción Aleatoria de CD de Audio, MP3, JPEG y WMA
Este reproductor puede cambiar el orden de las pistas para reproducirlas en orden aleatorio.
- Reproducción Programada de CD de Audio, MP3, JPEG y WMA
Puede programar el orden de las pistas para reproducirlas en cualquier orden que desee.
- Menús de DVD en el idioma deseado
Puede visualizar los menús del DVD en un idioma de su preferencia, siempre que el idioma deseado esté disponible en el DVD.
- Apagado automático
La alimentación se desconecta automáticamente si no se produce ninguna actividad en el reproductor o en su control remoto durante más de 30 minutos (consulte la página 24).
- Subtítulos en el idioma deseado
Puede elegir el idioma deseado para los subtítulos visualizados, si ese idioma se encuentra disponible en el disco.
- Selección de un ángulo de cámara
Puede seleccionar el ángulo de cámara deseado si un disco contiene imágenes grabadas desde ángulos diferentes.
- Elección de idioma de audio y modo de sonido
Puede seleccionar el idioma de audio y el modo de sonido deseados, si el disco dispone de idiomas y modos diferentes.
- Control acceso
Puede establecer un nivel de acceso determinado para limitar la reproducción de los discos que no sean apropiados para los niños.
- Detección automática de discos
El reproductor detecta automáticamente si el disco introducido es un DVD de Vídeo, un CD de Audio, un CD MP3, JPEG o WMA.
- Reproducción de discos MP3
Puede disfrutar de archivos MP3 grabados en un CD-R/RW.
- Búsqueda directa
Durante el modo de reproducción o parada, puede utilizar los botones numéricos para buscar el título, el capítulo o la pista deseados.
- Visualización en pantalla
La información acerca de la operación actual se puede visualizar en una pantalla de televisor, lo que permite confirmar las funciones que se encuentran actualmente activadas (reproducción programada, por ejemplo) utilizando el control remoto.
- Atenuador
Permite cambiar la luminosidad de la pantalla de visualización.
- Salvapantalla
El programa del salvapantalla se activa si no se produce ninguna actividad en el reproductor o en su control remoto durante más de 5 minutos. El brillo de la pantalla de visualización se oscurece un 75%. El programa se desactiva al producirse alguna actividad.
- Control de imagen
El control de imagen ajusta el brillo, el contraste, el color, la corrección gamma y la nitidez de la visualización específica.
- Búsqueda
Búsqueda de capítulo: Búsqueda del capítulo deseado. Búsqueda de título: Búsqueda del título deseado. Búsqueda de pista: Búsqueda de la pista deseada. Búsqueda de tiempo: Búsqueda del punt de tiempo/título deseado o de la pista deseada.
- Repetición
Capítulo: Repetición de la reproducción del capítulo del disco.
Título: Repetición de la reproducción del título del disco.
Pista: Repetición de la reproducción de la pista del disco.
Todo: Repetición de la reproducción de disco completo. (excluido DVD)
A-B: Repetición de la parte entre dos puntos indicada por el usuario.
Grupo: Repetición de la reproducción de la carpeta de MP3/JPEG/WMA.
- Zoom
Se puede visualizar una pantalla ampliada 2 veces y 4 veces.
- Marcador
Punto de referencia electrónico definido por el usuario y que puede llamarse.
- Reproducción con reanudación
El usuario puede reanudar la reproducción desde el punto donde ésta fue detenida aunque la alimentación esté desconectada.
- Conectores de salida de vídeo de componente
Conectores situados en la parte posterior del reproductor de DVD que se utilizan para enviar vídeo de alta calidad a los conectores de entrada de vídeo componente de un televisor.
- Indicación de velocidad en bits
• DRC (Control de margen dinámico)
Permite controlar el margen dinámico del volumen de sonido.
- Visualización de imágenes JPEG
Se puede reproducir discos Kodak Picture CD. También es posible reproducir imágenes fijas grabadas en formato JPEG en un CD-R/RW.
- Reproducción de datos WMA
Puede reproducir archivos WMA grabados en un CD-R/RW.
"WMA" (Windows Media Audio) es un nuevo codec de audio desarrollado por Microsoft® en los Estados Unidos de Norteamérica.
PANEL DELANTERO
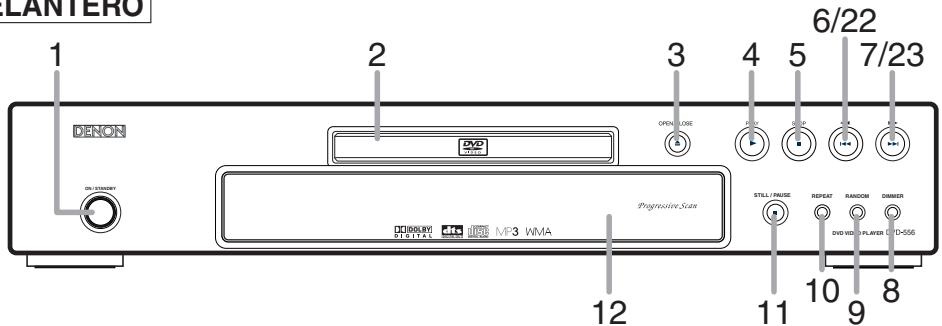
CONTROL REMOTO
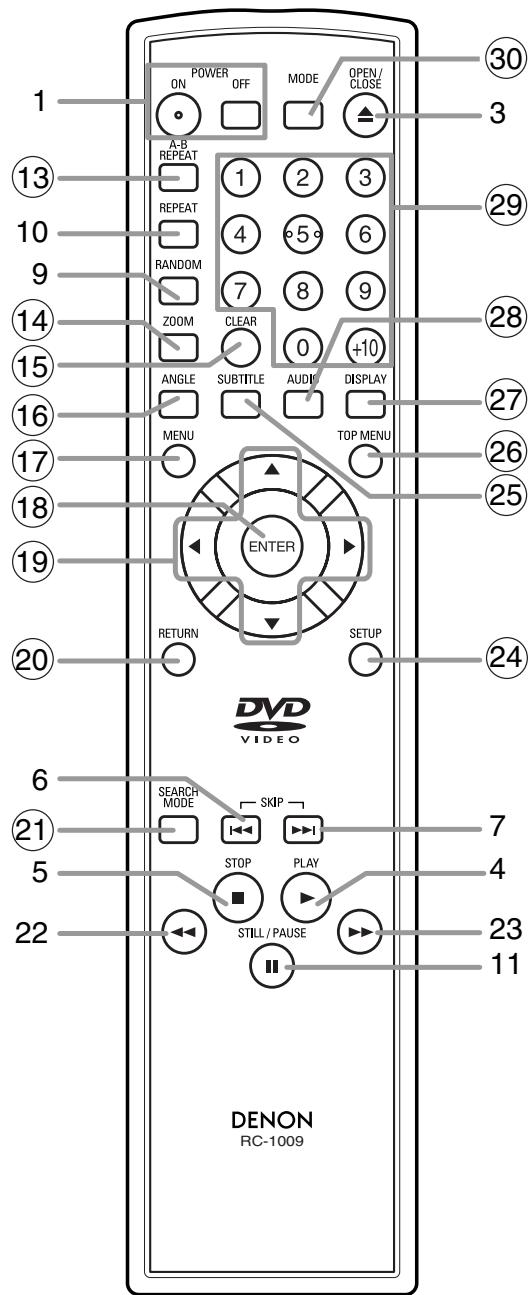
Los botones cuyos números aparecen dentro de un círculo sólo funcionan con el control remoto.
- Botones ON/STANDBY (POWER ON/OFF) [página 14]
- Bandeja de carga del disco
- Botón OPEN/CLOSE [página 14]
- Botón PLAY [página 14]
- Botón STOP [página 14]
- Botón ◀◀◀ (SKIP DOWN) [página 15]
- Botón ▶▶| (SKIP UP) [página 15]
- Botón DIMMER [página 14]
- Botón RANDOM [página 17]
- Botón REPEAT [página 16]
- Botón STILL/PAUSE [página 14]
- Pantalla de visualización, ventanilla sensora de control remoto
- Botón A-B REPEAT [página 16]
- Botón ZOOM [página 15]
- Botón CLEAR [página 16]
- Botón ANGLE [página 21]
- Botón MENU [página 14]
- Botón ENTER [página 14]
- Botones del Cursor [página 14]
- Botón RETURN [página 16]
- Botón SEARCH MODE [página 15]
- Botón ◀◀ (Retroceso rápido) [página 15]
Presione más de 2 segundos cuando utilise los botones del panel frontal para esta función. - Botón ▶▶ (Avance rápido) [página 15]
Presione más de 2 segundos cuando utilise los botones del panel frontal para esta función. - Botón SETUP [página 22]
- Botón SUBTITLE [página 20]
- Botón TOP MENU [página 14]
- Botón DISPLAY [página 19]
- Botón AUDIO [página 20]
- Botones Numéricos [página 14]
- Botón MODE [página 17]
Descripción del control remoto
Los botones del control remoto funcionan de distinta forma para DVD, CD de Audio, MP3, JPEG y WMA: Para usar correctamente los botones, consulte la siguiente tabla.
| DVD | CD/MP3/JPEG/WMA | |
Botones POWER | Para conectar la alimentación o poner el reproductor en modo de espera. | Para conectar la alimentación o poner el reproductor en modo de espera. |
| Botón A-B REPEAT[0045] | Para marca un segmento entre A y B para la reproducción repetida. | Para marca un segmento entre A y B para la reproducción repetida. (CD) |
| Botón REPEAT[1K6K5] | Para repetir la reproducción de un título o capítulo. | Para repetir la reproducción de una pista o disco. (CD)Para repetir la reproducción de una pista, un grupo o disco. (MP3, JPEG, WMA) |
| Botón RANDOM[1H7AA] | —— | Para reproducir pistas en orden aleatorio. |
| Botón MODE[8B27] | Para establecer el control de la imagen.Para activar/desactivar el nivel de negro.Para activar el sonido 3D (sistema de sonido envolvente virtual).Para establecer la voz en avance rápido. | Para programar un orden específico.Para activar el sonido 3D (sistema de sonido envolvente virtual). (CD, MP3, WMA) |
| Botón ZOOM[1XZTK] | Para ampliar una parte de la imagen (x2/x4). | Para ampliar una parte de la imagen (x2). (JPEG) |
| Botón ANGLE[1X10A][1XTH] | Para acceder a distintos ángulos de cámara en un disco. | —— |
| Botón SUBTITLES1(RITTIT)F[2A26] | Para acceder a diversos subtítulos en un disco. | —— |
| Botón AUDIOAUDIO[4G42] | Para acceder a distintas funciones de audio en un disco. | Para seleccionar ESTÉREO, L-ch o R-ch. (CD) |
| Botón DISPLAYDISPLAY[2SK-2] | Para mostrar el modo del disco actual. | Para mostrar el modo del disco actual. |
Botón SEARCH MODE[00001][00009] | Para buscar un capítulo, título, tiempo o marcador.Para volver rápidamente a un punto determinado del disco. | Para buscar una pista.Para búsqueda de tiempo o marcador. (CD)Para volver rápidamente a un punto determinado del disco. |
| Botón OPEN/CLOSE[0YEN][3Y40] | Para abrir y cerrar la bandeja portadisco. | Para abrir y cerrar la bandeja portadisco. |
| Botones Numéricos1[2SB07]346967[4HKX3][19] | Para seleccionar directamente un capítulo o título. | Para seleccionar una pista directamente. |
| Botón CLEAR[4VDC][1VDC] | Para borra los marcadores.Para cancela los números introducidos incorrectamente.Para cancelar el punto A de la repetición A-B. | Para borrar los marcadores. (CD)Para cancelar los números introducidos incorrectamente.Para cancelar el punto A de la repetición A-B. (CD) |
| Botón MENU[1V138] | Para llamar al menú de un disco. | Para llamar la LISTA DE ARCHIVOS.(MP3, JPEG, WMA) |
| Botón TOP MENU[01740][TOP MEN/U] | Para llamar al menú inicial de un disco. | Para volver al primer elemento en la jerarquía más alta de la LISTA DE ARCHIVOS. (MP3, JPEG, WMA) |
| Botones [1V7A]R, Cursor[1MTX5][1M75] | Para mover el cursor y determinar su posición. | Para mover el cursor y determinar su posición. |
| Botón RETURN[0WHD] | Para volver a la operación anterior en el menú de configuración. | Para volver a la operación anterior en el menú de configuración. |
| Botón SETUP[0C1U1][4ZH0] | Para llamar al menú de configuración. | Para llamar al menú de configuración. |
| Botones SKIP[10DP][10C42] | Para omitir capítulos/títulos. | Para omitir pistas. |
| Botones SEARCH[2TBW] | Para iniciar la búsqueda en avance rápido/retroceso rápido o en avance lento/retroceso lento. | Para iniciar la búsqueda en avance rápido/retroceso rápido. (CD, MP3, WMA) |
| Botón TOPSTOP[1NAC] | Para detener la reproducción. | Para detener la reproducción. |
| Botón PLAY[1EART][00583] | Para iniciar la reproducción. | Para iniciar la reproducción. |
| Botón STILL/PAUSESTILL/PAUSE[07V6C][11] | Para hacer una pausa en la reproducción.Para adelantar la reproducción cuadro por cuadro. | Para hacer una pausa en la reproducción. |
Pantalla de visualización del panel delantero
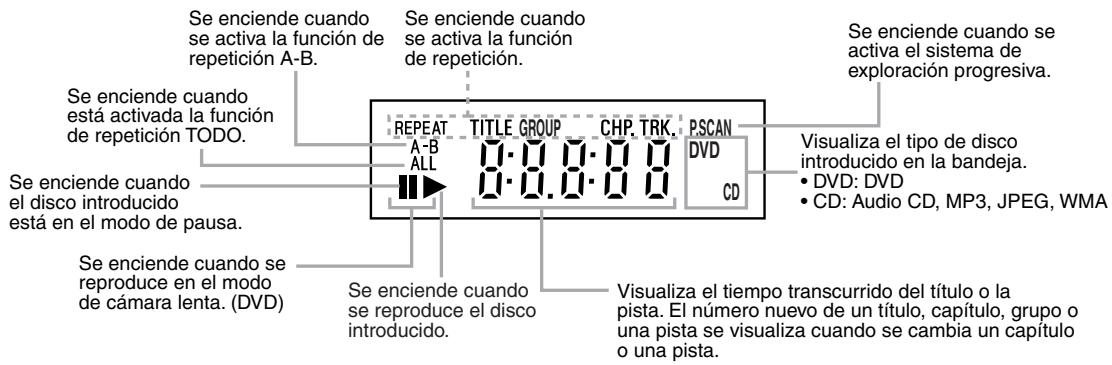
Visualizaciones durante el funcionamiento
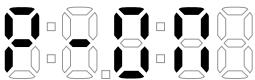 | Alimentación conectada |
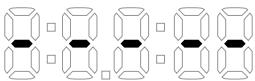 | No se ha insertado un disco o ésta no se puede reproducir |
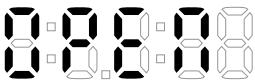 | Bandeja abierta |
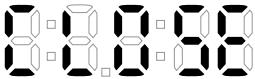 | Bandeja cerrada |
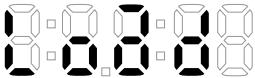 | Cargando el disco |
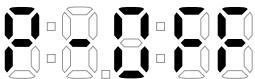 | Alimentación desconectada |
Instalación de las pilas
- Abra la tapa del compartimiento de las pilas.
- Introduzca dos pilas "AA" (R6P), asegurándose de orientarlas correctamente.
- Cierre la tapa.
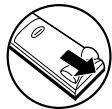
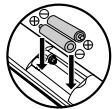

Precauciones concernientes a las pilas
- Utilice pilas “AA” (R6P) en esta unidad de control remoto.
- Cambie las pilas por otras nuevas aproximadamente una vez al año, aunque esto dependerá de la frecuencia con la que se use la unidad de control remoto.
- Si la unidad de control remoto no funciona a una corta distancia de la unidad principal, cambie las pilas por otras nuevas, incluso si ha transcurrido menos de un año.
- Las pilas incluidas sólo sirven para verificar el funcionamiento. Cámbielas por otras nuevas tan pronto como sea posible.
- Al insertar las pilas, asegúrese de hacerlo en la dirección correcta, observando las marcas ⊕ y ⊖ del compartimiento de pilas de la unidad de control remoto.
-
Para evitar daños o fuga de electrolito de las pilas:
-
No utilice una pila nueva con otra usada.
- No utilice dos tipos de pilas diferentes.
-
No cortocircuite, desmonte, caliente ni tire las pilas al fuego.
-
Extraiga las pilas cuando no vaya a utilizar la unidad de control remoto durante un período de tiempo prolongado.
- Si las pilas tuvieran fugas, limpie cuidadosamente el electrolito del interior del compartimiento de las pilas y luego instale las pilas nuevas.
Descripción – panel trasero
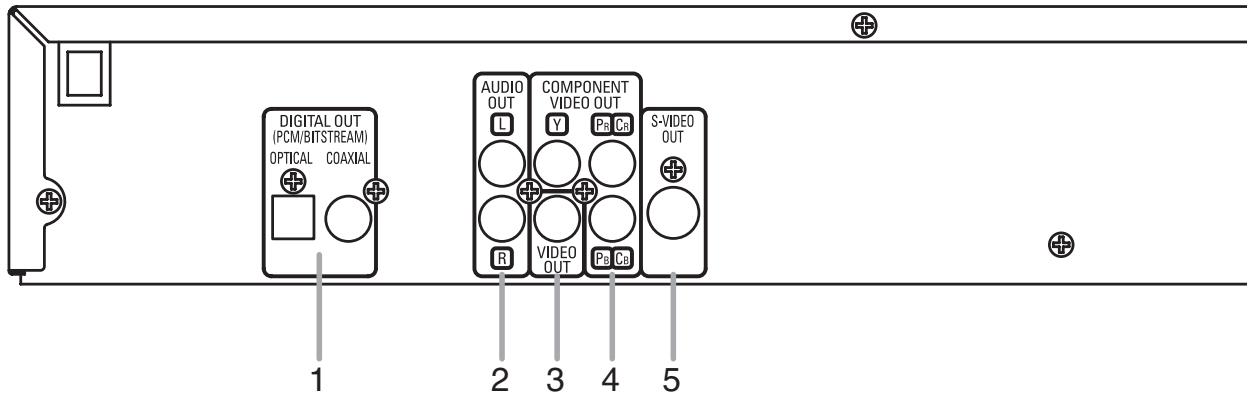
1. Conectores DIGITAL OUT
Utilice un cable digital óptico o coaxial para conectar a un amplificador AV con decodificador incorporado (centro de control AV).
2. Conectores AUDIO OUT
Conéctelos a los conectores de entrada de audio de un televisor compatible con A/V, televisor de pantalla ancha o sistema estereofónico.
3. Conector VIDEO OUT
Use un cable de vídeo para conectar el conector a la entrada de vídeo de un televisor compatible con A/V, televisor de pantalla ancha o sistema estereofónico.
4. Conectores COMPONENT VIDEO OUT
Use estos conectores si tiene un televisor con conectores de entrada de vídeo de componente. Estos conectores proporcionar vídeo C_R/P_R , C_B/P_B e Y. Junto con el sistema S-Vídeo, el sistema de vídeo de componente ofrece la mejor calidad de imagen.
5. Conector S-VIDEO OUT
Use el cable de S-Vídeo para conectar este conector al conector de S-Vídeo de un televisor compatible con A/V o televisor de pantalla ancha para obtener una mejor calidad de imagen.
Selección de reproducción con exploración progresiva (525p/480p o entrelazada 525i/480i)
- Si su televisor es compatible con la exploración progresiva (525p/480p), conecte el televisor a los conectores COMPONENT VIDEO OUT del reproductor DVD y ponga “PROGRESIVO” en “ENC.” en el ajuste de visualización. A continuación, ponga su televisor en el modo de exploración progresiva. Consulte la página 22 para conocer instrucciones acerca del cambio del ajuste de visualización. P.SCAN aparece en la pantalla de visualización.
- Si su televisor no es compatible con la exploración progresiva, ponga “PROGRESIVO” en “APDO.” (consulte la página 22). Compruebe que P.SCAN desaparece en la pantalla de visualización de la unidad.
- Si los conectores de entrada de vídeo de su televisor o monitor son del tipo BNC, utilice un adaptador (disponible en el comercio).
¿Qué es la exploración progresiva?
- A diferencia de la exploración entrelazada convencional, el sistema de exploración progresiva produce menor oscilación e imágenes con mayor resolución que las señales de televisión tradicionales (525i/480i).
Fabricado bajo licencia de Dolby Laboratories. "Dolby" y el símbolo de la doble D son marcas comerciales de Dolby Laboratories.
“DTS” y “DTS Digital Out” son marcas comerciales de Digital Theater Systems, Inc.
Los siguientes son ejemplos de las conexiones que normalmente se utilizan para conectar el reproductor de DVD a un televisor y a otros componentes.
Si se utiliza este reproductor DVD para reproducir un DVD del formato de sonido envolvente Dolby Digital de 5,1 canales o DTS, el reproductor DVD dará salida a una serie de datos Dolby Digital o DTS desde sus tomas OPTICAL o COAXIAL DIGITAL OUT. Conectando el reproductor a un decodificador Dolby Digital o DTS, usted podrá disfrutar de un ambiente más convincente y real, con el tipo de sonido envolvente potente y de alta calidad de estándar profesional que puede oírse en los cines. Utilice un cable de audio digital coaxial u óptico (disponible en el comercio) para realizar las conexiones de audio.
NOTAS:
- Antes de conectar un componente, asegúrese de desconectar la alimentación de todos los componentes del sistema.
- Consulte los manuales de instrucciones del televisor, sistema estereofónico y cualquier otro componente que vaya a conectar al reproductor de DVD.
Conexión a un sistema de audio
Método 1
natural_image
Line drawing of two speakers with front and back views, no text or symbols presentSistema estereofónico
Método 2
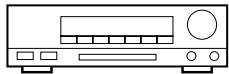
Amplificador AV con un decodificador incorporado (centro de control AV), Decodificador Dolby Digital, decodificador DTS, platina MD o platina DAT
AUDIO
Conectores de entrada de audio
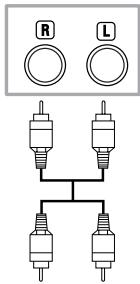
Cable de audio (incluido)
Conectores de entrada de audio digital
Cable óptico (disponible en el comercio)
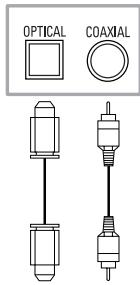
Cable de audio digital coaxial (disponible en el comercio)
DVD
AUDIO OUT (analógico)
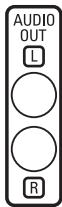
DIGITAL OUT
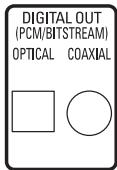
- Método 1 Reproductor de DVD + Sistema estereofónico
- Método 2 Reproductor DVD + amplificador AV con decodificador incorporado (centro de control AV), decodificador Dolby Digital, decodificador DTS, platina MD o platina DAT
NOTAS (Para el método 2 solamente):
- Cuando se utiliza un amplificador AV con un decodificador incorporado (centro de control AV), decodificador Dolby Digital o decodificador DTS, como se muestra en el método 2, ponga “DOLBY DIGITAL” o “DTS” en “BITSTREAM” para la salida de audio en el modo de configuración (consulte la página 23). Póngalo en “PCM” o “APDO.” para el decodificador que no se utilice actualmente. La reproducción de un DVD con los ajustes mal hechos puede generar ruidos, y también puede dañar los altavoces.
- La fuente de audio en un disco del formato de sonido envolvente Dolby Digital de 5.1 canales no se puede grabar como sonido digital mediante una platina MD o una platina DAT.
- Ponga “DOLBY DIGITAL” en “PCM” y “DTS” en “APDO.” para la salida de audio en el modo de configuración para conectar a una platina MD o a una platina DAT (consulte la página 23).
- Cuando se reproduce un DVD grabado en DTS mientras se utiliza un decodificador, etc., que no es compatible con DTS se produce un ruido que puede dañar sus oídos o los altavoces.
- Cuando se reproduce un DVD PCM lineal de 96kHz protegido por copyright, el sonido digital se muestreará en sentido descendente a 48kHz, aunque ponga “LPCM” en “APDO.” (consulte la página 23).
Cable óptico (disponible en el comercio)
- El cable óptico (disponible en el comercio) puede dañarse si se lo dobla excesivamente. Cuando enrolle el cable para guardarlo, su circunferencia deberá tener un diámetro de al menos 15 cm.
- Utilice un cable de 3 m o más corto.
- Al hacer las conexiones, inserte las clavijas del cable firmemente en los conectores.
- Si un enchufe tiene polvo o está sucio, limpie con un paño suave antes de enchufar en un conector.
Conexión a un televisor (para vídeo)
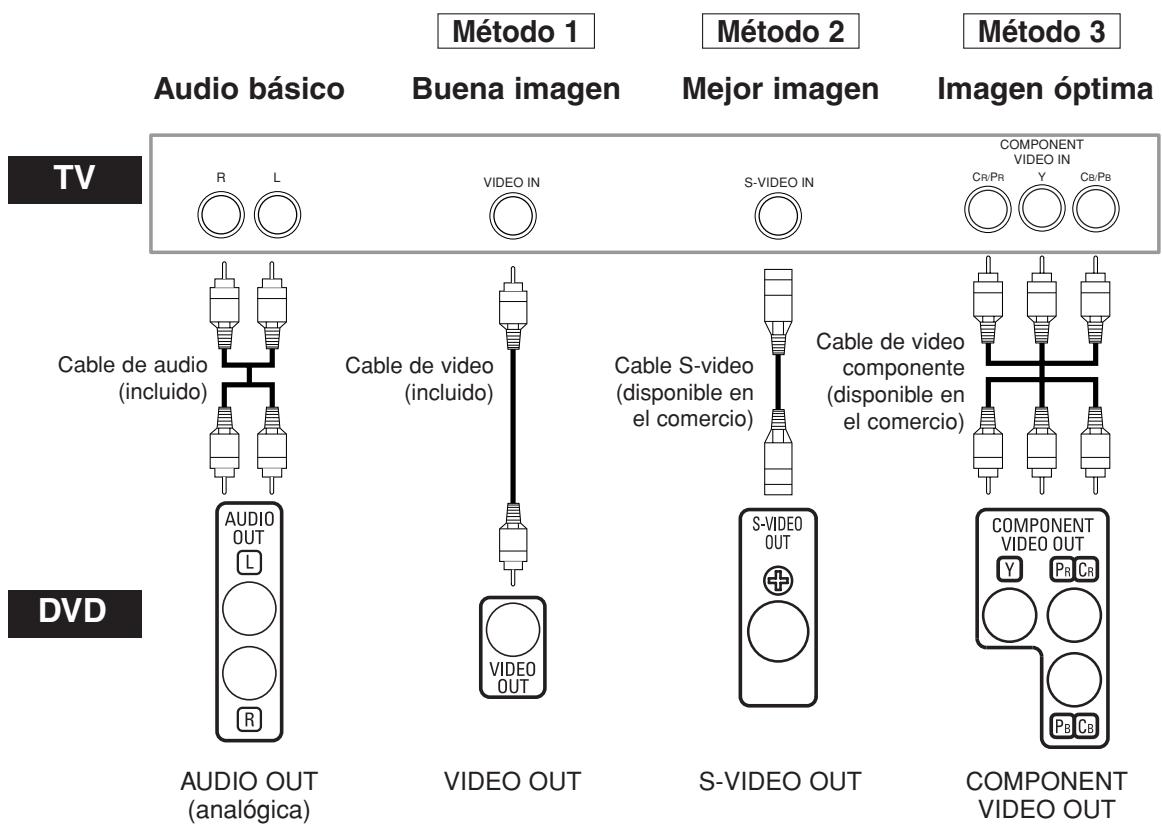
- Método 1 Reproductor de DVD + Televisor con conector de entrada de vídeo
- Método 2 Reproductor de DVD + Televisor con conector de entrada S-Vídeo
- Método 3 Reproductor de DVD + Televisor con conectores de vídeo de componente
NOTAS:
- Conecte el reproductor de DVD directamente a un televisor. Si conecta los cables de Audio/Vídeo a un VCR, las imágenes podrán aparecer distorsionadas debido al sistema de protección contra copia.
- Conector de salida S-Vídeo
Las señales de vídeo se dividen en señales de color (C) y señales de brillo (Y), con lo que se obtiene una imagen más nítida. Si el televisor está equipado con un conector de entrada S-Vídeo, le recomendamos conectarlo al conector de salida S-Vídeo de esta unidad utilizando un cable de conexión S-Vídeo (disponible en el comercio).
CÓMO CONECTAR EL EQUIPO A UN TELEVISOR QUE NO TIENE CONECTORES DE ENTRADA DE AUDIO/VÍDEO
Si su televisor no está equipado con conectores de entrada de audio y vídeo del tipo RCA, puede conectar el reproductor de DVD al terminal de antena de 75 ohmios de su televisor utilizando un modulador de RF audio/vídeo estéreo opcional (no suministrado). Conecte las salidas de audio y vídeo del reproductor de DVD a las entradas de audio y vídeo del modulador de RF y, a continuación, conecte la salida coaxial del modulador de RF (marcada generalmente como "TO TV") al terminal de antena coaxial de 75 ohmios de su televisor. Para más información, consulte las instrucciones suministradas con el modulador de RF.
Si el terminal de antena coaxial de 75 ohmios de su televisor ya está ocupado por una conexión de antena o caja de televisión por cable, desconecte el cable del terminal de antena del televisor y conéctelo al terminal de entrada de antena coaxial del modulador de RF (generalmente marcado "ANT IN"), luego, conecte el modulador de RF al terminal de antena de su televisor como se describió anteriormente.
NOTA:
- La calidad de la imagen de los discos DVD no será tan buena si el reproductor de DVD se conecta al terminal de antena del televisor a través de un modulador de RF.
Reproducción básica
DVD
CD
MP3
JPEG
WMA
Para empezar
- Encienda el televisor, el amplificador y cualquier otro componente que esté conectado al reproductor DVD.
- Asegúrese de que el televisor y el receptor de audio (disponible en el comercio) estén ajustados al canal correcto.
1 Presione el botón POWER ON.
- "P-ON" aparecerá brevemente en la pantalla de visualización.
2 Presione el botón OPEN/CLOSE para abrir la bandeja portadisco.
3 Coloque el disco en la bandeja, con la etiqueta hacia arriba.
4 Presione él botón PLAY.
- La bandeja se cerrará automáticamente y la reproducción comenzará desde el primer capítulo o pista del disco. Si la reproducción no comienza automáticamente, presione el botón PLAY.
- Cuando reproduzca un DVD con un menú de títulos, éste podrá aparecer en la pantalla. En este caso, consulte “Menú de títulos”.
5 Presione el botón STOP para detener la reproducción.
NOTAS:
- Durante la operación puede aparecer un “icono de prohibición” en la parte superior derecha de la pantalla del televisor, indicando que el reproductor de DVD o el disco ha detectado una operación que está prohibida.
- En el caso de DVDs que utilizan ciertos títulos para reproducir señales de programa, la reproducción puede comenzar desde el segundo título o puede omitir estos títulos.
- Durante la reproducción de discos de dos capas, las imágenes pueden detenerse por un momento. Esto sucede cuando la primera capa cambia a la segunda. Esto es normal y no indica mal funcionamiento.
- La operación puede cambiar cuando usted reproduce DVDs con menú de disco. Consulte el manual suministrado con el disco para conocer detalles.
Luminosidad de la pantalla de visualización del panel delantero
1 Presione el botón DIMMER en el panel delantero para seleccionar el nivel de luminosidad deseado para la pantalla de visualización. (BRILLO, OSCURO o APDO.) • BRILLO es el ajuste preestablecido de fábrica.
NOTAS:
- La luminosidad de la pantalla de visualización puede ajustarse desde el menú de configuración. Para más detalles, consulte la página 24.
- La próxima vez que encienda el equipo, la luminosidad de la pantalla de visualización corresponderá al ajuste seleccionado en el menú de configuración.
Funciones generales
DVD
Un DVD puede contener menús que utilizan para navegar por el disco y acceder a funciones especiales. Presione los botones Numéricos correspondientes o utilice los botones del Cursor (▲ / ▼ / ◀ / ▶) para resaltar la opción deseada en el menú principal del DVD y, a continuación, presione el botón ENTER para confirmar su selección.
NOTA:
- A menos que se indique lo contrario, todas las operaciones descritas se basan en el uso del control remoto. Algunas operaciones pueden realizarse con la barra de menú en la pantalla de TV.
Menú de disco
DVD
1 Presione el botón MENU.
- Aparecerá el menú principal del DVD.
2 Si la función no está disponible, en la pantalla de TV podrá aparecer el símbolo ☑.
3 Si el menú está disponible en el disco, aparecerá el idioma de audio, opciones de subtítulos, capítulos para el título y otras opciones.
4 Presione los botones del Cursor (▲ / ▼ / ◀ / ▶) para seleccionar una opción y, a continuación, presione el botón ENTER para confirmar su selección.
Menú de títulos
DVD
1 Presione el botón TOP MENU.
- Aparecerá el menú de títulos.
2 Si la función no está disponible, en la pantalla de TV podrá aparecer el símbolo Ⓧ.
3 Presione los botones del Cursor (▲ / ▼ / ◀ / ▶) para seleccionar una opción y, a continuación, presione el botón ENTER para confirmar su selección.
- La reproducción comenzará desde el título seleccionado.
Cómo visualizar una pantalla de menú durante la reproducción
DVD
- Presione el botón MENU para visualizar el menú principal del DVD.
- Presione el botón TOP MENU para visualizar el menú de títulos.
NOTA:
- El contenido de los menús y las operaciones correspondientes pueden variar según el disco. Para más detalles, consulte el manual suministrado con el disco.
Imagen fija / Pausa
DVD
CD
MP3
JPEG
WMA
1 Durante la reproducción, presione el botón STILL/PAUSE.
- La reproducción se interrumpirá y el sonido se silenciará.
2 Para reanudar la reproducción, presione el botón PLAY. NOTA:
- Ponga “MODO VISTA FIJA” en “IMAGEN” en el menú de visualización si las imágenes quedan borrosas en el modo de pausa (consulte la página 22).
Reanudación
DVD
CD
MP3
JPEG
WMA
1 Durante la reproducción, presione el botón STOP.
- El mensaje de reanudación aparecerá en la pantalla de TV.
2 Presione el botón PLAY; la reproducción se reanudará desde el punto en que fue interrumpida.
- Para cancelar la función de reanudación, presione el botón STOP dos veces.
NOTAS:
- La reanudación de la información permanece incluso cuando se apaga la unidad.
- Para MP3, JPEG o WMA, la reproducción se reanudará desde el comienzo de la pista actual.
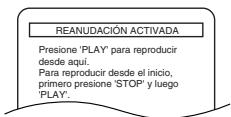
Búsqueda en avance rápido / retroceso rápido
DVD
CD
MP3
WMA
1 Durante la reproducción, presione repetidamente el botón ◀◀ o ▶▶ para seleccionar la velocidad de avance o retroceso deseada.
- Para los DVD, la velocidad de búsqueda en avance rápido o retroceso rápido es diferente según el disco. Las velocidades aproximadas son 1 (x2), 2 (x8), 3 (x20), 4 (x50) y 5 (x100).
Botón ◀◀◀

Botón ▶▶

- Para los CD de Audio, MP3 y WMA, la velocidad aproximada es 1 (x2), 2 (x8) y 3 (x16).
- En los CD de Audio, MP3, y WMA, el sonido se emitirá a cualquier velocidad de la búsqueda en avance/retroceso.
2 Para volver a la reproducción normal, presione el botón PLAY.
Avance lento / Retroceso lento
DVD
1 Presione el botón STILL/PAUSE durante la reproducción.
2 Presione el botón ◀◀ o ▶▶.
- La reproducción lenta empezará y se silenciará el sonido.
3 Presione repetidamente el botón ◀◀ o ▶▶ para seleccionar la velocidad deseada.
- La velocidad de avance lento o retroceso lento es diferente dependiendo del disco. La
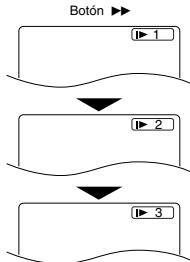
flowchart
graph TD
    A["Botón"] --> B["1"]
    B --> C["2"]
    C --> D["3"]
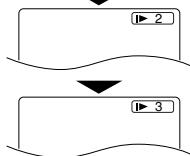
flowchart
graph TD
    A["1▶2"] --> B["1▶3"]
    B --> C["Downward Arrow"]
velocidad aproximada es 1 (1/16), 2 (1/8) y 3 (1/2).
4 Presione el botón PLAY para volver a la reproducción normal.
NOTA:
- Ponga “MODO VISTA FIJA” en “IMAGEN” en el menú de visualización si las imágenes quedan borrosas en el modo de reproducción lenta (consulte la página 22).
Reproducción cuadro por cuadro
DVD
1 Durante la reproducción, presione el botón STILL/PAUSE.
- La reproducción se interrumpirá y el sonido se silenciará.
2 El disco avanzará un cuadro cada vez que se presione el botón STILL/PAUSE.
3 Para cancelar el modo de reproducción cuadro por cuadro, presione el botón PLAY.
NOTA:
- Ponga “MODO VISTA FIJA” en “IMAGEN” en el menú de visualización si las imágenes quedan borrosas en el modo de pausa (consulte la página 22).
Zoom
DVD JPEG
Esta función permite ampliar la imagen de video y hacer una panorámica de la imagen ampliada con zoom.
1 Presione el botón ZOOM durante la reproducción.
- La reproducción continuará.
2 Presione repetidamente el botón ZOOM para seleccionar el factor de zoom requerido: x2, x4 o desactivar.
- Para JPEG sólo se encuentra disponible el zoom x2.
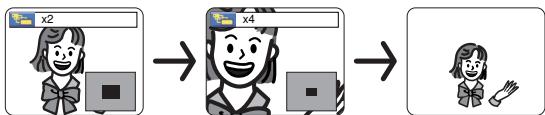
flowchart
graph LR
    A["x2"] --> B["x4"]
    B --> C["Child Icon"]
3 Utilice los botones del Cursor (▲/▼/◄/►) para mover la imagen tomada por el zoom por la pantalla.
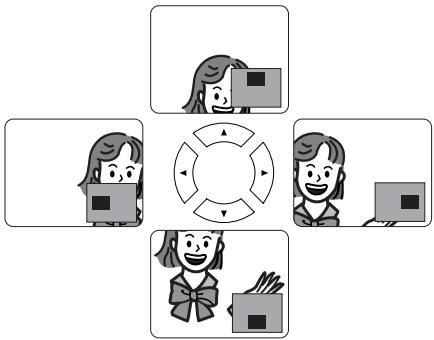
flowchart
graph TD
    A[" "] --> C[" "]
    B[" "] --> C[" "]
    D[" "] --> C[" "]
    E[" "] --> C[" "]
    F[" "] --> C[" "]
    C --> G[" "]
    style C fill:#f9f,stroke:#333,stroke-width:2px
4 Para salir del modo del zoom, presione el botón ZOOM.
NOTAS:
- La función del zoom no se activa cuando se muestra el menú del disco.
- El zoom x4 no se encuentra disponible en algunos discos.
- La pantalla de navegación no se encuentra disponible con JPEG.
- Con algunos archivos JPEG no se puede mover la imagen tomada con el zoom.
Búsqueda de título / capítulo
DVD
Utilizando el botón SEARCH MODE
1 Presione el botón SEARCH MODE repetidamente hasta que aparezca Búsqueda de capítulos o Búsqueda de títulos durante la reproducción.
2 Introduzca el número de capítulo/título deseado con los botones Numéricos.
Utilizando los botones SKIP |◀◀▶▶
Durante la reproducción, presione el botón SKIP ▶▶I para pasar al capítulo siguiente. Presiónelo repetidamente para saltarse pistas siguientes. Pressione el botón SKIP I◀◀ para regresar al inicio del capítulo actual. Presiónelo repetidamente para ir al capítulo anterior.
- El número de el capítulo aparecerá brevemente en la pantalla de visualización.
- Si se presiona el botón SKIP ◀◀ o ▶▶ I mientras la reproducción está en modo pausa, la reproducción volverá al estado de pausa después de pasar a la pista siguiente.
NOTAS:
- Según el disco, puede utilizar los botones Numéricos para buscar un capítulo deseado entrando directamente el número de canal. Consulte el manual que viene con el disco.
- Los botones SKIP ◀◀◀ y ▶▶▶ no pueden utilizarse cuando la reproducción está parada.
- En un disco que no contenga capítulos dentro de los títulos, los botones SKIP ◀◀◀ y ▶▶▶ I cambian los títulos.
Búsqueda de pistas
CD MP3 JPEG WMA
Hay dos formas de comenzar la reproducción de una pista específica de CD de Audio, de disco de MP3, de JPEG o de WMA.
Utilizando el botón SEARCH MODE
1 Presione el botón SEARCH MODE.
- Aparecerá el visualizador de búsqueda de pistas.
2 Durante los siguientes 30 segundos, seleccione el número de pista que desee utilizando los botones Numéricos.
- Para discos con menos de 10 pistas, presione directamente el número de pista.
- Para discos con 10 o más pero menos de 100 pistas, para reproducir una sola pista, presione primero 0 y después el número de pista (por ejemplo, para la pista 3, presione 0, 3). Para reproducir una pista de dos cifras, presione el número de pista.
- Para discos con 100 o más pistas, para reproducir una pista de una o dos cifras, presione primero 0 y después el número de pista (por ejemplo, para la pista 3, presione 0, 0, 3 y para la pista 26, presione 0, 2, 6). Para reproducir una pista de tres cifras, presione el número de pista.
- Presione el botón CLEAR para borrar la entrada incorrecta.
NOTA:
- El botón +10 también puede mostrar la búsqueda de pista excepto para discos con menos de 10 pistas. Para estos discos, la búsqueda de pista puede hacerse presionando el número de pista.
Utilizando los botones SKIP |◀◀▶▶
Durante la reproducción, presione el botón SKIP ▶▶▶ para pasar a la pista siguiente. Presiónelo repetidamente para saltarse pistas siguientes. Presione el botón SKIP ◀◀◀ para regresar al inicio de la pista actual. Presiónelo repetidamente para ir a las pistas anteriores.
- El número de la pista aparecerá brevemente en la pantalla de visualización.
- Si se presiona el botón SKIP |◀◀ o ▶▶| mientras la reproducción está en modo pausa, la reproducción volverá al estado de pausa después de pasar a la pista siguiente.
NOTA:
- Los botones SKIP ◀◀◀ y ▶▶▶ no se encuentran disponibles cuando se detiene la reproducción.
Búsqueda de tiempo
DVD CD
1 Presione el botón SEARCH MODE hasta que aparezca la pantalla de búsqueda de tiempo en el televisor.
2 Durante los siguientes 30 segundos, introduzca un punto de tiempo utilizando los botones Numéricos.
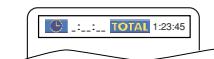
- Se iniciará la reproducción en el tiempo especificado.
- Para Búsqueda por tiempo, "0" aparece automáticamente cuando no es necesario introducir un número. Por ejemplo, si el tiempo total del título o pista es inferior a 10 minutos, aparecerá "0:0_:_ _" en la pantalla de búsqueda de tiempo.
3 Presione el botón CLEAR para borrar una entrada incorrecta.
Pantalla de ajuste de marcador
DVD CD
Utilice marcadores para memorizar sus puntos favoritos en un disco.
1 Presione repetidamente el botón SEARCH MODE hasta que la pantalla de visualización y los marcadores aparezcan durante la reproducción.
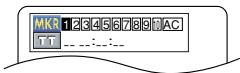
2 Presione los botones del Cursor (◀ o ▶) para seleccionar 1, 2, 3, 4, 5, 6, 7, 8, 9 ó 10, y asegúrese de que “: : : ” aparezca en la visualización.
3 Cuando el disco alcance el punto que usted quiera recordar, presione el botón ENTER.
- El título o la pista y el tiempo de reproducción transcurrido aparecerán en la pantalla del televisor.
4 Para volver más adelante al marcador, presione repetidamente el botón SEARCH MODE durante la reproducción y los botones del Cursor (◀ o ▶) para elegir el marcador deseado, y luego presione el botón ENTER.
5 Presione el botón SEARCH MODE o RETURN para salir.
NOTAS:
- Abrir la bandeja del disco, desconectar la alimentación o seleccionar AC en el paso 2 y presionar el botón ENTER borrarán todos los marcadores.
- Para borrar un marcador, utilizando los botones del Cursor (◀ o ▶), ponga el cursor en el número del marcador que va a borrar y luego presione el botón CLEAR.
- Se puede marcar hasta 10 puntos.
Repetición
- El botón REPEAT sólo funciona durante la reproducción.
REPETICIÓN DE TÍTULO / CAPÍTULO
DVD
Para activar la función de Repetición, presione el botón REPEAT durante la reproducción.
- Cada vez que presione el botón, el modo de repetición cambiará como se indica a continuación.
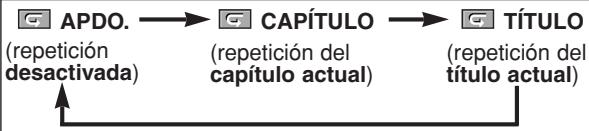
flowchart
graph LR
    A["APDO. (repetición desactivada)"] --> B["CAPÍTULO (repetición del capítulo actual)"]
    B --> C["TÍTULO (repetición del título actual)"]
NOTAS:
- El ajuste de Repetición de Títulos/Capítulos se cancelará cuando se cambie a otro título o capítulo.
- La repetición de reproducción no funciona durante la repetición de reproducción A-B.
- La Repetición de Título/Capítulo no se encuentra disponible con algunas escenas.
REPETICIÓN DE PISTA / GRUPO / TODO
CD
Para activar la función de repetición, presione el botón REPEAT durante la reproducción.
- Cada vez que presione el botón, el modo de repetición cambiará como se indica a continuación.
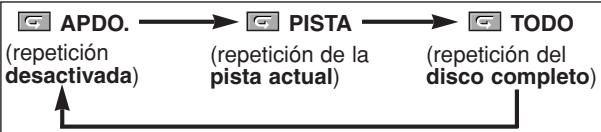
flowchart
graph LR
    A["APDO. (repetición desactivada)"] --> B["PISTA (repetición de la pista actual)"]
    B --> C["TODO (repetición del disco completo)"]
NOTAS:
- En el modo de repetición de pista, el ajuste de repetición se cancelará cuando se cambie a otra pista.
- La función de repetición de la reproducción no puede emplearse durante el modo de repetición A-B.
MP3 JPEG WMA
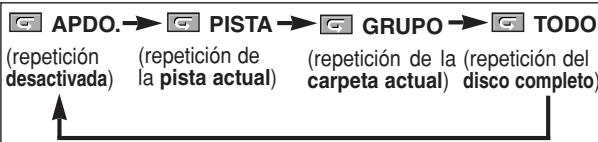
flowchart
graph LR
    A["APDO.→ PISTA→ GRUPO→ TODO\n(repetición desactivada) (repetición de la pista actual) (repetición de la carpeta actual) (repetición del disco completo)"]
    B["Up arrow"] --> A
NOTA:
- En el modo de repetición de pista o grupo, el ajuste de repetición se cancelará cuando se cambie a otra pista o grupo.
REPETICIÓN A-B
DVD CD
1 Presione el botón A-B REPEAT en el punto de inicio deseado.
- A- aparecerá brevemente en la pantalla de TV.
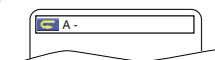
2 Presione de nuevo el botón A-B REPEAT en el punto de término deseado de la sección a repetir.
- A-B aparecerá brevemente en la pantalla de TV y la sección seleccionada se reproducirá repetidamente.
3 Para cancelar la repetición de la sección seleccionada, presione el botón A-B REPEAT.
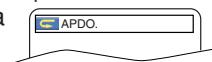
NOTAS:
- La sección A-B a repetir sólo puede definirse dentro del título actual (para DVD) o dentro de la pista actual (para CD de Audio).
- La función de repetición A-B no está disponible en algunas escenas de los DVDs.
- Para cancelar el punto A definido, presione el botón CLEAR.
- La función de repetición A-B no puede emplearse durante la repetición de títulos, capítulos, pistas o del disco completo.
Reproducción Programada
Esta función le permite programar CD de Audio, MP3, JPEG o WMA para reproducir en el orden deseado.
CD
1 En el modo de parada, presione el botón MODE. - Aparecerá la ventana de programa.
2 Presione los botones del Cursor (▲ o ▼) para seleccionar una pista, a continuación presione el
- Presione el botón CLEAR para borrar la pista introducido más recientemente.
3 Presione el botón PLAY para iniciar la reproducción programada.
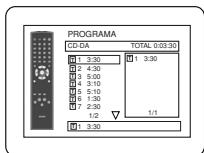
MP3
JPEG
WMA
1 En el modo de parada, presione el botón MODE. - Aparecerá la ventana prog
2 Presione los botones del Cursor (▲ o ▼) para seleccionar un grupo, a continuación, presione el botón ENTER.
- Aparecerá una pantalla de selección de pistas.
3 Presione los botones del Cursor (▲ o ▼) para seleccionar una pista, a continuación, presione el botón ENTER para guardarla en un programa.
- Presione el botón CLEAR para borrar la pista entrada más reciente.
- La pista programada se muestra en la pantalla de la derecha.
- Si no puede mostrarse todo el programa en la pantalla, “▼” aparecerá para pasar a la siguiente página.
- Si se presiona el botón del Cursor (◀) se mostrará una lista de carpetas que pertenecen a una jerarquía un nivel superior a la carpeta actualmente seleccionada.
4 Presione el botón PLAY para iniciar la reproducción programada.
- Presione el botón RETURN, y aparecerá la pantalla stop con el contenido programado en memoria.
NOTAS:
- Presione el botón STOP una vez y, a continuación, vuelva a presionar el botón PLAY, la reproducción se reiniciará desde el punto en el que se presionó el botón STOP. (Continuación del programa.)
- Presione el botón STOP dos veces y luego el botón PLAY nuevamente; la reproducción volverá comenzar desde la primera pista de la forma habitual. El programa quedarán almacenado hasta que se abra la bandeja portadisco o se desconecte la alimentación.
- Pueden introducirse hasta 99 pistas.
- Para borrar todas las pistas del programa a la vez, seleccione la opción BORRA TODO en la parte inferior de la lista en el paso 2.
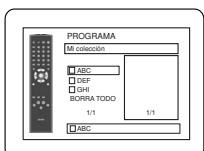

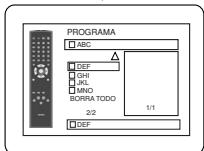

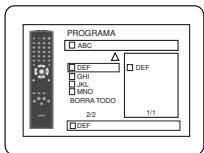
- Para repetir la pista actual en el programa, presione el botón REPEAT varias veces hasta que aparezca el mensaje PISTA durante la reproducción. Para repetir todo el programa, presione el botón REPEAT varias veces hasta que aparezca el mensaje TODO durante la reproducción.
- Si se memorizaron ocho pistas o más en un programa, utilice el botón SKIP ◀◀◀ o ▶▶▶ para ver todas las pistas.
- Cuando una carpeta está abierta:
-Presione el botón del Cursor (▶) cuando desea ir a la siguiente jerarquía.
–Presione el botón del Cursor (◀) cuando desea volver a la jerarquía anterior (excepto para la jerarquía superior).
- Si se inserta un disco que contiene archivos MP3, JPEG y WMA mezclados, la configuración del programa permite 99 pistas para que se combinen archivos MP3, JPEG y WMA.
Reproducción aleatoria
Esta función cambia el orden de reproducción de las pistas en lugar de reproducirlas en el orden original.
CD
MP3
JPEG
WMA
1 En el modo de parada, presione el botón RANDOM.
- Aparece la pantalla de aleatorio.
2 Presione el botón PLAY para iniciar la reproducción aleatoria.
NOTAS:
- Para repetir la pista actual en la selección aleatoria presione
- No puede volver a la jerarquía anterior durante la reproducción aleatoria.
- En aquellos discos que contengan archivos MP3, JPEG y WMA mezclados, se podrá activar la reproducción aleatoria de estos archivos.
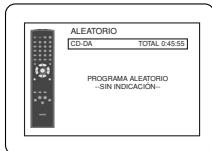
Reproducción de archivos MP3 / JPEG / WMA
MP3
JPEG
WMA
Cuando se introduzca un disco CD-R o CD-RW con archivos MP3, JPEG o WMA en el reproductor DVD y se presione el botón MENU, en la pantalla de visualización aparecerá LISTA DE ARCHIVOS. El número de pistas también se visualizará en el panel delantero.
1 Presione los botones del Cursor (▲ o ▼) para seleccionar el grupo (carpeta) o pista deseado.
- Para volver a la pantalla anterior, presione el botón del Cursor (◀).
- Si selecciona un grupo (carpeta), presione el botón del Cursor (▶) o ENTER para pasar a la pantalla de selección de pistas. Presione los botones del Cursor (▲ o ▼) para elegir una pista y luego presione el botón PLAY o ENTER.
- Si se selecciona una pista, presione el botón PLAY o ENTER para iniciar la reproducción de las pistas. La pista seleccionada y las pistas posteriores se reproducirán.
- Cuando una carpeta está abierta
–Presione el botón del Cursor (▶) cuando desea ir a la siguiente jerarquía.
-Presione el botón del Cursor (◀) cuando desea volver a la jerarquía (excepto para la jerarquía superior).
- Presione el botón TOP MENU para volver al primer elemento.
2 Presione el botón STOP para detener la reproducción.
NOTAS:
- Las carpetas se conocen por el nombre de grupos; y los archivos por el nombre de pistas.
- En la parte superior del nombre del grupo se muestra un símbolo “☐”.
-
En la parte superior de los archivos MP3 se muestra un símbolo "3".
-
En la parte superior de los archivos JPEG se muestra un símbolo “.”
- En la parte superior de los archivos WMA se muestra un símbolo “♪”.
- Se puede reconocer un máximo de 255 carpetas.
- Se puede reconocer un máximo de 999 archivos.
- Se pueden reconocer hasta 8 jerarquías.
- Si la pista se extiende más allá de los límites de la pantalla, aparece una flecha que apunta hacia abajo “▼”, indicando que se puede ver otra parte de la pista en la página anterior. El número de la página actual y el número total de páginas aparecen a la izquierda de la flecha que apunta hacia abajo “▼
- Si no se encuentran archivos MP3, JPEG o WMA en el grupo, éste no se visualiza.
- El reproductor DVD puede reproducir datos grabados en un disco de acuerdo con el nivel 1 o del nivel 2 de la norma ISO 9660 o Joliet.
- También se puede reproducir un disco en el que los datos se hayan grabado en múltiples sesiones.
- Para conocer más detalles de los sistemas de grabación, consulte el manual de instrucciones de la unidad CD-R / CD-RW o el software de escritura.
- Para los archivos MP3 y WMA grabados en la Velocidad de Bit Variable (VBR) la unidad puede no mostrar el tiempo transcurrido real.
Con este reproductor se recomienda utilizar los archivos grabados según las especificaciones siguientes:
| Archivos MP3 utilizables | Comentarios | |
| Frecuencia de muestreo | 44,1 kHz48 kHz | • Esta prohibido grabar sonido MP3 en un dispositivo digital cuando la conexión se realiza de forma digital. |
| Tipo | MPEG1 capa de audio 3 | • Se recomienda usar archivos MP3 grabados a una velocidad en bits fija de 32 kbps o superior. |
| Archivos JPEG utilizables | Comentarios | |
| Tamaño de la imagen | Límite superior:6300 x 5100 puntosLímite inferior:32 x 32 puntos | • Cuando una imagen JPEG se extiende más allá de los límites de la pantalla, su tamaño se reduce para poder mostrarla en la pantalla. |
| Archivos WMA utilizables | Comentarios | |
| Frecuencia de muestreo | 44,1 kHz48 kHz | • Estas frecuencias sólo son aplicables a la versión 9 de WMA. |
| Velocidad en bits | 48–192 kbps | • Al preparar un disco WMA, asegúrese de que la función de protección contra copia esté desactivada. |
| Tipo | WMA versión 9 | • Si el usuario intenta reproducir un archivo “no reproducible” (p. ej., un archivo protegido contra copia), aparecerá el símbolo de prohibición “inhabilitado”.• La grabación en el formato de 5.1 canales no se puede reproducir. |
Información acerca de los discos MP3, JPEG y WMA
- Este reproductor DVD puede reproducir imágenes y sonidos de datos grabados con los formatos MP3 y JPEG en discos CD-R y CD-RW.
- Un archivo cuya extensión es “.mp3 (MP3)” se denomina “archivo MP3”.
-
Un archivo cuya extensión es “.jpg (JPG)” o “.jpeg (JPEG)” se denomina “archivo JPEG”. El reproductor DVD puede reproducir un archivo de imágenes que cumpla con la especificación Exif. Exif es un formato de archivos; un formato de archivos de imágenes intercambiables establecido por la Asociación para el Desarrollo de la Industria Electrónica Japonesa (JEIDA).
-
Un archivo cuya extensión es “.wma (WMA)” se denomina “archivo WMA”.
- Los archivos cuya extensión no es “.mp3 (MP3)”, “.jpg (JPG)”, “.jpeg (JPEG)” o “.wma (WMA)”, no aparecen en el menú MP3, JPEG o WMA.
- Si el archivo no ha sido grabado en formato MP3, JPEG o WMA, podrá producirse ruido incluso si la extensión del archivo es ".mp3 (MP3)", ".jpg (JPG)", ".jpeg (JPEG)" o ".wma (WMA)".
- El nombre de un grupo o pista se puede visualizar con un máximo de 25 caracteres. Los caracteres que no sean reconocibles se reemplazarán por asteriscos. La novena jerarquía y otras más profundas no se podrán visualizar.
- Los grupos o pistas que no puedan reproducirse podrán visualizarse dependiendo de las condiciones de la grabación.
- Si se presiona el botón TOP MENU cuando se visualiza la lista de archivos, el primer elemento resaltará.
Kodak Picture CD
El reproductor de DVD también puede reproducir archivos JPEG almacenados en discos Kodak Picture CD. El usuario puede reproducir discos Picture CD para disfrutar de las imágenes en su televisor. Para conocer detalles de los Kodak Picture CDs, póngase en contacto con un establecimiento que ofrezca el servicio de desarrollo de Kodak Inc.
1 Presione el botón MENU. Aparece el menú Kodak Picture CD.
- Si no se pueden visualizar todos los elementos del menú en la pantalla, en la parte inferior derecha de la misma aparecerá “▶▶I”, indicando que el usuario podrá ver los elementos restantes en la página siguiente. Si aparece
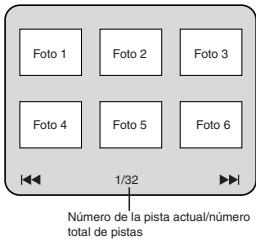
“◀◀”, esto indica que el usuario puede ver elementos de la página anterior. El número de pista del elemento actualmente resaltado y las pistas totales se muestran en la parte central inferior de la pantalla.
- Si se muestra “▶▶” en la parte inferior derecha, utilice el botón SKIP ▶▶I para ver la página siguiente, si se muestra “◀◀” en la parte inferior izquierda, utilice el botón SKIP I◀◀ para ver la página anterior.
- La visualización de todos los elementos del menú en la pantalla del menú tardará un tiempo.
2 Presione los botones del Cursor (▲/▼/◄/►), seleccione una pista que desee reproducir y luego presione el botón PLAY o ENTER.
- Si se selecciona un archivo Kodak Picture CD, se reproducirá una imagen de la pista seleccionada y luego se pasará a la siguiente en orden.
3 Presione el botón STOP para detener la reproducción.
Notas acerca de JPEG y Kodak Picture CD:
- Se visualiza una pista durante 5 o 10 segundos y luego se visualiza la siguiente pista.
- Cada vez que se presione el botón del Cursor (▶), la imagen girará 90° hacia la derecha, cuando se visualice una imagen. Cada vez que se presione el botón del Cursor (◀), la imagen girará hacia la izquierda 90°.
- Para cambiar el tamaño de la imagen reproducida, presione dos veces el botón MODE. El modo de cambio de tamaño aparece en la parte superior de la pantalla de TV durante la reproducción. Presione los botones del Cursor (◀ o ▶) o ENTER para cambiar entre NORMAL (100%) y PEQUENO (95%).
- Los archivos JPEGs progresivos (archivos JPEG memorizados en el formato progresivo) no se reproducirá en este reproductor de DVD.
- Los archivos JPEG de gran resolución demoran en aparecer.
- El modo de cambio de tamaño puede no tener efecto en algunos archivos (por ejemplo, archivos con tamaño de imagen pequeña).
Notas acerca de WMA:
- El reproductor DVD puede reproducir datos grabados de acuerdo con el nivel 2 de la norma ISO 9660, con nombre de archivo de 31 caracteres incluyendo signos de puntuación. El nombre del archivo se puede visualizar con un máximo de 25 caracteres.
- Se puede reconocer un máximo de 8 subcarpetas.
- También se puede visualizar información de fichas de WMA con un mínimo de 64 caracteres.
- El sistema puede reconocer archivos con extensión Joliet en formato Unicode de hasta 64 caracteres.
- Esta unidad no puede reproducir archivos WMA con protección de copyright.
Información en pantalla
Puede comprobar la información acerca del disco actual presionando el botón DISPLAY.
DVD
1 Presione el botón DISPLAY durante la reproducción.
- Se mostrará el número del capítulo actual/ total de capítulos, el tiempo transcu capítulo actual, y el estado
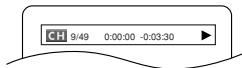
2 Presione el botón DISPLAY otra vez.
- Se mostrará el número del título actual/ total de títulos, el tiempo transcurrido y el tiempo restante de título actual, y el estado de reproducción actual.
3 Presione el botón DISPLAY tres vez.
- Se mostrará la velocidad en bits (la totalidad de datos de vídeo de la reproducción actual) y el estado de reproducción actual.
- Aparece el ajuste de repetición actual en el lado derecho de la barra de visualización sólo cuando está activado la función de Repetición. ( ⊕ C: Repetición de capítulo/ ⊕ T: Repetición de título/A ⊕ B: Repetición A-B)
- Si está reproduciónd un disco de boble capa, también se reproducirá el número de capa (L0: Se está reproduciendo la capa 0. L1: Se está reproduciendo la capa 1).
4 Presione el botón DISPLAY otra vez para salir.
CD
1 Presione el botón DISPLAY durante la reproducción.
- Se mostrará el número de la pista actual/total de pistas, el tiempo transcurrido y el tiempo restante de pista actual, y el estado de reproducción actual.
- Aparece el ajuste de repetición actual en el lado derecho de la barra de visualización sólo cuando está activado la función de Repetición. ( S T: Repetición de pista/ S A: Repetición de todas pistas/A S B: Repetición A-B)
2 Presione el botón DISPLAY otra vez.
- Se mostrará el número de la pista actual/total de pistas, el tiempo transcurrido y el tiempo restante del disco completo, y el estado de reproducción actual.
- Aparece el ajuste de repetición actual en el lado derecho de la barra de visualización sólo cuando está activado la función de Repetición. ( ⊆ T: Repetición de pista/ ⊆ A: Repetición de todas pistas/A ⊆ B: Repetición A-B)
- Cuando se reproduce un disco en el modo Programa o Aleatorio, aparecerá TR PROGRAMA (o ALEATORIO).
3 Presione el botón DISPLAY otra vez para salir.
1 Presione el botón DISPLAY durante la reproducción.
- Se mostrará el nombre del archivo reproducido actualmente.
MP3
JPEG
3 PISTA 01
▶
TR 1/36 0:01:15
2 Presione el botón DISPLAY otra vez.
- Se mostrará el nombre del archivo reproducido actualmente número de la pista actual/total de pistas, el tiempo transcurrido (MP3).
- Aparece el ajuste de repetición actual solo cuando está activado la función de Repetición. ( ⊉ T: Repetición de pista/ ⊉ A: Repetición de todo (disco)/ ⊉ G: Repetición de grupo)
- Cuando se reproduce un disco con MP3 o JPEG en el modo Programa o Aleatorio, aparecerá TR PROGRAMA (o ALEATORIO).
3 Presione el botón DISPLAY otra vez para salir.
- Durante la reproducción programada o aleatoria, cada estado de reproducción se mostrará cuando usted presione el botón DISPLAY. A continuación, presione de nuevo el botón DISPLAY para salir.
WMA
1 Presione el botón DISPLAY durante la reproducción.
- Aparecerá el nombre del archivo que se está reproduciendo.
PISTA 01
▶
2 Presione el botón DISPLAY otra vez.
- Aparecerá el nombre del título basado en la información de etiqueta que se está reproduciendo.
Tt Nombre de título
▶
3 Presione el botón DISPLAY otra vez.
- Aparecerá el nombre del artista basado en la información de etiqueta que se está reproduciendo.
Nombre de artista
▶
4 Presione el botón DISPLAY otra vez.
- Se mostrará el nombre del archivo reproducido actualmente número de la pista actual/total de pistas, el tiempo transcurrido.
- Aparece el ajuste de repetición actual solo cuando está activado la función de Repetición. ( ⊬ T: Repetición de pista/ ⊬ A: Repetición de todo (disco)/ ⊬ G: Repetición de grupo (carpeta))
- Cuando se reproduce un disco en el modo Programa o Aleatorio, aparecerá TR PROGRAMA (o ALEATORIO).
5 Presione el botón DISPLAY otra vez para salir.
- Durante el modo de reproducción programada o aleatoria, presione el botón DISPLAY para visualizar el estado de reproducción correspondiente. Luego, presione el botón DISPLAY otra vez para salir.
NOTA:
- Si el archivo no contiene información de etiqueta, se visualiza NO DISPONIBLE.
Modo de presentación
JPEG
Puede cambiar al modo de presentación durante la reproducción.
1 Presione el botón MODE durante la reproducción.
- Aparecerá la pantalla de modo de presentación.
- No puede cambiar al modo de exhibición de diapositivas en el modo de parada o de la pantalla de lista de archivos o la pantalla del Picture CD.
2 Presione el botón ENTER.
- El modo de presentación cambiará.
INSERTAR / CORTAR:
La imagen completa aparece de una vez.
APAR. / DESAP. GRADUAL:
La imagen aparece y luego desaparece gradualmente.
3 Presione el botón MODE para salir de este modo.
Voz en avance rapido
DVD
La voz en avance rápido sólo se encuentra disponible en los discos grabados en el formato Dolby Digital y esta función se puede hacer un poco más rápida o lenta manteniendo la calidad del sonido, como el de la reproducción normal.
1 Durante la reproducción, presione repetidamente el botón MODE hasta que aparezca el ajuste de velocidad de diálogo.
"APDO." aparece en la pantalla del televisor.
2 Presione el botón ENTER o los botones del Cursor (◀ o ▶) para cambiar entre ♪ (x1,3), ♪ (x0,8) y APDO.
♪ : La reproducción se hace a aproximadamente 0,8 veces la velocidad de reproducción normal.
♪♪ : La reproducción se hace a aproximadamente 1,3 veces la velocidad de reproducción normal.
3 Presione el botón PLAY para volver a la reproducción normal.
NOTAS:
- El ajuste se desactivará cada vez que se presione el botón STOP.
- Durante esta función se pueden ver subtítulos.
- Mientras se utiliza este modo no se pueden cambiar los ajustes de control de imagen, nivel del negro y audio (idioma).
- Mientras se utiliza este modo no funciona el sonido envolvente virtual.
- Esta función tal vez no se active en algunos puntos de un disco.
- El sonido LPCM saldrá cuando se utilice la conexión de audio digital (COAXIAL o OPTICAL).
- Cuando se utilice la función de velocidad de diálogo con la salida digital de 5,1 canales, el sonido de salida analógica se fijará en 2 canales.
- Cuando se utilice la conexión de audio digital sólo estará disponible el sonido Dolby Digital.
Idioma de audio
DVD
El reproductor DVD le permite seleccionar un idioma (si se encuentran disponibles múltiples idiomas) durante la reproducción de los discos DVD.
1 Presione el botón AUDIO durante la reproducción.
2 Presione repetidamente el botón AUDIO para seleccionar su idioma deseado.
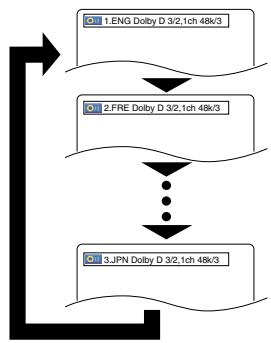
flowchart
graph TD
    A["1.ENG Dolby D 3/2,1ch 48k/3"] --> B["2.FRE Dolby D 3/2,1ch 48k/3"]
    B --> C["..."]
    C --> D["3.JPN Dolby D 3/2,1ch 48k/3"]
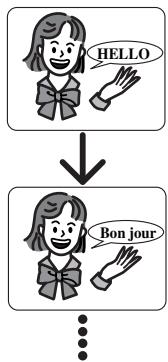
flowchart
graph TD
    A["HeLa"] --> B["Bon jour"]
    style A fill:#f9f,stroke:#333
    style B fill:#bbf,stroke:#333
NOTAS:
- El modo del sonido no se podrá cambiar durante la reproducción de los discos que no estén grabados en el modo de sonido doble.
-
Algunos discos permiten cambiar el ajuste del idioma de audio en el menú del disco. (La operación cambia según los discos. Consulte el manual entregado con el disco.)
-
Presionar el botón AUDIO puede que no sirva de nada con algunos DVDs con múltiples idiomas (DVDs que permiten cambiar el ajuste del idioma de audio en el menú del disco, por ejemplo).
- Si elige un idioma que tiene un código de idioma de tres letras, el código se visualizará cada vez que usted cambie el ajuste del idioma de audio. Si elige otro idioma se visualizará “---” (consulte la página 24).
- Durante el modo de voz en avance rapido no se puede seleccionar el idioma de audio.
- Si el disco no tiene idioma de audio se visualizará "NO DISPONIBLE".
Idioma de subtítulos
DVD
El reproductor DVD le permite seleccionar un idioma para los subtítulos (si se encuentran disponibles múltiples idiomas) durante la reproducción de un DVD.
1 Presione el botón SUBTITLE durante la reproducción.
2 Presione el botón SUBTITLE repetidamente para seleccionar el idioma deseado para los subtítulos.
- El idioma seleccionado se mostrará en la barra de visualización en la parte superior de la pantalla.
- Presione los botones del Cursor (◀ o ▶) para encender o apagar los subtítulos durante la reproducción.
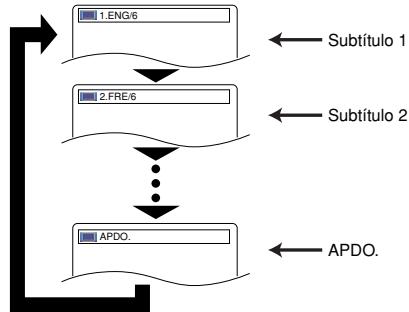
flowchart
graph TD
    A["1.ENG/6"] --> B["2.FRE/6"]
    B --> C["..."]
    C --> D["APDO."]
    E["Subtítulo 1"] --> B
    F["Subtítulo 2"] --> B
    G["APDO."] --> D
3 Para desactivar la función de subtítulos, presione el botón SUBTITLE repetidamente hasta visualizar APDO.
NOTAS:
- Algunos discos permiten elegir el idioma de los subtítulos en el menú del disco. (La operación cambia según los discos. Consulte el manual entregado con el disco.)
- Presionar el botón SUBTITLE puede no funcionar con algunos DVDs con idiomas de subtítulos múltiples (ej.: DVDs que permiten ajustar el idioma de subtítulos en el menú del disco).
- Si el idioma deseado no aparece después de presionar el botón SUBTITLE varias veces, significará que el disco no tiene subtítulos en ese idioma.
- Si elige un idioma que tiene un código de idioma de tres letras, el código aparecerá cada vez que cambie el idioma de los subtítulos. Si selecciona cualquier otro idioma, se visualizará “---” en lugar del código (consulte la página 24).
- Si el disco no tiene idioma de subtítulos se visualizará "NO DISPONIBLE".
Ángulo de cámara
DVD
Algunos discos DVD contienen escenas que han sido tomadas simultáneamente desde distintos ángulos. Se puede cambiar el ángulo de la cámara cuando la marca ( ) aparece en la pantalla.
1 Presione el botón ANGLE durante la reproducción.
- El ángulo seleccionado aparecerá en la barra de visualización en la parte superior de la pantalla.
2 Presione el botón ANGLE repetidamente para seleccionar el ángulo deseado.
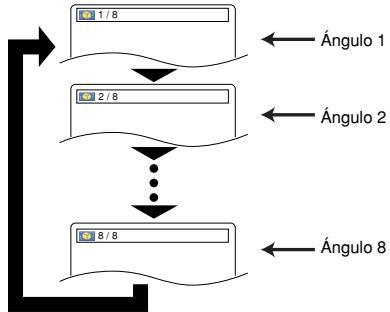
flowchart
graph TD
    A["1/8"] --> B["2/8"]
    B --> C["..."]
    C --> D["8/8"]
    style A fill:#f9f,stroke:#333
    style B fill:#f9f,stroke:#333
    style C fill:#f9f,stroke:#333
    style D fill:#f9f,stroke:#333
    note1["Ángulo 1"] --> A
    note2["Ángulo 2"] --> B
    note3["Ángulo 8"] --> D
NOTA:
- Si el ajuste de "ICONO DE ÁNGULO" está en "APDO." en el menú de visualización, "☐" no aparecerá.
Control de imagen
DVD
El control de imagen ajusta la luminosidad, el contraste, el color, la corrección gamma y la nitidez de la visualización específica.
1 Presione el botón MODE durante la reproducción.
2 Presione los botones del Cursor (▲ o ▼) para cambiar el elemento.
3 Presione el botón ENTER o los botones del Cursor (◀ o ▶) para ajustar el nivel deseado.
- Se puede seleccionar -6, -5, -4, -3, -2, -1, 0, +1, +2, +3, +4, +5 y +6.
4 Presione el botón RETURN para volver a la reproducción normal.
NOTAS:
- Los ajustes por defecto para todos los ítems en Control de imagen están "0".
- La visualización de ajuste desaparecerá en 10 segundos si no se utiliza.
- Esta función no se puede utilizar durante la voz en avance rapido (consulte la página 20).
Modo de sonido estereofónico
CD
1 Presione el botón AUDIO repetidamente durante la reproducción para seleccionar el modo de sonido deseado.
ESTÉREO - los canales derecho e izquierdo están activos (estéreo)
L-ch - sólo el canal izquierdo está activo R-ch - sólo el canal derecho está activo
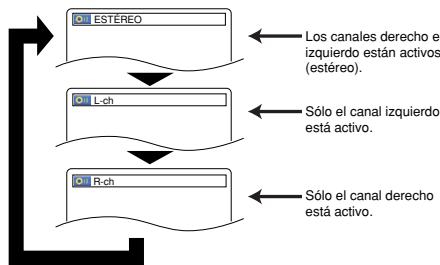
flowchart
graph TD
    A["ESTÉREO"] --> B["L-ch"]
    B --> C["R-ch"]
    D["Los canales derecho e izquierdo están activos (estéreo)."] --> A
    E["Sólo el canal izquierdo está activo."] --> B
    F["Sólo el canal derecho está activo."] --> C
NOTA:
- EI ESTÉREO sólo puede salir cuando se reproducen DTS CD.
Sonido envolvente virtual
DVD
CD
MP3
WMA
Puede disfrutar del efecto del sonido envolvente con dos altavoces.
1 Durante la reproducción, presione repetidamente el botón MODE hasta que aparezca el ajuste de soni
2 Presione el botón ENTER para establecer 1 (efecto natural), 2 (efecto realizado) u APDO. (apagado).
3 Presione el botón RETURN para salir.
NOTAS:
- Seleccione APDO. para el sonido envolvente virtual o baje el volumen si se distorsiona el sonido.
- El sonido envolvente virtual no producirá ningún efecto si el modo del sonido es otro diferente de “ESTEREO” (para la reproducción de Audio CD solamente).
- Esta función no se puede utilizar durante la voz en avance rapido (consulte la página 20).
Ajuste del nivel del negro
DVD-V
Ajuste el nivel del negro para que las partes negras de la imagen tengan el brillo que usted prefiera.
1 Durante la reproducción, presione repetidamente el botón MODE hasta que aparezca el ajuste del nive
2 Presione el botón ENTER para cambiar entre ENC. u APDO.
ENC. (Predeterminado): Hace que las partes oscuras sean más brillantes.
APDO.: Muestra la imagen original como fue grabada.
3 Presione el botón RETURN para salir.
NOTA:
- Esta función no se puede utilizar durante el modo de voz en avance rapido (consulte la página 20).
En el menú de configuración se encuentran disponibles los modos QUICK, CUSTOM y INITIALIZE (véase las páginas 22-24). El modo QUICK se compone de ítems de los menús de configuración utilizados frecuentemente y están acompañados por la marca QUICK. Puede hacer todos los ajustes en el modo CUSTOM.
Selección de idioma
Las opciones de idioma no se encuentran disponibles con algunos discos.
1 Presione el botón SETUP en el modo de parada.
2 Presione los botones del Cursor (◀ o ▶) para seleccionar CUSTOM y luego presione el botón ENTER.
- Aparecerá el modo CUSTOM.
3 Presione los botones del Cursor (◀ o ▶) para seleccionar IDIOMA y luego presione el botón ENTER para confirmar.
4 Presione los botones del Cursor (▲ o ▼) para seleccionar los elementos de abajo y luego presione el botón ENTER.
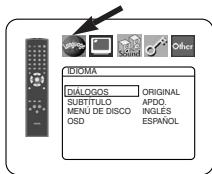
DIÁLOGOS (Predeterminado: ORIGINAL)
- Establece el idioma de audio.
SUBTÍTULO (Predeterminado: APDO.)
- Establece el idioma de subtítulos.
MENÚ DE DISCO (Predeterminado: INGLÉS)
- Establece el idioma para el menú DVD.
OSD (Predeterminado: ENGLISH) QUICK
- Establece el idioma para la visualización en pantalla.
5 Presione los botones del Cursor (▲ o ▼) para seleccionar un ajuste y luego presione el botón ENTER.
- Si se selecciona OTRO en la pantalla DIÁLOGOS, SUBTÍTULO o MENÚ DE DISCO, presione los botones numéricos para introducir el código de cuatro dígitos del idioma deseado (consulte la lista de códigos de idiomas en la página 24).
- Sólo se pueden seleccionar los idiomas que se encuentren grabados en el disco.
6 Presione el botón SETUP para salir y activar el ajuste nuevo.
NOTA:
- El ajuste de idioma para DIÁLOGOS y SUBTÍTULO no se encuentra disponible en algunos discos. Utilice los botones AUDIO y SUBTITLE. Detalles en la página 20.
Ajustes de visualización
Puede cambiar ciertos aspectos de las pantallas de visualización de los DVD, el modo vista fija y Progresivo.
1 Presione el botón SETUP en el modo de parada.
2 Presione los botones del
Cursor (◀ o ▶) para seleccionar CUSTOM y luego presione el botón ENTER.
• Aparecerá el modo CUSTOM.
3 Presione los botones del
Cursor (◀ o ▶) para
seleccionar PANTALLA y luego presione el botón ENTER para confirmar.
4 Presione los botones del Cursor (▲ o ▼) para seleccionar los elementos de abajo y luego presione el botón ENTER.
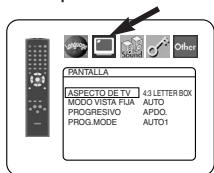
ASPECTO DE TV QUICK
(Predeterminado: 4:3 LETTER BOX)
- Presione los botones del Cursor (▲ o ▼) para seleccionar un elemento y luego presione el botón ENTER.
- Seleccione 4:3 LETTER BOX para que aparezcan franjas negras en la parte superior e inferior de la pantalla.
- Seleccione 4:3 PAN & SCAN para ver la imagen con toda su altura y ambos lados recortados.
- Seleccione 16:9 WIDE si se ha conectado un televisor de pantalla panorámica al reproductor DVD.
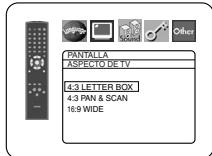
MODO VISTA FIJA
(Predeterminado: AUTO)
- Presione los botones del Cursor (▲ o ▼) para seleccionar un elemento (AUTO, IMAGEN o CUADRO) y luego presione el botón ENTER.
- Esta función le permite ajustar la resolución y la calidad de la imagen en el modo de imagen fija.
- Una imagen individual en la pantalla de TV se denomina “cuadro” que se compone de dos imágenes separadas llamadas “imagen”. Algunas imágenes pueden verse borrosas en la posición AUTO en el modo de vista fija debido a las características de sus datos.
- AUTO: Selecciona automáticamente el ajuste para la mejor resolución (CUADRO o IMAGEN) basado en las características de los datos de la imagen.
- IMAGEN: Seleccione IMAGEN cuando las imágenes siguen estando inestables incluso cuando se seleccionó AUTO. El IMAGEN estabiliza las imágenes aunque la calidad de la imagen puede verse mala debido a la limitada cantidad de datos.
- CUADRO: Seleccione CUADRO para mostrar imágenes relativamente quietas con gran resolución. CUADRO mejora la calidad de la imagen aunque puede desestabilizar las imágenes debido a que salen simultáneamente datos de dos campos.
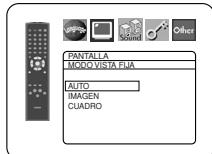
PROGRESIVO QUICK
(Predeterminado: APDO.)
- Presione los botones de del Cursor (▲ o ▼) para poner PROGRESIVO en ENC. o en APDO. y luego presione el botón ENTER.
- El ajuste se activará cuando usted salga de la pantalla de configuración presionando SETUP.
- Cuando PROGRESIVO esté en ENC., P.SCAN aparecerá en la pantalla de visualización del reproductor DVD después de salir de la pantalla de configuración.
- Consulte la página 11 para conocer más detalles.
PROG.MODE (Predeterminado: AUTO1)
- Presione los botones del Cursor (▲ o ▼) para una selección de ítem (AUTO1, AUTO2 o VIDEO) y presione el botón ENTER.
- Esta función permite seleccionar la salida de imagen dependiendo del material base (video o película) o las imágenes de DVD grabadas cua VIDEO está en COMPONENTE
- AUTO1: Selecciona automáticamente la mejor salida de imagen (AUTO2 o VIDEO) basada en la información del flujo de datos.
- AUTO2: Sale una combinación de los campos superior e inferior como una imagen de un fotograma.
- VIDEO: Sale el campo superior ó inferior como imagen de un fotograma.
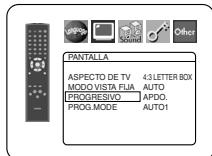
5 Presione el botón SETUP para salir y activar el ajuste nuevo.
Ajustes de audio
Elija los ajustes de audio apropiados para su equipo, los cuales sólo se activarán durante la reproducción de discos en el reproductor DVD.
1 Presione el botón SETUP en el modo de parada.
2 Presione los botones del Cursor (◀ o ▶) para seleccionar CUSTOM y luego presione el botón ENTER. • Aparecerá el modo CUSTOM.
3 Presione los botones del Cursor (◀ o ▶) para seleccionar AUDIO y luego presione el botón ENTER para confirmar.
4 Presione los botones del Cursor (▲ o ▼) para seleccionar un elemento y luego presione el botón ENTER.
- Esta pantalla del menú contiene 2 páginas. Presione repetidamente el botón del Cursor (▼) para que aparezca la siguiente página.
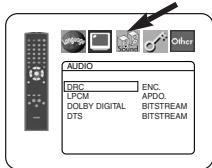
DRC (Control de margen dinámico)
(Predeterminado: ENC.)
- Para comprimir la gama del volumen del sonido.
- La función DRC sólo se encuentra disponible en los discos grabados en el formato Dolby Digital.
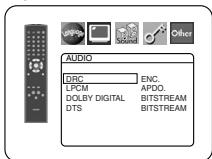
LPCM (Predeterminado: APDO.)
- Póngalo en ENC. cuando la salida sea de 48kHz (o 44,1kHz).
- Esta función sólo se encuentra disponible con la salida digital de un disco grabado con 96kHz (o 88,2kHz).
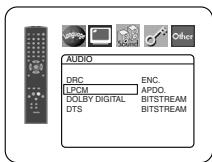
Cuando se reproduce un disco con protección del copyright
- El sonido se muestreará en sentido descendente a 48kHz (o 44,1kHz), aunque ponga APDO.
DOLBY DIGITAL
(Predeterminado: BITSTREAM)
- Ponga BITSTREAM cuando el reproductor esté conectado a un decodificador Dolby Digital.
- Esta función es efectiva sólo para las conexiones COAXIAL y OPTICAL.
BITSTREAM:
Salen las señales DOLBY
DIGITAL como Bitstream.
PCM: Conversión de Dolby Digital a PCM.
QUICK
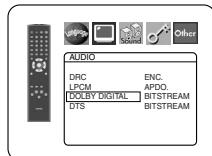
DTS (Predeterminado: BITSTREAM) QUICK
- Ponga BITSTREAM cuando el reproductor esté conectado a un decodificador DTS.
BITSTREAM: Salen las señales DTS como Bitstream. APDO.: No se emitriá senál de salida de sonido DTS.
- El sonido DTS se emite solamente desde las salidas de audio digital.
5 Presione el botón SETUP para salir y activar el ajuste nuevo.
Control acceso
El control paterno permite seleccionar un límite que evita que sus hijos vean material para adultos en el DVD. Una contraseña de cuatro cifras elegida le dará este control.
NIVEL ACCESO
Nivel de clasificación le permite establecer el nivel de clasificación de sus discos DVD. La reproducción se detendrá si la clasificación del disco sobrepasa el nivel que usted haya puesto.
1 Presione el botón SETUP en el modo de parada.
2 Presione los botones del Cursor (◀ o ▶) para seleccionar CUSTOM y luego presione el botón ENTER.
3 Presione los botones del Cursor (◀ o ▶) para seleccionar CLASIFICACIÓN y luego presione el botón ENTER.
4 Presione los botones Numéricos para introducir su contraseña de 4 dígitos.
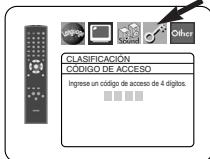
- Cuando haga esto por primera vez, introduzca cualquier número de 4 dígitos presionando los botones Numéricos (excepto el 4737), y luego presione el botón ENTER. Ese número será utilizado como contraseña desde la segunda vez que la utiliza en adelante. Anote su contraseña por si la olvida.
- Si olvida su contraseña, presione 4, 7, 3, 7. La contraseña original se borrará y los niveles de los padres se establecerán en TODO.
Introduzca una contraseña nueva de 4 dígitos y luego presione el botón ENTER.
5 Presione los botones del Cursor (▲ o ▼) para seleccionar NIVEL ACCESO y luego presione el botón ENTER.
6 Presione los botones del Cursor (▲ o ▼) para seleccionar el nivel deseado y luego presione el botón ENTER.
7 Presione el botón SETUP para salir y activar el ajuste nuevo.
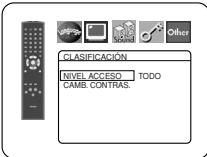
NOTA:
- Esta función puede que no se actiye con algunos DVDs. Asegúrese si CLASIFICACIÓN funciona de la forma que usted lo ha ajustado.
Para cambiar la contraseña:
1) Siga los pasos 1 a 4 de arriba.
2) Presione los botones del Cursor (▲ o ▼) para seleccionar CAMB. CONTRAS. y luego presione el botón ENTER.
3) Introduzca una contraseña nueva de 4 dígitos y luego presione el botón ENTER.
4) Presione el botón SETUP para salir.
SI OLVIDA LA CONTRASEÑA
1 Presione 4, 7, 3, 7 en el paso 4.
- La contraseña se cancelará y el nivel de clasificación se pondrá en TODO.
2 Repita los pasos 4 - 7 para volver a establecer el bloqueo de los padres.
NIVEL DE CONTROL
• TODO
El bloqueo de los padres se cancela.
- Nivel 8
Se pueden reproducir programas de DVD de cualquier clasificación (adultos/todos los públicos/niños).
- Niveles 7 a 2
Sólo se pueden reproducir los programas de DVD para uso general y para niños.
- Nivel 1
Sólo se pueden reproducir los programas de DVD aptos para niños, mientras que los programas para adultos y de uso general están prohibidos.
Ajuste otros
Esta función permite ajustar la disponibilidad del Icono de Ángulo, desconexión automática, brillo del panel de indicaciones y modo de exhibición de diapositivas.
1 Presione el botón SETUP en el modo de parada.
2 Presione los botones del Cursor (◀ o ▶) para seleccionar CUSTOM y luego presione el botón ENTER.
- Aparecerá el modo CUSTOM.
3 Presione los botones del Cursor (◀ o ▶) para seleccionar Other y luego presione el botón ENTER para confirmar.
4 Presione los botones del Cursor (▲ o ▼) para seleccionar los elementos de abajo y luego presione el botón ENTER.
ICONO DE ÁNGULO (Predeterminado: ENC.)
- Presione repetidamente el botón ENTER para ENC. o APDO. la marca del ángulo.
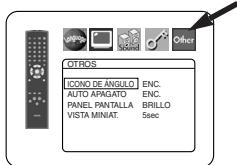
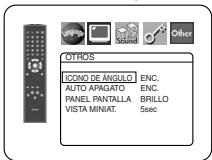
AUTO APAGATO (Predeterminado: ENC.)
- Presione repetidamente el botón ENTER para ENC. o APDO. el apagado automático de la alimentación. - Esto hará que el reproductor DVD se apague automáticamente si está más de 30 minutos sin ser utilizado
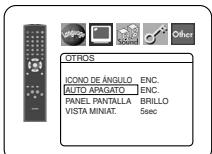
PANEL PANTALLA (Predeterminado: BRILLO)
- Presione los botones del Cursor (▲ o ▼) para seleccionar un elemento (BRILLIO, OSCURO y AUTO) y luego presione el botón ENTER. - Cuando se seleccione AUTO, la visualización se oscurecerá durante la reproducción.
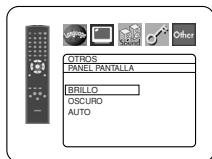
VISTA MINIAT. (Predeterminado: 5sec)
- Ajusta la velocidad de reproducción del JPEG VISTA MINIAT. - Presione los botones del Cursor (▲ o ▼) tpara seleccionar entre 5 sec. y 10 sec. y presione el botón ENTER.
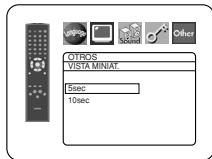
5 Presione el botón SETUP para salir.
Reprograme al ajuste por defecto (excepto Control acceso)
Esto permite cambiar todo lo seleccionado en CONFIGURACIÓN (excepto CLASIFICACIÓN) a los ajustes predeterminados
1 Presione el botón SETUP en el modo de parada.
2 Presione los botones del Cursor (◀ o ▶) para seleccionar INITIALIZE y luego presione el botón ENTER.
3 Presione los botones del Cursor (▲ o ▼) para seleccionar SÍ y luego presione el botón ENTER.
4 Presione el botón SÊTÚP para salir.
NOTA:
- Si desea salir de inicializar, seleccione NO en el paso 3.
Lista de códigos de idiomas
| Idioma | Código | Idioma | Código | Idioma | Código | Idioma | Código |
| A-B | Finlandés [FIN] | 5255 | Lituano | 5866 | Sueco [SWE] | 6568 | |
| Abcaciano | 4748 | Fiyiano | 5256 | Macedonio | 5957 | Sundanese | 6567 |
| Afarí | 4747 | Francés [FRE] | 5264 | Malgache | 5953 | T | |
| Afrikaans | 4752 | Frisio | 5271 | Malayo | 5965 | Tagalo | 6658 |
| Albanés | 6563 | Gaélico escocés | 5350 | Malayalam | 5958 | Tailandés | 6654 |
| Alemán [GER] | 5051 | Galés | 4971 | Maltés | 5966 | Tajik | 6653 |
| Amárico | 4759 | Gallego | 5358 | Maorí | 5955 | Tamil | 6647 |
| Árabe | 4764 | Georgiano | 5747 | Marathi | 5964 | Tártaro | 6666 |
| Armenio | 5471 | Griego [GRE] | 5158 | Moldavo | 5961 | Telugu | 6651 |
| Assamés | 4765 | Groenlandés | 5758 | Mongol | 5960 | Tibetano | 4861 |
| Aymará | 4771 | Guaraní | 5360 | Nauru | 6047 | Tigriña | 6655 |
| Azerí | 4772 | Gujarati | 5367 | Nepalí | 6051 | Tongano | 6661 |
| Bashkirio | 4847 | Hausa | 5447 | Noruego [NOR] | 6061 | Tsonga | 6665 |
| Bengalí;Bangla | 4860 | Hebreo | 5569 | O-R | Turco [TUR] | 6664 | |
| Bielorruso | 4851 | Hindi | 5455 | Occitano | 6149 | Turcomano | 6657 |
| Bihari | 4854 | Holandés [DUT] | 6058 | Oriya | 6164 | Twi | 6669 |
| Birmano | 5971 | Húngaro [HUN] | 5467 | Oromo(Afan) | 6159 | U-Z | |
| Bislama | 4855 | I-K | Pashto;Pushto | 6265 | Ucraniano | 6757 | |
| Bretón | 4864 | Indonesio | 5560 | Persa | 5247 | Urdu | 6764 |
| Búlgaro | 4853 | Inglés [ENG] | 5160 | Polaco | 6258 | Uzbeko | 6772 |
| Butanés | 5072 | Interlingua | 5547 | Portugués [POR] | 6266 | Vascuence | 5167 |
| C-E | Interlingue | 5551 | Punjabí | 6247 | Vietnamita | 6855 | |
| Cachemir | 5765 | Inupiak | 5557 | Quechua | 6367 | Volapük | 6861 |
| Camboyano | 5759 | Irlandés [IRI] | 5347 | Rhaeto-Romance | 6459 | Wolof | 6961 |
| Catalán | 4947 | Islandés [ICE] | 5565 | Romano [RUM] | 6461 | Xhosa | 7054 |
| Checo | 4965 | Italiano [ITA] | 5566 | Ruso [RUS] | 6467 | Yidish | 5655 |
| Chino [CHI] | 7254 | Japonés [JPN] | 5647 | S | Yoruba | 7161 | |
| Cingalés | 6555 | Javanés | 5669 | Samoano | 6559 | Zulú | 7267 |
| Coreano [KOR] | 5761 | Kannada | 5760 | Sangho | 6553 | ||
| Corso | 4961 | Kazaj | 5757 | Sánscrito | 6547 | ||
| Croata | 5464 | Kinyarwanda | 6469 | Serbio | 6564 | ||
| Danés [DAN] | 5047 | Kirguiz | 5771 | Serbocroata | 6554 | ||
| Eslovaco | 6557 | Kirundi | 6460 | Sesotho | 6566 | ||
| Esloveno | 6558 | Kurdo | 5767 | Setswana | 6660 | ||
| Español [SPA] | 5165 | L-N | Shona | 6560 | |||
| Esperanto | 5161 | Laosiano | 5861 | Sindhi | 6550 | ||
| Estonio | 5166 | Latín | 5847 | Siswat | 6565 | ||
| F-H | Latvio;Letón | 5868 | Somali | 6561 | |||
| Faroese | 5261 | Lingala | 5860 | Suahili | 6569 |
Si usted selecciona un Idioma con un código de idioma de tres letras (escrito en corchetes), el código se visualizará cada vez que usted cambie el ajuste de idioma de Audio o Subtítulo en la página 20. Si usted selecciona cualquier otro idioma, ‘---’ se visualizará en su lugar.
Si el reproductor de DVD no funciona correctamente al utilizarlo de acuerdo con las instrucciones de este manual, verifique el reproductor consultando la lista de comprobación siguiente.
| Problema | Solución | Página |
| El reproductor no se enciende | -Compruebe si el cable de alimentación de CA está conectado correctamente.-Desconecte el cable de alimentación una vez, espere 5 a 10 segundos y vuelva a conectarla. | — |
| Ausencia de sonido o imagen | -Compruebe si el televisor está encendido.-Compruebe la conexión de vídeo.-Compruebe la conexión del cable de VÍDEO/AUDIO al televisor.-Compruebe si el modo PROGRESIVO ha sido ajustado correctamente. | —131322 |
| Imagen distorsionada | -A veces puede producirse una ligera distorsión de la imagen. Esto no indica mal funcionamiento.-Conecte el reproductor directamente al televisor. | —13 |
| La imagen aparece completamente distorsionada o en blanco y negro al reproducir un DVD | -Conecte el reproductor de DVD directamente al televisor.-Asegúrese de que el disco sea compatible con el reproductor de DVD. | 136 |
| Ausencia de sonido o sonido distorsionado | -Ajuste el volumen.-Compruebe que los altavoces están conectados correctamente. | —12 |
| Ausencia de audio en la salida digital | -Compruebe las conexiones digitales.-Compruebe los ajustes de audio. | 1223 |
| No se emite sonido DTS | -Use un conector DIGITAL OUT al emitir sonido DTS. | 12, 23 |
| La imagen se detiene momentáneamente durante la reproducción | -Compruebe si el disco tiene huellas dactilares o rayas y límpielo con un paño suave desde el centro hacia el borde.-Limpie el disco. | 2626 |
| No se puede reproducir el disco | -Limpie el disco.-Asegúrese de que el lado de la etiqueta esté hacia arriba.-Compruebe si el disco tiene algún defecto; para ello, intente reproducir otro disco.-Desactive la función de control acceso o cambie el nivel de acceso.-Cargue un disco que pueda reproducirse en este reproductor. | 2614—236 |
| No se regresa a la pantalla inicial al extraer el disco | -Apague y vuelva a encender el reproductor para reinicializarlo. | — |
| El reproductor no responde al control remoto | -Apunte el control remoto directamente hacia el sensor del panel delantero del reproductor.-Disminuya la distancia al reproductor.-Cambie las pilas del control remoto.-Vuelva a instalar las pilas observando la polaridad correcta (signos +/-) de las mismas. | 8—1010 |
| Los botones no funcionan o el reproductor deja de responder | -Para reinicializar completamente el reproductor, desconecte el cable de CA de la toma de corriente de CA durante 5 a 10 segundos. | — |
| El reproductor no responde a ciertos comandos durante la reproducción | -Puede ser que el disco reproducido no admite ciertas operaciones. Consulte las instrucciones suministradas con el disco. | 6 |
| El reproductor de DVD no puede leer CDs/DVDs | -Antes de enviar el reproductor de DVD al servicio técnico, use un CD/DVD de limpieza (disponible en el comercio) para limpiar la lente. | 26 |
| No se puede cambiar el ángulo de cámara | -No es posible cambiar el ángulo en DVDs que no contienen escenas grabadas desde diferentes ángulos. En algunos casos, sólo se graban escenas específicas desde diferentes ángulos. | 21 |
| La reproducción no comienza cuando se selecciona el título | -Compruebe el ajuste de la función de control “CLASIFICACIÓN”. | 23 |
| Ha olvidado la contraseña para el nivel de acceso | -Introduzca la contraseña predeterminada “4737”; esto borrará la contraseña anterior. | 23 |
NOTAS:
- Algunas funciones no se encuentran disponibles en ciertos modos específicos, pero esto no indica mal funcionamiento. Lea las descripciones de este manual de instrucciones para conocer detalles acerca de las operaciones correctas.
- Las funciones de reproducción desde una pista específica y reproducción aleatoria no pueden utilizarse durante el modo de reproducción programada.
- En algunos discos, se prohíben algunas funciones.
SISTEMA DE SEÑALES
Sistema de color NTSC
DISCOS UTILIZABLES
(1) Discos de DVD de Vídeo
Discos de una cara y 1 capa, de 12 cm; discos de una cara y 2 capas de 12 cm; discos de dos caras y 2 capas (1 capa por lado) de 12 cm; discos de una cara y 1 capa de 8 cm; discos de una cara y 2 capas de 8 cm; discos de dos caras y 2 capas (1 capa por lado) de 8 cm.
(2) DVD-R/DVD-RW
(3) Discos compactos (CD de Audio) de 12 y 8 cm
(4) CD-R/CD-RW
SALIDA S-VÍDEO
Nivel de salida Y: 1 Vp-p (75 Ω/ohmios)
Nivel de salida C: 0,286 Vp-p
Conectores de salida: Conectores S, 1 juego
SALIDA DE VÍDEO
Nivel de salida: 1 Vp-p (75 Ω/ohmios)
Conector de salida: Conectores de espiga, 1 juego
SALIDA DE COMPONENTE
Nivel de salida Y: 1 Vp-p (75 Ω/ohmios)
Nivel de salida PB/CB: 0,7 Vp-p (75 Ω/ohmios)
Nivel de salida PR/CR: 0,7 Vp-p (75 Ω/ohmios)
Conector de salida: Conectores de espiga, 1 juego
SALIDA DE AUDIO
Nivel de salida: 2 Vrms
Conector de salida de 2 canales (L, R):
Conector de espiga, 1 juego
PROPIEDADES DE SALIDA DE AUDIO
(1) Respuesta de frecuencia
1 DVDs (PCM lineal) : 4Hz a 22kHz (frec. de muestreo de 48kHz)
: 4Hz a 44kHz (frec. de muestreo de 96kHz)
2 CDs : 4Hz a 20kHz
(2) Relación S/R : 115 dB
(3) Distorsión armónica total : 1 kHz CD: 0,004%
(4) Gama dinámica : DVD: 100 dB
CD: 98 dB
SALIDA DE AUDIO DIGITAL
Salida digital óptica: Conector óptico, 1 juego
Salida digital coaxial: Conector de espiga, 1 juego
ALIMENTACIÓN
CA 120 V, 60 Hz
CONSUMO
10 W (Modo de espera: 1,0 W)
DIMENSIONES EXTERNAS MÁXIMAS
Ancho: 17-3/32" (435mm)
Alto: 2-61/64" (75mm)
Prof: 12-13/64" (310mm)
(incluyendo las partes salientes)
PESO
5,06 lbs (2,3 kg)
UNIDAD DE CONTROL REMOTO
RC-1009
Impulsos infrarrojos
Alimentación: DC 3 V, 2 pilas R6P/AA
MANTENIMIENTO
Limpieza de la cubierta
- Use un paño suave ligeramente humedecido en una solución de detergente suave. No utilice una solución que contenga alcohol, gasolina, amoníaco o sustancias abrasivas.
Limpieza de los discos
- Cuando un disco esté sucio, límpielo con un paño de limpieza. Limpie el disco desde el centro hacia el exterior. No lo haga con movimientos circulares.
- No use solventes tales como benceno, diluyente, limpiadores disponibles en el comercio, detergente, agentes de limpieza abrasivos o pulverizadores antiestática diseñados para discos analógicos.
Limpieza del lector óptico
- Si el reproductor no funciona correctamente a pesar de que se han seguido las instrucciones de las secciones pertinentes y realizado las comprobaciones descritas en la sección “GUÍA PARA LA SOLUCIÓN DE PROBLEMAS” de este manual, puede ser que el lector óptico láser esté sucio. Para la inspección y limpieza del lector óptico láser, consulte a su distribuidor o centro de servicio autorizado.
Manipulación de los discos
- Útilice discos que tengan los logotipos siguientes.
- Manipule los discos de manera tal que las huellas dactilares y el polvo no se adhieran a la superficie de los mismos.
- Guarde siempre los discos en sus cajas protectoras cuando no los esté utilizando.
- Tenga presente que no es posible reproducir discos con formas especiales (discos con forma de corazón, discos hexagonales, etc.) en este equipo. No intente reproducir este tipo de discos, pues podría dañar el reproductor.



VIDEO

R

R W

The Ground Truth image displays a single, solid horizontal line. According to Rule 2 (UNDERSCORE & LINE RULES), this is a stylistic or background line, not a placeholder underscore. Therefore, the OCR result must ignore it and output nothing or only meaningful text. The provided OCR content is "____", which consists of four underscores. This is an incorrect interpretation of the line as a placeholder, violating the rule that stylistic lines must be ignored. The OCR has hallucinated underscores where none should exist based on the GT's visual context. Hence, the OCR result is inconsistent with the Ground Truth.

Recordable

[EMPTY]

ReWritable

[Non-Text]



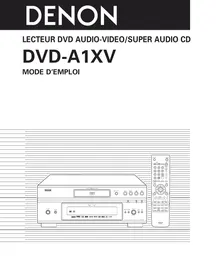
- WARNING: TO REDUCE THE RISK OF FIRE OR ELECTRIC SHOCK, DO NOT EXPOSE THIS APPLIANCE TO RAIN OR MOISTURE.
- CAUTION
- RISK OF ELECTRIC SHOCK DO NOT OPEN
- CAUTION:
- IMPORTANT SAFEGUARDS
- Laser Safety
- RADIO-TV INTERFERENCE
- Important
- Power Supply
- Warning
- WARNING:
- Installation Location
- Cautions on Installation
- NOTE:
- Dew Warning
- Avoid the Hazards of Electrical Shock and Fire
- TABLE OF CONTENTS
- About Copyright
- Notice for the Progressive Scan Outputs
- Supplied Accessories
- Symbols Used in this Manual
- A NOTE ABOUT RECYCLING
- - Progressive Scan system
- • Dolby Digital Sound
- • DTS (Digital Theater System)
- - Dialog Speed
- - Still/Fast/Slow/Step playback
- - Still Mode
- - Random Playback for Audio CD, MP3, JPEG and WMA
- - Program Playback for Audio CD, MP3, JPEG and WMA
- • DVD menus in a desired language
- - Auto Power Off
- - Subtitles in a desired language
- - Selecting a camera angle
- - Choices for audio language and sound mode
- ● Ratings Control (Parental lock)
- ● Automatic detection of discs
- - Playing back an MP3 disc
- - Direct Search
- - On-screen display
- - Dimmer
- - Screen Saver
- - Picture Control
- - Search
- - Repeat
- - Zoom
- - Marker
- - Resume Playback
- - Component Video Out Jacks
- - Bit rate indication
- • DRC (Dynamic Range Control)
- - Displaying a JPEG picture
- ● Reproducing WMA data
- Tour of the Remote Control
- Loading the Batteries
- Cautions On Batteries
- Description - Rear Panel
- DIGITAL OUT Jacks
- AUDIO OUT Jacks
- VIDEO OUT Jack
- COMPONENT VIDEO OUT Jacks
- S-VIDEO OUT Jack
- Selecting Progressive Scan (525p/480p or Interlaced 525i/480i) Playback
- What is Progressive Scanning?
- NOTES:
- NOTES (for Method 2 only):
- Optical cable (commercially available)
- HOW TO CONNECT TO A TV WITHOUT AUDIO/VIDEO INPUT JACKS
- Basic Playback
- Getting started
- Brightness of the Front Panel Display
- General Features
- Disc Menus
- Title Menu
- CALLING UP A MENU SCREEN DURING PLAYBACK
- Still / Pause
- Resume
- Fast Forward / Reverse Search
- Slow Forward / Slow Reverse
- Step by Step Playback
- Zoom
- Title / Chapter Search
- By using the SEARCH MODE button
- By using the SKIP buttons ◀◀▶▶
- Track Search
- Time Search
- DVD CD
- Marker Setup Screen
- DVD | CD
- Repeat
- REPEAT TITLE / CHAPTER
- DVD
- REPEAT TRACK / GROUP / ALL
- CD
- MP3 JPEG WMA
- A-B REPEAT
- Program Playback
- Random Playback
- MP3 / JPEG / WMA Playback
- Information on MP3, JPEG and WMA discs
- Kodak Picture CD
- NOTES on JPEG and Kodak Picture CD:
- NOTES on WMA:
- Changing the On-Screen Display
- WMA
- Slide Show Mode
- JPEG
- Dialog Speed
- Audio Language
- Subtitle Language
- Camera Angle
- Picture Control
- Stereo Sound Mode
- Virtual Surround
- Black Level Setting
- DVD SETUP
- Language Setting
- DIALOG (Default : ORIGINAL)
- SUBTITLE (Default : OFF)
- DISC MENU (Default : ENGLISH)
- OSD (Default : ENGLISH) QUICK
- Display Setting
- TV ASPECT (Default : 4:3 LETTER BOX)
- STILL MODE (Default : AUTO)
- PROGRESSIVE (Default: OFF) QUICK
- PROG.MODE (Default: AUTO1)
- Audio Setting
- DRC (Dynamic Range Control) (Default : ON)
- LPCM SELECT (Default : OFF)
- When playing disc with copyright protection
- DOLBY DIGITAL
- (Default: BITSTREAM)
- DTS
- Ratings Control
- RATING LEVEL
- To Change the Password:
- IF YOU FORGET THE PASSWORD
- CONTROL LEVELS
- Others Setting
- ANGLE ICON (Default : ON)
- AUTO POWER OFF (Default : ON)
- PANEL DISPLAY
- (Default : BRIGHT)
- SLIDE SHOW (Default : 5sec)
- Reset to the Default Settings (except for Ratings Control)
- SIGNAL SYSTEM
- APPLICABLE DISCS
- S-VIDEO OUTPUT
- VIDEO OUTPUT
- COMPONENT OUTPUT
- AUDIO OUTPUT
- AUDIO OUTPUT PROPERTIES
- DIGITAL AUDIO OUTPUT
- POWER CONSUMPTION
- MAXIMUM EXTERNAL DIMENSIONS
- MASS
- REMOTE CONTROL UNIT
- MAINTENANCE
- Cleaning the Cabinet
- Cleaning Discs
- Cleaning the disc lens
- Disc Handling
- ADVERTENCIA: PARA REDUCIR EL RIESGO DE INCENDIO O DESCARGA ELÉCTRICA, NO EXPONGA ESTE APARATO A LA LLUVIA NI A LA HUMEDAD.
- PRECAUCIÓN
- RIESGO DE DESCARGA ELÉCTRICA. NO ABRIR
- PRECAUCIÓN:
- INSTRUCCIONES DE SEGURIDAD IMPORTANTES
- Seguridad del Láser
- INTERFERENCIAS EN RADIO O TELEVISIÓN
- Importante
- Alimentación
- Advertencia
- Lugar de instalación
- Precauciones en la instalación
- NOTA:
- Advertencia acerca del rocío
- Evite los peligros de descarga eléctrica y fuego
- CONTENIDO
- INTRODUCCIÓN
- Acerca del copyright
- Aviso sobre proyecciones con barrido progresivo
- Accesorios suministrados
- Símbolos utilizados en este manual
- JPEG :
- WMA :
- MP3
- ACERCA DEL RECICLAJE
- Si no puede reproducir un disco que tenga una de las marcas anteriores, verifique las siguientes notas.
- - Sistema de exploración progresiva
- - Sonido Dolby Digital
- • DTS (Sistema Cinema Digital)
- - Voz en avance rapido
- - Reproducción de Imagen fija/Avance y retroceso rápido/Cámara lenta/Cuadro por cuadro
- - Modo de Vista Fija
- - Reproducción Aleatoria de CD de Audio, MP3, JPEG y WMA
- - Reproducción Programada de CD de Audio, MP3, JPEG y WMA
- - Menús de DVD en el idioma deseado
- - Apagado automático
- - Subtítulos en el idioma deseado
- - Selección de un ángulo de cámara
- - Elección de idioma de audio y modo de sonido
- - Control acceso
- - Detección automática de discos
- - Reproducción de discos MP3
- - Búsqueda directa
- - Visualización en pantalla
- - Atenuador
- - Salvapantalla
- - Control de imagen
- - Búsqueda
- - Repetición
- - Marcador
- - Reproducción con reanudación
- - Conectores de salida de vídeo de componente
- - Indicación de velocidad en bits
- • DRC (Control de margen dinámico)
- - Visualización de imágenes JPEG
- - Reproducción de datos WMA
- Descripción del control remoto
- Instalación de las pilas
- Precauciones concernientes a las pilas
- Descripción – panel trasero
- Conectores DIGITAL OUT
- Conectores AUDIO OUT
- Conector VIDEO OUT
- Conectores COMPONENT VIDEO OUT
- Conector S-VIDEO OUT
- Selección de reproducción con exploración progresiva (525p/480p o entrelazada 525i/480i)
- ¿Qué es la exploración progresiva?
- NOTAS:
- Conexión a un sistema de audio
- Método 1
- Método 2
- AUDIO
- NOTAS (Para el método 2 solamente):
- Cable óptico (disponible en el comercio)
- CÓMO CONECTAR EL EQUIPO A UN TELEVISOR QUE NO TIENE CONECTORES DE ENTRADA DE AUDIO/VÍDEO
- Reproducción básica
- Para empezar
- Luminosidad de la pantalla de visualización del panel delantero
- Funciones generales
- Menú de disco
- Menú de títulos
- Cómo visualizar una pantalla de menú durante la reproducción
- Imagen fija / Pausa
- Reanudación
- Búsqueda en avance rápido / retroceso rápido
- Avance lento / Retroceso lento
- Reproducción cuadro por cuadro
- Búsqueda de título / capítulo
- Utilizando el botón SEARCH MODE
- Utilizando los botones SKIP |◀◀▶▶
- Búsqueda de pistas
- Búsqueda de tiempo
- Pantalla de ajuste de marcador
- Repetición
- REPETICIÓN DE TÍTULO / CAPÍTULO
- REPETICIÓN DE PISTA / GRUPO / TODO
- REPETICIÓN A-B
- Reproducción Programada
- Reproducción aleatoria
- Reproducción de archivos MP3 / JPEG / WMA
- Información acerca de los discos MP3, JPEG y WMA
- Presione el botón MENU. Aparece el menú Kodak Picture CD.
- Presione los botones del Cursor (▲/▼/◄/►), seleccione una pista que desee reproducir y luego presione el botón PLAY o ENTER.
- Presione el botón STOP para detener la reproducción.
- Notas acerca de JPEG y Kodak Picture CD:
- Notas acerca de WMA:
- Información en pantalla
- Presione el botón DISPLAY durante la reproducción.
- Presione el botón DISPLAY otra vez.
- Presione el botón DISPLAY tres vez.
- Presione el botón DISPLAY otra vez para salir.
- Presione el botón DISPLAY otra vez para salir.
- Presione el botón DISPLAY otra vez.
- Presione el botón DISPLAY otra vez.
- Presione el botón DISPLAY otra vez para salir.
- Modo de presentación
- Presione el botón ENTER.
- Voz en avance rapido
- Idioma de audio
- Idioma de subtítulos
- Ángulo de cámara
- Control de imagen
- Modo de sonido estereofónico
- Sonido envolvente virtual
- Ajuste del nivel del negro
- Selección de idioma
- DIÁLOGOS (Predeterminado: ORIGINAL)
- SUBTÍTULO (Predeterminado: APDO.)
- MENÚ DE DISCO (Predeterminado: INGLÉS)
- OSD (Predeterminado: ENGLISH) QUICK
- Ajustes de visualización
- ASPECTO DE TV QUICK
- (Predeterminado: 4:3 LETTER BOX)
- MODO VISTA FIJA
- (Predeterminado: AUTO)
- PROGRESIVO QUICK
- (Predeterminado: APDO.)
- PROG.MODE (Predeterminado: AUTO1)
- Ajustes de audio
- DRC (Control de margen dinámico)
- (Predeterminado: ENC.)
- LPCM (Predeterminado: APDO.)
- Cuando se reproduce un disco con protección del copyright
- (Predeterminado: BITSTREAM)
- QUICK
- DTS (Predeterminado: BITSTREAM) QUICK
- Control acceso
- NIVEL ACCESO
- Para cambiar la contraseña:
- SI OLVIDA LA CONTRASEÑA
- Presione 4, 7, 3, 7 en el paso 4.
- Repita los pasos 4 - 7 para volver a establecer el bloqueo de los padres.
- NIVEL DE CONTROL
- Ajuste otros
- ICONO DE ÁNGULO (Predeterminado: ENC.)
- AUTO APAGATO (Predeterminado: ENC.)
- PANEL PANTALLA (Predeterminado: BRILLO)
- VISTA MINIAT. (Predeterminado: 5sec)
- Reprograme al ajuste por defecto (excepto Control acceso)
- SISTEMA DE SEÑALES
- DISCOS UTILIZABLES
- SALIDA S-VÍDEO
- SALIDA DE VÍDEO
- SALIDA DE COMPONENTE
- SALIDA DE AUDIO
- PROPIEDADES DE SALIDA DE AUDIO
- SALIDA DE AUDIO DIGITAL
- CONSUMO
- DIMENSIONES EXTERNAS MÁXIMAS
- PESO
- UNIDAD DE CONTROL REMOTO
- MANTENIMIENTO
- Limpieza de la cubierta
- Limpieza de los discos
- Limpieza del lector óptico
- Manipulación de los discos
Marque : DENON
Modèle : DVD-556
Catégorie : Lecteur dvd