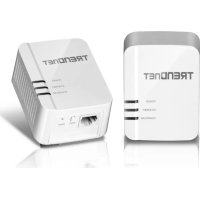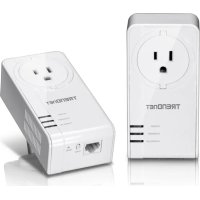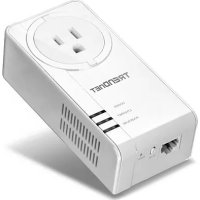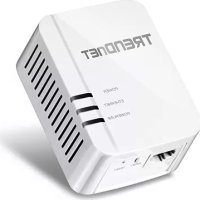
TPL-406E2K - Adaptateur Powerline TRENDNET - Notice d'utilisation et mode d'emploi gratuit
Retrouvez gratuitement la notice de l'appareil TPL-406E2K TRENDNET au format PDF.


| Type de produit | Kit adaptateur Powerline (2 adaptateurs) |
| Marque | TRENDNET |
| Modèle | TPL-406E2K |
| Dimensions (par adaptateur) | 70 x 50 x 63 mm (version UE) |
| Poids (par adaptateur) | 56,7 g |
| Alimentation | 100-240 V AC, 50-60 Hz |
| Consommation électrique | Active : 2,2 W max ; Veille : 0,5 W max |
| Débit Powerline | Jusqu'à 500 Mbps (théorique) |
| Port Ethernet | 1 x 10/100 Mbps Auto-MDIX |
| Normes supportées | IEEE 1901, HomePlug AV, IEEE 802.3, IEEE 802.3u |
| Sécurité | Cryptage AES 128 bits, bouton Sync pour clé aléatoire |
| Nombre maximal d'adaptateurs | 8 (recommandé pour la vidéo) |
| Couverture | Jusqu'à 300 mètres sur le réseau électrique |
| Indicateurs LED | Alimentation, liaison Powerline (vert/ambre/rouge), liaison Ethernet |
| Fonctions supplémentaires | QoS, mode économie d'énergie, utilité de gestion Windows |
| Contenu du kit | 2 adaptateurs, 2 câbles Ethernet (1,5 m), guide d'installation, CD-ROM |
| Entretien et nettoyage | Nettoyer avec un chiffon doux et sec. Ne pas utiliser de produits liquides ou abrasifs. |
| Pièces détachées et réparabilité | Aucune pièce réparable par l'utilisateur. Garantie 3 ans. Contacter le support TRENDnet. |
| Température de fonctionnement | 0 °C à 40 °C |
| Humidité | 95% max (sans condensation) |
FOIRE AUX QUESTIONS - TPL-406E2K TRENDNET
Questions des utilisateurs sur TPL-406E2K TRENDNET
0 question sur cet appareil. Repondez a celles que vous connaissez ou posez la votre.
Poser une nouvelle question sur cet appareil
Téléchargez la notice de votre Adaptateur Powerline au format PDF gratuitement ! Retrouvez votre notice TPL-406E2K - TRENDNET et reprennez votre appareil électronique en main. Sur cette page sont publiés tous les documents nécessaires à l'utilisation de votre appareil TPL-406E2K de la marque TRENDNET.
MODE D'EMPLOI TPL-406E2K TRENDNET
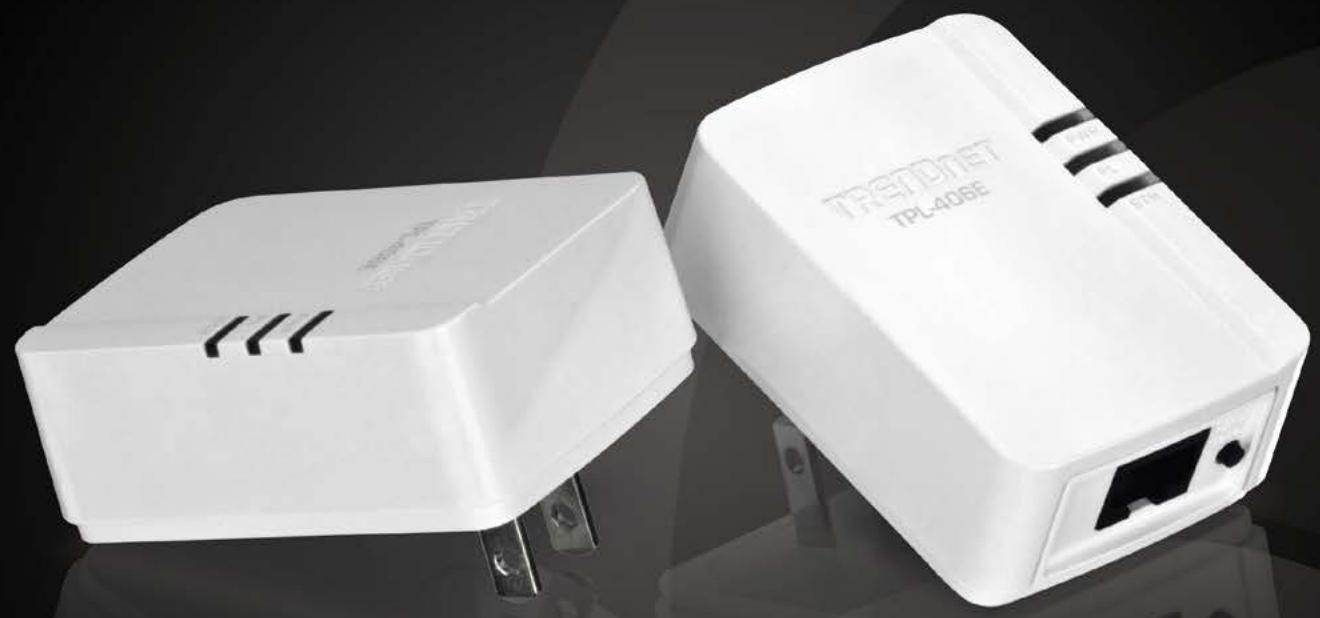
500Mbps Compact Powerline AV Adapter 500Mbps Compact Powerline AV Adapter Kit
TPL-406E/ TPL-406E2K
Contents
Product Overview 1
Package Contents 1
Features 1
Product Hardware Features. 2
Application Diagram 4
Installing your Powerline Adapters 5
Before you Install 5
Connect a Powerline adapter to your router 5
Add adapters to your network 6
Securing your Powerline Network 7
Using the Sync button. 7
Change your default encryption key using the Sync button 7
Add adapters using the Sync button 8
Using the Powerline Utility. 9
Powerline Utility System Requirements 9
Software Installation 10
Using the Utility 12
Powerline Utility Overview 13
Add adapters in the utility and create a customized encryption key 17
Upgrade Firmware 19
Technical Specifications 21
Troubleshooting 22
Appendix 23
Product Overview
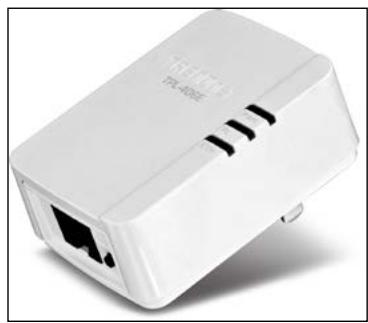
TPL-406E
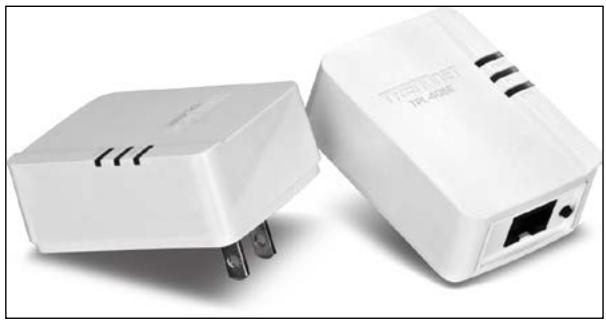
TPL-406E2K
Package Contents
TPL-406E package includes:
1 x TPL-406E: 500Mbps Compact Powerline AV adapter
- Quick Installation Guide
CD-ROM (Utility & User's Guide)
Network cable (1.5 m / 5 ft.)
TPL-406E2K package includes:
- 2 x TPL-406E: 500Mbps Compact Powerline AV adapters
Quick Installation Guide
CD-ROM (Utility & User's Guide) - 2 x Network cables (1.5 m / 5 ft.)
Features
The 500Mbps Compact Powerline AV Adapter, model TPL-406E, uses any electrical outlet to create a secure building-wide high speed network. Two adapters are needed to start a network. Connect one adapter to your router and plug another adapter into any outlet on your electrical system for instant high speed network access.
The compact form factor saves space around crowded electrical outlets. This adapter automatically connects to other TRENDnet Powerline AV adapters with no installation required —TRENDnet recommends pressing the 'Sync' button to automatically change default encryption keys.
Use up to 8 adapters to network devices in different rooms without running new cabling. Power Save mode reduces power consumption by up to 80% . Quality of Service technology prioritizes video, audio, and online gaming. LED displays convey device status for easy troubleshooting. Advanced 128-bit AES encryption secures your network. This adapter is ideal for use in buildings that interfere with wireless networking signals.
- Compliant with IEEE1901 and HomePlug AV standards
High speed building-wide networking over an existing electrical system - 1 x 10/100Mbps Auto-MDIX Ethernet port
Adapters automatically connect using an encrypted Powerline signal
One-touch Sync button networks changes encryption keys - Three LED indicators: Power (on/off), Powerline Connection (green (best), amber (better), red (good), off(no connection)), Ethernet Connection (solid (connection), blinking (transfer activity), off (no connection))
- Connect one 500Mbps Powerline AV Adapter to the Internet and then plug in up to 7^* additional 500Mbps Powerline AV adapters for instant building-wide connectivity
- Share data intensive files, play games, download music and more at faster data transfer rates
- Advanced 128-bit AES encryption to ensure total network security
Support for IPv6
Supports up to 16^** IGMP based IPTV streams
Power Save mode reduces electrical consumption by up to 80% - Neighbor network support for up to 4 overlapping networks
Network signal transmits up to 300 meters (984ft.) - Auto QoS support through traffic classification and multiple priority queuing
-
Optional management utility compatible with Windows 7 (32/64-bit), Vista (32/64-bit), and XP (32/64-bit) operating systems
-
Maximum of 8 adapters (nodes) recommended for streaming video across your network.
500Mbps is the maximum theoretical Powerline data rate. Actual throughput will vary depending on environment.
Networked Powerline devices need to be plugged into power outlets that are on the same electrical system.
*** GFCI outlets and AFCI circuit breakers may degrade Powerline network signals.
Product Hardware Features
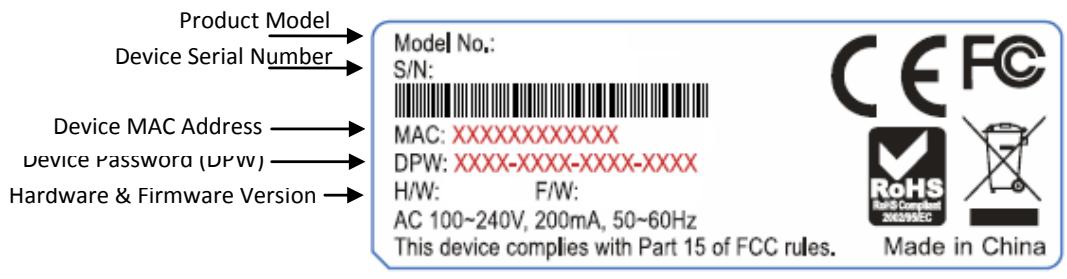
Device Label
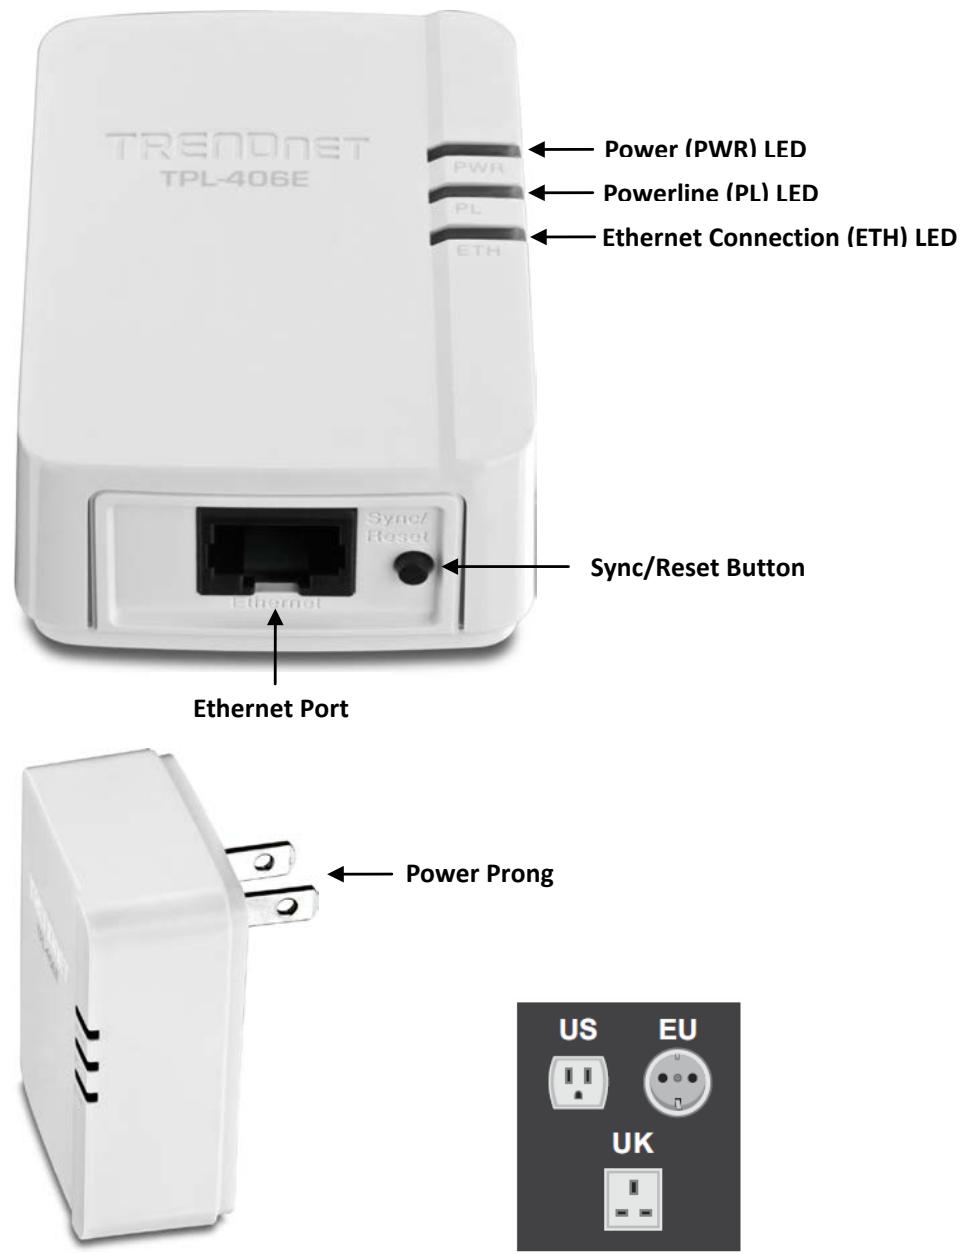
- Ethernet Port - Connect an Ethernet cable (also called network cable) from your Powerline adapter Ethernet port and to your computer or network device.
- Sync Button - Changes the default encryption key.
- Reset Button - Resets the unit to factory defaults.
| Button | Action | Function |
| Sync / Reset(see Using the Sync ButtonSection for use instructions) | SyncPush/hold for 3 seconds, then release | Initiate Sync/Connection and generate random network name/ key (PWR LED will start blinking).Note: The secondary or additional Powerline adapter's Sync button must also be pushed within 2 minutes (120 sec) of pushing the Sync button on the first adapter in order to establish connectivity. |
| ResetPush/Hold for 20 seconds, then release | Reset device to factory defaults (All LEDs will turn off and turn back on).Note: Will reset to the factory default private network name “HomePlug AV”. |
Power Prong - Plugs into an available power outlet.
Diagnostic LEDs - Indicates the device status and connectivity.
Note: Powerline (PL) LED color indicates the strength and quality of the Powerline connection through the electrical system.
| LED | Color | Sequence | Definition |
| PWR (Power) | Green | Solid | Device powered on |
| N/A | Off | Device powered off | |
| PL (Powerline) | Green | Solid | Powerline connected (Connection quality is Best) |
| Blinking | Syncing or Powerline data transmitting/receiving (Connection quality is Best) | ||
| Amber | Solid | Powerline connected (Connection quality is Better) | |
| Blinking | Powerline data transmitting/receiving (Connection quality is Better) | ||
| Red | Solid | Powerline connected (Connection quality is Good) | |
| Blinking | Powerline data transmitting/receiving (Connection quality is Good) | ||
| N/A | Off | Powerline is not syncsed or connected | |
| ETH | Green | Solid | 10/20 Mbps, 100/200Mbps (Half/Full Duplex) connected |
| Blinking | 10/20 Mbps, 100/200Mbps (Half/Full Duplex) data transmitting/receiving | ||
| N/A | Off | Port disconnected/no Ethernet link |
Note: The following factors may affect the Powerline network's connection quality:
- Noise - Generated by appliances which use your electrical system (e.g. Microwaves, ovens, blow dryer, iron, dishwasher, etc.). The quality of your household electrical wiring may also cause additional noise on your electrical system.
- Distance - Long lengths of electrical wiring through your electrical system between connected Powerline adapters.
Power Saving: The device will automatically reduce power usage when the connected device via Ethernet is powered off, unplugged or inactive for more than 5 minutes. The device will return to active mode when the connected device via Ethernet is powered on and the link is active.
Application Diagram
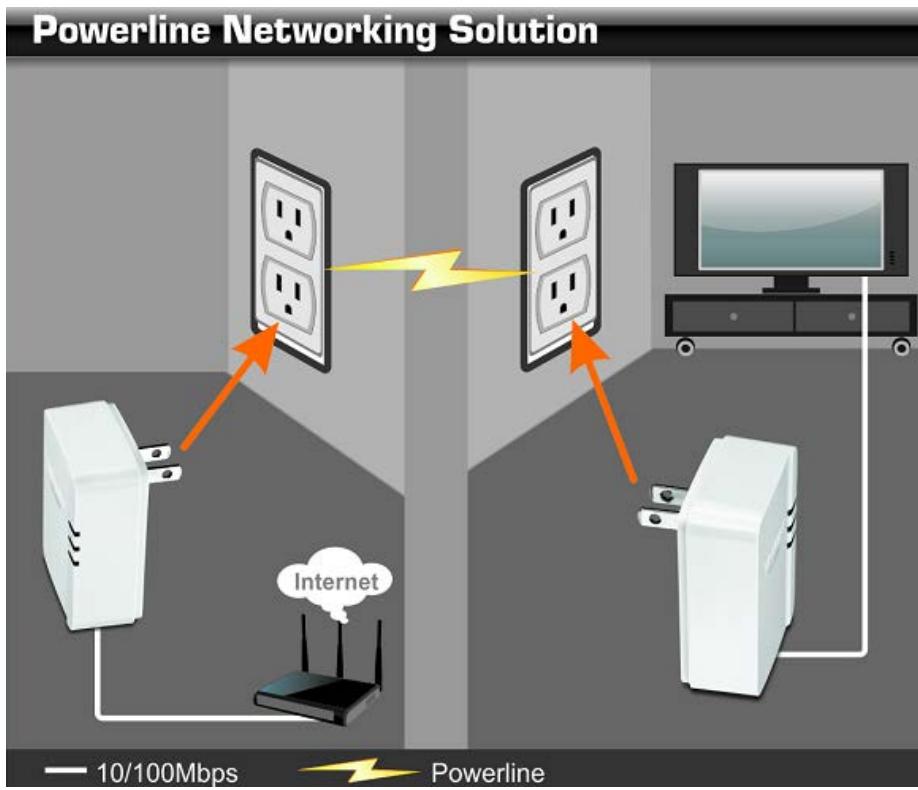
Diagram Explanation:
The first Powerline unit is networked to a router which is in turn connected to a modem (typically from your Internet Service Provider (ISP)) which provides Internet connectivity. A second Powerline adapter is plugged into a wall power outlet near a media center and is connected to a network game console and another network enabled media device such as a network enabled media player to provide Internet connectivity.
Installing your Powerline Adapters
Before you Install
-
Before you proceed with the installation, verify the following:
-
You already have a router already installed.
- You already have Internet access through your existing network.
An Ethernet port (also called LAN port) is available on your router. - Verify that you have at least two Powerline adapters. You will need at least two Powerline adapters to create a Powerline network.
Note: The TPL-406E package only includes a single Powerline adapter. Please ensure that your other Powerline adapter is HomePlug® AV or IEEE 1901 compliant (e.g. TRENDnet models TPL-303E, TPL-304E, TPL-305E, TPL-306E, TPL-307E, TPL-308E, TPL-309E, TPL-310AP, TPL-311P, TPL-401E, TPL-402E, TPL-405E, TPL-407E or another TPL-406E.)
-
Plan the location of where you will install your Powerline adapters.
-
Avoid plugging the adapters into power strips, extension cords, or surge protectors as this may prevent the adapter from functioning correctly or degrade performance.
- Avoid plugging the adapters into wall power outlets that are controlled by a light switch to prevent the Powerline adapter from being turned off accidentally.
- Avoid plugging the adapters into wall power outlets that are located near appliances that consume a lot of power (e.g. refrigerators, washers, dryers) as this may degrade performance.
- Make sure there is an available wall power outlet in the room where the router is installed and also near the router.
- Make sure there is an available wall power outlet in the room where you want to extend network connectivity.
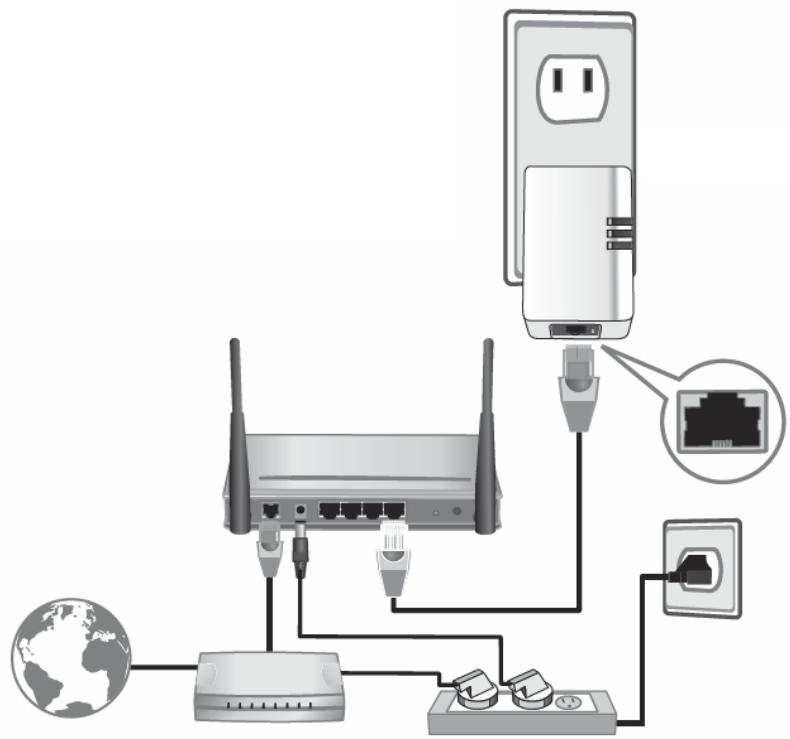
Connect a Powerline adapter to your router
- Plug the Powerline adapter into an available wall power outlet near your router.
Note: This will allow devices connected to your Powerline network to access the Internet and other devices connected to your network. - Connect the included Ethernet cable (also called network cable) from the Ethernet port (also called network port) of your Powerline adapter to an available Ethernet port (also called LAN port) on your router.
- Once the Powerline adapter is installed and connected to your router, verify that the Power (PWR) LED is on or blinking and the Ethernet Connection (ETH) LED is on or blinking.
Add adapters to your network
Once you have installed and connected the first Powerline adapter to your router, you can easily extend your network to other rooms by adding additional Powerline adapters.
To extend your network using an additional Powerline adapter:
- First, make sure the first Powerline adapter is installed and connected to your router. Note: This will allow devices connected to your Powerline network to access the Internet and other devices connected to your network. See “Connect a Powerline adapter to your router” on page 5.
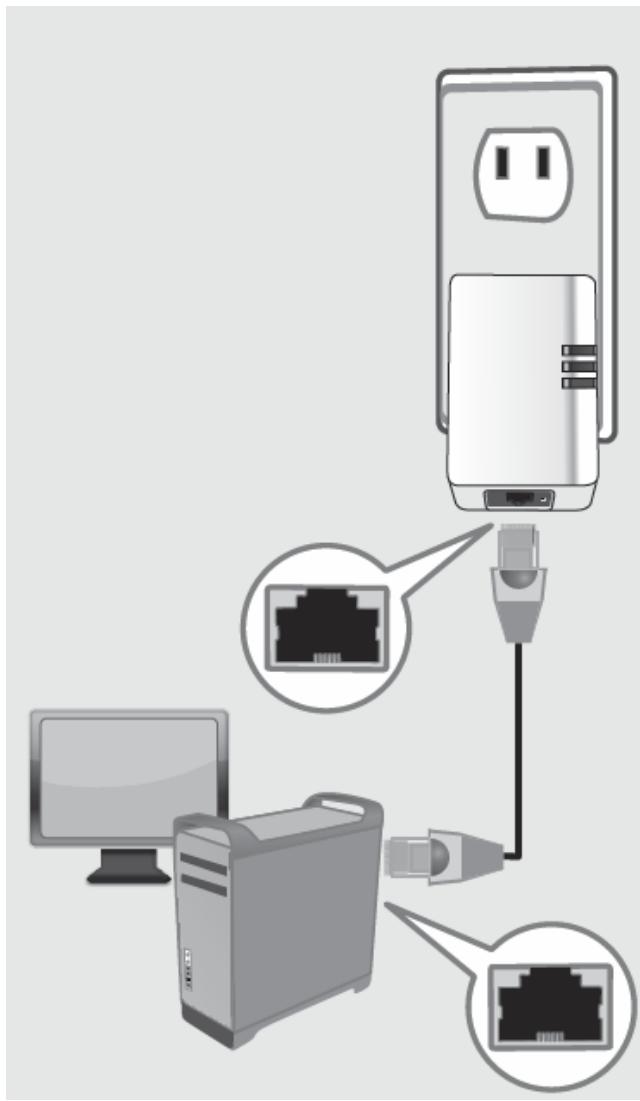
- Plug the additional Powerline adapter into an available wall power outlet in another room near a computer or network device (e.g. game consoles, network-enabled TVs, network attached storage, network media server/players, etc.) that you would like to connect to your network.
- Connect the included Ethernet cable from the Ethernet port on your Powerline adapter to the to the Ethernet port of your computers or network devices.
- After the additional Powerline adapter is connected and installed to your computer or network device, wait for the Powerline (PL) LED to turn on. After the Powerline (PL) LED turns on, verify that the Power (PWR) LED is on, the Powerline (PL) LED is on or blinking, and the Ethernet Connection (ETH) LED is on or blinking.
Note: To verify that your Powerline adapters are connected successfully to your network, you can check if the computer(s) or network device(s) can access the Internet through your Powerline network.
To install additional Powerline adapters in other rooms, repeat the steps above for each adapter.
Securing your Powerline Network
Powerline networks consist of two or more Powerline devices connected together using the same encryption key. TRENDnet Powerline adapters automatically connect to each other over a secure encrypted signal and share the same encryption key (Default encryption key: HomePlugAV).
In order for your Powerline devices to connect to the same Powerline network, the same encryption key must be assigned to all Powerline devices in that network. Powerline devices that are not assigned the same encryption key will not be able to connect to the Powerline network.
For additional security, TRENDnet recommends changing adapter default encryption key to prevent a neighbor with a Powerline adapter and the same default encryption key from gaining access to your network.
Note: After the default encryption key has been changed and the Powerline adapters have been connected using a new encryption key, the Powerline adapters will retain their security settings when they are unplugged and moved to a new location. No additional reconfiguration of the Powerline adapters is needed after the default encryption has been changed.
There are two methods to change the default encryption key:
- Use the physical Sync button on your Powerline adapter to generate a random encryption key. See "Using the Sync Button" on page 7.
*Recommended method*
OR
- Create a customized encryption key for your Powerline network using the included Powerline Utility. See "Using the Powerline Utility" on page 9.
*If users first use the Sync button method, the adapters will need to be reset to factory defaults in order to change setting using the Powerline Utility***
Using the Sync button
Change your default encryption key using the Sync button
The physical Sync button on the Powerline adapter provides an easy method of changing the default encryption key. The Sync button generates a random encryption key for your Powerline network. To create a customized encryption key, see "Using the Powerline Utility" on page 9.
Note: The default encryption key assigned to TRENDnet Powerline adapters is HomePlugAV. Before changing the default encryption, please ensure that your Powerline adapters are already installed and connected using the default encryption key. See "Installing your Powerline Adapters" on page 5.
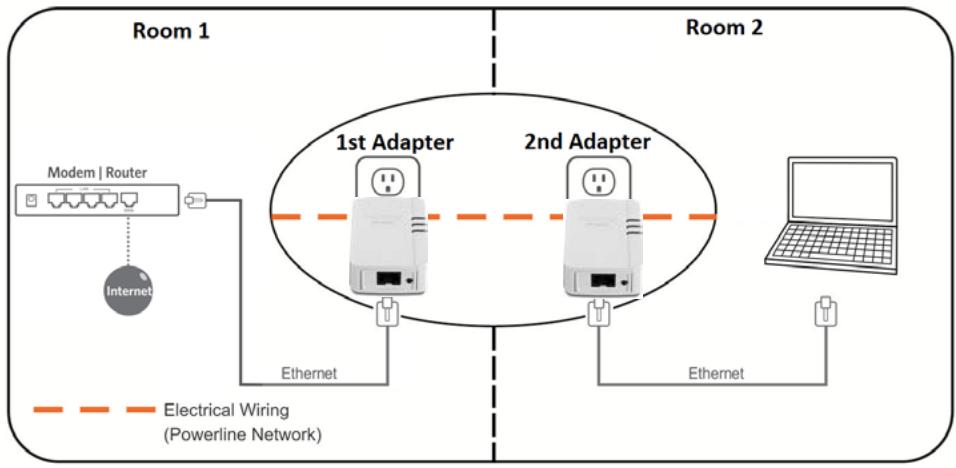
To change the default encryption key between two Powerline adapters:
Note: Use the Sync button procedure below if you are connecting TRENDnet Powerline models TPL-303E, TPL-304E, TPL-308E, TPL-309E, TPL-311P, TPL-406E, or TPL-407E. If you are connecting to other TRENDnet Powerline models, please refer to the Appendix on page 23 for using the correct Sync button procedure.
- Verify that all Powerline adapters are already installed and connected using the default encryption key, see "Installing your Powerline Adapters" on page 5.
- Push and hold the Sync button on one of the Powerline adapters for 3 seconds and release it. The Power (PWR) LED will start blinking. This will initiate the Sync process and generate a random encryption key on the first Powerline adapter.
- Within 2 minutes, push and hold the Sync button on the other Powerline adapter for 3 seconds and release it. The Power (PWR) LED will start blinking. This will negotiate a connection between both Powerline adapters using the new encryption key. All LEDs will turn off and turn back on and the Powerline (PL) LED will turn on the when adapters are connected.
Add adapters using the Sync button
If you have changed the default encryption key assigned to your Powerline adapters, additional adapters will not automatically connect to your Powerline network after they are plugged into a wall power outlet. For any additional adapters, you will need to reconfigure any additional Powerline adapters that you add to use the encryption key of your existing Powerline network.
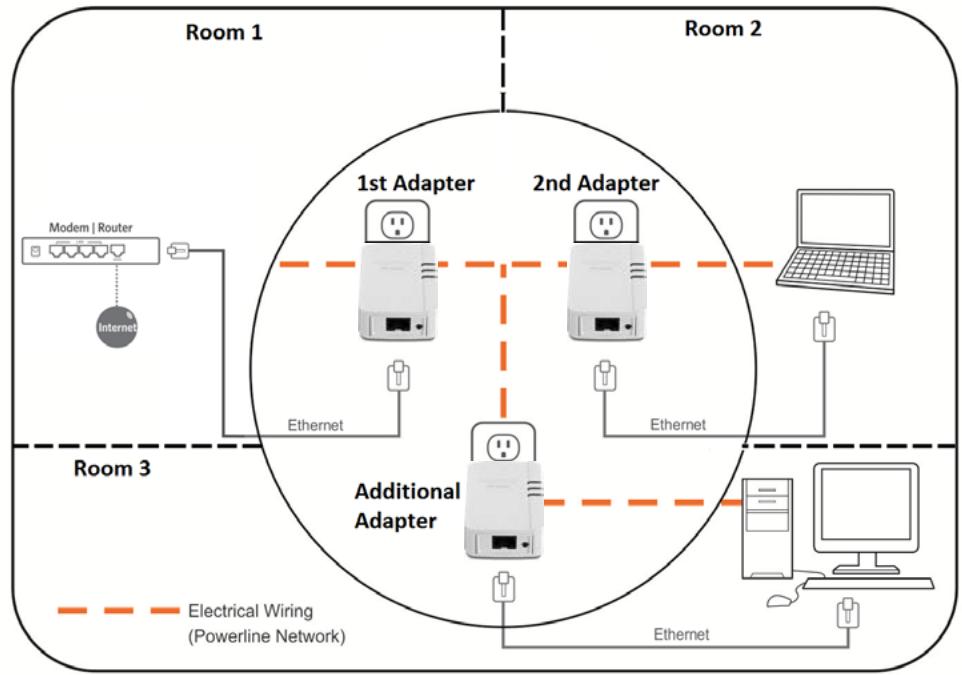
To reconfigure an additional Powerline adapter to connect and use the encryption key of your existing Powerline network:
Note: Use the Sync button procedure below if you are connecting TRENDnet Powerline models TPL-303E, TPL-304E, TPL-308E, TPL-309E, TPL-311P, TPL-406E, or TPL-407E. If you are connecting to other TRENDnet Powerline models, please refer to the Appendix on page 23 for using the correct Sync button procedure.
- Verify that all existing Powerline adapters are already installed and connected.
- Push and hold the Sync button on one of the existing Powerline adapters connected to your Powerline network for 3 seconds and release it. The Power (PWR) LED will start blinking. This will initiate the Sync process on the existing Powerline adapter.
- Within 2 minutes, push and hold the Sync button on the additional Powerline adapter for 3 seconds and release it. The Power (PWR) LED will start blinking. This will reconfigure your additional Powerline adapter to connect and use the encryption key of your existing Powerline network. All LEDs will turn off and turn back on and the Powerline (PL) LED will turn on the adapters are connected.
To reconfigure the encryption key and connect additional Powerline adapters to your existing Powerline network, repeat the steps above for each adapter.
Using the Powerline Utility
The Powerline Utility allows you to do the following:
- Create a customized encryption key for your Powerline network and apply it to multiple Powerline adapters at the same time.
- View the Powerline adapters connected to your network (using the MAC address) and the approximate connection quality and speed of each Powerline adapter.
View and upgrade Powerline adapter firmware.
Note: Link speed displayed in the utility of your Powerline adapters to another through your electrical system is estimated. Actual link speed may vary.
Before installing and using the utility, please ensure the following:
- Write down the Device Password (DPW) (16-digit characters A-Z only) and MAC Address (12-digit characters a-f, A-F, 0-9) of each Powerline adapter as this will be required to change the encryption key for multiple Powerline adapters. See "Product Hardware Features" on page 2.
- Make sure your computer in which you are installing the utility is connected to your network and your Powerline adapters are also connected to your network.
- If you have changed your encryption key using the Sync button and you are creating a customized encryption key, it is required to reset all Powerline devices to factory defaults using the physical Reset button on your Powerline adapter first before using the utility. See "Product Hardware Features" on page 2.
- Please ensure that your Powerline adapters are already installed and connected and the Ethernet port on each adapter is connected to a device powered on.
Powerline Utility System Requirements
- Windows 7 (32/64-bit), Windows Vista (32/64-bit), or Windows XP (32/64-bit)
- Microsoft®.NET Framework 2.0 installed (Included with CD installation)
Software Installation
- Insert the included CD-ROM into your computer's CD-ROM drive.
- At the CD Autorun Prompt window, click Run Autorun.exe.
Note: If the Autorun prompt does not appear automatically, open the CD contents and double-click Autorun.exe.
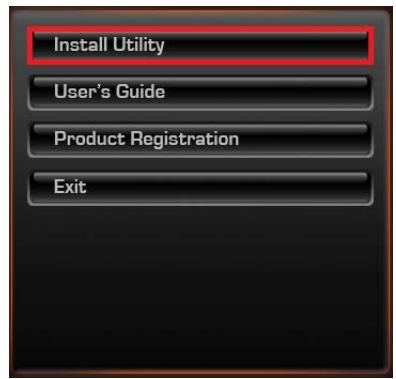
- At the CD-ROM main menu, click Install Utility.
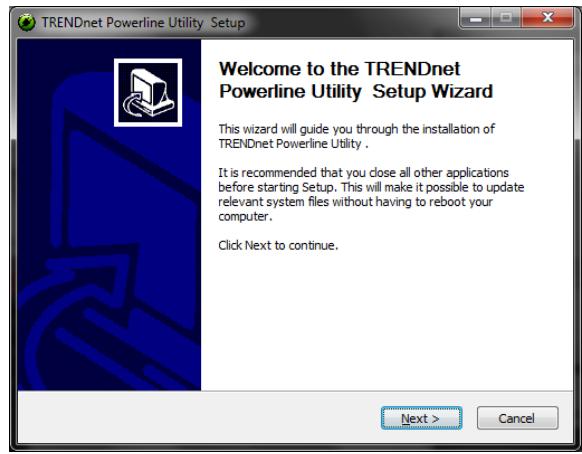
- At the Powerline Configuration Utility installation window, click Next.
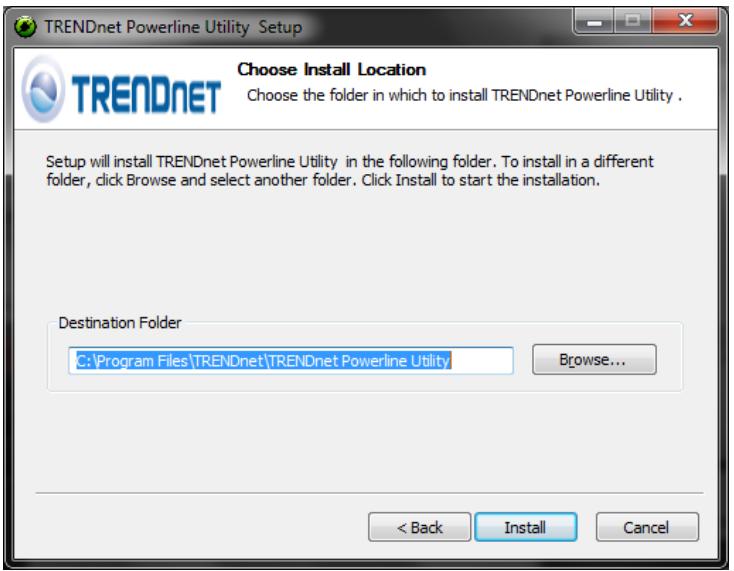
- At the Install Location installation window, click Install.
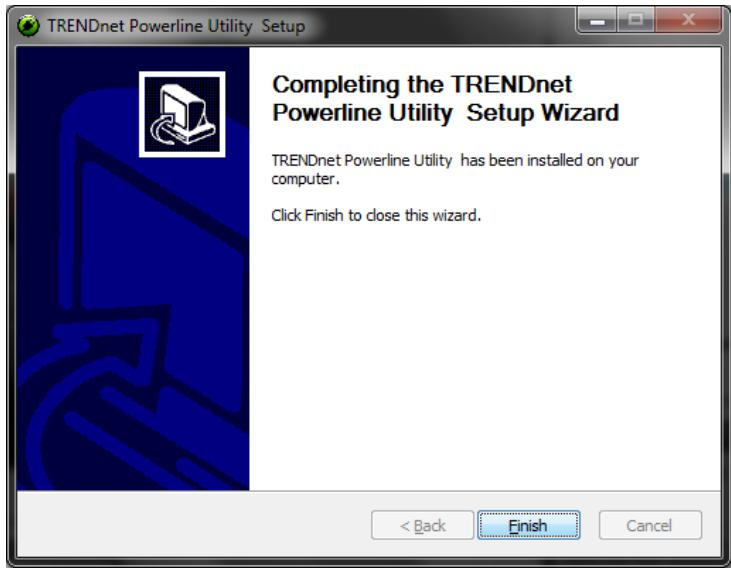
- In the Completion window, click Finish.
- At the WinPcap installer window, click Next.
Note: The Powerline Configuration Utility requires the use of the WinPcap application. If you are prompted to install the WinPcap application, continue through the following steps to complete the installation. Otherwise, if you are not prompted to install WinPcap, reboot your computer to complete the installation.
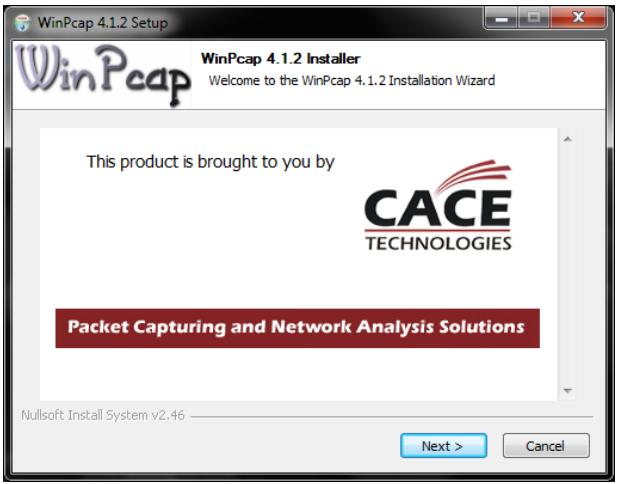
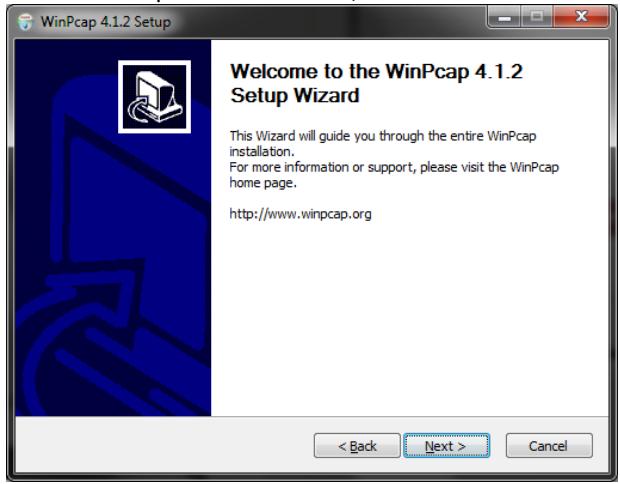
- In the Setup Wizard window, click Next.
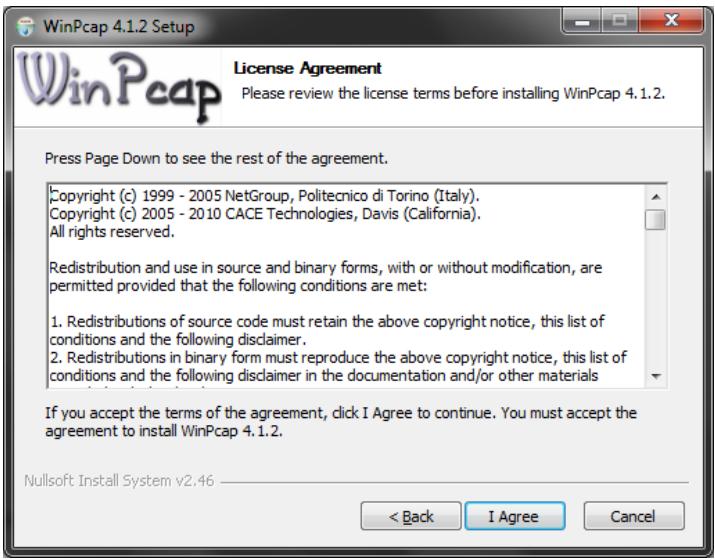
- In the License Agreement window, click I Agree.
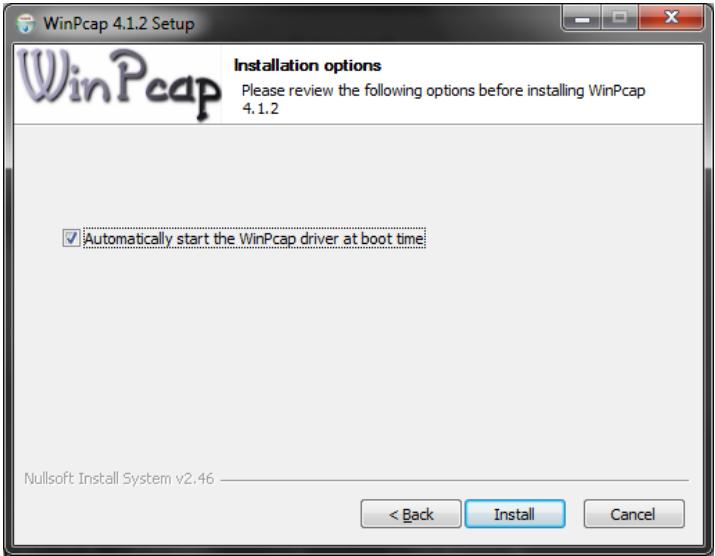
- In the Install Options window, leave the option Automatically start the WinPcap driver at boot time checked and click Install.
- Wait for the WinPcap installation to complete.
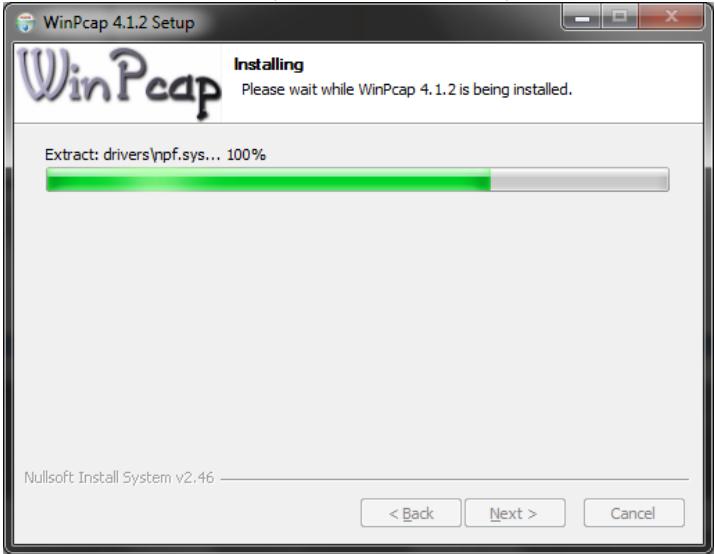
- After the process is completed, click Finish.
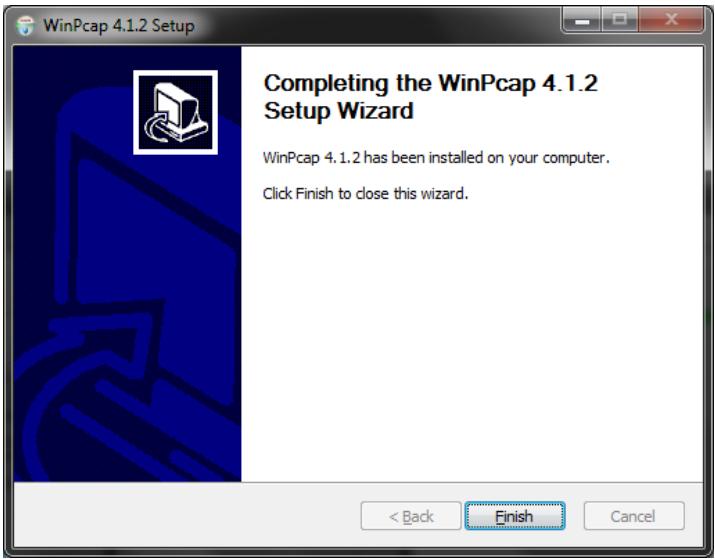
- Reboot your computer to complete the installation.
Using the Utility
Before using the utility, please ensure the following:
- Write down the Device Password (DPW) (16-digit characters A-Z only) and MAC Address (12-digit characters a-f, A-F, 0-9) of each Powerline adapter as this will be required to change the encryption key for multiple Powerline adapters. See "Product Hardware Features" on page 2.
- Make sure your computer in which you are installing the utility is connected to your network and your Powerline adapters are also connected to your network.
- If you have changed your encryption key using the Sync button and you are creating a customized encryption key, it is required to reset all Powerline devices to defaults using the physical Reset button on your Powerline adapter first before using the utility. See "Product Hardware Features" on page 2.
- Please ensure that your Powerline adapters are already installed and connected and the Ethernet port on each adapter is connected to a device powered on.
Upon completing the software installation, a desktop shortcut is automatically created. Double-click the icon to start the utility or open the utility if it is already running. Closing the utility will exit the application.

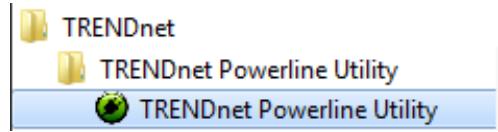
You can also launch the utility from the Start Menu programs.
Start > Programs (or All Programs) > TRENDnet > TRENDnet Powerline Utility
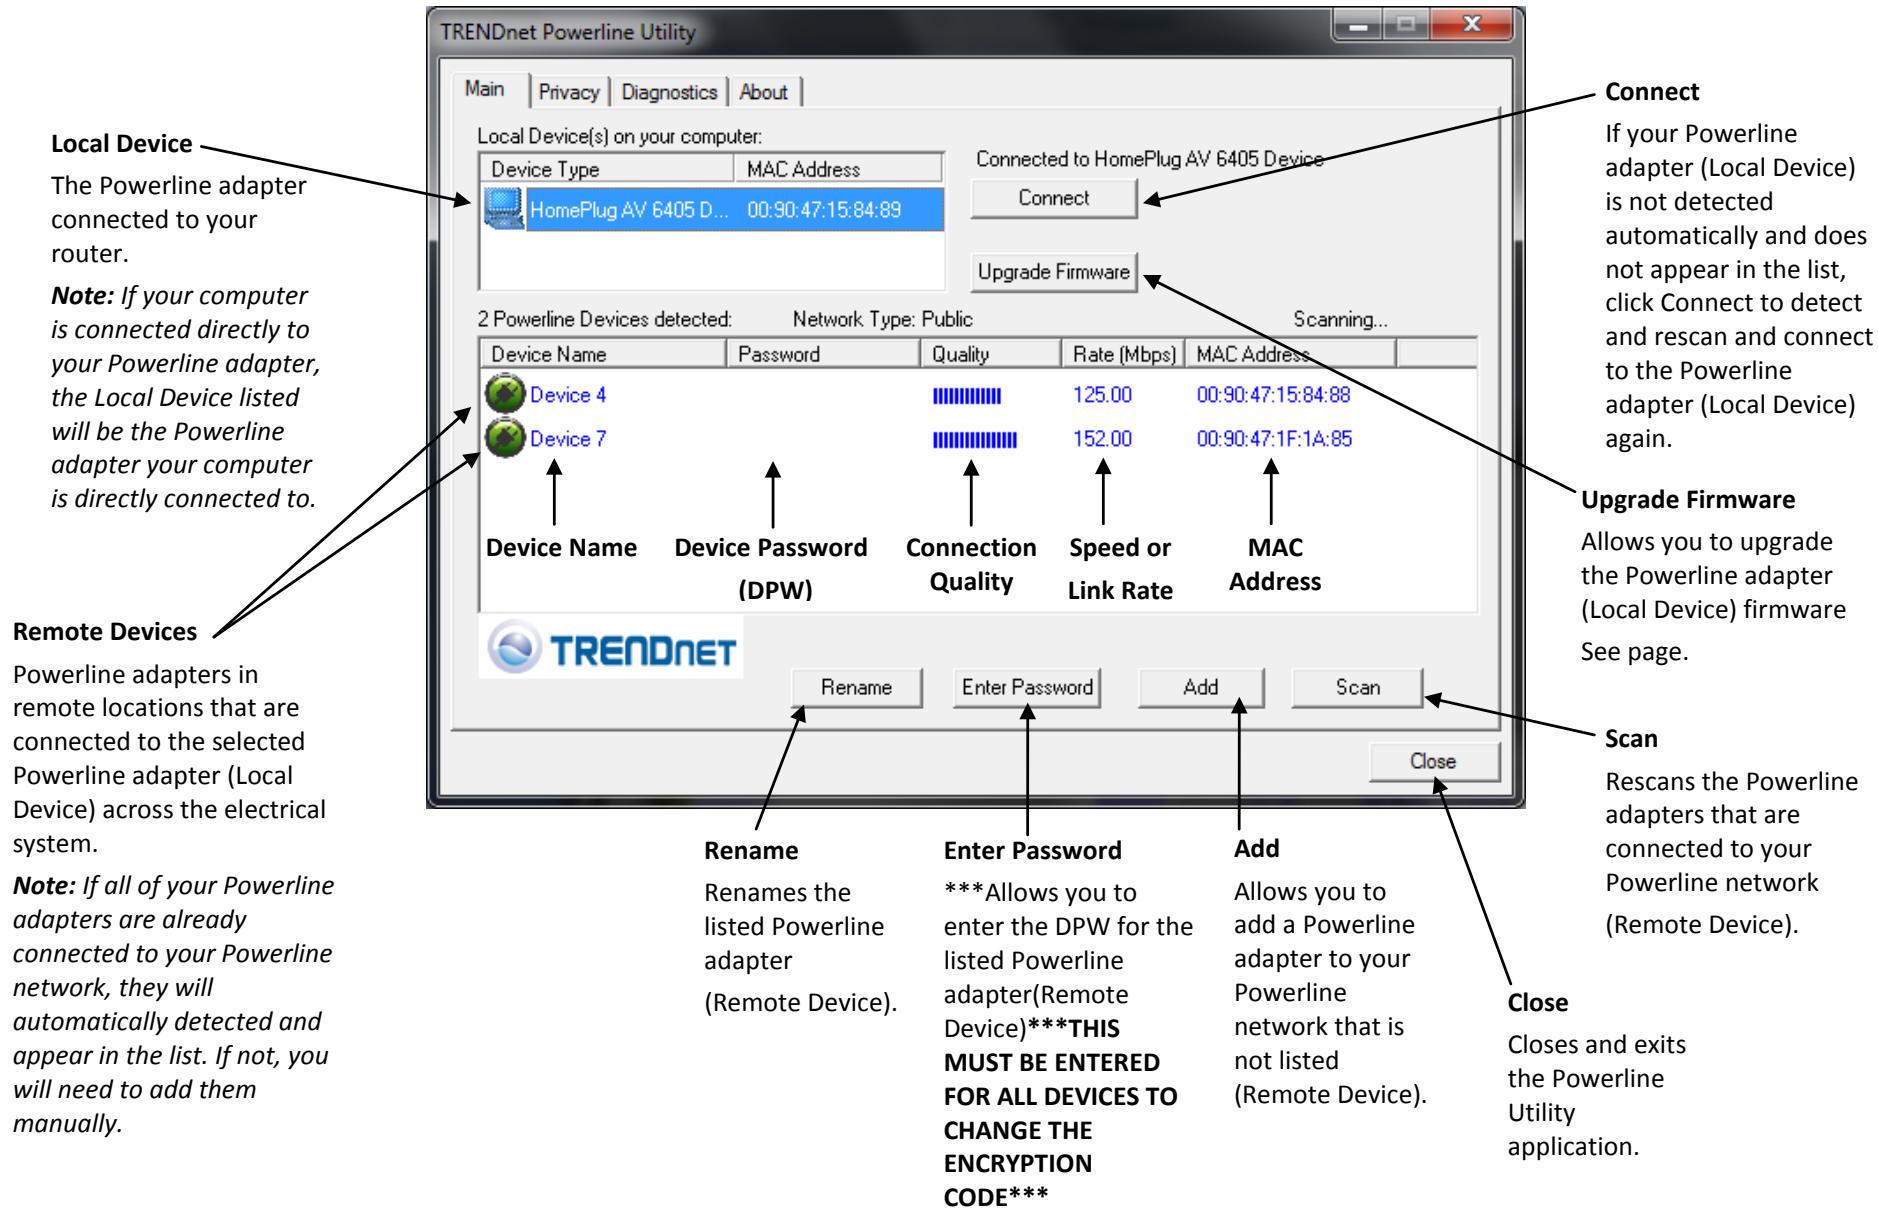
Powerline Utility Overview
Main Window
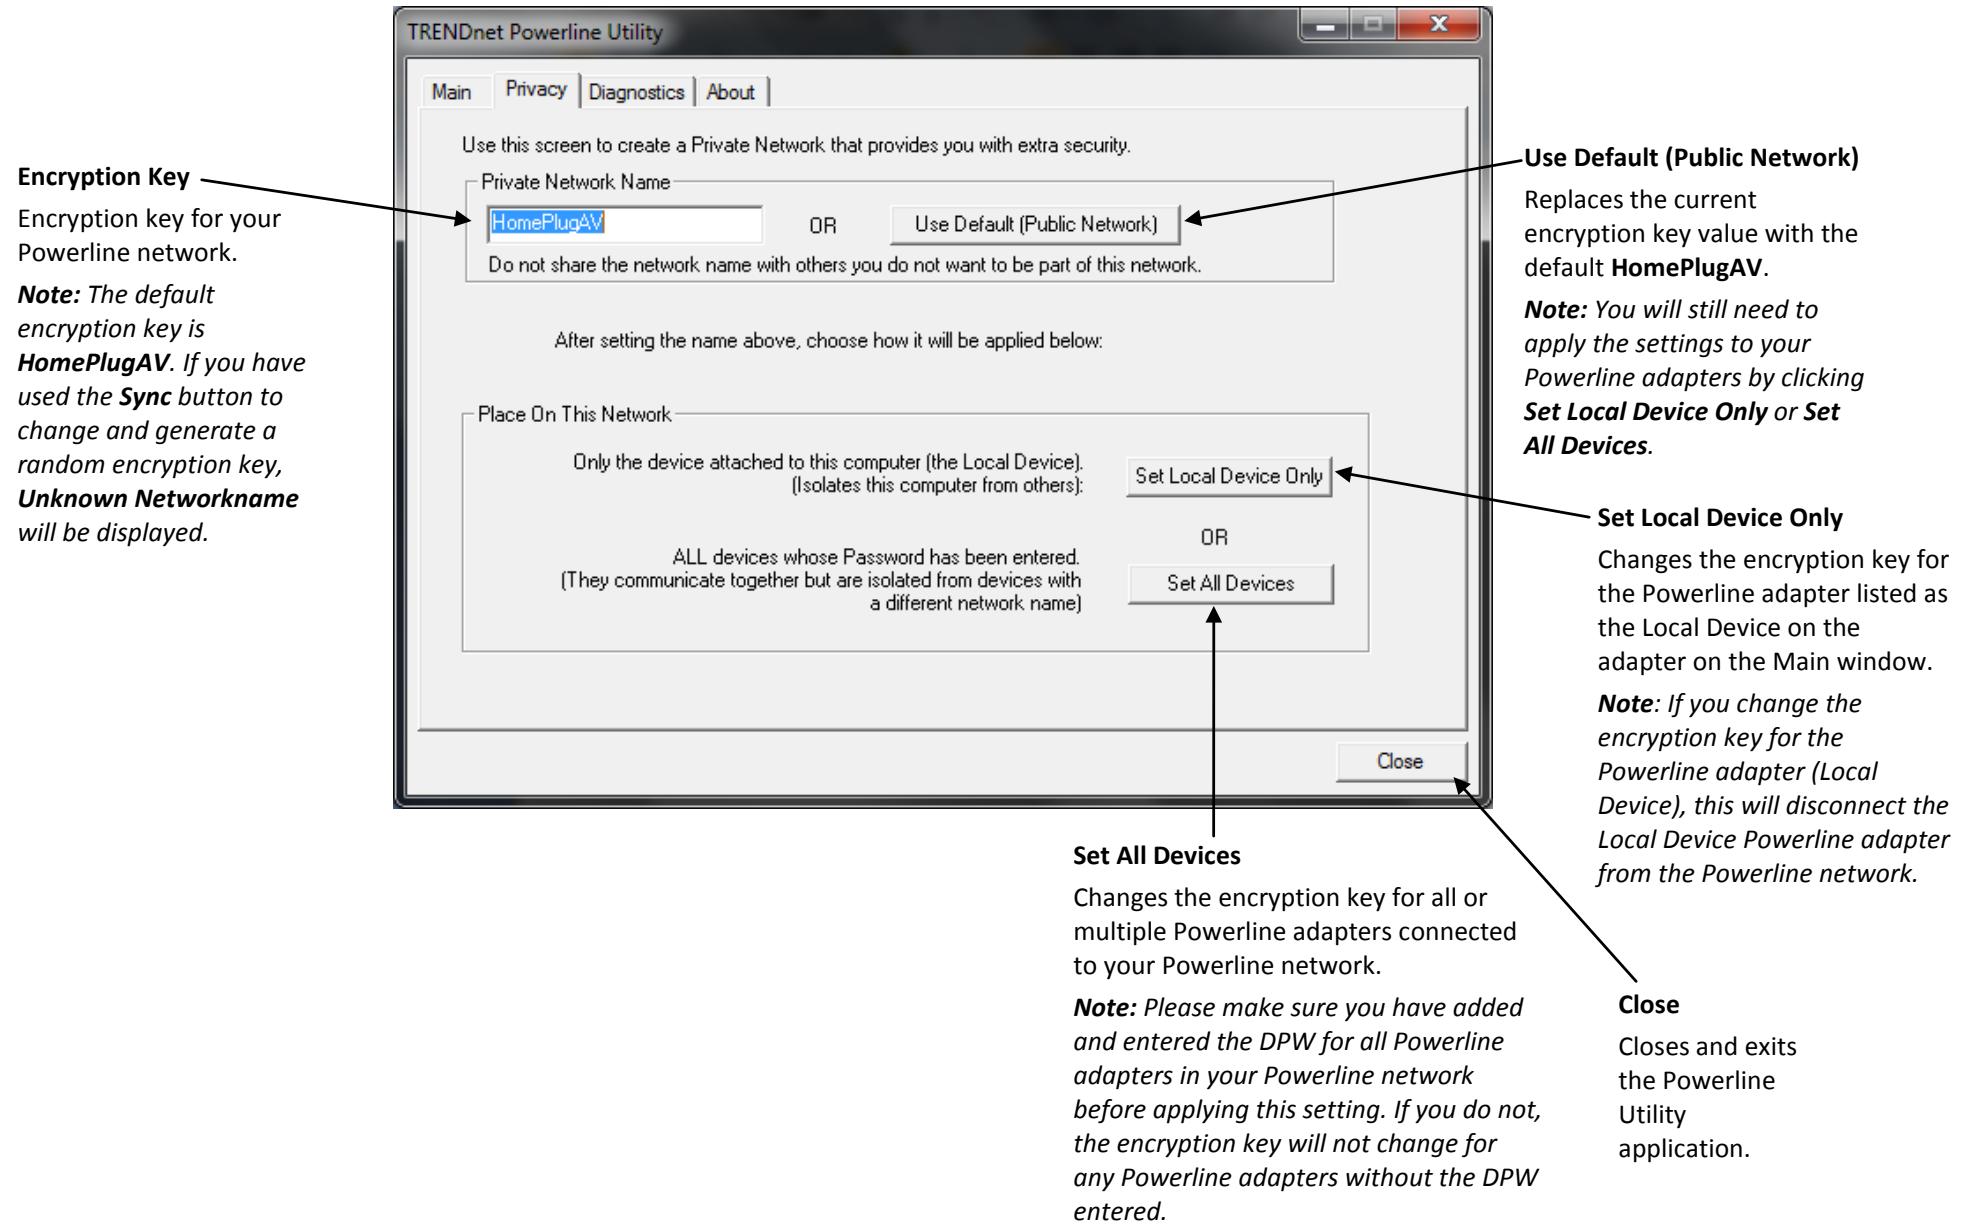
Powerline Utility Overview
Privacy Window
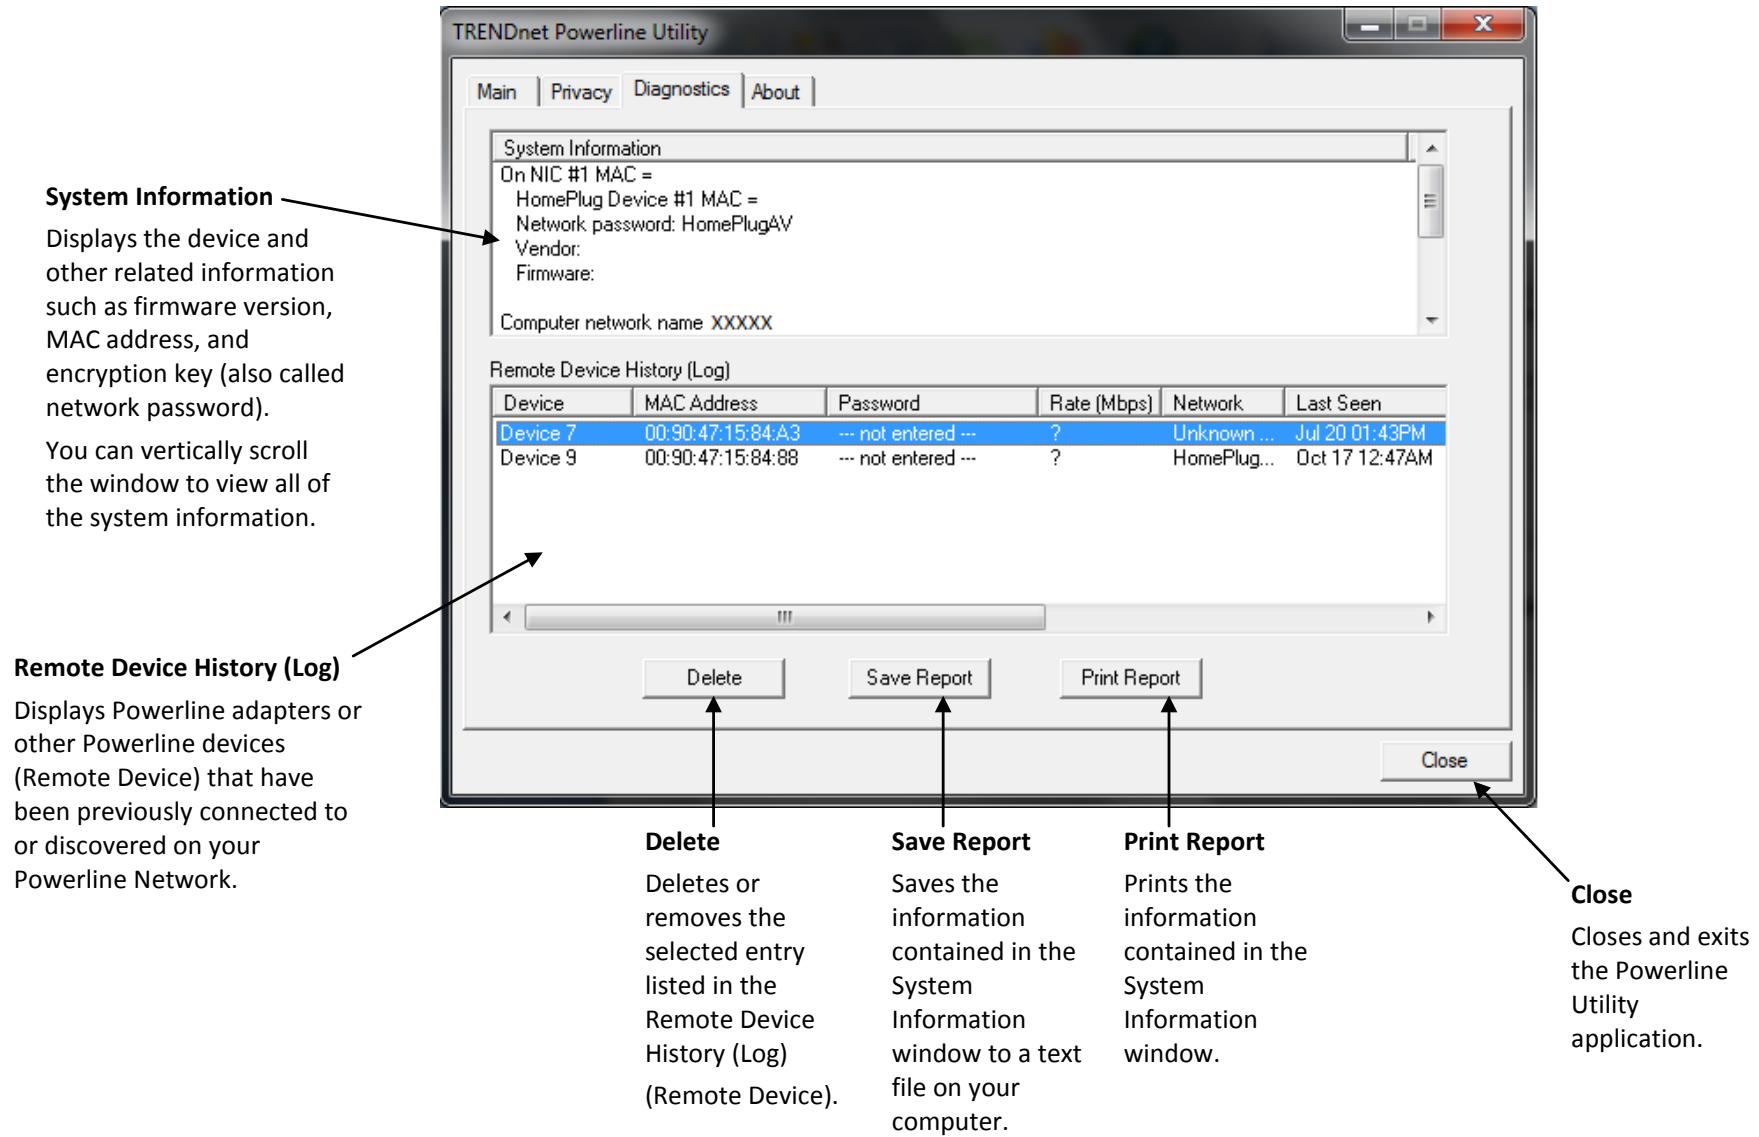
Powerline Utility Overview
Diagnostics Window
Powerline Utility Overview
About Window
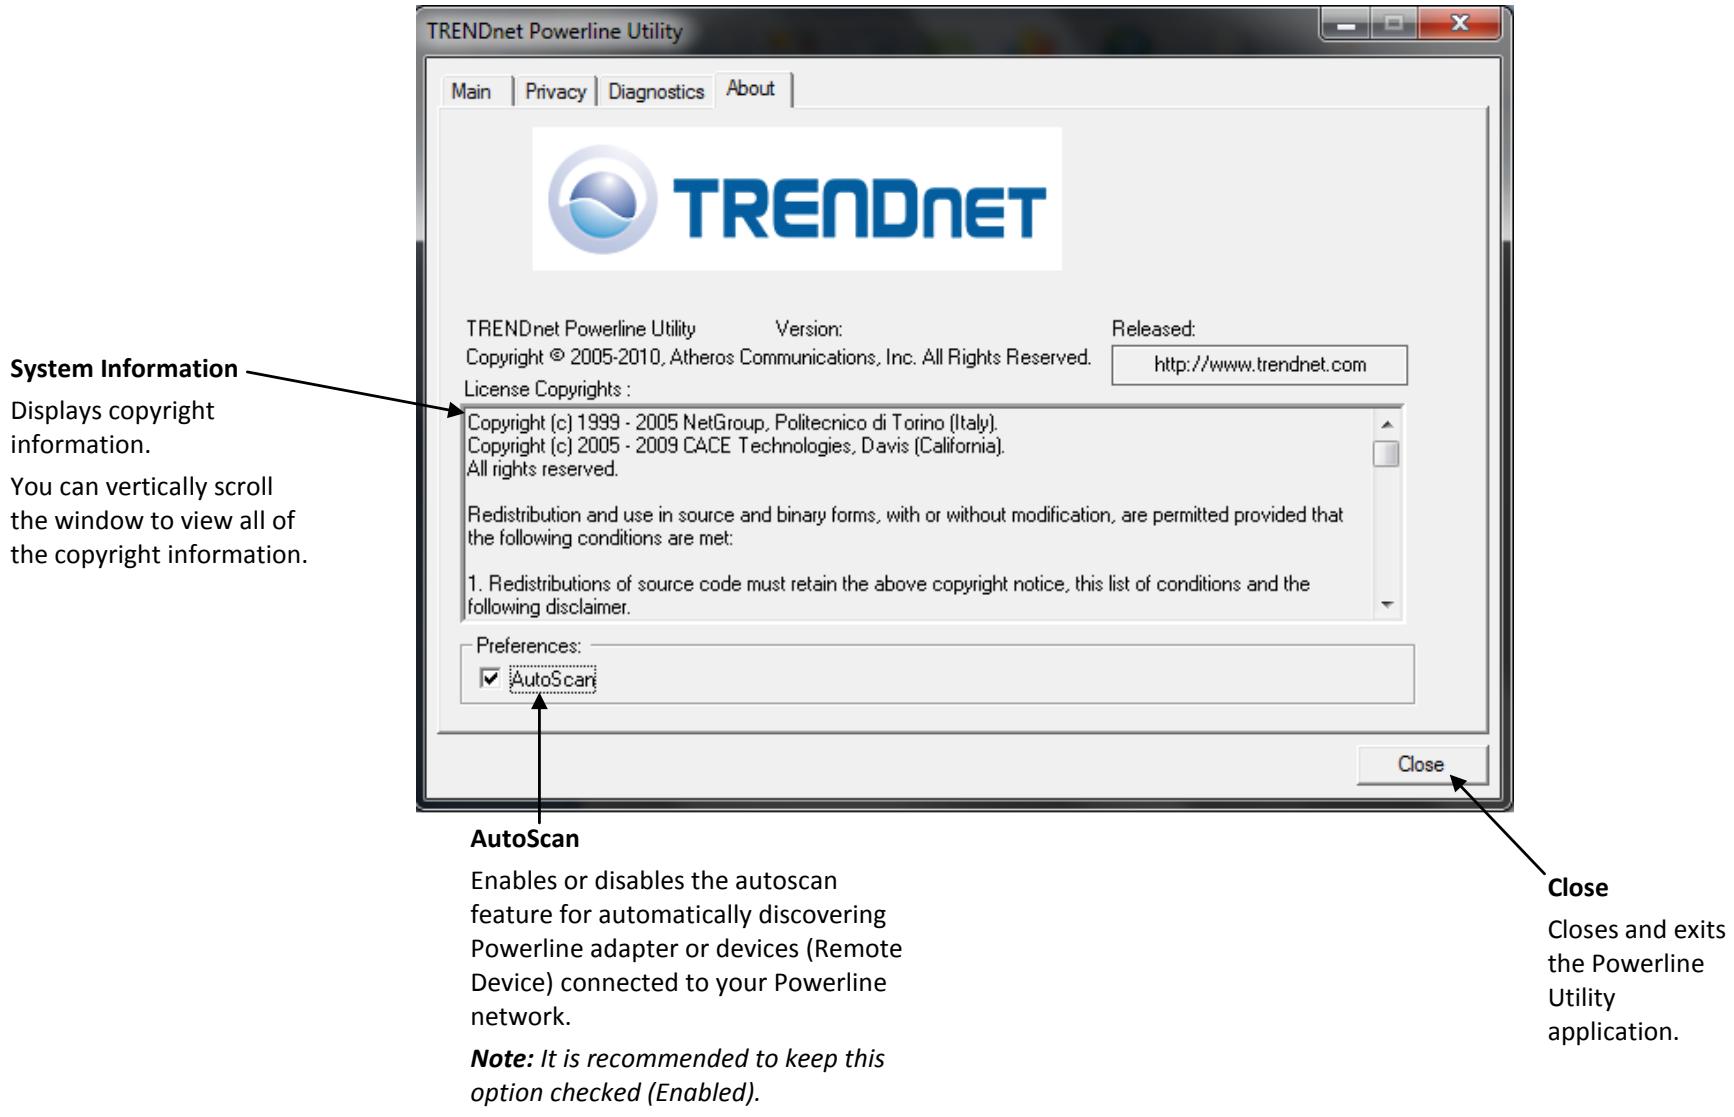
Add adapters in the utility and create a customized encryption key
If you have not written down the Device Password (DPW) and MAC address for each of your Powerline adapters, please do so as it is required to applying the customized encryption key for all of your Powerline adapters using the utility. This information is on the sticker on the inside face of each adapter.
Note: Write down the Device Password (DPW) (16-digit characters A-Z only) and MAC Address (12-digit characters a-f,A-F,0-9) of each Powerline adapter first before proceeding.
Example:
| Location of Powerline Adapter | Device Password (DPW) | MAC Address |
| At Router | ZAYB-VIMV-YFAQ-ZFPA | 00:90:47:15:84:89 |
| John’s Room | WECC-ZZYC-WJVY-GZRS | 00:90:47:15:84:88 |
| Jane’s Room | UXMA-UOUP-IQXJ-UTYN | 00:90:47:1F:1A:85 |
Note: It is recommended to ensure that your Powerline adapters are already installed and connected and the Ethernet port on each adapter is connected to a device powered on.
First, add all of the Powerline adapters to the utility and enter the Device Password (DPW) for each Powerline adapter to ensure you can change the encryption key for multiple adapters. This is required when using the Powerline utility to change the encryption key for multiple Powerline adapters.
To add automatically detected Powerline adapters to the Powerline Utility
- Launch the Powerline Utility.

TRENDnet
Powerline Utility
- In the Powerline Utility Main window, wait for the utility to automatically scan for Powerline adapters already connected to your Powerline network. If your Powerline adapters have already been installed and connected using the same encryption key, they should appear in the Remote Device list.
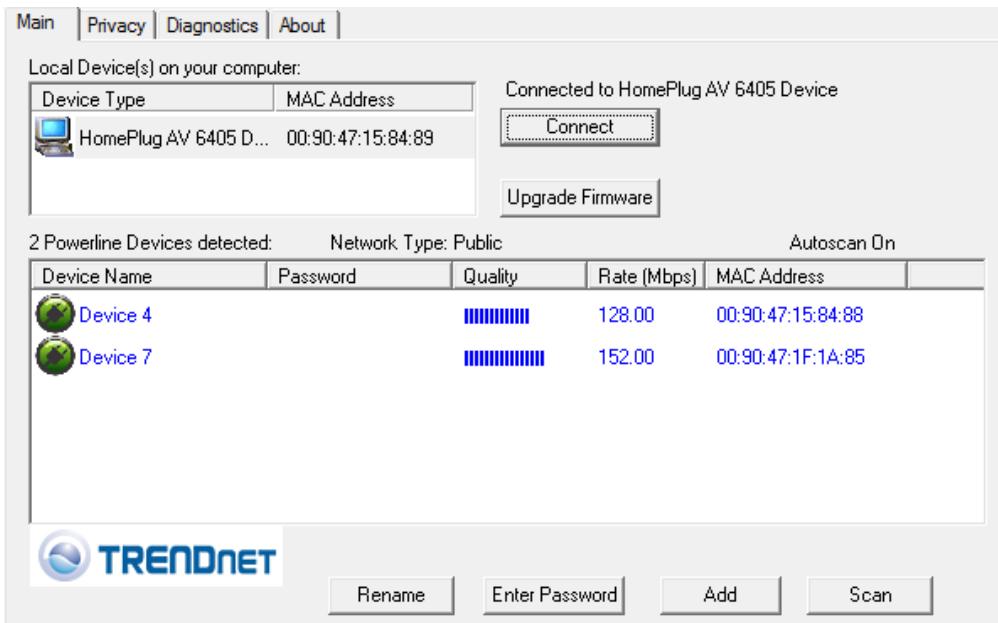
- Select one of the Powerline adapters listed under Remote Device.

- Click Enter Password.
Enter Password
- Enter the Device Password (DPW) and click OK.
Note: Match the Device Password (DPW) to the corresponding MAC address.

- If successful, you will receive a message indicating that the password is correct. Click OK.
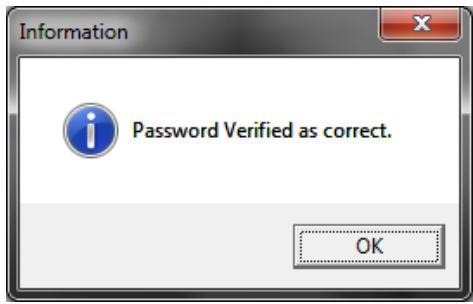
Repeat steps 2-6 for each additional Powerline adapter listed in Remote Device until you have added all of your remaining Powerline adapters before continuing to the next step "To create a customized encryption key".
To create a customized encryption key
- In the Powerline Utility Privacy window, under Private Network Name, enter the new encryption key for your Powerline network.
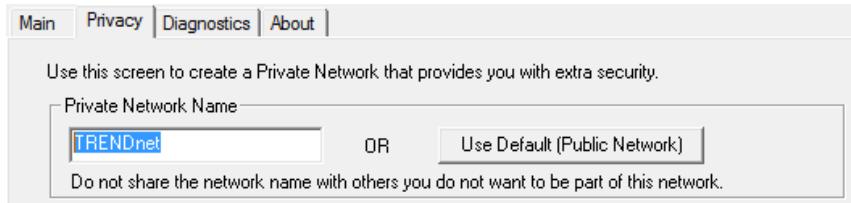
- After you have entered your new Powerline encryption key, click Set All Devices.
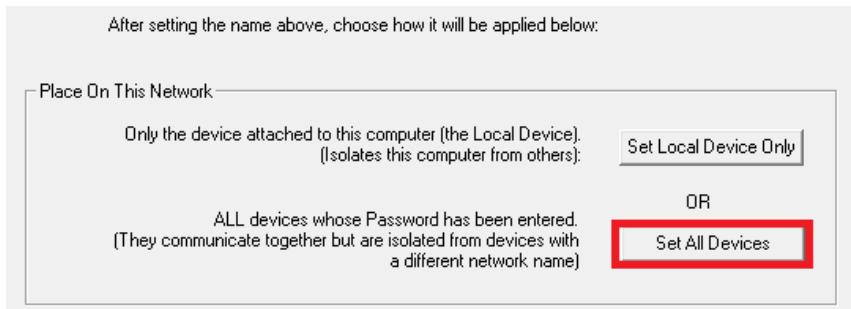
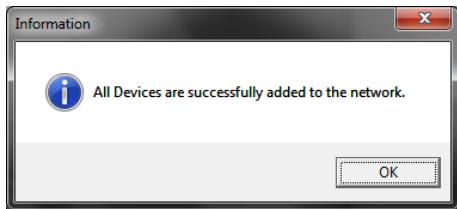
- Click OK. If successful, you will receive a message indicating that all Powerline adapters were added to your network verifying that the encryption key was changed for all Powerline adapters. Click OK.
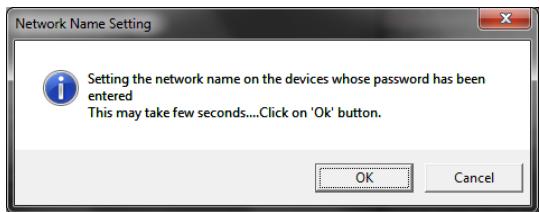
To rename the Powerline adapters
Note: Renaming the Powerline adapters (Remote devices) to describe the location of the device will help you to easily identify which Powerline adapter you are monitoring in the utility.
- In the Powerline Utility Main window, select one of the Powerline adapters listed under Remote Device.
| Device Name | Password | Quality | Rate (Mbps) | MAC Address | |
| Device 4 | 132.00 | 00:90:47:15:84:88 | |||
| Device 7 | 152.00 | 00:90:47:1F:1A:85 | |||
- Click Rename.

- The device name field will be available to edit.

Device 4
- Enter the new device name and press Enter on your keyboard.

John's Room
- To rename the adapter that is immediately connected to your computer, move your computer to a different adapter and restart the process listed above.
Upgrade Firmware
Note: The firmware can only be upgraded when your computer is directly connected to the Powerline adapter Ethernet port (also called network port) using an Ethernet cable (also called network cable). The Device Password (DPW) is not required when upgrading the firmware.
- To check if firmware updates are available for your Powerline adapter, check your Powerline model. http://www.trendnet.com/downloads/
- Save the zipped firmware file (.zip) and extract the file to your computer.
- Make sure you connect your computer with the utility installed is directly connected to the Powerline adapter using an Ethernet cable (also called network) cable when upgrading the device firmware.
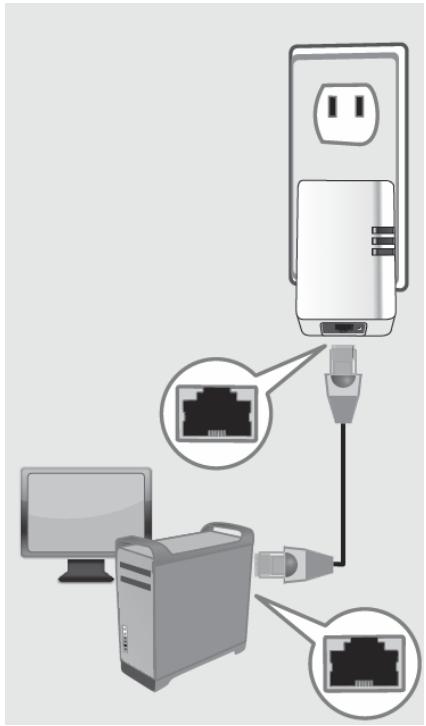
- Launch the Powerline Utility by double-clicking the icon.

TRENDnet
Powerline Utility
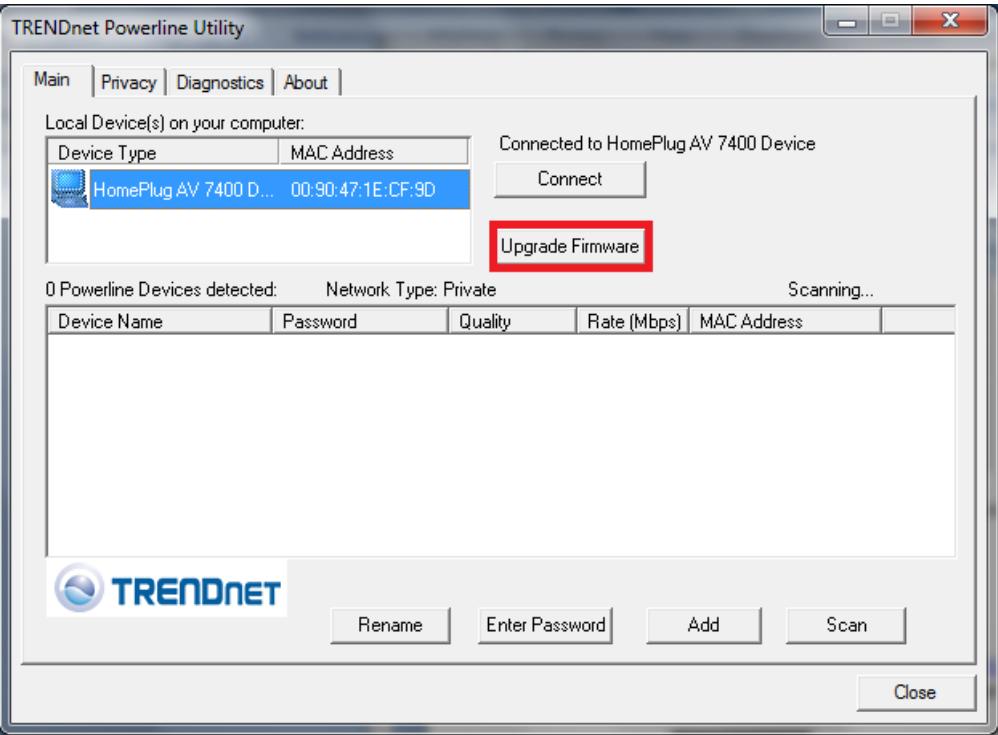
- The device should appear in the Main window of the utility under Local Device. Click Upgrade Firmware.
- Click Browse next to the PIB field and navigate to the unzipped folder with the firmware files. Select the PIB file. (Ex. TPL-401E-PIB-v50100.pib)
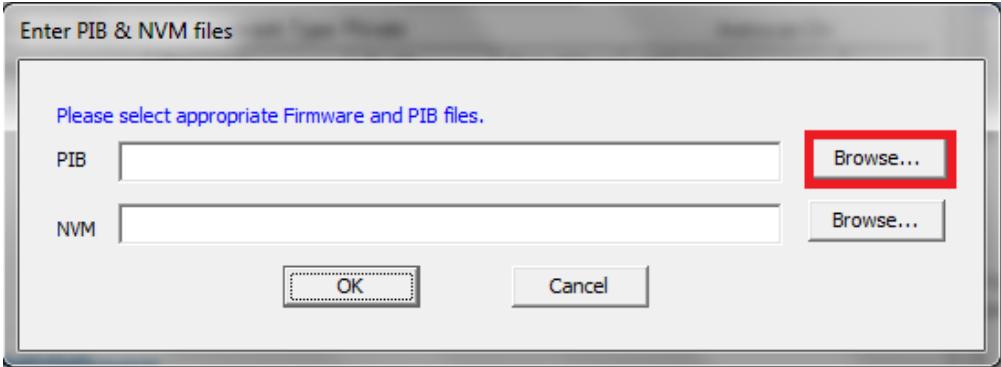
- Click Browse next to the NVM field and navigate to the unzipped folder with the firmware files. Select the NVM file. (Ex. TPL-401E-NVM-v5.0.1-0-0-X-FINAL.nvm)

- Click OK.
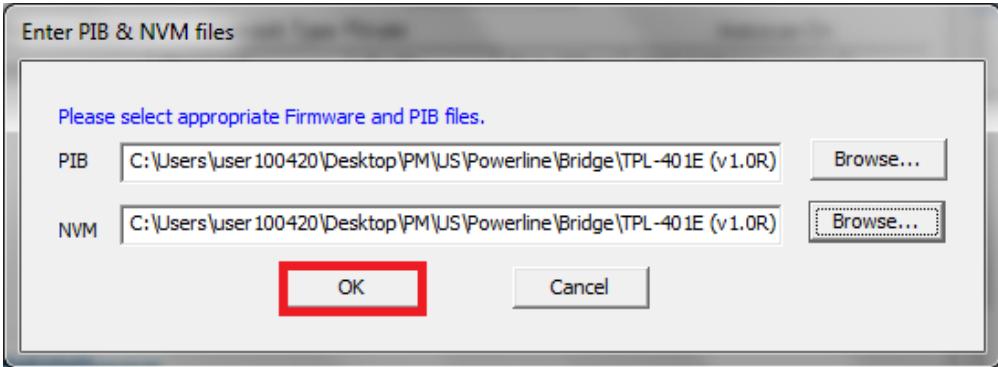
Wait until the firmware upload completed and the device reboot
Important! Do not turn off the device or press the reset button while this procedure is in progress.
Technical Specifications
| Hardware | |
| Standards | IEEE 1901, HomePlug® AV, IEEE 802.3, IEEE 802.3x, IEEE 802.3u |
| Interface | 1 x 10/100Mbps Auto-MDIX RJ-45 portPower prong○ A: North America Type B (NEMA 5-15)○ EU: Euro Type C (CEE 7/16)○ UK: United Kingdom Type G (BS 1363) |
| Frequency Band | 2 ~ 68 MHz |
| Modulation | OFDM Symbol Modulation on link synchronization, 1024/256/64/8 - QAM, QPSK, BPSK, ROBO Carrier |
| Protocol | TDMA, and CSMA/CA |
| Speed | Powerline: up to 500Mbps**Ethernet: Up to 200Mbps (Full Duplex mode) |
| Utility OS Compatibility | Windows 7 (32/64-bit), Vista (32/64-bit), XP(32/64-bit) |
| Nodes | Up to 8 (max.) |
| OverlappingPowerline Networks | Up to 4 (per electrical system) |
| Coverage | Up to 300m (984ft.) |
| Security | 128-Bit AES (Advanced Encryption Standard) |
| LED | Power (PWR)Powerline (PL) with Connection Quality IndicationBest (Green)Better (Amber)Good (Red)No connection (Off)Ethernet ConnectionSolid |
| • Blinking • Off | |
| Buttons | Sync (3 sec.)/Reset (20 sec.) |
| Dimension (L x W X H) | A: 70 x 50 x 43 mm (2.76 x 1.97 x 1.69 in.) per unit EU: 70 x 50 x 63 mm (2.76 x 1.97 x 2.48 in.) per unit UK: 70 x 50 x 58 mm (2.76 x 1.97 x 2.28 in.) per unit |
| Weight | A: 51 g (1.8 oz) per unit EU: 56.7 g(2.0 oz) per unit UK: 68 g (2.4 oz) per unit |
| Power Source | 100~240V AC, 50~60Hz |
| Consumption | Active mode: 2.2 Watts (max.) Standby mode: 0.5 Watts (max.) |
| Temperature | Operating: 0° ~ 40°C (32° ~ 104°F) Storage: -10° ~ 55°C (14° ~ 131°F) |
| Humidity | Max. 95% (non-condensing) |
| Certifications | CE, FCC |
- Maximum of 8 adapters (nodes) recommended for streaming video across your network.
500Mbps is the maximum theoretical Powerline data rate. Actual throughput will vary depending on environment.
Networked Powerline devices need to be plugged into power outlets that are on the same electrical system.
*** GFCI outlets and AFCI circuit breakers may degrade Powerline network signals.
Troubleshooting
Please reference the items below if you continue to experience difficulty with installing and using your Powerline adapters.
- Do not use the Sync button for more than 2 Powerline adapters to connect simultaneously. Wait for each Powerline adapter to connect to your Powerline network one at a time before connecting the next adapter. Using more than one adapter to Sync simultaneously may cause some of your adapters not to Sync and establish connection to your Powerline network.
- Power-cycle the Powerline adapters by disconnecting them from their power outlets for 15 seconds and then reconnect them.
- If the Powerline (PL) LED is red, try plugging the Powerline adapter into another available power outlet. The quality of the connection may be better in a different power outlet.
- If you are having issues connecting the Powerline adapters after changing the encryption key using the Sync button or Powerline utility, reset the Powerline adapters to defaults using the physical Reset button.
- Using a pin or paperclip; press and hold the Reset button for 1 second on each Powerline adapter. All LEDs will turn off then turn back on. This will reset the Powerline adapters to their default settings. The default encryption key is HomePlugAV.
- The Powerline adapters can provide better connectivity and performance when plugged directly into a power outlet. Connecting the Powerline adapters to a power strip or surge protector may degrade or block Powerline signals.
- Avoid using the Powerline adapters on GFI protected outlets and electrical systems with AFCI circuit breakers. They may degrade or block Powerline signals.
- The Powerline adapters should not be used in areas with excessive heat.
- Florescent and incandescent lighting can generate significant Powerline interference.
- If your building has more than one circuit breaker box, the Powerline adapter may not be able to establish connectivity between them. In this case, connect a Powerline adapter into a power outlet located on each of the circuit breaker boxes. Then connect an Ethernet cable between the Powerline adapters to bridge the two circuits together.
In addition to this User's Guide, you can find help below:
http://www.trendnet.com/support
(documentation, downloads, FAQs, how to contact technical support)
- Autorun CD (Quick Installation Guide)
Appendix
Using the Sync Button with other TRENDnet Powerline models
A different Sync button procedure may be required depending on the TRENDnet Powerline model adapter(s) you are using.
If you are using one of the Powerline models listed in the table below, you will need to use the Sync button procedure provided on the next page to connect to TRENDnet models TPL-303E, TPL-304E, TPL-308E, TPL-309E, TPL-311P, TPL-406E, or TPL-407E.
| Model |
| TPL-405E |
| TPL-401E |
| TPL-402E |
| TPL-305E |
| TPL-310AP |
| TPL-306E |
| TPL-307E |
If you are using an older firmware version on your Powerline adapter, it is recommended for you upgrade to the latest firmware version to ensure the latest fixes. To check if firmware updates are available for your Powerline adapter, check your Powerline model. http://www.trendnet.com/downloads/
To change the default encryption key between two Powerline adapters:
Note: Assuming one Powerline adapter is a model listed in the table and the other Powerline adapter being the TPL-303E, TPL-304E, TPL-308E, TPL-309E, TPL-311P, TPL-406E, or TPL-407E.
In this example, the procedure below will reference how to connect a TPL-306E to a TPL-406E Powerline adapter using the Sync button. The TPL-306E can be replaced with any of the models in the table and the TPL-406E can be replaced with the TPL-303E, TPL-304E, TPL-311P, or TPL-407E when following this procedure.
- On the TPL-306E, push and hold the Sync button for 15 seconds and release it. All LEDs will turn off and turn back on. This will erase the current encryption key assigned for this Powerline adapter.
Note: If the Powerline adapters were connected prior using the default encryption key, once you complete this step, the TPL-406E Powerline adapter will not be able to communicate to the TPL-306E Powerline adapter. - Afterwards, push and hold the Sync button on the TPL-306E for 2 seconds and release it. The Power (PWR) LED will start blinking. This will initiate the Sync process and generate a random encryption key.
- Within 2 minutes, push and hold the Sync button on the TPL-406E for 3 seconds and release it. The Power (PWR) LED will start blinking. This will negotiate a connection between both Powerline adapters using the new encryption key. All LEDs will turn off and turn back on and the Powerline (PL) LED will turn on the when adapters are connected.
To reconfigure an additional Powerline adapter to connect and use the encryption key of your existing Powerline network:
Note: Assuming two Powerline adapters are models listed in the table with are already connected and the additional Powerline adapter being the TPL-303E, TPL-304E, TPL-308E, TPL-309E, TPL-311P, TPL-406E, or TPL-407E.
In this example, the procedure below will reference how to connect the TPL-406E as an additional Powerline adapter to an existing Powerline network already connected with two TPL-306E Powerline adapters by using the Sync button. Either of the TPL-306E can be replaced with any of the models in the table and the TPL-406E can be replaced with the TPL-303E, TPL-304E, TPL-311P, or TPL-407E when following this procedure.
First, you will need to connect one of the TPL-306E Powerline adapters to the additional TPL-406E Powerline adapter using the procedure on the previous page "To change the default encryption key between two Powerline adapters". This will first disconnect the TPL-306E adapters from each other and connect one of the TPL-306E adapter to the TPL-406E. Then follow the procedure below to reconnect the other disconnected TPL-306E Powerline adapter to your Powerline network.
- Push and hold the Sync button on the other TPL-306E for 15 seconds and release it. All LEDs will turn off and turn back on. This will erase the current encryption key assigned to the TPL-306E.
- Afterwards, push and hold the Sync button on the same TPL-306E for 2 seconds and release it. The Power (PWR) LED will start blinking. This will initiate the Sync process.
- Within 2 minutes, push and hold the Sync button on the TPL-406E for 3 seconds and release it. The Power (PWR) LED will start blinking. This will negotiate a connection between both Powerline adapters using the new encryption key. All LEDs will turn off and turn back on and the Powerline (PL) LED will turn on the when adapters are connected.
Overlapping Powerline networks
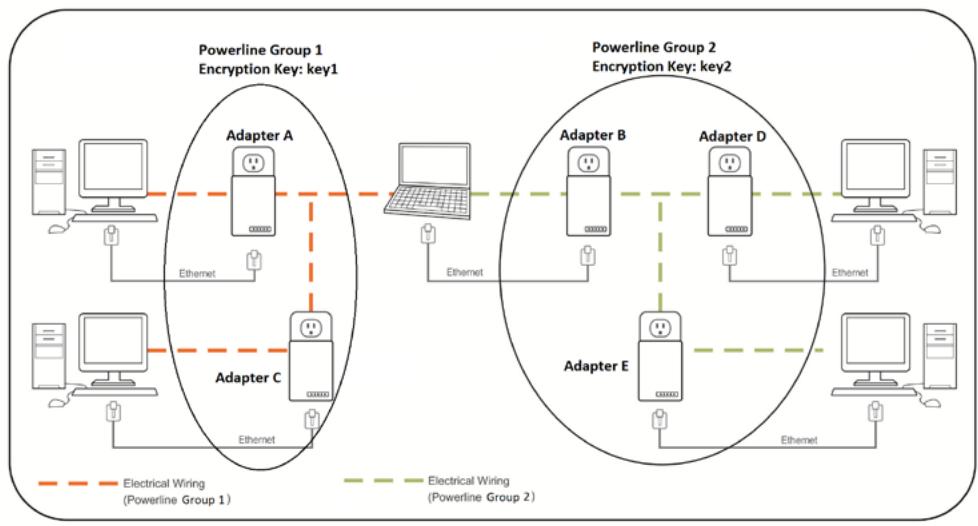
It is possible to create multiple Powerline networks on the same electrical system separated and grouped by different network encryption keys. The Powerline networks will work and communicate independently of each other which can provide security between different groups of Powerline adapters. For example, if you have five powerline adapters (Adapter A, Adapter B, Adapter C, Adapter D, Adapter E), you can group Adapters A,B, and C together on one powerline network and group Adapters D and E on a different Powerline network. Each group will use a different encryption key.
Note: It is recommended that only a maximum of up to 4 Powerline networks can be created per electrical system. Any additional Powerline networks above the recommended may result in significant degradation in Powerline performance.
Federal Communication Commission Interference Statement
This equipment has been tested and found to comply with the limits for a Class B digital device, pursuant to Part 15 of the FCC Rules. These limits are designed to provide reasonable protection against harmful interference in a residential installation. This equipment generates, uses and can radiate radio frequency energy and, if not installed and used in accordance with the instructions, may cause harmful interference to radio communications. However, there is no guarantee that interference will not occur in a particular installation. If this equipment does cause harmful interference to radio or television reception, which can be determined by turning the equipment off and on, the user is encouraged to try to correct the interference by one of the following measures:
Reorient or relocate the receiving antenna.
- Increase the separation between the equipment and receiver.
- Connect the equipment into an outlet on a circuit different from that to which the receiver is connected.
- Consult the dealer or an experienced radio/TV technician for help.
FCC Caution: Any changes or modifications not expressly approved by the party responsible for compliance could void the user's authority to operate this equipment.
This device complies with Part 15 of the FCC Rules. Operation is subject to the following two conditions: (1) This device may not cause harmful interference, and (2) this device must accept any interference received, including interference that may cause undesired operation.

IMPORTANT NOTE:
FCC Radiation Exposure Statement:
This equipment complies with FCC radiation exposure limits set forth for an uncontrolled environment. This equipment should be installed and operated with minimum distance 20cm between the radiator & your body.
This transmitter must not be co-located or operating in conjunction with any other antenna or transmitter.
The availability of some specific channels and/or operational frequency bands are country dependent and are firmware programmed at the factory to match the intended destination. The firmware setting is not accessible by the end user.
RoHS
This product is RoHS compliant.

Europe - EU Declaration of Conformity
This device complies with the essential requirements of the Directive 2004/108/EC. The following test methods have been applied in order to prove presumption of conformity with the essential requirements of the Directive 2004/108/EC:
EN 55022:2006+A1:2007
EN 61000-3-2:2006+A2:2009
EN 61000-3-3:2008
EN 55024:2010
EN 50412-2-1:2005
EN 60950-1:2006 + A11:2009

| csČesky [Czech] | TRENDnet tímtó prohlašuje, Že tento TPL-406E je ve shodě se základními požadavyk a dalísimi prííslužnými ustanoveními směrnice 2004/108/ES. |
| dDansk [Danish] | Undertegnede TRENDnet erkräer herved, at følgende udstyr TPL-406E overholder de væsentlige krav og øvtrige relevante krav i direktiv 2004/108/EF. |
| dDeutsch [German] | Hiermit erklart TRENDnet, dass sich das Gerät TPL-406E in Übereinstimmung mit den grundlegenden Anforderungen und den übrigen einschlögigen Bestimmungen der Richtlinie 2004/108/EG befindet. |
| etEesti [Estonian] | Käesolevaga kinnitab TRENDnet seadme TPL-406E vastavust direktivi 2004/108/Eü põhinõuetele ja nimetatud direktiivist tulenevatele teistele asjakohastele sâtetele. |
| enEnglish | Hereby, TRENDnet, declares that this TPL-406E is in compliance with the essential requirements and other relevant provisions of Directive 2004/108/EC. |
| esEspanol [Spanish] | Por medio de la presente TRENDnet declara que el TPL-406E cumple con los requisitos esencias y caulesquiera除外 dispositions aplicables o exigibles de la Directiva 2004/108/CE. |
| elEλληνική [Greek] | ME THN ΠΑρΟΥΣA TRENDnet ΔΗλΩNEI OTI TPL-406E ΣΥΜΟΡΦΩNETAI ΠΙΝΟ ΠΤΙ ΜΥΣΙΩΔΕΙΣ ΑΠΑΙΤΗΣΕΙΣ KAI TΙΣ ΛΟΙΝΕ ΣχETAΕΣ ΔΙΑΤΑΞΕΙΣ ΘΗ ΕΔΗΓΙΑΣ 2004/108/ΕΚ. |
| frFrançais [French] | Par la présente TRENDnet déclare que l'appareil TPL-406E est conforme aux exigences essentielles et aux autres dispositions pertinentes de la directive 2004/108/CE. |
| itItaliano [Italian] | Con la presente TRENDnet dichiara che questo TPL-406E è conforme ai requisiti essenziali ed alle autres dispositions pertinenti stabilite alla direttiva 2004/108/CE. |
| Latviski [Latvian] | Ar šo TRENDnet deklarē, ka TPL-406E atbilst Direktīvas 2004/108/EK būtiskajām prasībām un citiem ar to saistītajiem |
| noteikumiem. | |
| Lietuviç [Lithuanian] | Šiuo TRENDnet deklaruoja, kad šis TPL-406E atitinka esminius reikalavimus irKitas 2004/108/EB Direktyvos nuostatas. |
| n Netherlands [Dutch] | Hierbij verklaart TRENDnet dat het toestel TPL-406E in overeenstemming is met de essentiële eisen en de andere relevante bepalingen van richtlijn 2004/108/EG. |
| mtMalti [Maltese] | Hawnhekk, TRENDnet, jiddikjara li dan TPL-406E jikkonforma mal-htigijet essenzjali u ma provvedimenti ohrajn relevanti li hemm fid-Dirrettiva 2004/108/EC. |
| huMagyar [Hungarian] | Alulírott, TRENDnet nyilatkozom, hogy a TPL-406E megfelel a vonatkozó alapvetö követelményeknek és az 2004/108/EC irányelv égyéb előirásainak. |
| Polski [Polish] | Niniejszym TRENDnet oswiadcza, ze TPL-406E jest zgodny zzasadniczymi wymogami oraz pozostałymi stosownymi postanowieniami Dyrektywy 2004/108/EC. |
| ptPortuguès [Portuguese] | TRENDnet declares que este TPL-406E está conforme com os requisitos essenciais e autres disponções da Directiva 2004/108/CE. |
| slSlovensko [Slovenian] | TRENDnet izjavlja, da je ta TPL-406E v skladu z bistvenimi zahtevami in ostalimi relevantnimi določili direktive 2004/108/ES. |
| Slovensky [Slovak] | TRENDnet týmto vyhlasuje, ze TPL-406E splýna základné požiadaky a věsetky príslůné ustanovenia Smernice 2004/108/ES. |
| fSuomi [Finnish] | TRENDnet vakuuttaa täten että TPL-406E tyyppinen laite on direktiivin 2004/108/EY oleellisten vaatimusten ja sitä koskevien direktiivin muiden ehtojen mukainen. |
| svSvenska [Swedish] | Härmed intygarg TRENDnet attenna TPL-406E står l überensstammelse med de väsentliga egenskapskrav och övriga relevanta bestämelsen som framgår av direktiv 2004/108/EG. |
Limited Warranty
TRENDnet warrants its products against defects in material and workmanship, under normal use and service, for the following lengths of time from the date of purchase.
TPL-406E / TPL-406E2K - 3 Years Warranty
AC/DC Power Adapter, Cooling Fan, and Power Supply carry 1 year warranty. If a product does not operate as warranted during the applicable warranty period, TRENDnet shall reserve the right, at its expense, to repair or replace the defective product or part and deliver an equivalent product or part to the customer. The repair/replacement unit's warranty continues from the original date of purchase. All products that are replaced become the property of TRENDnet. Replacement products may be new or reconditioned. TRENDnet does not issue refunds or credit. Please contact the point-of-purchase for their return policies.
TRENDnet shall not be responsible for any software, firmware, information, or memory data of customer contained in, stored on, or integrated with any products returned to TRENDnet pursuant to any warranty.
There are no user serviceable parts inside the product. Do not remove or attempt to service the product by any unauthorized service center. This warranty is voided if (i) the product has been modified or repaired by any unauthorized service center, (ii) the product was subject to accident, abuse, or improper use (iii) the product was subject to conditions more severe than those specified in the manual.
Warranty service may be obtained by contacting TRENDnet within the applicable warranty period and providing a copy of the dated proof of the purchase. Upon proper submission of required documentation a Return Material Authorization (RMA) number will be issued. An RMA number is required in order to initiate warranty service support for all TRENDnet products. Products that are sent to TRENDnet for RMA service must have the RMA number marked on the outside of return packages and sent to TRENDnet prepaid, insured and packaged appropriately for safe shipment. Customers shipping from outside of the USA and Canada are responsible for return shipping fees. Customers shipping from outside of the USA are responsible for custom charges, including but not limited to, duty, tax, and other fees.
WARRANTIES EXCLUSIVE: IF THE TRENDNET PRODUCT DOES NOT OPERATE AS WARRANTED ABOVE, THE CUSTOMER'S SOLE REMEDY SHALL BE, AT TRENDNET'S OPTION, REPAIR OR REPLACE. THE FOREGOING WARRANTY AND REMEDIES ARE EXCLUSIVE AND ARE IN LIEU OF ALL OTHER WARRANTYES, EXPRESSED OR IMPLIED, EITHER IN FACT OR BY OPERATION OF LAW, STATUTORY OR OTHERWISE, INCLUDING
WARRANTIES OF MERCHANTABILITY AND FITNESS FOR A PARTICULAR PURPOSE. TRENDNET NEITHER ASSUMES NOR AUTHORIZES ANY OTHER PERSON TO ASSUME FOR IT ANY OTHER LIABILITY IN CONNECTION WITH THE SALE, INSTALLATION MAINTENANCE OR USE OF TRENDNET'S PRODUCTS.
TRENDNET SHALL NOT BE LIABLE UNDER THIS WARRANTY IF ITS TESTING AND EXAMINATION DISCLOSE THAT THE ALLEGED DEFECT IN THE PRODUCT DOES NOT EXIST OR WAS CAUSED BY CUSTOMER'S OR ANY THIRD PERSON'S MISUSE, NEGLECT, IMPROPER INSTALLATION OR TESTING, UNAUTHORIZED ATTEMPTS TO REPAIR OR MODIFY, OR ANY OTHER CAUSE BEYOND THE RANGE OF THE INTENDED USE, OR BY ACCIDENT, FIRE, LIGHTNING, OR OTHER HAZARD.
LIMITATION OF LIABILITY: TO THE FULL EXTENT ALLOWED BY LAW TRENDNET ALSO EXCLUDING FOR ITSELF AND ITS SUPPLIERS ANY LIABILITY, WHETHER BASED IN CONTRACT OR TORT (INCLUDING NEGLIGENCE), FOR INCIDENTAL, CONSEQUENTIAL, INDIRECT, SPECIAL, OR PUNITIVE DAMAGES OF ANY KIND, OR FOR LOSS OF REVENUE OR PROFITS, LOSS OF BUSINESS, LOSS OF INFORMATION OR DATE, OR OTHER FINANCIAL LOSS ASING OUT OF OR IN CONNECTION WITH THE SALE, INSTALLATION, MAINTENANCE, USE, PERFORMANCE, FAILURE, OR INTERRUPTION OF THE POSSIBILITY OF SUCH DAMAGES, AND LIMITS ITS LIABILITY TO REPAIR, REPLACEMENT, OR REFUND OF THE PURCHASE PRICE PAID, AT TRENDNET'S OPTION. THIS DISCLAIMER OF LIABILITY FOR DAMAGES WILL NOT BE AFFECTED IF ANY REMEDY PROVIDED HEREIN SHALL FAIL OF ITS ESSENTIAL PURPOSE.
Governing Law: This Limited Warranty shall be governed by the laws of the state of California.
Some TRENDnet products include software code written by third party developers. These codes are subject to the GNU General Public License ("GPL") or GNU Lesser General Public License ("LGPL").
Go to http://www.trendnet.com/gpl or http://www.trendnet.com Download section and look for the desired TRENDnet product to access to the GPL Code or LGPL Code. These codes are distributed WITHOUT WARRANTY and are subject to the copyrights of the developers. TRENDnet does not provide technical support for these codes. Please go to http://www.gnu.org/licenses/gpl.txt or http://www.gnu.org/licenses/lgpl.txt for specific terms of each license.
PWP05202009v2
2012/05/04
Product Warranty Registration
Please take a moment to register your product online. Go to TRENDnet's website at http://www.trendnet.com/register
TRENDnet
20675 Manhattan Place
Torrance, CA 90501. USA