BONTRAGER TRIP 5W - Compteur de vélo

TRIP 5W - Compteur de vélo BONTRAGER - Notice d'utilisation et mode d'emploi gratuit

Retrouvez gratuitement la notice de l'appareil TRIP 5W BONTRAGER au format PDF.

📄 22 pages Français FR Télécharger 💬 Question IA 13 questions ⚙️ Specs
Notice BONTRAGER TRIP 5W - page 1
Voir la notice : Français FR English EN
Choisissez votre langue et indiquez votre email : nous vous enverrons une version traduite specifiquement.
Type de produit Compteur de vélo sans fil
Marque Bontrager
Modèle Trip 5W
Alimentation Pile lithium CR2032, 3 V
Autonomie de la pile Environ 6 mois (selon utilisation)
Affichage LCD avec rétroéclairage (activé pendant 5 secondes)
Fonctions principales Vitesse actuelle, vitesse moyenne, vitesse maximale, distance parcourue (Trip), odomètre total, temps de trajet, horloge (12/24h), sélection de deux vélos, mode veille automatique
Unités MPH ou km/h, °F ou °C
Transmission Sans fil (capteur de roue)
Mémoire Conserve les données en cas de changement de pile (sauf réinitialisation)
Dimensions (approx.) 5 cm x 7 cm x 2 cm
Poids (approx.) 50 g
Matériau du boîtier Plastique
Étanchéité Non spécifié, mais protégé par joint torique au niveau du compartiment pile
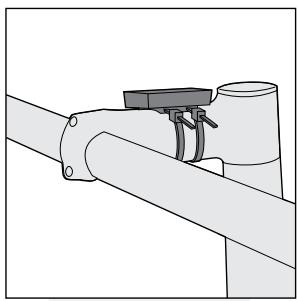
Installation Support de guidon ou de potence (fourni), capteur sans fil à fixer sur la fourche
Entretien Remplacement de la pile tous les 6 mois ou en cas de dysfonctionnement
Nettoyage Essuyer avec un chiffon doux et sec. Ne pas utiliser de produits chimiques.
Sécurité Ne pas regarder l'écran en roulant. Fixer correctement les capteurs pour éviter tout contact avec les rayons.
Pièces détachées Pile CR2032, capteur sans fil, support de fixation
Réparabilité Pile remplaçable par l'utilisateur. Pour les autres réparations, consulter un revendeur agréé.
Garantie Garantie limitée (voir site bontrager.com)
Notice incluse Oui, en anglais et français (téléchargeable)

FOIRE AUX QUESTIONS - TRIP 5W BONTRAGER

Comment installer la pile du compteur Trip 5W ?
Retirez le compteur de son support. Tournez le couvercle du compartiment pile d'un quart de tour dans le sens inverse des aiguilles d'une montre à l'aide d'une pièce de monnaie ou d'un tournevis plat. Soulevez le couvercle en prenant soin de ne pas perdre le joint torique. Retirez l'ancienne pile et insérez une nouvelle pile CR2032 avec le signe '+' et l'étiquette vers le haut. Replacez le couvercle et tournez d'un quart de tour dans le sens horaire.
Comment régler la taille de la roue sur le Trip 5W ?
Après avoir installé la pile ou après une réinitialisation, la taille de roue apparaît à l'écran. Utilisez le bouton M pour modifier la valeur et le bouton S pour valider. Vous pouvez également utiliser une taille personnalisée en mesurant la distance parcourue par la roue en un tour complet (roll-out) en millimètres. Pour entrer une taille personnalisée, accédez au réglage via le menu TME en maintenant S enfoncé.
Comment allumer le rétroéclairage du Trip 5W ?
Le rétroéclairage s'active en appuyant sur le bouton M pendant deux secondes, quel que soit l'affichage. Il s'éteint automatiquement après cinq secondes pour économiser la pile.
Comment réinitialiser les données de trajet (Trip Restart) ?
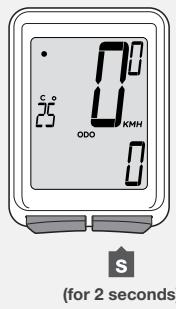
Pour remettre à zéro la distance du trajet, la vitesse moyenne, la vitesse maximale et le temps de trajet, maintenez les boutons S et M enfoncés simultanément pendant deux secondes. L'odomètre total n'est pas affecté.
Que faire si l'écran du Trip 5W reste vide ?
Vérifiez d'abord que la pile est correctement installée avec le bon côté (+ vers le haut). Si le problème persiste, remplacez la pile par une neuve CR2032. Assurez-vous que les contacts sont propres. Si l'écran reste vide, le compteur peut être défectueux.
Comment passer d'un vélo à l'autre sur le Trip 5W ?
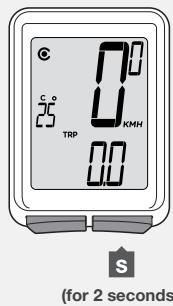
Le compteur peut mémoriser deux tailles de roue différentes. Pour changer de vélo, allez sur l'affichage TRP (distance trajet) et maintenez le bouton S enfoncé pendant deux secondes. L'icône de roue (roue 1 ou roue 2) clignote. Utilisez M pour sélectionner l'autre roue. Les données de l'odomètre sont cumulées pour les deux vélos.
Comment régler l'horloge sur le Trip 5W ?
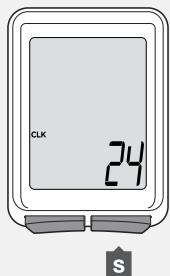
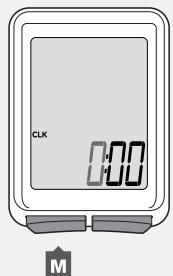
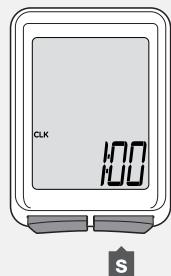
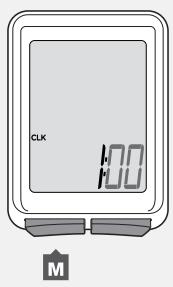
Accédez à l'affichage CLK en appuyant plusieurs fois sur M. Maintenez S enfoncé pendant deux secondes. L'écran affiche le format 12h ou 24h. Utilisez M pour changer le format, puis S pour valider. Ensuite, les heures clignotent, modifiez-les avec M et validez avec S. Faites de même pour les minutes. Une fois terminé, le compteur revient à l'affichage CLK.
Comment changer les unités de mesure (mph/km/h) ?
Depuis l'affichage MAX, maintenez S enfoncé pendant deux secondes. L'unité de vitesse (MPH ou KMH) clignote. Utilisez M pour basculer, puis S pour valider. Ensuite, l'unité de température (°F ou °C) apparaît, modifiez-la de la même manière. Le compteur retourne à l'affichage MAX.
Qu'est-ce que le mode veille (Sleep Mode) sur le Trip 5W ?
Si aucun signal n'est reçu du capteur de roue pendant 10 minutes, le compteur passe automatiquement en mode veille pour économiser la pile. L'écran s'éteint mais les données sont conservées. Le compteur se réveille dès qu'un mouvement est détecté.
Comment remplacer la pile du capteur sans fil du Trip 5W ?
Le capteur sans fil possède sa propre pile. Ouvrez le boîtier du capteur (généralement en tournant le couvercle). Retirez l'ancienne pile et insérez une nouvelle pile CR2032 en respectant la polarité. Refermez le boîtier. Si le compteur ne reçoit plus de signal, remplacez d'abord la pile du capteur.

Questions des utilisateurs sur TRIP 5W BONTRAGER

3 questions sur cet appareil. Repondez a celles que vous connaissez ou posez la votre.

Poser une nouvelle question sur cet appareil

L'email reste privé : il sert seulement à vous prévenir si quelqu'un répond à votre question.

Comment obtenir la notice d'utilisation du compteur de vélo BONTRAGER TRIP 5W ?
FAQ fréquente - 21/04/2026
Réponse Notice-Facile

La notice d'utilisation du compteur BONTRAGER TRIP 5W est disponible en téléchargement gratuit sur ce site (notice-facile.com) en format PDF. C'est un compteur sans fil doté d'un écran LCD rétroéclairé spécifique au modèle 5W.

Installation de base : Le compteur fonctionne avec une batterie CR2032 (3 volts) à installer avant la première utilisation. Montez le compteur sur le cintre ou la tige du vélo, puis installez le capteur sans fil sur la roue ainsi que l'aimant sur un rayon. La batterie du capteur sans fil est également de type CR2032. À la première mise en marche, le compteur vous demande de programmer la taille de votre roue et les unités de mesure (km/h ou mph).

Fonctionnalités principales : Le TRIP 5W affiche la vitesse actuelle, la distance parcourue, le temps de trajet, la vitesse moyenne et la vitesse maximale. L'écran rétroéclairé s'active en appuyant longtemps sur le bouton gauche et s'éteint automatiquement après 5 secondes pour économiser la batterie. Le compteur supporte deux tailles de roue différentes, pratique si vous l'utilisez sur plusieurs vélos.

Maintenance : Remplacez la batterie CR2032 tous les 6 mois environ ou dès que le compteur affiche des données erratiques. Avant de remplacer la batterie, notez votre kilométrage actuel (compteur ODO) car il sera réinitialisé. Nettoyez le compteur avec un chiffon doux et évitez les produits chimiques agressifs. Le compteur est résistant à l'eau.

Configuration avancée : La notice explique comment régler l'horloge, personnaliser la taille de roue par mesure de roulage exact, gérer deux vélos avec deux tailles de roue différentes, et utiliser les boutons pour naviguer entre les différents affichages (vitesse, distance, temps, odomètre). Consultez le PDF téléchargeable pour les procédures précises.

Répondre (soyez le premier)
À quoi servent les boutons M et S sur le compteur BONTRAGER TRIP 5W ?
FAQ fréquente - 21/04/2026
Réponse Notice-Facile

Le compteur de vélo BONTRAGER TRIP 5W est équipé de deux boutons principaux : M et S. Voici leurs fonctions principales :

  • Bouton M (Mode) : Ce bouton permet de naviguer entre les différents modes et écrans du compteur. Par exemple, il sert à accéder aux menus, afficher les données de vitesse, distance, temps, ou encore à entrer dans les réglages.
  • Bouton S (Set ou Sélection) : Ce bouton est utilisé pour sélectionner une option ou valider un réglage dans les menus. Il sert aussi à ajuster les valeurs lors de la configuration, comme la mise à jour de l'heure ou la taille de la roue.

En résumé, le bouton M sert à naviguer et changer de mode, tandis que le bouton S sert à confirmer et modifier les paramètres.

Répondre (soyez le premier)
Comment mettre à jour l'heure sur le compteur de vélo BONTRAGER TRIP 5W ?
FAQ fréquente - 21/04/2026
Réponse Notice-Facile

Pour mettre à jour l'heure sur votre compteur de vélo BONTRAGER TRIP 5W, vous devez accéder au menu d'horloge (CLK) et modifier les paramètres de 12h ou 24h selon vos préférences, puis ajuster les heures et minutes.

Étapes pour régler l'heure :

  • Faites défiler le menu sur l'écran du compteur jusqu'à voir CLK (horloge) affiché
  • Appuyez et maintenez le bouton E pendant 2 secondes pour entrer en mode réglage de l'heure
  • Appuyez plusieurs fois sur le bouton de défilement pour basculer entre le format 12h et 24h, puis appuyez sur le bouton E pour valider votre choix
  • Appuyez plusieurs fois sur le bouton de défilement pour modifier le chiffre des heures (qui clignotera), puis appuyez sur le bouton E pour confirmer
  • Appuyez plusieurs fois sur le bouton de défilement pour modifier le chiffre des minutes, puis appuyez sur le bouton E pour valider
  • Le compteur retournera automatiquement à l'affichage de l'horloge une fois vos modifications terminées

Important : le format 24h est idéal pour une lecture facile des horaires au long de la journée, tandis que le format 12h (avec AM/PM) est plus traditionnel. Assurez-vous que votre batterie CR2032 est bien installée et en bon état, car une batterie faible peut causer des dysfonctionnements ou une perte des paramètres.

Si après le réglage l'heure ne s'affiche pas correctement ou disparaît après quelques minutes, votre batterie doit probablement être remplacée. La batterie CR2032 dure généralement 6 mois et doit être changée si le compteur manifeste des comportements erratiques ou manque de réactivité.

Répondre (soyez le premier)

Téléchargez la notice de votre Compteur de vélo au format PDF gratuitement ! Retrouvez votre notice TRIP 5W - BONTRAGER et reprennez votre appareil électronique en main. Sur cette page sont publiés tous les documents nécessaires à l'utilisation de votre appareil TRIP 5W de la marque BONTRAGER.

MODE D'EMPLOI TRIP 5W BONTRAGER

BONTRAGER TRIP 5W - 1

BONTRAGER

Tripl 2, 2L, 3 and 5W

Owner's Manual.

WELCOME.

Thank you for buying a Bontrager Trip ™ computer. We hope this computer gives you miles (or kilometers) of pleasure.

Your Trip computer may not include all of the features discussed in this manual. This manual covers Trip 2, 2L, 3 and 5W models.

Please read this manual carefully. If you do not understand the information, or you have a question that this manual does not cover, consult your Authorized Bontrager Dealer or visit www.bontrager.com.

Safety When Riding

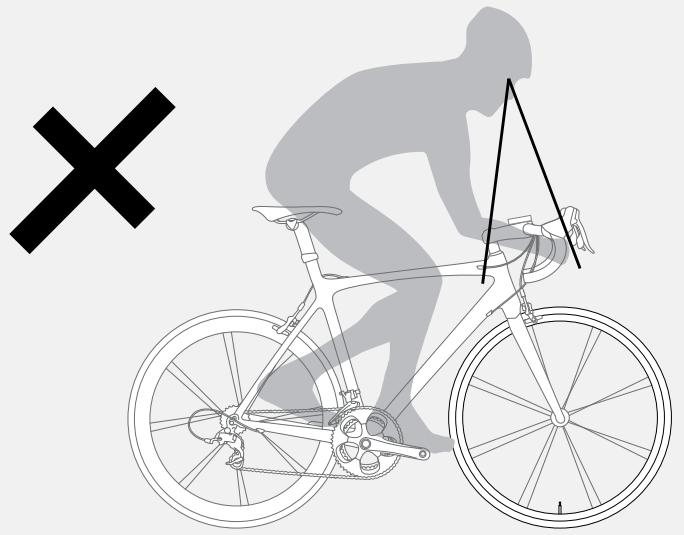
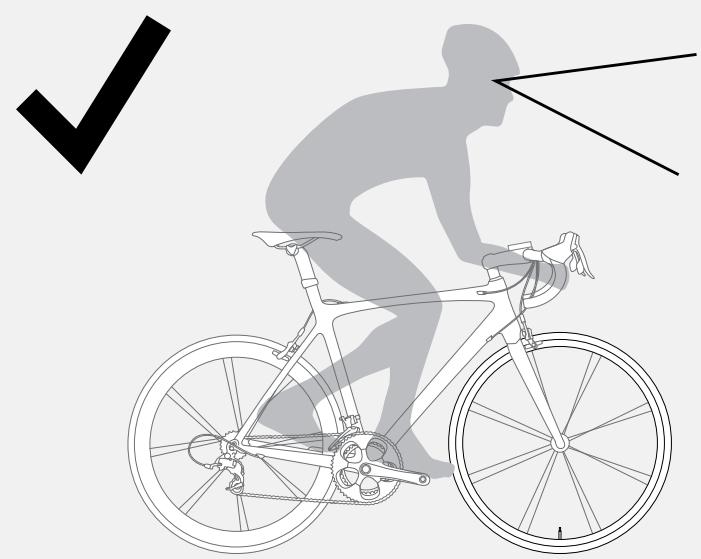
When riding your bicycle, do not stare at the computer for a long time (Figure 1). Failure to pay attention to the road ahead of you, obstacles, and traffic could result in a loss of control, serious injury, or death. Stay alert!

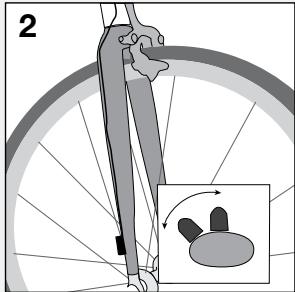
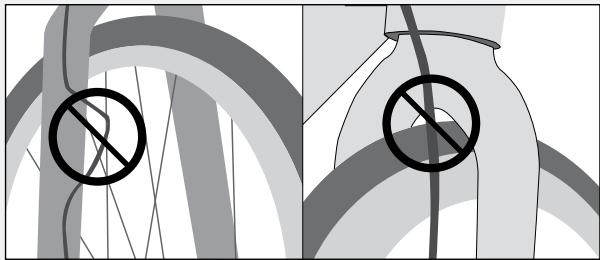
Make sure wires cannot contact the tire, rim, or spokes. Contact with wires could damage the computer or cause you to lose control and fall.

Terms Used

HoldPress a button continuously for about two seconds.
PressPush a button once, briefly.
ResetSet all values in the memory to 0 (zero) and erase all settings.
Trip RestartSet Trip values (only) in the memory to 0 (zero).
ScrollPress several times to scroll through a list of values or display elements.

BONTRAGER TRIP 5W - Safety When Riding - 1

BONTRAGER TRIP 5W - Safety When Riding - 2
Figure 1. Do Not Stare at Computer for Long Periods of Time.

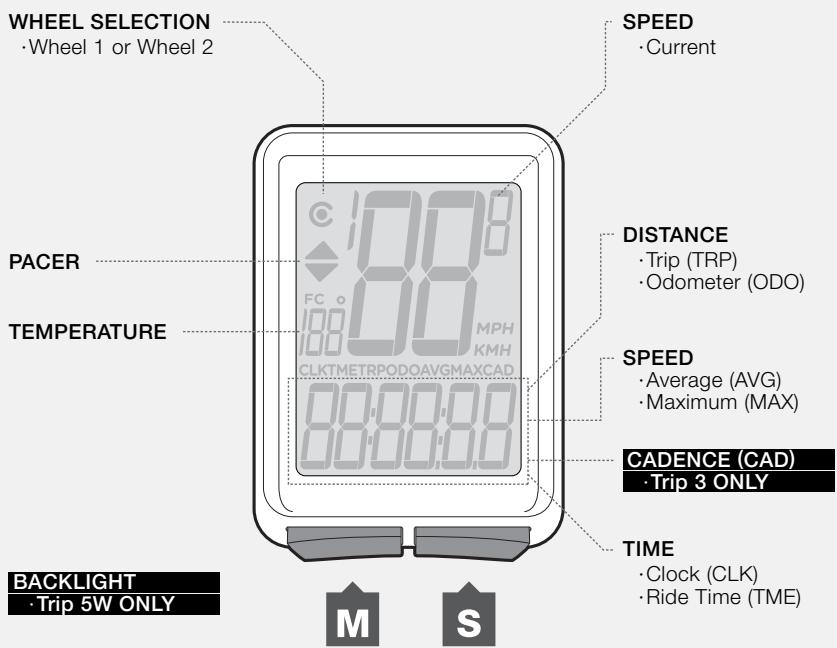
Display Elements and Abbreviations

The Trip can be used on two bicycles with different wheel sizes while still calculating data correctly for each wheel size. You must first set the wheel sizes and choose the appropriate bike setting before riding.

Trip Data (can be reset to 0 without affecting Odometer (ODO) total)

  • Trip Distance (TRP)
  • Average Speed (AVG) and Maximum Speed (MAX)
  • Ride Time (TME)

Abbreviations and Screen Terms

AbbreviationMeaning
AVGAverage Speed
CLKClock
CURCurrent Speed
MAXMaximum Speed
ODOOdometer
TMERide Time
TRPTrip Distance
CADCadence

BONTRAGER TRIP 5W - Trip Data (can be reset to 0 without affecting Odometer (ODO) total) - 1
Figure 2. Display Elements and Buttons.

After you install the battery, you can program the wheel size and units.

Install the Battery

To prolong the life of the battery, it is not installed at the factory. (See Figures 10 and 11 at the end of the manual for further help installing the battery.)

To Program Your Trip

This procedure programs your Trip cycle computer for the first time or after a Reset. If you would like to program individual features or advanced settings, see the sections Additional Information & Features and Advanced Settings.

  1. Install the battery (or push the Reset button—see Figure 12 at end of manual).
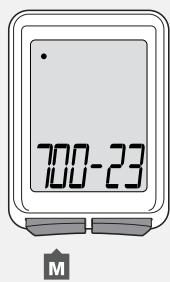
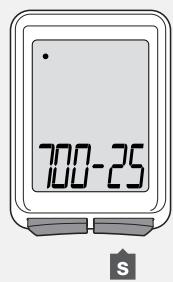
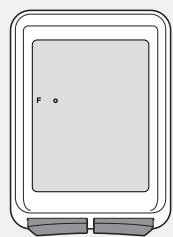
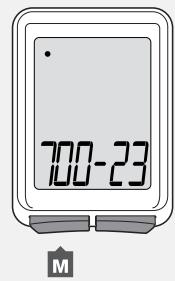
  2. The wheel size appears on the display.
  3. To change the wheel size, press M.

To select, press S.

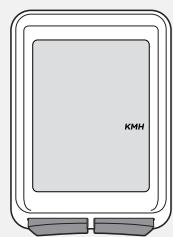
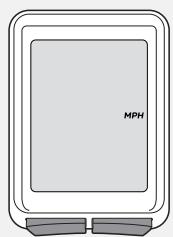
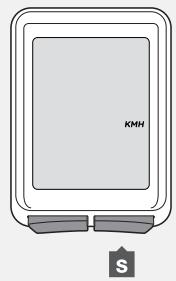
  1. To scroll between units of measurement, Miles per Hour (MPH) or Kilometers per Hour (KMH), press M.
  2. To select, press S
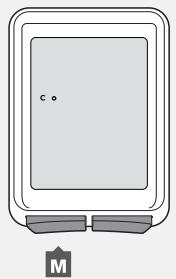
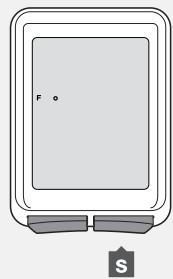
  3. To change to ^ F or ^ C , press M.

BONTRAGER TRIP 5W - To Program Your Trip - 1

BONTRAGER TRIP 5W - To Program Your Trip - 2

BONTRAGER TRIP 5W - To Program Your Trip - 3

1.

2.

3.

BONTRAGER TRIP 5W - To Program Your Trip - 4
M

BONTRAGER TRIP 5W - To Program Your Trip - 5
s

BONTRAGER TRIP 5W - To Program Your Trip - 6
M

4.

5.

6.

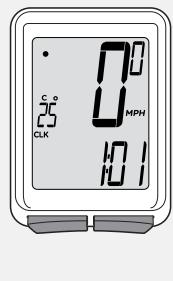
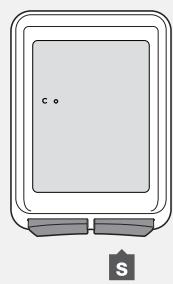
  1. To select, press S. The Trip returns to CLK.
BONTRAGER TRIP 5W - To Program Your Trip - 7

BONTRAGER TRIP 5W - To Program Your Trip - 8

7.

To Set the Clock

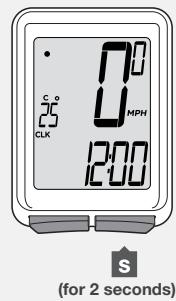
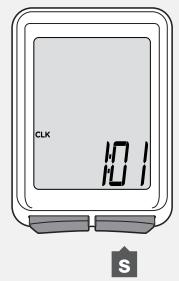
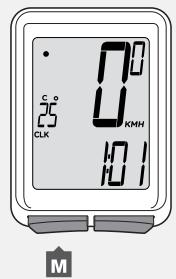
1.Scroll M to CLK.
2. Hold S for 2 seconds.
3. To change to 12hr or 24hr clock, press M.

BONTRAGER TRIP 5W - To Set the Clock - 1

BONTRAGER TRIP 5W - To Set the Clock - 2

BONTRAGER TRIP 5W - To Set the Clock - 3

4.

5.

6.

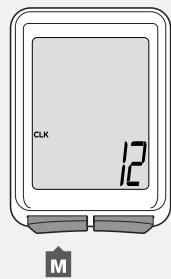
  1. To select, press S
  2. To change the flashing digit for hours, press M
  3. To select, press S.

BONTRAGER TRIP 5W - To Set the Clock - 4

BONTRAGER TRIP 5W - To Set the Clock - 5

BONTRAGER TRIP 5W - To Set the Clock - 6

7.

8.

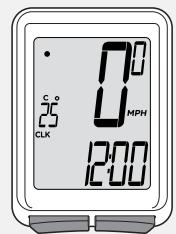
  1. To change the flashing digit for minutes, press M.
  2. To select, press S. The Trip returns to CLK.
BONTRAGER TRIP 5W - To Set the Clock - 7

BONTRAGER TRIP 5W - To Set the Clock - 8

BONTRAGER TRIP 5W - To Set the Clock - 9

7.

8.

Additional Information & Features

Automatic Sleep Mode

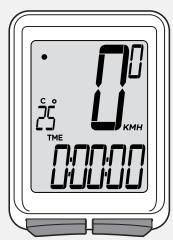
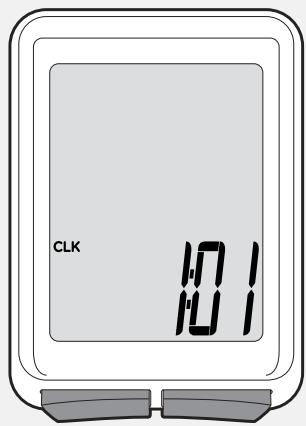
If the Trip's sensors do not send a signal to the computer head for 10 minutes, the Trip switches to Sleep Mode to prolong battery life (Figure 3).
BONTRAGER TRIP 5W - Automatic Sleep Mode - 1
Figure 3. Display in Sleep Mode.

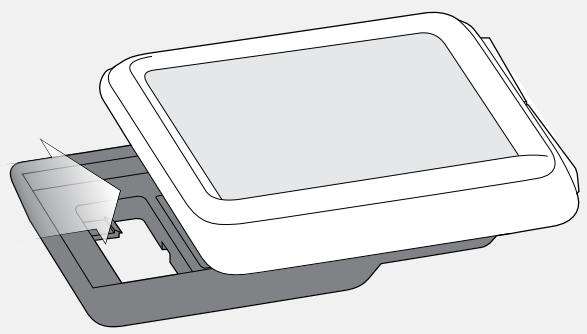
To Remove the Computer from the Computer Base

Press firmly on the computer (not on the base) in a rearward direction (Figure 4).
BONTRAGER TRIP 5W - To Remove the Computer from the Computer Base - 1
Figure 4. Removing the Computer from the Base.

Trip Restart (Set the Trip Data to Zero)

Trip Restart resets the following Trip data to zero:

  • Trip Distance (TRP)
  • Speed AVG and MAX
  • Ride Time (TME)

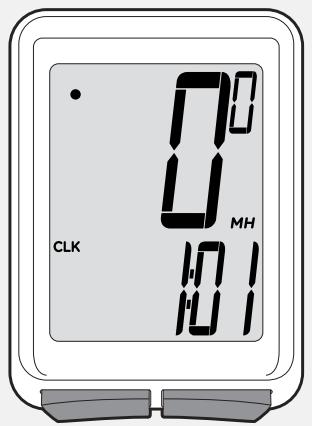
To Restart

Hold S and M at the same time for two seconds (Figure 5).

The trip data restarts at '0'.
BONTRAGER TRIP 5W - To Restart - 1

BONTRAGER TRIP 5W - To Restart - 2

(and)

BONTRAGER TRIP 5W - To Restart - 3
Figure 5. Restart the Trip Data.

(for 2 seconds)

Backlight (Trip 5W only)

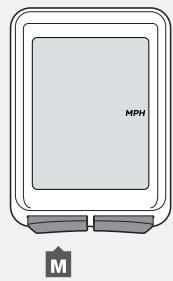
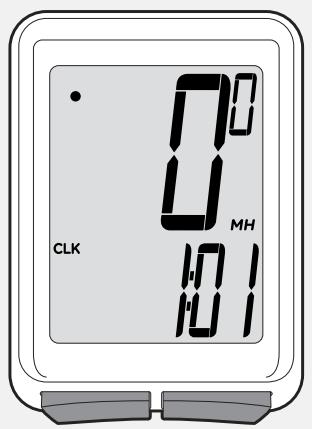
The Trip 5W has a backlit display. The backlight provides a light source behind the display so that the numbers are more visible. To save battery life, the backlight automatically switches to Off after five seconds.

To Switch the Backlight to On

While viewing any display hold M for two seconds (Figure 6).
BONTRAGER TRIP 5W - To Switch the Backlight to On - 1

BONTRAGER TRIP 5W - To Switch the Backlight to On - 2
Figure 6. Switch the Backlight On.

(for 2 seconds)

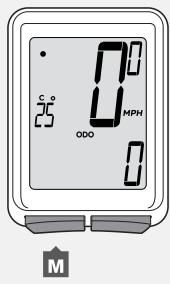
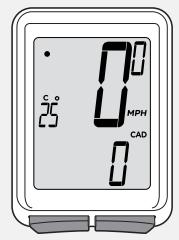
Cadence (Trip 3 only)

Cadence is a measurement of how fast you are pedaling, counted as the number of complete revolutions per minute (RPM) of the crankset.
BONTRAGER TRIP 5W - Cadence (Trip 3 only) - 1

BONTRAGER TRIP 5W - Cadence (Trip 3 only) - 2

To see Cadence

1.Scroll M to CAD.

1.

Advanced Settings

This section explains how to set individual features of your Trip, and how to set advanced features including a second wheel size.

To Set the Units of Measurement

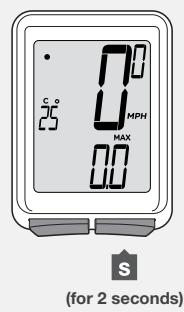
1.Scroll M to MAX.
2. Hold S for two seconds.
3. To change to MPH or KMH, press M.

  1. To select, press S.
  2. To change to ^ F or ^ C , press M.
  3. To select, press S. The Trip returns to MAX.

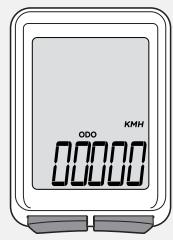
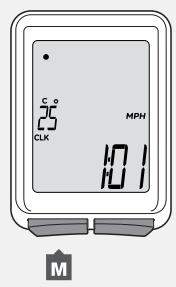
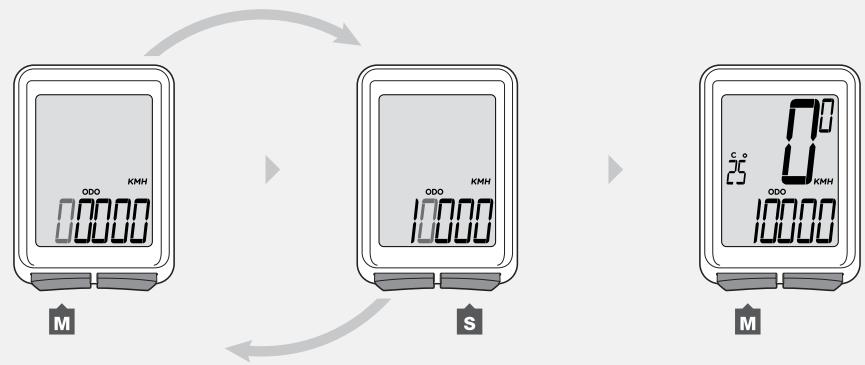
To Set the Odometer

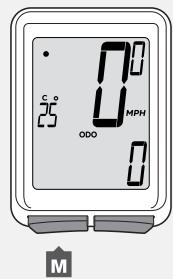
1.Scroll M to ODO.
2. Hold S for two seconds. The odometer appears.
BONTRAGER TRIP 5W - To Set the Odometer - 1

BONTRAGER TRIP 5W - To Set the Odometer - 2

BONTRAGER TRIP 5W - To Set the Odometer - 3

BONTRAGER TRIP 5W - To Set the Odometer - 4

1.

2.

3.

BONTRAGER TRIP 5W - To Set the Odometer - 5

BONTRAGER TRIP 5W - To Set the Odometer - 6

BONTRAGER TRIP 5W - To Set the Odometer - 7

4.

5.

6.

BONTRAGER TRIP 5W - To Set the Odometer - 8

BONTRAGER TRIP 5W - To Set the Odometer - 9

BONTRAGER TRIP 5W - To Set the Odometer - 10

1.

2.

  1. To change the flashing digit, press M.

To select, press S.

  1. Repeat step 3 to change the other digits. The Trip returns to ODO.

Custom Wheel Size

The menu on your computer for tire size is based on averages, but there is some variation in actual tire size even between tires marked as the same. You can make your computer more accurate by setting a custom wheel size.

To Set a Custom Wheel Size

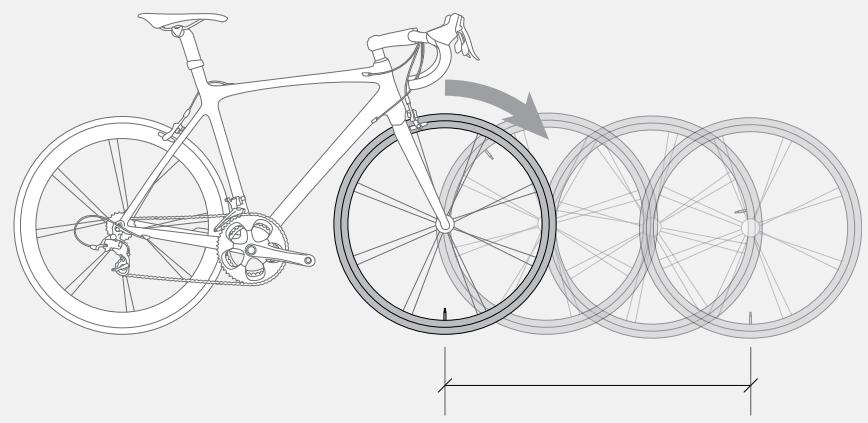
Measure the roll-out (Figure 7).

Roll-out is the distance your bicycle travels in exactly one revolution of the wheel. If one wheel on your bicycle is bigger, measure the wheel with the magnet.

  1. Start with the valve stem of the wheel directly perpendicular to the floor.
  2. Mark the floor at the valve stem. Placing an object on the floor makes a good mark.
  3. Roll the bike straight forward one revolution of the wheel, so that the valve stem is again directly over the floor.
  4. Mark the new location of the valve stem.
  5. Measure the distance between the marks in millimeters. The result is your Custom Wheel Size.
BONTRAGER TRIP 5W - To Set a Custom Wheel Size - 1

3.

4.

BONTRAGER TRIP 5W - To Set a Custom Wheel Size - 2
Figure 7. Measuring Roll-out.

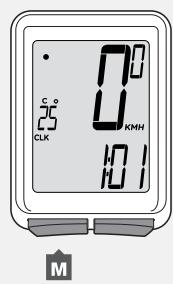
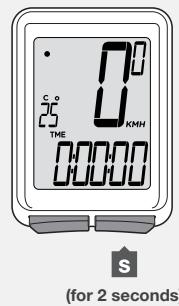
1.Scroll M to TME.
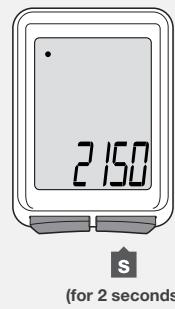
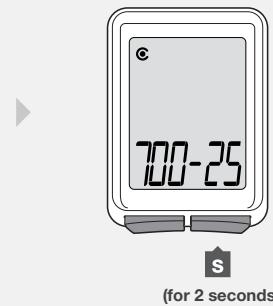
2. Hold S for two seconds until the wheel size appears. To program the second wheel size, press Set to change the preferred Wheel Selection icon to Wheel 1 or Wheel 2, and press M to select.
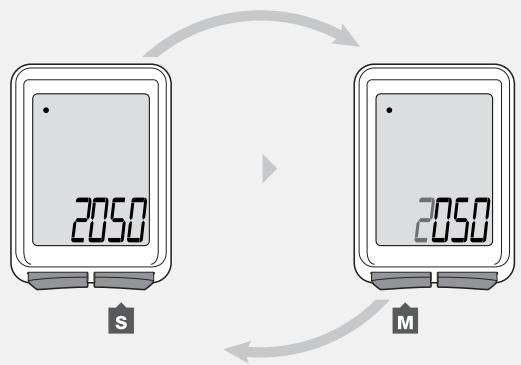
3. Scroll M to the four-digit number (example: 2050).
BONTRAGER TRIP 5W - To Set a Custom Wheel Size - 3

BONTRAGER TRIP 5W - To Set a Custom Wheel Size - 4

BONTRAGER TRIP 5W - To Set a Custom Wheel Size - 5

1.

2.

3.

  1. Press s.

To change the flashing digit, press M.

To select, press S.

Repeat step 4 for the other digits.

  1. To save and exit, hold S for two seconds. The Trip returns to the TME display.
BONTRAGER TRIP 5W - To Set a Custom Wheel Size - 6

BONTRAGER TRIP 5W - To Set a Custom Wheel Size - 7

4.

5.

Second Wheel Size (Trip 4W only)

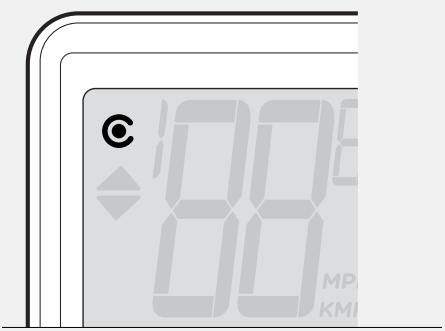
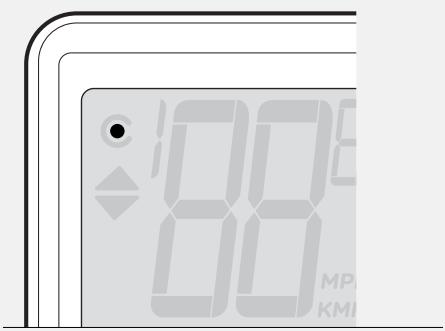
The Trip can store two different wheel sizes. The icon for Wheel 1 (Figure 8) is a small circle. Wheel 2 is a partial circle surrounding the Wheel 1 icon (Figure 9). The odometer combines the distance accumulated on both wheel settings.
BONTRAGER TRIP 5W - Second Wheel Size (Trip 4W only) - 1
Figure 8. Wheel 1 Icon.

BONTRAGER TRIP 5W - Second Wheel Size (Trip 4W only) - 2
Figure 9. Wheel 2 Icon.

To Set the Second Wheel Size

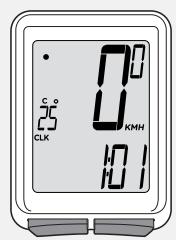
1.Scroll M to TME.
2. Hold S for two seconds

The Wheel Selection icon appears.

  1. To change to Wheel 1 or Wheel 2, press S.
BONTRAGER TRIP 5W - To Set the Second Wheel Size - 1
M

BONTRAGER TRIP 5W - To Set the Second Wheel Size - 2
s
(for 2 seconds)

BONTRAGER TRIP 5W - To Set the Second Wheel Size - 3
s

1.

2.

3.

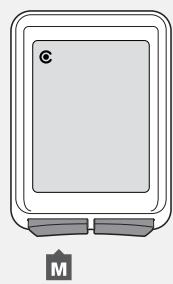
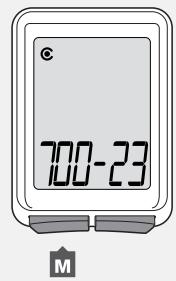
  1. To select, press M. The wheel size appears.
  2. To change the wheel size, press M.
  3. To select, hold S for two seconds. To set a custom a wheel size, refer to the instructions listed earlier in the manual.
BONTRAGER TRIP 5W - To Set the Second Wheel Size - 4

BONTRAGER TRIP 5W - To Set the Second Wheel Size - 5

BONTRAGER TRIP 5W - To Set the Second Wheel Size - 6

4.

5.

6.

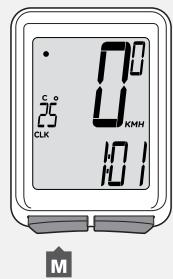
To Ride with the Second Wheel Size

1.Scroll to TRP.
2. Hold S for two seconds.
BONTRAGER TRIP 5W - To Ride with the Second Wheel Size - 1

BONTRAGER TRIP 5W - To Ride with the Second Wheel Size - 2

1.

2.

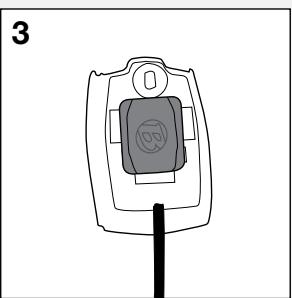
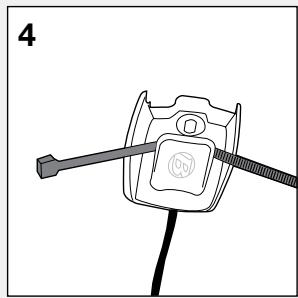
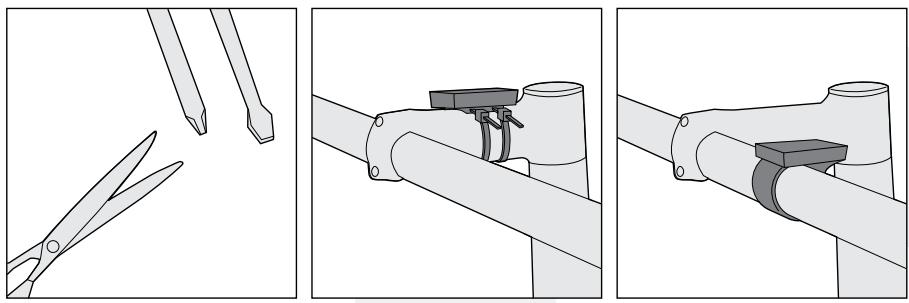
Installation

BONTRAGER TRIP 5W - Installation - 1
Trip 2, 2L, 3 (wired)

BONTRAGER TRIP 5W - Installation - 2

BONTRAGER TRIP 5W - Installation - 3

BONTRAGER TRIP 5W - Installation - 4
Handlebar Mount

BONTRAGER TRIP 5W - Installation - 5

BONTRAGER TRIP 5W - Installation - 6

BONTRAGER TRIP 5W - Installation - 7

BONTRAGER TRIP 5W - Installation - 8

BONTRAGER TRIP 5W - Installation - 9
Stem Mount

BONTRAGER TRIP 5W - Installation - 10

BONTRAGER TRIP 5W - Installation - 11

BONTRAGER TRIP 5W - Installation - 12

BONTRAGER TRIP 5W - Installation - 13

BONTRAGER TRIP 5W - Installation - 14

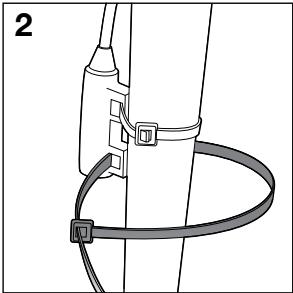
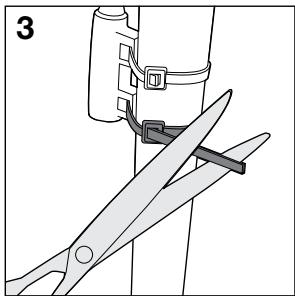
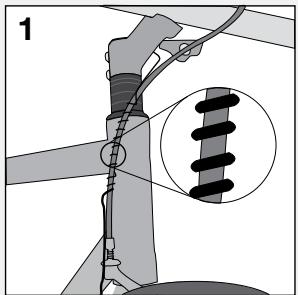
Attach Wire

Make sure the computer wire cannot contact the tire, rim, or spokes. Contact with wires could damage the computer or cause you to lose control and fall.

BONTRAGER TRIP 5W - Attach Wire - 1

BONTRAGER TRIP 5W - Attach Wire - 2

BONTRAGER TRIP 5W - Attach Wire - 3

BONTRAGER TRIP 5W - Attach Wire - 4

Install Wheel Magnet

BONTRAGER TRIP 5W - Install Wheel Magnet - 1

BONTRAGER TRIP 5W - Install Wheel Magnet - 2

BONTRAGER TRIP 5W - Install Wheel Magnet - 3

BONTRAGER TRIP 5W - Install Wheel Magnet - 4

BONTRAGER TRIP 5W - Install Wheel Magnet - 5

Install Wheel Sensor

BONTRAGER TRIP 5W - Install Wheel Sensor - 1

BONTRAGER TRIP 5W - Install Wheel Sensor - 2

BONTRAGER TRIP 5W - Install Wheel Sensor - 3

BONTRAGER TRIP 5W - Install Wheel Sensor - 4
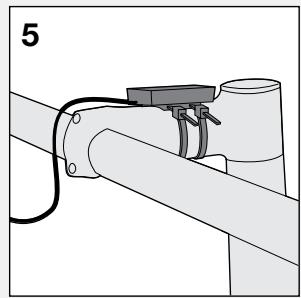
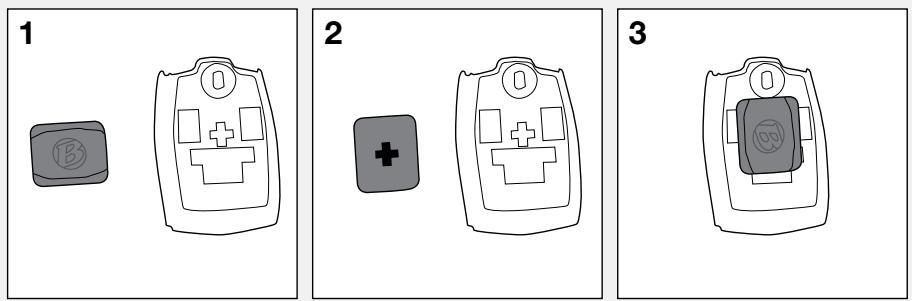
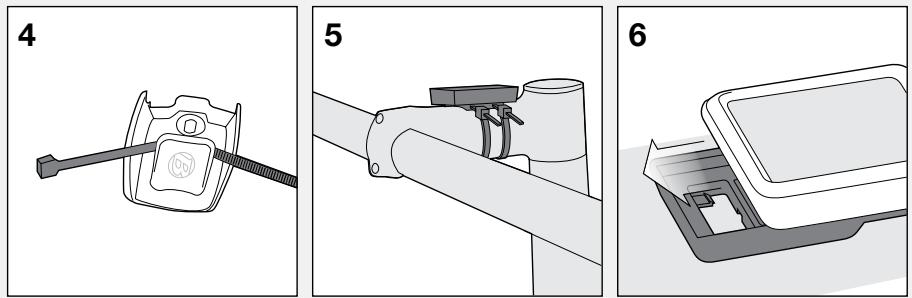
Trip 5W (wireless)

BONTRAGER TRIP 5W - Install Wheel Sensor - 5
Handlebar Mount

BONTRAGER TRIP 5W - Install Wheel Sensor - 6

BONTRAGER TRIP 5W - Install Wheel Sensor - 7
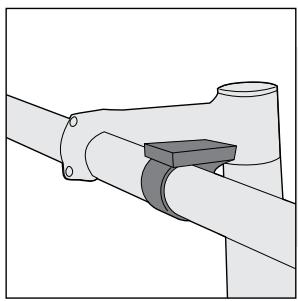
Stem Mount

BONTRAGER TRIP 5W - Install Wheel Sensor - 8

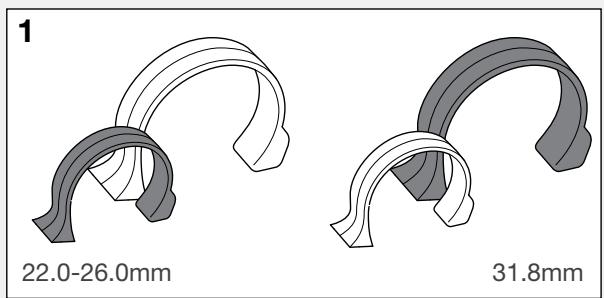
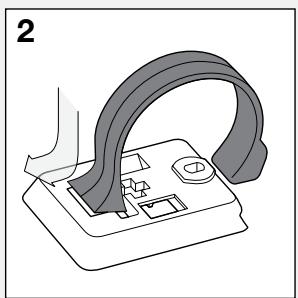
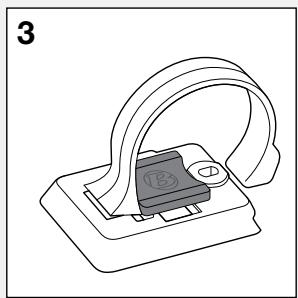
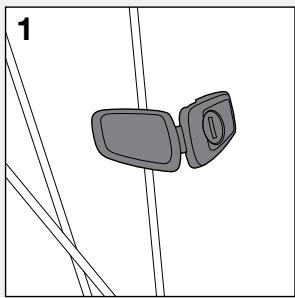
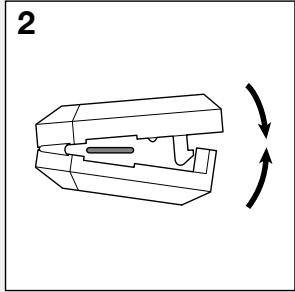
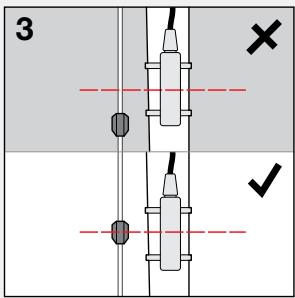
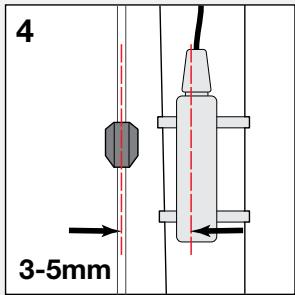
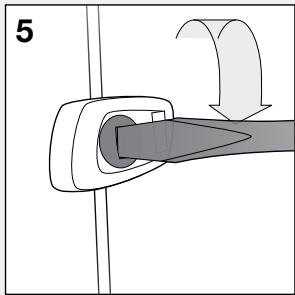
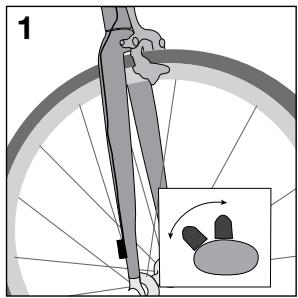
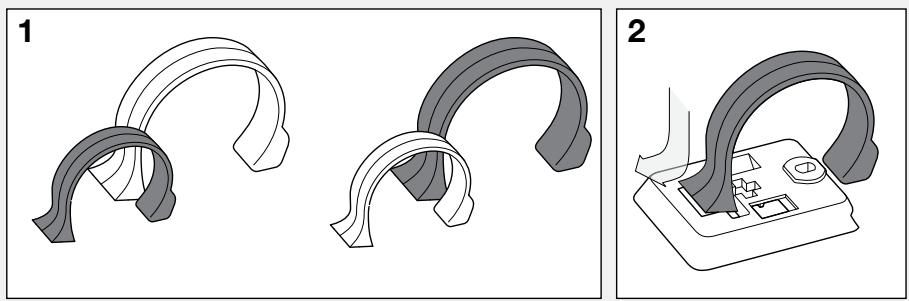
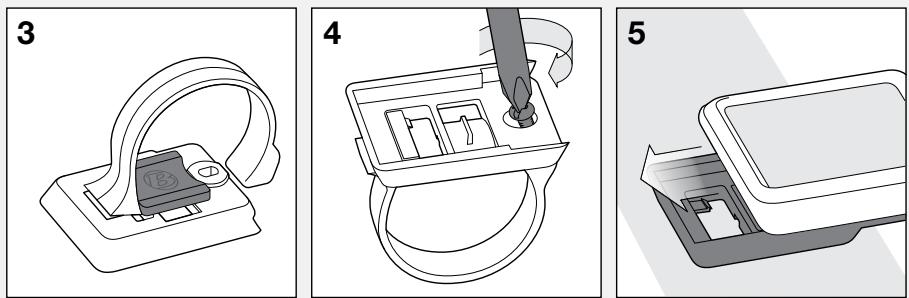
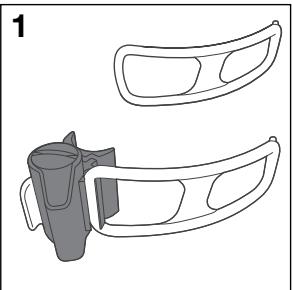
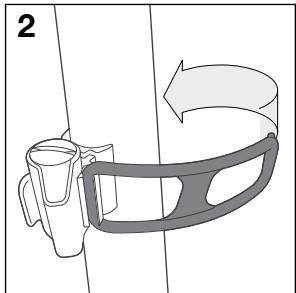
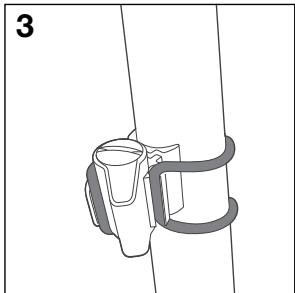
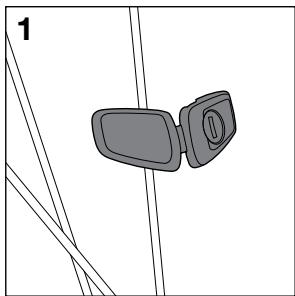
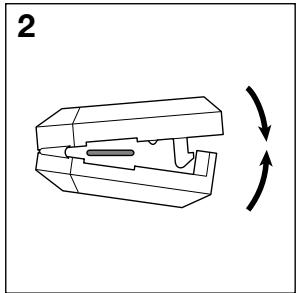
Install Wireless Wheel Sensor

BONTRAGER TRIP 5W - Install Wireless Wheel Sensor - 1

BONTRAGER TRIP 5W - Install Wireless Wheel Sensor - 2

BONTRAGER TRIP 5W - Install Wireless Wheel Sensor - 3

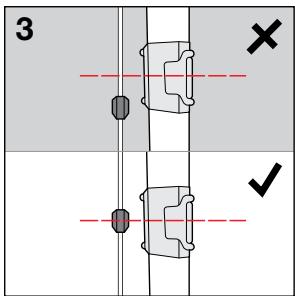
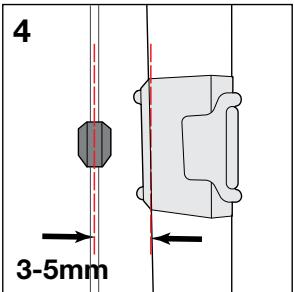
Install Wheel Magnet

BONTRAGER TRIP 5W - Install Wheel Magnet - 1

BONTRAGER TRIP 5W - Install Wheel Magnet - 2

BONTRAGER TRIP 5W - Install Wheel Magnet - 3

BONTRAGER TRIP 5W - Install Wheel Magnet - 4

BONTRAGER TRIP 5W - Install Wheel Magnet - 5

Battery Maintenance

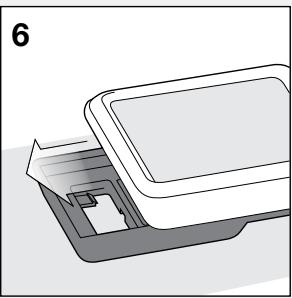
If the computer is giving erratic information, the battery may be running low. Replace the battery whenever the computer malfunctions, or every 6 months. When purchasing a new battery, it is best to take the old battery to the store with you. This is the battery type: CR2032, lithium cell, 3 volts.

When the battery is removed, the computer automatically resets function totals to zero. After installing a new battery, you can manually set your totals, but you must note those values before removing the battery.

To Replace the Battery

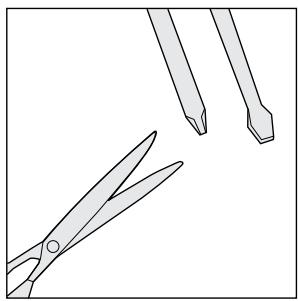
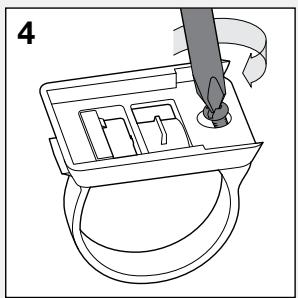
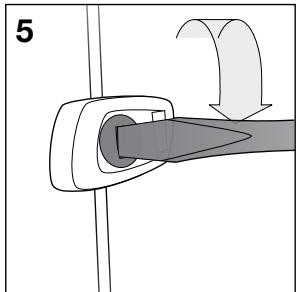
  1. Remove the computer from its base. Rotate the battery cover about one-quarter turn in a counter-clockwise direction (Figure 10). A coin or flat head screwdriver works well for this.
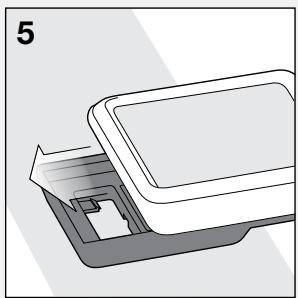
  2. Lift the battery cover, exposing the battery. Be careful to avoid losing the rubber O-ring seal.
  3. Remove the old battery.
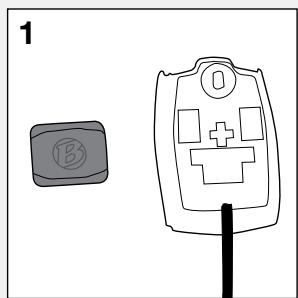
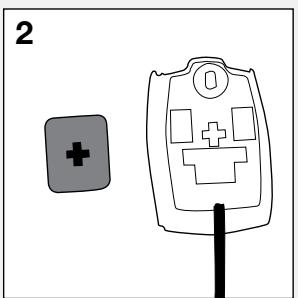
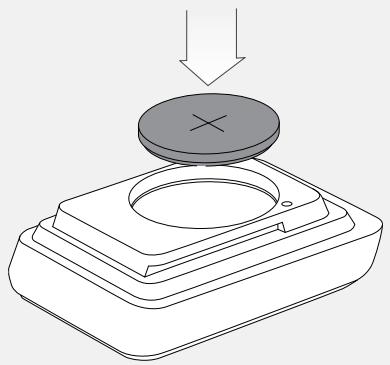
  4. Insert the new battery with the 'cross' and identifying label pointing up (Figure 11).
  5. Replace the battery cover with O-ring seal and rotate clockwise one-quarter turn.
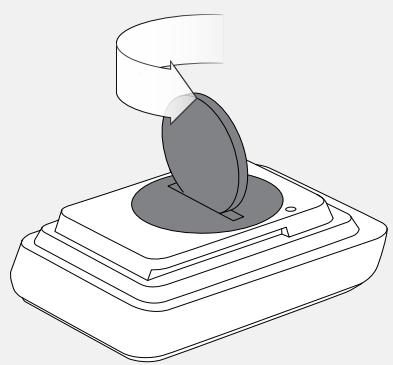
BONTRAGER TRIP 5W - To Replace the Battery - 1

BONTRAGER TRIP 5W - To Replace the Battery - 2
Figure 10. Removing the Battery Cover
Figure 11. Insert the New Battery

Reset

A Reset erases all data and settings. Before a Reset, you may wish to record the total miles (or kilometers) of the odometer so you can set the odometer to this number later during set up.

To Perform a Reset

Hold the Reset button (AC) for two seconds (Figure 12). A ball point pen works well for this. The button is on the back of the computer.
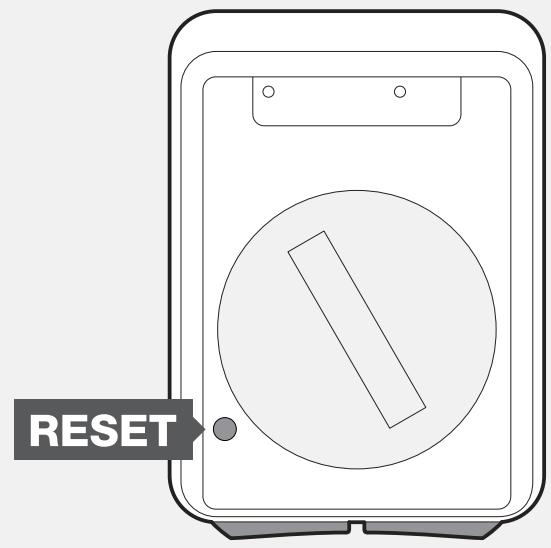
BONTRAGER TRIP 5W - To Perform a Reset - 1
Figure 12. Reset Button

If you experience a problem with your Trip computer, consult this guide for troubleshooting and solutions. Your local Bontrager Dealer can also assist you.

Symptom
Possible Causes
Solution

Display is blankBattery is low, not installed, or installed incorrectlyReinstall new battery
Data is erraticMagnet misaligned with—or too far away from—sensorReadjust magnet and sensor placement
Battery is low, not installed, or installed incorrectlyReplace battery
Current speed is missingMagnet misaligned with—or too far away from—sensorReadjust magnet and sensor placement
Wireless sensor battery is low (Trip 5W only)Replace battery battery in sensor
Cadence is missing (Trip 3 only)Magnet misaligned with—or too far away from—sensorReadjust magnet and sensor placement
Speed is incorrectWheel size is incorrectReset wheel size
Magnet misaligned with—or too far away from—sensorReadjust magnet and sensor placement

Limited Warranty

See bontrager.com or Bontrager dealer for detailed warranty information.

www.bontrager.com

Bontrager & Bontrager B-Dot are registered trademarks of Trek Bicycle Corporation.

©2007 Trek Bicycle Corporation, Waterloo, Wisconsin 53594 USA. All rights reserved.

Assistant notice
Powered by Anthropic
En attente de votre message
Informations produit

Marque : BONTRAGER

Modèle : TRIP 5W

Catégorie : Compteur de vélo