AG-H380 - Récepteur audio TEAC - Notice d'utilisation et mode d'emploi gratuit
Retrouvez gratuitement la notice de l'appareil AG-H380 TEAC au format PDF.

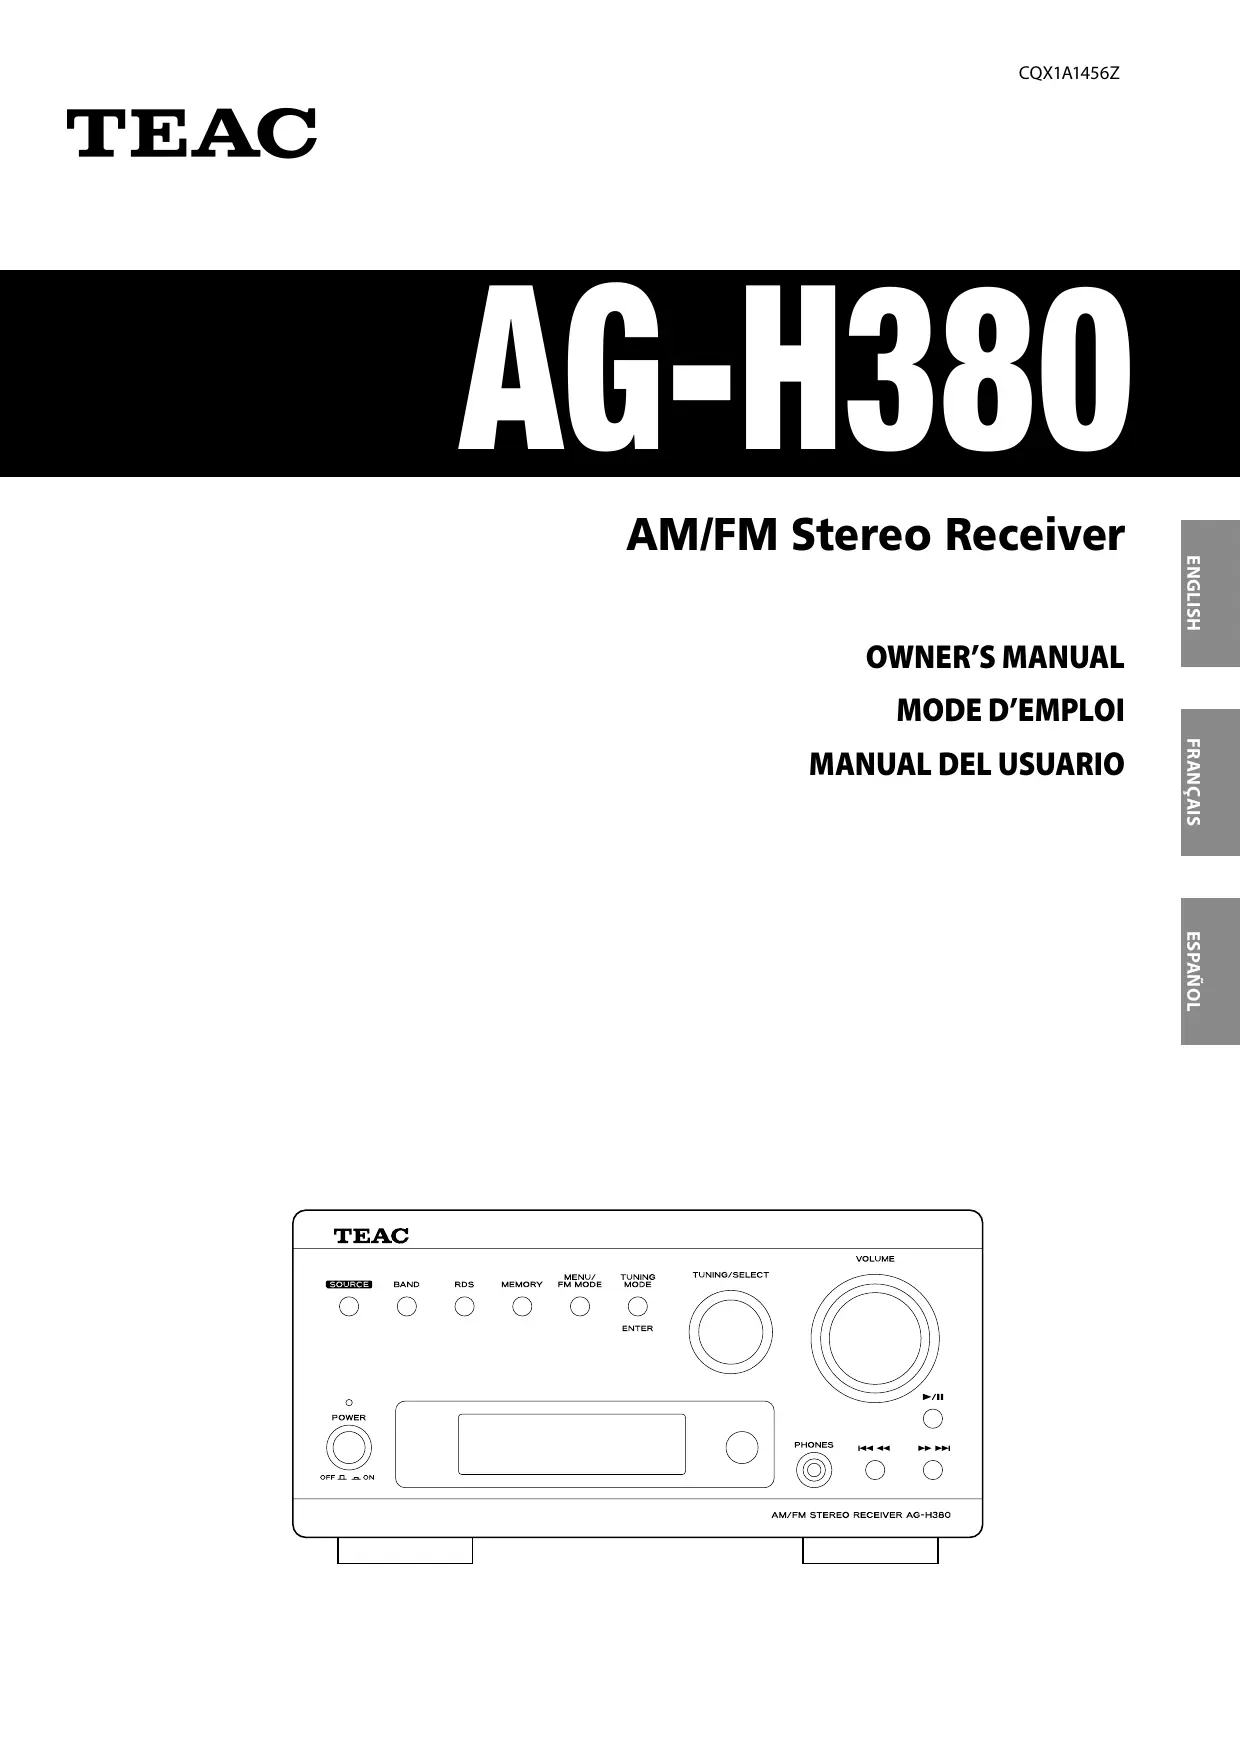

| Type de produit | Amplificateur stéréo intégré |
|---|---|
| Caractéristiques techniques principales | Amplification de 2 x 60 W sous 8 ohms, 2 x 100 W sous 4 ohms |
| Alimentation électrique | AC 230V, 50/60Hz |
| Dimensions approximatives | 430 mm (L) x 300 mm (P) x 100 mm (H) |
| Poids | 6,5 kg |
| Compatibilités | Compatible avec divers appareils audio via entrées RCA, optique et coaxiale |
| Fonctions principales | Contrôle de tonalité, entrée phono, Bluetooth intégré, sortie casque |
| Entretien et nettoyage | Nettoyer avec un chiffon doux, éviter les produits chimiques agressifs |
| Pièces détachées et réparabilité | Disponibilité limitée des pièces, consulter un professionnel pour les réparations |
| Sécurité | Ne pas exposer à l'humidité, utiliser sur une surface stable, respecter les instructions de sécurité |
| Informations générales utiles | Idéal pour les audiophiles recherchant un son de qualité, design élégant et compact |
FOIRE AUX QUESTIONS - AG-H380 TEAC
Questions des utilisateurs sur AG-H380 TEAC
0 question sur cet appareil. Repondez a celles que vous connaissez ou posez la votre.
Poser une nouvelle question sur cet appareil
Téléchargez la notice de votre Récepteur audio au format PDF gratuitement ! Retrouvez votre notice AG-H380 - TEAC et reprennez votre appareil électronique en main. Sur cette page sont publiés tous les documents nécessaires à l'utilisation de votre appareil AG-H380 de la marque TEAC.
MODE D'EMPLOI AG-H380 TEAC
AG-H380
AM/FM Stereo Receiver
OWNER'S MANUAL
MODE D'EMPLOI
MANUAL DEL USUARIO
CAUTION
RISK OF ELECTRIC SHOCK DO NOT OPEN

CAUTION: TO REDUCE THE RISK OF ELECTRIC SHOCK, DO NOT REMOVE COVER (OR BACK). NO USER-SERVICEABLE PARTS INSIDE. REFER SERVICING TO QUALIFIED SERVICE PERSONNEL.
The lightning flash with arrowhead symbol, within an equilateral triangle, is intended to alert the user to the presence of uninsulated "dangerous voltage" within the product's enclosure that may be of sufficient magnitude to constitute a risk of electric shock to persons.

The exclamation point within an equilateral triangle is intended to alert the user to the presence of important operating and maintenance (servicing) instructions in the literature accompanying the appliance.
IMPORTANT SAFETY INSTRUCTIONS
1) Read these instructions.
2) Keep these instructions.
3) Heed all warnings.
4) Follow all instructions.
5) Do not use this apparatus near water.
6) Clean only with dry cloth.
7) Do not block any ventilation openings. Install in accordance with the manufacturer's instructions.
8) Do not install near any heat sources such as radiators, heat registers, stoves, or other apparatus (including amplifiers) that produce heat.
9) Do not defeat the safety purpose of the polarized or grounding-type plug. A polarized plug has two blades with one wider than the other. A grounding type plug has two blades and a third grounding prong. The wide blade or the third prong are provided for your safety. If the provided plug does not fit into your outlet, consult an electrician for replacement of the obsolete outlet.
10) Protect the power cord from being walked on or pinched particularly at plugs, convenience receptacles, and the point where they exit from the apparatus.
11) Only use attachments/accessories specified by the manufacturer.
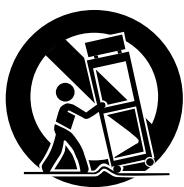
12) Use only with the cart, stand, tripod, bracket, or table specified by the manufacturer, or sold with the apparatus. When a cart is used, use caution when moving the cart/ apparatus combination to avoid injury from tip-over.
13) Unplug this apparatus during lightning storms or when unused for long periods of time.
14) Refer all servicing to qualified service personnel. Servicing is required when the apparatus has been damaged in any way, such as power-supply cord or plug is damaged, liquid has been spilled or objects have fallen into the apparatus, the apparatus has been exposed to rain or moisture, does not operate normally, or has been dropped.
- Do not expose this apparatus to drips or splashes.
- Do not place any objects filled with liquids, such as vases, on the apparatus.
- Do not install this apparatus in a confined space such as a bookcase or similar unit.
- The apparatus draws nominal non-operating power from the AC outlet with its POWER or STANDBY/ON switch not in the ON position.
- The apparatus should be located close enough to the AC outlet so that you can easily grasp the power cord plug at any time.
- The mains plug is used as the disconnect device, the disconnect device shall remain readily operable.
- Products with Class I construction are equipped with a power supply cord that has a 3-prong grounding plug. The cord of such a product must be plugged into an AC outlet that has a protective grounding connection.
- If the product uses batteries (including a battery pack or installed batteries), they should not be exposed to sunshine, fire or excessive heat.
- CAUTION for products that use replaceable lithium batteries: there is danger of explosion if a battery is replaced with an incorrect type of battery. Replace only with the same or equivalent type.
- Caution should be taken when using earphones or headphones with the product because excessive sound pressure (volume) from earphones or headphones can cause hearing loss.
WARNING: TO PREVENT FIRE OR SHOCK HAZARD, DO NOT EXPOSE THIS APPLIANCE TO RAIN OR MOISTURE.
CAUTION
DO NOT REMOVE THE EXTERNAL CASES OR CABINETS TO EXPOSE THE ELECTRONICS. NO USER SERVICEABLE PARTS ARE WITHIN!
- IF YOU ARE EXPERIENCING PROBLEMS WITH THIS PRODUCT, CONTACT TEAC FOR A SERVICE REFERRAL. DO NOT USE THE PRODUCT UNTIL IT HAS BEEN REPAIRED.
MPEG Layer-3 audio coding technology licensed from Fraunhofer IIS and Thomson.
This product is protected by certain intellectual property rights of Microsoft Corporation. Use or distribution of such technology outside of this product is prohibited without a license from Microsoft.
"Made for iPod" means that an electronic accessory has been designed to connect specifically to iPod and has been certified by the developer to meet Apple performance standards.
Apple is not responsible for the operation of this device or its compliance with safety and regulatory standards.
iPod is a trademark of Apple Inc., registered in the U.S. and other countries.
Contents
Thank you for choosing TEAC. Read this manual carefully to get the best performance from this unit.
Before Use. 4
MP3 and WMA. 4
Connecting Antennas (AM/FM). 5
Connections 6
Speaker Connections. 8
System Connection 9
Name of Each Control. 10
Remote Control Unit 12
Basic Operation 13
Listening to iPod 14
Listening to an USB Device 16
RepeatPlayback(USB) 18
ShufflePlayback(USB). 18
ProgrammedPlayback(USB). 19
Display (USB). 21
Before Recording 21
Recording to USB 22
Deleting a file from USB 22
Listening to FM/AM 23
Preset Tuning 24
RDS 25
RDS (PTY). 26
Setting the Clock 27
Setting the Timer 28
Timer Operation 28
Sleep Timer. 29
Restoring factory settings 30
Troubleshooting 30
Specifications. 31
Before Use
Read this before operations.
- When the unit is turned on, switching on the TV may cause lines to appear on the TV screen, depending on the condition of the electric waves of the TV broadcast. This is not malfunction in the unit or the TV. In this case, turn off the unit.
- As the unit may become warm during operation, always leave sufficient space around the unit for ventilation.
- The voltage supplied to the unit should match the voltage as printed on the rear panel. If you are in any doubt regarding this matter, consult an electrician.
- Choose the installation location of your unit carefully. Avoid placing it in direct sunlight or close to a source of heat. Also avoid locations subject to vibrations and excessive dust, heat, cold or moisture.
- Do not place the unit on an amplifier/receiver.
- Do not open the cabinet as this might result in damage to the circuitry or electrical shock. If a foreign object should get into the set, contact your dealer or service agency.
- When removing the power plug from the wall outlet, always pull directly on the plug, never yank the cord.
- Do not attempt to clean the unit with chemical solvents as this might damage the finish. Use a clean, dry cloth.
- Keep this manual in a safe place for future reference.
MP3 and WMA
- This unit can play MP3 files recorded in various external USB storage devices such as USB flash memory, MP3 player or HDD. The HDD must be formatted FAT 16 or FAT 32, but not NTFS.
- When more than 2000 files are recorded on the USB memory, the unit might not be able to play them correctly.
- File names of MP3 or WMA should be alphanumeric characters. This unit cannot display symbols and full-size or double-byte characters (such as Japanese, Chinese, etc.) correctly. Also, be sure to use the file extension. (".mp3" for MP3 files, ".wma" for WMA files.)
- MP3 files are mono or stereo MPEG-1 Audio Layer 3 format. This unit can play MP3 files with sampling frequency 44.1kHz or 48kHz , bit-rate 320kbps or less.
- This unit can play WMA files with sampling frequency 44.1 kHz, bit-rate 192 kbps or less.
WMA means Windows Media Audio. - Audio encoded at 128 kbps should sound close to regular audio CD quality. Although this player will play lower bit-rate MP3 songs, the sound quality becomes noticeably worse at lower bit-rates.
AM Indoor Loop Antenna
The high-performance AM loop antenna provided with this unit is sufficient for good reception in most areas.
To stand the loop antenna on a surface, fix the claw to the slot in the antenna base.
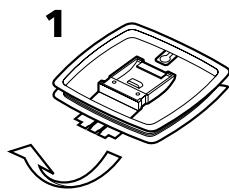
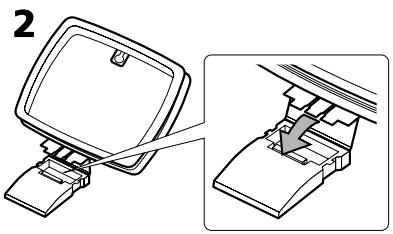
Connect the loop antenna's wires to the AM antenna terminals.
Place the antenna on a shelf or hang it on a window frame, etc., in the direction which gives the best reception. Keep all other wires such as power cords, speaker wires or interconnect wires as far away as possible from the antenna.
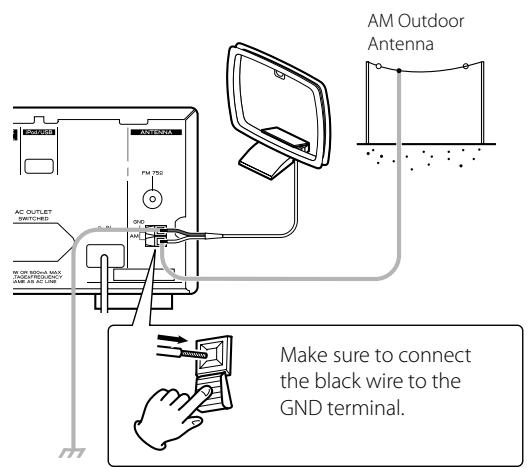
- If the AM loop antenna provided does not deliver sufficient reception (often due to being too far from the transmitter or in a concrete building, etc.), it may be necessary to use an AM outdoor antenna.
Use either a high quality commercially available AM antenna or, if not available, an insulated wire more than 5m long, strip one end, and connect this to the terminal as shown.
The antenna wire should be strung outdoors or indoors near a window. For better reception, connect the GND terminal to a reliable ground.
Note:
Even when using an AM outdoor antenna, do not disconnect the AM loop antenna.
FM Indoor Antenna
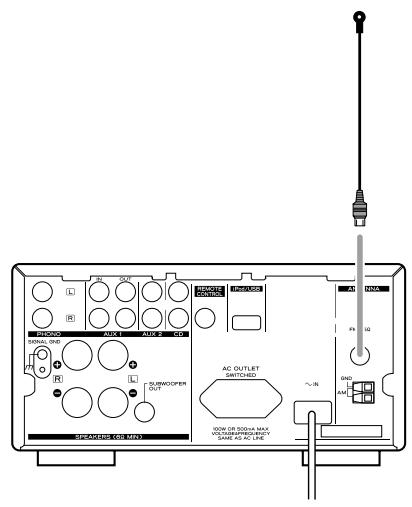
Connect the lead-type FM antenna to the FM 75Ω socket, extend the lead and tune in your favourite station (see page 23). Adjust the antenna in a suitable location like a window frame or wall until the reception is best and then affix the antenna in that position using thumb tacks, push pins or any other suitable means.
FM Outdoor Antenna
In an area where FM signals are weak, it may be necessary to use an FM outdoor antenna.
Generally, a 3-element antenna will be sufficient; if you live in an area where the FM signals are particularly weak, it may be necessary to use one with 5 or more elements.
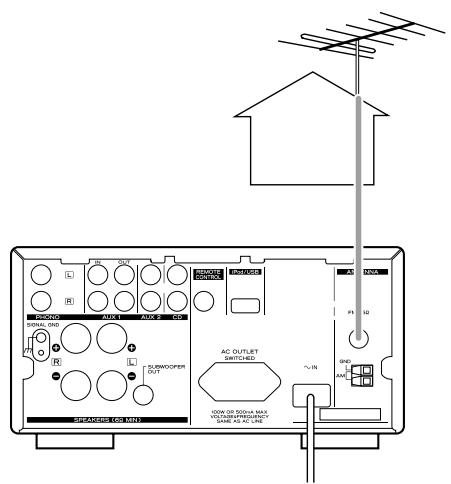
- Disconnect the FM indoor antenna when using an outdoor antenna.
Connections
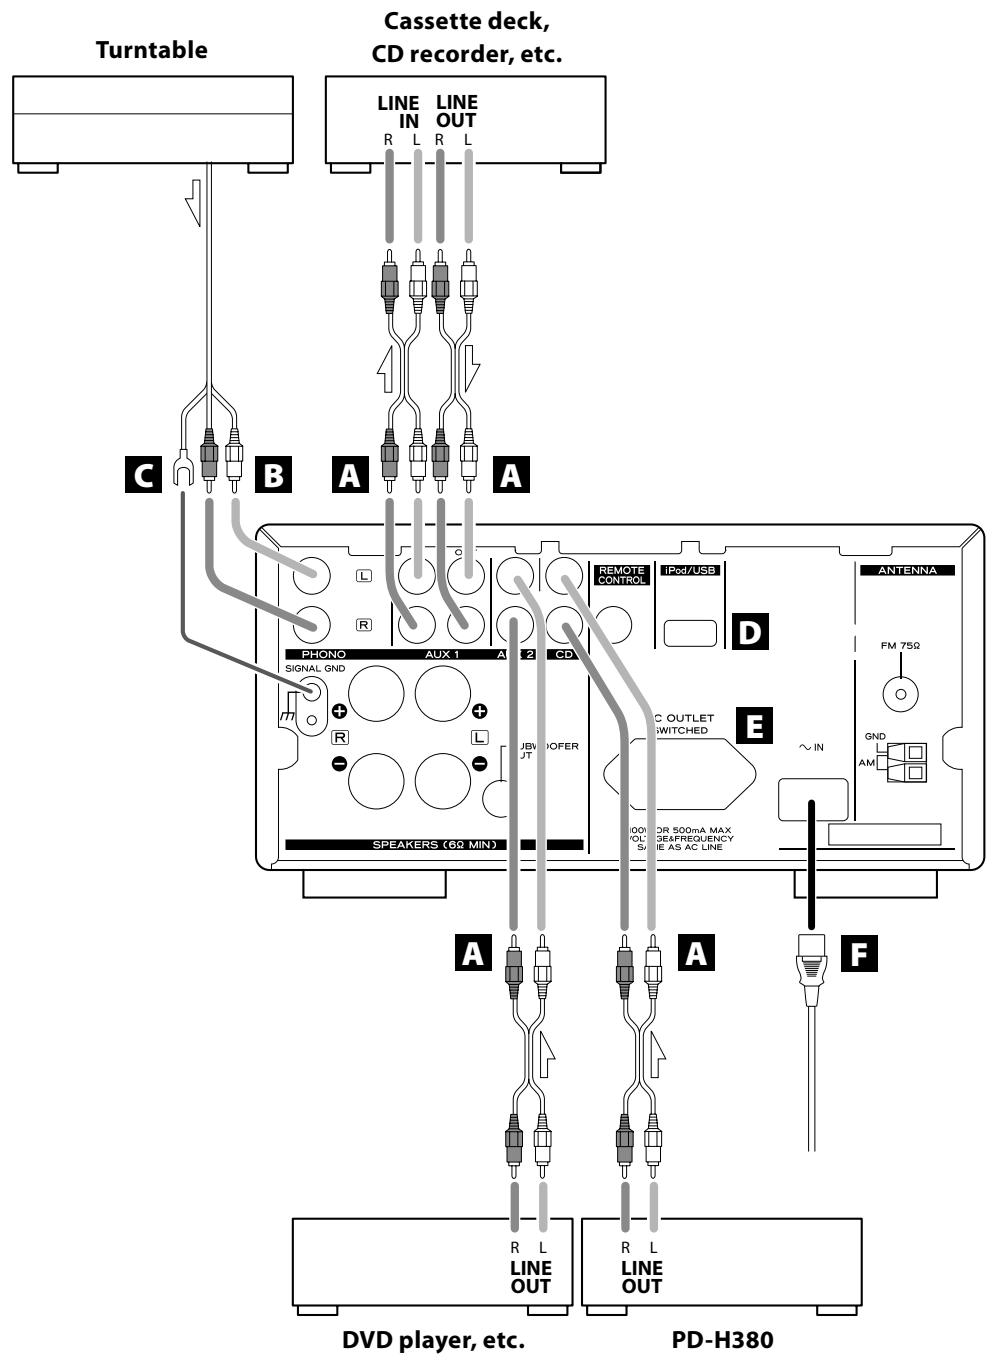
A AUX 1/AUX 2/CD jacks
These jacks transmit an analog 2-channel audio signal. Connect the components using RCA cables.
Make sure to connect the cables as follows:
white plug white jack (L: left channel) red plug red jack (R: right channel)

If you want to use a recorder (ex. a cassette deck or a CD recorder, etc.) with the AG-H380, connect the output jacks of the recorder to the AUX 1 IN jacks of the AG-H380, connect the input jacks of the recorder to the AUX 1 OUT jacks of the AG-H380.
- Be sure to insert each plug securely. To prevent hum and noise, avoid bundling the signal interconnection cables together with the AC power cord or speaker cables.
B PHONO jacks
Connect the turntable's RCA pin cord to the PHONO jacks.
Make sure to connect the cables as follows:
white plug white jack (L: left channel) red plug red jack (R: right channel)
- Be sure to insert each plug securely. To prevent hum and noise, avoid bundling the signal interconnection cables together with the AC power cord or speaker cables.
- Moving Magnet (MM) cartridges can be used for this unit.
C SIGNAL GND
Connect the ground lead of the turntable to this terminal.
This is not a safety earth.
- If the turntable's ground lead is not connected to this terminal, hum noise may be heard.
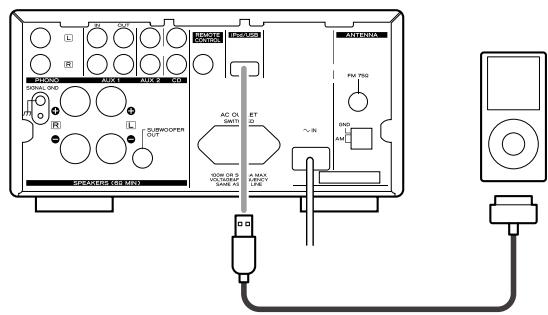
USB port
Connect the iPod or external USB storage device to this port.
- To connect the iPod, use the USB cable supplied with iPod.
- It cannot be played if you connect an iPod shuffle to this port.
Compatible iPod Software
In case your iPod will not work with the AG-H380 or with the remote control unit, software update may solve the problem.
Visit the Apple website and download the latest iPod software.
E AC OUTLET (SWITCHED)
You can connect the AC power cord of your component. This outlet is active only when the unit is on or standby. When the unit is off, the outlet is inactive.
CAUTION
Make sure that the total power consumption of all equipment connected to this outlet does not exceed 100 watts (or 500mA ).
AC Power Cord
Plug this cord into an AC wall socket.
- Unplug the power cord when you are not going to use the unit for long periods of time.
SPEAKER
SUBWOOFER
CAUTION
- Turn off the power of all the equipment before making connections.
- Read instructions of each component you intend to use with this unit.
- Be sure to insert each plug securely. To prevent hum and noise, do not bundle the connection cords with the power cord or speaker cord.
System Connection
Speaker Connections
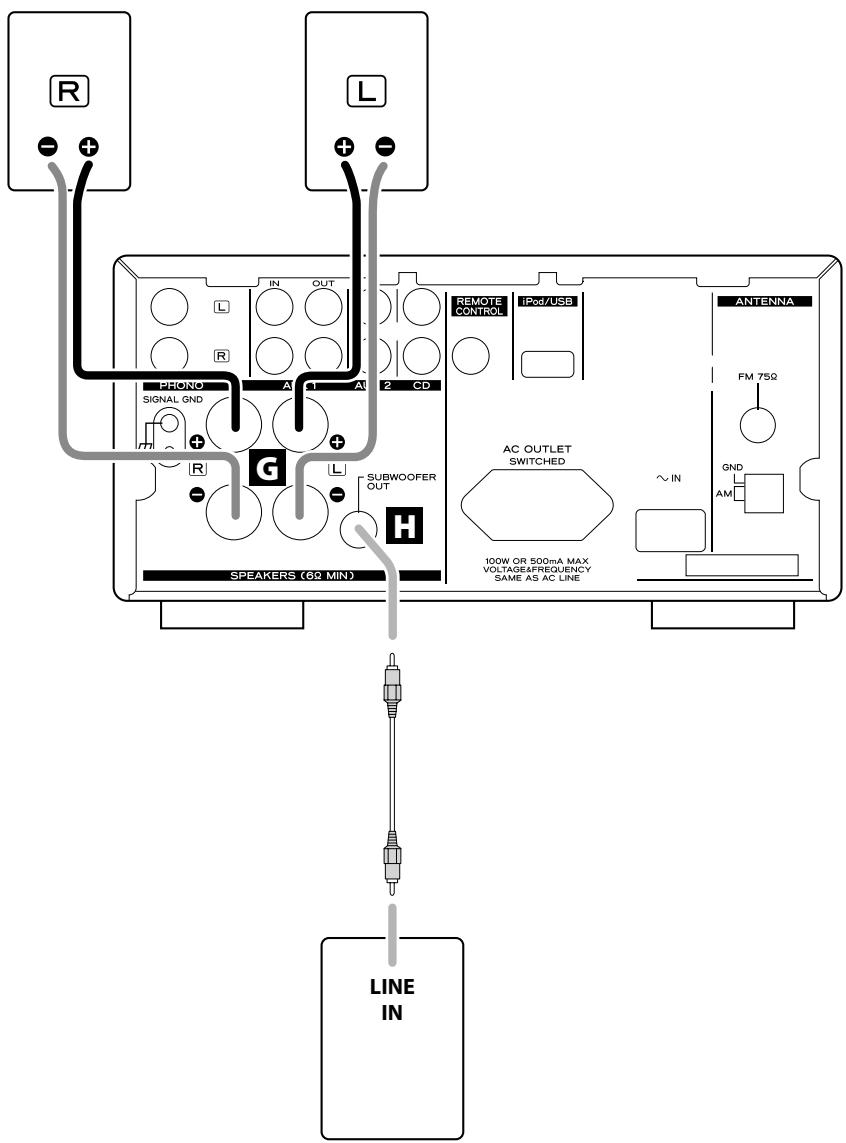
AG-H380's red speaker terminals are the (positive) terminals and the black terminals are the (negative) terminals.
The side of the speaker cable is marked to make it distinguishable from the negative side of the cable. Connect this marked side to the red terminal and the unmarked side to the black terminal of AG-H380 and speakers.
CAUTION
- To avoid damaging the speakers by a sudden high-level signal, be sure to switch the power off before connecting the speakers.
- Check the impedance of your speakers. Connect speaker with an impedance of 6 ohms or more.
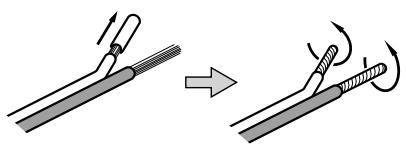
- Prepare the speaker cords for connection by stripping off approximately 10mm or less (no more as this could cause a short-circuit) of the outer insulation. Twist the wires tightly together to avoid tangles:
How to connect
- Turn the terminal cap counter-clockwise to loosen it. The speaker terminal caps cannot be fully removed from the base.
- Insert the wire into the terminal fully and turn the terminal cap clockwise to securely connect it:
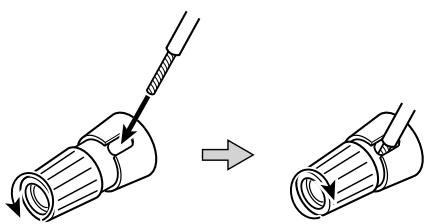
- Make sure it is fastened firmly by pulling the cable lightly.
For European customers
In accordance with European safety regulations, it is not possible to connect banana plugs into the speaker terminals on European models.
The holes into which banana plugs are inserted have been covered with black caps. Connect the speakers using spades or bare wires.
If the black caps become separated from the terminals, return them to their original position.
SUBWOOFER OUT jack
Connect a commercially available powered subwoofer.
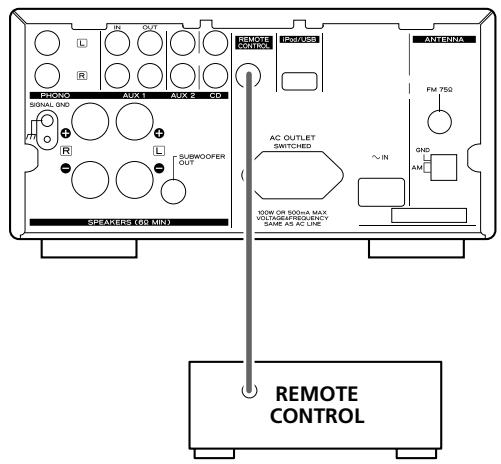
If you have TEAC Reference 380 series, convenient system control operations and AI direct play functions are possible.
- By pressing the POWER switch of AG-H380, you can switch ON/ standby all the unit connected by remote control cords. (Set the REMOTE CONTROL SELECTOR on the rear panel of the PD-H380 to "SYSTEM".)
- When you press the PLAY button of PD-H380, the source of AG-H380 is set to "CD" automatically.
- When you select "CD" by pressing the SOURCE button of AG-H380, PD-H380 starts playback automatically.
- When you turn on the system, the source that was selected last time will start playback automatically.
- You can use the system remote control unit to operate all the unit connected by remote control cords.
Connect the REMOTE CONTROL jack of each component by remote control connection cords.
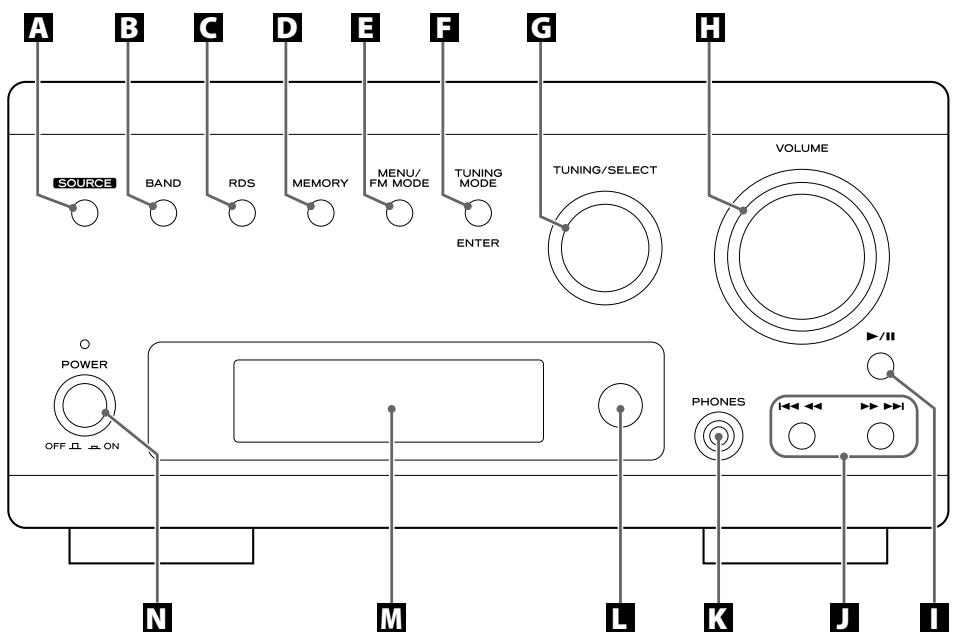
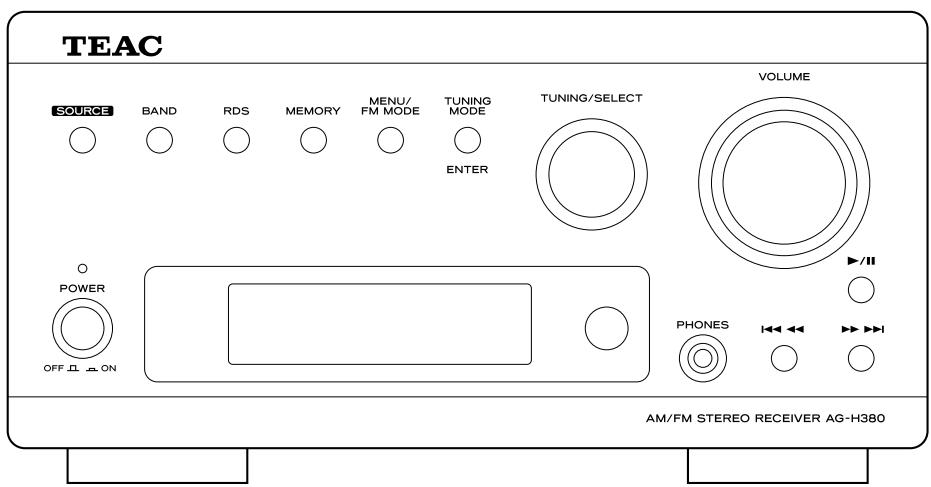
A SOURCE
Use this button to select a source.
B BAND
Use this button to select FM or AM.
C RDS
In FM mode, use this button to select an RDS mode.
D MEMORY
In TUNER mode, use this button to preset stations.
3 MENU/FM MODE
Use this button to go back to previous menu of iPod. This button is equivalent to the MENU button on your iPod.
In FM mode, use this button to select stereo or monaural.
F TUNING MODE, ENTER
In FM or AM mode, use this button to select the tuning mode. Use this button to set the time while setting the timer or the clock.
In iPod mode, use this button to confirm selection in menus.
TUNING/SELECT
In TUNER mode, use this knob to tune in stations or select the preset stations.
In iPod mode, use this knob to scroll up and down the menu.
VOLUME
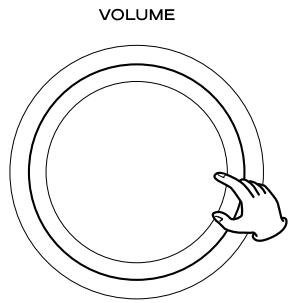
Turn this knob to adjust the volume.
- The volume level is memorized even if the unit turns off.
play/pause (▶/II)
In USB/iPod mode, use this button to start or pause playback of the iPod or USB.
skip(1<
In USB/iPod mode, use these buttons to skip files/songs during playback of the iPod or USB.
During playback, hold down these buttons to search for a track/file/song.
K PHONES
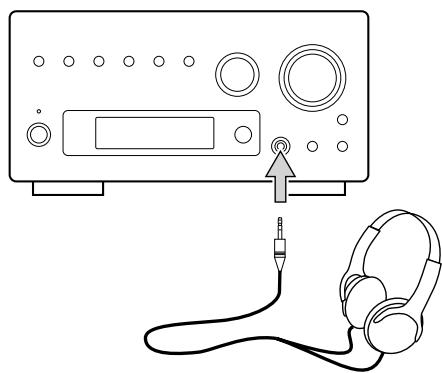
For private listening, insert the headphones plug into this jack, and adjust the volume by turning the VOLUME knob.
Remote sensor
When operating the remote control unit, point it towards the remote sensor.
M Display
N POWER
Press this switch to turn the unit on or off.
If you use the system control function, set this switch on, and turn on/standby the system using the remote control unit.
The standby indicator turns red when the unit is in the standby mode. When the unit is turned on, the indicator turns blue.
- The clock setting will not be saved when the POWER turns off.
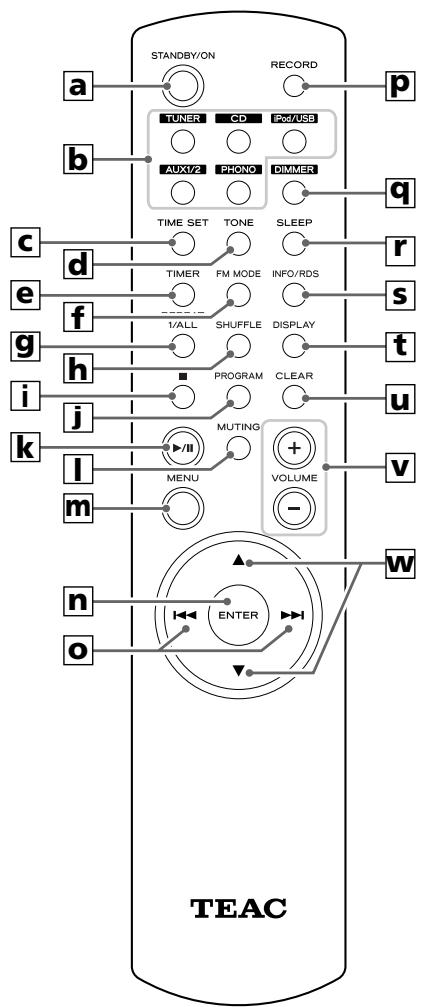
STANDBY/ON
Press this button to turn the unit on or standby.
b TUNER, CD, iPod/USB, AUX 1/2, PHONO
Use these buttons to select a source.
cTIMESET
Use this button to adjust the clock and to set a timer.
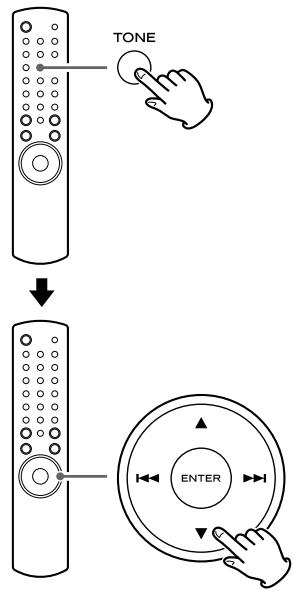
d TONE
Use this button to adjust bass and treble together with the or button.
e TIMER
Use this button to turn on or off the timer function.
FM MODE
In FM mode, use this button to select stereo or monaural.
9 REPEAT 1/ALL
In USB/iPod mode, use this button to set the repeat playback of the iPod or USB.
In CD mode, use this button to set the repeat playback of the PD-H380.
h SHUFFLE
In USB/iPod mode, use this button to start shuffle playback of the iPod or USB.
In CD mode, use this button to start shuffle playback of the PD-H380.
stop
In USB mode, use this button to stop playback of the USB. In CD mode, use this button to stop playback of the PD-H380.
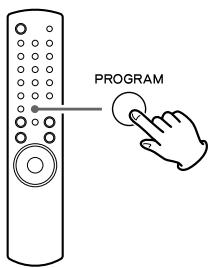
J PROGRAM
In USB/iPod mode, use this button to enter the programme mode of the USB.
In CD mode, use this button to enter the programme mode of the PD-H380.
In programme mode, use this button to enter the selection.
In TUNER mode, use this button to preset stations.
play/pause ( /II)
In USB/iPod mode, use this button to start or pause playback of the iPod or USB.
In CD mode, use this button to start or pause playback of the PD-H380.
1 MUTING
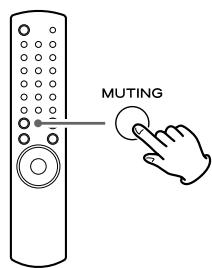
Use this button to mute the sound.
m MENU
Use this button to go back to previous menu of iPod. This button is equivalent to the MENU button on your iPod.
n ENTER
Use this button to set the time while setting the timer or the clock.
skip(1</>1)
In USB/iPod mode, use these buttons to skip files/songs during playback of the iPod or USB.
In CD mode, use these buttons to skip tracks/files during playback of the PD-H380.
RECORD
Use this button to start recording to an USB device.
DIMMER
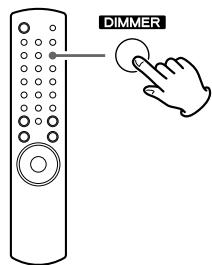
Use this button to dim the display.
SLEEP
Use this button to set sleep timer.
S INFO/RDS
In FM mode, use this button to select an RDS mode. INFO function do not work on the AG-H380.
DISPLAY
Use this button to change what information is displayed during USB/iPod playback.
u CLEAR
Use this button to clear files in programme mode.
V VOLUME
Use these buttons to adjust the volume level.
w scroll ( ,)
In USB/iPod mode, use these buttons to select a folder or file of USB.
Or use these buttons to scroll menu of the iPod.
After pressing the TONE button these buttons are used to adjust treble and bass.
The provided remote control unit allows the unit to be operated from a distance.
When operating the remote control unit, point it towards the remote sensor on the front panel of the unit.
- Even if the remote control unit is operated within the effective range, remote control operation may be impossible if there are any obstacles between the unit and the remote control unit.
- If the remote control unit is operated near other appliances which generate infrared rays, or if other remote control devices using infrared rays are used near the unit, it may operate incorrectly. Conversely, the other appliances may operate incorrectly.
Battery Installation
- Remove the battery compartment cover.
- Insert two "AAA" dry batteries. Make sure that the batteries are inserted with their positive "⊕" and negative "⊗" poles positioned correctly.
- Close the cover.
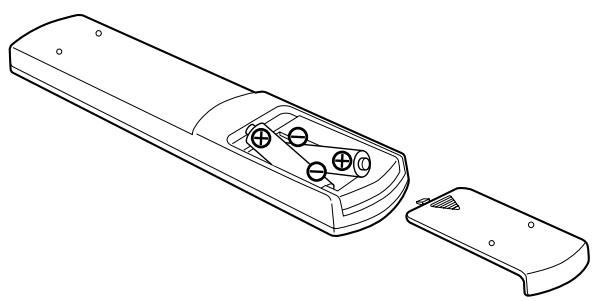
Battery Replacement
If the distance required between the remote control unit and main unit decreases, the batteries are exhausted. In this case replace the batteries with new ones.
- For more information about collection of batteries, please contact your local municipality, your waste disposal service or the point of sale where you purchased the items.
Precautions Concerning Batteries
- Be sure to insert the batteries with correct positive “⊕” and negative “ ” polarities.
- Use batteries of the same type. Never use different types of batteries together.
- Rechargeable and non-rechargeable batteries can be used. Refer to the precautions on their labels.
- When the remote control unit is not to be used for a long time (more than a month), remove the batteries from the remote control unit to prevent them from leaking.
- If the batteries leak, wipe away the liquid inside the battery compartment and replace the batteries with new ones.
- Do not use any other batteries not specified. Do not mix new batteries with old ones or use different types of batteries together.
- Do not heat or disassemble batteries and never throw them in the fire or water.
- Do not carry or store batteries with other metallic objects. The battery may short circuit, leak or explode.
- Never recharge a battery unless it is a verified rechargeable type.
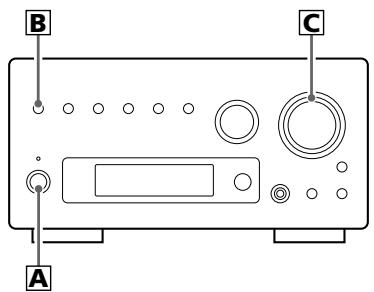
A How to turn the unit on or off
Press the POWER switch to turn the unit on or off.
When you use the system control function, set this switch on, and turn the system on/standby using the remote control unit.
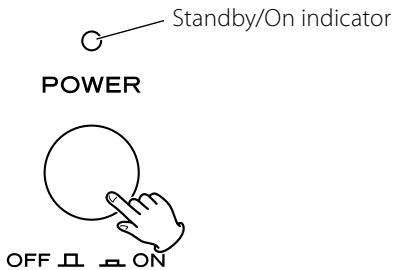
The Standby/On indicator turns blue when the unit is turned on.
- When you turn on the system, the source that was selected last time will start playback automatically.
- The clock setting will not be saved whern the POWER turns off.
B How to select source
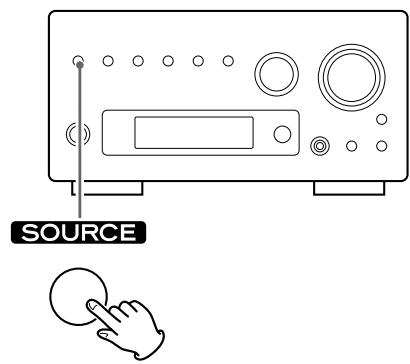
Every time the SOURCE button is pressed, the mode is changed as follows:
SOURCE

Or press the TUNER, USB/iPod, PHONO, AUX 1/2 or CD button on the remote control unit to select the source directly.
Adjust the volume
To protect speakers from a sudden high-level signal, gradually turn up the volume to the required level with the VOLUME knob.
D Muting
To cut the sound temporarily, press the MUTING button. To cancel muting, press the MUTING button again or change the volume setting.
E Dimmer
Press the DIMMER button to dim the display. Press the button again to cancel the dimmer function.
- This function will be cancelled when the unit is turned off.
F Listening through headphones
Insert the headphone plug into the PHONES jack, and adjust the volume. The sound from speakers and subwoofer will be cut off.
How to adjust the bass and treble sound
You can change the bass and treble sound between "-10" to "+"10". Press the TONE button repeatedly to select BASS or TREBLE. And then press the or button to adjust the sound level within 5 seconds.
Press the SOURCE button repeatedly to select "USB/iPod".
Connect your iPod using the USB cable supplied with iPod.
The iPod automatically turns on and starts playback from the iPod's music list.
When the iPod is connected while the AG-H380 is set to other source, the iPod will turn on and enter the pause mode.
- The iPod battery will be fully recharged when the iPod is docked and the AG-H380 is on.
- When headphones are plugged into the iPod, sound comes from both the speakers connected to the AG-H380 and the headphones.
To pause playback
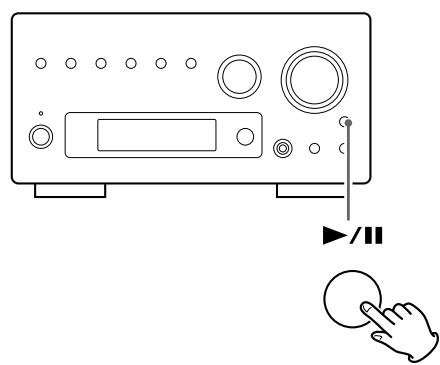
During playback, press the play/pause button ( / ) to pause playback. Playback stops at the current position.
To resume playback, press the play/pause button ( / ) again.
To skip to the next or a previous song
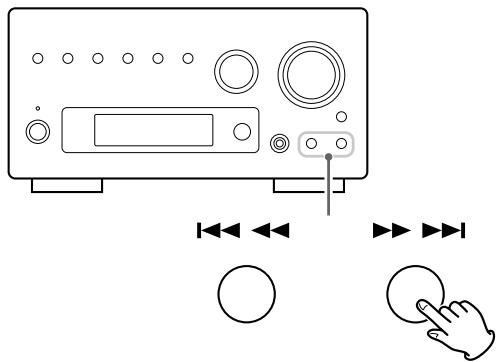
During playback, press the skip button (144444/▶▶▶) repeatedly until the desired song is found.
- When the 144 button is pressed during playback, the song being played will be played from the beginning. If you want to play the previous songs, press the 144 button twice or more.
Search for a part of a song
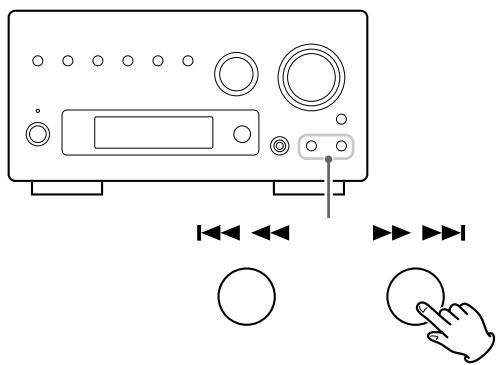
During playback, hold down the skip button(I<▶/▶▶) and release it when the part you want to listen to is found.
To go back to the previous menu
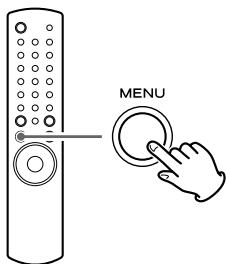
Press the MENU button to go back to the previous menu. This button is equivalent to the MENU button on your iPod.
Select the menu item
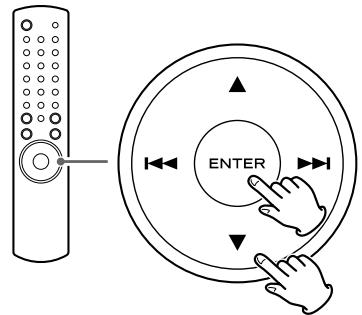
Press the scroll button ( /) of the remote control unit to scroll to the menu item you want, and then press the ENTER button.
Repeat playback
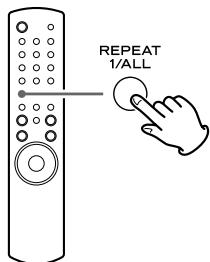
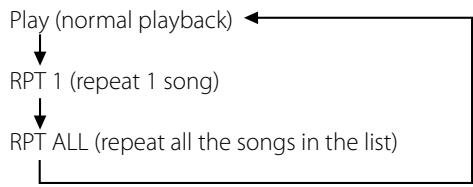
Every time the REPEAT 1/ALL button is pressed, the mode is changed as follows:
Shuffle playback
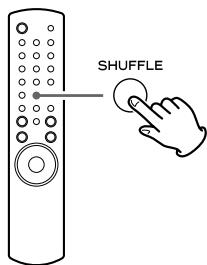
During playback, press the SHUFFLE button to change the shuffle mode.
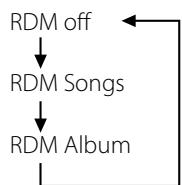
When you select "RDM Songs", the iPod shuffles songs within the list you choose to play.
When you select "RDM Album", the iPod plays all the songs on an album in order, and then randomly selects another album in the list and plays through it in order.
Listening to iPod (2)
Changing the display mode
When the iPod is connected, hold down the MENU button for more than 4 seconds to select which display to be used.
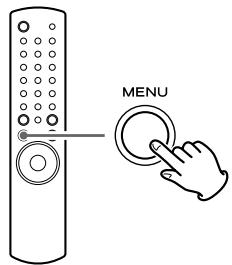
Direct Mode (default)
Select this to use the screen of the iPod.
Menu appears on the screen of the iPod.
The display of the AG-H380 constantly shows "Direct Mode".
Extended mode
Select this to use the display of the AG-H380.
Information on the audio files is displayed on the display of the AG-H380.
The screen of the iPod shows TEAC logo.
- Song/Album/Artist names of audio files should be alphanumeric characters. This unit cannot display symbols and full-size or double-byte characters (such as Japanese, Chinese, etc.) correctly.
Listening to an USB Device
You can play MP3/WMA files by connecting various external USB storage devices such as USB flash memory.
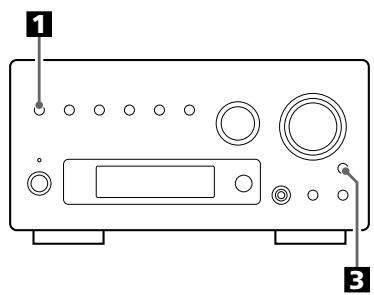
Press the SOURCE button repeatedly to select "USB/iPod".
"Not connected" will be displayed if no USB device is connected.
SOURCE
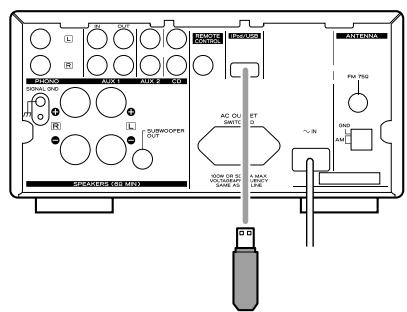
2 Connect the external USB storage device to the unit.
When an HDD device is connected to this unit, it may take several minutes to display the number of files.
Press the play/pause button ( /II)
Search
You can select a desired directory and song during playback or when stopped.
Press the or button to select a directory.
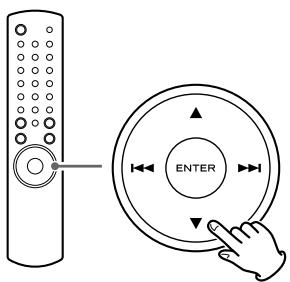
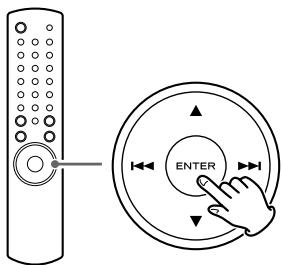
Press the ENTER button.
3 If you want to select a song, press the or button.
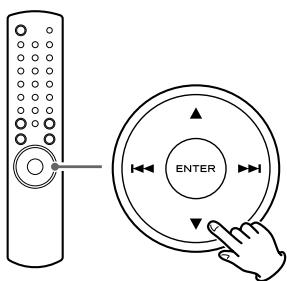
- The selection moves within the directory.
4 Press the ENTER button.
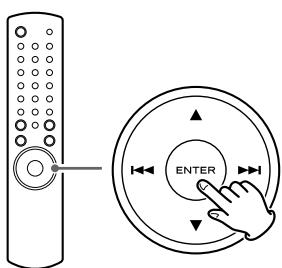
Playback starts from the selected song.
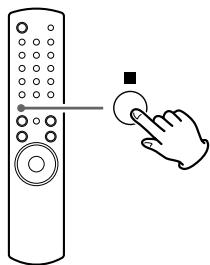
A To stop playback
Press the stop button (■) to stop playback.
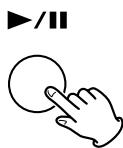
B To pause playback (pause mode)
Press the play/pause button ( / ) during playback. Playback stops at the current position. To resume playback, press the play/ pause button ( / ) again.
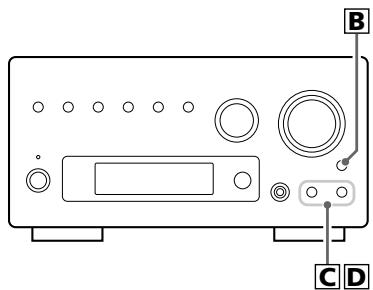
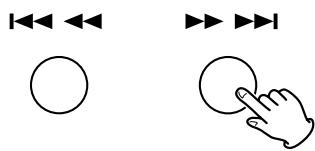
C To skip to the next or a previous song
Press the or button repeatedly until the desired song is found. The selected song will be played from the beginning.
On the remote control, press the 1 or 2 button.
- When the 14 button is pressed once during playback, the song being played will be played from the beginning.
If you want to play the previous song, press the button twice or more.
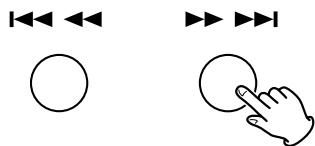
D Search for a part of a song
During playback, hold down the 1 or 2 button and release it when the part you want to listen to is found.
On the remote control, press the 1 or 2 button.
Repeat Playback (USB)
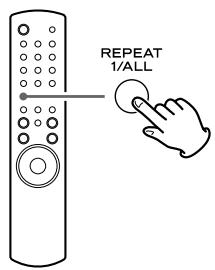
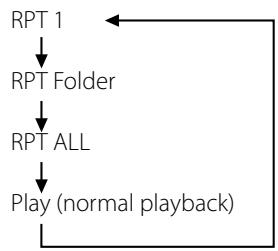
Each time the REPEAT 1/ALL button is pressed, the mode is changed as follows:
- If one of the following buttons is pressed, repeat mode will be cancelled:
stop (■), SOURCE (TUNER, CD, AUX1/2, PHONO), POWER
Repeat one file (RPT 1)
The file being played will be played repeatedly. If you press the skip button (▶▶ or▶▶) and select another file, the file you selected will be played repeatedly.
It is also possible to select a file to be repeated in the stop mode. Press the REPEAT 1/ALL button and select a file using the skip button (I or >).
Repeat all the files in the folder (RPT Folder)
All the files in the folder will be played repeatedly.
- When the USB has no folder, this mode will be skipped.
Repeat all the songs (RPT All)
All the files will be played repeatedly.
During programmed playback, programmed files will be played repeatedly.
Shuffle Playback (USB)
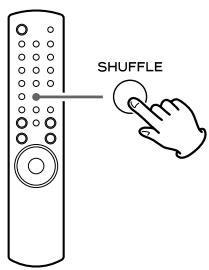
Press the SHUFFLE button in the stop or play mode.
"Random" appears on the display, and the files will be played randomly.
- If you press the button during shuffle playback, next file will be randomly selected and played. If you press the button, the currently played file will be played from the beginning.
A file cannot be replayed during shuffle playback.
- To stop shuffle playback, press the SHUFFLE button or the stop button (■).
Programmed Playback (USB) (1)
Up to 32 files can be programmed in the desired order.
Press the PROGRAM button in the stop mode.
P-00 T-0000
Total File: 0130
Press the or button to select a file.
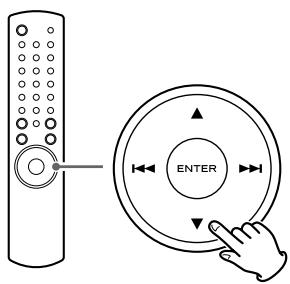
P-01 T-0012
Total File: 0130
3 Within 5 seconds, press the PROGRAM button.

P-02 T-0012
Total File: 0130
- Repeat steps 2 and 3 to programme more songs.
- If you made a mistake, press the CLEAR button.
The last programmed number will be deleted.
- Up to 32 files can be programmed. If you attempt to programme more than 32 files, "P-FULL (Programme is full)" is displayed and no more files can be programmed.
4 When programming has been finished, press the play/ pause button ( / ) to start programmed playback.
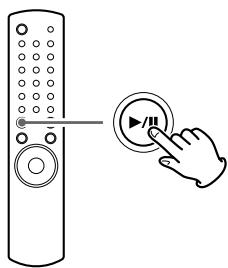
When the playback of all the programmed songs has finished, or if the stop button (■) or the POWER button is pressed, the programme mode will be cancelled.
- If the unit is disconnected from the power supply, the programmed contents will be erased.
To check the programmed order
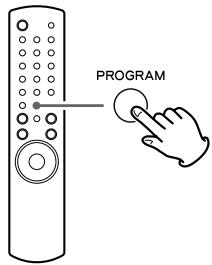
In the stop mode, press the PROGRAM button repeatedly. The song number and programme number will be shown on the display.
To add a file to the programme
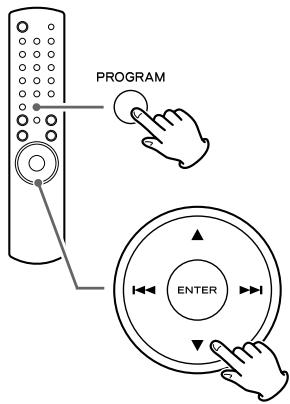
In the stop mode, press the PROGRAM button repeatedly until the programme number you want to insert a file appears on the display. If you want to add a file to the end of the programme, press the PROGRAM button repeatedly until "P-END" briefly appears on the display.
Then select a file using the or button. The file is added to the programme.
To delete a file from the programme
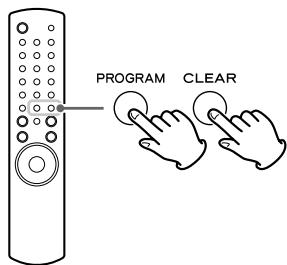
In the stop mode, press the PROGRAM button repeatedly until the programme number to be deleted appears on the display, then press the CLEAR button. The selected file is deleted from the programme.
To clear the programme
- In the stop mode, press the PROGRAM button.

- Hold down the CLEAR button for more than 4 seconds.
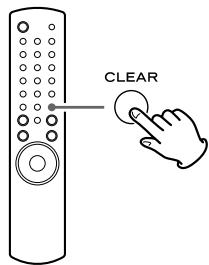
- If one of the following buttons is pressed, the programmed contents will also be cleared: SOURCE (TUNER, CD, AUX1/2, PHONO), POWER
- If the unit is disconnected from the power supply, the programmed contents will be cleared.
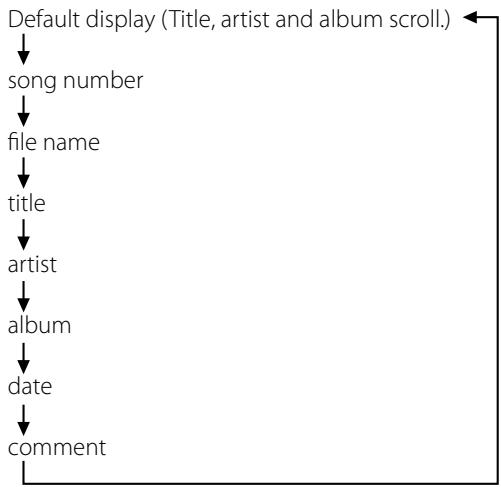
Display (USB)

Each time you press the DISPLAY button of the remote control unit during playback of MP3 or WMA, the display changes as follows:
Before Recording
This unit can record music from CDs, records, cassette tapes and radio, on USB memory devices, as MP3 files.
CAUTION
- Do not disconnect the USB storage device during recording.
Do not disconnect the power cord during recording.
It may cause damage to the products. - Adjust the volume of the external audio source to suitable level before recording. If not, the recording quality becomes poor.
Note
- The recorded files are saved in the AUDIO folder.
- The FILE NAME is fixed up automatically in regular sequence like "Audio001.MP3", "Audio002.MP3", .......
For Example:
If there are "Audio004.MP3" and "Audio009.MP3" files in the AUDIO folder, and you make a recording, a new file will be "Audio010.MP3".
- Before recording check the remaining capacity of the USB storage device using your PC.
You cannot check the remaining memory capacity with this unit.
- This unit can record up to 2000 files to the USB device.
- The maximum time of the recorded file is 90 minutes and new file is created when the time exceeds 90 minutes.
Recording to USB
You can record a source of radio broadcast and external device to the external USB storage device as MP3 files.
1 Connect the external USB storage device to the USB port of the AG-H380.
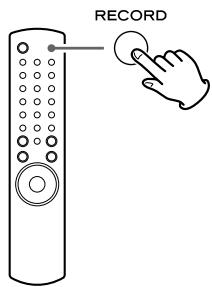
Press the RECORD button and recording starts.
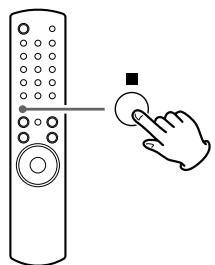
3 If you want to stop recording, press the stop button (■).
You cannot record to an external USB storage device if there is no free space or the device is locked.
Deleting a file from USB
In the stop mode, press the or button to select a directory.
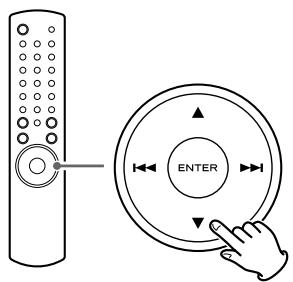
Press the ENTER button.
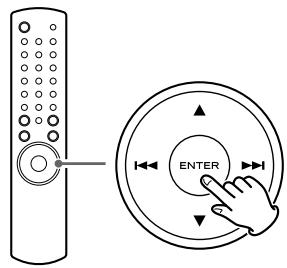
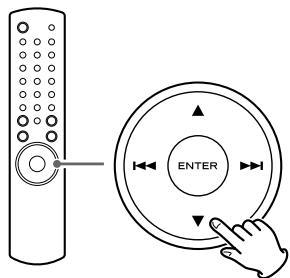
Press the or button to select the desired song.
4 Hold down the CLEAR button for more than 4 seconds.
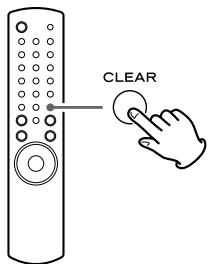
"Delete?" is displayed.
5 Within 3 seconds, press the CLEAR button.
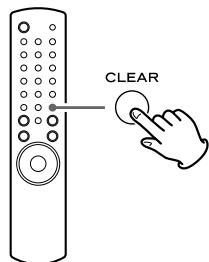
- The delete mode will be cancelled if you do not press the CLEAR button within 3 seconds.

Press the SOURCE button repeatedly to select TUNER mode.

SOURCE
2 Select FM or AM by pressing the BAND button repeatedly.
BAND
3 Select the desired tuning mode.
TUNING MODE
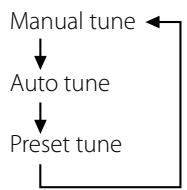
Each time the TUNING MODE button is pressed, the tuning mode changes as follows:
4 Select the station you want to listen to.
TUNING/SELECT
Manual tuning mode
Turn the TUNING/SELECT knob until the station you want to listen to is found.
On the remote control, press or repeatedly.
The frequency changes by a fixed step (FM: 50 kHz steps, AM: 9 kHz steps).
Auto tuning mode
Turn the TUNING/SELECT knob to begin auto tuning.
When a station is found, the unit tunes in the station automatically. Repeat this step until the station you want to listen to is found.
- Press the ENTER button to stop the auto tuning.
Preset tuning mode
Turn the TUNING/SELECT knob to select a preset channel.
On the remote control, press 1 or repeatedly.
The selected preset channel is tuned in.
FM Mode
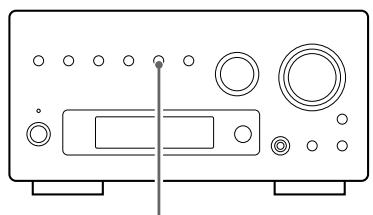
Pressing the FM MODE button alternates between Stereo mode and Mono mode.
MENUMFMMODE
Stereo:
FM stereo broadcasts are received in stereo and "ST" is displayed.
FM/ST
10:00
108.00MHz
Mono:
Select this mode when the signal is weak. Reception will be forced monaural, reducing unwanted noise.
Manual Preset (AM/FM)
You can store up to 30 FM and 30 AM stations.
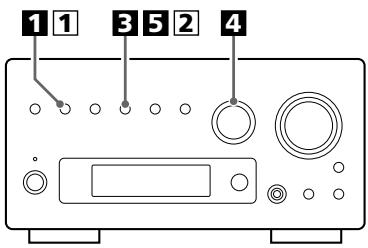
1 Select AM or FM by pressing the BAND button repeatedly.
BAND
2 Tune in the station you want to store.
See the previous page for the procedure of tuning.
Press the MEMORY button.
MEMORY
FM
10:00
CH
108.00MHz
4 Within 4 seconds, select the preset number for this station.
Turn the TUNING/SELECT knob.
TUNING/SELECT
FM
10:00
CH12
108.00MHz
5 Within 4 seconds, press the MEMORY button.

MEMORY
The station is stored.
-
To store more stations, repeat steps 2 to 5
-
If you do not press the MEMORY button within 4 seconds after selecting the preset number, presetting will be cancelled.
Presetting Automatically
1 Select FM or AM by pressing the BAND button repeatedly.

BAND
2 Hold down the MEMORY button for more than 3 seconds.

MEMORY
Up to 30 of the best received stations in your area will be stored automatically.
The Radio Data System (RDS) is a broadcasting service which allows stations to send additional information along with the regular radio programme signal.
RDS works on the FM waveband in Europe only.
Tune in an FM station (see page 23).
Press the RDS button.
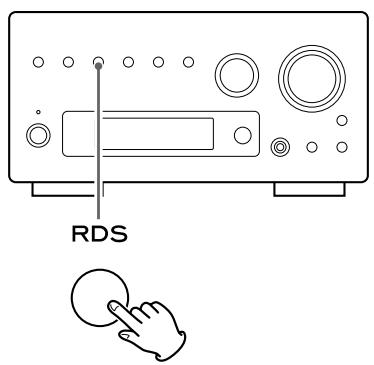
Each time the RDS button is pressed, the RDS mode is changed as follows:
PROGRAM SERVICE
When you select PROGRAM SERVICE, "PROGRAM SERVICE" will blink for about 3 seconds and then the programme service name or a station's name will be displayed. If there is no programme service data, the frequency will be displayed.
PROGRAM TYPE
When you select PROGRAM TYPE, "PROGRAM TYPE" will blink for about 3 seconds and then the programme type will be displayed.
CLOCK TIME
Displays the information about times provided from the station.
When you select CLOCK TIME, "RDS CLOCK TIME" will blink for about 3 seconds and then the clock time will be displayed.
RADIO TEXT
When you select RADIO TEXT, "RDS RADIO TEXT" will blink for about 3 seconds and then the news of stations composed of up to 64 symbols will be displayed.
If there is no radio text data, RDS mode will be automatically switched to PROGRAM SERVICE mode.
TRAFFIC ANNounce
When you select TRAFFIC ANNOUNCE, "TRAFFIC ANNOUNCE" will blink for 3 seconds and then the unit searches for a traffic announcement.
- When a traffic programme is found, the TRAFFIC ANNOUNCEMode is switched to PROGRAM SERVICE mode.
If the station currently selected is transmitting a traffic programme signal, the RDS mode will be switched to PROGRAM SERVICE mode without searching for a traffic programme.
PTY Search

You can search for stations by programme type.
1 Select FM by pressing the BAND button repeatedly.
Hold down the RDS button for more than 3 seconds.
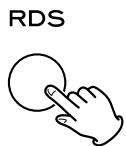
3 Select the desired programme type (PTY).
Turn the TUNING/SELECT knob to select an item.
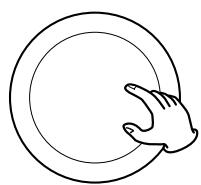
TUNING/SELECT
Select your desired one from among 31 kinds of PTY programmes.
The programme type will blink.
4 Press the ENTER button.
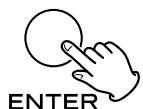
TUNING MODE
Searching starts.
- When the broadcast whose programme type you have selected is found, searching stops and the programme type will be displayed.
- If the broadcast of selected programme type is not found during PTY Search, it will stop at the beginning frequency.
- To stop searching, press the RDS button.
News:
brief announcements, events, public opinion, reports, actual situations.
Current Affairs:
a kind of suggestion including practical announcements other than news, documents, discussion, analysis and so on.
Information:
daily information or reference such as weather forecast, consumer guide, medical assistance and so on.
Sport:
sports related programmes.
Education:
educational and cultural information.
Drama:
all kinds of radio concert and serial drama.
Cultures:
all aspects of national or local culture including religious events, philosophy, social science, language, theatre, and so on.
Science:
programmes on natural science and technology.
Varied Speech:
popular programmes such as quiz, entertainment, private interview, comedy, satire and so on.
Pop Music:
programme on commercial, practical and popular songs, and sale volume of discs, etc.
Rock Music:
practical modern music generally composed and played by young musicians.
Easy Listening:
popular music usually lasting for less than 5 minutes.
Light Classics M:
classical music, instrumental music, chorus, and light music favoured by non-professionals.
Serious Classics:
orchestra including great operas, symphony, chamber music and so on.
Other Music:
other music styles (Rhythm & Blues, Reggae, etc.).
Weather & Meter:
weather reports, forecast.
Finance:
financial reports, commerce, trading.
Children's Progs:
children's programmes.
Social Affairs:
social affairs.
Religion:
religious programmes.
Phone In:
programme in which the public expresses its view by phone.
Travel & Touring:
travel reports.
Leisure & Hobby:
programmes concerning recreational activities.
Jazz Music:
jazz music.
Country Music:
country music.
National Music:
national music.
Oldies Music:
music from the so-called golden of popular music.
Folk Music:
folk music.
Documentary:
documentaries.
Alarm Test
Alarm-Alarm!
a programme notifying an emergency or a natural disaster.
The clock setting of this unit is automatically adjusted according to the CLOCK TIME (CT) data.
If you tune in an RDS station broadcasting incorrect CT data, the clock might be wrongly adjusted, and that may eventually affect the timer operation.
When you do not want the clock of this unit to be set according to the CT data, turn off the auto clock adjustment.
- No matter which RDS mode is selected, the unit receives CT data and adjusts the clock.
To turn off the auto clock adjustment, hold down the RDS button for more than 8 seconds.
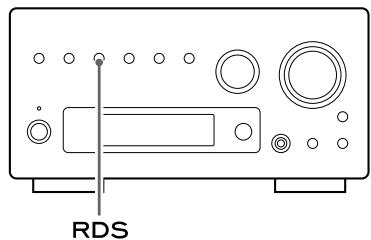

- To turn on the auto clock adjustment again, hold down the RDS button for more than 8 seconds.
- When the auto clock adjustment is turned off, CLOCK TIME is not displayed.
The clock setting of this unit is automatically adjusted according to the CLOCK TIME data of an RDS broadcasting.
If you adjust the clock manually, follow the following steps.
Press the TIME SET button.
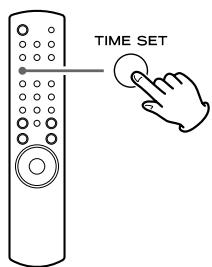
Each time the TIME SET button is pressed, the mode is changed as follows.
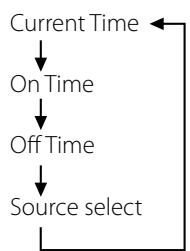
- The unit uses the 24-hour "military" clock.
- When no action is taken for 1 minute, the time adjust mode will be cancelled.
- Press the stop button (■) to cancel the time setting.
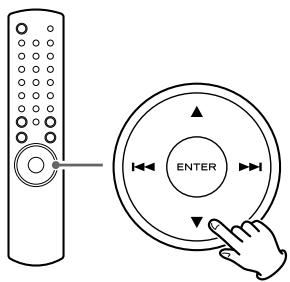
Press the or button to set the current hour.
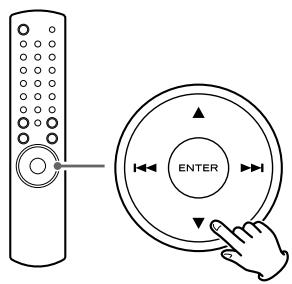
Press the ENTER button.
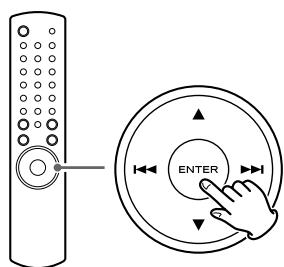
The "minute" value blinks.
4 Press the or button to set the current minute.
Press the ENTER button.
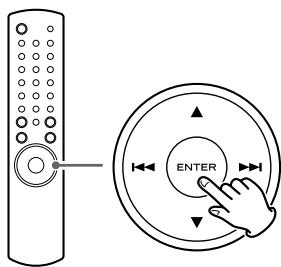
The clock starts from 00 seconds.
- The clock setting will not be saved when the POWER turns off.
Setting the Timer
- Adjust the clock before setting the timer.
- When no action is taken for 1 minute, the timer setting mode will be cancelled.
Press the TIME SET button repeatedly until "On time" is displayed.
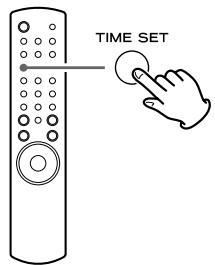
"On time" appears on the display, and the "hour" value blinks.
Press the or button to set the hour value, and press the ENTER button.
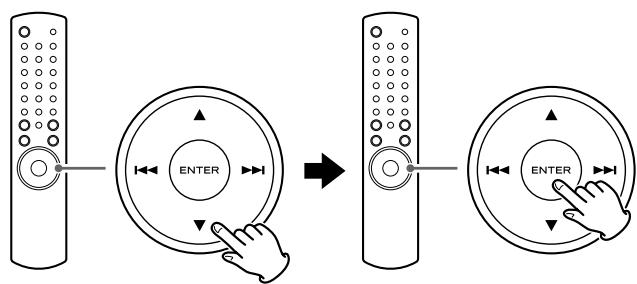
The "minute" value blinks.
Press the or button to set the minute value, and press the TIME SET button.
"Off time" appears on the display, and the "hour" value blinks.
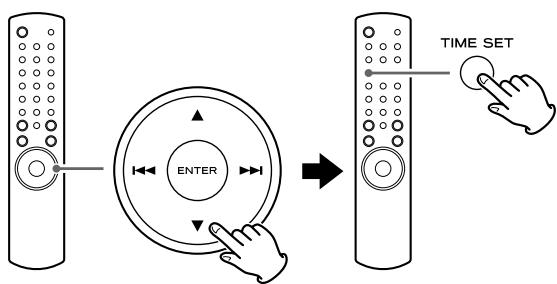
4 Repeat step 2 and 3 to set the Off time.
"Source select" appears on the display.
Press the or button to select the source, and press the ENTER button.
Now the timer setting is stored in memory.
Timer Operation
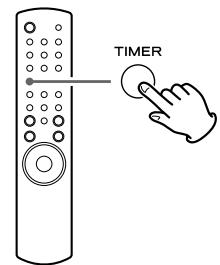
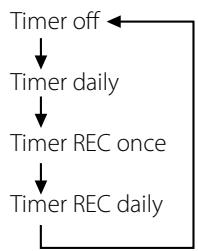
Every time you press the TIMER button on the remote control unit, the timer mode changes as follows.
TimerPlayback
1 Select "Timer daily" by pressing the TIMER button on the remote control unit.
The timer indicator "..." lights on the display.
Prepare for the timer playback.
Adjust the volume, tune in a station, etc.
Press the STANDBY/ON button on the remote control unit to place the unit in standby.
Everyday when the On time is reached, the unit will turn on and start playback, and when the Off time is reached the unit will return to standby.
- Do not turn off the unit by pressing the POWER button on the main unit. The timer does not work when the On time is reached.
Timer Recording
You are able to set the various external USB storage devices such as USB flash memory to record programme at the desired time.
Connect the external USB storage device to the unit beforehand.
1 Select "Timer REC once" or "Timer REC daily" by pressing the TIMER button on the remote control unit.
The timer indicator "..." and "..." light on the display.
Prepare for the timer recording.
Tune in a station, etc.
Press the STANDBY/ON button on the remote control unit to place the unit in standby.
One minute before the set On time, the unit turns on and starts recording at the On time.
When the Off time is reached the unit will return to standby.
- Do not turn off the unit by pressing the POWER button on the main unit. The timer does not work when the On time is reached.
Timer off
When not using the timer, press the TIMER button on the remote control unit to select "Timer off".
The timer indicator "..." disappears from the display.
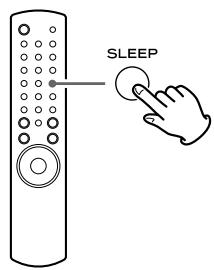
The power can be switched off after a specified amount of time. Press the SLEEP button repeatedly until desired time appears on the display.
SLEEP-90 (80, 70 ... 10)
The power will be switched off 90 (80, 70 ... 10) minutes later.
SLEEP OFF
The sleep timer is off.
-
The display is dimmed when you set the sleep timer.
-
If you want to check the remaining time, press the SLEEP button once. The remaining time will be displayed for 3 seconds, and return to the normal display.
Restoring factory settings
If the power supply is interrupted for 14 days or longer, all the settings kept in memory (such as preset stations and timer settings) will be erased.
It will take more than 3 days after plugging the power cord into the outlet to charge enough electricity for the memory backup function.
If you want to manually initialize the settings, hold down the SOURCE button and play/pause (▶/II) for more than 4 seconds in standby mode.
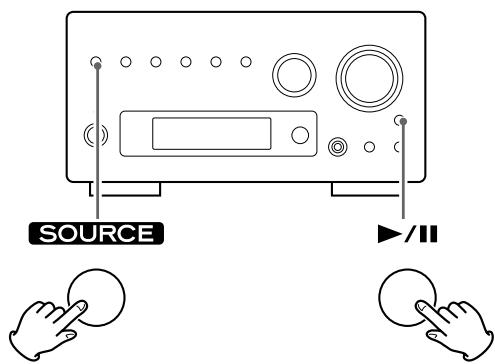
The unit will be turned on, and all the settings are reset to the default settings.
Troubleshooting
In case of trouble with the unit, please take the time to look through this chart and see if you can solve the problem yourself before you call your dealer or TEAC service center.
Amplifier
No power.
Check the connection to the AC power supply.
No sound from speakers.
Check the connection to the speakers.
Adjust the volume.
Select proper source.
Pull out the headphones plug from PHONES jack.
If muting is on, press the MUTING button.
The sound is noisy.
The unit is too close to a TV set or similar appliances. Install the unit apart from them, or turn them off.
Clock goes wrong.
The clock setting will not be saved when the POWER turns off. Do not turn off the POWER switch on the front panel.
Remote Control Unit
Remote control unit does not work.
If the batteries are exhausted, change the batteries.
Use remote control unit within the range (5 m) and point at the front panel.
Clear obstacles between the remote control unit and the main unit.
If a fluorescent light is near the unit, turn it off.
Tuner
Cannot listen to any station, or signal is too weak.
Tune in the station properly.
If a TV set is near the unit, turn it off.
Install the antenna again after locating the best reception position.
An external antenna is recommended.
Though the broadcast is stereo, it sounds monaural.
Press the FM MODE button.
iPod Player
Will not play.
Remove the iPod from the USB jack, wait a few seconds, and insert it again.
Software update may solve the problem. Visit the Apple website and download the latest iPod software.
Cannot operate the iPod.
Make sure the HOLD switch of the iPod is not set to HOLD.
MP3/WMA
There is no sound even if the play/pause button ( / ) is pressed.
Check if there are MP3 or WMA files on the USB.
Non-playable file formats (e.g MPEG 1 LAYER 2 file) cannot be played.
Specifications
"No song title No artist No album" appears on the display.
There is no ID3 tag information for the music file.
Edit the song title, artist, and album information of the song on a PC using the MP3 or WMA making application.
Some unknown characters are displayed on the display panel.
This unit cannot display symbols and full-size or double-byte characters (such as Japanese, Chinese, etc.) correctly. File name of MP3 or WMA should be alphanumeric characters.
If normal operation cannot be recovered, unplug the power cord from the outlet and plug it again.
Maintenance
If the surface of the unit gets dirty, wipe with a soft cloth or use diluted neutral cleaning liquid. Be sure to remove any fluid completely. Do not use thinner, benzine or alcohol as they may damage the surface of the unit.
AMPLIFIER Section
Output Power .40 W/ch (6 ohms, 0.5 %,1 kHz)
Input Sensitivity. PHONO: 2.5 mV 47 kΩ
AUX, CD, TUNER: 200 mV 47 kΩ
Frequency Response. 20 Hz to 60,000 Hz (+1/-3 dB)
TUNER Section
FM Section
Tuning Range. 87.50 MHz to 108.00 MHz
Signal-to-Noise Ratio 65 dB (Mono)
60 dB (Stereo)
AM Section
Tuning Range. 522 kHz to 1,629 kHz
Signal-to-Noise Ratio 35 dB
USB Section
Playback
Frequency Response. 20 Hz to 20,000 Hz (±2 dB)
Signal-to-Noise Ratio. .more than 85 dB
Recording
Frequency Response. 20 Hz to 15,000 Hz (±2 dB)
Signal-to-Noise Ratio. .more than 85 dB
GENERAL
Power Requirements. 230 V AC, 50 Hz
Power Consumption 85 W
0.5 W (standby)
Dimension (W× H× D) 215 x 110 x 315 mm
Weight 4.4 kg
Standard Accessories
Remote Control Unit (RC-1225) x 1
Batteries (AAA) × 2
AM Loop Antenna x 1
FM Lead-type Antenna x 1
Owner's Manual x 1
Warranty Card x 1
- Design and specifications are subject to change without notice.
- Weight and dimensions are approximate.
- Illustrations may differ slightly from production models.
TEAC
| TEAC CORPORATION | 1-47 Ochiai, Tama-shi, Tokyo 206-8530, Japan Phone: (042) 356-9156 |
| TEAC AMERICA, INC. | 7733 Telegraph Road, Montebello, California 90640, U.S.A. Phone: (323) 726-0303 |
| TEAC CANADA LTD. | 5939 Wallace Street, Mississauga, Ontario L4Z 1Z8, Canada Phone: (905) 890-8008 |
| TEAC MEXICO, S.A. de C.V. | Río Churubusco 364, Colonia Del Carmen, Delegación Coyoacan, CP 04100, México DF, México Phone: (5255)5010-6000 |
| TEAC UK LIMITED | Unit 19 & 20, The Courtyards, Hatters Lane, Watford, Hertfordshire, WD18 8TE, U.K. Phone: (0845) 130-2511 |
| TEAC EUROPE GmbH | Bahnstrasse 12, 65205 Wiesbaden-Erbenheim, Germany Phone: 0611-71580 |
This appliance has a serial number located on the rear panel. Please record the model number and serial number and retain them for your records.