TWT88 - Aspiradora H.KOENIG - Manual de uso y guía de instrucciones gratis
Encuentra gratis el manual del aparato TWT88 H.KOENIG en formato PDF.

Elija su idioma y proporcione su correo: le enviaremos una version traducida especificamente para usted.
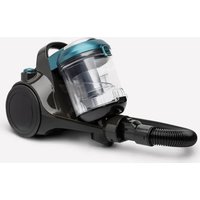
| Tipo de producto | Limpiador textil de agua caliente |
| Marca | H.Koenig |
| Modelo | TWT88 |
| Tensión de alimentación | 220-240 V ~ 50 Hz |
| Potencia nominal | 1200 W |
| Capacidad del depósito de agua limpia | 1800 ml |
| Capacidad del depósito de agua sucia | 950 ml |
| Longitud de la manguera | 1,8 m |
| Longitud del cable eléctrico | 5 m |
| Depresión | 15 kPa |
| Nivel sonoro | ≤ 80 dB |
| Índice de protección | IPX4 |
| Peso neto | 4,2 kg |
| Dimensiones (Largo × Ancho × Alto) | 320 × 226 × 327 mm |
| Tiempo de calentamiento | 15 segundos |
| Temperatura de uso | 5 °C a 50 °C |
| Tipo de motor | Motor de aspiración seco/húmedo |
| Funciones principales | Pulverización de agua caliente/fría, aspiración de líquidos, limpieza a vapor |
| Accesorios incluidos | Cepillo estándar, cepillo ancho, cepillo en T, cepillo autolimpiante, soporte de asa, gancho, manguera |
| Mantenimiento recomendado | Limpieza regular de los depósitos y del filtro después de cada uso |
| Garantía | 2 años |
Preguntas frecuentes - TWT88 H.KOENIG
¿Cómo usar el aparato para limpiar un tejido?
Llene el depósito de agua limpia (máx. 1800 ml), enchufe el aparato, seleccione la temperatura y la potencia de aspiración, luego pulverice agua sobre la mancha manteniendo presionado el botón de pulverización. A continuación, aspire el agua sucia con el cepillo. Repita si es necesario.
¿Qué hacer si la máquina no pulveriza agua?
Verifique primero que el depósito de agua limpia no esté vacío. Si el depósito está lleno, la boquilla puede estar obstruida: use una aguja fina para desbloquear el orificio. Si el problema persiste, contacte al servicio postventa.
¿Cómo limpiar el depósito de agua sucia?
Desenganche el depósito de agua sucia tirando oblicuamente, abra la tapa, vacíe el agua sucia y enjuáguelo con agua limpia. Límpielo regularmente para mantener el rendimiento de aspiración.
El ruido es anormal, ¿qué hacer?
Apague y desenchufe el aparato. Verifique que el orificio de aspiración no esté bloqueado por residuos. Si el ruido persiste, el motor puede estar defectuoso: contacte al servicio postventa.
¿Puedo usar productos de limpieza químicos?
Sí, puede añadir un líquido de limpieza profesional sin burbujas en el depósito de agua limpia. Para manchas difíciles, use un quitamanchas especial para textiles antes de pasar el aparato.
¿Cómo guardar el cable y la manguera después del uso?
Enrolle el cable de alimentación alrededor de los ganchos en la parte trasera de la máquina. La manguera se puede guardar enrollándola en la ranura de almacenamiento situada debajo del aparato.
¿Cuál es la duración de la garantía?
La garantía es de 2 años a partir de la fecha de compra o entrega. Cubre defectos de fabricación en uso normal, pero no el desgaste normal, accesorios o daños causados por mal uso.
¿Cómo reemplazar la manguera?
La manguera es desmontable. Desconéctela del aparato desbloqueando la conexión. Para instalar una manguera nueva, alinee el codo con la base y empuje firmemente hasta escuchar un clic.
¿Cómo limpiar el cepillo autolimpiante?
Coloque el cepillo autolimpiante en el mango, encienda el aparato y mantenga presionado el botón de pulverización de agua. También puede colocar el cepillo directamente bajo un grifo de agua limpia mientras deja funcionar el aparato para una limpieza profunda.
¿Qué hacer en caso de fuga de agua?
Detenga inmediatamente el aparato y desenchúfelo. Verifique que los depósitos estén correctamente encajados y que las juntas no estén dañadas. Si la fuga persiste, consulte a un profesional.
Preguntas de los usuarios sobre TWT88 H.KOENIG
0 pregunta sobre este aparato. Responde a las que conoces o haz la tuya.
Hacer una nueva pregunta sobre este aparato
Aún no hay preguntas. Sé el primero en hacer una.
Descarga las instrucciones para tu Aspiradora en formato PDF gratis! Encuentra tus instrucciones TWT88 - H.KOENIG y toma tu dispositivo electrónico nuevamente en la mano. En esta página están publicados todos los documentos necesarios para el uso de su dispositivo. TWT88 de la marca H.KOENIG.
MANUAL DE USUARIO TWT88 H.KOENIG
H
Instruction Manual
Manuel d'instructions
Bedienungsanleitung
Gebruiksaanwijzing
Manual de instrucciones
Manuale d'uso
Manual de instruções
Instrukcja obsługi

natural_image
Exterior view of a HCoenig vacuum cleaner with digital display and coiled tubing (no text or symbols visible on device body)
Hot water textile cleaner
Nettoyeur textile eau chaude
Textilreiniger Heißwasser
Heet water textielreiniger
Limpiador textil de agua caliente
Detergente tessile ad acqua calda
Limpador de têxteis com água quente
Gorąca woda do czyszczenia tekstyliów

ENGLISH

natural_image
Line drawing of a medical or laboratory equipment setup with a coiled tube and control panel (no text or symbols)
Read this instruction manual carefully before using the product. It contains important safety information and advice on use and maintenance.
ATTENTION
Please read the user manual carefully.
Clean and maintain the product in accordance with the instructions. In the event of a fault, first consult the troubleshooting guide.
This warranty is void if the defect is caused by accidental damage, misuse, abuse, neglect, improper repair or modification by unauthorised persons, or failure to follow the operating instructions supplied with the product. This warranty does not apply to normal wear and tear or commercial use.
In no event shall liability exceed the purchase price paid by the purchaser of the product. In no event shall there be any liability for any loss - direct or indirect - or any incidental or consequential damages arising out of or in connection with the use of the product.
IMPORTANT SAFETY INSTRUCTIONS
BEFORE USING THIS APPLIANCE, READ ALL INSTRUCTIONS AND WARNINGS
IN YOUR USER GUIDE AND ON THE DEVICE.
When using an electrical appliance, basic precautions should always be taken, including the following:
1. Unplug the before to servicing, inspect it or move it.
2. Use a professional cleaning fluid without bubbles to avoid damaging the appliance.
3. Regularly remove dust from the socket
4. Plug the appliance in firmly when in use.
5. Unplug the appliance when not in use for extended periods.
6. ensure that the plug is not overloaded
7. Use the appliance at 220 V AC.
8. Stop use immediately, switch off the appliance and unplug it from the mains in the event of a fault or malfunction.
9. Stop using the appliance and consult the manual or customer service if you notice any abnormal noises or odours.
10. Do not not inhale any substances flammable such as cigarette butts.
11. Stop immediately from work if a foreign object blocks the spray nozzle.
12. Stop work immediately if a foreign body is inhaled.
13. If foreign objects block the clean water bucket or the waste water bucket, empty the water and clean before continuing to use the appliance.
14. Don't forget to unplug the power cord after use.
15. Cleaning and maintenance by the user must not be carried out by children unless they are over 8 years old and under adult supervision.
16. Keep the device and its cable out of the reach of children under 8.
17. When using electrical appliances, safety precautions must always be taken to prevent any risk of fire, electric shock and/or injury in the event of misuse.
18. Check that the voltage indicated on the appliance nameplate corresponds to that of your electrical installation. If this is not the case, contact your retailer and do not connect the appliance.
19. The appliance must not be used if it has been dropped, if there are visible signs of damage or if it is leaking.
20. Please keep this document available and give it to the future owner if you sell your appliance.
21. Do not use the appliance if its power cable or plug is damaged, if it is not working properly, if it has been damaged or if it has been dropped. If the cable
is damaged, it must be replaced by the manufacturer or its agent, or by a qualified person to avoid any risk.
22. This appliance may be used by persons with reduced physical, sensory or mental capabilities or lack of experience and knowledge, provided that they have received supervision or instructions concerning the safe use of the appliance and that they understand the hazards involved. Children must not play with the appliance.
23. This appliance is intended for use in domestic and similar applications such as :
\- kitchen areas in shops, offices and other work environments;
\- farms ;
\- in hotels, motels and other residential environments;
- guest rooms.
24. The appliance is not intended to be operated using an external timer or a separate remote control system.
25. Never immerse the appliance, its power cord or the mains plug in water or any other liquid.
Safety advice :
1. Do not damage the power cord. Do not pull it when handling it.
2. Do not use the appliance if the power cord and plug are broken or if the plug comes loose.
3. Do not touch or connect or disconnect the appliance with wet hands.
4. Do not allow small children to touch the power plug.
5. Do not spray pesticides, hair dyes, lubricants or other liquids.
6. Do not inhale heat from petroleum gases or dry dust.
7. Do not dismantle, repair or modify the appliance yourself.
8. Do not use the appliance in dangerous situations such as rain or strong winds.
9. Never immerse the appliance, its power cord or the mains plug in water or any other liquid.
10. Avoid breathing in particles of dirt or dust that could carry infectious diseases.
11. Do not use the appliance without a waste water bucket
12. Do not use for purposes other than cleaning
13. Do not bend over or roll
14. Keep the machine out of the reach of small children.
15. Do not allow children to use or play with it.
16. Do not use outdoors
17. Do not continue to use it if the suction inlet is blocked.
18. To avoid electric shock, do not pull on the power cord to connect or disconnect it.
Product introduction


Body :
1. Water tank
2. Cleaning brush
3. Control panel
4. Dirty water tank
5. appliance body
6. Flexible
7. Water spray button
8. Handle support
9. Support for cable reel
10. Flexible locking with the appliance
11. Suspension hook
Accessories

1

2

3

4

5

6

7

8
1. Standard brush
2. Wide trajectory brush
3. T-shaped brush
4. Self-cleaning brush
5. Instruction manual
6. Handle support
7. Handle hook
8. Hose
PRODUCT PARAMETERS :
Rated operating voltage 25V 50Hz Engine type Wet and dry dust extraction motor Rated power 1200W Length of hose 1,8m Degree of vacuum 15Kpa Tightness level IPX4 Noise </= 80dB Net weight of machine 4.2kg Clean water tank capacity 1800mL Working environment T°C 5-50°C Dirty water tank capacity 950mL Machine size 320*226*327mm Length of electrical cable 5m Heating time 15s
PRÉPARATION
1. Remove the suspension hook and handle support.

natural_image
Two 3D mechanical component diagrams shown in wireframe and perspective views (no text or symbols)
2. Remove the suspension hook and attach it to the right-hand side of the rear cover.

natural_image
Line drawing of a mechanical mixing or cleaning device (no text or symbols)
3. Remove the handle support and snap it onto the left-hand side of the rear cover.

natural_image
Line drawing of a mechanical device with no visible text or symbols
4. Remove the hose connector, align the hole in the hose elbow with the back of the base, insert firmly and hear a "pop".

natural_image
Cross-sectional technical diagram of a mechanical assembly (no visible text or labels)
5. Fit the appropriate cleaning brush head as required.

natural_image
Simple line drawing of a mechanical component with an arrow indicating motion (no text or symbols)
INSTRUCTIONS
1. Remove the clean water tank from the body.

natural_image
Line drawing of a mechanical device with a handle and base, showing no text or symbols
2. Open it and fill it with clean water.

3. Install the clean water tank in the body.

natural_image
Technical line drawing of a mechanical device with a downward arrow indicating motion (no text or symbols)
4. Plug it in.

natural_image
Line drawing of a plug inserted into an electrical outlet with three switches (no text or symbols)
5. Switch on the device to begin.

natural_image
Simple line drawing of a kitchen appliance with a side table and a stand (no text or symbols)
6. Select suction power or water temperature.

Notice: Please spray any residual water in the hose before spraying any hot water.
7. Press the water spray button to spray clean water.

natural_image
Diagram of a handheld device with spray and spray pattern (no text or symbols)
Spray the stain with clean water to bring it to the surface. Do not spray continuously in the same place.
After spraying, soak up the water to avoid mould and odours.
8. Absorbs water.

natural_image
Simple line drawing of a mechanical device with a lever and base plate (no text or symbols)
9. Switch off the power supply to stop.

natural_image
Simple line drawing of a mechanical device with no text or symbols
10. Unplug it.

natural_image
Illustration of a plug inserted into an electrical outlet (no text or symbols)
11. Empty the clean water and waste water, and clean the waste water bucket.

natural_image
Simple line drawing of a mechanical component with no text or symbols
INSTRUCTIONS FOR USE
To avoid obstructing the air duct, please remove any large pieces of rubbish from the area, such as large pieces of paper, wrapping film, etc. This appliance can be used on soft surfaces such as fabrics and lint. It is not recommended for use on hard surfaces.
1. Press the switch to start the machine and begin work; press the switch again to switch the machine off.
2. Power: The default speed is "Standard", press the "Power" button to switch to "Turbo" speed. Press this button again to return to "Standard" speed, and vice versa.
3. Temp: The default mode is "Warm", press the "Temp" button to set the mode to "Hot". Press this button again to switch to "Warm" mode.
4. Invitation to fill the waste water tank: When the wastewater tank is full, all the lights flash, the "drip" buzzer sounds three times in succession to enter standby mode.
5. Set the mode according to demand, hold the cleaning brush, press and hold the "water spray switch" button on the bottom of the cleaning brush knob, the water spray head continues to spray water outwards; release the button, the water spray stops.
6. For ordinary stains, pour the cleaning liquid into the cleaning tank and spray water onto the stains. After spraying the water, the cleaning brush is used to wipe the stains several times, and the waste water is sucked into the waste water canister and vacuumed several times to clean the stains quickly. After cleaning, it is advisable to clean again with water to prevent the cleaning liquid from remaining in the fabric.
7. For stubborn stains, first use a special cleaning solution to spray onto the fabric above the stain, spray after using the cleaning brush several times, the cleaning solution will completely dissolve the stain, open the machine to clean the liquid and sewage water into the sewage water tank, vacuuming several times can quickly clean the stain.
8. After cleaning, use the self-cleaning brush head and clean the hose in general.
Storing the power cord and hose :
1. This product has a long power cord. Once the product is in use, the power cord can be wrapped around the back of the machine.
2. After using the product, the hose can be rolled up in the storage slot at the bottom of the machine.

natural_image
Technical line drawing of a mechanical device with coiled tubing and mounting bracket (no text or symbols)
ATTENTION :
1. The power cord on this product is long, so be careful not to trip over it when using it.
2. Do not allow children to sit on the machine.
3. Please ensure that you use this product safely. Do not immerse the power cord in water.
4. Do not use the machine at ambient temperatures below 0°C-50°C.
5. 5. it is strictly forbidden to change the entire machine, accessories and wires.
MAINTENANCE
ATTENTION :
Switch it off and unplug it before servicing.
Body cleaning :
Ordinary stains can be removed with a damp cloth.
Stubborn dirt can be wiped off with a damp cloth soaked in detergent, then wiped with a dry cloth soaked in water.
After each use :
Remove them from the body, rinse thoroughly with water and air dry.

natural_image
Line drawings of five different mechanical components or housing designs, no text or symbols present
Remove the front cover, then rinse the nozzle with water :

natural_image
Simple line drawing of two objects: a triangular prism and a cylindrical object with a long line extending from it (no text or symbols)
Open and remove
Self-cleaning brush head and hose:
1. Place the head of the self-cleaning brush on the handle, open the machine and it will start working. At the same time, keep pressing the water button, and see a certain amount of water stored in the hose, and clean the hose.
Press the water button
2. Install the self-cleaning brush head on the handle, open the machine and place the brush head directly in the tap for direct cleaning.
Auto cleaning
Cleaning the dirty water tank :
To maintain the product's performance, please clean the dirty water tank regularly. If there is more dirty water in the dirty water tank, the suction power of this product will be weakened. If the water level reaches the maximum level, the dirty water tank should be cleaned in good time. Once the dirty water tank has been removed from the host, the dirty water and internal waste must be emptied and cleaned.
How to remove the dirty water tank:
Pull the dirty water tank at an angle to remove it as a whole, then open the buckle on the dirty water tank cover, open the cover and clean the dirty water tank.

natural_image
Diagram showing a mechanical device before and after assembly, with no visible text or symbols
Add water to the clean water tank : When the cleanwater tank runs out of water, please add water in time :
Adding water: Remove the clean water tank, open the water tank lid and add water.
Clean water tank removal method: Pull the clean water tank upwards at an angle to remove the entire clean water tank, then open the clean water tank cover and add water.

natural_image
Diagram showing a mechanical device before and after assembly, with no visible text or symbols.
Cleaning the cleaning brush : When the cleaning brush is tangled by hair or blocked by dirt, please clean and maintain it in time :
1. If the cleaning brush gets tangled in hair, use a tool to clean the hair or dirt from the bristles.
2. When the cleaning brush is blocked, remove the transparent cover above the cleaning brush and use chopsticks or other tools to clean the air duct inside the cleaning brush handle.

natural_image
Line drawing of a firearm with two upright arms (no text or symbols)
Clean the filter in the fresh water tank :
The strainer in the clean water tank is used to filter out the impurities in the water and the limescale generated after boiling the water. Please clean the strainer in good time after using it several times to ensure its filtering effect.

Removable hose :
The hose on this machine is removable. If the hose becomes damaged, please remove it and replace it with a new one.
TROUBLESHOOTING
If a fault is detected during use, please refer to the following table:
WARRANTY
The warranty period for our products is 2 years, unless otherwise stated, starting from the date of initial purchase or the date of delivery.
If you have any problems or questions, you can easily access our help pages, troubleshooting tips, FAQ, and user manuals on our service site: https://sav.hkoenig.com.
By typing the reference name of your device in the search bar, you can access all available online support, designed to best meet your needs.
If you still cannot find an answer to your question or problem, then click on “Did the answer solve your problem?”. This will direct you to the Customer Support Request Form, which you can fill out to validate your request and get help.
WARRANTY CONDITIONS
The warranty covers all failures occurring under normal use, in accordance with the usage and specifications in the user's manual.
This warranty does not apply to packaging or transportation problems during shipment of the product by the owner. It also does not include normal wear and tear of the product, nor maintenance or replacement of consumable parts.
EXCLUSION OF WARRANTY
- Accessories and wearing parts (\*).
- Normal maintenance of the device.
- All breakdowns resulting from improper use (shocks, failure to comply with power supply recommendations, poor conditions of use, etc.), insufficient maintenance or misuse of the device, as well as the use of unsuitable accessories.
- Damage of external origin: fire, water damage, electrical surge, etc.
- Any equipment that has been disassembled, even partially, by persons other than those authorized to do so (notably the user).
- The products whose serial number would be missing, deteriorated or illegible that would not allow its identification.
- The products subjected to leasing, demonstration, or exhibition.
(\*) Some parts of your device, called wear parts or consumables, deteriorate with time and frequency of use of your device. This wear and tear are normal but can be accentuated by poor conditions of use or maintenance of your device. These parts are therefore not covered by the warranty.
The accessories supplied with the device are also excluded from the warranty. They cannot be exchanged or refunded. However, some accessories can be purchased directly through our website: https://sav.hkoenig.com/.
ENVIRONMENT
CAUTION:

Do not dispose of this product as it has with other household products. There is a separation of this waste product into communities, you will need to inform your local authorities about the places where you can return this product. In fact, electrical and electronic products contain hazardous substances that have harmful effects on the environment or human health and should be recycled. The symbol here indicates that electrical and electronic equipment should be chosen carefully, a wheeled waste container is marked with a cross.
Adeva SAS / H.Koenig Europe - 8 rue Marc Seguin, 77290 Mitry-Mory, France www.hkoenig.com - https://en.hkoenig.com - Tél: +33 1 64 67 00 05
FRANÇAIS

natural_image
Line drawing of a medical or laboratory equipment setup with a coiled tube and control panel (no text or symbols)
Lisez attentivement ce manuel d'instructions avant d'utiliser le produit. Il contient des informations importantes pour votre sécurité ainsi que des conseils d'utilisation et d'entretien
ATTENTION
Veuillez lire attentivement le manuel d'utilisation.
Nettoyez et entretenez le produit conformément aux instructions.
En cas d'anomalie, consultez d'abord le guide de dépannage.
Cette garantie est annulée si le défaut est causé par un dommage accidentel, une mauvaise utilisation, un abus, une négligence, une réparation ou une modification incorrecte par des personnes non autorisées, ou un non-respect des instructions d'utilisation fournies avec le produit. Cette garantie ne s'applique pas à l'usure normale ou à l'utilisation commerciale.
En aucun cas, la responsabilité ne peut excéder le prix d'achat payé par l'acheteur du produit. En aucun cas, il n'y aura de responsabilité pour toute perte - directe ou indirecte - ou tout dommage accessoire ou consécutif résultant de l'utilisation du produit ou en rapport avec celle-ci.
CONSIGNES DE SÉCURITÉ IMPORTANTES
AVANT D'UTILISER CET APPAREIL, LISEZ TOUTES LES INSTRUCTIONS ET TOUS LES AVERTISSEMENTS
FIGURANT DANS VOTRE GUIDE DE L'UTILISATEUR ET SUR L'APPAREIL.
Lors de l'utilisation d'un appareil électrique, des précautions de base doivent toujours être prises, notamment les suivantes :
1. Débranchez l'appareil avant de l'entretenir, de l'inspecter ou de le déplacer.
2. Utilisez un liquide de nettoyage professionnel sans bulles pour éviter d'endommager l'appareil.
3. Éliminer régulièrement la poussière sur la prise
4. Branchez fermement l'appareil lorsqu'il est utilisé.
5. Débranchez l'appareil lorsqu'il n'est pas utilisé pendant une longue période.
6. veillez à ce que la prise ne soit pas surchargée
7. Utiliser l'appareil sous une tension de 220 V CA
8. Arrêter immédiatement l'utilisation, éteindre l'appareil et le débrancher en cas d'anomalie ou de panne.
9. Cessez d'utiliser l'appareil et consultez le manuel ou le service clientèle en cas de bruits ou des odeurs anormaux
10. Ne pas inhaler de substances inflammables et explosives telles que les mégots de cigarettes.
11. Cessez immédiatement de travailler si un corps étranger bloque la buse de pulvérisation.
12. Arrêter immédiatement le travail en cas d'inhalation d'un corps étranger.
13. Lorsque des corps étrangers bloquent le seau d'eau propre ou le seau d'eaux usées, videz l'eau et nettoyez avant de continuer à utiliser l'appareil.
14. N'oubliez pas de débrancher le cordon d'alimentation après utilisation.
15. Le nettoyage et l'entretien par l'utilisateur ne doivent pas être effectués par des enfants, à moins qu'ils ne soient âgés de plus de 8ans et qu'ils soient sous la surveillance d'un adulte.
16. Conserver l'appareil et son câble hors de portée des enfants âgés de moins 8ans.
17. Lors de l'utilisation d'appareils électriques, des précautions de sécurité doivent toujours être prises pour prévenir tout risque d'incendie, de choc électrique et/ou de blessure en cas de mauvaise utilisation.
18. Vérifier que le voltage indiqué sur la plaque signalétique de l'appareil correspond bien à celui de votre installation électrique. Si ce n'est pas le cas, adressez-vous au revendeur et ne branchez pas l'appareil.
19. L'appareil ne doit pas être utilisé s'il a chuté, s'il y a des signes visibles de dommages ou en cas de fuite.
20. Veuillez conserver ce document à disposition et le remettre au futur propriétaire en cas de cession de votre appareil.
21. N'utilisez pas l'appareil si son câble d'alimentation ou sa prise est endommagée, s'il ne fonctionne pas correctement, s'il a été abimé ou s'il est tombé. Si le câble
d'alimentation est endommagé, il doit être remplacé par le fabricant ou son agent ou encore par une personne qualifiée afin d'éviter tout risque.
22. Cet appareil peut être utilisé par des personnes ayant des capacités physiques, sensorielles ou mentales réduites ou un manque d'expérience et de connaissances à condition qu'elles aient reçu une supervision ou des instructions concernant l'utilisation de l'appareil en toute sécurité et qu'elles comprennent les dangers encourus. Les enfants ne doivent pas jouer avec l'appareil.
23. Cet appareil est destiné à être utilisé pour des applications domestiques et similaires telles que :
\- les zones de cuisine dans les magasins, bureaux et autres environnements de travail ;
\- les fermes ;
\- dans des hôtels, motels et d'autres environnements de type résidentiel ;
\- les chambres d'hôtes.
24. L'appareil n'est pas destiné à être mis en fonctionnement au moyen d'une minuterie extérieure ou par un système de commande à distance séparé.
25. Ne plongez jamais l'appareil, son cordon d'alimentation ou la prise de courant dans l'eau ou tout autre liquide.
Conseils de sécurité :
1. Ne pas endommager le cordon d'alimentation.
Ne le tirez pas lorsque vous le manipulez
2. Ne pas utiliser l'appareil si le cordon d'alimentation et la fiche sont cassés ou si la fiche se détache.
3. Ne pas toucher ou brancher et débrancher l'appareil avec des mains mouillées.
4. Ne pas laisser les enfants en bas âge toucher la fiche d'alimentation.
5. Ne pas pulvériser de pesticides, de colorants capillaires, de lubrifiants ou d'autres liquides.
6. Ne pas inhaler la chaleur des gaz de pétrole ou la poussière sèche.
7. Ne pas démonter, réparer ou transformer l'appareil soi-même.
8. Ne pas utiliser l'appareil dans des situations dangereuses telles que l'eau de pluie et le vent fort.
9. Ne plongez jamais l'appareil, son cordon d'alimentation ou la prise de courant dans l'eau ou tout autre liquide.
10. Évitez de respirer des particules de saleté ou de poussière potentiellement porteuses de maladies infectieuses.
11. Ne pas utiliser l'appareil sans un seau à eaux usées
12. Ne pas utiliser à des fins autres que le nettoyage
13. Ne pas se pencher ou rouler
14. Ne pas utiliser la machine à la portée des jeunes enfants.
15. Ne pas laisser les enfants l'utiliser et jouer avec.
16. Ne pas l'utiliser à l'extérieur
17. Ne pas continuer à l'utiliser si l'entrée d'aspiration est bloquée.
18. Ne pas tirer sur le cordon d'alimentation pour le brancher ou le débrancher afin de ne pas provoquer de choc électrique.
Introduction du produit


Corps :
1. Réservoir d'eau
2. Brosse de nettoyage
3. Panneau de commande
4. Réservoir d'eau sale
5. corps de l'appareil
6. Flexible
7. Bouton de pulvérisation d'eau
8. Support de poignée
9. Support pour enrouleur de cable
10. Verrouillage flexible avec l'appareil
11. Crochet de suspension
Accessoires

1

2

3

4

5

6

7

8
1. Brosse standard
2. Brosse à large trajectoire
3. Brosse en forme de T
4. Brosse autonettoyante
5. Manuel d'instruction
6. Support de poignée
7. Crochet de poignée
8. Tuyau
PARAMÈTRES DU PRODUIT :
Tension de service nominale 25V 50Hz Type de moteur Moteur d'aspiration de poussières sèches et humides Puissance nominale 1200W Longueur du tuyau 1.8m Degré de vide 15Kpa Niveau d'étanchéité IPX4 Bruit </= 80dB Poids net de la machine 4,2kg Capacité du réservoir d'eau propre 1800mL Environnement de travail T°C 5-50°C Capacité du réservoir d'eau sale 950mL Taille de la machine 320*226*327mm Longueur de la ligne électrique 5m Temps de chauffage 15s
PRÉPARATION
1. Retirer le crochet de suspension et le support de poignée.

natural_image
Two 3D mechanical component diagrams shown in wireframe and cutaway views (no text or symbols)
2. Retirez le crochet de suspension et fixez-le sur le côté droit de la couverture arrière.

natural_image
Line drawing of a kitchen mixer with control panel and fan (no text or symbols)
3. Retirer le support de la poignée et l'enclencher sur le côté gauche du couvercle arrière.

natural_image
Technical line drawing of a mechanical device with no visible text or symbols
4. Retirer le raccord du tuyau, aligner le trou du coude du tuyau avec l'arrière de la base, insérer fermement et entendre un « pop ».

natural_image
Cross-sectional technical diagram of a mechanical assembly (no visible text or labels)
5. Monter la tête de brosse de nettoyage appropriée selon les besoins.

natural_image
Simple line drawing of a mechanical component with an arrow indicating motion (no text or symbols)
INSTRUCTIONS
1. Retirer le réservoir d'eau propre du corps.

natural_image
Line drawing of a mechanical device with a scroll wheel and handle (no text or symbols)
2. Ouvrez-la et remplissez-la d'eau propre.
Niveau d'eau maximum

natural_image
Line drawing of a mechanical device with no visible text or symbols
3. Installer le réservoir d'eau propre dans le corps.

natural_image
Technical line drawing of a mechanical device with a downward arrow indicating motion (no text or symbols)
4. Branchez-le.

natural_image
Line drawing of a plug inserted into a wall-mounted electrical outlet (no text or symbols)
5. Mettez l'appareil sous tension pour commencer.

natural_image
Simple line drawing of a mechanical device with no text or symbols
6. Sélectionner la puissance d'aspiration ou la température de l'eau.

Notice : Veuillez vaporiser l'eau résiduelle dans le tuyau avant de vaporiser de l'eau chaude.
7. Appuyez sur le bouton de pulvérisation d'eau pour pulvériser de l'eau propre.

natural_image
Diagram of a handheld device with spray and spray pattern (no text or symbols)
Vaporisez la tâche avec de l'eau propre pour la faire remonter à la surface. Ne pas vaporiser continuellement au même endroit.
Après la pulvérisation, absorber l'eau afin d'éviter les moisissures et les odeurs.
8. Absorbe l'eau.

natural_image
Simple line drawing of a mechanical device with a lever and base plate (no text or symbols)
9. Coupez l'alimentation pour arrêter.

natural_image
Simple line drawing of a mechanical device with no text or symbols
10. Débranchez-le.

natural_image
Illustration of a plug inserted into a wall-mounted electrical outlet (no text or symbols)
11. Videz l'eau propre et les eaux usées, et nettoyez le seau à eaux usées.

natural_image
Simple line drawing of a mechanical component with no text or symbols
INSTRUCTIONS D'UTILISATION
Afin d'éviter d'obstruer le conduit d'air, veuillez nettoyer les gros déchets présents dans la zone, tels que les gros morceaux de papier, les films d'emballage, etc. Cet appareil peut être utilisé sur des surfaces douces telles que les tissus et les peluches. Il n'est pas recommandé de l'utiliser sur des surfaces dures.
1. Appuyez sur l'interrupteur pour démarrer la machine et commencer à travailler ; appuyez à nouveau sur l'interrupteur pour éteindre la machine.
2. Puissance : La vitesse par défaut est "Standard", appuyez sur le bouton "Puissance" pour passer à la vitesse "Turbo". Appuyez à nouveau sur ce bouton pour revenir à la vitesse "Standard", et inversement.
3. Temp : Le mode par défaut est "Warm", appuyez sur le bouton "Temp" pour régler le mode "Hot". Appuyez à nouveau sur cette touche pour passer au mode "Chaud".
4. Invitation à remplir le réservoir d'eaux usées : Lorsque le réservoir d'eaux usées est plein, tous les voyants clignotent, l'avertisseur sonore "goutte à goutte" se fait entendre trois fois de suite pour passer en mode d'attente.
5. Réglez le mode en fonction de la demande, tenez la brosse de nettoyage, appuyez et maintenez le bouton "water spray switch" sur le bas du bouton de la brosse de nettoyage, la tête de pulvérisation d'eau continue à pulvériser de l'eau vers l'extérieur ; relâchez le bouton, la pulvérisation d'eau s'arrête.
6. Pour les taches ordinaires, versez le liquide de nettoyage dans le réservoir de nettoyage et vaporisez de l'eau sur les taches. Après avoir pulvérisé l'eau, la brosse de nettoyage est utilisée pour essuyer à plusieurs reprises, et les taches et les eaux usées sont aspirées dans la boîte à eaux usées et aspirées plusieurs fois pour nettoyer rapidement les taches. Après le nettoyage, il est recommandé de nettoyer à nouveau avec de l'eau pour éviter que le liquide de nettoyage ne reste dans le tissu.
7. Pour les taches tenaces, utilisez d'abord une solution de nettoyage spéciale à pulvériser sur le tissu au-dessus de la tache, pulvérisez après l'utilisation de la brosse de nettoyage à plusieurs reprises, la solution de nettoyage dissoudra complètement la tache, ouvrez la machine pour nettoyer le liquide et l'eau d'égout dans le réservoir d'eau d'égout, l'aspiration répétée plusieurs fois peut nettoyer rapidement la tache.
8. Après le nettoyage, utilisez la tête de brosse autonettoyante et procédez au nettoyage général du tuyau.
Rangement du cordon d'alimentation et du tuyau :
1. Ce produit est doté d'un long cordon d'alimentation. Une fois le produit utilisé, le cordon d'alimentation peut être enroulé autour de l'arrière de la machine.
2. Après utilisation du produit, le tuyau peut être enroulé dans la fente de stockage située au bas de la machine.

natural_image
Technical line drawing of a mechanical device with coiled tubing and mounting bracket (no text or symbols)
ATTENTION :
1. Le cordon d'alimentation de ce produit est long, veillez à le faire trébucher lorsque vous l'utilisez.
2. Ne laissez pas les enfants s'asseoir sur la machine.
3. Veillez à la sécurité lors de l'utilisation de ce produit. Ne mettez pas le cordon d'alimentation dans l'eau.
4. N'utilisez pas la machine à une température ambiante inférieure à 0°C-50°C.
5. 5. il est strictement interdit de changer l'ensemble de la machine, des accessoires et des fils.
Remplacement ;
ENTRETIEN
ATTENTION :
Arrêtez de le faire fonctionner et débranchez-le avant de procéder à l'entretien.
Nettoyage du corps :
Les taches ordinaires peuvent être nettoyées avec un chiffon humide.
La saleté tenace peut être essuyée avec un chiffon humide imbibé de détergent, puis nettoyée avec un chiffon sec trempé dans l'eau.
Après chaque utilisation :
Retirez-les du corps, rincez-les soigneusement à l'eau et séchez-les à l'air libre.

natural_image
Line drawings of five different mechanical components or housing designs (no text or symbols)
Retirer le couvercle avant, puis rincer le suceur d'eau :

natural_image
Simple line drawing of two mechanical components or tools, one tilted and one with a long rod extending (no text or symbols)
Ouvrez-la avec le doigt et retirez-la
Tête de brosse et tuyau autonettoyants :
1. Installez la tête de la brosse autonettoyante sur la poignée, ouvrez la machine et celle-ci commence à fonctionner. En même temps, continuez à appuyer sur le bouton d'eau, et voyez une certaine quantité d'eau stockée dans le tuyau, et nettoyez le tuyau.

natural_image
Simple line drawing of a cylindrical object with a pointed tip and a curved line extending from it (no text or symbols)
Appuyer sur le bouton d'eau
2. Installer la tête de brosse autonettoyante sur la poignée, ouvrir la machine, placer directement la tête de brosse dans le robinet pour un nettoyage direct.

Nettoyage du réservoir d'eau sale :
Afin de maintenir les performances du produit, veuillez nettoyer régulièrement le réservoir d'eau sale. S'il y a plus d'eau sale dans le réservoir d'eau sale, l'aspiration de ce produit sera affaiblie. Si le niveau d'eau atteint le niveau maximum, le réservoir d'eau sale doit être nettoyé à temps. Une fois le réservoir d'eau sale retiré de l'hôte, l'eau sale et les déchets internes doivent être vidés et nettoyés.
Méthode de démontage du réservoir d'eau sale:
Tirez obliquement le réservoir d'eau sale pour le retirer dans son ensemble, puis ouvrez la boucle du couvercle du réservoir d'eau sale, ouvrez le couvercle et nettoyez le réservoir d'eau sale.

natural_image
Diagram showing a mechanical device before and after assembly, with no visible text or symbols
Ajouter de l'eau au réservoir d'eau propre : Lorsque le réservoir d'eau propre manque d'eau, veuillez ajouter de l'eau à temps :
Méthode d'ajout d'eau : Retirer le réservoir d'eau propre, ouvrir le couvercle du réservoir d'eau et ajouter de l'eau. Méthode de démontage du réservoir d'eau propre : Tirer obliquement le réservoir d'eau propre vers le haut pour retirer le réservoir d'eau propre dans son ensemble, puis ouvrir le couvercle du réservoir d'eau propre et ajouter de l'eau.

natural_image
Diagram showing a mechanical device before and after assembly, with no visible text or symbols
Nettoyage de la brosse de nettoyage : Lorsque la brosse de nettoyage est emmêlée par les cheveux ou bloquée par la saleté, veuillez la nettoyer et l'entretenir à temps :
1. Lorsque la brosse de nettoyage est emmêlée dans des cheveux, utilisez un outil pour nettoyer les cheveux ou la saleté sur les poils.
2. Lorsque la brosse de nettoyage est bloquée, retirez le couvercle transparent situé au-dessus de la brosse de nettoyage et utilisez des baguettes ou d'autres outils pour nettoyer le conduit d'air à l'intérieur de la poignée de la brosse de nettoyage.

natural_image
Line drawing of a firearm with two upright arms (no text or symbols)
Nettoyer le filtre dans le réservoir d'eau propre :
La crépine du réservoir d'eau propre est utilisée pour filtrer les impuretés présentes dans l'eau et le tartre généré après avoir fait bouillir l'eau. Veuillez donc nettoyer la crépine à temps après l'avoir utilisée plusieurs fois afin de garantir son effet filtrant.

Tuyau amovible :
Le tuyau de cette machine est amovible. Si le tuyau se détériore, veuillez l'enlever et le remplacer par un nouveau.
DÉPANNAGE
Si une anomalie est constatée lors de l'utilisation, veuillez vous référer au tableau suivant :
STATUT CAUSES POSSIBLES MÉTHODE DE TRAITEMENT La machine ne fonctionne pas après la mise en marche de l'interrupteur. La fiche n'est pas correctement branchée et est lâche, ce qui entraîne un mauvais contact. Éteignez l'appareil et rebranchez-le. La ligne interne ou le cordon d'alimentation est rompu. Appelez le téléphone de réparation. L'ensemble de la machine surchauffe et le dispositif de protection fonctionne. Se référer aux instructions du dispositif de protection. Le produit ne pulvérise pas d'eau Blocage de la buse Retirer le bouchon de la buse à l'aide d'une aiguille fine. Manque d'eau dans le réservoir d'eau propre Ajouter de l'eau au réservoir d'eau propre à temps La conduite d'eau interne est obstruée ou cassée Contacter le commerçant ou le service après-vente Bruit anormal L'orifice d'aspiration du produit est bloqué ou des déchets importants sont inhalés. Eliminer les blocages à temps Défaillance du moteur Contacter le commerçant ou le service après-vente Faible aspiration ou absence d'absorption d'eau Trop d'eau sale dans le réservoir d'eau sale Nettoyer le réservoir d'eau sale à temps Le tuyau est cassé Remplacer le tuyau par un nouveau La saleté bloque l'aspiration Eliminer les blocages à temps Machine anormale ou inopérante La température ambiante est trop élevée ou trop basse Maintenez l'appareil à une température ambiante appropriée (0°C-50°C). Contacter le marchand ou le service après-vente
GARANTIE
La durée de garantie de nos produits est de 2 ans, sauf décret en vigueur, à compter de la date d'achat initiale ou la date de livraison.
En cas de problèmes ou d'interrogations, vous pouvez facilement accéder à nos pages d'aides, conseils de dépannage, FAQ et modes d'emplois sur
notre site SAV : https://sav.hkoenig.com.
En tapant le nom de référence de votre appareil dans la barre de recherche, vous accédez à tous les supports en ligne disponibles, conçus pour vous répondre au mieux à vos besoins.
Si vous ne trouvez toujours pas de réponse à votre question ou votre problème, alors cliquez sur « Est-ce que la réponse a résolu votre problème ? ». Vous accéderez alors au formulaire de demande d'assistance SAV, qu'il vous suffira de compléter pour valider votre demande et obtenir de l'aide.
CONDITIONS DE GARANTIE
La garantie couvre l'ensemble des pannes survenant dans le cadre d'une utilisation normale, conforme aux usages et spécifications présentes sur le manuel d'utilisation.
Cette garantie ne s'applique pas aux problèmes d'emballage ou de transport pendant l'expédition du produit par son propriétaire. Elle n'inclut également pas l'usure normale du produit, ni la maintenance ou le remplacement de pièces consommables.
EXCLUSION DE GARANTIE
- Les accessoires et les pièces d'usure (\*).
- L'entretien normal de l'appareil.
- Toutes pannes survenant par suite d'une mauvaise utilisation (chocs, non-respect des préconisations d'alimentation électrique, mauvaises conditions d'utilisation, etc.), d'un entretien insuffisant ou d'un détournement de fonction de l'appareil, ainsi que l'usage d'accessoires non appropriés.
\- Les dommages d'origine externe : incendie, dégâts des eaux, surtension électrique, etc.
\- Tout matériel qui aura été démonté même partiellement par des personnes autres que celles habilitées (notamment l'utilisateur).
\- Les produits dont le numéro de série serait absent, détérioré ou illisible que ne permettrait pas son identification.
\- Les produits soumis à la location, à la démonstration ou à l'exposition.
(\*) Certaines pièces de votre appareil dites pièces d'usure ou consommables se détériorent avec le temps et la fréquence d'usage de votre appareil. Cette usure est normale, mais peut être accentuée par des mauvaises conditions d'utilisation ou entretien de votre appareil. Ces pièces ne sont donc pas couvertes par la garantie.
Les accessoires fournis avec l'appareil sont également exclus du champ de la garantie. Ils ne peuvent donc être ni échangés, ni remboursés. Toutefois, certains accessoires peuvent être directement achetés via notre site : https://sav.hkoenig.com/.
ENVIRONNEMENT
ATTENTION :

Vous ne devez pas vous débarrasser de cet appareil avec vos déchets ménagers. Un système de collecte sélective pour ce type de produit est mis en place par les communes, vous devez vous renseigner auprès de votre mairie afin d'en connaître les emplacements. En effet, les produits électriques et électroniques peuvent contenir des substances dangereuses qui ont des effets néfastes sur l'environnement ou la santé humaine et doivent être recyclés. Le symbole ci-contre indique que les équipements électriques et électroniques font l'objet d'une collecte sélective, il représente une poubelle sur roues barrée d'une croix.
Adeva SAS / H.Koenig Europe - 8 rue Marc Seguin, 77290 Mitry-Mory, France www.hkoenig.com - https://sav.hkoenig.com - Tél: +33 1 64 67 00 05
DEUTCH

natural_image
Line drawing of a medical or laboratory equipment setup with a coiled tube, control panel, and monitor (no text or symbols)
Lesen Sie diese Anleitung sorgfältig durch bevor Sie das Produkt verwenden. Sie enthält wichtige Informationen für Ihre Sicherheit sowie Tipps zur Verwendung und Pflege.
ACHTUNG
Bitte lesen Sie die Bedienungsanleitung sorgfältig durch.
Reinigen und pflegen Sie das Produkt gemäß den Anweisungen.
Schlagen Sie bei Problemen zuerst in der Anleitung zur
Fehlerbehebung nach.
Diese Garantie erlischt, wenn der Defekt durch Unfallschäden, Missbrauch, falsche Verwendung, Vernachlässigung, unsachgemäße Reparatur oder Modifikation durch nicht autorisierte Personen oder durch Nichtbeachtung der mit dem Produkt gelieferten Gebrauchsanweisungen verursacht wurde. Diese Garantie gilt nicht für normalen Verschleiß oder kommerzielle Nutzung.
In keinem Fall wird die Haftung den vom Käufer für das Produkt gezahlten Kaufpreis übersteigen. In keinem Fall besteht eine Haftung für irgendwelche - direkten oder indirekten - Verluste oder Neben- oder Folgeschäden, die sich aus oder im Zusammenhang mit der Verwendung des Produkts ergeben.
WICHTIGE SICHERHEITSHINWEISE
LESEN SIE VOR DER BENUTZUNG DIESES GERÄTS ALLE ANWEISUNGEN UND WARNUNGEN DURCH, DIE SICH IN IHREM BENUTZERHANDBUCH UND AUF DEM GERÄT BEFINDEN.
Bei der Verwendung eines elektrischen Geräts sollten immer grundlegende Vorsichtsmaßnahmen getroffen werden, einschließlich der folgenden:
1. Ziehen Sie den Stecker des Gerät vor von es zu warten, es zu inspizieren oder zu bewegen.
2. Verwenden Sie eine professionelle, blasenfreie Reinigungsflüssigkeit, um Schäden am Gerät zu vermeiden.
3. Entfernen Sie regelmäßig Staub von der Steckdose
4. Schließen Sie das Gerät fest an, wenn es verwendet wird.
5. Trennen Sie das Gerät vom Stromnetz, wenn es längere Zeit nicht benutzt wird.
6. achten Sie darauf, dass die Steckdose nicht überlastet ist
7. Verwenden Sie das Gerät mit einer Spannung von 220 V Wechselstrom.
8. Unterbrechen Sie sofort den Gebrauch, schalten Sie das Gerät aus und ziehen Sie den Stecker, wenn eine Anomalie oder ein Fehler auftritt.
9. Stellen Sie die Benutzung des Geräts ein und konsultieren Sie das Handbuch oder den Kundendienst, wenn Sie ungewöhnliche Geräusche oder Gerüche wahrnehmen.
10. Nicht nicht inhalieren von Substanzen entflammbar und explosive Stoffe wie Zigarettenkippen.
11. Beenden Sie sofort von arbeiten wenn ein Fremdkörper die Sprühdüse blockiert.
12. Die Arbeit sofort einstellen, wenn ein Fremdkörper eingeatmet wird.
13. Wenn Fremdkörper den Frischwasser- oder den Abwassereimer blockieren, lassen Sie das Wasser ab und reinigen Sie es, bevor Sie das Gerät weiter benutzen.
14. Denken Sie daran, das Netzkabel nach dem Gebrauch aus der Steckdose zu ziehen.
15. Die Reinigung und Wartung durch den Nutzer sollte nicht von Kindern durchgeführt werden, es sei denn, sie sind älter als 8 Jahre und werden von einem Erwachsenen beaufsichtigt.
16. Bewahren Sie das Gerät und sein Kabel außerhalb der Reichweite von Kindern unter 8 Jahren auf.
17. Bei der Verwendung von Elektrogeräten müssen immer Sicherheitsvorkehrungen getroffen werden, um bei unsachgemäßem Gebrauch Feuer, Stromschläge und/oder Verletzungen zu vermeiden.
18. Überprüfen Sie, ob die auf dem Typenschild des Geräts angegebene Spannung mit der Spannung Ihrer elektrischen Anlage übereinstimmt.
Wenn dies nicht der Fall ist, wenden Sie sich an Ihren Händler und schließen Sie das Gerät nicht an.
19. Das Gerät darf nicht benutzt werden, wenn es heruntergefallen ist, sichtbare Anzeichen von Schäden aufweist oder undicht ist.
20. Bitte halten Sie dieses Dokument zur Verfügung und geben Sie es dem zukünftigen Besitzer, wenn Sie Ihr Gerät weitergeben.
21. Verwenden Sie die Kamera nicht, wenn das Netzkabel oder der Stecker beschädigt ist, wenn sie nicht richtig funktioniert, wenn sie beschädigt wurde oder heruntergefallen ist. Wenn das Kabel Wenn das Netzkabel beschädigt ist, muss es vom Hersteller oder seinem Vertreter oder von einer qualifizierten Person ausgetauscht werden, um Risiken zu vermeiden.
22. Dieses Gerät kann von Personen mit eingeschränkten physischen, sensorischen oder geistigen Fähigkeiten oder Mangel an Erfahrung und Wissen benutzt werden, sofern sie beaufsichtigt oder angewiesen wurden, das Gerät sicher zu benutzen und die damit verbundenen Gefahren zu verstehen. Kinder sollten nicht mit dem Gerät spielen.
23. Dieses Gerät ist für
Haushalts- und ähnliche Anwendungen wie :
a. Küchenbereiche in Geschäften, Büros und anderen Arbeitsumgebungen ;
b. Bauernhöfe ;
c. in Hotels, Motels und anderen
wohnungsähnlichen Umgebungen ;
d. Gästezimmer.
24. Das Gerät ist nicht dafür vorgesehen, über eine externe Zeitschaltuhr oder über ein separates Fernsteuerungssystem in Betrieb genommen zu werden.
25. Tauchen Sie das Gerät, das Netzkabel oder den Netzstecker niemals in Wasser oder andere Flüssigkeiten.
Sicherheitstipps :
1. Beschädigen Sie das Netzkabel nicht. Ziehen Sie nicht daran, wenn Sie es handhaben
2. Benutzen Sie das Gerät nicht, wenn das Netzkabel und der Stecker gebrochen sind oder wenn sich der Stecker löst.
3. Berühren Sie das Gerät nicht und stecken Sie es nicht mit nassen Händen ein und ziehen Sie es nicht aus der Steckdose.
4. Kleinkinder dürfen den Netzstecker nicht berühren.
5. Nicht mit Pestiziden, Haarfärbemitteln, Schmiermitteln oder anderen Flüssigkeiten besprühen.
6. Atmen Sie nicht die Hitze von Petroleumgasen oder trockenem Staub ein.
7. Nehmen Sie das Gerät nicht selbst auseinander, reparieren Sie es nicht und bauen Sie es nicht selbst um.
8. Verwenden Sie das Gerät nicht in gefährlichen Situationen wie Regenwasser oder starkem Wind.
9. Tauchen Sie das Gerät, das Netzkabel oder den Netzstecker niemals in Wasser oder andere Flüssigkeiten.
10. Vermeiden Sie das Einatmen von Schmutz- und
Staubpartikeln, die möglicherweise Infektionskrankheiten übertragen können.
11. Benutzen Sie das Gerät nicht ohne einen Eimer für Abwasser.
12. Nicht für andere Zwecke als zur Reinigung verwenden
13. Nicht bücken oder rollen
14. Benutzen Sie die Maschine nicht in der Reichweite von kleinen Kindern.
15. Lassen Sie nicht zu, dass Kinder es benutzen und damit spielen.
16. Nicht im Freien verwenden
17. Verwenden Sie ihn nicht weiter, wenn der Saugeinlass blockiert ist.
18. Ziehen Sie beim Einstecken oder Herausziehen des Netzkabels nicht am Kabel, um einen Stromschlag zu vermeiden.
Einführung des Produkts


Körper :
1 Wassertank
2 Reinigungsbürste
3 Bedienfeld
4 Schmutziger Wassertank
5 Körper
6 Flexibel
7 Wassersprühknopf
8 Halterung für den Griff
9 Halterung für Kabelaufroller
10 Flexible Verriegelung mit dem Gerät
11 Aufhängehaken
Zubehör
1. Standardbürste
2. Bürste mit breiter Bahn
3. T-förmige Bürste
4. Selbstreinigende Bürste
5. Anleitung
6. Halterung für den Griff
7. Griffithaken
8. Rohr
PRODUKTPARAMETER :
Nennbetriebsspannung 25V 50Hz Art des Motors Saugmotor für trockenen und feuchten Staub Nennleistung 1200W Schlauchlänge 1,8m Vakuumgrad 15Kpa Dichtungsniveau IPX4 Geräusch </= 80dB Nettogewicht der Maschine 4,2kg Kapazität des Frischwassertanks 1800mL Arbeitsumgebung T°C 5-50°C Kapazität des Schmutzwassertanks 950mL Größe der Maschine 320*226*327mm Länge des Elektrokabels 5m Aufheizzeit 15s
VORBEREITUNG
1. Entfernen Sie den Aufhängehaken und die Griffhalterung.

natural_image
Two 3D mechanical component diagrams shown in wireframe and cutaway views (no text or symbols)
2. Entfernen Sie den Aufhängehaken und befestigen Sie ihn an der rechten Seite der hinteren Abdeckung.

natural_image
Line drawing of a kitchen mixer with control panel and fan (no text or symbols)
3. Ziehen Sie die Halterung vom Griff ab und lassen Sie sie auf der linken Seite der hinteren Abdeckung einrasten.

natural_image
Line drawing of a mechanical device with no visible text or symbols
4. Entfernen Sie den Schlauchanschluss, richten Sie das Loch im Schlauchbogen an der Rückseite der Basis aus, führen Sie ihn fest ein und hören Sie ein "Plopp".

natural_image
Cross-sectional technical diagram of a mechanical assembly (no visible text or labels)
5. Montieren Sie den passenden Reinigungsbürstenkopf nach Bedarf.

natural_image
Simple line drawing of a mechanical component with an arrow indicating motion (no text or symbols)
ANLEITUNG
1. Nehmen Sie den Frischwassertank vom Körper ab.

natural_image
Line drawing of a mechanical device with a handle and base, showing no text or symbols
2. Öffne sie sie und fülle sie mit sauberem wasser

natural_image
Line drawing of a mechanical component or device with no visible text, numbers, or symbols.
Maximaler
Wasserstand
3. Setzen Sie den Frischwassertank in den Körper ein.

natural_image
Technical line drawing of a mechanical device with a downward arrow indicating motion (no text or symbols)
4. Schließen Sie ihn an.

natural_image
Diagram of a plug inserted into a wall-mounted electrical outlet (no text or symbols)
5. Schalten Sie die Kamera ein, um zu beginnen.

natural_image
Simple line drawing of a kitchen appliance with a refrigerator and a showerhead (no text or symbols)
6. Wählen Sie die Saugkraft oder die Wassertemperatur.

Hinweis: Bitte verdampfen Sie das Restwasser im Schlauch, bevor Sie de sprühen
heißes Wasser.
7. Drücken Sie die Wassers prühta st e, um sauberes Wasser zu versprühen.

natural_image
Diagram of a handheld device with spray and control panel (no text or symbols)
Besprühen Sie den Fleck mit sauberem Wasser, um ihn an die Oberfläche zu bringen. Nicht ständig an derselben Stelle sprühen.
Nach dem Sprühen das Wasser aufsaugen, u m Schimmel und Gerüche zu vermeiden.
8. Absorbiert Wasser.

natural_image
Simple line drawing of a mechanical device with a lever and base plate (no text or symbols)
9. Schalten Sie den Strom ab, um zu stoppen.

natural_image
Simple line drawing of a mechanical device with no text or symbols
10. Ziehen Sie den Stecker.

natural_image
Illustration of a plug inserted into a wall-mounted electrical outlet (no text or symbols)
11. Leeren Sie das Frischwasser und das Abwasser ab und reinigen Sie den Abwassereimer.

natural_image
Simple line drawing of a mechanical component with no text or symbols
GEBRAUCHSANWEISUNG
Um eine Verstopfung des Luftkanals zu vermeiden, entfernen Sie bitte größere Abfälle in diesem Bereich, z. B. große Papierschnipsel, Verpackungsfolien etc. Dieses Gerät kann auf weichen Oberflächen wie
Stoffen und Flusen verwendet werden. Es wird nicht empfohlen, es auf harten Oberflächen zu verwenden.
1. Drücken Sie den Schalter, um die Maschine zu starten und mit der Arbeit zu beginnen; drücken Sie den Schalter erneut, um die Maschine auszuschalten.
2. Leistung: Die Standardgeschwindigkeit ist "Standard". Drücken Sie die Taste "Leistung", um auf die Geschwindigkeit "Turbo" umzuschalten.
Drücken Sie die Taste erneut, um zur Geschwindigkeit "Standard" zurückzukehren, und umgekehrt.
3. Temp: Der Standardmodus ist "Warm", drücken Sie die Taste "Temp", um den Modus "Heiß" einzustellen. Drücken Sie die Taste erneut, um den Modus "Warm" einzustellen.
4. Aufforderung zum Auffüllen des Abwassertanks : Wenn der Abwassertank voll ist, blinken alle Anzeigen, die Hupe "Signalton" ertönt dreimal hintereinander, um in den Wartemodus zu wechseln.
5. Stellen Sie den Modus je nach Bedarf ein, halten Sie die Reinigungsbürste fest, drücken und halten Sie die Taste "water spray switch" an der Unterseite des Knopfes der Reinigungsbürste, der Der Wassersprühkopf setzt fortlaufend Wasser frei; lassen Sie die Taste los, das Wassersprühen stoppt.
6. Bei gewöhnlichen Flecken gießen Sie die Reinigungsflüssigkeit in den Reinigungsbehälter und sprühen Wasser auf die Flecken. Nachdem das Wasser aufgesprüht wurde, wird mit der Reinigungsbürste mehrmals gewischt, und die Flecken und das Abwasser werden in den Abwasserkasten gesaugt und mehrmals abgesaugt, um die Flecken schnell zu reinigen. Nach der Reinigung empfiehlt es sich, noch einmal mit Wasser nachzureinigen, damit die Reinigungsflüssigkeit nicht im Stoff verbleibt.
7. Bei hartnäckigen Flecken verwenden Sie zunächst eine spezielle Reinigungslösung, die Sie auf den Stoff über dem Fleck sprühen, sprühen Sie nach der Verwendung der Reinigungsbürste mehrmals nach, die Reinigungslösung wird den Fleck vollständig auflösen, Öffnen Sie das Gerät, um die Flüssigkeit und das Abwasser aus dem Abwassertank zu entfernen, mehrmaliges wiederholtes Absaugen kann den Fleck schnell reinigen.
8. Verwenden Sie nach der Reinigung den selbstreinigenden Bürstenkopf und führen Sie eine allgemeine Reinigung des Rohrs durch.
Aufbewahrung des Netzkabels und des Schlauchs : .
1. Dieses Produkt verfügt über ein langes Netzkabel. Nach der Verwendung des Produkts kann das Netzkabel um die Rückseite des Geräts gewickelt werden.
2. Nach der Verwendung des Produkts kann der Schlauch in den Aufbewahrungsschlitz an der Unterseite der Maschine aufgerollt werden.

natural_image
Technical line drawing of a mechanical device with coiled tubing and mounting bracket (no text or symbols)
ACHTUNG :
1. Das Netzkabel dieses Produkts ist lang. Achten Sie darauf, dass es bei der Benutzung nicht stolpert.
2. Lassen Sie Kinder nicht auf dem Gerät sitzen.
3. Achten Sie bei der Verwendung dieses Produkts auf Sicherheit. Legen Sie das Netzkabel nicht ins Wasser.
4. Verwenden Sie die Maschine nicht bei einer Umgebungstemperatur von unter 0°C-50°C.
5. es ist strengstens untersagt, die gesamte Maschine, das Zubehör und die Fäden auszutauschen.
ACHTUNG :
Stellen Sie den Betrieb ein und ziehen Sie den Stecker, bevor Sie Wartungsarbeiten durchführen.
Körperreinigung :
Gewöhnliche Flecken können mit einem feuchten Tuch abgewischt werden.
Hartnäckiger Schmutz kann mit einem feuchten, mit Spülmittel angefeuchteten Tuch abgewischt und anschließend mit einem trockenen, in Wasser getauchten Tuch gereinigt werden.
Nach jedem Gebrauch :
Entferne sie vom Körper, spüle sie gründlich mit Wasser
ab und trockne sie an der Luft.

natural_image
Line drawings of five different mechanical components or devices, including cylindrical and triangular shapes (no text or symbols)
Entfernen Sie die vordere Abdeckung und spülen Sie dann die Wasserdüse :

natural_image
Simple line drawing of two mechanical components, one wedge and one cylindrical, with no text or symbols present.
öffnen Sie sie mit dem Finger und ziehen Sie sie heraus
Selbstreinigender Bürstenkopf und Ror:
1. Bringen Sie den Kopf der selbstreinigenden Bürste am Griff an, öffnen Sie die Maschine und sie beginnt zu arbeiten. Drücken Sie gleichzeitig weiter auf den Wasserknopf und sehen Sie, dass eine gewisse Menge Wasser im Schlauch gespeichert ist, und reinigen Sie den Schlauch.

natural_image
Simple line drawing of a cylindrical object with a pointed tip and a diagonal line extending from it (no text or symbols)
drücken Sie auf den Wasserknopf
2. Installieren Sie den selbstreinigenden Bürstenkopf am Griff, öffnen Sie die Maschine, setzen Sie den Bürstenkopf direkt in den Wasserhahn, um ihn direkt zu reinigen.

Reinigung des Schmutzwassertanks :
Um die Leistungsfähigkeit des Produkts zu erhalten, reinigen Sie bitte regelmäßig den Schmutzwassertank. Wenn sich mehr Schmutzwasser im Schmutzwassertank befindet, wird die Saugkraft dieses Produkts geschwächt. Wenn der Wasserstand den Höchststand erreicht, sollte der Schmutzwassertank rechtzeitig gereinigt werden. Nachdem der Schmutzwassertank vom Wirt entfernt wurde, müssen das Schmutzwasser und der interne Abfall entleert und gereinigt werden.
Methode zum Ausbau des Schmutzwassertanks: . Ziehen Sie den Schmutzwassertank schräg heraus, um ihn als Ganzes zu entfernen. Öffnen Sie dann die Schnalle am Deckel des Schmutzwassertanks, öffnen Sie den Deckel und reinigen Sie den Schmutzwassertank.

natural_image
Diagram showing a cleaning or inspection device before and after transformation, with no visible text or symbols.
Wasser zum Frischwassertank hinzufügen: Wenn dem Frischwassertank das Wasser ausgeht, fülle bitte rechtzeitig Wasser nach :
Methode zum Hinzufügen von Wasser: Nehmen Sie den Frischwassertank heraus, öffnen Sie den Deckel des Wassertanks und geben Sie Wasser hinzu.
Methode zum Ausbau des Frischwassertanks: Ziehen Sie den Frischwassertank schräg nach oben, um den Frischwassertank als Ganzes zu entfernen, öffnen Sie dann den Deckel des Frischwassertanks und füllen Sie Wasser nach.

natural_image
Diagram showing a mechanical device before and after assembly, with no visible text or symbols
Reinigung der Reinigungsbürste: Wenn sich die Reinigungsbürste mit Haaren verheddert oder durch Schmutz blockiert ist, reinigen und pflegen Sie sie bitte rechtzeitig : .
3. Wenn sich die Reinigungsbürste in Haaren verheddert hat, verwenden Sie ein Werkzeug, um die
Haare oder den Schmutz auf den Borsten zu entfernen.
4. Wenn die Reinigungsbürste blockiert ist, entfernen Sie die durchsichtige Abdeckung über der
Reinigungsbürste und verwenden Sie Stäbchen oder andere Werkzeuge, um den Luftkanal im Griff der Reinigungsbürste zu reinigen.

natural_image
Line drawing of a handgun with two upright arms (no text or symbols)
Reinigen Sie den Filter im Frischwassertank : .
Das Sieb des Frischwassertanks wird verwendet, um Verunreinigungen im Wasser und Kalkablagerungen, die nach dem Kochen des Wassers entstehen, herauszufiltern.
Bitte reinigen Sie das Sieb daher rechtzeitig nach mehrmaligem Gebrauch, um seine Filterwirkung zu gewährleisten.

Abnehmbarer Schlauch:
Der Schlauch dieses Geräts ist abnehmbar. Wenn sich der Schlauch verschlechtert, nehmen Sie ihn bitte ab und ersetzen Sie ihn durch einen neuen.
FEHLERSUCHE
Wenn bei der Verwendung eine Abweichung festgestellt wird, beziehen Sie sich bitte auf die folgende Tabelle
STATUS MÖGLICHE URSACHEN BEHANDLUNGSMETHODE Die Maschine funktioniert nicht nicht nach dem einschalten vom Schalter. Der Stecker ist nicht richtig eingesteckt und ist Locker, was führt zu schlechtem Kontakt. Schalten Sie das Gerät aus und schließen Sie es wieder an. Die Interne Leitung oder Schnur Stromversorgung ist gebrochen. Rufen Sie das Telefon von Reparatur. Die ganze Maschine überhltzung und das Gerät von Schutz funktioniert. Beziehen Sie sich auf die Anweisungen des Schutzvorrichtung. Das Produkt sprüht nicht Wasser! Verstopfung der Düse Entfernen Sie die Kappe von der Düse zu mlt elner dünnen Nadel. Wassermangel im Tank sauberes Wasser Wasser in den Tank geben sauberes Wasser rechtzeitig Die interne Wasserleitung ist verstopft oder gebrochen! Kontaktieren Sie den Händler oder after-Sales-service! Anormales Geräusch Die Saugöffnung des Produkts ist blockiert oder Müll wichtige werden eingeatmet. Blockaden rechtzeitig beseitigen Motorausfall Kontaktieren Sie den Händler oder after-Sales-service Geringe aspiration oder Abwesenheit Wasser absorption Zu viel schmutziges Wasser in der Schmutzwassertank Reinigen Sie den Schmutzwassertank rechtzeitig Das Rohr ist gebrochen Ersetzen Sie den Schlauch durch einen neu Schmutz blockiert das saugen Blockaden rechtzeitig beseltigen Anormale Maschine oder funktionsunfähig Die Umgebungstemperatur ist zu hoch oder zu niedrig Halten Sie das Gerät an einem Raumtemperatur geeignet (0 °C-50°C). Kontaktieren Sie den Händler oder after-Sales-service!
GARANTIE
Die Garantiezeit für unsere Produkte beträgt 2 Jahre, sofern keine anderen Bestimmungen gelten, ab dem Datum des ursprünglichen Kaufs oder ab dem Lieferdatum.
Bei Problemen oder Fragen können Sie sich an unsere Hilfeseiten, Tipps zur Fehlerbehebung, FAQs und Bedienungsanleitungen auf unserer Kundendienst-Website wenden: https://sav.hkoenig.com.
Wenn Sie den Referenznamen Ihres Geräts in die Suchleiste eingeben, erhalten Sie Zugang zu allen verfügbaren Online-Supports.
Wenn Sie immer noch keine Antwort auf Ihre Frage oder Ihr Problem finden, dann klicken Sie auf "Hat die Antwort Ihr Problem gelöst?". Sie können dieses Formular ausfüllen, um Ihre Anfrage zu bestätigen und Hilfe zu erhalten.
GARANTIEBEDINGUNGEN
Die Garantie deckt alle Defekte ab, die bei normalem, bestimmungsgemäßem Gebrauch und den in der Bedienungsanleitung enthaltenen Spezifikationen auftreten.
Diese Garantie gilt nicht für Probleme mit der Verpackung oder dem Transport während des Versands des Produkts durch den Eigentümer. Sie umfasst auch nicht den normalen Verschleiß des Produkts, die Wartung oder den Austausch von Verschleißteilen.
AUSSCHLUSS DER GARANTIE
- Zubehör und Verschleißteile (\*).
- Die normale Wartung des Geräts.
- Alle Defekte, die durch unsachgemäßen Gebrauch (Stöße, Nichteinhaltung der empfohlenen Stromzufuhr, schlechte Nutzungsbedingungen usw.), unzureichende Wartung oder Zweckentfremdung des Geräts auftreten, sowie die Verwendung von ungeeignetem Zubehör.
- Schäden durch äußere Einflüsse: Brand, Wasserschäden, elektrische Überspannung usw.
- Alle Geräte, die von anderen als den befugten Personen (insbesondere dem Nutzer) auch nur teilweise auseinandergebaut wurden.
- Produkte, deren Seriennummer fehlt, beschädigt oder unleserlich ist, sodass sie nicht identifiziert werden können.
- Produkte, die vermietet, vorgeführt oder ausgestellt werden.
(\*) Einige Teile Ihres Geräts, die als Verschleißteile oder Verbrauchsmaterialien bezeichnet werden, verschleßen mit der Zeit und der Häufigkeit der Nutzung Ihres Geräts. Diese Abnutzung ist normal, kann aber durch falsche Nutzung oder Pflege Ihres Geräts noch verstärkt werden. Diese Teile sind daher nicht durch die Garantie abgedeckt.
Das mit dem Gerät gelieferte Zubehör ist ebenfalls von der Garantie ausgeschlossen. Sie können daher weder umgetauscht noch erstattet werden. Einige Zubehörteile können jedoch direkt über unsere Website https://sav.hkoenig.com/ erworben werden.
UMWELT
ACHTUNG:

Werfen Sie nicht dieses Produkt, wie es mit anderen Haushaltsprodukten hat. Es gibt eine Mülltrennungs von diesem Produkt in Gemeinden, Sie müssen Ihre lokalen Behörden über die Orte, wo man dieses Produkt zurückgeben können zu informieren. In der Tat enthalten elektrische und elektronische Produkte gefährliche Stoffe, die schädliche Auswirkungen auf die Umwelt oder die menschliche Gesundheit haben und sollte recycelt werden. Das Symbol hier darauf hinweisen, dass elektrische oder elektronische Geräte sollten sorgfältig ausgewählt werden, ist ein fahrbarer Abfallbehälter mit einem Kreuz markiert.
Adeva SAS / H.Koenig Europe - 8 rue Marc Seguin, 77290 Mitry-Mory, France www.hkoenig.com - https://kundenservice.hkoenig.com - Tél: +33 1 64 67 00 05
NEDERLANDS

natural_image
Line drawing of a medical or laboratory device with coiled tubing and control panel (no text or symbols)
Lees deze gebruiksaanwijzing zorgvuldig door voordat u het product gebruikt. Deze bevat belangrijke veiligheidsinformatie en advies over gebruik en onderhoud.
ATTENTIE
Lees de gebruikershandleiding zorgvuldig door.
Reinig en onderhoud het product volgens de instructies.
Raadpleeg bij storingen eerst de gids voor het oplossen van problemen.
Deze garantie vervalt als het defect is veroorzaakt door onopzettelijke schade, verkeerd gebruik, misbruik, verwaarlozing, onjuiste reparatie of wijziging door onbevoegde personen, of het niet opvolgen van de bedieningsinstructies die bij het product zijn geleverd. Deze garantie is niet van toepassing op normale slijtage of commercieel gebruik.
In geen geval zal de aansprakelijkheid hoger zijn dan de aankoopprijs die door de koper van het product is betaald. In geen geval zal er aansprakelijkheid zijn voor enig verlies - direct of indirect - of enige incidentele of gevolgschade voortvloeiend uit of in verband met het gebruik van het product.
BELANGRIJKE VEILIGHEIDSINSTRUCTIES
LEES ALLE INSTRUCTIES EN WAARSCHUWINGEN
VOORDAT U DIT APPARAAT GEBRUIKT
IN UW GEBRUIKERSHANDLEIDING EN OP HET APPARAAT.
Wanneer u een elektrisch apparaat gebruikt, moet u altijd de volgende basisvoorzorgen nemen:
1. Ontkoppel de voordat naar onderhoud, inspecteren of verplaatsen.
2. Gebruik een professionele reinigingsvloeistof zonder bubbels om beschadiging van het apparaat te voorkomen.
3. Verwijder regelmatig stof van de contactdoos
4. Steek de stekker stevig in het stopcontact als het apparaat in gebruik is.
5. Haal de stekker uit het stopcontact als u het apparaat langere tijd niet gebruikt.
6. zorg ervoor dat de stekker niet overbelast is
7. Gebruik het apparaat op 220 V AC.
8. Stop het gebruik onmiddellijk, schakel het apparaat uit en trek de stekker uit het stopcontact in geval van een storing of defect.
9. Stop met het gebruik van het apparaat en raadpleeg de handleiding of de klantenservice als u abnormale geluiden of geuren opmerkt.
10. Niet niet inhaleren geen stoffen brandbare zoals sigarettenpeuken.
11. Stop onmiddellijk van het werk als a een vreemd voorwerp de spuitmond blokkeert.
12. Stop het werk onmiddellijk als een vreemd voorwerp wordt ingeademd.
13. Als de emmer voor schoon water of het afvalwater verstopt raakt door vreemde voorwerpen, moet u het water legen en schoonmaken voordat u het apparaat verder gebruikt.
14. Vergeet niet de stekker uit het stopcontact te halen na gebruik.
15. Reiniging en onderhoud door de gebruiker mogen niet worden uitgevoerd door kinderen, tenzij ze ouder zijn dan 8 jaar en onder toezicht van een volwassene staan.
16. Houd het apparaat en de kabel buiten het bereik van kinderen jonger dan 8 jaar.
17. Bij het gebruik van elektrische apparaten moeten altijd veiligheidsmaatregelen worden genomen om elk risico op brand, elektrische schokken en/of letsel bij verkeerd gebruik te voorkomen.
18. Controleer of de op het typeplaatje van het apparaat aangegeven spanning overeenkomt met die van uw elektrische installatie. Als dit niet het geval is, neem dan contact op met uw verkoper en sluit het
apparaat niet aan.
19. Het apparaat mag niet gebruikt worden als het gevallen is, als er zichtbare tekenen van schade zijn of als het lekt.
20. Houd dit document bij de hand en geef het aan de toekomstige eigenaar als u uw apparaat verkoopt.
21. Gebruik het apparaat niet als het netsnoer of de stekker beschadigd is, als het niet goed werkt, als het beschadigd is of als het gevallen is. Als het snoer
beschadigd is, moet deze worden vervangen door de fabrikant of diens vertegenwoordiger, of door een gekwalificeerd persoon om elk risico te vermijden.
22. Dit apparaat mag worden gebruikt door personen met beperkte fysieke, sensorische of mentale capaciteiten of met een gebrek aan ervaring en kennis, op voorwaarde dat ze toezicht of instructies hebben gekregen over het veilige gebruik van het apparaat en dat ze de gevaren begrijpen. Kinderen mogen niet met het apparaat spelen.
23. Dit apparaat is bedoeld voor gebruik in huishoudelijke en soortgelijke toepassingen zoals :
a. keukenruimtes in winkels, kantoren en andere werkomgevingen;
b. boerderijen ;
c. in hotels, motels en andere residentiële omgevingen;
d. gastenkamers.
24. Het apparaat is niet bedoeld voor gebruik met een externe timer of een apart afstandsbedieningssysteem.
25. Dompel het apparaat, het netsnoer of de stekker nooit onder in water of een andere vloeistof.
Veiligheidsadvies :
1. Beschadig het netsnoer niet. Trek er niet aan bij het hanteren.
2. Gebruik het apparaat niet als het netsnoer en de stekker kapot zijn of als de stekker loszit.
3. Raak het apparaat niet aan en sluit het niet aan of af met natte handen.
4. Kleine kinderen mogen de stekker niet aanraken.
5. Spuit geen pesticiden, haarverf, smeermiddelen of andere vloeistoffen.
6. Inhaleer geen hitte van petroleumgassen of droog stof.
7. Demonteer, repareer of modificeer het apparaat niet zelf.
8. Gebruik het apparaat niet in gevaarlijke situaties zoals regen of harde wind.
9. Dompel het apparaat, het netsnoer of de stekker nooit onder in water of een andere vloeistof.
10. Vermijd het inademen van vuil- of stofdeeltjes die besmettelijke ziekten kunnen overbrengen.
11. Gebruik het apparaat niet zonder afvalwateremmer
12. Niet gebruiken voor andere doeleinden dan reinigen
13. Niet bukken of rollen
14. Houd het apparaat buiten het bereik van kleine kinderen.
at kinderen het niet gebruiken of ermee spelen.
et buitenshuis gebruiken
17. Gebruik het apparaat niet meer als de aanzuigopening geblokkeerd is.
18. Trek niet aan het netsnoer om het aan te sluiten of los te koppelen om elektrische schokken te voorkomen.
Product Introductie


Lichaam :
1 Watertank
2 Schoonmaakborstel
3 Bedieningspaneel
4 Vuil waterreservoir
5 apparaatbehuizing
6 Flexibel
7 Water sproeiknop
8 Handvatondersteuning
9 Steun voor kabelhaspel
10 Flexibele vergrendeling met het apparaat
11 Ophanghaak
Accessoires

1

2

3

4

5

6

7

8
1. Standaard borstel
2. Borstel met breed trajectory
3. T-vormige borstel
4. Zelfreinigende borstel
5. Gebruiksaanwijzing
6. Handvatondersteuning
7. Handvathaak
8. Slang
PRODUCTPARAMETERS :
Nominale bedrijfsspanning 25V 50Hz Type motor Motor voor natte en droge stofafzuiging Nominaal vermogen 1200W Lengte slang 1,8m Mate van vacuum 15Kpa Strakheidsniveau IPX4 Geluid </= 80dB Nettogewicht van machine 4,2kg Capaciteit schoonwatertank 1800 ml Werkomgeving T°C 5-50°C Inhoud vuilwatertank 950 ml Machinegrootte 320*226*327mm Lengte van elektrische kabel 5m Opwarmtijd 15s
VOORBEREIDING
1. Verwijder de ophanghaak en de handgreepsteun.

natural_image
Two 3D mechanical component diagrams shown in wireframe and perspective views (no text or symbols)
2. Verwijder de ophanghaak en bevestig deze aan de rechterkant van de achterklep.

natural_image
Line drawing of a kitchen mixer with control panel and fan (no text or symbols)
3. Verwijder de handgreepsteun en klik hem vast aan de linkerkant van de achterklep.

natural_image
Technical line drawing of a mechanical device with no visible text or symbols
4. Verwijder de slangconnector, lijn het gat in de slangbocht uit met de achterkant van de basis, steek hem er stevig in en hoor een "plop".

natural_image
Cross-sectional technical diagram of a mechanical assembly (no visible text or labels)
5. Monteer indien nodig de juiste borstelkop.

natural_image
Simple line drawing of a mechanical component with an arrow indicating motion (no text or symbols)
INSTRUCTIES
1. Verwijder de schoonwatertank van de body.
2. Open het en vul het met schoon water.
Maximaal
waterniveau
3. Installeer de schoonwatertank in de body.
4. Inpluggen.

natural_image
Line drawing of a plug inserted into a wall-mounted electrical outlet (no text or symbols)
5. Schakel het apparaat in om te beginnen.

natural_image
Simple line drawing of a washing machine with a handle and base (no text or symbols)
6. Selecteer zuigkracht of watertemperatuur.

flowchart
graph LR
    A["Temperatuurknop"] --> B["Device"]
    C["Zuigknop"] --> B
Let op: Spuit restwater in de slang voordat u gaat spuiten.
heet water.
7. Druk op de watersproeiknop om schoon water te sproeien.

natural_image
Diagram of a handheld device with spray and spray pattern (no text or symbols)
Besproei de vlek met schoon water om hem aan de oppervlakte te brengen. Spuit niet continu op dezelfde plek.
Laat het water na het sproeien weken o m schimmel en geurtjes te voorkomen.
8. Absorbeert water.

natural_image
Simple line drawing of a mechanical device with a lever and base plate (no text or symbols)
9. Schakel de voeding uit om te stoppen.

natural_image
Simple line drawing of a mechanical device with no text or symbols
10. Haal de stekker eruit.

natural_image
Illustration of a plug inserted into a wall-mounted electrical outlet (no text or symbols)
11. Leeg het schone water en het afvalwater en maak de afvalwateremmer schoon.

natural_image
Simple line drawing of a mechanical component with no text or symbols
GEBRUIKSAANWIJZING
Om te voorkomen dat het luchtkanaal verstopt raakt, dient u grote stukken afval in de buurt op te ruimen, zoals grote stukken papier, verpakkingsfolie, enz. Dit apparaat kan gebruikt worden op zachte oppervlakken zoals stoffen en pluizen. Het wordt niet aanbevolen voor gebruik op harde oppervlakken.
1. Druk op de schakelaar om de machine te starten en te beginnen werken; druk nogmaals op de schakelaar om de machine uit te schakelen.
2. Vermogen: De standaardsnelheid is "Standaard", druk op de knop "Vermogen" om over te schakelen naar de snelheid "Turbo". Druk nogmaals op deze knop om terug te gaan naar de "Standaard" snelheid, en andersom.
3. Temp: De standaardmodus is "Warm", druk op de knop "Temp" om de modus in te stellen op "Heet". Druk nogmaals op deze knop om over te schakelen naar de modus "Warm".
4. Uitnodiging om de afvalwatertank te vullen: Als de afvalwatertank vol is, knipperen alle lampjes, de "druppel"-zoemer klinkt drie keer achter elkaar om naar de stand-bymodus te gaan.
5. Stel de modus in volgens de vraag, houd de reinigingsborstel vast, druk op de knop "watersproeischakelaar" aan de onderkant van de reinigingsborstelknop en houd deze ingedrukt, de watersproeikop blijft water naar buiten sproeien; laat de knop los, de watersproeikop stopt.
6. Voor gewone vlekken giet u de reinigingsvloeistof in de reinigingstank en spuit u water op de vlekken. Na het sproeien van het water wordt de reinigingsborstel gebruikt om de vlekken meerdere keren af te vegen en het afvalwater wordt in de afvalwatertank gezogen en meerdere keren gestofzuigd om de vlekken snel te reinigen. Na het reinigen is het raadzaam om nogmaals met water te reinigen om te voorkomen dat de reinigingsvloeistof in de stof achterblijft.
7. Gebruik voor hardnekkige vlekken eerst een speciale reinigingsoplossing om op de stof boven de vlek te spuiten, spuit na gebruik van de reinigingsborstel enkele keren, de reinigingsoplossing zal de vlek volledig oplossen.
8. Gebruik na het schoonmaken de zelfreinigende borstelkop en reinig de slang in het algemeen.
Het netsnoer en de slang opbergen :
1. Dit product heeft een lang netsnoer. Als het product in gebruik is, kan het netsnoer om de achterkant van het apparaat worden gewikkeld.
2. Na gebruik kan de slang worden opgerold in de opbergopening aan de onderkant van de machine.

natural_image
Technical line drawing of a mechanical device with coiled tubing and mounting bracket (no text or symbols)
LET OP:.
1. Het netsnoer van dit product is lang, dus pas op dat je er niet over struikelt als je het gebruikt.
2. Laat kinderen niet op het apparaat zitten.
3. Zorg ervoor dat u dit product veilig gebruikt. Dompel het netsnoer niet onder in water.
4. Gebruik het apparaat niet bij omgevingstemperaturen lager dan 0°C-50°C.
5. Het is ten strengste verboden om de hele machine, accessoires en bedrading te vervangen.
ONDERHOUD
LET OP:
Schakel het apparaat uit en trek de stekker uit het stopcontact voor onderhoud.
Lichaamsreiniging :
Gewone vlekken kunnen worden verwijderd met een vochtige doek.
Hardnekkig vuil kan worden weggeveegd met een vochtige doek gedrenkt in afwasmiddel en vervolgens worden afgeveegd met een droge doek gedrenkt in water.
Na elk gebruik :
Haal ze van het lichaam, spoel ze grondig af met water en laat ze aan de lucht drogen.

natural_image
Line drawings of five different mechanical components or housing designs (no text or symbols)
Verwijder de voorklep en spoel het mondstuk af met water
:

natural_image
Simple line drawing of two mechanical components with a diagonal line extending from one (no text or symbols)
Openen en verwijderen
Zelfreinigende borstelkop en slang: .
1. Plaats de kop van de zelfreinigende borstel op het handvat, open de machine en hij begint te werken. Blijf tegelijkertijd op de waterknop drukken en zie dat er een bepaalde hoeveelheid water in de slang is opgeslagen en maak de slang schoon.

natural_image
Simple line drawing of a cylindrical object with a pointed tip and a curved line extending from it (no text or symbols)
Druk op de waterknop
2. Installeer de zelfreinigende borstelkop op de handgreep, open de machine en plaats de borstelkop direct in de kraan voor directe reiniging.

Schoonmaken van de vuilwatertank :
Maak de vuilwatertank regelmatig schoon om de prestaties van het product te behouden. Als er meer vuil water in de vuilwatertank zit, zal de zuigkracht van dit product verzwakken. Als het waterniveau het maximumniveau bereikt, moet de vuilwatertank tijdig worden gereinigd. Zodra de vuilwatertank van de gastheer is verwijderd, moeten het vuile water en het interne afval worden geleegd en gereinigd.
Hoe verwijder ik de vuilwatertank:
Trek de vuilwatertank schuin om deze in zijn geheel te verwijderen, open vervolgens de gesp op het vuilwatertankdeksel, open het deksel en reinig de vuilwatertank.

natural_image
Diagram showing a mechanical device before and after assembly, with no visible text or symbols
Water toevoegen aan de schoonwatertank: Als de schoonwatertank zonder water komt te zitten, voeg dan op tijd water toe.
Water toevoegen: Verwijder de schoonwatertank, open het deksel van de watertank en voeg water toe.
Verwijder de schoonwatertank: Trek de schoonwatertank schuin omhoog om de hele schoonwatertank te verwijderen, open vervolgens het deksel van de schoonwatertank en voeg water toe.

natural_image
Diagram showing a cleaning or repair process: one device with a handle and scroll, the other with a door handle (no text or symbols present)
Schoonmaken van de schoonmaakborstel: Als de schoonmaakborstel verstrikt is geraakt door haar of geblokkeerd is door vuil, maak hem dan tijdig schoon en onderhoud hem.
3. Als de reinigingsborstel verstrikt zit in haar, gebruik dan een hulpmiddel om het haar of vuil van de borstelharen te verwijderen.
4. Als de reinigingsborstel verstopt is, verwijder dan het doorzichtige deksel boven de reinigingsborstel en gebruik stokjes of ander gereedschap om het luchtkanaal in de handgreep van de reinigingsborstel schoon te maken.

natural_image
Line drawing of a firearm with two upright arms (no text or symbols)
Reinig het filter in de drinkwatertank :
Het zeefje in de schoonwatertank wordt gebruikt om de onzuiverheden in het water en de kalk die ontstaat na het koken van het water uit te filteren. Maak het zeefje tijdig schoon nadat je het een aantal keer hebt gebruikt, zodat het filter goed blijft werken.

Afneembare slang :
De slang van dit apparaat is afneembaar. Als de slang beschadigd raakt, verwijder hem dan en vervang hem door een nieuwe.
PROBLEEMOPLOSSING
Raadpleeg de volgende tabel als er tijdens het gebruik een storing wordt gedetecteerd
TOESTAND MOGELIJKE OORZAKEN BEHANDELINGSMETHODE De machine werkt niet nadat de schakelaar is ingeschakeld. De stekker is niet goed aangesloten en zit los, waardoor slecht contact ontstaat. Schakel het apparaat uit en sluit het weer aan. De interne lijn of het netsnoer is kapot. Bel de reparatietelefoon. De hele machine raakt oververhit en het beveiligingsapparaat treedt in werking. Raadpleeg de instructies voor het beveiligingsapparaat. Het product spuit geen water Verstopping van het mondstuk Verwijder de spuitdop met behulp van een fijne naald. Gebrek aan water in de schoonwatertank Voeg tijdig water toe aan de schoonwatertank De interne waterleiding is verstopt of kapot Neem contact op met de dealer of de klantenservice Abnormaal geluid De productaanzuigpoort is geblokkeerd of er is grof afval ingeademd. Ruim tijdig blokkades op Motor falen Neem contact op met de dealer of de klantenservice Lage zuigkracht of gebrek aan wateropname Te veel vuil water in de vuilwatertank Maak de vuilwatertank tijdig schoon De pijp is gebroken Vervang de slang door een nieuwe Vuil blokkeert de zuigkracht Ruim tijdig blokkades op Abnomale of niet-werkende machine De omgevingstemperatuur is te hoog of te laag Bewaar het apparaat op een geschikte omgevingstemperatuur (0°C-50°C). Neem contact op met de dealer of de klantenservice
GARANTIE
De garantieperiode op onze producten is 2 jaar, tenzij anders vermeld, beginnend vanaf de datum van de initiele aankoop of bezorgdatum.
Als u problemen of vragen heeft, kunt u eenvoudig onze hulppagina's bezoeken voor tips om problemen op te lossen, de FAQ's en andere gebruikershandleidingen op onze website: https://sav.hkoenig.com.
Door de referentienaam van uw apparaat in de zoekbalk te typen, krijgt u toegang tot alle beschikbare online hulpmiddelen, ontworpen om aan uw behoeften te voldoen.
Als u toch niet geen antwoord op uw vraag kunt vinden, klik dan op "Heeft het antwoord uw probleem opgelost? Hierdoor gaat u naar het Aanvraagformulier voor Klantenondersteuning, dat u in kunt vullen om uw verzoek te valideren en hulp te ontvangen.
GARANTIEVOORWAARDEN
De garantie dekt alle mankementen die voortkomen uit normaal gebruik, volgens de sectie gebruik en specificaties in de gebruikershandleiding.
Deze garantie omvat niet verpakkings- of transportproblemen tijdens het vervoer van het product door de eigenaar. Het omvat ook niet de normale slijtage van het product, noch het onderhoud of vervangen van verbruiksartikelen.
UITSLUITINGEN VAN DE GARANTIE
- Accessoires en verbruiksartikelen (\*).
- Normaal onderhoud van het apparaat.
- Alle mankementen veroorzaakt door verkeerd gebruik (schokken, het niet opvolgen van de aanbevolen stroomvoorziening, in slechte omstandigheden gebruiken, etc.), onvoldoende onderhoud of ondeugdelijk gebruik van het apparaat, alsook het gebruik van ongeschikte accessoires.
\- Schade van buitenaf: vuur, waterschade, elektrische stroompiek, etc.
\- Apparaten die uit elkaar zijn gehaald, ook gedeeltelijk, door personen die niet er niet gekwalificeerd voor zijn (zoals de gebruiker).
\- Producten waarvan het serienummer verdwenen, beschadigd of onleesbaar is, waardoor we het niet kunnen identificeren.
\- Producten die verhuurd werden of ter demonstratie of showmodel waren.
(\*) Sommige onderdelen van uw apparaat, genaamd verbruiksartikelen, slijten naar verloop van tijd en bij veel gebruik van uw apparaat. Deze slijtage is normaal, maar kan verergerd worden door slechte omstandigheden of onderhoud van uw apparaat. Deze onderdelen worden daarom niet gedekt door de garantie.
De accessoires meegeleverd met het apparaat zijn ook uitgesloten van de garantie. Ze kunnen niet vervangen of gerestitueerd worden. Echter, sommige accessoires zijn te koop via onze website: https://sav.hkoenig.com/.
MILIEU
ATTENTIE:

Dit apparaat mag niet met uw ander huishoudelijke toestellen worden verwijdert. Dit product moet op een geselecteerde stortplaats verwijdert worden. U kunt bij de gemeente een indiceerde plaats aanvragen. Elektrisch en elektronische producten kunnen gevaarlijke stoffen inhouden die schadelijk zijn voor mensen en het milieu en moet recycled worden. Het symbool aan de kant geeft aan dat het een elektrisch en elektronisch toestel is en zijn dus artikelen van een selectieve collectie. Het beeld geeft een afvalbak met een X teken aan.
Adeva SAS / H.Koenig Europe - 8 rue Marc Seguin, 77290 Mitry-Mory, France www.hkoenig.com - https://kundenservice.hkoenig.com - Tél: +33 1 64 67 00 05
ESPAÑOL

natural_image
Line drawing of a medical or laboratory device with coiled tubing and control panel (no text or symbols)
Lea atentamente este manual de instrucciones antes de utilizar el producto.
Contiene información importante sobre seguridad y consejos de uso y mantenimiento.
ATENCIÓN
Lea atentamente el manual del usuario.
Limpie y mantenga el producto de acuerdo con las instrucciones.
En caso de avería, consulte primero la guía de resolución de problemas.
Esta garantía quedará anulada si el defecto se debe a daños accidentales, uso indebido, abuso, negligencia, reparación o modificación indebidas por parte de personas no autorizadas o incumplimiento de las instrucciones de uso suministradas con el producto. Esta garantía no se aplica al desgaste normal ni al uso comercial.
En ningún caso la responsabilidad excederá el precio de compra pagado por el comprador del producto. En ningún caso se asumirá responsabilidad alguna por pérdidas -directas o indirectas- ni por daños fortuitos o emergentes derivados del uso del producto o relacionados con él.
INSTRUCCIONES IMPORTANTES DE SEGURIDAD
ANTES DE UTILIZAR ESTE APARATO, LEA TODAS
LAS INSTRUCCIONES Y ADVERTENCIAS
EN SU GUÍA DEL USUARIO Y EN EL DISPOSITIVO.
Al utilizar un aparato eléctrico, deben tomarse siempre las precauciones básicas, entre las que se incluyen las siguientes:
1. Desenchufe el antes de darle servicio, inspeccionarlo o moverlo.
2. Utilice un líquido de limpieza profesional sin burbujas para evitar dañar el aparato.
3. Elimine regularmente el polvo del enchufe
4. Enchufe el aparato firmemente cuando lo utilice.
5. Desenchufe el aparato cuando no lo utilice durante períodos prolongados.
6. asegúrese de que el enchufe no esté sobrecargado
7. Utilice el aparato a 220 V CA.
8. Deje de utilizar el aparato inmediatamente, apáguelo y desenchúfelo de la red eléctrica en caso de avería o mal funcionamiento.
9. Deje de utilizar el aparato y consulte el manual o al servicio de atención al cliente si percibe ruidos u olores anormales.
10. No se no inhalar ninguna sustancias inflamables como colillas de cigarrillos.
11. Detener inmediatamente de trabajo si a objeto extraño bloquea la boquilla de pulverización.
12. Interrumpir inmediatamente el trabajo si se inhala un cuerpo extraño.
13. Si algún objeto extraño obstruye el cubo de agua limpia o el cubo de aguas residuales, vacíe el agua y límpielo antes de seguir utilizando el aparato.
14. Recuerda desenchufar el cable de alimentación después de usarlo.
15. La limpieza y el mantenimiento por parte del usuario no deben ser realizados por niños, a menos que sean mayores de 8 años y estén bajo la supervisión de un adulto.
16. Mantenga el aparato y su cable fuera del alcance de los niños menores de 8 años.
17. Al utilizar aparatos eléctricos, deben tomarse siempre precauciones de seguridad para evitar cualquier riesgo de incendio, descarga eléctrica y/o lesiones en caso de uso indebido.
18. Compruebe que el voltaje indicado en la placa de características del aparato se corresponde con el de su instalación eléctrica.
En caso contrario, póngase en contacto con su
distribuidor y no conecte el aparato.
19. No utilice el aparato si se ha caído, si presenta daños visibles o si tiene fugas.
20. Conserve este documento y entrégueselo al futuro propietario si vende su aparato.
21. No utilice el aparato si el cable de alimentación o el enchufe están dañados, si no funciona correctamente, si se ha estropeado o si se ha caído. Si el cable
está dañado, debe ser sustituido por el fabricante o su agente, o por una persona cualificada para evitar cualquier riesgo.
22. Este aparato puede ser utilizado por personas con capacidades físicas, sensoriales o mentales reducidas o con falta de experiencia y conocimientos, siempre que hayan recibido supervisión o instrucciones relativas al uso seguro del aparato y que comprendan los peligros que conlleva. Los niños no deben jugar con el aparato.
23. Este aparato está diseñado para su uso en aplicaciones domésticas y similares como :
a. zonas de cocina en tiendas, oficinas y otros entornos de trabajo;
b. granjas ;
c. en hoteles, moteles y otros entornos residenciales;
d. habitaciones de huéspedes.
24. El aparato no está diseñado para funcionar con un temporizador externo o un sistema de mando a distancia independiente.
25. No sumerja nunca el aparato, su cable de alimentación ni el enchufe en agua ni en ningún otro líquido.
Consejos de seguridad :
1. No dañe el cable de alimentación. No tire de él al manipularlo.
2. No utilice el aparato si el cable de alimentación y el enchufe están rotos o si el enchufe se afloja.
3. No toque ni conecte o desconecte el aparato con las manos mojadas.
4. No permita que los niños pequeños toquen el enchufe.
5. No pulverice pesticidas, tintes para el pelo, lubricantes u otros líquidos.
6. No inhalar el calor de los gases de petróleo ni el polvo seco.
7. No desmonte, repare ni modifique el aparato usted mismo.
8. No utilice el aparato en situaciones peligrosas como lluvia o vientos fuertes.
9. No sumerja nunca el aparato, su cable de alimentación ni el enchufe en agua ni en ningún otro líquido.
10. Evite respirar partículas de suciedad o polvo que puedan transmitir enfermedades infecciosas.
11. No utilice el aparato sin un cubo de aguas residuales lo utilizar para fines distintos de la limpieza
lo se agache ni ruede
14. Mantenga la máquina fuera del alcance de los niños pequeños.
Jo permita que los niños lo utilicen o jueguen con él.
lo utilizar al aire libre
17. No siga utilizándolo si la entrada de aspiración está obstruida.
18. Para evitar descargas eléctricas, no tire del cable de alimentación para conectarlo o desconectarlo.
Presentación del producto


Cuerpo :
1 Depósito de agua
2 Cepillo de limpieza
3 Panel de control
4 Depósito de agua sucia
5 cuerpo del aparato
6 Flexible
7 Botón de rociado de agua
8 Soporte para asas
9 Soporte para carrete de cable
10 Bloqueo flexible con el aparato
11 Gancho de suspensión
Accesorios

1

2

3

4

5

6

7

8
1. Cepillo estándar
2. Cepillo de trayectoria ancha
3. Cepillo en forma de T
4. Cepillo autolimpiante
5. Manual de instrucciones
6. Soporte para asas
7. Gancho del asa
8. Manguera
PARÁMETROS DEL PRODUCTO :
Tensión nominal de funcionamiento 25V 50Hz Tipo de motor Motor de aspiración de polvo húmedo y seco Potencia nominal 1200W Longitud de la manguera 1.8m Grado de vacío 15Kpa Nivel de sellado IPX4 Ruido < /=80dB Peso neto de la máquina 4,2kg Capacidad del depósito de agua limpia 1800mL Entorno de trabajo T°C 5-50°C Capacidad del depósito de agua sucia 950mL Tamaño de la máquina 320*226*327mm Longitud eléctrica 5m Tiempo de calentamiento 15s
PREPARACIÓN
1. Retire el gancho de suspensión y el soporte del asa.

natural_image
Two 3D mechanical component diagrams shown in wireframe and perspective views (no text or symbols)
2. Retire el gancho de suspensión y fíjelo en el lado derecho de la cubierta trasera.

natural_image
Line drawing of a kitchen mixer with control panel and fan (no text or symbols)
3. Retire el soporte de la empuñadura y encájelo en el lado izquierdo de la tapa trasera.

natural_image
Technical line drawing of a mechanical device with no visible text or symbols
4. Retire el conector de la manguera, alinee el orificio del codo de la manguera con la parte posterior de la base, insértelo firmemente y escuche un "pop".

natural_image
Cross-sectional technical diagram of a mechanical assembly (no visible text or labels)
5. Coloque el cabezal del cepillo de limpieza adecuado según sea necesario.

natural_image
Simple line drawing of a mechanical component with an arrow indicating direction (no text or symbols)
INSTRUCCIONES
1. Retire el depósito de agua limpia del cuerpo.

natural_image
Line drawing of a mechanical device with a handle and base, showing no text or symbols
2. Ábralo y llénelo de agua limpia. Nivel

3. Instale el depósito de agua limpia en el cuerpo.

natural_image
Technical line drawing of a mechanical device with a downward arrow indicating motion (no text or symbols)
4. Enchúfalo.

natural_image
Line drawing of a plug inserted into an electrical outlet with three switches (no text or symbols)
5. Enciende el aparato para empezar.

natural_image
Simple line drawing of a washing machine with a handle and base (no text or symbols)
6. Seleccione la potencia de aspiración o la temperatura del agua.

Aviso: Por favor, rocíe cualquier residuo de agua en la manguera antes de rociar cualquier agua caliente.
7. Pulse el botón de rociado de agua para rociar agua limpia.

natural_image
Diagram of a handheld device with spray and spray pattern (no text or symbols)
Rocíe la mancha con agua limpia para sacarla a la superficie. No rocíe continuamente en el mismo lugar.
Después de pulverizar, absorba el agua p a r a evitar el moho y los malos olores.
8. Absorbe el agua.

natural_image
Simple line drawing of a mechanical lever or lever device on a flat surface (no text or symbols)
9. Desconecte la alimentación para parar.

natural_image
Simple line drawing of a mechanical device with no text or symbols
10. Desenchúfalo.

natural_image
Illustration of a plug inserted into an electrical outlet with two switches (no text or symbols)
11. Vacíe el agua limpia y el agua residual, y limpie el cubo de agua residual.

natural_image
Simple line drawing of a mechanical device with no text or symbols
INSTRUCCIONES DE USO
Para evitar la obstrucción del conducto de aire, retire de la zona cualquier residuo de gran tamaño, como trozos grandes de papel, film de embalaje, etc. Este aparato puede utilizarse sobre superficies blandas, como tejidos y pelusas. No se recomienda su uso en superficies duras.
1. Pulse el interruptor para arrancar la máquina y empezar a trabajar; vuelva a pulsar el interruptor para apagar la máquina.
2. Potencia: La velocidad por defecto es "Estándar", pulse el botón "Potencia" para cambiar a velocidad "Turbo". Pulse de nuevo este botón para volver a la velocidad "Estándar", y viceversa.
3. Temp: El modo por defecto es "Cálido", pulse el botón "Temp" para ajustar el modo a "Caliente". Vuelva a pulsar este botón para cambiar al modo "Cálido".
4. Invitación a llenar el depósito de aguas residuales: Cuando el depósito de aguas residuales está lleno, todas las luces parpadean, el zumbador de "goteo" suena tres veces seguidas para entrar en modo de espera.
5. Ajuste el modo según la demanda, sujete el cepillo de limpieza, mantenga pulsado el botón "interruptor de rociado de agua" situado en la parte inferior del mando del cepillo de limpieza, el cabezal de rociado de agua sigue rociando agua hacia fuera; suelte el botón, el rociado de agua se detiene.
6. Para las manchas normales, vierta el líquido limpiador en el depósito de limpieza y rocíe agua sobre las manchas. Después de rociar el agua, se utiliza el cepillo de limpieza para limpiar las manchas varias veces, y el agua residual se aspira en el bidón de agua residual y se aspira varias veces para limpiar las manchas rápidamente. Después de limpiar, es aconsejable volver a limpiar con agua para evitar que el líquido de limpieza se quede en el tejido.
7. Para las manchas difíciles, utilice primero una solución de limpieza especial para rociar sobre la tela por encima de la mancha, rocíe después de usar el cepillo de limpieza varias veces, la solución de limpieza se disolverá completamente la mancha, abra la máquina para limpiar el líquido y el agua residual en el tanque de agua residual, aspirar varias veces puede limpiar rápidamente la mancha.
8. Después de la limpieza, utilice el cabezal del cepillo autolimpiante y limpie la manguera en general.
Cómo guardar el cable de alimentación y la manguera :
1. Este producto tiene un cable de alimentación largo. Una vez que el producto está en uso, el cable de alimentación se puede enrollar alrededor de la parte posterior de la máquina.
2. Después de utilizar el producto, la manguera puede enrollarse en la ranura de almacenamiento situada en la parte inferior de la máquina.

natural_image
Technical line drawing of a mechanical device with coiled tubing and mounting bracket (no text or symbols)
ATENCIÓN :
1. El cable de alimentación de este producto es largo, así que tenga cuidado de no tropezar con él cuando lo utilice.
2. No permita que los niños se sienten en la máquina.
3. Asegúrese de utilizar este producto de forma segura. No sumerja el cable de alimentación en agua.
4. No utilice la máquina a temperaturas ambiente inferiores a 0°C-50°C.
5. Queda terminantemente prohibido cambiar toda la máquina, los accesorios y los cables.
MANTENIMIENTO
ATENCIÓN :
Apáguelo y desenchúfelo antes de repararlo.
Limpieza corporal :
Las manchas corrientes pueden eliminarse con un paño
húmedo.
La suciedad persistente puede limpiarse con un paño
húmedo empapado en detergente y, a continuación, con
un paño seco empapado en agua.
Después de cada uso :
Retírelos del cuerpo, aclárelos bien con agua y séquelos al aire.

natural_image
Line drawings of five different mechanical components or housing designs, no text or symbols present
Retire la cubierta frontal y, a continuación, enjuague la boquilla con agua :

natural_image
Simple line drawing of two mechanical components, one wedge and one cylindrical, with no text or symbols present.
Ábrelo y retíralo
Cabezal del cepillo y manguera autolimpiables :
1. Coloque la cabeza del cepillo autolimpiante en el mango, abra la máquina y empezará a funcionar. Al mismo tiempo, mantenga pulsado el botón de agua, y ver una cierta cantidad de agua almacenada en la manguera, y limpiar la manguera.

natural_image
Simple line drawing of a mechanical device with a lever and handle (no text or symbols)
Pulse el botón de agua
2. Instale el cabezal del cepillo autolimpiante en el mango, abra la máquina y coloque el cabezal del cepillo directamente en el grifo para una limpieza directa.
Autolimpieza

natural_image
Simple line drawing of a water pump connected to a tank (no text or symbols)
Limpieza del depósito de agua sucia :
Para mantener el rendimiento del producto, limpie el depósito de agua sucia con regularidad. Si hay más agua sucia en el depósito de agua sucia, la potencia de succión de este producto se debilitará. Si el nivel de agua alcanza el nivel máximo, el depósito de agua sucia debe limpiarse a tiempo. Una vez retirado el depósito de agua sucia del huésped, el agua sucia y los residuos internos deben vaciarse y limpiarse.
Cómo quitar el depósito de agua sucia :
Tire del depósito de agua sucia en ángulo para extraerlo en su totalidad, luego abra la hebilla de la tapa del depósito de agua sucia, abra la tapa y limpie el depósito de agua sucia.

natural_image
Diagram showing a cleaning machine before and after assembly, with no visible text or symbols
Añada agua al depósito de agua limpia :
Cuando el depósito de agua limpia se quede sin agua, añada agua a tiempo:
Añadir agua: Retire el depósito de agua limpia, abra la tapa del depósito de agua y añada agua.
Método de extracción del depósito de agua limpia: Tire del depósito de agua limpia hacia arriba en ángulo para extraer todo el depósito de agua limpia; a continuación, abra la tapa del depósito de agua limpia y añada agua.
Limpieza del cepillo de limpieza : Cuando el cepillo de limpieza está enredado por el pelo o bloqueado por la suciedad, por favor limpiar y mantener a tiempo : .
3. Si el cepillo de limpieza se enreda en el pelo, utiliza una herramienta para limpiar el pelo o la suciedad de las cerdas.
4. Cuando el cepillo de limpieza esté bloqueado, retire la tapa transparente situada sobre el cepillo de limpieza y utilice palillos u otras herramientas para limpiar el conducto de aire situado en el interior del mango del cepillo de limpieza.

natural_image
Line drawing of a handgun with two upright arms (no text or symbols)
Limpie el filtro del depósito de agua dulce :
El colador del depósito de agua limpia sirve para filtrar las impurezas del agua y la cal que se genera después de hervir el agua. Por favor, limpie el colador a tiempo después de usarlo varias veces para asegurar su efecto filtrante.

Manguera extraíble :
La manguera de esta máquina es desmontable. Si la manguera se daña, retírela y sustitúyala por una nueva.
SOLUCIÓN DE PROBLEMAS
Si se detecta un fallo durante el uso, consulte la siguiente tabla
ESTADO POSIBLES CAUSAS MÉTODO DE TRATAMIENTO La máquina no funciona no después de encender del interruptor. El enchufe no está correctamente enchufado y está suelto, lo cual conduce a un mal contacto. Apague el dispositivo y vuelva a enchufario. La línea Interna o el cordón la fuente de alimentación está rota. Llame al teléfono de reparación. Toda la máquina sobrecalentamiento y el dispositivo de la protección funciona. Consulte las Instrucciones del dispositivo de protección. El producto no rocía de agua Bloqueando la boquilla Retire el tapón de la boquilla para usando una aguja fina. Falta de agua en el tanque de agua limpia Agregue agua al tanque de agua limpia a tiempo La tubería de agua interna es obstruido o roto ! Póngase en contacto con el comerciante o el servicio postventa Ruido anormal El puerto de succión del producto. está bloqueado o se desperdicia Importantes son Inhalados. Eliminar bloqueos a tiempo Fallo del motor Póngase en contacto con el comerciante o el servicio postventa Baja succión o ausencia absorción de agua Demaslada agua sucla en el tanque de agua sucia Limpie el tanque de agua sucia a tiempo La tubería está rota Reemplace la manguera con un nuevo La suciedad bloquea la succión EllmInar bloqueos a tiempo Máquina anormal o inoperativo La temperatura ambiente es demasiado alto o demasiado bajo Sostenga el dispositivo a una temperatura ambiente adecuado (0 °C-50°C). Póngase en contacto con el comerciante o el servicio postventa
GARANTÍA
El periodo de garantía de nuestros productos es de 2 años, salvo que la ley estipule lo contrario, a partir de la fecha de la compra inicial o de la fecha de entrega.
Si tiene algún problema o pregunta, puede acceder fácilmente a nuestras páginas de ayuda, consejos para solucionar problemas, preguntas frecuentes y manuales de usuario en nuestro sitio de servicio: https://sav.hkoenig.com. Al escribir el nombre de referencia de su dispositivo en la barra de búsqueda, puede acceder a toda la asistencia en línea disponible, diseñada para satisfacer mejor sus necesidades.
Si sigue sin encontrar una respuesta a su pregunta o problema, haga clic en "¿La respuesta ha resuelto su problema? Esto le llevará al formulario de solicitud de asistencia posventa, que puede rellenar para validar su solicitud y obtener ayuda.
CONDICIONES DE GARANTÍA
La garantía cubre todos los fallos que se produzcan en el contexto de un uso normal, de acuerdo con los usos y especificaciones del manual de usuario.
Esta garantía no se aplica a los problemas de embalaje o transporte durante el envío del producto por parte del propietario. Tampoco incluye el desgaste normal del producto, ni el mantenimiento o la sustitución de piezas consumibles.
EXCLUSIÓN DE GARANTÍA
- Accesorios y piezas de desgaste (\*).
- Mantenimiento normal del aparato.
- Todas las averías derivadas de un uso incorrecto (golpes, incumplimiento de las recomendaciones de alimentación eléctrica, malas condiciones de uso, etc.), de un mantenimiento insuficiente o de un mal uso del aparato, así como del uso de accesorios inadecuados.
- Daños de origen externo: incendio, daños por agua, sobrecarga eléctrica, etc.
- Cualquier equipo que haya sido desmontado, incluso parcialmente, por personas que no estén autorizadas a hacerlo (en particular el usuario).
- Productos cuyo número de serie falte, esté dañado o sea ilegible, lo que no permitiría su identificación.
- Productos sujetos a alquiler, demostración o exposición.
(\*) Algunas piezas de su aparato, conocidas como piezas de desgaste o consumibles, se deterioran con el tiempo y la frecuencia de uso de su aparato. Este desgaste es normal, pero puede acentuarse por las malas condiciones de uso o de mantenimiento de su aparato. Por lo tanto, estas piezas no están cubiertas por la garantía.
Los accesorios suministrados con el aparato también están excluidos de la garantía. No se pueden cambiar ni reembolsar. No obstante, algunos accesorios pueden adquirirse directamente en nuestro sitio web: https://sav.hkoenig.com/
MEDIO AMBIENTE
ATENCIÓN:

No se deshaga de este producto como lo hace con otros productos del hogar. Existe un sistema selectivo de colecta de este producto puesto en marcha por las comunidades, debe de informarse en su ayuntamiento acerca de los lugares en los que puede depositar este producto. De hecho, los productos eléctricos y electrónicos pueden contener substancias peligrosas que tienen efectos nefastos para el medio ambiente o para la salud humana y deben ser reciclados. El símbolo aquí presente indica que los equipos eléctricos o electrónicos deben de ser cuidadosamente seleccionados, representa un recipiente de basura con ruedas marcado con una X.
Adeva SAS / H.Koenig Europe - 8 rue Marc Seguin, 77290 Mitry-Mory, France www.hkoenig.com - https://kundenservice.hkoenig.com - Tél: +33 1 64 67 00 05
ITALIANO

natural_image
Line drawing of a medical or laboratory equipment setup with a coiled tube and control panel (no text or symbols)
Leggere attentamente questo manuale di istruzioni prima di utilizzare il prodotto. Esso contiene importanti informazioni sulla sicurezza e consigli sull'uso e la manutenzione.
ATTENZIONE
Leggere attentamente il manuale d'uso.
Pulire e mantenere il prodotto secondo le istruzioni. In caso di guasto, consultare innanzitutto la guida alla risoluzione dei problemi.
La garanzia è nulla se il difetto è causato da danni accidentali, uso improprio, abuso, negligenza, riparazione o modifica impropria da parte di persone non autorizzate o mancata osservanza delle istruzioni operative fornite con il prodotto. La garanzia non si applica alla normale usura o all'uso commerciale.
In nessun caso la responsabilità supererà il prezzo di acquisto pagato dall'acquirente del prodotto. In nessun caso si avrà responsabilità per perdite - dirette o indirette - o per danni incidentali o consequenziali derivanti da o in relazione all'uso del prodotto.
IMPORTANTI ISTRUZIONI DI SICUREZZA
PRIMA DI UTILIZZARE QUESTO APPARECCHIO, LEGGERE TUTTE LE ISTRUZIONI E LE AVVERTENZE. NEL MANUALE D'USO E SUL DISPOSITIVO.
Quando si utilizza un apparecchio elettrico, è necessario adottare sempre le precauzioni di base, tra cui le seguenti:
1. Staccare la spina il prima di manutenzione, ispezionarlo o spostarlo.
2. Utilizzare un liquido detergente professionale senza bolle per evitare di danneggiare l'apparecchio.
3. Rimuovere regolarmente la polvere dallo zoccolo
4. Collegare saldamente l'apparecchio quando lo si utilizza.
5. Scollegare l'apparecchio quando non viene utilizzato per lunghi periodi.
6. assicurarsi che la spina non sia sovraccarica
7. Utilizzare l'apparecchio a 220 V CA.
8. In caso di guasto o malfunzionamento, interrompere immediatamente l'uso, spegnere l'apparecchio e scollegarlo dalla rete elettrica.
9. Se si notano rumori o odori anomali, interrompere l'uso dell'apparecchio e consultare il manuale o il servizio clienti.
10. Non non inalare qualsiasi sostanze infiammabili come i mozziconi di sigaretta.
11. Fermarsi immediatamente da lavoro se a un oggetto estraneo blocca l'ugello di spruzzatura.
12. Interrompere immediatamente il lavoro in caso di inalazione di un corpo estraneo.
13. Se dei corpi estranei bloccano il secchio dell'acqua pulita o il secchio dell'acqua di scarico, svuotare l'acqua e pulirla prima di continuare a utilizzare l'apparecchio.
14. Non dimenticare di scollegare il cavo di alimentazione dopo l'uso.
15. La pulizia e la manutenzione da parte dell'utente non devono essere eseguite da bambini, a meno che non abbiano più di 8 anni e siano sotto la supervisione di un adulto.
16. Tenere il dispositivo e il suo cavo fuori dalla portata dei bambini al di sotto degli 8 anni.
17. Quando si utilizzano apparecchi elettrici, è necessario prendere sempre le dovute precauzioni per evitare il rischio di incendi, scosse elettriche e/o lesioni in caso di uso improprio.
18. Verificare che la tensione indicata sulla targhetta dell'apparecchio corrisponda a quella dell'impianto elettrico. In caso contrario, contattare il rivenditore e non collegare l'apparecchio.
19. L'apparecchio non deve essere utilizzato se è caduto, se presenta segni visibili di danneggiamento o se perde.
20. Tenere a disposizione questo documento e consegnarlo al futuro proprietario in caso di vendita dell'apparecchio.
21. Non utilizzare l'apparecchio se il cavo di alimentazione o la spina sono danneggiati, se non funzionano correttamente, se sono stati danneggiati o se sono caduti. Se il cavo è danneggiato, deve essere sostituito dal produttore o dal suo agente o da una persona qualificata per evitare qualsiasi rischio.
22. Questo apparecchio può essere utilizzato da persone con ridotte capacità fisiche, sensoriali o mentali o con scarsa esperienza e conoscenza, a condizione che abbiano ricevuto la supervisione o le istruzioni per l'uso sicuro dell'apparecchio e che ne comprendano i pericoli. I bambini non devono giocare con l'apparecchio.
23. Questo apparecchio è destinato all'uso in applicazioni domestiche e simili, come ad esempio :
a. aree di cucina in negozi, uffici e altri ambienti di lavoro;
b. aziende agricole ;
c. in hotel, motel e altri ambienti residenziali;
d. camere per gli ospiti.
24. L'apparecchio non è destinato a essere azionato tramite un timer esterno o un sistema di controllo a distanza separato.
25. Non immergere mai l'apparecchio, il cavo di alimentazione o la spina di rete nell'acqua o in altri liquidi.
Consigli di sicurezza :
1. Non danneggiare il cavo di alimentazione. Non tirarlo quando lo si maneggia.
2. Non utilizzare l'apparecchio se il cavo di alimentazione e la spina sono rotti o se la spina si allenta.
3. Non toccare o collegare o scollegare l'apparecchio con le mani bagnate.
4. Non permettere ai bambini piccoli di toccare la spina di alimentazione.
5. Non spruzzare pesticidi, tinture per capelli, lubrificanti o altri liquidi.
6. Non inalare il calore dei gas di petrolio o della polvere secca.
7. Non smontare, riparare o modificare l'apparecchio da soli.
8. Non utilizzare l'apparecchio in situazioni pericolose come pioggia o forte vento.
9. Non immergere mai l'apparecchio, il cavo di alimentazione o la spina di rete nell'acqua o in altri liquidi.
10. Evitare di respirare particelle di sporco o polvere che potrebbero essere portatrici di malattie infettive.
11. Non utilizzare l'apparecchio senza un secchio per l'acqua di scarico.
12. Non utilizzare per scopi diversi dalla pulizia
13. Non piegarsi o rotolare
14. Tenere l'apparecchio fuori dalla portata dei bambini.
15. Non permettere ai bambini di usarlo o giocarci.
16. Non utilizzare all'aperto
17. Non continuare a utilizzarlo se la bocca di aspirazione è bloccata.
18. Per evitare scosse elettriche, non tirare il cavo di alimentazione per collegarlo o scollegarlo.
Introduzione al prodotto


Corpo:
1 Serbatoio dell'acqua
2 Spazzola di pulizia
3 Pannello di controllo
4 Serbatoio dell'acqua sporco
5 corpo dell'apparecchio
6 Flessibile
7 Pulsante di spruzzatura dell'acqua
8 Supporto della maniglia
9 Supporto per avvolgicavo
10 Bloccaggio flessibile con l'apparecchio
11 Gancio di sospensione
Accessori

1

2

3

4

5

6

7

8
1. Spazzola standard
2. Spazzola a traiettoria larga
3. Spazzola a T
4.Spazzola autopulente
5. Manuale di istruzioni
6.Supporto della maniglia
7. Gancio per la maniglia
8. Tubo flessibile
PARAMETRI DEL PRODOTTO: PARAMETRI DELPRODOTTO
Tensione nominale di esercizio 25V 50Hz Tipo di motore Motore di aspirazione a umido e a secco Potenza nominale 1200W Lunghezza del tubo flessibile 1,8m Grado di vuoto 15Kpa Livello di tenuta IPX4 Rumore </= 80dB Peso netto della macchina 4,2kg Capacità del serbatoio dell'acqua pulita 1800mL Ambiente di lavoro T°C 5-50°C Capacità del serbatoio dell'acqua sporca 950mL Dimensioni della macchina 320*226*327mm Lunghezza del cavo elettrico 5m Tempo di riscaldamento 15s
PREPARAZIONE
1. Rimuovere il gancio di sospensione e il supporto della maniglia.

natural_image
Two 3D mechanical parts shown in wireframe and perspective views (no text or symbols)
2. Rimuovere il gancio di sospensione e fissarlo sul lato destro del coperchio posteriore.

natural_image
Line drawing of a kitchen mixer with control panel and fan (no text or symbols)
3. Rimuovere il supporto della maniglia e farlo scattare sul lato sinistro del coperchio posteriore.

natural_image
Technical line drawing of a mechanical device with no visible text or symbols
4. Rimuovere il connettore del tubo, allineare il foro del gomito del tubo con la parte posteriore della base, inserirlo saldamente e sentire uno "schiocco".

natural_image
Cross-sectional technical diagram of a mechanical assembly (no visible text or labels)
5. Montare la testina di pulizia appropriata, come richiesto.

natural_image
Diagram showing a mechanical component being inserted into a cylindrical device (no text or symbols present)
ISTRUZIONI
6. Rimuovere il serbatoio dell'acqua pulita dal corpo.

natural_image
Technical line drawing of a mechanical device with no visible text or symbols
7. Aprire e riempire con acqua pulita.

natural_image
Line drawing of a mechanical device with no visible text or symbols
Livello massimo
dell'acqua
8. Installare il serbatoio dell'acqua pulita nel corpo.

natural_image
Technical line drawing of a mechanical device with a downward arrow indicating motion (no text or symbols)
9. Collegare la spina.

natural_image
Line drawing of a plug inserted into an electrical outlet with three switches (no text or symbols)
10. Accendere il dispositivo per iniziare.

natural_image
Simple line drawing of a mechanical device with no text or symbols
11. Selezionare la potenza di aspirazione o la temperatura dell'acqua.
Manopola della temperatura

Pulsante di aspirazione
Avviso: spruzzare l'eventuale acqua residua nel tubo prima di spruzzare
qualsiasi
acqua calda.
12. Premere il pulsante di spruzzo dell'acqua per spruzzare acqua pulita.

natural_image
Diagram of a handheld device with spray and spray pattern (no text or symbols)
Spruzzare la macchia con acqua pulita per portarla in superficie. Non spruzzare continuamente nello stesso punto.
Dopo la spruzzatura, assorbire l'acqua p e r evitare muffe e odori.
13. Assorbe l'acqua.

natural_image
Simple line drawing of a mechanical device with a lever and base plate (no text or symbols)
14. Spegnere l'alimentazione per interrompere l'operazione.

natural_image
Simple line drawing of a mechanical device with no text or symbols
15. Staccare la spina.

natural_image
Illustration of a plug inserted into a wall-mounted electrical outlet (no text or symbols)
16. Svuotare l'acqua pulita e l'acqua di scarico e pulire il secchio dell'acqua di scarico.

natural_image
Simple line drawing of a mechanical component with no text or symbols
ISTRUZIONI PER L'USO
Per evitare di ostruire il condotto dell'aria, rimuovere dall'area tutti i rifiuti di grandi dimensioni, come carta, pellicola da imballaggio, ecc. Questo apparecchio può essere utilizzato su superfici morbide come tessuti e pelucchi. Non si consiglia l'uso su superfici dure.
1. Premere l'interruttore per avviare la macchina e iniziare il lavoro; premere nuovamente l'interruttore per spegnere la macchina.
2. Potenza: la velocità predefinita è "Standard", premere il pulsante "Power" per passare alla velocità "Turbo". Premere nuovamente questo pulsante, per tornare alla velocità "Standard" e viceversa.
3. Temp: la modalità predefinita è "Caldo", premere il pulsante "Temp" per impostare la modalità su "Caldo". Premere nuovamente questo pulsante per passare alla modalità "Caldo".
4. Invito a riempire il serbatoio delle acque reflue: Quando il serbatoio dell'acqua di scarico è pieno, tutte le spie lampeggiano, il cicalino "drip" suona tre volte in successione per entrare in modalità standby.
5. Impostare la modalità in base alle esigenze, tenere la spazzola per la pulizia, premere e tenere premuto il pulsante "interruttore spruzzo d'acqua" sulla parte inferiore della manopola della spazzola per la pulizia, la testa dello spruzzo d'acqua continua a spruzzare acqua verso l'esterno; rilasciare il pulsante, lo spruzzo d'acqua si ferma.
6. Per le macchie comuni, versare il liquido detergente nel serbatoio e spruzzare l'acqua sulle macchie. Dopo aver spruzzato l'acqua, la spazzola per la pulizia viene utilizzata per strofinare le macchie più volte, mentre l'acqua di scarico viene aspirata nel contenitore delle acque reflue e aspirata più volte per pulire rapidamente le macchie. Dopo la pulizia, si consiglia di pulire nuovamente con acqua per evitare che il liquido di pulizia rimanga nel tessuto.
7. Per le macchie più ostinate, utilizzare innanzitutto una soluzione detergente speciale da spruzzare sul tessuto sopra la macchia, spruzzare dopo aver utilizzato più volte la spazzola di pulizia, la soluzione detergente dissolverà completamente la macchia, aprire la macchina per pulire il liquido e l'acqua di scarico nel serbatoio dell'acqua di scarico, aspirare più volte per pulire rapidamente la macchia.
8. Dopo la pulizia, utilizzare la testina autopulente e pulire il tubo in generale.
Conservazione del cavo di alimentazione e del tubo flessibile
1. Questo prodotto ha un lungo cavo di alimentazione. Quando il prodotto è in uso, il cavo di alimentazione può essere avvolto sul retro della macchina.
2. Dopo l'utilizzo del prodotto, il tubo può essere arrotolato nell'apposito vano sul fondo della macchina.

natural_image
Technical line drawing of a mechanical device with coiled tubing and mounting bracket (no text or symbols)
ATTENZIONE: IL NOSTRO LAVORO È STATO FATTO IN MODO DA NON AVERE PROBLEMI.
1. Il cavo di alimentazione di questo prodotto è lungo, quindi fate attenzione a non inciampare durante l'utilizzo.
2. Non permettere ai bambini di sedersi sulla macchina.
3. Assicurarsi di utilizzare questo prodotto in modo sicuro. Non immergere il cavo di alimentazione in acqua.
4. Non utilizzare la macchina a temperature ambiente inferiori a 0°C-50°C.
5. è severamente vietato cambiare l'intera macchina, gli accessori e i cavi.
MANUTENZIONE
ATTENZIONE: IL NOSTRO LAVORO È STATO FATTO IN MODO DA NON AVERE PROBLEMI.
Prima di effettuare la manutenzione, spegnere l'apparecchio e staccare la spina.
Pulizia del corpo: Le macchie ordinarie possono essere rimosse con un panno umido.
Lo sporco ostinato può essere eliminato con un panno
umido imbevuto di detergente, quindi con un panno asciutto imbevuto di acqua.
Dopo ogni uso: il prodotto
Rimuoverli dal corpo, sciacquarli accuratamente con acqua e asciugarli all'aria.

natural_image
Line drawings of five different mechanical components or housing designs, no text or symbols present
Rimuovere il coperchio anteriore, quindi risciacquare l'ugello con acqua:.

Testina e tubo flessibile autopulenti:
1. Posizionare la testa della spazzola autopulente sull'impugnatura, aprire la macchina e iniziare a lavorare. Allo stesso tempo, continuare a premere il pulsante dell'acqua per vedere una certa quantità d'acqua immagazzinata nel tubo e pulire il tubo.

natural_image
Simple line drawing of a mechanical device with a lever and shaft (no text or symbols)
Premere il pulsante dell'acqua
2. Installare la testina autopulente
sull'impugnatura, aprire la macchina e inserire la testina direttamente nel rubinetto per una pulizia diretta.
Autopulizia

natural_image
Simple line drawing of a mechanical device with a curved pipe and two containers (no text or symbols)
Pulizia del serbatoio dell'acqua sporca
Per mantenere le prestazioni del prodotto, pulire regolarmente il serbatoio dell'acqua sporca. Se nel serbatoio dell'acqua sporca c'è più acqua sporca, la potenza di aspirazione del prodotto si indebolisce. Se il livello dell'acqua raggiunge il massimo, il serbatoio dell'acqua sporca deve essere pulito tempestivamente. Una volta rimosso il serbatoio dell'acqua sporca dall'host, l'acqua sporca e i rifiuti interni devono essere svuotati e puliti.
Come rimuovere il serbatoio dell'acqua sporca
Tirare il serbatoio dell'acqua sporca ad angolo per rimuoverlo nel suo insieme, quindi aprire la fibbia sul coperchio del serbatoio dell'acqua sporca, aprire il coperchio e pulire il serbatoio dell'acqua sporca.

natural_image
Diagram showing a mechanical device before and after assembly, with no visible text or symbols
Aggiungere acqua al serbatoio dell'acqua pulita: quando il serbatoio dell'acqua pulita si esaurisce, si prega di aggiungere acqua in tempo : .
Aggiunta di acqua: rimuovere il serbatoio dell'acqua pulita, aprire il coperchio del serbatoio e aggiungere acqua.
Metodo di rimozione del serbatoio dell'acqua pulita: tirare il serbatoio dell'acqua pulita verso l'alto con un angolo per rimuovere l'intero serbatoio dell'acqua pulita, quindi aprire il coperchio del serbatoio dell'acqua pulita e aggiungere acqua.

natural_image
Diagram showing a mechanical device before and after assembly, with no visible text or symbols
Pulizia della spazzola di pulizia: quando la spazzola di pulizia è aggrovigliata dai capelli o bloccata dalla sporcizia, si prega di pulirla e mantenerla in tempo : .
3. Quando la spazzola di pulizia è impigliata nei capelli, utilizzare uno strumento per pulire i capelli o lo sporco dalle setole.
4. Quando la spazzola di pulizia è bloccata, rimuovere il coperchio trasparente sopra la spazzola di pulizia e utilizzare bacchette o altri strumenti per pulire il condotto dell'aria all'interno dell'impugnatura della spazzola di pulizia.

natural_image
Line drawing of a handgun with two upright arms (no text or symbols)
Pulire il filtro nel serbatoio dell'acqua dolce: - Pulire il
filtro nel serbatoio dell'acqua dolce
Il filtro nel serbatoio dell'acqua pulita serve a filtrare le impurità dell'acqua e il calcare che si forma dopo l'ebollizione dell'acqua. Si prega di pulire il filtro in tempo utile dopo averlo utilizzato più volte per garantirne l'effetto filtrante.

Tubo flessibile rimovibile:
Il tubo flessibile di questa macchina è rimovibile. Se il tubo si danneggia, rimuoverlo e sostituirlo con uno nuovo.
RISOLUZIONE DEI PROBLEMI
Se viene rilevato un guasto durante l'uso, fare riferimento alla seguente tabella
STATO POSSIBILI CAUSE METODO DI TRATTAMENTO La macchina non funziona non dopo l'accensione dell'interruttore. La spina non è corretta collegato ed è sciolto, che porta a scarso contatto. Spegnere il dispositivo e ricollegalo. La Ilinea Interna o Il cavo l'alimentazione è rotta. Chlama Il telefono di rlaparazione. Tutta la macchina surriscaldamento e il dispositivo di la protezione funziona. Fare riferimento alle istruzioni del dispositivo di protezione. Il prodotto non spruzza di acqua! Blocco dell'ugello Rimuovere la spina dall'ugello per usando un ago sottile. Mancanza di acqua nel serbatoio di acqua pulita Aggiungere acqua al serbatoio di acqua pulita in tempo Il tubo dell'acqua interno è intasato o rotto Contattare il commerciante o il servizio di assistenza al cliente Rumore anomalo La porta di aspirazione del prodotto è bloccato o rifiuti importanti sono inalati. Eliminare i blocchi nel tempo Guasto al motore Contattare il commerciante o il servizio di assistenza al cliente Bassa aspirazione o assenza assorbimento d'acqua Troppa acqua sporca nel serbatoio acqua sporca Pulire il serbatoio dell'acqua sporca puntuale Il tubo è rotto Sostituire il tubo con un nuovo Lo sporco blocca l'asplrazione Eliminare i blocchi nel tempo Macchina anormale o inoperativo La temperatura ambiente è troppo alto o troppo basso Tenere il dispositivo a temperatura adatto (0°C-50°C). Contattare Il commerciante o Il servizio di assistenza al cliente
GARANZIA
Il periodo di garanzia per i nostri prodotti è di 2 anni, se non diversamente stabilito dalla legge, a partire dalla data di acquisto iniziale o di consegna. Se avete problemi o domande, potete facilmente accedere alle nostre pagine di aiuto, consigli per la risoluzione dei problemi, FAQ e manuali d'uso sul nostro sito post-vendita: https://sav.hkoenig.com.
Digitando il nome di riferimento del tuo dispositivo nella barra di ricerca, puoi accedere a tutto il supporto online disponibile, progettato per soddisfare al meglio le tue esigenze.
Se ancora non riesci a trovare una risposta alla tua domanda o al tuo problema, allora clicca su "La risposta ha risolto il tuo problema ? Questo vi porterà al modulo di richiesta di supporto post-vendita, che potete completare per convalidare la vostra richiesta e ottenere aiuto.
CONDIZIONI DI GARANZIA
La garanzia copre tutti i guasti derivanti da un uso normale, in conformità con gli usi e le specifiche del manuale utente.
Questa garanzia non si applica a problemi di imballaggio o di trasporto durante la spedizione del prodotto da parte del proprietario. Non include inoltre la normale usura del prodotto, né la manutenzione o la sostituzione delle parti di consumo.
ESCLUSIONE DELLA GARANZIA
\- Accessori e parti soggette a usura (\*).
\- Normale manutenzione dell'apparecchio.
\- Tutti i guasti derivanti da un uso improprio (urti, mancato rispetto delle raccomandazioni sull'alimentazione, cattive condizioni d'uso, ecc.), da una manutenzione inadeguata o da un uso improprio dell'apparecchio, nonché dall'uso di accessori inadeguati.
\- Danni di origine esterna: incendio, danni d'acqua, sovratensione elettrica, ecc.
\- Qualsiasi attrezzatura che sia stata smontata, anche parzialmente, da persone diverse da quelle autorizzate a farlo (in particolare l'utente).
\- Prodotti per i quali il numero di serie è mancante, danneggiato o illeggibile, il che non permetterebbe la sua identificazione.
\- Prodotti soggetti a noleggio, dimostrazione o esposizione.
(\*) Alcune parti del suo apparecchio, note come parti soggette a usura o materiali di consumo, si deteriorano con il tempo e la frequenza d'uso del suo apparecchio. Questa usura è normale, ma può essere accentuata da cattive
condizioni d'uso o di manutenzione del vostro apparecchio. Queste parti non sono quindi coperte dalla garanzia.
Anche gli accessori forniti con l'apparecchio sono esclusi dalla garanzia. Non possono essere scambiati o rimborsati. Tuttavia, alcuni accessori possono essere acquistati direttamente dal nostro sito web: https://sav.hkoenig.com/.
AMBIENTE
ATTENZIONE:

Non gettare quest' apparecchio tra i rifiuti domestici. Per questo tipo di prodotti è fornito dai comuni un sistema di raccolta e ritiro in zona ed è quindi un dovere informarsi per conoscere il giusto smistamento del rifiuto. Infatti, i prodotti elettrici ed elettronici possono contenere sostanze pericolose che hanno effetti dannosi
sull'ambiente o sulla nostra salute e quindi devono essere riciclati. Il simbolo al lato indica che le apparecchiature elettriche ed elettroniche fanno parte di una raccolta selettiva e differenziata (rappresentata da un bidone su due ruote sbarrato da una croce.
Adeva SAS / H.Koenig Europe - 8 rue Marc Seguin, 77290 Mitry-Mory, France www.hkoenig.com - https://kundenservice.hkoenig.com - Tél: +33 1 64 67 00 05
PORTUGUÊS

natural_image
Line drawing of a medical or laboratory device with a coiled tube and control panel (no text or symbols)
Leia atentamente este manual de instruções antes de utilizar o produto. Contém informações de segurança importantes e conselhos sobre a utilização e manutenção.
ATENÇÃO
Leia atentamente o manual do utilizador.
Limpar e manter o produto em conformidade com as instruções.
Em caso de avaria, consultar primeiro o guia de resolução de problemas.
Esta garantia é anulada se o defeito for causado por danos acidentais, utilização incorrecta, abuso, negligência, reparação inadequada ou modificação por pessoas não autorizadas, ou se não forem seguidas as instruções de funcionamento fornecidas com o produto. Esta garantia não se aplica ao desgaste normal ou à utilização comercial.
Em nenhuma circunstância a responsabilidade excederá o preço de compra pago pelo comprador do produto. Em caso algum haverá qualquer responsabilidade por qualquer perda - direta ou indireta - ou quaisquer danos acidentais ou consequenciais resultantes de ou relacionados com a utilização do produto.
INSTRUÇÕES DE SEGURANÇA IMPORTANTES
ANTES DE UTILIZAR ESTE APARELHO, LEIA TODA
AS INSTRUÇÕES E AVISOS
NO MANUAL DO UTILIZADOR E NO APARELHO.
Ao utilizar um aparelho elétrico, devem ser sempre tomadas precauções básicas, incluindo as seguintes:
1. Desligar a ficha o antes de de manutenção, inspeccioná-lo ou deslocá-lo.
2. Utilizar um líquido de limpeza profissional sem bolhas para não danificar o aparelho.
3. Remover regularmente o pó da tomada
4. Ligar firmemente o aparelho à tomada quando estiver a ser utilizado.
5. Desligue o aparelho da tomada quando não estiver a ser utilizado durante longos períodos de tempo.
6. assegurar que a tomada não está sobrecarregada
7. Utilizar o aparelho com 220 V AC.
8. Em caso de avaria ou mau funcionamento, interromper imediatamente a utilização, desligar o aparelho e retirar a ficha da tomada.
9. Pare de utilizar o aparelho e consulte o manual ou o serviço de apoio ao cliente se detetar ruídos ou odores anormais.
10. Não não inalar quaisquer substâncias inflamáveis tais como pontas de cigarro.
11. Parar imediatamente do trabalho se a um objeto estranho bloquear o bico de pulverização.
12. Parar imediatamente o trabalho se for inalado um corpo estranho.
13. Se objectos estranhos obstruírem o balde de água limpa ou o balde de águas residuais, esvazie a água e limpe-a antes de continuar a utilizar o aparelho.
14. Não se esqueça de desligar o cabo de alimentação depois de o utilizar.
15. A limpeza e a manutenção pelo utilizador não devem ser efectuadas por crianças, a menos que tenham mais de 8 anos de idade e estejam sob a supervisão de um adulto.
16. Manter o aparelho e o respetivo cabo fora do alcance de crianças com menos de 8 anos.
17. Ao utilizar aparelhos eléctricos, devem ser sempre tomadas precauções de segurança para evitar qualquer risco de incêndio, choque elétrico e/ou ferimentos em caso de utilização indevida.
18. Verifique se a tensão indicada na placa de identificação do aparelho corresponde à da sua instalação eléctrica. Se não for o caso, contacte o seu revendedor e não ligue o aparelho.
19. O aparelho não deve ser utilizado se tiver caído, se apresentar sinais visíveis de danos ou se tiver fugas.
20. Mantenha este documento disponível e entregue-o ao futuro proprietário se vender o seu aparelho.
21. Não utilize o aparelho se o cabo de alimentação ou a ficha estiverem danificados, se não estiver a funcionar corretamente, se tiver sido danificado ou se tiver caído. Se o cabo estiver danificado, deve ser substituído pelo fabricante ou pelo seu agente, ou por uma pessoa qualificada para evitar qualquer risco.
22. Este aparelho pode ser utilizado por pessoas com capacidades físicas, sensoriais ou mentais reduzidas ou com falta de experiência e conhecimentos, desde que tenham recebido supervisão ou instruções relativas à utilização segura do aparelho e que compreendam os perigos envolvidos. As crianças não devem brincar com o aparelho.
23. Este aparelho destina-se a ser utilizado em aplicações domésticas e similares, tais como :
a. zonas de cozinha em lojas, escritórios e outros ambientes de trabalho;
b. quintas ;
c.em hotéis, motéis e outros ambientes residenciais;
d. quartos de hóspedes.
24. O aparelho não se destina a ser utilizado com um temporizador externo ou um sistema de controlo remoto separado.
25. Nunca mergulhar o aparelho, o cabo de alimentação ou a ficha de alimentação na água ou em qualquer outro líquido.
Conselhos de segurança :
1. Não danificar o cabo de alimentação. Não o puxe quando o manusear.
2. Não utilizar o aparelho se o cabo de alimentação e a ficha estiverem partidos ou se a ficha se soltar.
3. Não tocar, ligar ou desligar o aparelho com as mãos molhadas.
4. Não permitir que crianças pequenas toquem na ficha de alimentação.
5. Não pulverizar pesticidas, tintas para o cabelo, lubrificantes ou outros líquidos.
6. Não inalar o calor dos gases de petróleo ou do pó seco.
7. Não desmontar, reparar ou modificar o aparelho por si próprio.
8. Não utilizar o aparelho em situações perigosas, como chuva ou ventos fortes.
9. Nunca mergulhar o aparelho, o cabo de alimentação ou a ficha de alimentação na água ou em qualquer outro líquido.
10. Evitar respirar partículas de sujidade ou poeira que possam ser portadoras de doenças infecciosas.
11. Não utilizar o aparelho sem um balde de águas residuais
12. Não utilizar para outros fins que não a limpeza
13. Não se dobrar nem rolar
14. Manter a máquina fora do alcance de crianças pequenas.
15. Não permitir que as crianças o utilizem ou brinquem com ele.
16. Não utilizar no exterior
17. Não continuar a utilizar o aparelho se a entrada de aspiração estiver bloqueada.
18. Para evitar choques eléctricos, não puxe pelo cabo de alimentação para o ligar ou desligar.
Apresentação do produto


Corpo :
1 Depósito de água
2 Escova de limpeza
3 Painel de controlo
4 Depósito de água sujo
5 corpo do aparelho
6 Flexível
7 Botão de pulverização de água
8 Suporte do punho
9 Suporte para enrolador de cabos
10 Bloqueio flexível com o aparelho
11 Gancho de suspensão
Acessórios

1

2

3

4

5

6

7

8
1. Escova standard
2. Escova de trajetória larga
3. Escova em forma de T
4. Escova de auto-limpeza
5. Manual de instruções
6. Suporte do punho
7. Gancho de pega
8. Mangueira
PARÂMETROS DO PRODUTO :
Tensão nominal de funcionamento 25V 50Hz Tipo de motor Motor de extração de poeiras húmidas e secas Potência nominal 1200W Comprimento da mangueira 1,8m Grau de vácuo 15Kpa Nível de aperto IPX4 Ruído </= 80dB Peso líquido da máquina 4,2 kg Capacidade do depósito de água limpa 1800mL Ambiente de trabalho T°C 5-50°C Capacidade do reservatório de água suja 950mL Tamanho da máquina 320*226*327mm Comprimento do cabo elétrico 5m Tempo de aquecimento 15s
PREPARAÇÃO
1. Retirar o gancho de suspensão e o suporte do punho.

natural_image
Two 3D mechanical component diagrams shown in wireframe and cutaway views (no text or symbols)
2. Retirar o gancho de suspensão e fixá-lo no lado direito da tampa traseira.

natural_image
Line drawing of a kitchen mixer with control panel and fan (no text or symbols)
3. Retire o suporte da pega e encaixe-o no lado esquerdo da tampa traseira.

natural_image
Technical line drawing of a mechanical device with no visible text or symbols
4. Retirar o conetor da mangueira, alinhar o orifício do cotovelo da mangueira com a parte de trás da base, inserir firmemente e ouvir um "pop".

natural_image
Cross-sectional technical diagram of a mechanical assembly (no visible text or labels)
5. Colocar a cabeça da escova de limpeza adequada, conforme necessário.

natural_image
Diagram showing a mechanical component being inserted into a cylindrical part, with an arrow indicating direction (no text or symbols present)
INSTRUÇÕES
1. Retirar o depósito de água limpa da carroçaria.

natural_image
Line drawing of a mechanical device with a handle and base, showing no text or symbols
2. Abra-o e encha-o com água limpa.

natural_image
Line drawing of a mechanical component with no visible text or symbols
Nível máximo de água
3. Instalar o depósito de água limpa na carroçaria.

natural_image
Technical line drawing of a mechanical device with a downward arrow indicating motion or force (no text or symbols present)
4. Ligue-o.

natural_image
Line drawing of a plug inserted into a wall-mounted electrical outlet (no text or symbols)
5. Ligar o aparelho para começar.

natural_image
Simple line drawing of a washing machine with a handle and top-mounted fan (no text or symbols)
6. Seleccionar a potência de sucção ou a temperatura da água.

Aviso: Por favor, pulverize qualquer água residual na mangueira antes de pulverizar qualquer água quente.
7. Prima o botão de pulverização de água para pulverizar água limpa.

natural_image
Diagram of a handheld device with spray and spray pattern (no text or symbols)
Pulverizar a nódoa com água limpa para a trazer à superfície. Não pulverizar continuamente no mesmo local.
Após a pulverização, absorver a água p a r a evitar bolores e odores.
8. Absorve a água.

natural_image
Simple line drawing of a mechanical device with a lever and base plate (no text or symbols)
9. Desligar a alimentação eléctrica para parar.

natural_image
Simple line drawing of a mechanical device with no text or symbols
10. Desligue-o da tomada.

natural_image
Illustration of a plug inserted into a wall-mounted electrical outlet (no text or symbols)
11. Esvaziar a água limpa e as águas residuais e limpar o balde das águas residuais.

natural_image
Simple line drawing of a mechanical component with no text or symbols
INSTRUÇÕES DE UTILIZAÇÃO
Para evitar a obstrução da conduta de ar, é necessário retirar da área quaisquer pedaços grandes de lixo, tais como grandes pedaços de papel, película de embalagem, etc.
Este aparelho pode ser utilizado em superfícies macias, como tecidos e cotão. Não se recomenda a sua utilização em superfícies duras.
1. Premir o interrutor para ligar a máquina e começar a trabalhar; premir novamente o interrutor para desligar a máquina.
2. Potência: A velocidade predefinida é "Standard", prima o botão "Power" para mudar para a velocidade "Turbo". Prima novamente este botão para voltar à velocidade "Standard" e vice-versa.
3. Temp: O modo predefinido é "Quente", prima o botão "Temp" para definir o modo para "Quente". Premir novamente este botão para mudar para o modo "Quente".
4. Convite para encher o depósito de águas residuais: Quando o depósito de águas residuais está cheio, todas as luzes piscam, a campainha de "gotejamento" soa três vezes seguidas para entrar no modo de espera.
5. Definir o modo de acordo com a procura, segurar a escova de limpeza, premir e manter premido o botão "interrutor de pulverização de água" na parte inferior do botão da escova de limpeza, a cabeça de pulverização de água continua a pulverizar água para fora; soltar o botão, a pulverização de água pára.
6. Para as nódoas normais, deitar o líquido de limpeza no depósito de limpeza e pulverizar água sobre as nódoas. Depois de pulverizar a água, a escova de limpeza é utilizada para limpar as nódoas várias vezes, e as águas residuais são aspiradas para o recipiente de águas residuais e aspiradas várias vezes para limpar as nódoas rapidamente. Após a limpeza, é aconselhável limpar novamente com água para evitar que o líquido de limpeza permaneça no tecido.
7. Para as nódoas mais difíceis, utilizar primeiro uma solução de limpeza especial para pulverizar sobre o tecido por cima da nódoa, pulverizar depois de utilizar a escova de limpeza várias vezes, a solução de limpeza dissolverá completamente a nódoa, abrir a máquina para limpar o líquido e a água de esgoto para o depósito de água de esgoto, aspirar várias vezes pode limpar rapidamente a nódoa.
8. Após a limpeza, utilize a cabeça da escova autolimpante e limpe a mangueira em geral.
Guardar o cabo de alimentação e a mangueira :
1. Este produto tem um cabo de alimentação comprido. Quando o produto estiver a ser utilizado, o cabo de alimentação pode ser enrolado na parte de trás da máquina.
2. Depois de utilizar o produto, a mangueira pode ser enrolada na ranhura de armazenamento na parte inferior da máquina.
ATENÇÃO :
1. O cabo de alimentação deste produto é comprido, pelo que deve ter cuidado para não tropeçar nele quando o utilizar.
2. Não permitir que as crianças se sentem em cima da máquina.
3. Certifique-se de que utiliza este produto de forma segura. Não mergulhar o cabo de alimentação na água.
4. Não utilizar a máquina a temperaturas ambiente inferiores a 0°C-50°C.
5. é estritamente proibido mudar toda a máquina, os acessórios e os fios.
MANUTENÇÃO
ATENÇÃO :
Desligue-o e retire a ficha da tomada antes de efetuar qualquer intervenção.
Limpeza do corpo :
As manchas comuns podem ser removidas com um pano
húmido.
A sujidade mais persistente pode ser limpa com um pano húmido embebido em detergente e, em seguida, com um pano seco embebido em água.
Após cada utilização :
Retire-os do corpo, enxagúe-os bem com água e seque-os ao ar.

natural_image
Line drawings of five different mechanical components or housing designs, no text or symbols present
Remova a tampa frontal, em seguida, enxaguar o bocal com água :

natural_image
Simple line drawing of two mechanical components or tools, one with a triangular base and the other with a cylindrical pin (no text or symbols)
Abrir e retirar
Cabeça de escova e mangueira auto-limpantes :
1. Coloque a cabeça da escova de auto-limpeza na pega, abra a máquina e esta começará a funcionar. Ao mesmo tempo, continuar a premir o botão da água, ver uma certa quantidade de água armazenada na mangueira e limpar a mangueira.

natural_image
Simple line drawing of a mechanical device with a lever and handle (no text or symbols)
Premir o botão da água
2. Instalar a cabeça da escova autolimpante na
pega, abrir a máquina e colocar a cabeça da escova
diretamente na torneira para limpeza direta.
Limpeza de automóveis

natural_image
Simple line drawing of a mechanical device with a curved pipe and two containers (no text or symbols)
Limpeza do tanque de água suja :
Para manter o desempenho do produto, limpe regularmente o depósito de água suja. Se houver mais água suja no depósito de água suja, o poder de sucção deste produto será enfraquecido. Se o nível de água atingir o nível máximo, o depósito de água suja deve ser limpo atempadamente. Quando o depósito de água suja for retirado do hospedeiro, a água suja e os resíduos internos devem ser esvaziados e limpos.
Como remover o tanque de água suja:
Puxe o depósito de água suja num ângulo para o retirar como um todo, depois abra a fivela da tampa do depósito de água suja, abra a tampa e limpe o depósito de água suja.
Adicione água ao tanque de água limpa: Quando o tanque de água limpa ficar sem água, adicione água a tempo :
Adicionar água: Retirar o depósito de água limpa, abrir a tampa do depósito de água e adicionar água.
Método de remoção do depósito de água limpa: Puxe o depósito de água limpa para cima num ângulo para remover todo o depósito de água limpa, depois abra a tampa do depósito de água limpa e adicione água.

natural_image
Diagram showing a mechanical device before and after assembly, with no visible text or symbols
Limpeza da escova de limpeza: Quando a escova de limpeza estiver emaranhada pelo cabelo ou bloqueada pela sujidade, por favor, limpe e mantenha-a a tempo :
3. Quando a escova de limpeza estiver enredada em cabelos, utilize uma ferramenta para limpar os cabelos ou a sujidade das cerdas.
4. Quando a escova de limpeza estiver bloqueada, retire a tampa transparente por cima da escova de limpeza e utilize pauzinhos ou outras ferramentas para limpar a conduta de ar no interior do punho da escova de limpeza.

natural_image
Line drawing of a handgun with two upright arms (no text or symbols)
Limpe o filtro no tanque de água doce :
O filtro no depósito de água limpa serve para filtrar as impurezas da água e o calcário gerado após a fervura da água.
Depois de o utilizar várias vezes, o coador deve ser limpo atempadamente para garantir o seu efeito de filtragem.

Mangueira amovível :
A mangueira desta máquina é amovível. Se a mangueira ficar danificada, retire-a e substitua-a por uma nova.
RESOLUÇÃO DE PROBLEMAS
Se for detectada uma avaria durante a utilização, consulte a tabela seguinte
STATUS CAUSAS POSSÍVEIS METODO DE TRATAMENTO A máquina não funciona depois de ligar o interruptor. O plugue não está conectado corretamente e está solto, resultando em mau contato. Desligue o dispositivo e conecte-o novamente. A linha interna ou o cabo de alimentação está quebrado. Ligue para o telefone de reparo. Toda a máquina superaquece e o dispositivo de proteção funciona. Consulte as instruções do dispositivo de proteção. O produto não borrifa água Bloqueio do bico Remova a tampa do bico usando uma agulha fina. Falta de água no tanque de água limpa Adicione água ao tanque de água limpa a tempo A linha de água interna está entupida ou quebrada Contacte o revendedor ou o serviço pós-venda Barulho fora do normal A porta de sucção do produto está bloqueada ou grandes resíduos são inalados. Limpe os bloqueios a tempo Falha do motor Contacte o revendedor ou o serviço pós-venda Baixa sucção ou falta de absorção de água Muita água suja no tanque de água suja Limpe o tanque de água suja a tempo O cano está quebrado Substitua a mangueira por uma nova A sujeira bloqueia a sucção Limpe os bloqueios a tempo Máquina anormal ou inoperante A temperatura ambiente está muito alta ou muito baixa Mantenha o dispositivo a uma temperatura ambiente adequada (0°C-50°C). Contacte o revendedor ou o serviço pós-venda
GARANTIA
O período de garantia dos nossos produtos é de 2 anos, salvo disposição legal em contrário, a contar da data da compra inicial ou da entrega.
Se tiver algum problema ou dúvida, pode aceder facilmente às nossas páginas de ajuda, dicas de resolução de problemas, perguntas frequentes e manuais de utilizador no nosso site pós-venda: https://sav.hkoenig.com.
Ao escrever o nome de referência do seu dispositivo na barra de pesquisa, pode aceder a todo o suporte online disponível, concebido para melhor se adaptar às suas necessidades.
Se, mesmo assim, não conseguir encontrar uma resposta para a sua pergunta ou problema, clique em "A resposta resolveu o seu problema? Isto conduzi-lo-á ao formulário de pedido de assistência pós-venda, que pode preencher para validar o seu pedido e obter ajuda.
CONDIÇÕES DE GARANTIA
A garantia cobre todos os defeitos resultantes de uma utilização normal, de acordo com as utilizações e especificações do manual do utilizador.
Esta garantia não se aplica a problemas de embalagem ou de transporte aquando da expedição do produto pelo proprietário. Também não inclui o desgaste normal do produto, nem a manutenção ou substituição de peças consumíveis.
EXCLUSÃO DA GARANTIA
\- Acessórios e peças de desgaste (\*).
\- Manutenção normal do aparelho.
\- Todos os defeitos resultantes de uma utilização incorrecta (choques, inobservância das recomendações relativas à alimentação eléctrica, más condições de funcionamento, etc.), de uma manutenção inadequada ou de uma utilização incorrecta do aparelho, bem como da utilização de acessórios inadequados.
\- Danos de origem externa: incêndio, danos causados pela água, sobretensão eléctrica, etc.
- Qualquer equipamento que tenha sido desmontado, mesmo parcialmente, por pessoas não autorizadas a fazê-lo (nomeadamente o utilizador).
- Produtos cujo número de série esteja ausente, danificado ou ilegível, o que não permitiria a sua identificação.
- Produtos sujeitos a aluguer, demonstração ou exposição.
(\*) Algumas peças do seu aparelho, designadas por peças de desgaste ou consumíveis, deterioram-se com o tempo e a frequência de utilização do seu aparelho. Este desgaste é normal, mas pode ser acentuado por más condições de utilização ou de manutenção do seu aparelho. Por conseguinte, estas peças não estão cobertas pela garantia.
Os acessórios fornecidos com o aparelho estão igualmente excluídos da garantia. Não podem ser trocados ou reembolsados. No entanto, alguns acessórios podem ser adquiridos diretamente no nosso sítio Web: https://sav.hkoenig.com/.
AMBIENTE
AVISO:

Não deitar este aparelho no lixo doméstico. Os municípios dispõem de um sistema local de recolha e de retoma para este tipo de produtos, pelo que é seu dever informar-se sobre a forma correcta de eliminar os resíduos. De facto, os produtos eléctricos e electrónicos podem conter substâncias perigosas que têm efeitos nocivos para o ambiente ou para a nossa saúde, pelo que devem ser reciclados. O símbolo ao lado indica que os equipamentos eléctricos e electrónicos fazem parte de uma recolha selectiva e diferenciada (representada por um contentor com duas rodas riscadas).
Adeva SAS / H.Koenig Europe - 8 rue Marc Seguin, 77290 Mitry-Mory, France www.hkoenig.com - https://kundenservice.hkoenig.com - Tél: +33 1 64 67 00 05
POLSKI

natural_image
Line drawing of a medical or laboratory equipment setup with a coiled tube, control panel, and monitor (no text or symbols)
Przed rozpoczęciem korzystania z produktu należy uważnie przeczytać niniejszą instrukcję obsługi. Zawiera ona ważne informacje dotyczące bezpieczeństwa oraz porady dotyczące użytkowania i konserwacji.
UWAGA
Należy uważnie przeczytać instrukcję obsługi.
Produkt należy czyścić i konserwować zgodnie z instrukcjami. W przypadku usterki należy najpierw zapoznać się z instrukcją rozwiązywania problemów.
Niniejsza gwarancja traci ważność, jeśli wada jest spowodowana przypadkowym uszkodzeniem, niewłaściwym użytkowaniem, nadużyciem, zaniedbaniem, niewłaściwą naprawą lub modyfikacją przez osoby nieupoważnione lub nieprzestrzeganiem instrukcji obsługi dostarczonej z produktem. Niniejsza gwarancja nie obejmuje normalnego zużycia lub użytkowania komercyjnego.
W żadnym wypadku odpowiedzialność nie przekroczy ceny zakupu zapłaconej przez nabywcę produktu. W żadnym wypadku nie będzie ponoszona odpowiedzialność za jakiekolwiek straty - bezpośrednie lub pośrednie - lub jakiekolwiek szkody przypadkowe lub wtórne wynikające z lub w związku z użytkowaniem produktu.
WAŻNE INSTRUKCJE BEZPIECZEŃSTWA
PRZED UŻYCIEM TEGO URZĄDZENIA NALEŻY PRZECZYTAĆ WSZYSTKIE INSTRUKCJE I OSTRZEŻENIA W INSTRUKCJI OBSŁUGI I NA URZĄDZENIU.
Podczas korzystania z urządzenia elektrycznego należy zawsze przestrzegać podstawowych środków ostrożności, w tym poniższych:
1. Odtącz urządzenieprzed do
serwisowaniem, sprawdzeniem lub przeniesieniem.
2. Używaj profesjonalnego płynu do czyszczenia bez pęcherzyków powietrza, aby uniknąć uszkodzenia urządzenia.
3. Regularnie usuwaj kurz z gniazda
4. Podłącz urządzenie do zasilania, gdy jest używane.
5. Gdy urządzenie nie jest używane przez dłuższy czas, należy je odłączyć od zasilania.
6. upewnić się, że wtyczka nie jest przeciążona
7. Z urządzenia należy korzystać przy napięciu 220 V AC.
8. W przypadku usterki lub nieprawidłowego działania należy natychmiast przerwać korzystanie z urządzenia, wyłączyć je i odłączyć od zasilania.
9. W przypadku zauważenia nietypowych dźwięków lub zapachów należy zaprzestać korzystania z urządzenia i
skonsultować się z instrukcją obsługi lub działem obsługi klienta.
10. Nie nie wdychać żadnych substancje łatwopalnych takich jak niedopatki papierosów.
11. Zatrzymać się natychmiast od praca jeśli a obcy przedmiot blokuje dyszę rozpylającą.
12. W przypadku wdychania ciał obcych należy natychmiast przerwać pracę.
13. Jeśli wiaderko na czystą wodę lub wiaderko na zużytą wodę zostanie zablokowane przez ciała obce, należy je opróżnić i wyczyścić przed dalszym korzystaniem z urządzenia.
14. Pamiętaj, aby odłączyć przewód zasilający po użyciu.
15. Czyszczenie i konserwacja przez użytkownika nie mogą być wykonywane przez dzieci, chyba że mają one więcej niż 8 lat i są pod nadzorem osoby dorostej.
16. Urządzenie i jego kabel należy przechowywać w miejscu niedostępnym dla dzieci poniżej 8 roku życia.
17. Podczas korzystania z urządzeń elektrycznych należy zawsze podejmować środki ostrożności, aby zapobiec ryzyku pożaru, porażenia prądem i/lub obrażeń w przypadku niewłaściwego użycia.
18. Należy sprawdzić, czy napięcie podane na tabliczce znamionowej urządzenia odpowiada napięciu w instalacji elektrycznej. Jeśli tak nie jest, należy
skontaktować się ze sprzedawcą i nie podłączać urządzenia.
19. Urządzenia nie wolno używać, jeśli zostało upuszczone, ma widoczne ślady uszkodzenia lub przecieka.
20. Należy zachować ten dokument i przekazać go przysztemu właścicielowi w przypadku sprzedaży urządzenia.
21. Nie używaj urządzenia, jeśli jego kabel zasilający lub wtyczka są uszkodzone, jeśli nie działa ono prawidłowo, jeśli zostało uszkodzone lub upuszczone. Jeśli kabel jest uszkodzony, musi zostać wymieniony przez producenta lub jego przedstawiciela, lub przez wykwalifikowaną osobę, aby uniknąć jakiegokolwiek ryzyka.
22. To urządzenie może być używane przez osoby o ograniczonych zdolnościach fizycznych, sensorycznych lub umysłowych lub nieposiadające doświadczenia i wiedzy, pod warunkiem, że otrzymały one nadzór lub instrukcje dotyczące bezpiecznego korzystania z urządzenia i rozumieją związane z tym zagrożenia. Dzieci nie mogą bawić się urządzeniem.
23. To urządzenie jest przeznaczone do użytku w domowych i podobnych zastosowań, takich jak : a. obszary kuchenne w sklepach, biurach i innych środowiskach pracy;
b. gospodarstwa ;
c.w hotelach, motelach i innych środowiskach mieszkalnych;
d. pokoje gościnne.
24. Urządzenie nie jest przeznaczone do obsługi za pomocą zewnętrznego timera lub oddzielnego systemu zdalnego sterowania.
25. Nigdy nie zanurzaj urządzenia, przewodu zasilającego lub wtyczki sieciowej w wodzie lub innym płynie.
Wskazówki dotyczące bezpieczeństwa :
1. Nie wolno uszkodzić przewodu zasilającego. Nie ciągnąć go podczas obsługi.
2. Nie używaj urządzenia, jeśli przewód zasilający i wtyczka są uszkodzone lub jeśli wtyczka jest poluzowana.
3. Nie dotykać, nie podłączać ani nie odłączać urządzenia mokrymi rękami.
4. Nie należy pozwalać małym dzieciom na dotykanie wtyczki zasilania.
5. Nie rozpyłać pestycydów, farb do włosów, smarów ani innych płynów.
6. Nie wdychać ciepta gazów ropopochodnych ani suchego pytu.
7. Nie należy samodzielnie demontować, naprawiać ani modyfikować urządzenia.
8. Nie używaj urządzenia w niebezpiecznych sytuacjach,
takich jak deszcz lub silny wiatr.
9. Nigdy nie zanurzaj urządzenia, jego przewodu zasilającego lub wtyczki sieciowej w wodzie lub innym płynie.
10. Unikaj wdychania cząstek brudu lub pyłu, które mogą przenosić choroby zakaźne.
11. Nie używaj urządzenia bez wiaderka na ścieki
12. Nie używać do celów innych niż czyszczenie
13. Nie schylaj się ani nie przewracaj
14. Urządzenie należy przechowywać w miejscu niedostępnym dla małych dzieci.
15. Nie pozwalać dzieciom na korzystanie z urządzenia lub zabawę nim.
16. Nie używać na zewnątrz
17. Nie używaj urządzenia, jeśli wlot ssania jest zablokowany.
18. Aby uniknąć porażenia prądem, nie należy ciągnąć za przewód zasilający w celu jego podłączenia lub odłączenia.
Wprowadzenie produktu


Ciało :
1 Zbiornik na wodę
2 Szczotka do czyszczenia
3 Panel sterowania
4 Brudny zbiornik na wodę
5 korpus urządzenia
6 Elastyczność
7 Przycisk rozpylania wody
8 Wsparcie uchwytu
9 Wspornik bębna kablowego
10 Elastyczne blokowanie za pomocą urządzenia
11 Hak do zawieszania
Akcesoria

1

2

3

4

5

6

7

8
1. Standardowa szczotka
2. Szczotka o szerokiej trajektorii
3. Szczotka w kształcie litery T
4. Szczotka samoczyszcząca
5. Instrukcja obsługi
6. Wsparcie uchwytu
7. Hak uchwytu
8. Wąż
PARAMETRY PRODUKTU :
Znamionowe napięcie robocze 25V 50Hz Typ silnika Silnik odpylający na mokro i sucho Moc znamionowa 1200W Długość węża 1,8m Stopień próżni 15Kpa Poziom szczelności IPX4 Hałas </= 80dB Masa netto urządzenia 4,2 kg Pojemność zbiornika czystej wody 1800 ml Środowisko pracy T°C 5-50°C Pojemność zbiornika brudnej wody 950 ml Rozmiar maszyny 320*226*327mm Długość kabla elektrycznego 5m Czas nagrzewania 15s
PRZYGOTOWANIE
1. Zdejmij hak zawieszenia i wspornik uchwytu.

natural_image
Two 3D mechanical component diagrams shown in wireframe and perspective views (no text or symbols)
2. Zdejmij hak do zawieszania i zamocuj go po prawej stronie tylnej pokrywy.

natural_image
Line drawing of a kitchen mixer with control panel and fan (no text or symbols)
3. Zdejmij wspornik uchwytu i zatrzaśnij go po lewej stronie tylnej pokrywy

natural_image
Technical line drawing of a mechanical device with no visible text or symbols
4. Zdejmij złącze węża, wyrównaj otwór w kolanku węża z tylną częścią podstawy, włóż mocno i usłysz "trzask".

natural_image
Cross-sectional technical diagram of a mechanical assembly (no visible text or labels)
5. W razie potrzeby zamontuj odpowiednią głowicę szczotki czyszczącej.

natural_image
Diagram showing a mechanical component being inserted into a cylindrical part, with an arrow indicating direction (no text or symbols present)
INSTRUKCJE
1. Wyjmij zbiornik czystej wody z korpusu.

natural_image
Line drawing of a mechanical device with a gear and handle (no text or symbols)
2. Otwórz go i napetnij czystą woda.

3. Zamontuj zbiornik czystej wody w korpusie.

natural_image
Technical line drawing of a mechanical device with a downward arrow indicating motion (no text or symbols)
4. Podłącz urządzenie.

natural_image
Line drawing of a plug inserted into a wall-mounted electrical outlet (no text or symbols)
5. Włącz urządzenie, aby rozpocząć.

natural_image
Simple line drawing of a kitchen appliance with a refrigerator and a showerhead (no text or symbols)
6. Wybierz moc ssania lub temperaturę wody.

Uwaga: Przed rozpyleniem jakiejkolwiek substancji należy spryskać wąż pozostałą w nim wodą.
gorąca woda.
7. Naciśnij przycisk rozpylania wody, aby rozpylić czystą wodę.

natural_image
Diagram of a handheld device with spray and spray pattern (no text or symbols)
Spryskaj plamę czystą woda, aby wypłynęła na powierzchnię. Nie spryskuj ciągle tego samego miejsca.
Po spryskaniu należy wchłonąć wodę, a b y uniknąć pleśni i nieprzyjemnych zapachów.
8. Wchtania wodę.

natural_image
Simple line drawing of a mechanical device with a lever and base plate (no text or symbols)
9. Wyłącz zasilanie, aby zatrzymać urządzenie.

natural_image
Simple line drawing of a mechanical device with no text or symbols
10. Odtącz go.

natural_image
Illustration of a plug inserted into an electrical outlet with two switches (no text or symbols)
11. Opróżnij czystą wodę i ścieki oraz wyczyść wiadro na ścieki.

natural_image
Simple line drawing of a mechanical component with no text or symbols
INSTRUKCJE UŻYTKOWANIA
Aby uniknąć zablokowania kanału powietrznego, należy usunąć wszelkie duże śmieci z obszaru, takie jak duże kawałki papieru, folia do pakowania itp. Urządzenie może być używane na miękkich powierzchniach, takich jak tkaniny i klaczki. Nie zaleca się używania go na twardych powierzchniach.
1. Naciśnij przełącznik, aby uruchomić maszynę i rozpocząć pracę; naciśnij przełącznik ponownie, aby wyłączyć maszynę.
2. Moc: Domyślna prędkość to "Standardowa", naciśnij przycisk "Moc", aby przełączyć na prędkość "Turbo". Naciśnij ten przy cisk ponownie, aby powrócić do prędkości "Standard" i odwrotnie.
3. Temp: Domyślnym trybem jest "Ciepły", naciśnij przycisk "Temp", aby ustawić tryb na "Gorący". Naciśnij ten przycisk ponownie, aby przełączyć na tryb "Ciepły".
4. Zaproszenie do napełnienia zbiornika na ścieki: Gdy zbiornik na ścieki jest pełny, wszystkie kontrolki migają, brzęczyk "kroplówki" rozbrzmiewa trzy razy z rzędu, aby przejść do trybu gotowości.
5. Ustaw tryb zgodnie z zapotrzebowaniem, przytrzymaj szczotkę czyszczącą, naciśnij i przytrzymaj przycisk "przełącznika strumienia wody" na spodzie pokrętła szczotki czyszczącej, głowica rozpylająca wodę nadal rozpyła wodę na zewnątrz; zwolnij przycisk, strumień wody zatrzyma się.
6. W przypadku zwykłych plam należy włać płyn czyszczący do zbiornika czyszczącego i rozpylić wodę na plamy. Po rozpyleniu wody, szczoteczka do czyszczenia jest używana do kilkukrotnego wycierania plam, a ścieki są zasysane do zbiornika na ścieki i kilkakrotnie odkurzane w celu szybkiego usunięcia plam. Po czyszczeniu zaleca się ponowne wyczyszczenie wodą, aby zapobiec pozostaniu płynu czyszczącego w tkaninie.
7. W przypadku uporczywych plam najpierw użyj specjalnego roztworu czyszczącego, aby spryskać tkaninę nad plamą, spryskaj po kilkukrotnym użyciu szczotki czyszczącej, roztwór czyszczący całkowicie rozpuści plamę, otwórz maszynę, aby wyczyścić płyn i wodę ściekową do zbiornika wody ściekowej, kilkakrotne odkurzanie może szybko wyczyścić plamę.
8. Po czyszczeniu należy użyć samoczyszczącej głowicy szczotki i ogólnie wyczyścić wąż.
Przechowywanie przewodu zasilającego i węża :
1. Ten produkt ma długi przewód zasilający. Gdy produkt jest używany, przewód zasilający można owinąć wokół tylnej części urządzenia.
2. Po użyciu produktu wąż można zwinąć w szczelinie do przechowywania w dolnej części urządzenia.

natural_image
Technical line drawing of a mechanical device with coiled tubing and mounting bracket (no text or symbols)
UWAGA :
6. Przewód zasilający tego produktu jest długi, więc należy uważać, aby nie potknąć się o niego podczas użytkowania.
7. Nie pozwalaj dzieciom siadać na urządzeniu.
8. Należy zapewnić bezpieczne korzystanie z tego produktu. Nie zanurzać przewodu zasilającego w wodzie.
9. Nie używaj urządzenia w temperaturze otoczenia poniżej 0°C-50°C.
10. 5. zmiana całego urządzenia, akcesoriów i przewodów jest surowo zabroniona.
KONSERWACJA
UWAGA :
Przed serwisowaniem należy wyłączyć urządzenie i odłączyć je od zasilania.
Czyszczenie ciała :
Zwykłe plamy można usunąć wilgotną szmatką.
Uporczywe zabrudzenia można zetrzeć wilgotną szmatką nasączoną detergentem, a następnie wytrzeć suchą
szmatką nasączoną woda.
Po każdym użyciu :
Zdejmij je z ciała, dokładnie spłucz wodą i wysusz na powietrzu.

natural_image
Line drawings of five different mechanical components or parts, including cylindrical and triangular shapes (no text or symbols)
Zdejmij przednią pokrywę, a następnie przeptucz dyszę woda : .

natural_image
Simple line drawing of two mechanical components or tools, one tilted and one with a long line extending (no text or symbols)
Otwieranie i usuwanie
Samoczyszcząca się główna szczoteczki i wąż:
1. Umieść główkę szczotki samoczyszczącej na uchwycie, otwórz urządzenie i rozpocznie ono pracę. W tym samym czasie naciskaj przycisk wody, a zobaczysz pewną ilość wody zgromadzonej w wężu i wyczyść wąż.

natural_image
Simple line drawing of a mechanical component or tool with no visible text or symbols
Naciśnij przycisk wody
2. Zamontuj samoczyszczącą głowicę szczotkową na uchwycie, otwórz urządzenie i umieść głowicę szczotkową bezpośrednio w kranie w celu bezpośredniego czyszczenia.
Automatyczne czyszczenie

natural_image
Simple line drawing of a laboratory apparatus with a curved tube and two beakers (no text or symbols)
Czyszczenie zbiornika brudnej wody :
Aby utrzymać wydajność produktu, należy regularnie czyścić zbiornik brudnej wody. Jeśli w zbiorniku brudnej wody znajduje się więcej brudnej wody, siła ssania tego produktu zostanie ostabiona. Jeśli poziom wody osiągnie maksymalny poziom, zbiornik brudnej wody należy wyczyścić w odpowiednim czasie. Po odłączeniu zbiornika brudnej wody od hosta należy opróżnić i wyczyścić zbiornik brudnej wody i wewnętrzne odpady.
Jak usunąć zbiornik brudnej wody:
Pociągnij zbiornik brudnej wody pod kątem, aby wyjąć go w całości, a następnie otwórz klamrę na pokrywie zbiornika brudnej wody, otwórz pokrywę i wyczyść zbiornik brudnej wody.

natural_image
Diagram showing a mechanical device before and after assembly, with no visible text or symbols
Dolej wody do zbiornika czystej wody: Gdy w zbiorniku czystej wody zabraknie wody, należy dolać wody na czas:.
Dodawanie wody: Wyjmij zbiornik czystej wody, otwórz pokrywę zbiornika wody i dodaj wodę.
Metoda wyjmowania zbiornika czystej wody: Pociągnij zbiornik czystej wody do góry pod kątem, aby wyjąć cały zbiornik czystej wody, a następnie otwórz pokrywę zbiornika czystej wody i wlej wodę.

natural_image
Diagram showing a cleaning or repair process: one machine with attached components, the other with a device (no text or symbols present)
Czyszczenie szczotki czyszczącej: Gdy szczotka czyszcząca jest zaplątana przez włosy lub zablokowana przez brud, należy ją wyczyścić i konserwować na czas:.
3. Jeśli szczotka do czyszczenia zapłącze się we włosy, użyj narzędzia do usunięcia włosów lub brudu z włosia.
4. Jeśli szczotka czyszcząca jest zablokowana, zdejmij przezroczystą pokrywę nad szczotką czyszczącą i użyj pałeczek lub innych narzędzi, aby oczyścić kanał powietrzny wewnątrz uchwytu szczotki czyszczącej.

natural_image
Line drawing of a firearm with two upright arms (no text or symbols)
Wyczyść filtr w zbiorniku świeżej wody :
Sitko w zbiorniku czystej wody służy do odfiltrowywania zanieczyszczeń znajdujących się w wodzie oraz kamienia powstającego po zagotowaniu wody. Po kilkukrotnym użyciu należy wyczyścić sitko w odpowiednim czasie, aby zapewnić jego skuteczność filtrowania.

Zdejmowany wąż :
Wąż w tym urządzeniu jest wymienny. Jeśli wąż ulegnie uszkodzeniu, należy go wyjąć i wymienić na nowy.
ROZWIĄZYWANIE PROBLEMÓW
W przypadku wykrycia usterki podczas użytkowania należy zapoznać się z poniższą tabelą
STATUS MOŻLIWE PRZYCZYNY METODA LECZENIA Maszyna nie działa po włączeniu wyłącznika. Wtyczka nie jest prawidłowo podłączona i jest luźna, co powoduje słaby kontakt. Wyłącz urządzenie i podłącz je ponownie. Uszkodzona linia wewnętrzna lub przewód zasilający. Zadzwoń na telefon naprawczy. Cała maszyna przegrzewa się i działa urządzenie zabezpieczające. Zapoznaj się z instrukcją urządzenia zabezpieczającego. Produkt nie rozpyła wody Zablokowanie dyszy Zdejmij nasadkę dyszy za pomocą cienkiej igły. Brak wody w zbiorniku czystej wody Dodaj wodę do zbiornika czystej wody na czas Wewnętrzna linia wodna jest zatkana lub uszkodzona Skontaktuj się ze sprzedawcą lub serwisem posprzedażowym Nienormalny hałas Port zasysania produktu jest zablokowany lub wdychane są duże odpady. Usuń blokady na czas Awaria silnika Skontaktuj się ze sprzedawcą lub serwisem posprzedażnym Niskie ssanie lub brak absorpcji wody Za dużo brudnej wody w zbiorniku brudnej wody Wyczyść zbiornik brudnej wody na czas Rura jest uszkodzona Wymień wąż na nowy Brud blokuje ssanie Usuń blokady na czas Nieprawidłowa lub niedziałająca maszyna Temperatura otoczenia jest za wysoka lub za niska Przechowuj urządzenie w odpowiedniej temperaturze otoczenia (0°C-50°C). Skontaktuj się ze sprzedawcą lub serwisem posprzedażowym
GWARANCJA
O ile przepisy prawa nie stanowią inaczej, okres gwarancji na nasze produkty wynosi 2 lata od daty zakupu lub dostawy.
W przypadku jakichkolwiek problemów lub pytań można łatwo uzyskać dostęp do naszych stron pomocy, wskazówek dotyczących rozwiązywania problemów, często zadawanych pytań i instrukcji obsługi na naszej stronie internetowej: https://sav.hkoenig.com.
Wpisując nazwę referencyjną swojego urządzenia w pasku wyszukiwania, można uzyskać dostęp do całej dostępnej pomocy online, zaprojektowanej tak, aby jak najlepiej odpowiadała Twoim potrzebom.
Jeśli nadal nie możesz znaleźć odpowiedzi na swoje pytanie lub problem, kliknij "Czy odpowiedź rozwiązała Twój problem? Spowoduje to przejście do formularza wniosku o pomoc posprzedażną, który można wypełnić w celu potwierdzenia wniosku i uzyskania pomocy.
WARUNKI GWARANCJI
Gwarancja obejmuje wszystkie wady wynikające z normalnego użytkowania, zgodnie z przeznaczeniem i specyfikacjami zawartymi w instrukcji obsługi. Gwarancja nie obejmuje problemów związanych z opakowaniem lub transportem, gdy produkt jest wysyłany przez właściciela. Nie obejmuje również normalnego zużycia produktu, konserwacji lub wymiany części eksploatacyjnych.
WYŁĄCZENIE GWARANCJI
\- Akcesoria i części zużywalne (\*).
\- Normalna konserwacja urządzenia.
\- Wszelkie usterki wynikające z niewłaściwego użytkowania (wstrząsy, nieprzestrzeganie zaleceń dotyczących zasilania, złę warunki pracy itp.), niewłaściwej konserwacji lub nieprawidłowego użytkowania urządzenia, a także korzystania z nieodpowiednich akcesoriów.
\- Uszkodzenia zewnętrzne: pożar, zalanie wodą, przepięcie elektryczne itp.
\- Wszelkie urządzenia, które zostały zdemontowane, nawet częściowo, przez osoby do tego nieupoważnione (tj. użytkownika).
\- Produkty, których numer seryjny zaginał, jest uszkodzony lub nieczytelny, co uniemożliwia ich identyfikację.
\- Produkty podlegające wynajmowi, demonstracji lub wystawie.
(\*) Niektóre części urządzenia, zwane częściami zużywalnymi lub materiałami eksploatacyjnymi, ulegają zużyciu wraz z upływem czasu i częstotliwością korzystania z urządzenia. Zużycie to jest zjawiskiem normalnym, ale może być spotęgowane złymi warunkami użytkowania lub konserwacji urządzenia.
Części te nie są zatem objęte gwarancją.
Akcesoria dostarczone wraz z urządzeniem również nie są objęte gwarancją. Nie podlegają one wymianie ani zwrotowi. Niektóre akcesoria można jednak zakupić bezpośrednio na naszej stronie internetowej: https://sav.hkoenig.com/.
ŚRODOWISKO
OSTRZEŻENIE:

Nie należy wyrzucać tego urządzenia jako odpadu domowego. Gminy mają lokalny system zbiórki i odbioru tego typu produktów, dlatego należy poinformować się o prawidłowym sposobie utylizacji odpadów. W rzeczywistości produkty elektryczne i elektroniczne mogą zawierać niebezpieczne substancje, które mają szkodliwy wpływ na środowisko lub nasze zdrowie, dlatego należy je poddać recyklingowi. Symbol obok wskazuje, że sprzęt elektryczny i elektroniczny jest częścią selektywnej i zróżnicowanej zbiórki (reprezentowanej przez pojemnik z dwoma przekreślonymi kołami).
Adeva SAS / H.Koenig Europe - 8 rue Marc Seguin, 77290 Mitry-Mory, France www.hkoenig.com - https://kundenservice.hkoenig.com - Tél: +33 1 64 67 00 05


FR
Cet appareil se recycle
À DÉPOSER
EN MAGASIN

À DÉPOSER
EN DÉCHÉTERIE

Points de collecte sur www.quefairedemesdechets.fr
Privilégiez la réparation ou le don de votre appareil !
Instruction Manual
Manuel d'instructions Bedienungsanleitung Gebruiksaanwijzing Manual de instrucciones Manuale d'uso Manual de instruções Instrukcja obsługi natural_image
Exterior view of a HCoenig vacuum cleaner with digital display and coiled tubing (no text or symbols visible on device body)Hot water textile cleaner
Nettoyeur textile eau chaude Textilreiniger Heißwasser Heet water textielreiniger Limpiador textil de agua caliente Detergente tessile ad acqua calda Limpador de têxteis com água quente Gorąca woda do czyszczenia tekstyliów ENGLISH
natural_image
Line drawing of a medical or laboratory equipment setup with a coiled tube and control panel (no text or symbols)ATTENTION
Please read the user manual carefully. Clean and maintain the product in accordance with the instructions. In the event of a fault, first consult the troubleshooting guide. This warranty is void if the defect is caused by accidental damage, misuse, abuse, neglect, improper repair or modification by unauthorised persons, or failure to follow the operating instructions supplied with the product. This warranty does not apply to normal wear and tear or commercial use. In no event shall liability exceed the purchase price paid by the purchaser of the product. In no event shall there be any liability for any loss - direct or indirect - or any incidental or consequential damages arising out of or in connection with the use of the product.IMPORTANT SAFETY INSTRUCTIONS
BEFORE USING THIS APPLIANCE, READ ALL INSTRUCTIONS AND WARNINGS IN YOUR USER GUIDE AND ON THE DEVICE. When using an electrical appliance, basic precautions should always be taken, including the following: 1. Unplug the before to servicing, inspect it or move it. 2. Use a professional cleaning fluid without bubbles to avoid damaging the appliance. 3. Regularly remove dust from the socket 4. Plug the appliance in firmly when in use. 5. Unplug the appliance when not in use for extended periods. 6. ensure that the plug is not overloaded 7. Use the appliance at 220 V AC. 8. Stop use immediately, switch off the appliance and unplug it from the mains in the event of a fault or malfunction. 9. Stop using the appliance and consult the manual or customer service if you notice any abnormal noises or odours. 10. Do not not inhale any substances flammable such as cigarette butts. 11. Stop immediately from work if a foreign object blocks the spray nozzle. 12. Stop work immediately if a foreign body is inhaled. 13. If foreign objects block the clean water bucket or the waste water bucket, empty the water and clean before continuing to use the appliance. 14. Don't forget to unplug the power cord after use. 15. Cleaning and maintenance by the user must not be carried out by children unless they are over 8 years old and under adult supervision. 16. Keep the device and its cable out of the reach of children under 8. 17. When using electrical appliances, safety precautions must always be taken to prevent any risk of fire, electric shock and/or injury in the event of misuse. 18. Check that the voltage indicated on the appliance nameplate corresponds to that of your electrical installation. If this is not the case, contact your retailer and do not connect the appliance. 19. The appliance must not be used if it has been dropped, if there are visible signs of damage or if it is leaking. 20. Please keep this document available and give it to the future owner if you sell your appliance. 21. Do not use the appliance if its power cable or plug is damaged, if it is not working properly, if it has been damaged or if it has been dropped. If the cable is damaged, it must be replaced by the manufacturer or its agent, or by a qualified person to avoid any risk. 22. This appliance may be used by persons with reduced physical, sensory or mental capabilities or lack of experience and knowledge, provided that they have received supervision or instructions concerning the safe use of the appliance and that they understand the hazards involved. Children must not play with the appliance. 23. This appliance is intended for use in domestic and similar applications such as : \- kitchen areas in shops, offices and other work environments; \- farms ; \- in hotels, motels and other residential environments; - guest rooms. 24. The appliance is not intended to be operated using an external timer or a separate remote control system. 25. Never immerse the appliance, its power cord or the mains plug in water or any other liquid. Safety advice : 1. Do not damage the power cord. Do not pull it when handling it. 2. Do not use the appliance if the power cord and plug are broken or if the plug comes loose. 3. Do not touch or connect or disconnect the appliance with wet hands. 4. Do not allow small children to touch the power plug. 5. Do not spray pesticides, hair dyes, lubricants or other liquids. 6. Do not inhale heat from petroleum gases or dry dust. 7. Do not dismantle, repair or modify the appliance yourself. 8. Do not use the appliance in dangerous situations such as rain or strong winds. 9. Never immerse the appliance, its power cord or the mains plug in water or any other liquid. 10. Avoid breathing in particles of dirt or dust that could carry infectious diseases. 11. Do not use the appliance without a waste water bucket 12. Do not use for purposes other than cleaning 13. Do not bend over or roll 14. Keep the machine out of the reach of small children. 15. Do not allow children to use or play with it. 16. Do not use outdoors 17. Do not continue to use it if the suction inlet is blocked. 18. To avoid electric shock, do not pull on the power cord to connect or disconnect it.Product introduction
 Body :
1. Water tank 2. Cleaning brush 3. Control panel 4. Dirty water tank 5. appliance body 6. Flexible 7. Water spray button 8. Handle support 9. Support for cable reel 10. Flexible locking with the appliance 11. Suspension hookAccessories
 1  2  3  4  5  6  7  8 1. Standard brush 2. Wide trajectory brush 3. T-shaped brush 4. Self-cleaning brush 5. Instruction manual 6. Handle support 7. Handle hook 8. HosePRODUCT PARAMETERS :
| Rated operating voltage | 25V 50Hz | Engine type | Wet and dry dust extraction motor |
| Rated power | 1200W | Length of hose | 1,8m |
| Degree of vacuum | 15Kpa | Tightness level | IPX4 |
| Noise | </= 80dB | Net weight of machine | 4.2kg |
| Clean water tank capacity | 1800mL | Working environment T°C | 5-50°C |
| Dirty water tank capacity | 950mL | Machine size | 320*226*327mm |
| Length of electrical cable | 5m | Heating time | 15s |
PRÉPARATION
1. Remove the suspension hook and handle support. natural_image
Two 3D mechanical component diagrams shown in wireframe and perspective views (no text or symbols)natural_image
Line drawing of a mechanical mixing or cleaning device (no text or symbols)natural_image
Line drawing of a mechanical device with no visible text or symbolsnatural_image
Cross-sectional technical diagram of a mechanical assembly (no visible text or labels)natural_image
Simple line drawing of a mechanical component with an arrow indicating motion (no text or symbols)INSTRUCTIONS
1. Remove the clean water tank from the body. natural_image
Line drawing of a mechanical device with a handle and base, showing no text or symbolsnatural_image
Technical line drawing of a mechanical device with a downward arrow indicating motion (no text or symbols)natural_image
Line drawing of a plug inserted into an electrical outlet with three switches (no text or symbols)natural_image
Simple line drawing of a kitchen appliance with a side table and a stand (no text or symbols)natural_image
Diagram of a handheld device with spray and spray pattern (no text or symbols)natural_image
Simple line drawing of a mechanical device with a lever and base plate (no text or symbols)natural_image
Simple line drawing of a mechanical device with no text or symbolsnatural_image
Illustration of a plug inserted into an electrical outlet (no text or symbols)natural_image
Simple line drawing of a mechanical component with no text or symbolsINSTRUCTIONS FOR USE
To avoid obstructing the air duct, please remove any large pieces of rubbish from the area, such as large pieces of paper, wrapping film, etc. This appliance can be used on soft surfaces such as fabrics and lint. It is not recommended for use on hard surfaces. 1. Press the switch to start the machine and begin work; press the switch again to switch the machine off. 2. Power: The default speed is "Standard", press the "Power" button to switch to "Turbo" speed. Press this button again to return to "Standard" speed, and vice versa. 3. Temp: The default mode is "Warm", press the "Temp" button to set the mode to "Hot". Press this button again to switch to "Warm" mode. 4. Invitation to fill the waste water tank: When the wastewater tank is full, all the lights flash, the "drip" buzzer sounds three times in succession to enter standby mode. 5. Set the mode according to demand, hold the cleaning brush, press and hold the "water spray switch" button on the bottom of the cleaning brush knob, the water spray head continues to spray water outwards; release the button, the water spray stops. 6. For ordinary stains, pour the cleaning liquid into the cleaning tank and spray water onto the stains. After spraying the water, the cleaning brush is used to wipe the stains several times, and the waste water is sucked into the waste water canister and vacuumed several times to clean the stains quickly. After cleaning, it is advisable to clean again with water to prevent the cleaning liquid from remaining in the fabric. 7. For stubborn stains, first use a special cleaning solution to spray onto the fabric above the stain, spray after using the cleaning brush several times, the cleaning solution will completely dissolve the stain, open the machine to clean the liquid and sewage water into the sewage water tank, vacuuming several times can quickly clean the stain. 8. After cleaning, use the self-cleaning brush head and clean the hose in general. Storing the power cord and hose : 1. This product has a long power cord. Once the product is in use, the power cord can be wrapped around the back of the machine. 2. After using the product, the hose can be rolled up in the storage slot at the bottom of the machine. natural_image
Technical line drawing of a mechanical device with coiled tubing and mounting bracket (no text or symbols)ATTENTION :
1. The power cord on this product is long, so be careful not to trip over it when using it. 2. Do not allow children to sit on the machine. 3. Please ensure that you use this product safely. Do not immerse the power cord in water. 4. Do not use the machine at ambient temperatures below 0°C-50°C. 5. 5. it is strictly forbidden to change the entire machine, accessories and wires.MAINTENANCE
ATTENTION :
Switch it off and unplug it before servicing. Body cleaning : Ordinary stains can be removed with a damp cloth. Stubborn dirt can be wiped off with a damp cloth soaked in detergent, then wiped with a dry cloth soaked in water. After each use : Remove them from the body, rinse thoroughly with water and air dry. natural_image
Line drawings of five different mechanical components or housing designs, no text or symbols presentnatural_image
Simple line drawing of two objects: a triangular prism and a cylindrical object with a long line extending from it (no text or symbols)natural_image
Diagram showing a mechanical device before and after assembly, with no visible text or symbolsnatural_image
Diagram showing a mechanical device before and after assembly, with no visible text or symbols.natural_image
Line drawing of a firearm with two upright arms (no text or symbols)TROUBLESHOOTING
If a fault is detected during use, please refer to the following table:WARRANTY
The warranty period for our products is 2 years, unless otherwise stated, starting from the date of initial purchase or the date of delivery. If you have any problems or questions, you can easily access our help pages, troubleshooting tips, FAQ, and user manuals on our service site: https://sav.hkoenig.com. By typing the reference name of your device in the search bar, you can access all available online support, designed to best meet your needs. If you still cannot find an answer to your question or problem, then click on “Did the answer solve your problem?”. This will direct you to the Customer Support Request Form, which you can fill out to validate your request and get help.WARRANTY CONDITIONS
The warranty covers all failures occurring under normal use, in accordance with the usage and specifications in the user's manual. This warranty does not apply to packaging or transportation problems during shipment of the product by the owner. It also does not include normal wear and tear of the product, nor maintenance or replacement of consumable parts.EXCLUSION OF WARRANTY
- Accessories and wearing parts (\*). - Normal maintenance of the device. - All breakdowns resulting from improper use (shocks, failure to comply with power supply recommendations, poor conditions of use, etc.), insufficient maintenance or misuse of the device, as well as the use of unsuitable accessories. - Damage of external origin: fire, water damage, electrical surge, etc. - Any equipment that has been disassembled, even partially, by persons other than those authorized to do so (notably the user). - The products whose serial number would be missing, deteriorated or illegible that would not allow its identification. - The products subjected to leasing, demonstration, or exhibition. (\*) Some parts of your device, called wear parts or consumables, deteriorate with time and frequency of use of your device. This wear and tear are normal but can be accentuated by poor conditions of use or maintenance of your device. These parts are therefore not covered by the warranty. The accessories supplied with the device are also excluded from the warranty. They cannot be exchanged or refunded. However, some accessories can be purchased directly through our website: https://sav.hkoenig.com/.ENVIRONMENT
CAUTION:  Do not dispose of this product as it has with other household products. There is a separation of this waste product into communities, you will need to inform your local authorities about the places where you can return this product. In fact, electrical and electronic products contain hazardous substances that have harmful effects on the environment or human health and should be recycled. The symbol here indicates that electrical and electronic equipment should be chosen carefully, a wheeled waste container is marked with a cross. Adeva SAS / H.Koenig Europe - 8 rue Marc Seguin, 77290 Mitry-Mory, France www.hkoenig.com - https://en.hkoenig.com - Tél: +33 1 64 67 00 05FRANÇAIS
natural_image
Line drawing of a medical or laboratory equipment setup with a coiled tube and control panel (no text or symbols)ATTENTION
Veuillez lire attentivement le manuel d'utilisation. Nettoyez et entretenez le produit conformément aux instructions. En cas d'anomalie, consultez d'abord le guide de dépannage. Cette garantie est annulée si le défaut est causé par un dommage accidentel, une mauvaise utilisation, un abus, une négligence, une réparation ou une modification incorrecte par des personnes non autorisées, ou un non-respect des instructions d'utilisation fournies avec le produit. Cette garantie ne s'applique pas à l'usure normale ou à l'utilisation commerciale. En aucun cas, la responsabilité ne peut excéder le prix d'achat payé par l'acheteur du produit. En aucun cas, il n'y aura de responsabilité pour toute perte - directe ou indirecte - ou tout dommage accessoire ou consécutif résultant de l'utilisation du produit ou en rapport avec celle-ci.CONSIGNES DE SÉCURITÉ IMPORTANTES
AVANT D'UTILISER CET APPAREIL, LISEZ TOUTES LES INSTRUCTIONS ET TOUS LES AVERTISSEMENTS
FIGURANT DANS VOTRE GUIDE DE L'UTILISATEUR ET SUR L'APPAREIL.
Lors de l'utilisation d'un appareil électrique, des précautions de base doivent toujours être prises, notamment les suivantes : 1. Débranchez l'appareil avant de l'entretenir, de l'inspecter ou de le déplacer. 2. Utilisez un liquide de nettoyage professionnel sans bulles pour éviter d'endommager l'appareil. 3. Éliminer régulièrement la poussière sur la prise 4. Branchez fermement l'appareil lorsqu'il est utilisé. 5. Débranchez l'appareil lorsqu'il n'est pas utilisé pendant une longue période. 6. veillez à ce que la prise ne soit pas surchargée 7. Utiliser l'appareil sous une tension de 220 V CA 8. Arrêter immédiatement l'utilisation, éteindre l'appareil et le débrancher en cas d'anomalie ou de panne. 9. Cessez d'utiliser l'appareil et consultez le manuel ou le service clientèle en cas de bruits ou des odeurs anormaux 10. Ne pas inhaler de substances inflammables et explosives telles que les mégots de cigarettes. 11. Cessez immédiatement de travailler si un corps étranger bloque la buse de pulvérisation. 12. Arrêter immédiatement le travail en cas d'inhalation d'un corps étranger. 13. Lorsque des corps étrangers bloquent le seau d'eau propre ou le seau d'eaux usées, videz l'eau et nettoyez avant de continuer à utiliser l'appareil. 14. N'oubliez pas de débrancher le cordon d'alimentation après utilisation. 15. Le nettoyage et l'entretien par l'utilisateur ne doivent pas être effectués par des enfants, à moins qu'ils ne soient âgés de plus de 8ans et qu'ils soient sous la surveillance d'un adulte. 16. Conserver l'appareil et son câble hors de portée des enfants âgés de moins 8ans. 17. Lors de l'utilisation d'appareils électriques, des précautions de sécurité doivent toujours être prises pour prévenir tout risque d'incendie, de choc électrique et/ou de blessure en cas de mauvaise utilisation. 18. Vérifier que le voltage indiqué sur la plaque signalétique de l'appareil correspond bien à celui de votre installation électrique. Si ce n'est pas le cas, adressez-vous au revendeur et ne branchez pas l'appareil. 19. L'appareil ne doit pas être utilisé s'il a chuté, s'il y a des signes visibles de dommages ou en cas de fuite. 20. Veuillez conserver ce document à disposition et le remettre au futur propriétaire en cas de cession de votre appareil. 21. N'utilisez pas l'appareil si son câble d'alimentation ou sa prise est endommagée, s'il ne fonctionne pas correctement, s'il a été abimé ou s'il est tombé. Si le câble d'alimentation est endommagé, il doit être remplacé par le fabricant ou son agent ou encore par une personne qualifiée afin d'éviter tout risque. 22. Cet appareil peut être utilisé par des personnes ayant des capacités physiques, sensorielles ou mentales réduites ou un manque d'expérience et de connaissances à condition qu'elles aient reçu une supervision ou des instructions concernant l'utilisation de l'appareil en toute sécurité et qu'elles comprennent les dangers encourus. Les enfants ne doivent pas jouer avec l'appareil. 23. Cet appareil est destiné à être utilisé pour des applications domestiques et similaires telles que : \- les zones de cuisine dans les magasins, bureaux et autres environnements de travail ; \- les fermes ; \- dans des hôtels, motels et d'autres environnements de type résidentiel ; \- les chambres d'hôtes. 24. L'appareil n'est pas destiné à être mis en fonctionnement au moyen d'une minuterie extérieure ou par un système de commande à distance séparé. 25. Ne plongez jamais l'appareil, son cordon d'alimentation ou la prise de courant dans l'eau ou tout autre liquide. Conseils de sécurité : 1. Ne pas endommager le cordon d'alimentation. Ne le tirez pas lorsque vous le manipulez 2. Ne pas utiliser l'appareil si le cordon d'alimentation et la fiche sont cassés ou si la fiche se détache. 3. Ne pas toucher ou brancher et débrancher l'appareil avec des mains mouillées. 4. Ne pas laisser les enfants en bas âge toucher la fiche d'alimentation. 5. Ne pas pulvériser de pesticides, de colorants capillaires, de lubrifiants ou d'autres liquides. 6. Ne pas inhaler la chaleur des gaz de pétrole ou la poussière sèche. 7. Ne pas démonter, réparer ou transformer l'appareil soi-même. 8. Ne pas utiliser l'appareil dans des situations dangereuses telles que l'eau de pluie et le vent fort. 9. Ne plongez jamais l'appareil, son cordon d'alimentation ou la prise de courant dans l'eau ou tout autre liquide. 10. Évitez de respirer des particules de saleté ou de poussière potentiellement porteuses de maladies infectieuses. 11. Ne pas utiliser l'appareil sans un seau à eaux usées 12. Ne pas utiliser à des fins autres que le nettoyage 13. Ne pas se pencher ou rouler 14. Ne pas utiliser la machine à la portée des jeunes enfants. 15. Ne pas laisser les enfants l'utiliser et jouer avec. 16. Ne pas l'utiliser à l'extérieur 17. Ne pas continuer à l'utiliser si l'entrée d'aspiration est bloquée. 18. Ne pas tirer sur le cordon d'alimentation pour le brancher ou le débrancher afin de ne pas provoquer de choc électrique.Introduction du produit
 Corps :
1. Réservoir d'eau 2. Brosse de nettoyage 3. Panneau de commande 4. Réservoir d'eau sale 5. corps de l'appareil 6. Flexible 7. Bouton de pulvérisation d'eau 8. Support de poignée 9. Support pour enrouleur de cable 10. Verrouillage flexible avec l'appareil 11. Crochet de suspensionAccessoires
 1  2  3  4  5  6  7  8 1. Brosse standard 2. Brosse à large trajectoire 3. Brosse en forme de T 4. Brosse autonettoyante 5. Manuel d'instruction 6. Support de poignée 7. Crochet de poignée 8. Tuyau PARAMÈTRES DU PRODUIT :| Tension de service nominale | 25V 50Hz | Type de moteur | Moteur d'aspiration de poussières sèches et humides |
| Puissance nominale | 1200W | Longueur du tuyau | 1.8m |
| Degré de vide | 15Kpa | Niveau d'étanchéité | IPX4 |
| Bruit | </= 80dB | Poids net de la machine | 4,2kg |
| Capacité du réservoir d'eau propre | 1800mL | Environnement de travail T°C | 5-50°C |
| Capacité du réservoir d'eau sale | 950mL | Taille de la machine | 320*226*327mm |
| Longueur de la ligne électrique | 5m | Temps de chauffage | 15s |
PRÉPARATION
1. Retirer le crochet de suspension et le support de poignée. natural_image
Two 3D mechanical component diagrams shown in wireframe and cutaway views (no text or symbols)natural_image
Line drawing of a kitchen mixer with control panel and fan (no text or symbols)natural_image
Technical line drawing of a mechanical device with no visible text or symbolsnatural_image
Cross-sectional technical diagram of a mechanical assembly (no visible text or labels)natural_image
Simple line drawing of a mechanical component with an arrow indicating motion (no text or symbols)INSTRUCTIONS
1. Retirer le réservoir d'eau propre du corps. natural_image
Line drawing of a mechanical device with a scroll wheel and handle (no text or symbols)natural_image
Line drawing of a mechanical device with no visible text or symbolsnatural_image
Technical line drawing of a mechanical device with a downward arrow indicating motion (no text or symbols)natural_image
Line drawing of a plug inserted into a wall-mounted electrical outlet (no text or symbols)natural_image
Simple line drawing of a mechanical device with no text or symbolsnatural_image
Diagram of a handheld device with spray and spray pattern (no text or symbols)natural_image
Simple line drawing of a mechanical device with a lever and base plate (no text or symbols)natural_image
Simple line drawing of a mechanical device with no text or symbolsnatural_image
Illustration of a plug inserted into a wall-mounted electrical outlet (no text or symbols)natural_image
Simple line drawing of a mechanical component with no text or symbolsINSTRUCTIONS D'UTILISATION
Afin d'éviter d'obstruer le conduit d'air, veuillez nettoyer les gros déchets présents dans la zone, tels que les gros morceaux de papier, les films d'emballage, etc. Cet appareil peut être utilisé sur des surfaces douces telles que les tissus et les peluches. Il n'est pas recommandé de l'utiliser sur des surfaces dures. 1. Appuyez sur l'interrupteur pour démarrer la machine et commencer à travailler ; appuyez à nouveau sur l'interrupteur pour éteindre la machine. 2. Puissance : La vitesse par défaut est "Standard", appuyez sur le bouton "Puissance" pour passer à la vitesse "Turbo". Appuyez à nouveau sur ce bouton pour revenir à la vitesse "Standard", et inversement. 3. Temp : Le mode par défaut est "Warm", appuyez sur le bouton "Temp" pour régler le mode "Hot". Appuyez à nouveau sur cette touche pour passer au mode "Chaud". 4. Invitation à remplir le réservoir d'eaux usées : Lorsque le réservoir d'eaux usées est plein, tous les voyants clignotent, l'avertisseur sonore "goutte à goutte" se fait entendre trois fois de suite pour passer en mode d'attente. 5. Réglez le mode en fonction de la demande, tenez la brosse de nettoyage, appuyez et maintenez le bouton "water spray switch" sur le bas du bouton de la brosse de nettoyage, la tête de pulvérisation d'eau continue à pulvériser de l'eau vers l'extérieur ; relâchez le bouton, la pulvérisation d'eau s'arrête. 6. Pour les taches ordinaires, versez le liquide de nettoyage dans le réservoir de nettoyage et vaporisez de l'eau sur les taches. Après avoir pulvérisé l'eau, la brosse de nettoyage est utilisée pour essuyer à plusieurs reprises, et les taches et les eaux usées sont aspirées dans la boîte à eaux usées et aspirées plusieurs fois pour nettoyer rapidement les taches. Après le nettoyage, il est recommandé de nettoyer à nouveau avec de l'eau pour éviter que le liquide de nettoyage ne reste dans le tissu. 7. Pour les taches tenaces, utilisez d'abord une solution de nettoyage spéciale à pulvériser sur le tissu au-dessus de la tache, pulvérisez après l'utilisation de la brosse de nettoyage à plusieurs reprises, la solution de nettoyage dissoudra complètement la tache, ouvrez la machine pour nettoyer le liquide et l'eau d'égout dans le réservoir d'eau d'égout, l'aspiration répétée plusieurs fois peut nettoyer rapidement la tache. 8. Après le nettoyage, utilisez la tête de brosse autonettoyante et procédez au nettoyage général du tuyau. Rangement du cordon d'alimentation et du tuyau : 1. Ce produit est doté d'un long cordon d'alimentation. Une fois le produit utilisé, le cordon d'alimentation peut être enroulé autour de l'arrière de la machine. 2. Après utilisation du produit, le tuyau peut être enroulé dans la fente de stockage située au bas de la machine. natural_image
Technical line drawing of a mechanical device with coiled tubing and mounting bracket (no text or symbols)ATTENTION :
1. Le cordon d'alimentation de ce produit est long, veillez à le faire trébucher lorsque vous l'utilisez. 2. Ne laissez pas les enfants s'asseoir sur la machine. 3. Veillez à la sécurité lors de l'utilisation de ce produit. Ne mettez pas le cordon d'alimentation dans l'eau. 4. N'utilisez pas la machine à une température ambiante inférieure à 0°C-50°C. 5. 5. il est strictement interdit de changer l'ensemble de la machine, des accessoires et des fils. Remplacement ;ENTRETIEN
ATTENTION :
Arrêtez de le faire fonctionner et débranchez-le avant de procéder à l'entretien. Nettoyage du corps : Les taches ordinaires peuvent être nettoyées avec un chiffon humide. La saleté tenace peut être essuyée avec un chiffon humide imbibé de détergent, puis nettoyée avec un chiffon sec trempé dans l'eau. Après chaque utilisation : Retirez-les du corps, rincez-les soigneusement à l'eau et séchez-les à l'air libre. natural_image
Line drawings of five different mechanical components or housing designs (no text or symbols)natural_image
Simple line drawing of two mechanical components or tools, one tilted and one with a long rod extending (no text or symbols)natural_image
Simple line drawing of a cylindrical object with a pointed tip and a curved line extending from it (no text or symbols)natural_image
Diagram showing a mechanical device before and after assembly, with no visible text or symbolsnatural_image
Diagram showing a mechanical device before and after assembly, with no visible text or symbolsnatural_image
Line drawing of a firearm with two upright arms (no text or symbols)DÉPANNAGE
Si une anomalie est constatée lors de l'utilisation, veuillez vous référer au tableau suivant :| STATUT | CAUSES POSSIBLES | MÉTHODE DE TRAITEMENT |
| La machine ne fonctionne pas après la mise en marche de l'interrupteur. | La fiche n'est pas correctement branchée et est lâche, ce qui entraîne un mauvais contact. | Éteignez l'appareil et rebranchez-le. |
| La ligne interne ou le cordon d'alimentation est rompu. | Appelez le téléphone de réparation. | |
| L'ensemble de la machine surchauffe et le dispositif de protection fonctionne. | Se référer aux instructions du dispositif de protection. | |
| Le produit ne pulvérise pas d'eau | Blocage de la buse | Retirer le bouchon de la buse à l'aide d'une aiguille fine. |
| Manque d'eau dans le réservoir d'eau propre | Ajouter de l'eau au réservoir d'eau propre à temps | |
| La conduite d'eau interne est obstruée ou cassée | Contacter le commerçant ou le service après-vente | |
| Bruit anormal | L'orifice d'aspiration du produit est bloqué ou des déchets importants sont inhalés. | Eliminer les blocages à temps |
| Défaillance du moteur | Contacter le commerçant ou le service après-vente | |
| Faible aspiration ou absence d'absorption d'eau | Trop d'eau sale dans le réservoir d'eau sale | Nettoyer le réservoir d'eau sale à temps |
| Le tuyau est cassé | Remplacer le tuyau par un nouveau | |
| La saleté bloque l'aspiration | Eliminer les blocages à temps | |
| Machine anormale ou inopérante | La température ambiante est trop élevée ou trop basse | Maintenez l'appareil à une température ambiante appropriée (0°C-50°C). |
| Contacter le marchand ou le service après-vente |
GARANTIE
La durée de garantie de nos produits est de 2 ans, sauf décret en vigueur, à compter de la date d'achat initiale ou la date de livraison. En cas de problèmes ou d'interrogations, vous pouvez facilement accéder à nos pages d'aides, conseils de dépannage, FAQ et modes d'emplois sur notre site SAV : https://sav.hkoenig.com. En tapant le nom de référence de votre appareil dans la barre de recherche, vous accédez à tous les supports en ligne disponibles, conçus pour vous répondre au mieux à vos besoins. Si vous ne trouvez toujours pas de réponse à votre question ou votre problème, alors cliquez sur « Est-ce que la réponse a résolu votre problème ? ». Vous accéderez alors au formulaire de demande d'assistance SAV, qu'il vous suffira de compléter pour valider votre demande et obtenir de l'aide.CONDITIONS DE GARANTIE
La garantie couvre l'ensemble des pannes survenant dans le cadre d'une utilisation normale, conforme aux usages et spécifications présentes sur le manuel d'utilisation. Cette garantie ne s'applique pas aux problèmes d'emballage ou de transport pendant l'expédition du produit par son propriétaire. Elle n'inclut également pas l'usure normale du produit, ni la maintenance ou le remplacement de pièces consommables.EXCLUSION DE GARANTIE
- Les accessoires et les pièces d'usure (\*). - L'entretien normal de l'appareil. - Toutes pannes survenant par suite d'une mauvaise utilisation (chocs, non-respect des préconisations d'alimentation électrique, mauvaises conditions d'utilisation, etc.), d'un entretien insuffisant ou d'un détournement de fonction de l'appareil, ainsi que l'usage d'accessoires non appropriés. \- Les dommages d'origine externe : incendie, dégâts des eaux, surtension électrique, etc. \- Tout matériel qui aura été démonté même partiellement par des personnes autres que celles habilitées (notamment l'utilisateur). \- Les produits dont le numéro de série serait absent, détérioré ou illisible que ne permettrait pas son identification. \- Les produits soumis à la location, à la démonstration ou à l'exposition. (\*) Certaines pièces de votre appareil dites pièces d'usure ou consommables se détériorent avec le temps et la fréquence d'usage de votre appareil. Cette usure est normale, mais peut être accentuée par des mauvaises conditions d'utilisation ou entretien de votre appareil. Ces pièces ne sont donc pas couvertes par la garantie. Les accessoires fournis avec l'appareil sont également exclus du champ de la garantie. Ils ne peuvent donc être ni échangés, ni remboursés. Toutefois, certains accessoires peuvent être directement achetés via notre site : https://sav.hkoenig.com/.ENVIRONNEMENT
ATTENTION :
 Vous ne devez pas vous débarrasser de cet appareil avec vos déchets ménagers. Un système de collecte sélective pour ce type de produit est mis en place par les communes, vous devez vous renseigner auprès de votre mairie afin d'en connaître les emplacements. En effet, les produits électriques et électroniques peuvent contenir des substances dangereuses qui ont des effets néfastes sur l'environnement ou la santé humaine et doivent être recyclés. Le symbole ci-contre indique que les équipements électriques et électroniques font l'objet d'une collecte sélective, il représente une poubelle sur roues barrée d'une croix. Adeva SAS / H.Koenig Europe - 8 rue Marc Seguin, 77290 Mitry-Mory, France www.hkoenig.com - https://sav.hkoenig.com - Tél: +33 1 64 67 00 05DEUTCH
natural_image
Line drawing of a medical or laboratory equipment setup with a coiled tube, control panel, and monitor (no text or symbols)ACHTUNG
Bitte lesen Sie die Bedienungsanleitung sorgfältig durch. Reinigen und pflegen Sie das Produkt gemäß den Anweisungen. Schlagen Sie bei Problemen zuerst in der Anleitung zur Fehlerbehebung nach. Diese Garantie erlischt, wenn der Defekt durch Unfallschäden, Missbrauch, falsche Verwendung, Vernachlässigung, unsachgemäße Reparatur oder Modifikation durch nicht autorisierte Personen oder durch Nichtbeachtung der mit dem Produkt gelieferten Gebrauchsanweisungen verursacht wurde. Diese Garantie gilt nicht für normalen Verschleiß oder kommerzielle Nutzung. In keinem Fall wird die Haftung den vom Käufer für das Produkt gezahlten Kaufpreis übersteigen. In keinem Fall besteht eine Haftung für irgendwelche - direkten oder indirekten - Verluste oder Neben- oder Folgeschäden, die sich aus oder im Zusammenhang mit der Verwendung des Produkts ergeben.WICHTIGE SICHERHEITSHINWEISE
LESEN SIE VOR DER BENUTZUNG DIESES GERÄTS ALLE ANWEISUNGEN UND WARNUNGEN DURCH, DIE SICH IN IHREM BENUTZERHANDBUCH UND AUF DEM GERÄT BEFINDEN. Bei der Verwendung eines elektrischen Geräts sollten immer grundlegende Vorsichtsmaßnahmen getroffen werden, einschließlich der folgenden: 1. Ziehen Sie den Stecker des Gerät vor von es zu warten, es zu inspizieren oder zu bewegen. 2. Verwenden Sie eine professionelle, blasenfreie Reinigungsflüssigkeit, um Schäden am Gerät zu vermeiden. 3. Entfernen Sie regelmäßig Staub von der Steckdose 4. Schließen Sie das Gerät fest an, wenn es verwendet wird. 5. Trennen Sie das Gerät vom Stromnetz, wenn es längere Zeit nicht benutzt wird. 6. achten Sie darauf, dass die Steckdose nicht überlastet ist 7. Verwenden Sie das Gerät mit einer Spannung von 220 V Wechselstrom. 8. Unterbrechen Sie sofort den Gebrauch, schalten Sie das Gerät aus und ziehen Sie den Stecker, wenn eine Anomalie oder ein Fehler auftritt. 9. Stellen Sie die Benutzung des Geräts ein und konsultieren Sie das Handbuch oder den Kundendienst, wenn Sie ungewöhnliche Geräusche oder Gerüche wahrnehmen. 10. Nicht nicht inhalieren von Substanzen entflammbar und explosive Stoffe wie Zigarettenkippen. 11. Beenden Sie sofort von arbeiten wenn ein Fremdkörper die Sprühdüse blockiert. 12. Die Arbeit sofort einstellen, wenn ein Fremdkörper eingeatmet wird. 13. Wenn Fremdkörper den Frischwasser- oder den Abwassereimer blockieren, lassen Sie das Wasser ab und reinigen Sie es, bevor Sie das Gerät weiter benutzen. 14. Denken Sie daran, das Netzkabel nach dem Gebrauch aus der Steckdose zu ziehen. 15. Die Reinigung und Wartung durch den Nutzer sollte nicht von Kindern durchgeführt werden, es sei denn, sie sind älter als 8 Jahre und werden von einem Erwachsenen beaufsichtigt. 16. Bewahren Sie das Gerät und sein Kabel außerhalb der Reichweite von Kindern unter 8 Jahren auf. 17. Bei der Verwendung von Elektrogeräten müssen immer Sicherheitsvorkehrungen getroffen werden, um bei unsachgemäßem Gebrauch Feuer, Stromschläge und/oder Verletzungen zu vermeiden. 18. Überprüfen Sie, ob die auf dem Typenschild des Geräts angegebene Spannung mit der Spannung Ihrer elektrischen Anlage übereinstimmt. Wenn dies nicht der Fall ist, wenden Sie sich an Ihren Händler und schließen Sie das Gerät nicht an. 19. Das Gerät darf nicht benutzt werden, wenn es heruntergefallen ist, sichtbare Anzeichen von Schäden aufweist oder undicht ist. 20. Bitte halten Sie dieses Dokument zur Verfügung und geben Sie es dem zukünftigen Besitzer, wenn Sie Ihr Gerät weitergeben. 21. Verwenden Sie die Kamera nicht, wenn das Netzkabel oder der Stecker beschädigt ist, wenn sie nicht richtig funktioniert, wenn sie beschädigt wurde oder heruntergefallen ist. Wenn das Kabel Wenn das Netzkabel beschädigt ist, muss es vom Hersteller oder seinem Vertreter oder von einer qualifizierten Person ausgetauscht werden, um Risiken zu vermeiden. 22. Dieses Gerät kann von Personen mit eingeschränkten physischen, sensorischen oder geistigen Fähigkeiten oder Mangel an Erfahrung und Wissen benutzt werden, sofern sie beaufsichtigt oder angewiesen wurden, das Gerät sicher zu benutzen und die damit verbundenen Gefahren zu verstehen. Kinder sollten nicht mit dem Gerät spielen. 23. Dieses Gerät ist für Haushalts- und ähnliche Anwendungen wie : a. Küchenbereiche in Geschäften, Büros und anderen Arbeitsumgebungen ; b. Bauernhöfe ; c. in Hotels, Motels und anderen wohnungsähnlichen Umgebungen ; d. Gästezimmer. 24. Das Gerät ist nicht dafür vorgesehen, über eine externe Zeitschaltuhr oder über ein separates Fernsteuerungssystem in Betrieb genommen zu werden. 25. Tauchen Sie das Gerät, das Netzkabel oder den Netzstecker niemals in Wasser oder andere Flüssigkeiten.Sicherheitstipps :
1. Beschädigen Sie das Netzkabel nicht. Ziehen Sie nicht daran, wenn Sie es handhaben 2. Benutzen Sie das Gerät nicht, wenn das Netzkabel und der Stecker gebrochen sind oder wenn sich der Stecker löst. 3. Berühren Sie das Gerät nicht und stecken Sie es nicht mit nassen Händen ein und ziehen Sie es nicht aus der Steckdose. 4. Kleinkinder dürfen den Netzstecker nicht berühren. 5. Nicht mit Pestiziden, Haarfärbemitteln, Schmiermitteln oder anderen Flüssigkeiten besprühen. 6. Atmen Sie nicht die Hitze von Petroleumgasen oder trockenem Staub ein. 7. Nehmen Sie das Gerät nicht selbst auseinander, reparieren Sie es nicht und bauen Sie es nicht selbst um. 8. Verwenden Sie das Gerät nicht in gefährlichen Situationen wie Regenwasser oder starkem Wind. 9. Tauchen Sie das Gerät, das Netzkabel oder den Netzstecker niemals in Wasser oder andere Flüssigkeiten. 10. Vermeiden Sie das Einatmen von Schmutz- und Staubpartikeln, die möglicherweise Infektionskrankheiten übertragen können. 11. Benutzen Sie das Gerät nicht ohne einen Eimer für Abwasser. 12. Nicht für andere Zwecke als zur Reinigung verwenden 13. Nicht bücken oder rollen 14. Benutzen Sie die Maschine nicht in der Reichweite von kleinen Kindern. 15. Lassen Sie nicht zu, dass Kinder es benutzen und damit spielen. 16. Nicht im Freien verwenden 17. Verwenden Sie ihn nicht weiter, wenn der Saugeinlass blockiert ist. 18. Ziehen Sie beim Einstecken oder Herausziehen des Netzkabels nicht am Kabel, um einen Stromschlag zu vermeiden. Einführung des Produkts  Körper :
1 Wassertank 2 Reinigungsbürste 3 Bedienfeld 4 Schmutziger Wassertank 5 Körper 6 Flexibel 7 Wassersprühknopf 8 Halterung für den Griff 9 Halterung für Kabelaufroller 10 Flexible Verriegelung mit dem Gerät 11 AufhängehakenZubehör
1. Standardbürste 2. Bürste mit breiter Bahn 3. T-förmige Bürste 4. Selbstreinigende Bürste 5. Anleitung 6. Halterung für den Griff 7. Griffithaken 8. RohrPRODUKTPARAMETER :
| Nennbetriebsspannung | 25V 50Hz | Art des Motors | Saugmotor für trockenen und feuchten Staub |
| Nennleistung | 1200W | Schlauchlänge | 1,8m |
| Vakuumgrad | 15Kpa | Dichtungsniveau | IPX4 |
| Geräusch | </= 80dB | Nettogewicht der Maschine | 4,2kg |
| Kapazität des Frischwassertanks | 1800mL | Arbeitsumgebung T°C | 5-50°C |
| Kapazität des Schmutzwassertanks | 950mL | Größe der Maschine | 320*226*327mm |
| Länge des Elektrokabels | 5m | Aufheizzeit | 15s |
VORBEREITUNG
1. Entfernen Sie den Aufhängehaken und die Griffhalterung. natural_image
Two 3D mechanical component diagrams shown in wireframe and cutaway views (no text or symbols)natural_image
Line drawing of a kitchen mixer with control panel and fan (no text or symbols)natural_image
Line drawing of a mechanical device with no visible text or symbolsnatural_image
Cross-sectional technical diagram of a mechanical assembly (no visible text or labels)natural_image
Simple line drawing of a mechanical component with an arrow indicating motion (no text or symbols)ANLEITUNG
1. Nehmen Sie den Frischwassertank vom Körper ab. natural_image
Line drawing of a mechanical device with a handle and base, showing no text or symbolsnatural_image
Line drawing of a mechanical component or device with no visible text, numbers, or symbols.natural_image
Technical line drawing of a mechanical device with a downward arrow indicating motion (no text or symbols)natural_image
Diagram of a plug inserted into a wall-mounted electrical outlet (no text or symbols)natural_image
Simple line drawing of a kitchen appliance with a refrigerator and a showerhead (no text or symbols)natural_image
Diagram of a handheld device with spray and control panel (no text or symbols)natural_image
Simple line drawing of a mechanical device with a lever and base plate (no text or symbols)natural_image
Simple line drawing of a mechanical device with no text or symbolsnatural_image
Illustration of a plug inserted into a wall-mounted electrical outlet (no text or symbols)natural_image
Simple line drawing of a mechanical component with no text or symbolsGEBRAUCHSANWEISUNG
Um eine Verstopfung des Luftkanals zu vermeiden, entfernen Sie bitte größere Abfälle in diesem Bereich, z. B. große Papierschnipsel, Verpackungsfolien etc. Dieses Gerät kann auf weichen Oberflächen wie Stoffen und Flusen verwendet werden. Es wird nicht empfohlen, es auf harten Oberflächen zu verwenden. 1. Drücken Sie den Schalter, um die Maschine zu starten und mit der Arbeit zu beginnen; drücken Sie den Schalter erneut, um die Maschine auszuschalten. 2. Leistung: Die Standardgeschwindigkeit ist "Standard". Drücken Sie die Taste "Leistung", um auf die Geschwindigkeit "Turbo" umzuschalten. Drücken Sie die Taste erneut, um zur Geschwindigkeit "Standard" zurückzukehren, und umgekehrt. 3. Temp: Der Standardmodus ist "Warm", drücken Sie die Taste "Temp", um den Modus "Heiß" einzustellen. Drücken Sie die Taste erneut, um den Modus "Warm" einzustellen. 4. Aufforderung zum Auffüllen des Abwassertanks : Wenn der Abwassertank voll ist, blinken alle Anzeigen, die Hupe "Signalton" ertönt dreimal hintereinander, um in den Wartemodus zu wechseln. 5. Stellen Sie den Modus je nach Bedarf ein, halten Sie die Reinigungsbürste fest, drücken und halten Sie die Taste "water spray switch" an der Unterseite des Knopfes der Reinigungsbürste, der Der Wassersprühkopf setzt fortlaufend Wasser frei; lassen Sie die Taste los, das Wassersprühen stoppt. 6. Bei gewöhnlichen Flecken gießen Sie die Reinigungsflüssigkeit in den Reinigungsbehälter und sprühen Wasser auf die Flecken. Nachdem das Wasser aufgesprüht wurde, wird mit der Reinigungsbürste mehrmals gewischt, und die Flecken und das Abwasser werden in den Abwasserkasten gesaugt und mehrmals abgesaugt, um die Flecken schnell zu reinigen. Nach der Reinigung empfiehlt es sich, noch einmal mit Wasser nachzureinigen, damit die Reinigungsflüssigkeit nicht im Stoff verbleibt. 7. Bei hartnäckigen Flecken verwenden Sie zunächst eine spezielle Reinigungslösung, die Sie auf den Stoff über dem Fleck sprühen, sprühen Sie nach der Verwendung der Reinigungsbürste mehrmals nach, die Reinigungslösung wird den Fleck vollständig auflösen, Öffnen Sie das Gerät, um die Flüssigkeit und das Abwasser aus dem Abwassertank zu entfernen, mehrmaliges wiederholtes Absaugen kann den Fleck schnell reinigen. 8. Verwenden Sie nach der Reinigung den selbstreinigenden Bürstenkopf und führen Sie eine allgemeine Reinigung des Rohrs durch. Aufbewahrung des Netzkabels und des Schlauchs : . 1. Dieses Produkt verfügt über ein langes Netzkabel. Nach der Verwendung des Produkts kann das Netzkabel um die Rückseite des Geräts gewickelt werden. 2. Nach der Verwendung des Produkts kann der Schlauch in den Aufbewahrungsschlitz an der Unterseite der Maschine aufgerollt werden. natural_image
Technical line drawing of a mechanical device with coiled tubing and mounting bracket (no text or symbols)ACHTUNG :
1. Das Netzkabel dieses Produkts ist lang. Achten Sie darauf, dass es bei der Benutzung nicht stolpert. 2. Lassen Sie Kinder nicht auf dem Gerät sitzen. 3. Achten Sie bei der Verwendung dieses Produkts auf Sicherheit. Legen Sie das Netzkabel nicht ins Wasser. 4. Verwenden Sie die Maschine nicht bei einer Umgebungstemperatur von unter 0°C-50°C. 5. es ist strengstens untersagt, die gesamte Maschine, das Zubehör und die Fäden auszutauschen.ACHTUNG :
Stellen Sie den Betrieb ein und ziehen Sie den Stecker, bevor Sie Wartungsarbeiten durchführen. Körperreinigung : Gewöhnliche Flecken können mit einem feuchten Tuch abgewischt werden. Hartnäckiger Schmutz kann mit einem feuchten, mit Spülmittel angefeuchteten Tuch abgewischt und anschließend mit einem trockenen, in Wasser getauchten Tuch gereinigt werden. Nach jedem Gebrauch : Entferne sie vom Körper, spüle sie gründlich mit Wasser ab und trockne sie an der Luft. natural_image
Line drawings of five different mechanical components or devices, including cylindrical and triangular shapes (no text or symbols)natural_image
Simple line drawing of two mechanical components, one wedge and one cylindrical, with no text or symbols present.Selbstreinigender Bürstenkopf und Ror:
1. Bringen Sie den Kopf der selbstreinigenden Bürste am Griff an, öffnen Sie die Maschine und sie beginnt zu arbeiten. Drücken Sie gleichzeitig weiter auf den Wasserknopf und sehen Sie, dass eine gewisse Menge Wasser im Schlauch gespeichert ist, und reinigen Sie den Schlauch. natural_image
Simple line drawing of a cylindrical object with a pointed tip and a diagonal line extending from it (no text or symbols)Reinigung des Schmutzwassertanks :
Um die Leistungsfähigkeit des Produkts zu erhalten, reinigen Sie bitte regelmäßig den Schmutzwassertank. Wenn sich mehr Schmutzwasser im Schmutzwassertank befindet, wird die Saugkraft dieses Produkts geschwächt. Wenn der Wasserstand den Höchststand erreicht, sollte der Schmutzwassertank rechtzeitig gereinigt werden. Nachdem der Schmutzwassertank vom Wirt entfernt wurde, müssen das Schmutzwasser und der interne Abfall entleert und gereinigt werden. Methode zum Ausbau des Schmutzwassertanks: . Ziehen Sie den Schmutzwassertank schräg heraus, um ihn als Ganzes zu entfernen. Öffnen Sie dann die Schnalle am Deckel des Schmutzwassertanks, öffnen Sie den Deckel und reinigen Sie den Schmutzwassertank. natural_image
Diagram showing a cleaning or inspection device before and after transformation, with no visible text or symbols.natural_image
Diagram showing a mechanical device before and after assembly, with no visible text or symbolsnatural_image
Line drawing of a handgun with two upright arms (no text or symbols)Abnehmbarer Schlauch:
Der Schlauch dieses Geräts ist abnehmbar. Wenn sich der Schlauch verschlechtert, nehmen Sie ihn bitte ab und ersetzen Sie ihn durch einen neuen.FEHLERSUCHE
Wenn bei der Verwendung eine Abweichung festgestellt wird, beziehen Sie sich bitte auf die folgende Tabelle| STATUS | MÖGLICHE URSACHEN | BEHANDLUNGSMETHODE |
| Die Maschine funktioniert nicht nicht nach dem einschalten vom Schalter. | Der Stecker ist nicht richtig eingesteckt und ist Locker, was führt zu schlechtem Kontakt. | Schalten Sie das Gerät aus und schließen Sie es wieder an. |
| Die Interne Leitung oder Schnur Stromversorgung ist gebrochen. | Rufen Sie das Telefon von Reparatur. | |
| Die ganze Maschine überhltzung und das Gerät von Schutz funktioniert. | Beziehen Sie sich auf die Anweisungen des Schutzvorrichtung. | |
| Das Produkt sprüht nicht Wasser! | Verstopfung der Düse | Entfernen Sie die Kappe von der Düse zu mlt elner dünnen Nadel. |
| Wassermangel im Tank sauberes Wasser | Wasser in den Tank geben sauberes Wasser rechtzeitig | |
| Die interne Wasserleitung ist verstopft oder gebrochen! | Kontaktieren Sie den Händler oder after-Sales-service! | |
| Anormales Geräusch | Die Saugöffnung des Produkts ist blockiert oder Müll wichtige werden eingeatmet. | Blockaden rechtzeitig beseitigen |
| Motorausfall | Kontaktieren Sie den Händler oder after-Sales-service | |
| Geringe aspiration oder Abwesenheit Wasser absorption | Zu viel schmutziges Wasser in der Schmutzwassertank | Reinigen Sie den Schmutzwassertank rechtzeitig |
| Das Rohr ist gebrochen | Ersetzen Sie den Schlauch durch einen neu | |
| Schmutz blockiert das saugen | Blockaden rechtzeitig beseltigen | |
| Anormale Maschine oder funktionsunfähig | Die Umgebungstemperatur ist zu hoch oder zu niedrig | Halten Sie das Gerät an einem Raumtemperatur geeignet (0 °C-50°C). |
| Kontaktieren Sie den Händler oder after-Sales-service! |
GARANTIE
Die Garantiezeit für unsere Produkte beträgt 2 Jahre, sofern keine anderen Bestimmungen gelten, ab dem Datum des ursprünglichen Kaufs oder ab dem Lieferdatum. Bei Problemen oder Fragen können Sie sich an unsere Hilfeseiten, Tipps zur Fehlerbehebung, FAQs und Bedienungsanleitungen auf unserer Kundendienst-Website wenden: https://sav.hkoenig.com. Wenn Sie den Referenznamen Ihres Geräts in die Suchleiste eingeben, erhalten Sie Zugang zu allen verfügbaren Online-Supports. Wenn Sie immer noch keine Antwort auf Ihre Frage oder Ihr Problem finden, dann klicken Sie auf "Hat die Antwort Ihr Problem gelöst?". Sie können dieses Formular ausfüllen, um Ihre Anfrage zu bestätigen und Hilfe zu erhalten.GARANTIEBEDINGUNGEN
Die Garantie deckt alle Defekte ab, die bei normalem, bestimmungsgemäßem Gebrauch und den in der Bedienungsanleitung enthaltenen Spezifikationen auftreten. Diese Garantie gilt nicht für Probleme mit der Verpackung oder dem Transport während des Versands des Produkts durch den Eigentümer. Sie umfasst auch nicht den normalen Verschleiß des Produkts, die Wartung oder den Austausch von Verschleißteilen.AUSSCHLUSS DER GARANTIE
- Zubehör und Verschleißteile (\*). - Die normale Wartung des Geräts. - Alle Defekte, die durch unsachgemäßen Gebrauch (Stöße, Nichteinhaltung der empfohlenen Stromzufuhr, schlechte Nutzungsbedingungen usw.), unzureichende Wartung oder Zweckentfremdung des Geräts auftreten, sowie die Verwendung von ungeeignetem Zubehör. - Schäden durch äußere Einflüsse: Brand, Wasserschäden, elektrische Überspannung usw. - Alle Geräte, die von anderen als den befugten Personen (insbesondere dem Nutzer) auch nur teilweise auseinandergebaut wurden. - Produkte, deren Seriennummer fehlt, beschädigt oder unleserlich ist, sodass sie nicht identifiziert werden können. - Produkte, die vermietet, vorgeführt oder ausgestellt werden. (\*) Einige Teile Ihres Geräts, die als Verschleißteile oder Verbrauchsmaterialien bezeichnet werden, verschleßen mit der Zeit und der Häufigkeit der Nutzung Ihres Geräts. Diese Abnutzung ist normal, kann aber durch falsche Nutzung oder Pflege Ihres Geräts noch verstärkt werden. Diese Teile sind daher nicht durch die Garantie abgedeckt. Das mit dem Gerät gelieferte Zubehör ist ebenfalls von der Garantie ausgeschlossen. Sie können daher weder umgetauscht noch erstattet werden. Einige Zubehörteile können jedoch direkt über unsere Website https://sav.hkoenig.com/ erworben werden.UMWELT
ACHTUNG:
 Werfen Sie nicht dieses Produkt, wie es mit anderen Haushaltsprodukten hat. Es gibt eine Mülltrennungs von diesem Produkt in Gemeinden, Sie müssen Ihre lokalen Behörden über die Orte, wo man dieses Produkt zurückgeben können zu informieren. In der Tat enthalten elektrische und elektronische Produkte gefährliche Stoffe, die schädliche Auswirkungen auf die Umwelt oder die menschliche Gesundheit haben und sollte recycelt werden. Das Symbol hier darauf hinweisen, dass elektrische oder elektronische Geräte sollten sorgfältig ausgewählt werden, ist ein fahrbarer Abfallbehälter mit einem Kreuz markiert. Adeva SAS / H.Koenig Europe - 8 rue Marc Seguin, 77290 Mitry-Mory, France www.hkoenig.com - https://kundenservice.hkoenig.com - Tél: +33 1 64 67 00 05NEDERLANDS
natural_image
Line drawing of a medical or laboratory device with coiled tubing and control panel (no text or symbols)ATTENTIE
Lees de gebruikershandleiding zorgvuldig door. Reinig en onderhoud het product volgens de instructies. Raadpleeg bij storingen eerst de gids voor het oplossen van problemen. Deze garantie vervalt als het defect is veroorzaakt door onopzettelijke schade, verkeerd gebruik, misbruik, verwaarlozing, onjuiste reparatie of wijziging door onbevoegde personen, of het niet opvolgen van de bedieningsinstructies die bij het product zijn geleverd. Deze garantie is niet van toepassing op normale slijtage of commercieel gebruik. In geen geval zal de aansprakelijkheid hoger zijn dan de aankoopprijs die door de koper van het product is betaald. In geen geval zal er aansprakelijkheid zijn voor enig verlies - direct of indirect - of enige incidentele of gevolgschade voortvloeiend uit of in verband met het gebruik van het product.BELANGRIJKE VEILIGHEIDSINSTRUCTIES
LEES ALLE INSTRUCTIES EN WAARSCHUWINGEN VOORDAT U DIT APPARAAT GEBRUIKT IN UW GEBRUIKERSHANDLEIDING EN OP HET APPARAAT. Wanneer u een elektrisch apparaat gebruikt, moet u altijd de volgende basisvoorzorgen nemen: 1. Ontkoppel de voordat naar onderhoud, inspecteren of verplaatsen. 2. Gebruik een professionele reinigingsvloeistof zonder bubbels om beschadiging van het apparaat te voorkomen. 3. Verwijder regelmatig stof van de contactdoos 4. Steek de stekker stevig in het stopcontact als het apparaat in gebruik is. 5. Haal de stekker uit het stopcontact als u het apparaat langere tijd niet gebruikt. 6. zorg ervoor dat de stekker niet overbelast is 7. Gebruik het apparaat op 220 V AC. 8. Stop het gebruik onmiddellijk, schakel het apparaat uit en trek de stekker uit het stopcontact in geval van een storing of defect. 9. Stop met het gebruik van het apparaat en raadpleeg de handleiding of de klantenservice als u abnormale geluiden of geuren opmerkt. 10. Niet niet inhaleren geen stoffen brandbare zoals sigarettenpeuken. 11. Stop onmiddellijk van het werk als a een vreemd voorwerp de spuitmond blokkeert. 12. Stop het werk onmiddellijk als een vreemd voorwerp wordt ingeademd. 13. Als de emmer voor schoon water of het afvalwater verstopt raakt door vreemde voorwerpen, moet u het water legen en schoonmaken voordat u het apparaat verder gebruikt. 14. Vergeet niet de stekker uit het stopcontact te halen na gebruik. 15. Reiniging en onderhoud door de gebruiker mogen niet worden uitgevoerd door kinderen, tenzij ze ouder zijn dan 8 jaar en onder toezicht van een volwassene staan. 16. Houd het apparaat en de kabel buiten het bereik van kinderen jonger dan 8 jaar. 17. Bij het gebruik van elektrische apparaten moeten altijd veiligheidsmaatregelen worden genomen om elk risico op brand, elektrische schokken en/of letsel bij verkeerd gebruik te voorkomen. 18. Controleer of de op het typeplaatje van het apparaat aangegeven spanning overeenkomt met die van uw elektrische installatie. Als dit niet het geval is, neem dan contact op met uw verkoper en sluit het apparaat niet aan. 19. Het apparaat mag niet gebruikt worden als het gevallen is, als er zichtbare tekenen van schade zijn of als het lekt. 20. Houd dit document bij de hand en geef het aan de toekomstige eigenaar als u uw apparaat verkoopt. 21. Gebruik het apparaat niet als het netsnoer of de stekker beschadigd is, als het niet goed werkt, als het beschadigd is of als het gevallen is. Als het snoer beschadigd is, moet deze worden vervangen door de fabrikant of diens vertegenwoordiger, of door een gekwalificeerd persoon om elk risico te vermijden. 22. Dit apparaat mag worden gebruikt door personen met beperkte fysieke, sensorische of mentale capaciteiten of met een gebrek aan ervaring en kennis, op voorwaarde dat ze toezicht of instructies hebben gekregen over het veilige gebruik van het apparaat en dat ze de gevaren begrijpen. Kinderen mogen niet met het apparaat spelen. 23. Dit apparaat is bedoeld voor gebruik in huishoudelijke en soortgelijke toepassingen zoals : a. keukenruimtes in winkels, kantoren en andere werkomgevingen; b. boerderijen ; c. in hotels, motels en andere residentiële omgevingen; d. gastenkamers. 24. Het apparaat is niet bedoeld voor gebruik met een externe timer of een apart afstandsbedieningssysteem. 25. Dompel het apparaat, het netsnoer of de stekker nooit onder in water of een andere vloeistof.Veiligheidsadvies :
1. Beschadig het netsnoer niet. Trek er niet aan bij het hanteren. 2. Gebruik het apparaat niet als het netsnoer en de stekker kapot zijn of als de stekker loszit. 3. Raak het apparaat niet aan en sluit het niet aan of af met natte handen. 4. Kleine kinderen mogen de stekker niet aanraken. 5. Spuit geen pesticiden, haarverf, smeermiddelen of andere vloeistoffen. 6. Inhaleer geen hitte van petroleumgassen of droog stof. 7. Demonteer, repareer of modificeer het apparaat niet zelf. 8. Gebruik het apparaat niet in gevaarlijke situaties zoals regen of harde wind. 9. Dompel het apparaat, het netsnoer of de stekker nooit onder in water of een andere vloeistof. 10. Vermijd het inademen van vuil- of stofdeeltjes die besmettelijke ziekten kunnen overbrengen. 11. Gebruik het apparaat niet zonder afvalwateremmer 12. Niet gebruiken voor andere doeleinden dan reinigen 13. Niet bukken of rollen 14. Houd het apparaat buiten het bereik van kleine kinderen. at kinderen het niet gebruiken of ermee spelen. et buitenshuis gebruiken 17. Gebruik het apparaat niet meer als de aanzuigopening geblokkeerd is. 18. Trek niet aan het netsnoer om het aan te sluiten of los te koppelen om elektrische schokken te voorkomen.Product Introductie
 Lichaam :
1 Watertank 2 Schoonmaakborstel 3 Bedieningspaneel 4 Vuil waterreservoir 5 apparaatbehuizing 6 Flexibel 7 Water sproeiknop 8 Handvatondersteuning 9 Steun voor kabelhaspel 10 Flexibele vergrendeling met het apparaat 11 OphanghaakAccessoires
 1  2  3  4  5  6  7  8 1. Standaard borstel 2. Borstel met breed trajectory 3. T-vormige borstel 4. Zelfreinigende borstel 5. Gebruiksaanwijzing 6. Handvatondersteuning 7. Handvathaak 8. SlangPRODUCTPARAMETERS :
| Nominale bedrijfsspanning | 25V 50Hz | Type motor | Motor voor natte en droge stofafzuiging |
| Nominaal vermogen | 1200W | Lengte slang | 1,8m |
| Mate van vacuum | 15Kpa | Strakheidsniveau | IPX4 |
| Geluid | </= 80dB | Nettogewicht van machine | 4,2kg |
| Capaciteit schoonwatertank | 1800 ml | Werkomgeving T°C | 5-50°C |
| Inhoud vuilwatertank | 950 ml | Machinegrootte | 320*226*327mm |
| Lengte van elektrische kabel | 5m | Opwarmtijd | 15s |
VOORBEREIDING
1. Verwijder de ophanghaak en de handgreepsteun. natural_image
Two 3D mechanical component diagrams shown in wireframe and perspective views (no text or symbols)natural_image
Line drawing of a kitchen mixer with control panel and fan (no text or symbols)natural_image
Technical line drawing of a mechanical device with no visible text or symbolsnatural_image
Cross-sectional technical diagram of a mechanical assembly (no visible text or labels)natural_image
Simple line drawing of a mechanical component with an arrow indicating motion (no text or symbols)INSTRUCTIES
1. Verwijder de schoonwatertank van de body. 2. Open het en vul het met schoon water. Maximaal waterniveau 3. Installeer de schoonwatertank in de body. 4. Inpluggen. natural_image
Line drawing of a plug inserted into a wall-mounted electrical outlet (no text or symbols)natural_image
Simple line drawing of a washing machine with a handle and base (no text or symbols)flowchart
graph LR
A["Temperatuurknop"] --> B["Device"]
C["Zuigknop"] --> B
natural_image
Diagram of a handheld device with spray and spray pattern (no text or symbols)natural_image
Simple line drawing of a mechanical device with a lever and base plate (no text or symbols)natural_image
Simple line drawing of a mechanical device with no text or symbolsnatural_image
Illustration of a plug inserted into a wall-mounted electrical outlet (no text or symbols)natural_image
Simple line drawing of a mechanical component with no text or symbolsGEBRUIKSAANWIJZING
Om te voorkomen dat het luchtkanaal verstopt raakt, dient u grote stukken afval in de buurt op te ruimen, zoals grote stukken papier, verpakkingsfolie, enz. Dit apparaat kan gebruikt worden op zachte oppervlakken zoals stoffen en pluizen. Het wordt niet aanbevolen voor gebruik op harde oppervlakken. 1. Druk op de schakelaar om de machine te starten en te beginnen werken; druk nogmaals op de schakelaar om de machine uit te schakelen. 2. Vermogen: De standaardsnelheid is "Standaard", druk op de knop "Vermogen" om over te schakelen naar de snelheid "Turbo". Druk nogmaals op deze knop om terug te gaan naar de "Standaard" snelheid, en andersom. 3. Temp: De standaardmodus is "Warm", druk op de knop "Temp" om de modus in te stellen op "Heet". Druk nogmaals op deze knop om over te schakelen naar de modus "Warm". 4. Uitnodiging om de afvalwatertank te vullen: Als de afvalwatertank vol is, knipperen alle lampjes, de "druppel"-zoemer klinkt drie keer achter elkaar om naar de stand-bymodus te gaan. 5. Stel de modus in volgens de vraag, houd de reinigingsborstel vast, druk op de knop "watersproeischakelaar" aan de onderkant van de reinigingsborstelknop en houd deze ingedrukt, de watersproeikop blijft water naar buiten sproeien; laat de knop los, de watersproeikop stopt. 6. Voor gewone vlekken giet u de reinigingsvloeistof in de reinigingstank en spuit u water op de vlekken. Na het sproeien van het water wordt de reinigingsborstel gebruikt om de vlekken meerdere keren af te vegen en het afvalwater wordt in de afvalwatertank gezogen en meerdere keren gestofzuigd om de vlekken snel te reinigen. Na het reinigen is het raadzaam om nogmaals met water te reinigen om te voorkomen dat de reinigingsvloeistof in de stof achterblijft. 7. Gebruik voor hardnekkige vlekken eerst een speciale reinigingsoplossing om op de stof boven de vlek te spuiten, spuit na gebruik van de reinigingsborstel enkele keren, de reinigingsoplossing zal de vlek volledig oplossen. 8. Gebruik na het schoonmaken de zelfreinigende borstelkop en reinig de slang in het algemeen. Het netsnoer en de slang opbergen : 1. Dit product heeft een lang netsnoer. Als het product in gebruik is, kan het netsnoer om de achterkant van het apparaat worden gewikkeld. 2. Na gebruik kan de slang worden opgerold in de opbergopening aan de onderkant van de machine. natural_image
Technical line drawing of a mechanical device with coiled tubing and mounting bracket (no text or symbols)LET OP:.
1. Het netsnoer van dit product is lang, dus pas op dat je er niet over struikelt als je het gebruikt. 2. Laat kinderen niet op het apparaat zitten. 3. Zorg ervoor dat u dit product veilig gebruikt. Dompel het netsnoer niet onder in water. 4. Gebruik het apparaat niet bij omgevingstemperaturen lager dan 0°C-50°C. 5. Het is ten strengste verboden om de hele machine, accessoires en bedrading te vervangen.ONDERHOUD
LET OP:
Schakel het apparaat uit en trek de stekker uit het stopcontact voor onderhoud. Lichaamsreiniging : Gewone vlekken kunnen worden verwijderd met een vochtige doek. Hardnekkig vuil kan worden weggeveegd met een vochtige doek gedrenkt in afwasmiddel en vervolgens worden afgeveegd met een droge doek gedrenkt in water. Na elk gebruik : Haal ze van het lichaam, spoel ze grondig af met water en laat ze aan de lucht drogen. natural_image
Line drawings of five different mechanical components or housing designs (no text or symbols)natural_image
Simple line drawing of two mechanical components with a diagonal line extending from one (no text or symbols)natural_image
Simple line drawing of a cylindrical object with a pointed tip and a curved line extending from it (no text or symbols)natural_image
Diagram showing a mechanical device before and after assembly, with no visible text or symbolsnatural_image
Diagram showing a cleaning or repair process: one device with a handle and scroll, the other with a door handle (no text or symbols present)natural_image
Line drawing of a firearm with two upright arms (no text or symbols)PROBLEEMOPLOSSING
Raadpleeg de volgende tabel als er tijdens het gebruik een storing wordt gedetecteerd| TOESTAND | MOGELIJKE OORZAKEN | BEHANDELINGSMETHODE |
| De machine werkt niet nadat de schakelaar is ingeschakeld. | De stekker is niet goed aangesloten en zit los, waardoor slecht contact ontstaat. | Schakel het apparaat uit en sluit het weer aan. |
| De interne lijn of het netsnoer is kapot. | Bel de reparatietelefoon. | |
| De hele machine raakt oververhit en het beveiligingsapparaat treedt in werking. | Raadpleeg de instructies voor het beveiligingsapparaat. | |
| Het product spuit geen water | Verstopping van het mondstuk | Verwijder de spuitdop met behulp van een fijne naald. |
| Gebrek aan water in de schoonwatertank | Voeg tijdig water toe aan de schoonwatertank | |
| De interne waterleiding is verstopt of kapot | Neem contact op met de dealer of de klantenservice | |
| Abnormaal geluid | De productaanzuigpoort is geblokkeerd of er is grof afval ingeademd. | Ruim tijdig blokkades op |
| Motor falen | Neem contact op met de dealer of de klantenservice | |
| Lage zuigkracht of gebrek aan wateropname | Te veel vuil water in de vuilwatertank | Maak de vuilwatertank tijdig schoon |
| De pijp is gebroken | Vervang de slang door een nieuwe | |
| Vuil blokkeert de zuigkracht | Ruim tijdig blokkades op | |
| Abnomale of niet-werkende machine | De omgevingstemperatuur is te hoog of te laag | Bewaar het apparaat op een geschikte omgevingstemperatuur (0°C-50°C). |
| Neem contact op met de dealer of de klantenservice |
GARANTIE
De garantieperiode op onze producten is 2 jaar, tenzij anders vermeld, beginnend vanaf de datum van de initiele aankoop of bezorgdatum. Als u problemen of vragen heeft, kunt u eenvoudig onze hulppagina's bezoeken voor tips om problemen op te lossen, de FAQ's en andere gebruikershandleidingen op onze website: https://sav.hkoenig.com. Door de referentienaam van uw apparaat in de zoekbalk te typen, krijgt u toegang tot alle beschikbare online hulpmiddelen, ontworpen om aan uw behoeften te voldoen. Als u toch niet geen antwoord op uw vraag kunt vinden, klik dan op "Heeft het antwoord uw probleem opgelost? Hierdoor gaat u naar het Aanvraagformulier voor Klantenondersteuning, dat u in kunt vullen om uw verzoek te valideren en hulp te ontvangen.GARANTIEVOORWAARDEN
De garantie dekt alle mankementen die voortkomen uit normaal gebruik, volgens de sectie gebruik en specificaties in de gebruikershandleiding. Deze garantie omvat niet verpakkings- of transportproblemen tijdens het vervoer van het product door de eigenaar. Het omvat ook niet de normale slijtage van het product, noch het onderhoud of vervangen van verbruiksartikelen.UITSLUITINGEN VAN DE GARANTIE
- Accessoires en verbruiksartikelen (\*). - Normaal onderhoud van het apparaat. - Alle mankementen veroorzaakt door verkeerd gebruik (schokken, het niet opvolgen van de aanbevolen stroomvoorziening, in slechte omstandigheden gebruiken, etc.), onvoldoende onderhoud of ondeugdelijk gebruik van het apparaat, alsook het gebruik van ongeschikte accessoires. \- Schade van buitenaf: vuur, waterschade, elektrische stroompiek, etc. \- Apparaten die uit elkaar zijn gehaald, ook gedeeltelijk, door personen die niet er niet gekwalificeerd voor zijn (zoals de gebruiker). \- Producten waarvan het serienummer verdwenen, beschadigd of onleesbaar is, waardoor we het niet kunnen identificeren. \- Producten die verhuurd werden of ter demonstratie of showmodel waren. (\*) Sommige onderdelen van uw apparaat, genaamd verbruiksartikelen, slijten naar verloop van tijd en bij veel gebruik van uw apparaat. Deze slijtage is normaal, maar kan verergerd worden door slechte omstandigheden of onderhoud van uw apparaat. Deze onderdelen worden daarom niet gedekt door de garantie. De accessoires meegeleverd met het apparaat zijn ook uitgesloten van de garantie. Ze kunnen niet vervangen of gerestitueerd worden. Echter, sommige accessoires zijn te koop via onze website: https://sav.hkoenig.com/.MILIEU
ATTENTIE:
 Dit apparaat mag niet met uw ander huishoudelijke toestellen worden verwijdert. Dit product moet op een geselecteerde stortplaats verwijdert worden. U kunt bij de gemeente een indiceerde plaats aanvragen. Elektrisch en elektronische producten kunnen gevaarlijke stoffen inhouden die schadelijk zijn voor mensen en het milieu en moet recycled worden. Het symbool aan de kant geeft aan dat het een elektrisch en elektronisch toestel is en zijn dus artikelen van een selectieve collectie. Het beeld geeft een afvalbak met een X teken aan. Adeva SAS / H.Koenig Europe - 8 rue Marc Seguin, 77290 Mitry-Mory, France www.hkoenig.com - https://kundenservice.hkoenig.com - Tél: +33 1 64 67 00 05ESPAÑOL
natural_image
Line drawing of a medical or laboratory device with coiled tubing and control panel (no text or symbols)ATENCIÓN
Lea atentamente el manual del usuario. Limpie y mantenga el producto de acuerdo con las instrucciones. En caso de avería, consulte primero la guía de resolución de problemas. Esta garantía quedará anulada si el defecto se debe a daños accidentales, uso indebido, abuso, negligencia, reparación o modificación indebidas por parte de personas no autorizadas o incumplimiento de las instrucciones de uso suministradas con el producto. Esta garantía no se aplica al desgaste normal ni al uso comercial. En ningún caso la responsabilidad excederá el precio de compra pagado por el comprador del producto. En ningún caso se asumirá responsabilidad alguna por pérdidas -directas o indirectas- ni por daños fortuitos o emergentes derivados del uso del producto o relacionados con él.INSTRUCCIONES IMPORTANTES DE SEGURIDAD
ANTES DE UTILIZAR ESTE APARATO, LEA TODAS LAS INSTRUCCIONES Y ADVERTENCIAS EN SU GUÍA DEL USUARIO Y EN EL DISPOSITIVO. Al utilizar un aparato eléctrico, deben tomarse siempre las precauciones básicas, entre las que se incluyen las siguientes: 1. Desenchufe el antes de darle servicio, inspeccionarlo o moverlo. 2. Utilice un líquido de limpieza profesional sin burbujas para evitar dañar el aparato. 3. Elimine regularmente el polvo del enchufe 4. Enchufe el aparato firmemente cuando lo utilice. 5. Desenchufe el aparato cuando no lo utilice durante períodos prolongados. 6. asegúrese de que el enchufe no esté sobrecargado 7. Utilice el aparato a 220 V CA. 8. Deje de utilizar el aparato inmediatamente, apáguelo y desenchúfelo de la red eléctrica en caso de avería o mal funcionamiento. 9. Deje de utilizar el aparato y consulte el manual o al servicio de atención al cliente si percibe ruidos u olores anormales. 10. No se no inhalar ninguna sustancias inflamables como colillas de cigarrillos. 11. Detener inmediatamente de trabajo si a objeto extraño bloquea la boquilla de pulverización. 12. Interrumpir inmediatamente el trabajo si se inhala un cuerpo extraño. 13. Si algún objeto extraño obstruye el cubo de agua limpia o el cubo de aguas residuales, vacíe el agua y límpielo antes de seguir utilizando el aparato. 14. Recuerda desenchufar el cable de alimentación después de usarlo. 15. La limpieza y el mantenimiento por parte del usuario no deben ser realizados por niños, a menos que sean mayores de 8 años y estén bajo la supervisión de un adulto. 16. Mantenga el aparato y su cable fuera del alcance de los niños menores de 8 años. 17. Al utilizar aparatos eléctricos, deben tomarse siempre precauciones de seguridad para evitar cualquier riesgo de incendio, descarga eléctrica y/o lesiones en caso de uso indebido. 18. Compruebe que el voltaje indicado en la placa de características del aparato se corresponde con el de su instalación eléctrica. En caso contrario, póngase en contacto con su distribuidor y no conecte el aparato. 19. No utilice el aparato si se ha caído, si presenta daños visibles o si tiene fugas. 20. Conserve este documento y entrégueselo al futuro propietario si vende su aparato. 21. No utilice el aparato si el cable de alimentación o el enchufe están dañados, si no funciona correctamente, si se ha estropeado o si se ha caído. Si el cable está dañado, debe ser sustituido por el fabricante o su agente, o por una persona cualificada para evitar cualquier riesgo. 22. Este aparato puede ser utilizado por personas con capacidades físicas, sensoriales o mentales reducidas o con falta de experiencia y conocimientos, siempre que hayan recibido supervisión o instrucciones relativas al uso seguro del aparato y que comprendan los peligros que conlleva. Los niños no deben jugar con el aparato. 23. Este aparato está diseñado para su uso en aplicaciones domésticas y similares como : a. zonas de cocina en tiendas, oficinas y otros entornos de trabajo; b. granjas ; c. en hoteles, moteles y otros entornos residenciales; d. habitaciones de huéspedes. 24. El aparato no está diseñado para funcionar con un temporizador externo o un sistema de mando a distancia independiente. 25. No sumerja nunca el aparato, su cable de alimentación ni el enchufe en agua ni en ningún otro líquido.Consejos de seguridad :
1. No dañe el cable de alimentación. No tire de él al manipularlo. 2. No utilice el aparato si el cable de alimentación y el enchufe están rotos o si el enchufe se afloja. 3. No toque ni conecte o desconecte el aparato con las manos mojadas. 4. No permita que los niños pequeños toquen el enchufe. 5. No pulverice pesticidas, tintes para el pelo, lubricantes u otros líquidos. 6. No inhalar el calor de los gases de petróleo ni el polvo seco. 7. No desmonte, repare ni modifique el aparato usted mismo. 8. No utilice el aparato en situaciones peligrosas como lluvia o vientos fuertes. 9. No sumerja nunca el aparato, su cable de alimentación ni el enchufe en agua ni en ningún otro líquido. 10. Evite respirar partículas de suciedad o polvo que puedan transmitir enfermedades infecciosas. 11. No utilice el aparato sin un cubo de aguas residuales lo utilizar para fines distintos de la limpieza lo se agache ni ruede 14. Mantenga la máquina fuera del alcance de los niños pequeños. Jo permita que los niños lo utilicen o jueguen con él. lo utilizar al aire libre 17. No siga utilizándolo si la entrada de aspiración está obstruida. 18. Para evitar descargas eléctricas, no tire del cable de alimentación para conectarlo o desconectarlo.Presentación del producto
 Cuerpo :
1 Depósito de agua 2 Cepillo de limpieza 3 Panel de control 4 Depósito de agua sucia 5 cuerpo del aparato 6 Flexible 7 Botón de rociado de agua 8 Soporte para asas 9 Soporte para carrete de cable 10 Bloqueo flexible con el aparato 11 Gancho de suspensiónAccesorios
 1  2  3  4  5  6  7  8 1. Cepillo estándar 2. Cepillo de trayectoria ancha 3. Cepillo en forma de T 4. Cepillo autolimpiante 5. Manual de instrucciones 6. Soporte para asas 7. Gancho del asa 8. MangueraPARÁMETROS DEL PRODUCTO :
| Tensión nominal de funcionamiento | 25V 50Hz | Tipo de motor | Motor de aspiración de polvo húmedo y seco |
| Potencia nominal | 1200W | Longitud de la manguera | 1.8m |
| Grado de vacío | 15Kpa | Nivel de sellado | IPX4 |
| Ruido | < /=80dB | Peso neto de la máquina | 4,2kg |
| Capacidad del depósito de agua limpia | 1800mL | Entorno de trabajo T°C | 5-50°C |
| Capacidad del depósito de agua sucia | 950mL | Tamaño de la máquina | 320*226*327mm |
| Longitud eléctrica | 5m | Tiempo de calentamiento | 15s |
PREPARACIÓN
1. Retire el gancho de suspensión y el soporte del asa. natural_image
Two 3D mechanical component diagrams shown in wireframe and perspective views (no text or symbols)natural_image
Line drawing of a kitchen mixer with control panel and fan (no text or symbols)natural_image
Technical line drawing of a mechanical device with no visible text or symbolsnatural_image
Cross-sectional technical diagram of a mechanical assembly (no visible text or labels)natural_image
Simple line drawing of a mechanical component with an arrow indicating direction (no text or symbols)INSTRUCCIONES
1. Retire el depósito de agua limpia del cuerpo. natural_image
Line drawing of a mechanical device with a handle and base, showing no text or symbolsnatural_image
Technical line drawing of a mechanical device with a downward arrow indicating motion (no text or symbols)natural_image
Line drawing of a plug inserted into an electrical outlet with three switches (no text or symbols)natural_image
Simple line drawing of a washing machine with a handle and base (no text or symbols)natural_image
Diagram of a handheld device with spray and spray pattern (no text or symbols)natural_image
Simple line drawing of a mechanical lever or lever device on a flat surface (no text or symbols)natural_image
Simple line drawing of a mechanical device with no text or symbolsnatural_image
Illustration of a plug inserted into an electrical outlet with two switches (no text or symbols)natural_image
Simple line drawing of a mechanical device with no text or symbolsINSTRUCCIONES DE USO
Para evitar la obstrucción del conducto de aire, retire de la zona cualquier residuo de gran tamaño, como trozos grandes de papel, film de embalaje, etc. Este aparato puede utilizarse sobre superficies blandas, como tejidos y pelusas. No se recomienda su uso en superficies duras. 1. Pulse el interruptor para arrancar la máquina y empezar a trabajar; vuelva a pulsar el interruptor para apagar la máquina. 2. Potencia: La velocidad por defecto es "Estándar", pulse el botón "Potencia" para cambiar a velocidad "Turbo". Pulse de nuevo este botón para volver a la velocidad "Estándar", y viceversa. 3. Temp: El modo por defecto es "Cálido", pulse el botón "Temp" para ajustar el modo a "Caliente". Vuelva a pulsar este botón para cambiar al modo "Cálido". 4. Invitación a llenar el depósito de aguas residuales: Cuando el depósito de aguas residuales está lleno, todas las luces parpadean, el zumbador de "goteo" suena tres veces seguidas para entrar en modo de espera. 5. Ajuste el modo según la demanda, sujete el cepillo de limpieza, mantenga pulsado el botón "interruptor de rociado de agua" situado en la parte inferior del mando del cepillo de limpieza, el cabezal de rociado de agua sigue rociando agua hacia fuera; suelte el botón, el rociado de agua se detiene. 6. Para las manchas normales, vierta el líquido limpiador en el depósito de limpieza y rocíe agua sobre las manchas. Después de rociar el agua, se utiliza el cepillo de limpieza para limpiar las manchas varias veces, y el agua residual se aspira en el bidón de agua residual y se aspira varias veces para limpiar las manchas rápidamente. Después de limpiar, es aconsejable volver a limpiar con agua para evitar que el líquido de limpieza se quede en el tejido. 7. Para las manchas difíciles, utilice primero una solución de limpieza especial para rociar sobre la tela por encima de la mancha, rocíe después de usar el cepillo de limpieza varias veces, la solución de limpieza se disolverá completamente la mancha, abra la máquina para limpiar el líquido y el agua residual en el tanque de agua residual, aspirar varias veces puede limpiar rápidamente la mancha. 8. Después de la limpieza, utilice el cabezal del cepillo autolimpiante y limpie la manguera en general. Cómo guardar el cable de alimentación y la manguera : 1. Este producto tiene un cable de alimentación largo. Una vez que el producto está en uso, el cable de alimentación se puede enrollar alrededor de la parte posterior de la máquina. 2. Después de utilizar el producto, la manguera puede enrollarse en la ranura de almacenamiento situada en la parte inferior de la máquina. natural_image
Technical line drawing of a mechanical device with coiled tubing and mounting bracket (no text or symbols)ATENCIÓN :
1. El cable de alimentación de este producto es largo, así que tenga cuidado de no tropezar con él cuando lo utilice. 2. No permita que los niños se sienten en la máquina. 3. Asegúrese de utilizar este producto de forma segura. No sumerja el cable de alimentación en agua. 4. No utilice la máquina a temperaturas ambiente inferiores a 0°C-50°C. 5. Queda terminantemente prohibido cambiar toda la máquina, los accesorios y los cables.MANTENIMIENTO
ATENCIÓN :
Apáguelo y desenchúfelo antes de repararlo. Limpieza corporal : Las manchas corrientes pueden eliminarse con un paño húmedo. La suciedad persistente puede limpiarse con un paño húmedo empapado en detergente y, a continuación, con un paño seco empapado en agua. Después de cada uso : Retírelos del cuerpo, aclárelos bien con agua y séquelos al aire. natural_image
Line drawings of five different mechanical components or housing designs, no text or symbols presentnatural_image
Simple line drawing of two mechanical components, one wedge and one cylindrical, with no text or symbols present.natural_image
Simple line drawing of a mechanical device with a lever and handle (no text or symbols)natural_image
Simple line drawing of a water pump connected to a tank (no text or symbols)natural_image
Diagram showing a cleaning machine before and after assembly, with no visible text or symbolsnatural_image
Line drawing of a handgun with two upright arms (no text or symbols)Manguera extraíble :
La manguera de esta máquina es desmontable. Si la manguera se daña, retírela y sustitúyala por una nueva.SOLUCIÓN DE PROBLEMAS
Si se detecta un fallo durante el uso, consulte la siguiente tabla| ESTADO | POSIBLES CAUSAS | MÉTODO DE TRATAMIENTO |
| La máquina no funciona no después de encender del interruptor. | El enchufe no está correctamente enchufado y está suelto, lo cual conduce a un mal contacto. | Apague el dispositivo y vuelva a enchufario. |
| La línea Interna o el cordón la fuente de alimentación está rota. | Llame al teléfono de reparación. | |
| Toda la máquina sobrecalentamiento y el dispositivo de la protección funciona. | Consulte las Instrucciones del dispositivo de protección. | |
| El producto no rocía de agua | Bloqueando la boquilla | Retire el tapón de la boquilla para usando una aguja fina. |
| Falta de agua en el tanque de agua limpia | Agregue agua al tanque de agua limpia a tiempo | |
| La tubería de agua interna es obstruido o roto ! | Póngase en contacto con el comerciante o el servicio postventa | |
| Ruido anormal | El puerto de succión del producto. está bloqueado o se desperdicia Importantes son Inhalados. | Eliminar bloqueos a tiempo |
| Fallo del motor | Póngase en contacto con el comerciante o el servicio postventa | |
| Baja succión o ausencia absorción de agua | Demaslada agua sucla en el tanque de agua sucia | Limpie el tanque de agua sucia a tiempo |
| La tubería está rota | Reemplace la manguera con un nuevo | |
| La suciedad bloquea la succión | EllmInar bloqueos a tiempo | |
| Máquina anormal o inoperativo | La temperatura ambiente es demasiado alto o demasiado bajo | Sostenga el dispositivo a una temperatura ambiente adecuado (0 °C-50°C). |
| Póngase en contacto con el comerciante o el servicio postventa |
GARANTÍA
El periodo de garantía de nuestros productos es de 2 años, salvo que la ley estipule lo contrario, a partir de la fecha de la compra inicial o de la fecha de entrega. Si tiene algún problema o pregunta, puede acceder fácilmente a nuestras páginas de ayuda, consejos para solucionar problemas, preguntas frecuentes y manuales de usuario en nuestro sitio de servicio: https://sav.hkoenig.com. Al escribir el nombre de referencia de su dispositivo en la barra de búsqueda, puede acceder a toda la asistencia en línea disponible, diseñada para satisfacer mejor sus necesidades. Si sigue sin encontrar una respuesta a su pregunta o problema, haga clic en "¿La respuesta ha resuelto su problema? Esto le llevará al formulario de solicitud de asistencia posventa, que puede rellenar para validar su solicitud y obtener ayuda.CONDICIONES DE GARANTÍA
La garantía cubre todos los fallos que se produzcan en el contexto de un uso normal, de acuerdo con los usos y especificaciones del manual de usuario. Esta garantía no se aplica a los problemas de embalaje o transporte durante el envío del producto por parte del propietario. Tampoco incluye el desgaste normal del producto, ni el mantenimiento o la sustitución de piezas consumibles.EXCLUSIÓN DE GARANTÍA
- Accesorios y piezas de desgaste (\*). - Mantenimiento normal del aparato. - Todas las averías derivadas de un uso incorrecto (golpes, incumplimiento de las recomendaciones de alimentación eléctrica, malas condiciones de uso, etc.), de un mantenimiento insuficiente o de un mal uso del aparato, así como del uso de accesorios inadecuados. - Daños de origen externo: incendio, daños por agua, sobrecarga eléctrica, etc. - Cualquier equipo que haya sido desmontado, incluso parcialmente, por personas que no estén autorizadas a hacerlo (en particular el usuario). - Productos cuyo número de serie falte, esté dañado o sea ilegible, lo que no permitiría su identificación. - Productos sujetos a alquiler, demostración o exposición. (\*) Algunas piezas de su aparato, conocidas como piezas de desgaste o consumibles, se deterioran con el tiempo y la frecuencia de uso de su aparato. Este desgaste es normal, pero puede acentuarse por las malas condiciones de uso o de mantenimiento de su aparato. Por lo tanto, estas piezas no están cubiertas por la garantía. Los accesorios suministrados con el aparato también están excluidos de la garantía. No se pueden cambiar ni reembolsar. No obstante, algunos accesorios pueden adquirirse directamente en nuestro sitio web: https://sav.hkoenig.com/MEDIO AMBIENTE
ATENCIÓN:
 No se deshaga de este producto como lo hace con otros productos del hogar. Existe un sistema selectivo de colecta de este producto puesto en marcha por las comunidades, debe de informarse en su ayuntamiento acerca de los lugares en los que puede depositar este producto. De hecho, los productos eléctricos y electrónicos pueden contener substancias peligrosas que tienen efectos nefastos para el medio ambiente o para la salud humana y deben ser reciclados. El símbolo aquí presente indica que los equipos eléctricos o electrónicos deben de ser cuidadosamente seleccionados, representa un recipiente de basura con ruedas marcado con una X. Adeva SAS / H.Koenig Europe - 8 rue Marc Seguin, 77290 Mitry-Mory, France www.hkoenig.com - https://kundenservice.hkoenig.com - Tél: +33 1 64 67 00 05ITALIANO
natural_image
Line drawing of a medical or laboratory equipment setup with a coiled tube and control panel (no text or symbols)ATTENZIONE
Leggere attentamente il manuale d'uso. Pulire e mantenere il prodotto secondo le istruzioni. In caso di guasto, consultare innanzitutto la guida alla risoluzione dei problemi. La garanzia è nulla se il difetto è causato da danni accidentali, uso improprio, abuso, negligenza, riparazione o modifica impropria da parte di persone non autorizzate o mancata osservanza delle istruzioni operative fornite con il prodotto. La garanzia non si applica alla normale usura o all'uso commerciale. In nessun caso la responsabilità supererà il prezzo di acquisto pagato dall'acquirente del prodotto. In nessun caso si avrà responsabilità per perdite - dirette o indirette - o per danni incidentali o consequenziali derivanti da o in relazione all'uso del prodotto.IMPORTANTI ISTRUZIONI DI SICUREZZA
PRIMA DI UTILIZZARE QUESTO APPARECCHIO, LEGGERE TUTTE LE ISTRUZIONI E LE AVVERTENZE. NEL MANUALE D'USO E SUL DISPOSITIVO. Quando si utilizza un apparecchio elettrico, è necessario adottare sempre le precauzioni di base, tra cui le seguenti: 1. Staccare la spina il prima di manutenzione, ispezionarlo o spostarlo. 2. Utilizzare un liquido detergente professionale senza bolle per evitare di danneggiare l'apparecchio. 3. Rimuovere regolarmente la polvere dallo zoccolo 4. Collegare saldamente l'apparecchio quando lo si utilizza. 5. Scollegare l'apparecchio quando non viene utilizzato per lunghi periodi. 6. assicurarsi che la spina non sia sovraccarica 7. Utilizzare l'apparecchio a 220 V CA. 8. In caso di guasto o malfunzionamento, interrompere immediatamente l'uso, spegnere l'apparecchio e scollegarlo dalla rete elettrica. 9. Se si notano rumori o odori anomali, interrompere l'uso dell'apparecchio e consultare il manuale o il servizio clienti. 10. Non non inalare qualsiasi sostanze infiammabili come i mozziconi di sigaretta. 11. Fermarsi immediatamente da lavoro se a un oggetto estraneo blocca l'ugello di spruzzatura. 12. Interrompere immediatamente il lavoro in caso di inalazione di un corpo estraneo. 13. Se dei corpi estranei bloccano il secchio dell'acqua pulita o il secchio dell'acqua di scarico, svuotare l'acqua e pulirla prima di continuare a utilizzare l'apparecchio. 14. Non dimenticare di scollegare il cavo di alimentazione dopo l'uso. 15. La pulizia e la manutenzione da parte dell'utente non devono essere eseguite da bambini, a meno che non abbiano più di 8 anni e siano sotto la supervisione di un adulto. 16. Tenere il dispositivo e il suo cavo fuori dalla portata dei bambini al di sotto degli 8 anni. 17. Quando si utilizzano apparecchi elettrici, è necessario prendere sempre le dovute precauzioni per evitare il rischio di incendi, scosse elettriche e/o lesioni in caso di uso improprio. 18. Verificare che la tensione indicata sulla targhetta dell'apparecchio corrisponda a quella dell'impianto elettrico. In caso contrario, contattare il rivenditore e non collegare l'apparecchio. 19. L'apparecchio non deve essere utilizzato se è caduto, se presenta segni visibili di danneggiamento o se perde. 20. Tenere a disposizione questo documento e consegnarlo al futuro proprietario in caso di vendita dell'apparecchio. 21. Non utilizzare l'apparecchio se il cavo di alimentazione o la spina sono danneggiati, se non funzionano correttamente, se sono stati danneggiati o se sono caduti. Se il cavo è danneggiato, deve essere sostituito dal produttore o dal suo agente o da una persona qualificata per evitare qualsiasi rischio. 22. Questo apparecchio può essere utilizzato da persone con ridotte capacità fisiche, sensoriali o mentali o con scarsa esperienza e conoscenza, a condizione che abbiano ricevuto la supervisione o le istruzioni per l'uso sicuro dell'apparecchio e che ne comprendano i pericoli. I bambini non devono giocare con l'apparecchio. 23. Questo apparecchio è destinato all'uso in applicazioni domestiche e simili, come ad esempio : a. aree di cucina in negozi, uffici e altri ambienti di lavoro; b. aziende agricole ; c. in hotel, motel e altri ambienti residenziali; d. camere per gli ospiti. 24. L'apparecchio non è destinato a essere azionato tramite un timer esterno o un sistema di controllo a distanza separato. 25. Non immergere mai l'apparecchio, il cavo di alimentazione o la spina di rete nell'acqua o in altri liquidi.Consigli di sicurezza :
1. Non danneggiare il cavo di alimentazione. Non tirarlo quando lo si maneggia. 2. Non utilizzare l'apparecchio se il cavo di alimentazione e la spina sono rotti o se la spina si allenta. 3. Non toccare o collegare o scollegare l'apparecchio con le mani bagnate. 4. Non permettere ai bambini piccoli di toccare la spina di alimentazione. 5. Non spruzzare pesticidi, tinture per capelli, lubrificanti o altri liquidi. 6. Non inalare il calore dei gas di petrolio o della polvere secca. 7. Non smontare, riparare o modificare l'apparecchio da soli. 8. Non utilizzare l'apparecchio in situazioni pericolose come pioggia o forte vento. 9. Non immergere mai l'apparecchio, il cavo di alimentazione o la spina di rete nell'acqua o in altri liquidi. 10. Evitare di respirare particelle di sporco o polvere che potrebbero essere portatrici di malattie infettive. 11. Non utilizzare l'apparecchio senza un secchio per l'acqua di scarico. 12. Non utilizzare per scopi diversi dalla pulizia 13. Non piegarsi o rotolare 14. Tenere l'apparecchio fuori dalla portata dei bambini. 15. Non permettere ai bambini di usarlo o giocarci. 16. Non utilizzare all'aperto 17. Non continuare a utilizzarlo se la bocca di aspirazione è bloccata. 18. Per evitare scosse elettriche, non tirare il cavo di alimentazione per collegarlo o scollegarlo. Introduzione al prodotto  Corpo:
1 Serbatoio dell'acqua 2 Spazzola di pulizia 3 Pannello di controllo 4 Serbatoio dell'acqua sporco 5 corpo dell'apparecchio 6 Flessibile 7 Pulsante di spruzzatura dell'acqua 8 Supporto della maniglia 9 Supporto per avvolgicavo 10 Bloccaggio flessibile con l'apparecchio 11 Gancio di sospensioneAccessori
 1  2  3  4  5  6  7  8 1. Spazzola standard 2. Spazzola a traiettoria larga 3. Spazzola a T 4.Spazzola autopulente 5. Manuale di istruzioni 6.Supporto della maniglia 7. Gancio per la maniglia 8. Tubo flessibilePARAMETRI DEL PRODOTTO: PARAMETRI DELPRODOTTO
| Tensione nominale di esercizio | 25V 50Hz | Tipo di motore | Motore di aspirazione a umido e a secco |
| Potenza nominale | 1200W | Lunghezza del tubo flessibile | 1,8m |
| Grado di vuoto | 15Kpa | Livello di tenuta | IPX4 |
| Rumore | </= 80dB | Peso netto della macchina | 4,2kg |
| Capacità del serbatoio dell'acqua pulita | 1800mL | Ambiente di lavoro T°C | 5-50°C |
| Capacità del serbatoio dell'acqua sporca | 950mL | Dimensioni della macchina | 320*226*327mm |
| Lunghezza del cavo elettrico | 5m | Tempo di riscaldamento | 15s |
PREPARAZIONE
1. Rimuovere il gancio di sospensione e il supporto della maniglia. natural_image
Two 3D mechanical parts shown in wireframe and perspective views (no text or symbols)natural_image
Line drawing of a kitchen mixer with control panel and fan (no text or symbols)natural_image
Technical line drawing of a mechanical device with no visible text or symbolsnatural_image
Cross-sectional technical diagram of a mechanical assembly (no visible text or labels)natural_image
Diagram showing a mechanical component being inserted into a cylindrical device (no text or symbols present)ISTRUZIONI
6. Rimuovere il serbatoio dell'acqua pulita dal corpo. natural_image
Technical line drawing of a mechanical device with no visible text or symbolsnatural_image
Line drawing of a mechanical device with no visible text or symbolsnatural_image
Technical line drawing of a mechanical device with a downward arrow indicating motion (no text or symbols)natural_image
Line drawing of a plug inserted into an electrical outlet with three switches (no text or symbols)natural_image
Simple line drawing of a mechanical device with no text or symbolsnatural_image
Diagram of a handheld device with spray and spray pattern (no text or symbols)natural_image
Simple line drawing of a mechanical device with a lever and base plate (no text or symbols)natural_image
Simple line drawing of a mechanical device with no text or symbolsnatural_image
Illustration of a plug inserted into a wall-mounted electrical outlet (no text or symbols)natural_image
Simple line drawing of a mechanical component with no text or symbolsISTRUZIONI PER L'USO
Per evitare di ostruire il condotto dell'aria, rimuovere dall'area tutti i rifiuti di grandi dimensioni, come carta, pellicola da imballaggio, ecc. Questo apparecchio può essere utilizzato su superfici morbide come tessuti e pelucchi. Non si consiglia l'uso su superfici dure. 1. Premere l'interruttore per avviare la macchina e iniziare il lavoro; premere nuovamente l'interruttore per spegnere la macchina. 2. Potenza: la velocità predefinita è "Standard", premere il pulsante "Power" per passare alla velocità "Turbo". Premere nuovamente questo pulsante, per tornare alla velocità "Standard" e viceversa. 3. Temp: la modalità predefinita è "Caldo", premere il pulsante "Temp" per impostare la modalità su "Caldo". Premere nuovamente questo pulsante per passare alla modalità "Caldo". 4. Invito a riempire il serbatoio delle acque reflue: Quando il serbatoio dell'acqua di scarico è pieno, tutte le spie lampeggiano, il cicalino "drip" suona tre volte in successione per entrare in modalità standby. 5. Impostare la modalità in base alle esigenze, tenere la spazzola per la pulizia, premere e tenere premuto il pulsante "interruttore spruzzo d'acqua" sulla parte inferiore della manopola della spazzola per la pulizia, la testa dello spruzzo d'acqua continua a spruzzare acqua verso l'esterno; rilasciare il pulsante, lo spruzzo d'acqua si ferma. 6. Per le macchie comuni, versare il liquido detergente nel serbatoio e spruzzare l'acqua sulle macchie. Dopo aver spruzzato l'acqua, la spazzola per la pulizia viene utilizzata per strofinare le macchie più volte, mentre l'acqua di scarico viene aspirata nel contenitore delle acque reflue e aspirata più volte per pulire rapidamente le macchie. Dopo la pulizia, si consiglia di pulire nuovamente con acqua per evitare che il liquido di pulizia rimanga nel tessuto. 7. Per le macchie più ostinate, utilizzare innanzitutto una soluzione detergente speciale da spruzzare sul tessuto sopra la macchia, spruzzare dopo aver utilizzato più volte la spazzola di pulizia, la soluzione detergente dissolverà completamente la macchia, aprire la macchina per pulire il liquido e l'acqua di scarico nel serbatoio dell'acqua di scarico, aspirare più volte per pulire rapidamente la macchia. 8. Dopo la pulizia, utilizzare la testina autopulente e pulire il tubo in generale. Conservazione del cavo di alimentazione e del tubo flessibile 1. Questo prodotto ha un lungo cavo di alimentazione. Quando il prodotto è in uso, il cavo di alimentazione può essere avvolto sul retro della macchina. 2. Dopo l'utilizzo del prodotto, il tubo può essere arrotolato nell'apposito vano sul fondo della macchina. natural_image
Technical line drawing of a mechanical device with coiled tubing and mounting bracket (no text or symbols)ATTENZIONE: IL NOSTRO LAVORO È STATO FATTO IN MODO DA NON AVERE PROBLEMI.
1. Il cavo di alimentazione di questo prodotto è lungo, quindi fate attenzione a non inciampare durante l'utilizzo. 2. Non permettere ai bambini di sedersi sulla macchina. 3. Assicurarsi di utilizzare questo prodotto in modo sicuro. Non immergere il cavo di alimentazione in acqua. 4. Non utilizzare la macchina a temperature ambiente inferiori a 0°C-50°C. 5. è severamente vietato cambiare l'intera macchina, gli accessori e i cavi.MANUTENZIONE
ATTENZIONE: IL NOSTRO LAVORO È STATO FATTO IN MODO DA NON AVERE PROBLEMI.
Prima di effettuare la manutenzione, spegnere l'apparecchio e staccare la spina. Pulizia del corpo: Le macchie ordinarie possono essere rimosse con un panno umido. Lo sporco ostinato può essere eliminato con un panno umido imbevuto di detergente, quindi con un panno asciutto imbevuto di acqua. Dopo ogni uso: il prodotto Rimuoverli dal corpo, sciacquarli accuratamente con acqua e asciugarli all'aria. natural_image
Line drawings of five different mechanical components or housing designs, no text or symbols presentnatural_image
Simple line drawing of a mechanical device with a lever and shaft (no text or symbols)2. Installare la testina autopulente
sull'impugnatura, aprire la macchina e inserire la testina direttamente nel rubinetto per una pulizia diretta. Autopulizia natural_image
Simple line drawing of a mechanical device with a curved pipe and two containers (no text or symbols)natural_image
Diagram showing a mechanical device before and after assembly, with no visible text or symbolsnatural_image
Diagram showing a mechanical device before and after assembly, with no visible text or symbolsnatural_image
Line drawing of a handgun with two upright arms (no text or symbols)RISOLUZIONE DEI PROBLEMI
Se viene rilevato un guasto durante l'uso, fare riferimento alla seguente tabella| STATO | POSSIBILI CAUSE | METODO DI TRATTAMENTO |
| La macchina non funziona non dopo l'accensione dell'interruttore. | La spina non è corretta collegato ed è sciolto, che porta a scarso contatto. | Spegnere il dispositivo e ricollegalo. |
| La Ilinea Interna o Il cavo l'alimentazione è rotta. | Chlama Il telefono di rlaparazione. | |
| Tutta la macchina surriscaldamento e il dispositivo di la protezione funziona. | Fare riferimento alle istruzioni del dispositivo di protezione. | |
| Il prodotto non spruzza di acqua! | Blocco dell'ugello | Rimuovere la spina dall'ugello per usando un ago sottile. |
| Mancanza di acqua nel serbatoio di acqua pulita | Aggiungere acqua al serbatoio di acqua pulita in tempo | |
| Il tubo dell'acqua interno è intasato o rotto | Contattare il commerciante o il servizio di assistenza al cliente | |
| Rumore anomalo | La porta di aspirazione del prodotto è bloccato o rifiuti importanti sono inalati. | Eliminare i blocchi nel tempo |
| Guasto al motore | Contattare il commerciante o il servizio di assistenza al cliente | |
| Bassa aspirazione o assenza assorbimento d'acqua | Troppa acqua sporca nel serbatoio acqua sporca | Pulire il serbatoio dell'acqua sporca puntuale |
| Il tubo è rotto | Sostituire il tubo con un nuovo | |
| Lo sporco blocca l'asplrazione | Eliminare i blocchi nel tempo | |
| Macchina anormale o inoperativo | La temperatura ambiente è troppo alto o troppo basso | Tenere il dispositivo a temperatura adatto (0°C-50°C). |
| Contattare Il commerciante o Il servizio di assistenza al cliente |
GARANZIA
Il periodo di garanzia per i nostri prodotti è di 2 anni, se non diversamente stabilito dalla legge, a partire dalla data di acquisto iniziale o di consegna. Se avete problemi o domande, potete facilmente accedere alle nostre pagine di aiuto, consigli per la risoluzione dei problemi, FAQ e manuali d'uso sul nostro sito post-vendita: https://sav.hkoenig.com. Digitando il nome di riferimento del tuo dispositivo nella barra di ricerca, puoi accedere a tutto il supporto online disponibile, progettato per soddisfare al meglio le tue esigenze. Se ancora non riesci a trovare una risposta alla tua domanda o al tuo problema, allora clicca su "La risposta ha risolto il tuo problema ? Questo vi porterà al modulo di richiesta di supporto post-vendita, che potete completare per convalidare la vostra richiesta e ottenere aiuto.CONDIZIONI DI GARANZIA
La garanzia copre tutti i guasti derivanti da un uso normale, in conformità con gli usi e le specifiche del manuale utente. Questa garanzia non si applica a problemi di imballaggio o di trasporto durante la spedizione del prodotto da parte del proprietario. Non include inoltre la normale usura del prodotto, né la manutenzione o la sostituzione delle parti di consumo.ESCLUSIONE DELLA GARANZIA
\- Accessori e parti soggette a usura (\*). \- Normale manutenzione dell'apparecchio. \- Tutti i guasti derivanti da un uso improprio (urti, mancato rispetto delle raccomandazioni sull'alimentazione, cattive condizioni d'uso, ecc.), da una manutenzione inadeguata o da un uso improprio dell'apparecchio, nonché dall'uso di accessori inadeguati. \- Danni di origine esterna: incendio, danni d'acqua, sovratensione elettrica, ecc. \- Qualsiasi attrezzatura che sia stata smontata, anche parzialmente, da persone diverse da quelle autorizzate a farlo (in particolare l'utente). \- Prodotti per i quali il numero di serie è mancante, danneggiato o illeggibile, il che non permetterebbe la sua identificazione. \- Prodotti soggetti a noleggio, dimostrazione o esposizione. (\*) Alcune parti del suo apparecchio, note come parti soggette a usura o materiali di consumo, si deteriorano con il tempo e la frequenza d'uso del suo apparecchio. Questa usura è normale, ma può essere accentuata da cattive condizioni d'uso o di manutenzione del vostro apparecchio. Queste parti non sono quindi coperte dalla garanzia. Anche gli accessori forniti con l'apparecchio sono esclusi dalla garanzia. Non possono essere scambiati o rimborsati. Tuttavia, alcuni accessori possono essere acquistati direttamente dal nostro sito web: https://sav.hkoenig.com/.AMBIENTE
ATTENZIONE:
 Non gettare quest' apparecchio tra i rifiuti domestici. Per questo tipo di prodotti è fornito dai comuni un sistema di raccolta e ritiro in zona ed è quindi un dovere informarsi per conoscere il giusto smistamento del rifiuto. Infatti, i prodotti elettrici ed elettronici possono contenere sostanze pericolose che hanno effetti dannosi sull'ambiente o sulla nostra salute e quindi devono essere riciclati. Il simbolo al lato indica che le apparecchiature elettriche ed elettroniche fanno parte di una raccolta selettiva e differenziata (rappresentata da un bidone su due ruote sbarrato da una croce. Adeva SAS / H.Koenig Europe - 8 rue Marc Seguin, 77290 Mitry-Mory, France www.hkoenig.com - https://kundenservice.hkoenig.com - Tél: +33 1 64 67 00 05PORTUGUÊS
natural_image
Line drawing of a medical or laboratory device with a coiled tube and control panel (no text or symbols)ATENÇÃO
Leia atentamente o manual do utilizador. Limpar e manter o produto em conformidade com as instruções. Em caso de avaria, consultar primeiro o guia de resolução de problemas. Esta garantia é anulada se o defeito for causado por danos acidentais, utilização incorrecta, abuso, negligência, reparação inadequada ou modificação por pessoas não autorizadas, ou se não forem seguidas as instruções de funcionamento fornecidas com o produto. Esta garantia não se aplica ao desgaste normal ou à utilização comercial. Em nenhuma circunstância a responsabilidade excederá o preço de compra pago pelo comprador do produto. Em caso algum haverá qualquer responsabilidade por qualquer perda - direta ou indireta - ou quaisquer danos acidentais ou consequenciais resultantes de ou relacionados com a utilização do produto.INSTRUÇÕES DE SEGURANÇA IMPORTANTES
ANTES DE UTILIZAR ESTE APARELHO, LEIA TODA AS INSTRUÇÕES E AVISOS NO MANUAL DO UTILIZADOR E NO APARELHO. Ao utilizar um aparelho elétrico, devem ser sempre tomadas precauções básicas, incluindo as seguintes: 1. Desligar a ficha o antes de de manutenção, inspeccioná-lo ou deslocá-lo. 2. Utilizar um líquido de limpeza profissional sem bolhas para não danificar o aparelho. 3. Remover regularmente o pó da tomada 4. Ligar firmemente o aparelho à tomada quando estiver a ser utilizado. 5. Desligue o aparelho da tomada quando não estiver a ser utilizado durante longos períodos de tempo. 6. assegurar que a tomada não está sobrecarregada 7. Utilizar o aparelho com 220 V AC. 8. Em caso de avaria ou mau funcionamento, interromper imediatamente a utilização, desligar o aparelho e retirar a ficha da tomada. 9. Pare de utilizar o aparelho e consulte o manual ou o serviço de apoio ao cliente se detetar ruídos ou odores anormais. 10. Não não inalar quaisquer substâncias inflamáveis tais como pontas de cigarro. 11. Parar imediatamente do trabalho se a um objeto estranho bloquear o bico de pulverização. 12. Parar imediatamente o trabalho se for inalado um corpo estranho. 13. Se objectos estranhos obstruírem o balde de água limpa ou o balde de águas residuais, esvazie a água e limpe-a antes de continuar a utilizar o aparelho. 14. Não se esqueça de desligar o cabo de alimentação depois de o utilizar. 15. A limpeza e a manutenção pelo utilizador não devem ser efectuadas por crianças, a menos que tenham mais de 8 anos de idade e estejam sob a supervisão de um adulto. 16. Manter o aparelho e o respetivo cabo fora do alcance de crianças com menos de 8 anos. 17. Ao utilizar aparelhos eléctricos, devem ser sempre tomadas precauções de segurança para evitar qualquer risco de incêndio, choque elétrico e/ou ferimentos em caso de utilização indevida. 18. Verifique se a tensão indicada na placa de identificação do aparelho corresponde à da sua instalação eléctrica. Se não for o caso, contacte o seu revendedor e não ligue o aparelho. 19. O aparelho não deve ser utilizado se tiver caído, se apresentar sinais visíveis de danos ou se tiver fugas. 20. Mantenha este documento disponível e entregue-o ao futuro proprietário se vender o seu aparelho. 21. Não utilize o aparelho se o cabo de alimentação ou a ficha estiverem danificados, se não estiver a funcionar corretamente, se tiver sido danificado ou se tiver caído. Se o cabo estiver danificado, deve ser substituído pelo fabricante ou pelo seu agente, ou por uma pessoa qualificada para evitar qualquer risco. 22. Este aparelho pode ser utilizado por pessoas com capacidades físicas, sensoriais ou mentais reduzidas ou com falta de experiência e conhecimentos, desde que tenham recebido supervisão ou instruções relativas à utilização segura do aparelho e que compreendam os perigos envolvidos. As crianças não devem brincar com o aparelho. 23. Este aparelho destina-se a ser utilizado em aplicações domésticas e similares, tais como : a. zonas de cozinha em lojas, escritórios e outros ambientes de trabalho; b. quintas ; c.em hotéis, motéis e outros ambientes residenciais; d. quartos de hóspedes. 24. O aparelho não se destina a ser utilizado com um temporizador externo ou um sistema de controlo remoto separado. 25. Nunca mergulhar o aparelho, o cabo de alimentação ou a ficha de alimentação na água ou em qualquer outro líquido.Conselhos de segurança :
1. Não danificar o cabo de alimentação. Não o puxe quando o manusear. 2. Não utilizar o aparelho se o cabo de alimentação e a ficha estiverem partidos ou se a ficha se soltar. 3. Não tocar, ligar ou desligar o aparelho com as mãos molhadas. 4. Não permitir que crianças pequenas toquem na ficha de alimentação. 5. Não pulverizar pesticidas, tintas para o cabelo, lubrificantes ou outros líquidos. 6. Não inalar o calor dos gases de petróleo ou do pó seco. 7. Não desmontar, reparar ou modificar o aparelho por si próprio. 8. Não utilizar o aparelho em situações perigosas, como chuva ou ventos fortes. 9. Nunca mergulhar o aparelho, o cabo de alimentação ou a ficha de alimentação na água ou em qualquer outro líquido. 10. Evitar respirar partículas de sujidade ou poeira que possam ser portadoras de doenças infecciosas. 11. Não utilizar o aparelho sem um balde de águas residuais 12. Não utilizar para outros fins que não a limpeza 13. Não se dobrar nem rolar 14. Manter a máquina fora do alcance de crianças pequenas. 15. Não permitir que as crianças o utilizem ou brinquem com ele. 16. Não utilizar no exterior 17. Não continuar a utilizar o aparelho se a entrada de aspiração estiver bloqueada. 18. Para evitar choques eléctricos, não puxe pelo cabo de alimentação para o ligar ou desligar.Apresentação do produto
 Corpo :
1 Depósito de água 2 Escova de limpeza 3 Painel de controlo 4 Depósito de água sujo 5 corpo do aparelho 6 Flexível 7 Botão de pulverização de água 8 Suporte do punho 9 Suporte para enrolador de cabos 10 Bloqueio flexível com o aparelho 11 Gancho de suspensãoAcessórios
 1  2  3  4  5  6  7  8 1. Escova standard 2. Escova de trajetória larga 3. Escova em forma de T 4. Escova de auto-limpeza 5. Manual de instruções 6. Suporte do punho 7. Gancho de pega 8. MangueiraPARÂMETROS DO PRODUTO :
| Tensão nominal de funcionamento | 25V 50Hz | Tipo de motor | Motor de extração de poeiras húmidas e secas |
| Potência nominal | 1200W | Comprimento da mangueira | 1,8m |
| Grau de vácuo | 15Kpa | Nível de aperto | IPX4 |
| Ruído | </= 80dB | Peso líquido da máquina | 4,2 kg |
| Capacidade do depósito de água limpa | 1800mL | Ambiente de trabalho T°C | 5-50°C |
| Capacidade do reservatório de água suja | 950mL | Tamanho da máquina | 320*226*327mm |
| Comprimento do cabo elétrico | 5m | Tempo de aquecimento | 15s |
PREPARAÇÃO
1. Retirar o gancho de suspensão e o suporte do punho. natural_image
Two 3D mechanical component diagrams shown in wireframe and cutaway views (no text or symbols)natural_image
Line drawing of a kitchen mixer with control panel and fan (no text or symbols)natural_image
Technical line drawing of a mechanical device with no visible text or symbolsnatural_image
Cross-sectional technical diagram of a mechanical assembly (no visible text or labels)natural_image
Diagram showing a mechanical component being inserted into a cylindrical part, with an arrow indicating direction (no text or symbols present)INSTRUÇÕES
1. Retirar o depósito de água limpa da carroçaria. natural_image
Line drawing of a mechanical device with a handle and base, showing no text or symbolsnatural_image
Line drawing of a mechanical component with no visible text or symbolsnatural_image
Technical line drawing of a mechanical device with a downward arrow indicating motion or force (no text or symbols present)natural_image
Line drawing of a plug inserted into a wall-mounted electrical outlet (no text or symbols)natural_image
Simple line drawing of a washing machine with a handle and top-mounted fan (no text or symbols)natural_image
Diagram of a handheld device with spray and spray pattern (no text or symbols)natural_image
Simple line drawing of a mechanical device with a lever and base plate (no text or symbols)natural_image
Simple line drawing of a mechanical device with no text or symbolsnatural_image
Illustration of a plug inserted into a wall-mounted electrical outlet (no text or symbols)natural_image
Simple line drawing of a mechanical component with no text or symbolsINSTRUÇÕES DE UTILIZAÇÃO
Para evitar a obstrução da conduta de ar, é necessário retirar da área quaisquer pedaços grandes de lixo, tais como grandes pedaços de papel, película de embalagem, etc. Este aparelho pode ser utilizado em superfícies macias, como tecidos e cotão. Não se recomenda a sua utilização em superfícies duras. 1. Premir o interrutor para ligar a máquina e começar a trabalhar; premir novamente o interrutor para desligar a máquina. 2. Potência: A velocidade predefinida é "Standard", prima o botão "Power" para mudar para a velocidade "Turbo". Prima novamente este botão para voltar à velocidade "Standard" e vice-versa. 3. Temp: O modo predefinido é "Quente", prima o botão "Temp" para definir o modo para "Quente". Premir novamente este botão para mudar para o modo "Quente". 4. Convite para encher o depósito de águas residuais: Quando o depósito de águas residuais está cheio, todas as luzes piscam, a campainha de "gotejamento" soa três vezes seguidas para entrar no modo de espera. 5. Definir o modo de acordo com a procura, segurar a escova de limpeza, premir e manter premido o botão "interrutor de pulverização de água" na parte inferior do botão da escova de limpeza, a cabeça de pulverização de água continua a pulverizar água para fora; soltar o botão, a pulverização de água pára. 6. Para as nódoas normais, deitar o líquido de limpeza no depósito de limpeza e pulverizar água sobre as nódoas. Depois de pulverizar a água, a escova de limpeza é utilizada para limpar as nódoas várias vezes, e as águas residuais são aspiradas para o recipiente de águas residuais e aspiradas várias vezes para limpar as nódoas rapidamente. Após a limpeza, é aconselhável limpar novamente com água para evitar que o líquido de limpeza permaneça no tecido. 7. Para as nódoas mais difíceis, utilizar primeiro uma solução de limpeza especial para pulverizar sobre o tecido por cima da nódoa, pulverizar depois de utilizar a escova de limpeza várias vezes, a solução de limpeza dissolverá completamente a nódoa, abrir a máquina para limpar o líquido e a água de esgoto para o depósito de água de esgoto, aspirar várias vezes pode limpar rapidamente a nódoa. 8. Após a limpeza, utilize a cabeça da escova autolimpante e limpe a mangueira em geral. Guardar o cabo de alimentação e a mangueira : 1. Este produto tem um cabo de alimentação comprido. Quando o produto estiver a ser utilizado, o cabo de alimentação pode ser enrolado na parte de trás da máquina. 2. Depois de utilizar o produto, a mangueira pode ser enrolada na ranhura de armazenamento na parte inferior da máquina.ATENÇÃO :
1. O cabo de alimentação deste produto é comprido, pelo que deve ter cuidado para não tropeçar nele quando o utilizar. 2. Não permitir que as crianças se sentem em cima da máquina. 3. Certifique-se de que utiliza este produto de forma segura. Não mergulhar o cabo de alimentação na água. 4. Não utilizar a máquina a temperaturas ambiente inferiores a 0°C-50°C. 5. é estritamente proibido mudar toda a máquina, os acessórios e os fios.MANUTENÇÃO
ATENÇÃO :
Desligue-o e retire a ficha da tomada antes de efetuar qualquer intervenção. Limpeza do corpo : As manchas comuns podem ser removidas com um pano húmido. A sujidade mais persistente pode ser limpa com um pano húmido embebido em detergente e, em seguida, com um pano seco embebido em água. Após cada utilização : Retire-os do corpo, enxagúe-os bem com água e seque-os ao ar. natural_image
Line drawings of five different mechanical components or housing designs, no text or symbols presentnatural_image
Simple line drawing of two mechanical components or tools, one with a triangular base and the other with a cylindrical pin (no text or symbols)natural_image
Simple line drawing of a mechanical device with a lever and handle (no text or symbols)natural_image
Simple line drawing of a mechanical device with a curved pipe and two containers (no text or symbols)natural_image
Diagram showing a mechanical device before and after assembly, with no visible text or symbolsnatural_image
Line drawing of a handgun with two upright arms (no text or symbols)Mangueira amovível :
A mangueira desta máquina é amovível. Se a mangueira ficar danificada, retire-a e substitua-a por uma nova.RESOLUÇÃO DE PROBLEMAS
Se for detectada uma avaria durante a utilização, consulte a tabela seguinte| STATUS | CAUSAS POSSÍVEIS | METODO DE TRATAMENTO |
| A máquina não funciona depois de ligar o interruptor. | O plugue não está conectado corretamente e está solto, resultando em mau contato. | Desligue o dispositivo e conecte-o novamente. |
| A linha interna ou o cabo de alimentação está quebrado. | Ligue para o telefone de reparo. | |
| Toda a máquina superaquece e o dispositivo de proteção funciona. | Consulte as instruções do dispositivo de proteção. | |
| O produto não borrifa água | Bloqueio do bico | Remova a tampa do bico usando uma agulha fina. |
| Falta de água no tanque de água limpa | Adicione água ao tanque de água limpa a tempo | |
| A linha de água interna está entupida ou quebrada | Contacte o revendedor ou o serviço pós-venda | |
| Barulho fora do normal | A porta de sucção do produto está bloqueada ou grandes resíduos são inalados. | Limpe os bloqueios a tempo |
| Falha do motor | Contacte o revendedor ou o serviço pós-venda | |
| Baixa sucção ou falta de absorção de água | Muita água suja no tanque de água suja | Limpe o tanque de água suja a tempo |
| O cano está quebrado | Substitua a mangueira por uma nova | |
| A sujeira bloqueia a sucção | Limpe os bloqueios a tempo | |
| Máquina anormal ou inoperante | A temperatura ambiente está muito alta ou muito baixa | Mantenha o dispositivo a uma temperatura ambiente adequada (0°C-50°C). |
| Contacte o revendedor ou o serviço pós-venda |
GARANTIA
O período de garantia dos nossos produtos é de 2 anos, salvo disposição legal em contrário, a contar da data da compra inicial ou da entrega. Se tiver algum problema ou dúvida, pode aceder facilmente às nossas páginas de ajuda, dicas de resolução de problemas, perguntas frequentes e manuais de utilizador no nosso site pós-venda: https://sav.hkoenig.com. Ao escrever o nome de referência do seu dispositivo na barra de pesquisa, pode aceder a todo o suporte online disponível, concebido para melhor se adaptar às suas necessidades. Se, mesmo assim, não conseguir encontrar uma resposta para a sua pergunta ou problema, clique em "A resposta resolveu o seu problema? Isto conduzi-lo-á ao formulário de pedido de assistência pós-venda, que pode preencher para validar o seu pedido e obter ajuda.CONDIÇÕES DE GARANTIA
A garantia cobre todos os defeitos resultantes de uma utilização normal, de acordo com as utilizações e especificações do manual do utilizador. Esta garantia não se aplica a problemas de embalagem ou de transporte aquando da expedição do produto pelo proprietário. Também não inclui o desgaste normal do produto, nem a manutenção ou substituição de peças consumíveis.EXCLUSÃO DA GARANTIA
\- Acessórios e peças de desgaste (\*). \- Manutenção normal do aparelho. \- Todos os defeitos resultantes de uma utilização incorrecta (choques, inobservância das recomendações relativas à alimentação eléctrica, más condições de funcionamento, etc.), de uma manutenção inadequada ou de uma utilização incorrecta do aparelho, bem como da utilização de acessórios inadequados. \- Danos de origem externa: incêndio, danos causados pela água, sobretensão eléctrica, etc. - Qualquer equipamento que tenha sido desmontado, mesmo parcialmente, por pessoas não autorizadas a fazê-lo (nomeadamente o utilizador). - Produtos cujo número de série esteja ausente, danificado ou ilegível, o que não permitiria a sua identificação. - Produtos sujeitos a aluguer, demonstração ou exposição. (\*) Algumas peças do seu aparelho, designadas por peças de desgaste ou consumíveis, deterioram-se com o tempo e a frequência de utilização do seu aparelho. Este desgaste é normal, mas pode ser acentuado por más condições de utilização ou de manutenção do seu aparelho. Por conseguinte, estas peças não estão cobertas pela garantia. Os acessórios fornecidos com o aparelho estão igualmente excluídos da garantia. Não podem ser trocados ou reembolsados. No entanto, alguns acessórios podem ser adquiridos diretamente no nosso sítio Web: https://sav.hkoenig.com/.AMBIENTE
AVISO:
 Não deitar este aparelho no lixo doméstico. Os municípios dispõem de um sistema local de recolha e de retoma para este tipo de produtos, pelo que é seu dever informar-se sobre a forma correcta de eliminar os resíduos. De facto, os produtos eléctricos e electrónicos podem conter substâncias perigosas que têm efeitos nocivos para o ambiente ou para a nossa saúde, pelo que devem ser reciclados. O símbolo ao lado indica que os equipamentos eléctricos e electrónicos fazem parte de uma recolha selectiva e diferenciada (representada por um contentor com duas rodas riscadas). Adeva SAS / H.Koenig Europe - 8 rue Marc Seguin, 77290 Mitry-Mory, France www.hkoenig.com - https://kundenservice.hkoenig.com - Tél: +33 1 64 67 00 05POLSKI
natural_image
Line drawing of a medical or laboratory equipment setup with a coiled tube, control panel, and monitor (no text or symbols)UWAGA
Należy uważnie przeczytać instrukcję obsługi. Produkt należy czyścić i konserwować zgodnie z instrukcjami. W przypadku usterki należy najpierw zapoznać się z instrukcją rozwiązywania problemów. Niniejsza gwarancja traci ważność, jeśli wada jest spowodowana przypadkowym uszkodzeniem, niewłaściwym użytkowaniem, nadużyciem, zaniedbaniem, niewłaściwą naprawą lub modyfikacją przez osoby nieupoważnione lub nieprzestrzeganiem instrukcji obsługi dostarczonej z produktem. Niniejsza gwarancja nie obejmuje normalnego zużycia lub użytkowania komercyjnego. W żadnym wypadku odpowiedzialność nie przekroczy ceny zakupu zapłaconej przez nabywcę produktu. W żadnym wypadku nie będzie ponoszona odpowiedzialność za jakiekolwiek straty - bezpośrednie lub pośrednie - lub jakiekolwiek szkody przypadkowe lub wtórne wynikające z lub w związku z użytkowaniem produktu.WAŻNE INSTRUKCJE BEZPIECZEŃSTWA
PRZED UŻYCIEM TEGO URZĄDZENIA NALEŻY PRZECZYTAĆ WSZYSTKIE INSTRUKCJE I OSTRZEŻENIA W INSTRUKCJI OBSŁUGI I NA URZĄDZENIU. Podczas korzystania z urządzenia elektrycznego należy zawsze przestrzegać podstawowych środków ostrożności, w tym poniższych: 1. Odtącz urządzenieprzed do serwisowaniem, sprawdzeniem lub przeniesieniem. 2. Używaj profesjonalnego płynu do czyszczenia bez pęcherzyków powietrza, aby uniknąć uszkodzenia urządzenia. 3. Regularnie usuwaj kurz z gniazda 4. Podłącz urządzenie do zasilania, gdy jest używane. 5. Gdy urządzenie nie jest używane przez dłuższy czas, należy je odłączyć od zasilania. 6. upewnić się, że wtyczka nie jest przeciążona 7. Z urządzenia należy korzystać przy napięciu 220 V AC. 8. W przypadku usterki lub nieprawidłowego działania należy natychmiast przerwać korzystanie z urządzenia, wyłączyć je i odłączyć od zasilania. 9. W przypadku zauważenia nietypowych dźwięków lub zapachów należy zaprzestać korzystania z urządzenia i skonsultować się z instrukcją obsługi lub działem obsługi klienta. 10. Nie nie wdychać żadnych substancje łatwopalnych takich jak niedopatki papierosów. 11. Zatrzymać się natychmiast od praca jeśli a obcy przedmiot blokuje dyszę rozpylającą. 12. W przypadku wdychania ciał obcych należy natychmiast przerwać pracę. 13. Jeśli wiaderko na czystą wodę lub wiaderko na zużytą wodę zostanie zablokowane przez ciała obce, należy je opróżnić i wyczyścić przed dalszym korzystaniem z urządzenia. 14. Pamiętaj, aby odłączyć przewód zasilający po użyciu. 15. Czyszczenie i konserwacja przez użytkownika nie mogą być wykonywane przez dzieci, chyba że mają one więcej niż 8 lat i są pod nadzorem osoby dorostej. 16. Urządzenie i jego kabel należy przechowywać w miejscu niedostępnym dla dzieci poniżej 8 roku życia. 17. Podczas korzystania z urządzeń elektrycznych należy zawsze podejmować środki ostrożności, aby zapobiec ryzyku pożaru, porażenia prądem i/lub obrażeń w przypadku niewłaściwego użycia. 18. Należy sprawdzić, czy napięcie podane na tabliczce znamionowej urządzenia odpowiada napięciu w instalacji elektrycznej. Jeśli tak nie jest, należy skontaktować się ze sprzedawcą i nie podłączać urządzenia. 19. Urządzenia nie wolno używać, jeśli zostało upuszczone, ma widoczne ślady uszkodzenia lub przecieka. 20. Należy zachować ten dokument i przekazać go przysztemu właścicielowi w przypadku sprzedaży urządzenia. 21. Nie używaj urządzenia, jeśli jego kabel zasilający lub wtyczka są uszkodzone, jeśli nie działa ono prawidłowo, jeśli zostało uszkodzone lub upuszczone. Jeśli kabel jest uszkodzony, musi zostać wymieniony przez producenta lub jego przedstawiciela, lub przez wykwalifikowaną osobę, aby uniknąć jakiegokolwiek ryzyka. 22. To urządzenie może być używane przez osoby o ograniczonych zdolnościach fizycznych, sensorycznych lub umysłowych lub nieposiadające doświadczenia i wiedzy, pod warunkiem, że otrzymały one nadzór lub instrukcje dotyczące bezpiecznego korzystania z urządzenia i rozumieją związane z tym zagrożenia. Dzieci nie mogą bawić się urządzeniem. 23. To urządzenie jest przeznaczone do użytku w domowych i podobnych zastosowań, takich jak : a. obszary kuchenne w sklepach, biurach i innych środowiskach pracy; b. gospodarstwa ; c.w hotelach, motelach i innych środowiskach mieszkalnych; d. pokoje gościnne. 24. Urządzenie nie jest przeznaczone do obsługi za pomocą zewnętrznego timera lub oddzielnego systemu zdalnego sterowania. 25. Nigdy nie zanurzaj urządzenia, przewodu zasilającego lub wtyczki sieciowej w wodzie lub innym płynie. Wskazówki dotyczące bezpieczeństwa : 1. Nie wolno uszkodzić przewodu zasilającego. Nie ciągnąć go podczas obsługi. 2. Nie używaj urządzenia, jeśli przewód zasilający i wtyczka są uszkodzone lub jeśli wtyczka jest poluzowana. 3. Nie dotykać, nie podłączać ani nie odłączać urządzenia mokrymi rękami. 4. Nie należy pozwalać małym dzieciom na dotykanie wtyczki zasilania. 5. Nie rozpyłać pestycydów, farb do włosów, smarów ani innych płynów. 6. Nie wdychać ciepta gazów ropopochodnych ani suchego pytu. 7. Nie należy samodzielnie demontować, naprawiać ani modyfikować urządzenia. 8. Nie używaj urządzenia w niebezpiecznych sytuacjach, takich jak deszcz lub silny wiatr. 9. Nigdy nie zanurzaj urządzenia, jego przewodu zasilającego lub wtyczki sieciowej w wodzie lub innym płynie. 10. Unikaj wdychania cząstek brudu lub pyłu, które mogą przenosić choroby zakaźne. 11. Nie używaj urządzenia bez wiaderka na ścieki 12. Nie używać do celów innych niż czyszczenie 13. Nie schylaj się ani nie przewracaj 14. Urządzenie należy przechowywać w miejscu niedostępnym dla małych dzieci. 15. Nie pozwalać dzieciom na korzystanie z urządzenia lub zabawę nim. 16. Nie używać na zewnątrz 17. Nie używaj urządzenia, jeśli wlot ssania jest zablokowany. 18. Aby uniknąć porażenia prądem, nie należy ciągnąć za przewód zasilający w celu jego podłączenia lub odłączenia.Wprowadzenie produktu
 Ciało :
1 Zbiornik na wodę 2 Szczotka do czyszczenia 3 Panel sterowania 4 Brudny zbiornik na wodę 5 korpus urządzenia 6 Elastyczność 7 Przycisk rozpylania wody 8 Wsparcie uchwytu 9 Wspornik bębna kablowego 10 Elastyczne blokowanie za pomocą urządzenia 11 Hak do zawieszaniaAkcesoria
 1  2  3  4  5  6  7  8 1. Standardowa szczotka 2. Szczotka o szerokiej trajektorii 3. Szczotka w kształcie litery T 4. Szczotka samoczyszcząca 5. Instrukcja obsługi 6. Wsparcie uchwytu 7. Hak uchwytu 8. Wąż PARAMETRY PRODUKTU :| Znamionowe napięcie robocze | 25V 50Hz | Typ silnika | Silnik odpylający na mokro i sucho |
| Moc znamionowa | 1200W | Długość węża | 1,8m |
| Stopień próżni | 15Kpa | Poziom szczelności | IPX4 |
| Hałas | </= 80dB | Masa netto urządzenia | 4,2 kg |
| Pojemność zbiornika czystej wody | 1800 ml | Środowisko pracy T°C | 5-50°C |
| Pojemność zbiornika brudnej wody | 950 ml | Rozmiar maszyny | 320*226*327mm |
| Długość kabla elektrycznego | 5m | Czas nagrzewania | 15s |
PRZYGOTOWANIE
1. Zdejmij hak zawieszenia i wspornik uchwytu. natural_image
Two 3D mechanical component diagrams shown in wireframe and perspective views (no text or symbols)natural_image
Line drawing of a kitchen mixer with control panel and fan (no text or symbols)natural_image
Technical line drawing of a mechanical device with no visible text or symbolsnatural_image
Cross-sectional technical diagram of a mechanical assembly (no visible text or labels)natural_image
Diagram showing a mechanical component being inserted into a cylindrical part, with an arrow indicating direction (no text or symbols present)INSTRUKCJE
1. Wyjmij zbiornik czystej wody z korpusu. natural_image
Line drawing of a mechanical device with a gear and handle (no text or symbols)natural_image
Technical line drawing of a mechanical device with a downward arrow indicating motion (no text or symbols)natural_image
Line drawing of a plug inserted into a wall-mounted electrical outlet (no text or symbols)natural_image
Simple line drawing of a kitchen appliance with a refrigerator and a showerhead (no text or symbols)natural_image
Diagram of a handheld device with spray and spray pattern (no text or symbols)natural_image
Simple line drawing of a mechanical device with a lever and base plate (no text or symbols)natural_image
Simple line drawing of a mechanical device with no text or symbolsnatural_image
Illustration of a plug inserted into an electrical outlet with two switches (no text or symbols)natural_image
Simple line drawing of a mechanical component with no text or symbolsINSTRUKCJE UŻYTKOWANIA
Aby uniknąć zablokowania kanału powietrznego, należy usunąć wszelkie duże śmieci z obszaru, takie jak duże kawałki papieru, folia do pakowania itp. Urządzenie może być używane na miękkich powierzchniach, takich jak tkaniny i klaczki. Nie zaleca się używania go na twardych powierzchniach. 1. Naciśnij przełącznik, aby uruchomić maszynę i rozpocząć pracę; naciśnij przełącznik ponownie, aby wyłączyć maszynę. 2. Moc: Domyślna prędkość to "Standardowa", naciśnij przycisk "Moc", aby przełączyć na prędkość "Turbo". Naciśnij ten przy cisk ponownie, aby powrócić do prędkości "Standard" i odwrotnie. 3. Temp: Domyślnym trybem jest "Ciepły", naciśnij przycisk "Temp", aby ustawić tryb na "Gorący". Naciśnij ten przycisk ponownie, aby przełączyć na tryb "Ciepły". 4. Zaproszenie do napełnienia zbiornika na ścieki: Gdy zbiornik na ścieki jest pełny, wszystkie kontrolki migają, brzęczyk "kroplówki" rozbrzmiewa trzy razy z rzędu, aby przejść do trybu gotowości. 5. Ustaw tryb zgodnie z zapotrzebowaniem, przytrzymaj szczotkę czyszczącą, naciśnij i przytrzymaj przycisk "przełącznika strumienia wody" na spodzie pokrętła szczotki czyszczącej, głowica rozpylająca wodę nadal rozpyła wodę na zewnątrz; zwolnij przycisk, strumień wody zatrzyma się. 6. W przypadku zwykłych plam należy włać płyn czyszczący do zbiornika czyszczącego i rozpylić wodę na plamy. Po rozpyleniu wody, szczoteczka do czyszczenia jest używana do kilkukrotnego wycierania plam, a ścieki są zasysane do zbiornika na ścieki i kilkakrotnie odkurzane w celu szybkiego usunięcia plam. Po czyszczeniu zaleca się ponowne wyczyszczenie wodą, aby zapobiec pozostaniu płynu czyszczącego w tkaninie. 7. W przypadku uporczywych plam najpierw użyj specjalnego roztworu czyszczącego, aby spryskać tkaninę nad plamą, spryskaj po kilkukrotnym użyciu szczotki czyszczącej, roztwór czyszczący całkowicie rozpuści plamę, otwórz maszynę, aby wyczyścić płyn i wodę ściekową do zbiornika wody ściekowej, kilkakrotne odkurzanie może szybko wyczyścić plamę. 8. Po czyszczeniu należy użyć samoczyszczącej głowicy szczotki i ogólnie wyczyścić wąż. Przechowywanie przewodu zasilającego i węża : 1. Ten produkt ma długi przewód zasilający. Gdy produkt jest używany, przewód zasilający można owinąć wokół tylnej części urządzenia. 2. Po użyciu produktu wąż można zwinąć w szczelinie do przechowywania w dolnej części urządzenia. natural_image
Technical line drawing of a mechanical device with coiled tubing and mounting bracket (no text or symbols)UWAGA :
6. Przewód zasilający tego produktu jest długi, więc należy uważać, aby nie potknąć się o niego podczas użytkowania. 7. Nie pozwalaj dzieciom siadać na urządzeniu. 8. Należy zapewnić bezpieczne korzystanie z tego produktu. Nie zanurzać przewodu zasilającego w wodzie. 9. Nie używaj urządzenia w temperaturze otoczenia poniżej 0°C-50°C. 10. 5. zmiana całego urządzenia, akcesoriów i przewodów jest surowo zabroniona.KONSERWACJA
UWAGA :
Przed serwisowaniem należy wyłączyć urządzenie i odłączyć je od zasilania. Czyszczenie ciała : Zwykłe plamy można usunąć wilgotną szmatką. Uporczywe zabrudzenia można zetrzeć wilgotną szmatką nasączoną detergentem, a następnie wytrzeć suchą szmatką nasączoną woda. Po każdym użyciu : Zdejmij je z ciała, dokładnie spłucz wodą i wysusz na powietrzu. natural_image
Line drawings of five different mechanical components or parts, including cylindrical and triangular shapes (no text or symbols)natural_image
Simple line drawing of two mechanical components or tools, one tilted and one with a long line extending (no text or symbols)natural_image
Simple line drawing of a mechanical component or tool with no visible text or symbolsnatural_image
Simple line drawing of a laboratory apparatus with a curved tube and two beakers (no text or symbols)natural_image
Diagram showing a mechanical device before and after assembly, with no visible text or symbolsnatural_image
Diagram showing a cleaning or repair process: one machine with attached components, the other with a device (no text or symbols present)natural_image
Line drawing of a firearm with two upright arms (no text or symbols)ROZWIĄZYWANIE PROBLEMÓW
W przypadku wykrycia usterki podczas użytkowania należy zapoznać się z poniższą tabelą| STATUS | MOŻLIWE PRZYCZYNY | METODA LECZENIA |
| Maszyna nie działa po włączeniu wyłącznika. | Wtyczka nie jest prawidłowo podłączona i jest luźna, co powoduje słaby kontakt. | Wyłącz urządzenie i podłącz je ponownie. |
| Uszkodzona linia wewnętrzna lub przewód zasilający. | Zadzwoń na telefon naprawczy. | |
| Cała maszyna przegrzewa się i działa urządzenie zabezpieczające. | Zapoznaj się z instrukcją urządzenia zabezpieczającego. | |
| Produkt nie rozpyła wody | Zablokowanie dyszy | Zdejmij nasadkę dyszy za pomocą cienkiej igły. |
| Brak wody w zbiorniku czystej wody | Dodaj wodę do zbiornika czystej wody na czas | |
| Wewnętrzna linia wodna jest zatkana lub uszkodzona | Skontaktuj się ze sprzedawcą lub serwisem posprzedażowym | |
| Nienormalny hałas | Port zasysania produktu jest zablokowany lub wdychane są duże odpady. | Usuń blokady na czas |
| Awaria silnika | Skontaktuj się ze sprzedawcą lub serwisem posprzedażnym | |
| Niskie ssanie lub brak absorpcji wody | Za dużo brudnej wody w zbiorniku brudnej wody | Wyczyść zbiornik brudnej wody na czas |
| Rura jest uszkodzona | Wymień wąż na nowy | |
| Brud blokuje ssanie | Usuń blokady na czas | |
| Nieprawidłowa lub niedziałająca maszyna | Temperatura otoczenia jest za wysoka lub za niska | Przechowuj urządzenie w odpowiedniej temperaturze otoczenia (0°C-50°C). |
| Skontaktuj się ze sprzedawcą lub serwisem posprzedażowym |