STC62 - Aspiradora H.KOENIG - Manual de uso y guía de instrucciones gratis
Encuentra gratis el manual del aparato STC62 H.KOENIG en formato PDF.

Elija su idioma y proporcione su correo: le enviaremos una version traducida especificamente para usted.
| Marca | H.Koenig |
| Modelo | STC62 |
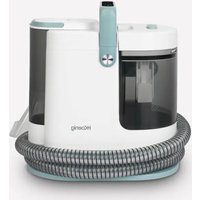
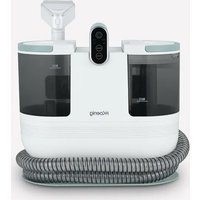
| Tipo de producto | Aspirador sin bolsa |
| Potencia | 850 W |
| Alimentación | 220-240 V ~ 50 Hz |
| Longitud del cable | Aproximadamente 5 m (estimación) |
| Capacidad del depósito de polvo | 1,5 L (estimación) |
| Filtración | Filtro HEPA lavable + esponja de salida |
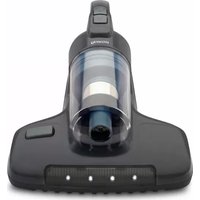
| Accesorios incluidos | Boquilla plana, cepillo redondo, cepillo para muebles, cepillo para parqué |
| Tubo de aspiración | Tubo metálico extensible |
| Enrollador de cable | Automático con marcas (amarillo/rojo) |
| Uso | Solo doméstico |
| Garantía | 2 años |
| Peso | Aproximadamente 4,5 kg (estimación) |
| Dimensiones (L x An x Al) | Aproximadamente 40 x 30 x 30 cm (estimación) |
Preguntas frecuentes - STC62 H.KOENIG
¿Cómo ensamblar el aspirador H.Koenig STC62?
Para ensamblar el aparato, conecte la manguera flexible insertándola en la entrada y girando hacia la derecha. Luego conecte el tubo metálico extensible a la manguera, luego fije el cepillo encajando el tubo y girando. Finalmente, enchufe el cable de alimentación y presione el botón de encendido/apagado.
¿Cómo vaciar el depósito de polvo?
Para vaciar el depósito, presione el botón de desbloqueo ubicado en el asa, retire el depósito del aparato. Colóquelo sobre una basura, presione el botón debajo del depósito para abrir la parte inferior y deje caer el polvo. Cierre la parte inferior antes de volver a colocar el depósito.
¿Cómo limpiar el filtro HEPA del aspirador?
Para limpiar el filtro HEPA, abra el panel de salida de aire, retire el filtro y gire la tapa HEPA para separarla. Lave el filtro HEPA, la tapa y la esponja con agua sin detergente, luego séquelos completamente antes de volver a montarlos. Nunca use un filtro húmedo.
¿Qué hacer si el cable de alimentación no se enrolla más?
Si el cable no se enrolla, verifique que no esté torcido o bloqueado. Asegúrese de que el cable esté completamente extendido (hasta la marca amarilla) y no hasta la marca roja. Presione suavemente el botón de enrollamiento hasta que el cable entre completamente. Nunca fuerce.
¿Puedo aspirar agua con el aspirador H.Koenig STC62?
No, este aspirador está diseñado solo para limpieza en seco. Aspirar agua o cualquier líquido puede dañar seriamente el motor y anular la garantía.
El aspirador pierde potencia, ¿qué verificar?
Si la potencia de aspiración disminuye, verifique primero que el depósito de polvo no esté lleno y que el filtro HEPA no esté obstruido. Limpie el filtro si es necesario. Verifique también que la manguera y los accesorios no estén obstruidos por residuos.
¿Cómo usar el cepillo para parqué suministrado con el modelo STC62?
El cepillo para parqué está especialmente diseñado para suelos duros (parqué, baldosas). Fíjelo simplemente al tubo metálico como un cepillo estándar. Tiene cerdas suaves para no rayar las superficies delicadas.
¿Dónde puedo comprar piezas de repuesto para mi aspirador?
Las piezas de repuesto (filtros, accesorios) están disponibles en el sitio web oficial del servicio técnico H.Koenig: https://sav.hkoenig.com/. También puede contactar al servicio de atención al cliente en los datos indicados en el manual.
¿La garantía cubre roturas accidentales?
La garantía de 2 años cubre averías debidas a un uso doméstico normal, de acuerdo con el manual. No cubre daños causados por mal uso, golpes, uso de accesorios no adecuados, ni piezas de desgaste (filtros, accesorios).
¿Puedo usar el aspirador sin filtro?
No, está prohibido usar sin filtro HEPA. Esto provocaría pérdida de potencia, daños al motor y anularía la garantía. Asegúrese siempre de que todos los filtros estén correctamente colocados antes de encender el aparato.
Preguntas de los usuarios sobre STC62 H.KOENIG
0 pregunta sobre este aparato. Responde a las que conoces o haz la tuya.
Hacer una nueva pregunta sobre este aparato
Aún no hay preguntas. Sé el primero en hacer una.
Descarga las instrucciones para tu Aspiradora en formato PDF gratis! Encuentra tus instrucciones STC62 - H.KOENIG y toma tu dispositivo electrónico nuevamente en la mano. En esta página están publicados todos los documentos necesarios para el uso de su dispositivo. STC62 de la marca H.KOENIG.
MANUAL DE USUARIO STC62 H.KOENIG
H
Instruction Manual
Manuel d'instructions
Bedienungsanleitung
Gebruiksaanwijzing
Manual de instrucciones
Manuale d'uso
Manual de instruções
Instrukcja obsługi

natural_image
Technical line drawing of a mechanical device with no visible text or symbols

natural_image
Technical line drawing of a vacuum cleaner (no text or symbols visible)
Vacuum cleaner
Aspirateur
Staubsauger
Stofzuiger
Aspiradora
Aspirapolvere
Aspirador
Odkurzacz

ENGLISH
Product Power (W) Accessories STC56 700 W Crevice nozzle, round and furniture brush STC58 850 W STC56 + pet brush STC62 850 W STC56 + parquet brush
STRUCTURE OF THE PRODUCT

16

12

13

14

15
1 Brush tool 9 Winding device button 2 Extending metal tube 10 Back wheel 3 Power button 11 Back wheel rubber 4 Handle 12 Crevice nozzle 5 Handle of the dust cup 13 Accessory holder 6 Hose 14 Round brush 7 Hose connector 15 Furniture brush 8 Dust cup 16 Pet brush (only for STC58) 17 Parquet brush (only for STC62)
Safety warning
1. Be sure to use the cleaner in compliance with the contents of this manual, and use the fittings designated by the manufacturer.
2. Please do not leave the cleaner when it is powered on.
Turn off the power switch and pull out the power plug when not using or before maintenance.
3. Please do not pull or carry the cleaner by the power cord, or nip it when closing a door; keep the cord free from the press of the cleaner.
4. Please do not let children take the cleaner as a toy, and close attention is necessary when the cleaner approaches children.
5. Please do not use the cleaner when its power cord or plug is damaged. Send it to the appointed service center. Please do not unplug by pulling the cord or plug. To unplug, grasp the plug, not the cord.
6. Never pull the power plug or use the cleaner with wet hands.
7. When using the cleaner, pay attention to prevent any
hair roll or other rubbish block up the air inlet (including the hose and the spill), otherwise motor failure and housing distortion may be caused. If the matters absorbed in forms a blockage, stop the cleaner by pulling out the power plug immediately to clean the blockage.
8. When using the cleaner, don't plug up the air outlet by towel or other matters, otherwise the efficiency of dust absorbance will be influenced, and the motor will be at high risk of being burnt out.
9. Never use the cleaner at uneven floor or ground; and be very careful when cleaning stairs to prevent the cleaner from falling down.
10. Never absorb live stumps with the cleaner, otherwise the motor may be damaged.
11. The cleaner should be kept far away from heat sources (such as central heating, oven, etc) to avoid the distortion of plastic parts as well as the influence caused by such distortion.
12. Before using the cleaner, please remove big and sharp matters on the floor to avoid damaging the plastic parts, filter gauzes and motor.
13. Never absorb water or other liquid with this cleaner, otherwise, the motor will be damaged.
14. This appliance may be used by persons with reduced physical, sensory or mental capabilities or lack of experience or knowledge, provided that they are supervised or instructed in the safe use of the appliance and that they fully understand the potential hazards.
15. If the power cord is damaged, it must be replaced with an after-sales service to avoid any danger.
16. Do not operate this appliance if it has a damaged cord or plug, if it is not working properly or if it has been damaged or dropped. If the supply cord is damaged, it must be replaced by the manufacturer or its service agent or a similarly qualified person in order to avoid a hazard.
17. This appliance may be used by children of at least 8 years of age, as long as they are supervised and have been given instructions about using the appliance safely and are fully aware of the dangers involved.
18. Cleaning and maintenance should not be carried
out by children unless they are at least 8 years of age and are supervised by an adult.
19. Keep the appliance and its power cord out of reach of children under 8 years of age.
20. When using electrical equipment, safety precautions must always be taken to prevent the risk of fire, electric shock and/or injury in the event of misuse.
21. Make sure that the voltage rating on the typeplate corresponds to your main voltage of your installation. If this is not the case, contact the dealer and do not connect the unit
22. Never leave the unit unattended while in operation.
23. Make sure the power supply is 220-240V 50Hz
24. Your appliance has been designed for domestic use only. It is not intended for use in the following situations which are not covered by the warranty:
\- in staff kitchen areas in shops, offices and other professional environments,
\- in farm hostels,
\- by guests in hotels, motels and other residential environments,
\- in bed and breakfast type environments.
HOW TO USE
ASSEMBLY BEFORE USE
Fig.1 shows the connection of the hose and the vacuum cleaner:
Put the hose connector in front of the vacuum cleaner. Then insert it into the inlet hole and turn right. If you want to disassemble it, you can turn the hose connection left and then pull it out.
Fig.2 shows the connection of the hose and the extending metal tube:
Hold the flexural connector of the hose and put it into the bigger hole of the tube.
Fig.3 shows the connection of the tube and the brush tool:
Put the metal tube into the hole of the brush and rotate it to fasten them.
Fig.4 shows how to check the winding of the power cord.
You can pull the power cord out of the machine and stop it when you see the yellow mark. Make sure the red mark is not out. When your sweep is over, first turn off the power, pull the plug out of the socket, and then push the winding device button until the cord is completely in the machine.
Fig.5 shows the power button
Put the plug into the socket, push the power button to control the work of the machine.

Fig.3
Fig.4

natural_image
Technical line drawing of a mechanical component with no visible text or symbols
Fig.5
CLEANING OF THE DUST CHAMBER
The steps of the chamber cleaning:
1. As in Fig.6, hold the dust chamber and handle and push the release button.
2. As in Fig.7, take the dust chamber out of the machine.
3. As in Fig.8, put the dust chamber onto the rubbish bin, push the release button to open the bottom of the dust chamber, and the dirt and dust will fall into the bin by themself.
4. As in Fig.9, shut up the dust chamber for a circular use after your cleaning.
Fig.6

natural_image
Technical line drawing of a mechanical device with no visible text or symbols
Fig.7

natural_image
Technical line drawing of a portable air purifier with hoses and connectors (no text or symbols)
Fig.8
Fig.9

MAINTENANCE
HOW TO MAINTAIN
1. The filter should be cleaned twice a year, and when there is obvious dirt on the filter, it is time.
2. You must fix the filter properly before running the vacuum cleaner.
3. The filter can't be cleaned in the washing machine or baked by the blower.
4. It will reduce the suction power and damage the motor if you use the wet filter.
5. Steps for maintenance:
1) As in fig.10, press the outlet lock to open the outlet board.
2) As in fig.11, get out the outlet filter.
3) As in fig.12, rotate the HEPA cover to separate it from
the chamber cover
4) As in fig.13, get the HEPA cover
5) As in fig.14, If you have any hair winding removable cleaning.
6) As in fig.15, get the HEPA and wash it.
7) Wash the HEPA cover, the HEPA assembly, the outlet sponge and the dust chamber in the water without detergent and dry them before use.

natural_image
Line drawing of a mechanical device with no visible text or symbols

natural_image
Technical line drawing of a mechanical device with no visible text or symbols
8) Put the dust chamber assembly into the machine. And in this process, first you should make the chamber in the right position and then press the handle of the dust chamber, if there is a cluck it means the operation is successful.
Fig.10

natural_image
Technical line drawing of a mechanical device with no visible text or symbols
Fig.11

natural_image
Technical line drawing of a DSLR camera with front panel and control buttons (no text or symbols)
Fig.12

natural_image
Line drawing of a hand holding a container with a curved handle, alongside a red curved shape (no text or symbols)
Fig.13

natural_image
Line drawing of a rice cooker with lid open, showing internal components and a red flame symbol (no text or labels)
Fig.14

Fig.15

natural_image
Line drawing of a rice cooker with lid and side legs (no text or symbols)
WARRANTY
The warranty period for our products is 2 years.
If you have any problems or questions, you can easily access our help pages, troubleshooting tips, FAQ, and user manuals on our service site: https://sav.hkoenig.com.
By typing the reference name of your device in the search bar, you can access all available online support, designed to best meet your needs.
If you still cannot find an answer to your question or problem, then click on "Did the answer solve your problem?". This will direct you to the Customer Support Request Form, which you can fill out to validate your request and get help.
WARRANTY CONDITIONS
The warranty covers all failures occurring under normal use, in accordance with the usage and specifications in the user's manual.
This warranty does not apply to packaging or transportation problems during shipment of the product by the owner. It also does not include normal wear and tear of the product, non maintenance or replacement of consumable parts.
EXCLUSION OF WARRANTY
- Accessories and wearing parts (\*).
- Normal maintenance of the device.
- All breakdowns resulting from improper use (shocks, failure to comply with power supply recommendations, poor conditions of use, etc.), insufficient maintenance or misuse of the device, as well as the use of unsuitable accessories.
- Damage of external origin: fire, water damage, electrical surge, etc.
- Any equipment that has been disassembled, even partially, by persons other than those authorized to do so (notably the user).
- The products whose serial number would be missing, deteriorated or illegible that would not allow its identification.
- The products subjected to leasing, demonstration, or exhibition.
(\*) Some parts of your device, called wear parts or consumables, deteriorate with time and frequency of use of your device. This wear and tear are normal but can be accentuated by poor conditions of use or maintenance of your device. These parts are therefore not covered by the warranty.
The accessories supplied with the device are also excluded from the warranty. They cannot be exchanged or refunded. However, some accessories can be purchased directly through our website: https://sav.hkoenig.com/.

CAUTION
Do not dispose of this product as it has with other household products. There is a separation of this waste product into communities, you will need to inform your local authorities about the places where you can return this product. In fact, electrical and electronic products contain hazardous substances that have harmful effects on the environment or human health and should be recycled. The symbol here indicates that electrical and electronic equipment should be chosen carefully, a wheeled waste container is marked with a cross.
Adeva SAS / H.Koenig Europe - 8 rue Marc Seguin - 77290 Mitry Mory - France www.hkoenig.com - sav@hkoenig.com - contact@hkoenig.com - Tél: +33 1 64 67 00 05
FRANÇAIS
Produit Puissance (W) Accessoires STC56 700 W Suceur plat, brosse ronde et brosse à meubles STC58 850 W STC56 + brosse animaux STC62 850 W STC56 + brosse parquet

1 Brosse large 9 Bouton du dispositif d'enroulement 2 Tube extensible en métal 10 Roue 3 Bouton de déverrouillage 11 Pneu de la roue 4 Poignée 12 Suceur plat 5 Bac à poussière et poignée 13 Support à accessoires 6 Tuyau flexible 14 Brosse ronde 7 Raccord du tuyau flexible 15 Brosse pour tissu d'ameublement 8 Bac à poussière 16 Brosse pour animaux (STC58) 17 Brosse pour parquet (STC62)
Avertissement de Sécurité
1. Assurez-vous d'utiliser l'aspirateur conformément au contenu de ce manuel et d'employer les accessoires fournis par le fabricant.
2. Veuillez ne pas laisser l'aspirateur lorsqu'il est allumé. Mettez l'interrupteur d'alimentation sur Off et retirez la fiche d'alimentation lorsque vous ne l'utilisez pas ou avant l'entretien.
3. Veuillez ne pas tirer ou transporter l'aspirateur par le cordon d'alimentation, ni le pincer lors de la fermeture d'une porte. Ne passez pas sur le cordon avec l'aspirateur.
4. Veuillez ne pas laisser les enfants jouer avec l'aspirateur. Soyez prudent quand vous utilisez l'aspirateur près des enfants.
5. Veuillez ne pas utiliser l'aspirateur lorsque son cordon d'alimentation ou sa fiche est endommagée. .Envoyez-le au service technique agréé. Veuillez ne pas débrancher en tirant sur le cordon ou la fiche, mais saisissez la fiche et non le cordon.
6. Ne tirez jamais sur la fiche d'alimentation et n'utilisez pas l'aspirateur avec les mains mouillées.
7. Lorsque vous utilisez l'aspirateur, évitez que des déchets bloquent l'entrée d'air sous peine d'abîmer le moteur. Un problème peut survenir si les matières absorbées obstruent le tuyau. Arrêtez l'aspirateur en débranchant immédiatement la fiche d'alimentation pour déboucher le tuyau.
8. Lorsque vous utilisez l'aspirateur, ne bouchez pas la sortie d'air avec une serviette ou d'autres objets, sinon le rendement de l'appareil sera affecté et le moteur pourra surchauffer.
9. Ne jamais utiliser l'aspirateur sur un sol inégal, et soyez très prudent lors du nettoyage des escaliers pour éviter qu'il ne tombe.
10. Ne jamais absorber de choses vivantes avec l'aspirateur, sinon le moteur pourrait être endommagé.
11. L'aspirateur doit être gardé loin des sources de chaleur (comme le chauffage central, le four, etc.) pour éviter la déformation des pièces en plastique et ses conséquences.
12. Avant d'utiliser l'aspirateur, veuillez enlever les débris gros et tranchants sur le sol pour éviter d'endommager les pièces en plastique, le filtre et le moteur.
13. N'absorbez jamais d'eau ou tout autre liquide avec l'aspirateur, sinon le moteur sera endommagé.
14. Cet appareil peut être utilisé par des personnes dont les capacités physiques, sensorielles ou mentales sont réduites ou dont l'expérience ou les connaissances ne sont pas suffisantes, à condition qu'elles bénéficient d'une surveillance ou qu'elles aient reçu des instructions quant à l'utilisation de l'appareil en toute sécurité et qu'elles en comprennent bien les dangers potentiels.
15. Si le cordon d'alimentation est endommagé, il doit être remplacé par un technicien agréé pour éviter tout accident.
16. N'utilisez pas cet appareil si son cordon ou sa fiche est endommagée, s'il ne fonctionne pas correctement, s'il a été abîmé ou est tombé par terre. .Afin d'écarter tout accident en cas de cordon d'alimentation endommagé, celui-ci doit être remplacé par le fabricant, son représentant ou toute personne de même qualification.
17. Cet appareil peut être utilisé par des enfants d'au moins 8 ans, tant qu'ils sont surveillés et ont reçu des instructions pour utiliser l'appareil en toute sécurité et sont pleinement conscients des dangers encourus.
18. Le nettoyage et l'entretien ne doivent pas être effectués par des enfants à moins qu'ils soient âgés d'au moins 8 ans et surveillés par un adulte.
19. Gardez l'appareil et son cordon d'alimentation hors de portée des enfants de moins de 8 ans.
20. Lors de l'utilisation d'équipements électriques, des précautions de sécurité doivent toujours être prises pour éviter les risques d'incendie, de choc électrique et / ou de blessure en cas de mauvaise utilisation.
21. Assurez-vous que la tension nominale sur la plaque signalétique corresponde à la tension principale de votre installation. Si ce n'est pas le cas, contactez le revendeur et ne branchez pas l'aspirateur.
22. Ne laissez jamais l'appareil sans surveillance pendant son fonctionnement.
23. Assurez-vous que l'alimentation soit de 220-240V 50Hz
24. Votre appareil a été conçu pour un usage domestique seulement. Elle n'a pas été conçue pour être utilisée dans les cas suivants qui ne sont pas couverts par la garantie :
\- dans des coins de cuisines réservés au personnel dans des magasins, bureaux et autres environnements
professionnels,
– dans des fermes auberges,
\- par les clients des hôtels, motels et autres environnements à caractère résidentiel,
\- dans des environnements de type chambres d'hôtes.
COMMENT L'UTILISER
ASSEMBLAGE AVANT UTILISATION
La Fig.1 montre le branchement du tuyau à l'aspirateur :
Placez le raccord de tuyau devant l'aspirateur. Insérez-le ensuite dans l'orifice d'entrée et tournez vers la droite. Si vous souhaitez l'enlever, vous pouvez tourner le raccord du tuyau vers la gauche puis le retirer.
La Fig.2 montre le branchement du tuyau au tube métallique extensible :
Tenez le raccord coudé du tuyau et placez-le dans le plus grand trou du tube.
La Fig.3 montre le branchement du tube à la brosse :
Placez le tube métallique dans le trou de la brosse et faites-le pivoter pour le fixer.
La Fig.4 montre comment vérifier l'enroulement du cordon d'alimentation.
Vous pouvez tirer le cordon d'alimentation de l'aspirateur et arrêter lorsque vous voyez la marque jaune. Assurez-vous que la marque rouge ne soit pas visible. Lorsque votre nettoyage est terminé, éteignez l'aspirateur, retirez la fiche de la prise, puis appuyez sur le bouton du dispositif d'enroulement jusqu'à ce que le cordon soit complètement enroulé.
La Fig. 5 montre le bouton-interrupteur.
Mettez la fiche dans la prise, appuyez sur le bouton-interrupteur pour contrôler le travail de l'aspirateur.

natural_image
Technical line drawing of a mechanical assembly with no visible text or symbols
Fig.1

natural_image
Line drawing of a curved cable or connector with a small rectangular component on top (no text or symbols)
Fig.2

Fig.3

natural_image
Technical line drawing of a mechanical component with a red arrow indicating direction (no text or symbols present)

natural_image
Technical line drawing of a mechanical component with no visible text or symbols
Fig.5
NETTOYAGE DU BAC À POUSSIÈRE
Les étapes du nettoyage du bac :
1. Comme sur la Fig.6, tenez le bac à poussière et la poignée et appuyez sur le bouton de déverrouillage.
2. Comme dans la Fig.7, sortez le bac à poussière de l'appareil.
3. Comme dans la Fig.8, placez le bac à poussière sur la poubelle, appuyez sur le bouton de déverrouillage pour ouvrir le fond du bac à poussière, et les débris tomberont dans la poubelle.
4. Comme sur la Fig.9, refermez le bac à poussière pour le réutiliser au prochain nettoyage.

natural_image
Technical line drawing of a mechanical device with no visible text or symbols
Fig.6

natural_image
Technical line drawing of a vacuum cleaner with hoses and connectors (no text or symbols)
Fig.7

natural_image
Technical line drawing of a mechanical device with no visible text or symbols
Fig.8

natural_image
Diagram of a mechanical device with a red upward arrow indicating motion or force (no text or symbols present)
Fig.9
ENTRETIEN
Procédure
1. Le filtre doit être nettoyé au moins deux fois par an, et chaque fois qu'il y a de la saleté évidente dessus.
2. Vous devez monter correctement le filtre avant d'utiliser l'aspirateur.
3. Le filtre ne peut pas être nettoyé dans la machine à laver ou séché au sèche-cheveux.
4. Cela réduira la puissance d'aspiration et endommagera le moteur si vous utilisez un filtre humide.
Étapes de maintenance:
1) Comme sur la figure 10, appuyez sur le bouton de déverrouillage pour enlever le couvercle.
2) Comme sur la figure 11, sortez le filtre.
3) Comme sur la figure 12, tournez le filtre HEPA pour le séparer du couvercle.
4) Comme sur la figure 13, récupérez le filtre HEPA
5) Comme sur la figure 14, enlevez éventuellement les cheveux emmêlés.
6) Comme sur la figure 15, récupérez le filtre HEPA et lavez-le.
7) Lavez l'ensemble du filtre HEPA avec la partie en mousse, ainsi que le bac à poussière dans l'eau sans détergent et séchez-les avant utilisation.
8) Placez l'ensemble du bac à poussière dans l'aspirateur. Pour cela, vous devez d'abord mettre le bac dans la bonne position, puis appuyer sur la poignée jusqu'à entendre un déclic.

natural_image
Technical line drawing of a mechanical device with no visible text or symbols
Fig.10

natural_image
Technical line drawing of a digital camera with front panel and control buttons (no text or symbols)
Fig.11

natural_image
Line drawing of a curved mechanical device with attached wires, next to a red abstract shape (no text or symbols)
Fig.12

natural_image
Line drawing of a rice cooker with open lid and side panel, emitting red smoke (no text or symbols)
Fig.13

Fig.14

natural_image
Line drawing of a rice cooker with lid and side legs (no text or symbols)
Fig.15
GARANTIE
La durée de garantie de nos produits est de 2 ans.
En cas de problèmes ou d'interrogations, vous pouvez facilement accéder à nos pages d'aides, conseils de dépannage, FAQ et modes d'emplois sur notre site SAV : https://sav.hkoenig.com.
En tapant le nom de référence de votre appareil dans la barre de recherche, vous accédez à tous les supports en ligne disponibles, conçus pour vous répondre au mieux à vos besoins.
Si vous ne trouvez toujours pas de réponse à votre question ou votre problème, alors cliquez sur « Est-ce que la réponse a résolu votre problème ? ». Vous accéderez alors au formulaire de demande d'assistance SAV, qu'il vous suffira de compléter pour valider votre demande et obtenir de l'aide.
CONDITIONS DE GARANTIE
La garantie couvre l'ensemble des pannes survenant dans le cadre d'une utilisation normale, conforme aux usages et spécifications présentes sur le manuel d'utilisation.
Cette garantie ne s'applique pas aux problèmes d'emballage ou de transport pendant l'expédition du produit par son propriétaire. Elle n'inclut également pas l'usure normale du produit, ni la maintenance ou le remplacement de pièces consommables.
EXCLUSION DE GARANTIE
- Les accessoires et les pièces d'usure (\*).
- L'entretien normal de l'appareil.
- Toutes pannes survenant par suite d'une mauvaise utilisation (chocs, non-respect des préconisations d'alimentation électrique, mauvaises conditions d'utilisation, etc.), d'un entretien insuffisant ou d'un détournement de fonction de l'appareil, ainsi que l'usage d'accessoires non appropriés.
- Les dommages d'origine externe : incendie, dégâts des eaux, surtension électrique, etc.
- Tout matériel qui aura été démonté même partiellement par des personnes autres que celles habilitées (notamment l'utilisateur).
- Les produits dont le numéro de série serait absent, détérioré ou illisible que ne permettrait pas son identification.
- Les produits soumis à la location, à la démonstration ou à l'exposition.
(\*) Certaines pièces de votre appareil dites pièces d'usure ou consommables se détériorent avec le temps et la fréquence d'usage de votre appareil. Cette usure est normale, mais peut être accentuée par des mauvaises conditions d'utilisation ou entretien de votre appareil. Ces pièces ne sont donc pas couvertes par la garantie.
Les accessoires fournis avec l'appareil sont également exclus du champ de la garantie. Ils ne peuvent donc être ni échangés, ni remboursés. Toutefois, certains accessoires peuvent être directement achetés via notre site : https://sav.hkoenig.com/.
ENVIRONMENT

ATTENTION
Ne pas jeter ce produit comme il l'a été avec d'autres produits ménagers. Il existe une séparation de ces déchets vous devrez informer les autorités locales des endroits où vous pouvez rapporter ce produit.
ce produit. En effet, les produits électriques et électroniques contiennent des substances dangereuses qui ont des effets nocifs
sur l'environnement ou la santé humaine et doivent être recyclés. Le symbole ci-contre indique que les équipements électriques et électroniques doivent être choisis avec soin.
Le symbole ici indique que les équipements électriques et électroniques doivent être choisis avec soin, une poubelle à roulettes est marquée d'une croix.
DEUTSCH
Erzeugnis Fassungsvermögen (W) Zubehör STC56 700 W Fugendüse, Rund und Möbelbürste STC58 850 W STC56 + Tierbürste STC62 850 W STC56 + Parkettbürste
AUFBAU DES PRODUKTES

1 Bürsteneinsatz 9 Ausrolltaste 2 Teleskop-Metallrohr 10 Hinterrad 3 Auslösetaste 11 Hinterrad-Reifen 4 Griff 12 Spaltdüse 5 Staubbehälter-Griff 13 Zuberhörhalter 6 Schlauch 14 Rundbürste 7 Schlauchanschluss 15 Polsterbürste 8 Staubbehälter 16 Tierbürste 17 Parkettbürste
Sicherheitshinweise
1. Vergewissern Sie sich, dass der Staubsauger mit den in der Anleitung angegebenen Inhalten übereinstimmt, und benutzen Sie ausschließlich das von dem Hersteller angegebene Zubehör.
2. Lassen Sie das Gerät bitte nicht unbeaufsichtigt, wenn es eingeschaltet ist.
Schalten Sie das Gerät aus und ziehen Sie den Stromstecker beim Nichtgebrauch und vor der Wartung.
3. Ziehen Sie den Staubsauger nicht am Kabel, lassen Sie dieses beim Schließen von Türen nicht dazwischen, stellen Sie den Staubsauger nicht auf das Kabel.
4. Erlauben Sie Kindern bitte nicht, den Staubsauger als ein Spielzeug warzunehmen, besondere Aufmerksamkeit ist erforderlich, wenn der Staubsauger in der Nähe von Kindern bedient wird.
5. Benutzen Sie den Sauger bitte nicht, wenn das Stromkabel oder der Stecker beschädigt sind. Senden Sie diesen an die zuständige Servicestelle. Trennen Sie dieses nicht vom Netz, indem Sie am Kabel oder am Stecker ziehen. Um das Gerät vom Netz zu trennen, halten Sie den Stecker, nicht das Kabel.
6. Ziehen Sie niemals den Stecker oder benutzen Sie das Gerät nicht mit feuchten Händen.
7. Wenn Sie den Staubsauger benutzen, achten Sie darauf, dass der Lufteinlass nicht durch Haare oder Müll blockiert wird (einschließlich des Schlauchs und des Rohrs), ansonsten kann dies zu Motorschäden und der Gehäuse-Verformung führen. Wenn die eingesaugten Gegenstände zu einer Verstopfung führen, stellen Sie den Betrieb sofort ein, indem Sie den Stromkabel sofort ziehen und die Blockade entfernen.
Während der Nutzung des Staubsaugers, verstopfen Sie den Luftauslass nicht durch ein Handtuch oder andere Gegenstände, ansonsten kann die Saugleistung beeinträchtigt werden, wobei auch ein hohes Risiko des Durchbrennens vom Motor besteht.
9. Benutzen Sie den Staubsauger niemals auf einem unebenen Boden oder einer unebenen Fläche, und seien Sie besonders vorsichtig, wenn Sie die Treppe reinigen, um das Herunterfallen des Staubsaugers zu vermeiden.
10. Saugen Sie keine Stümpfe mit dem Staubsauger, ansonsten kann der Motor beschädigt werden.
11. Der Sauger muss von Hitzequellen (wie z.B. Zentralheizung, Öfen, usw.) ferngehalten werden, um eine Verformung der Teile aus Plastik genauso wie die Folgen dieser Verformung zu vermeiden.
12. Vor der Nutzung des Staubsaugers, entfernen Sie bitte große und scharfe Gegenstände vom Boden, um Beschädigungen der Plastikteile, des Filtergitters und des Motors zu vermeiden.
13. Saugen Sie mit diesem Staubsauger niemals Wasser oder andere Flüssigkeiten, ansonsten wird der Motor beschädigt.
14. Dieses Gerät kann von Personen mit eingeschränkten körperlichen, sensorischen oder geistigen Fähigkeiten oder mangelnder Erfahrung und Kenntnis benutzt werden, vorausgesetzt, dass sie beaufsichtigt oder in der sicheren Benutzung des Gerätes unterwiesen werden und die möglichen Gefahren vollständig verstehen.
15. Wenn das Stromkabel beschädigt ist, muss es über den Kundendienst ersetzt werden, um jegliche Gefahren zu vermeiden.
16. Bedienen Sie das Gerät nicht, wenn das Stromkabel
oder der Stecker beschädigt sind, wenn es nicht ordnungsgemäß funktioniert, beschädigt oder fallen gelassen wurde. Wenn das Stromkabel beschädigt ist, muss es von dem Hersteller, seinem Dienstleister oder einer ähnlich qualifizierten Person ersetzt werden, um Gefahren zu vermeiden.
17. Dieses Gerät darf von Kindern ab 8 Jahre bedient werden, solange sie beaufsichtigt werden und Anweisungen über die sichere Nutzung des Gerätes erhielten, und können die damit verbundenen Gefahren vollständig nachvollziehen.
18. Die Reinigung und Wartung dürfen von Kindern nicht durchgeführt werden, es sei denn sie sind über 8 Jahre alt und werden von einem Erwachsenen beaufsichtigt.
19. Halten Sie das Gerät und sein Stromkabel außer Reichweite von Kindern unter 8 Jahren.
20. Während der Nutzung von elektrischen Geräten müssen Sicherheitsvorkehrungen immer getroffen werden, um das Risiko eines Brandes, eines Stromschlages und/oder einer Verletzung im Falle eines Missbrauchs zu vermeiden.
21. Vergewissern Sie sich, dass die Spannung auf dem Typenschild des Gerätes mit der Hauptspannung Ihrer Einrichtung übereinstimmt. Wenn dies nicht der Fall ist, kontaktieren Sie den Händler und schließen Sie das Gerät nicht an.
22. Lassen Sie das Gerät während der Nutzung niemals unbeaufsichtigt.
23. Vergewissern Sie sich, dass die Stromversorgung 220-240V 50Hz ist.
24. Ihr Gerät ist nur für den Hausgebrauch bestimmt. Es ist nicht für die Verwendung in den folgenden Situationen vorgesehen, die nicht von der Garantie abgedeckt sind:
\- in Personalküchen in Geschäften, Büros und anderen professionellen Umgebungen,
\- in Landgasthöfen,
\- von Gästen in Hotels, Motels und anderen Wohnumgebungen,
\- in Bed-and-Breakfast-Umgebungen.
NUTZUNG
MONTAGE VOR DER NUTZUNG
Abb. 1 demonstriert die Verbindung zwischen dem Schlauch und dem Staubsauger:
Platzieren Sie den Schlauchanschluss vor dem Staubsauger. Dann setzen Sie den Schlauch in die Einlassöffnung ein oder drehen Sie diesen nach rechts. Wenn Sie diesen abnehmen möchten, drehen Sie den Schlauchanschluss nach links und ziehen Sie diesen heraus.
Abb.2 zeigt die Verbindung zwischen dem Schlauch und dem Teleskop-Metallrohr:
Halten Sie den biegsamen Anschluss des Schlauchs und setzten Sie diesen in die größere Öffnung des Rohres ein.
Abb. 3 zeigt die Verbindung zwischen dem Rohr und dem Bürsteneinsatz:
Setzen Sie das Metallrohr in die Öffnung auf der Bürste ein und drehen Sie dieses, um die Teile zu befestigen.
Abb. 4 demonstriert, wie man das Aufrollen von dem Stromkabel überprüfen kann.
Sie können das Stromkabel aus der Maschine herausziehen und stoppen, wenn Sie die gelbe Markierung sehen. Vergewissern Sie sich, dass die rote Markierung nicht sichtbar ist. Wenn Sie mit dem Staubsaugen fertig sind, schalten Sie das Gerät zuerst aus, dann ziehen Sie den Stecker aus der Steckdose, danach drücken Sie auf die Ausrolltaste, bis sich das Kabel komplett in der Maschine befindet.
Abb. 5 zeigt die Power-Taste

natural_image
Technical line drawing of a mechanical assembly with no visible text or symbols
Abb.1

natural_image
Line drawing of a curved cable or connector with a small sensor attached (no text or symbols)
Abb.2

natural_image
Technical line drawing of a mechanical component with a red arrow indicating a process or assembly (no text or symbols present)
Abb.3

natural_image
Technical line drawing of a mechanical component with a red arrow indicating direction (no text or symbols)
Abb.4
Abb.5

natural_image
Technical line drawing of a mechanical component with no visible text or symbols
REINIGUNG DES STAUBBEHÄLTERS
Die Schritte für die Reinigung des Staubbehälters:
1. Wie auf der Abb.6, halten Sie den Staubbehälter und den Griff und drücken Sie auf die Auslösetaste.
2. Wie auf der Abb. 7, entnehmen Sie den Staubbehälter aus der Maschine.
3.Wie auf der Abb. 8, setzen Sie den Staubbehälter in den Mülleimer ein und drücken Sie auf die Auslösetaste, um den Boden des Staubbehälters zu öffnen, der Dreck und Staub werden von alleine in den Mülleimer fallen.
4. Wie auf der Abb. 9, schließen Sie den Staubbehälter für die weitere Nutzung nach der Reinigung.
Abb.6

natural_image
Technical line drawing of a mechanical component with no visible text or symbols
Abb.7

natural_image
Line drawing of a vacuum cleaner with attached hoses and control knobs (no text or symbols)
Abb.8
Abb.9

natural_image
Diagram of a portable device with a red arrow indicating direction (no text or symbols present)

natural_image
Technical line drawing of a mechanical device with a downward arrow indicating motion or force (no text or symbols present)
WARTUNG
WARTUNGS-HINWEISE
5. Der Filter muss zweimal im Jahr gereinigt werden, oder wenn dieser sichtbar dreckig wird.
6. Sie müssen den Filter ordnungsgemäß befestigen, bevor Sie den Staubsauger bedienen.
7. Der Filter darf nicht in der Waschmaschine gewaschen oder von einem Ventilator belüftet werden.
8. Die Nutzung eines feuchten Filters reduziert die Saugleistung und beschädigt den Motor.
9. Schritte für die Wartung:
1) Wie auf der Abb. 10, drücken Sie auf die Auslass-Sperre, um das Auslass-Brett zu öffnen.
2) Wie auf der Abb. 11, ziehen Sie den Auslass-Filter
heraus.
3) Wie auf der Abb. 12, drehen Sie die HEPA-Abdeckung, um diese vom dem Behälterdeckel zu trennen.
4) Wie auf der Abb. 13, ziehen Sie die HEPA-Abdeckung ab.
5) Wie auf der Abb.14, entfernen Sie angesaugte Haare vor der Reinigung.
6) Wie auf der Abb. 15, entnehmen Sie den HEPA und reinigen Sie diesen.
7) Reinigen Sie die HEPA-Abdeckung, die HEPA-Baugruppe, den Auslass-Schwamm und den Staubbehälter in Wasser ohne Waschmittel und trocknen Sie diese vor der Nutzung.
8) Setzen Sie die Staubbehälter-Baugruppe in die Maschine ein. Um dies zu machen, müssen Sie zuerst den Behälter richtig platzieren und dann auf den Griff des Staubbehälters drücken; wenn dieser einrastet ist der Vorgang korrekt verlaufen.
Abb.10

natural_image
Line drawing of a vintage-style vacuum cleaner device with no visible text or symbols
Abb.12
Abb.11

natural_image
Technical line drawing of a mechanical device with no visible text or symbols
Abb.13

natural_image
Line drawing of a portable device with a curved lid and handle, showing a red abstract shape on the right (no text or symbols)
Abb.14

natural_image
Line drawing of a rice cooker with open lid and side panel, no text or symbols present
Abb.15


natural_image
Line drawing of a rice cooker with lid and side-mounted legs (no text or symbols)
GARANTIE
Die Garantiezeit für unsere Produkte beträgt 2 Jahre.
Bei Problemen oder Fragen können Sie sich an unsere Hilfeseiten, Tipps zur Fehlerbehebung, FAQs und Bedienungsanleitungen auf unserer Kundendienst-Website wenden:
https://sav.hkoenig.com.
Wenn Sie den Referenznamen Ihres Geräts in die Suchleiste eingeben, erhalten Sie Zugang zu allen verfügbaren Online-Supports.
Wenn Sie immer noch keine Antwort auf Ihre Frage oder Ihr Problem finden, dann klicken Sie auf "Hat die Antwort Ihr Problem gelöst?". Sie können dieses Formular ausfüllen, um Ihre Anfrage zu bestätigen und Hilfe zu erhalten.
GARANTIEBEDINGUNGEN
Die Garantie deckt alle Defekte ab, die bei normalem, bestimmungsgemäßem Gebrauch und den in der Bedienungsanleitung enthaltenen Spezifikationen auftreten.
Diese Garantie gilt nicht für Probleme mit der Verpackung oder dem Transport während des Versands des Produkts durch den Eigentümer. Sie umfasst auch nicht den normalen Verschleiß des Produkts, die Wartung oder den Austausch von Verschleißteilen.
AUSSCHLUSS DER GARANTIE
- Zubehör und Verschleißteile (\*).
- Die normale Wartung des Geräts.
- Alle Defekte, die durch unsachgemäßen Gebrauch (Stöße, Nichteinhaltung der empfohlenen Stromzufuhr, schlechte Nutzungsbedingungen usw.), unzureichende Wartung oder Zweckentfremdung des Geräts auftreten, sowie die Verwendung von ungeeignetem Zubehör.
- Schäden durch äußere Einflüsse: Brand, Wasserschäden, elektrische Überspannung usw.
- Alle Geräte, die von anderen als den befugten Personen (insbesondere dem Nutzer) auch nur teilweise auseinandergebaut wurden.
- Produkte, deren Seriennummer fehlt, beschädigt oder unleserlich ist, sodass sie nicht identifiziert werden können.
- Produkte, die vermietet, vorgeführt oder ausgestellt werden.
(\*) Einige Teile Ihres Geräts, die als Verschleißteile oder Verbrauchsmaterialien bezeichnet werden, verschleßen mit der Zeit und der Häufigkeit der Nutzung Ihres Geräts. Diese Abnutzung ist normal, kann aber durch falsche Nutzung oder Pflege Ihres Geräts noch verstärkt werden.
Diese Teile sind daher nicht durch die Garantie abgedeckt.
Das mit dem Gerät gelieferte Zubehör ist ebenfalls von der Garantie ausgeschlossen. Sie können daher weder umgetauscht noch erstattet werden. Einige Zubehörteile können jedoch direkt über unsere Website https://sav.hkoenig.com/ erworben werden.

ACHTUNG
Entsorgen Sie dieses Produkt nicht zusammen mit anderen Haushaltsprodukten. Es gibt eine Trennung dieses Abfallprodukts
müssen Sie sich bei den örtlichen Behörden über die Stellen informieren, an denen Sie dieses Produkt zurückgeben können. dieses Produkt zurückgeben können. Elektrische und elektronische Produkte enthalten gefährliche Stoffe, die schädliche Auswirkungen
auf die Umwelt oder die menschliche Gesundheit haben und recycelt werden sollten. Das Symbol hier zeigt an, dass elektrische und elektronische
Das Symbol hier zeigt an, dass Elektro- und Elektronikgeräte sorgfältig ausgewählt werden sollten; ein Abfallcontainer auf Rädern ist mit einem Kreuz gekennzeichnet.
Adeva SAS / H.Koenig Europe - 8 rue Marc Seguin - 77290 Mitry Mory - France www.hkoenig.com - sav@hkoenig.com - contact@hkoenig.com - Tél:
+33 1 64 67 00 05
NEDERLANDS
Product Vermogen (W) Toebehoren STC56 700 W Spleetmondstuk, ronde borstel en meubelborstel STC58 850 W STC56 + dierenborstel STC62 850 W STC56 + parketborstel
ONDERDELEN VAN HET PRODUCT

1 Borstel 9 Knop oprolmechanisme 2 Verlengbare metalen buis 10 Achterwiel 3 Ontgrendelknop 11 Rubber achterwiel 4 Handgreep 12 Spleetmondstuk 5 Stofkamer met handgreep 13 Accessoire houder 6 Slang 14 Ronde kwast 7 Slangaansluiting 15 Bekleding borstel 8 Stofkamer 16 Dierenborstel 17 Parketborstel
Veiligheidswaarschuwing
1. Zorg dat u de stofzuiger gebruikt zoals beschreven in deze handleiding en gebruik de aansluitingen die door de fabrikant zijn ontworpen.
2. Laat de stofzuiger in gebruik niet onbeheerd achter. Schakel het apparaat uit en haal de stekker uit het stopcontact als het niet gebruikt wordt of voor onderhoud.
3. Trek of til de stofzuiger niet op aan de stroomkabel, klem deze ook niet tussen een deuropening; rijd niet met de stofzuiger over de stroomkabel.
4. Laat kinderen de stofzuiger niet gebruiken als speelgoed en let extra goed op bij gebruik van de stofzuiger in de buurt van kinderen.
5. Gebruik de stofzuiger niet als de stroomkabel of stekker beschadigd is. Stuur het naar het aangewezen servicecentrum. Haal de stekker er niet uit door aan de kabel te trekken. Trek aan de stekker om deze uit het stopcontact te halen, niet aan de kabel.
6. Nooit de stekker of de stofzuiger aanraken met natte handen.
7. Bij gebruik van de stofzuiger dient u op te letten dat
geen haar of andere troep de luchtinlaat blokkeert (inclusief de slang en de buis), anders kan er schade ontstaan aan de motor en de behuizing. Als er enige vorm van blokkade ontstaat, schakel de stofzuiger meteen uit en haal de stekker uit het stopcontact en verwijder de blokkade.
8. Tijdens gebruik van de stofzuiger niet de luchtuitlaat afdekken met een handdoek of iets dergelijks, anders wordt de stofopname beïnvloed en loopt de motor het risico om te verbranden.
9. Nooit de stofzuiger gebruiken op een onvlakke ondergrond; en wees erg voorzichtig bij het stofzuigen van een trap ter voorkoming dat de stofzuiger valt.
10. Nooit brandende sigarettenpeuken opzuigen, anders kan de motor beschadigd raken.
11. De stofzuiger dient ver weg gehouden te worden van warmtebronnen (zoals verwarming, oven, etc.) om vervorming van plastic onderdelen te vermijden alsook de invloed die een dergelijke vervorming heeft.
12. Voor gebruik van de stofzuiger dient u grote en scherpe voorwerpen op de vloer te verwijderen om schade te vermijden aan plastic onderdelen, filters en
motor.
13. Nooit water of een andere vloeistof opzuigen met deze stofzuiger, anders kan de motor beschadigd raken.
14. Dit apparaat kan worden gebruikt door personen met verminderde fysieke, zintuiglijke of mentale vermogens of met gebrek aan ervaring of kennis, op voorwaarde dat zij onder toezicht staan of instructies hebben gekregen over het veilige gebruik van het apparaat en dat zij de mogelijke gevaren volledig begrijpen.
15. Als de kabel beschadigd is, moet deze worden vervangen door een reparatiedienst om gevaren te vermijden.
16. Niet het apparaat gebruiken als deze een beschadigde kabel of stekker heeft, als het niet goed werkt of beschadigd of gevallen is. Als de stroomkabel beschadigd is, moet het worden vervangen door de fabrikant, een servicemonteur of een gelijkwaardig gekwalificeerd persoon om gevaren te vermijden.
17. Dit apparaat mag gebruikt worden door kinderen van minimaal 8 jaar als er toezicht wordt gehouden en ze instructies hebben gehad over hoe ze het apparaat
moeten gebruiken en ze de gevaren begrijpen.
18. Het schoonmaken en onderhoud mag niet worden uitgevoerd door kinderen tenzij ze 8 jaar of ouder zijn en er toezicht is.
19. Houd het apparaat en de stroomkabel uit de buurt van kinderen jonger dan 8 jaar.
20. Bij het gebruik van elektrische apparaten moeten altijd de standaard veiligheidsinstructies worden opgevolgd om de kans op vuur, elektrische schokken en/of verwondingen te voorkomen.
21. Controleer dat de aangegeven spanning op het typeplaatje overeenkomt met de spanning van uw spanningsbron. Als dit niet het geval is, neem dan contact op met de dealer en sluit het apparaat niet aan.
22. Laat het apparaat nooit onbeheerd achter tijdens gebruik.
23. Controleer dat de spanningsbron 220-240V50Hz levert.
24. Uw apparaat is uitsluitend ontworpen voor huishoudelijk gebruik. Het is niet bedoeld voor gebruik in de volgende situaties, die niet onder de garantie vallen:
\- in personeelskeukens in winkels, kantoren en
andere professionele omgevingen,
- in boerderijherbergen,
- door gasten in hotels, motels en andere residentiële omgevingen,
- in bed & breakfast-omgevingen.
HOE TE GEBRUIKEN
MONTAGE VOOR GEBRUIK
Fig.1 laat de aansluiting zien van de slang op de stofzuiger:
Plaats de aansluiting van de slang aan de voorkant van de stofzuiger. Steek hem in de opening en draai naar rechts. Als u hem los wilt maken, draai dan de slangaansluiting naar links en trek hem eruit.
Fig.2 laat de aansluiting zien van de slang op de metalen buis:
Pak de kromme connector van de slang en plaats deze in het grotere gat van de buis.
Fig.3 laat de aansluiting zien van de buis op de borstel:
Plaats de metalen buis in het gat van de borstel en draai hem om hem vast te zetten.
Fig. 4 laat zien hoe controleert hoe de stroomkabel is opgerold.
U kunt de stroomkabel uit het apparaat trekken en stoppen als u de gele markering ziet.
Gaat niet door tot de rode markering. Als u klaar bent met zuigen, schakel dan eerst de stofzuiger uit, haal de stekker uit het stopcontact en druk dan op de knop van het oprolmechanisme tot de kabel helemaal is opgerold.
Fig.5 toont de hoofdknop.
Steek de stekker in het stopcontact, druk op de hoofdknop om het apparaat in te schakelen.

natural_image
Technical line drawing of a mechanical assembly with no visible text or symbols
Fig.1

natural_image
Line drawing of a curved cable or connector with a small circular component on top (no text or symbols)
Fig.2

SCHOONMAKEN VAN DE STOFKAMER
De stappen voor het schoonmaken van de kamer:
1. Zoals in Fig.6 de stofkamer met handgreep vasthouden en druk op de ontgrendelknop.
2. Zoals in Fig.7 de stofkamer uit het apparaat halen.
3. Zoals in Fig.8 houdt de stofkamer boven de vuilnisbak, druk op de ontgrendelknop om de onderkant van de stofkamer te openen en de rommel en stof valt vanzelf in de vuilnisbak
4. Zoals in Fig.9 de stofkamer sluiten voor nieuw gebruik.

Fig.8
Fig.9
ONDERHOUD
HOE TE ONDERHOUDEN
1. Het filter dient tweemaal per jaar schoongemaakt te worden, ook als er duidelijk viezigheid op het filter zit is dat nodig.
2. U dient het filter goed vast te zetten voordat u de stofzuiger gebruikt.
3. Het filter kan niet worden schoongemaakt in de wasmachine of schoongeblazen worden.
4. De zuigkracht wordt verminderd en de motor kan beschadigd raken als u een nat filter gebruikt.
5. Stappen voor het onderhoud:
1) Zoals in fig.10, druk op de ontgrendeling van de afdekking om deze te openen.
2) Zoals in fig.11, haal het filter eruit.
3) Zoals in fig.12, draai de afdekking van de HEPA om deze van de kamer lost te maken.
4) Zoals in fig.13, pak de afdekking van de HEPA.
5) Zoals in fig.14, als er haren op zitten dient u deze eerst te verwijderen.
6) Zoals in fig.15, pak de HEPA en was deze.
7) Plaats de stofkamer terug in het apparaat. Tijdens dit proces dient u de stofkamer op de juiste plek te plaatsen en druk dan op de handgreep van de stofkamer, als u een klik hoort, is het gelukt.

natural_image
Technical line drawing of a mechanical device with no visible text or symbols
Fig.10

natural_image
Technical line drawing of a vacuum cleaner device with attached components (no text or symbols)
Fig.11

natural_image
Line drawing of a kettle with a handle and spout, alongside a red abstract shape (no text or symbols)
Fig.12

natural_image
Line drawing of a rice cooker with open lid and side panel, no text or symbols present
Fig.13

Fig.14

natural_image
Line drawing of a rice cooker with lid and side legs (no text or symbols)
Fig.15
GARANTIE
De garantieperiode op onze producten is 2 jaar.
Als u problemen of vragen heeft, kunt u eenvoudig onze hulppagina's bezoeken voor tips om problemen op te lossen, de FAQ's en andere gebruikershandleidingen op onze website: https://sav.hkoenig.com.
Door de referentienaam van uw apparaat in de zoekbalk te typen, krijgt u toegang tot alle beschikbare online hulpmiddelen, ontworpen om aan uw behoeften te voldoen.
Als u toch niet geen antwoord op uw vraag kunt vinden, klik dan op "Heeft het antwoord uw probleem opgelost? Hierdoor gaat u naar het Aanvraagformulier voor Klantenondersteuning, dat u in kunt vullen om uw verzoek te valideren en hulp te ontvangen.
GARANTIEVOORWAARDEN
De garantie dekt alle mankementen die voortkomen uit normaal gebruik, volgens de sectie gebruik en specificaties in de gebruikershandleiding.
Deze garantie omvat niet verpakkings- of transportproblemen tijdens het vervoer van het product door de eigenaar. Het omvat ook niet de normale slijtage van het product, noch het onderhoud of vervangen van verbruiksartikelen.
UITSLUITINGEN VAN DE GARANTIE
- Accessoires en verbruiksartikelen (\*).
- Normaal onderhoud van het apparaat.
- Alle mankementen veroorzaakt door verkeerd gebruik (schokken, het niet opvolgen van de aanbevolen stroomvoorziening, in slechte omstandigheden gebruiken, etc.), onvoldoende onderhoud of ondeugdelijk gebruik van het apparaat, alsook het gebruik van ongeschikte accessoires.
- Schade van buitenaf: vuur, waterschade, elektrische stroompiek, etc.
- Apparaten die uit elkaar zijn gehaald, ook gedeeltelijk, door personen die niet er niet gekwalificeerd voor zijn (zoals de gebruiker).
- Producten waarvan het serienummer verdwenen, beschadigd of onleesbaar is, waardoor we het niet kunnen identificeren.
- Producten die verhuurd werden of ter demonstratie of showmodel waren.
(\*) Sommige onderdelen van uw apparaat, genaamd verbruiksartikelen, slijten naar verloop van tijd en bij veel gebruik van uw apparaat. Deze slijtage is normaal, maar kan verergerd worden door slechte omstandigheden of onderhoud van uw apparaat. Deze onderdelen worden daarom niet gedekt door de garantie.
De accessoires meegeleverd met het apparaat zijn ook uitgesloten van de garantie. Ze kunnen niet vervangen of gerestitueerd worden. Echter, sommige accessoires zijn te koop via onze website: https://sav.hkoenig.com/.
MILIEU 
LET OPGooi dit product niet weg met andere huishoudelijke producten.Er is een scheiding van dit afvalproduct in gemeenschappen, moet u uw lokale autoriteiten te informeren over de plaatsen waar u kunt inleverenkunt inleveren. Elektrische en elektronische producten bevatten namelijk gevaarlijke stoffen die schadelijke gevolgen hebben hebben op het milieu of de menselijke gezondheid en moeten worden gerecycled. Het symbool hier geeft aan dat elektrische en elektronischeapparatuur zorgvuldig moet worden gekozen, een afvalcontainer op wieltjes is gemarkeerd met een kruis.
Adeva SAS / H.Koenig Europe - 8 rue Marc Seguin - 77290 Mitry Mory - France www.hkoenig.com - sav@hkoenig.com - contact@hkoenig.com - Tél:
+33 1 64 67 00 05
ESPANOL
Producto Potencia (W) Accesorios STC56 700 W Boquilla para hendiduras, cepillo redondo y para muebles STC58 850 W STC56 + cepillo para animales STC62 850 W STC56 + cepillo para parquet
DESCRIPCIÓN DEL PRODUCTO

1 Cepillo trapeador 9 Botón de enrollamiento del cable de alimentación 2 Tubo extensor de metal 10 Rueda trasera 3 Botón interruptor 11 Goma de la rueda trasera 4 Empuñadura 12 Boquilla de grieta 5 Agarradera y tapa del depósito de polvo 13 Soporte para accesorios 6 Manguera 14 Cepillo redondo 7 Conector de la manguera 15 Cepillo para tapicería 8 Depósito de polvo 16 17
INSTRUCCIONES DE SEGURIDAD
1. Asegúrese de usar la aspiradora siguiendo las orientaciones en este manual, y use solamente los accesorios aprobados por el fabricante.
2. No deje la aspiradora sola mientras esté en funcionamiento. Apague la aspiradora por el botón interruptor y desenchufe el cable de alimentación del tomacorriente cuando no esté en uso o antes del mantenimiento.
3. No hale ni arrastre la aspiradora por el cable de alimentación y evite que se pellizque al cerrar las puertas; mantenga el cable de alimentación lejos de las bocas de succión de la aspiradora.
4. No permita que los niños jueguen con la aspiradora, y redoble la atención cuando use la aspiradora cerca de niños o mascotas.
5. No use la aspiradora si el cable de alimentación o enchufe están dañados. Llévela al centro de servicios para su reparación. No desenchufe la aspiradora del tomacorriente tirando del cable de alimentación; hágalo agarrando firmemente por el enchufe, no por el cable.
6. Nunca manipule el enchufe ni use la aspiradora con las manos mojadas.
7. Siempre use la aspiradora con precaución para evitar que cabellos u otras pelusas obstruyan las entradas de aire (incluida la manguera y la boca de succión), ya que eso puede dañar el motor o deformar la manguera. Si ocurriera un bloqueo, apague la aspiradora y desenchúfela del tomacorriente para eliminar la obstrucción.
8. Durante el uso, nunca tape la salida de aire con toallas o artículos similares, ya que eso afectará la eficiencia de succión de la aspiradora y aumentará el riesgo de incendio por sobrecarga en el motor.
9. Nunca use la aspiradora sobre pisos o suelos irregulares; y tenga mucho cuidado al limpiar escaleras para evitar que la aspiradora se resbale y caiga.
10. Nunca absorba cabos de cigarro humeantes con la aspiradora ya que eso puede dañar el motor.
11. Mantenga la aspiradora lejos de fuentes de calor (central de calefacción, horno, etc.) para evitar la deformación de piezas de plástico, así como las
consecuencias de tales deformaciones.
12. Antes de usar la aspiradora, recoja todos los objetos grandes y afilados del piso para evitarle daños a las piezas de plástico, las gasas del filtro e inclusive el motor.
13. Nunca aspire agua u otros líquidos con esta aspiradora ya que esto puede dañar el motor.
14. Este aparato puede ser utilizado por personas con capacidades físicas, sensoriales o mentales reducidas o con falta de experiencia o conocimientos, siempre que sean supervisadas o instruidas en el uso seguro del aparato y que entiendan perfectamente los peligros potenciales.
15. Si el cable de alimentación está deteriorado deberá ser reemplazado por un especialista del centro de servicios para evitar cualquier peligro.
16. No use este aparato si el cable de alimentación o enchufe están dañados, si no funciona como debería, muestra defectos o ha sufrido una caída. Si el cable de alimentación está roto, deberá ser reemplazado por el fabricante, su agente de servicios técnicos o una persona con calificación similar para evitar riesgos.
17. Este aparato puede ser utilizado por niños con al menos 8 años de edad, siempre que estén bajo vigilancia o hayan sido instruidos para el uso seguro de la aspiradora y estén plenamente conscientes de los peligros involucrados.
18. La limpieza y el mantenimiento de la aspiradora no deben ser realizados por niños, a menos que tengan 8 o más años de edad y sean vigilados constantemente por un adulto.
19. Mantenga a la aspiradora y su cable de alimentación fuera del alcance de los niños menores de 8 años.
20. Al utilizar cualquier electrodoméstico, siempre se deben de tomar las precauciones básicas de seguridad para evitar el riesgo de incendios, descargas eléctricas y/o lesiones personales en caso de un mal uso.
21. Asegúrese de que la tensión en el tomacorriente de su red eléctrica se corresponda con la exigida en la placa de características del aparato. Si este no es el caso, no enchufe la aspiradora y póngase en contacto con el distribuidor.
22. Nunca desatienda la aspiradora mientras esté en
funcionamiento.
23. Asegúrese de que el tomacorriente donde vaya a enchufar la aspiradora tenga 220-240V 50Hz.
24. Su aparato ha sido diseñado únicamente para uso doméstico. No ha sido diseñado para ser utilizado en las siguientes situaciones que no están cubiertas por la garantía:
- en áreas de cocina para el personal en tiendas, oficinas y otros entornos profesionales,
- en albergues agrícolas,
- en hoteles, moteles y otros entornos residenciales,
- en entornos de tipo bed and breakfast.
INSTRUCCIONES DE USO Y OPERACIÓN
Montaje antes del uso
La Figura 1 muestra la conexión de la manguera con la aspiradora:
\- Coloque el conector de la manguera de frente a la aspiradora; luego insértelo en el orificio de entrada y gírelo hacia la derecha. Si desea desmontar la manguera nuevamente, gire el conector hacia la izquierda y sáquela del orificio.
La Figura 2 muestra la conexión de la manguera con el tubo extensor de metal:
\- Agarre el conector del extremo flexible de la manguera e insértelo en el orificio más grande del tubo extensor.
La Figura 3 muestra la conexión del tubo extensor con el cepillo trapeador:
\- Coloque el tubo metálico en el orificio del cepillo trapeador y gírelo hacia la derecha para fijarlo.
La Figura 4 muestra cómo comprobar la recogida del cable de alimentación:
\- Puede ir sacando el cable de alimentación de la aspiradora hasta que vea una marca amarilla. Asegúrese de que no aparezca la marca roja. Cuando termine la limpieza,
primero apague la aspiradora por el botón interruptor, luego desenchufe el cable del tomacorriente y presione el botón de enrollamiento hasta que el cable esté completamente recogido dentro del aparato.
La Figura 5 muestra el botón interruptor:
\- Enchufe el cable de alimentación al tomacorriente y presione el botón interruptor para iniciar o detener el trabajo de la aspiradora.
Fig.1

natural_image
Technical line drawing of a mechanical assembly with no visible text or symbols
Fig.2

natural_image
Line drawing of a curved mechanical component with a labeled tag (no text or symbols present)
Fig.4
Fig.3

natural_image
Mechanical assembly diagram showing a pipe joint with a red arrow indicating force or direction (no text or symbols)

natural_image
Technical line drawing of a mechanical component with a red arrow indicating downward motion (no text or symbols)
Fig.5

natural_image
Technical line drawing of a mechanical component with no visible text or symbols
LIMPIEZA DEL DEPÓSITO DE POLVO
Siga estos pasos para limpiar el depósito de polvo:
1. Sujete el depósito de polvo junto con la agarradera y presione hacia abajo para liberar el conjunto completo (Figura 6).
2. Saque el depósito de polvo de la aspiradora como se muestra en la Figura 7.
3. Sujete el depósito de polvo encima del cesto de basura y presione el botón de liberación inferior para abrir el fondo del depósito; la suciedad y el polvo caerán por sí solos en el cesto (Figura 8).
4. Como se muestra en la Figura 9, levante el fondo del depósito de polvo y ciérrelo antes de colocarlo en la aspiradora para un nuevo ciclo de trabajo.

Figura 8
Figura 9

natural_image
Diagram of a cylindrical device with internal components and a red arrow indicating direction (no text or symbols)

natural_image
Diagram of a cylindrical device with internal components and an upward arrow indicating motion (no text or symbols)
MANTENIMIENTO
1. El filtro se debe limpiar al menos dos veces por año y cuando sea necesario debido al acúmulo de suciedad.
2. Asegúrese de que el filtro esté bien montado en su lugar antes de encender la aspiradora.
3. El filtro no se puede limpiar en el lavavajillas o lavadora, ni secar en hornos o secadores calientes.
4. El uso del filtro húmedo reducirá la potencia de succión y le puede causar daños al motor.
5. Siga estos pasos para darle mantenimiento a la aspiradora:
1) Presione la tecla en la rejilla de salida para liberarla de la aspiradora (Figura 10).
2) Retire el filtro de salida (Figura 11).
3) Como se muestra en la Figura 12, gire la cubierta del filtro HEPA para separarla de la tapa del depósito de polvo.
4) Levante la tapa del depósito y retire el conjunto del filtro HEPA (Figura 13).
5) Elimine cualquier embrollo de cabellos o pelusas en la cubierta del filtro (Figura 14).
6) Saque el filtro HEPA y lávelo bien como se muestra en la Figura 15.
7) Lave el conjunto del filtro HEPA, el filtro de salida y el depósito de polvo con agua común sin usar detergente; luego séquelos todos bien antes de usarlos.
8) Fije el conjunto del depósito completo en la aspiradora. Para esto, primero debe colocar el depósito en la posición correcta y luego presionar la agarradera de la tapa del depósito; si escucha un sonido “tac”, significa que la aspiradora está bien montada.
Figura 10

natural_image
Technical line drawing of a mechanical device with no visible text or symbols
Figura 12
Figura 11

natural_image
Technical line drawing of a mechanical device with no visible text or symbols
Figura 13

natural_image
Line drawing of a mechanical device with a curved top and handle, alongside a red abstract symbol (no text or labels)
Figura 14

natural_image
Line drawing of a rice cooker with open lid and side panel, showing internal structure (no text or symbols)
Figura 15


natural_image
Line drawing of a cylindrical container with lid and side connectors (no text or symbols)
GARANTÍA
El periodo de garantía de nuestros productos es de 2 años.
Si tiene algún problema o pregunta, puede acceder fácilmente a nuestras páginas de ayuda, consejos para solucionar problemas, preguntas frecuentes y manuales de usuario en nuestro sitio de servicio: https://sav.hkoenig.com.
Al escribir el nombre de referencia de su dispositivo en la barra de búsqueda, puede acceder a toda la asistencia en línea disponible, diseñada para satisfacer mejor sus necesidades.
Si sigue sin encontrar una respuesta a su pregunta o problema, haga clic en "¿La respuesta ha resuelto su problema? Esto le llevará al formulario de solicitud de asistencia posventa, que puede rellenar para validar su solicitud y obtener ayuda.
CONDICIONES DE GARANTÍA
La garantía cubre todos los fallos que se produzcan en el contexto de un uso normal, de acuerdo con los usos y especificaciones del manual de usuario.
Esta garantía no se aplica a los problemas de embalaje o transporte durante el envío del producto por parte del propietario. Tampoco incluye el desgaste normal del producto, ni el mantenimiento o la sustitución de piezas consumibles.
EXCLUSIÓN DE GARANTÍA
- Accesorios y piezas de desgaste (\*).
- Mantenimiento normal del aparato.
- Todas las averías derivadas de un uso incorrecto (golpes, incumplimiento de las recomendaciones de alimentación eléctrica, malas condiciones de uso, etc.), de un mantenimiento insuficiente o de un mal uso del aparato, así como del uso de accesorios inadecuados.
- Daños de origen externo: incendio, daños por agua, sobrecarga eléctrica, etc.
- Cualquier equipo que haya sido desmontado, incluso parcialmente, por personas que no estén autorizadas a hacerlo (en particular el usuario).
- Productos cuyo número de serie falte, esté dañado o sea ilegible, lo que no permitiría su identificación.
- Productos sujetos a alquiler, demostración o exposición.
(\*) Algunas piezas de su aparato, conocidas como piezas de desgaste o consumibles, se deterioran con el tiempo y la frecuencia de uso de su aparato. Este desgaste es normal, pero puede acentuarse por las malas condiciones de uso o de mantenimiento de su aparato. Por lo tanto, estas piezas no están cubiertas por la garantía.
Los accesorios suministrados con el aparato también están excluidos de la garantía. No se pueden cambiar ni reembolsar. No obstante, algunos accesorios pueden adquirirse directamente en nuestro sitio web: https://sav.hkoenig.com/
MEDIO AMBIENTE 
ATENCIÓNNo deseche este producto junto con otros productos domésticos.Existe una separación de este residuoproducto en las comunidades, tendrá que informar a las autoridades locales acerca de los lugares donde se puede devolvereste producto. De hecho, los productos eléctricos y electrónicos contienen sustancias peligrosas que tienen efectos nocivos sobre el medio ambiente o la salud humana y deben ser reciclados.Este símbolo indica que los aparatos eléctricos y electrónicos deben elegirse con cuidado, un contenedor de residuos con ruedas está marcado con una cruz.
Adeva SAS / H.Koenig Europe - 8 rue Marc Seguin - 77290 Mitry Mory - France www.hkoenig.com - sav@hkoenig.com - contact@hkoenig.com - Tél:
+33 1 64 67 00 05
ITALIANO
Prodotto Potenza (W) Accessori STC56 700 W Bocchetta per crepe, spazzola rotonda e per mobili STC58 850 W STC56 + spazzola per animali STC62 850 W STC56 + spazzola per parquet
STRUTTURA DEL PRODOTTO

1 Strumento Spazzola 9 Pulsante dispositivo avvolgimento 2 Tubo metallico estensibile 10 Ruota posteriore 3 Pulsante di rilascio 11 Gomma ruota posteriore 4 Maniglia 12 Ugello a fessura 5 Contenitore polvere e maniglia 13 Porta accessori 6 Tubo flessibile 14 Spazzola rotonda 7 Connettore tubo 15 Spazzola per tappezzeria 8 Contenitore polvere 16 Spazzola per animali 17 Spazzola per parquet
Avvertenza di sicurezza
1. Assicurarsi di utilizzare l'apparecchio in conformità con il contenuto di questo manuale e utilizzare i raccordi indicati dal produttore.
2. Si prega di non lasciare incustodito l'apparecchio quando è acceso.
Spegnere l'interruttore di alimentazione ed estrarre la spina di alimentazione quando non viene utilizzato o prima della manutenzione.
3. Si prega di non tirare o trasportare l'apparecchio per il cavo di alimentazione e di non stringerlo quando si chiude una porta; mantenere il cavo libero dalla pressa dell'apparecchio.
4. Si prega di non lasciare che i bambini prendano l'apparecchio come giocattolo, è necessaria una grande attenzione quando i bambini si avvicinano all'apparecchio
5. Si prega di non utilizzare l'aspirapolvere quando il cavo di alimentazione o la spina sono danneggiati. Inviarlo al centro di assistenza designato. Non scollegare tirando il cavo. Per staccare la spina, afferrare la spina, non il cavo.
6. Non staccare mai la spina di alimentazione e non
utilizzare l'apparecchio con le mani bagnate.
7. Quando si utilizza l'aspirapolvere, prestare attenzione per evitare che i rotoli di capelli o altri rifiuti ostruiscano l'ingresso dell'aria (compresi il tubo flessibile e lo scarico), altrimenti si potrebbero verificare guasti al motore e all'alloggiamento e causare distorsione. Se le cose aspirate formano un blocco, arrestare l'apparecchio estraendo immediatamente la spina di alimentazione per pulire il blocco.
8.Quando si usa l'apparecchio, non coprire l'uscita dell'aria con un asciugamano o altre cose, altrimenti l'efficienza dell'assorbimento della polvere sarà influenzata e il motore sarà ad alto rischio di guasto.
9. Non utilizzare mai l'apparecchio su pavimenti o terreni irregolari; e fare molta attenzione quando si puliscono le scale per evitare che l'apparecchio cada.
10. Non assorbire mai ceppi vivi con l'apparecchio, altrimenti il motore potrebbe essere danneggiato.
11. L'apparecchio deve essere tenuto lontano da fonti di calore (come riscaldamento centralizzato, forno, ecc.) Per evitare la distorsione delle parti in plastica e l'influenza causata da tale distorsione.
12. Prima di utilizzare l'aspirapolvere, rimuovere gli oggetti grandi e taglienti dal pavimento per evitare di danneggiare le parti in plastica, le maglie del filtro e il motore.
13. Non assorbire mai acqua o altri liquidi con questo apparecchio, altrimenti il motore verrà danneggiato.
14. Questo apparecchio può essere usato da persone con ridotte capacità fisiche, sensoriali o mentali o con mancanza di esperienza o conoscenza, a condizione che siano sorvegliate o istruite sull'uso sicuro dell'apparecchio e che comprendano pienamente i potenziali pericoli.
15. Se il cavo di alimentazione è danneggiato, deve essere sostituito da un servizio post-vendita per evitare qualsiasi pericolo.
16. Non utilizzare questo apparecchio se ha un cavo o una spina danneggiati, se non funziona correttamente o se è stato danneggiato o fatto cadere. Se il cavo di alimentazione è danneggiato, deve essere sostituito dal produttore, dal suo agente di servizio o da una persona qualificata per evitare rischi.
17. Questo apparecchio può essere utilizzato da bambini di almeno 8 anni, purché siano sorvegliati e abbiano
ricevuto istruzioni sull'uso sicuro dell'apparecchio e siano pienamente consapevoli dei pericoli connessi.
18. La pulizia e la manutenzione non devono essere eseguite da bambini a meno che non abbiano almeno 8 anni e siano sorvegliati da un adulto.
19. Tenere l'apparecchio e il cavo di alimentazione fuori dalla portata dei bambini di età inferiore a 8 anni.
20. Quando si utilizzano apparecchiature elettriche, è necessario prendere sempre precauzioni di sicurezza per prevenire il rischio di incendi, scosse elettriche e/o lesioni in caso di uso improprio.
21. Assicurarsi che la tensione nominale sulla targhetta corrisponda alla tensione del vostro impianto elettrico. In caso contrario, contattare il rivenditore e non collegare l'unità.
22. Non lasciare mai l'unità incustodita mentre è in funzione.
23. Assicurarsi che l'alimentazione sia 220-240 V 50Hz.
24. Il vostro apparecchio è stato progettato esclusivamente per un uso domestico. Non è destinato all'uso nelle seguenti situazioni che non sono coperte dalla garanzia:
- in cucine per il personale in negozi, uffici e altri ambienti professionali,
- in ostelli agricoli,
- da ospiti in hotel, motel e altri ambienti residenziali,
- in ambienti tipo bed and breakfast.
COME USARE L'APPARECCHIO
MONTAGGIO PRIMA DELL'UTILIZZO
La Fig.1 mostra il collegamento del tubo flessibile e dell'aspirapolvere:
Posizionare il connettore del tubo davanti all'aspirapolvere, quindi inserirlo nel foro di ingresso e girare a destra. Se si desidera smontarlo, è possibile ruotare il raccordo del tubo flessibile a sinistra e quindi estrarlo.
La Fig.2 mostra il collegamento del tubo flessibile e del tubo metallico estensibile: Tenere il connettore del tubo flessibile e inserirlo nel foro più grande del tubo.
La Fig.3 mostra la connessione del tubo e dello strumento pennello: Inserire il tubo di metallo nel foro della spazzola e ruotarlo per fissarlo.
La Fig.4 mostra come effettuare l'avvolgimento del cavo di alimentazione.
È possibile estrarre il cavo di alimentazione dall'apparecchio e fermarsi quando appare il segno il segno giallo. Assicurarsi che il segno rosso non sia fuori. Al termine dell'utilizzo, spegnere prima l'alimentazione, estrarre la spina dalla presa e quindi premere il pulsante del dispositivo di avvolgimento fino a quando il cavo non è completamente avvolto.
La Fig.5 mostra il pulsante di accensione
Inserire la spina nella presa, premere il pulsante di accensione per controllare il funzionamento dell'apparecchio.

natural_image
Technical line drawing of a mechanical assembly with no visible text or symbols
Fig.1

natural_image
Line drawing of a curved cable or hose with a small attached component (no text or symbols)
Fig.2

natural_image
Technical line drawing of a mechanical component with no visible text or symbols
Fig.3

natural_image
Technical line drawing of a mechanical component with no visible text or symbols
Fig.4

natural_image
Technical line drawing of a mechanical component with no visible text or symbols
Fig.5
PULIZIA DEL CONTENITORE POLVERE
passaggi della pulizia del contenitore:
1. Come in Fig.6, tenere il contenitore polvere e la maniglia e premere il pulsante di rilascio.
2. Come in Fig.7, estrarre il contenitore polvere dall'apparecchio.
3. Come in Fig.8, posizionare il contenitore sul cestino,
premere il pulsante di rilascio per aprire la parte inferiore del contenitore polvere, e lo sporco e la polvere cadranno nel cestino da soli.
4. Come in Fig.9, chiudere il contenitore polvere per un uso circolare dopo la pulizia.

MANUTENZIONE
COME EFFETTUARE LA MANUTENZIONE
1. Il filtro deve essere pulito due volte l'anno e quando c'è sporco evidente sul filtro.
2. È necessario fissare correttamente il filtro prima di avviare l'aspirapolvere.
3. Il filtro non può essere pulito in lavatrice o asciugato nell'asciugatrice.
4. Utilizzare un filtro bagnato ridurrà la potenza di aspirazione e danneggerà il motore.
5. Passaggi per la manutenzione:
1) Come in fig.10, premere il blocco di uscita per aprire lo sportellino.
2) Come in fig.11, estrarre il filtro.
3) Come in fig.12, ruotare il coperchio HEPA per separarlo dal coperchio
4) Come in fig.13, estrarre il filtro HEPA
5) Come in fig.14, rimuovere eventuali capelli.
6) Come in fig.15, lavare il filtro HEPA.
7) Lavare il coperchio HEPA, il gruppo HEPA, la spugna di uscita e il contenitore polvere nell'acqua senza detersivo e asciugarli prima dell'uso.
8) Inserire il gruppo del contenitore polvere nell'apparecchio. E in questo processo, posizionare il contenitore nella giusta posizione e quindi premere la maniglia del contenitore polvere, se si sente un cluck significa che l'operazione è stata effettuata con successo.

natural_image
Technical line drawing of a mechanical device with no visible text or symbols
Fig.10

natural_image
Line drawing of a camera with front-mounted sensor and display panel (no text or symbols)
Fig.11

natural_image
Line drawing of a curved mechanical component with attached parts, alongside a stylized red logo (no text or symbols)
Fig.12

natural_image
Line drawing of a rice cooker with open lid and side panel, showing internal components (no text or symbols)
Fig.13

Fig.14

natural_image
Line drawing of a rice cooker with lid and side legs (no text or symbols)
Fig.15
GARANZIA
Il periodo di garanzia per i nostri prodotti è di 2 anni.
Se avete problemi o domande, potete facilmente accedere alle nostre pagine di aiuto, consigli per la risoluzione dei problemi, FAQ e manuali d'uso sul nostro sito post-vendita: https://sav.hkoenig.com.
Digitando il nome di riferimento del tuo dispositivo nella barra di ricerca, puoi accedere a tutto il supporto online disponibile, progettato per soddisfare al meglio le tue esigenze.
Se ancora non riesci a trovare una risposta alla tua domanda o al tuo problema, allora clicca su "La risposta ha risolto il tuo problema? Questo vi porterà al modulo di richiesta di supporto post-vendita, che potete completare per convalidare la vostra richiesta e ottenere aiuto.
CONDIZIONI DI GARANZIA
La garanzia copre tutti i guasti derivanti da un uso normale, in conformità con gli usi e le specifiche del manuale utente.
Questa garanzia non si applica a problemi di imballaggio o di trasporto durante la spedizione del prodotto da parte del proprietario. Non include inoltre la normale usura del prodotto, né la manutenzione o la sostituzione delle parti di consumo.
ESCLUSIONE DELLA GARANZIA
- Accessori e parti soggette a usura (\*).
- Normale manutenzione dell'apparecchio.
- Tutti i guasti derivanti da un uso improprio (urti, mancato rispetto delle raccomandazioni sull'alimentazione, cattive condizioni d'uso, ecc.), da una manutenzione inadeguata o da un uso improprio dell'apparecchio, nonché dall'uso di accessori inadeguati.
- Danni di origine esterna: incendio, danni d'acqua, sovratensione elettrica, ecc.
- Qualsiasi attrezzatura che sia stata smontata, anche parzialmente, da persone diverse da quelle autorizzate a farlo (in particolare l'utente).
- Prodotti per i quali il numero di serie è mancante, danneggiato o illeggibile, il che non permetterebbe la sua identificazione.
- Prodotti soggetti a noleggio, dimostrazione o esposizione.
(\*) Alcune parti del suo apparecchio, note come parti soggette a usura o materiali di consumo, si deteriorano con il tempo e la frequenza d'uso del suo apparecchio. Questa usura è normale, ma può essere accentuata da cattive condizioni d'uso o di manutenzione del vostro apparecchio. Queste parti non sono quindi coperte dalla garanzia.
Anche gli accessori forniti con l'apparecchio sono esclusi dalla garanzia. Non possono essere scambiati o rimborsati. Tuttavia, alcuni accessori possono essere acquistati direttamente dal nostro sito web: https://sav.hkoenig.com/.

ATTENZIONE
Non smaltire questo prodotto insieme ad altri prodotti domestici.
Esiste una raccolta differenziata di questo prodotto
di questo prodotto in comunità, è necessario informarsi presso
le autorità locali sui luoghi in cui è possibile restituire il prodotto.
questo prodotto. Infatti, i prodotti elettrici ed elettronici
contengono sostanze pericolose che hanno effetti nocivi
sull'ambiente e sulla salute umana.
sull'ambiente o sulla salute umana e devono essere riciclati. Il
simbolo qui riportato indica che le apparecchiature elettriche ed
elettroniche
Il simbolo indica che le apparecchiature elettriche ed
elettroniche devono essere scelte con cura, mentre il
contenitore dei rifiuti su ruote è contrassegnato da una croce.
Adeva SAS / H.Koenig Europe - 8 rue Marc Seguin - 77290 Mitry Mory - France www.hkoenig.com - sav@hkoenig.com - contact@hkoenig.com - Tél:
+33 1 64 67 00 05
PORTUGUÊS
Produto Potência (W) Acessórios STC56 700 W Bocal para fendas, escova redonda e para móveis STC58 850 W STC56 + escova para animais STC62 850 W STC56 + escova para parquet
COMPONENTES DO APARELHO

1 Escova Multiuso 9 Botão de Recolha do Cabo 2 Tubo Extensível de Metal 10 Tampa da Roda Traseira 3 Botão de Ligar/Desligar 11 Roda Traseira de Borracha 4 Alça para Transporte 12 Bico de fenda 5 Alça do Reservatório de Pó 13 Porta accessori 6 Tubo Flexível 14 Escova redonda 7 Conector do Tubo Flexível 15 Escova para estofados 8 Reservatório de Pó 16 Escova para animais 17 Escova para parquet
Aviso de Segurança
1. Certifique-se de utilizar o aspirador conforme as instruções deste manual e utilize os acessórios designados pelo fabricante.
2. Por favor, não abandone o aspirador quando estiver em funcionamento.
Desligue o interruptor de alimentação e tire a ficha da tomada elétrica quando não estiver a utilizar ou antes de realizar a manutenção.
3. Por favor, não puxe ou transporte o aspirador pelo cabo de alimentação ou não deixe que o cabo de alimentação fique entalado quando fechar uma porta; mantenha o cabo sempre livre da pressão do aspirador.
4. Por favor, não deixe as crianças brincarem com o aspirador como se fosse um brinquedo e é necessário ter muita atenção quando o aspirador se aproximar das crianças.
5. Por favor, não utilize o aspirador quando o cabo de alimentação ou a ficha estiverem danificados. Leve-o a um centro de serviços autorizado. Por favor, não deligue o aspirador puxando o cabo de alimentação ou a ficha. Para desligá-lo deve sempre fazê-lo segurando na ficha,
não no cabo de alimentação.
6. Nunca puxe a ficha elétrica ou utilize o aspirador com as mãos molhadas.
7. Quando utilizar o aspirador, tenha atenção para evitar que qualquer rolo de cabelo ou outro tipo de lixo obstrua a entrada de ar (incluindo o tubo flexível e o tubo de metal extensível), caso contrário, pode ocorrer falha no motor e distorção na caixa. Se o que for aspirado formar um bloqueio, desligue o aspirador imediatamente, desligando a ficha elétrica, limpe o que foi aspirado para desbloquear o aspirador.
8. Quando utilizar o aspirador, não conecte a saída de ar com uma toalha ou com outras matérias, caso contrário, a eficiência da aspiração do pó será influenciada e o motor estará sob alto risco de queimar.
9. Nunca utilize o aspirador em superfícies ou pisos irregulares; e tenha muito cuidado quando limpar escadas para evitar que o aspirador caia.
10. Nunca aspire seres vivos com o aspirador, caso contrário, o motor pode ser danificado.
11. o aspirador deve ser mantido afastado de fontes de calor (como aquecimento central, forno, etc.) para evitar
a distorção das peças/partes de plástico, assim como da influência causada por essa distorção.
12. Antes de utilizar o aspirador, por favor, remova objetos grandes e afiados do chão para evitar danificar as peças/partes de plástico, as telas do filtro e o motor.
13. Nunca aspire água ou outro líquido com este aspirador, caso contrário, o motor danificar-se-á.
14. Este aparelho pode ser utilizado por pessoas com capacidades físicas, sensoriais ou mentais reduzidas ou com falta de experiência ou conhecimento, desde que sejam supervisionadas ou instruídas sobre a utilização segura do aparelho e que compreendam totalmente os perigos potenciais.
15. Se o cabo de alimentação estiver danificado, deverá ser substituído por um serviço de pós-venda para evitar qualquer perigo.
16. Não coloque o aparelho em funcionamento se houver um cabo ou ficha danificados, se não estiver a funcionar corretamente, se foi danificado ou caiu. Se o cabo de alimentação estiver danificado, deve ser substituído pelo fabricante, fornecedor de serviços ou pessoas com qualificação semelhante, com a finalidade
de evitar riscos.
17. Este aparelho pode ser utilizado por crianças com idade acima dos 8 anos, desde que sejam supervisionadas e tenham recebido instruções relativamente à utilização do aparelho de uma forma segura e estejam conscientes dos perigos envolvidos.
18. A limpeza e manutenção não devem ser realizadas por crianças, a menos que tenham pelo menos 8 anos de idade e sejam supervisionadas por um adulto.
19. Mantenha o aparelho e o cabo de alimentação fora do alcance das crianças com idades inferiores a 8 anos.
20. Quando utilizar eletrodomésticos (aparelhos elétricos), devem ser sempre seguidas as precauções básicas de segurança para evitar o risco de incêndio, choque elétrico e/ou ferimentos em caso de utilização indevida.
21. Verifique se a voltagem na placa de identificação corresponde à voltagem principal da sua instalação elétrica. Se não for esse o caso, entre em contator
com o revendedor e não ligue o aparelho.
22. Nunca deixe o aparelho sem vigilância enquanto estiver em funcionamento.
23. Verifique se a fonte de alimentação é de 220-240V 50Hz.
24. O seu aparelho foi concebido apenas para uso doméstico. Não se destina a uso nas seguintes situações que não são cobertas pela garantia:
- nas áreas de cozinha do pessoal em lojas, escritórios e outros ambientes profissionais,
- em albergues agrícolas,
- por hóspedes em hotéis, motéis e outros ambientes residenciais,
- em ambientes do tipo cama e pequeno-almoço.
COMO UTILIZAR
MONTAGEM ANTES DE UTILIZAR
A Fig.1 mostra a montagem do tubo flexível ao aspirador:
Coloque o conector do tubo flexível na frente do aspirador. Em seguida, insira-o no orifício de entrada e rode para a direita. Se quiser desmontá-lo, pode rodar o conector do tubo flexível para a esquerda e puxar para fora.
A Fig.2 mostra a montagem do tubo flexível ao tubo extensível de metal:
Segure o conector de resistência flexural que se encontra no tubo flexível e coloque-o no orifício maior do tubo extensível de metal.
A Fig.3 mostra a montagem do tubo extensível de metal na escova multiusos:
Coloque o tubo extensível de metal no orifício da escova e rode-o para fixá-los.
A Fig.4 mostra como verificar o enrolamento do cabo de alimentação:
Você pode puxar o cabo de alimentação para fora do aspirador e parar quando vir a marca amarela. Verifique se a marca vermelha não está apagada. Quando terminar de aspirar, primeiro desligue a energia do aspirador, remova a ficha da tomada elétrica e,
em seguida, pressione o botão de recolha do cabo até que o cabo esteja completamente dentro do aspirador.
A Fig.5 mostra o botão de Ligar/Desligar:
Coloque a ficha na tomada elétrica, pressione o botão de Ligar/Desligar para controlar o funcionamento do aspirador.

LIMPEZA DO RESERVATÓRIO DE PÓ
Os passos para fazer a limpeza do reservatório de pó:
1. Como mostra na Fig.6, segure na alça do reservatório de pó e pressione o botão de desbloqueio.
2. Como mostra na Fig.7, remova o reservatório de pó do aspirador.
3. Como mostra na Fig.8, coloque o reservatório de pó sobre o caixote do lixo, pressione o botão de desbloqueio para abrir a parte inferior do reservatório de pó e a sujidade e a poeira cairão no caixote do lixo por si mesmos.
4. Como mostra na Fig.9, feche o reservatório de pó para um uso circular após a limpeza.

natural_image
Technical line drawing of a mechanical component with no visible text or symbols
Fig.6

natural_image
Technical line drawing of a vacuum cleaner with attached hoses and gauges (no text or symbols)
Fig.7

natural_image
Technical line drawing of a mechanical device with a red arrow indicating direction (no text or symbols)
Fig.8

natural_image
Diagram of a mechanical device with a downward arrow indicating compression or disassembly (no text or symbols present)
Fig.9
MANUTENÇÃO
COMO MANTER O ASPIRADOR OPERACIONAL
1. O filtro deve ser limpo duas vezes por ano e quando verificar que existe sujidade no filtro também deve limpá-lo.
2. Você deve colocar o filtro corretamente antes de colocar o aspirador em funcionamento.
3. O filtro não pode ser limpo na máquina de lavar ou soprado por ventilador.
4. Reduzirá a potência de sucção e danificará o motor se usar o filtro húmido.
5. Passos para realizar a manutenção:
1) Como mostra na Fig.10, pressione o botão da rede
de saída de ar para a abrir.
2) Como mostra na Fig.11, remova o filtro de saída de ar para a sua limpeza.
3) Como mostra na Fig.12, rode a tampa HEPA para separá-la da tampa do reservatório.
4) Como mostra na Fig.13, obtenha a tampa HEPA.
5) Como mostra na Fig.14, se você tiver qualquer acessório de limpeza removível para enrolar os cabelos.
6) Como mostra na Fig.15, pegue na tampa HEPA e lave-a.
7) Lave a tampa HEPA, o conjunto HEPA, a esponja que se encontra na saída de ar e o reservatório de pó com água sem detergente e seque-os antes de utilizar.
8) Coloque o conjunto do reservatório de pó no aspirador. Neste processo, primeiro, você deve colocar o reservatório na posição correcta e, em seguida, pressionar a alça do reservatório de pó; se ouvir um clique, significa que a operação foi realizada com sucesso.

natural_image
Technical line drawing of a handheld vacuum cleaner device (no text or symbols)
Fig.10

natural_image
Technical line drawing of a mechanical device with no visible text or symbols
Fig.11

natural_image
Line drawing of a curved container with a handle, next to a red arrow symbol (no text or labels)
Fig.13

natural_image
Line drawing of a rice cooker with open lid and side arm, showing internal compartments (no text or symbols)
Fig.12

Fig.14

natural_image
Line drawing of a rice cooker with lid and side legs (no text or symbols)
Fig.15
GARANTIA
O período de garantia dos nossos produtos é de 2 anos.
Se tiver quaisquer problemas ou perguntas, pode aceder facilmente às nossas páginas de ajuda, resolução de problemas
dicas, FAQ, e manuais do utilizador no nosso site de serviços: https://sav.hkoenig.com.
Ao digitar o nome de referência do seu dispositivo na barra de pesquisa, pode aceder a todos os apoio em linha, concebido para melhor responder às suas necessidades.
Se ainda não encontrar uma resposta para a sua pergunta ou problema, então clique em "Did the answer resolver o seu problema...". Isto irá encaminhá-lo para o Formulário de Pedido de Apoio ao Cliente, o qual pode preencher para validar o seu pedido e obter ajuda.
CONDIÇÕES DE GARANTIA
A garantia cobre todas as falhas que ocorram em condições normais de utilização, de acordo com a utilização e especificações no manual do utilizador.
Esta garantia não se aplica a problemas de embalagem ou transporte durante o envio do produto pelo proprietário. Também não inclui o desgaste normal do produto, nem manutenção ou substituição de peças consumíveis.
EXCLUSÃO DE GARANTIA
- Acessórios e peças de desgaste (\*).
- Manutenção normal do dispositivo.
- Todas as avarias resultantes de utilização indevida (choques, não cumprimento de fornecimento de energia recomendações, más condições de utilização, etc.), manutenção insuficiente ou utilização indevida do bem como a utilização de acessórios impróprios.
- Danos de origem externa: incêndio, danos causados pela água, surtos eléctricos, etc.
- Qualquer equipamento que tenha sido desmontado, mesmo parcialmente, por outras pessoas para além das que
autorizado para o fazer (nomeadamente o utilizador).
\- Os produtos cujo número de série estaria em falta, deteriorado ou ilegível que não permitir a sua identificação.
\- Os produtos sujeitos a leasing, demonstração, ou exposição.
(\*) Algumas partes do seu dispositivo, chamadas peças de desgaste ou consumíveis, deterioram-se com o tempo e
frequência de utilização do seu dispositivo. Este desgaste é normal, mas pode ser acentuado por más condições de utilização ou manutenção do seu dispositivo. Estas peças não são, portanto, abrangidas pela garantia.
Os acessórios fornecidos com o dispositivo estão também excluídos da garantia. Não podem ser trocados ou reembolsados. No entanto, alguns acessórios podem ser adquiridos directamente através do nosso
website: https://sav.hkoenig.com/.
Descarte Correto deste produto Esta marcação indica que este produto não pode ser descartado/eliminado como outros resíduos domésticos, em toda a UE. Para evitar possíveis danos ao meio ambiente ou à saúde humana, decorrentes do descarte incontrolável de resíduos, recicle-o com responsabilidade para promover a reutilização sustentável dos recursos materiais. Para devolver o aparelho usado, por favor, utilize os sistemas de devolução e recolha ou entre em contato com o revendedor onde o produto foi adquirido. Os revendedores podem levar este aparelho para uma reciclagem ambientalmente segura.
Adeva SAS / H.Koenig Europe - 8 rue Marc Seguin - 77290 Mitry Mory - France www.hkoenig.com - sav@hkoenig.com - contact@hkoenig.com - Tél:
+33 1 64 67 00 05
POLSKI
Produkt Moc (W) Akcesoria STC56 700 W Ssawka szczelinowa, szczotka okrągła i szczotka do mebli STC58 850 W STC56 + szczotka do zwierząt STC62 850 W STC56 + szczotka do parkietu
KOMPONENTY URZĄDZENIA

1 Szczotka uniwersalna 9 Pokrętło zwijania linki 2 Metalowa rura przedłużająca 10 Osłona tylnego koła 3 Przycisk włączania/wyłączania 11 Gumowe tylne koło 4 Uchwyt do przenoszenia 12 Śrubokręt 5 Uchwyt pojemnika na kurz 13 Uchwyt na akcesoria 6 Elastyczna rura 14 Okrągła szczotka 7 Złącze elastycznej rurki 15 Szczotka do tapicerki 8 Pojemnik na kurz 16 Szczotka dla zwierząt 17 Szczotka do parkietu
Ostrzeżenie dotyczące bezpieczeństwa
1. Należy upewnić się, że odkurzacz jest używany zgodnie z instrukcjami zawartymi w niniejszym podręczniku oraz z akcesoriami określonymi przez producenta.
2. Nie należy pozostawiać odkurzacza podczas pracy. Wyłączyć wyłącznik zasilania i wyjąć wtyczkę z gniazda sieciowego, gdy urządzenie nie jest używane lub przed przystąpieniem do konserwacji.
3. Nie należy ciągnąć ani przenosić odkurzacza za przewód zasilający ani dopuszczać do zapłatania się przewodu zasilającego podczas zamykania drzwi; przewód należy zawsze trzymać z dala od nacisku odkurzacza.
4. Nie pozwalaj dzieciom bawić się odkurzaczem jak zabawką i zwracaj szczególnie uwagę, gdy odkurzacz znajduje się w pobliżu dzieci.
5. Nie używaj odkurzacza, jeśli kabel zasilający lub wtyczka są uszkodzone. Odkuracz należy oddać do autoryzowanego serwisu. Nie wyłączaj odkurzacza ciągnąc za kabel zasilający lub wtyczkę.
Aby wyłączyć urządzenie, należy zawsze chwytać za
wtyczkę, a nie za przewód zasilający.
6. Nigdy nie ciągnij za wtyczkę sieciową ani nie używaj odkurzacza mokrymi rękami.
7. Podczas korzystania z odkurzacza należy uważać, aby wałki do włosów lub inne śmieci nie blokowały wlotu powietrza (w tym węża elastycznego i wysuwanego węża metalowego), w przeciwnym razie może dojść do awarii silnika i odkształcenia obudowy. W przypadku zablokowania odkurzacza przez zassane śmieci należy natychmiast wyłączyć odkuracz poprzez wyjęcie wtyczki z gniazdka, a następnie usunąć zassane śmieci w celu odblokowania odkurzacza.
8. Podczas korzystania z odkurzacza nie należy podłączać wylotu powietrza za pomocą ręcznika lub innych materiałów, w przeciwnym razie zmniejszy się skuteczność zasysania kurzu, a silnik będzie narażony na wysokie ryzyko spalenia.
9. Nigdy nie używaj odkurzacza na nierównych powierzchniach lub podłogach; zachowaj szczególną ostrożność podczas czyszczenia schodów, aby uniknąć upadku odkurzacza.
10. Nigdy nie odkurzaj żywych stworzeń za pomocą
odkurzacza, w przeciwnym razie silnik może ulec uszkodzeniu. 11.
11. Odkurzacz należy przechowywać z dala od źródeł ciepła (takich jak centralne ogrzewanie, piekarnik itp.), aby uniknąć odkształcenia plastikowych części i wpływu spowodowanego tym odkształceniem.
12. Przed użyciem odkurzacza należy usunąć z podłogi duże, ostre przedmioty, aby uniknąć uszkodzenia plastikowych części, sit filtrujących i silnika.
13. Nigdy nie zasysaj wody ani innych płynów za pomocą tego odkurzacza, w przeciwnym razie silnik zostanie uszkodzony.
14. To urządzenie może być używane przez osoby o ograniczonych zdolnościach fizycznych, sensorycznych lub umysłowych lub nieposiadające doświadczenia lub wiedzy, pod warunkiem, że są one nadzorowane lub poinstruowane w zakresie bezpiecznego użytkowania urządzenia i w pełni rozumieją potencjalne zagrożenia.
15. Jeśli kabel zasilający jest uszkodzony, musi zostać wymieniony przez centrum obsługi posprzedażnej, aby uniknąć zagrożenia.
16. Nie należy uruchamiać urządzenia z uszkodzonym
kablem lub wtyczką, jeśli nie działa ono prawidłowo, zostało uszkodzone lub upuszczone. Jeśli kabel zasilający jest uszkodzony, musi zostać wymieniony przez producenta, serwis lub podobnie wykwalifikowane osoby w celu uniknięcia zagrożeń.
17. To urządzenie może być używane przez dzieci w wieku powyżej 8 lat, pod warunkiem, że są one nadzorowane i zostały poinstruowane w zakresie bezpiecznego korzystania z urządzenia i są świadome związanych z tym zagrożeń.
18. Czyszczenie i konserwacja nie powinny być wykonywane przez dzieci, chyba że mają one co najmniej 8 lat i są nadzorowane przez osobę dorosłą.
19. Urządzenie i kabel zasilający należy przechowywać w miejscu niedostępnym dla dzieci poniżej 8 roku życia.
20. Podczas korzystania z urządzeń gospodarstwa domowego (urządzeń elektrycznych) należy zawsze przestrzegać podstawowych środków ostrożności, aby uniknąć ryzyka pożaru, porażenia prądem i/lub obrażeń w przypadku niewłaściwego użytkowania.
21. Sprawdź, czy napięcie podane na tabliczce znamionowej odpowiada głównemu napięciu instalacji
elektrycznej. Jeśli tak nie jest, należy skontaktować się ze sprzedawcą i nie włączać urządzenia.
22. Nigdy nie pozostawiaj urządzenia bez nadzoru podczas jego pracy.
23. Sprawdź, czy zasilanie wynosi 220-240 V 50 Hz.
24. Urządzenie jest przeznaczone wyłącznie do użytku domowego. Nie jest ono przeznaczone do użytku w następujących sytuacjach, które nie są objęte gwarancją:
\- w kuchniach pracowniczych w sklepach, biurach i innych środowiskach zawodowych,
- w hostelach rolniczych,
- przez gości w hotelach, motelach i innych środowiskach mieszkalnych,
- w pensjonatach.
JAK UŻYWAĆ
MONTAŻ PRZED UŻYCIEM
Rys. 1 przedstawia sposób montażu węża do odkurzacza:
Umieść złącze węża z przodu odkurzacza. Następnie włóż go do otworu wlotowego i przekręć zgodnie z ruchem wskazówek zegara. Jeśli chcesz go wyjąć, możesz obrócić złącze węża w lewo i wyciągnąć je.
Rys. 2 przedstawia montaż węża do metalowej rury przedłużającej:
Chwyć złącze wytrzymałości na zginanie na wężu i umieść je w większym otworze w metalowej rurce przedłużającej.
Rys. 3 przedstawia montaż metalowej rurki przedłużającej do szczotki wielofunkcyjnej:
Umieść metalową rurkę przedłużającą w otworze w szczotce i obróć ją, aby ją zamocować.
Rys. 4 pokazuje, jak sprawdzić nawinięcie kabla zasilającego:
Możesz wyciągnąć kabel zasilający z odkurzacza i zatrzymać go, gdy zobaczysz żółty
znak. Sprawdź, czy czerwone oznaczenie nie zgasło. Po zakończeniu odkurzania należy najpierw wyłączyć zasilanie odkurzacza, wyjąć wtyczkę z gniazda sieciowego, a następnie nacisnąć przycisk wsuwania przewodu, aż przewód znajdzie się całkowicie wewnątrz odkurzacza.
Rys. 5 przedstawia przycisk włączania/wyłączania:
Włóż wtyczkę do gniazda sieciowego i naciśnij przycisk włączania/wyłączania, aby sterować pracą odkurzacza.

CZYSZCZENIE POJEMNIKA NA KURZ
Kroki czyszczenia pojemnika na kurz:
1. Jak pokazano na Rys. 6, przytrzymaj uchwyt pojemnika na kurz i naciśnij przycisk zwalniający.
2. Jak pokazano na Rys. 7, wyjmij pojemnik na kurz z odkurzacza.
3. Jak pokazano na Rys.8, umieść pojemnik na kurz na koszu na śmieci, naciśnij przycisk zwalniający, aby otworzyć dno pojemnika na kurz, a brud i kurz same wpadną do kosza na śmieci.
4. Jak pokazano na rys. 9, po zakończeniu czyszczenia zamknij pojemnik na kurz, aby można go było używać na okrągło.

natural_image
Technical line drawing of a mechanical component with no visible text or symbols
Fig.6

natural_image
Technical line drawing of a vacuum cleaner with hoses and control panel (no text or symbols)
Fig.7

natural_image
Line drawing of a mechanical device with a red arrow indicating direction (no text or symbols)
Fig.8

natural_image
Diagram of a water heater with a downward arrow indicating flow or movement (no text or symbols present)
Fig.9
KONSERWACJA
JAK UTRZYMAĆ ODKURZACZ W DOBRYM STANIE
1. Filtr należy czyścić dwa razy w roku, a w przypadku zauważenia zabrudzeń na filtrze należy go również wyczyścić.
2. Przed uruchomieniem odkurzacza należy prawidłowo założyć filtr.
3. Filtra nie można czyścić w pralce ani przedmuchiwać wentylatorem.
4. Użycie wilgotnego filtra spowoduje zmniejszenie siły ssania i uszkodzenie silnika.
5. Kroki przeprowadzania konserwacji:
1) Jak pokazano na Rys.10, naciśnij przycisk na siatce wylotu powietrza, aby ją otworzyć.
2) Jak pokazano na Rys. 11, wyjmij filtr wylotu powietrza, aby go wyczyścić.
3) Jak pokazano na Rys. 12, obróć korek HEPA, aby oddzielić go od korka zbiornika.
4) Jak pokazano na Rys. 13, zdejmij nasadkę HEPA.
5) Jak pokazano na rys. 14, jeśli posiadasz
zdejmowane akcesoria do czyszczenia, zwiń włosy.
6) Jak pokazano na rys. 15, zdejmij nasadkę HEPA i umyj ją.
7) Umyj pokrywę HEPA, zespół HEPA, gąbkę na wylocie powietrza i pojemnik na kurz wodą bez detergentu i wysusz je przed użyciem.
8) Włóż zespół pojemnika na kurz do odkurzacza. W tym procesie należy najpierw umieścić pojemnik w prawidłowej pozycji, a następnie nacisnąć uchwyt pojemnika na kurz; jeśli usłyszysz kliknięcie, oznacza to, że operacja została wykonana pomyślnie.

natural_image
Line drawing of a vacuum cleaner device with mesh head and control panel (no text or symbols)
Fig.10

natural_image
Line drawing of a DSLR camera with front-mounted screen and control panel (no text or symbols)
Fig.11

natural_image
Line drawing of a kettle with handle and spout, no text or symbols present
Fig.12

natural_image
Line drawing of a rice cooker with lid open, showing internal structure and handle (no text or symbols)
Fig.13

Fig.14

natural_image
Line drawing of a rice cooker with lid and handle (no text or symbols)
Fig.15
GWARANCJA
Okres gwarancji na nasze produkty wynosi 2 lata.
W przypadku jakichkolwiek problemów lub pytań można łatwo uzyskać dostęp do naszych stron pomocy, porad dotyczących rozwiązywania problemów
porad, często zadawanych pytań i instrukcji obsługi na naszej stronie internetowej serwisu:
https://sav.hkoenig.com.
Wpisując nazwę referencyjną urządzenia w pasku wyszukiwania, można uzyskać dostęp do całego wsparcie online, zaprojektowane tak, aby jak najlepiej zaspokoić Twoje potrzeby.
Jeśli nadal nie możesz znaleźć odpowiedzi na swoje pytanie lub problem, kliknij „Czy odpowiedź rozwiązała Twój problem...”. Spowoduje to przejście do formularza zgłoszenia do pomocy technicznej, który można wypełnić w celu potwierdzenia zgłoszenia.
który można wypełnić w celu potwierdzenia zgłoszenia i uzyskania pomocy.
WARUNKI GWARANCJI
Gwarancja obejmuje wszystkie usterki, które wystąpią w normalnych warunkach użytkowania, zgodnie z przeznaczeniem i specyfikacjami zawartymi w instrukcji obsługi.
i specyfikacjami zawartymi w instrukcji obsługi.
Niniejsza gwarancja nie obejmuje problemów związanych z opakowaniem lub transportem podczas wysyłki urządzenia.
przez właściciela. Gwarancja nie obejmuje również normalnego zużycia produktu, konserwacji lub wymiany części eksploatacyjnych.
konserwacji lub wymiany części eksploatacyjnych.
WYŁĄCZENIE GWARANCJI
\- Akcesoria i części zużywalne (\*).
\- Normalna konserwacja urządzenia.
\- Wszelkie usterki wynikające z niewłaściwego użytkowania (wstrząsy, nieprzestrzeganie zaleceń dotyczących zasilania, złę warunki użytkowania itp.
nieprzestrzeganie zaleceń dotyczących zasilania, złę warunki użytkowania itp.
a także korzystania z nieodpowiednich akcesoriów.
\- Uszkodzenia pochodzenia zewnętrznego: pożar, zalanie wodą, przepięcia elektryczne itp.
\- Wszelkie urządzenia, które zostały zdemontowane, nawet częściowo, przez osoby inne niż do tego upoważnione (tj. użytkownika).
Osoby nieupoważnione do tego (tj. użytkownik).
\- Produkty z brakującym, uszkodzonym lub nieczytelnym numerem seryjnym, który nie umożliwia identyfikacji. identyfikacji.
\- Produkty będące przedmiotem leasingu, demonstracji lub wystawy.
(\*) Niektóre części urządzenia, zwane częściami zużywalnymi lub materiałami eksploatacyjnymi, niszczeją wraz z upływem czasu i użytkowaniem urządzenia.
użytkowania urządzenia. To zużycie jest normalne, ale może być spotęgowane przez złe warunki użytkowania lub konserwacji urządzenia. Części te nie są zatem objęte
gwarancją.
Akcesoria dostarczone wraz z urządzeniem również nie są objęte gwarancją. Nie można ich wymieniane ani zwracane. Niektóre akcesoria można jednak nabyć bezpośrednio za pośrednictwem naszej strony internetowej
stronę internetową: https://sav.hkoenig.com/.
Prawidłowa utylizacja tego produktu

To oznaczenie wskazuje, że ten produkt nie może być utylizowany jak inne odpady z gospodarstw domowych w całej UE. Aby uniknąć możliwych szkód dla środowiska lub zdrowia ludzkiego wynikających z niekontrolowanej utylizacji odpadów, należy poddać go recyklingowi w sposób odpowiedzialny, aby promować zrównoważone ponowne wykorzystanie zasobów materialnych. Aby zwrócić zużyte urządzenie, należy skorzystać z systemów zwrotu i zbiórki odpadów lub kontaktować się ze sprzedawcą, u którego produkt został zakupiony. Sprzedawcy mogą przekazać urządzenie do bezpiecznego dla środowiska recyklingu.
Adeva SAS / H.Koenig Europe - 8 rue Marc Seguin - 77290 Mitry Mory - France www.hkoenig.com - sav@hkoenig.com - contact@hkoenig.com - Tél: +33 1 64 67 00 05


Points de collecte sur www.quefairedemesdechets.fr
Privilégiez la réparation ou le don de votre appareil !
Instruction Manual
Manuel d'instructions Bedienungsanleitung Gebruiksaanwijzing Manual de instrucciones Manuale d'uso Manual de instruções Instrukcja obsługi natural_image
Technical line drawing of a mechanical device with no visible text or symbolsnatural_image
Technical line drawing of a vacuum cleaner (no text or symbols visible)Vacuum cleaner
Aspirateur Staubsauger Stofzuiger Aspiradora Aspirapolvere Aspirador Odkurzacz ENGLISH
| Product | Power (W) | Accessories |
| STC56 | 700 W | Crevice nozzle, round and furniture brush |
| STC58 | 850 W | STC56 + pet brush |
| STC62 | 850 W | STC56 + parquet brush |
STRUCTURE OF THE PRODUCT
 16  12  13  14  15| 1 | Brush tool | 9 | Winding device button |
| 2 | Extending metal tube | 10 | Back wheel |
| 3 | Power button | 11 | Back wheel rubber |
| 4 | Handle | 12 | Crevice nozzle |
| 5 | Handle of the dust cup | 13 | Accessory holder |
| 6 | Hose | 14 | Round brush |
| 7 | Hose connector | 15 | Furniture brush |
| 8 | Dust cup | 16 | Pet brush (only for STC58) |
| 17 | Parquet brush (only for STC62) | ||
Safety warning
1. Be sure to use the cleaner in compliance with the contents of this manual, and use the fittings designated by the manufacturer. 2. Please do not leave the cleaner when it is powered on. Turn off the power switch and pull out the power plug when not using or before maintenance. 3. Please do not pull or carry the cleaner by the power cord, or nip it when closing a door; keep the cord free from the press of the cleaner. 4. Please do not let children take the cleaner as a toy, and close attention is necessary when the cleaner approaches children. 5. Please do not use the cleaner when its power cord or plug is damaged. Send it to the appointed service center. Please do not unplug by pulling the cord or plug. To unplug, grasp the plug, not the cord. 6. Never pull the power plug or use the cleaner with wet hands. 7. When using the cleaner, pay attention to prevent any hair roll or other rubbish block up the air inlet (including the hose and the spill), otherwise motor failure and housing distortion may be caused. If the matters absorbed in forms a blockage, stop the cleaner by pulling out the power plug immediately to clean the blockage. 8. When using the cleaner, don't plug up the air outlet by towel or other matters, otherwise the efficiency of dust absorbance will be influenced, and the motor will be at high risk of being burnt out. 9. Never use the cleaner at uneven floor or ground; and be very careful when cleaning stairs to prevent the cleaner from falling down. 10. Never absorb live stumps with the cleaner, otherwise the motor may be damaged. 11. The cleaner should be kept far away from heat sources (such as central heating, oven, etc) to avoid the distortion of plastic parts as well as the influence caused by such distortion. 12. Before using the cleaner, please remove big and sharp matters on the floor to avoid damaging the plastic parts, filter gauzes and motor. 13. Never absorb water or other liquid with this cleaner, otherwise, the motor will be damaged. 14. This appliance may be used by persons with reduced physical, sensory or mental capabilities or lack of experience or knowledge, provided that they are supervised or instructed in the safe use of the appliance and that they fully understand the potential hazards. 15. If the power cord is damaged, it must be replaced with an after-sales service to avoid any danger. 16. Do not operate this appliance if it has a damaged cord or plug, if it is not working properly or if it has been damaged or dropped. If the supply cord is damaged, it must be replaced by the manufacturer or its service agent or a similarly qualified person in order to avoid a hazard. 17. This appliance may be used by children of at least 8 years of age, as long as they are supervised and have been given instructions about using the appliance safely and are fully aware of the dangers involved. 18. Cleaning and maintenance should not be carried out by children unless they are at least 8 years of age and are supervised by an adult. 19. Keep the appliance and its power cord out of reach of children under 8 years of age. 20. When using electrical equipment, safety precautions must always be taken to prevent the risk of fire, electric shock and/or injury in the event of misuse. 21. Make sure that the voltage rating on the typeplate corresponds to your main voltage of your installation. If this is not the case, contact the dealer and do not connect the unit 22. Never leave the unit unattended while in operation. 23. Make sure the power supply is 220-240V 50Hz 24. Your appliance has been designed for domestic use only. It is not intended for use in the following situations which are not covered by the warranty: \- in staff kitchen areas in shops, offices and other professional environments, \- in farm hostels, \- by guests in hotels, motels and other residential environments, \- in bed and breakfast type environments.HOW TO USE
ASSEMBLY BEFORE USE
Fig.1 shows the connection of the hose and the vacuum cleaner: Put the hose connector in front of the vacuum cleaner. Then insert it into the inlet hole and turn right. If you want to disassemble it, you can turn the hose connection left and then pull it out. Fig.2 shows the connection of the hose and the extending metal tube: Hold the flexural connector of the hose and put it into the bigger hole of the tube. Fig.3 shows the connection of the tube and the brush tool: Put the metal tube into the hole of the brush and rotate it to fasten them. Fig.4 shows how to check the winding of the power cord. You can pull the power cord out of the machine and stop it when you see the yellow mark. Make sure the red mark is not out. When your sweep is over, first turn off the power, pull the plug out of the socket, and then push the winding device button until the cord is completely in the machine. Fig.5 shows the power button Put the plug into the socket, push the power button to control the work of the machine.  Fig.3 Fig.4 natural_image
Technical line drawing of a mechanical component with no visible text or symbolsCLEANING OF THE DUST CHAMBER
The steps of the chamber cleaning: 1. As in Fig.6, hold the dust chamber and handle and push the release button. 2. As in Fig.7, take the dust chamber out of the machine. 3. As in Fig.8, put the dust chamber onto the rubbish bin, push the release button to open the bottom of the dust chamber, and the dirt and dust will fall into the bin by themself. 4. As in Fig.9, shut up the dust chamber for a circular use after your cleaning. Fig.6 natural_image
Technical line drawing of a mechanical device with no visible text or symbolsnatural_image
Technical line drawing of a portable air purifier with hoses and connectors (no text or symbols)MAINTENANCE
HOW TO MAINTAIN
1. The filter should be cleaned twice a year, and when there is obvious dirt on the filter, it is time. 2. You must fix the filter properly before running the vacuum cleaner. 3. The filter can't be cleaned in the washing machine or baked by the blower. 4. It will reduce the suction power and damage the motor if you use the wet filter. 5. Steps for maintenance: 1) As in fig.10, press the outlet lock to open the outlet board. 2) As in fig.11, get out the outlet filter. 3) As in fig.12, rotate the HEPA cover to separate it from the chamber cover 4) As in fig.13, get the HEPA cover 5) As in fig.14, If you have any hair winding removable cleaning. 6) As in fig.15, get the HEPA and wash it. 7) Wash the HEPA cover, the HEPA assembly, the outlet sponge and the dust chamber in the water without detergent and dry them before use. natural_image
Line drawing of a mechanical device with no visible text or symbolsnatural_image
Technical line drawing of a mechanical device with no visible text or symbolsnatural_image
Technical line drawing of a mechanical device with no visible text or symbolsnatural_image
Technical line drawing of a DSLR camera with front panel and control buttons (no text or symbols)natural_image
Line drawing of a hand holding a container with a curved handle, alongside a red curved shape (no text or symbols)natural_image
Line drawing of a rice cooker with lid open, showing internal components and a red flame symbol (no text or labels)natural_image
Line drawing of a rice cooker with lid and side legs (no text or symbols)WARRANTY
The warranty period for our products is 2 years. If you have any problems or questions, you can easily access our help pages, troubleshooting tips, FAQ, and user manuals on our service site: https://sav.hkoenig.com. By typing the reference name of your device in the search bar, you can access all available online support, designed to best meet your needs. If you still cannot find an answer to your question or problem, then click on "Did the answer solve your problem?". This will direct you to the Customer Support Request Form, which you can fill out to validate your request and get help.WARRANTY CONDITIONS
The warranty covers all failures occurring under normal use, in accordance with the usage and specifications in the user's manual. This warranty does not apply to packaging or transportation problems during shipment of the product by the owner. It also does not include normal wear and tear of the product, non maintenance or replacement of consumable parts.EXCLUSION OF WARRANTY
- Accessories and wearing parts (\*). - Normal maintenance of the device. - All breakdowns resulting from improper use (shocks, failure to comply with power supply recommendations, poor conditions of use, etc.), insufficient maintenance or misuse of the device, as well as the use of unsuitable accessories. - Damage of external origin: fire, water damage, electrical surge, etc. - Any equipment that has been disassembled, even partially, by persons other than those authorized to do so (notably the user). - The products whose serial number would be missing, deteriorated or illegible that would not allow its identification. - The products subjected to leasing, demonstration, or exhibition. (\*) Some parts of your device, called wear parts or consumables, deteriorate with time and frequency of use of your device. This wear and tear are normal but can be accentuated by poor conditions of use or maintenance of your device. These parts are therefore not covered by the warranty. The accessories supplied with the device are also excluded from the warranty. They cannot be exchanged or refunded. However, some accessories can be purchased directly through our website: https://sav.hkoenig.com/. CAUTION
Do not dispose of this product as it has with other household products. There is a separation of this waste product into communities, you will need to inform your local authorities about the places where you can return this product. In fact, electrical and electronic products contain hazardous substances that have harmful effects on the environment or human health and should be recycled. The symbol here indicates that electrical and electronic equipment should be chosen carefully, a wheeled waste container is marked with a cross. Adeva SAS / H.Koenig Europe - 8 rue Marc Seguin - 77290 Mitry Mory - France www.hkoenig.com - sav@hkoenig.com - contact@hkoenig.com - Tél: +33 1 64 67 00 05FRANÇAIS
| Produit | Puissance (W) | Accessoires |
| STC56 | 700 W | Suceur plat, brosse ronde et brosse à meubles |
| STC58 | 850 W | STC56 + brosse animaux |
| STC62 | 850 W | STC56 + brosse parquet |
| 1 | Brosse large | 9 | Bouton du dispositif d'enroulement |
| 2 | Tube extensible en métal | 10 | Roue |
| 3 | Bouton de déverrouillage | 11 | Pneu de la roue |
| 4 | Poignée | 12 | Suceur plat |
| 5 | Bac à poussière et poignée | 13 | Support à accessoires |
| 6 | Tuyau flexible | 14 | Brosse ronde |
| 7 | Raccord du tuyau flexible | 15 | Brosse pour tissu d'ameublement |
| 8 | Bac à poussière | 16 | Brosse pour animaux (STC58) |
| 17 | Brosse pour parquet (STC62) | ||
Avertissement de Sécurité
1. Assurez-vous d'utiliser l'aspirateur conformément au contenu de ce manuel et d'employer les accessoires fournis par le fabricant. 2. Veuillez ne pas laisser l'aspirateur lorsqu'il est allumé. Mettez l'interrupteur d'alimentation sur Off et retirez la fiche d'alimentation lorsque vous ne l'utilisez pas ou avant l'entretien. 3. Veuillez ne pas tirer ou transporter l'aspirateur par le cordon d'alimentation, ni le pincer lors de la fermeture d'une porte. Ne passez pas sur le cordon avec l'aspirateur. 4. Veuillez ne pas laisser les enfants jouer avec l'aspirateur. Soyez prudent quand vous utilisez l'aspirateur près des enfants. 5. Veuillez ne pas utiliser l'aspirateur lorsque son cordon d'alimentation ou sa fiche est endommagée. .Envoyez-le au service technique agréé. Veuillez ne pas débrancher en tirant sur le cordon ou la fiche, mais saisissez la fiche et non le cordon. 6. Ne tirez jamais sur la fiche d'alimentation et n'utilisez pas l'aspirateur avec les mains mouillées. 7. Lorsque vous utilisez l'aspirateur, évitez que des déchets bloquent l'entrée d'air sous peine d'abîmer le moteur. Un problème peut survenir si les matières absorbées obstruent le tuyau. Arrêtez l'aspirateur en débranchant immédiatement la fiche d'alimentation pour déboucher le tuyau. 8. Lorsque vous utilisez l'aspirateur, ne bouchez pas la sortie d'air avec une serviette ou d'autres objets, sinon le rendement de l'appareil sera affecté et le moteur pourra surchauffer. 9. Ne jamais utiliser l'aspirateur sur un sol inégal, et soyez très prudent lors du nettoyage des escaliers pour éviter qu'il ne tombe. 10. Ne jamais absorber de choses vivantes avec l'aspirateur, sinon le moteur pourrait être endommagé. 11. L'aspirateur doit être gardé loin des sources de chaleur (comme le chauffage central, le four, etc.) pour éviter la déformation des pièces en plastique et ses conséquences. 12. Avant d'utiliser l'aspirateur, veuillez enlever les débris gros et tranchants sur le sol pour éviter d'endommager les pièces en plastique, le filtre et le moteur. 13. N'absorbez jamais d'eau ou tout autre liquide avec l'aspirateur, sinon le moteur sera endommagé. 14. Cet appareil peut être utilisé par des personnes dont les capacités physiques, sensorielles ou mentales sont réduites ou dont l'expérience ou les connaissances ne sont pas suffisantes, à condition qu'elles bénéficient d'une surveillance ou qu'elles aient reçu des instructions quant à l'utilisation de l'appareil en toute sécurité et qu'elles en comprennent bien les dangers potentiels. 15. Si le cordon d'alimentation est endommagé, il doit être remplacé par un technicien agréé pour éviter tout accident. 16. N'utilisez pas cet appareil si son cordon ou sa fiche est endommagée, s'il ne fonctionne pas correctement, s'il a été abîmé ou est tombé par terre. .Afin d'écarter tout accident en cas de cordon d'alimentation endommagé, celui-ci doit être remplacé par le fabricant, son représentant ou toute personne de même qualification. 17. Cet appareil peut être utilisé par des enfants d'au moins 8 ans, tant qu'ils sont surveillés et ont reçu des instructions pour utiliser l'appareil en toute sécurité et sont pleinement conscients des dangers encourus. 18. Le nettoyage et l'entretien ne doivent pas être effectués par des enfants à moins qu'ils soient âgés d'au moins 8 ans et surveillés par un adulte. 19. Gardez l'appareil et son cordon d'alimentation hors de portée des enfants de moins de 8 ans. 20. Lors de l'utilisation d'équipements électriques, des précautions de sécurité doivent toujours être prises pour éviter les risques d'incendie, de choc électrique et / ou de blessure en cas de mauvaise utilisation. 21. Assurez-vous que la tension nominale sur la plaque signalétique corresponde à la tension principale de votre installation. Si ce n'est pas le cas, contactez le revendeur et ne branchez pas l'aspirateur. 22. Ne laissez jamais l'appareil sans surveillance pendant son fonctionnement. 23. Assurez-vous que l'alimentation soit de 220-240V 50Hz 24. Votre appareil a été conçu pour un usage domestique seulement. Elle n'a pas été conçue pour être utilisée dans les cas suivants qui ne sont pas couverts par la garantie : \- dans des coins de cuisines réservés au personnel dans des magasins, bureaux et autres environnements professionnels, – dans des fermes auberges, \- par les clients des hôtels, motels et autres environnements à caractère résidentiel, \- dans des environnements de type chambres d'hôtes.COMMENT L'UTILISER
ASSEMBLAGE AVANT UTILISATION
La Fig.1 montre le branchement du tuyau à l'aspirateur : Placez le raccord de tuyau devant l'aspirateur. Insérez-le ensuite dans l'orifice d'entrée et tournez vers la droite. Si vous souhaitez l'enlever, vous pouvez tourner le raccord du tuyau vers la gauche puis le retirer. La Fig.2 montre le branchement du tuyau au tube métallique extensible : Tenez le raccord coudé du tuyau et placez-le dans le plus grand trou du tube. La Fig.3 montre le branchement du tube à la brosse : Placez le tube métallique dans le trou de la brosse et faites-le pivoter pour le fixer. La Fig.4 montre comment vérifier l'enroulement du cordon d'alimentation. Vous pouvez tirer le cordon d'alimentation de l'aspirateur et arrêter lorsque vous voyez la marque jaune. Assurez-vous que la marque rouge ne soit pas visible. Lorsque votre nettoyage est terminé, éteignez l'aspirateur, retirez la fiche de la prise, puis appuyez sur le bouton du dispositif d'enroulement jusqu'à ce que le cordon soit complètement enroulé. La Fig. 5 montre le bouton-interrupteur. Mettez la fiche dans la prise, appuyez sur le bouton-interrupteur pour contrôler le travail de l'aspirateur. natural_image
Technical line drawing of a mechanical assembly with no visible text or symbolsnatural_image
Line drawing of a curved cable or connector with a small rectangular component on top (no text or symbols)natural_image
Technical line drawing of a mechanical component with a red arrow indicating direction (no text or symbols present)natural_image
Technical line drawing of a mechanical component with no visible text or symbolsNETTOYAGE DU BAC À POUSSIÈRE
Les étapes du nettoyage du bac : 1. Comme sur la Fig.6, tenez le bac à poussière et la poignée et appuyez sur le bouton de déverrouillage. 2. Comme dans la Fig.7, sortez le bac à poussière de l'appareil. 3. Comme dans la Fig.8, placez le bac à poussière sur la poubelle, appuyez sur le bouton de déverrouillage pour ouvrir le fond du bac à poussière, et les débris tomberont dans la poubelle. 4. Comme sur la Fig.9, refermez le bac à poussière pour le réutiliser au prochain nettoyage. natural_image
Technical line drawing of a mechanical device with no visible text or symbolsnatural_image
Technical line drawing of a vacuum cleaner with hoses and connectors (no text or symbols)natural_image
Technical line drawing of a mechanical device with no visible text or symbolsnatural_image
Diagram of a mechanical device with a red upward arrow indicating motion or force (no text or symbols present)ENTRETIEN
Procédure
1. Le filtre doit être nettoyé au moins deux fois par an, et chaque fois qu'il y a de la saleté évidente dessus. 2. Vous devez monter correctement le filtre avant d'utiliser l'aspirateur. 3. Le filtre ne peut pas être nettoyé dans la machine à laver ou séché au sèche-cheveux. 4. Cela réduira la puissance d'aspiration et endommagera le moteur si vous utilisez un filtre humide.Étapes de maintenance:
1) Comme sur la figure 10, appuyez sur le bouton de déverrouillage pour enlever le couvercle. 2) Comme sur la figure 11, sortez le filtre. 3) Comme sur la figure 12, tournez le filtre HEPA pour le séparer du couvercle. 4) Comme sur la figure 13, récupérez le filtre HEPA 5) Comme sur la figure 14, enlevez éventuellement les cheveux emmêlés. 6) Comme sur la figure 15, récupérez le filtre HEPA et lavez-le. 7) Lavez l'ensemble du filtre HEPA avec la partie en mousse, ainsi que le bac à poussière dans l'eau sans détergent et séchez-les avant utilisation. 8) Placez l'ensemble du bac à poussière dans l'aspirateur. Pour cela, vous devez d'abord mettre le bac dans la bonne position, puis appuyer sur la poignée jusqu'à entendre un déclic. natural_image
Technical line drawing of a mechanical device with no visible text or symbolsnatural_image
Technical line drawing of a digital camera with front panel and control buttons (no text or symbols)natural_image
Line drawing of a curved mechanical device with attached wires, next to a red abstract shape (no text or symbols)natural_image
Line drawing of a rice cooker with open lid and side panel, emitting red smoke (no text or symbols)natural_image
Line drawing of a rice cooker with lid and side legs (no text or symbols)GARANTIE
La durée de garantie de nos produits est de 2 ans. En cas de problèmes ou d'interrogations, vous pouvez facilement accéder à nos pages d'aides, conseils de dépannage, FAQ et modes d'emplois sur notre site SAV : https://sav.hkoenig.com. En tapant le nom de référence de votre appareil dans la barre de recherche, vous accédez à tous les supports en ligne disponibles, conçus pour vous répondre au mieux à vos besoins. Si vous ne trouvez toujours pas de réponse à votre question ou votre problème, alors cliquez sur « Est-ce que la réponse a résolu votre problème ? ». Vous accéderez alors au formulaire de demande d'assistance SAV, qu'il vous suffira de compléter pour valider votre demande et obtenir de l'aide.CONDITIONS DE GARANTIE
La garantie couvre l'ensemble des pannes survenant dans le cadre d'une utilisation normale, conforme aux usages et spécifications présentes sur le manuel d'utilisation. Cette garantie ne s'applique pas aux problèmes d'emballage ou de transport pendant l'expédition du produit par son propriétaire. Elle n'inclut également pas l'usure normale du produit, ni la maintenance ou le remplacement de pièces consommables.EXCLUSION DE GARANTIE
- Les accessoires et les pièces d'usure (\*). - L'entretien normal de l'appareil. - Toutes pannes survenant par suite d'une mauvaise utilisation (chocs, non-respect des préconisations d'alimentation électrique, mauvaises conditions d'utilisation, etc.), d'un entretien insuffisant ou d'un détournement de fonction de l'appareil, ainsi que l'usage d'accessoires non appropriés. - Les dommages d'origine externe : incendie, dégâts des eaux, surtension électrique, etc. - Tout matériel qui aura été démonté même partiellement par des personnes autres que celles habilitées (notamment l'utilisateur). - Les produits dont le numéro de série serait absent, détérioré ou illisible que ne permettrait pas son identification. - Les produits soumis à la location, à la démonstration ou à l'exposition. (\*) Certaines pièces de votre appareil dites pièces d'usure ou consommables se détériorent avec le temps et la fréquence d'usage de votre appareil. Cette usure est normale, mais peut être accentuée par des mauvaises conditions d'utilisation ou entretien de votre appareil. Ces pièces ne sont donc pas couvertes par la garantie. Les accessoires fournis avec l'appareil sont également exclus du champ de la garantie. Ils ne peuvent donc être ni échangés, ni remboursés. Toutefois, certains accessoires peuvent être directement achetés via notre site : https://sav.hkoenig.com/.ENVIRONMENT
ATTENTION
Ne pas jeter ce produit comme il l'a été avec d'autres produits ménagers. Il existe une séparation de ces déchets vous devrez informer les autorités locales des endroits où vous pouvez rapporter ce produit. ce produit. En effet, les produits électriques et électroniques contiennent des substances dangereuses qui ont des effets nocifs sur l'environnement ou la santé humaine et doivent être recyclés. Le symbole ci-contre indique que les équipements électriques et électroniques doivent être choisis avec soin. Le symbole ici indique que les équipements électriques et électroniques doivent être choisis avec soin, une poubelle à roulettes est marquée d'une croix.DEUTSCH
| Erzeugnis | Fassungsvermögen (W) | Zubehör |
| STC56 | 700 W | Fugendüse, Rund und Möbelbürste |
| STC58 | 850 W | STC56 + Tierbürste |
| STC62 | 850 W | STC56 + Parkettbürste |
| 1 | Bürsteneinsatz | 9 | Ausrolltaste |
| 2 | Teleskop-Metallrohr | 10 | Hinterrad |
| 3 | Auslösetaste | 11 | Hinterrad-Reifen |
| 4 | Griff | 12 | Spaltdüse |
| 5 | Staubbehälter-Griff | 13 | Zuberhörhalter |
| 6 | Schlauch | 14 | Rundbürste |
| 7 | Schlauchanschluss | 15 | Polsterbürste |
| 8 | Staubbehälter | 16 | Tierbürste |
| 17 | Parkettbürste |
Sicherheitshinweise
1. Vergewissern Sie sich, dass der Staubsauger mit den in der Anleitung angegebenen Inhalten übereinstimmt, und benutzen Sie ausschließlich das von dem Hersteller angegebene Zubehör. 2. Lassen Sie das Gerät bitte nicht unbeaufsichtigt, wenn es eingeschaltet ist. Schalten Sie das Gerät aus und ziehen Sie den Stromstecker beim Nichtgebrauch und vor der Wartung. 3. Ziehen Sie den Staubsauger nicht am Kabel, lassen Sie dieses beim Schließen von Türen nicht dazwischen, stellen Sie den Staubsauger nicht auf das Kabel. 4. Erlauben Sie Kindern bitte nicht, den Staubsauger als ein Spielzeug warzunehmen, besondere Aufmerksamkeit ist erforderlich, wenn der Staubsauger in der Nähe von Kindern bedient wird. 5. Benutzen Sie den Sauger bitte nicht, wenn das Stromkabel oder der Stecker beschädigt sind. Senden Sie diesen an die zuständige Servicestelle. Trennen Sie dieses nicht vom Netz, indem Sie am Kabel oder am Stecker ziehen. Um das Gerät vom Netz zu trennen, halten Sie den Stecker, nicht das Kabel. 6. Ziehen Sie niemals den Stecker oder benutzen Sie das Gerät nicht mit feuchten Händen. 7. Wenn Sie den Staubsauger benutzen, achten Sie darauf, dass der Lufteinlass nicht durch Haare oder Müll blockiert wird (einschließlich des Schlauchs und des Rohrs), ansonsten kann dies zu Motorschäden und der Gehäuse-Verformung führen. Wenn die eingesaugten Gegenstände zu einer Verstopfung führen, stellen Sie den Betrieb sofort ein, indem Sie den Stromkabel sofort ziehen und die Blockade entfernen. Während der Nutzung des Staubsaugers, verstopfen Sie den Luftauslass nicht durch ein Handtuch oder andere Gegenstände, ansonsten kann die Saugleistung beeinträchtigt werden, wobei auch ein hohes Risiko des Durchbrennens vom Motor besteht. 9. Benutzen Sie den Staubsauger niemals auf einem unebenen Boden oder einer unebenen Fläche, und seien Sie besonders vorsichtig, wenn Sie die Treppe reinigen, um das Herunterfallen des Staubsaugers zu vermeiden. 10. Saugen Sie keine Stümpfe mit dem Staubsauger, ansonsten kann der Motor beschädigt werden. 11. Der Sauger muss von Hitzequellen (wie z.B. Zentralheizung, Öfen, usw.) ferngehalten werden, um eine Verformung der Teile aus Plastik genauso wie die Folgen dieser Verformung zu vermeiden. 12. Vor der Nutzung des Staubsaugers, entfernen Sie bitte große und scharfe Gegenstände vom Boden, um Beschädigungen der Plastikteile, des Filtergitters und des Motors zu vermeiden. 13. Saugen Sie mit diesem Staubsauger niemals Wasser oder andere Flüssigkeiten, ansonsten wird der Motor beschädigt. 14. Dieses Gerät kann von Personen mit eingeschränkten körperlichen, sensorischen oder geistigen Fähigkeiten oder mangelnder Erfahrung und Kenntnis benutzt werden, vorausgesetzt, dass sie beaufsichtigt oder in der sicheren Benutzung des Gerätes unterwiesen werden und die möglichen Gefahren vollständig verstehen. 15. Wenn das Stromkabel beschädigt ist, muss es über den Kundendienst ersetzt werden, um jegliche Gefahren zu vermeiden. 16. Bedienen Sie das Gerät nicht, wenn das Stromkabel oder der Stecker beschädigt sind, wenn es nicht ordnungsgemäß funktioniert, beschädigt oder fallen gelassen wurde. Wenn das Stromkabel beschädigt ist, muss es von dem Hersteller, seinem Dienstleister oder einer ähnlich qualifizierten Person ersetzt werden, um Gefahren zu vermeiden. 17. Dieses Gerät darf von Kindern ab 8 Jahre bedient werden, solange sie beaufsichtigt werden und Anweisungen über die sichere Nutzung des Gerätes erhielten, und können die damit verbundenen Gefahren vollständig nachvollziehen. 18. Die Reinigung und Wartung dürfen von Kindern nicht durchgeführt werden, es sei denn sie sind über 8 Jahre alt und werden von einem Erwachsenen beaufsichtigt. 19. Halten Sie das Gerät und sein Stromkabel außer Reichweite von Kindern unter 8 Jahren. 20. Während der Nutzung von elektrischen Geräten müssen Sicherheitsvorkehrungen immer getroffen werden, um das Risiko eines Brandes, eines Stromschlages und/oder einer Verletzung im Falle eines Missbrauchs zu vermeiden. 21. Vergewissern Sie sich, dass die Spannung auf dem Typenschild des Gerätes mit der Hauptspannung Ihrer Einrichtung übereinstimmt. Wenn dies nicht der Fall ist, kontaktieren Sie den Händler und schließen Sie das Gerät nicht an. 22. Lassen Sie das Gerät während der Nutzung niemals unbeaufsichtigt. 23. Vergewissern Sie sich, dass die Stromversorgung 220-240V 50Hz ist. 24. Ihr Gerät ist nur für den Hausgebrauch bestimmt. Es ist nicht für die Verwendung in den folgenden Situationen vorgesehen, die nicht von der Garantie abgedeckt sind: \- in Personalküchen in Geschäften, Büros und anderen professionellen Umgebungen, \- in Landgasthöfen, \- von Gästen in Hotels, Motels und anderen Wohnumgebungen, \- in Bed-and-Breakfast-Umgebungen.NUTZUNG
MONTAGE VOR DER NUTZUNG
Abb. 1 demonstriert die Verbindung zwischen dem Schlauch und dem Staubsauger: Platzieren Sie den Schlauchanschluss vor dem Staubsauger. Dann setzen Sie den Schlauch in die Einlassöffnung ein oder drehen Sie diesen nach rechts. Wenn Sie diesen abnehmen möchten, drehen Sie den Schlauchanschluss nach links und ziehen Sie diesen heraus. Abb.2 zeigt die Verbindung zwischen dem Schlauch und dem Teleskop-Metallrohr: Halten Sie den biegsamen Anschluss des Schlauchs und setzten Sie diesen in die größere Öffnung des Rohres ein. Abb. 3 zeigt die Verbindung zwischen dem Rohr und dem Bürsteneinsatz: Setzen Sie das Metallrohr in die Öffnung auf der Bürste ein und drehen Sie dieses, um die Teile zu befestigen. Abb. 4 demonstriert, wie man das Aufrollen von dem Stromkabel überprüfen kann. Sie können das Stromkabel aus der Maschine herausziehen und stoppen, wenn Sie die gelbe Markierung sehen. Vergewissern Sie sich, dass die rote Markierung nicht sichtbar ist. Wenn Sie mit dem Staubsaugen fertig sind, schalten Sie das Gerät zuerst aus, dann ziehen Sie den Stecker aus der Steckdose, danach drücken Sie auf die Ausrolltaste, bis sich das Kabel komplett in der Maschine befindet. Abb. 5 zeigt die Power-Taste natural_image
Technical line drawing of a mechanical assembly with no visible text or symbolsnatural_image
Line drawing of a curved cable or connector with a small sensor attached (no text or symbols)natural_image
Technical line drawing of a mechanical component with a red arrow indicating a process or assembly (no text or symbols present)natural_image
Technical line drawing of a mechanical component with a red arrow indicating direction (no text or symbols)natural_image
Technical line drawing of a mechanical component with no visible text or symbolsREINIGUNG DES STAUBBEHÄLTERS
Die Schritte für die Reinigung des Staubbehälters: 1. Wie auf der Abb.6, halten Sie den Staubbehälter und den Griff und drücken Sie auf die Auslösetaste. 2. Wie auf der Abb. 7, entnehmen Sie den Staubbehälter aus der Maschine. 3.Wie auf der Abb. 8, setzen Sie den Staubbehälter in den Mülleimer ein und drücken Sie auf die Auslösetaste, um den Boden des Staubbehälters zu öffnen, der Dreck und Staub werden von alleine in den Mülleimer fallen. 4. Wie auf der Abb. 9, schließen Sie den Staubbehälter für die weitere Nutzung nach der Reinigung. Abb.6 natural_image
Technical line drawing of a mechanical component with no visible text or symbolsnatural_image
Line drawing of a vacuum cleaner with attached hoses and control knobs (no text or symbols)natural_image
Diagram of a portable device with a red arrow indicating direction (no text or symbols present)natural_image
Technical line drawing of a mechanical device with a downward arrow indicating motion or force (no text or symbols present)WARTUNG
WARTUNGS-HINWEISE
5. Der Filter muss zweimal im Jahr gereinigt werden, oder wenn dieser sichtbar dreckig wird. 6. Sie müssen den Filter ordnungsgemäß befestigen, bevor Sie den Staubsauger bedienen. 7. Der Filter darf nicht in der Waschmaschine gewaschen oder von einem Ventilator belüftet werden. 8. Die Nutzung eines feuchten Filters reduziert die Saugleistung und beschädigt den Motor. 9. Schritte für die Wartung: 1) Wie auf der Abb. 10, drücken Sie auf die Auslass-Sperre, um das Auslass-Brett zu öffnen. 2) Wie auf der Abb. 11, ziehen Sie den Auslass-Filter heraus. 3) Wie auf der Abb. 12, drehen Sie die HEPA-Abdeckung, um diese vom dem Behälterdeckel zu trennen. 4) Wie auf der Abb. 13, ziehen Sie die HEPA-Abdeckung ab. 5) Wie auf der Abb.14, entfernen Sie angesaugte Haare vor der Reinigung. 6) Wie auf der Abb. 15, entnehmen Sie den HEPA und reinigen Sie diesen. 7) Reinigen Sie die HEPA-Abdeckung, die HEPA-Baugruppe, den Auslass-Schwamm und den Staubbehälter in Wasser ohne Waschmittel und trocknen Sie diese vor der Nutzung. 8) Setzen Sie die Staubbehälter-Baugruppe in die Maschine ein. Um dies zu machen, müssen Sie zuerst den Behälter richtig platzieren und dann auf den Griff des Staubbehälters drücken; wenn dieser einrastet ist der Vorgang korrekt verlaufen. Abb.10 natural_image
Line drawing of a vintage-style vacuum cleaner device with no visible text or symbolsnatural_image
Technical line drawing of a mechanical device with no visible text or symbolsnatural_image
Line drawing of a portable device with a curved lid and handle, showing a red abstract shape on the right (no text or symbols)natural_image
Line drawing of a rice cooker with open lid and side panel, no text or symbols presentnatural_image
Line drawing of a rice cooker with lid and side-mounted legs (no text or symbols)GARANTIE
Die Garantiezeit für unsere Produkte beträgt 2 Jahre. Bei Problemen oder Fragen können Sie sich an unsere Hilfeseiten, Tipps zur Fehlerbehebung, FAQs und Bedienungsanleitungen auf unserer Kundendienst-Website wenden: https://sav.hkoenig.com. Wenn Sie den Referenznamen Ihres Geräts in die Suchleiste eingeben, erhalten Sie Zugang zu allen verfügbaren Online-Supports. Wenn Sie immer noch keine Antwort auf Ihre Frage oder Ihr Problem finden, dann klicken Sie auf "Hat die Antwort Ihr Problem gelöst?". Sie können dieses Formular ausfüllen, um Ihre Anfrage zu bestätigen und Hilfe zu erhalten.GARANTIEBEDINGUNGEN
Die Garantie deckt alle Defekte ab, die bei normalem, bestimmungsgemäßem Gebrauch und den in der Bedienungsanleitung enthaltenen Spezifikationen auftreten. Diese Garantie gilt nicht für Probleme mit der Verpackung oder dem Transport während des Versands des Produkts durch den Eigentümer. Sie umfasst auch nicht den normalen Verschleiß des Produkts, die Wartung oder den Austausch von Verschleißteilen.AUSSCHLUSS DER GARANTIE
- Zubehör und Verschleißteile (\*). - Die normale Wartung des Geräts. - Alle Defekte, die durch unsachgemäßen Gebrauch (Stöße, Nichteinhaltung der empfohlenen Stromzufuhr, schlechte Nutzungsbedingungen usw.), unzureichende Wartung oder Zweckentfremdung des Geräts auftreten, sowie die Verwendung von ungeeignetem Zubehör. - Schäden durch äußere Einflüsse: Brand, Wasserschäden, elektrische Überspannung usw. - Alle Geräte, die von anderen als den befugten Personen (insbesondere dem Nutzer) auch nur teilweise auseinandergebaut wurden. - Produkte, deren Seriennummer fehlt, beschädigt oder unleserlich ist, sodass sie nicht identifiziert werden können. - Produkte, die vermietet, vorgeführt oder ausgestellt werden. (\*) Einige Teile Ihres Geräts, die als Verschleißteile oder Verbrauchsmaterialien bezeichnet werden, verschleßen mit der Zeit und der Häufigkeit der Nutzung Ihres Geräts. Diese Abnutzung ist normal, kann aber durch falsche Nutzung oder Pflege Ihres Geräts noch verstärkt werden. Diese Teile sind daher nicht durch die Garantie abgedeckt. Das mit dem Gerät gelieferte Zubehör ist ebenfalls von der Garantie ausgeschlossen. Sie können daher weder umgetauscht noch erstattet werden. Einige Zubehörteile können jedoch direkt über unsere Website https://sav.hkoenig.com/ erworben werden. ACHTUNG
Entsorgen Sie dieses Produkt nicht zusammen mit anderen Haushaltsprodukten. Es gibt eine Trennung dieses Abfallprodukts müssen Sie sich bei den örtlichen Behörden über die Stellen informieren, an denen Sie dieses Produkt zurückgeben können. dieses Produkt zurückgeben können. Elektrische und elektronische Produkte enthalten gefährliche Stoffe, die schädliche Auswirkungen auf die Umwelt oder die menschliche Gesundheit haben und recycelt werden sollten. Das Symbol hier zeigt an, dass elektrische und elektronische Das Symbol hier zeigt an, dass Elektro- und Elektronikgeräte sorgfältig ausgewählt werden sollten; ein Abfallcontainer auf Rädern ist mit einem Kreuz gekennzeichnet. Adeva SAS / H.Koenig Europe - 8 rue Marc Seguin - 77290 Mitry Mory - France www.hkoenig.com - sav@hkoenig.com - contact@hkoenig.com - Tél: +33 1 64 67 00 05 NEDERLANDS| Product | Vermogen (W) | Toebehoren |
| STC56 | 700 W | Spleetmondstuk, ronde borstel en meubelborstel |
| STC58 | 850 W | STC56 + dierenborstel |
| STC62 | 850 W | STC56 + parketborstel |
| 1 | Borstel | 9 | Knop oprolmechanisme |
| 2 | Verlengbare metalen buis | 10 | Achterwiel |
| 3 | Ontgrendelknop | 11 | Rubber achterwiel |
| 4 | Handgreep | 12 | Spleetmondstuk |
| 5 | Stofkamer met handgreep | 13 | Accessoire houder |
| 6 | Slang | 14 | Ronde kwast |
| 7 | Slangaansluiting | 15 | Bekleding borstel |
| 8 | Stofkamer | 16 | Dierenborstel |
| 17 | Parketborstel |
Veiligheidswaarschuwing
1. Zorg dat u de stofzuiger gebruikt zoals beschreven in deze handleiding en gebruik de aansluitingen die door de fabrikant zijn ontworpen. 2. Laat de stofzuiger in gebruik niet onbeheerd achter. Schakel het apparaat uit en haal de stekker uit het stopcontact als het niet gebruikt wordt of voor onderhoud. 3. Trek of til de stofzuiger niet op aan de stroomkabel, klem deze ook niet tussen een deuropening; rijd niet met de stofzuiger over de stroomkabel. 4. Laat kinderen de stofzuiger niet gebruiken als speelgoed en let extra goed op bij gebruik van de stofzuiger in de buurt van kinderen. 5. Gebruik de stofzuiger niet als de stroomkabel of stekker beschadigd is. Stuur het naar het aangewezen servicecentrum. Haal de stekker er niet uit door aan de kabel te trekken. Trek aan de stekker om deze uit het stopcontact te halen, niet aan de kabel. 6. Nooit de stekker of de stofzuiger aanraken met natte handen. 7. Bij gebruik van de stofzuiger dient u op te letten dat geen haar of andere troep de luchtinlaat blokkeert (inclusief de slang en de buis), anders kan er schade ontstaan aan de motor en de behuizing. Als er enige vorm van blokkade ontstaat, schakel de stofzuiger meteen uit en haal de stekker uit het stopcontact en verwijder de blokkade. 8. Tijdens gebruik van de stofzuiger niet de luchtuitlaat afdekken met een handdoek of iets dergelijks, anders wordt de stofopname beïnvloed en loopt de motor het risico om te verbranden. 9. Nooit de stofzuiger gebruiken op een onvlakke ondergrond; en wees erg voorzichtig bij het stofzuigen van een trap ter voorkoming dat de stofzuiger valt. 10. Nooit brandende sigarettenpeuken opzuigen, anders kan de motor beschadigd raken. 11. De stofzuiger dient ver weg gehouden te worden van warmtebronnen (zoals verwarming, oven, etc.) om vervorming van plastic onderdelen te vermijden alsook de invloed die een dergelijke vervorming heeft. 12. Voor gebruik van de stofzuiger dient u grote en scherpe voorwerpen op de vloer te verwijderen om schade te vermijden aan plastic onderdelen, filters en motor. 13. Nooit water of een andere vloeistof opzuigen met deze stofzuiger, anders kan de motor beschadigd raken. 14. Dit apparaat kan worden gebruikt door personen met verminderde fysieke, zintuiglijke of mentale vermogens of met gebrek aan ervaring of kennis, op voorwaarde dat zij onder toezicht staan of instructies hebben gekregen over het veilige gebruik van het apparaat en dat zij de mogelijke gevaren volledig begrijpen. 15. Als de kabel beschadigd is, moet deze worden vervangen door een reparatiedienst om gevaren te vermijden. 16. Niet het apparaat gebruiken als deze een beschadigde kabel of stekker heeft, als het niet goed werkt of beschadigd of gevallen is. Als de stroomkabel beschadigd is, moet het worden vervangen door de fabrikant, een servicemonteur of een gelijkwaardig gekwalificeerd persoon om gevaren te vermijden. 17. Dit apparaat mag gebruikt worden door kinderen van minimaal 8 jaar als er toezicht wordt gehouden en ze instructies hebben gehad over hoe ze het apparaat moeten gebruiken en ze de gevaren begrijpen. 18. Het schoonmaken en onderhoud mag niet worden uitgevoerd door kinderen tenzij ze 8 jaar of ouder zijn en er toezicht is. 19. Houd het apparaat en de stroomkabel uit de buurt van kinderen jonger dan 8 jaar. 20. Bij het gebruik van elektrische apparaten moeten altijd de standaard veiligheidsinstructies worden opgevolgd om de kans op vuur, elektrische schokken en/of verwondingen te voorkomen. 21. Controleer dat de aangegeven spanning op het typeplaatje overeenkomt met de spanning van uw spanningsbron. Als dit niet het geval is, neem dan contact op met de dealer en sluit het apparaat niet aan. 22. Laat het apparaat nooit onbeheerd achter tijdens gebruik. 23. Controleer dat de spanningsbron 220-240V50Hz levert. 24. Uw apparaat is uitsluitend ontworpen voor huishoudelijk gebruik. Het is niet bedoeld voor gebruik in de volgende situaties, die niet onder de garantie vallen: \- in personeelskeukens in winkels, kantoren en andere professionele omgevingen, - in boerderijherbergen, - door gasten in hotels, motels en andere residentiële omgevingen, - in bed & breakfast-omgevingen.HOE TE GEBRUIKEN
MONTAGE VOOR GEBRUIK
Fig.1 laat de aansluiting zien van de slang op de stofzuiger: Plaats de aansluiting van de slang aan de voorkant van de stofzuiger. Steek hem in de opening en draai naar rechts. Als u hem los wilt maken, draai dan de slangaansluiting naar links en trek hem eruit. Fig.2 laat de aansluiting zien van de slang op de metalen buis: Pak de kromme connector van de slang en plaats deze in het grotere gat van de buis. Fig.3 laat de aansluiting zien van de buis op de borstel: Plaats de metalen buis in het gat van de borstel en draai hem om hem vast te zetten. Fig. 4 laat zien hoe controleert hoe de stroomkabel is opgerold. U kunt de stroomkabel uit het apparaat trekken en stoppen als u de gele markering ziet. Gaat niet door tot de rode markering. Als u klaar bent met zuigen, schakel dan eerst de stofzuiger uit, haal de stekker uit het stopcontact en druk dan op de knop van het oprolmechanisme tot de kabel helemaal is opgerold. Fig.5 toont de hoofdknop. Steek de stekker in het stopcontact, druk op de hoofdknop om het apparaat in te schakelen. natural_image
Technical line drawing of a mechanical assembly with no visible text or symbolsnatural_image
Line drawing of a curved cable or connector with a small circular component on top (no text or symbols)SCHOONMAKEN VAN DE STOFKAMER
De stappen voor het schoonmaken van de kamer: 1. Zoals in Fig.6 de stofkamer met handgreep vasthouden en druk op de ontgrendelknop. 2. Zoals in Fig.7 de stofkamer uit het apparaat halen. 3. Zoals in Fig.8 houdt de stofkamer boven de vuilnisbak, druk op de ontgrendelknop om de onderkant van de stofkamer te openen en de rommel en stof valt vanzelf in de vuilnisbak 4. Zoals in Fig.9 de stofkamer sluiten voor nieuw gebruik.  Fig.8 Fig.9ONDERHOUD
HOE TE ONDERHOUDEN
1. Het filter dient tweemaal per jaar schoongemaakt te worden, ook als er duidelijk viezigheid op het filter zit is dat nodig. 2. U dient het filter goed vast te zetten voordat u de stofzuiger gebruikt. 3. Het filter kan niet worden schoongemaakt in de wasmachine of schoongeblazen worden. 4. De zuigkracht wordt verminderd en de motor kan beschadigd raken als u een nat filter gebruikt. 5. Stappen voor het onderhoud: 1) Zoals in fig.10, druk op de ontgrendeling van de afdekking om deze te openen. 2) Zoals in fig.11, haal het filter eruit. 3) Zoals in fig.12, draai de afdekking van de HEPA om deze van de kamer lost te maken. 4) Zoals in fig.13, pak de afdekking van de HEPA. 5) Zoals in fig.14, als er haren op zitten dient u deze eerst te verwijderen. 6) Zoals in fig.15, pak de HEPA en was deze. 7) Plaats de stofkamer terug in het apparaat. Tijdens dit proces dient u de stofkamer op de juiste plek te plaatsen en druk dan op de handgreep van de stofkamer, als u een klik hoort, is het gelukt. natural_image
Technical line drawing of a mechanical device with no visible text or symbolsnatural_image
Technical line drawing of a vacuum cleaner device with attached components (no text or symbols)natural_image
Line drawing of a kettle with a handle and spout, alongside a red abstract shape (no text or symbols)natural_image
Line drawing of a rice cooker with open lid and side panel, no text or symbols presentnatural_image
Line drawing of a rice cooker with lid and side legs (no text or symbols)GARANTIE
De garantieperiode op onze producten is 2 jaar. Als u problemen of vragen heeft, kunt u eenvoudig onze hulppagina's bezoeken voor tips om problemen op te lossen, de FAQ's en andere gebruikershandleidingen op onze website: https://sav.hkoenig.com. Door de referentienaam van uw apparaat in de zoekbalk te typen, krijgt u toegang tot alle beschikbare online hulpmiddelen, ontworpen om aan uw behoeften te voldoen. Als u toch niet geen antwoord op uw vraag kunt vinden, klik dan op "Heeft het antwoord uw probleem opgelost? Hierdoor gaat u naar het Aanvraagformulier voor Klantenondersteuning, dat u in kunt vullen om uw verzoek te valideren en hulp te ontvangen.GARANTIEVOORWAARDEN
De garantie dekt alle mankementen die voortkomen uit normaal gebruik, volgens de sectie gebruik en specificaties in de gebruikershandleiding. Deze garantie omvat niet verpakkings- of transportproblemen tijdens het vervoer van het product door de eigenaar. Het omvat ook niet de normale slijtage van het product, noch het onderhoud of vervangen van verbruiksartikelen.UITSLUITINGEN VAN DE GARANTIE
- Accessoires en verbruiksartikelen (\*). - Normaal onderhoud van het apparaat. - Alle mankementen veroorzaakt door verkeerd gebruik (schokken, het niet opvolgen van de aanbevolen stroomvoorziening, in slechte omstandigheden gebruiken, etc.), onvoldoende onderhoud of ondeugdelijk gebruik van het apparaat, alsook het gebruik van ongeschikte accessoires. - Schade van buitenaf: vuur, waterschade, elektrische stroompiek, etc. - Apparaten die uit elkaar zijn gehaald, ook gedeeltelijk, door personen die niet er niet gekwalificeerd voor zijn (zoals de gebruiker). - Producten waarvan het serienummer verdwenen, beschadigd of onleesbaar is, waardoor we het niet kunnen identificeren. - Producten die verhuurd werden of ter demonstratie of showmodel waren. (\*) Sommige onderdelen van uw apparaat, genaamd verbruiksartikelen, slijten naar verloop van tijd en bij veel gebruik van uw apparaat. Deze slijtage is normaal, maar kan verergerd worden door slechte omstandigheden of onderhoud van uw apparaat. Deze onderdelen worden daarom niet gedekt door de garantie. De accessoires meegeleverd met het apparaat zijn ook uitgesloten van de garantie. Ze kunnen niet vervangen of gerestitueerd worden. Echter, sommige accessoires zijn te koop via onze website: https://sav.hkoenig.com/.| MILIEU | |
| LET OPGooi dit product niet weg met andere huishoudelijke producten.Er is een scheiding van dit afvalproduct in gemeenschappen, moet u uw lokale autoriteiten te informeren over de plaatsen waar u kunt inleverenkunt inleveren. Elektrische en elektronische producten bevatten namelijk gevaarlijke stoffen die schadelijke gevolgen hebben hebben op het milieu of de menselijke gezondheid en moeten worden gerecycled. Het symbool hier geeft aan dat elektrische en elektronischeapparatuur zorgvuldig moet worden gekozen, een afvalcontainer op wieltjes is gemarkeerd met een kruis. |
ESPANOL
| Producto | Potencia (W) | Accesorios |
| STC56 | 700 W | Boquilla para hendiduras, cepillo redondo y para muebles |
| STC58 | 850 W | STC56 + cepillo para animales |
| STC62 | 850 W | STC56 + cepillo para parquet |
DESCRIPCIÓN DEL PRODUCTO
| 1 | Cepillo trapeador | 9 | Botón de enrollamiento del cable de alimentación |
| 2 | Tubo extensor de metal | 10 | Rueda trasera |
| 3 | Botón interruptor | 11 | Goma de la rueda trasera |
| 4 | Empuñadura | 12 | Boquilla de grieta |
| 5 | Agarradera y tapa del depósito de polvo | 13 | Soporte para accesorios |
| 6 | Manguera | 14 | Cepillo redondo |
| 7 | Conector de la manguera | 15 | Cepillo para tapicería |
| 8 | Depósito de polvo | 16 | |
| 17 |
INSTRUCCIONES DE SEGURIDAD
1. Asegúrese de usar la aspiradora siguiendo las orientaciones en este manual, y use solamente los accesorios aprobados por el fabricante. 2. No deje la aspiradora sola mientras esté en funcionamiento. Apague la aspiradora por el botón interruptor y desenchufe el cable de alimentación del tomacorriente cuando no esté en uso o antes del mantenimiento. 3. No hale ni arrastre la aspiradora por el cable de alimentación y evite que se pellizque al cerrar las puertas; mantenga el cable de alimentación lejos de las bocas de succión de la aspiradora. 4. No permita que los niños jueguen con la aspiradora, y redoble la atención cuando use la aspiradora cerca de niños o mascotas. 5. No use la aspiradora si el cable de alimentación o enchufe están dañados. Llévela al centro de servicios para su reparación. No desenchufe la aspiradora del tomacorriente tirando del cable de alimentación; hágalo agarrando firmemente por el enchufe, no por el cable. 6. Nunca manipule el enchufe ni use la aspiradora con las manos mojadas. 7. Siempre use la aspiradora con precaución para evitar que cabellos u otras pelusas obstruyan las entradas de aire (incluida la manguera y la boca de succión), ya que eso puede dañar el motor o deformar la manguera. Si ocurriera un bloqueo, apague la aspiradora y desenchúfela del tomacorriente para eliminar la obstrucción. 8. Durante el uso, nunca tape la salida de aire con toallas o artículos similares, ya que eso afectará la eficiencia de succión de la aspiradora y aumentará el riesgo de incendio por sobrecarga en el motor. 9. Nunca use la aspiradora sobre pisos o suelos irregulares; y tenga mucho cuidado al limpiar escaleras para evitar que la aspiradora se resbale y caiga. 10. Nunca absorba cabos de cigarro humeantes con la aspiradora ya que eso puede dañar el motor. 11. Mantenga la aspiradora lejos de fuentes de calor (central de calefacción, horno, etc.) para evitar la deformación de piezas de plástico, así como las consecuencias de tales deformaciones. 12. Antes de usar la aspiradora, recoja todos los objetos grandes y afilados del piso para evitarle daños a las piezas de plástico, las gasas del filtro e inclusive el motor. 13. Nunca aspire agua u otros líquidos con esta aspiradora ya que esto puede dañar el motor. 14. Este aparato puede ser utilizado por personas con capacidades físicas, sensoriales o mentales reducidas o con falta de experiencia o conocimientos, siempre que sean supervisadas o instruidas en el uso seguro del aparato y que entiendan perfectamente los peligros potenciales. 15. Si el cable de alimentación está deteriorado deberá ser reemplazado por un especialista del centro de servicios para evitar cualquier peligro. 16. No use este aparato si el cable de alimentación o enchufe están dañados, si no funciona como debería, muestra defectos o ha sufrido una caída. Si el cable de alimentación está roto, deberá ser reemplazado por el fabricante, su agente de servicios técnicos o una persona con calificación similar para evitar riesgos. 17. Este aparato puede ser utilizado por niños con al menos 8 años de edad, siempre que estén bajo vigilancia o hayan sido instruidos para el uso seguro de la aspiradora y estén plenamente conscientes de los peligros involucrados. 18. La limpieza y el mantenimiento de la aspiradora no deben ser realizados por niños, a menos que tengan 8 o más años de edad y sean vigilados constantemente por un adulto. 19. Mantenga a la aspiradora y su cable de alimentación fuera del alcance de los niños menores de 8 años. 20. Al utilizar cualquier electrodoméstico, siempre se deben de tomar las precauciones básicas de seguridad para evitar el riesgo de incendios, descargas eléctricas y/o lesiones personales en caso de un mal uso. 21. Asegúrese de que la tensión en el tomacorriente de su red eléctrica se corresponda con la exigida en la placa de características del aparato. Si este no es el caso, no enchufe la aspiradora y póngase en contacto con el distribuidor. 22. Nunca desatienda la aspiradora mientras esté en funcionamiento. 23. Asegúrese de que el tomacorriente donde vaya a enchufar la aspiradora tenga 220-240V 50Hz. 24. Su aparato ha sido diseñado únicamente para uso doméstico. No ha sido diseñado para ser utilizado en las siguientes situaciones que no están cubiertas por la garantía: - en áreas de cocina para el personal en tiendas, oficinas y otros entornos profesionales, - en albergues agrícolas, - en hoteles, moteles y otros entornos residenciales, - en entornos de tipo bed and breakfast.INSTRUCCIONES DE USO Y OPERACIÓN
Montaje antes del uso
La Figura 1 muestra la conexión de la manguera con la aspiradora: \- Coloque el conector de la manguera de frente a la aspiradora; luego insértelo en el orificio de entrada y gírelo hacia la derecha. Si desea desmontar la manguera nuevamente, gire el conector hacia la izquierda y sáquela del orificio. La Figura 2 muestra la conexión de la manguera con el tubo extensor de metal: \- Agarre el conector del extremo flexible de la manguera e insértelo en el orificio más grande del tubo extensor. La Figura 3 muestra la conexión del tubo extensor con el cepillo trapeador: \- Coloque el tubo metálico en el orificio del cepillo trapeador y gírelo hacia la derecha para fijarlo. La Figura 4 muestra cómo comprobar la recogida del cable de alimentación: \- Puede ir sacando el cable de alimentación de la aspiradora hasta que vea una marca amarilla. Asegúrese de que no aparezca la marca roja. Cuando termine la limpieza, primero apague la aspiradora por el botón interruptor, luego desenchufe el cable del tomacorriente y presione el botón de enrollamiento hasta que el cable esté completamente recogido dentro del aparato. La Figura 5 muestra el botón interruptor: \- Enchufe el cable de alimentación al tomacorriente y presione el botón interruptor para iniciar o detener el trabajo de la aspiradora. Fig.1 natural_image
Technical line drawing of a mechanical assembly with no visible text or symbolsnatural_image
Line drawing of a curved mechanical component with a labeled tag (no text or symbols present)natural_image
Mechanical assembly diagram showing a pipe joint with a red arrow indicating force or direction (no text or symbols)natural_image
Technical line drawing of a mechanical component with a red arrow indicating downward motion (no text or symbols)natural_image
Technical line drawing of a mechanical component with no visible text or symbolsLIMPIEZA DEL DEPÓSITO DE POLVO
Siga estos pasos para limpiar el depósito de polvo: 1. Sujete el depósito de polvo junto con la agarradera y presione hacia abajo para liberar el conjunto completo (Figura 6). 2. Saque el depósito de polvo de la aspiradora como se muestra en la Figura 7. 3. Sujete el depósito de polvo encima del cesto de basura y presione el botón de liberación inferior para abrir el fondo del depósito; la suciedad y el polvo caerán por sí solos en el cesto (Figura 8). 4. Como se muestra en la Figura 9, levante el fondo del depósito de polvo y ciérrelo antes de colocarlo en la aspiradora para un nuevo ciclo de trabajo.  Figura 8 Figura 9 natural_image
Diagram of a cylindrical device with internal components and a red arrow indicating direction (no text or symbols)natural_image
Diagram of a cylindrical device with internal components and an upward arrow indicating motion (no text or symbols)MANTENIMIENTO
1. El filtro se debe limpiar al menos dos veces por año y cuando sea necesario debido al acúmulo de suciedad. 2. Asegúrese de que el filtro esté bien montado en su lugar antes de encender la aspiradora. 3. El filtro no se puede limpiar en el lavavajillas o lavadora, ni secar en hornos o secadores calientes. 4. El uso del filtro húmedo reducirá la potencia de succión y le puede causar daños al motor. 5. Siga estos pasos para darle mantenimiento a la aspiradora: 1) Presione la tecla en la rejilla de salida para liberarla de la aspiradora (Figura 10). 2) Retire el filtro de salida (Figura 11). 3) Como se muestra en la Figura 12, gire la cubierta del filtro HEPA para separarla de la tapa del depósito de polvo. 4) Levante la tapa del depósito y retire el conjunto del filtro HEPA (Figura 13). 5) Elimine cualquier embrollo de cabellos o pelusas en la cubierta del filtro (Figura 14). 6) Saque el filtro HEPA y lávelo bien como se muestra en la Figura 15. 7) Lave el conjunto del filtro HEPA, el filtro de salida y el depósito de polvo con agua común sin usar detergente; luego séquelos todos bien antes de usarlos. 8) Fije el conjunto del depósito completo en la aspiradora. Para esto, primero debe colocar el depósito en la posición correcta y luego presionar la agarradera de la tapa del depósito; si escucha un sonido “tac”, significa que la aspiradora está bien montada. Figura 10 natural_image
Technical line drawing of a mechanical device with no visible text or symbolsnatural_image
Technical line drawing of a mechanical device with no visible text or symbolsnatural_image
Line drawing of a mechanical device with a curved top and handle, alongside a red abstract symbol (no text or labels)natural_image
Line drawing of a rice cooker with open lid and side panel, showing internal structure (no text or symbols)natural_image
Line drawing of a cylindrical container with lid and side connectors (no text or symbols)GARANTÍA
El periodo de garantía de nuestros productos es de 2 años. Si tiene algún problema o pregunta, puede acceder fácilmente a nuestras páginas de ayuda, consejos para solucionar problemas, preguntas frecuentes y manuales de usuario en nuestro sitio de servicio: https://sav.hkoenig.com. Al escribir el nombre de referencia de su dispositivo en la barra de búsqueda, puede acceder a toda la asistencia en línea disponible, diseñada para satisfacer mejor sus necesidades. Si sigue sin encontrar una respuesta a su pregunta o problema, haga clic en "¿La respuesta ha resuelto su problema? Esto le llevará al formulario de solicitud de asistencia posventa, que puede rellenar para validar su solicitud y obtener ayuda.CONDICIONES DE GARANTÍA
La garantía cubre todos los fallos que se produzcan en el contexto de un uso normal, de acuerdo con los usos y especificaciones del manual de usuario. Esta garantía no se aplica a los problemas de embalaje o transporte durante el envío del producto por parte del propietario. Tampoco incluye el desgaste normal del producto, ni el mantenimiento o la sustitución de piezas consumibles.EXCLUSIÓN DE GARANTÍA
- Accesorios y piezas de desgaste (\*). - Mantenimiento normal del aparato. - Todas las averías derivadas de un uso incorrecto (golpes, incumplimiento de las recomendaciones de alimentación eléctrica, malas condiciones de uso, etc.), de un mantenimiento insuficiente o de un mal uso del aparato, así como del uso de accesorios inadecuados. - Daños de origen externo: incendio, daños por agua, sobrecarga eléctrica, etc. - Cualquier equipo que haya sido desmontado, incluso parcialmente, por personas que no estén autorizadas a hacerlo (en particular el usuario). - Productos cuyo número de serie falte, esté dañado o sea ilegible, lo que no permitiría su identificación. - Productos sujetos a alquiler, demostración o exposición. (\*) Algunas piezas de su aparato, conocidas como piezas de desgaste o consumibles, se deterioran con el tiempo y la frecuencia de uso de su aparato. Este desgaste es normal, pero puede acentuarse por las malas condiciones de uso o de mantenimiento de su aparato. Por lo tanto, estas piezas no están cubiertas por la garantía. Los accesorios suministrados con el aparato también están excluidos de la garantía. No se pueden cambiar ni reembolsar. No obstante, algunos accesorios pueden adquirirse directamente en nuestro sitio web: https://sav.hkoenig.com/| MEDIO AMBIENTE | |
| ATENCIÓNNo deseche este producto junto con otros productos domésticos.Existe una separación de este residuoproducto en las comunidades, tendrá que informar a las autoridades locales acerca de los lugares donde se puede devolvereste producto. De hecho, los productos eléctricos y electrónicos contienen sustancias peligrosas que tienen efectos nocivos sobre el medio ambiente o la salud humana y deben ser reciclados.Este símbolo indica que los aparatos eléctricos y electrónicos deben elegirse con cuidado, un contenedor de residuos con ruedas está marcado con una cruz. |
ITALIANO
| Prodotto | Potenza (W) | Accessori |
| STC56 | 700 W | Bocchetta per crepe, spazzola rotonda e per mobili |
| STC58 | 850 W | STC56 + spazzola per animali |
| STC62 | 850 W | STC56 + spazzola per parquet |
| 1 | Strumento Spazzola | 9 | Pulsante dispositivo avvolgimento |
| 2 | Tubo metallico estensibile | 10 | Ruota posteriore |
| 3 | Pulsante di rilascio | 11 | Gomma ruota posteriore |
| 4 | Maniglia | 12 | Ugello a fessura |
| 5 | Contenitore polvere e maniglia | 13 | Porta accessori |
| 6 | Tubo flessibile | 14 | Spazzola rotonda |
| 7 | Connettore tubo | 15 | Spazzola per tappezzeria |
| 8 | Contenitore polvere | 16 | Spazzola per animali |
| 17 | Spazzola per parquet |
Avvertenza di sicurezza
1. Assicurarsi di utilizzare l'apparecchio in conformità con il contenuto di questo manuale e utilizzare i raccordi indicati dal produttore. 2. Si prega di non lasciare incustodito l'apparecchio quando è acceso. Spegnere l'interruttore di alimentazione ed estrarre la spina di alimentazione quando non viene utilizzato o prima della manutenzione. 3. Si prega di non tirare o trasportare l'apparecchio per il cavo di alimentazione e di non stringerlo quando si chiude una porta; mantenere il cavo libero dalla pressa dell'apparecchio. 4. Si prega di non lasciare che i bambini prendano l'apparecchio come giocattolo, è necessaria una grande attenzione quando i bambini si avvicinano all'apparecchio 5. Si prega di non utilizzare l'aspirapolvere quando il cavo di alimentazione o la spina sono danneggiati. Inviarlo al centro di assistenza designato. Non scollegare tirando il cavo. Per staccare la spina, afferrare la spina, non il cavo. 6. Non staccare mai la spina di alimentazione e non utilizzare l'apparecchio con le mani bagnate. 7. Quando si utilizza l'aspirapolvere, prestare attenzione per evitare che i rotoli di capelli o altri rifiuti ostruiscano l'ingresso dell'aria (compresi il tubo flessibile e lo scarico), altrimenti si potrebbero verificare guasti al motore e all'alloggiamento e causare distorsione. Se le cose aspirate formano un blocco, arrestare l'apparecchio estraendo immediatamente la spina di alimentazione per pulire il blocco. 8.Quando si usa l'apparecchio, non coprire l'uscita dell'aria con un asciugamano o altre cose, altrimenti l'efficienza dell'assorbimento della polvere sarà influenzata e il motore sarà ad alto rischio di guasto. 9. Non utilizzare mai l'apparecchio su pavimenti o terreni irregolari; e fare molta attenzione quando si puliscono le scale per evitare che l'apparecchio cada. 10. Non assorbire mai ceppi vivi con l'apparecchio, altrimenti il motore potrebbe essere danneggiato. 11. L'apparecchio deve essere tenuto lontano da fonti di calore (come riscaldamento centralizzato, forno, ecc.) Per evitare la distorsione delle parti in plastica e l'influenza causata da tale distorsione. 12. Prima di utilizzare l'aspirapolvere, rimuovere gli oggetti grandi e taglienti dal pavimento per evitare di danneggiare le parti in plastica, le maglie del filtro e il motore. 13. Non assorbire mai acqua o altri liquidi con questo apparecchio, altrimenti il motore verrà danneggiato. 14. Questo apparecchio può essere usato da persone con ridotte capacità fisiche, sensoriali o mentali o con mancanza di esperienza o conoscenza, a condizione che siano sorvegliate o istruite sull'uso sicuro dell'apparecchio e che comprendano pienamente i potenziali pericoli. 15. Se il cavo di alimentazione è danneggiato, deve essere sostituito da un servizio post-vendita per evitare qualsiasi pericolo. 16. Non utilizzare questo apparecchio se ha un cavo o una spina danneggiati, se non funziona correttamente o se è stato danneggiato o fatto cadere. Se il cavo di alimentazione è danneggiato, deve essere sostituito dal produttore, dal suo agente di servizio o da una persona qualificata per evitare rischi. 17. Questo apparecchio può essere utilizzato da bambini di almeno 8 anni, purché siano sorvegliati e abbiano ricevuto istruzioni sull'uso sicuro dell'apparecchio e siano pienamente consapevoli dei pericoli connessi. 18. La pulizia e la manutenzione non devono essere eseguite da bambini a meno che non abbiano almeno 8 anni e siano sorvegliati da un adulto. 19. Tenere l'apparecchio e il cavo di alimentazione fuori dalla portata dei bambini di età inferiore a 8 anni. 20. Quando si utilizzano apparecchiature elettriche, è necessario prendere sempre precauzioni di sicurezza per prevenire il rischio di incendi, scosse elettriche e/o lesioni in caso di uso improprio. 21. Assicurarsi che la tensione nominale sulla targhetta corrisponda alla tensione del vostro impianto elettrico. In caso contrario, contattare il rivenditore e non collegare l'unità. 22. Non lasciare mai l'unità incustodita mentre è in funzione. 23. Assicurarsi che l'alimentazione sia 220-240 V 50Hz. 24. Il vostro apparecchio è stato progettato esclusivamente per un uso domestico. Non è destinato all'uso nelle seguenti situazioni che non sono coperte dalla garanzia: - in cucine per il personale in negozi, uffici e altri ambienti professionali, - in ostelli agricoli, - da ospiti in hotel, motel e altri ambienti residenziali, - in ambienti tipo bed and breakfast.COME USARE L'APPARECCHIO
MONTAGGIO PRIMA DELL'UTILIZZO
La Fig.1 mostra il collegamento del tubo flessibile e dell'aspirapolvere: Posizionare il connettore del tubo davanti all'aspirapolvere, quindi inserirlo nel foro di ingresso e girare a destra. Se si desidera smontarlo, è possibile ruotare il raccordo del tubo flessibile a sinistra e quindi estrarlo. La Fig.2 mostra il collegamento del tubo flessibile e del tubo metallico estensibile: Tenere il connettore del tubo flessibile e inserirlo nel foro più grande del tubo. La Fig.3 mostra la connessione del tubo e dello strumento pennello: Inserire il tubo di metallo nel foro della spazzola e ruotarlo per fissarlo. La Fig.4 mostra come effettuare l'avvolgimento del cavo di alimentazione. È possibile estrarre il cavo di alimentazione dall'apparecchio e fermarsi quando appare il segno il segno giallo. Assicurarsi che il segno rosso non sia fuori. Al termine dell'utilizzo, spegnere prima l'alimentazione, estrarre la spina dalla presa e quindi premere il pulsante del dispositivo di avvolgimento fino a quando il cavo non è completamente avvolto. La Fig.5 mostra il pulsante di accensione Inserire la spina nella presa, premere il pulsante di accensione per controllare il funzionamento dell'apparecchio. natural_image
Technical line drawing of a mechanical assembly with no visible text or symbolsnatural_image
Line drawing of a curved cable or hose with a small attached component (no text or symbols)natural_image
Technical line drawing of a mechanical component with no visible text or symbolsnatural_image
Technical line drawing of a mechanical component with no visible text or symbolsnatural_image
Technical line drawing of a mechanical component with no visible text or symbolsPULIZIA DEL CONTENITORE POLVERE
passaggi della pulizia del contenitore: 1. Come in Fig.6, tenere il contenitore polvere e la maniglia e premere il pulsante di rilascio. 2. Come in Fig.7, estrarre il contenitore polvere dall'apparecchio. 3. Come in Fig.8, posizionare il contenitore sul cestino, premere il pulsante di rilascio per aprire la parte inferiore del contenitore polvere, e lo sporco e la polvere cadranno nel cestino da soli. 4. Come in Fig.9, chiudere il contenitore polvere per un uso circolare dopo la pulizia. MANUTENZIONE
COME EFFETTUARE LA MANUTENZIONE
1. Il filtro deve essere pulito due volte l'anno e quando c'è sporco evidente sul filtro. 2. È necessario fissare correttamente il filtro prima di avviare l'aspirapolvere. 3. Il filtro non può essere pulito in lavatrice o asciugato nell'asciugatrice. 4. Utilizzare un filtro bagnato ridurrà la potenza di aspirazione e danneggerà il motore. 5. Passaggi per la manutenzione: 1) Come in fig.10, premere il blocco di uscita per aprire lo sportellino. 2) Come in fig.11, estrarre il filtro. 3) Come in fig.12, ruotare il coperchio HEPA per separarlo dal coperchio 4) Come in fig.13, estrarre il filtro HEPA 5) Come in fig.14, rimuovere eventuali capelli. 6) Come in fig.15, lavare il filtro HEPA. 7) Lavare il coperchio HEPA, il gruppo HEPA, la spugna di uscita e il contenitore polvere nell'acqua senza detersivo e asciugarli prima dell'uso. 8) Inserire il gruppo del contenitore polvere nell'apparecchio. E in questo processo, posizionare il contenitore nella giusta posizione e quindi premere la maniglia del contenitore polvere, se si sente un cluck significa che l'operazione è stata effettuata con successo. natural_image
Technical line drawing of a mechanical device with no visible text or symbolsnatural_image
Line drawing of a camera with front-mounted sensor and display panel (no text or symbols)natural_image
Line drawing of a curved mechanical component with attached parts, alongside a stylized red logo (no text or symbols)natural_image
Line drawing of a rice cooker with open lid and side panel, showing internal components (no text or symbols)natural_image
Line drawing of a rice cooker with lid and side legs (no text or symbols)GARANZIA
Il periodo di garanzia per i nostri prodotti è di 2 anni. Se avete problemi o domande, potete facilmente accedere alle nostre pagine di aiuto, consigli per la risoluzione dei problemi, FAQ e manuali d'uso sul nostro sito post-vendita: https://sav.hkoenig.com. Digitando il nome di riferimento del tuo dispositivo nella barra di ricerca, puoi accedere a tutto il supporto online disponibile, progettato per soddisfare al meglio le tue esigenze. Se ancora non riesci a trovare una risposta alla tua domanda o al tuo problema, allora clicca su "La risposta ha risolto il tuo problema? Questo vi porterà al modulo di richiesta di supporto post-vendita, che potete completare per convalidare la vostra richiesta e ottenere aiuto.CONDIZIONI DI GARANZIA
La garanzia copre tutti i guasti derivanti da un uso normale, in conformità con gli usi e le specifiche del manuale utente. Questa garanzia non si applica a problemi di imballaggio o di trasporto durante la spedizione del prodotto da parte del proprietario. Non include inoltre la normale usura del prodotto, né la manutenzione o la sostituzione delle parti di consumo.ESCLUSIONE DELLA GARANZIA
- Accessori e parti soggette a usura (\*). - Normale manutenzione dell'apparecchio. - Tutti i guasti derivanti da un uso improprio (urti, mancato rispetto delle raccomandazioni sull'alimentazione, cattive condizioni d'uso, ecc.), da una manutenzione inadeguata o da un uso improprio dell'apparecchio, nonché dall'uso di accessori inadeguati. - Danni di origine esterna: incendio, danni d'acqua, sovratensione elettrica, ecc. - Qualsiasi attrezzatura che sia stata smontata, anche parzialmente, da persone diverse da quelle autorizzate a farlo (in particolare l'utente). - Prodotti per i quali il numero di serie è mancante, danneggiato o illeggibile, il che non permetterebbe la sua identificazione. - Prodotti soggetti a noleggio, dimostrazione o esposizione. (\*) Alcune parti del suo apparecchio, note come parti soggette a usura o materiali di consumo, si deteriorano con il tempo e la frequenza d'uso del suo apparecchio. Questa usura è normale, ma può essere accentuata da cattive condizioni d'uso o di manutenzione del vostro apparecchio. Queste parti non sono quindi coperte dalla garanzia. Anche gli accessori forniti con l'apparecchio sono esclusi dalla garanzia. Non possono essere scambiati o rimborsati. Tuttavia, alcuni accessori possono essere acquistati direttamente dal nostro sito web: https://sav.hkoenig.com/. ATTENZIONE
Non smaltire questo prodotto insieme ad altri prodotti domestici. Esiste una raccolta differenziata di questo prodotto di questo prodotto in comunità, è necessario informarsi presso le autorità locali sui luoghi in cui è possibile restituire il prodotto. questo prodotto. Infatti, i prodotti elettrici ed elettronici contengono sostanze pericolose che hanno effetti nocivi sull'ambiente e sulla salute umana. sull'ambiente o sulla salute umana e devono essere riciclati. Il simbolo qui riportato indica che le apparecchiature elettriche ed elettroniche Il simbolo indica che le apparecchiature elettriche ed elettroniche devono essere scelte con cura, mentre il contenitore dei rifiuti su ruote è contrassegnato da una croce. Adeva SAS / H.Koenig Europe - 8 rue Marc Seguin - 77290 Mitry Mory - France www.hkoenig.com - sav@hkoenig.com - contact@hkoenig.com - Tél: +33 1 64 67 00 05PORTUGUÊS
| Produto | Potência (W) | Acessórios |
| STC56 | 700 W | Bocal para fendas, escova redonda e para móveis |
| STC58 | 850 W | STC56 + escova para animais |
| STC62 | 850 W | STC56 + escova para parquet |
| 1 | Escova Multiuso | 9 | Botão de Recolha do Cabo |
| 2 | Tubo Extensível de Metal | 10 | Tampa da Roda Traseira |
| 3 | Botão de Ligar/Desligar | 11 | Roda Traseira de Borracha |
| 4 | Alça para Transporte | 12 | Bico de fenda |
| 5 | Alça do Reservatório de Pó | 13 | Porta accessori |
| 6 | Tubo Flexível | 14 | Escova redonda |
| 7 | Conector do Tubo Flexível | 15 | Escova para estofados |
| 8 | Reservatório de Pó | 16 | Escova para animais |
| 17 | Escova para parquet |
Aviso de Segurança
1. Certifique-se de utilizar o aspirador conforme as instruções deste manual e utilize os acessórios designados pelo fabricante. 2. Por favor, não abandone o aspirador quando estiver em funcionamento. Desligue o interruptor de alimentação e tire a ficha da tomada elétrica quando não estiver a utilizar ou antes de realizar a manutenção. 3. Por favor, não puxe ou transporte o aspirador pelo cabo de alimentação ou não deixe que o cabo de alimentação fique entalado quando fechar uma porta; mantenha o cabo sempre livre da pressão do aspirador. 4. Por favor, não deixe as crianças brincarem com o aspirador como se fosse um brinquedo e é necessário ter muita atenção quando o aspirador se aproximar das crianças. 5. Por favor, não utilize o aspirador quando o cabo de alimentação ou a ficha estiverem danificados. Leve-o a um centro de serviços autorizado. Por favor, não deligue o aspirador puxando o cabo de alimentação ou a ficha. Para desligá-lo deve sempre fazê-lo segurando na ficha, não no cabo de alimentação. 6. Nunca puxe a ficha elétrica ou utilize o aspirador com as mãos molhadas. 7. Quando utilizar o aspirador, tenha atenção para evitar que qualquer rolo de cabelo ou outro tipo de lixo obstrua a entrada de ar (incluindo o tubo flexível e o tubo de metal extensível), caso contrário, pode ocorrer falha no motor e distorção na caixa. Se o que for aspirado formar um bloqueio, desligue o aspirador imediatamente, desligando a ficha elétrica, limpe o que foi aspirado para desbloquear o aspirador. 8. Quando utilizar o aspirador, não conecte a saída de ar com uma toalha ou com outras matérias, caso contrário, a eficiência da aspiração do pó será influenciada e o motor estará sob alto risco de queimar. 9. Nunca utilize o aspirador em superfícies ou pisos irregulares; e tenha muito cuidado quando limpar escadas para evitar que o aspirador caia. 10. Nunca aspire seres vivos com o aspirador, caso contrário, o motor pode ser danificado. 11. o aspirador deve ser mantido afastado de fontes de calor (como aquecimento central, forno, etc.) para evitar a distorção das peças/partes de plástico, assim como da influência causada por essa distorção. 12. Antes de utilizar o aspirador, por favor, remova objetos grandes e afiados do chão para evitar danificar as peças/partes de plástico, as telas do filtro e o motor. 13. Nunca aspire água ou outro líquido com este aspirador, caso contrário, o motor danificar-se-á. 14. Este aparelho pode ser utilizado por pessoas com capacidades físicas, sensoriais ou mentais reduzidas ou com falta de experiência ou conhecimento, desde que sejam supervisionadas ou instruídas sobre a utilização segura do aparelho e que compreendam totalmente os perigos potenciais. 15. Se o cabo de alimentação estiver danificado, deverá ser substituído por um serviço de pós-venda para evitar qualquer perigo. 16. Não coloque o aparelho em funcionamento se houver um cabo ou ficha danificados, se não estiver a funcionar corretamente, se foi danificado ou caiu. Se o cabo de alimentação estiver danificado, deve ser substituído pelo fabricante, fornecedor de serviços ou pessoas com qualificação semelhante, com a finalidade de evitar riscos. 17. Este aparelho pode ser utilizado por crianças com idade acima dos 8 anos, desde que sejam supervisionadas e tenham recebido instruções relativamente à utilização do aparelho de uma forma segura e estejam conscientes dos perigos envolvidos. 18. A limpeza e manutenção não devem ser realizadas por crianças, a menos que tenham pelo menos 8 anos de idade e sejam supervisionadas por um adulto. 19. Mantenha o aparelho e o cabo de alimentação fora do alcance das crianças com idades inferiores a 8 anos. 20. Quando utilizar eletrodomésticos (aparelhos elétricos), devem ser sempre seguidas as precauções básicas de segurança para evitar o risco de incêndio, choque elétrico e/ou ferimentos em caso de utilização indevida. 21. Verifique se a voltagem na placa de identificação corresponde à voltagem principal da sua instalação elétrica. Se não for esse o caso, entre em contator com o revendedor e não ligue o aparelho. 22. Nunca deixe o aparelho sem vigilância enquanto estiver em funcionamento. 23. Verifique se a fonte de alimentação é de 220-240V 50Hz. 24. O seu aparelho foi concebido apenas para uso doméstico. Não se destina a uso nas seguintes situações que não são cobertas pela garantia: - nas áreas de cozinha do pessoal em lojas, escritórios e outros ambientes profissionais, - em albergues agrícolas, - por hóspedes em hotéis, motéis e outros ambientes residenciais, - em ambientes do tipo cama e pequeno-almoço.COMO UTILIZAR
MONTAGEM ANTES DE UTILIZAR
A Fig.1 mostra a montagem do tubo flexível ao aspirador: Coloque o conector do tubo flexível na frente do aspirador. Em seguida, insira-o no orifício de entrada e rode para a direita. Se quiser desmontá-lo, pode rodar o conector do tubo flexível para a esquerda e puxar para fora. A Fig.2 mostra a montagem do tubo flexível ao tubo extensível de metal: Segure o conector de resistência flexural que se encontra no tubo flexível e coloque-o no orifício maior do tubo extensível de metal. A Fig.3 mostra a montagem do tubo extensível de metal na escova multiusos: Coloque o tubo extensível de metal no orifício da escova e rode-o para fixá-los. A Fig.4 mostra como verificar o enrolamento do cabo de alimentação: Você pode puxar o cabo de alimentação para fora do aspirador e parar quando vir a marca amarela. Verifique se a marca vermelha não está apagada. Quando terminar de aspirar, primeiro desligue a energia do aspirador, remova a ficha da tomada elétrica e, em seguida, pressione o botão de recolha do cabo até que o cabo esteja completamente dentro do aspirador. A Fig.5 mostra o botão de Ligar/Desligar: Coloque a ficha na tomada elétrica, pressione o botão de Ligar/Desligar para controlar o funcionamento do aspirador. LIMPEZA DO RESERVATÓRIO DE PÓ
Os passos para fazer a limpeza do reservatório de pó: 1. Como mostra na Fig.6, segure na alça do reservatório de pó e pressione o botão de desbloqueio. 2. Como mostra na Fig.7, remova o reservatório de pó do aspirador. 3. Como mostra na Fig.8, coloque o reservatório de pó sobre o caixote do lixo, pressione o botão de desbloqueio para abrir a parte inferior do reservatório de pó e a sujidade e a poeira cairão no caixote do lixo por si mesmos. 4. Como mostra na Fig.9, feche o reservatório de pó para um uso circular após a limpeza. natural_image
Technical line drawing of a mechanical component with no visible text or symbolsnatural_image
Technical line drawing of a vacuum cleaner with attached hoses and gauges (no text or symbols)natural_image
Technical line drawing of a mechanical device with a red arrow indicating direction (no text or symbols)natural_image
Diagram of a mechanical device with a downward arrow indicating compression or disassembly (no text or symbols present)MANUTENÇÃO
COMO MANTER O ASPIRADOR OPERACIONAL
1. O filtro deve ser limpo duas vezes por ano e quando verificar que existe sujidade no filtro também deve limpá-lo. 2. Você deve colocar o filtro corretamente antes de colocar o aspirador em funcionamento. 3. O filtro não pode ser limpo na máquina de lavar ou soprado por ventilador. 4. Reduzirá a potência de sucção e danificará o motor se usar o filtro húmido. 5. Passos para realizar a manutenção: 1) Como mostra na Fig.10, pressione o botão da rede de saída de ar para a abrir. 2) Como mostra na Fig.11, remova o filtro de saída de ar para a sua limpeza. 3) Como mostra na Fig.12, rode a tampa HEPA para separá-la da tampa do reservatório. 4) Como mostra na Fig.13, obtenha a tampa HEPA. 5) Como mostra na Fig.14, se você tiver qualquer acessório de limpeza removível para enrolar os cabelos. 6) Como mostra na Fig.15, pegue na tampa HEPA e lave-a. 7) Lave a tampa HEPA, o conjunto HEPA, a esponja que se encontra na saída de ar e o reservatório de pó com água sem detergente e seque-os antes de utilizar. 8) Coloque o conjunto do reservatório de pó no aspirador. Neste processo, primeiro, você deve colocar o reservatório na posição correcta e, em seguida, pressionar a alça do reservatório de pó; se ouvir um clique, significa que a operação foi realizada com sucesso. natural_image
Technical line drawing of a handheld vacuum cleaner device (no text or symbols)natural_image
Technical line drawing of a mechanical device with no visible text or symbolsnatural_image
Line drawing of a curved container with a handle, next to a red arrow symbol (no text or labels)natural_image
Line drawing of a rice cooker with open lid and side arm, showing internal compartments (no text or symbols)natural_image
Line drawing of a rice cooker with lid and side legs (no text or symbols)GARANTIA
O período de garantia dos nossos produtos é de 2 anos. Se tiver quaisquer problemas ou perguntas, pode aceder facilmente às nossas páginas de ajuda, resolução de problemas dicas, FAQ, e manuais do utilizador no nosso site de serviços: https://sav.hkoenig.com. Ao digitar o nome de referência do seu dispositivo na barra de pesquisa, pode aceder a todos os apoio em linha, concebido para melhor responder às suas necessidades. Se ainda não encontrar uma resposta para a sua pergunta ou problema, então clique em "Did the answer resolver o seu problema...". Isto irá encaminhá-lo para o Formulário de Pedido de Apoio ao Cliente, o qual pode preencher para validar o seu pedido e obter ajuda.CONDIÇÕES DE GARANTIA
A garantia cobre todas as falhas que ocorram em condições normais de utilização, de acordo com a utilização e especificações no manual do utilizador. Esta garantia não se aplica a problemas de embalagem ou transporte durante o envio do produto pelo proprietário. Também não inclui o desgaste normal do produto, nem manutenção ou substituição de peças consumíveis.EXCLUSÃO DE GARANTIA
- Acessórios e peças de desgaste (\*). - Manutenção normal do dispositivo. - Todas as avarias resultantes de utilização indevida (choques, não cumprimento de fornecimento de energia recomendações, más condições de utilização, etc.), manutenção insuficiente ou utilização indevida do bem como a utilização de acessórios impróprios. - Danos de origem externa: incêndio, danos causados pela água, surtos eléctricos, etc. - Qualquer equipamento que tenha sido desmontado, mesmo parcialmente, por outras pessoas para além das que autorizado para o fazer (nomeadamente o utilizador). \- Os produtos cujo número de série estaria em falta, deteriorado ou ilegível que não permitir a sua identificação. \- Os produtos sujeitos a leasing, demonstração, ou exposição. (\*) Algumas partes do seu dispositivo, chamadas peças de desgaste ou consumíveis, deterioram-se com o tempo e frequência de utilização do seu dispositivo. Este desgaste é normal, mas pode ser acentuado por más condições de utilização ou manutenção do seu dispositivo. Estas peças não são, portanto, abrangidas pela garantia. Os acessórios fornecidos com o dispositivo estão também excluídos da garantia. Não podem ser trocados ou reembolsados. No entanto, alguns acessórios podem ser adquiridos directamente através do nosso website: https://sav.hkoenig.com/.| Descarte Correto deste produto | |
| Esta marcação indica que este produto não pode ser descartado/eliminado como outros resíduos domésticos, em toda a UE. Para evitar possíveis danos ao meio ambiente ou à saúde humana, decorrentes do descarte incontrolável de resíduos, recicle-o com responsabilidade para promover a reutilização sustentável dos recursos materiais. Para devolver o aparelho usado, por favor, utilize os sistemas de devolução e recolha ou entre em contato com o revendedor onde o produto foi adquirido. Os revendedores podem levar este aparelho para uma reciclagem ambientalmente segura. | |
POLSKI
| Produkt | Moc (W) | Akcesoria |
| STC56 | 700 W | Ssawka szczelinowa, szczotka okrągła i szczotka do mebli |
| STC58 | 850 W | STC56 + szczotka do zwierząt |
| STC62 | 850 W | STC56 + szczotka do parkietu |
KOMPONENTY URZĄDZENIA
| 1 | Szczotka uniwersalna | 9 | Pokrętło zwijania linki |
| 2 | Metalowa rura przedłużająca | 10 | Osłona tylnego koła |
| 3 | Przycisk włączania/wyłączania | 11 | Gumowe tylne koło |
| 4 | Uchwyt do przenoszenia | 12 | Śrubokręt |
| 5 | Uchwyt pojemnika na kurz | 13 | Uchwyt na akcesoria |
| 6 | Elastyczna rura | 14 | Okrągła szczotka |
| 7 | Złącze elastycznej rurki | 15 | Szczotka do tapicerki |
| 8 | Pojemnik na kurz | 16 | Szczotka dla zwierząt |
| 17 | Szczotka do parkietu |