411-142 - Heating Anslut - Free user manual and instructions
Find the device manual for free 411-142 Anslut in PDF.


| Product Type | Space Heater |
| Brand | Anslut |
| Model | 411-142 |
| Power | 2000 W |
| Voltage | 220-240 V |
| Frequency | 50/60 Hz |
| Dimensions (H x W x D) | 25 x 20 x 15 cm |
| Weight | 1.5 kg |
| Heating Element | PTC Ceramic |
| Heating Type | Fan Forced |
| Thermostat | Adjustable |
| Safety Features | Overheat Protection, Tip-Over Switch |
| Material | Plastic |
| Color | White / Black |
| Noise Level | < 45 dB |
| Room Coverage | Up to 20 m² |
| Cord Length | 1.8 m |
| Overheat Protection | Yes, automatic shut-off |
| Tip-Over Protection | Yes, safety switch |
| Cleaning Instructions | Wipe with dry cloth; do not immerse in water |
| Maintenance | Check and clean air intake regularly |
| Spare Parts Availability | Contact manufacturer or authorized service |
Frequently Asked Questions - 411-142 Anslut
User questions about 411-142 Anslut
0 question about this device. Answer the ones you know or ask your own.
Ask a new question about this device
Download the instructions for your Heating in PDF format for free! Find your manual 411-142 - Anslut and take your electronic device back in hand. On this page are published all the documents necessary for the use of your device. 411-142 by Anslut.
USER MANUAL 411-142 Anslut
natural_image
Exterior view of a black outdoor heating lamp with visible heat source and wiring (no text or symbols)EN Operating instructions for infrared heater
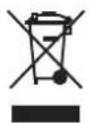
Värna om miljön!
Care for the environment!
Must not be discarded with household waste! This product contains electrical or electronic components that should be recycled. Leave the product for recycling at the designated station e.g. the local authority's recycling station.
SE - Bruksanvisning i original
EN - Operating instructions (Translation of the original instructions)
Jula reserves the right to make changes. In the event of problems, please contact our service department. www.jula.com
Tillverkare/ Produsent/ Produenci/ Manufacturer Jula AB, Box 363, 532 24 SKARA
Distributör/ Distributør/ Dystrybutor/ Distributor
Jula Poland Sp. z o.o., ul. Malborska 49, 03-286 Warszawa, Polska
SAFETY INSTRUCTIONS 14
Symbols 15
TECHNICAL DATA 15
DESCRIPTION 15
ASSEMBLY....16
USE....16
Positioning....16
Use 16
CLEANING 16
SÄKERHETSANVISNINGAR
natural_image
Mechanical assembly diagram showing a circular component with numbered parts and directional arrows (no text or symbols)natural_image
Mechanical assembly diagram showing a circular component with numbered parts and directional arrows (no text or symbols)- Gitter
- Strømbryter/effektvelger
- Bunnplate
- Stolpe, nedre del
- Stolpe, midtre del
- Stolpe, øvre del
- Monteringsskrue
- Varmeelement"
MONTERING
natural_image
3D mechanical assembly diagram showing a circular component with numbered parts and directional arrows (no text or symbols)Read the operating instructions carefully before use.
Save them for future reference.
WARNING: The infrared heater does not have a thermostat to control the room temperature. If used in small rooms where there are persons who cannot leave the room without assistance, it must therefore be kept under constant supervision.
- The infrared heater must only be connected to an earthed socket 230 V\~50 Hz. Connection to other voltage or types of sockets can result in personal injury and material damage, and will also invalidate the warranty.
- The infrared heater must only be used for its intended purpose and in accordance with these instructions, i.e. for heating terraces and patios and other outdoor environments.
- The infrared heater must not be used to dry washing.
- The infrared heater is not intended for commercial or professional use, or for heating of buildings, greenhouses, sheds or machine rooms.
- Handle the infrared heater with care and do not expose it to knocks or blows – short wave infrared bulbs are fragile.
- The infrared heater is a powerful source of heat and emits intense thermal radiation. For this reason avoid exposing pets and people, especially infants, older persons or persons with diminished health to direct radiation.
- Do not place the infrared heater near furniture, curtains or other flammable materials. Do not place it near power points or use it in damp environments, such as wet rooms or beside pools.
- Do not put the power cord under carpets or the like, or through doors and openings. Do not put the power cord where it can be stood on, or where furniture can be put on it. Do not put the power cord round sharp corners, or wind it up too tightly when not in use.
- Do not use the infrared heater outdoors in wet weather.
- Never use the infrared heater with a programming unit, timer or other device that switches it on automatically – this can result in the risk of fire if the heater is covered over or in a bad position.
- Never cover the infrared heater.
- Protect the power cord from the hot parts on the infrared heater.
- Do not use extension cords unless this is necessary. Extension cords must be approved for 10 A. Always completely unreel an extension cord.
- Never immerse the infrared heater in water or any other liquid.
- Some parts of the infrared heater get very hot. Do not touch hot parts – risk of burn injuries.
- Never poke your fingers or any objects into the inlet or outlet openings – risk of electric shock, fire and/or personal injury.
- The heater element and front grille get very hot when the infrared heater is in use. Do not touch these parts before the heater has cooled.
- Keep the heater under careful supervision when it is used by, or near children, or persons with functional disorders. Keep small children under supervision to make sure they do not play with the heater.
- This appliance can be used by children aged from 8 years and above and people with reduced physical, sensory or mental capabilities or lack of experience and knowledge if they have been given supervision or instruction concerning use of the appliance in a safe way and understand the hazards involved. Children shall not play with the appliance. Cleaning and user maintenance tasks may not be carried out by children unless they are supervised.
- Switch off the infrared heater and unplug the plug from the power point before moving or cleaning it.
- Never attempt to dismantle or repair the heater yourself.
- Repairs of the heater, power cord and/or plug must only be carried out by qualified personnel. Any unauthorised
repairs or modification of the heater will void the warranty.
- Tilt protection; the infrared heater has a safety switch that automatically switches off the power if it tips over.
- Remove the plug from the power point if the heater tips over.
- Carefully check that the heater is not damaged and put it upright again. Never use the heater if it is damaged. Take it to an authorised service centre to be repaired if it is damaged.
- If the infrared heater is not visibly damaged, put the power switch in the 0 position and connect the plug to the mains. Switch on the power switch. Monitor the infrared heater very carefully for the first 15 minutes. If there is any sign of a fault or damage, unplug the plug immediately from the power point and contact an authorised service centre.
SYMBOLS
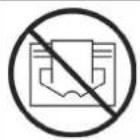
Do not cover the infrared heater.
TECHNICAL DATA
| Heat output 1000–2000 W | |
| Voltage 230 V | ~ 50 Hz |
| Protection rating IP24 | |
| Bulb Short wave infrared | |
| Model | Upright |
| Casing | Metal |
| Height 162 – 200 cm | |
| Cord length 175 cm | |
DESCRIPTION

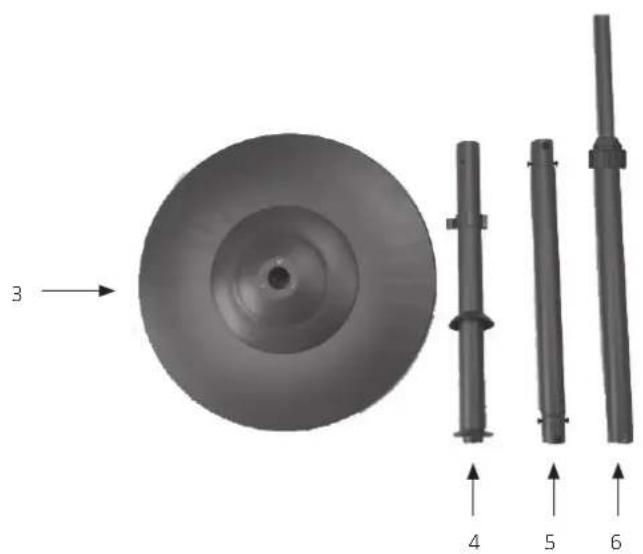
natural_image
3D mechanical component diagram showing a circular base with concentric rings and three vertical shafts with numbered arrows (no text or symbols on parts)- Grille
- Power switch/output selector
- Base plate
- Bottom pillar
- Middle pillar
- Top pillar
- Retaining screw
- Heater element"
ASSEMBLY
- Screw the bottom pillar to the base plate from underneath. Put the bottom part of the pillar on the foot plate so that the screw holes are opposite each other. Put the cover in place over the screw union (the cord holder needs to temporarily removed).
- Undo the prefitted screws in one end of the middle pillar. Put the middle pillar in the bottom pillar and fasten with the screws.
- Undo the prefitted screws in the other end of the middle pillar and slip on the top part. Fasten with the screws in the same way.
- Undo the retaining screw on the back of the lamp and unscrew it almost completely from the retainer. Slip the heater element onto the top pillar. Fasten with the retaining screw. Tighten the screw firmly. The screw must be fully screwed into the pillar – it must not stick out.
- To adjust the height:
- Release the clamp coupling by turning it to the left.
- Raise or lower the outer part of the top pillar.
- Fix the height by turning the clamp coupling to the right.
USE
POSITIONING
- The infrared heater must stand at least 1m from the nearest wall.
- The underlying surface must be stable, smooth and completely flat.
USE
WARNING: The infrared heater does not have a thermostat and emits a constant source of heat while it is switched on. For this reason never leave the heater unattended when it is in use.
NOTE: Check before use that all the connections are properly tightened and that the infrared heater is correctly and safety positioned.
- Align the heater element in the required direction.
- Plug the plug into the mains.
- Use the power switch to switch the infrared heater on and off, and to select the power mode.
- Mode O = Switched off
- Mode 1 = Low power, 1000 watt
-
Mode 2 = High power, 2000 watt
-
Unplug the plug from the mains after use.
CLEANING
NOTE: Switch off the infrared heater and make sure it is not plugged into the mains before cleaning.
- Clean the infrared heater with a damp cloth, if necessary with a little mild detergent. Do not use strong or abrasive detergents.
- Clean behind the grille.
- Undo the four small screws in each corner on the back of heater element, and carefully lift off the grille.
- Carefully remove any dust and scrape with a soft brush. Do not blow with compressed air – this can damage the bulb and the reflector.
- Replace the grille and screw on."
Brand : Anslut
Model : 411-142
Category : Heating