
GeoVision 5466 Navitel - Gps PRESTIGIO - Free user manual and instructions
Find the device manual for free GeoVision 5466 Navitel PRESTIGIO in PDF.


| Product Type | GPS Navigator |
| Brand | Prestigio |
| Model | GeoVision 5466 Navitel |
| Display Size | 5.0 inches |
| Resolution | 480 x 272 pixels |
| Dimensions | 137 x 85 x 18 mm |
| Weight | 200 g |
| Power Source | Rechargeable Li-ion battery, 12V car charger |
| Battery Life | Up to 4 hours |
| Navigation Software | Navitel Navigator |
| Maps Included | Preloaded maps of Europe |
| Key Functions | Turn-by-turn directions, POI search, speed camera alerts, route planning |
| Connectivity | USB 2.0, microSD card slot (max 32GB) |
| Mounting | Suction cup windshield mount |
| Audio | Built-in speaker, 3.5mm audio jack |
| Maintenance | Clean with soft, dry cloth. Avoid liquids. |
| Safety | Secure mounting to avoid distraction. Do not operate while driving. |
Frequently Asked Questions - GeoVision 5466 Navitel PRESTIGIO
User questions about GeoVision 5466 Navitel PRESTIGIO
0 question about this device. Answer the ones you know or ask your own.
Ask a new question about this device
Download the instructions for your Gps in PDF format for free! Find your manual GeoVision 5466 Navitel - PRESTIGIO and take your electronic device back in hand. On this page are published all the documents necessary for the use of your device. GeoVision 5466 Navitel by PRESTIGIO.
USER MANUAL GeoVision 5466 Navitel PRESTIGIO
- Important safety instructions .... 2
- Accessories ......3
- View of main unit 4
- Device connections ...... 6
- Cautions on battery charging 8
- Getting started 9..
- Device Settings....10
- Bluetooth Function 11
- FM Function 15.
- Programme Interface.... 16
- Autorouting 20
- Additional Features.... 22
- Troubleshooting 23
Important Safety Instructions
CAUTION
RISK OF ELECTRIC SHOCK DO NOT OPEN!


The exclamation point within an equilateral triangle is intended to alert the user to the presence of important operating and maintenance (servicing) instructions in the literature accompanying the appliance.
CAUTION
- To reduce the risk of electric shock, do not remove the cover (or back). No user-serviceable parts inside. Refer servicing to qualified service personnel.
- The manufacturer should not hold responsibility for the damage caused by any substitutions and modifications of the product without authorization from the manufacturer or authorized unit.
WARNING
The device should not be exposed to dripping or splashing and no objects filled with liquids should be placed on the device.
Prestigio GeoVision 4466/5466/5466BTFM—Accessories List
ITEM



Prestigio



QTY
Car Charger 1
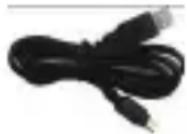
USB Cable 1
Stylus Pen 1
User Manual 1
Warranty Card 1
Driver/Document CD 1
Mounting Cradle
1
Prestigio GeoVision 4466/5466/5466BTFM
Front and Side View

1. LCD Touch Screen
Tap the screen with touch pen or finger to select menu commands or to enter information.
2. Battery Status Indicator
The indicator glows in bright green color when battery is fully charged and in red color when charging.
3. Earphone Jack
Connects to earphones or headsets.
4. microSD Slot
Receiving microSD memory card for data access or memory expansion.
5. mini USB Port
Connection to USB Cable for data access or battery charging
6. Microphone
Records sound.
Prestigio GeoVision 4466/5466/5466BTFM
Rear and Top View


- Speaker
Emits sound, voice or music.
- Reset Button
Press to reboot the device.
- Light Sensor
Adjust the brightness of touch screen
- Power Button
Press to power the device ON/OFF.
Device Connections
Inserting microSD Card

- To insert a microSD card, place the connector towards the device and the card label towards the front side of the device.
- To remove a microSD card, gently press the edge of the card to release the safety lock and pull the card out of the slot.

NOTE:
Please always make sure that no application is accessing the microSD card before extraction.
Connecting to External USB Device (Charging)
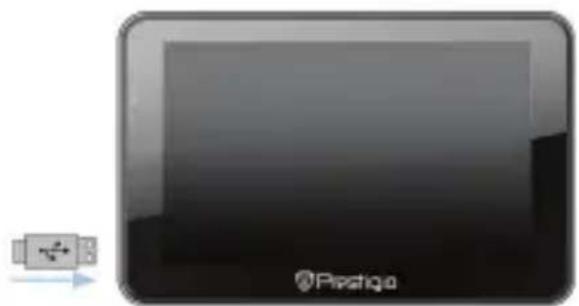
- Insert the USB connector into the appropriate USB port.
- Insert the other USB connector into the USB port on PC to start charging.
Connecting to Car Charger
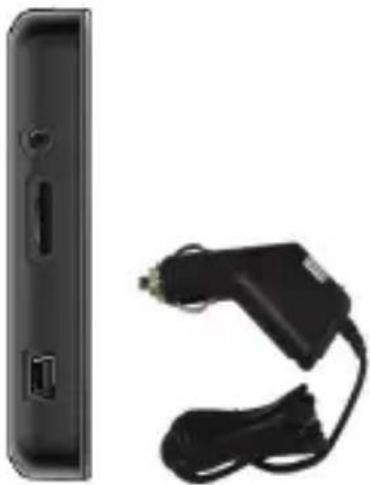
- Insert the USB connector into the appropriate USB port.
- Insert car charger connector into vehicle 12V accessory/cigarette socket to start charging.

NOTE:
Please connect the car charger to vehicle 12V accessory/cigarette socket after the vehicle engine is started to protect the device from sudden surges in current.
Cautions on Battery Charging
About Rechargeable Battery
The device is equipped with a built-in rechargeable battery. Please fully charge the battery (for at least 5 hours) before initial use. The battery status indicator glows in red color when charging and turns bright green color when charging is complete. Charging time is approximately 4 hours.
Working conditions and precautions for the rechargeable battery
● Devices with new batteries should be fully charged before initial use.
- It is not necessary to start charging the device before the battery is fully discharged.
Getting Started
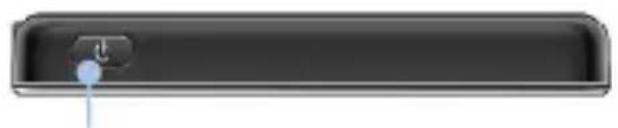


-
Press and hold Power Button to turn on the device.
-
Shortly after the greeting screen is shown, the main menu will be displayed.
-
Tap the corresponding buttons with touch pen included to navigate through various functions.
-
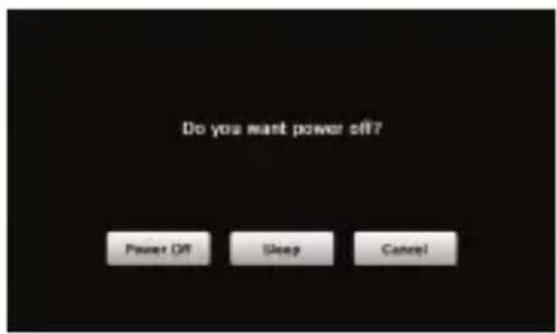
Press and hold Power Button to turn the device off or to allow the device to enter sleep mode.
-
Tap Sleep icon to put the device to sleep mode or Power Off icon to turn the device off.
Device Settings

- In the main menu, tap on 📄 to enter the device settings.
- Tap to display other settings.
| Volume | Adjust sound volume, mute device, or enable warning messages. |
| Backlight | Adjust the brightness of touch screen, enable/disable auto backlight. |
| Language Select desired language. | |
| DateTime Set up Time Zone/Date/Time. | |
| Calibration Calibrate the screen when position deviation occurs. | |
| FM transmitter Transmit audio signals from the navigator to radio sets. | |
| USB | Set the data transmission mode between the navigator and computer. |
| Factory Reset Restore all system settings to factory default values. | |
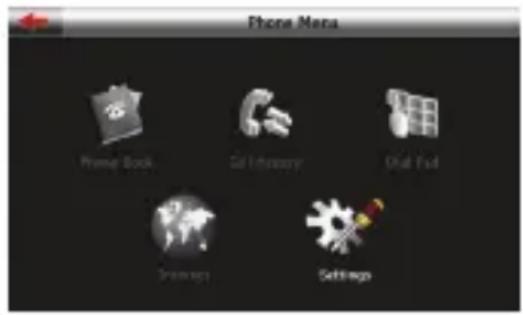

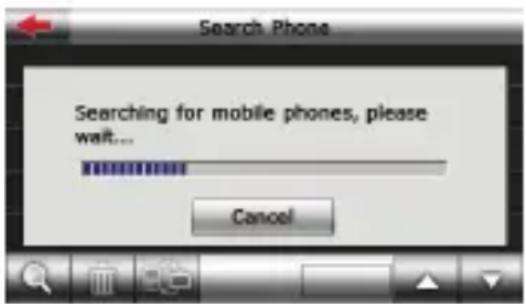

-
Tap on Bluetooth icon on the main menu to start using Bluetooth function.
-
Tap on to exit the current function.
-
Tap on 📋 in Phone Menu to enter Settings
-
Tap on 📄 to search for mobile phones automatically (Note: mobile phone's Bluetooth function should be enabled beforehand)
-
Tap on to begin new search for Bluetooth devices; tap on to delete selected Bluetooth devices; tap on to connect the selected Bluetooth device with PND
Bluetooth Function
(GeoVision 5466BTFM)


-
Tap on 📄 to pair, and as request to enter the PIN code-1234
-
After successful connection, the interface will show as.
-
Tap on to stop the connection between the PND and Bluetooth device; tap on to turn off the Bluetooth function.
-
Tap on to back to the Phone Menu interface


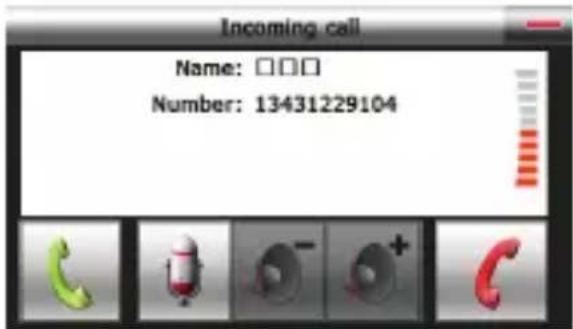

- Tap on 📄 on Bluetooth interface to enter Dial pad
- Tap on to delete the latest inputted number; Tap on to input the symbol+. Tap on to open the phone book interface; Tap on to enter the call history interface; Tap on to make a phone call, and Call out interface will be shown
- Tap on to stop audio input; Tap on to volume down; Tap on to volume up; Tap on to stop calling out; Tap on to open the Options interface.
- Tap on 📄 to enter Dial Pad; Tap on 📋 to switch sound between mobile phone and PND.
- For a incoming call, tap on to answer / to reject it
Bluetooth Function
(GeoVision 5466BTFM)
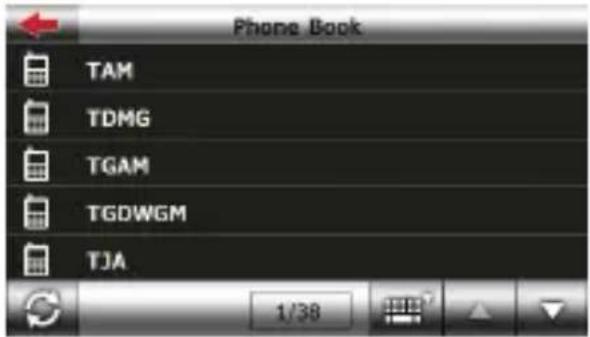


- Tap on 📋 in Phone Menu interface to enter Phone Book
- Tap on 📋 to transfer data of contacts from mobile phone to PND; the icon shows current page/total pages of contacts. Tap on 📋 enable quick search for a contact; Tap on 📋 to view the previous page of contacts; Tap on 📋 to view the next page of contacts;
- Tap on 📄 in Phone Menu to enter the Call History.
- Tap on to check records of the incoming calls; Tap on to check records of outgoing calls; Tap on to check records of the missed call
- Tap on in Phone Menu interface to browse the web
in Phone Menu interface to e Book
to transfer data of mobile phone to PND; the
icon shows current page/total pages of contacts. Tap on enable quick search for a contact; Tap on to view the previous page of contacts; Tap on to view the next page of contacts;
in Phone Menu to enter story.
check records of the
incoming calls; Tap on to check records of outgoing calls; Tap on to check records of the missed calls.
in Phone Menu interface ne web


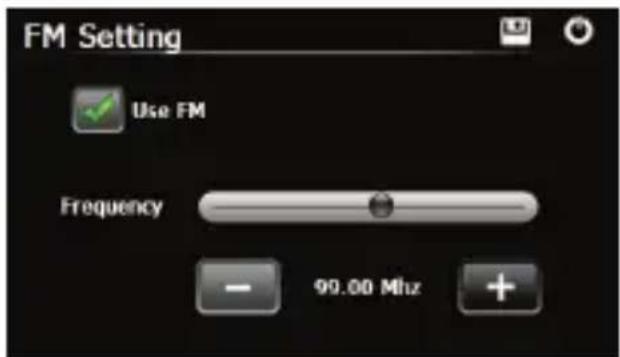
- Tap on Function icon on the main menu.
- Tap on FM icon to start using Bluetooth function.
- Tap on - /+ or drag the cursor to tune FM frequency down/up.
- Tap on to save current FM station.
- Tap on to use the FM function.
- Tap or to exit.
(Note: Please make sure GPS is connected to the car charger before using FM Transmitter)
Program interface
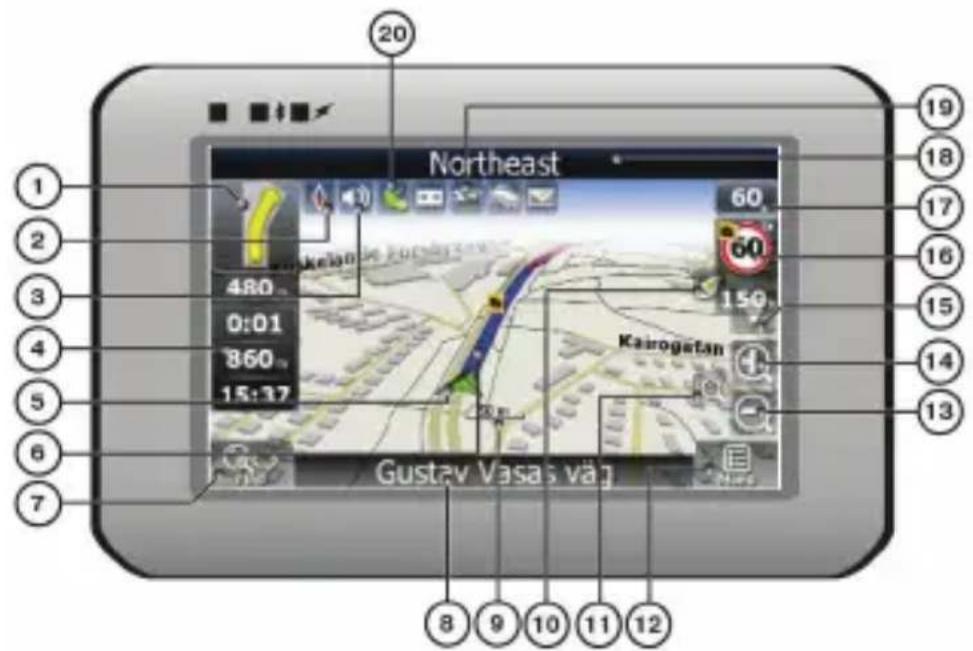
No. Name Function
| 1 | Next maneuver | Next maneuver on the way and distance up to it. Press this Icon to open route options menu. |
| 2 | Compass | Press the compass loon to edit map rotation mode, map view and day/night mode. |
| 3 | Sound | Press this button to turn on/off voice and sound effects. |
| 4 | Information panels | Display time until the end of the trip, total route length, and arrival time. |
| 5 | GPS-cursor | If GPS connection is established, displays your current location. |
| 6 | Route | Route you are currently navigating displays as a wide blue line. |
| 7 | Search | Press this button to enter the search menu and to find specific address or object (you can find more Info about Search In ~Functionality~ section) |
| 8 | Information panel | Shows street name you are currently moving on. Available only if GPS or GLONASS connection is established. If there is no street name, the direction will be shown. |
| 9 | Scale Map current scale. | |
No. Name Function
| 10 | Return to current location | You can see the green arrow at the top of the screen if the map was moved relative to your position. Press it to return view to your current location. |
| 11 | Autoscale | If you zoom In/out with ~Autozoom~ function activated, this function will deactivate for a period according to settings. Press this button to activate ~Autozoom~ function manually. |
| 12 | MENU Press to enter the Main Menu. | |
| 13 | Zoom Out | Decrease map scale. |
| 14 | Zoom In Increase map scale. | |
| 15 | Map slope | Press "Up"/"Down" to slope the map. Available only if scale is between 5 and 300 m. |
| 16 | Speedcam window | When you approach a speed camera with visual warnings being activated the window will appear In upper right comer at the screen. This window shows you permitted speed and distance left. Press the window to turn On/Off speed exceeding sound warnings. |
| 17 | Speed | Current speed. Available only with GPS connection established. |
| 18 | Information panel | Shows street name you are currently moving on. Available only if GPS or GLONASS connection is established. If there is no street name, the direction will be shown. |
| 19 | Battery | Icon displays battery life. Press it to open window with full information about battery life and remaining memory. |
| 20 | GPS | GPS connection button. Green icon - connection enabled, white icon - function disabled. Green icon also has a dot at different color: red - no connection, yellow - poor connection, green - connection established. |
Program interface

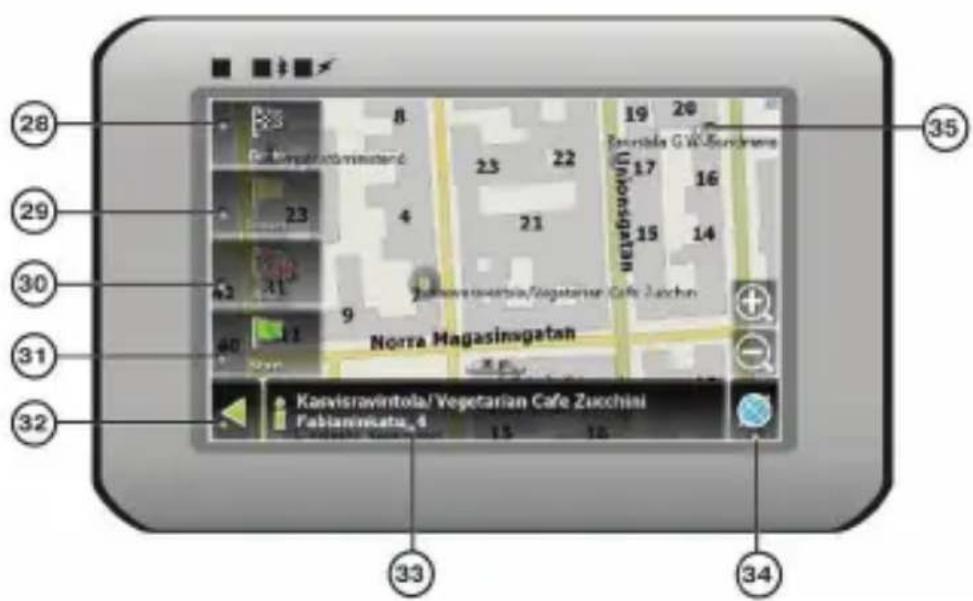
No. Name Function
| 21 Waypoint | Waypoints are manually created by the user and display with red flags on a map. |
| 22 “SaveWP” | Saves current mark on map as a waypoint. |
No. Name Function
| 23 | “Cursor” | Shows the menu of mark on map |
| 24 | Mark on map | Touch the screen with a stylus to set a mark. You can save this mark as a way point add it to the route or see object's characteristics the mark was set on. |
| 25 | Track record | Track record. Green icon - track record enabled, white icon function disabled. |
| 26 | Traffic Jams | Press this icon to edit "Navitel.Traffic Jams." function. |
| 27 | Navitel.SMS | Button is used to read/send SMS-messages and to work with coordinates given there. Figure near the icon displays number of unread messages. |
| 28 | "Go To" | "Mark on map" becomes the end point of the route. |
| 29 | Insert | "Mark on map" becomes the middle point of the route |
| 30 | "Add" | "Mark on map" becomes the end point of the route, whereas previous end point becomes middle point. |
| 31 | "Start" | "Mark on map" becomes the start point of the route. You should turn off your GPS/GLOANASS-receiver. |
| 32 | Back | Depends on way you got to this screen , returns back to “Map” screen or to find menu. |
| 33 | Info | Info about current “Mark on map” position. Tap to see more. |
| 34 | Back to map | Returns to the “Map” page |
| 35 | Object of interest | Different objects on map (traffic lights, metro stations, petrol stations etc.). |
Autorouting
Autorouting
In order to create a route automatically, from the current position to the destination point, tap with the stylus pen on the place on the map where the final point is, tap on the "Cursor" button and in the context menu choose "Go to" (Fig. 1). The calculated route will be shown on the map in blue color with highly visible dark border (Fig. 2). Please, note that in case of non-routable maps, the route will represent a straight green line from your position to the destination point, ignoring the existing buildings, roads, etc.

1

2
Autorouting using search
Find an object of interest using "Search" and press it with stylus, then select "Go To" item from the menu. Apart from this item there are also "Insert" — add a point between two points of existing route, and "Add" — point is added to the end of a route and continues it. Both items are available only with existing route.
Manual route creation
The difference of this route creation method from previous two is what you can set a start point and a destination point.
To create a route, press a map using stylus, press the "Cursor" (Fig. 1) button and "Start" button after the menu appears (Fig. 2). Then find the destination point and press "Cursor" — "Go To" (Fig. 3). If you using maps support autorouting, route will be created referring to this data and will be the shortest or the quickest. Otherwise waypoints will be connected with strait green lines.
Please note! If GPS-receiver is active, you cannot set the start point!

1 2 3


Additional features
If your device has GPRS-module, or provides Internet connection via the GPRS-module of your mobile phone through Bluetooth, you will be able to use some «Navitel.Navigator» software features like «Navitel.Traffic» and «Navitel.SMS» services.
Navitel. Traffic
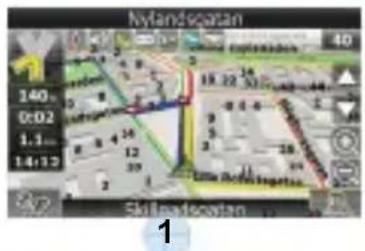

Using this service you can see the traffic situation in Russia, Ukraine, Belarus or any other country you have official map for. To set the service, go to "Settings" -> «On-line services» -> "Traffic Jams". When the service is active, the roads are colorized in different colors, which mean: red - traffic jam, pink - movement is complicated, yellow - movement is a bit complicated, green - favorable traffic(1).
Navitel.SMS
The special window will appear on the screen when you receive the Navitel.SMSI2]. Select "Hide" to hide it or "Accept" to see options.
Note:
For more detailed information regarding the functionality of Navitel 5.0 software, please, refer to the complete user manual on CD, or to www.prestigio.com.
Take the steps described in the tables below to solve simple problems before contacting customer service centers.

NOTE:
Immediately turn off the device and disconnect the power adapter if the device is not working properly. Never try to repair the unit without authorized personnel for it may damage the unit.
PROBLEM
Users cannot turn on the unit.
There is no sound.
There is no picture.
The unit cannot receive satellite signals or cannot orient.
POSSIBLE CAUSE
The adaptor is not connected well.
The built-in rechargeable battery is weak.
The volume may be turned down or mute.
The brightness may be turned down.
The unit work may be obstructed by buildings or metal constructions.
POSSIBLE SOLUTION
Connect the adaptor correctly.
Use the adaptor to supply power or charge the battery.
Turn up the volume or turn on the sound output.
Adjust the brightness of the LCD.
Make sure to use the unit out of room; if in the vehicle, you can use the external GPS antenna to solve this problem.
Troubleshooting
PROBLEM
Irregularity or instability in signal receiving.
POSSIBLE CAUSE
| The built-in rechargeable battery is weak. | Use the adaptor to supply power or charge the battery. |
| The unit may be obstructed by material, such as heat insulation paper. | Remove the material. |
PC Connection
To establish connection with PC for data access and synchronization, please execute setup file included in the Driver/Documentation CD or download the file from Microsoft website to install:
Microsoft Active Sync® software for operating system Microsoft XP or earlier versions
(http://www.microsoft.com/windowsmobile/en-us/downloads/microsoft/activesync-download.mspx)
and/or
Microsoft Mobile Device Center® software for operating system Microsoft Vista
(http://www.microsoft.com/windowsmobile/en-us/downloads/microsoft/device-center-download.mspx).
Please refer to the Microsoft website for more detailed instructions.


1 2 3
![Northwest Street Northwest Street [ ] [ ] [ ]](/content/2026/05/995271/images/242a6782abb9f48602ba4aec75350fb32acbc3a24787d111aee762a7ca54df6b.jpg)


Adjust the brightness of the LCD.
- Important safety instructions
- Caution
- Risk of electric shock do not open
- Warning
- Prestigio geovision 4466/5466/5466BTFM—Accessories list
- Prestigio geovision 4466/5466/5466BTFM
- Front and side view
- Lcd touch screen
- Battery status indicator
- Earphone jack
- Microsd slot
- Mini usb port
- Microphone
- Rear and top view
- Device connections
- Inserting microsd card
- Note
- Connecting to external usb device (charging)
- Connecting to car charger
- Cautions on battery charging
- About rechargeable battery
- Working conditions and precautions for the rechargeable battery
- Getting started
- Device settings
- Bluetooth function
- (Geovision 5466BTFM)
- Program interface
- Autorouting
- Autorouting using search
- Manual route creation
- Additional features
- Navitel. traffic
- Navitel.sms
- Problem
- Possible cause
- Possible solution
- Troubleshooting
- Pc connection
- Microsoft active sync® software for operating system microsoft xp or earlier versions
- Microsoft mobile device center® software for operating system microsoft vista
Brand : PRESTIGIO
Model : GeoVision 5466 Navitel
Category : Gps