
ARMDUALPS - Flat Screen Mount StarTech.com - Free user manual and instructions
Find the device manual for free ARMDUALPS StarTech.com in PDF.


| Product Type | Desk-Mount Dual Monitor Arm |
| Brand | StarTech.com |
| Model | ARMDUALPS |
| Color | Silver |
| Maximum Screen Size | 30 in (762 mm) |
| Maximum Weight Capacity (total) | 44.09 lb (20 kg) |
| VESA Mounting Hole Pattern | 75x75 mm, 100x100 mm |
| Tilt Range | +90° to -15° |
| Swivel Range | 360° |
| Rotate Range | 360° |
| Lift Range | 6.3 in (160 mm) |
| Mounting Options | C-Clamp, Grommet Mount |
| Cable Management | Integrated cable-routing system with clips |
| Warranty | 10 years |
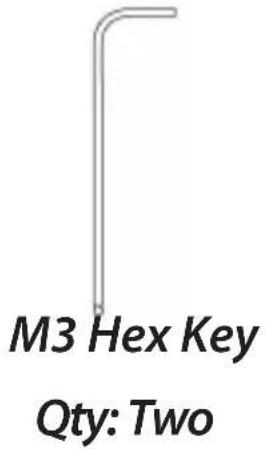
| Package Contents | 2 VESA Monitor Mounts, 4 Swivel Arms, 1 Monitor Shoulder, 1 Support Pole with C-Clamp, 1 EVA Cushion, 8 Thumb Screws, 2 M3 Hex Keys |
| Number of Monitors Supported | 2 |
Frequently Asked Questions - ARMDUALPS StarTech.com
User questions about ARMDUALPS StarTech.com
0 question about this device. Answer the ones you know or ask your own.
Ask a new question about this device
Download the instructions for your Flat Screen Mount in PDF format for free! Find your manual ARMDUALPS - StarTech.com and take your electronic device back in hand. On this page are published all the documents necessary for the use of your device. ARMDUALPS by StarTech.com.
USER MANUAL ARMDUALPS StarTech.com
Desk-Mount Dual Monitor Arm | Full Motion | Silver
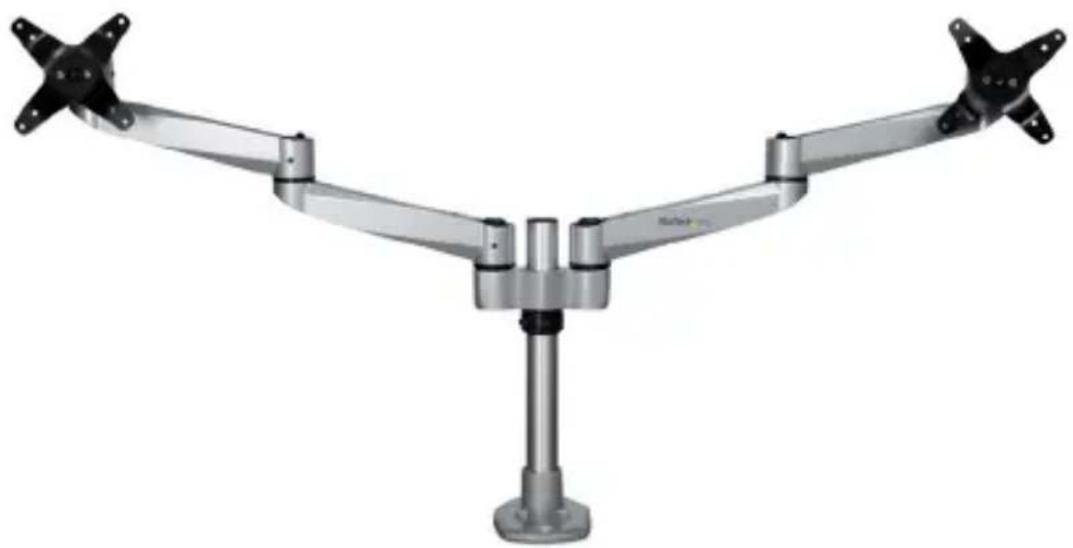
natural_image
Mechanical arm with two articulated arms and a central vertical support (no text or symbols visible)Actual product may vary from photos
User Manual
SKU#: ARMDUALPS
For the latest information and specifications visit
www.startech.com/ARMDUALPS
Compliance Statements
Use of Trademarks, Registered Trademarks, and other Protected Names and Symbols
This manual may make reference to trademarks, registered trademarks, and other protected names and/or symbols of third-party companies not related in any way to StarTech.com. Where they occur these references are for illustrative purposes only and do not represent an endorsement of a product or service by StarTech.com, or an endorsement of the product(s) to which this manual applies by the third-party company in question. Regardless of any direct acknowledgement elsewhere in the body of this document, StarTech.com hereby acknowledges that all trademarks, registered trademarks, service marks, and other protected names and/or symbols contained in this manual and related documents are the property of their respective holders.
Warning Statements
• Make sure that you assemble this product according to the instructions.
- Do not exceed the weight capacity of this product. Overloading this product might result in injury or property damage. This product can support the following weight: 44.09 lb. (20 kg).
- This product is intended for indoor use only and should not be used outdoors.
Varningsmeddelanden
To view manuals, videos, drivers, downloads, technical drawings, and more visit www.startech.com/support
Mensagens de aviso
To view manuals, videos, drivers, downloads, technical drawings, and more visit www.startech.com/support
Safety Statements
Safety Measures
- Cables (including power and charging cables) should be placed and routed to avoid creating electric, tripping or safety hazards.
Mesures de sécurité
Compliance Statements....1
Warning Statements....2
Safety Statements....4
Product Diagram....6
Product Dimensions ....7
Product Dimension......8
Product Information 9
Specifications....9
Package Contents .... 10
Installation 12
Using the Grommet Mount....12
Using the C-Clamp....14
Attaching the Monitor Mount......18
Attaching a Monitor Using the VESA Mount....21
Attaching the Monitor Mount 22
Removing the Monitor Mount 23
Adjusting the Monitor Tilt 24
Routing the Cables....24
To view manuals, videos, drivers, downloads, technical drawings, and more visit www.startech.com/support
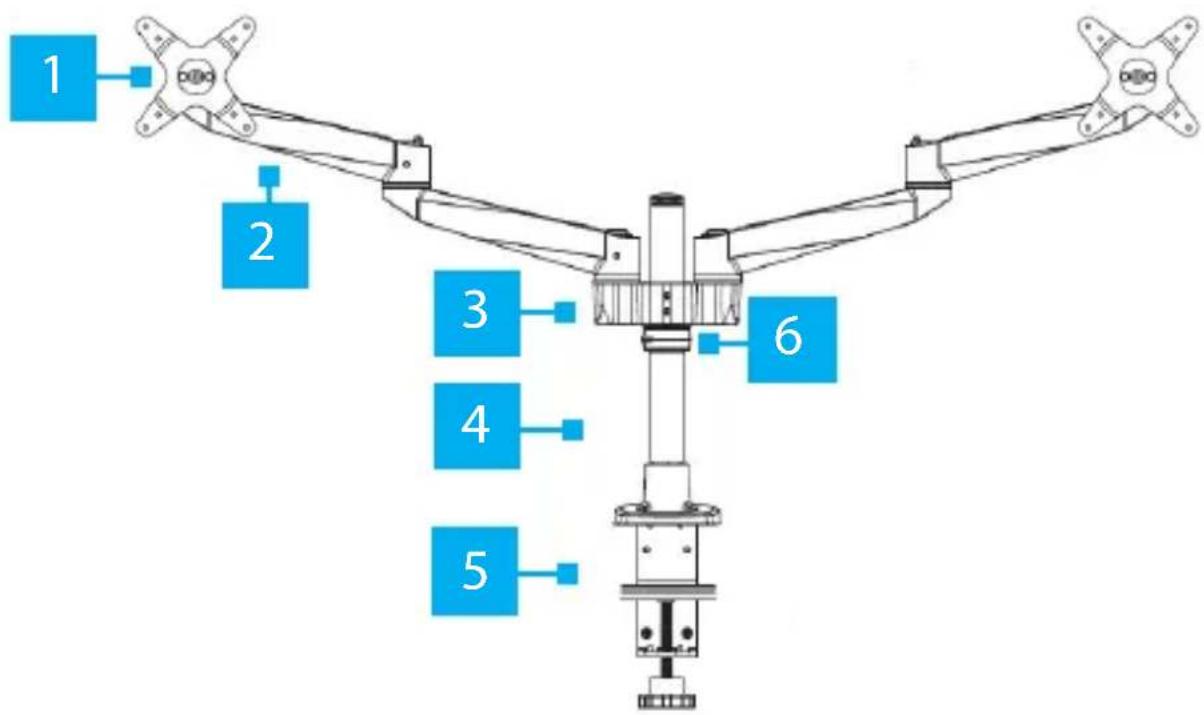
Product Diagram
flowchart
graph TD
    A["1"] --> B["2"]
    B --> C["3"]
    C --> D["4"]
    D --> E["5"]
    E --> F["6"]
| 1 Monitor Mount (x 2) Support Pole | ||
| 2 Swivel Arm (x 4) C-Clamp | ||
| 3 Monitor Shoulder Cable-Management Clip | Clip | |
To view manuals, videos, drivers, downloads, technical drawings, and more visit www.startech.com/support
Product Dimensions
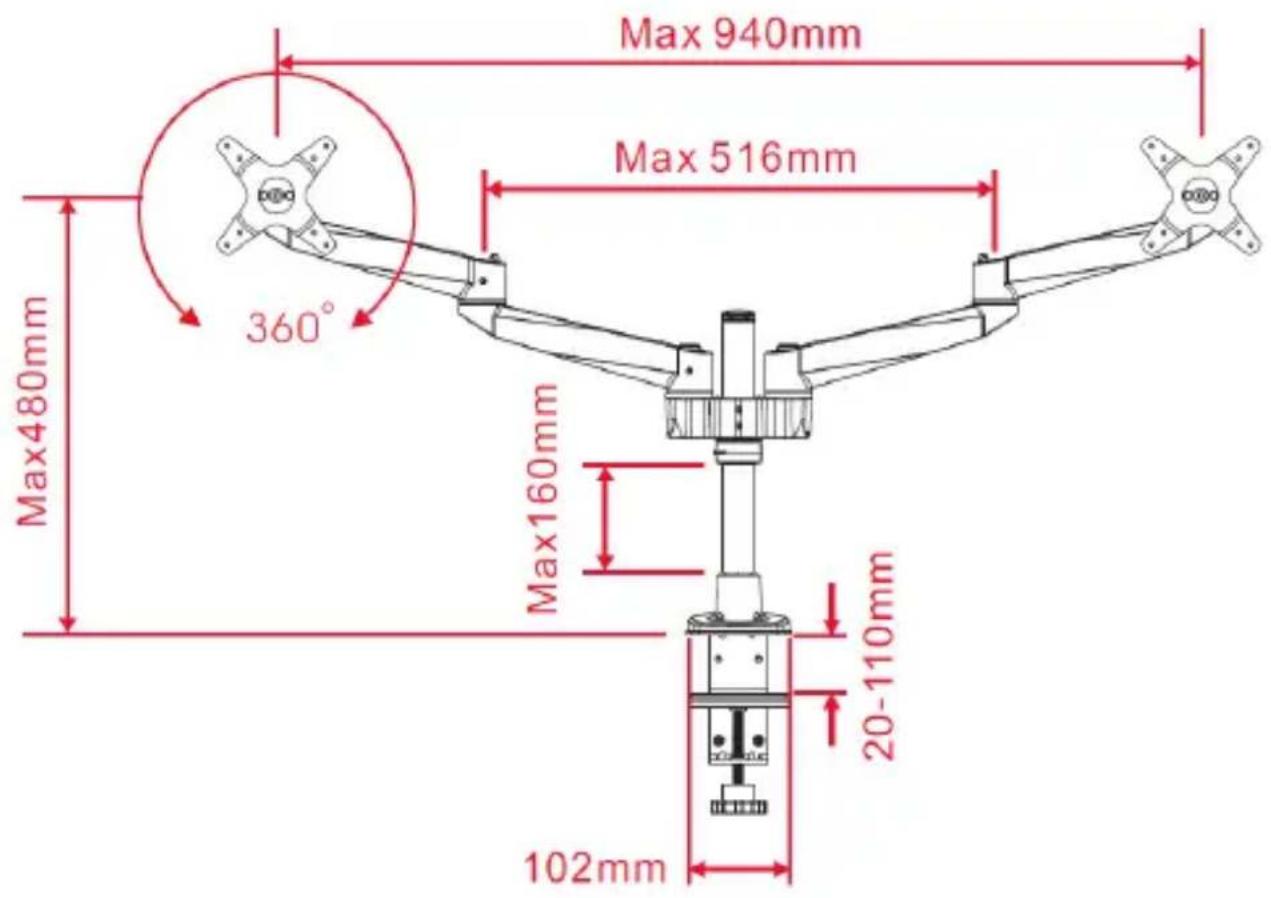
To view manuals, videos, drivers, downloads, technical drawings, and more visit www.startech.com/support
Product Dimension
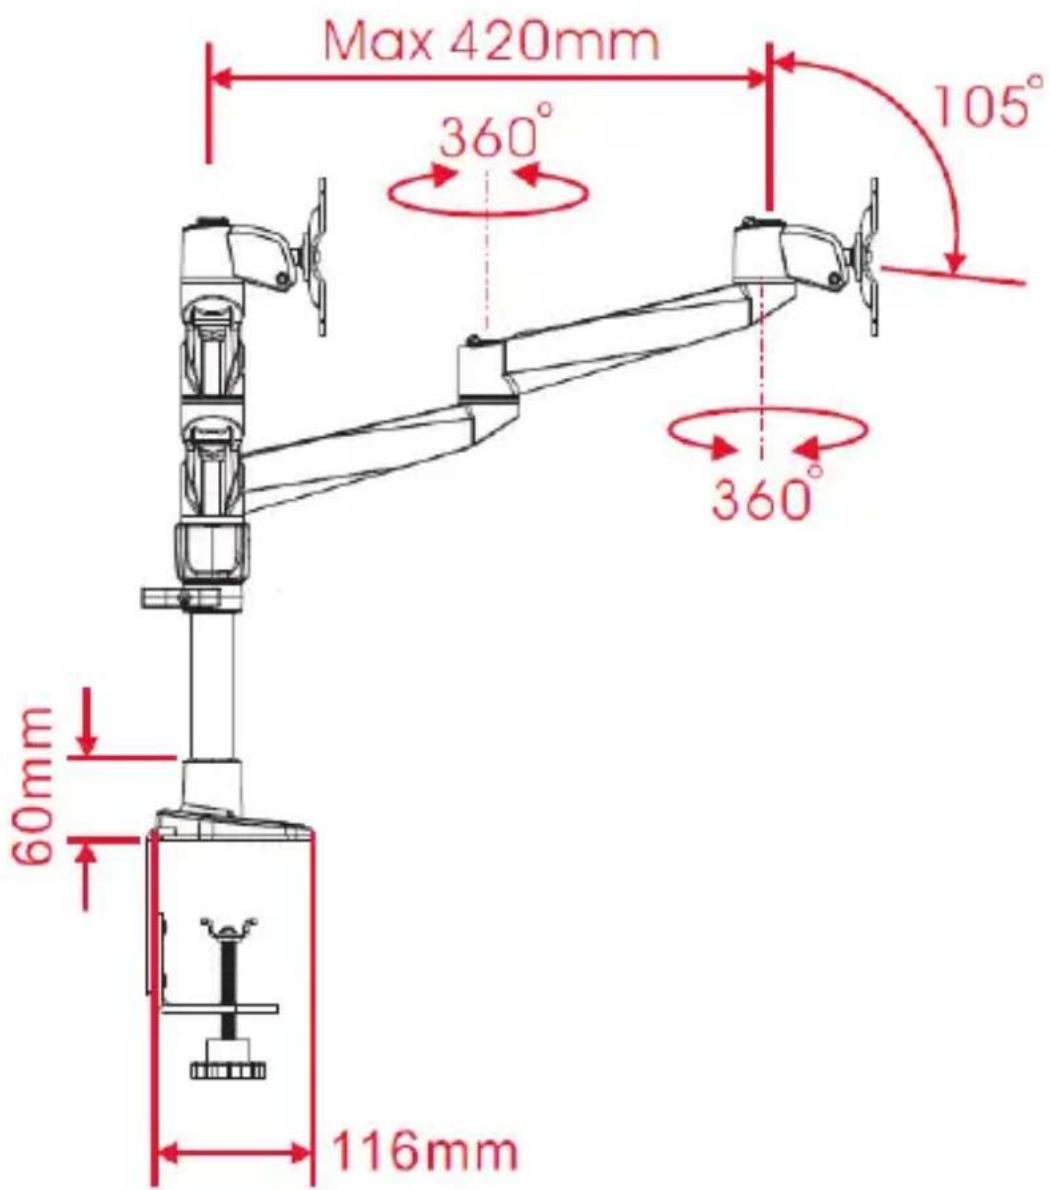
To view manuals, videos, drivers, downloads, technical drawings, and more visit www.startech.com/support
Product Information
Specifications
| Type of measurement Measurement | |
| VESA mounting hole pattern 75x75 | 100x100 |
| Tilt +90° to -15° | |
| Screen size | Maximum 30 in. (762 mm) |
| Rotate 360° | |
| Swivel 360° | |
| Weight/Load Capacity 44.09 lb. (20 kg) | |
| Lift 6.3 in. (160 mm) | |
To view manuals, videos, drivers, downloads, technical drawings, and more visit www.startech.com/support
Package Contents
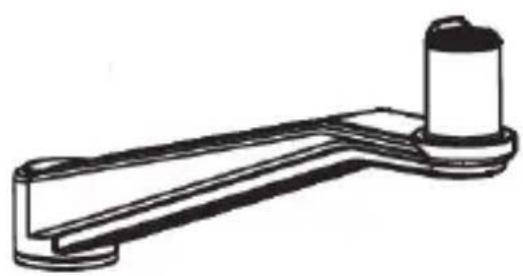
natural_image
Line drawing of a mechanical lever or support structure with a cylindrical component on top (no text or symbols)Swivel Arms
Qty: Four
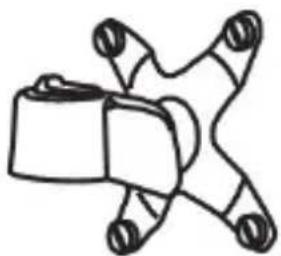
natural_image
Simple line drawing of a mechanical or electrical component with no text or symbolsVESA Monitor Mounts
Qty: Two
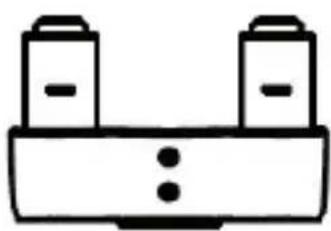
natural_image
Simple line drawing of a two-cylinder battery with no text or symbolsMonitor Shoulder
Qty: One
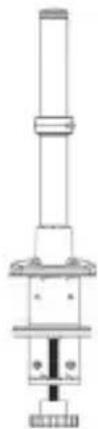
natural_image
Technical line drawing of a mechanical assembly with no visible text or symbolsSupport Pole w/ C-Clamp
Qty: One
To view manuals, videos, drivers, downloads, technical drawings, and more visit www.startech.com/support
 | 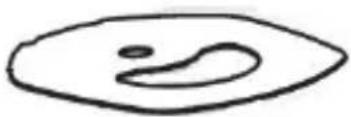 EVA CushionQty: One EVA CushionQty: One |
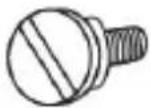 Thumb ScrewsQty: Eight Thumb ScrewsQty: Eight |
To view manuals, videos, drivers, downloads, technical drawings, and more visit www.startech.com/support
Installation
Using the Grommet Mount
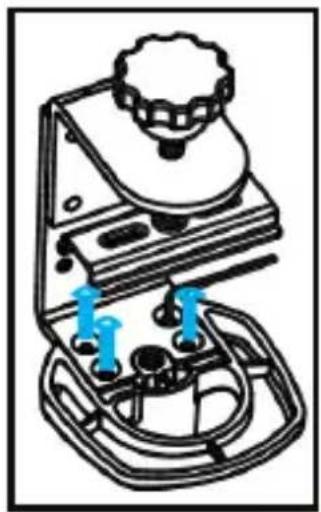
- Turn the Desk Mount over so that the Support Pole faces downwards. Use the M3 Hex Keys to remove the four Hex Screws that are holding the base of the Support Pole to the C-Clamp.
natural_image
Diagram of a mechanical device with blue arrows indicating motion or force direction (no text or symbols)Removing the Four Hex Screws
-
Use a Phillips Screwdriver (not included) to remove the Screw from the Plate on the C-Clamp.
-
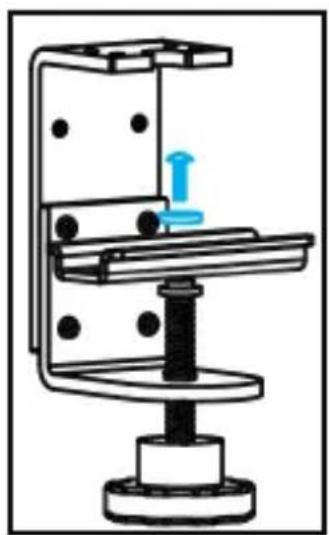
Remove the Plate, Two Washers, and the Knob from the bottom of the C-Clamp.
To view manuals, videos, drivers, downloads, technical drawings, and more visit www.startech.com/support
natural_image
Mechanical assembly diagram showing a clamping mechanism with no visible text or symbolsRemoving the Plate from the C-Clamp
-
Remove the backing from the EVA Cushion and attach it to the bottom of the Support Pole. Make sure that you line up the hole on the Support Pole with the corresponding hole on the EVA Cushion.
-
Position the Support Pole over the Grommet Hole.
-
Slide the Plate (removed in step 3) through the Threaded Rod on the Knob.
-
Place the Knob through the Grommet Hole in the desk or table and into the Support Pole.
-
Turn the Knob clockwise to tighten it.
To view manuals, videos, drivers, downloads, technical drawings, and more visit www.startech.com/support
Using the C-Clamp
By default, the Desk Mount comes with the C-Clamp pre-assembled. If you assembled the Grommet mount and want to switch back to a C-Clamp.
Skip to step 5 if you do not have to reassemble the C-Clamp.
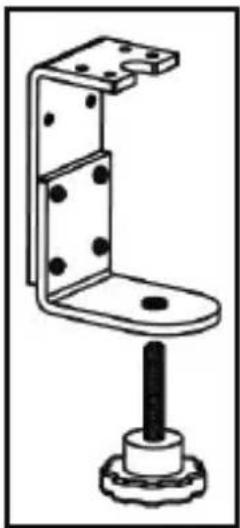
- Insert the Knob through the hole in the C-Clamp.
natural_image
Technical line drawing of a mechanical clamp or bracket with mounting base (no text or symbols)Attaching the Knob to the C-Clamp
-
Place a Washer onto the Knob.
-
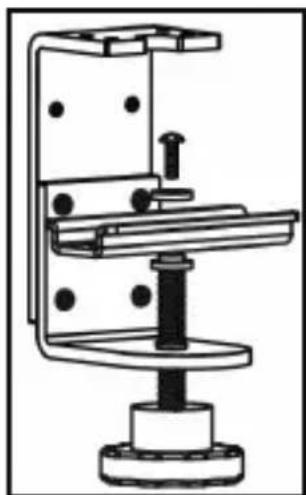
Place a Phillips Screw through a Round Washer, Plate, and into the Washer on the Knob.
To view manuals, videos, drivers, downloads, technical drawings, and more visit www.startech.com/support
natural_image
Mechanical assembly diagram showing a clamping mechanism with no visible text or symbolsAssembling the C-Clamp
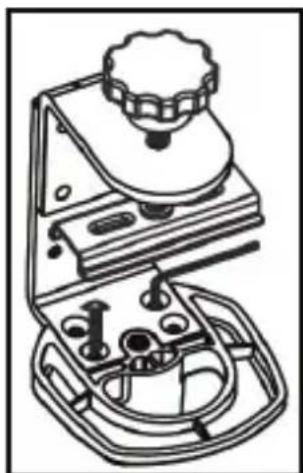
- Turn the Desk Mount over and use one of the M3 Hex Keys to insert four Hex Screws through the C-Clamp and into the base of the Mount.
natural_image
Line drawing of a vintage scientific instrument with a circular top and base (no text or symbols)Attaching the Hex Screws to the C-Clamp
-
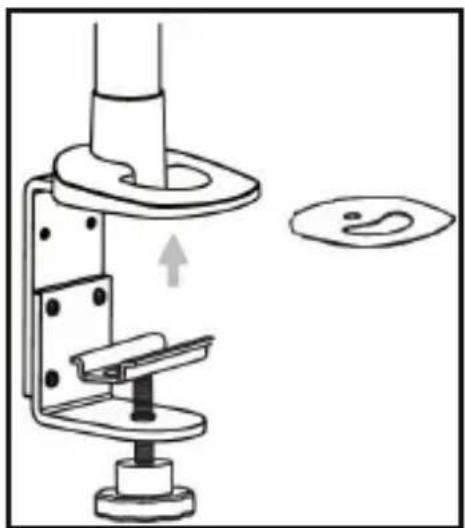
Remove the backing from the EVA Cushion.
-
Align the adhesive side of the EVA Cushion with the bottom of the Support Pole.
To view manuals, videos, drivers, downloads, technical drawings, and more visit www.startech.com/support
natural_image
Mechanical assembly diagram showing a clamp mechanism with a valve and a separate circular component (no text or symbols)Installing the EVA Cushion
-
While applying pressure fix the EVA Cushion to the bottom of the Support Pole.
-
Using your hand, tighten the Knob until the C-Clamp is pressed tightly against the mounting surface.
To view manuals, videos, drivers, downloads, technical drawings, and more visit www.startech.com/support
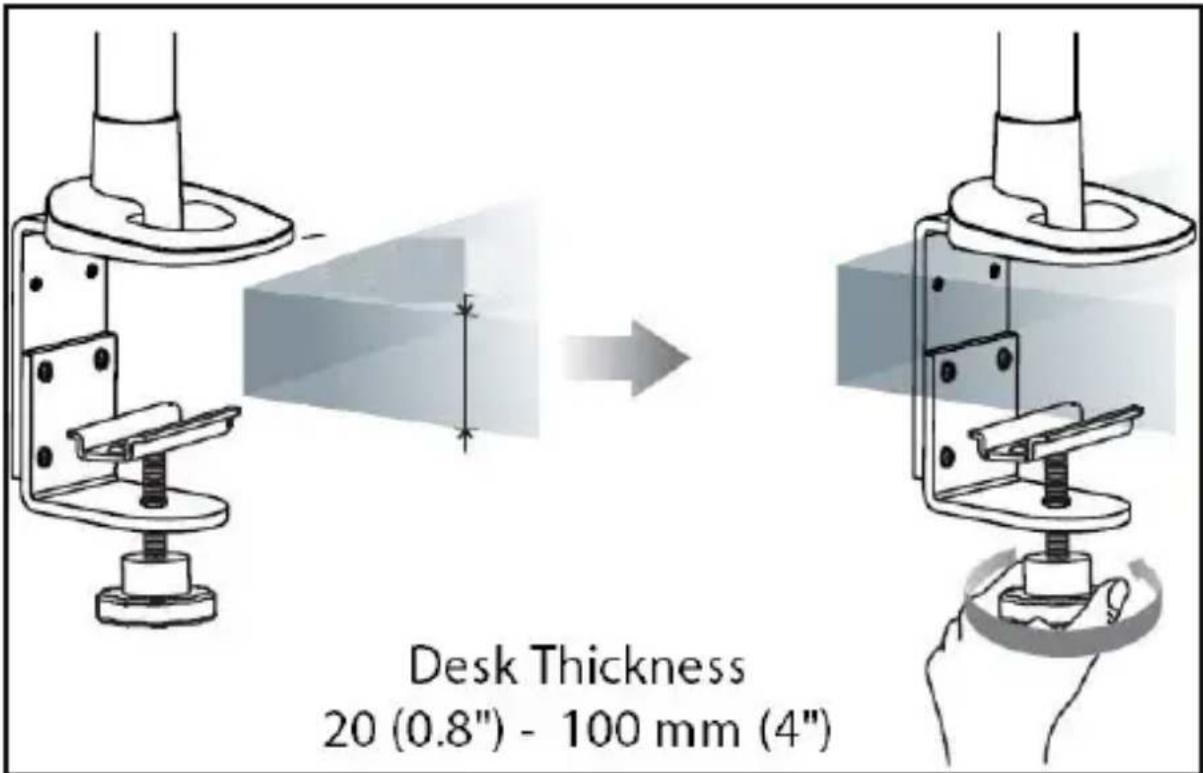
Securing the C-Clamp to the Mounting Surface
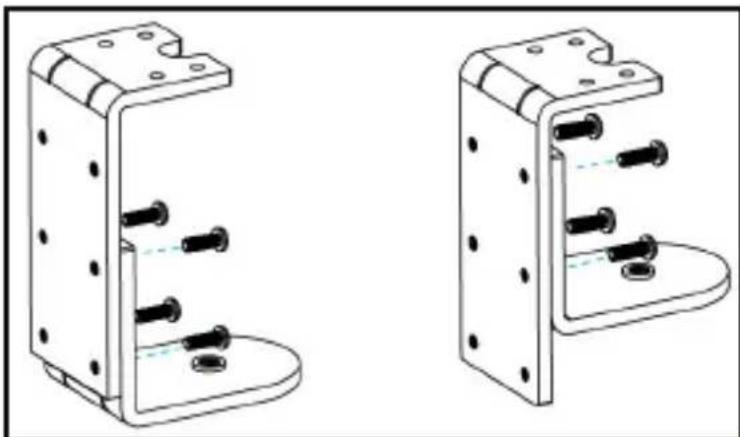
Note: You can adjust the size of the C-Clamp by removing the two screws holding the upper and lower portions of the clamp together and re-installing the screws into the lower two screw holes.
natural_image
Technical line drawing of two mechanical bracket components with mounting holes and bolted joints (no text or symbols)Adjusting the C-Clamp
To view manuals, videos, drivers, downloads, technical drawings, and more visit www.startech.com/support
Attaching the Monitor Mount
Once the Desk Mount has been mounted to the mounting surface either by using the C-Clamp or Grommet.
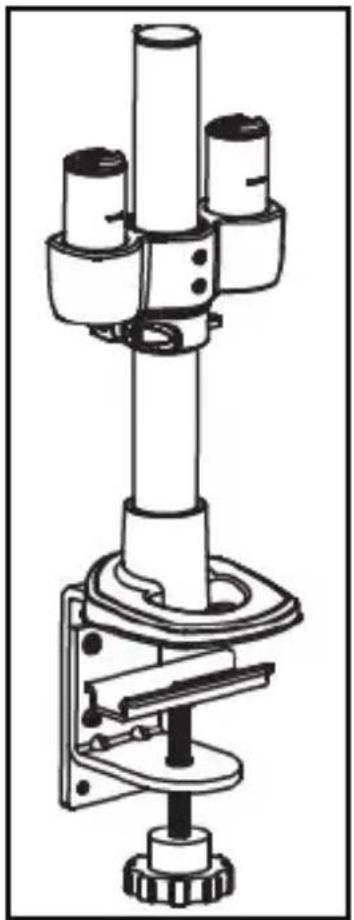
- Slide the Monitor Shoulder onto the Support Pole, so that it is resting on the Cable-Management Clip.
natural_image
Technical line drawing of a mechanical device with cylindrical and rectangular components mounted on a base (no text or symbols)Installing the Swivel Arm
- Tighten the Mounting Shoulder using the Adjustment Screw located on the side of the Monitor Shoulder, using the M3 Hex Key. Be careful not to over-tighten the Monitor Shoulder.
To view manuals, videos, drivers, downloads, technical drawings, and more visit www.startech.com/support
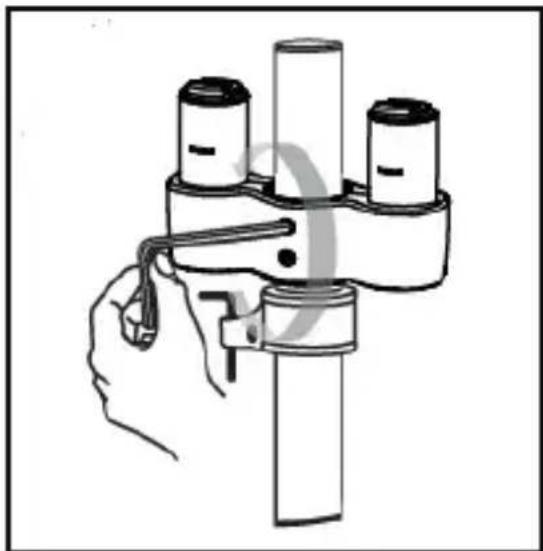
natural_image
Hand holding a tool interacting with a mechanical clamp or bracket (no text or symbols visible)Tightening the Monitor Shoulder
- Align the Mounting Hole on Swivel Arm 1 with the Mounting Peg on the top of the Monitor Shoulder.
- Slide the Mounting Hole on Swivel Arm 1 over the Mounting Peg until it clicks into place.
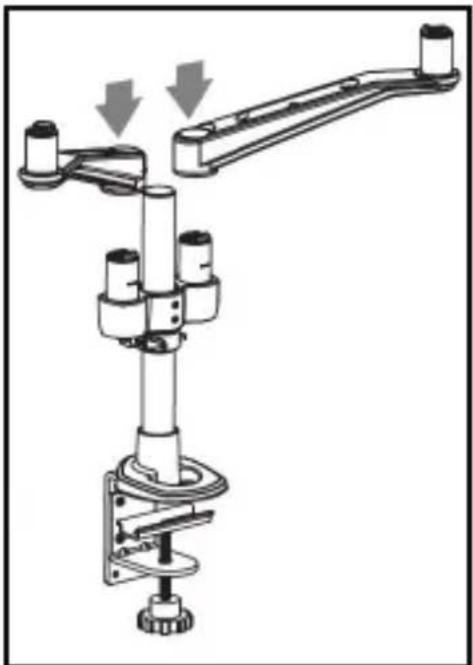
natural_image
Mechanical assembly diagram showing a articulated arm with three cylindrical components and directional arrows indicating motion (no text or labels)Sliding the Swivel Arm into Place
To view manuals, videos, drivers, downloads, technical drawings, and more visit www.startech.com/support
-
Repeat steps 8 - 9 to install Swivel Arm 2.
-
Align the Mounting Hole on Swivel Arm 3 with the Mounting Peg on the top of Swivel Arm 1.
-
Slide the Mounting Hole on Swivel Arm 3 over the Mounting Peg until it clicks into place.
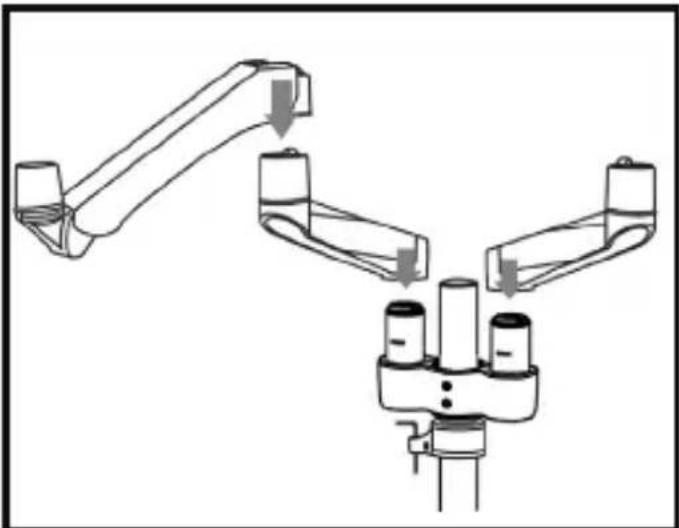
natural_image
Diagram of a mechanical or industrial device with three arms and a central shaft, showing directional arrows (no text or symbols)Attaching the Swivel Arm
- Repeat steps 11 - 12 to install Swivel Arm 4.
Attaching a Monitor Using the VESA Mount
- Align the Mounting Holes (x 4) on the Monitor Mount with the mounting holes on the back of the Monitor.
Note: When mounting the VESA mount the orientation of the Monitor is important.
- Insert the Thumb Screws through the Monitor Mount and into the back of the Monitor.
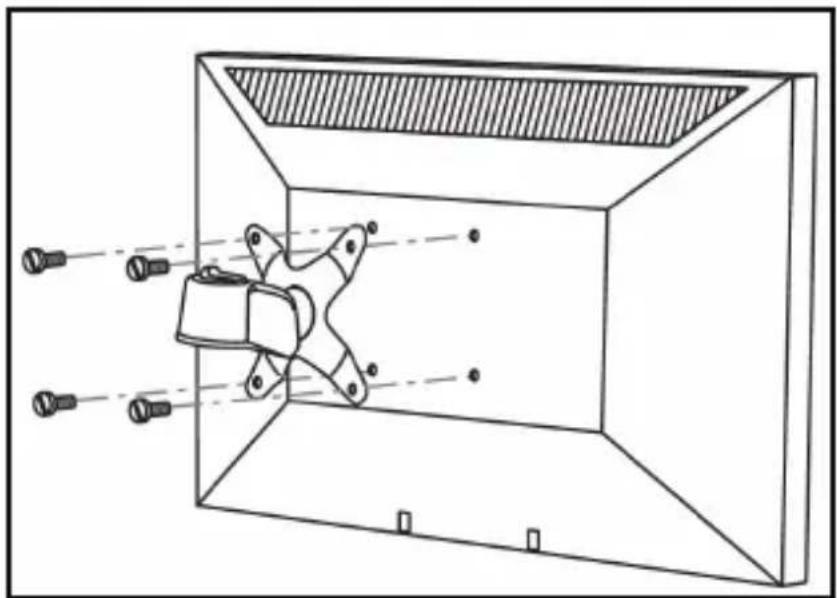
natural_image
Technical line drawing of a mechanical assembly inside a transparent enclosure, showing internal components and alignment lines (no text or symbols)Mounting the Monitor Using the VESA Mount
- Using your fingers, tighten the Thumb Screws.
Warning! Do not over-tighten the Thumb Screws. If you encounter resistance while you're tightening the Thumb Screws, stop tightening. Failure to do so could result in damage to the monitor.
To view manuals, videos, drivers, downloads, technical drawings, and more visit www.startech.com/support
Attaching the Monitor Mount
Notes: Attaching the Monitor Mount may require two people.
The Monitor Mount supports up to a maximum of 44.09 lb. (20 kg).
-
While supporting the weight of the Monitor, carefully align the Mounting Hole on the Monitor Mount with the Mounting Peg on the top Swivel Arm.
-
Slide the Mounting Hole on the Monitor Mount over the Mounting Peg until it clicks into place.
-
Using the Hex Keys, adjust the swivel tension of the Monitor Mount by loosening or tightening the Hex Screws located on the Monitor Mount next to the Mounting Hole.
-
Repeat Steps 1 - 3 to attached the second Monitor Mount.
Removing the Monitor Mount
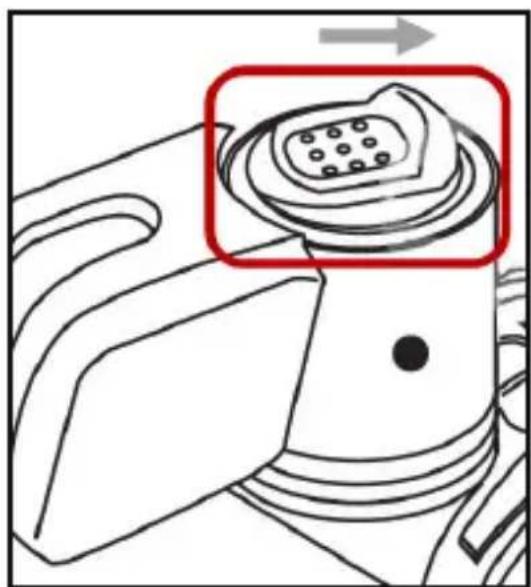
- Slide the Thumb Clip towards the Monitor Mount, disengaging the locking mechanism.
natural_image
Technical line drawing of a mechanical component with a highlighted section showing a grid-like structure (no text or symbols)Sliding the Thumb Clip towards the Monitor Mount
- While holding the Thumb Clip and the weight of the Monitor Mount, lift the Monitor Mount up, sliding the Mounting Peg out of the Mounting Hole.
To view manuals, videos, drivers, downloads, technical drawings, and more visit www.startech.com/support
Adjusting the Monitor Tilt
- While supporting the weight of the Monitor, use the Hex Key (included) to loosen or tighten the Hex Screw on the side of the Monitor Mount, until the tension can hold the weight of the Monitor but it is still adjustable.
Note: The screw cap located on the opposite side of the Hex Screw is not used for tilt adjustments.
Routing the Cables
The Desk Mount comes with a Cable-Management System that can be used to run the monitor cables down the mounting arms.
Note: Make sure that the cables are unplugged before you route them through the Cable-Management System.
- Thread the Cable through the hole in the Swivel Arm.
- Run the Cable through the Cable-Management Clip on the side of the Support Pole.
- Repeat steps 1 - 2 for any additional monitors.
To view manuals, videos, drivers, downloads, technical drawings, and more visit www.startech.com/support
Warranty Information
This product is backed by a ten-year warranty.
For further information on product warranty terms and conditions, please refer to www.startech.com/warranty.
Limitation of Liability
In no event shall the liability of StarTech.com Ltd. and StarTech.com USA LLP (or their officers, directors, employees or agents) for any damages (whether direct or indirect, special, punitive, incidental, consequential, or otherwise), loss of profits, loss of business, or any pecuniary loss, arising out of or related to the use of the product exceed the actual price paid for the product.
Some states do not allow the exclusion or limitation of incidental or consequential damages. If such laws apply, the limitations or exclusions contained in this statement may not apply to you.
Hard-to-find made easy. At StarTech.com, that isn't a slogan. It's a promise.
StarTech.com is your one-stop source for every connectivity part you need. From the latest technology to legacy products — and all the parts that bridge the old and new — we can help you find the parts that connect your solutions.
We make it easy to locate the parts, and we quickly deliver them wherever they need to go. Just talk to one of our tech advisors or visit our website. You'll be connected to the products you need in no time.
Visit www.startech.com for complete information on all StarTech.com products and to access exclusive resources and time-saving tools.
StarTech.com is an ISO 9001 Registered manufacturer of connectivity and technology parts. StarTech.com was founded in 1985 and has operations in the United States, Canada, the United Kingdom and Taiwan servicing a worldwide market.
Reviews
Share your experiences using StarTech.com products, including product applications and setup, what you love about the products, and areas for improvement.
StarTech.com Ltd.
45 Artisans Cres.
London, Ontario
N5V 5E9
Canada
StarTech.com LLP
2500 Creekside Pkwy.
Lockbourne, Ohio
43137
U.S.A.
StarTech.com Ltd.
Unit B, Pinnacle
15 Gowerton Rd., Brackmills
Northampton
NN4 7BW
United Kingdom
FR: startech.com/fr
DE: startech.com/de
ES: startech.com/es
NL: startech.com/nl
IT: startech.com/it
JP: startech.com/jp
- Desk-Mount Dual Monitor Arm | Full Motion | Silver
- Compliance Statements
- Use of Trademarks, Registered Trademarks, and other Protected Names and Symbols
- Warning Statements
- Varningsmeddelanden
- Mensagens de aviso
- Safety Statements
- Safety Measures
- Mesures de sécurité
- Product Diagram
- Product Dimensions
- Product Dimension
- Product Information
- Specifications
- Package Contents
- Installation
- Using the Grommet Mount
- Removing the Plate from the C-Clamp
- Using the C-Clamp
- Attaching the Knob to the C-Clamp
- Securing the C-Clamp to the Mounting Surface
- Attaching the Monitor Mount
- Attaching a Monitor Using the VESA Mount
- Removing the Monitor Mount
- Adjusting the Monitor Tilt
- Routing the Cables
- Warranty Information
- Limitation of Liability
- Hard-to-find made easy. At StarTech.com, that isn't a slogan. It's a promise.
- Reviews
- StarTech.com Ltd.
- StarTech.com LLP
Brand : StarTech.com
Model : ARMDUALPS
Category : Flat Screen Mount