
MixWizard3 12M - Blender ALLEN & HEATH - Free user manual and instructions
Find the device manual for free MixWizard3 12M ALLEN & HEATH in PDF.


| Product Type | Analog Audio Mixer |
| Brand | Allen & Heath |
| Model | MixWizard3 12M |
| Number of Channels | 12 mono inputs + 2 stereo returns |
| Input Types | XLR (mic/line) on channels 1-12, 1/4" TRS on channels 1-12, stereo RCA inputs |
| EQ per Channel | 3-band (High, Mid, Low) with sweepable mid |
| Outputs | Main L/R (XLR), Monitor (1/4"), headphones (1/4"), 2 aux sends (1/4") |
| Phantom Power | +48V globally switchable |
| Built-in Effects | No (external FX via aux sends) |
| Dimensions (W x D x H) | 12.6 x 13.8 x 2.75 inches (32 x 35 x 7 cm) |
| Weight | 8.8 lbs (4 kg) |
| Power Supply | Internal, 100-240V AC, 50/60 Hz, 30W |
| Frequency Response | 20 Hz - 20 kHz ±0.5 dB |
| Total Harmonic Distortion | <0.005% @ 1 kHz |
| Signal-to-Noise Ratio | >110 dB |
| Main Functions | Mixing, routing, level control, EQ, auxiliary sends, monitoring |
| Cleaning and Maintenance | Use a soft dry cloth; avoid liquids; clean faders with contact cleaner if needed |
| Safety | Do not expose to moisture; ensure proper ventilation; use provided power cord |
| Spare Parts and Repairability | Faders, potentiometers, power supply modules available from authorized service centers |
| General Information | Compact analog mixer for live sound and studio; built-in 12V lamp socket |
Frequently Asked Questions - MixWizard3 12M ALLEN & HEATH
User questions about MixWizard3 12M ALLEN & HEATH
0 question about this device. Answer the ones you know or ask your own.
Ask a new question about this device
Download the instructions for your Blender in PDF format for free! Find your manual MixWizard3 12M - ALLEN & HEATH and take your electronic device back in hand. On this page are published all the documents necessary for the use of your device. MixWizard3 12M by ALLEN & HEATH.
USER MANUAL MixWizard3 12M ALLEN & HEATH
The console is supplied ready for free standing operation with its side trims fitted and connector pod positioned for rear access. If you are converting from rack to free standing then make sure the pod is correctly rotated and secured, and the side trims fitted as shown:
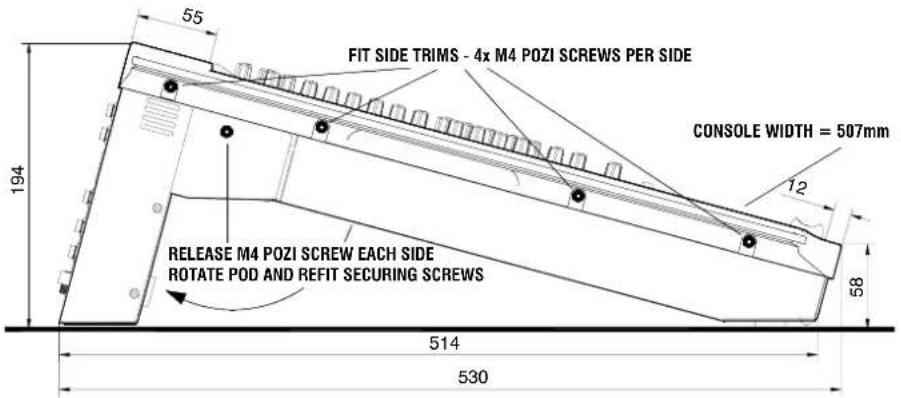
Weight
13kg (29 lbs)
19" Rack Mount
For rack mounting, remove the two side trims and rotate the pod into the connector position preferred. Allow enough space for the cables and connectors behind the console.
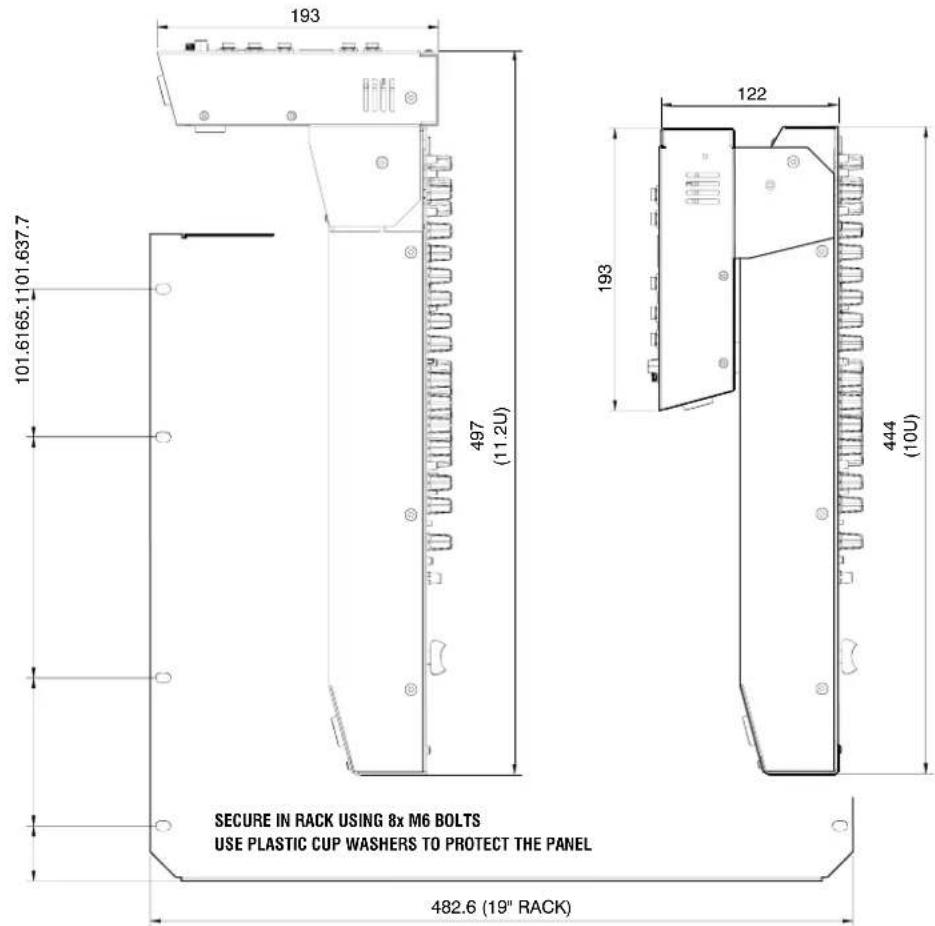

Do not transport the console with its connector pod securing screws removed. Do not attempt to remove the connector pod from the console. Do not obstruct the ventilation slots. Allow adequate space around the console for air flow. If the side trims are to be removed, do not refit their fixing screws to the unit. Retain and store these in case the trims need to be refitted in the future.
Brand : ALLEN & HEATH
Model : MixWizard3 12M
Category : Blender