
SFS 156 A1 - Tripod SILVERCREST - Free user manual and instructions
Find the device manual for free SFS 156 A1 SILVERCREST in PDF.


| Product Type | Photo/Video Tripod |
| Brand | SilverCrest |
| Model | SFS 156 A1 |
| Maximum Height | 156 cm |
| Minimum Height | 40 cm |
| Folded Height | 50 cm |
| Weight | 1.2 kg |
| Maximum Load | 3 kg |
| Material | Aluminum |
| Leg Sections | 3 sections |
| Lock Type | Quick-release collars |
| Integrated Head | Multidirectional Ball Head |
| Center Column | Sliding |
| Bubble Level | Yes |
| Camera Attachment | Universal 1/4" screw |
| Included Accessories | Carrying bag, Allen key |
| Recommended Use | Indoor and outdoor |
| Maintenance and Cleaning | Clean with a soft, dry cloth. Do not use harsh solvents. |
| Safety | Do not exceed the maximum load. Use on a stable surface. |
| Spare Parts and Repairability | Spare parts available from the manufacturer. Contact customer service for repairs. |
Frequently Asked Questions - SFS 156 A1 SILVERCREST
User questions about SFS 156 A1 SILVERCREST
0 question about this device. Answer the ones you know or ask your own.
Ask a new question about this device
Download the instructions for your Tripod in PDF format for free! Find your manual SFS 156 A1 - SILVERCREST and take your electronic device back in hand. On this page are published all the documents necessary for the use of your device. SFS 156 A1 by SILVERCREST.
USER MANUAL SFS 156 A1 SILVERCREST
CAMERA TRIPOD Operation and Safety Notes
FR BE
TRÉPIED POUR APPAREIL PHOTO
Operation and Safety Notes Page 18
FR/BE
natural_image
Illustration of a robotic device with hands operating it, showing mechanical components and a curved arrow indicating rotation (no text or symbols present)natural_image
Technical line drawing showing a mechanical assembly with a tool and a motor (no text or symbols)2. Go-Pro-Adapter
natural_image
Three-step diagram showing a camera body with adjustment arrows, no text or symbols presentnatural_image
Technical line drawing of a camera mount with no visible text or symbols4. Panoramaaufnahme
natural_image
Technical line drawing of a mechanical device with rotational arrow indicating motion (no text or symbols)5.Plattformplatte 14
natural_image
Technical line drawing of a camera setup with tripod and lens components (no text or symbols)6. Wasserwaage 15
natural_image
Technical line drawing of a mechanical device with directional arrows indicating movement (no text or symbols)natural_image
Mechanical diagram showing a hook being adjusted with a spring, no text or symbols presentnatural_image
Diagram of a mechanical device with two internal components and directional arrows indicating flow or movement (no text or symbols)9. Beine verlängern
natural_image
Simple line drawing of a device with a rectangular panel and a curved base, no text or symbols present.natural_image
Technical line drawing of two mechanical devices with lever arms, no text or symbols presentnatural_image
Line drawing of a hand using a tool to adjust or install a mechanical component (no text or symbols visible)12. Tragegriff
natural_image
Silhouette of a person disposing of trash into a bin (no text or symbols)Warnings and symbols used ...... Page 19
Introduction......Page 20
Intended use....Page 20
Scope of delivery ...... Page 20
Safety notes....Page 21
Description of parts....Page 23
Technical data ...... Page 24
Before use....Page 24
Operation Page 25
Storage when not in use ...... Page 29
Cleaning Page 29
Disposal Page 29
Warranty......Page 30
| Warnings and symbols usedThese instructions for use contain the following symbols and warnings: | |
 | DANGER! This symbol with the signal word “DANGER” indicates a hazard with a high level of risk which, if not avoided, will result in serious injury or death. |
 | WARNING! This symbol with the signal word “WARNING” indicates a hazard with a medium level of risk which, if not avoided, could result in serious injury. |
 | CAUTION! This symbol with the signal word “CAUTION” indicates a hazard with a low level of risk which, if not avoided, could result in minor or moderate injury. |
 | ATTENTION! This symbol with the signal word “ATTENTION” indicates a possible property damage. |
 | NOTE: This symbol with the signal word “NOTE” provides additional useful information. |
CAMERA TRIPOD SFS 156 A1
● Introduction
We congratulate you on the purchase of your new product. You have chosen a high quality product. The instructions for use are part of the product. They contain important information concerning safety, use and disposal. Before using the product, please familiarise yourself with all of the safety information and instructions for use. Only use the product as described and for the specified applications. If you pass the product on to anyone else, please ensure that you also pass on all the documentation with it.
Intendeduse
This CAMERA TRIPOD (hereinafter referred to as "product") serves to fasten camera or other devices by using the tripod.
This product is only suitable for private use in dry locations. This product is not intended for commercial use. Furthermore, this product may not be used in tropical climates. Any other use is considered improper. Any claims resulting from improper use or due to unauthorised modification of the product will be considered un-warranted. Any such use is at your own risk.
- Scope of delivery
1 Camera Tripod
1 Go-Pro adaptor
1 Carry bag
1 Instruction Manual
● Safety notes
Before using the product, please familiarize yourself with all of the safety instructions and instructions for use! When passing this product on to others, please also include all the documents!

WARNING! DANGER TO LIFE AND RISK OF ACCIDENT FOR INFANTS AND CHILDREN!

DANGER! Risk of suffocation!
- Never leave children unsupervised with the packaging material. The packaging material poses a suffocation hazard. Children frequently underestimate the dangers. The packaging material is not a toy.
- This product may be used by children age 14 years and up, as well as by persons with reduced physical, sensory or mental capacities or lacking experience and/or knowledge, so long as they are supervised or instructed in the safe use of the product and understand the associated risks.
- Do not allow children to play with the product. Cleaning and user maintenance should not be performed by children without supervision. The product is not a toy.

ATTENTION! RISK OF PROPERTY DAMAGE
- Check the product before every use!
- This product does not contain any parts which can be serviced by the user.
- Keep the product away from moisture, dripping and splash water!
- Do not place burning candles or other open fire on or next to the product.
-
Do not operate the product near heat sources, e.g. radiators or other devices emitting heat!
-
Do not throw the product into fire and do not expose to high temperatures.
- Ensure that the product is not subjected to a mechanical load.
- Do not put the product on sensitive surfaces of furniture, otherwise scratching may cause.

ATTENTION! Ensure that:
• no direct heat sources (e.g. heating can affect the product)
• the product is not exposed to bright artificial light
- any contact with splashed and dripping water and corrosive liquids is avoided and the product are not operated in the vicinity of water. In particular, the product should never be submerged in liquid; do not place any vessels filled with liquid, for example, vases or drinks, on or near the product
- no fire sources (e.g. burning candles) are placed on or near the product
• no foreign objects penetrate the device
- the product is never subjected to extreme temperature fluctuations as this could result in condensation. If the product were subjected to extreme temperature fluctuations, however, wait (approx. 2 hours) until the product have reached ambient temperature before use
- the product is never subjected to excessive shocks and vibrations
● Description of parts
Please refer to the fold out page.
1 Quick release plate
2 Vertical tilt lock screw thread
3 Handle
4 Elevator crank
5 Carry handle
6 Aluminum alloy leg
7 Leg brace locking collar
8 Weight hanging hook
9 Self-leveling rubber feet
10 Leg lock lever
11 Go-Pro adaptor
12 Center column lock screw thread
13 Pan locking screw
14 Platform plate
15 Bubble levels
● Technical data
Tripod thread dimension : 1/4"
Weight: 1.2 kg
Max. loading
(with tripod legs extended): 2.5 kg
Min. height: 60 cm
Max. height: 156 cm
Max. load for hanging hook: 1.5kg
Operating conditions: 5 °C to 45 °C
40 % to 85 % (rel. humidity)
Storage temperature: -20 °C to +60 °C

NOTE:
The specification and design may be changed without notification.
Before use

NOTE:
Before use, verify the package contents are complete and undamaged!
All parts have to be unpacked and the packaging material has to be removed completely.
Place the product on a firm, level and anti-slip surface for use.
Operation
natural_image
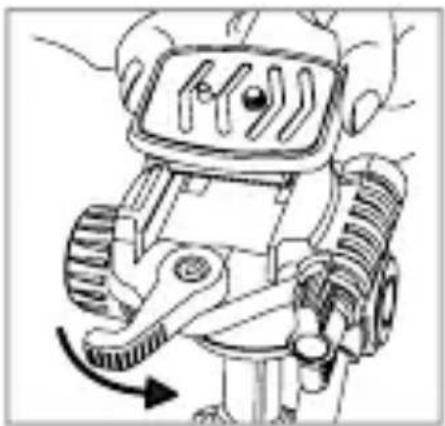
Illustration of a robotic device with gears and a handle, showing mechanical components and motion direction (no text or symbols)1. Quick release plate 1
Release the quick release locking lever and remove the quick release plate 1 by lifting upwards.
natural_image
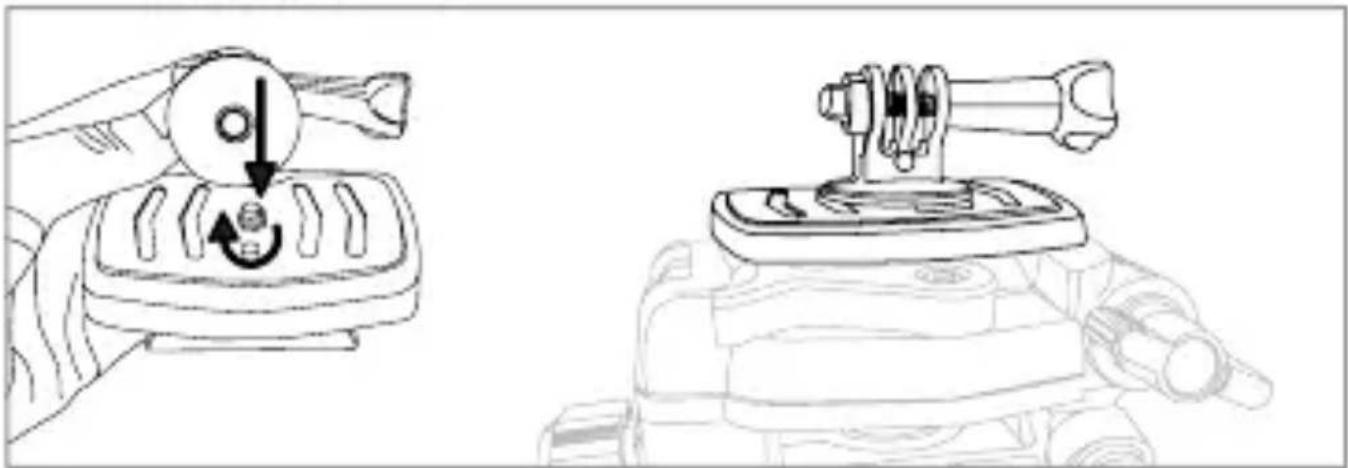
Technical line drawing showing a mechanical assembly with a knob and adjustment knob (no text or symbols)2. Go-Pro adaptor
Mount the Go-Pro adaptor 11 to the quick release plate 1 then tighten the screw thread.
natural_image
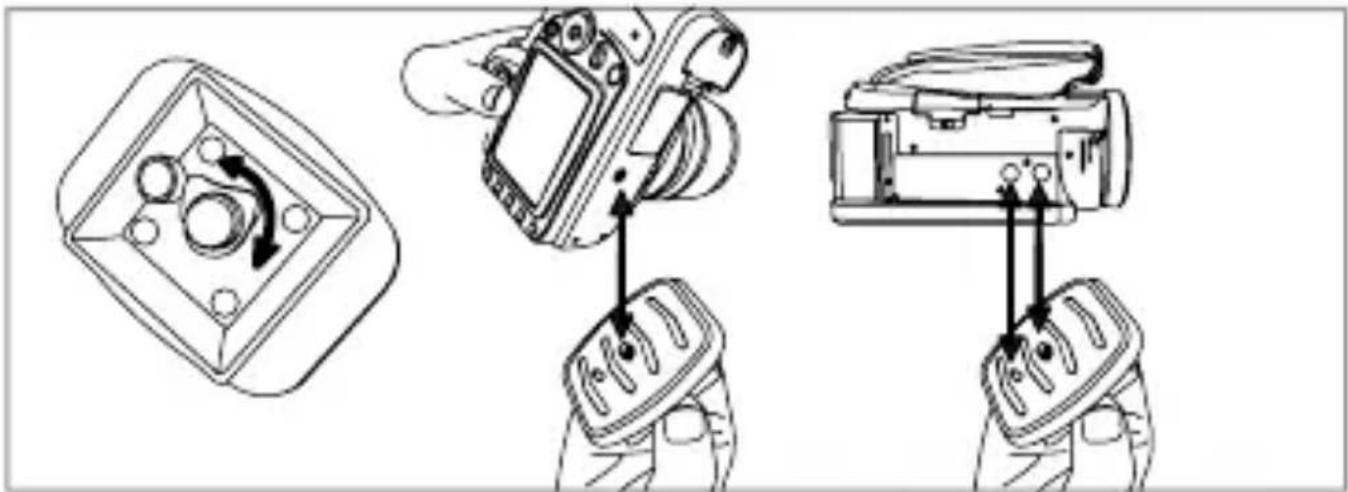
Technical line drawing showing three steps of a camera module being adjusted, with no visible text or symbols.3. Installing camera
Mount camera or video camera to the quick release plate 1 then thread clockwise to tighten. Thread counterclockwise to loosen and remove your camera or video cam.
natural_image
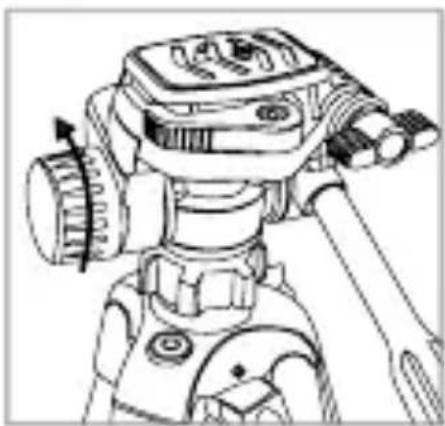
Technical line drawing of a camera setup with no visible text or symbols4. Panorama shot
Rotate the pan locking screw 13 counter-clockwise and move the handle 3 for a smooth 360^ panorama shot.
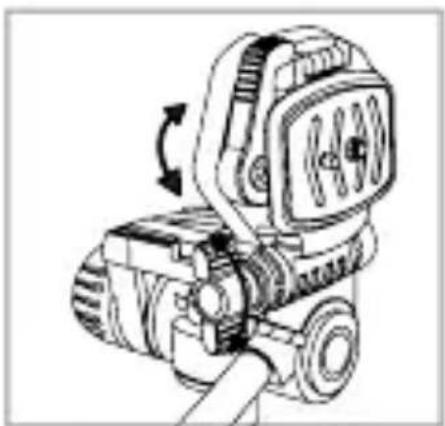
natural_image
Technical line drawing of a mechanical device with rotational arrow indicating motion (no text or symbols)5. Platform plate 14
Loosen the vertical tilt lock screw thread 2 to reach the multi-angle of the platform.
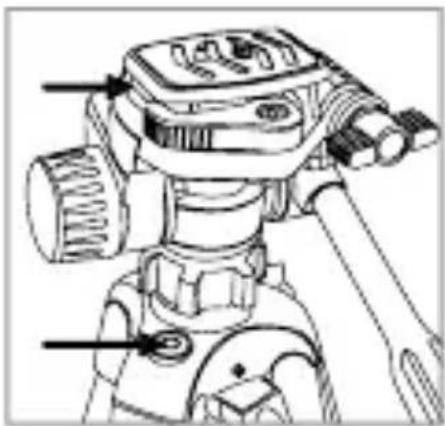
natural_image
Technical line drawing of a camera setup with tripod and lens components (no text or symbols)6. Bubble levels 15
To adjust the tripod for level photo shooting.
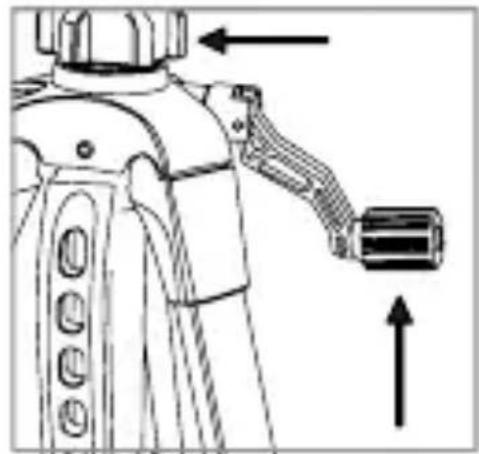
natural_image
Technical line drawing of a mechanical device with directional arrows indicating movement (no text or symbols)7. Elevator crank and center column lock screw thread
Turn the elevator crank 4 to adjust the center column height. Retighten the center column lock screw thread 12 to secure.
natural_image
Mechanical diagram showing a hook and lever assembly with no visible text or symbols8. Leg brace locking collar and hanging hook
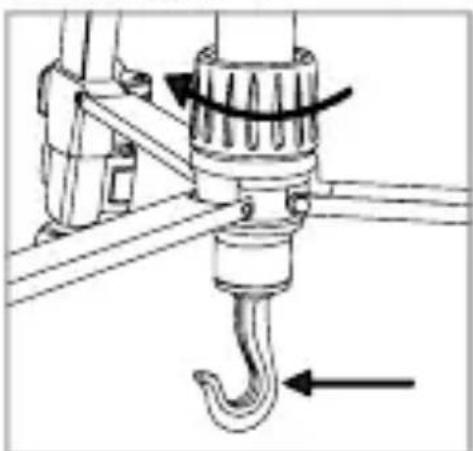
Twist the leg brace locking collar 7 to lock the leg braces. Add extra weight to the weight hanging hook 8 for added stability.
natural_image
Diagram of a mechanical device with three internal components and directional arrows indicating flow or movement (no text or symbols)9. Extending the legs
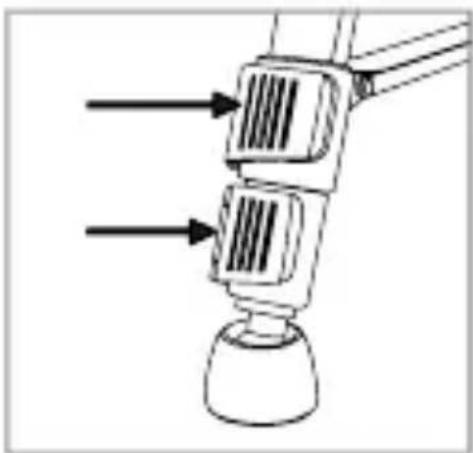
Flip open the leg lock lever 10 and gently pull on the aluminum alloy leg 6 segment to the desired length. Close the leg lock lever 10 to secure.
natural_image
Simple line drawing of a device with a screen and a base, no text or symbols present10. Self-leveling rubber feet 9
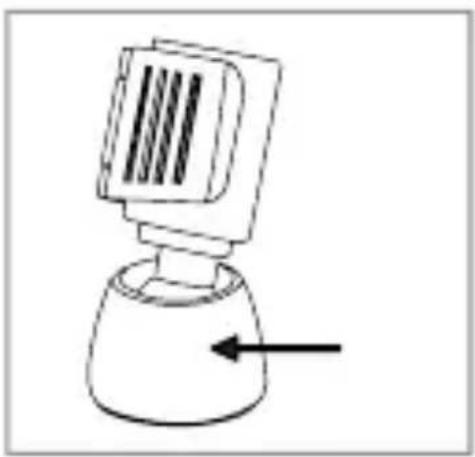
Provides level and anti-skid set-up of tripod.
natural_image
Technical line drawing of two mechanical arms with articulated joints, no text or symbols present11. Vertical Shooting
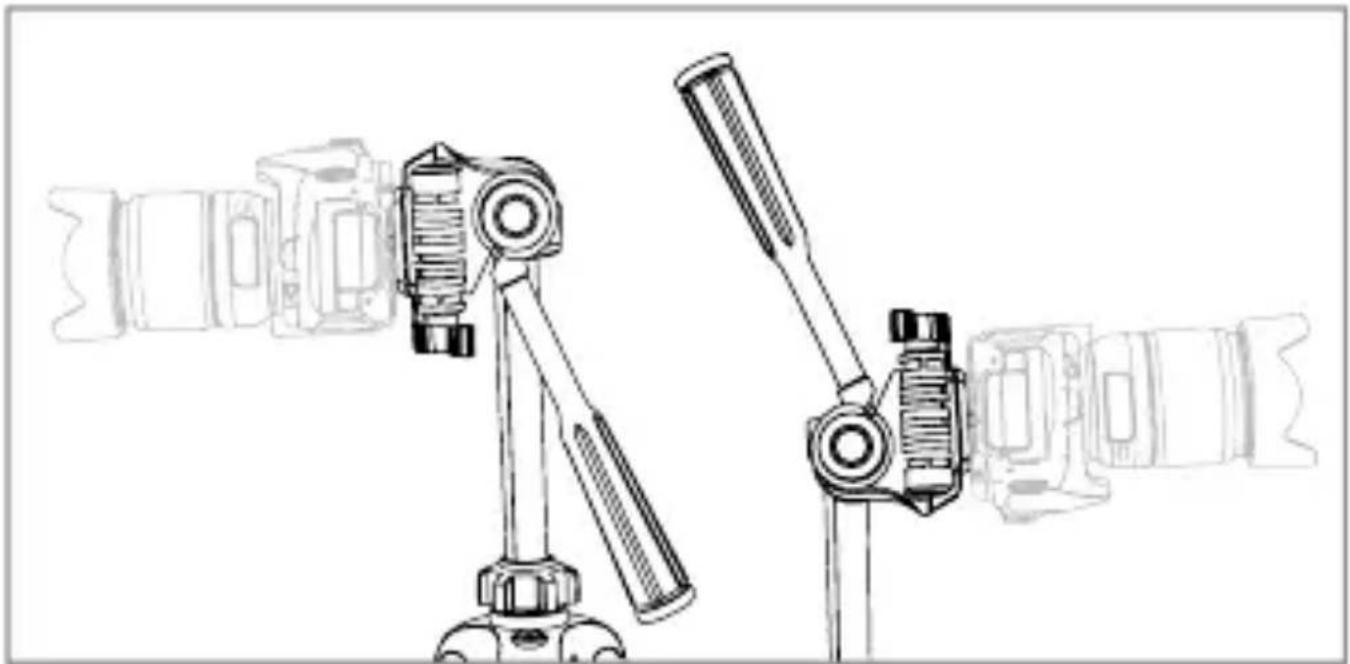
Rotate the handle 3 counter-clockwise then tilt the pan head to a maximum of 90^ for vertical use. Rotate the handle 3 clockwise.
natural_image
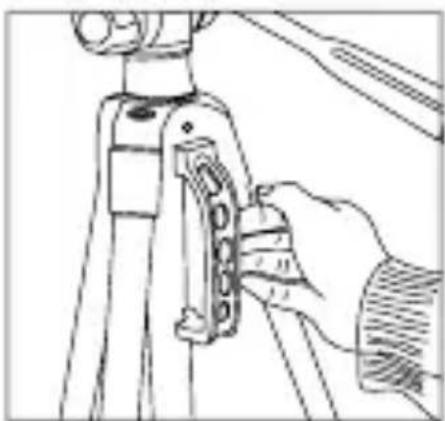
Line drawing of a hand using a tool to adjust or install a mechanical component (no text or symbols visible)12. Carry handle
Use the carry handle 5 to transport the tripod easily to other locations.
● Storage when not in use
Store the product in a dry location protected from dust and direct sunlight.
- Cleaning
- Under no circumstances should you use liquids or detergents for cleaning, as these will damage the product.
- The exterior of the product should be cleaned with a soft dry cloth only.
● Disposal
The packaging is made entirely of recyclable materials, which you may dispose of at local recycling facilities.
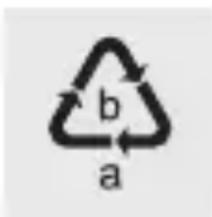
Observe the marking of the packaging materials for waste separation, which are marked with abbreviations (a) and numbers (b) with following meaning:
1 - 7: plastics / 20 - 22: paper and fibreboard / 80 - 98: composite materials.
natural_image
Symbolic icon of a person recycling a circular arrow, no text or numbers presentThe product and packaging materials are recyclable, dispose of it separately for better waste treatment. The Triman logo is valid in France only.
natural_image
Simple icon of a person disposing of trash into a bin (no text or symbols)Contact your local refuse disposal authority for more details of how to dispose of your worn-out product.
● Warranty
The product has been manufactured to strict quality guidelines and meticulously examined before delivery. In the event of product defects you have legal rights against the retailer of this product. Your legal rights are not limited in any way by our warranty detailed below.
The warranty for this product is 3 years from the date of purchase. Should this product show any fault in materials or manufacture within 3 years from the date of purchase, we will repair or replace it – at our choice – free of charge to you.
The warranty period begins on the date of purchase. Please keep the original sales receipt in a safe location. This document is required as your proof of purchase. This warranty becomes void if the product has been damaged, or used or maintained improperly.
The warranty applies to defects in material or manufacture. This warranty does not cover product parts subject to normal wear, thus possibly considered consumables (e.g. batteries) or for damage to fragile parts, e.g. switches, rechargeable batteries or glass parts.
natural_image
Illustration of a robotic device with gears and a handle, showing mechanical components and motion direction (no text or symbols)natural_image
Technical line drawing showing a mechanical assembly with a rotating component and a motor (no text or symbols)natural_image
Three-step diagram showing a camera body with adjustment arrows, no text or symbols presentnatural_image
Technical line drawing of a camera setup with tripod and binoculars (no text or symbols)natural_image
Line drawing of a mechanical device with rotational arrow indicating motion (no text or symbols)natural_image
Technical line drawing of a mechanical device with no visible text or symbolsnatural_image
Line drawing of a robotic arm with directional arrows indicating movement or force (no text or symbols)natural_image
Mechanical diagram showing a hook and lever assembly with no visible text or symbolsnatural_image
Diagram of a mechanical device with two parallel plates and directional arrows indicating flow or movement (no text or symbols)9. Extension des montants
natural_image
Simple line drawing of a device with a rectangular panel and a curved base, no text or symbols present.natural_image
Technical line drawing of two mechanical devices with no visible text or symbolsnatural_image
Line drawing of a hand operating a tripod-mounted tool, no text or symbols presentchemical
Recycling symbol with 'a' and 'b' labels on a white backgroundnatural_image
Symbolic icon of a person recycling a circular arrow, no text or numbers presentnatural_image
Silhouette of a person disposing of trash into a bin (no text or symbols)natural_image
Illustration of a robotic device with gears and a handle, showing mechanical components and motion direction (no text or symbols)natural_image
Technical line drawing showing a mechanical assembly with a knob and adjustment knob (no text or symbols)2. Go-Pro adapter
natural_image
Technical line drawing showing three steps of a camera module being adjusted, with no visible text or symbols.3. Camera plaatsen
natural_image
Technical line drawing of a camera or surveying instrument with no visible text or symbols4. Panorama-opname
natural_image
Technical line drawing of a mechanical device with rotational arrow indicating motion (no text or symbols)5. Platformplaat 14
natural_image
Technical line drawing of a mechanical device with no visible text or symbols6. Waterpassen 15
natural_image
Technical line drawing of a robotic arm with directional arrows indicating movement (no text or symbols)natural_image
Mechanical diagram showing a hook and lever assembly with no visible text or symbols8. Pootvergrendeling en ophanghaak
natural_image
Diagram of a mechanical device with internal components and directional arrows (no text or symbols)natural_image
Simple line drawing of a device with a rectangular panel and a curved base, no text or symbols present.natural_image
Technical line drawing of two mechanical arms with no visible text or symbols11. Vetticaal fotograferen/filmen
natural_image
Line drawing of a hand using a tool to adjust or install a mechanical component (no text or symbols visible)12. Draaggreep
chemical
Recycling symbol with 'a' and 'b' labels, indicating a two-part cycle in materials sciencenatural_image
Symbolic icon of a person moving with arrows, enclosed in a circle (no text or symbols)natural_image
Silhouette of a person sorting trash into a bin (no text or symbols)natural_image
Illustration of a robotic device with gears and a handle, showing mechanical components and motion direction (no text or symbols)natural_image
Technical line drawing showing a mechanical assembly with a knob and adjustment knob (no text or symbols)2. Adapter Go-Pro
natural_image
Three-step diagram showing a camera body with adjustment arrows, no text or symbols presentnatural_image
Technical line drawing of a camera setup with tripod and binoculars (no text or symbols)natural_image
Line drawing of a mechanical device with rotational arrow indicating motion (no text or symbols)natural_image
Line drawing of a mechanical device with no visible text or symbols6. Poziomice 15
natural_image
Technical line drawing of a mechanical device with directional arrows indicating movement or force (no text or symbols)natural_image
Mechanical diagram showing a hook being lifted by a crane, with no visible text or symbolsnatural_image
Diagram of a mechanical component with two parallel slots and directional arrows indicating flow or movement (no text or symbols)9. Rozkładanie nóg
natural_image
Simple line drawing of a device with a rectangular panel and a curved base, no text or symbols present.natural_image
Technical line drawing of two mechanical arms with no visible text or symbols11. Kadr pionowy
natural_image
Line drawing of a hand operating a tripod-mounted device with a tool, no text or symbols presentnatural_image
Symbolic icon of a person walking with arrows indicating rotation or cycle (no text or symbols)natural_image
Silhouette of a person disposing of trash into a bin (no text or symbols)natural_image
Illustration of a robotic device with gears and a curved arrow indicating rotation (no text or symbols)natural_image
Line drawing of a mechanical device with a hand operating a control panel and a separate view showing the same component (no text or symbols present)2. Adaptér Go-Pro
natural_image
Three-step diagram showing a camera body with adjustment arrows, no text or symbols presentnatural_image
Technical line drawing of a camera setup with tripod and lenses (no text or symbols)natural_image
Technical line drawing of a mechanical device with rotational arrow indicating motion (no text or symbols)natural_image
Technical line drawing of a mechanical device with no visible text or symbolsnatural_image
Technical line drawing of a mechanical device with directional arrows indicating movement (no text or symbols)natural_image
Mechanical diagram showing a hook being adjusted with a spring, no text or symbols presentnatural_image
Diagram of a mechanical device with two parallel plates and directional arrows indicating flow or movement (no text or symbols)9. Roztažení nohou
natural_image
Simple line drawing of a device with a rectangular panel and a curved base, no text or symbols present.natural_image
Technical line drawing of two mechanical arms with no visible text or symbolsnatural_image
Line drawing of a hand operating a tripod-mounted device with a tool, no text or symbols presentnatural_image
Symbolic icon of a person recycling a box with arrows, enclosed in a circle (no text or numbers)natural_image
Silhouette of a person sorting trash into a bin (no text or symbols)natural_image
Illustration of a robotic device with gears and a handle, showing mechanical components and motion direction (no text or symbols)natural_image
Technical line drawing showing a mechanical assembly with a knob and adjustment knob (no text or symbols)2. Adaptér Go-Pro
natural_image
Illustration of three-step camera assembly process showing hand positioning and adjustment (no text or symbols)natural_image
Technical line drawing of a camera tripod with no visible text or symbolsnatural_image
Technical line drawing of a mechanical device with rotational arrow indicating motion (no text or symbols)natural_image
Technical line drawing of a camera or surveying instrument with no visible text or symbolsnatural_image
Technical line drawing of a mechanical device with directional arrows indicating movement (no text or symbols)natural_image
Mechanical diagram showing a hook and lever assembly with no visible text or symbolsnatural_image
Diagram of a mechanical device with two parallel plates and directional arrows indicating flow or movement (no text or symbols)9. Vysunutie nôh
natural_image
Simple line drawing of a device with a rectangular panel and a curved base, no text or symbols present.natural_image
Technical line drawing of two mechanical arms with no visible text or symbolsnatural_image
Line drawing of a hand using a tool to adjust or install a mechanical component (no text or symbols visible)chemical
Recycling symbol with labels a and b, indicating two complementary recycling cyclesnatural_image
Symbolic icon of a person recycling a document with arrows, enclosed in a circle (no text or symbols)natural_image
Silhouette of a person disposing of trash into a bin (no text or symbols)
- TRÉPIED POUR APPAREIL PHOTO
- Go-Pro-Adapter
- Panoramaaufnahme
- 5.Plattformplatte 14
- Wasserwaage 15
- Beine verlängern
- Tragegriff
- CAMERA TRIPOD SFS 156 A1
- ● Introduction
- Intendeduse
- - Scope of delivery
- ● Safety notes
- WARNING! DANGER TO LIFE AND RISK OF ACCIDENT FOR INFANTS AND CHILDREN!
- DANGER! Risk of suffocation!
- ATTENTION! RISK OF PROPERTY DAMAGE
- ATTENTION! Ensure that:
- ● Description of parts
- ● Technical data
- NOTE:
- Before use
- Operation
- Quick release plate 1
- Go-Pro adaptor
- Installing camera
- Panorama shot
- Platform plate 14
- Bubble levels 15
- Elevator crank and center column lock screw thread
- Leg brace locking collar and hanging hook
- Extending the legs
- Self-leveling rubber feet 9
- Vertical Shooting
- Carry handle
- ● Storage when not in use
- - Cleaning
- ● Disposal
- ● Warranty
- Extension des montants
- Go-Pro adapter
- Camera plaatsen
- Panorama-opname
- Platformplaat 14
- Waterpassen 15
- Pootvergrendeling en ophanghaak
- Vetticaal fotograferen/filmen
- Draaggreep
- Adapter Go-Pro
- Poziomice 15
- Rozkładanie nóg
- Kadr pionowy
- Adaptér Go-Pro
- Roztažení nohou
- Vysunutie nôh
Brand : SILVERCREST
Model : SFS 156 A1
Category : Tripod