ZHM1265S - Kitchen Appliances Zelmer - Free user manual and instructions
Find the device manual for free ZHM1265S Zelmer in PDF.


| Product Type | Immersion Blender |
| Brand | Zelmer |
| Model | ZHM1265S |
| Power Consumption | 700 W |
| Number of Speeds | 2 + Turbo |
| Blending Shaft Material | Stainless Steel |
| Accessories Included | Whisk, Chopper Attachment, Measuring Cup |
| Voltage | 220-240 V, 50/60 Hz |
| Cable Length | 1.2 m |
| Dishwasher Safe Parts | Blending shaft, whisk, chopper bowl |
| Overheat Protection | Yes |
| Housing Material | Plastic with Soft Grip |
| Color | Silver and Black |
| Weight | 0.85 kg |
| Warranty | 2 years |
Frequently Asked Questions - ZHM1265S Zelmer
User questions about ZHM1265S Zelmer
0 question about this device. Answer the ones you know or ask your own.
Ask a new question about this device
Download the instructions for your Kitchen Appliances in PDF format for free! Find your manual ZHM1265S - Zelmer and take your electronic device back in hand. On this page are published all the documents necessary for the use of your device. ZHM1265S by Zelmer.
USER MANUAL ZHM1265S Zelmer
natural_image
White electric motor with a hand mixer in a bowl, no visible text or symbols on the device itself.PLF !NSTRUKCJA UŻYTKOWANIA
MIKSER 6–11
CZ NÁVOD K POUŽITÍ
ŠLEHAČ 12–16
SK NÁVOD NA OBSLUHU
MIXÉR 17–22
HU HASZNÁLATI UTASÍTÁS
HÁZTARTÁSI KÉZIROBOT 23–28
RO INSTRUCTIUNI DE UTILIZARE
MIXER 29–34
ИНСТРУКЦИЯ ПО ЭКСПЛУАТАЦИИ
МИКСЕР 35-40
BG ИНСТРУКЦИЯ ЗА УПОТРЕБА
МИКСЕР 41-46
UA ІНСТРУКЦІЯ З ВИКОРИСТАННЯ
МИКСЕР 47–52
EN USER MANUAL
MIXER 53–57
ZHM12...
MIKSER
тиксер
/ mixer
zelmer
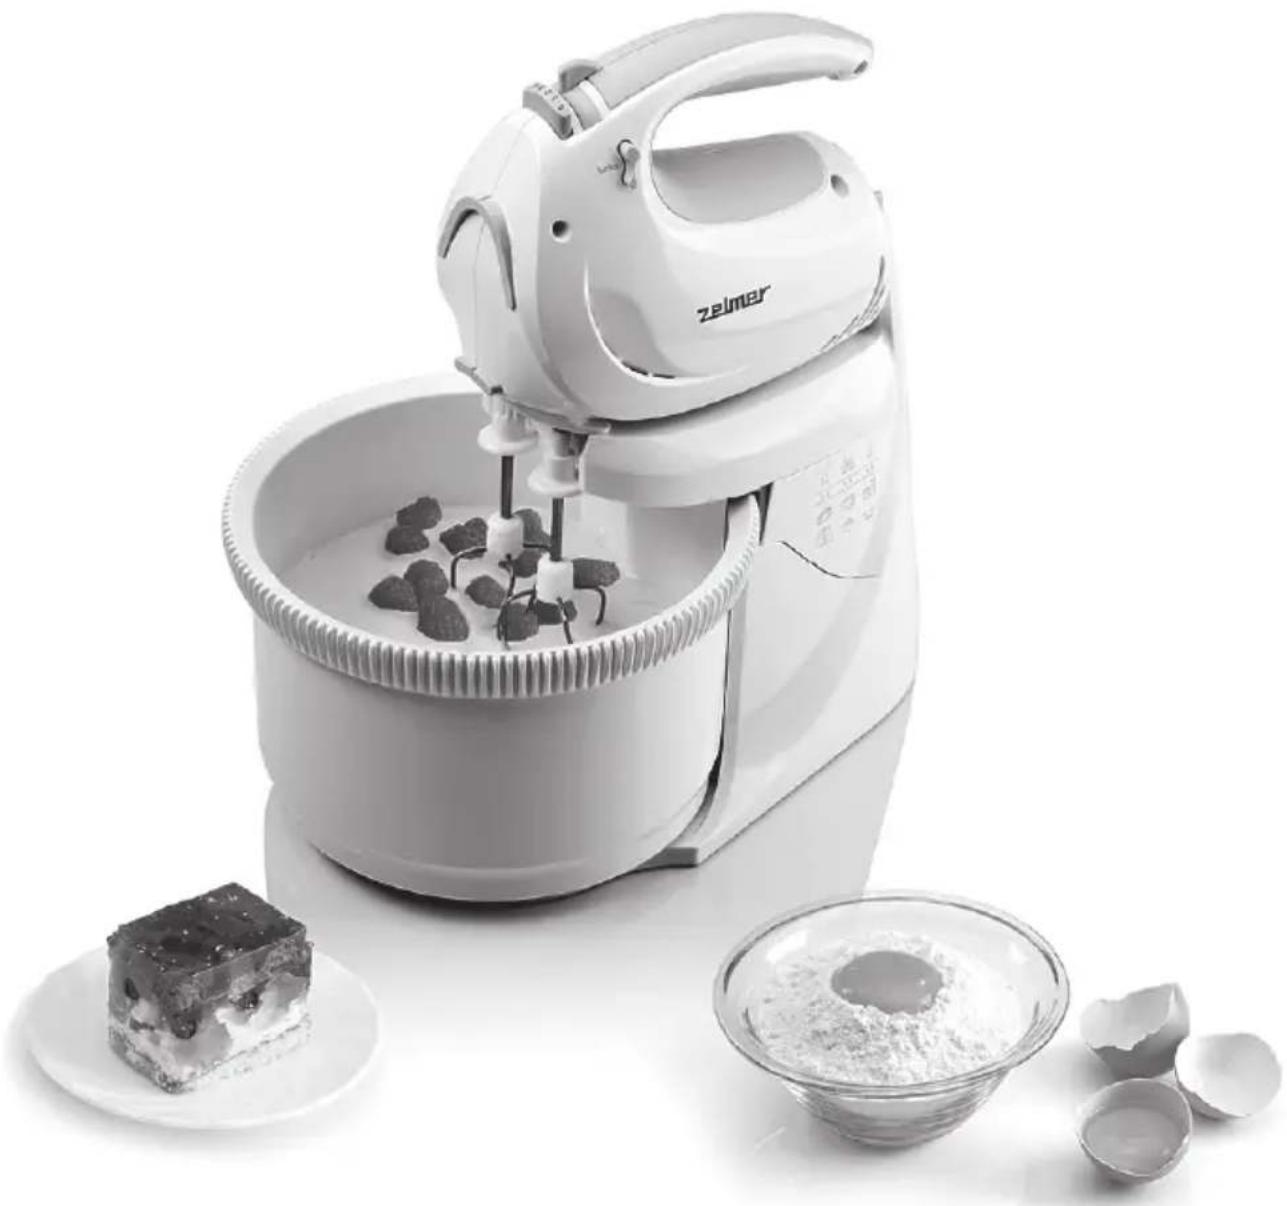
Reliable mixer with accessories
natural_image
Black-and-white photo of a white zelmer mixing bowl with food, accompanied by small bowls and a cake (no text or symbols visible)A
natural_image
Transparent cylindrical container with a small labeled object on the side (no text or symbols visible)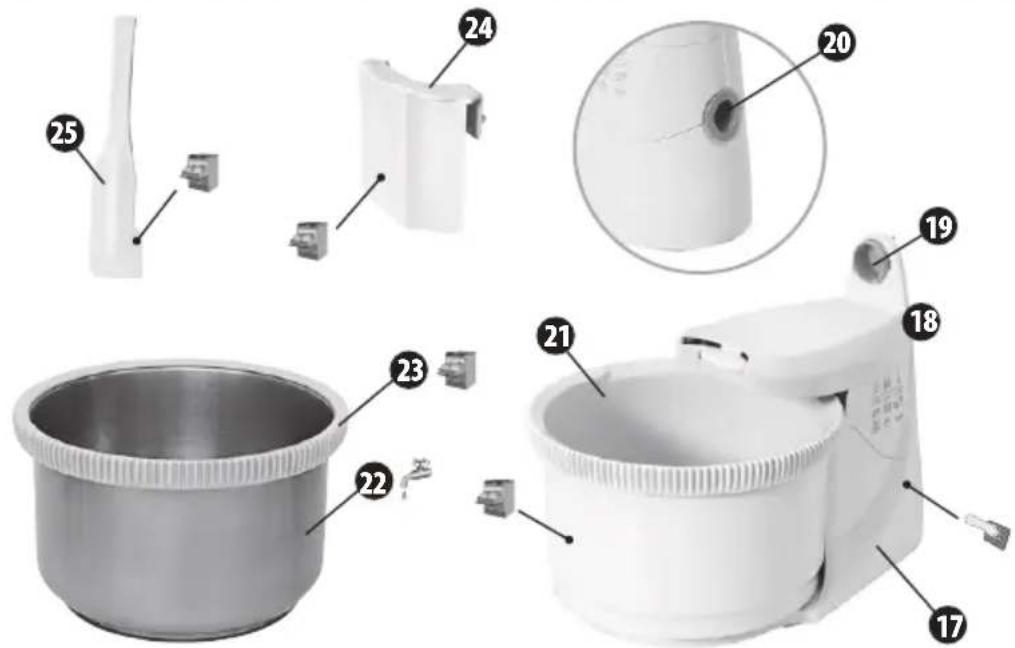


B
natural_image
Close-up of hands using a power tool to draw metal wire (no text or symbols visible)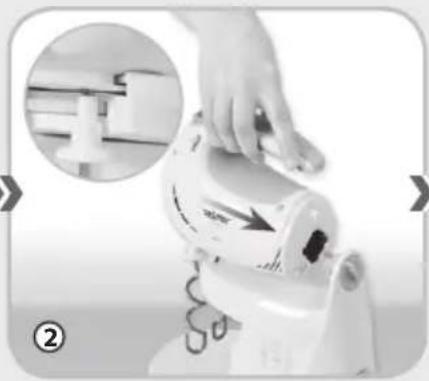
natural_image
Close-up of a hand operating a white manual pump device with a magnified inset showing internal components (no text or symbols visible)[Non-Text]
natural_image
Close-up of hands using a power tool to press a button on a white surface (no visible text or symbols)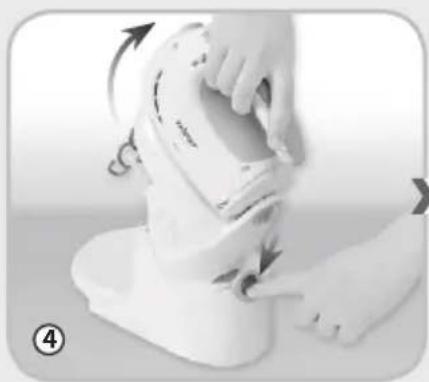
natural_image
Person performing a medical procedure on a white object, no visible text or symbols》
natural_image
Person holding a metal container with a lid, showing a step to cut the lid (no text or symbols visible)[Non-Text]
natural_image
Close-up of hands holding a metal bowl with a lid, no text or symbols visible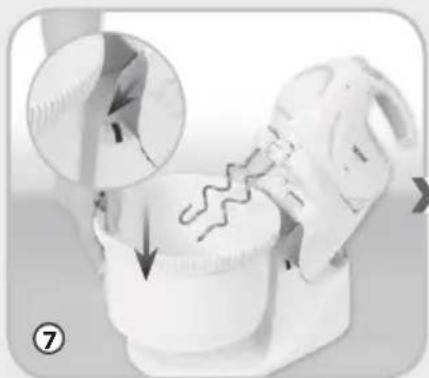
natural_image
Close-up of a white plastic container being cut with a magnified inset showing internal structure (no text or symbols visible)[Non-Text]
natural_image
Close-up of hands mixing a small object with a hook, no visible text or symbols[Non-Text]
natural_image
Hand placing a small object into a white bowl with a curved arrow indicating rotation (no text or symbols visible)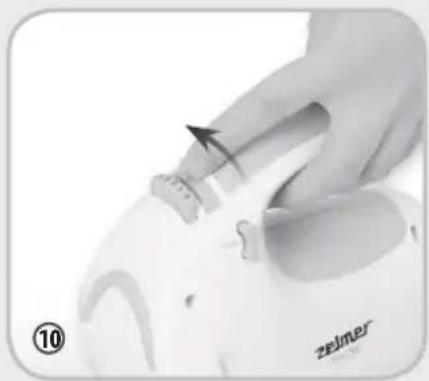
natural_image
Close-up of a hand holding a white object with a black arrow indicating rotation (no text or symbols visible)I
natural_image
Hand holding a white electronic device with a scroll wheel, showing a button and adjustment arrow (no text or symbols visible)[Non-Text]
natural_image
Hand holding a small object with an upward and downward arrow indicating motion or movement (no text or symbols)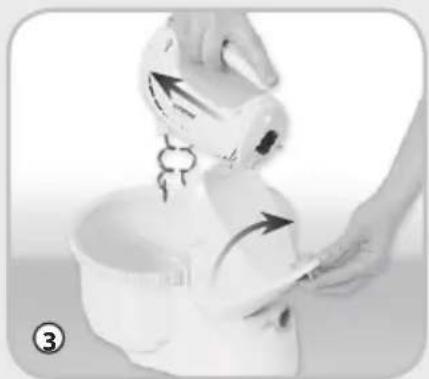
natural_image
Person mixing a white bowl with a hand mixer, no visible text or symbolsPRACA Z TARCZA PRZECIERAJACA
E
Congratulations on your choice of our appliance, and welcome among the users of Zelmer products.
In order to achieve best possible results we recommend using exclusively original Zelmer accessories. They have been specially designed for this product.
Please read this user manual carefully. Pay special attention to important safety instructions. Keep this user manual for future reference.
Important safety precautions
Before starting to use the appliance, become familiar with the whole content of this user manual.
Make sure that you understand the instructions given below.

DANGER! / WARNING!
Health hazard
- Do not start up the device, with a visibly damaged cord or casing.
- If the supply cord is damaged, it must be replaced by the manufacturer, its service agent or similarly qualified persons in order to avoid a hazard.
- The appliance can only be repaired by qualified service personnel. Improper servicing may cause a serious hazard to the user. In case of defects please contact a qualified service center.
- Do not take out working elements from the bowl, when mixer is on.
- Do not touch moving elements with your hands, the blades of mixing attachment, mixing jug, mini food processor as well as the ice crusher disc are especially dangerous. They are very sharp!
• Always unplug the appliance from the electrical outlet when it is left unattended and before assembling, disassembling and cleaning.
- Turn off the device and unplug it from an outlet before replacing the equipment or approaching moving parts during use.
- Keep special caution during operation in presence of children.
- This product is not intended for use by children. Keep the appliance and the power cable out of reach of children.
- Appliances can be used by persons with reduced physical, sensory or mental capabilities or lack of experience and knowledge if they have been given supervision or instruction concerning use of the appliance in a safe way and understand the hazards involved.
- Children shall not play with the appliance.
- Due to safety reasons, the products can only be blended in the mixing cup when the lid is properly attached to the cup. It is forbidden to insert any items to the inside of the cup such as: spoons, spatulas, etc. It may lead to damage to the mixer or breaking of the elements inside the cup which may directly enter the product being blended and this in turn poses a threat to the health or even life.
- Only use the appliance indoors at room temperature and up to 2000 m above sea level.

CAUTION!
Not observance can result in damage to possessions
Always plug the appliance to the mains (AC only) with voltage corresponding to that indicated on the rating plate.
Do not unplug by pulling the cord.
Do not expose the mixer and its equipment to the temperature above 60^ C. You can damage your mixer.
Do not immerse the mixer motor in water, nor clean it under running water.
Do not clean the equipment when assembled on the motor.
Do not clean the casing with aggressive detergents, such as emulsion, milk, paste, etc. They can remove the graphic symbols such as: scales, labels, caution signs, etc.
Do not use mixing adapter without immersing it in products, in case of liquids, their level should not be higher then the half of adapter height.
Be careful not to flood the inner of mixing adapter casing with water – after assembling on the motor part, the motor can get flooded.
Do not use the mixer with empty mixing cup.
Be careful not to flood the bottom space of mixing cup, containing clutch - after assembling on the motor part, the motor can get flooded.
Do not put simultaneously the mixer and whisk with toothed bar into the motor socket. In the moment of start-up the mixer shall get damaged.
Do not use the mixing attachment or the mixing jug longer than 3 min., mini food processor and ice crusher longer than 2 min., and whisks longer than 10 minutes.
SUGGESTION 1 Informat
Information on the product and suggestions for its use
This appliance is intended for domestic use only. In case it is used for food business purposes, the warranty conditions shall change.
After operation unplug the Power cord and wind on the mixer motor part.
Do not wash metal parts in a dishwasher. Aggressive cleaning agents used in such machines cause that a/m parts get darker. Clean them manually with traditional washing up liquids.
Put the mixer and whisk with toothed bar into the motor socket marked with a star.
The manufacturer cannot accept any liability for damage to the mixer or personal injury resulting from improper usage.
Technical data
Technical parameters are quoted at product nameplate.
Permitted motor operation time:
-with mixers, whisks 10 min.
– with mixing adapter or mixing cup 3 min.
Interval time before next operation (min.) 20 min.
Noise caused by the device (LWA):
-with mixers, whisks, mixing adapter, on the stand
-with mixing cup
80 dB/A
84 dB/A
This device complies with Commission Regulation (EC) no. 1275/2008 on eco-design requirements.
Appliance elements

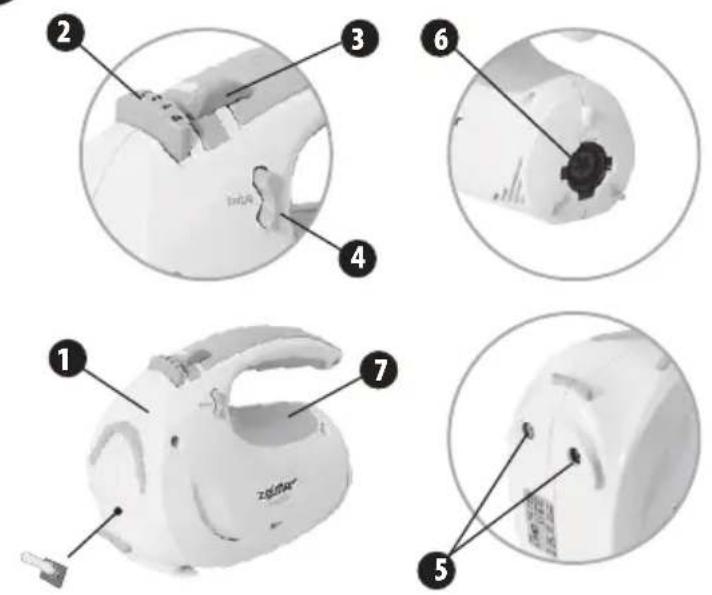
1 Mixer motor
2 Pusher button
3 Switch lever
4 Turbo button
5 Whisks or mixers sockets
6 Mixing adapter hole
7 Handle insert
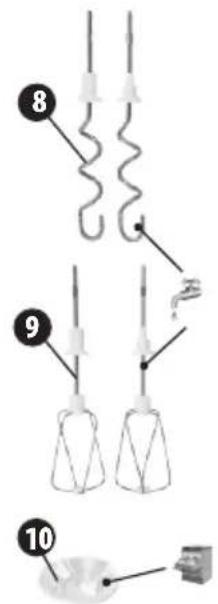
8 Mixers: left / right with toothed bar
9 Whisks: left / right with toothed bar
10 Liquidising dics
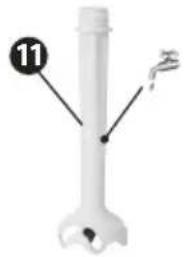
11 Mixing attachment
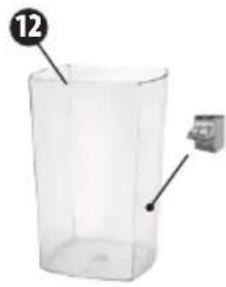
12 Cup
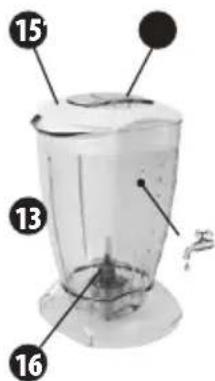
13 Mixing cup
14 Doser
15 Lid
16 Knife cup
17 Stand
18 Head
19 Grip knob
20 Fastening button
21 Rotating bowl
22 Steel rotating bowl
23 Toothed wheel rim for steel rotating bowl
24 Scraper blade
25 Blade
ZELMER mixers types

√ basic mixer equipment
○ additional accessories available in shops
*appliance colour
Device description
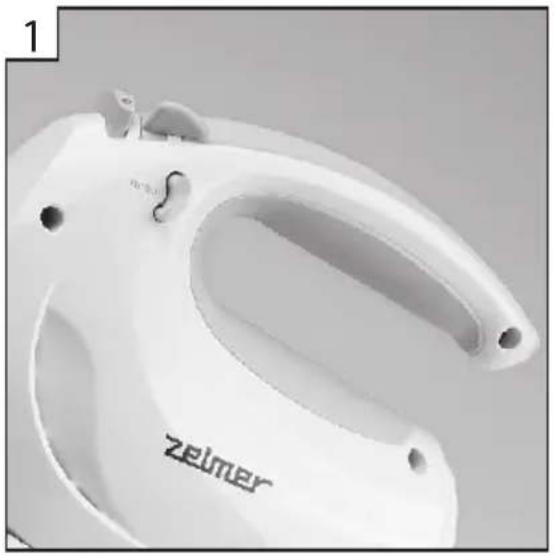
The mixer has 5 speed positions. The lever is used to set up the particular rotation speed according to the numbers: 0, 1, 2, 3, 4, and 5 on pusher button, which helps to remove (push out) the mixers or whisks from the mixer motor part.
Additionally, the drive has "turbo" button which helps to get the maximum rotation speed immediately, regardless the speed set with the lever. Such buttons are placed both on the right and left sides of the casing intended for the convenience of both left and right-handed users. The "turbo" button is automatically blocked in "0" position.
There are 2 sockets (holes), for whisks or mixers assembling, placed on the bottom of the motor part.
The insert handle, placed on the top of the motor part, is made of the material increasing the comfort of holding the mixer motor part - SOFTTOUCH.
There is a hole for mixing adapter or mixing cup assembling at the back of motor casing. The hole is covered with a mobile cover.
Mixer start-up and position setting (rotation speed)

① Place the ON/OFF switch in the "0" position - the leftmost position. Install the selected tool.
Plug in the appliance.
Switch on the appliance by sliding the switch to the right.
② If you want to increase the rotation shift the lever in position "5" direction, choose the desired rotation speed.
③ In order to increase the rotation immediately, regardless set speed, press and hold one of "turbo" buttons (on the right or left side of the casing).
When you want to return to the previously selected speed release "turbo" button.
Preparing for operations
Wash the parts in contact with processed product before first usage.
Operate the mixer so, that the closed/open markings located on the appliance are well visible.
Operation with whisks or mixers

The whisks are intended to whipping eggs white foam, cream, rubbing yolks with sugar, cream and pancakes or omelettes dough preparation.
The mixers are intended to work the rubbed dough, yeast dough, cheeses cakes, imbirbread cakes, etc.
The whisks and mixers shall be assembled in sockets on the bottom of the robot.
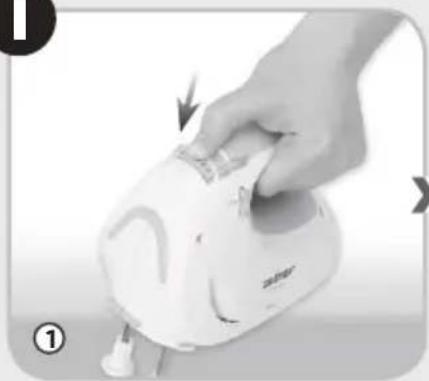
① Press until you feel the refusal – when the clamps get fastened.
When assembled improperly, the parts fall apart during operation.
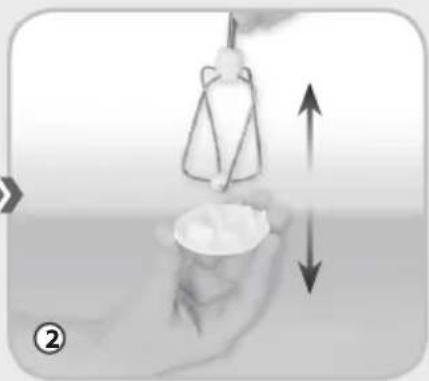
② Insert the mixer or whisk with toothed bar into the socket marked with a star.
The reverse assembling of the mixers can cause lifting up the dough (taking the dough out of bowl).
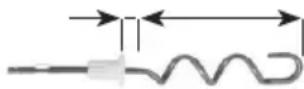
The level of products inside the bowl should not exceed the hight of mixers or whisks working part (L).

Operation with liquidising disc

Liquidizing disc is used for liquidizing boiled fruit and vegetables such as: carrots, potatoes, tomatoes, apples through the sieve. It partly replaces the function of the mixing adapter.
① Insert the liquidizing disc on the whisk with toothed bar from the bottom side.
② Insert the whisk into the socket marked with a star.
Cup (12)
Made of transparent material is used as a container when mixing adapter is used.
Operation with mixing adapter

You can use the mixing adapter for:
mixing liquids,
crumbling boiled vegetables and raw, soft fruit,
preparing different mayonnaise and pastes,
preparing soups for infants.
You can assemble the adapter after moving the cover.
① Gently press the bolt and slide towards the direction shown in the figure.
② Insert the threaded part into the motor casing hole and screw it turning right until you feel the refusal.

quate screwing of the mixing adapter can result in clutch damage or the adapter damage.
③ Put the adapter into the processed product and switch the mixer on.
Operation with mixing cup


the mixer in your hand all the time during operation.
Mixing cup is intended for infant soups preparation, milk shakes or pancake dough.
① It has the label "500 ml max" on both sides, which indicates the maximum level of product to fill the cup and graphic scale to determine the volume 200 ml to 500 ml (according to the symbols in the drawing beside).
② After moving the cover (like during assembling the adapter) assemble the cup the following way: Insert the mixing cup on the motor part so that the 3 buckles visible at the bottom of the cup got into the nuts of the motor casing.
③ Holding the motor casing handle turn the cup clockwise direction until you feel the refusal.
You shall obtain the proper connection, when the 3 buckles get under the motor casing, and the fastener on the cup rib move on the other side of the spherical buckle on the motor casing.
④ Fill the cup with products and put the cover with the doser on – you can add next products to the cup during operation.
Operation with stand including turnable bowl

The stand with assembled motor part makes the operation with whisks or mixers easy, as the user does not have to hold the device.
The housing with the bowl is equipped with a self-gathering spatula, which is an innovative solution.
It helps to effectively blend the products, prevents the dough from gathering on the edges of the bowl and shortens the preparation time.
The stand head driver automatically makes the head move pendulum-like and simultaneously turns the bowl with the mixed product.
You can use the stand with specially prepared whisks and mixers only. The device equipped with stand includes also one mixer and one whisk with toothed bar.
① Insert the mixers or whisks into the motor casing (as described above).
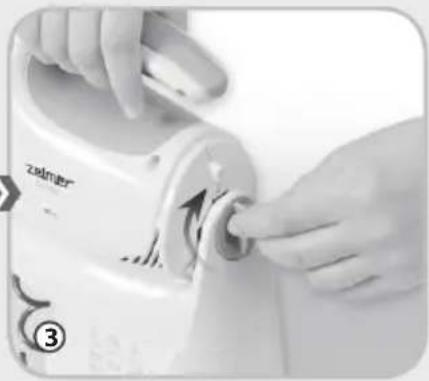
② Assemble the drive in the stand head after moving the cover (like during assembling the adapter) the following way: Insert the drive fasteners (which are located near the holes for whisks assembling) under the stand head fastener.
③ Turn the control clamp to the limit in such a way that the hand is positioned vertically.
④ Press the fastener button and simultaneously deflect the stand head with the motor part back.
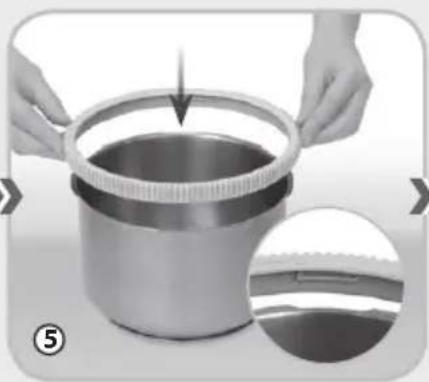
⑤ Before putting the ingredients into the steel bowl (ZHM1264M), attach the toothed wheel plastic rim to the bowl until it sits in the recess.
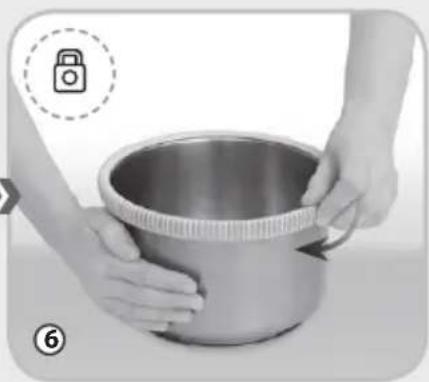
⑥ Then twist it in the direction marked on the rim until it stops.
⑦ Place the bowl on the 3 lips of the stand and put it on the stand base.
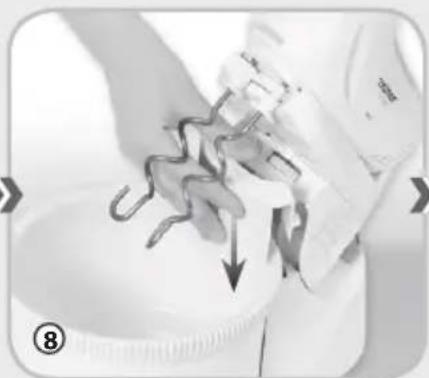
⑧ Attach the bowl scraper attachment and put ingredients into the bowl.
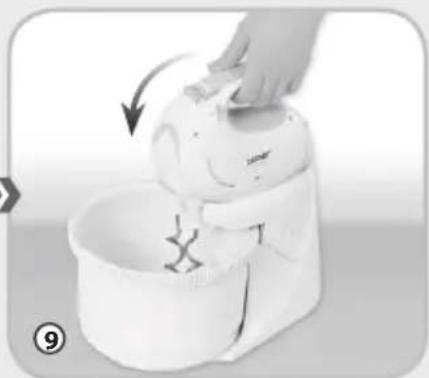
⑨ Place the stand head with the motor part in horizontal position (you will hear the clicking sound of fastener blocking clamps).
10 Start-up the mixer with the switch lever and it will make the bowl turn and the head with drive move pendulum-like.

r block or stop the oscillatory movement during operation. It may cause damage to the housing.

re emptying the metal bowl, take away toothed wheel. Removing toothed wheel facilitates emptying and cleaning of the product.
After operation

Switch the mixer off and unplug it.
Depending on assembled equipment:
① Push the whisks or mixers out with a pushing button.
② Disassemble the liquidizing disc from the whisk.
Disassemble the mixing adapter or mixing cup in reverse way to assembling it.
③ Deflect the stand head with the motor part back. Turn the clamp knob in counter clockwise direction as much as possible and put the motor out of the head fasteners.
Wind the cord onto the motor.
Cleaning and maintenance
Remember to unplug before clearing and maintenance.
Clean the whisks and mixers with warm water with cleaning agents.
Clean the mixing adapter and mixing cup by mixing clean, warm water (after plugging the mixer to mains supply).
Clean the cogged rim of rotational bowl with dishes cleaning brush.
Do not wash the mixing adapter or the mixing cup in dishwasher.
Turn the bowl upside down after cleaning and pour out the water, which could remain under the cogged rim.
Before cleaning the steel bowl (ZHM1264M) disassemble the toothed wheel rim proceeding in reverse to the assembly instruction (Fig. H).
Dry the mixer equipment after cleaning and store in dry place.
Clean the motor or stand casing with dump cloth and then dry it.
Disposal
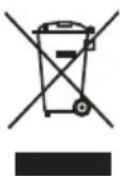
Dispose of packaging in an environmentally-friendly manner. This appliance is labelled in accordance with European Directive 2012/19/EU concerning used electrical and electronic appliances (waste electrical and electronic equipment – WEEE). The guideline determines the framework for the return and recycling of used appliances as applicable throughout the EU. Please ask your specialist retailer about current disposal facilities.
The manufacturer does not accept any liability for any damages resulting from unintended use or inappropriate handling.
The manufacturer reserves his rights for modifying the product any time in order to adjust it to law regulations, norms, directives, or due to construction, trade aesthetic or other reasons, without notifying it in advance.
| DISH EQUIPMENT | THE AMOUNT OF PROCESSED PRODUCT | RECOMMENDED SPEED OPERATION TIME | ||
| Soup for infants mixing adapter 1 litre I position 10 s, next V position 40 - 60 s | ||||
| Vegetable puree for infants | mixing adapter | 0,5 litre (with a sieve) | I position 10 s, next V position | 1 - 1,5 min. |
| liquidizing disc I position | ||||
| Cream soup | mixing adapter 1 litre I position 10 s, next V position 30 - 45 s | |||
| mixing cup 0,5 litre IV position or V position 2 min. | ||||
| Fruit latte | mixing adapter 0,5 litre V position 30 - 60 s | |||
| mixing cup | 0,15 kg of fruit and 0,3 litre of kefir | IV position or V position | 1 - 1,5 min. | |
| Greens: parsley, dill ... | mixing adapter | 1 bundle | II position | 30 s |
| Pancake dough | whisks | 1 litre I position 15 s, next V position 1 - 1,5 min. | ||
| mixing cup 0,5 litre III, IV or V position 1 min. | ||||
| Egg white foam | whisks | White of 5 eggs | V position | 2 - 3 min. |
| Sponge cake dough | whisks | Made of 6 eggs | IV position | 7 - 8 min. |
| Butter cream | whisks | 0,25 kg of vegetable butter | III or IV position | 4 - 5 min. |
| Whipped cream | whisks | 1 litre | II position 15 s, next IV position | |
| Potatoes puree | whisks | 1 kg | I position 15 s, next V position | 40 - 60 s |
| Potatoes and cheese dumplings stuffing | whisks | 1 kg of potatoes and 0,5 kg of cottage cheese | position 15 s, next IV position | 40 - 60 s |
| Cottage cheese with cream | whisks | 0,5 kg | III position | |
| Gingerbread dough | watery | whisks | 0,5 kg of flour | I position 30 s, next III position |
| dense | mixers | |||
| Yeast dough | mixers | 0,5 kg of flour | I position 30 s next V position | |
natural_image
Close-up of a white electric shaver with visible brand name 'Zelmer' on the handle (no additional text or symbols)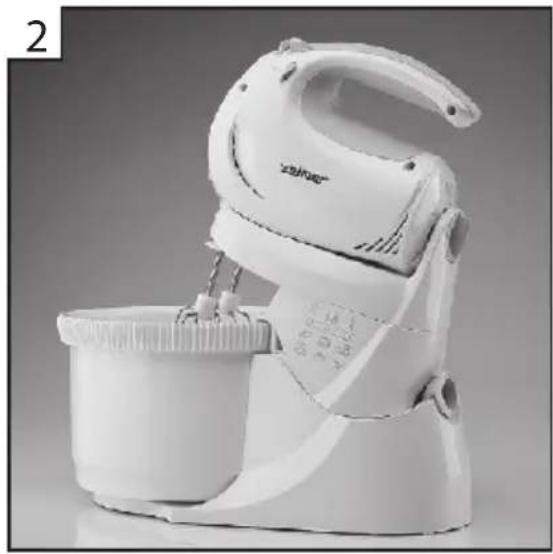
natural_image
White kitchen mixer with bucket and handle, no visible text or symbols on device body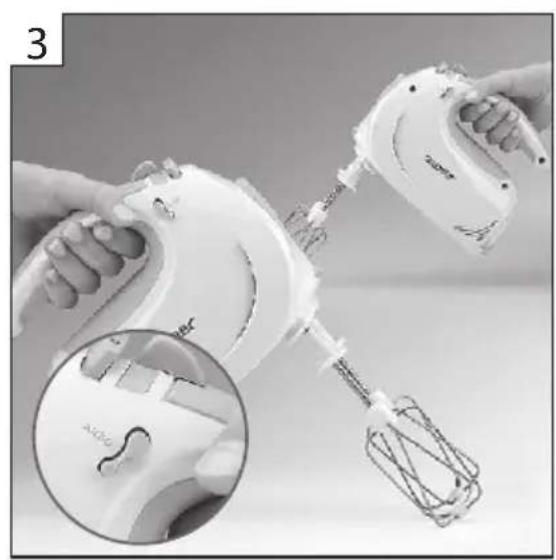
natural_image
Close-up of hands using a white manual hand mixer with a magnified inset showing the handle (no text or symbols visible)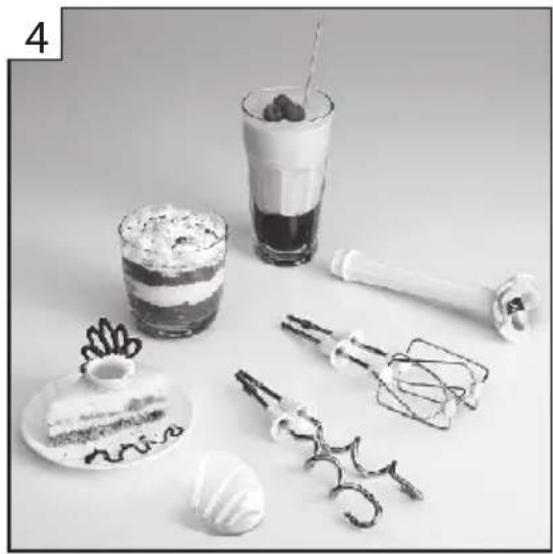
natural_image
Black-and-white photo of assorted kitchen utensils including a cake, cream, glass, and kitchen tools (no text or symbols visible)EN 1. Comfortable handle 2. Mixer and bowl stand 3. Turbo boost button for right- and left-handers 4. Multifunctional accessories and attachments

- ZHM12...
- zelmer
- PRACA Z TARCZA PRZECIERAJACA
- E
- Important safety precautions
- DANGER! / WARNING!
- Health hazard
- CAUTION!
- Not observance can result in damage to possessions
- SUGGESTION 1 Informat
- Information on the product and suggestions for its use
- Technical data
- Appliance elements
- ZELMER mixers types
- Device description
- Mixer start-up and position setting (rotation speed)
- Preparing for operations
- Operation with whisks or mixers
- When assembled improperly, the parts fall apart during operation.
- The reverse assembling of the mixers can cause lifting up the dough (taking the dough out of bowl).
- The level of products inside the bowl should not exceed the hight of mixers or whisks working part (L).
- Operation with liquidising disc
- Cup (12)
- Operation with mixing adapter
- Operation with mixing cup
- Operation with stand including turnable bowl
- After operation
- Cleaning and maintenance
- Disposal
Brand : Zelmer
Model : ZHM1265S
Category : Kitchen Appliances