
Aqua Style - Smartphone INTEX - Free user manual and instructions
Find the device manual for free Aqua Style INTEX in PDF.


| Product type | Smartphone |
| Brand | Intex |
| Model | Aqua Style |
| Dimensions | 125 x 63 x 10 mm |
| Weight | 120 g |
| Display | 4.5 inch TFT LCD, 480 x 854 pixels |
| Processor | 1.3 GHz quad-core |
| RAM | 1 GB |
| Internal storage | 8 GB |
| Expandable storage | up to 32 GB (microSD) |
| Battery | 1500 mAh Li-ion, removable |
| Operating system | Android 4.4 KitKat |
| Rear camera | 5 MP |
| Front camera | 0.3 MP |
| Connectivity | 3G, Wi-Fi 802.11 b/g/n, Bluetooth 4.0, GPS |
| SIM | Dual SIM (micro-SIM) |
| Sensors | Accelerometer, proximity |
| Audio | 3.5 mm headphone jack, FM radio |
| Charging port | microUSB |
| Colors available | Black, White |
| Maintenance | Clean with soft dry cloth; avoid water and solvents |
| Spare parts | Battery, screen, charger (available from authorized service) |
| Repairability | Service by authorized technician recommended; battery user-replaceable |
Frequently Asked Questions - Aqua Style INTEX
User questions about Aqua Style INTEX
0 question about this device. Answer the ones you know or ask your own.
Ask a new question about this device
Download the instructions for your Smartphone in PDF format for free! Find your manual Aqua Style - INTEX and take your electronic device back in hand. On this page are published all the documents necessary for the use of your device. Aqua Style by INTEX.
USER MANUAL Aqua Style INTEX
1.7 Install the SIM card or USIM card and battery....9
1.2 Battery charging....10
1·3 Insert the storage card....12
1.4 Remove the storage card....13
1.5 Format the storage card....13
1·6 Use the storage card as U disk....14
1.7 Standby screen....15
2 Custom mobile phone....16
2·1 Wireless and internet....16
2·2 Equipment....17
2·3 Personal....18
2.4 System....19
2·5 Install and unload apps....20
2·6 Gesture Sensor....20
3 First Interface....21
3·1 Dial....21
3.2 Contacts....22
3·3 Message....23
3.4 Browser....24
3·5 E-mail....25
3·6 Camera & Vidicon....26
3·7 Multi-media file management....27
3·8 Music player....29
3·9 Recorder 30
3·10 Calendar....31
3·11 clock....Error! Bookmark not defined.
3·12 calculator....Error! Bookmark not defined.
3·13 Other functions....33
4 Application....34
4.1 Map....34
4.2 Talk 35
4.3 Facebook 36
4.4 Nimbizz....37
4.5 Google+, Messenger....38
4·6 Play Music, AajTAK, Headlines, Saavn....40
4.7 Documents to Go, Adobe Reader, Flash Player settings....40
4.8 Games....40
4.9 Play Store....40
5 Use and Maintenance....40
6 Technical Information....41
Dear INTEX customer,
Congratulations on becoming a proud owner of INTEX product. You have now joined the fraternity of millions of satisfied INTEX customers spread across the globe.
Intex Technologies is one of the fastest growing IT Hardware, Mobile Phones and Electronics Company. A well established brand, INTEX has kept pace with the technology needs of millions of IT hardware & electronics consumers and has been serving them with more than 300 user friendly, high quality, state-of-the-art yet simple products/solutions. The products have been in the market since 1996 and conform to global standards.
Brand INTEX covers a wide range of computer peripherals and accessories such as Computer Multimedia speakers, Cabinets, Keyboards, Mouse, UPS, Add-on cards, Webcams, Headphones, Laptop bags, etc. As a part of its diversification strategy, Intex also offers an interesting range of PCs, TFT-LCD Monitors, Consumer Electronics (DVD Players), Home UPS & Mobile Phones.
Every INTEX product goes through a rigorous process of sample evaluation and approval before commercial launch. Customers look upon the brand as a value-for-money & feature-rich offering, supported by efficient after sales service.
We look forward to your patronage.
It would be our pleasure to receive feedback and suggestions you may have for improvements in the product(s) you are using.
Intex Technologies (1) Ltd
info@intextechnologies.com
www.intextechnologies.com
Helpline No· 1800-103- 8822 (India)
Intex Way Gulf LLC
service@intexuae.com
www.intexuae.com
Toll Free No· 800-468- 39823 (Dubai)
Tel: 00971 04 3931991
Need Add below in safety column
SAR
The highest SAR value for this mobile phone is < 1·6 W/Kg, in
accordance with the requirements of the ICNIRP, which
recommended the limit for exposure to radio waves is 1·6
watts/kilogram (W/kg) averaged over 1 gram of tissue. For more
information, please visit (website) to query
SAFETY TIPS
Use of wireless hands-free system (headphone, headset) with a low power Bluetooth emitter.
Make sure the cell phone has a low SAR.
Keep your calls short or send a text message (SMS) (instead.
This advice applies especially to children, adolescents and pregnant women.
Use cell phone when the signal quality is good.
People having active medical implants should preferably keep the cell phone at least 15 cm away from the implant.
Please read the instruction file first
Before you use this phone, please read all the safety cautions in the instructions in detail, to ensure safety and correct use.
The descriptions are based on the default settings
The pictures and screen shots may different from the actual product.
The phone with sound resource, wall paper and picture are permitted to use limited in Intex or among all the owners. Against the commercial and other reason to extract and use these file will violate the copyright law. Intex is not responsible
for this behave of right violation.
Receive and send message, upload and download, automatic synchronism or GPRS service may cause other kinds of fee. If you want to avoid the extra fee, choose the probable charging plan. Any relevant information, please contact the service supplier.
To the unknown software, be careful when install, the strange website pop up when browsing the internet, you can click but better to avoid the operation or the phone will be poisoned.
➢ Please properly keep this instruction book for the future reference.
Mobile phone parts diagram
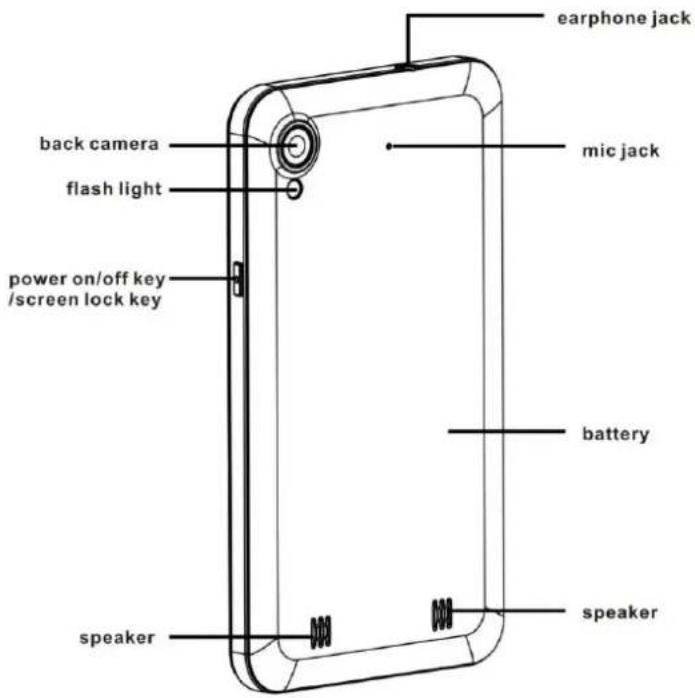
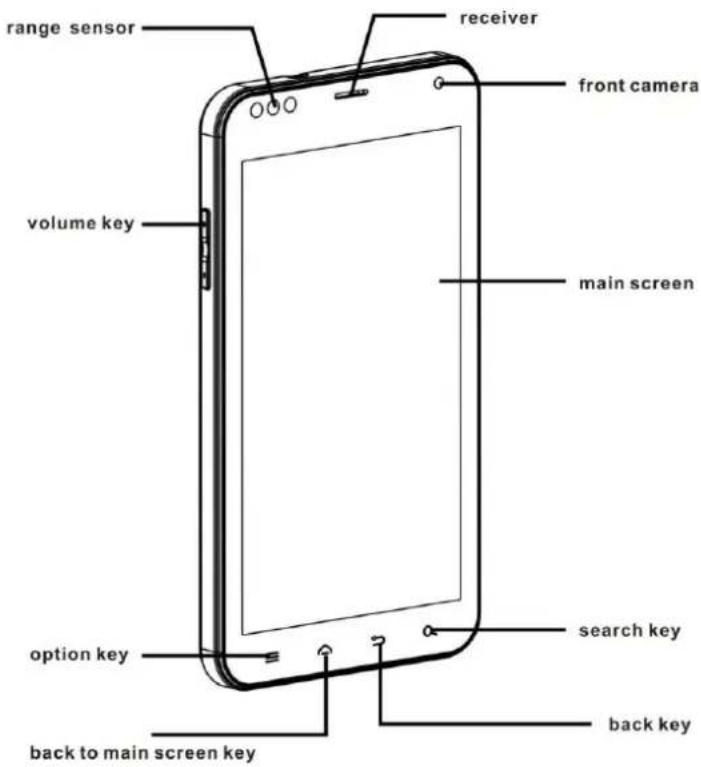
1 Install
1.1 Install the SIM card or USIM card and battery
- If the phone is on power, please turn it off, press the power off key->choose power off->confirm to turn off the phone, take off the battery
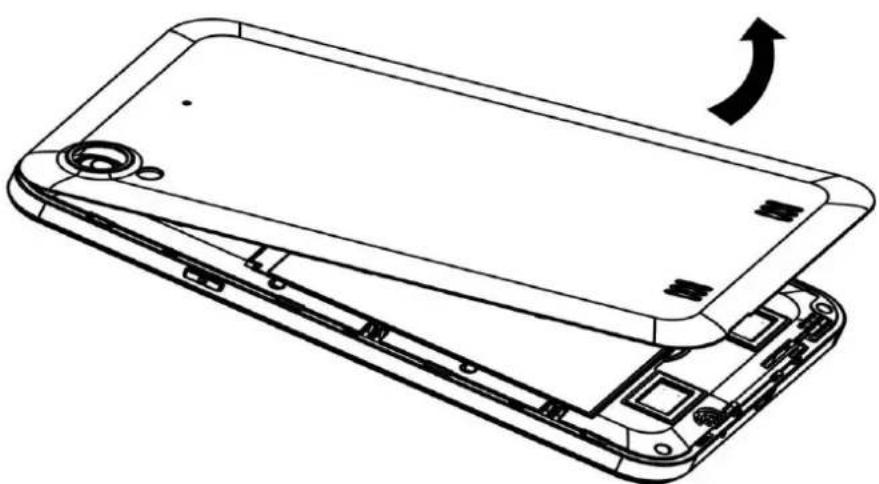
natural_image
Line drawing of a smartphone showing the open base and internal circuitry with a curved arrow indicating rotation (no text or symbols present)- Take off the battery, put the SIM card into the corresponding card slot
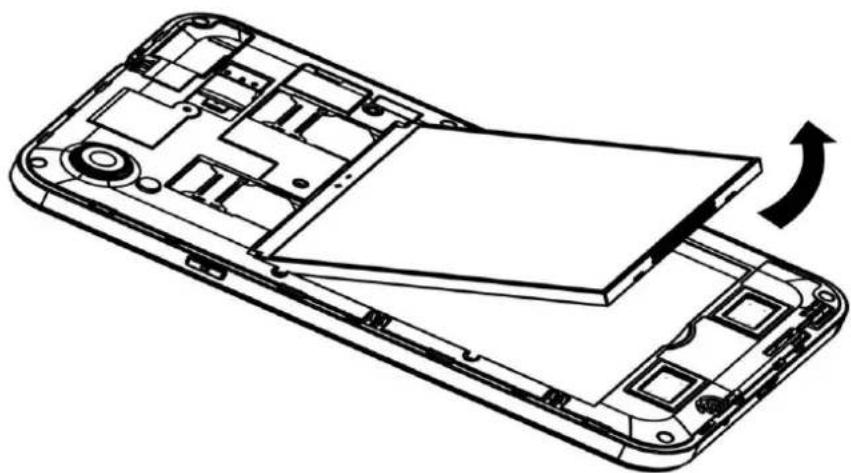
natural_image
Line drawing of a smartphone showing the open circuit board and internal components, with an arrow indicating the portion of the device (no text or symbols present)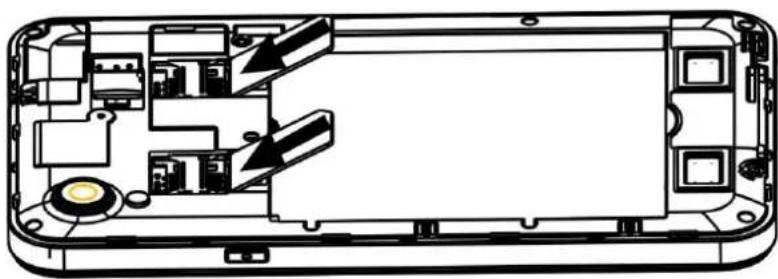
natural_image
Cross-sectional diagram of a device casing showing internal components and wiring (no text or labels)3. Put back the battery and battery cover
1.2 Battery charging
When using the phone at the first time, need to charge for the phone, can use charger or connect the phone with the computer via data cable.
The phone will issue warning tone and display electricity shortage information when low battery, the battery icon will turn red, moreover, the phone will turn off automatically when electricity is too low. Need to charge then you can use the phone:
If the battery is power off, can't turn on the phone immediately even connect to the charger, before you turn on the phone, please charge for several minutes.
When charging with the charger, Please put the small end plug of the charger into the mobile phone in the multi-function socket, put the big end into the standard
power socket, be attention the improper charger connection will lead to serious damage to the phone, to the damage caused by disoperation, will not guarantee to repair.
Can use the phone when charging, but thus will influence the charging time of the phone, the phone may get hot when charging, this is normal phenomenon, do not affect the using life and performance.
When the batteries get full electricity (battery icon doesn't move), please disconnect the charger and the phone, and take down the charger from the socket. Do not take off the battery when charging, this might damage the phone.
Reduce battery loss
If launched automatic synchronization, Bluetooth function or WLAN function in the background, the battery will consume faster. If you want to save electricity, please shut down unnecessary application. You can also reduce background light time and the brightness of the display screen, or press the power off key to switch over to sleep patterns.
1·3 Insert the storage card
If you want to store more multi-media file, you should insert storage card, the biggest storage card can be used in this phone is 32GB (depending on the storage card manufacturer and category)
Karbonn use the public storage card industry standard, but some brand may can't compatible with the phone, if use incompatible storage card might damage the phone and storage card, and also damage the data in the card.
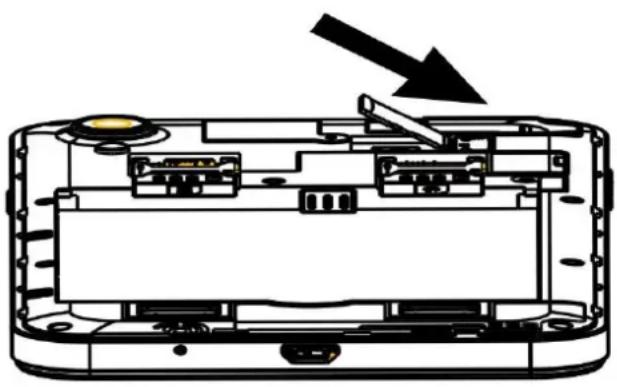
Install the storage card:
1, Take down battery cove and battery, insert the storage card into the phone, and let the golden electric shock surface downward.
natural_image
Cross-sectional diagram of a device showing internal components and a black arrow pointing to a component (no text or symbols present)- Push the storage card into the socket until it lock in place.
3, Put back the battery and battery cover.
1.4 Remove the storage card
Before you remove the storage card, please uninstall for safely remove.
- Under standby pattern, setting>storage>uninstall SD card>confirm
2, Take down the battery cover and battery.
3 Slightly push the storage card to drop from the phone, take out the card.
4, Put back the battery and battery cover
Attention: when upload or download data, please do not take out the storage card, or may lead to data loss or damage the phone and storage card.
1.5 Format the storage card
Format the storage card on the computer may lead to incompatibility between the card and the phone, please format the card on the phone.
Under standby pattern, setting>storage>format SD card>OK Before you format the storage card, remember to back up the important file to the phone.
1.6 Use the storage card as U disk
If you want to transfer the file from computer to the storage card of the equipment, please set the equipment to U disk pattern.
- Use USB cable to connect the equipment and the computer, at this time will drop-down the shortcut list, choose USB already connected. USB connected
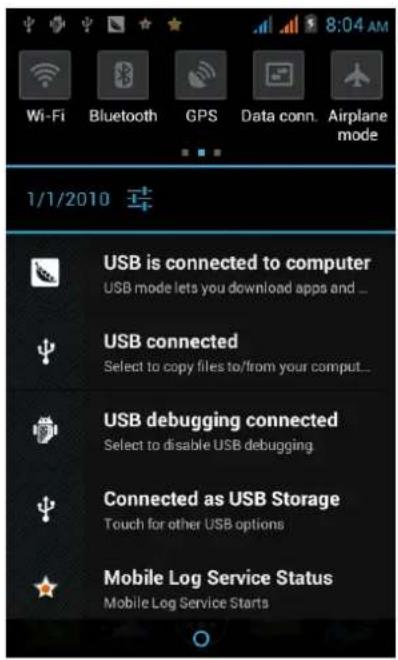
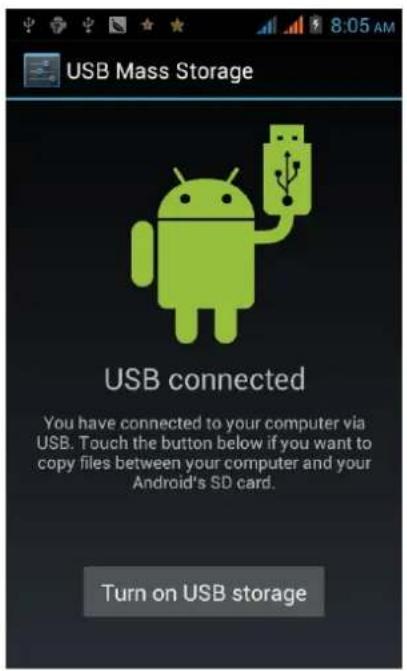
- In the pop-up interface, click to open the USB storage equipment, Turn on USB storage
Attention: after open the USB equipment, some applications may can't be used, such as camera, music player etc. If want to close U disk pattern, please click to close the USB storage
equipment·
1.7 Standby screen
When the phone is under standby pattern, can see standby screen. In the standby screen, can view the state of the phone and access program, and the standby screen have multiple panels, sliding to the left or right to choose a screen panel
Can add application or the application project, the group file or folder shortcuts to custom the standby screen: under standby mode, long hold application icon click on the standby screen blank area.
➢ Move the project in the standby screen, click on the project, and drag to the position you want.
➢ Delete project from standby screen: click on the project, the recycle bin appear above the screen, drag the project to the recycle bin, loosen when project turn red.
Use shortcuts surface; under standby pattern or use the application, click on the indicator icon area and drag down to open the shortcut panel, can cancel or start data connection function and access notice list, such as information, call, activity or processing condition. If you want to hide list, drag up the list will be OK. On the shortcut panel can also start
or shut down the following options: data connection, off-line mode, the screen brightness, standby, automatic roll screen and contextual model switching.
2 Custom mobile phone
Standby interface->main menu->setting
2·1 Wireless and internet
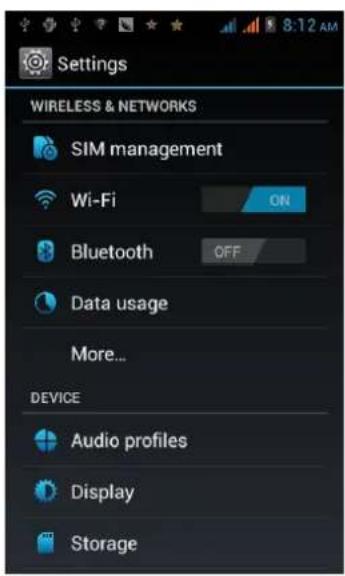
SIM card management: can set SIM card and voice calls, information, data connection to start or close.
Flow use situation: can check the current flow use situation, so that you can more clearly to control the flow use.
Other mode setting: start or close flight mode, and the internet setting.
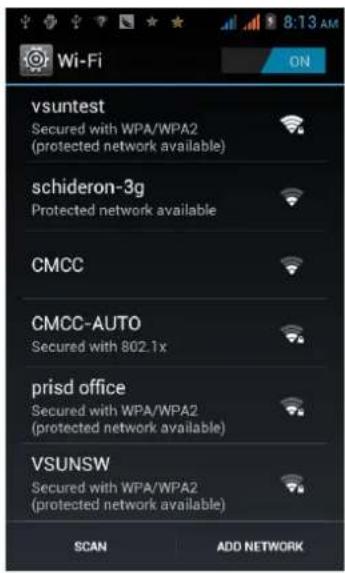
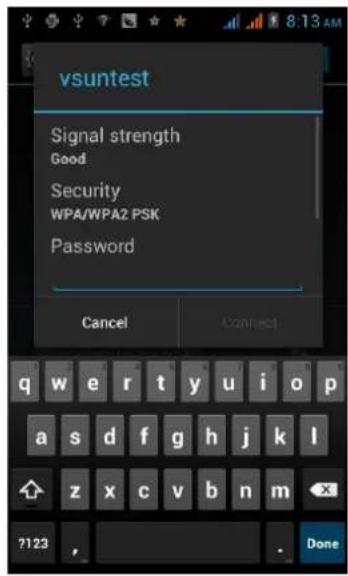
Use WIFI: setting>WLAN setting>open, will appear the wireless internet nearby, choose your internet, enter the password will be ok.
2·2 Equipment
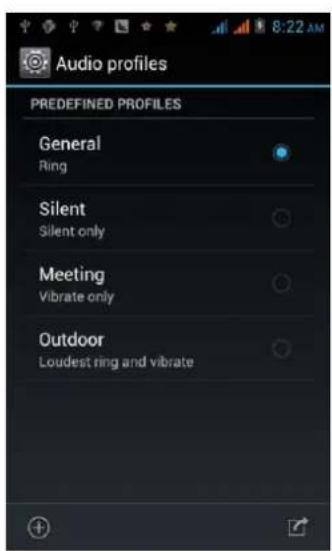
Audio Profiles: In audio profiles, it has General mode, Silent mode, Meeting mode, and Outdoor mode. You also can add Custom mode according to your demand, and reset all the audio profiles to default.
Display: You can custom the display settings.
➢ Brightness: Set the brightness of the screen.
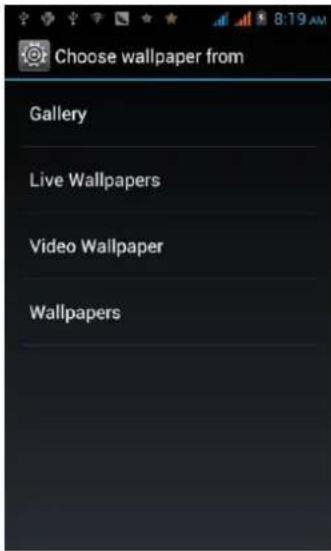
Wallpaper: Wallpaper setting has four modes, Live Wallpapers, Gallery, Wallpapers, and Video Wallpapers. You can choose your style by yourself, also can download from the Internet
Theme: change the Theme UI.
▶ Auto-rotate screen: On/Off
Sleep: 15 seconds/30 seconds/1 min/2 min/5 min/10 min/30 min, you can set the sleep time according to your habit. Sleep time
is shorter, you can save more electricity, increase your mobile using time.
➢ Font size: Set the size of System fonts.
Storage: Check the use condition, and install, unload, erase SD card.
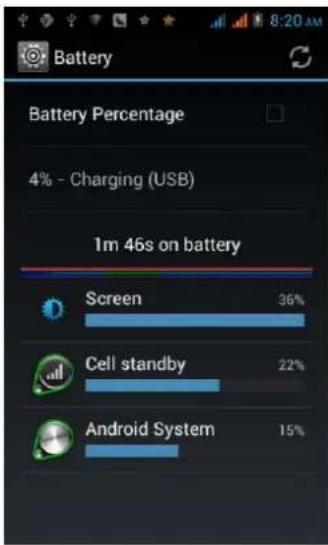
Battery Percentage: Start or Close the battery percentage, know about the using condition of the battery.
Apps: check and manage the downloaded apps, and unload the unnecessary apps.
bar
| Category | Percentage (%) | | :--- | :--- | | Screen | 36 | | Cell standby | 22 | | Android System | 15 | Battery Percentage: 4% - Charging (USB)2·3 Personal
Accounts & sync: On/Off
Location services: set the location services.
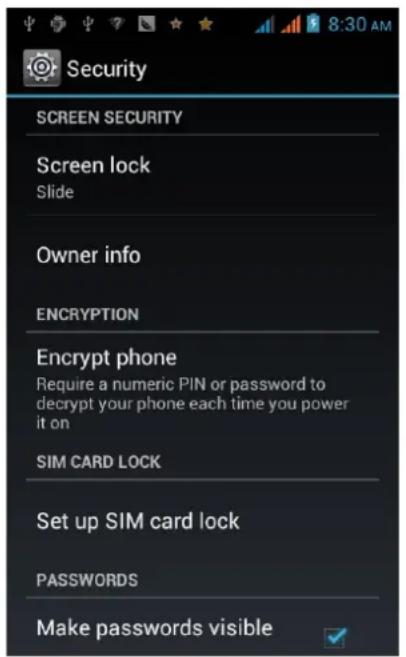
Security: Security settings can set screen lock mode, encrypt the
phone, set SIM card lock and device administrators, and set the use and install of the unknown sources and apps.
Language & Input: Set the system languages and input methods. Backup & reset: DRM reset, Factory data reset. Note that the data of your mobile will be erased when reset factory data.
2·4 System
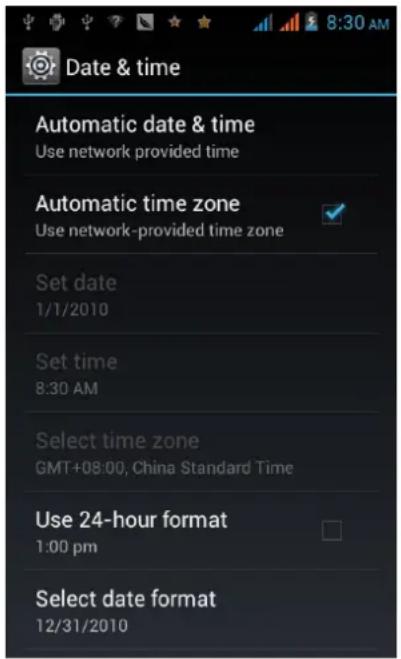
Date & time: Manual setting time, automatic time mode.
➢ Automatic date & time: can choose use network provided time and off.
▶ Automatic time zone: On/Off
Set date/time/ Select time zone: Manually set date, time and time zone.
▶ Use 24-hour format: On/Off
Select date format: Select the format according to your habit.
Accessibility: some special functions settings.
About Phone: Include Status, Legal information, Model number, Android, Baseband version and Kernel version.
2·5 Install and unload apps
Install apps: download the app through e-market or browser, click install. Android system is APK format. You also can down from your computer, copy it to T-Flash card, then get into the T-Flash card through file manager, choose APK file, click install.
Unload apps: Click the menu> Manage applications, click the app you want to unload, click "unload" or "erase the data" to erase the app record, release the space.
Note: If the app downloaded from the browser can not be installed, please choose Setting > Security> Unknown sources. And you can find it from the download content.
2·6 Gesture Sensor
Gesture Sensor: Aim at the cell phone top left corner, slide left and right. Through the gesture slide to operate the parts
functions of the cell phone, switch pictures, videos, music and answer and end incoming calls.
3 First Interface
3.1 Dial
In homepage, click , input the numbers then click
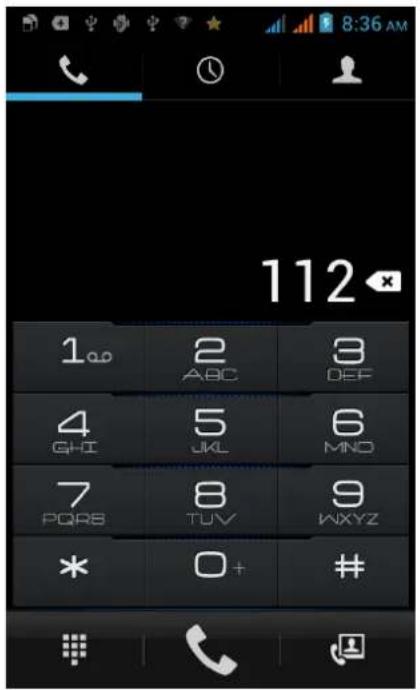
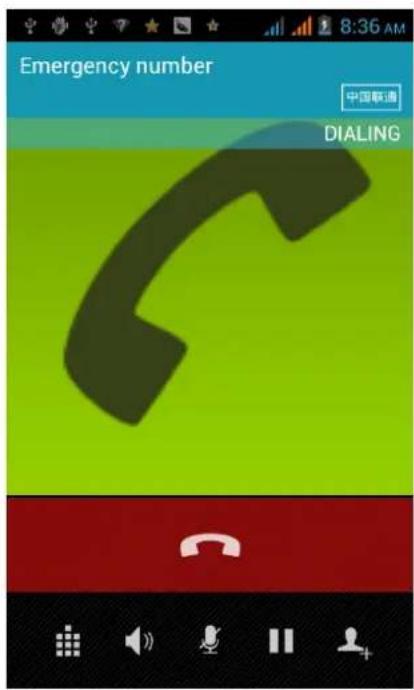
Press incoming calls, Slide to left for rejecting the calls, slide to the top is rejecting the SMS, slide to right is answering the calls.
Note: When receive the incoming calls, will display the name,
number, contacts photo, etc, information. And will choose ringtone hint and Vibration hint according to cell phone settings. If the incoming calls are not in the contacts list, it will only display the number and default photo.
3·2 Contacts
In homepage, click >Contact. Choose new contact, display √ is OK。
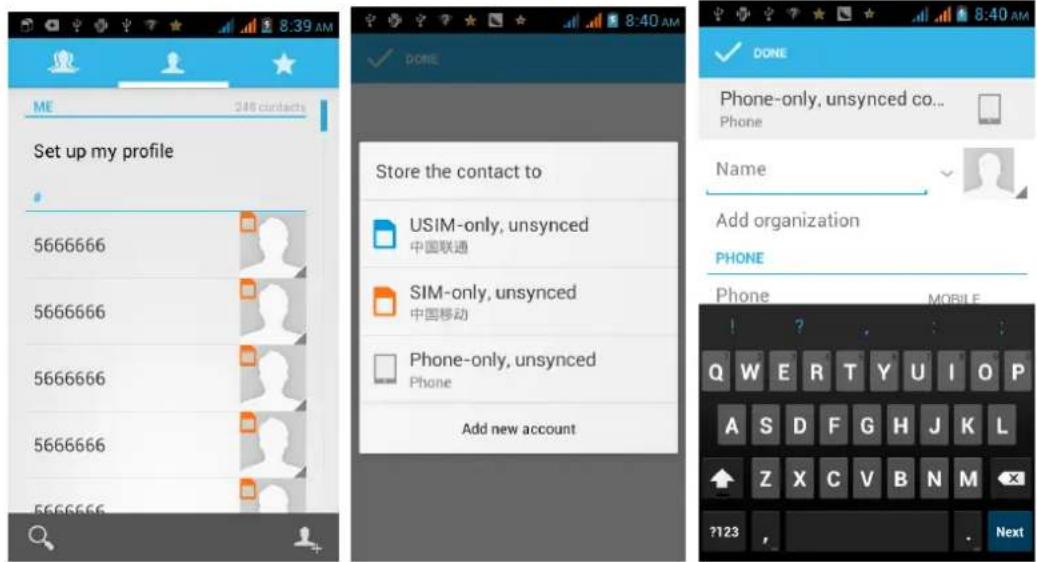
Import Contacts
-
In contacts list, press menu, click import/export, choose the contact in the list.
-
Choose next, you can import or export the message according to the steps.
Note: If the contacts are too many, it will take some time to
read the contacts information, please wait with patiently.
Search contacts
-
Press "search" in contacts list
-
Input the contact name, then contact meet the requirements will display in the bottom of the input box.
Note: find the contacts, you can click it to make the phone call or send SMS/MMS/Emails, etc.
3·3 Message
In homepage, click >message
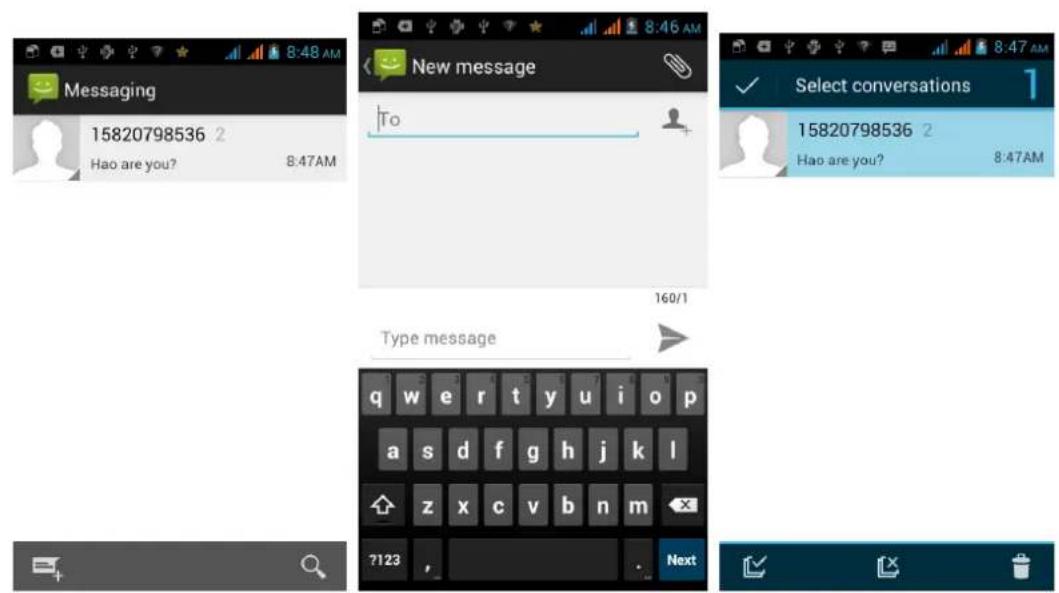
Click to type messages, click add contacts, also you can input the number. After type messages, click to send message. Long press the message, choose can
delete, multi-choose, and select all messages.
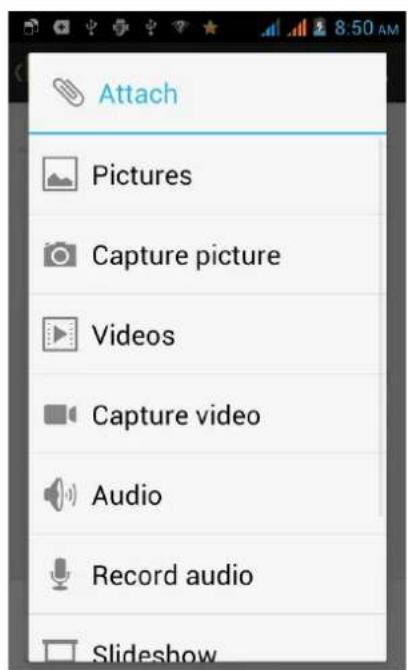
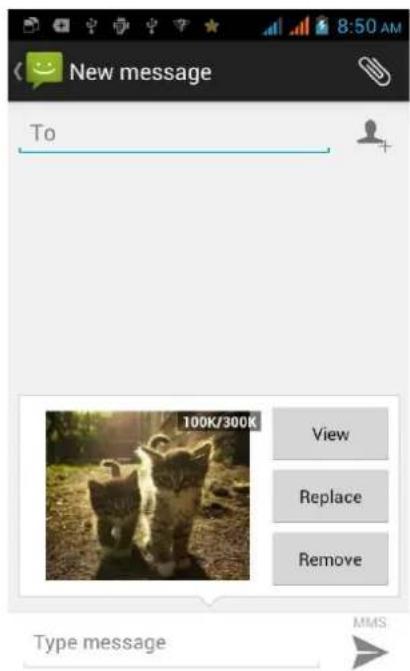
Send MMS, please click information editor interface, choose the attachments, it will convert to MMS. Or:
- Click "Menu", click "add theme", type theme content.
2, Click "input content" box, type your message. - Click "Menu", add attachment.
Note: In attachment adding window, you can add pictures, videos, audios, records, PPT, contacts, calendar, etc. After adding the attachments, you can also check, replace, and delete them.
3.4 Browser
In homepage, click search or input the websites, click

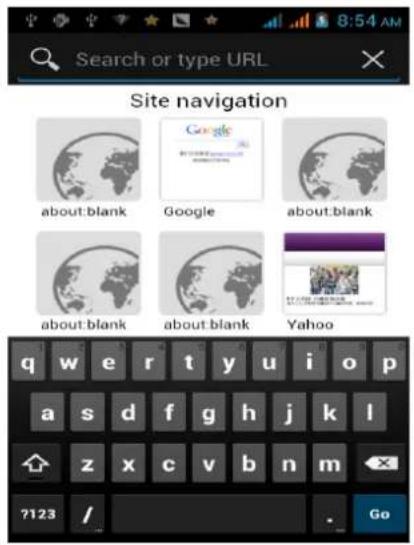
Click "Menu", can realize more functions.
3·5 E-mail
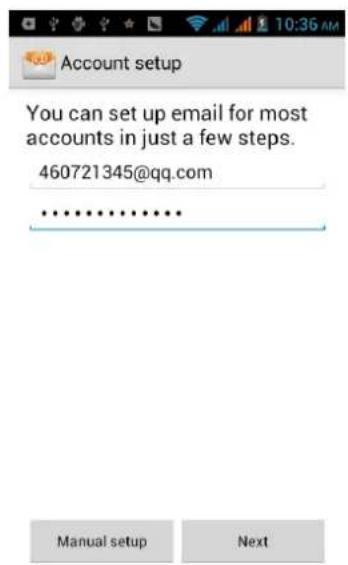
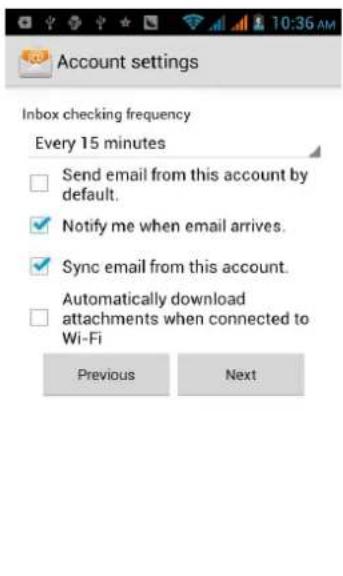
- In homepage, click "Email" > input email account and password>click next step, system will extract mail setting automatically.
2, Send-receive emails
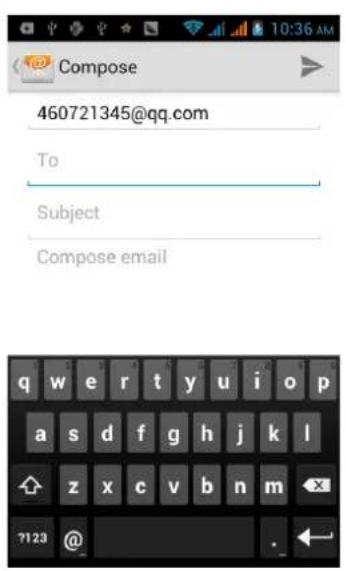
Click to edit the mail>input the address in recipients' box> type theme> edit mail content>click to send the mail out. You also can press "menu" to add attachment and set the sent mails. When your cell phone connect to the internet, enter into Email, the inbox will receive the mails automatically.
Note: Click can search the mails. Click can refresh the mails. Click can get into mail folder list to check the draft and sent mails.
3·6 Camera & Vidicon
Take Picturesque
In homepage, click >camera>Camera alignment to shooting
objects>click
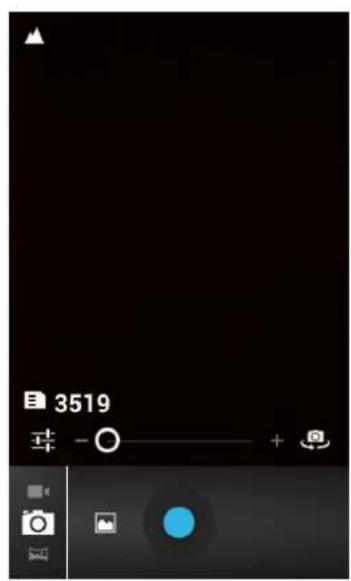
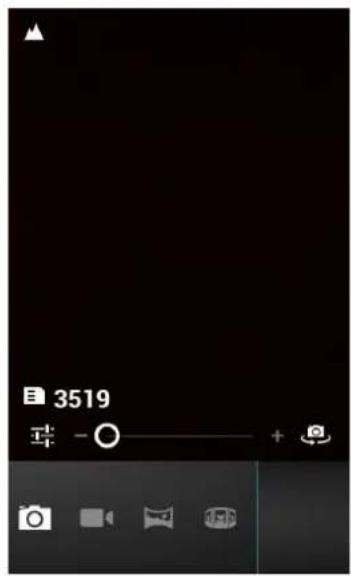
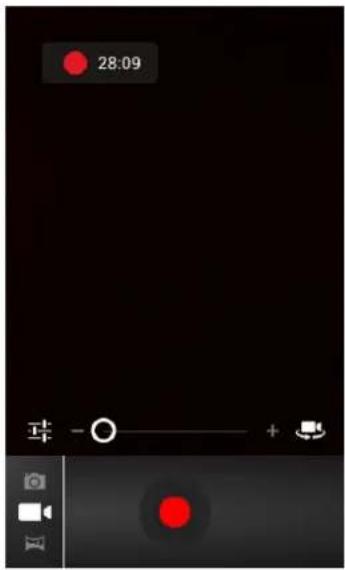
Click The bottom or top of the icon and choose for continuous shooting, Select for Panorama shooting.
Select Video shooting.
Cameras frame your subject, Click Shooting, Click to end shooting.
3·7 Multi-media file management
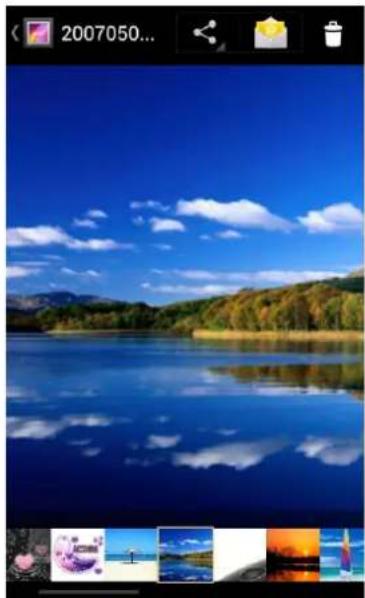
- Click In menu to enter into pictures list interface
natural_image
Scenic lake view with autumn foliage and clear sky reflections (no text or symbols)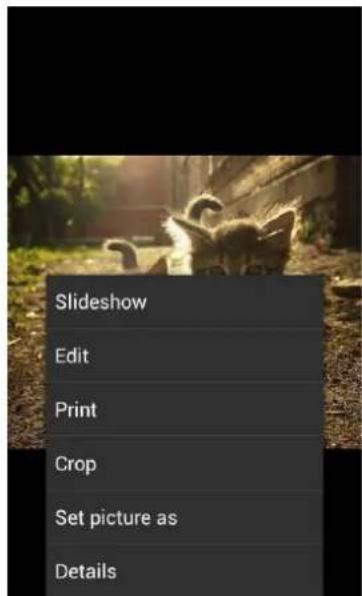
Choose picture and click, change pictures via horizontal left and right slide. Click menu button to choose play film slide.
Click 📁 to send email or massage for the selected picture. Click to delete pictures.
- Click a menu to enter into pictures list interface, choose video for play
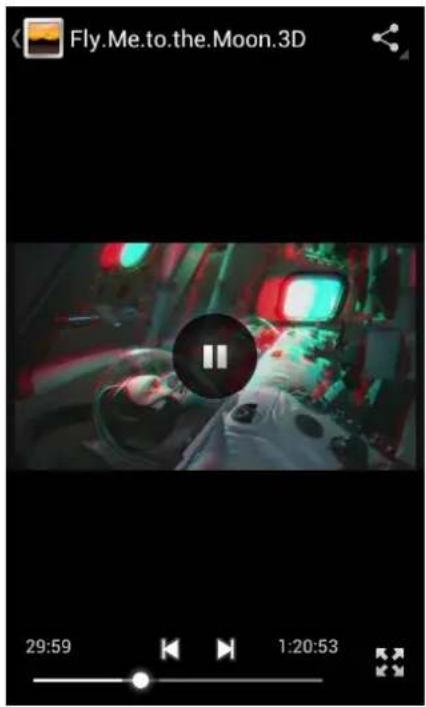
Click ☐ to transfer to full screen for
the playing video.
Also could click [play button] menu to enter into video playing list to play video.
3.8 Music player
Click main menu interface > music list, Choose the music for play.
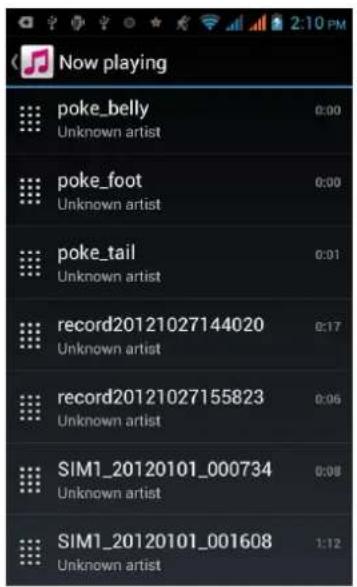
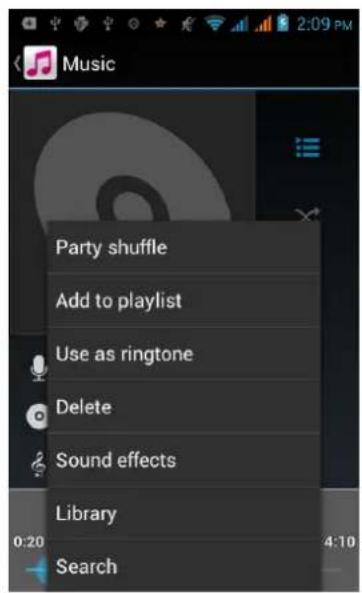
Choose music to into playing interface:

Enter into music list interface.

On or off random play.

Replay switch.

Music switch, last or next item, and pause.

Music fast reverse and fast forward.
Note: for more operation please click menu button, see above picture.
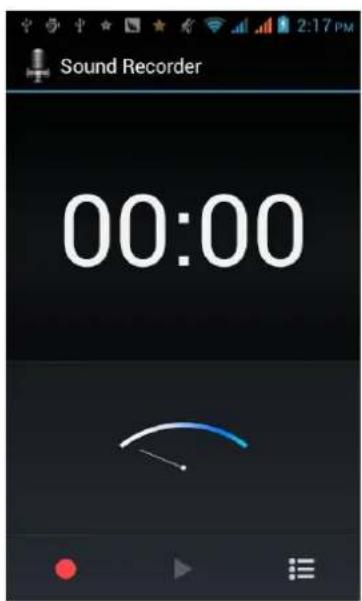
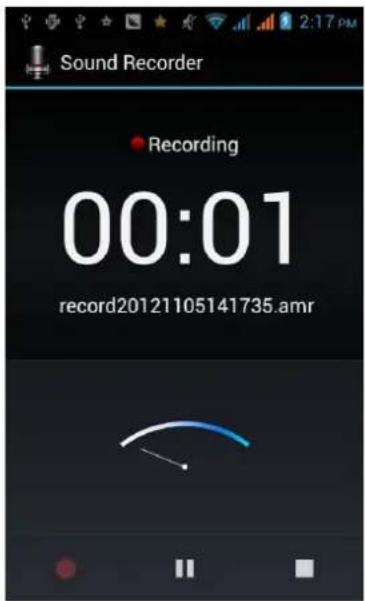
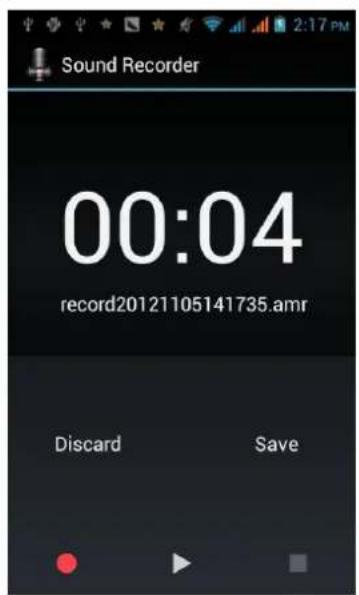
3·9 Recorder
Click in main menu > recorder, click into record, click for pause
Click for stop, and remind to save or abandon the record
file· Choose save and click ▶ to play the file·
3·10 Calendar
Click in main menu > calendar
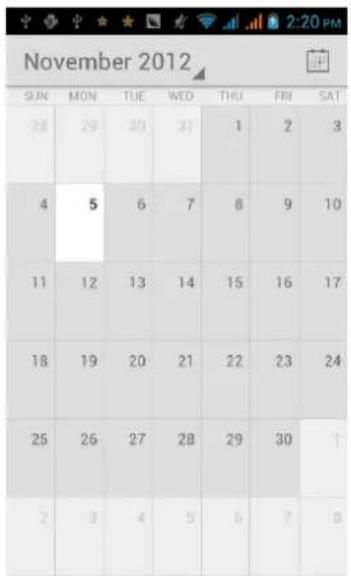
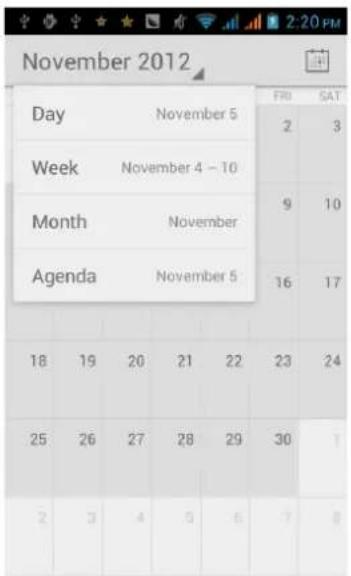
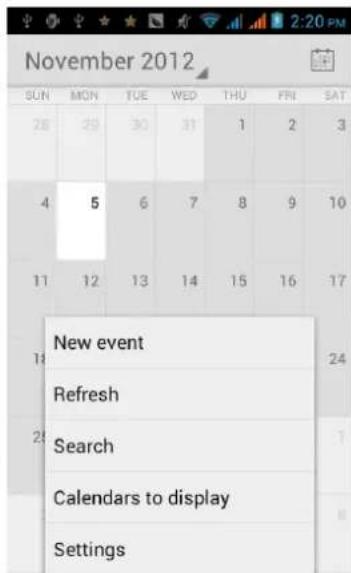
Choose to switch the calendar interface, display per date, week, month or schedule.
Press menu button for more info set.
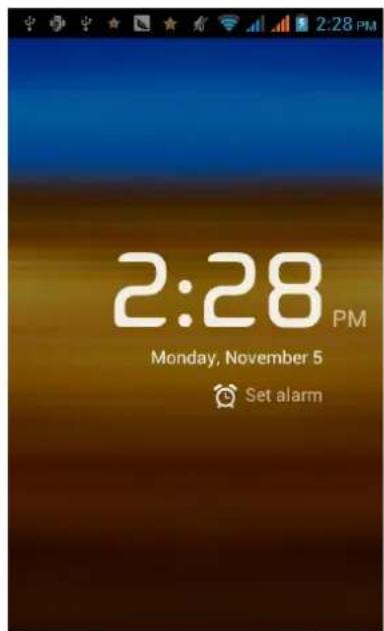
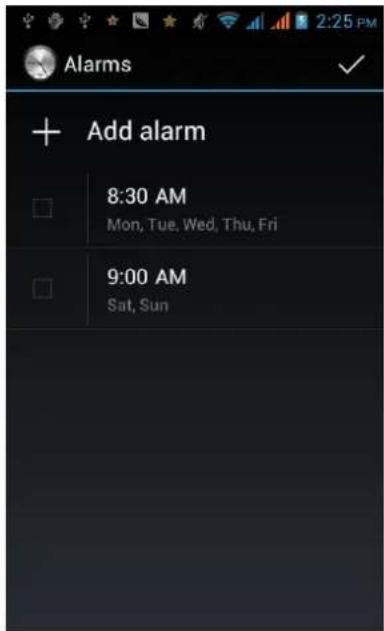
3·11 Clock
Click in main menu>clock
Click 📋 Set alarm to into interface for alarm setting, click √ after set and then add ok.
3·12 Calculator
Click in main menu>calculator
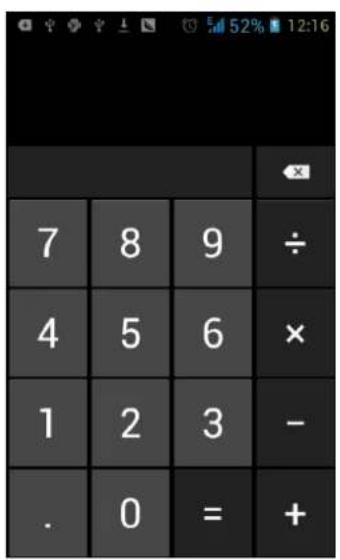
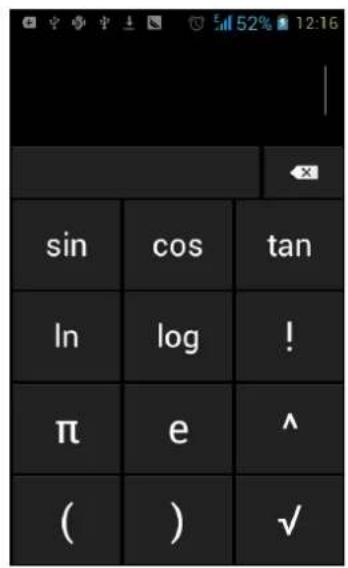
Press menu key>choose high grade panel to get the high grade usage:
3·13 Other functions
- SIM card application: this will be differ per your operators
- Search: shortcut of search engine
You should select right area, then enter to search channel. And channels searched will be channel list.
4, FM: Make sure the headset, which is used as the antenna, is plugged in before using the FM radio.
5,Flashlight:on/off.
6, auto call record: on/off.
7 Flip mute: on/off
8, Mobile Tracker
By Selecting Mobile Tracker you should input a new password that
you remember easily. And you should input this password every time you enter this menu.
By default it is set as off.
When you set it ON, the mobile will remember SIM's IMSI.
In case that user turn ON and lost the mobile, if someone pick-up the mobile and insert new SIM,
The Mobile Tracker will send SMS to Phone No· to show the details of the lost mobile as given below.
4 Application
These are third party applications; you have to open the GPRS or WLAN before using these functions.
4.1 Map
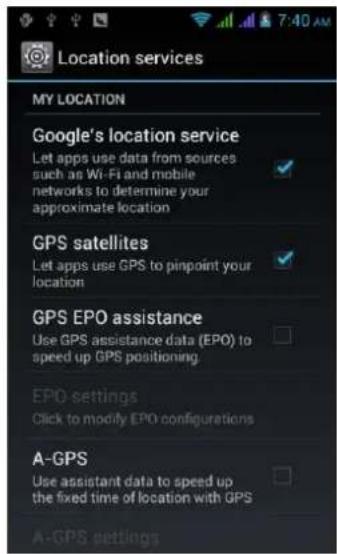
Local、Maps、Navigation, these applications are based on Google maps, When you use a navigation; you must first open the setting of GPS. Settings>Location services
Latitude: You can share your location.
4·2 Talk
These are third party applications; using these functions will cost GPRS charges as per the Service Provider. If you don't have a SIM card, you must open the WLAN.
Click in main menu>talk, Input the corresponding user name and password· and then landing
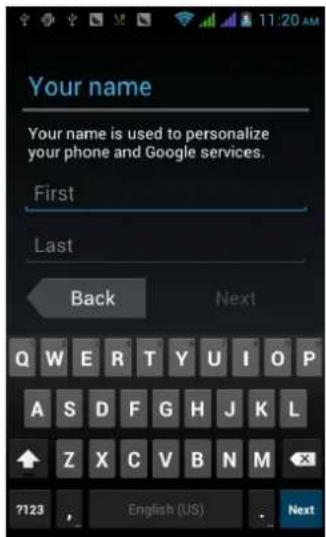
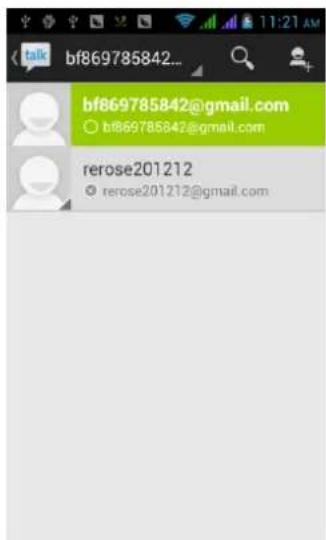
Choose a friend to start a conversation and Click, You can tell
a friend video calls. More important, Can switch video and only voice chat.
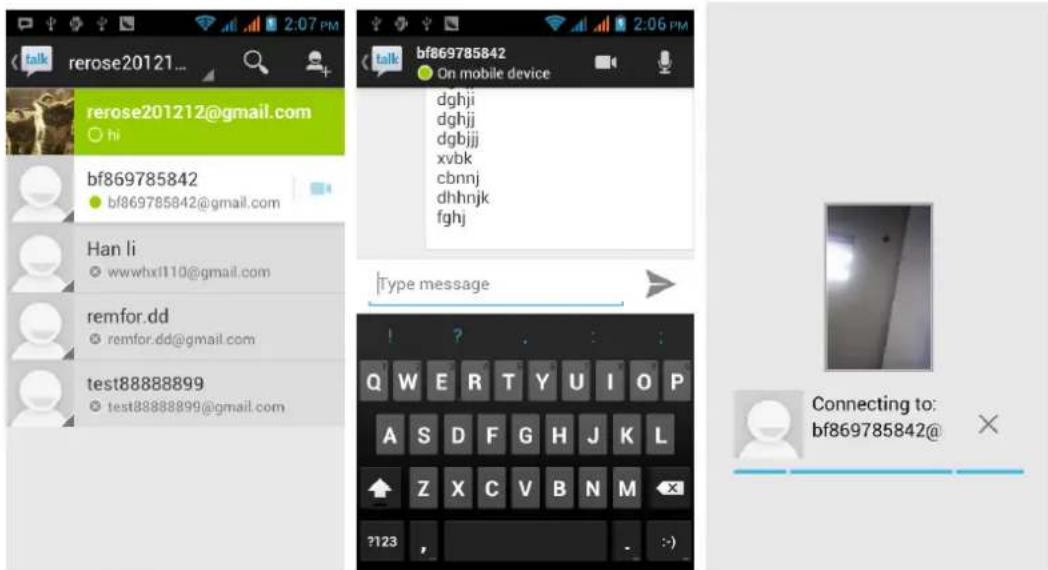
Click with a friend voice chat.
Note: If you can't log in, just check the password and account name is correct, and the network is connected.
4.3 Facebook
These are third party applications; using these functions will cost GPRS charges as per the Service Provider. If you don't have a SIM card, you must open the WLAN.
Click in main menu> Facebook
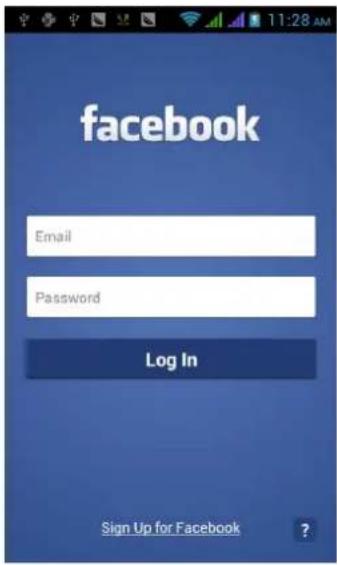
Note: If you can't log in, just check the password and account name is correct, and the network is connected.
4.4 Nimbizz
Click in main menu> Nimbizz
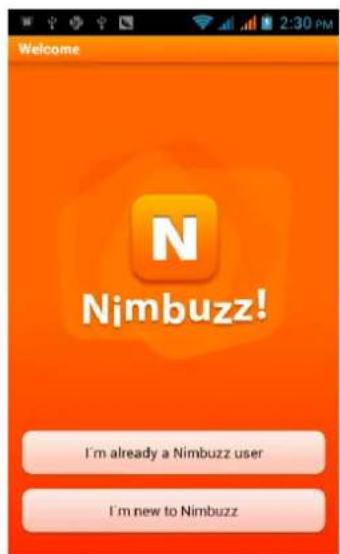
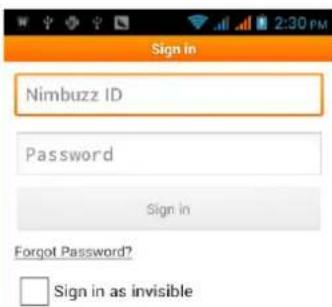
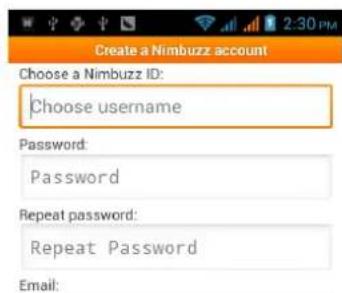
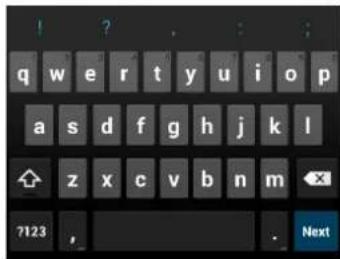
Click enter login interface.
If you do not have this account, you can click and create a new account.

Note: If you can't log in, just check the password and account name is correct, and the network is connected.
4.5 Google+, Messenger
Chat tool, You can also share photos to your friends.
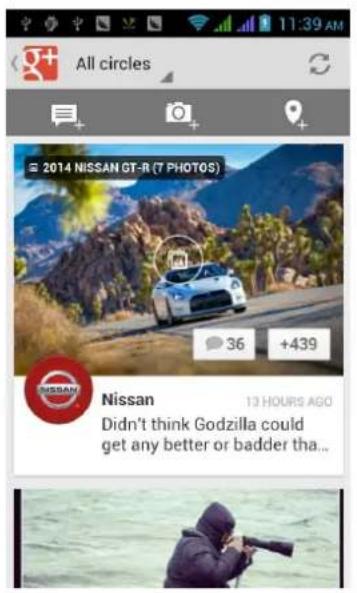
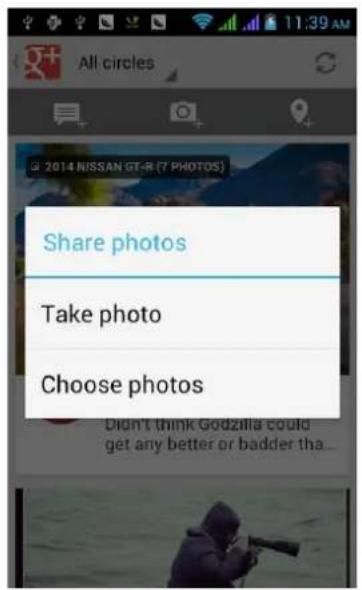
Click in main menu>Google+
Click you can write information to share with your friends. Click You can take pictures of the photos in the album or choose to share with your friends.
Click You can share your position to your friends
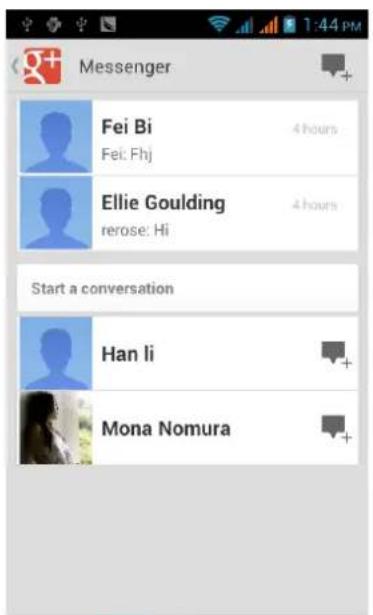
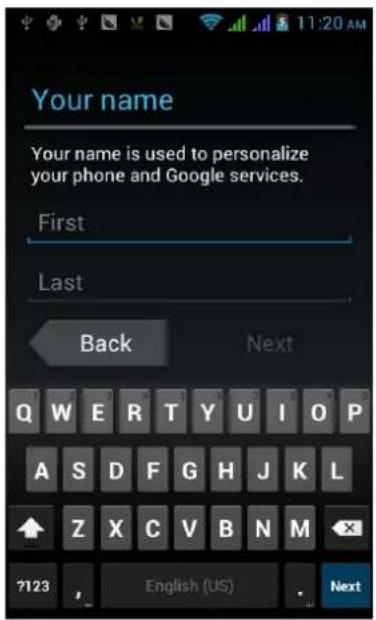
Click in main menu > messenger
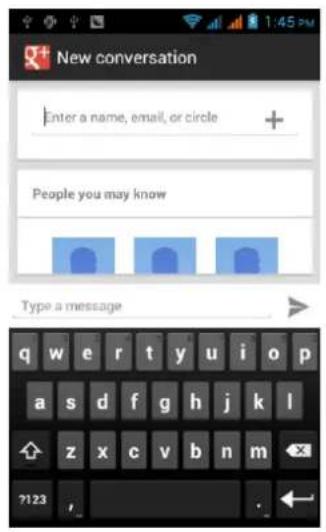
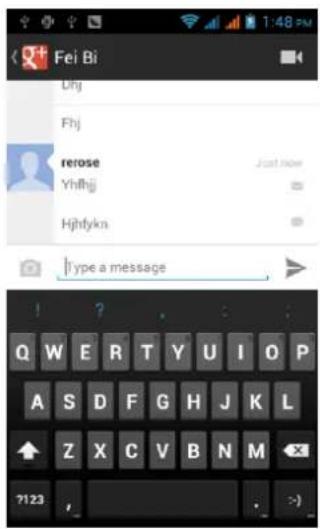
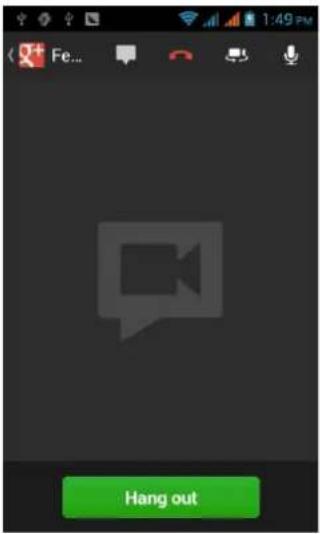
Click > new conversation, you can build a new dialogue with your friends
Choose a friend to start a conversation and Click. You can tell a friend video calls. More important, Can switch video and only voice chat.
Note: If you can't log in, just check the password and account name is correct, and the network is connected.
4·6 Play Music, AajTAK, Headlines, Saavn
Multimedia tools, you can listen to music and Play video online.
4.7 Documents to Go, Adobe Reader, Flash Player settings
You can open a variety of formats, Such as word, ppt, doc, xls, PDT swf etc.
4.8 Games
Fruit Ninjafree, Alpine Boarder Lite, Angry Birds Racing Moto, Temple Run
4.9 Play Store
You can download the application again.
5 Use and Maintenance
Far from any liquid, do not put your mobiles in water, raining or expose in any wet places.
Far from extreme cold or hot, avoid expose the mobile in below 10^ C or above 45^ C.
Far from dust and dirt, do not put mobile in dust, dirt, sandy, food and other improper physical environment.
Please use dry and soft cloth to clear mobile, do not use alcohol or other kinds of cleanser
Use carefully and prevent mobile from falling.
6 Technical Information
Weight: 228.4 gram (with battery)
Size Length: 131mm × Width: 93mm × Depth: 11mm
Battery: 2500mAh
Networks: GSM 900/1800 MHz
SAR Value: **** -GSM 900MHz; **** -DCS 1800MHz; ......etc
Model: Aqua Style
Weight: 228·4gram (with battery)
Lithium Battery
Model: BR 911
Nominal voltage: 3·7v
Nominal: 4·2v
Capacity rating: 2500mAh
Continuous standby time*:300-350hrs
Continuous calling time: 2(3G)-3·5(2G) hrs
* Depending on the network
Operation Temperature: -10\~+55 °C
The operation time of the battery depends on conditions such as:
• Transmitting power level
• Signal (distance between the phone and the base station)
• Network parameters defined by the operator
• Phone use (WAP, games, SMS)
- Charging procedure used
Exclusions:
Subject to the exclusions contained below:
-
Damage due to the improper use.
-
User does not follow the manual.
Explanation:
The company has the final right of the explanation for this document.
Software upgrades will not be announced.
All pictures are for reference only in the instruction book; please refer to the actual phone:
Disclaimer
© Intex· All rights reserved·
Features and specifications are subject to change without prior
notice· Certain mobile phone features may not be activated by your service provider, and / or their network setting may limit the feature's functionality· Services and some features such as GPRS, email may be dependent on the network, SIM card, as well as on the compatibility of the devices used and content formats supported and may require network/service
subscription/solutions. Data transfers speeds are network dependent. Always contact your service provider for details or help. Talk and standby time is quoted in digital mode and are approximate; battery performance and the signal reception depend on network configuration, signal strength, type of SIM card, operating temperature, features selected as well as voice, data and other application usage pattern. The phones supports Bluetooth, A2DP, in order for Bluetooth devices to communicate with one another, they must utilize the same Bluetooth Profile. To determine the profiles supported by other Intex products, visit www.intextechologies.com, for other devices, contact their respective manufacturers. Always demand for original Intex mobile phones to protect against buying tinkered and/or used, refurbished or tampered phones. The warranty is applicable only for Intex phones; the company is not responsible for any loss or theft. Always use Intex original Enhancements (including
batteries) for safety. The use of any other type may invalidate and approval or warranty applying to the mobile phone and may be dangerous. The phone is designed to operate using Li-ion batteries approved by the phone manufactures. Using non approved batteries with the phone may result in poor performance and damage to the phone or its enhancements. The display and products visualization here are illustrative purposes only; Display / color of the phone may differ from that shown on the manual. All features, functionality and other product specifications are based on the latest available information and are correct at the time of printing; however such product specifications are subject to change without notice. Copyrights are reserved. Intex is the trademark of INTEX TECHNOLOGIES (INDIA) LTD. which is registered. The unauthorized copying of copyrighted material is not legalized is inimical to the provisions of the copyright laws of India and other countries.
INFORMATION UNDER E-WASTE (MANAGEMENT AND HANDLING) RULES, 2011
For disposal of e-waste, please call our helpline no· or visit our website.
E-waste Helpline no· 1800-103-8822
We blink:
http://intextechnologies.com/window_self/Waste%20Disposal.html
Do's for disposal of product
Always drop your used electronic products, batteries, and packaging materials after the end of their life in nearest collection point or collection center
Separate the packaging material according to responsible waste disposal options and sorting for recycling.
The battery can easily be removed from the product for recycling. Don't of disposal of equipment
Never dump E-waste in garbage bins or municipal solid waste stream.
Do not dispose of your product as unsorted municipal waste. Do not throw used batteries into household waste.
Do not dispose damaged or leaking Lithium Ion (Li-Ion) battery with normal household waste.
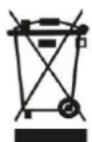
Information on the consequences of improper handling, accidental breakage damage and improper recycling of the end of life product If batteries are not properly disposed of, it can cause harm to
human health or the environment.
Placing of batteries or devices on or in heating devices, such as microwave ovens, stoves, or radiators and improper disposal of batteries may lead to explosion.
If the battery terminals are in contact with metal objects, it may cause a fire.
- Custom mobile phone....16
- First Interface....21
- SAFETY TIPS
- Please read the instruction file first
- Install
- Install the SIM card or USIM card and battery
- Put back the battery and battery cover
- Battery charging
- Reduce battery loss
- 1·3 Insert the storage card
- Remove the storage card
- Format the storage card
- Use the storage card as U disk
- equipment·
- Standby screen
- Custom mobile phone
- 2·1 Wireless and internet
- 2·2 Equipment
- 2·3 Personal
- 2·4 System
- 2·5 Install and unload apps
- 2·6 Gesture Sensor
- First Interface
- Dial
- 3·2 Contacts
- Import Contacts
- Search contacts
- 3·3 Message
- Browser
- 3·5 E-mail
- 2, Send-receive emails
- 3·6 Camera & Vidicon
- 3·7 Multi-media file management
- Music player
- 3·9 Recorder
- 3·10 Calendar
- 3·11 Clock
- 3·12 Calculator
- 3·13 Other functions
- Application
- Map
- 4·2 Talk
- Nimbizz
- Google+, Messenger
- Use and Maintenance
- Technical Information
Brand : INTEX
Model : Aqua Style
Category : Smartphone