
Q7436 - Server AXIS - Free user manual and instructions
Find the device manual for free Q7436 AXIS in PDF.


| Brand | AXIS |
| Model | Q7436 |
| Product Type | Video Server (Encoder) |
| Dimensions (HxWxD) | 44 x 440 x 250 mm (1.73 x 17.32 x 9.84 in) |
| Weight | 2.5 kg (5.5 lb) |
| Power Supply | AC 100-240 V, 50/60 Hz, max 25 W |
| Operating Temperature | 0 °C to 50 °C (32 °F to 122 °F) |
| Network Interface | 1x 10/100/1000 Mbps RJ-45 |
| Video Inputs | 16 channels (BNC composite) |
| Video Compression | H.264, MJPEG |
| Max Resolution per Channel | 704 x 480 (NTSC) / 704 x 576 (PAL) |
| Storage | Support for microSD card (not included) |
| Security | Password protection, IP address filtering, HTTPS encryption |
| Supported Protocols | IPv4, IPv6, HTTP, HTTPS, RTSP, FTP, SMTP |
| Mounting | Rack-mountable (19") |
| Included Accessories | Power cord, mounting brackets, quick start guide |
| Compliance | CE, FCC Class A, UL |
Frequently Asked Questions - Q7436 AXIS
User questions about Q7436 AXIS
0 question about this device. Answer the ones you know or ask your own.
Ask a new question about this device
Download the instructions for your Server in PDF format for free! Find your manual Q7436 - AXIS and take your electronic device back in hand. On this page are published all the documents necessary for the use of your device. Q7436 by AXIS.
USER MANUAL Q7436 AXIS
EquipmentModifications
This equipment must be installed and used in strict accordance with the instructions given in the user documentation. This equipment contains nouser-serviceable components. Unauthorized equipment changes or modifications will invalidate all applicable regulatory certifications and approvals.
TrademarkAcknowledgments
AXISCOMMUNICATIONS, AXIS, ETRAX, ARTPEC and VAPIX are registered trademarks to trademark applications of AxisAB in various jurisdictions. All other company names and products are trademarks or registered trademarks of their respective companies.
Apple,Boa,Apache,Bonjour,Ethernet,InternetExplorer,Linux,Microsoft,Mozilla,Real,SMPTE,QuickTime,UNIX,Windows,Windows VistaandWWWareregisteredtrademarksoftherespectiveholders. JavaandallJava-basedtrademarksandlogosaretrademarkor registeredtrademarksofOracleand/oritsaffiliates.UPnP ^TM is certificationmarkoftheUPnP ^TM ImplementersCorporation.
RegulatoryInformation
Europe
CE
CE ThisproductcomplieswiththeapplicableCEmarkingdirectives andharmonizedstandards:
- Electromagnetic Compatibility (EMC) Directive 2004/108/EC. See Electromagnetic Compatibility (EMC), on page 2.
LowVoltage(LVD)Directive2006/95/ECSeeSafetyprpag2
- Restrictions of Hazardous Substances (RoHS) Directive 2011/65/EU. See Disposal and Recycling, on page 2.
Acopyoftheoriginaldeclarationofconformitymaybeobtainedfrom AxisCommunicationsAB.SeeContactInformation,onpage3.
Electromagnetic Compatibility(EMC)
This equipment has been designed and tested to fulfill applicable standards for:
- Radiofrequencyemissionwheninstalledaccordingtothe instructionsandusedinitsintendedenvironment.
- Immunitytoelectricalandelectromagneticphenomenawhen installedaccordingtotheinstructionsandusedinitsintended environment.
USA
Thisequipmenthasbeentestedusingashieldednetworkcable(STP) andfoundtocomplywiththelimitsforaClassBdigitaldevice, pursuanttopart15oftheFCCRules. Theselimitsaredesigned toprovidereasonableprotectionagainstharmfulinterferenceina residentialinstallation. Thisequipmentgenerates,usesandcanradiate radiofrequencyenergyand,ifnotinstalledandusedinaccordance withtheinstructions,maycauseharmfulinterferencetoradio communications. However,thereisnoguaranteethatinterference willnotoccurinaparticularinstallation.Ifthisequipmentdoes causeharmfulinterferencetoradioortelevisionreception,which canbedeterminedbyturningtheequipmentoffandon,theuseris encouragedtotrytocorrecttheinterferencebyoneormoreofthe followingmeasures:
•Reorientorrelocatethereceivingantenna.
- Increase these separation between the equipment and receiver.
- Connecttheequipmentintoanoutletonacircuitdifferentfrom thattowhichthereceiverisconnected.
- Consultthedealeroranexperiencedradio/TVtechnicianforhelp.
Canada
ThisClassBdigitalapparatuscomplieswithCanadianICES-003.
Europe
This digitalequipmentfulfillstherequirementsforRFemission according to the ClassBlimitofEN55022.
This product fulfill therequirements for immunity according to EN61000-6-1 residential, commercial and light-industrial environments.
Thisproductfulfillstherequirementsforimmunityaccordingto EN61000-6-2industrialenvironments.
Thisproductfulfillstherequirementsforimmunityaccordingto EN55024officeandcommercialenvironments
Australia/NewZealand
This digitalequipmentfulfillstherequirementsforRFemission according to the ClassBlimitofAS/NZSCISPR22.
Japan
DisposalandRecycling
Whenthisproducthasreachedtheendofitsusefullife,disposeof itaccordingtolocalrawsandregulations.Forinformationabout yournearestdesignatedcollectionpoint,contactyourlocalauthority responsibleforwastedisposal.Inaccordancewithlocallegislation, penaltiesmaybeapplicableforincorrectdisposalofthiswaste.
Europe

Thissymbolmeansthattheproductshallnotbedisposedof togetherwithhouseholdorcommercialwaste. Directive2012/19/EU onwasteelectricalandelectronicequipment(WEEE)isapplicable in theEuropeanUnionmemberstates.Topreventpotentialharmto humanhealthandtheenvironment,theproductmustbedisposed ofinanapprovedandenvironmentallysaferecyclingprocess.For
informationaboutyournearestdesignatedcollectionpoint,contact yourlocalauthorityresponsibleforwastedisposal.Businessesshould contacttheproductsupplierforinformationabouthowtodispose ofthisproductcorrectly.
ThisproductcomplieswiththerequirementsofDirective2011/65/EU ontherestrictionoftheuseofcertainhazardoussubstancesin electricalandelectronicequipment(RoHS).
China
Thisproductcomplieswiththerequirementsofthelegislative actAdministrationontheControlofPollutionCausedbyElectronic InformationProducts(ACPEIP).
ContactInformation
AxisCommunicationsAB
Emdalavägen14
22369Lund
Sweden
Tel:+46462721800
Fax:+4646136130
www.axis.com
Support
Should you require any technical assistance, please contact your Axis reseller. If your questions cannot be answered immediately, your reseller will forward your queries through the appropriate channel to ensure a rapid response. If you are connected to the Internet, you can:
- downloaduserdocumentationandsoftwareupdates
• findanswerstoresolvedproblemsintheFAQdatabase.Search byproduct, category, orphrase
• reportproblemstoAxissupportstaffbyloggingintoyourprivate supportarea
- chatwithAxissupportstaff(selectedcountriesonly)
- visitAxisSupportatwww.axis.com/techsup/
LearnMore!
VisitAxislearningcenterwww.axis.com/academy/forusefultrainings, webinars,tutorialsandguides.
TableofContents
HardwareOverview....6
ConnectorsandButtons....6
PinAssignmentsforI/OConnector-AXIS2911UVideoServerRack.....7
Pinassignmentsforthel/OConnectoroftheAXISQ7900andAXISQ7920
Chassis....7
PinAssignmentsforRS485Connector-AXISQ7900andAXISQ7920
Chassis....8
LEDIndicators......8
AccessingtheProduct....9
AccessfromaBrowser....9
Accessfromthelnternet....10
SettheRootPassword....10
TheLiveViewPage....11
MediaStreams....14
HowtoStreamH.264....14
MJPEG....14
AXISMediaControl(AMC)....14
AlternativeMethodsofAccessingtheVideoStream....15
SettingUptheProduct
BasicSetup....17
Video....18
VideoStream....18
StreamProfiles....19
CameraSettings....20
Overlay....20
PrivacyMask....22
LiveViewConfig....23
PTZ(PanTilZoom)
PresetPositions....26
GuardTour....26
Advanced....27
InstallingaPTZdriver....27
ControlQueue....27
Detectors
CameraTampering....28
MotionDetection....28
Applications....31
ApplicationLicenses....31
InstallApplication....31
ApplicationConsiderations....31
Events
SettingUpanActionRule....34
Recipients....35
Schedules....36
Recurrences....36
Recordings....37
RecordingList....37
ContinuousRecording....37
Languages....38
SystemOptions
Security....39
Date&Time....41
Network....41
Storage....46
Ports&Devices......47
Maintenance....47
Support......48
Advanced....48
ResettoFactoryDefaultSettings....49
Troubleshooting....50
CheckingtheFirmware....50
TableofContents
UpgradingtheFirmware....50
Symptoms, Possible Causes and Remedial Actions....51
TechnicalSpecifications....54
PerformanceConsiderations....55
HardwareOverview

- BNCconnector(Videoinput,6nos.)
- StatusLED(6nos.)
- Controlbutton
- Restartbutton
- PowerLED
- Busconnector
ConnectorsandButtons
Fortechnicalspecifications,seepage54.
BusConnector
Thebusconnectorsare thephysicalinterface to the videoencoderchassist that provide power, network, RS485, and I/O terminal connections.
ControlButton
Thecontrolbuttonisusedfor:
- Resetting the product to factory default settings. See page 49.
ConnectingorAXISidedHostingSystemserviceSepage4.1connectpressandholdhouttorfoaboutseconduntiltheStatusLEDflashesgreen.
ConnectingtoAXISInterneDynamicDNServiceSepage43connectpressandholdhouttorforaboutSeconds.
RestartButton
Presstherestartbuttontorestarttheproduct.
PinAssignmentsforl/OConnector-AXIS2911UVideoServerRack
| PinFunctionDescription | |||
| 1 | +12Vout,100mA | ||
| 2 | GND | ||
| 3 | Channel1,ConfigurableI/O1 | Digitalinput-ConnecttoGNDtoactivate, orleavefloating(orunconnected)to deactivate. Digitaloutput-UsesanopendrainNFET transistorwiththesourceconnectedto GND.Ifusedwithanexternalrelay,adiode mustbeconnectedinparallelwiththeload, forprotectionagainstvoltagetransients. | Mininput=-40VDC Maxinput=+40VDC Maxload=100mA Maxvoltage=+40VDC (tothetransistor) |
| 4 | Channel2,ConfigurableI/O1 | ||
| 5 | Channel3,ConfigurableI/O1 | ||
| 6 | Channel4,ConfigurableI/O1 | ||
| 7 | Channel5,ConfigurableI/O1 | ||
| 8 | Channel6,ConfigurableI/O1 | ||
| 9 | Channel1,ConfigurableI/O2 | ||
| 10 | Channel2,ConfigurableI/O2 | ||
| 11 | RS485A | Ahalf-duplexRS485interfaceforcontrollingauxiliaryequipmentsuchasPTZ devices. | |
| 12 | RS485B | ||
Pinassignmentsforthel/OConnectoroftheAXISQ7900andAXISQ7920Chassis
| PinFunctionDescription | |||
| 1 | Channel1,Configurable/01 | Digitalinput-ConnecttoGNDtoactivate, orleavefloating(orunconnected)to deactivate. Digitaloutput-UsesanopendrainNFET transistorwiththesourceconnectedto GND.Ifusedwithanexternalrelay,adiode mustbeconnectedinparallelwiththeload, forprotectionagainstvoltagetransients. | Mininput=-40VDC Maxinput=+40VDC Maxload=100mA Maxvoltage=+40VDC (tothetransistor) |
| 2 | Channel2,Configurable/01 | ||
| 3 | Channel3,Configurable/01 | ||
| 4 | Channel4,Configurable/01 | ||
| 5 | Channel5,Configurable/01 | ||
| 6 | Channel6,Configurable/01 | ||
| 7 | Channel1,Configurable/02 | ||
| 8 | Channel2,Configurable/02 | ||
| 9 | Channel3,Configurable/02 | ||
| 10 | Channel4,Configurable/02 | ||
| 11 | Channel5,Configurable/02 | ||
| 12 | Channel6,Configurable/02 | ||
PinAssignmentsforRS485Connector-AXISQ7900andAXISQ7920Chassis
| PinFunctionDescription | ||
| 1 | Channel1,RS485A | Ahalf-duplexRS485interfaceforcontrollingauxiliary equipmentsuchasPTZdevices. |
| 2 | Channel1,RS485B | |
| 3 | Channel2,RS485A | |
| 4 | Channel2,RS485B | |
| 5 | Channel3,RS485A | |
| 6 | Channel3,RS485B | |
| 7 | Channel4,RS485A | |
| 8 | Channel4,RS485B | |
| 9 | Channel5,RS485A | |
| 10 | Channel5,RS485B | |
| 11 | Channel6,RS485A | |
| 12 | Channel6,RS485B | |
LEDIndicators
| LED | Color | Indication |
| Status | GreenSteadygreenformormaloperation. | |
| Amber | Steadyduringstartupandwhenrestoringsettings. | |
| Red | Slowflashforfailedupgrade. | |
| Green | Normaloperation. Power | |
| Amber | Flashesgreen/amberduringfirmwareupgrade. | |
Note
- TheStatusLEDcanbeconfiguredtoflashwhileaneventisactive.
The StatusLEDcarbe configuredflashfordidentifyingtheunitGdSetupSystemOptionsMaintenance
AccessingtheProduct
ToinstalltheAxisproduct, refertothel InstallationGuidesupplied with the product.
The product can be used with most operating systems and browsers. There recommended browsers are Internet Explorer with Windows, Safari with Macintosh and Firefox with the operating system. See Technical Specifications or page 54.
ToviewstreamingvideoinInternetExplorer, allowinstallationofAXISMediaControl(AMC)whenprompted.
TheAxisproductincludesone(1)H.264decoderlicenseforviewingvideostreams. ThelicenseisautomaticallyinstalledwithAMC. Theadministratorcandisabletheinstallationofthedecoders,topreventinstallationofunlicensedcopies.
Note
- QuickTime ^TM is also supported for viewing H.264 streams.
- If your computer restrict the use of additional software components, the product can be configured to use a Java applet for viewing Motion JPEG.
AccessfromaBrowser
- Startabrowser(InternetExplorer, Firefox, Safari).
2.EntertheIPaddressorhostnameoftheAxisproductinthebrowser'sLocation/Addressfield.ToaccesstheproductfromaMacintoshcomputer(MacOSX),clickontheBonjourtabandselecttheproductfromthedrop-downlist.
If you donot know the I paddress, use AXISIP Utility to locate the product on thenetwork. For information about how to discover and assign I address through installation and management Software C doth document Assign or I Address and Access the Video Stream on Axis Support web at www axis.com/techsup
- Enteryourusernameandpassword.Ifthisisthefirsttimetheproductisaccessed,therootpasswordmustfirstbe configured.Forinstructions,see.
- The product'sLiveViewpageappearsinyourbrowser.
Note
The controls and layout of theLiveViewpagem may have been customized to meet specific installation requirements and user preferences. Consequently, some of the examples and functions featured her may differ from those displayed in your ownLiveViewpage.
AccessingtheProduct

AccessfromtheInternet
Onceconnected,theAxisproductisaccessibleonyourlocalnetwork(LAN).ToaccesstheproductfromtheInternetyoumust configureyournetworkroutertoallowincomingdatatrafficctotheproduct.Todothis,enabletheNAT-traversalfeature,which wilattemptautomaticallyconfiguretheroutetallowaccesstheproductThisenabledfromSetupSystemOptions>Network>TCP/IPAdvanced.
FomoreinformationseeNATraversa(portmapping)forPv4orpage4SealsAXISnterneDynamidDNService atwww.axiscam.net
ForTechnicalnotesonthisandothertopics,visittheAxisSupportwebatwww.axis.com/techsup
SettheRootPassword
Tacce the Axi product you must the password for the default administrator user or this slone the Configur Root Password dialog, which appears when the product is accessed for the first time.
Topreventnetworkeavesdropping,therootpasswordcanbesetviaanencryptedHTTPSconnection,whichrequiresanHTTPS certificate. HTTPS(HypertextTransferProtocoloverSSL)isaprotocolusedtoencrypttrafficbetweenwebbrowsersandservers.The HTTPScertificatensureencryptedexchangofinformationSedHTTPSprpage44.
The default administrator names are root permanent and cannot be deleted the password for root to stop the product must be reset the factory default settings. See Reset Factory Default Settings page 49.
TosetthepasswordviaastandardHTTPconnection,enteritdirectlyinthedialog.
TosetthepasswordviaanencryptedHTTPSconnection,followthesesteps:
- ClickCreateself-signedcertificate.
Provide the requested information and click OK The certificates created and password password be securely.
3.Enterapasswordandthenre-enterittoconfirmthespelling.
4.ClickOK.Thepasswordhasnowbeenconfigured.
![Create Certificate Secure configuration of the root password via HTTPS requires a self- certificate. Create self-signed certificate... Configure Root Password using HTTP User name: root Password (max 64 characters): Confirm password: OK The password for the pre-configured administrator root must be changed before the product can be used. If the password for root is lost, the product must be reset to the factory default settings, by pressing the button located in the product's casing. Please see the user documentation for more information. ONVIF will be disabled. To enable ONVIF go to Setup > System Options > Security > ONVIF Create Self-Signed Certificate Common name: 10.92.25.211 Validity: 365 days [1..9644] *The name of the entity to be certified, i.e. the IP address or host name of this product. Once the certificate is created, this page will close and you will be able to configure the root password via HTTPS. AXIS Configure Root Password using HTTPS User name: root Password (max 64 characters): Confirm passwords: OK The password for the pre-configured administrator root must be changed before the product can be used. If the password for root is lost, the product must be reset to the factory default settings, by pressing the button located in the product's casing. Please see the user documentation for more information. ONVIF will be disabled. To enable ONVIF go to Setup > System Options > Security > ONVIF](/content/2026/05/960651/images/54aefc84013ccf7e15530f7553c2fe581747eb52bd9b09e2d7fa51af9490698b.jpg)
TheLiveViewPage
The controls and layout of the liveView pagemay have been customized to meet specific installation requirements and user preferences. Consequently, some of the examples and functions featured her may differ from those displayed in your own live view page. The following provides an overview of each available control.
ControlsontheLiveViewPage

ClicViewsizetoscalethemagedowrto800pixelswidodfulscaleOnlyavailableMJPEG.

SelectstreamprofileoftheLiveViewpagefromthStreamProfiledrop-downlistEomformationabouthowtoconfigurestreamprofiles,see page 19.

ClicPulsdactivateproduct'sutputporforefineperiodofimeFoinformationabouthowtenable andconfigureoutputbuttons,seepage24.

ClicktheActive/Inactivebuttontomanuallyactivateandnactivetheproduct'outputportinformation abouthowtoenableandconfigureoutputbuttons,seepage24.

TheManualTriggerbuttonisuseddriggeractionrulefromtheLiveViewpageEoinformationabouthowtoconfigureandenablethebutton,seeManualTrigger,onpage12.

ClickSnapshotsavesnapshobthevideimageRight-clickthevideimagesaveinPEformatyour computer.ThisbuttonisprimarilyintendedforusewhentheAXISMediaControlviewertoolbarsnotavailable. EnablethisbuttonfromLiveViewConfig>ActionButtons.
ManualTrigger
The ManualTrigger used trigger action rule from the live/view page. The manual trigger can be used to validate actions during product installation and configuration.
Toconfigurethemanualtrigger:
1.GotoSetup>Events.
2.ClickAddtoaddanewactionrule.
BonthTriggerdrop-downlistselectnpuSignal.
4. From these second drop-down list, select Manual Trigger.
5. Select the desired action and configure the other settings as required.
Formoreinformationaboutactionrules,seeEvents,onpage33.
ToshowthemanualtriggerbuttonsintheLiveViewpage:
- GotoSetup>LiveViewLayout.
2ndeActionButtonsselecShowmanuatriggebutton.
AXISMediaControlviewertoolbar
TheAXISMediaControlViewetoolbarsavailableInterneExploreonlySeeAXISMediaControl(AMC)prpage14omore information.Thetoolbardisplaysthefollowingbuttons:

ThePlaybuttonconnectstotheAxisproductandstartsplayingamediastream.

TheStopbuttonstopsthemediastream.

The SnapshobuttortakesnapshobthevideimageThelocationwherthimagesavedcarspecifiedintheAMCControlPanel.

Click the View Full Screen Button and the video image will filter entire screen Press ESC Escape the computer keyboard to cancel full screen view.

The Recordbutton is used to record the current video stream location where the recordings saved are specified in the AMControlPaneEnable this button from LiveViewConfigViewSettings.
PTZControls
TheLiveViewpagealsodisplaysPan/Tilt/Zoom(PTZ)controls.Theadministratorcanenable/disablecontrolsforspecifiedusersunder SystemOptions>Security>Users.
With the PTZ controlQueue enabled the time each user is a controb of the PTZ setting's limited Click button request release, control of the PTZ controls The PTZ controlQueue setup de PTZ controlQueue.

Click the Emulate joystick mode button and click the image to move the camera view with the direction of the mouse pointer.

Click the Centemode button and click them image to cent the camera view through a position. The centemode button could also be used to zoom in on as specific area. Click the image and drag to draw are rectangles surrounding the are at obemagnified. To zoom out, rotate them mouse wheel.
Ctrl panel
Click the CtrpanebuttonoperthePTZontropanewhichprovidesadditionaPTZcontrols. User-definedbuttonscanalsoappearintheControlpanel.SeeControls,onpage27.
The PTZ control carbe isabled under PTZ Advanced Controlssee Controlsprpage27.
MediaStreams
TheAxisproductprovidesseveralvideostreamformats.Yourrequirementsandthepropertiesofyournetworkwilldeterminethetypeyouuse.
TheLiveViewpageintheproductprovidesaccesstoH.264andMotionJPEGvideostreams,andtothelistofavailablestreamprofiles. Otherapplicationsandclientscanaccessvideostreamsdirectly,withoutgoingviatheLiveViewpage.
HowtoStreamH.264
The videocompressionstandardH.264 makes good use of bandwidth, and can provide high quality video streams at less than 1 Mbit/s.
Deciding which combination of protocols and method stoused depends on your viewing requirements, and on the properties of your network. The available options in AXISMediaControl are:
| UnicastRTP | Thisunicastmethod(RTPoverUDP)isused forliveunicastvideo,especiallywhenitis importanttoalwayshaveanup-to-datevideo stream,evenifsomeimagesaredropped. | Unicastingisusedforvideo-on-demand transmissionsothatthereisnovideotraffic onthenetworkuntilaclientconnectsand requeststhestream.Notethatthereareamaximumof20 simultaneousunicastconnections. |
| RTPoverRTSP | Thisunicastmethod(RTPtunneledoverRTSP) isusefulasitisrelativelysimpletoconfigure firewallstoallowRTSPtraffic. | |
| RTPoverRTSPoverHTTP | Thisunicastmethodcanbeusedtotraverse firewalls.Firewallsarecommonlyconfiguredto allowtheHTTPprotocol,thusallowingRTPto betunneled. | |
| MulticastRTP | Thismethod(RTPoverUDP)shouldbeusedforlivemulticastvideo.Thevideostreamisalways up-to-date,evenifsomeimagesaredropped.Multicastingprovidesthemostefficientusageofbandwidthwhentherearelargenumbersof clientsviewingsimultaneously.Amulticastcannothowever,passanetworkrouterunlessthe routerisconfiguredtoallowthis.ItisnotpossibletomulticastoverthelInternet,forexample.Notealsothatallmulticastviewerscountasoneunicastviewerinthemaximumtotalof20 simultaneousconnections. | |
AXISMediaControlnegotiateswiththeAxisproducttodeterminethetransportprotocoltouse.Theorderofpriority,listedintheAMCControlPanel,canbechangedandtheoptionsdisabled,tosuitspecificrequirements.
Note
H.264islicensedtechnology.TheAxisproductincludesoneH.264viewingclientlicense.Installingadditionalunlicensed copiesoftheclientisprohibited.Topurchaseadditionallicenses,contactyourAxisreseller.
MJPEG
This formatusesstandardJPEGstillimagesforthevideostream. These images are then displayed and updated at a rate sufficient to create stream that shows constantly updated motion.
TheMotionJPEGstreamusesconsiderableamountsofbandwidth,butprovidesexcellentimagequalityandaccesstoeveryimage containedinthestream.TherecommendedmethodofaccessingMotionJPEGlivevideofromtheAxisproductistousetheAXISMediaControlInInternetExplorerinWindows.
AXISMediaControl(AMC)
AXISMediaControl(AMC)inInternetExplorerinWindowsistherecommendedmethodofaccessinglivevideofromtheAxisproduct.
MediaStreams
TheAMCControlPanelcanbeusedtoconfigurevariousvideosettings.PleaseeseetheAXISMediaControlUser'sManualformore information.
TheAMCControlPanelisautomaticallyinstalledonfirstuse,afterwhichitcanbeconfigured.OpentheAMCControlPanelfrom:
- WindowsControlPanel(fromtheStartmenu)
Alternatively right-click the video image Interne Explore and click Settings.

AlternativeMethodsofAccessingtheVideoStream
YoucanalsoaccessvideoandimagesfromtheAxisproductinthefollowingways:
MotionPEGervepush(fupported by the client Firefox fo example) This option maintains proper HTTP connection to the browser and sends data as and when required, for as long as required.
StiUPEGimagesbrowserEntethepathhttp://
Window Media Player This requires AXIS Media Control and the 1.264 decoder to installed the following paths can be used:
-UnicastviaRTP:axrtpu://<ip>/axis-media/media.amp
-UnicastviaRTSP:axrtsp://<ip>/axis-media/media.amp
-UnicastviaRTSP,tunneledviaHTTP:axrtsphttp://<ip>/axis-media/media.amp
-Multicast:axrtpm://<ip>/axis-media/media.amp
- QuickTime TM. The following pathscanbeused:
-rtsp://<ip>/axis-media/media.amp
-rtsp://<ip>/axis-media/media.3gp
Note
=|Paddress
•TheAxisproductsupportsQuickTime6.5.1andlater.- QuickTimeaddslatencytothevideostream.
- It maybe possible to use other player's view the H.264 stream using the paths above, although Axis does not guarantee this.
SettingUptheProduct
The Axproduct are configured by users with administrator operator rights to the product's setup pages, including the copyright-hand corner of the Live View page.
- Administratorshaveunrestrictedaccesstoallsettings.
- OperatorshaveaccesstoallsettingsexceptSystemOptions
Seealsotheonlinehelp

BasicSetup
BasicSetupprovidesshortcutstothesettingsthatshouldbemadebeforeusingtheAxisproduct:
1.Users.Seepage39.
2.TCP/IP.Seepage41.
3. Date&Time.Seepage41.
4.VideoStream.Seepage18.
TheBasicSetupmenucanbedisabledfromSystemOptions>Security>Users.
Video
ItispossibletoconfigurethefollowingvideofeaturesinyourAxisproduct:
•Videostream.See page 18.
- Streamprofiles.Seepage19.
- Camerasettings.See page20.
•Overlayimage.Seepage20.
- Privacymask.Seepage22.
VideoStream
You can define following idestreamsettings from VideoVideStream:
- Image.See page 19.
•H.264.See page 19. - MJPEG.See page 19.
![Basic Setup Video Stream Profiles Camera Settings Overlay Image Privacy Mask Live View Config PTZ Detectors Applications Events Recordings Languages System Options About Video Stream Settings Image H.364 MOPEG Image Appearance Resolution: Aspect ratio correction 4CIF (704 x 480/704 x 576) (NTSC/PAL) Compression: 30 [0..100] Mirror Image Rotate image: 0 degrees Color setting: Color Video Stream Maximum frame rate: Unlimited Limited to 30 [1..30, 50, 60] fps per viewer Overlay Settings Include overlay image at the coordinates: X 0 [0..] Y 0 [0..] Include date Include time Include text: Text overlay size: small Text color: white Text background color: black Place text/date/time at top of image Preview View image stream while configuring. Video format: MOPEG Open... Save Reset](/content/2026/05/960651/images/af304032eb31b916e4f51afe03f49ce6f38dfcd9ff9f873a26a6c503258bc583.jpg)
PixelCounter
Thepixelcountershowsthenumberofpixelsinanareaoftheimage. Thepixelcounterisusefulinsituationswherethereisa requirementthattheimageisacertainsize,forexampleinfacerecognition.
Thepixelcountercanbeaccessedfrom:
VideoVideStreamUndePreviewclickOperandelecthShowpixelountenptionerabletherectangleithemagdUsethmousectomovandesiztherectanglepentethumberppixelsirthWidthandHeightfieldsandclickApply.
TheLiveViewpagerInterneExploreinWindowsRight-clickthemagandelecPixelcounterUsethemouse tomoveandresizetherectangle.
Image
ThedefaultmagsettingscarbeconfiguredundeVideo>VideoStreamSelectdmagtab.
The followingsettingsareavailable:
- Resolution.Selectthedefaultresolution.
CompressionThe compressionlevelaffect the imagequalitybandwidthlandilsizeofavedmagesthdowethe compression, the higher the imagequalitywith higher bandwidthrequirementsandlargerfilesizes.
- Rotateimage.Ifrequired,theimagecanberotated.
ColosettingSelectitheColonBlackWhiteBlackWhitesesbandwidththanColor.
- Mirror.Ifrequired,theimagecanbemirrored.
Maximunframeate avoid bandwidth problems the framerate allowed each viewer can be limited to fixed amount Alternatively the framerate carbeet Unlimited which means the Axis product always delivers the highest framerate possible under the current conditions.
OverlayettingSeeOverlayprpage20.
ClickSavetoapplythenewsettings.
H.264
H.264,alsoknownasMPEG-4Part10/AVC,isavideocompressionstandardthatprovideshighqualityvideostreamsatlowbitrates. AnH.264videostreamconsistsofdifferenttypesofframessuchasl-framesandP-frames.Anl-frameisacompleteimagewhereas P-framesonlycontainthedifferencesfrompreviousframes.
The GOVength the number frames between two consecutive frames increasing the GOVength may save considerably in bandwidth requirements in some cases, but may also have an adverse effect on image quality.
ThebitatcarbeseVariableBiRate(VBR)ConstanBiRate(CBR)VBRadjuststhatirataccordingthimage complexity,usingupmorebandwidthforincreasedactivityintheimage,andlessforlowerimageactivity.CBRallowsyoutoseta fixedTargetatathatonsumespredictableamountbandwidthAshbitatowouldusuallyneedincreasefoincreased imageactivity,butinthiscasecannot,framerateandimagequalityareaffectednegatively.Topartlycompensateforthis,itis possibletoprioritizeeitherframerateorimagequality.Notsettingaprioritymeansthatframerateandimagequalityareequally affected.Youmustsaveyoursettingsbeforetheycantakeeffect.
The current table shows an abstract overlay of this selection and the checkbox option under Overlay Settings and enter them modifier bin the field.
MJPEG
Sometimes the imagesize is large duolow light or complex scenery. Adjusting them a maximum framesize help to control the bandwidth and storage by the Motion PEG video stream in these situations. Setting the framesize the Default setting provides consistently good image quality at the expense of increased bandwidth and storage usage in low light. Limiting the frame size optimizes bandwidth and storage usage, but may give poor image quality. Toprevent increased bandwidth and storage usage, the maximum framesizes should be set to an optimal value.
StreamProfiles
Astreamprofileisasetofpredefinedstreamsettingsincludingresolution,compression,framerateandoverlaysettings.Stream profilescanbeused:
- Whensettinguprecordingusingactionrules.SeeEvents,onpage33.
- Whensettingupcontinuousrecording.SeeContinuousRecording,onpage37.
In the ViewpageselectstreamprofilefromtheStreamprofiledrop-downlist.
Forquicksetup, useoneofthepredefinedstreamprofiles. Each predefinedprofilehasadescriptivename, indicatingitspurpose. If required, thepredefinedstreamprofilescanbemodifiedandnewcustomizedstreamprofilescanbecreated.
TreatenewprofilemodifyexistingprofilegetSetupVideoStreamProfiles.
To select default stream profile for the live view page to Setup Live View Config.
CameraSettings
The Video Camer Settings page provides access to advanced image settings for the Axis product.
ImageAppearance
Increasing the color level increases the color saturation. The value gives maximum color saturation. The value gives black and white image.
Thémage Brightness can be adjusted the range 0–100 where higher value produces brighter image.
Increasingh Sharpness an increase bandwidth usage sharper image might increase image noise especially low light conditions. Alowersetting reduces image noise, but the whole image will appear less sharp.
The Contrastangestrelativdifferencbetweenlightandarkcarbadjustedusingthe Sldebar.
LocaContrast applies contrast to specific area of image Use the lidet adjust the contrast where higher value produces animagewith high contrast between the dark and light areas.
Videoinput
- EnteradescriptivenameforyourvideosourceintheVideosourcenamefield.
The values in the Offse Adjustment fields affect the horizontal and vertical synchronization for the image. This can be used to eliminate any black borders surrounding the image. High values, both negative and positive can put the image out of sync.
- De-interlacing-isused to improve videostream image quality from analog devices. Select any of the following options from the De-interlacing drop-down is Select None file-interlacing not necessary. Blending to improved image quality that not process intensive. Adaptiventerpolation performs de-interlacing of the video stream by applying different filters or the image. This may give better result than Motion Adaptiventerpolation in cases. Motion Adaptiventerpolation performs de-interlacing of the video stream by applying different filters depending on the motion indifferent part of the image. This will in most cases result in the best image quality.
Antialiasingwillminimizedistortionknowrasaliasingwhichhappenswhenhigh-resolutionimagesrepresentedatalowerresolution.
- Foreachvideoinput75Ohmvideoterminationcanbeenabled/disabledviatheproduct'swebpageatVideo&Audio>VideoInput>Videotermination.Theseterminationsareenabledonfactorydefault.Incaseswheretheproductistobeconnectedinparallelwithotherequipment,foroptimumvideoquality,itisrecommendedthatterminationbe enabledforonlythelastdeviceinthevideosignalchain.
ImageSettings
Overlay
Overlaysareusedtoprovideextrainformation,forexampleforforensicvideoanalysisorduringproductinstallationand configuration.Overlaysaresuperimposedoverthevideostream.
Anoverlaytextcandisplaythecurrentdateandtime,oratextstring.Whenusingatextstring, modifierscanbeusedtodisplay information such the currentbitato the currentframe data information about available modifiersseeFileNaminget
Date/TimeFormatsintheonlinehelp.

Italspossible displaytextwhenactionrulestriggeredsedUsingOverlayTextfranActionRule.
Toenableoverlays:
GdVideoVideStreamandelecthæmagtab.
TincluderoverlayimagesselectIncludoverlaymagathcoordinatesTheoverlaymagenusfirstbauploaded to theAxisproduct,seeOverlayImage.
Tincluddatandimeselectncluddatandncludtime.
TincludetextstringselectIncludetextandentethextrthfieldModifiersarbusedseFileNamingft
Date/TimeFormatsintheonlinehelp

5.Definetextoverlaycharacteristicsintherelevantfields.
6.ClickSave.
Tomodify the date and time format to System Options Date Time See Date Time per page 41.
OverlayImage
Anoverlayimageisastaticimagesuperimposedoverthevideostream.Theimage,forexamplecompanylogo,isusedtoprovide extrainformationortomaskapartoftheimage.
Sinceitisstatic, the position and size of an overlay image will remain the same regardless of resolution and Pan/Tilt/Zoom movements to update dynamic mask which will always mask the specific part of monitored area. Privacy Mask page 2
Touseanoverlayimage, theimagemustfirstbeuploadedtotheAxisproduct:
GoVideoOverlaymage.
2.ClickBrowseandbrowsetothefile.
3.ClickUpload.
- Select the imagetouse from the Use overlay imagelist.
5.ClickSave.
Todisplaytheoverlayimage:
GoVideoVideStreamandelecthImagtab.
UndeOverlassettingsselectincludeoverlaymagathcoordinatesandentethandcoordinates.
3.ClickSave.
Forinformationaboutsupportedimageformats,seetheonlinehelp

UsingOverlayTextinanActionRule
Actionrulespage33cardisplayproverlaltexwhetherulestriggeredIdextarbusedprovidinformationforforensicvideoanalysis,notifiesurveillanceoperatorsorvalidatetriggersandactionsduringproductinstallationandconfiguration.
Tolisplayoverlaytextwhenactionrulestriggeredthemodifien# should be used as described below Whetherules triggered,#Dwillbereplacedbythetextspecifiedintheactionrule.
Startbyenablingoverlaytextinthevideostream:
GoVideoVideStreamandelecthmagtab.
UndeOverlaySettingsselectncludtext.
Enterthemodifi#Landoptionallyadditionatextwhichwilbdisplayedalsowhethactionrulenoactive.
Createtheactionrule:
- GotoEvents>ActionRules
2.ClickAddtocreateanewrule.
SelectTriggerandoptionally,SchedulandAdditionaConditionsSethonlinhelpofetails. - From the Actionslist, select OverlayText
Entethext Display the Textfield This Text that Wilbereplaced by.
Specify the DurationIndexLabel displayed while the rule active for fixed number seconds.
Example
TodisplaydTextMotiondetectedWhenmotionsdetectedCenterBirthIncludtexfieldandenteMotiondetectedIn theTextfieldwhensettinguptheactionrule.
PrivacyMask
Aprivacymaskisanareaofsolidcolorthatprohibitsusersfromviewingpartsofthemonitoredarea.Privacymaskscannotbe bypassedviatheVAPIX®ApplicationProgrammingInterface(API).
The Privacy Mask List (Video Privacy Mask) shows the mask that are currently configured in the Axiproduct and indicates if they are enabled.
Youcanaddanewmask,re-sizethemaskwiththemouse,chooseacolorforthemask,andgivethemaskaname.
Formoreinformation,seetheonlinehelp

Important
Adding many privacy masks may affect the product's performance.
LiveViewConfig
YoucancustomizetheLiveViewpageandalterittosuityourrequirements.ItispossibletedefinethefollowingfeaturesoftheLiveViewpage.
- StreamProfile.Seepage19.
- DefaultViewerforBrowser.Seepage23.
-ViewerSettings.Seepage24.
ActionButtonsThesearchbuttonsdescribednControlstheLiveViewPageprpage1.
-UserDefinedLinks.Seepage24.
- OutputButtons.Seepage24.

DefaultViewerforBrowsers
FromLiveViewConfigDefaultVieweselecthedefaultmethodforviewingvideimagesyoubrowserTheproductattempts toshowthevideoimagesintheselectedvideoformatandviewer.Ifthisisnotpossible,theproductoverridesthesettingsand selectsthebestavailablecombination.
| BrowserViewerDescription | ||
| WindowsInternetExplorer | AMC | RecommendedviewerinInternetExplorer(H.264/MotionJPEG). |
| QuickTime | H.264. | |
| Javaapplet | AslowerimagingalternativetoAMC(MotionJPEG).Requiresoneofthe followinginstalledontheclient:•JVM(J2SE)1.4.2orhigher.•JRE(J2SE)5.0orhigher. | |
| StillimageDisplaysstillimagesonly.ClicktheRefreshbuttoninyourbrosertoviewa newimage. | ||
| Otherbrowsers | ServerPush | Recommendedviewerforotherbrowsers(MotionJPEG). |
| QuickTime | H.264. | |
| Javaapplet | AslowerimagingalternativetoServerPush(MotionJPEGonly). | |
| StillimageDisplaysstillimagesonly.ClicktheRefreshbuttoninyourbrosertoviewa newimage. | ||
Formoreinformation,pleaseetheonlinehelp.

ViewerSettings
Toconfigureoptionsfortheviewer,gotoLiveViewConfig>ViewerSettings.
SelectShowewetoolbatalisplaytheAXISmediaControl(AMC)theQuickTimeviewetoolbaundethevideoimageinyourbrowser.
H.264lecodeinstallationThe administratorandisableinstallationofH.264lecodeincludedwithAXISMedia Control.Thisisusedtopreventinstallationofunlicensedcopies.Furtherdecoderlicensescanbepurchasedfromyour Axisreseller.
SelectShovercrosshainPTJoystickmode enable crosshatwill indicate the center of the image PTJoystick mode.
SelectUsePTZystickmodasdefaultenablejoystickmode. The mode can be changed temporarily from the PTZcontrolpanel.
SelectEnableecordingbuttonEnablerecordingfromtheLiveViewpagThisbuttonisavailablewhenusingtheAMCviewer.TherecordingsaresavedtothelocationspecifiedintheAMCControlPanel.SeeAXISMediaControl(AMC),onpage 14.
UserDefinedLinks
Todisplayuser-definedinkinthliveViewpageselecthShowcustomlinkoptiongivthedinknamandherentethURL tolinkto.Whendefiningaweblinkdonotremovethehttp://fromtheURLaddress.Customlinkscanbeusedtorunscriptor activateexternaldevicesconnectedtotheproduct,ortheycanlinktoawebpage.Customlinksdefinedascgilinkswillrunthe scriptinthebackground,inahiddenframe.Definingthelinkasaweblinkwillopenthelinkinanewwindow.
OutputButtons
Externall/OdevicesconnectedtotheAxisproduct'soutputportscanbecontrolleddirectlyfromtheLiveViewpage.
TodisplayoutputbuttonsintheLiveViewpage:
-
GotoSetup>LiveViewConfig.
-
UnderOutputButtons, select the type of controltouse:
Pulsactivates the output for define period time. The pulse time can be from 10 seconds to 60 seconds.
-Active/Inactive displaywobuttons, oneoreachaction.
ToconfigureactiveandnactivstatesgdSystemOptionsPortsDevicesl/Portandethport'Normastate.
Formoreinformationaboutl/Oports,seeI/OPorts,onpage47.
PTZ(PanTiltZoom)
The PTZmenusavailablePTZdrivehasbeenuploadedSednstallingPTZdriverprpage27.
PresetPositions
Apresetpositionisapredefinedviewthatcanbeusedtoquicklysteerthecameratoaspecificlocation.Presetpositionscan beaccessedinseveralways:
- Whensettingupactionrules.Seepage33.
- WhensettingupGuardTour.Seepage26.
Toaddapresetposition:
- GotoPTZ>PresetPositions.
- Usethepan, tilt and zoom control, tosteer the camera view to the desired position.
3.EnteradescriptivenameintheCurrentpositionfield.
TheproductcanbeconfiguredtoreturntotheHomepositionwhenthePTZfunctionalityhasbeeninactiveforaspecifiedlengthofimeEntethdengthofimerthfieldandlicSavSethdimdzerdpreventheproducfromautomaticallyreturningtotheHomeposition.
To include the prepositionam airth overlay text goto video select Includ overlay text and then them modify # Birth field.
FomoreinformationaboutmodifiersseeFileNamingDate/TimeFormatistonlinehelp


GuardTour
Aguardtourdisplaysthevideostreamfromdifferentpresetpositions,one-by-one,inapredeterminedorderoratrandomandforconfigurabletimeperiods.Theenabledguardtourwillkeeprunningaftertheuserhasloggedofforclosedthebrowser.
Toaddaguardtour:
GdPTZGuardTouandclickAdd.
2.Enteradescriptivename.
3. Specifythepauselengthbetweenruns.
4. SelectanavailablepresetpositionandclickApply.
- Specify theViewTimeinsecondsorminutes.
Specify the View Order Select the Random View Deoption.
7.ClickSave.
TomodifyremoveguardoursgdtPTZGuardTourselectheguardouritheGuardTouListandclicModify/Remove.
Formoreinformationseetheonlinehelp

Advanced
Controls
PaneShortcuCommandButtonsa b configured provide direct access command issued in the APIX® Application Programming Interface. The button will be displayed in the PTZ control panel, which is available in the Live View page through the Ctr pane button se page 12.
InstallingaPTZdriver
ThisAxisproductsupportsseveralPTZdevices.Pleaseeseewww.axis.comforacompletelistofsupporteddevices,andtoobtainthe correctdriver.ToinstallaPTZdeviceyouneedtoinstallthePTZdriver.
TønstalthePTDrivegøPTZ-DriveSelectionBrowseindtherive(e.driver.ptz)andUploadfdrivewas successfullyuploadedappearsthSelectrivetausdrop-downlistFronthisdrop-downlistselectdrivetonstall orremove,andclickSave.
SelectActivatePTZ enable PTZ The address of connected device appears against DeviceD Choos the Device type from the drop-downlist. To find which device type to use, consult the documentation supplied by the PTZ driver.
To complete the installation and System Options Ports Devices COMPort (see COMPort) and verify the settings.
ControlQueue
The administrator setup que ufo PTZ controller from PTZControlDueo Oncsetpthe PTZControlDueu buttons appear in the Viewpageofferingoneviewerexclusivecontrolforalimitedperiodoftime. Other users will be placed in queue.
Ausewho belongs to grouped users page 39 with higher PT priority and before other users the queue and take control of the product. The order of priority is as follows:
Administrator\Administrator takesovePTZ controlregardless of his first queue. The administrator will be removed from the queue 60 seconds after the last PTZ control command.
Event-TheAxiproductarbeconfigured@topresepositionwhertriggeredbyalarm(seeEventsprpage33). Theeventwillimmediatelybeplacedfirstinthequeueexceptwhenanadministratorisincontrol.
- Operator—Sameas administrator but with lower priority
GuardTour-Aguardou(sepage26)haPTZontrofoarindefinitperiodofimdmayoverriddenbyan operator,eventoradministrator.Theguardtourwillresumewhenhigherprioritygroupsleavethequeue.
ViewerMultiviewersmustwaifotheiturnTheviewehasSecondPTZontrobeforecontrolpassed ontothenextviewerinqueue.
Note
- The administratorcanenableanddisablePTZcontrolsforselectedusers.
- Toidentifydifferentusersintheviewergroup,cookiesmustbeenabledontheclient.
Detectors
CameraTampering
CameraTamperingcangenerateanalarmwheneverthecameraisrepositioned,orwhenthelensiscovered,sprayedorseverely defocused.Tosendanalarm,forexampleanemail,anactionrulemustbesetup.
Toconfiguretampering:
- GotoDetectors > CameraTampering.
SethMinimundurationthattheimehatmustlapsbeforealarmigeneratedThisahelprevent falsealarmsforknownconditionsthataffecttheimage.
Select Alarmfor dark images for alarm should be generated fights and dimmed turned off or then is sprayed, covered, or rendered severely out of focus.
4.ClickSave.
Toconfiguretheproducttosendanalarmwhentamperingoccurs:
- GotoEvents>ActionRules.
2.ClickAddtosetupanewactionrule.
- EnteraNamefortheactionrule.
UndeConditionselecDetectorsfromtheTriggerlist.
- SelectTamperingfromthelistofdetectors.
6.Selectthevideochannel.
- Optionally, select as schedule and set additional conditions.
SelectactionTosendaremailselectSendNotificationandselectRecipientfromtheisbfefineddecipients.
Note
The Whileu16activeoptionundeDurationcannobusedwithcamertamperingsincecamertamperingdoesnot haveadurationandonceithasbeentriggereditwillnotautomaticallyreturntoitsuntriggeredstate.
Formoreinformationonactionsrules,seeEvents,onpage33.
MotionDetection
Motiondetectionisusedtogenerateanalarmwhenevermovementstartsorstopsinthecameraview.
Motiondetectionisconfiguredbydefiningupto10IncludeandExcludewindows:
- Includewindows—defineareaswheremotionsshouldbedetected
Exclude windows define areas within an include window that should be ignored (areas outside include windows are automatically ignored).
Forinstructions, see SetupMotionDetectionWindows, onpage29.
To control the number of motion detection alarms, parameter ObjectSizeHistory and Sensitivity are adjusted. See Motion Detection Parameters, on page 29.
Oncemotiondetectionwindowsareconfigured, theAxisproductcanbeconfiguredtoperformactionswhenmotionisdetected. Possible actions include uploading images and start recording. For more information setting UponActionRuleprpage34.
Note
- Usingthemotiondetectionfeaturemaydecreasetheproduct'soverallperformance.
- ThepositionoftheMotionDetectionWindowisrelativetotheorientationoftheCamera.Changingtheorientationofthe camerawillalsochangethepositionoftheMotionDetectionWindow.
SetUpMotionDetectionWindows
TosetupamotiondetectionIncludeWindow, followtheseinstructions:
- GotoDetectors > MotionDetection.
Select the Configured Window option and click New Select the new window with distribution windows and enter adescriptivename.
- Adjustthesize(dragthebottomright-handcorner)andtheposition(clickonthetextatthetopanddragtothedesired position)ofthewindow.
Adjust the Object Size History and Sensitivity profile slider (see Motion Detection Parameters for details) Any detected motion within an active window is indicated by red peaks in the Activity window.
5.ClickSave.
To exclude parts of the inclusion window, select the Configur Excluded Window and position the exclusion window within the inclusion window.
ToletenincludeexcludowindowselecthowindowirthistofwindowsandelicDel.
MotionDetectionParameters
The parameters controlling motion detection are described in the table below:
| Parameter | ObjectSize | History | Sensitivity |
| Description | Objectsizerelativetowindow size. | Objectmemorylength. | Differenceinluminance betweenbackground and object. |
| Highlevel(100%) | Onlyverylargeobjectstrigger motiondetection. | Anobjectthatappearsin thewindowtriggersmotion detectionforalongtime beforeitisconsideredas non-moving. | Ordinarycoloredobjectson ordinarybackgroundstrigger motiondetection. |
| Mediumlevel(50%) | Alargedifferenceinluminance isrequiredtotriggermotion detection. | ||
| Lowlevel(0%) | Evenverysmallobjectstrigger motiondetection. | Anobjectthatappearsin thewindowtriggersmotion detectiononlyforaveryshort timebeforeitisconsideredas non-moving. | Onlyverybrightobjectson adarkbackgroundtrigger motiondetection. |
| Recommendedvalues | 5–15%60–90%75–95% | ||
| Defaultvalues | 15%90%90% |
Detectors
Note
- Totriggeronsmallobjectsormovements,useseveralsmallmotiondetectionwindowsratherthanonelargewindow andselectalowobjectsize.
- To avoid triggering on small objects, select a high object size.
- Whilemonitoringanareawheremovingobjectsarenotexpected,selectahighhistorylevel.Thiswillcausemotion detectiontotriggeraslongastheobjectispresentinthewindow.
- Toonlydetectflashinglight,selectalowsensitivity.Inothercaseshighsensitivityisrecommended.
Applications
ThirdpartyapplicationscanbeuploadedtoandinstalledontheAxisproduct. Applicationsaddfunctionalitytotheproduct,for examplevideoanalyticsandintelligentvideocapabilitiessuchasrecognition,tracking,detectionandcounting.Forinformation aboutavailableapplications,downloads,trialsandlicenses,goto www.axis.com/applications
Note
- Itisrecommendedtorunoneapplicationatatime.
- Avoidrunningapplicationswhenthebuilt-inmotiondetectionisactive.
ApplicationLicenses
Someapplicationsneedalicensetorun.Licensescanbeinstalledintwoways:
•Automaticinstallation—requiresaccesstothelnternet
- Manualinstallation—obtainthelicensekeyfromtheapplicationvendoranduploadthekeytotheAxisproduct
Torequestalicense, theAxisproductserialnumber(S/N) is required. The serial number can be found on the product label and under SystemOptions > Support > SystemOverview.
InstallApplication
Toinstallandstartanapplication:
1.GotoSetup>Applications.
UndeUploadApplicationclickBrowseLocatethapplicationfileandclickUploadPackage.
3. Install the license (if applicable). For instructions, seethedocumentation provided by the application vendor.
Start the applicationG40 page Applications select the application in the disf installed applications and click Start.
5. Configuretheapplication.Forinstructions,seethedocumentationprovidedbytheapplicationvendor.
Note
- Applicationscanbeuploadedbyproductadministrators.
- ApplicationsandlicensescanbeinstalledonmultipleproductsatthesametimeusingAXISCameraManagement,version 3.10andlater.
To generate log file of the application to Application Select the application and click Log.
ApplicationConsiderations
Ifanapplicationisupgraded, applicationsettings, including the license, will be removed. The license must be installed and the application reconfigured.
If the Axis product's firmware is upgraded, installed applications and their settings will remain unchanged, although this is not guaranteed by Axis Communications AB. Not that the application must be supported by the new firmware. For information about firmware upgrades, see Upgrading the Firmware.
If the Axis product is restarted, running applications will restart automatically.
If theAxisproduct is restored, installed applications remain unchanged but must be restarted. Tostarttheapplication, goto SetupApplicationSelectapplication理由isbinstalled applications and clickStartInformationaboutestoring theAxisproduct, see Maintenance.
Applications
If theAxisproductisresettofactorydefault, installed applications and their settings are removed. For information about factory default, see ResettoFactoryDefaultSettings.
Events
TheAxisproductcanbeconfiguredtoperformactionswhendifferenteventsoccur,forexample,startarecordingwhenmotionis detectedThesecondditionsthatefineshowandwhetheractionstriggeredcalledActionRule.
AvailableActionRuletriggersandconditionsinclude:
Applications=usinstalled applicationsdriggetheuleseApplicationsprpage31.
- Detectors
LivStreamAccessed-triggetheulewheranystreamisaccessedandduringdgestoragplayback. Thiscanforexamplebeusedtosendnotifications.
MotionDetection-triggered Rule when motion is detected. See MotionDetection on page 28.
Tampering-triggered rule whertampering detected see CameraTamperingpage28.
- Hardware
-VideoSignal—triggertheruleifvideosignalislost.
-Network-triggertheruleifnetworkconnectionislostorrestored.
Temperature-triggered temperature falls outside inside the operating range of the product This can forexamplebeused to send maintenance notifications.
- InputSignal
DigitalInputPort-triggered rule when an Port receive signa from connected devicesed/O Ports, on page 47.
ManualTrigger-triggered using the ManualTriggerbutton in the liveViewpagesControl on theLiveViewPage, on page 11. This can forexample be used to validate actions during product installation and configuration.
VirtualInputs-carbused by VMSVideManagemenSystemdriggeractionsVirtualInputscanfor example,beconnectedtobuttonsintheVMSuserinterface.
Error-triggetheulefthPTFunctionalityisnotworkingcorrectlyThisafoexampleusedosendmaintenancenotifications.
Moving-triggered rule where the camera view moves dueto PTZ operation This can be used as an additional condition to prevent an action rule triggered by motion detection to record videowhile the camera view moves dueto PTZ operation.
PreseReached-triggered rule whether the cameratops at preseposition This bar before example used with the SendImagesactiontouploadimagesfromthepresetposition.
Ready-triggered rule whether the PT functionality ready to be used. This can be used to store the camerato as specific preset position when the product is started.
•Storage
Disruption-triggetheule&storageproblemsdetectedfoexample#the storage devices unavailable, removed,full,lockedorifotherreadorwriteproblemsoccur.Thiscanforexamplebeusedtosendmaintenance notifications.
Recording-trigger the rule whether the product recorded storage device The recording status trigger can be used to notify the operator,forexamplebyflashingLEDlights,iftheproducthasstartedorstopped to record to the storage device. Notethat, thistrigger can be used only foredgestoragerecording status.
•System
Events
SystemReady-triggeredwhertheproduchabeerstartedandalservicesareunningThisarfor examplebeusedtosendanotificationwhentheproductrestarts.
•Time
Recurrence-triggered ul periodically see Recurrences or page 36 This afo example should upload an image every 5 minutes.
UsSchedule-triggetheuleaccordingtheselectedscheduleseSchedulesprpage36.
Availableactionsinclude:
- OutputPort—activateanl/Oporttocontrolanexternaldevice.
OverlayText-display=overlaytextsedUsingOverlayText=ActionRule=page21.
-PresetPosition—gotoapresetposition.
GuardTour-startguardourseGuardTourprpage26.
- RecordVideo—recordvideotoaselectedstorage.
- SendImages—sendimagestoarecipient.
- SendNotifications—sendanotificationmessagetoarecipient.
- SendVideoClip—sendavideocliptoarecipient.
StatuLED-flas the LED indicator This afo example should validate triggers such motion detection during product installation and configuration.
SettingUpanActionRule
Anactionruledefinestheconditionsthatmustbemetfortheproducttoperformanaction,forexemplerecordvideoorsendan emailnotification.Ifmultipleconditionsaredefined,allofthemmustbemettotriggertheaction.
The following example describes how to setup an action rule to record video to an network share if there is movement in the camera's field of view.
Setupmotiondetectionandaddanetworkshare:
Gad Detectors Motion Detection and configurational motion detection window page 29
QdSystemOptionsStorageandetupthetworksharesepage46.
Setuptheactionrule:
GetEventsActionRulesandClickAdd.
- SelectEnableruleandenteradescriptivenamefortherule.
SelectDetectorsfromtheTriggerdrop-downlist.
SelectMotionDetectionfromthedrop-downlistSelectthemotiondetectionwindowtuse.
Optionally select Schedule and Addition conditions set below.
UndeActionsselecRecordVidefromthTypdrop-downlist.
SelectStreamprofilandconfiguretheDurationsettingsdescribedbelow.
- SelectNetworkSharefromtheStoragedrop-downlist.
Optionallyselect the FallbackAction option to example send a premai notification if the recording does not start. See FallbackAction, on page 35.
Events
To additionacriteriaselect the Additiona conditions option and additionatrigger I prevenaction from being triggered repeatedly. Wa i b e a t i m c a n b s e E n t h e d i m e r h o u r s m i n u t e s a n d e c o n d s l u r i n g w h i c h t h r i g g r should be ignored before the action rule can be activated again.
The recording Duration of actions can be set in the immediately before and after the event Select Pre-trigger time and oPost-triggered number seconds. When while the active enabled and action triggered again during the post-trigger time, therecording timewill be extended with another post-trigger time period.
Formoreinformation,seetheonlinehelp

FallbackAction
Afallbackactionisstartediftheprimaryactioncannotbestarted,forexampleifconnectiontoarecipientcannotbeestablished.
Fallbackactionsaretypicallyusedtosendemailnotificationsonfailedactionsortuploadimagestoasecondaryrecipient.
Recipients
Recipientsreceivemediafilesandnotificationmessages.Thefollowingrecipientsareavailable:
| RecipientUsewithaction | |
| Email^1 | SendImagesSendNotificationSendVideoClip |
| FTP | SendImagesSendVideoClip |
| HTTP | SendImagesSendNotificationSendVideoClip |
| NetworkShare ^2 | SendImagesSendVideoClip |
| TCPSendNotification |
Some email provider has secure filtering a prevent users from receiving viewing charges amount attachments from receiving scheduled emails and similar. Check the email provider's security policy to avoid delivery problems and locked email accounts. An framework can also use storage device recorded video system options. Storage configuration network before setting continuous recording action until record video storage page for more information about storage devices.
Toaddarecipient:
GdEventsRecipientandclicAdd.
2.Enteradescriptivename.
3.SelectarecipientType.
4.Entertheinformationneededfortherecipienttype.
5.ClickTesttotesttheconnectiontotherecipient.
6.ClickOK.
SettingUpanEmailRecipient
Email recipients can be configured by selecting one of the listed email providers, or specifying the SMTP server, port and authentication used by, forexample, incorporate email server.
Note
Some email providers have security filter that prevent users from receiving or viewing large amount of attachments, from receiving scheduled emails and similar. Check the email provider's security policy to avoid delivery problems and locked email accounts.
Tosetupanemailrecipientusingoneofthelistedproviders:
GdEvents Recipients and click Add.
EnterNameandelecEmaifronthTypeist.
Entethemailaddresses send emails forth Toield Use commas separate multiple addresses.
- Select the email provider from the Provider list.
5.Entertheuser|Dandpasswordfortheemailaccount.
6.ClickTesttosendatestemail.
ToeupremailrecipientusingforexamplecorporatemaierverfollowtheinstructionsaboveuselecUsedefineds ProviderEntethemailaddressappeansendeintheFromfieldSelectAdvancedettingsandspeciftheSMTServer addressportandauthenticationmethodOptionallyselectUsencryptiontoendmailsoverencryptedconnectionTheserver certificatecanbevalidatedusingthecertificatesavailableintheAxisproduct.Forinformationonhowtuploadcertificates, seeCertificates,onpage40.
Schedules
Schedulescanbeusedasactionruletriggersorasadditionalconditions,forexampletorecordvideoifmotionisdetectedoutside officehours.Useoneofthepredefinedschedulesorcreateanewscheduleasdescribedbelow.
Tocreateanewschedule:
GdEventsSchedulesandClickAdd.
- Enteradescriptivename and the information needed for daily, weekly, monthly or yearly schedule.
3.ClickOK.
Taus the scheduled Action Rule select the scheduled from the Schedule drop-down list the Action Rule Setup page.
Recurrences
RecurrencesareusedtotriggerActionRulesrepeatedly,forexampleevery5minutesoreveryhour.
Tosetuparecurrence:
GdEventsRecurrencesandClickAdd.
2.Enteradescriptivenameandrecurrencepattern.
3.ClickOK.
To the recurrence in Action Rule first select Time from the Triggered drop-down list the Action Rule Setup page and then select the recurrence from these second drop-down list.
To modify remove recurrences, select the recurrence path. Recurrence List and click Modify Remove.
Recordings
TheAxisproductcanbeconfiguredtorecordvideocontinuouslyoraccordingtoanactionrule:
- Tostartacontinuousrecording,see page37.
- Tosetupactionrules,seepage34.
•Toaccessrecordings,seeRecordingList,onpage37.
•Toconfigurecameracontrolledstorage,seeStorage,onpage46.
RecordingList
Recorded videos and the Recordings List page the shows a recording start at and time duration and the event that triggered therecording.
Toplayordownloadarecording, followthesesteps:
- GotoRecordings>List.
Use filter to narrow disb recording Enteth desired filter criterion and lic Filte Some filters may take along timetocomplete.
- Selecttherecording.
@licPlayplaythecordingorclickDownloaddownloadhrecording.
Multiple recordingscarbdownloadedatsameTimeSelectRecordingsandlicDownloadThedownloadedfilezipfile containingaminimumofthreefiles,ofwhichtheMatroska(mkv)filesaretheactualrecordings.Therecordingsaretime-stamped withthedateandtimetheyweredownloaded(thatis,notthedatetherecordingsweremade).
Note
ToplayrecordingsinWindowsMediaPlayer,AXISMatroskaFileSplittermustbeinstalled.AXISMatroskaFileSplitter canbedownloadedfromwww.axis.com/techsup/software
For detailed recording and video information, select recording and lic Properties.
Toremovearecording,selecttherecordingandclickRemove.
ContinuousRecording
The Axiproductarbeconfiguredcontinuouslysaved storage device See Storage page 460 more information about storagedevices. Topreventthediskfrombecomingfull,itisrecommendedtoconfigurethedisktoautomaticallyremoveold recordings. Ifanewstreamprofileisselectedwhilearecordingisongoing,therecordingwillbestoppedandsavedintherecording listandanewrecordingwiththenewstreamprofilewillstart. Allpreviouscontinuousrecordingswillremainintherecordinglist untiltheyareremovedmanuallyyorthroughautomaticremovalofoldrecordings.
Tostartacontinuousrecording,followthesesteps:
- GotoRecordings>Continuous.
2.SelectEnabled. - SelecttypeofstoragedevicefromtheDisklist.
- SelectaStreamprofiletouseforcontinuousrecordings.
5.ClickSavetosaveandstarttherecording.
Languages
MultiplelanguagescanbeinstalledintheAxisproduct.AllwebpagesincludingtheonlinehelpwillbedisplayedintheselectedlanguageSwitchlanguagesgetSetupLanguagesandfirstuploadthenewlanguagefileBrowseandocatchelandclicktheUploadLanguagebutton.SelectthenewlanguagefromthelistandclickSave.
Note
- Resetting the product to factory default settings will erase any uploaded language file and reset the product language to English.
- ClickingtheRestorebuttonontheMaintenancepagewillnotaffectthelanguage.
- Afirmwareupgradewillnotaffectthelanguageused.Howeverifyouhaveuploadedanewlanguagetotheproductandlaterupgradethefirmware,itmayhappenthatthetranslationnolongermatchestheproduct'swebpages.Inthiscase,uploadanupdatedlanguagefile.
- Alanguagealreadyinstalledintheproductwillbereplacedwhenacurrentoralaterverersionofthelanguagefileisuploaded.
SystemOptions
Security
Users
Use access controlled enabled by default and bar configured under System Options Security Users Administrator can setup other users by giving them usernames and passwords. It is also possible to allow anonymous viewer login, which means that anybody may access the Live View page.
Theuserlistdisplaysauthorizedusersandusergroups(accesslevels):
Viewer-AccesstotheLiveViewpage
Operator-AccessstotheLiveViewpageandtoallsettingsexceptSystemOptions
Administrator-Unrestrictedaccesstoallsettings;canadd,modifyandremoveotherusers.
UndeHTTP/RTSIPasswordSettingsselectthypopasswordallowYoumayneedallowunencryptepasswordsthere areviewingclientsthatdonotsupportencryption,orifyouupgradedthefirmwareandexistingclientssupportencryptionbutneed tologinagainandbeconfiguredtousethisfunctionality.
UndeUseSettingsselecttheEnablanonymousviewelogimptionallowanonymoususersaccesstheLiveViewpage.
Deselect the Enable Basi Setup option to hide the Basi Setup menu Basi Setup provides quick access settings that should be made before using the Axis product.
ONVIF
ONVIF(OpenNetworkVideoInterfaceForum)isaglobalinterfacestandardthatmakesiteasierforendusers,integrators,consultants,andmanufacturerstotakeadvantageofthepossibilitiesofferedbynetworkvideotechnology.ONVIFenablesinteroperabilitybetweendifferentvendorproducts,increasedflexibility,reducedcostandfuture-proofsystems.
BycreatingauseryouautomaticallyenableONVIFcommunication.UsetheusernameandpasswordwithallONVIFcommunication withtheproduct.Formoreinformationseewww.onvif.org
IPAddressFilter
IAddressfiltering enableorthSystemOptionsSecurityAddressFiltepageOnce enabledthestdaddressare alloweddeniedaccesstheAxiproductSelectAllowDenfrontdistancelicApplyenabledAddressfiltering.
The administrator can add up to 2561 Paddressentriestothelist (asingleentry can contain multiple Paddresses).
HTTPS
HTTPS(HyperTextTransferProtocoloverSecureSocketLayer,orHTTPowerSSL)isawebprotocolprovidingencryptedbrowsing. HTTPScanalsobeusedbyusersandclientstoverifythatthecorrectdeviceisbeingaccessed. Thesecuritylevelprovidedby HTTPSisconsideredadequateformostcommercialexchanges.
TheAxisproductcanbeconfiguredtorequireHTTPSwhenusersfromdifferentusergroups(administrator, operator, viewer)connect.
TousHTTPSarHTTPScertificatemusfirstbeinstalledGoSystemOptionsSecurityCertificatesinstallandmanage certificates.See Certificates,onpage40.
ToenableHTTPSontheAxisproduct:
-
GotoSystemOptions>Security>HTTPS
-
SelectanHTTPCertificatefromthelistofinstalledcertificates.
SystemOptions
- Optionally, click Ciphers and select the encryption algorithm for SSL.
- SettheHTTPSConnectionPolicyforthedifferentusergroups.
5.ClickSavetoenablethesettings.
TaccesstheAxisproductiathdesireprotocolentehttps://onhttp://irthaddressfieldbrowser.
The HTTP Sport change or the System Options Network TCP/IP Advance page.
IEEE802.1X
IEEE802.1Xisastandardforport-basedNetworkAdmissionControlprovidingsecureauthenticationofwiredandwirelessnetwork devices.IEEE802.1XisbasedonEAP(ExtensibleAuthenticationProtocol).
ToaccessanetworkprotectedbyIEEE802.1X,devicesmustbeauthenticated.Theauthenticationisperformedbyanauthentication servertypicallyRADIUServerexamplesofwhichardFreeRADIUSandMicrosoftInternetAuthenticationService.
InAxisimplementation, theAxisproductandtheauthenticationserveridentifythemselveswithdigitalcertificatesusingEAP-TLS (ExtensibleAuthenticationProtocolTransportLayerSecurity)ThecertificatesareprovidedbyCertificationAuthorityCA). Youneed:
- aCAcertificatetoauthenticatetheauthenticationserver
- aCA-signedclientcertificatetoauthenticatetheAxisproduct.
TreatandnstalbertificatesgdsystemOptionsSecurityCertificateSecCertificatespage40ManyCAcertificates arepreinstalled.
ToallowtheproducttoaccessanetworkprotectedbyIEEE802.1X:
- GotoSystemOptions>Security>IEEE802.1X.
SelectCACertificateandClientCertificatfronttheistofinstalledcertificates.
UndeSettingsselect the EAPOversion and provide the EARidentity associated with the client certificate.
- ChecktheboxtoenableIEEE802.1XandclickSave.
Note
Forauthenticationtoworkproperly,thedateandtimesettingsintheAxisproductshouldbesynchronizedwithanNTP server.SeeDate&Time,onpage41.
Certificates
Certificatesareusedtoauthenticateddevicesonanetwork.Typicalapplicationsincludeencryptedwebbrowsing(HTTPS),network protectionviaIEEE802.1Xandsecureuploadofimagesandnotificationmessagesforexampleviaemail.Twotypesofcertificates canbeusedwiththeAxisproduct:
Server/Clientcertificates-toauthenticatetheAxisproduct
CAcertificates:authenticatpeercertificatesforexamplethecertificateofauthenticationserveincastheAxisproducts connectedtoanIEEE802.1Xprotectednetwork.
Note
Installedcertificates,exceptpreinstalledCAcertificates,willbedeletediftheproductisresettofactorydefault.PreinstalledCAcertificatesthathavebeendeletedwillbereinstalled.
Server/Client certificate can self-signed issued by Certificate Authority(CA) Self-signed certificate offers limited protection and can be used before a CA-issued certificate has been obtained.
Toinstallaself-signedcertificate:
SystemOptions
- GotoSystemOptions>Security>Certificates.
2.ClickCreateself-signedcertificateandprovidetherequestedinformation.
TocreateandinstallaCA-signedcertificate:
- Createaself-signedcertificateasdescribedabove.
2.GotoSystemOptions>Security>Certificates.
ClickCreatecertificatesigningequestanprovidetherequestedinformation.
4.CopythePEM-formattedrequestandsendtotheCAofyourchoice.
Whether signed certificate returned click install certificate and upload certificate.
Server/Clientcertificates:carbaninstalledaCertificatfromsigningequesbaCertificatanprivatekeySelectCertificateandprivatekeyiftheprivatekeyistobeuploadasaseparatefileorifthecertificateisinPKCS#12format.
The Axi product shipped with severapreinstalled C certificates, required additional C certificates, can be installed:
- GotoSystemOptions>Security>Certificates
- ClickInstallcertificateanduploadthecertificate.
Date&Time
The Axi product's lat and dim settings are configured under System Options DateTime.
CurrenServeTime display the current time (24clock) The time are displayed in 2 clock the text overlay (see below).
TochangthelatandimsettingsselecthepreferredTimmodundeNewServeTime:
Synchronizwithcomputetimsetslatandimeaccording thecomputer'slockWiththisoptiondatandtimearestonceandwillnotbeupdatedautomatically. SynchronizwithNTBerveobtainslatandimfromNTBerveWiththisoptiondatandimsettingsareupdatedcontinuouslyInformationonNTBettingssedNTRConfigurationprpage43.
If using hostname for the NTServer, DNServemust configured See DNSConfigurationpage43.
- Setmanuallyallowsyoutomanuallysetdateandtime.
Ifising NTServer select your Timezone from the drop-down list, required check Automatically adjust todaylight saving timechanges.
The DateTimFormaUsedImagesthdatandimformatdisplayedstexoverlaythevidestreamUsthe
predefinedformatsorseeFileNaming&tDate/TimeFormatsintheonlinehelp forinformationonhowtocreatecustomdateand timeformatsIncluddatandimethoverlaytextg0dVideandselectIncluddatandIncludtime.
Network
BasicTCP/IPSettings
TheAxisproductsupportsIPversion4andIPversion6.Bothversionscanbeenabledsimultaneously, andatleastoneversion mustalwaysbeenabled.
IPv4AddressConfiguration
Bydefault, theAxisproductissettouseIPv4(IPversion4) and to obtain theIPaddress automatically via DHCP. TheIPv4 settings are configured under SystemOptions > Network > TCP/IP > Basic.
DHCP(DynamicHostConfigurationProtocol) allows network administrator stocentrally manage and automate the assignment of IP addresses. DHCP should only be enabled if using dynamicIP address notification, or if the DHCP can update a DNS server. It is then possible to access the Axis product by name (hostname).
If DHCP is enabled and the product cannot be accessed, run AXISIPUtility to search then network for connected Axis products, or reset the product that factory default settings page 49 and then perform then installation again.
To restatid Paddress check Used following Paddress and specify the Paddress subnet masland default router.
IPv6AddressConfiguration
IfIPv6(IPversion6)isenabled,theAxisproductwillreceiveanIPaddressaccordingtotheconfigurationinthenetworkrouter.
TenablePv6gdoSystemOptionsNetworkTCP/IPBasicOthersettingsforIPvShouldbeconfiguredrthenetworkrouter.
ARP/Ping
The product's Address can be assigned using ARP and Ping for instructions see Assign/Address Using ARP/Ping on page 42.
TheARP/Pingserviceisenabledbydefaultbutisautomaticallydisabledtwominutesaftertheproductisstarted,orassoonasanIP addressisassigned.Tore-assignIPaddressusingARP/Ping,theproductmustberestartedtoenableARP/Pingforanadditional twominutes.
TalisabletheServicegotoSystemOptionsNetworkTCP/IPBasicandbleathoptionEnableARP/PingettingofPaddress.
Pinging the product is still possible when the service is disabled.
AssignIPAddressUsingARP/Ping
Theproduct'sIPaddresscanbeassignedusingARP/Ping.Thecommandmustbeissuedwithin2minutesofconnectingpower.
- AcquireafreestaticIPaddressonthesamenetworksegmentasthecomputer.
- Locatetheserialnumber(S/N) on the product label.
3.Openacommandpromptandenterthefollowingcommands:
Linux/Unixsyntax
arp-s<IPaddress><serialnumber>temp
ping-l408<IPaddress>
Linux/Unixexample
arp-s192.168.0.12500:40:8c:18:10:00temp
ping-1408192.168.0.125
Windowssyntax(thismayrequirethatyourunthecommandpromptasanadministrator)
arp-s<IPaddress><serialnumber>
ping-1408-t<IPaddress>
Windowsexample(thismayrequirethatyourunthecommandpromptasanadministrator)
arp-s192.168.0.12500-40-8c-18-10-00
ping-l408-t192.168.0.125
- Check that thenetwork cable is connected and then restart the product by disconnecting and reconnecting power.
SystemOptions
Glosthe comma prompt whether products respond with Reply from 92.168.0.125:..osimilar.
Openbrowseandyp:http://
intheLocation/Addressfield.Fothemethods of assigning the Address through installation and Management Software, CDothelocument Assigned IP Address and Access the Video Stream on Axis Support web at www.axis.com/techsup
Note
ToperformmanpromptWindowspperthStartmenuandtypecmdrthRun/Searchfield.
- TousetheARPcommandinWindows7/WindowsVista,right-clickthecommandprompticonandselectRunas administrator.
ToopercommanspromptMacOSxoperthTerminalutilityfromApplicationUtilities.
AXISVideoHostingSystem(AVHS)
AVHSusedinconjunctionwithanAVHSservice,provideaseasyandsecureInternetaccesstoliveandrecordedvideoaccessiblefromanylocation.FormoreinformationandhelptofindalocalAVHSServiceProvidergotowww.axis.com/hosting
The AVHSettings are configured under SystemOptionsNetworkTCPBasicThe possibility to connect AVHService is enabled by default. Todisable, clear the Enable AVHSbox.
One-clickenabledPresthproduct'sontrobuttonisedHardwareOverviewpropag &connectanAVHServiceovethe InternetOnceregisteredAlwayswilbenabledtheAxiproductstaysconnectedtheAVHServicdfhproductnot registeredwithin24hoursfromwhenthebuttonispressed,theproductwilldisconnectfromtheAVHSservice.
Always The AxiproductwilconstantlyattemptconnecttheAVHServicovethdInternet. Once registered the product will stayconnectedtotheservice.Thisoptioncanbeusedwhentheproductisalreadyinstalledanditisnotconveniettousethe one-clickinstallation.
AXISInternetDynamicDNSService
AXISInternetDynamicDNSServiceassignsahostnameforeasyaccesstotheproduct.Formoreinformation,seewww.axiscam.net
Toregister the Axis product with AXIS Interne Dynamic DNS service for System Options Network TCP/IPBasid Under Services click the AXIS Interne Dynamic DNS Service Settings button (requires access to the Internet) The domain name currently registered at AXIS Internet Dynamic DNS service for the product can at any time be removed.
AdvancedTCP/IPSettings
DNSConfiguration
DNS(DomainNamServiceprovides the translation of names to addresses The DNS settings are configured under System Options > Network > TCP/IP > Advanced.
SelectObtainDNServeaddress via DHCP to the DNSetting provided by the DHCP server.
TomakemanuatasettingsselectUsethefollowingDNServeaddressandspecifythefollowing:
DomainnameEntethdomain(s)searchforthoshnameusedbytheAxiproductMultipldomainsarbeseparated by semicolonsThehoshnameiswaythefirstparbfullyqualifieddomainameforexamplemyserveristhoshnamethefullyqualifieddomainamemyserver.mycompany.comwheremycompany.comith-domainame.
Primary/SecondaryDNServerEntethdAddressesofthprimaryandsecondaryDNServersThesecondaryDNServes optionalandwillbeusediftheprimaryisunavailable.
NTPConfiguration
NTP(NetworkTimeProtocol)isusedtosynchronizetheclocktimesofdevicesinanetwork.TheNTPsettingsareconfiguredunder SystemOptions>Network>TCP/IP>Advanced.
SystemOptions
SelectObtainNTBervaddress via DHCP users the NTBetting provided by the DHCP server.
TomakemanuabettingsselectUsefollowingNTBervaddressandentethosthamorAddressoftheNTBerver.
HostNameConfiguration
TheAxisproductcanbeaccessedusingahostnameinsteadofanIPaddress.ThehostnameisusuallythesameastheassignedDNS nameThehostnameisconfiguredundesystemOptionsNetworkTCP/IBAdvanced.
SelectObtainnostamviaPv4DHCRusnostamprovidedbythDHCBerverunningrlPv4.
SelectUsethehostnametosetthehostnamemanually.
SelectEnableDynamidDNSUpdates dynamically updateocaDNServers whenever the Axi product's Paddress changes.
Formoreinformation,seetheonlinehelp
Link-LocalIPv4Address
Link-LocalAddressenabledbydefaultandassigntheAxiproductadditionalAddresswhichcarbasedaccess theproductfromotherhostsonthesamesegmentonthelocalnetwork.TheproductcanhaveaLink-LocalIPandastatic orDHCP-suppliedIPaddressatthesametime.
This function can be disabled under System Options Network TCP/IP Advanced.
HTTP
The HTTP port used by the Axisproduct are changed under SystemOptionsNetworkTCP/IP Advanced addition to the default setting, which is 80, any port in therange 1024-65535 can be used.
HTTPS
The HTTP sport used by the Axi product are changed under System Options Network TCP/IP Advanced addition to the default setting, which is 443, any portion in the range 1024-65535 can be used.
TenableHTTPSgdsystemOptionsSecurityHTTPSFomoreinformationsedHTTPSprpage39.
NATtraversal(portmapping)forIPv4
Anetworkrouterallowsdevicesonaprivatenetwork(LAN)toshareasingleconnectiontotheInternet.Thisisdonebyforwarding networktrafficfromtheprivatenetworktothe"outside",thatis,theInternet.Securityontheprivatenetwork(LAN)isincreased sincemostroutersarepre-configuredtostopattemptsstoaccesstheprivatenetwork(LAN)fromthepublicnetwork(Internet).
UsNATraversawhethAxiproductlocatedmaintrane(LAN)andyouwistomaketavailablefromtheother (WAN)sideofaNATrouter.WithNATtraversalproperlyconfigured,allHTTPtraffictoanexternalHTTPportintheNATrouter isforwardedtotheproduct.
NATraversalconfiguredundeSystemOptionsNetworkTCP/IPAdvanced.
Note
- ForNATtraversaltowork, this must be supported by the router. Therouter must also support UPnP
TM. - Therouterhasmanydifferentnames:"NATrouter","Networkrouter","InternetGateway","Broadbandrouter","Broadband sharingdevice"or"Homefirewall"buttheessentialpurposeofthedeviceisthesame.
Enable/DisableWhenenabledtheAxisproductattemptsconfigurportmappingnNATouteoryounetworkusingUPnP NotethatUPnP™ mustbeenabledintheproduct(seeSystemOptions>Network>UPnP).
TM.
Usmanually selected NATouteSelect this option manually select NAToute and the address for router in the field. If norouter is specified, the product automatically searches for NATrouterson your network. If more than one router is found, the default router is selected.
SystemOptions
Alternative HTTP port Select this option manually defines externa HTTP port Ent the port number the field of ports entered here, a port number is automatically selected when NAT traversalisenabled.
Note
- AnalternativeHTTPportcanbeusedorbeactiveevenifNATtraversalisdisabled.ThisisusefulifyourNATrouterdoesnot supportUPnPandyouneedtomanuallyconfigureportforwardingintheNATrouter.
- If you attempt to manually enter a port that is already in use, another available port is automatically selected.
WhertheportselectedautomaticallyitsdisplayedrthisfieldTochangthisentenewpornumberandclickSave.
FTP
TheFTPserverrunningintheAxisproductenablesuploadofnewfirmware,userapplications,etc.TheFTPservercanbedisabled underSystemOptions>Network>TCP/IP>Advanced.
Note
ThisFTPserverhasnothingtodowiththeproduct'sabilitytotransferimagesviaFTPtootherlocationsandservers.
RTSP
TheRTSPserverrunningintheAxisproductallowsaconnectingclienttostartanH.264stream.TheRTSPportnumbercanbe changedundeSystemOptionsNetworkTCP/IBAdvancedThedefaultports54.
Note
H.264videostreamswillnotbeavailableiftheRTSPserverisdisabled.
SOCKS
SOCKSisanetworkingproxyprotocol.TheAxisproductcanbeconfiguredtouseaSOCKSservertoreachnetworksontheother sideofafirewallorproxyserver.ThisfunctionalityisusefuliftheAxisproductislocatedonalocalnetworkbehindafirewall,and notifications,uploads,alarms,etcneedtobesenttoadestinationoutsidethelocalnetwork(forexamplethelnternet).
SOCKSconfiguredundeSystemOptionsNetworkSOCKSFomoreinformationsetchonlinehelp

QoS(QualityofService)
QoS(QualityofService)guaranteesacertainlevelofaspecifiedresourcetoselectedtrafficonanetwork.AQoS-awarenetwork prioritizesnetworktrafficandprovidesagreaternetworkreliabilitybycontrollingtheamountofbandwidthanapplicationmayuse.
TheQoSettings are configured under SystemOptionsNetworkQoSUsingDSCR Differentiated ServiceCodepointvalues the Axisproduct can mark the following types of traffic: live video, event/alarm traffic and management traffic.
SNMP
TheSimpleNetworkManagementProtocol(SNMP) allows remotemanagementofnetworkdevices.AnSNMPcommunityisthe groupofdevicesandmanagementstationrunningSNMP.Communitynamesareusedtoidentifygroups.
The Axi product are configured support SNMPorth System Options Network SNMPage.
Dependingonthelevelofsecurityrequired,selecttheversiononSNMPtouse.
SNMR1/v provide the lowest security. The community name can be specified as password for a read/write access supported SNMR device. The default password for the community public and default password for the write community is write.
Note
IfHTTPSisenabled,SNMPv1andSNMPv2cshouldbedisabled.
SystemOptions
TrapfoSNMR1/v2areused by the Axiproduct send messages to management system important event and status change. ChecEnabletrapandentethAddress where the trapmessage should be sent and the rapi community that should receive themessage.
The following traps are available:
•Coldstart
•Warmstart
- Linkup
- Authenticationfailed
SNMR3provideencryptionandsecurepasswordstostrapwithSNMR3arSNMR3managementapplicationrequired.
TousSNMR3HTTPSmusenabledseHTTPSprpage39 enableSNMR3checkboxanprovidethenitialuser password.
Note
The initial password can only be set once. If the password is lost, the Axis product must be reset to factory default, see ResettoFactoryDefaultSettings, on page 49.
UPnP ^TM
TheAxisproductincludessupportforUPnP ^TM .UPnP ^TM isenabledbydefaultandtheproductisautomaticallydetectedbyoperating systemsandclientsthatsupportthisprotocol.
UPnP™ canbedisabledunderSystemOptions>Network>UPnP TM.
RTP/H.264
The RTportangandmulticastettings are configured under SystemOptionsNetworkRTP.
The RTP portranged defines the range of ports from which the video ports are automatically selected. Form multicast streams, only certain IP addresses and port numbers should be used.
SelectAlwayMulticastVidedstartmulticaststreamingwithoubpeningRTSBession.
Bonjour
TheAxisproductincludessupportforBonjour.Bonjourisenabledbydefaultandtheproductisautomaticallydetectedbyoperating systemsandclientsthatsupportthisprotocol.
BonjourcanbedisabledunderSystemOptions>Network>Bonjour.
Storage
NetworkShare
NetworkshareallowsyoutoaddnetworkstoragesuchasaNAS(NetworkAttachedStorage)oranyserverthatusesCIFS(Common InternetFileSystem)andusethemforstorageofrecordings.
Toaddanetworkshare:
- GotoSystemOptions>Storage.
2.ClickNetworkShare.
3.EntertheIPaddress,DNSorBonjourametothehostserverintheHostfield.
4.EnterthenameoftheshareintheSharefield.Subfolderscannotbeused.
SystemOptions
I ^s required ^e lectTheshare requires ogirandentethusenamandpassword.
6.ClickConnect.
To eal recordings and data from the Axi product's folderth designated share click Clearunde Storage Tools.
T avoid filling the share it recommended remove recordings continuously Under Recording Settings select Remove recordings older than and select then number of days or weeks.
Tstopwriting the share an protect recordings from being removed select Lockunde Recording Settings.
Ports&Devices
I/OPorts
Configure the input and output ports supported by you A x product from System Options Ports Devices / Ports Ports can begin describing names, and their Normal state can be configured. Form more information about this se the online help
Eoinformationregarding how to connect input and output this product see PirAssignments for OConnectorAXIS 2911UVideoServerRack, on page 7.
COMPort
TheAxisproducthasoneRS-485/RS-422serialport.Theportsupportsthefollowingmodes:
- GenericHTTPallowstheAxisproducttoreceivedataandsendcommandsviaHTTP.
PaTilZoomusedcontrolPTDeviceThePTDevicerequiresDriveSednstallingPTZdrivefromore information.Driverscanbedownloadedfromwww.axis.com
GenericTCP/IPallows theAxisproduct receive data and send commands via TCP/IPDaisychairserverAllowDaisy chainclientstocommunicatewiththeAxisproduct.
Select the desired Port type from the drop-down list. From information or Series Port Settings and Daisy Chain Port Settings seetheonline help ?
PortStatus
The birth System Options Ports Devices Port Status page shows the status of the product's input and output ports.
Maintenance
The Axis product provides several maintenance functions. These are available under System Options Maintenance.
ClickRestart perform correct start the Axiproducts no behaving expected this will have affected any of the current settings.
ClickRestoresetmostsettingsofthefactorydefaultvaluesThefollowingsettingsarenotaffected:
•thebootprotocol(DHCPorstatic)
- thestaticIPaddress
- thedefaultrouter
- thesubnetmask
- thesystemtime
• theIEEE802.1Xsettings
SystemOptions
- uploadedapplicationsarekeptbutmustberestarted
ClickDefaultresetSettingsincludinghdAddressdthfactorydefaultvaluesThisbuttonshouldusedwithcautionTheAxiproductamalsoresetfactorydefaultusingthecontrolbuttonsedResetFactoryDefaultSettingsprpage49.
To identify the product test the Status LED click Flash LED undel identify and specify the duration in seconds minutes hours. This can be useful for identifying the product among other products installed in the same location.
Forinformationaboutfirmwareupgrade,seeUpgradingtheFirmware,onpage50.
Support
SupportOverview
The SystemOptionsSupportSupportOverviewpage provides information on troubleshooting and contact information, should you require technical assistance.
See also Troubleshooting, on page 50.
SystemOverview
Together overview of the Axi product status and settings and System Options Support System Overview Information that can be found here includes firmware version, IP address, network and security settings, event settings, imagesettings and recent log items. Many of the captions are linked to the proper Setup page.
Logs&Reports
The SystemOptionsSupportLogReportsgageneratesogandreportusefuofsystemanalysisandroubleshootingIf contactingAxisSupport,pleaseprovideavalidServerReportwithyourquery.
SystemLog-Providesinformationaboutsystemevents.
AccesLogListalfailed attempts to access the product. The AccesLogar also configured distal connections the product (see below).
ServeReport Provides information about the product status: pop-up window The Access log automatically included in the Server Report.
Youcanviewordownloadtheserverreport.Downloadingtheserverreportcreatesa.zipfilethatcontainsacompleteserverreport textilerUTF-formaSelectdIncludenapshowwithdefaultImagesettingsptiortincludesnapshotofhproduct's LiveViewthatalsowshsettingsspecifiedundevideStream>Image>ImageAppearanceTheserverreportzipfile should alwaysbeincludedwhencontactingsupport.
ParameterLisShowProduct' parameters and their current settings This may prove useful when troubleshooting or when contacting AxisSupport.
ConnectionList-Listsallclientsthatarecurrentlyaccessingmediastreams.
CrashReport-Generatesanarchivewithdebugginginformation.Thereporttakesseveralminutestogenerate.
TheogevalsothSystemLogandheAccessLogresetndeSystemOptionsSupportLogReportsConfiguration. TheAccessLogcanbeconfiguredtolistallconnectionstotheproduct(selectCritical,Warnings&Info).
Advanced
Scripting
Scriptingallowsexperienceduserstocustomizeandusetheirownscripts.
NOTICE
ImproperusemaycauseunexpectedbehaviorandlossofcontactwiththeAxisproduct.
Axisstronglyrecommendsthatyoudonotusethisfunctionunlessyouunderstandtheconsequences.AxisSupportdoesnotprovide assistanceforproblemswithcustomizedscripts.
To Perth Script Editor and System Options Advanced Scripting, script cause problems reset product to factory default settings, see page 49.
Formoreinformation,seewww.axis.com/developer
FileUpload
Files,forexamplewebpagesandimages,canbeuploadedtotheAxisproductandusedascustomsettings.Touloadafile,go toSystemOptions>Advanced>FileUpload.
Uploadedfilesaccessedthroughhttp://
PlainConfig
PlainConfigisforadvanceduserswithexperienceofAxisproductconfiguration.Mostparameterscanbesetandmodifiedfromthis page.Helpisavailablefromthestandardhelppages.
ToperPlainConfigdSystemOptionsAdvancedPlainConfigAxisSupportdoesnoprovideassistance.
ResettoFactoryDefaultSettings
Important
Resettofactorydefaultshouldbeusedwithcaution.Aresettofactorydefaultwillresetallsettings,includingtheIP address,tothefactorydefaultvalues.
Note
The installation and management software tools are available on the CDs supplied with the product and from the support pages on www.axis.com/techsup
Toresettheproducttothefactorydefaultsettings:
- Pressandholdthecontrolbuttonandthererastartbuttonatthesametime.
- Releasetherestartbuttonandholdthecontrolbutton.
- Keep the control button pressed until the power LED indicator turns green and the 6 status LED indicator turn number (this may take up to 15 seconds).
- Releasethecontrolbutton. WhenthestatusLEDindicatorsdisplaygreen(whichcantakeupto1 minute) the process is complete and the unithas been reset.
- Using the installation and management software tools, assign the IP addresses, set the password and access the video stream.
Note
Toresetasinglechanneltotheoriginalfactorydefaultsettings,usethebuttonprovidedinthatunit'swebinterface.
It's also possible to rese parameters for factory default via the web interface. Gd Setup System Options Maintenance.
Troubleshooting
CheckingtheFirmware
Firmwareissoftwarethatdeterminesthefunctionalityofnetworkdevices.Oneofyourfirstactionswhentroubleshootingaproblem shouldbetocheckthecurrentfirmwareversion.Thelatestversionmaycontainacorrectionthatfixesyourparticularproblem.The currenfirmwareversiontheAxiproductsdisplayedthepagSetupBasiSetupandSetupAbout.
UpgradingtheFirmware
Whenyouupgradethe>withthelatestfirmwarefromAxiswebsite,theproductreceivesthelatestfunctionalityavailable.Alwaysreadtheupgradeinstructionsandreleasenotesavailable witheachnewrelease,beforeupgradingthefirmware.
Toupgrade, followtheseinstructions:
- Savethefirmwarefiletoyourcomputer. The latest version of the firmware is available free of charge from Axis website at www.axis.com/techsup
- GotoSetup>SystemOptions>Maintenanceintheproduct'swebpages.
UndeUpgradServerClicBrowsandocatchfileyourcomputerClicUpgrade.
Afterstartingtheupgradeprocess,alwayswaitatleast5–10minutesbeforerestartingtheproduct,evenifyoususpectthe upgradehasfailed.
AXISCameraManagementcanbeusedformultipleupgrades.Seewww.axis.comformoreinformation.
Note
- Yourdealerreservestherighttochargeforanyrepairattributabletofaultyupgradebytheuser.
- Preconfiguredandcustomizedsettingsaresavedwhenthefirmwareisupgraded(providingthefeaturesareavailableinthenewfirmware)althoughthisisnotguaranteedbyAxisCommunicationsAB.

EmergencyRecoveryProcedure
If powerornetworkconnection is lostduring the upgrade, the process fails and the product becomes unresponsive. Flashing red Status indicator indicates a failed upgrade. Torecover the product, follow the steps below. The serial number is found on the product's label.
- In UNIX/Linux, typethefollowing from the commandline:
arp-s<IPaddress><serialnumber>temp
ping-1408<IPaddress>
In Window styp the following from command/DO prompt(this may require that your the command prompts an administrator):
arp-s<IPaddress><serialnumber>
ping-1408-t<IPaddress>
- If the product does not reply in 30 seconds, restart it and wait for areply. Press CTRL + Ctostop Ping.
Openbrowseandypertheproduct'dAddressrthepagthatappearsustheBrowsbuttortoelectheupgrade filetouse.ThenclickLoadtorestarttheupgradeprocess.
-
After the upgrade is complete (1–10 minutes), the product automatically restarts and shows a steady green on the Status indicator.
-
Reinstall the product, referring to the Installation Guide.
If the emergency recovery procedure does not get the product up and running again, contact Axissupport at www.axis.com/techsup/
Symptoms, Possible Causes and Remedial Actions
ProblemssettingtheIPaddress
| WhenusingARP/Ping | Trytheinstallationagain.TheIPaddressmustbesetwithintwominutesafterpowerhasbeen appliedtotheproduct.EnsurethePinglengththissetto408.Forinstructions,seeAssignIPAddressUsingARP/Ping,onpage42. |
| Theproductislocatedona differentsubnet | IfthelPaddressintendedfortheproductandthelPaddressofthecomputerusedtoaccessthe productarelocatedondifferentsubnets,youwillnotbeabletosethelPaddress.Contactyour networkadministratortoobtainanIPaddress. |
| ThelPaddressisbeingused byanotherdevice | DisconnecttheAxisproductfromthenetwork.RunthePingcommand(inaCommand/DOS window,typepingandthelPaddressoftheproduct):·Ifyoureceive:Replyfrom:bytes=32;time=10... thismeansthatthelPaddressmayalreadybeinusebyanotherdeviceonthenetwork. ObtainanewIPaddressfromthenetworkadministratorandreinstalltheproduct.·Ifyoureceive:Requesttimedout,thismeansthatthelPaddressisavailable forusewiththeAxisproduct.Checkallcablingandreinstalltheproduct. |
| PossibleIPaddressconflict withanotherdeviceonthe samesubnet. | ThestaticIPaddressintheAxisproductisusedbeforetheDHCPserversetsadynamicaddress. ThismeansthatifthesamedefaultstaticIPaddressisalsousedbyanotherdevice,theremay beproblemsaccessingtheproduct. |
| Theproductcannotbeaccessedfromabrowser | |
| Cannotlogin | WhenHTTPSisenabled,ensurethatthecorrectprotocol(HTTPorHTTPS)isusedwhenattempting tdognYoumayneedmanuallytypehttporthpithethrowser'saddressfield.Ifthepasswordfortheuserrootislost,theproductmustberesettothefactorydefaultsettings.SeeResettoFactoryDefaultSettings,onpage49. |
Troubleshooting
| TheIPaddresshasbeen changedbyDHCP | IPaddressesobtainedfromaDHCPserveraredynamicandmaychange.IftheIPaddresshas beenchanged,useAXISIPUtilityorAXISCameraManagementtolocatetheproductonthe network.Identifytheproductusingitsmodelorserialnumber,orbytheDNSname(ifthename hasbeenconfigured).Ifrequired,astaticIPaddressscanbeassignedmanually.Forinstructions,seethInstallationand ManagemenSoftwareCDothedocumentAssignandAddressandAccesstheVideStreamonAxisSupportwebatwww.axis.com/techsup. |
| Certificateerrorwhenusing IEEE802.1X | Forauthenticationtoworkproperly,thedateandtimesettingsintheAxisproductshouldbe synchronizedwithanNTPserver.SeeDate&Time,onpage41. |
Theproductisaccessiblelocallybutnotexternally
| RouterconfigurationToconfigureyourroutertoallowincomingdatatrafficitotheAxisproduct,enabletheNAT-traversalfeaturewhichwillattempttoautomaticallyconfiguretheroutertoallowaccesstotheAxisproductsedNATtraversal(portmapping)forIPv4prpage44TheroutemustupporUPnP | TM. | |
| Firewallprotection | CheckthelInternetfirewallwithyournetworkadministrator. | |
| Defaultroutersrequired | CheckifyouneedtoconfiguretheroutersettingsfromSystemOptions>Network>TCP/IP>Basic. | |
ProblemswithstreamingH.264
| ProblemswithAXISMedia Control(InternetExplorer only) | ToenabletheupdatingofvideoimagesinInternetExplorer,setthebrowsertoallowActiveX controls.Also,makesurethatAXISMediaControlisinstalledonyourcomputer. |
| NoH.264displayedinthe client | CheckthattherelevantH.264connectionmethodsandcorrectinterfaceareenabledintheAMC ControlPanel(streamingtab).SeeAXISMediaControl(AMC),onpage 14.IntheAMControPanelselecthd.264bandlicSetdefaultH.264decoder.CheckhaRTSRenabledundesystemOptionsNetworkTCP/IPAdvanced. |
| MulticastH.264only accessiblebylocalclients | Checkifyourroutersupportsmulticasting,orifteroutersettingsbetweentheclientandthe productneedtobeconfigured.TheTTL(TimeToLive)valuemayneedtobeincreased. |
| NomulticastH.264 displayedintheclient | CheckwithyournetworkadministratorthatthemulticastaddressesusedbytheAxisproduct arevalidforyournetwork.Checkwithyournetworkadministratortoseeifthereisafirewallpreventingviewing. |
| Installationofadditional ActiveXcomponent restrictedorprohibited | ConfiguretheAxisproducttouseaJavaappletforupdatingvideoimagesinyourbrowser.Goto SetupLiveViewConfigandelectlavaappletundeDefaultviewer. |
| PoorrenderingofH.264 images | Ensurethatyourgraphicscardisusingthelatestdriver.Thelatestdriverscanusuallybe downloadedfromthemanufacturer'swebsite. |
| Colorsaturationisdifferent inH.264andMotionJPEG | Modifythesettingsforyourgraphicsadapter.Refertotheadapter'sdocumentationformore information. |
Troubleshooting
| Lowerframeratethan expected | SeePerformanceConsiderations,onpage55. |
| Reducethenumberofapplicationsrunningontheclientcomputer. | |
| Limitthenumberofsimultaneousviewers. | |
| Checkwiththenetworkadministratorthatthereisenoughbandwidthavailable. | |
| CheckintheAMCControlPanel(H.264tag)thatvideoprocessingisNOTsettoDecodeonly keyframes. | |
| Lowertheimageresolution. |
Videoandimageproblems,general
| Imageunsatisfactory | CheckthevidestreamandcamersettingsundefSetupVideoVidestramandSetup>Video>CameraSettings. |
| MotionDetectiontriggersunexpectedly | |
| Changesinluminance | Motiondetectionisbasedonchangesinluminanceintheimage.Thismeansthatiftherearesuddenchangesinthelighting,motiondetectionmaytriggermistakenly.Lowerthesensitivitysettingtoavoidproblemswithluminance. |
| Storageanddiskmanagementproblems | |
| Storagedisruption | Astoragedisruptionalarmissentifastoragedeviceisunavailable,removed,full,lockedorifotherreadwriteproblemsoccurIdentifythesourcoftheproblemcheckSystemLogunderSystemOptions>Support>LogsetReports.Dependingontheproblem,itmightbenecessarytore-mountthestoragedevice.Forinformationonhowtosetupastoragedisruptionalarm,seeEvents,onpage33. |
TechnicalSpecifications
| Function/group | Item | Specifications |
| VideoEncoderModel | AXISQ7436Videoencoderblade | |
| Video | Video compression | H.264(MPEG-4Part10/AVC)Baseline,MainandHighprofileMotionJPEG |
| Resolutions | 176x120to720x576 | |
| FramerateH.264 andMotionJPEG | 60/50(NTSC/PAL)fpsinallresolutions | |
| Videostreaming | Multiple,individuallyconfigurablestreamsinH.264andMotionJPEG.ControllableframerateandbandwidthVBR/CBRH.264 | |
| Pan/Tilt/Zoom | WiderangeofanalogPTZcamerassupported(driversavailablefordownloadatwww.axis.com)100presets/camera,guardtour,PTZcontrolqueueSupportsWindowscompatiblejoysticksCompatiblewithCoaxitron®byPelco | |
| Imagesettings | Compression,color,brightness,contrast,localcontrastRotation:90°,180°,270°AspectratiocorrectionMirroringofimages,Textandimageoverlay,PrivacymaskEnhanceddeinterlacefilterVideotermination,Anti-aliasing,Sharpness,Noisereduction | |
| Network | SecurityPasswordprotection,IPaddressfiltering,HTTPSencryption*,IEEE802.1Xnetworkaccesscontrol**,digestauthentication,useraccesslog*ThisproductincludessoftwaredevelopedbytheOpenSSLProjectforuseintheOpenSSLToolkit(www.openssl.org) | |
| Supported protocols | IPv4/v6,HTTP,HTTPS*,QoSlayer3DiffServ,FTP,CIFS/SMB,SMTP,Bonjour,UPnPTM,SNMPv1/v2c/v3(MIB-II),DNS,DynDNS,NTP,RTSP,RTP,TCP,UDP,IGMP,RTCP,ICMP,DHCP,ARP,SOCKSThisproductincludesoftwaredevelopedbytheOpenSSLProjectforuseintheOpenSSLToolkit(www.openssl.org) | |
| System Integration | Application Programming Interface | OpenAPIforsoftwareintegration,includingVAPIX®andAXISCameraApplicationPlatformfromAxisCommunications,availableatwww.axis.com,ONVIFProfileS,specificationsavailableatwww.onvif.orgAXISVideoHostingSystem(AVHS)withOne-ClickCameraConnection |
| Intelligentvideo | Videomotiondetection,activetamperingalarm,AXISCameraApplicationPlatform | |
| EventtriggersIntelligentvideoExternalinputsVideoloss | ||
| EventactionsFileupload adviaFTP,HTTPandemailNotificationviaemail,HTTPandTCPPTZpresetExternaloutputactivationPre-andpost-alarmvideobuffering | ||
| DataStreaming | Eventdata | |
| Installation,managementandmaintenance | AXISCameraManagementtoolonCDandweb-basedconfigurationFirmwareupgradesoverHTTPForFTP,firmwareavailableatwww.axis.com | |
| Videoaccessfrom webbrowser | CameraliveviewVideorecordingtofile(ASF)Windows7,Vista,XP,2000,2003serverDirectX9corhigherForotheroperatingsystemsandbrowersseewww.axis.com/techsup | |
TechnicalSpecifications
| Function/group | Item | Specifications |
| General | Memory6x256MBRAM | 6x256MBFlashBatterybacked-upreal-timeclock |
| Power | 12VDC,max16.3W | |
| Connectors6xanalog | compositevideoBNCinputs1x1000BaseTEthernetUpto12xconfigurableexternalinputs/outputs(dependingonthechassis)Upto6xRS-485/422halfduplex(dependingonthechassis) | |
| Requiredhardware | AXISQ7900orAXISQ7920ChassisorAXIS2911Urack | |
| Operatingconditions | 0to45°C(32to113°F)Humidity10-85%RH(non-condensing) | |
| Storageconditions | -40°Cto65°C(-40°Fto149°F) | |
| Approvals | EN55022ClassB,EN61000-3-2,EN61000-3-3,EN55024EN61000-6-1,EN61000-6-2,FCCPart15SubpartBClassBICES-003ClassB,VCCIClassB,C-tickAS/NZSCISPR22,KCCClassBIEC/EN/UL60950-1WithAXISQ7920:EN50121-4 | |
| Weight | 303g(0.6lb) | |
| Includedaccessories | InstallationGuide,InstallationandManagementSoftwareCD,1Windowsdecoderuser license, | |
| Optionalaccessories | AXIST8310VideoSurveillanceBoard | |
| Dimensions(HxWxD) | 30x128x255mm(1.2x5.03x10.0in.)includingconnectors | |
| Videmanagementsoftware | AXISCameraCompanion(included),AXISCameraStationandvideomanagementsoftwarefromAxis'ApplicationDevelopmentPartners(notincluded).Formoreinformation,seewww.axis.com/products/video/software | |
| Warranty | Axis3-yearwarrantyandAXISExtendedWarrantyoption,seewww.axis.com/warranty |
PerformanceConsiderations
Whensettingsupyoursystem,itisimportanttoconsiderhowvarioussettingsandsituationswillaffectperformance.Somefactors affecttheamountofbandwidth(thebitrate)required,otherscanaffecttheframerate,andsomeaffectboth.Iftheloadonthe CPUreachesitsmaximum,thiswillalsoaffecttheframerate.
The following factors are among them most important to consider:
- Highimageresolutionand/orlowercompressionlevelsresultinimagescontainingmoredata.Bandwidthaffected.
- AccessbylargenumbersofMotionJPEGand/orunicastH.264clients.Bandwidthaffected.
- Simultaneousviewingofdifferentstreams(resolution, compression)bydifferentclients.Effectonframerateand bandwidth.
- AccessingMotionJPEGandH.264videostreamssimultaneously.Framerateandbandwidthaffected.
- Heavyusageofeventsettingsaffecttheproduct'sCPUload.Framerateaffected.
- Heavynetworkutilizationduetopoorinfrastructure.Bandwidthaffected.
TechnicalSpecifications
- Viewingonpoorlyperformingclientcomputerslowersperceivedperformance.Framerateaffected.


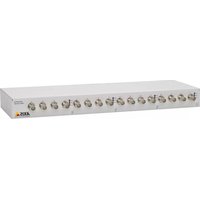
- EquipmentModifications
- TrademarkAcknowledgments
- RegulatoryInformation
- Electromagnetic Compatibility(EMC)
- USA
- Canada
- Europe
- Australia/NewZealand
- Japan
- DisposalandRecycling
- China
- ContactInformation
- Support
- LearnMore!
- TableofContents
- HardwareOverview
- ConnectorsandButtons
- BusConnector
- ControlButton
- RestartButton
- Note
- AccessingtheProduct
- AccessfromaBrowser
- AccessfromtheInternet
- SettheRootPassword
- TheLiveViewPage
- ControlsontheLiveViewPage
- ManualTrigger
- AXISMediaControlviewertoolbar
- PTZControls
- MediaStreams
- HowtoStreamH.264
- MJPEG
- AXISMediaControl(AMC)
- AlternativeMethodsofAccessingtheVideoStream
- SettingUptheProduct
- BasicSetup
- Video
- VideoStream
- PixelCounter
- Image
- H.264
- StreamProfiles
- CameraSettings
- ImageAppearance
- Videoinput
- ImageSettings
- Overlay
- OverlayImage
- UsingOverlayTextinanActionRule
- Example
- PrivacyMask
- Important
- LiveViewConfig
- DefaultViewerforBrowsers
- ViewerSettings
- UserDefinedLinks
- OutputButtons
- PTZ(PanTiltZoom)
- PresetPositions
- GuardTour
- Advanced
- Controls
- InstallingaPTZdriver
- ControlQueue
- Detectors
- CameraTampering
- MotionDetection
- SetUpMotionDetectionWindows
- MotionDetectionParameters
- Applications
- ApplicationLicenses
- InstallApplication
- ApplicationConsiderations
- Events
- SettingUpanActionRule
- FallbackAction
- Recipients
- SettingUpanEmailRecipient
- Schedules
- Recurrences
- Recordings
- RecordingList
- ContinuousRecording
- Languages
- SystemOptions
- Security
- Users
- ONVIF
- IPAddressFilter
- HTTPS
- IEEE802.1X
- Certificates
- Date&Time
- Network
- BasicTCP/IPSettings
- IPv4AddressConfiguration
- IPv6AddressConfiguration
- ARP/Ping
- AssignIPAddressUsingARP/Ping
- AXISVideoHostingSystem(AVHS)
- AXISInternetDynamicDNSService
- AdvancedTCP/IPSettings
- DNSConfiguration
- NTPConfiguration
- HostNameConfiguration
- Link-LocalIPv4Address
- HTTP
- NATtraversal(portmapping)forIPv4
- FTP
- RTSP
- SOCKS
- QoS(QualityofService)
- SNMP
- UPnP TM
- RTP/H.264
- Bonjour
- Storage
- NetworkShare
- Ports&Devices
- I/OPorts
- COMPort
- PortStatus
- Maintenance
- SupportOverview
- SystemOverview
- Logs&Reports
- Scripting
- NOTICE
- FileUpload
- PlainConfig
- ResettoFactoryDefaultSettings
- Troubleshooting
- CheckingtheFirmware
- UpgradingtheFirmware
- EmergencyRecoveryProcedure
- Symptoms, Possible Causes and Remedial Actions
- TechnicalSpecifications
- PerformanceConsiderations
Brand : AXIS
Model : Q7436
Category : Server