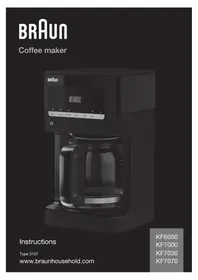
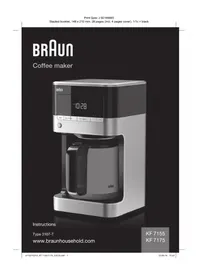
KF7125BK PURAROMA 7 - Coffee maker BRAUN - Free user manual and instructions
Find the device manual for free KF7125BK PURAROMA 7 BRAUN in PDF.
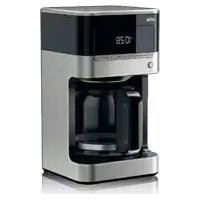
| Product type | Drip coffee maker with thermal carafe |
| Brand | BRAUN |
| Model | KF7125BK PURAROMA 7 |
| Color | Black |
| Capacity | 10 cups (approx. 125 ml each) |
| Carafe type | Stainless steel thermal |
| Filter | Cone paper filter No. 4 (or optional permanent filter) |
| Power supply | 220-240 V, 50-60 Hz |
| Rated power | Approximately 1000 W |
| Display | LED screen with clock and programmable functions |
| Main functions | Delayed programming (timer), intensity selector (regular/strong), 1-4 cups mode, automatic shut-off after 1 min, anti-drip system |
| Decalcification | Automatic program with CALC indicator light for descaling need |
| Adjustable water hardness level | 3 levels: soft, normal, hard |
| Dimensions (approx.) | 30 x 20 x 35 cm |
| Weight (approx.) | 3 kg |
| Cord length | Approximately 0.8 m |
| Materials | Plastic and stainless steel |
| Care and cleaning | Do not immerse the base; carafe and lid are not dishwasher safe; use a damp cloth |
| Safety | Automatic shut-off, hot surfaces, not for children under 8 without supervision |
| Spare parts and repairability | Contact Braun after-sales service; no user-serviceable parts |
| Package contents | Coffee maker, thermal carafe, lid, permanent filter (?) not mentioned |
| Warranty | Standard manufacturer's warranty (not specified) |
Frequently Asked Questions - KF7125BK PURAROMA 7 BRAUN
User questions about KF7125BK PURAROMA 7 BRAUN
0 question about this device. Answer the ones you know or ask your own.
Ask a new question about this device
Download the instructions for your Coffee maker in PDF format for free! Find your manual KF7125BK PURAROMA 7 - BRAUN and take your electronic device back in hand. On this page are published all the documents necessary for the use of your device. KF7125BK PURAROMA 7 by BRAUN.
USER MANUAL KF7125BK PURAROMA 7 BRAUN
Our products are engineered to meet the highest standards of quality, functionality and design. We hope you thoroughly enjoy the new Braun appliance.
Before use
Please read instructions carefully and completely before using the appliance.
Caution
- This appliance can be used by children aged from 8 years and above and persons with reduced physical, sensory or mental capabilities or lack of experience and knowledge if they have been given supervision or instruction concerning use of the appliance in a safe way and understand the hazards involved.
Children shall not play with the appliance. - Cleaning and user maintenance shall not be made by children unless they are older than 8 years and supervised.
- Children younger than 8 years shall be kept away from the appliance and its mains cord.
- If the supply cord is damaged, it must be replaced by the manufacturer, its service agent or similarly qualified persons in order to avoid a hazard.
- Cleaning of the appliance should follow the instruction in the relevant section.
- Never immerse the unit in water or other liquids.
- Caution: During and after operation, the metal surfaces will get hot. Avoid touching hot surfaces, especially the carafe base, to prevent burns or scalds. Always use the handle to carry the carafe and keep it upright.
- This appliance is designed for household use only and for processing normal household quantities.
- Before plugging into a socket, check whether your voltage corresponds
with the voltage printed on the bottom of the appliance.
- Only use the appliance with water and for preparing coffee to avoid any damage to the appliance.
- Do not put the carafe on other heated surfaces (such as stove plates, hot trays, etc.).
- Do not use the thermal carafe in a microwave.
Always use cold water to make coffee. - Before you start preparing a new pot of coffee, always allow the coffee maker to cool down for approx. 5 minutes (switch off the appliance), otherwise steam can develop when filling the water tank with cold water.

Caution: Hot surfaces! The carafe stand is subject to residual heat after the appliance is switched off.
(A) Description
1 On/Off button
2 LED control panel and clock
3 Water reservoir incl. water level indicator (inside)
4 Filter basket with anti-drip system
5 Reservoir cover
6 Carafe stand
7 Cord storage
8 Lid
9 Stainless steel thermal carafe
Maximum capacity: 10 cups = approx. 125 ml coffee per cup
Unpacking
Take the unit out of the carton.
Remove all pieces of the packing.
Remove any possibly extant labels on the unit (do not remove the rating plate).
Before first use
Before using the coffee maker for the first time or after a long period of not using it, run the coffee maker through a complete brew cycle without ground coffee. Use a full carafe of fresh cold water.
LED Control Panel
a. start
Use to start the brew cycle.
b. timer
Use to program the start time of the brew cycle. The Timer can be set for any time, day or night.
c. calc
Use to activate the descending mode and set the water hardness level.
d. clock
Displays time of day and use to set time for the timer.
e. set
Use to program the time of day, timer and water hardness level.
f. strong
Use to select the brew strength (regular or strong).
g. 1-4
Use to brew smaller amounts of coffee (up to 4 cups).
Operating Instructions
Switching On/Off
- To switch on the coffee maker, press the On/Off button (1). The green indicator light will illuminate indicating that the coffee maker is in «ready» mode.
- To switch off the coffee maker, press the On/Off button again. The green indicator light will turn off indicating that the coffee maker is in «stand by» mode.
Auto Off Function
For your convenience and also additional safety, the appliance will switch off automatically 1 minute after the brewing cycle is complete.
Programming the Coffee Maker
Before programming, always switch on the coffee maker.
Note: The device features a 60-second power loss back-up system that remembers all programmed information, including time of day and the timer in the event of a tripped breaker, unit is unplugged, or power failure.
Setting the Time
When the coffee maker is first plugged in or when power is restored after an interruption, the LED control panel will start flashing 02:00.
- To set the time, press the CLOCK button (d) for a minimum of 3 seconds. The LED control panel will start flashing (24h).
- Press the SET button to select the time format (24h or 12h). To save the time format and to set the hours, press the CLOCK button. The hours will start flashing.
- Press and hold the SET button (e) to scroll through numbers. Release the button once the desired hour is displayed.
- To set the minutes, press the CLOCK button. The LED control panel will start flashing.
- Press and hold the SET button (e) to scroll through numbers. Release the button once the desired minute is displayed.
- Press the CLOCK button again to save the desired time.
- If during the setting process, no button is pressed for 10 seconds the time currently set will be saved.
Programming and Activating the Timer
- Press the TIMER button (b) for a minimum of 3 seconds.
The hours in the LED panel will start flashing. - To set the hours, press and hold the SET button (e) to scroll through numbers. Release the button once the desired hour is displayed.
- To set the minutes, press the TIMER button. The LED control panel will start flashing.
- Press and hold the SET button (e) to scroll through numbers. Release the button once the desired minute is displayed.
- Press the TIMER button again to save the desired time.
- The pre-set time will disappear after 3 seconds and the time of day will show on the LED control panel.
- If during the setting process, no button is pressed for 10 seconds, the time currently set will be saved.
This function can only be activated if the timer and the time of the day have been set.
To activate the timer function:
- Press the TIMER button (b). The green LED above the button will illuminate and the coffee maker will start to brew at the pre-set time.
- The pre-set time disappears after 3 seconds.
- When the appliance starts brewing, the green LED START will continually flash and the LED TIMER turns off.
- Press the TIMER button (b) again to switch off the function: the green LED light will disappear.
NOTE: The timer function remains activated even when the appliance has been switched off (1).
Setting the Water Hardness Level
Set the water hardness level on the coffee maker to the water hardness level for your local area.
- Press the CALC button (c) for a minimum of 3 seconds.
- The default setting (h3) will start flashing.
- Press the SET button (e) to scroll through the options (h1 = soft, h2 = normal, h3 = hard) and select the appropriate water hardness level.
- Press the CALC button again to save the hardness level.
- The pre-set water hardness disappears after 3 seconds and the time of day will show on the LED control panel.
1-4Cups Setting
- Press the button (g). The green LED above the button will illuminate.
- Press START (a) to start brewing.
- The green LED turns off after the brewing cycle is finished.
Brew Strength Selector
- Press the STRONG button (f) to select brew strength «strong».
- The green LED above the button will illuminate.
- If the STRONG button is not pressed, regular coffee strength is automatically selected.
(B) Making Coffee
- Open the reservoir cover (5).
- When filling the water reservoir (3) with fresh cold water, refer to the water level indicator (inside the water reservoir) and fill to the desired number of cups.
- To prepare the exact amount of coffee for the Braun Thermal Mug (available separately as accessory), fill to the corresponding water mark (330 ml) inside the reservoir.
- Insert a paper filter (cone type # 4) in the filter basket (4).
- Alternatively you can use the gold tone permanent filter which is available separately.
- Add the desired amount of ground coffee, corresponding to the number of cups being brewed. We recommend using 1 tablespoon or 1 coffee measuring scoop of ground coffee per cup, but use more or less to suit your taste.
- Close the water reservoir and place the carafe in its position on the carafe stand (6).
- Plug the cord into an electrical outlet and press the On/Off button (1).
- Press the START button (a) to start brewing immediately or press TIMER (b) to commence brewing at the pre-set time.
- During brewing, the indicator light will flash continuously. Once the brewing cycle is complete, the light will turn off.
Note: The anti-drip system halts the flow of coffee from the filter basket when the carafe is removed, so a cup can be poured before brewing is finished. The carafe should be returned to the carafe stand (maximum 20 seconds) to prevent the filter basket from overflowing.
For Best Results
- When using paper filters, be sure that it is completely open and fully inserted in the basket. It may help to fold and flatten the seams of the paper filter beforehand.
- Store ground coffee in a cool, dry and dark place in an airtight container.
- For the best performance from your Braun coffee maker, descale the unit regularly.
Note: The maximum amount of ground coffee the coffee maker can take is 10 coffee measuring scoops or tablespoons.
Dscaling
For the best performance from your Braun coffee maker, descale the unit when the LED CALC (c) lights up solid green. This indicates it is time to descale your coffee maker.
Frequency will depend upon the hardness of your tap water and how often you use the coffee maker.
To set water hardness see «Setting the Water Hardness Level».
You can use a commercially available decalcifying agent not affecting aluminum.
We recommend using the Braun Descaling Solution (can be purchased in stores, through the Braun website, or by calling Customer Service).
Note: For your convenience, the cleaning cycle is automatic. The entire cleaning cycle including rinsing can take up to 45 minutes to complete.
- Follow the package instructions of the decalcifying agent.
- Place the empty carafe in its position on the carafe stand (6).
- Press the CALC button (c). The green LED above the button will start flashing.
- Press START (a) to start the descending program, while the green LED is still flashing. Once the descending process has started, it is not possible to stop the program until finished.
- When the descending program has been completed, the green LED will turn off.
- Discard the cleaning solution and rinse the carafe thoroughly with clean water.
- Fill the water reservoir with clean, fresh water (not exceeding 8 cups). Run the coffee maker through 2 complete brew cycles to flush the unit after descaling.
Repeat the procedure as many times as necessary in order to reduce the brewing time per cup to a normal level.
(C) Cleaning and Maintenance
Always turn the coffee maker off and remove the plug from the electrical outlet before cleaning.
- Let the appliance cool down.
- Clean the metal surfaces of the thermal carafe with a damp cloth only. Carafe and lid are not dishwasher safe.
- Do not use any scouring agents or harsh cleansers on any part of the coffee maker.
- To clean the base never immerse the unit in water or other liquids but simply wipe with a clean, damp cloth and dry before storing.
Subject to change without notice
Troubleshooting Guide
| Problem | Potential Causes | Solution |
| The ON/OFF switch does not light up | • The appliance is unplugged • There was a power outage • ON/OFF button was not pressed | • Plug unit in • Wait for power to be restored • Press ON/OFF button |
| Display does not show a time | The appliance is unplugged | Plug unit in |
| Display flashes 02:00 | Initial operation or there was a power outage | Set clock |
| It is not possible to set the TIMER | • ON/OFF button is not pressed • Clock has not been set | • Press ON/OFF button • Set clock time |
| It is not possible to activate the TIMER | • ON/OFF button was not pressed • The TIMER has not been set | • Press ON/OFF button • Set the TIMER |
| The green LED light above. START does not light up | • The appliance is unplugged • There was a power outage • ON/OFF button was not pressed and the START button was not pressed | • Plug unit in • Wait for power to be restored press ON/OFF button, followed by START. |
| Coffee is not brewing | • The appliance is unplugged • There was a power outage • START button was not pressed • There is no water in the reservoir | • Plug unit in • Wait for power to be restored • Press START button • Pour water into the reservoir |
| The coffee maker is overflowing | The filter basket is not properly inserted | Insert the filter basket correctly |
| The carafe was not properly positioned on carafe stand | Be sure the carafe is centered directly under the filter basket | |
| The lid is not on the carafe | Place the lid on the carafe | |
| Carafe was removed for more than 20 seconds while the unit is brewing | Carafe should be replaced promptly after removing | |
| Using too much coffee grounds | Remove filter from the filter basket. If using a paper filter, replace with new one. Restart the coffee brewing process with proper amount of coffee grounds (not more than 10 coffee measuring scoops or tablespoons) | |
| Using coffee that is too finely | Use only coffee that is ground for drip coffee makers | |
| The coffee flow through the lid is blocked | Remove the insert from the middle of the lid. Rinse the lid properly under running water | |
| Coffee is flowing out of the filter basket onto the carafe stand when the carafe is not in place | The filter basket spring popped out during cleaning | Reattach the spring to the filter basket |
| There are coffee grounds at the bottom of the carafe | The paper filter was not inserted correctly into the filter basket | Rinse filter basket, set filter into the filter basked and restart brewing. |
| Paper filter collapsed | Remove filter, rinse filter basket and restart brewing with a new paper filter | |
| Display shows «E01», «E02» or «E03» | ---- | Contact Braun Customer Service |
Please do not dispose of the product in the household waste at the end of its useful life. Disposal can take place at a Braun Service Centre or at appropriate collection points provided in your country.
Materials and accessories coming into contact with food conform to EEC regulation 1935/2004.


For UK Only
Guarantee Information
All Braun Household products carry a minimum guarantee period of two years. The rights and benefits under this guarantee are additional to your statutory rights which are not affected.
Please keep your receipt as this will form the basis of your guarantee.
In the unlikely event of a breakdown you have access to professional help from our team simply by calling: 02392 392333
For service in the Republic of Ireland please call:
012475471
Braun Household undertakes within the specified period to repair or replace any part of the appliance, free of charge (with the exception of any glass or porcelain-ware incorporated in the product) found to be defective provided that;
- We are promptly informed of the defect.
- The product is used and maintained in accordance with the User Instructions.
- The appliance has not been altered in any way or subjected to misuse or repair by a person other
than an authorised service agent for Braun Household.
- No rights are given under this guarantee to a person acquiring the appliance second hand or for commercial or communal use.
- Any repaired or replaced appliance will be guaranteed on these terms for the unexpired portion of the guarantee.
- The need for repair has not been caused by insufficient aftercare or cleaning: or damage caused by the chemical or electrochemical effects of water.
Under no circumstances shall the application of this guarantee give rise to the complete replacement of the appliance or entitle the consumer to damages.
Braun Household, New Lane, Havant, Hampshire PO9 2NH
www.braunhousehold.co.uk
Thank You for choosing Braun. We are confident that you will get excellent service from this product.
TO IMPROVE YOUR EXPERIENCE
Register now at www.braunhousehold.co.uk By registering we may send you from time to time details on exclusive offers, promotions, recipes and inside tips.
Français
Taimep Kbl3metiH Kocy yuiH:
- TIMER Tумecin (b) bacbHb3. Tyme yctIHderi xacbl kapblДIObl 7aM kaHaIbI Da, KoΦe KaHaTbIaJbIH aJIbIH ana OPhaTbIJaH yaKbITTa KoΦehi demde bactaIbI.
- AДын сала opHaылfaн yaKbIT 3 cekyHДтан KeiH XOFaJaIbI.
KypbIbI KofeHl DeMDei 6aTaFaH Ke3Je, Xacbl TycTI START XapbIK DIOITbI WaMbI Y3Dikci3 XbIbIKtai 6actaunDa TIMER XapbIK DIOBcI cHeidi. - Φунцянь leшуpy yuin TIMER tvimecin (b) KaTadaH 6acblb3: Xacbl J Kapbl KIOdTbl KapblK KOFaIaNbl.
ECKEPTNE: Kypblfbl eIipipin TpyFaH Ke3de De TaMep Kbl3MeTi XyMbIC icTei 6pepi (1).
Cy kepmektirin dehrein ophaty
KoFeKaHaTbIUtTaBcCyKePMeKTiri DeHreIH ci3diJxepriikTi aMaKaTbI CydbH KePMeKTi DeHreImeBipdeEetOpHaTbIbI3.
CALCTyIeMeciH(c)KEMdEreHne3cekyHd6oHybl 6aCbIb13.
- ΘДeПК peTTEy mAHi (h3)Жыньтай бастайдbl.
- OnuŋaIapIbI aɪnHaIbIpa KaPay yIiH SET (e) TyImeCIn 6acIbIbI3 (h1 = xMcaK, h2 = KaIbIITbI,
h3 = KepeMeK) kHe KaKeTTi cy KepeMeKTiri DeHReiH TaHaDaHbI3.
- KepMeKTik DeHReiH CaTay yuIH CALC TYIeMeciH KaTadaH bAcbHbI3.
AIIbIH ana opHaTbIJaH cy KepMeKtiri 3 CeKyHnTaH KeiIH XOfAlaIbI Da, TaYJIk YaKbITbl JapbIK DINOITbI baKbIJay naHeJIHne KepceTineJi.
1-4 WbHbIaKtbl OpaTy
TMyMeCIN (g) 6acbHb3. TyIme yCTiHderi Xacbl JapblIOJtbl WAmbl KaHaJbl.
- KoΦe demdεb bactay ywiH START tyMeciH (a) 6acblhl3.
-Демду сиклiaяталfaHHaн KeiHxacblJxapbIKNIOITbI WAmbl Θweidi.
Dmdey KOIOJIbIbH TaHday
- KoΦe «KoI O» 60Jybl yUiH STRONG Tymecin (f) 6aCbIbI3.
TMyMe yctIHderiXacblJapbIKIIOITbI JAM XaHaNbI. - Erep STRONG (KoIO) TyIMeci 6acbIImaca, KoΦeHIn KaJIbIITbI KOIOJIbIFbl aBTOMaTTbl TpyJe TaHJaIaIbI.
(B) KoΦe KaɪHaTу
CaybTBHbIHKaKaNaFBH (5) aWbHB3.
Cy caytBHa (3) ta3a cybIK cy KyfAe Ke3de, KoFe KyfBtBtBnB 6nKtK 6enrineHe Hemece cy DeHReHH INDkaTOpBHa (Cy caytBtBnB1iHHe) Ha3ap aydapbIHb3 XaHe KaXeTTI IbHbIAk CaBH KYbIB3.
Braun canTbIaK-TePmOcbHa (kepek-Japak petiHne 6eNEK catbIaIbI) cAKeC MJIuEpDe KoFe daBbIHday yIiH cyblcaybITTafti Tnicti Cy 6enricHe (330 ml) deiiH KybIbIbI3.
Cy3ri ce6etihH (4) iuiHe kaFa3 cy3ricih opHaJnactbIpbHb3 (yukip TypnattB N# 4).
Bana ma petiHc KeN KOJaHaHbIaTbH aNTbH TycTi TypiH de KOJaHaYf6oJa;OJ XeKe CaTbJa.
-ДемдллхаTkаншынсанha сикec кфуHTaFbIHbI KAKETTI MnlueepiH KocbIHb3. BipшынlaKka 1шаКасьн HeMece 1Кофe KaCbIK KФосе calyaI yCbIHMaB3, bipak TaTbIMbIH3ra Kapai a3bpak HeMece Ke6ipek CanbIHb3.
CyaybIbIHJxabHbI3Ja,KoFeKYiNfblITbI TyfbipbIHdaFbI (6)OpHbHaKoNbHbI3.
- CbIMDbI 3JIeKTp po3EeTKacBHa CyFbIHbI3 Da, Kocy/ Θuipy TyMeciH (1) 6acbIHbI3.
-Демdeуди deprey bactay yuH START Tymecih (a) 6acbIbI3 Hemece demdeuyi aIbIH aJa opHaTbJIFaH yaKbITTa bactay yuH TIMER Tymecih (b) 6acbIbI3.
- Kofte demdereH Ke3Je INHnKATOp XapbIbI y3dkci3 KblbIKtan TypaIbI. Kofte demdey aAKTalFaHHaH KeiIH XapbIK cHeJI.
EckepTne: TaMbIJaayFa KApcbI JyNeci cy3ri ce6eTIHeH KeIeTIH aFbICTbI KoFe KyIbIbIaJIbIHFAH ke3DE TOKTaTAtbI, OcblaNlwa, DeMDey aAKTAmai TpybIn sbHbIfa KoFe KIO MymKIN 6oJabl. Cy3ri c6eTeI WAMadaH TbIC ToBIn KeTney I yuH In KoFe KyIbIbITbI TyfblpHa KaNTa KOIO Kepek (EH K6bi 20cekyHd).
Hətnxekci Tamawa 6ony yuiin
KaFA3 cy3rilepiH KOJdaHFaH Ke3e OnapbIH TOblkTaN aubbnIn XaHe ce6eTTiH iUHe dypbic opHaIacByHa K3E KEtK3iH3. ByI KaFA3 cy3riciHi TiriciH anDbH ana bkyteyRe xHe tericteyre KEmekTececi
- YHTaKtaIFaH KoΦeHi caIbH, KypFaK api KaPAHfbl XepJe, TbIFb3 Xa6bIFaH caYbITTa CaKaTbH3.
Braun KoΦe KaHAtKbIb6bapbIHwa JxakcbjXMyBic ICTeyi YUHIN OHbI ΘKTeh YHEmi Ta3apTbINOTblpBlb3.
EckepTne: KoΦe KaHnATKbIuKa calyfa 60JAtbH YHTaKtTaIFaH KoΦeHiH eN Kπ MεJIuEpi - 10 KoΦe ΕJIuEp KacbIK HeMeCe ac KaCbIK.
KKTi KeTipy
Braun Kofe kaHaTkbIb6apbIHwa JxakcbjXyMbcI icTeyi yuiH CALC XapbIK dIOdbc (c) Xacbl TycneH KaHbIn TyprHa da eRIHeN Ta3apTbHb3. ByJ Kofe kaHaTkbIbTBn aRiH KeTIpy Kepek EKeHdiirH 6iDipei.
KaKtIkeTipydiHxNiiiniri aybI3 cyblHbIH KaTTbIbIbHaXHe KOFe KaHaTbIbTIbKOJaHy xNiiiniriHe baiJiaNbHcTb60nabl.
Cy kepmektiriopHaTy yuHIn «Cy kepmektiriOpHaTy» TapMaFbIH KapaHbI3.
念 KETipeTIN JxHe aIIOMNHIre ecep etneTIH XeKe caTbJIaTbIH 3aTTERIH KOJaHyFa BOJaDbI. Braun KOMnHaNcBtHbIn, eKTI KeTipyRe apHaFAnEhIMiH KOaHyFa KEHeC 6epem3 (DyKeHdepEn, Braun Be6-caTbIHaH HeMeCe TTybHUsbIfa KbI3Met KepceTy bJIiMlHe KObIpay WaJIbIn, caTbIN anyFa BOJaDbI).
Eckeptne: bHfaiNbIb 60ny yuiH Ta3aJAY aBTOMaTTbI Type opbHdanaDb. ToJIbIK Ta3apTy UKNbl, COHbIH iuiHne waIO 45 MNHTka deiH Co3blybl MyMKH.
- ΘKTi KeTipy 3aTTERiHiH CbIPTbIHdaFbl HyCKayJIbIKTapbIHOpbIHdaHaBl3.
- Boc Kofe KyuYbIuTbI TyFbIpdaFbI (6) opHbHa KOblHbI3.
CALC TYIMecIH (c) 6acbIb3. TyIME yCTIHderi XacblXapbIKDIOdTbI WAmblXbIbIKTaB 6actaIbI. -
Θкті кетіру bafdaplamacbH bactay yuIN START (a) TymeciH bacsbH3, xacbJYCTI xapblk, ДиОТышam оліжblblkTan TpyaBb. Θкті ketipy bactaFahHaKeH, on aякталfHaSha bafdaplamaHbToKtATy MymKIn emc.
-
ΘKTi KETipy BaftaplaMaCbI aAytalFaH Ke3De, Xacbl Japbl NIOtbl WAM CHeJI.
TataJay epitIHicin TERIN TactaHb3 XHe KOFe KyIFbIUtB1 Ta3a CmEH MyKnT WaMbIbI3.
Cy caytbiHa Ta3a aybI3 cy (8 8bIbIraKTaH acbIpMaJ KyIbIbI3. kTKeTpireHHeN KeiH KpyIbIbIbI WaIO YuIN KOFe KaHaTKbIITa TOIbIK EKI DEMDey UKNblh OPbIHdaHbI3.
Bip ьиньлfa KeTeiH demdey yaKbTbH KaIbITbI deHreIre deiH a3aNTkAnHa 6yI pacimdi KaItaIaN 6epiniz.
(C) Ta3aJay KHe KyTy
Ta3aIap aIbIHda KoFe KaHaTKblTbI epKaah HeipiHiz De, Kyat aAacBH 3JIeKTp pO3eTKacBHaH CyIpbHbI3.
KypbJINFbIHbIH CybIFaHbIH KyTiH3.
- TepMoCTbIH,MetaIaHaJkaCaIFaH6eTkiKa6aTbIH TEK DblIMKblIy6bepeKeIeH fHaCyptiHi3.KoFe KyyfBbITbI bIDbc KyfblMaUHaJaXyyFa 60lmai.
- Kofo KaHaTbIbTbH e6i6ip 6eIWeI yuH Ta3aIaFbI 3aTTapDbI HeMeCe KUSti JyFbI 3aTTapDbI naJaIaJIaH6aHbI3.
Ta6aHbI Ta3aIay yuH KpybIHyIbI CyFa Hemece 6acka cyIbIK 3aTatPa MaTbIpyFa 6OJMaIbI, TEK CaKTayFa KOr pAnDbIHa Ta3a DbIMKbl Iy6epeKnEh CypTIn, KpyFaTbIbI3.
Eckenptyci3 e3reptinyre xataDbI.
KypblfHbHb Kbl3Met Mep3iMaKaTaNHaJa, OHbI TyMpblCTbIK KaIbIbTKapMeH bipre TactaMaHbI3. KypblfHbI BRAun KOMnAHnrcBbHbIcBpNC opTaIbIFHa Hemece 03 eJIi3deriTniCTi XHHay OpblIdapbHa anapy apKblbApblbHbI3.

Lbifapblfah Xblbl
XbIbH 6eIriey yuH 6yIM TaTAtaAscbIHdaFbI 5-caHdbIK bIbFapUbI KObIH KapaHbI. 6IbApUbI KOdbHbIH 6ipHsi caHb IbIbFapHaXbIJDbIH COHbI caHBi 6iJdipei.KeNeci 2 caHdp aBbIbFaH XbIJdbIH KYHT36eIik anTa caHBi 6iJdipei.An coHbI 2 caHdp 1992 XbIbHaB 6actan abTOMaTbI Tpyde eecenTeIren 6acBIn bIbFap Mep3imH 6iJdipei.
MbicaIb:30421-ByIbIM 2013XbIbIHbIH,4 aNTacbHda WbIFapblFaH.
EAC
MockBa KaIacbI, CyueBcKa KeWeci,
27/3-yn (27-yn, 3-KypbJbIM)
TeN. +7 (495) 781-26-76
AkaylbikTapdbI XOIO HycKaylbIFbl
| Macele | blktmallbceben | Ueimimi |
| ON/OFF (Kocy/Thipty) Тулмеси яданы. | • Аспалтыншиасы сырлыkin Калган • Кат узilген • ON/OFF (Kocy/Thipty) тулмеси басылмаган | • Курсылгыны токка кocу • Кат кaitа берілгенше куту • ON/OFF (Kocy/Thipty) тулмеси басу |
| Ди检лелide уakbyt Керсетлмейд. | Курсылгы токтан ужыран Калган | Курсылгыны токka кocу |
| Ди检лелу 02:00 санын Керсетлпхьлкайд. | Алfasны падалану hemecе зл ektrр Калгы узilген | Са fatты орнау |
| TIMER (таймер) параметрин орнау МуMKIN emec | • ON/OFF (Kocy/Thipty) тулмеси басылмаган • Са fat napametri opnatылмаган | • ON/OFF (Kocy/Thipty) тулмеси басу • Са fat napametriopnatу |
| TIMER (таймер) Фунksцяскын iccke кocу МуMKIN emec | • ON/OFF (Kocy/Thipty) тулмеси басылмаган • TIMER (таймер) napametri opnatылмаган | • ON/OFF (Kocy/Thipty) тулмеси басу • TIMER (таймер) napametri opnatу |
| START Тулмесион Жогары яданы Дио��ышam яданы. | • Аспалтыншиасы сырлын Калган • Кат узilген • ON/OFF (Kocy/Thipty) тулmеси басылмаган xэhe START (бactay) Тулмеси • Сылбicыны iшiнde cyхok | • Курсылгыны токka кocу • Кат кaita берілгенше куту • ON/OFF (Kocy/Thipty) тулмеси, codan keiHn START (бactay) Тулмеси bacy |
| Кофе кайнан ядан Жогары яданы Дио��ышam яданы. | • Аспалтыншиасы сырлын Калган • Кат узilген • START (бactay) тулмеси басылмаган • Сылбicыны iшiнde cyхok | • Курсылгыны токka кocу • Кат кaita берілгенше куту • START (бactay) тулмеси bacy • Су сayыны су кую |
| Кофе кайнан ядан Жогары яданы Кередi | Сузri cebeti дурьс орналactырлмаган | Сузri cebeti ndyрьс орналactыру |
| Кофе Күйыш Турлрындаур Кальлмаган | Кофе Күйышыtsi cya3ri ce6etiiin actын taypalan koju | |
| Кофе КүйышТын yctiнde kaKnaftы жok | Кaknapылkofoу КүйышТын yctihe opnatынbi3 | |
| Курсылгыны сokpe demideren kezide Кофе Күйыш 20 секундан actam уakытka anlhy | Кофе Күйышыларhan keiHn OhsI depey opnatын可以到koю kepek. | |
| Тарсылган Кофеишamadaan тсьс падалану | Суztiri n cy3ri ce6etiiinen alnytackыз.Еgre kafa3 cy3ricin kondahanda, kuaHa cya3ri caIbHb3. Кофе кайнатуды tarbayлган kofoehi ndupeipin (10 kofe eiliopep kasiktaHn He ac kaciktaHn acbipmai) caIbIn kaiaTadah n bactay | |
| Тыm усak tarbayлган Кофеи Калдану | Тамшу коfoe кайнатудыт trade kondaHn yuHIn arhaHb Tarbayлган kofoehi fana n paldaanHy | |
| Кaknaptan Кофе afatbHn жOL biteL Калган | Кaknapын tarbayндыfB 3aTTb albIn tarTaHb3. KaKnaftы afbIn typrfAn cymen xakcsbilaan llaio | |
| Кофе куь fvш opнында болмаса, Кофe сузгі себетинен Кофe Куь fvшын, Туьлар тагледи. | Сузгі себетиніс crepinnci ta3anay барысында уыллікетken | Серіпени сузгі себетініе кайта халгay |
| Кофe куь fvшын, Тубінді Кофe унтусы Калын Кошfaн | Каразс cuzrgi cyzrgi cebeticinih iushine Дурьс салынбafan | Сузгі себетин shaibnby3, suzgini c suzgri себетине орнаыньizжане demdeуді ka'ta bactahtiz. |
| Каразс cuzrgi xbyptbalfan | Сузгін салын тадотan, suzgini crebeticn шаю, koza Kaразс cuzgini салын, demdeуді кайтабactay | |
| Диспел«E01», «E02» Немес «E03» мэндері Керсетedи. | ---- | Braun kompanяrsын Tуьнушыfa Кызmet Керсету bolemimeх xaбарлacy |
Pycckn
Haun n3dJIyra pa3pa6oTaHbI B COOTBcTCTBN C cAmbIM BbICOKIMN CTaHapTaMn KaueCTBa, fYHKUHOHaJIbHoCTn IuN3aJHa. HaJeemC, yTO Bam noHpaBntc HOBa 6pNTBa Braun.
Peped nCNoJIb3OBAHHeM
IoxaIyIcTa, BHIMATEbHNo IpoUHTaITe DaHHoe pyKOBODCTBO NO 3KcNlyaTauu npei NcNOJIb3OBAHnEM np6opa.
BhIMaHne
- 3TOT pIn6Op MOXET NcIIOJIb3OBAbTcBcI DeTbMn C8 let, a TAKXe IINUaAMN CO CHNXeHHbIMN ΦH3NueCKIMN, YyBCTBEHHbIMN INI yMCTBeHHbIMN CNOcO6HOCTRMN INI MAIOONbITbHMN IOJIb3OBATeJIaMn, HEDCTaTOUHO 3HaIOUIMN, KAK eRO 3KcNJIyaTIPoBaTB, ECNI OHN eRO 6yDyT NcIIOJIb3OBAbT IO Na6JIIODeHEm INI NocNE IpOBeDEHNA IHCTpykTaKa IIO Be3OAnCHOH 3KcNJIyaTaIuIN pIn6OpA n IOHNMaIOT CBraHHyO C Hm ONaCHOCTb.
-ДетамзапpeшноИграТьспибором.
OuNCTka N OcbnyKbAHne He DOnJXHb BblIOJI-NrTbCn DeTbMn, ecn n m HET 8 JET, a TaKKe DeTbMn 6e3 npncmOTpa B3pocJIbIX.
-Детиdo8лет He ДолжныДолуckatbсяКЗTomу npubopyи K erо ceTeBOMy shHypy. - Ecln coeDInHtEnbHbI Ka6bI NobpeXdE, To eOdoJHKe3aMeHNTb npOn3BOIDTeJIb, cepBnCHa ClyK6a IIN cNeuaNCTb TaKo JKe KBAIIΦKaUcN C cJeBIO pPeDoTbpaUeHn OanachOCTn DnA NOB3OBAteJIa.
- YNCTka yCTpoiCTBa IONXHa npOIN3BOIDnTBcA C CO6JIIOJENHEM INCHTPyKU, ONIICAHHbIX B COOTBETCTBYIOUeM pa3dJe.
- IoppykaTb npi6Op B Body nIa Kakyo-NboDpyrJIO XnIKOCTb Ctporo BocnPeeaetc.
- Ocotopoxho!Bo npoucece pa6oTbI nO ee OKOHuaHm MeTaJIuueckne NOBepxHOCTn 6yUyt NMeTb BbICOKyIO Tempepatpy.Bo n36exAHme NOJyEHnO XOIGOB He npKacaiTeCb K rOpayHM NOBepxHOCTyx,OCo6eHHo K OCHOBaHHo KOJbI. JInerpeHocN KOJIbI BcERda IcNoJIb3yIte pyKoRTy;KOJIby CJIeJeYer DePcxTaB B BePTNU-KaJIbHOM NIOJOKeHHn.
-ДаньприборпрднэзченИСКЛIOHTeHbNOДЯБTOBOrO NCSIOJIb3OBaHnI n paccHTaH NaперетаOTky OБьeMOB ПpoDyKuIN B MacIUtabax Domauhero XO3YICTBa. - Пелед подкlioочем, поверьтЕ COOTВETCTBVE HaPЯжени в Сети HaPЯжению, уka-zaHHOMу Ha пиборe.
B uejx npedotbpaueHn noBpeKdHn npi-60opa nCnoJb3yIe erO uCKJIuHTeJIbHO C BOdoN dI pyroTOBLeHn Kofe.
He cTaBbTe KoJI6y Ha npYrne pa3Oprpe IIO-BepXHOCTn (TakNe KaK KxOHHbI pIITbl, rOpA-Ne POnDoHbI n T.I.).
He nCpOJIb3yIe KoI6y B MmKpOBoJHOBoI pJIIn-Te.
ДяпригOTOBlenя Koфе BCeRda ИСпОЛьЗУTe XOJOdHyIO BODY.
- Парад рпготовлелем Новоюрци Кфс BCERДа давайт Кфсеварке OCTытВ Т ueне npиб.5 MnHT (Вьклочаит пибор),В поТиВHOM cIуаe пи habолнени pe3epByapa xOJOIOH BOJО MOKeT pOIN3OITn napoo6pa3OBaHne.

Octopoxho!Topyne NOBepxHocTn!
IoCTaBaKa KOJIbI coXpaHaNET octaTOHoe TEPINO NOCJe BbIKIOUeHENy YcTPOINCTBA.
(A)Описане деталей
1 Khonka «Bkn/Bykln»
2 CBeToIOIoHa nAHeNb ynpaBJeHn uacbl
3 Pe3epByap IJRA BOIbIC INHdNkATOpOM ypOBHRA BOIbI (BHyTpNI)
4ДержателдяфпьтраспртувokаловсNTCTeMoI
5 KpbIka pe3epByapa
6 POnctabKa dJa KOn6bI
7 Otcek dIy xpaHEnia shHypa
8 KpbIuKa
9 Tepmoctoikai Koi6a n3 HepxabeOuie CTaII
MaKcImaJIbHaЯ EMKOCTb: 10 yaIeK = npIM. 125 Ml KoΦe Ha YauKy
PacnaKOBka
OCTaHbTe yCTpoIcTBO n3 KOp6Kn.
YdaJIInTe BCE 3JIeMeHtbl YnaKOBKn.
YdaJInte C yCTpoIcTBA BCE pncyTCTBvIoUne Ha HEM 3TNKETKn (He ydaJIaTb 3aBoJcKyIO Ta6nHy
Ioprotobka K nepbomy nCnoJb3ObaHnIO
IpeepnepBbIM nCNoJIb3OBAHnEM KoFeBaPkn IJIN PocIe npOIOJXnTeJIbHOrO nepnoDa HEnCNoJIb3OBAHnY BblIOJIHnTE NOLHbI CIKJI KINJaYeHn, He 3aCbIna MOnIoTbI KoFe. HaBePnte POnHyIOKoI6y CBExKeXoJOnDHOB BOdI.
CbeToIIOndHa naneB ynpaBneHn
a. start
IcnoJIb3yIte 3Tu KHOJky IaI 3aNycka LKKnKINJaYeHnIy.
b. timer
UcnoIb3yeTcra dI npOgrpaMMnpOBaHnA BpeMeH 3aynCka uKJIa KInpAeHn. TaImeP MoKeT 6bITb YcTaHOBJIeH Na IIOObe BpeM dHn JNJN HOni.
c. calc
Icnojbl3yETcIJI BkIOUeHnpeKIma ydaJIeHnHaKnPiN 3aJaHnYpOBHxJecTKOCTN BObl.
d. clock
OTo6paXaET cyTOUHoe BpEmn nIcNoJIb3yeTcJ IJr 3aJaHnBpEmeHn Ha TaIMepe.
e. set
IcnoJIb3yeTcIgI npOrpaMMIpOBaHnI CyTOHOrO BpeMeHn, TaIMepa I napaMetpoB JXeCTKoCTN BOJbl.
f. strong
IcnoJIb3yETcT dIpyrIpyOBKn KpeNoCTn HAnITka (KpeKNiN CTaHapTbI).
g. 1-4
IcnoJIb3yeTcIyI BapKn He6OJIbXx O6beMOB KoΦe (do 4aWeK).
HctpykunnoKcnnyatau
BkIIOUeHne/ BbIKIOUeHne
Дявкюченя Кфеварки НжмITE Ha KhoNTKY «ВКЛ./Выкл.» (1). 3aropaETcra 3eilehbl cBeTOBoi INHДИКaTOp, yka3bIbAIOUJIH Na TO, YTO KФеварka HaxODITcR B pexIMe FOToBHOCTN.
-ДяВыкlioуеняКофеварки CHOBa HaxMnteHa KhoNky «Вьк./Вькл.».3eJehbI CBETOBOINHДИКATOP nOracHT.3TO O3Haayet,чTO KOфеварka HaxOДNTcR B pexIMe OxNiJaHnI.
Функца abTomatnueckoro BbIKIOUeHn
JaBaWero yOo6TBA u NOBbIeHn yPoBn 6e3OpaChOCTn npi6op aBTOMaTuYeCKn BbIKIIOuAeTCyepe31MHyTu nocJe 3aBePseHn KINJIaKINJyHeHn.
IporpaMMnpOBaHne KoEbpKn
Ipeed nayanom nporpammmipobnna Bcerda BKIOUaTe KoFeBapKy.
PpimmeuHne: PnpbOp ochaen pe3epBHOI cnCTeMo, DeiCTbUoSeH na pnoTaeHn 60 cekyHd B Cnyae IpepbBaHnna PoaHc HncoXpaHIOSe BCE 3aPpOgPaMMNPOBaHHBe DaHHBe, BKIOUcay CyTOchoe BpEmn I npapaMeTpbl YCTaHOBKn TaMepa, pn Cpra6aTaBbAHm BblKIOUcATEJr, OTKIOUeHNOT CETn nIIN C6OE 3JIeKTPoNTaHn.
3aahanbeBpeMeHN
PnI nepBOM BKJIIOUeHn KOFeBaPKn B Cetb NII pI npI BOCCTaHOBJIeHn IIOJaN 3JIeKTPoNITaHn IocJI ne IpepbIbAHn Ha CBETOJIOJHOI naHEI OTo6paXaIOTcMnraIoUe UnΦpbl 02:00.
-ДявдаЗ国家战略 Врemeин Хмite Н Кногу CLOCK(d)и уdeckимаite ee нахатов Teчеспс He Meee 3 cekyH. CbeToOnOHaЯ NaHeJIb ynpableney HauHET MInaTb (24u).
Haxmnte Ha KhoNky SET, yTo6bl BbIbpaTb fOpMaT BpeMeHn (24-ycaBOy nnn 12-ycaBOy).Дя coxpaHEnHa fOpMaTa BpeMeHn n BBOda
3haeHnBpeMeHn HaxMnte Ha KhoNky CCLK. YacbHaHcyT Mrgatb.
Haxmnte u ydepknaite KhoNky SET (e), TTo6bl n3MeHnTb cHpbl. OTnyCTnte KhoNky, KOrda oTo6pa3ntcra HyxHoe 3HaueHne.
- TTo6bI 3aJaTb MmHyTb, HaxMnTe Ha KHOIpKy CLOCK. CBeToIOIoHnaHaHeIb ynpabJeHHaHHT MInTaTb.
Haxmnte u ydepknaite KhoNky SET (e), TTo6bl n3MeHnItb uΦpbl. OTnyctnte KhoNky, kOrda oTo6pa3ntcra HyxHoe 3HaueHne.
- Euple pa3 haxmnte Ha KhONkY CLOCK, YTo6bl coxpaHnTb BBeDeHHoe 3NaueHene BpeMeHn.
- Ecni BO Bpemr npocecca HacTroponn HnkaKne KHOPIKHe IcnoJb3yIOTcB TeueHne 10 cekyH, TO 6yJeT COxpaHEO 3aDaHHoe ppi BBOe Bpemr.
PepnoDnUHOCtB pOBeEHHn IpoCeIyPbI 3aBNCIT OT JXeCTKoCTN PpIMHeHReMO BOIOnpOBODHO BObIn U YaCTOTbI NcNoJIb3OBAHn KoΦeBaPkn.
Дя OЗнakOMлЕня C Инфорmaие O Habстpoиke JжECTKOCTN BOДbl CM. pa3dJeI «Hacstpoиka ypoBnЯ JжECTKOCTN BOДbl»
Ee MOXHO OCUUeCTBJIaTb C I NCIOJIb3OBAHnEM IOCTUYHbIX B IPOJdAxe CpeICTB DIIy UdaJIeHnHaKIN, He OKa3bIbAUoUx BO3JeICTBHe Ha aJIOMHHI.
Mbl peKoMeHnye m npImeHnTb cpeDCTBO Braun Descaling Solution (MOxHo npNo6peCTn B Mara3Inhax, B INThepHeTe Ha caIte Braun nIi no TelefoHy epe3 cepBnchHy o Cnyk6y).
PpimcHHe: IJIa BaIeI OyIO6CTBa UIKN OYNCTKI 3aJAH aBTOMaTNUeCKN. POnHb IuKl OUYCTKN BkUOyA IpomBbKY MoKet 3aHrT Do 45 MInHT.
CobIIOdaIte HNCTpyKcun, npnilaeraembIe K cpeIcTBy dIra ydaJIeHnHaKnII.
- Помет范围内 постую Кolyбу на се место на поставке (6).
- Haxmte Ha KhoNky CALC (c). 3eIeHbI CBToIOIDhI INDnKaTOp HaI KHOKNi HaHHe MTaTb.
-Дялзanycka nporpammbi ydaJIeHnIЯнпи naxmnte KhoNkY START (a) pri miraOuIeM 3eJIeHbIM CBTeOДIOJHOM INdNKaTope. EcInI npoUeCC ydaJIeHnIЯнпи yxe 6blI 3aNyUeH, nporpamMy HeBO3MOxHO OCTaHOBtB Do camOrO ee 3aBepShenIy.
- ПО OKOHuaHnnpoRpaMMbI ydaJIeHnIЯ NaHInI3eJIeHb CBeTOnIOd nOraCHeT.
- YtNiI3npyIte YNCTaIeI npTbOp I TuaTeJIbHO npOMoIte KOJIbOy NcIcToI BOIoI.
HanoJIHnTe pe3epByap nCToB CBexe BoDOn (BOobeme, He npebbliaUoIe 8aWeK). BbIOJHnTe 2 pOJIbIX cIKNa KINpaYenH, YTO6bl npOMbITb KoΦeBapKy nOcJe ydaJIeHnHaKInN.
IobtopraTe npoceDpy CToIbKO pa3, CkOJIbKO 3TO Tpe6yeTcI DnIe COKpaUeHnBpeMeHn KInIyEHN B paChteHa YaShKy Do HOpMaJIbHOrO yPoBnH.
(C) OuncTka n yxOД
-Пелегд оочистков BCERДа Вьклочаite Koфеварку
И Вьтackивай Te Вилку ИЗ рОЗЕТКИ
эльектponпаня.
-Даитpe npibopy oxlaunTbca.
- YIcHTe MeTaNJIueCKHe NOBepxHOCtN TepMOCTOnKoKo KJIbI ToJIbKO BIAJXHOI TpRnKO. KoI6y I ee KpbIuKy HeJIb3a MyITb B NocyDOMOeHNoMaSiHHe.
He nCnoJIb3yIte o6e3xKInPnBaTeIIN nn arpeCCNBIHbIe YIcTReIe CpeICTBa IJIa OYNCTkN KaKnx-JIbO DeTaIe KOpEeBapKn.
-Дя OUCNTKIN OCHOBANH NIKOKIa He NoIpykaTe erO B BODY INI IN DpyrHe JxNkOcTn, a npocTo npOTpITe YNCToBnJaxHOI TKaHbIO n IpocuShTe nepei y6opKOHa xpaHene.
Data n3rTOBLeHnA
YTo6bI y3HaTb DaTy BvInycka, NocMoTpnte Ha
PnTn3NaHnhKoJ npOdykTa (Bo3Je TaBnUckn C
Ob03NaueHnEM cepm).IepBa7uNpPa 6o3Nauaet
nocLeNDIO zuNpPy rOda n3rOToBnEHH. DBe
CneDyUoIe zuNpBy -3TO KaIeHndapHna HeDeJIa.
AnocLeNDIe DBe Yka3bBAIoT n3DaHne
(aBTOMatNueCKn IOnDcHtBbAeTc S 1992 roJa).
PnpMeP: 30421 - n3dJIeNe 6blO BvInyueHo B 2013
roNy (B 4 HeJeIIO).
EAC
| Мо dyeль | KF 7125 |
| Наръжени | 220 - 240 B |
| Частota кoleбану | 50 - 60 Гι |
| Моцност b | 1000 Вт |
| Условя храеня: | ТемпераType: +5°C до +45°C Влajхости: < 80% |
Изговленив Китай Дe'Лонги Бpayн Хаухолд ГмбХ Германь De'Longhi Braun Household GmbH Carl-Ulrich-StraBe 4 63263 Neu-Isenburg/Germany
PykoBoIcTbO nO yCTpaHEnHIO HeuCnpaBHOcTei
| ПюбLEMа | Возимная р孥па | Реценье |
| He загорaitся, песлочател' «Вкл./ Выкл.» | •Усточьno He полоченьо к электорсети •Посада олекторанглиь六大п пррава •Кнокka Вкл./Выкл. He нажatable | •Посада олектора пожбор к электорсети •Дождіteь BOCSTановленья посаду олекторангли. •Нжміte на Кноку «Вкл./Выкл.» |
| Ha діспліе не отобрах? �цфсы 02:00 | Пробны не полочень к электорсети | Пождіочьп пожбор к электорсети |
| Ha діспліе міг? �цфсы 02:00 | Мервий січай Incponsьзов? пожизошел сб氧 пітанья | Настоіе часы |
| Hobozmotно akтувир? aійМЕР | •Кнокka «Вкл./Выкл.» He наж? •Hасточьчacob He sixlya пожиз? aійМЕР | •Hajtmіte на Кноку «Вкл./Выкл.» •Пожиз? aійМЕР |
| Hobozmotно akтувир? �ayMΕP | •Кнокka «Вкл./Выкл.» He наж? •Hасточь? aійМЕР aійMΕP | •Hajtmіte на Кноку «Вкл./Выкл.» •Пожиз? aійМЕР |
| Зileн? инідік? aійМЕР START He zagop? eT | •Усточьну He полоченьо к электорсети •Посада олекторанглиь六大п пррава •He наж? aійМЕР aійMΕP | •Пождіочьп пожбор к электорсети •Дождіteь BOCSTанов? пождіteь oлек? a затем на Кноку START |
| Вар? Быліог? eT | •Усточьну He полоченьо к электорсети •Посада олек? eн? aійМЕР aійMΕP | •Пождіочьп пожбор к электорсети •Дождіteь BOCSTанов? пождіteь oлек? a затем на Кноку START |
| Кофеварka перелINAETСА | Дерхаелдя Фильта установли ненравильно | Вставы derpxаелдя Фильта правильно |
| Колба неrelравиьно установлиа на побstавke | Убенисть, что колба раслооже; п по центу, несяредостavenho по derpxаелдя Фильта | |
| На колбе оtcутstbvет кршka | Помechине кршку на колбу | |
| Во врем п fireotoblenя кофe колба не нахочилась на своем мосте на потяжени boilee 20 секунd | Колбу с dedуet бicitro STabTь образно посту сягеля с пл actины пдогрева ochobaningia | |
| Исpenьз汞етс сшиков smolbwoe Колчесъ мolyotoro кофe | Изberгійе Фиьт und derpxаелдя Фиьтра. Рп и сpenьзован; Бумaxного Фиьтра заменITE erо на новь. Начип л proцessь варки Кофe Занов, засьлал Достаточhoe Колчесъ мolyotoro Кофe (н бolee 10 stolobbyx ilm Мерных ложек дя Кофe) | |
| Исpenьз汞етс кофe сшиков Тонкою помола | Исpenьзу列车 Токо Кофe c Тонковлю помола дя Кофеварok Кального Тида | |
| Налв кофе чered Кршу Заблорован | Удалы Воронку, раслооженни; В сcentre Кршки. Тцателно прор�очил eршу п对接ною Воротоюн Воротоюн | |
| Кофе влteкай ИЗ дерхаелдя Фильта на поставку, когда на ней net Kolбы | При ouhicstke Вьскочил prujхина derpxаелдя Филь Tina | Прикрелпге рухиму К derpxаел дя Филь Tina |
| Ндne колбу осela Кофейная руца | Бумжный Фильтп He bly BCTablen В derpxаелдя Филь Tina надлесашиим образим | Промоі列车 derpxаелдя Фиьтра, В сcentre Крш�ь В derpxаелдя Фиьтра и Вылочитп Варку заю. Изberгійе Фиьт, ромоіт derpxаелдя Фиьтра и Вылочитп Варку заю С Новь Бумжный Филь Tina |
| Нди检пcee отображается «E01», «E02» ilin «E03». | ---- | Оьратпесь в сервисию сухбу kompanьи Braun. |
| الل | الإستعمال | الإستعمال |
| الل | الإستعمال | الإستعمال |
| الل | الإستعمال | الإستعمال |
| الل | الإستعمال | الإستUTION |
| الل | الإستUTION | الإستUTION |
| الل | الإستUTION | الإستUTION |
| الل | الإستUTION | الإستUTION |
| الل | الإستUTION | الإستUTION |
| الل | الإستUTION | الإستUTION |
| الل | الإستUTION | الإستUTION |
| الل | ال,enGLISH | ال,enGLISH |
| الل | ال,enGLISH | ال,enGLISH |
| الل | ال,enGLISH | ال,enGLISH |
| الل | ال,enGLISH | ال,enGLISH |
| الل | ال,enGLISH | ال,enGLISH |
| الل | ال,enGLISH | ال,enGLISH |
| الل | ال,enGLISH | ال,enGLISH |
| الل | ال,enGLISH | ال,enGLISH |
| الل | ال,en | ال,en |
| الل | ال,en | ال,en |
| الل | ال,en | ال,en |
| الل | ال,en | ال,en |
| الل | ال,en | ال,en |
| الل | ال,en | ال,en |
| الل | ال,en | ال,en |
| الل | ال,en | ال,en |
| الل | ال,en | ال,en |
| الل | ال,en | ال,en· |
| الل | ال,en | ال,en· |
| الل | ال,en | ال,en· |
| الل | ال,en | ال,en· |
| الل | ال,en | ال,en· |
| الل | ال,en | ال,en· |
| الل | ال,en | ال,en· |
| الل | ال,en | ال,en· |
| الل | ال,en | ال,en· |
| ---- | --- |
.6) 1dolaldeAiksoeEjralllrjrrg
.aaaggl y jll gag aad LED CALC (c) JJg
4.5 1234567890123456789012345678901234567890123456789012345678901234567890123456789012345678901234567890123456789
a! jzuyuzyu yulj ydaas yy aLED
.
jaiyLED gao jbiu cui jilai jolj lao jie
a bslg ydlg a bll Jglao jolai
aSla 8jgaiy y) aig cai slal slal
a aaii 1
S 5
gabll gannnll
aJzallg 1200 (C)
jll jnssllgoggall aiaSlo Jaaa baaa p. lal
.
JdJI 1
a aaa aaaa aaaa aaaa aaaa aaaa aaaa
1 1
ailo joo jg jgl aolhio jabui Jolgc jpuuoy
.0g
jSg jSgll jIgl gl gl lgl ooggl gaoa Jg jhaoa. aalal
Lgjoo Js aIbog abbjablaaabaae ablu J
.ogai yoo ooyo yoi yoo yoi LED cuaa aibiu
ogaloo
STRONG(f)
jllg jgsjLED
aall aggall agd ydo aSTRONG jj gdo aal p 13!
.
@gall (B)
(5) 13/14 12/13 .
gill gyl yalalalgl aiall alalal oal
oall oolg od gdoafo 0s aao Loo
. 15g j 15j 15j 15j 15j 15j 15j 15j 15j
.6) 1dol dcl 4k0 g d2y yg oog cl jz
.1) 1
j 1 (a) (j)
.120000000000000000000000000000000000000000000000000000
03jLJxwJyQJ.1oIg2gJgl Jgagall gagagagagall sl
Cuaaogao duouo LED CALC (c)
a 8gall a1sla c1wj allj y j s Cgll j lI Jaa.
aicslololovcul oJyodg ygiallolo jwge d aaloojSnu
.0
(1) 20 & if x = 10, y = 15, z = 10 10 & 若 x = 15, y = 10, z = 15 .
Jgj y gll l jao aolal gssssll 1 Jolge ool aluowd elSos
.
j j 000000000000000000000000000000000000000000000000000000
Braun
033 1
45 abu w s loa
clsslll! Jale oge oleoosgall clalld
3jLJyOJ(0)CLOCKJJIeIbIJI,JIJIJIJIJIJI
.24) 1oogly LED oSs aJ uJg
gAeL24)GgSsUaI (Ball) SET jj Ie b.
CLOCK JJ 12
.
e (e) (b) SET jj jg jaoa a o h
yj yjaiu (e) (baill) SET jj jjayaiyaiyaiyaiyaiyaiyaiyaiyaiyaiyaiyaiyaiyaiyaiyaiyaiyaiyaiyaiyaiyaiyaiyaiyaiyaiyaiyaiyaiyaiyaiyaiyaiyaiyaiyaiyaiyaiyaiyaiyaiyaiyai
aagblll aaaaal ooc yoo jdyjy jy.
a gll 2 a (acl) CCK j j b
.
aal alas 10 aol jg bdo p o
1.150 1.160 1.170 1.180 1.190
abagg aal
.1j3 3 jL J y o (C) TIMER JJ Jbc
LED aogj gosgagll
j. j. (o) SET jj jj jj jj jj jj jj jj jj
aIgblal all aclll oocococococococococococococococococococococococococococococococococococococococococococococococococococococ
LED Sall aag (C) TIMER JJg Jg Jg
.
alol jssg sddg (jss= h3. s0e = h2
Sssss sbsd y (sS)CALC jglb
g 3 1 1 1
.led
4-1
. jll ggsjddLED cuaa .g) jglbd
.ogai a (a) (a) START
2
a. iδj gSll 10 a.o.o.gll
.ogall jogghll 5j
.(aaaiagj alljly jaiy)oogllde losggs Jaaloo cuaaai aJj
pUduuUgUd
pueo aagb ojg jg ogyall aiaol pailw l 1
.ajgaboo gog jgsa k yoi ogyll ao aaiy iayal oaii
jo uie gdlj!l 100 gsw. gall alll all no tlaao yipilow
.oggl g cag yll collalalall
LED
start.a
joooll jgol kwl pdo
timer.b
Jusll Tiner 1s.0g.oggall sgs 0g 0g 0g 0g 0g 0g 0g 0g
calc.c
aill jssgnsjssg jssjll all! gog bnnn paa
clock.d
Cgall 1000
set.e
aalj yagg cagglg agllcag aeg
strong f
.(g)g(scl)gallnduol
1-4 .g
..(1g54 1J L) o8gall no aLdcls
J
(J)On/Off
J!/(L)On/Off jj 1s aagall aiaa Llaa J. (1) (L)
(1) On/Off jj jle baleo.ogall aiaSlo (1) 120 agall aiaSlo jilu waiy yagall egalbiu .gjfo (1)
.1J2y
(g) Auto Off
1 111111111111111111111111111111111
ogall aaoa aol ao
Jusu no St. aoojul J
.8gai jaoa diSlo
a 60 aol Jaoaaiall aie yjglal jyjai jayai: abdo
joo jg Cag gll g uo l ou, aegnll cloglgs Ssir g kll gll g ll g
gbl
yglglll 02:00 15 LED
a aalblll 1y dally lgs jaoe al llaiaaa aai
plucysl
jlll lalul 1a yla 1alol 1alal 0e j
4
glg 8 gglj jll lIbIy abwJ jzgl Iio plzwl Jsay Cilgll gglj oIaI yabWj jzgl Iio plzwl Jsay Ls, jzbl aoi joo gI oOgall aIeall gI aaiill cll iiai plzwiJc paoji gaoLj qI bI dIg og2oog aIaq Jlaq Ige gbi jll bala Iy JcI gls I1g aaiy jzgl
.jlglw
.
agall aicla 1a jyj yg 2y jy 1u 1 u 1u 1u 1u 1u 1u 1u 1u 1u 1u 1u 1u 1u 1u 1u 1u 1u 1u 1u 1u 1u 1u 1u 1u 1u 1u 1u 1u 1u 1u 1u 1u 1u 1u 1u
jgljgljyllalaojzaiiaolllhj: jla jlai jai

(A)
(1) On/Off 1
aLdG LED a
(JlJl)sllgssygo laoo slljz3
Jaiit gio pbiu ogo aai alw4
wJgJz65
3 106
dUJj0j0j67
8
JU 100000000000000000000000000000000000000000000
JU 152 10:aau