
DAB320 - DAB Radio MPMAN - Free user manual and instructions
Find the device manual for free DAB320 MPMAN in PDF.


| Product type | DAB+ / FM radio with CD player |
| Brand | MPMAN |
| Model | DAB320 |
| Power supply | 230 V ~ 50 Hz |
| Output power | 3 W × 2 |
| Standby consumption | 0.74 W |
| Radio frequency band | DAB (Band III) and FM 87.5 – 108 MHz |
| Number of presets | 10 (DAB or FM) |
| Compatible CD formats | Audio CD, CD-R, CD-RW |
| Antenna | Telescopic antenna for DAB/FM |
| Headphone jack | 3.5 mm stereo jack |
| Main functions | Automatic DAB and FM scanning, manual tuning, DLS information display, synchronized clock, timer, sleep mode, CD playback with repeat and programming |
| Maintenance and cleaning | Clean the housing with a soft, dry cloth. For CDs, wipe from the center to the edge with a soft cloth. Do not use solvents or chemicals. |
| Safety | Do not expose to water, excessive heat, dust, or humidity. Do not block ventilation openings. Use only in moderate temperatures. Do not open the housing – refer all servicing to qualified personnel. |
| Remote control battery | 1 CR2032 battery (included) |
| Dimensions (approx.) | Approx. 280 × 150 × 200 mm (estimate) |
Frequently Asked Questions - DAB320 MPMAN
User questions about DAB320 MPMAN
0 question about this device. Answer the ones you know or ask your own.
Ask a new question about this device
Download the instructions for your DAB Radio in PDF format for free! Find your manual DAB320 - MPMAN and take your electronic device back in hand. On this page are published all the documents necessary for the use of your device. DAB320 by MPMAN.
USER MANUAL DAB320 MPMAN
Frequenz (Frequency)
Audio Bitrate (Audio BitRate)
Ensemble / Multiplex (Group Name)
- CD BOUTON
- LCD DISPLAY
- DAB / FM
- PRESET
- PRESET
- Headphone Jack
- Touche REPEAT
15.PROGRAMME
- VOLUME
17.AFFICHAGE/INFO - VEILLE
- TIMER BUTTON
- IR SENSOR
- Bornes d'enceinte
- DAB / FM Antenne
- ALIMENTATION
TELECOMMANDES
- Touche STANDBY / ON
- DISPLAY / Touche INFO
- Touche REPEAT
4.PROGRAMME - ALEATOIRE
6.MUET - DAB / FM
- CD
- STOP / MENU
- PLAY / PAUSE / SELECT
- DEFILEMENT
- DEFILEMENT ▲/ ▷ ▪
- PRESET-BOUTON
- PRESET + BOUTON
- VOLUME -
- VOLUME +
DAB services secondaires
To achieve the utmost in enjoyment and performance, and in order to become familiar with its features, please read this manual carefully before attempting to operate the unit.
Important Notes
This safety and operating instruction should be retained for future reference.
The apparatus shall not be exposed to dripping or splashing and no objects filled with liquids, such as vases, shall be placed on apparatus. Avoid installing the unit in locations described below:
-
- Places exposed to direct sunlight or close to heat radiating appliances such as electric heaters, on top of other stereo equipment that radiate too much heat.
-
- Places blocking ventilation or dusty places.
-
- Places subject to constant vibration, humid or moist places.
No naked flame sources such as lighted candles should be placed on the unit.
Attention should be drawn to the environmental aspects of battery disposal.
Make sure not to obstruct the ventilation openings, a minimum of 10cm should be kept around the apparatus for ventilation.
The ventilation should not be impeded by covering the ventilation openings with items such as newspaper, table-cloths, curtains, etc. Use apparatus in moderate climates only.
Operate tuning controls and switches as instructed in the manual.
Before turning on the power for the first time, make sure the power cord is properly installed.
Store your CD in a cool area to avoid damage from heat.
The mains plug is used as the disconnect device and it must remain readily operable. To completely disconnect the power input, the mains plug of the apparatus must be disconnected from the mains.
The normal function of the product may be disturbed by Strong Electro Magnetic Interference. If so, simply reset the product to resume normal operation by following the instruction manual. In case the function could not resume, please use the product in other location.
Do not attempt to remove any screws, or open the casing of the unit; there are no user serviceable parts inside, refer all servicing to qualified service personnel.



CAUTION: TO REDUCE THE RISK OF ELECTRIC SHOCK DO NOT REMOVE COVER(OR BACK), NO USER SERVICEABLE PARTS INSIDE, REFER SERVICING TO QUALIFIED SERVICE PERSONNEL.
DANGEROUS VOLTAGE

Conductor dangerous voltage, that may be of sufficient magnitude to constitute a risk of electric shock to persons is present within this product's enclosure.

ATTENTION
The owner's manual contains important operating and maintenance instructions, for your safety, it is necessary to refer to the manual.
WARNING :TO PREVENT FIRE OR SHOCK HAZARD, DO NOT EXPOSE THIS APPLIANCE TO DRIPPING OR SPLASHING.
Note: This unit will become warm when used for a long period of time. This is normal and does not indicate a problem with the unit. This unit includes micro-processors which may malfunction as a result of external electrical interference/noise or electrostatic discharge . If the unit is not working properly, disconnect the power source and then reconnect it.
FEATURES AND CONTROLS
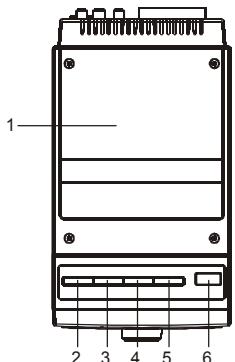
1. CD DOOR
2. SCROLL▼/I▲ BUTTON
3. SCROLL▲/▶▶I BUTTON
4. PLAY/PAUSE/SELECT BUTTON
5. STOP/MENU BUTTON
6. CD DOOR OPEN BUTTON
7. STANDBY/ON BUTTON
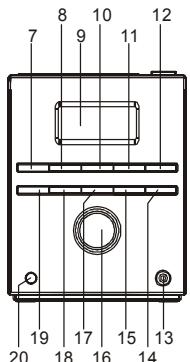
8. CD BUTTON
9. LCD DISPLAY
10. DAB/FM BUTTON
11. PRESET-B BUTTON
12. PRESET + BUTTON
13. HEADPHONE JACK
14. REPEAT BUTTON
15.PROGRAM BUTTON
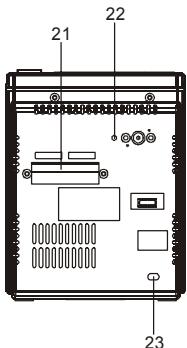
16. VOLUME CONTROL
17. DISPLAY/INFO BUTTON
18. SLEEP BUTTON
19. TIMER BUTTON
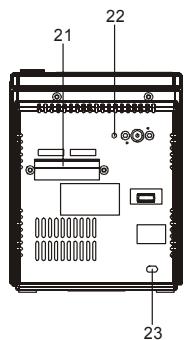
20. IR SENSOR
21. SPEAKER TERMINALS
22. DAB/FM WIRE ANTENNA
23. AC POWER CORD
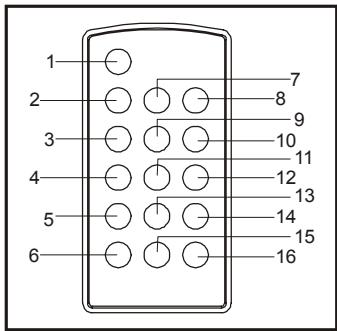
REMOTE CONTROL
- STANDBY/ON BUTTON
- DISPLAY/INFO BUTTON
- REPEAT BUTTON
4.PROGRAM BUTTON - RANDOM BUTTON
- MUTE BUTTON
- DAB/FM BUTTON
- CD BUTTON
- STOP/MENU BUTTON
- PLAY/PAUSE/SELECT BUTTON
- SCROLL▼/I▲ BUTTON
- SCROLL▲/▶I BUTTON
- PRESET - BUTTON
- PRESET + BUTTON
- VOLUME - BUTTON
- VOLUME + BUTTON
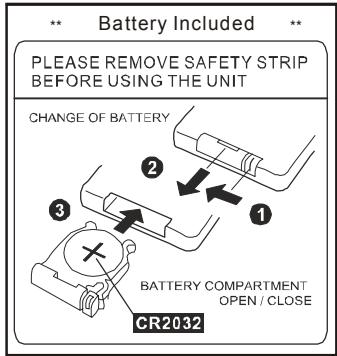
PUTTING THE BATTERY INTO THE REMOTE CONTROL UNIT
- Press the battery compartment gently according to the direction indicated in the illustration.
- Slide to open the battery compartment.
- Insert the supplied CR2032 battery into the compartment according to the polarity markings ("+" and "-") inside the compartment and on the battery. Replace the battery compartment until it clicks.
NOTE: Remove the batteries from the remote control if not in use for long period of time. Replace with new batteries when the batteries become weak, otherwise the remote control will not function properly.
Hints for better reception
This unit is fitted with a single lead wire DAB/FM antenna, to obtain the best performance, you should fully extend the wire antenna and adjust the position as well as the direction until you find the best reception. For ideal DAB reception, always maintain the lead wire antenna in a vertical position (holding it upward or downward behind the unit) is highly recommended.
Getting started - DAB mode
When the unit is powered up for the first time, it will be in standby mode. The display will show "00:00" and "Setting clock ..." Press the STANDBY/ON button once to switch the unit on, it will automatically enter into the DAB mode and perform auto scan function. During the scan the display will show "Scanning ..." together with a slide bar that indicates the progress of the scan and the amount of stations that have been found so far. (F. 1) (F. 2) (F. 3)

Setting clock...

Welcome! Digital Radio

Scanning 0
Once the scan has finished, the radio will select the first alphabetically found station. You can now press the SCROLL or button to explore the found stations and then press the SELECT button to select your station.
Note: If there is no stations found after auto scan, the radio will enter into the Tune Select Menu and you can now press the SCROLL or buttons followed by pressing the SELECT button to select manual tune or auto scan modes for stations.
Clock setting
The clock will only set and be updated if you can receive DAB signals in your location. In order for the clock to synchronise to the current local time you must leave it one DAB station for a short period. Manual clock setting is not required.
DAB auto tune modes
There are two types of auto scan modes, one is local auto scan and the other is full auto scan. Local auto scan will only search for part of the DAB Band III channels and full auto scan will search for the entire DAB Band III channels. After the scan has finished, the first alphabetically found station will be automatically selected.
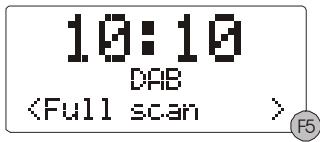
- To activate the auto scan modes, first press the MENU button to enter into the Tune Select Menu, then press the SCROLL or button to select "Local scan" or "Full scan", finally press the SELECT button to confirm, the display will show "Scanning ..." and a progressing slide bar. (F.4) (F.5)
- All the stations that have been found will be stored automatically, to explore the found stations, press the SCROLL or buttons; and when you find a station that you would like to listen to, press the SELECT button

DAB manual tune
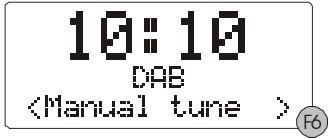
- To select manual tune, first press the MENU button to enter into the Tune Select Menu, then press the SCROLL or buttons to select "Manual tune", finally press the SELECT button to confirm. (F. 6)
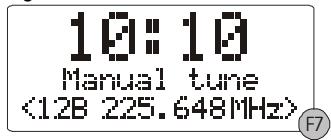
- Press the SCROLL or buttons to move through the DAB channels, the display will show "5A to 13F" and their associated frequencies. (F. 7)
- When your desired frequency appears in the display, press the SELECT button to confirm. The name of the station group (ensemble/multiplex) will be displayed.
- To listen to the station selected, press the SELECT button again.
DAB secondary services
On some occasions you will see a “>” symbol directly after the name of the station, this indicates that there are secondary services available to that station. These secondary services contain extra services that relate to the primary station. E.g. a sports station may want to add extra commentaries. The secondary services are inserted directly after the primary station.
DAB display modes
Every time you press the DISPLAY/INFO button, the display will cycle through the following display modes:

Time and date
The time and date will be automatically updated by the broadcasted information; it is no need to set the clock manually. In the unlikely event that no clock information is received, the display will show "[No Time)".
Frequency
The frequency of the present station will be displayed.
Audio bit rate
The display will show the digital audio bit rate being received.
DLS
DLS stands for Dynamic Label Segment which is a scrolling message that the broadcaster may include in their transmissions. The message usually includes information such as programme details ...etc.
Signal strength
The display will show a slide bar to indicate the signal strength, the stronger the signal, the longer the bar will be from left to right.
Programme type
This describes the style of the programme that is being broadcast. If the information is not available, the display will show "[No PTY)".
Ensemble/Multiplex (Group name)
The Ensemble/Multiplex is a collection of radio stations that are bundled and transmitted together in a single frequency. There are national and local multiplexes, local ones contain stations that are specific to that area.
Note: Press and hold the DISPLAY/INFO button for longer than 2 seconds, the software version number will be displayed.
FM radio
- To select FM, press the DAB/FM button, the FM frequency will be displayed. (F. 8)
- To activate auto search, press and hold the or buttons until it starts to scan down or up the frequency band, it will stop automatically once a station has been found.
- To activate manual search, repeatedly press the I or button.
- To select audio mode, press the SELECT button to toggle between the "Auto" or "Mono" selection.
Note: The radio will automatically switch between stereo and mono mode, but you can override this and switch this function manually which is helpful for poor signal reception.
Tuner
93.90MHz
[No RadioText]
STORING AND RECALLING PRESET STATIONS
In either DAB or FM, you can store up to 10 stations to the favourite presets; this will enable you to get direct access to your favourite stations.
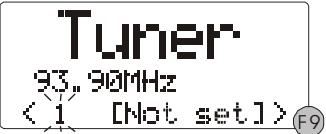
- To store a preset, first tune to your desired station, then press and hold the PROGRAM button until the display shows the preset number and flash. (F. 9)
- Press the PRESET +I- buttons to select your desired station preset number.
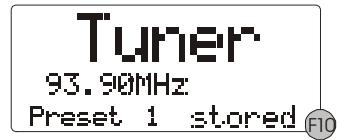
- Finally press the PROGRAM button to confirm your selection, the display will show "Preset # stored". (F.10)
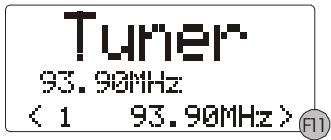
- To recall a preset station that you have stored, press the PRESET +/- buttons, the display will show the preset number and the associated information. It would tune to the station in one second after the buttons are released. (F.11)
FACTORY RESET
When you move the system to another part of the country, your pre-tuned and stored DAB stations may no longer be available. If this is the case then you will need to reset your system back to its original factory settings; to perform a factory reset, please do the following:
- Connect the unit to mains and press the STANDBY/ON button once to turn the unit on.
- Ensure the unit is in DAB mode, then press and hold the MENU button until the display shows "Press SELECT to confirm reset".
- Release the MENU button and press the SELECT button once, the display will show "Restarting..." and then perform auto scan function.
- After the scan has finished, the radio will select and display the first alphanumericly found station.
Note: All of your stored DAB & FM presets will be lost once the reset has taken place.
LISTENING TO YOUR COMPACT DISCS
NOTE: Although this CD player can read CD-R and CD-RW discs in addition to normal CDs, the playability of CD-R and CD-RW discs may be affected by the type of software that was used to create the discs, as well as the quality and condition of the blank media you are using, 100% playability cannot be guaranteed. This is not an indication of a problem with the player.
Playing the entire CD
- When the unit is ON, press the CD button to select CD function. The display will first show "Switch to CD" and then finally "NO DISC". (F.12) (F.13)
- Press the OPEN button to open the CD door, insert the disc with the printed label side facing up and then close the CD door. The display will first show "READING" and then the total number of tracks on the disc and time. (F.14)
- Press the /II button to start playback from the first track, the display will show the current track number and elapsed time. (F.15)
- To interrupt playback, press /II button once, "II" will be displayed and the time in the display will flash.
- To resume playback, press the button again.
- To stop playback, press the button.
Selecting a different track during play
- To select a different track during play, press the or buttons until the desired track number appears on the display, then release the button, playback will begin from this track.
- To play the next track, press the button once.
- To play the previous track, press the 1 button twice.
- To play the current track from the beginning during play, press the I button once.
Repeat play
- Press the REPEAT button to select the repeat play, to repeat the same track, press the REPEAT button once, the display will show “G 1”. (F.16)
- To repeat the entire disc, press the REPEAT button again, the display will show "G". (F.17)
- To cancel repeat play, repeatedly press the REPEAT button until the repeat icon disappears in the display.
Random play (remote control only)
- During CD stop, press the RANDOM button to start random play, the display will show "RANDOM" and the tracks will be started playing randomly. (F.18)
- During normal CD playback, first press the RANDOM button once, when the display shows "RANDOM", press the 1 or 1 buttons to randomly select playing another track.
- To cancel random play, press the RANDOM button again until the "RANDOM" disappears in the display.
Program play
In CD stop mode, a maximum number of 20 tracks can be programmed to play in any desired order.
- Load your disc as usual and wait until the display shows the total number of tracks.
- Press the PROGRAM button, the display will show "P-01" and flash. (F.19)
- Press the I or buttons to select the first track to be programmed, then press the PROGRAM button to confirm, the first track to play is now programmed, the display will show "P-02" and ready for the next entry.
- Repeat the above procedure to program other tracks for program play.
- When you have completed programming, press the button to begin program play, the display will show "MEM". Playback will begin on the first track you programmed and will continue until the last programmed track has played.
- To erase the program, in CD stop mode, press the button once; in CD play mode, press the button twice. "MEM" will disappear in the display.
Switch to CD
NO DISC
CDDA
Tr 16
70:19
STOP
CD/DA
CDDATr01
8:19

CDDATr02 1:00
F16
CDDATr021:00
5
CDDA Tr
2 1:00
RANDOM

MEM
Tr 02
STOP
P-01
Repeat program play
You may use the program play and the repeat play features together to continuously repeat a programmed playback. First program the desired playback sequence, then press the REPEAT button to select repeating the current track or the entire programmed sequence.
TIMER FUNCTION
You can set the timer to switch on the system at your desired time, listening mode and volume level.
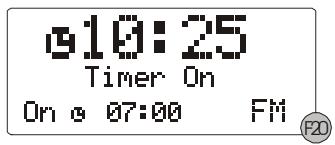
- Press the TIMER button to toggle the timer function between "On" and "Off", the display will show the timer on/off status, the timer on mode and the time.(F.20)
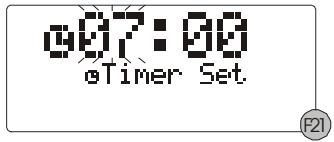
- To set the timer, press and hold the TIMER button until the display shows "Timer Set" and the "hour" digit of the timer clock in the display will flash. (F.21)
- Press the or buttons to set the time and press the TIMER button to confirm, first set the hour and then the minute.
- When the time to switch on the system is set, the display will show the timer on mode and flash, press the or buttons to select the mode (CD/FM/DAB), then press the TIMER button to confirm and the timer on mode is set
- The display will show the volume level and flash, press the or buttons to select the timer on volume level, then press the TIMER button to confirm and the timer setting is now completed.
SLEEP FUNCTION
This function allows you to program the system to switch off itself after a set period of time.
- To activate the sleep function, repeatedly press the SLEEP button, the sleep time in the display will change in sequence on every press:

- When the display shows your desired sleep time, release the button, the sleep timer is now activated. The display will show "S#" in which "S1" is to indicate "10 minutes" sleep time and so on. (F.22)
- To cancel sleep function, press the SLEEP button once, the display will show "Sleep-Off" and the "S#" will be disappeared.
18:2558
MUTE FUNCTION (remote control only)
Press the MUTE button on the remote control will stop the sound from the speakers temporarily, the display will show "MUTE" and flash. To cancel mute and restore the sound, press the MUTE button again or the VOLUME +/-. button, the "MUTE" will disappear in the display.
HEADPHONE JACK
A 3.5mm type stereo headphone jack is located on the front panel. Connect a set of stereo headphones (not included) to this jack for private listening without disturbing others. The external speakers are automatically disconnected when the headphones are in use.
IMPORTANT: When using headphones always set the volume to a low level before you put the headphones on. Then insert the headphones and gradually increase the volume to a comfortable listening level.
COMPACT DISC
- Always use compact discs bearing the mark as shown.

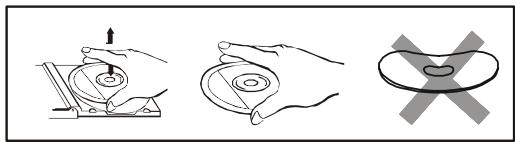
- Notes on handling discs
Removing the disc from its storage case.
- Do not touch the reflective recorded surface.
- Do not stick paper or write anything on the surface.
- Do not bend the disc.
-
Storage
-
Store the disc in its case.
-
Do not expose discs to direct sunlight or high temperatures, high humidity or dusty places.
-
Cleaning a disc
-
Should the disc become soiled, wipe off dust, dirt and fingerprints with a soft cloth.
- The disc should be cleaned from the centre to the edge.

- Never use benzene, thinners, record cleaner fluid or anti static spray.
- Be sure to close the CD door so the lens is not contaminated by dust.
- Do not touch the lens.
SPECIFICATIONS
POWER SUPPLY:
OUTPUT POWER:
POWER CONSUMPTION (IN STANDBY MODE)
UNIT DIMENSION:
SPEAKER BOX DIMENSION:
WEIGHT:
RADIO SECTION
FREQUENCY RANGE:
230V\~50Hz
3W×2
0.74W