
Ariva T30 Mini - TV tuner card Ferguson - Free user manual and instructions
Find the device manual for free Ariva T30 Mini Ferguson in PDF.


| Product Type | Digital terrestrial television receiver (DVB-T2) |
| Brand | Ferguson |
| Model | Ariva T30 Mini |
| Tuner | DVB-T2/T, HEVC H.265 |
| Frequency Range | 177.5 ~ 226.5 MHz (VHF), 474 ~ 866 MHz (UHF) |
| Input Level | 25 ~ -82 dBm |
| Modulation | QPSK, 16QAM, 64QAM, 256QAM |
| Video Decoding | MPEG4 AVC/H.264, HEVC/H.265, MPEG2 |
| Video Output Format | 576P, 720P, 1080i, PAL/NTSC |
| Audio Decoding | MPEG-1, Dolby Digital 5.1, Dolby Downmix 2ch, DD+ (E-AC-3) |
| Audio Output | HDMI |
| Video Output | HDMI |
| USB Port | Micro USB 2.0 (Host) for power and media |
| IR Sensor Port | 2.5mm jack for external IR receiver |
| Antenna Input | ANT IN (F-type) |
| Power Supply | DC 5V, 1.5A via Micro USB (adapter not included) |
| Power Consumption | Max 7.5W, Standby ≤0.5W |
| File System Support (USB) | FAT, FAT32 (NTFS not supported) |
| Supported Photo Formats | JPEG, BMP, PNG |
| Supported Audio Formats | MP3, AAC, AC3 |
| Supported Video Formats | MPEG1, MPEG2, MPEG4, AVI, DIVX |
| Remote Control | RCU33 with programmable TV keys |
| Package Contents | Receiver, remote, IR sensor, power cord, manual, warranty card |
Frequently Asked Questions - Ariva T30 Mini Ferguson
User questions about Ariva T30 Mini Ferguson
0 question about this device. Answer the ones you know or ask your own.
Ask a new question about this device
Download the instructions for your TV tuner card in PDF format for free! Find your manual Ariva T30 Mini - Ferguson and take your electronic device back in hand. On this page are published all the documents necessary for the use of your device. Ariva T30 Mini by Ferguson.
USER MANUAL Ariva T30 Mini Ferguson
terrestrial television receiver T30MINI
DV3 T2 HEVC H.265


natural_image
Black T30 Mini device with gold connector, displayed next to a keypad (no visible text or symbols on device body)natural_image
Pure diagram of a cylindrical device with internal slots and a bulb, no text or symbols present

natural_image
Simple line drawing of a cylindrical object with internal holes and a protruding shaft (no text or symbols)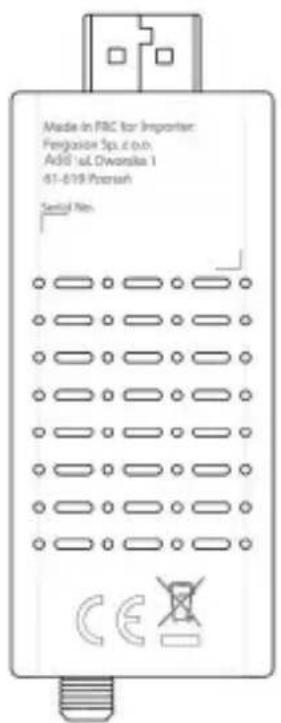
- Please read the user manual and its recommendations carefully.
- Please read the manual carefully before starting the equipment for the first time.
- To avoid electric shock, never open the housing. Damage to the warranty seal will void the warranty.
- Disconnect the device from the plug during lightning storms or when it is not going to be used for a long period of time. Remember that the warranty does not cover damage to the device caused by a lightning strike.
- Do not expose the device to direct sunlight. Keep away from heat sources and from humid environments. Don't cover up ventilation holes so as to provide proper air circulation.
- Use only original accessories included with the device.
- If you are moving the device from a warm to a cold room and vice versa, wait at least 1 hour before switching onto
electricity. Otherwise problems may occur.
- Keep the device away from vases, bottles, aquariums and other water sources to avoid damage. Do not touch the power plug with bare hands.
- Do not put any objects on the housing of the device. Before starting maintenance or installation activities disconnect the device from the electricity network.
- Do not use alcohol or liquids containing ammonia to clean the device. If necessary, clean it with a soft, lint-free cloth moistened with a mild solution of soapy water.
- Do not connect any cables when the power plug is in the socket
- Check that you have working cables. Damaged cables can cause a fire.
- Please disconnect the device from the power supply while making the connections.
Contents of the package
Before installing the product, check that you have the following:
- 1 x DVB-T2 receiver
- 1 x Remote control
- 1 x User Manual
- 1 x Warranty card
- 1 x IR signal receiver
- 1 x Power cord
Panel
- HDMI: Audio and video output
- ANT IN: This jack connects to an external antenna

natural_image
Pure technical line drawing of a cylindrical device with internal slots and a base, no text or symbols present
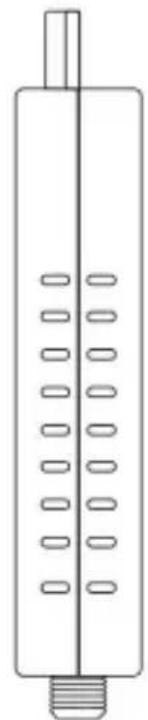
- IR PORT: 2.5mm JACK for connecting the included infrared remote control sensor
- MICRO USB 2.0 HOST PORT: Port for memory and power connection receiver. 5V power adapter not included. You can also use the USB port on the TV for power.

natural_image
Pure diagram of a cylindrical object with internal oval patterns and a protruding shaft (no text or symbols)
Connecting to a TV
- Connect the receiver to the TV via the HDMI port.
- Connect the terrestrial TV antenna to the ANT IN port on the receiver.

Remote control
- POWER (STANDBY)- turn on or switch the receiver to standby
- VOL+/VOL- - (programmable part) - increases or reduces the TV volume
- SET- press and hold to start learning function
• TV POWER- turn the TV on or off
• TV/AV, TV-IN- switching the TV/AV functions of the television - MUTE- mute or restore audio output
- SUB-T- display subtitle options (availability depends on the channel)
• AUDIO- language or sound mode selection - EPG- (electronic program guide) starts the program guide
- UP/CH+, DOWN/CH- - menu navigation; selects the next or
previous channel; page up, page down
- TXT- display text information about the current service (if available)
- RIGHT/VOL+, LEFT/VOL- navigating the menu; increases or decreases the volume
- MENU - activates the main menu
- EXIT- exit from the current menu
- FAV- displays a list of favorite channels, press againFAV to access other favorite lists
• TV/RADIO- switches from TV function to Radio function and from Radio to TV function
• 0-9 - selects a channel or setting - INFO (i)- displays information about the current channel
- BACK > - go back to the previously viewed channel
- OK/LIST- enter or confirm the operation or call the quick selecti window when there is no menu the screen; channel list
- SEARCH BACK ◀◀- searches backward while playing media
- SEARCH FORWARD ▶▶- searches forward while playing media
- PLAY ▶, PAUSE ||- starts or resumes multimedia playback; pauses media playback
- STOP ■ - stops media playback
- RECORD● - press this key to s' recording the program
• PVR- management of recordings
- COLORED BUTTONS- various functions in text mode; GREEN - video format; YELLOW - proportions; BLUE - timer
Attention: Sunlight or very bright light will reduce the sensitivity of the remote control. The description of the remote programming procedure is presented below.
First run
After all connections are properly made, turn on the TV and make sure that the receiver is connected to the main power supply. Turns on the receiver. If you use the receiver for the first time of

reset to factory settings, the main menu will appear on the TV screen.
- Select [OSD Language] and press the RIGHT / LEFT button to select a language
- Select [Country] and press the RIGHT / LEFT button to select your home country
- Select [Channel Search] and press the RIGHT or OK button to start automatic channel search. After tuning channels is complete, you can watch TV
Programming the remote control
The RCU33 remote control allows you to control both the terrestrial TV receiver and the TV set. Follow the procedure below to program the remote.
- Open the cover on the back of the remote control and insert 2 AAA (LR03) batteries. Make sure the polarity is correct (+/-).
- You can program 4 keys to control your TV: TV POWER, TV-IN, VOL
+ and VOL-.
- Place the remote controlling the TV and RCU33 in front of each other (leave a sp of 3 to 5mm between them).


-
Press and hold the SET button for 4 seconds to enter programming mode (the TV POWER button light will stay on and shine brighter).
-
On the remote control of the receiver and the TV remote, press the button you want program (eg VOL +), the LED will light up quickly 3 times, the code is saved. If the I
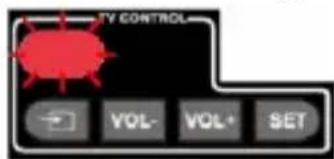
light up 5 times, then it's necessary to repeate this step (some error has occurred).
-
Do the same with the TV POWER, TV-IN and VOL- buttons.
-
After memorizing the 4 keys, you can press the SET key to exit the programming mode, the light of the TV POWER button will turn off).
Basic operations
1. Program management settings
To access the Menu, press the MENU button and select [Program]. The menu provides options to customize the program management settings. Select an option and press OK or RIGHT to adjust the setting. Press the EXIT button to exit the menu
2. Editing the program
To edit the program's preferences (lock, skip, add to favourites, move or delete), you need to enter the program edit menu. Access to this menu requires a password. Enter the default password / o "000000".
2.1 Set your favourite program
You can make a short list of your favourite programs that you have easy access to. Set your favourite TV or radio program:
- Select your preferred program, then press the FAV button. A heart-shaped symbol appears and the
program is marked as favourite.
-
Repeat the previous step to select more favourite programs.
-
To confirm and exit the menu, press the EXIT button.
To remove a TV or radio program from the favourites list: press the FAV button on the remote control with the heart-shaped symbol.
2.2 Watching your favourite program
- Press the FAV button and the favourites menu will appear.
- Press UP / DOWN to select your favourite programs.
- Press OK to select your favourite program.
2.3 Delete a TV or Radio Program
-
Select a program then press the BLUE button. A message will appear. Press OK to remove the program.
-
Repeat the previous step to select more programs to remove.
2.4 Skip TV or Radio Program
- Select the program you want to skip and press the GREEN button. The skip symbol appears. The program is marked as skipped.
- Repeat the previous step to select more programs.
- To confirm and exit the menu press the EXIT button.
Disable TV or Radio Skip: Press th GREEN button on the skipped program with the skip symbol.
2.5 Transferring a TV or radio program
- Select a program, then press the RED button. The move symbol appears.
- Press UP / DOWN to move the program.
- Press OK to confirm.
- Repeat the above steps to move more channels.
2.6 Lock the program
You can lock selected programs for restricted view. To block a TV or radio program:
-
Select a program then press the YELLOW button. The lock symbol is displayed. The program is now marked as blocked.
-
Repeat the previous step to select more programs.
- To confirm and exit the menu, press the EXIT button.
- Press the YELLOW button to disable the blocked program.
- To view the blocked program, you will need to enter the default password "000000" or the last set password.
3.EPG (Electronic Program Guide)
EPG is an on-screen TV guide that shows scheduled programs seven days in advance for each tuned channel. Press the EPG button on the remote control to access the guide. You can use the UP / DOWN keys to select your preferred program. If there is more than one page of information, use the BLUE button to go up and the YELLOW button to go to the next page
4. Sort
Sort your channels by the following options:
- [LCN] - Sort the channels in ascending order.
- [Name] - Sort the channels in alphabetical order.
- [Service identifier] - Sort channels by station.
5. LCN (logical channel number)
Enable or disable LCN.
6. Video settings
To access the Menu, press MENU, then select [Image]. The menu provides options for adjusting the video settings. Press UP / DOWN to select an option and press RIGHT / LEFT to adjust the setting Press EXIT to exit the menu.
-
Aspect - You must set the display format to 4: 3 PanScan, 4: 3 Letter Box, 16: Full Screen, or Auto to get the correct aspect ratio while watching TV.
-
Resolution - If the video is not displayed properly, change this setting. This setting is intended to correspond to the most common setting for HDMI:
• [480i] for an NTSC TV,
• [480P] for an NTSC system TV,
• [576i] for a PAL TV,
• [576P] for a PAL TV,
• [720P] for TV in NTSC or PAL system,
• [1080i] for an NTSC or PAL TV.
- TV Format - If the video does not display properly, you
need to change this setting. This should correspond to the most common TV setting in your country:
• [NTSC] for NTSC TV,
• [PAL] for a PAL TV.
7. Channel Search
To access the menu, press MENU and select [Channel Search]. The menu provides options to adjust the channel search settings.
Select an option and press LEFT / RIGHT to adjust the settings. Press EXIT to exit the menu.
7.1 Automatic search
Search and install all channels automatically. This option overwrites all programmed channels.Select [Auto Search] and press OK or RIGHT to start channel search. To cancel channel search, press EXIT.
7.2 Manual Search
Install new channels manually.
This option adds new channels without changing the current channel list.
-
Select [Manual Search], then press the OK or RIGHT button. The channel search screen will appear.
-
Press the RIGHT / LEFT key to select the channel frequency.
- Press OK to start channel search. If the channel is found, it will be saved and added to the channel list. If channels cannot be found, exit the menu.
- Country - Select your country of residence.
- Antenna Power - Power on the antenna if an external active antenna is connected.
8. Time setting
To access the menu, press MENU and then select [Time]. The menu provides options for adjusting the time settings. Press UP / DOWN t select an option and press RIGHT / LEFT to adjust the setting. Press EXIT to exit the menu.
- Time Offset - Select auto or manual for GMT offset correction.
- Country Region - Select the region of the country when [Time Offset] is set to Auto.
- Time zone - select a time zone offset when [Time Offset] is set to Manual.
- Sleep Mode - If this setting is disabled, this feature does not work. If this setting is
enabled, a message will appear after the preferred time letting you know that the device will enter sleep mode. The auto power off function can be set between 0-12 hours. The standard setting is 3 hours. Press the STANDBY button to exit Sleep / Auto Off mode.
9. Options
To access the menu, press MENU and select [Options]. The menu provides options to adjust the OSD language, subtitle language and audio language. Select an option and press RIGHT / LEFT to adjust the setting. Press EXIT to exit the Menu.
- OSD Language - Select the language of the OSD.
- Audio language - Select the preferred audio language for watching TV channels. If the language is not available, the default language of the program will be used.
- Subtitle Language - Select your preferred subtitle language.
- Digital Audio - Select the digital audio output mode.
10. System settings
To enter the Menu, press MENU and select [System]. The menu provides options for adjusting system settings. Press UP / DOWN to select an option and press RIGHT / LEFT to adjust the setting Press EXIT to exit the Menu.
-
Parental supervision - You can restrict access to channels that are unsuitable for children. To restrict / lock a channel, you need to enter a password. The default password is "000000".
-
Set password - Set or change a password for blocked programs. Enter your old password or the default password "000000". After that, you will be prompted to enter a new password. To confirm, re-enter the new password. After confirming, press EXIT to exit the menu.
-
Restore factory default settings - Reset the decoder to factory default settings. In the main menu, select [Restore factory settings] and press OK or RIGHT to select. Enter your password or the default password "000000"
and press OK to confirm. This option will delete all preset channels and settings.
- Information - View information about the model, hardware and software.
11. USB
To access the Menu, press the MENU button and select [USB]. The menu provides options for playing music and photos. The receiver supports MP3, WMA, JPG, BMP files. The receiver only supports USB devices with the FAT and FAT32 file system. It does not support the NTFS file system.
-
Multimedia - If no USB device is connected, the warning message "USB device not found" will appear, otherwise you can select music or photos and press OK to go to the file browser and select the file to play.
-
Configure the display of photos
- Slide time: set the slideshow interval to 1-8 seconds.
- Slide mode: Set the slide show effect.
- Aspect Ratio: Keep original picture aspect. [Discard]
displays the image in full screen mode.
3. Configure the display of movies
- Aspect Ratio: [Keep]: Play back the movie in its original aspect ratio. [Discard]: Play the movie in full screen.
- Writings: [Small]: Display the subtitles in the small mode. [Normal]: Display subtitles in normal mode. [Large]: Displays the subtitles in large mode.
- Subtitle background: [White]: Display the subtitles with a white background. [Transparent]: Display the subtitles with a transparent background. [Gray]: Display the subtitles with a gray background. [Yellow-green]: Display the subtitles in yellow-green background.
- Subtitle font color:
[Red]: Display subtitles in red.
[Blue]: Display subtitles in blue.
[Green]: Display subtitles in green.
Warning!
- We cannot guarantee the compatibility (operation and / or power supply) with all USB storage devices and are not responsible for any data loss that may occur when connected to this device.
- The system may take a long time to read the contents of the USB device when the amount of data is large.
- Some USB devices may not be recognized properly.
- Even if they are in a supported format, some files may not be played back or displayed depending on the content.
4. PVR configuration
[Recording device]: Select a disc to save recordings.
[Format]: Format the selected disk.
Troubleshooting
| Problem | Potential causes | What to do |
| No picture | Power is not connected | Connect the power |
| The receiver is not turned on | Turn on the power | |
| "No Signal" message is displayed on the screen | DVB-T2 cable not connected | Connect the DVB-T2 cable |
| Incorrect setting | Reset settings | |
| No sound from the speaker | Missing or incorrect connection to the audio cable | Connect the audio cable correctly |
| Sound muted (MUTE) | Turn off the MUTE function | |
| Incorrect audio track | Try a different soundtrack | |
| Only sound, no image on screen | Missing or incorrect connection to AV cable | Make sure the cables are properly connected |
| The program is a radio program | Press the TV / RADIO button to switch to TV mode | |
| The pilot is not responding | Battery exhausted | Replace the battery |
| The remote is not pointed at the receiver or is not close enough to the receiver | Adjust the position of the remote control and move closer to the device | |
| The image stops suddenly or a mosaic effect appears | The signal is too weak | Strengthen the signal |
Technical Specifications
| Position | Sub item | Parameter |
| Tuner | Input frequency | 17 7.5 ~ 226.5MHz, 474 ~ 866MHz |
| RF input level | 25 ~ -82dBm | |
| Intermediate frequency | 7 MHz and 8MHz | |
| Modulation | QPSK, 16QAM, 64QAM, 256QAM | |
| Video | Decoding | MPEG4 AVC / H.264 HEVC / H.265 HP @ L4 MPEG2 MP@ML.HL |
| The output format | 576P, 720P, 1080i, PAL / NTSC | |
| Out port | HDMI | |
| Audio | Decoding | MPEG-1 layerl / 11, PCM downmix, IEC958 SIPDIF, Dolby 5.1 channel, Dolby downmix 2channel, Dolby Prologic2, DD + (E-AC-3) |
| Audio output | HDMI | |
| Power | Tension | DC5V1.5A |
| Power | Max 7.5W | |
| MICRO USB 2.0 | Photos | JPEG, BMP, PNG |
| Sound | MP3, AAC, AC3 | |
| Video | MPEG1, MPEG2, MPEG4, AVI DIVX | |
| StandBy | Power consumption | ≤ 0.5W |
SIMPLIFIED DECLARATION OF CONFORMITY
Producer: Ferguson Sp. z o. o., ul. Dworska 1, 61-619 Poznań
Name: Ariva T30 MINI
Device type: Digital terrestrial TV receiver
The above-mentioned product complies with Directive 2014/53/EU of the European Parliament and of the Council of April 16, 2014 on the harmonization of the laws of the Member States relating to the making available on the market of radio equipment and repealing Directive 1999/5/EC.
Full Declaration of Conformity can be downloaded from the website: https://ferguson-digital.eu/deklaracje-zgodnosci/
Misure di sicurezza
natural_image
Line drawing of a cylindrical device with internal slots and a small protrusion, no text or symbols present
natural_image
Simple line drawing of a cylindrical object with internal oval patterns and a protruding rod (no text or symbols)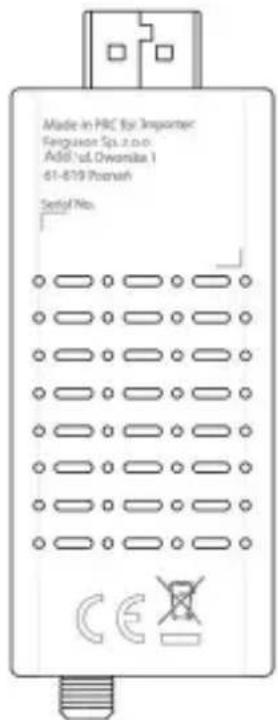
natural_image
Pure line drawing of a cylindrical device with internal slots and a small protrusion, no text or symbols present.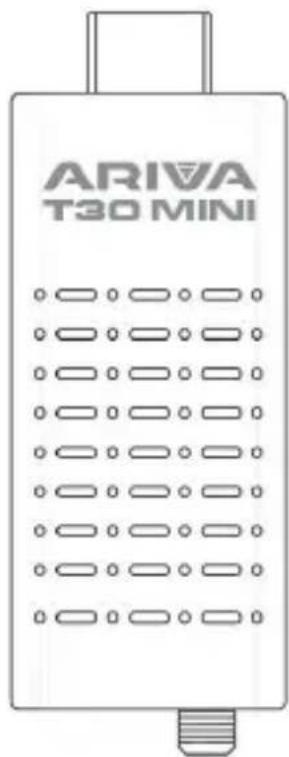
Panel
natural_image
Pure technical line drawing of a cylindrical component with internal slots and a threaded end (no text or symbols)
- Contents of the package
- Panel
- Connecting to a TV
- Remote control
- First run
- Programming the remote control
- Basic operations
- Program management settings
- Editing the program
- Set your favourite program
- Watching your favourite program
- Delete a TV or Radio Program
- Skip TV or Radio Program
- Transferring a TV or radio program
- Lock the program
- 3.EPG (Electronic Program Guide)
- Sort
- LCN (logical channel number)
- Video settings
- Channel Search
- Automatic search
- Manual Search
- Time setting
- Options
- System settings
- USB
- Configure the display of movies
- Warning!
- PVR configuration
- SIMPLIFIED DECLARATION OF CONFORMITY
- Misure di sicurezza
Brand : Ferguson
Model : Ariva T30 Mini
Category : TV tuner card