MRK-38 - Food processor MPM - Free user manual and instructions
Find the device manual for free MRK-38 MPM in PDF.


| Product Type | Food processor with cooking and steaming functions |
| Model | MPM MRK-38 |
| Power Consumption | 1400 W total (1000 W motor, 1000 W heater) |
| Voltage / Frequency | 220-240 V ~, 50-60 Hz |
| Bowl Capacity | 4.5 L (max), 3.0 L usable volume |
| Speed Settings | 12 speeds (approx. 120-5000 RPM) + TURBO mode |
| Temperature Range | 37°C to 130°C (1°C increments) |
| Timer Range | 1 second to 90 minutes |
| Built-in Scales | 0-5000 g, 1 g accuracy, tare function |
| Control Panel | 7" touchscreen with knob and START/STOP button |
| Connectivity | Wi-Fi (2400-2483.5 MHz) for recipe updates |
| Accessories Included | Knife, stirrer, butterfly whisk, strainer, grating/slicing disc, steam cooking bowl with tray and lid, pusher, spatula, measuring cup |
| Bowl Material | High-grade stainless steel with graduated markings (600-3000 ml) |
| Safety Features | Interlock system for bowl and lid, overheating protection, thermal protection reset button |
| Reverse Operation | Available for speeds 1-3 |
| Automatic Programs | 9 programs: Knead, Steam, Sous Vide, Boil, Food Processor, Chop, TURBO, Scales, Autowash |
| Recipe Database | Built-in with categories (salads, desserts, soups, etc.), updateable via Wi-Fi |
| Cleaning | Most accessories dishwasher safe; bowl and drive shaft hand wash only |
| BPA-Free | All food contact accessories are BPA-free |
| Power Cord Length | 0.9 m |
Frequently Asked Questions - MRK-38 MPM
User questions about MRK-38 MPM
0 question about this device. Answer the ones you know or ask your own.
Ask a new question about this device
Download the instructions for your Food processor in PDF format for free! Find your manual MRK-38 - MPM and take your electronic device back in hand. On this page are published all the documents necessary for the use of your device. MRK-38 by MPM.
USER MANUAL MRK-38 MPM
natural_image
Modern kitchen appliance with a black lid and stainless steel bowl, mounted on a stand (no visible text or symbols)DE JELINJNGANLEITUNG
LN USER VANUAL 25
PL NSTRUKCJA O35EUG 43
UA НСТРУКШЯ 2 ЕКСПЛУАТАЦИ 62
PRZED PIERWSZYM UŻYCIEM ZAPOZNAJ SIE Z INSTRUKCJA OBSŁUGIWWW.MPM.PL
natural_image
Line drawing of a kitchen pot with lid and side handles (no text or symbols)-Read the instructions carefully before use.
-Take special care when children are near the device.
-Do not leave the device unattended during operation!
- Do not use the device for purposes other than those for which it was intended.
- Do not immerse the device, cable or charger in water or other liquids.
- Always remove the plug from the mains socket when the device is not in use or before cleaning.
- Never use a damaged device, including one with a damaged cord or plug, in which case have it repaired at an authorised service centre.
-Use of accessories not recommended by the manufacturer may cause damage to the device or personal injury.
-If the device starts producing abnormal sounds or odour, or if smoke comes out of it, switch it off immediately and contact an authorized service to have it repaired.
- Do not use the device outdoors.
-Do not touch the device with wet hands.
- Do not hang the mains cable on sharp edges or allow it to come into contact with hot surfaces.
- Make sure the mains cable is not extending over the edge of the device's support surface. This will prevent the device from being accidentally pulled down.
-Store the device in cool, dark and dry place.
- Do not put hands or any items inside the bowl during operation.
- Do not place the device near other electric devices, cookers, burners, ovens, stoves etc. and under cupboards. Do not place the device near table edges.
- Always ensure that all parts of the device are correctly fitted before starting work.
- Do not place the device near flammable materials such as curtains, tablecloths etc., because this may lead to a fire.
-The device is intended for domestic use only.
- The temperature of the device's surfaces may be higher during operation.
- The device should be connected to a mains socket outlet with a grounding pin!
- The device may be used by people with reduced physical, sensory or mental abilities, as well as those without prior knowledge or experience in using such types of device, provided that they either are supervised or have been instructed and informed about potential threats.
-Children should be supervised to ensure that they do not play with the equipment/device. - The device has not been designed to operate with an external timer switch or a separate remote control system.
-Do not connect the plug to the power socket with wet hands.
- Do not pull the plug out of the power socket by pulling the cord.
-Use the device on a smooth and stable surface.
-For the safety of children, please do not leave freely accessible parts of the packaging (plastic bags, cardboard boxes, polystyrene, etc.).
- WARNING! Do not allow children to play with the film. Danger of suffocation!
- Pay special attention when handling the blades, especially when removing and washing them.
-Do not place the device on a hot surface.
- Do not touch the blades, especially during operation. The blades' edges are very sharp. Hold the blades from the top when installing and uninstalling them.
- Before removing any rotating parts from the device, always wait until they fully stop.
- Disconnect the device from the mains as soon as it is not in use.
-Switch the device off and disconnect it from the mains before exchanging any accessories or handling any moving parts.
- Wait until the motor stops completely before disassembling the device.
- Do not use the TURBO mode or rapidly increase the motor's RPM if the device's temperature exceeds 55°C.
- Do not touch the bowl, cover, measuring cup and steam cooking bowl with bare hands, when preparing hot food. Use cooking mittens.

CAUTION! Hot surface!

CAUTION! Scalding danger!
-Check that the power parameters on the device's rating plate correspond to the parameters of your power supply network.
- Never use the device in cooking mode with an empty bowl. - Do not operate the robot at speed 12 for more than one minute.
- The device must be kept away from children. Keep the device and cable out of the reach of children.
- Disconnect the device from the power supply each time when the device is left unattended and before any assembling, disassembling or cleaning works.
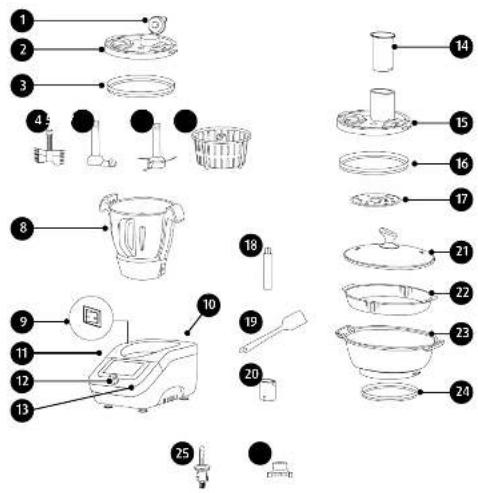
DEVICE DESCRIPTION
-
Bowl lid's tilting lip
-
Bowl's lid
-
Bowl lid's seal
-
Light product stirrer (butterfly)
-
Stirrer
-
Knife
-
Strainer
-
4.5 L bowl (max usable volume 3.0 L)
-
On / off (0/1) switch
-
Power cable
-
Housing
-
Control touch panel
-
Parameter setting knob with START/STOP button
-
Pusher
-
Disc lid
-
Disc lid's seal
-
Grating / slicing disc
-
Disc fitting pin
-
Spatula
-
30 ml measuring cup
-
Glass lid for steam cooking bowl
-
Tray for steam cooking bowl
-
Steam cooking bowl
-
Steam cooking bowls seal
-
Drive shaft with seal
-
Shaft's lock
Food contact accessories are bisphenol-free (BPA-free).
ROBOT'S ACCESSORIES AND FEATURES
CONTROL PANEL WITH TOUCH-SCREEN - the control panel uses a 7" touch-screen. The robot can be used with dedicated recipes stored in its data base and automatic programs for using its accessories. Settings can be also customized. The recipe data base can be updated via the Wi-Fi module. The bowl and lid are equipped with a system of interlocks and safety devices to prevent start-up in case of incorrect installation.
VIBRATION REDUCTION SYSTEM – an innovative flexible bowl mounting system in the food processor reduces vibrations transmitted to the food processor housing during high speeds or heavy pulp kneading.
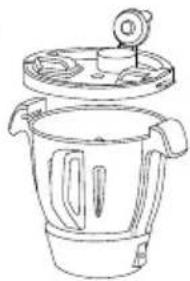
JUG AND JUG LID – bowls (8) are made of high-grade stainless steel. There is an opening for mounting the drive shaft in each bowl's bottom (25). There are six horizontal lines on the inner wall of the bowl, denoting the following capacities - 600 ml, 1000 ml, 1500 ml, 2000 ml, 2500 ml and 3000 ml, and MAX capacity (3000 ml). Each bowl is equipped with handles for easy adjustment. The lid of the bowl (2) is fitted with a seal to ensure that it is leakproof during use. The tilting lid cap (1) allows dosing of ingredients and spices. The bowl and lid are equipped with a system of interlocks and safety devices to prevent activation in case of incorrect installation.
natural_image
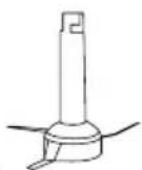
Line drawing of a kitchen pot with lid and side handles (no text or symbols)KNIFE – the knife blades (6) are made of stainless steel selected to retain their parameters for a very long service life. Its unique design provides the highest performance, even at the lowest speed setting.
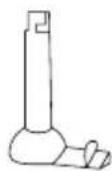
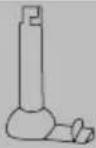
STIRRER – the shape of the stirrer (5) has been designed so that the content of the bowl is only mixed, without shredding. It is suitable for slow and long cooking of, e.g. soups. The stirrer has different mixing characteristics depending on the direction of rotation.
CAUTION! Do not set the speed higher than "3" when working with the mixer.
LIGHTWEIGHT PULP (BUTTERFLY) STIRRER – the butterfly stirrer (4) allows whisking light creams, pulps and as well as egg whites. The design prevents the whisked pulp from being completely shredded.
CAUTION! Do not set the speed higher than "4" when working with the butterfly mixer.
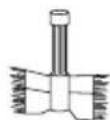
GRATING / SLICING DISC – the disc (17) is used for gratin and slicing fruit and vegetables. The function of the disc depends on the side of its mounting. The power to the disc is transferred via the pin (18).

CAUTION! Do not set the speed higher than "6" when working with the disc.
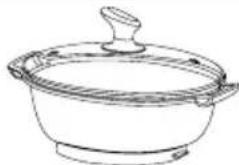
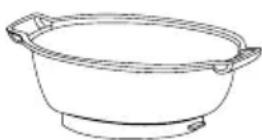
STEAM COOKING BOWL – thanks to the container (23) the food processor can work as
a steamer. It is mounted on the bowl (8). The container has a tray (22) for cooking more food at once. The whole assembly is covered with a lid (21).
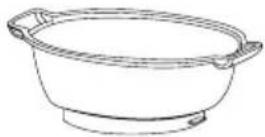
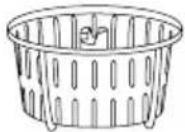
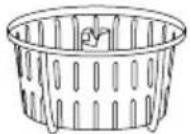
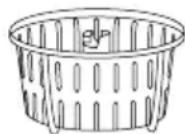
STRAINER – the strainer (7) allows cooking loose products such as rice, groats, eggs, vegetables or pieces of meat in soup. The gaps in the strainer act as a sieve, draining water from the cooked products when the strainer is removed. The measuring cup (20) on the outside of the bottom has a special hook that helps to lift the strainer from the bowl. You can also use the strainer for steaming smaller portions of food.
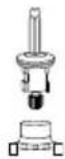
DRIVER SHAFT – the shaft (25) is attached to the bottom of the bowl. It is equipped with a silicone seal to prevent leaks in the bottom of the bowl. Additional rotary accessories can be attached to the shaft. The drive is transmitted through a hexagonal shaft tip.
SCALES – the robot is equipped with scales for measurement in the range 0-5000 g, at 1 g accuracy. The scales allow for precise dosing of ingredients, also while a programme is running In addition, the built-in scales has a zero (tare) function. The Access to the scales function is possible after selecting the appropriate function or after selecting the scales shortcut icon – ♦.

TURBO - for operating the installed knife at the maximum speed setting "12" - the food processor acts as a blender. The function only works if you hold down the "TURBO" button.
CAUTION! Do not use "TURBO" function for more than 60 seconds at a time.
REVERSE MOTOR OPERATION – the food processor's motor can operate in reverse, at speeds from "1" to "3". Used properly, reverse revs improve the work of the knife and the mixer.

CONTROL PANEL DESCRIPTION
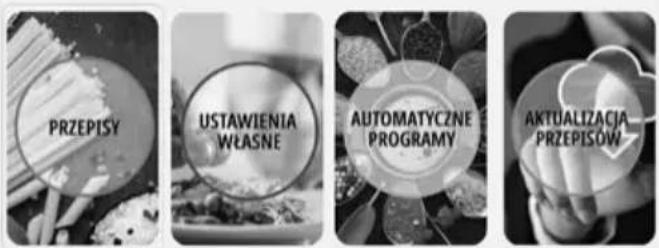
MAIN MENU
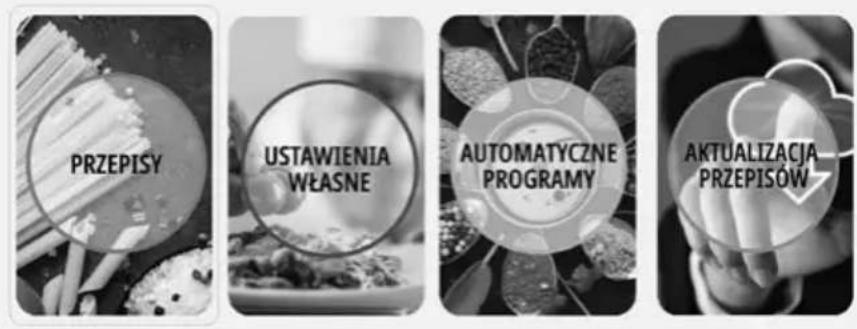
Select the "Recipes" panel to go to the device's recipe list.
Select the "Manual cooking" panel to use various operating modes.
Select the "Automatic programs" panel to use one of the device's predefined programs.
Select the "Appliance update" panel to download the latest versions of recipes and software. A message informing about a new update is displayed once an Internet connection is established.
RECIPES
The food has a data base of recipes, in the form of a cookbook divided into several chapters:
- Salads
- Cakes and desserts
- Sosy
- Breadstuff
- Soups and creams
- Main flour dishes
- Main meat dishes
- Steamed dishes
- Main fish dishes
- Pastes, starters, snacks
- Drinks and beverages
- Basic recipes
- Vegetarian dishes
- Dania Sous Vide
- New recipes
- Christmas dishes
- Snacks for kids
- Fit recipes
Each recipe includes:
-a list of ingredients
-instructions for preparations
-indicative preparation time
-required accessories
-the number of people a dish feeds
-difficulty level
Caloric value is listed for all recipes in the Fit recipes category.
The list of recipes can be arranged alphabetically or by group. Selected recipes can be also added to the “Favourite” list. Using ready recipes makes preparing meals quicker and easier. Messages displayed on the control panel’s screen will be informing the user about any available updates to the recipe list.
MANUAL COOKING
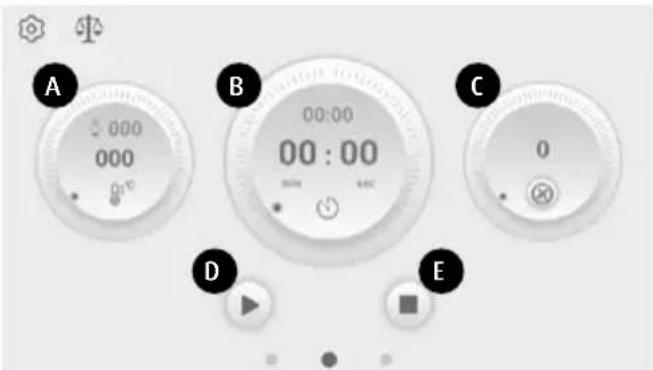
A - process temperature selection field
The available temperature range is from 37^ C to 130^ C, with 1^ C increments. “000” means ambient temperature. The steaming bowl temperature indicator shows the current temperature in the bowl with 1^ C accuracy.
B - process duration selection field
The available duration range is from 1 second to 90 minutes, with 1 s increments. Once the process starts, the timer counts down the remaining time. The smaller time indicator shows the originally set process time.
C - accessory rotation speed selection field
There are 12 rotation speed settings, with "1" indicating the lowest speed (app. 120 RPM) and "12" indicating the highest speed (app. 5000 RPM). Pressing the knife icon changes the direction of revolutions, indicated by the icon ⚙. Reverse rotation is only available for speeds "1", "2" and "3".
D - process start & pause button.
E - process stop button.
AUTOMATIC PROGRAMS
There are 9 automatic programmes available to speed up and suggest the optimum processing time for the food. Programs can be modified to a limited extent. There is an additional TURBO mode available for increasing the motor speed to the maximum and a product weighing mode.
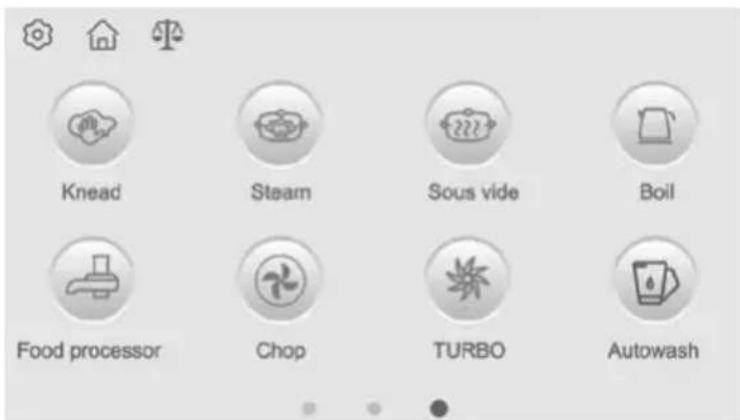
Automatic program menu
| Program / Icon | Parameters (edit range) | Equipment | Notes | |
 | Temperature: 0 (0-37°C)Time: 3 minutes (2, 3 minutes)Speed: 2 (1-2) | knife Periodical reverse rotation | ||
| Knead | ||||
 | Temperature: rising graduallyTime: 20 minutes (1-60 minutes)Speed: 0 (0-3) | none or stirrer Countdown begins once95°C is exceeded | ||
| Steam | ||||
 | Temperature: 100°C (60-100°C)Time: 60 minutes (1-90 minutes)Speed: not applicable | - | - | |
| Sous vide | ||||
 | Temperature: 100° (60-100°C)Time: Not applicableSpeed: not applicable | - | - | |
| Boil | ||||
 | Temperature: not applicableTime: 30 s (10-59 s)Speed: 5 (4-6) | grating / slicing disc | - | |
| Food processor | ||||
 | Temperature: not applicableTime: 10 s (10 s - 4 min.)Speed: 6 (1-12) | knife - | ||
| Chop | ||||
 | Temperature: not applicableTime: up to 1 min.Speed: 12 | knife The function only worksif you hold down the “TURBO” button. | ||
| TURBO | ||||
 | Weighing up to 5000 g, accuracy 1 g - Tare option available | |||
| Scales | ||||
 | Temperature: 45°CTime: 2 min.Speed: 3 and 6 | knife Use a little washingagent for better effect | ||
| Autowash | ||||
RECIPE UPDATE
This function allows you to download the latest recipe database once the manufacturer has updated it. Before updating, it is necessary to establish a connection to an available Wi-Fi wireless network. In addition to the recipes, the food processor system soft ware will be updated (if required). To connect to a Wi-Fi network, go to settings and then
select "Network settings". Select one of the available Wi-Fi networks, input the password and click "Connect".
DESCRIPTION AND MEANING OF OTHER ICONS IN THE CONTROL PANEL
| Icon (button) Meaning Notes | ||
 | START (the process) | |
 | PAUSE (the process) | |
 | STOP (the process) | |
 | Stirrer, butterfly, knife (recommended accessory) | Icon displayed when an automatic program is used |
 | Reverse rotation Maximum speed: "3" | |
 | Bowl lid placed correctly | |
 | Bowl lid missing or placed incorrectly | |
| [DBKH] | Go to the "settings" menu | |
 | Return to the home page | |
 | Shortcut to the "scales" function | |
| [YSZ6] | Sorting recipes | |
 | Alphabetical order | |
| [TWS7] | Searching recipes | Touch the screen on a text field to display a keyboard |
 | Favourites Press the icon to add the recipe to favourites | |
 | Recipe details | |
 | Network settings | |
 | Interface language | |

This device

Help

History

Product preparation time

Dish preparation time

Servings
| ACCESSORY ACTIVITY SPEED TIME TEMPERATURE | MAXIMUM AMOUNT OF FOOD IN BOWL | |||||
| meat chopping | 8-12 | 30-60 s | - | 800 g boneless meat | ||
| ice cube crushing 8-12 10-20 s - 600 g + 50-100 g of | water if needed | |||||
| sugar grinding | 8-10 | 10-30 s | - | 800 g | ||
| blending 8-12 up to 60 s - 2500 ml | ||||||
| chopping onion, celery, etc. | 5-7 | 15-60 s | - | 800 g | ||
| beans, soy, nuts, coffee, almonds | 10 | 2-3 min. | - | 800 g | ||
| light dough kneading | 1 | 2-4 min. | - | 900 g | ||
| dough kneading | 2 (1-2) | 2-3 min. | 900 g | |||
 | whisking egg whites | 4 | 2-4 min. | - | 2500 ml | |
| light product stirrer (butterfly) | whipping creams | 3 | 3-5 min. | - | 3000 ml | |
| churning butter | 4 | 5 minutes | -500 ml | |||
 | soup simmering | 1-3 | 1-90 min. | 100°C | 2500 ml | |
| other dishes requiring stirring | 1-2 as needed | as needed 2500 ml | ||||
| stirrer | ||||||
strainer
steaming rice, groats -
15-35
min.
automatic
100 g rice, 700 ml
water

Grating / slicing disc
grating / slicing 5-6 30-60 s - 600 g
natural_image
Line drawing of a cooking pot with lid and side handles (no text or symbols)Steam cooking bowl
steaming fish and
vegetables
10-60
min.
automatic -
PREPARATION FOR USE
- Remove the device from the box, remove all bags, labels, cardboard profiles and fillers. Make sure the device has not been damaged during transport. Contact the seller in case of any doubts.
- Make sure the electrical mains parameters match the technical data on the device's rating plate.
- Carefully wash and dry all elements that contact food, following the recommendation in the "CLEANING & MAINTENANCE" chapter.
- Set the device on a dry, flat, stable and horizontal surface so that the rubber feet of the device suck to the surface.
- The device has a safety system and can be activated only of the bowl (8) and the bowl lid (2) have been mounted correctly.
MOUNTING / REMOVING THE BOWL
CAUTION! Never start an incomplete device. Risk of injury!
- Make sure the seal is seated correctly on the drive shaft (25).
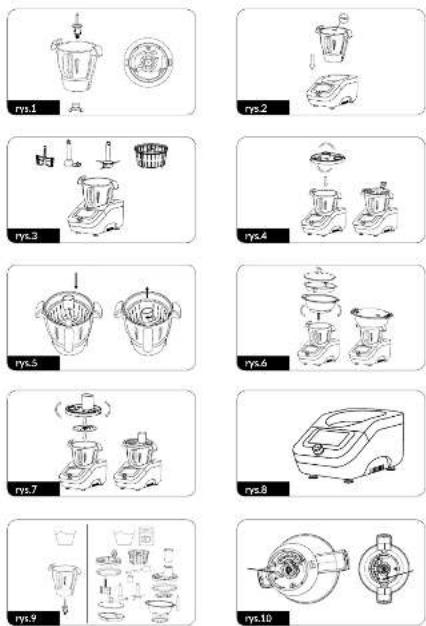
- Place the drive shaft (25) into the bowl so that its cog goes through the opening in the bowl's bottom. Lock the shaft by placing a locking ring (26) on it, from the outside, and turning it gently clockwise (Fig. 1).
- Place the bowl (8) on the device's housing (11) so that the volume markings inside the bowl are at the device's back (Fig 2).
- Place one of the accessories on the installed shaft (25) (Fig. 3):
-light product stirrer - butterfly (4)
-stirrer (5)
-knife (6)
-strainer (7)
CAUTION! The knife's blades are sharp. Handle them with extreme care!
- Make sure the seal (3) is correctly seated in the bowl lid (2). The entire circumference of the seal must be inserted in the groove.
-
Place the bowl lid (2) on the bowl (8) as shown on Fig. 4, press it and turn it so that the handles of the bowl and the lid are aligned with each other (the lid's tabs fit into the bowl sockets).
-
Follow the steps to remove the bowl from the device:
-
slightly turn the lid (2) anti-clockwise so that the lid's tabs slide out of the bowl sockets and gently remove the lid
-remove the bowl from the food processor's base
-remove the accessory from the shaft (butterfly, stirrer, knife)
- remove the strainer using the strainer handle placed in the measuring cup's bottom (Fig. 5).
MOUNTING / REMOVING THE STEAM COOKING BOWL
- Follow the steps in Point 1-3 in the chapter MOUNTING / REMOVING THE BOWL.
- Make sure the seal (24) is correctly seated in the steam cooking bowl (23). The entire circumference of the seal must be in contact with the external part of the ring inside the bowl.
- Place the steam cooking bowl (23) on the bowl (8) as shown on Fig. 6, press it and turn it so that the handles of the two bowls are aligned with each other (the bowl tabs fit into the bowl sockets). Place the tray (22) on the bowl (23) i close it with a lid (21).
- Follow the steps to remove the steam cooking bowl from the device:
-remove the lid (21) and the tray (22) - slightly turn the bowl (23) anti-clockwise so that the bowl tabs slide out of the bowl sockets and gently remove the bowl
-remove the bowl from the food processor's base
MOUNTING / REMOVING THE GRATING / SLICING DISC
- Follow the steps in Point 1-3 in the chapter MOUNTING / REMOVING THE BOWL. Mount the disc fitting pin (18) on the drive shaft (25).
- Place the grating / slicing disc (17) on the pin (18), with the side of the disc you intend to use facing up (grating or slicing).
- Make sure the seal (16) is correctly seated in the disc's cover (15). The entire circumference of the seal must be inserted in the groove.
- Place the disc lid (15) on the bowl (8) as shown on Fig. 7, press it and turn it so that the handles of the bowl and the lid are aligned with each other (the lid's tabs fit into the bowl sockets).
-
Place the pusher (14) in the disc's lid.
-
Follow the steps to remove the disc from the device:
-
slightly turn the lid (15) anti-clockwise so that the lid's tabs slide out of the bowl sockets and gently remove the lid
-remove the bowl from the food processor's base
-remove the disc (17) from the pin (18)
-remove the pin (18) from the shaft (25).
USING THE FOOD PROCESSOR
The following operating descriptions contain a diagram of how to use the appliance. You will find detailed recipes for individual dishes, their ingredients, proportions and weight in the food processor's recipe database.
- Place the drive shaft (25) in the bowl and mount the bowl in the device's base. xxx
- Depending on the type of food you wish to prepare, use the correct accessory: knife (6), stirrer (5), butterfly (4) or strainer (7).
CAUTION! The knife's blades are very sharp. Handle them with extreme care.
- Place the ingredients into the bowl. Do not exceed the maximum volume of the bowl marked with a horizontal line (upper line max - 3000 ml). If you wish to cook food in the strainer (7), pour enough water (broth, stock) into the bowl to cover the food in the strainer. When adding ingredients to the bowl, you can dose them precisely thanks to the scales (see: "SCALES"). If you wish to cook according to recipes, fill the bowl with ingredients as in the particular recipe.
CAUTION! Do not fill the bowl over 3000 ml (MAX line inside the bowl) with ingredients or over 2500 ml for liquids (water, soup etc.)
CAUTION! Be extra careful when cooking food. Do not start the device with an empty bowl. Make sure there is an adequate amount of water in the bowl when cooking food.
CAUTION! Pay special attention not to splash the device's base xxx when filling the bowl with ingredients. Danger of electric shock.
- Place the bowl lid (2) on the bowl (8).
- Connect the device to the mains and switch it on with the button (9) on its left side. The device will enter standby mode if no actions are taken within 5 minutes. To re-activate it, touch the control panel.
- Once the food processor is activated, select the operating mode:
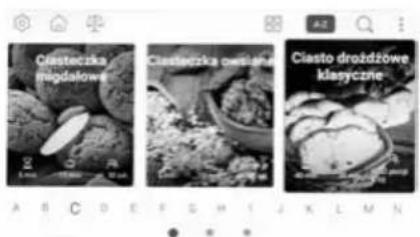
Recipes (example) Manual cooking Automatic programs
The currently selected operating mode is indicated by the red dot in display's bottom part.
Recipes – select a recipe and follow the displayed commands.
Manual cooking – use the touch screen to select temperature, time and speed.
Automatic programs – select an automatic program and make changes to parameters, if needed.
Once a parameter is selected on the panel, the value range can be selected from the control panel or with the knob (13). Press icon ▶ to start the process. Press the knob to start or stop the process. The knob's green backlight indicates an ongoing process.
CAUTION! Do not set the speed to more than "3" if the declared temperature exceeds 55°C. Scalding danger!
CAUTION! Do not set the speed to more than "3" when using the stirrer (5).
CAUTION! Do not set the speed higher than "4" when working with the butterfly (4).
CAUTION! When cooking or heating up the contents of the bowl, adding ingredients, opening or closing the lid's tilting lip or emptying the bowl, always use the bowl's side handles and cooking mittens. If the bowl is full, never use the handle only. This is especially important when moving or pouring the bowl's hot contents. SCALDING DANGER!
- Pay attention to the ongoing process, make corrections to the settings and the quantity of ingredients if necessary, after stopping the food processor. You can add smaller pieces of ingredients through the lid's tilting lid (1).
CAUTION! If you notice that the food processor's RPM drop significantly or oscillate when kneading heavy pulp or dough, immediately stop the process. Reduce the amount of processed food.
CAUTION! After the food processor finished kneading heavy pulp or dough, allow it to cool down for about 15 minutes! DO NOT IMMEDIATELY START ANOTHER RECIPE!
-
When adding ingredients to the bowl, you can dose them precisely thanks to the scales (see: "SCALES"), but the selected process must be first paused (PAUSE).
-
Once the countdown is finished, the activity is completed. You can stop any activity at any time by pressing the "STOP" button. If the duration of activity is counted from zero, it will automatically stop after 90 minutes.
- Once the process is completed, check the processed food. Alternatively, start a new process with any necessary corrections.
- Switch the device off with the button (9) and disconnect it from the mains. Remove the bowl lid and the bowl. Use the spatula (19) to remove the contents of the bowl, if needed.
- Wait until the device and its accessories cool down and promptly clean them.
STEAMING
- Place the drive shaft (25) in the bowl and mount the bowl in the device's base. xxx
- Pour 600-800 ml of water into the bowl (8) (up to the marking inside the bowl) - this is the default amount of water for steaming in automatic program (no time correction). Use more water if the steaming takes longer.
- Place the steaming bowl (23) on the bowl (8).
- Put food ingredients in the steaming bowl (23). Use the tray (22) for larger amounts of ingredients. Place the lid (21) on top of the bowl.
- Connect the device to the mains and switch it on with the button (9) on its left side.
- Once the food processor is switched on, select "Automatic Programs" and then "Steam".
- Select steam generation intensity. There are three intensity levels available, indicated by a flashing bowl icon on the display. Set the process duration - the default is 20 minutes. Make sure to pour more water into the bowl for longer steaming.
- Start the process by pressing ▶ or the knob (13). The countdown starts when the water's temperature exceeds 95°C.
- Periodically check the processed food.
CAUTION! Around 500 ml of water is used every 30 minutes during steaming. Steaming should be limited to 1 hour. Periodically check the amount of water in the bowl. If all water boils out, the device may be damaged or a fire may even start.
CAUTION! Use cooking mittens when removing the processed food or checking it.
- Food can also be steamed in a strainer (7) placed in the bowl. Please make sure that the surface of water in the bowl must be below the strainer's bottom and that the water's volume may not exceed 600 ml. Alternatively, when cooking rice, groats, eggs or potatoes, the products may be completely submerged in water.
- To stop the food preparation process at any time, press the button ☐.
- Once the food is ready, switch the device off by pressing the "ON/OFF" button (9), disconnect it from the mains, remove the bowl and serve the food.
- Wait until the device and its accessories cool down and promptly clean them.
SOUS VIDE COOKING
SOUS VIDE cooking (French for “vacuum cooking”) consists in cooking meals in vacuum-sealed bags in water, slowly and in with high precision.
That way, nutrients, vitamins and minerals can be better preserved in the cooked food. The entire process takes place in an adequately low temperature and for a specified duration.
- The recipe (temperature and time) must be closely followed.
- The cooked food should be enjoyed promptly after cooking or adequately preserved.
GRATING AND SLICING
- Place the drive shaft (25) in the bowl and mount the bowl in the device's base. xxx
- Place the pin (18), disc (17) and disc's cover (15) on the shaft. Make sure to place the disc with the side you intend to use facing up (grating or slicing).
CAUTION! The grating and slicing disc is sharp. Handle them with extreme care!
- Prepare the ingredients to be cooked. Slice the fruit and vegetables so that they can be put into the bowl through the disc cover's opening. Remove stones and kernels from the fruit.
- Connect the device to the mains and switch it on with the button (9) on its left side.
- Once the food processor is on, select AUTOMATIC PROGRAMS and then select Grating & slicing. If necessary, adjust the time and speed settings.
- Once the parameters are selected, start the process by pressing ▶. To stop the process press ■
- Put the products into the opening in the disc's cover (15) slowly and push in with the pusher (14). Make sure not to fill in the bowl completely with the processed food. Stop the food processor periodically to remove the processed food from the bowl.
CAUTION! Please not that some smaller parts of the fruit and vegetables may remain intact - this is a natural occurrence. To minimise this effect, the pieces to be put into the bowl should be as large as possible.
NOTE: The disc's cover (15) is not designed to be put on the bowl for thermal processing or when using the knife or the stirrer.
- Once the program is complete, switch the device off with the switch (9), disconnect it from the mains, empty the bowl and clean it.
PRACTICAL COOKING TIPS
Follow the tips below to fully enjoy working with your MRK-38 food processor and achieve the best results.
- Always use the highest speed settings (8-12) to grind ingredients (e.g. when grinding vegetables, nuts, dry bread rolls, coffee beans or rice into very small pieces or when pulverizing them). It is recommended to start with lower speed and gradually increase it.
- Always use the highest speed settings (9-12) to pulverize ingredients (e.g. spices, chocolate, crystal sugar). It is recommended to start with lower speed and gradually increase it.
- Use medium speed settings (4-6) to slice ingredients (chopping fruit and vegetables into very small pieces). It is recommended to add a little water into the bowl when chopping cabbage or lettuce.
- When doing this, do not fill the bowl to over half of its nominal volume. Use the knife (6) for such operations. The suggested processing duration is a dozen seconds and depends on the quality, firmness and amount of ingredients.
- Food emulsification (bringing products to an emulsified state e.g. mayonnaise, sauces) can be carried out with the butterfly whisk (4) (stirring speed 1-4). The time depends on the ingredients of the dish (from 20 seconds to several minutes).
- Whisking (bringing cream or egg whites to a firm state) is best done with the butterfly (4), at medium speed (2-4). Given the eggs freshness, their size and temperature at the start of the process, it is difficult to specify the duration of whisking. As a rule of thumb, 1 minute can be used as a starting figure, to be extended if needed.
- Preparing dough is best done using the Kneading program, slightly modified, if needed. The butterfly (4) should be used for kneading light dough, but for heavy dough (pizza dough, yeast dough) the knife (6) is the better choice.
- Please note that some ingredients may stick to the bowl's bottom and get burnt if fried too long. This especially applies to products containing natural sugar, e.g. onion. This is a natural process and
not a sign of failure of the device. Consequently, it is recommended to mind the frying time or to reduce the temperature.
- It is recommended to divide the ingredients into portions to achieve a better chopping or grinding effect when using the knife (e.g. meat, vegetables). Chopping is more accurate when done with smaller portions.
CLEANING AND MAINTENANCE
CAUTION! Disconnect the device from the mains and wait until it cools down before cleaning! CAUTION! Do not submerge the device in water or other liquids.
CAUTION! Remove all accessories before cleaning the device.
CAUTION! The knife's blades are sharp. Handle them with extreme care.
- The device and its accessories must be cleaned after every use. This guarantees its full operating capability.
- When cleaning it, do not use aggressive cleaning agents, solvents or hard, abrasive materials that would scratch the surface.
- Clean the device's housing (8) with a damp cloth and then wipe it with a dry one. Use a damp cloth with cleaning agents for stubborn dirt.
- You can pre-wash the inside of the bowl by pouring about 0.6l of water with detergent into it and setting the knife speed to 6 for about 30 seconds. This operation is enough to initially clean the inside of the bowl, but it still needs to be washed thoroughly. Alternatively, the program AU-TOWASH can be used. Before pre-washing, make sure that the knife is properly placed on the drive shaft and that there are no food residues under the knife. In the pre-wash program, do not use a stirrer and butterfly.
- If there are any signs of burnt grime in the bowl, pour in some water and citric acid solution and wait a few minutes. The plastic (black) elements of the bowl, lids and accessories may become discoloured if too much citric acid is used. This has no effect on the device's operation.
- Remove all accessories (Fig. 9), wash in warm water with cleaning agent, rinse and dry thoroughly. The accessories can be also washed in a dishwasher. Please note that the bowl (8) and the drive shaft (25) installed in the bowl (Fig. 9) must not be washed in a dishwasher. The bowl contains electrical components that may accumulate condensation and become damaged if washed in a dishwasher.
- Make sure the rubber seals (3), (16) and (24) are clean and correctly seated. The seals may be removed and washed independently, but must be then correctly re-seated. The seals are of different dimensions and are not interchangeable.
-
Store the device in a dry place that is not exposed to the sun. Place the device in a cardboard box for longer storage.
-
The bowl features an overheating protection. If the temperature in the bowl exceeds a certain, safe level, the bowl's heating function will be deactivated until the bowl's thermal protection is reset. The protection reset button is located in the bowl's bottom part (Fig. 10). Use the tip of a small screwdriver or a pen to press the button. Do not use any sharp tools to do that. An audible click indicates that the protection has been reset.
Before resetting the protection, please note that:
- overheating may result from the failure to use the knife or the stirrer, cooking with an empty bowl or cooking at an excessive temperature or for too long. Never let the food get burnt in the bowl. If the food is starting to get burnt, reduce the temperature and add some water or grease.
- Empty the bowl and let it cool down before resetting the protection.
- Never place the bowl in the fridge.
CAUTION! If the thermal protection keeps switching the device off very frequently, this may indicate a technical problem. Do not use a damaged bowl. Contact an authorised service centre.
CAUTION! Do not use the bowl if the thermal protection switch is damaged.
CAUTION! Do not use sharp objects, abrasive polishes, solvents or other strong chemicals for cleaning since their use may cause damages to the device.
TROUBLESHOOTING
PROBLEM CAUSE SOLUTION
| The device will not start or suddenly stops | Incorrect assembly | Assemble the device correctly |
| Knife or stirrer blocked Too many or too large pieces of processed food | Do not fill the bowl over the maximum level; chop the food into smaller pieces | |
| Smell indicating the device is overheating The device's elements are heated up for the first time | This is a normal occurrence and will not take place later | |
| The device is overloaded | Switch the device off and wait until it cools down; do not exceed the recommended working time | |
| The bowl is not heating up The bowl's thermal protection has been triggered | Reset the protection | |
If the device is experiencing a problem that is not covered in this manual and which cannot be solved with the above solutions, please call our hotline or visit our website.
TECHNICAL DATA
| Voltage: 220-240 V~, 50-60 Hz | |
| Power: 1400 W | |
| Heater power: 1000 W | |
| Motor power: 1000 W | |
| Wi-Fi frequency range: | 2400~2483.5 MHz |
| WiFi max transmission power: | 20 dBm |
| Bowl capacity | 3.0 L / 4.5 L (max) |
| Max scales load | 5000 g |
Power cord length: 0.90 m

The manufacturer reserves the right to modify the contents of the operating instruction or the graphical elements (icons, images) in the updated software. Any such changes will have no effect on the device's operation.
The product may be slightly different from the photos/drawings contained in the instructions and other marketing materials.
SIMPLIFIED EU DECLARATION OF CONFORMITY
MPM agd S.A. hereby represents that the food processor MRK-38 satisfies the requirements and standards listed in EU directives and national regulations. As a radio device, it conforms to the Directive 2014/53/EU of 16 April, 2014 on the harmonisation of the laws of the Member States relating to the making available on the market of radio equipment and repealing Directive 1999/5/EC.
The full text of the declaration is available at:
https://mpm.pl/produkty/wyposazenie-kuchni/roboty-kuchenne/termorobot-mrk-38/
Proper disposal of the product (waste electrical and electronic equipment)
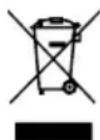
Marking on the product indicates that after the service-life of the product expires, it should not be disposed with other type of municipal waste. Used equipment may have a negative impact on the environment and health of people due to potentially containing hazardous substances, mixtures and components. Mixing electric waste with other types of waste or disassembling those in an unprofessional manner may cause a release of substances that are hazardous to the environment and health. Used equipment should be handed-over to a point for collection of electric waste. In order to obtain detailed information regarding the electric waste collection points, the user should contact the municipal point of electric waste collection or used equipment processing department.
WSKAZÓWKI DOTYCZĄCE BEZPIECZEŃSTWA UŻYTKOWANIA:
FUNKCJE WYPOSAŻENIA I CECHY ROBOTA
natural_image
Line drawing of a kitchen pot with lid and side handles (no text or symbols)natural_image
Line drawing of a bowl with lid and side handles (no text or symbols)PROBLEMY I SPOSÓB ICH ROZWIAZANIA
PROBLEM PRZYCZYNA ROZWIĄZANIE
natural_image
Line drawing of a kitchen pot with lid and side handles (no text or symbols)natural_image
Two technical line drawings of a mechanical component with no visible text or symbols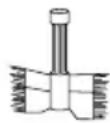


Legible signature of the buyer

- CAUTION! Hot surface!
- CAUTION! Scalding danger!
- DEVICE DESCRIPTION
- ROBOT'S ACCESSORIES AND FEATURES
- CONTROL PANEL DESCRIPTION
- MAIN MENU
- RECIPES
- MANUAL COOKING
- AUTOMATIC PROGRAMS
- RECIPE UPDATE
- PREPARATION FOR USE
- MOUNTING / REMOVING THE BOWL
- CAUTION! Never start an incomplete device. Risk of injury!
- CAUTION! The knife's blades are sharp. Handle them with extreme care!
- MOUNTING / REMOVING THE STEAM COOKING BOWL
- MOUNTING / REMOVING THE GRATING / SLICING DISC
- USING THE FOOD PROCESSOR
- STEAMING
- CAUTION! Around 500 ml of water is used every 30 minutes during steaming. Steaming should be limited to 1 hour. Periodically check the amount of water in the bowl. If all water boils out, the device may be damaged or a fire may even start.
- CAUTION! Use cooking mittens when removing the processed food or checking it.
- SOUS VIDE COOKING
- GRATING AND SLICING
- CAUTION! The grating and slicing disc is sharp. Handle them with extreme care!
- CAUTION! Please not that some smaller parts of the fruit and vegetables may remain intact - this is a natural occurrence. To minimise this effect, the pieces to be put into the bowl should be as large as possible.
- NOTE: The disc's cover (15) is not designed to be put on the bowl for thermal processing or when using the knife or the stirrer.
- PRACTICAL COOKING TIPS
- CLEANING AND MAINTENANCE
- TROUBLESHOOTING
- SIMPLIFIED EU DECLARATION OF CONFORMITY
- The full text of the declaration is available at:
- Proper disposal of the product (waste electrical and electronic equipment)
- WSKAZÓWKI DOTYCZĄCE BEZPIECZEŃSTWA UŻYTKOWANIA:
- FUNKCJE WYPOSAŻENIA I CECHY ROBOTA
- PROBLEMY I SPOSÓB ICH ROZWIAZANIA
Brand : MPM
Model : MRK-38
Category : Food processor