
SR-HD2700US - DVD player JVC - Free user manual and instructions
Find the device manual for free SR-HD2700US JVC in PDF.
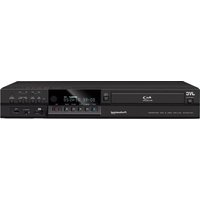


| Product Type | DVD Player |
| Brand | JVC |
| Model | SR-HD2700US |
| Dimensions (W x H x D) | 430 x 35 x 250 mm |
| Weight | 2.0 kg |
| Power Supply | AC 120V, 60Hz |
| Power Consumption | 10 W (standby: <1 W) |
| Playable Discs | DVD-Video, DVD-R/RW, DVD+R/RW, CD, CD-R/RW, VCD, SVCD |
| Playable File Formats | MP3, JPEG, DivX, WMA |
| Video Output | Composite, S-Video, Component (YUV) |
| Audio Output | Stereo RCA, Coaxial Digital |
| Remote Control | Included (AAA batteries required) |
| Maintenance | Clean exterior with soft cloth; use lens cleaner disc for laser lens |
| Safety Class | Class II (double insulation) |
| Spare Parts Availability | Replacement remote and power cord available |
| Repairability | User-replaceable fuse; other repairs by qualified technician |
| Manual Language | English (PDF available) |
Frequently Asked Questions - SR-HD2700US JVC
User questions about SR-HD2700US JVC
0 question about this device. Answer the ones you know or ask your own.
Ask a new question about this device
Download the instructions for your DVD player in PDF format for free! Find your manual SR-HD2700US - JVC and take your electronic device back in hand. On this page are published all the documents necessary for the use of your device. SR-HD2700US by JVC.
USER MANUAL SR-HD2700US JVC
SR-HD2700U SR-HD2700E
INSTRUCTIONS


dts-HD
Master Audio | Essential


For Customer Use:
Enter below the Model No. and Serial No. which is located on the body. Retain this information for future reference.
Model No.
Serial No.
Please read the following before getting started:
Thank you for purchasing this product. Before operating this unit, please read the instructions carefully to ensure the best possible performance. In this manual, each model number is described without the last letter (U/E) which means the shipping destination. (U: for USA and Canada, E: for Europe) Only "U" models (SR-HD2700U) have been evaluated by UL.
Safety Precaution
Cautions CLASS 1 LASER PRODUCT
CAUTION
RISK OF ELECTRIC SHOCK DO NOT OPEN
CAN ICES-3 A / NMB-3 A
NOTICE
RISK OF ELECTRIC SHOCK DO NOT OPEN.


The lightning flash with arrowhead symbol, within an equilateral triangle, is intended to alert the user to the presence of uninsulated “dangerous voltage” within the product’s enclosure that may be of sufficient magnitude to constitute a risk of electric shock to persons.

The exclamation point within an equilateral triangle is intended to alert the user to the presence of important operating and maintenance (servicing) instructions in the literature accompanying the appliance.
CAUTION:
THIS UNIT IS A CLASS 1 LASER PRODUCT. HOWEVER, THIS UNIT USES A VISIBLE LASER BEAM WHICH COULD CAUSE HAZARDOUS RADIATION EXPOSURE IF DIRECTED. BE SURE TO OPERATE THE UNIT CORRECTLY AS INSTRUCTED. WHEN THIS UNIT IS PLUGGED INTO THE WALL OUTLET, DO NOT PLACE YOUR EYES CLOSE TO THE OPENING OF THE DISC TRAY AND OTHER OPENINGS TO LOOK INTO THE INSIDE OF THIS UNIT.
USE OF CONTROLS OR ADJUSTMENTS OR PERFORMANCE OF PROCEDURES OTHER THAN THOSE SPECIFIED HEREIN MAY RESULT IN HAZARDOUS RADIATION EXPOSURE.
DO NOT OPEN COVERS AND DO NOT REPAIR YOURSELF. REFER SERVICING TO QUALIFIED PERSONNEL.
CAUTION:
THIS UNIT IS A CLASS 1 LASER PRODUCT. HOWEVER, THIS UNIT USES A VISIBLE LASER BEAM WHICH COULD CAUSE HAZARDOUS RADIATION EXPOSURE IF DIRECTED. BE SURE TO OPERATE THE UNIT CORRECTLY AS INSTRUCTED.
WHEN THIS UNIT IS PLUGGED INTO THE WALL OUTLET, DO NOT PLACE YOUR EYES CLOSE TO THE OPENING OF THE DISC TRAY OR OTHER OPENINGS TO LOOK INTO THE INSIDE OF THIS UNIT.
USE OF CONTROLS OR ADJUSTMENTS OR PERFORMANCE OF PROCEDURES OTHER THAN THOSE SPECIFIED HEREIN MAY RESULT IN HAZARDOUS RADIATION EXPOSURE. DO NOT OPEN COVERS AND DO NOT REPAIR YOURSELF. REFER SERVICING TO QUALIFIED PERSONNEL.
REPRODUCTION OF LABELS
WARNING LABEL INSIDE OF THE UNIT

This unit applies to the standard "IEC60825-1:2007" for laser products.
WARNING:
TO PREVENT FIRE OR SHOCK HAZARD, DO NOT EXPOSE THIS UNIT TO RAIN OR MOISTURE.
CAUTION:
This unit should be used with AC 120V~, 60Hz (SR-HD2700U only). To prevent electric shocks and fire hazards, DO NOT use any other power source.
CAUTION:
TO PREVENT ELECTRIC SHOCK, MATCH WIDE BLADE OF PLUG TO WIDE SLOT, FULLY INSERT.
ATTENTION:
TO PREVENT ELECTRIC SHOCK, INSERT THE WIDEST BLADE OF THE PLUG INTO THE CORRESPONDING OUTLET AND PUSH IN FULLY.
Note to CATV system installer:
This reminder is provided to call the CATV system installer's attention to Article 820-40 of the NEC that provides guidelines for proper grounding and, in particular, specifies that the cable ground shall be connected to the grounding system of the building, as close to the point of cable entry as practical.
"WARNING" and the following or equivalent. "To reduce the risk of fire or electric shock, do not expose this apparatus to rain or moisture."
A warning that an apparatus with CLASS I construction shall be connected to a MAINS socket outlet with protective earthing connection.
Batteries shall not be exposed to excessive heat such as sunshine, fire or the like.
When the main plug or appliance coupler shall remain readily operable.
This product contains a CR Coin Cell Lithium Battery which contains Perchlorate Material – special handling may apply. See www.dtsc.ca.gov/hazardouswaste/perchlorate
IMPORTANT SAFETY INSTRUCTIONS
1) Read these instructions. 2) Keep these instructions. 3) Heed all warnings. 4) Follow all instructions. 5) Do not use this apparatus near water. 6) Clean only with dry cloth. 7) Do not block any ventilation openings. Install in accordance with the manufacturer's instructions.
8) Do not install near any heat sources such as radiators, heat registers, stoves, or other apparatus (including amplifiers) that produce heat.
9) Do not defeat the safety purpose of the polarized or grounding-type plug. A polarized plug has two blades with one wider than the other. A grounding type plug has two blades and a third grounding prong. The wide blade or the third prong are provided for your safety. If the provided plug does not fit into your outlet, consult an electrician for replacement of the obsolete outlet.
10) Protect the power cord from being walked on or pinched particularly at plugs, convenience receptacles, and the point where they exit from the apparatus.
11) Only use attachments/accessories specified by the manufacturer.
12) Use only with the cart, stand, tripod, bracket, or table specified by the manufacturer, or sold with the apparatus. When a cart is used, use caution when moving the cart/apparatus combination to avoid injury from tip-over.
13) Unplug this apparatus during lightning storms or when unused for long periods of time.
14) Refer all servicing to qualified service personnel. Servicing is required when the apparatus has been damaged in any way, such as power-supply cord or plug is damaged, liquid has been spilled or objects have fallen into the apparatus, the apparatus has been exposed to rain or moisture, does not operate normally, or has been dropped.

Failure to heed the following precautions may result in damage to the unit, remote control or disc/cassette.
1. DO NOT place the unit—
—in an environment prone to extreme temperatures or humidity. —in direct sunlight. —in a dusty environment. —in an environment where strong magnetic fields are generated. —on a surface that is unstable or subject to vibration.
- DO NOT block the unit's ventilation openings or holes. (If the ventilation openings or holes are blocked by a newspaper or cloth, etc., the heat may not be able to get out.)
- DO NOT place heavy objects on the unit or remote control.
- DO NOT place anything which might spill on top of the unit or remote control.
(If water or liquid is allowed to enter this equipment, fire or electric shock may be caused.)
- DO NOT expose the apparatus to dripping or splashing.
- DO NOT use this equipment in a bathroom or places with water. Also DO NOT place any containers filled with water or liquids (such as cosmetics or medicines, flower vases, potted plants, cups, etc.) on top of this unit.
- DO NOT place any naked flame sources, such as lighted candles, on the apparatus.
- AVOID violent shocks to the unit during transport.
CAUTION: Changes or modifications not approved by JVC could void user's authority to operate the equipment.
Declaration of Conformity
Model Number: SR-HD2700U
Trade Name: JVC
Responsible Party: JVCKENWOOD USA Corporation
Address: 1700 Valley Road Wayne, N.J. 07470
Telephone Number: 973-317-5000
This device complies with Part 15 of FCC Rules
Operation is subject to the following two conditions:
(1) This device may not cause harmful interference, and (2) this device must accept any interference received, including interference that may cause undesired operation.
"This equipment has been tested and found to comply with the limits for a Class A digital device, pursuant to Part 15 of the FCC Rules. These limits are designed to provide reasonable protection against harmful interference when the equipment is operated in a commercial environment.
This equipment generates, uses, and can radiate radio frequency energy and, if not installed and used in accordance with the instruction manual, may cause harmful interference to radio communications.
Operation of this equipment in a residential area is likely to cause harmful interference in which case the user will be required to correct the interference at his own expense."
When the equipment is installed in a cabinet or a shelf, make sure that it has sufficient space on all sides to allow for ventilation (10cm or more on both sides, on top and at the rear).
When discarding batteries, environmental problems must be considered and the local rules or laws governing the disposal of these batteries must be followed strictly.
Use the supplied power cord.
(If not, fire or electric shock may be caused.)
DON'T continue to operate the equipment if you are in any doubt about it working normally, or if it is damaged in any way—switch off, withdraw the mains plug and contact the local dealers in your area.
DO be careful with glass panels or doors on equipment.
DO contact the local dealers in your area if you are ever in doubt about the installation, operation or safety of your equipment.
NEVER let anyone especially children push anything into holes, slots or any other opening in the case—this could result in a fatal electrical shock.
MOISTURE CONDENSATION
Moisture in the air will condense on the unit when you move it from a cold place to a warm place, or under extremely humid conditions—just as water droplets form on the surface of a glass filled with cold liquid. In conditions where condensation may occur, disconnect the unit's power plug from the wall and keep it disconnected for a few hours to let the moisture dry, then turn on the unit.
Batteries—Incorrect use of batteries may cause the batteries to burst or ignite. A leaky battery may corrode the equipment, dirty your hands or spoil your clothing. In order to avoid these problems, make sure to observe the precautions below:
- Use the specified batteries only.
- Install the batteries with due attention to the plus (+) and minus (-) sides of the batteries according to the instructions in the compartment.
- Do not mix old and new batteries.
- Do not mix batteries of different types. Voltage specifications of batteries of the same shape may vary. -Replace an exhausted battery with a new one promptly.
- If you will not use the remote control for a long time, remove the batteries.
- If leaked battery fluid gets on your skin or clothing, rinse immediately and thoroughly. If it gets into you eye, bathe your eye well rather than rubbing and seek medical treatment immediately. Leaked battery fluid that gets into your eye or your clothing may cause a skin irritation or damage your eye.
- Do not put the batteries in a place where young children can reach.
DISCLAIMER OF LIABILITY
JVC shall not be liable for any loss relating to the unit's failure to properly record, store or playback any content (video, audio or otherwise) for any reason whatsoever. Any applicable warranties shall only cover replacement or repair of the effected unit, and shall not apply to recovery or replacement of lost content.
ATTENTION:
■ Using a mobile phone in the vicinity of the unit may cause picture vibration on the TV screen or change the screen to a black back display. ■ Some TVs or other appliances generate strong magnetic fields. Do not place such appliances on top of the unit as it may cause picture disturbance. When moving the product, press (I)/I to turn off the power, and wait at least 30 seconds before unplugging the power cord. Then, wait at least 2 minutes before moving the product. ■ If there is a power outage when using the unit, the recorded data may be erased. It is recommended to back up discs which contain important recordings periodically (every few years). As digital signals do not deteriorate, failure to play back or record might arise due to the effects of the disc aging through the years depending on the storage environment. ■ Recorded programs and data cannot be restored once the disc or tape is damaged.
- SR-HD2700U can play back and record only NTSC signals.
- SR-HD2700E can play back and record only PAL signals. NTSC signals can also be played back on the BD/DVD deck.
The hard disk is a consumable item. Replacement is recommended after 10000 hours of use (if use in a 25°C environment). For information on maintenance planning and costs, contact the local dealers in your area. The fan motor is a consumable item. Replacement is recommended after 30000 hours of use (if use in a 25°C environment). For information on maintenance planning and costs, contact the local dealers in your area.

If this symbol is shown, it is only valid in the European Union.
HOW TO USE THIS INSTRUCTION MANUAL
- All major sections and subsections are listed in the Table Of Contents on page 5. Use this when searching for information on a specific procedure or feature.
- The mark signals a reference to another page for instructions or related information.
- Operation buttons necessary for the various procedures are clearly indicated through the use of illustrations at the beginning of each major section.
BEFORE YOU INSTALL YOUR NEW UNIT ...
... please read the sections/literature listed below. - "Cautions" on page 2 "IMPORTANT SAFETY INSTRUCTIONS" on page 3 to 4
The rating plate and the safety caution are on the rear of the unit.
WARNING : DANGEROUS VOLTAGE INSIDE WARNING : TO PREVENT FIRE OR SHOCK HAZARD, DO NOT EXPOSE THIS UNIT TO RAIN OR MOISTURE.
Dear Customer, [European Union]
This apparatus is in conformance with the valid European directives and standards regarding electromagnetic compatibility and electrical safety.
European representative of JVC KENWOOD Corporation is: JVC Technical Services Europe GmbH Konrad-Adenauer-Allee 1-11 61118 Bad Vilbel Germany
This is a Class A product. In a domestic environment this product may cause radio interference in which case the user may be required to take adequate measures.
IMPORTANT:
■ Please read the various precautions on page 5 to 7 before installing or operating the unit. It should be noted that it may be unlawful to re-record pre-recorded tapes, DVDs, or discs without the consent of the owner of copyright in the sound or video recording, broadcast or cable programme and in any literary, dramatic, musical, or artistic work embodied therein.
CAUTION:
When you are not using the unit for a long period of time, it is recommended that you disconnect the power cord from the mains outlet. - Dangerous voltage inside. Refer internal servicing to qualified service personnel. To prevent electric shock or fire hazard, remove the power cord from the mains outlet prior to connecting or disconnecting any signal lead or aerial. ■ The mains plug shall remain readily operable.
The STANDBY/ON ⏻/I button does not completely shut off mains power from the unit, but switches operating current on and off. " ⏻" shows electrical power standby and " I" shows ON.
A warning that an apparatus with CLASS I construction shall be connected to a MAINS socket outlet with protective earthing connection.
Main Plug
The Main Plug is used as the disconnect device, the disconnect device shall remain readily operable
Even if the display window of the unit is unlit, the main power supply is not cut off unless the power cord is unplugged.
The main power supply for this unit is controlled by inserting or removing the power plug.
POWER CONNECTION
The power supply voltage rating of this product is AC 220 - 240 V (For European countries, Asian countries, and United Kingdom).
The power cord attached conforms to the following power supply voltage and countries. Use only the power cord designated to ensure safety and EMC regulations of each country.
For European and Asian countries: AC 220 – 240 V
For United Kingdom: AC 220 - 240 V


This plug will fit only into a grounded power outlet. If you are unable to insert the plug into the outlet, contact your electrician to install the proper outlet. Do not defeat the safety purpose of the grounded plug.
- This product should be operated only with the type of power source indicated on the label. If you are not sure of the type of power supply of your home, contact the local dealers in your area or local electric power company.
Warning:
- Do not use the same power cord for AC 120 V as for AC 220 - 240 V. Doing so may cause malfunction, electric shock or fire.
Note for United Kingdom power cord only
The plug of United Kingdom power cord has a built-in fuse. When replacing the fuse, be sure to use only a correctly rated approved type, re-fit the fuse cover. (Contact the local dealers in your area or qualified personnel.)
How to replace the fuse
Open the fuse compartment with the blade screwdriver, and replace the fuse.
Fuse
This equipment has been designed and manufactured to meet international safety standards but, like any electrical equipment, care must be taken if you are to obtain the best results and safety is to be assured.
DO read the operating instructions before you attempt to use the equipment.
DO ensure that all electrical connections (including the mains plug, extension leads and interconnections between pieces of equipment) are properly made and in accordance with the manufacturer's instructions. Switch off and withdraw the mains plug when making or changing connections.
DO contact the local dealers in your area if you are ever in doubt about the installation, operation or safety of your equipment.
DO be careful with glass panels or doors on equipment.
DON'T continue to operate the equipment if you are in any doubt about it working normally, or if it is damaged in any way—switch off, withdraw the mains plug and contact the local dealers in your area.
DON'T remove any fixed cover as this may expose dangerous voltages.
DON'T leave equipment switched on when it is unattended unless it is specifically stated that it is designed for unattended operation or has a standby mode. Switch off using the switch on the equipment and make sure that your family knows how to do this. Special arrangements may need to be made for infirm or handicapped people.
DON'T use equipment such as personal stereos or radios so that you are distracted from the requirements of road safety. It is illegal to watch television whilst driving.
DON'T listen to headphones at high volume, as such use can permanently damage your hearing.
DON'T obstruct the ventilation of the equipment, for example with curtains or soft furnishings. Overheating will cause damage and shorten the life of the equipment.
DON'T use make shift stands and NEVER fix legs with wood screws—to ensure complete safety always fit the manufacturer's approved stand or legs with the fixings provided according to the instructions.
DON'T allow electrical equipment to be exposed to rain or moisture.
ABOVE ALL...
—NEVER let anyone especially children push anything into holes, slots or any other opening in the case—this could result in a fatal electrical shock;
—NEVER guess or take chances with electrical equipment of any kind—it is better to be safe than sorry!
EMC Supplement
This equipment is in conformity with the provisions and protection requirements of the corresponding European Directives.
This equipment is designed for professional video appliances and can be used in the following environments:
- Controlled EMC environment (for example purpose built broadcasting or recording studio), and rural outdoors environment (far away from railways, transmitters, overhead power lines, etc.)
In order to keep the best performance and ensure electromagnetic compatibility, we recommend to use cables not exceeding the following length:
Cable Length
Power cord (attached cable (H05VV-F 3 x 0.75 mm 2 )) 2.0 m
Video signal cable (coaxial cable) 2.0 m
1.5 mAudio signal ca
HDMI cable (shielded cable) 2.0 m
RS-232C cable (shielded cable) 2.0 m
(A straight cable with a D-sub 9-pin connector)
HDV/DV cable (shielded cable) 2.0 m
USB cable (shielded cable) 2.0 m
REMOTE cable (shielded cable) 2.0 m
SDI signal cable (coaxial cable) 2.0 m
The inrush current of this apparatus is 9.5 ampere.
CAUTION
In case where the strong electromagnetic waves or magnetism are near the audio cable or the signal cable, the sound or the picture will contain noise. In such cases, please keep the cable away from the sources of the disturbance.
Contents
Safety Precaution
Safety Precaution 2
Getting Started
Key Features 9
How to Read this Manual 9
Other Precautionary Notes 10
Hard Disk Drive (HDD) 11
SD Cards 12
Discs 12
Precautions on the Use of Discs 14
On-screen Displays 15
Name and Function of Parts 16
Front panel 16
Display window 17
Rear panel 17
Remote control 18
Preparation
Connecting a Monitor 20
Connecting an Amplifier 21
Connecting a Video Camera or Other Equipment 21
Connecting External Devices 22
Connecting the Power Supply 22
Setting and Displaying Date/Time 23
Setting the Time Code 26
Dubbing/Importing
Dubbing/Importing 28
Dubbing chart 29
Formatting 30
Recording Modes 33
Importing Data from a BD/DVD to the HDD 35
Importing Data from a USB-compatible Device to the HDD ..... 37
Importing Data from an SD Card to the HDD 40
Importing Data from an i.LINK-compatible Device to the HDD . 42
Importing Data from a LAN-compatible Device to the HDD ..... 44
Dubbing a Title from the HDD to a BD/DVD 45
Dubbing Still Images from the HDD 48
Enabling Playback on Other Devices (Finalizing) 50
Copying the Entire Disc 52
Recording
Switching External Input 54
Direct Recording to Discs 54
Simultaneous Recording to HDD and BD/DVD 54
Recording Using External Inputs 55
Playing Back
About Playing Back 58
Using Playback Navigation 58
Option menu list 60
Video Playback Operation 61
Playing Videos on a BD/DVD 63
Playing Videos on the HDD 64
Playing Videos on a SD Card 64
Playing Still Images (JPEG) 65
Changing Playback Settings 66
Playback Settings Menu 66
Audio/subtitle settings 66
Playback settings 66
Video settings 67
Editing
Editing 68
Entering Characters 69
Character List 70
Grouping 71
Changing the Title/Group Name 73
Deleting a Title/Group 73
Turning On Title/Group Protection 74
Turning Off Title/Group Protection 75
Creating a Playlist 76
Editing a Thumbnail 77
Editing a Chapter 78
Dividing 80
Deleting Scenes 81
Changing the Disc Name 82
Changing the Shooting Date/Time 82
Mode Conversion 83
Settings Menu
Changing Settings of this Unit 84
Setting Menu List 84
SETUP 85
PLAYBACK SETTING 86
RECORD 87
AUDIO 88
DISPLAY 89
CONNECTION 90
SDI/HDMI CONNECTION 92
NETWORK SETTING 95
Others
Locking the Disc Tray 96
Turning on the Mode Lock 96
Last Function Memory 96
External Control 97
RS-232C Specifications 97
LAN Connection 97
Command Table 97
Command 98
Language Code List 108
Country Code List 110
Using the HDMI Consumer Electronics Control (HDMI CEC) 112
Creating a Seamless BD 112
Troubleshooting 113
Frequently Asked Questions on Dubbing 116
Remarks 117
Specifications 118
Important Notice Concerning the Software 119
Index 123
Key Features
Professional Blu-ray Disc recorder of the high-definition era
Copy videos to a Blu-ray Disc in high-definition from a high-definition camcorder, or down convert the videos and record them onto DVDs, all without the need for a PC. The internal hard disk drive enables for easy editing and dubbing multiple discs.
Supports direct recording to discs
You can record contents directly to an optical disc (BD-R/RE, DVD-R/RW).
Interface with JVC ProHD MEMORY CARD CAMERA RECORDER GY-HM series
Supports the import of "HQ mode" (*1) and "SP mode" (*2) files in the MOV or MXF format recorded using the JVC ProHD MEMORY CARD CAMERA RECORDER GY-HM series (excluding GY-HM200 and GY-HM170). Import to the HDD and dubbing to discs are supported.
MOV format
(*1) HQ : 1280x720/60p, 30p, 24p, 1440x1080/60i, mode 1920x1080/60i, 30p, 24p (SR-HD2700U) 1280x720/50p, 25p, 1440x1080/50i, 1920x1080/50i, 25p (SR-HD2700E)
(*2) SP : 1280x720/60p, 30p, 24p, 1440x1080/60i mode (SR-HD2700U) 1280x720/50p, 25p, 1440x1080/50i (SR-HD2700E)
MXF format
(*1) HQ : 1440x1080/60i, 1920x1080/60i, 30p, 24p mode (SR-HD2700U) 1440x1080/50i, 1920x1080/50i, 25p (SR-HD2700E)
(*2) SP : 1440x1080/60i (SR-HD2700U) mode 1440x1080/50i (SR-HD2700E)
Compatibility with other consumer camcorders
In addition to AVCHD, HDV, and DV, JVC Everio file formats are also compatible, and digital dubbing can be done.
Digital interface that allows for camcorder compatibility
This unit is equipped with USB, SD slots, and i.Link input terminals for connecting the camcorder.
Create menu-supported Blu-ray discs
Blu-ray discs can be created using the BDMV (with menu) format. (*1) BDAV discs can also be created and dubbed according to the intended use. This unit also enables users to use an original image as the background.
(*1): Menu cannot be created when recording directly to a BDMV format disc.
Compatible with dual-layer 50 GB Blu-ray discs, and records up to 24 hours of full high-definition images on a single disc
This unit is also compatible with high-capacity dual-layer 50 GB Blu-ray discs, and up to 24 hours (AE mode) of full high-definition images can be recorded on a single disc.
Authoring menu enables discs to be created and used industrially such as for demonstrations
Disc authoring can be used to create discs for industrial use, such as discs that repeat playback automatically.
Equipped with external control RS-232C terminal
This unit is equipped with an RS-232C terminal that allows for external control using a PC.
Equipped with SDI output terminal
You can connect this unit directly to an SDI system without using any converter or peripheral device.
Equipped with HDMI input terminal
You can input copyright-free HDMI content and record directly using this unit.
How to Read this Manual
About this manual
This manual mainly describes operation procedures using the remote control unit buttons.
- The buttons on the remote control unit are indicated as [Button Name].
- The menu items are indicated as "Menu Item".
Supplementary remarks in the main text
Memo: States restrictions on the functions or use of this unit. Note: States precautions to be taken during operation. Indicates the page numbers or items to refer to.
Memo:
The displays of operable media are highlighted.
HDD: Hard disk drive
DVD: DVD
BD: Blu-ray disc
SD: SD card
SDHC: SDHC Card
CD: Music compact disc
JPEG: JPEG (still picture) file disc
Contents of this manual
- All rights reserved by JVC KENWOOD Corporation. Unauthorized duplication or reprinting of this manual, in whole or in part, is strictly prohibited.
- Other product names included in this manual are trademarks and/or registered trademarks of their respective companies. Marks such as ™, ®, and © have been omitted in this manual.
- Illustrated designs, specifications and other contents of this manual are subject to change for improvement without prior notice.
Other Precautionary Notes
Copyright protection
This unit supports copyright protection technologies.
Copyrights
- According to the copyright law, video or music data that you store must not be used for purposes other than personal enjoyment without the authorization of the copyright holder.
- This product incorporates copyright protection technology that is protected by U.S. patents and other intellectual property rights. Use of this copyright protection technology must be authorized by Rovi Corporation, and is intended for home and other limited viewing uses only unless otherwise authorized by Rovi Corporation. Reverse engineering or disassembly is prohibited.
- The copyright protection function prevents copyrighted video images from being saved to equipment such as a video recorder. This function may also cause deterioration in the playback picture quality when the data is output to a monitor through a video recorder. This is not a hardware malfunction. To play back copyrighted videos, connect this product directly to the monitor.
- Read and understand fully the terms and conditions of all copyright works before using this unit in the correct manner. Under no circumstances shall JVC KENWOOD take any responsibility for any infringements of copyright caused by the customer when using this unit. The customer shall be responsible for resolving all legal issues regarding any copyright infringements.
- This product is licensed under the AVC Patent Portfolio License and VC-1 Patent Portfolio License. No license is granted except for the personal and non-commercial use of a consumer to the followings.
- Recording video in compliance with the AVC Standard
- Playing back AVC/VC-1 video that was recorded by a consumer engaged in a personal and non-commercial activity
- Playing back AVC/VC-1 video obtained from a licensed video provider. Additional information may be obtained from MPEG LA, LLC. See http://www.mpegla.com.
- This product is licensed under the AVC patent portfolio license and VC-1 patent portfolio license for the personal and noncommercial use of a consumer to (i) encode video in compliance with the AVC Standard and VC-1 Standard ("AVC/VC-1 Video") and/or (ii) decode AVC/VC-1 Video that was encoded by a consumer engaged in a personal and non-commercial activity and/or was obtained from a video provider licensed to provide AVC/VC-1 Video. No license is granted or shall be implied for any other use. Additional information may be obtained from MPEG LA, LLC. See http://www.mpegla.com.
Trademarks
DOLBY.
TRUEHD
DIGITAL PLUS

- Manufactured under licence from Dolby Laboratories. Dolby and the double-D symbol are trademarks of Dolby Laboratories.
- For DTS patents, see http://patents.dts.com. Manufactured under license from DTS Licensing Limited. DTS, DTS-HD, the Symbol, & DTS and the Symbol together are registered trademarks of DTS, Inc. © DTS, Inc. All Rights Reserved.
- DVD logo is a registered trademark of DVD Format/Logo Licensing Corporation.
- HDMI, the HDMI Logo and High-Definition Multimedia Interface are trademarks or registered trademarks of HDMI Licensing LLC in the United States and other countries.
- Blu-ray Disc and the Blu-ray Disc logo are trademarks of Blu-ray Disc Association.
- "x.v.Color" and the "x.v.Color" logo are trademarks of Sony Corporation Co., Ltd.
- Java and all marks related to Java are the registered trademarks of Oracle Corporation, its subsidiaries and affiliates in the US and other countries. SD and the SDHC logo are trademarks of SD-3C, LLC.
- i.LINK and the i.LINK logo are trademarks.
- "AVCHD" and the "AVCHD" logo are trademarks of Panasonic Corporation and Sony Corporation.
- Windows and Internet Explorer are either registered trademarks or trademarks of Microsoft Corporation in the United States and/or other countries. Mac OS is trademark of Apple Inc., registered in the U.S. and other countries.
Stored video content and compensation
- For discs containing important video content, backup on a periodic basis (once every few years) is recommended. Although digital signals do not deteriorate, playback or dubbing may fail due to aging of the disc resulting from the storage conditions.
- Recorded data may be lost if power outage occurs while this unit is being used. It is therefore recommended that videos stored on the HDD be dubbed to a BD or DVD as soon as possible in case the HDD breaks down.
- Videos or data stored on a BD/DVD, HDD, or SD card cannot be recovered if the media is damaged.
Disclaimer of compensation for loss or damage of stored video content
Please note that our company will not be liable for compensation of the content or any incidental damages in the event that dubbing or playback cannot be performed properly for some reasons. The same applies during repair of this unit.
Compatibility with Analog Sunset
Video contents that are copyright-protected under the AACS will not be output from the analog output terminals of this unit. Video contents that are not copyright-protected under the AACS will be output from the analog output terminals of this unit. Analog output terminals refer to the [VIDEO OUT] terminal, [S-VIDEO OUT] terminal, and [COMPONENT VIDEO OUT] terminals. For details on the output resolution, refer to "List of Output Resolutions" (P 11).
List of Output Resolutions
| Media Output Terminal | Content Protection | Output Resolution | |
| DVD-Video Analog Output (Component) | Free 480p | (SR-HD2700U)576p (SR-HD2700E) | |
| CSS | |||
| BDMV Analog Output (Component) | Free In HD | (SR-HD2700U)576p (SR-HD2700E) | |
| AACS No | Output | ||
| BDAV Analog Output (Component) | Free In HD | Output | |
| AACS No | |||
The output resolution if "SDI/COMPONENT OUTPUT" (P 91) is set to "1080i" when there is no HDMI connection.
BD contents are assumed to be recorded in the 1080i format.
- CSS is the abbreviation for content scramble system.
- AACS is the abbreviation for advanced access content system.
Handling precautions
Do not use the plug or power point with dust or metallic objects attached to it
- Failure to do so may cause short circuit or heating, and result in fire or electric shock.
- Remove the plug once every half a year, and clean it with a dry cloth.
Make use of a power point that allows the power plug to be inserted or removed easily
- Make sure that the plug can be removed immediately in case an abnormality is found in the unit.
Insert the plug firmly into the power point
- Failure to do so may cause short circuit or heating, and result in fire or electric shock.
Do not make use of a power voltage other than that specified
- Doing so may result in fire or electric shock.
Do not insert or remove the plug with wet hands
- Doing so may result in electric shock.
Do not touch the plug when there is thunder or lightning
- Doing so may cause electric shock.
Do not insert any foreign object into this unit.
- Doing so may result in fire or electric shock.
Do not dismantle or remodel this unit.
- This unit consists of high-voltage components. Dismantling or remodeling the unit may cause fire or electric shock.
Request the authorized dealer to inspect the interior part of the unit once a year.
• Using this unit with dust accumulated inside may result in fire. - It is particularly effective to perform servicing before the humid rainy season.
Do not connect any video cameras that are not made by JVC to the USB terminal.
- Doing so may result in malfunction.
- Please read through "SD Cards" (P 12) if you are using a USB card reader.
Hard Disk Drive (HDD)
Hard disk drive (HDD)
The HDD rotates at a high speed whenever the power is turned "On".
Pay particular attention to the following precautions when using this unit.
| Warning |
| Do not subject it to vibration or strong impactSubjecting this unit to excessive impact may result in loss of recorded data and even damage of the HDD.Do not remove the power plug when this unit is running Shutting down the power when the HDD is running may result in data loss and even damage of the HDD. Make sure that the power plug is removed only after turning off the power.(Wait for the “GOODBYE” message on the display window to disappear first) |
| Formatting the HDD
To format the HDD, perform the following steps.
1 Press the [MEDIA MANAGE] button on the remote control unit. 2 Select "FORMAT" from "HDD".
- A confirmation screen for formatting the HDD appears.
3 Select "YES".
- The confirmation screen for formatting the HDD reappears.
4 Select "FORMAT".
- HDD formatting starts.
SD Cards
Handling of SD cards
Note:
- The disc operation display icon appears blinking and "READING" is displayed on the display window when the SD card is being accessed (such as during dubbing, playback, or formatting). When access to the SD card is in progress, do not remove the card or the power plug. Doing so may cause the SD card to become unusable. If the SD card is not usable, reformat the card. If the problem persists even after reformatting, use a new SD card.
- Do not use or store the card at a place that is subject to static or electrical noise.
- Inserting the SD card incorrectly may cause this unit or the card to malfunction.
- Our company will not be liable for any damage or loss of the stored data due to accidents. (Be sure to back up the data.)
- Use the card according to the prescribed conditions. Do not use it at the following locations.
- Places that are exposed to direct sunlight
- Places near heat-generating equipment
- Inside a car that is under the sun with the windows tightly shut
- Places that are subject to high humidity and corrosion
- Do not bend or drop the card, or subject it to strong impact or vibration.
- Do not expose the card to water.
- Do not place near devices that emit strong magnetic or radio waves.
- Do not touch the metal part of the card.
- The SD SLOT does not support SDXC cards.
- To use an SDXC card, connect a SDXC-compatible USB card reader (sold separately) via USB connection.
- Use a USB card reader with no more than two card slots. This unit may not recognize the SD card if a USB card reader with three or more card slots is used.
- When an SDXC card is formatted in the standard OS format of the PC, title import may fail in some cases.
Memo:
- To dispose a card after erasing all data inside, it is recommended that this be done using a commercially available data deletion software, or by destroying the card physically, such as with a hammer. Formatting or deletion of data using this unit only changes the file administration information, and does not erase the data completely.
| BD video data
You can erase BD Video data from the SD card as follows.
1. Insert the SD card which has BD video data stored on it, into the [SD SLOT].
Memo:
- The BD video data cannot be erased if the SD card is write-protected. In this case, turn off the write-protect lock before inserting the SD card.
2. Press the [MEDIA MANAGE] button on the remote control unit.
3. Select "BD-VIDEO DATA ERASE" from "SD CARD".
- The confirmation screen for erasing the BD video data is displayed.
4. Select "ERASE", and press the [OK] button.
- The BD video data will be erased.
Discs
| BD recording formats
BDAV mode
- Videos can be edited (chapter edit etc) and new videos can be added to the disc. This format is suitable for recording videos.
- MPEG2 with HD quality will be recorded as it is onto the disc. This format has low playback compatibility, but performs well when used for backups.
BDMV mode
- Compatible and playable on other BD players. Menu functions similar to those of DVD video mode are also included. (*1) This format performs well for distribution purposes.
(*1): Menu cannot be created when recording directly to a BDMV format disc.
| DVD recording formats
VR mode
- Format the disc using "VR MODE" if you want to add new videos to the disc.
- Deleting currently saved videos increases the remaining space on the disc. (except for the case of DVD-R discs.)
Video mode
- Format the disc in this mode if you want to play the disc on a different DVD player.
| Formatting of discs
Formatting is required for some disc types. Perform formatting if this is necessary.
When using BD-RE or BD-R discs
Formatting is required. Format the disc using this unit.
- Format it to the BDAV or BDMV mode.
When using DVD-R or DVD-RW discs
Formatting is required. Format the disc using this unit.
- Format using "VR MODE" or "VIDEO MODE".
Note:
- BD-R and DVD-R discs cannot be reformatted. Check the disc mode before formatting the disc.
Discs that enable both dubbing and playback
| Disc Type Recording Format Format Finalize | Repeated Use (Reformat) | |||
| BD-RE BDAV mode | √ | - | √ | |
| BDMV mode | √ | - | √ | |
| BD-R BDAV mode | √ | √ | - | |
| BDMV mode | √ | - | - | |
| DVD-RW Video mode | √ √ √ | |||
| VR mode | √ √ √ | |||
| DVD-R Video mode | √ | √ | - | |
| VR mode | √ | √ | - |
Memo: - This unit does not support the BDXL format.
| Discs that enable playback only
| Disc Type Description | |
| DVD-RAM (4.7 GB) Supports specific forms of playback, but no recording can be done. | |
| BD-ROM Commercially available Blu-ray discs (movies, music, etc.)The region code that can be played back on this unit is “*1”. | |
| DVD video Commercially available DVD-Video discs (movies, music, etc.)The region code that can be played back on this unit is “*2”. The video format used is PAL or NTSC. | |
| Music CD CD-DA | DTS music CDs are also playable. |
*1: SR-HD2700U: A, SR-HD2700E: B *2: SR-HD2700U: 1, SR-HD2700E: 2
Memo:
- If 8 cm discs are used, only playback can be performed. The disc cannot be used for recording or editing.
- 8 cm discs can be used without adapters.
• DVD-RAM cartridges and BD-RE are not supported. Take the DVD-RAM out of the cartridge before using it.
| Discs that are not supported
• DVD-RAM (2.6 GB/5.2 GB) • DVD-R (for authoring) • CD-ROM/R/RW (PhotoCD, CD-G, VCD etc.) • DDCD (1.3 GB, Double Density CD) • HDCD (High Density CD)
Memo:
• To playback a BD or DVD that was created using this unit on another player, finalize the disc.
- There is no need for finalizing if the BD-RE disc is recorded using BDAV mode.
- If a DVD that was recorded using VR mode has been finalized, the disc can only be played back on VR mode compatible devices.
• To perform high-speed dubbing, make use of a disc that supports high-speed recording.
- This unit can play back and record only PAL signals. NTSC signals can also be played back on the BD/DVD deck. (SR-HD2700E)
- This unit can play back and record only NTSC signals. (SR-HD2700U)
Note:
- Do not use disc if the sticker or label is peeled off from the disc surface, if the disc is not round in shape, or if it is significantly warped or cracked.
Precautions on the Use of Discs
Maintenance of discs
- Dirt attached to the disc, such as fingerprints and dust, may cause distortion in the video image or sound. Keep the disc clean at all times such as by using a soft cloth.
- Wipe the disc lightly from the center outward using the cloth.
- If dirt is stubborn, wipe it off using a slightly wet cloth, followed by a dry cloth.
- Do not use thinner, benzine, alcohol, conventional record cleaners, or antistatic sprays. Doing so may damage the disc surface.
| Handling discs
Removing a disc
Keeping a disc
Correct way to hold a disc
Do not touch the recording/playback side of the disc with your fingers.
Fingerprints attached to the surface may affect the recorded video/audio, and prevent this unit from operating properly.
Disc storage
- Avoid storing the disc at the following locations.
- Places that are subject to high humidity, dust, or mold growth
- Places that are exposed to direct sunlight or near a heater
- Inside a car during summer
- Do not drop the disc or subject it to strong impact.
- Place the disc in a case and store it vertically.
- Stacking the discs without using a case, placing the discs against one another or dropping them may result in deformation or cracking.
When the recording/playback lens is dirty
Dust or dirt may be attached to the recording/playback lens after using this unit for a prolonged period of time, and recording or playback may not be properly performed as a result. In such case, contact the local dealers in your area.
Precautions when playing a dual disc
The side of the dual disc that is not used for DVD recording does not comply with the standard specifications of music CDs. It is recommended that playback on this unit be limited to the DVD recording side of the dual disc.
Disc usage
The best performance may not be obtained for some discs.
Power Cable
Do not unplug the cable during recording or playback.
Doing so may cause the disc to become unusable.
If the disc becomes unusable, refer to the following.
BD-R or : Use a new disc.
DVD-R
BD-RE or : Reformat the disc after erasing the data. If the disc DVD-RW is still not usable, use a new disc.
Do not turn off the [⏻/l] button or unplug the power cable immediately after closing the disc tray.
On-screen Displays
Status display
Displays the current settings and operating status (such as playback, pause) of this unit.
Pressing the [ON SCREEN] button on the remote control displays the status. To cancel the display, press the [ON SCREEN] button again.
You can select whether to display the statuses by changing the settings in the settings menu.
For details, refer to "ON SCREEN GUIDE" (P 89).
Memo:
- To display the statuses, set the "ON SCREEN GUIDE" item on the "DISPLAY" menu screen to "AUTO".
- Setting the "ON SCREEN GUIDE" item on the "DISPLAY" menu screen to "OFF" hides display of all status information.
- You can display the status by pressing the [OPTION] button on the remote control unit when playback, dubbing or editing is not in progress.
① Press the [OPTION] button on the remote control unit. ② Select "ON-SCREEN DISPLAY", and press the [OK] button on the remote control unit.
Event display
An on-screen event display appears on the display window as well as the monitor when there is a misoperation.
- The event display appears for an interval of about three seconds.
Memo:
- The same event display may appear several times.
Alarm display
When an operation is not accepted by this unit, an on-screen alarm display appears on the display of the main unit as well as the monitor.
| SDI time code display
The time code is displayed during recording of SDI input signals. You can specify whether to display the time code, and also where to display it.
For details, refer to "TIME CODE INPUT SETTING" and "TIME CODE DISPLAY POSITION" under "SDI/HDMI CONNECTION".
Memo:
- When "TIME CODE INPUT SETTING" of "SDI/HDMI CONNECTION" is set to "OFF", the time code is not displayed.
Menu operation
Pressing the remote control buttons below calls up the respective menu screens.
- [SET UP], [NAVIGATION], [EDIT], [INFORMATION CORRECT], [DUBBING], [MEDIA MANAGE]
- Press any of the [ ▲/▼/◄/► ] buttons to move to a specific menu item (yellow item indicated by a small arrow).
- Press the [OK] button to confirm the selection.
- Press the [RETURN] button to return to the previous screen.
- Simple instructions on the operation procedure may be displayed at the bottom of the screen.
Memo:
- During playback using DIRECT OUT on this unit, pressing each of the [SET UP], [NAVIGATION], [EDIT], [INFORMATION CORRECT], [DUBBING], and [MEDIA MANAGE] buttons automatically switches to MONITOR OUT. Switching cannot be performed when recording using DIRECT OUT is in progress.
Pressing any of the above buttons during playback using MONITOR OUT does not switch automatically to DIRECT OUT. The display remains as MONITOR OUT.
Name and Function of Parts
Front panel

① [⏻/l] button
Switches operation on or off.
② Disc tray
③ [▲] button
Opens/closes the disc tray.
④ Display window
⑤ Remote control sensor
⑥ [RESET] switch
Reset the unit.
⑦ [REC MODE] button
Switches the recording mode.
8 [HDD] lamp
Lights up when in HDD mode.
The [REC] lamp lights up while recording/importing.
⑨ [INPUT SELECT] button
Switches the external input signals (SDI, HDMI, HDV/DV, L-1).
⑩ [BD] lamp
Lights up when in BD/DVD mode.
The [REC] lamp lights up while recording/dubbing.
⑪ [MEDIA SELECT] button
Switches between HDD and BD/SD.
⑫ [DIRECT/MONITOR] lamp
Lights up in the MONITOR OUT mode.
⑬ [DIRECT/MONITOR] selection button
Switches the output of the rear SDI and HDMI output terminals to "DIRECT OUT" or "MONITOR OUT".
Note:
- When each of the [SET UP], [NAVIGATION], [EDIT], [INFORMATION CORRECT], [DUBBING], and [MEDIA MANAGE] buttons is pressed, "ONSCREEN" appears in the display window of the unit. In this case, switching is possible only when the respective top screens are displayed. If a display other than the top screen appears, such as a pop-up screen, switching may not be possible.
⑭ Playback control buttons
• [▶] button
Plays back the data.
• [■] button
Stops playback/recording.
• [◀◀] button
Fast reverses playback.
- [▶▶] button
Fast forwards playback.
• [Ⅱ] button
Pauses playback.
15 [ ● ] button
Starts recording.
16 [SD SLOT]
Used for inserting SD cards.
⑰ [i.LINK(HDV/DV IN)] terminal
Connect a video camera using i.LINK (HDV/DV IN).
18 [USB] terminal
For connecting using a USB cable.
| Display window

① HDD/DISC remaining level display ② Dubbing display ③ Disc status display ④ HDMI output display
Memo:
- The brightness of the display window can be adjusted. For details, refer to "PANEL DISPLAY BRIGHTNESS" (P 85).
English messages appear for a number of operations.
(Examples)
HELLO: When the power plug is inserted
READING: When reading the disc
ONSCREEN: Upon moving to the playback navigation screen
Rear panel

① AC inlet
For connecting the power supply.
② Cooling fan
③ [LAN] terminal
For connecting a LAN cable.
④ [SDI IN/OUT THROUGH/OUT] terminal. For connecting using a BNC cable.
⑤ [AUDIO OUT/IN] terminals
For connecting using an audio cable.
⑥ [VIDEO OUT/IN] terminals
For connecting using a video cable.
⑦ [SERIAL COM.(RS-232C)] terminal
For connecting to a PC using a serial cable.
⑧ [HDMI IN / HDMI OUT] terminal. For connecting using an HDMI cable. ⑨ [S-VIDEO OUT/IN] terminals. For connecting using an S-video cable. ⑩ [COMPONENT VIDEO OUT] terminals. For connecting using a component video cable. ⑪ [REMOTE IN] terminal. For connecting a wired remote control.
Remote control

① [DELETE]
Deletes a title or characters.
② [△]
Opens/closes the disc tray.
③ [HDD]
For operating the HDD.
④ [0]-[9]
For entering characters.
⑤ [*]
For entering characters.
⑥ [RED], [GREEN], [BLUE], [YELLOW]
Enabled when the color button is displayed.
Memo:
- The sequence of the button color is different depending on the model.
⑦ [DUBBING]
Displays the dubbing menu screen.
⑧ [ ▲ / ▼ / ◀ / ▶ ]
The cursor can be moved to select an item.
⑨ [OPTION]
Displays the option screen.
10 [ ◀◀◀ ]
Move to the chapter just before the current chapter.
⑪ [ ◀◀ ]
Fast reverses the video and starts slow playback.
12 [ ● ]
Press the [●] and [▶] buttons together to start recording.
13 [REC MODE]
For checking the recording mode settings and amount of time remaining.
⑭ [ON SCREEN]
Displays information on the screen.
⑮ [PROGRESSIVE SCAN]
Switches the resolution of the image output.
16 [AUDIO]
Switches the playback audio.
17 [EDIT]
Displays the editing menu screen.
18 [MEDIA MANAGE]
Displays the media management menu screen.
19 [ ⏻/I ]
Switches operation on or off.
20 [INPUT SELECT]
Switches the external input signals (SDI, HDMI, HDV/DV, L-1).
21 [BD/SD]
For operating BD/DVD or SD.
22 [PAGE PRV] [PAGE NEXT]
Returns to the previous page. Or advances to the next page.
23 [ ]
Move the playback position slightly backwards.
24 [ ↘ ]
Advance the playback position slightly.
25[#]
For character input and switching between DIRECT OUT/MONITOR OUT.
Memo :
- During character input, it cannot be used for switching between DIRECT OUT/MONITOR OUT.
- When each of the [SET UP], [NAVIGATION], [EDIT], [INFORMATION CORRECT], [DUBBING], and [MEDIA MANAGE] buttons is pressed, "ONSCREEN" appears in the display window of the unit. In this case, switching is possible only when the respective top screens are displayed. If a display other than the top screen appears, such as a pop-up screen, switching may not be possible.
26 [NAVIGATION]
Displays the playback navigation screen.
27 [OK]
Confirms a selection or entry.
28 [RETURN]
Returns to the previous screen without applying the selection or entry.
29 [▶▶]
Move to the next chapter.
30 [▶▶]
Fast forwards the video and starts slow playback.
31 [▶]
Plays the video.
32 [ II ]
Pauses the video that is currently playing/recording.
33 [ ■ ]
Stops playback/recording.
34 [MARK]
Adds a chapter mark during playback or recording. Select multiple titles from the playback navigation screen or other screens.
35 [PB MODE]
Display the playback settings screen.
36 [ANGLE]
Switches the camera angle for playback.
37 [SET UP]
Displays the settings menu screen.
38 [SUB TITLE]
Switches the playback subtitle.
39 [INFORMATION CORRECT]
Displays the information editing screen.
| Change batteries for the remote control
If the operable distance of the remote control unit becomes shorter, this means that the batteries are running out. When this occurs, replace the batteries with new ones.

Batteries
- Insert the batteries correctly according to the + and - signs. Insert the - side of the battery first.
- If an error occurs while using the remote control unit, remove the batteries, wait for about five minutes, and operate the remote control unit again after re-inserting the batteries.
Battery life: Approximately 6 months (depending on the frequency of use)
Remote control codes
By setting a remote control code for the unit and remote control, you can prevent two recorders from operating simultaneously using the remote control for this unit. (The setting for the unit and remote control at time of purchase is "REMOTE CONTROL 3".)
Memo:
- Changing the remote control code for the remote control before the unit's remote control code is changed will cause the unit to be inoperable. Change the unit's remote control code first when changing remote control codes.
Changing the remote control code for the unit
1 Press the [SET UP] button on the remote control to display the "SETUP" menu. 2 Change the "REMOTE CONTROL CODE" option in the "SETUP" menu.
Memo:
- For details, refer to "REMOTE CONTROL CODE" (P 85).
Changing the remote control code for the remote control
1 Press and hold the [OPTION] button on the remote control. 2 Press either of the [1], [2], [3] or [4] buttons.
- Press the number button that is equivalent to the remote control code you desire.
3 Press the [OK] button.
- Press the [OK] button to change the remote control code.
4 Release the [OPTION] button on the remote control.
Memo:
- If the remote control code is different from the unit, the remote control code for the unit will be displayed on the display window.
Examples: REMOTE CONTROL 3
Connecting a Monitor
To display video images from this unit, connect it to a monitor.
- This unit supports connections using "HDMI cable", "component video cable", "S-video cable", or "video cable".
Memo:
- Switch to the appropriate monitor input according to the type of connection cable used. For details, refer to the instruction manual of the monitor.
| Connecting using an HDMI cable
Connecting using an HDMI cable (sold separately) enables signals to be maintained in the digital format, and thus playback of clear video images.

Memo:
- To connect to a monitor that does not support the copyright protection system (HDCP), set "HDCP". For details, refer to "HDCP" (P 91).
- Use a High Speed HDMI Cable.
- After connecting using an HDMI cable, change the unit setting to "HDMI CONNECTION". For details, refer to "VIDEO PRIORITY MODE" (P90).
| Connecting using a component video cable
Connecting using a component video cable (sold separately) delivers playback images that are clearer than those by an S-video cable.

Memo:
- After connecting a component video cable, change the unit setting to "SDI/COMPONENT OUTPUT".
- For output from the component video output terminals, the setting will be limited to "480i" in the case of copyright-protected videos. For details, refer to "SDI/COMPONENT OUTPUT" (P 91).
- Videos that are AACS copyright-protected are not output from the component video output terminals.
| Connecting using an S-video cable
For connecting an S-video cable (sold separately).

| Connecting using a video cable
Connect the output terminal of this unit to the input terminal of a TV using a video/audio cable (sold separately). (Use a BNC adapter that is sold separately)

Note :
- Connect the S-video/video output of this unit directly to the TV (or monitor). Connecting this unit to the TV or monitor via a video deck triggers the copy protection function, and may cause distortion in the video images during playback.
- Videos that are AACS copyright-protected are not output from the S-video/video output terminals.
| Connecting using an SDI cable (BNC)
Connect using an SDI cable (sold separately). You can transmit both digital video and audio signals with a single cable.

Memo :
- The SDI output terminal comes with two outputs, one is an SDI terminal that enables switching between DIRECT OUT/MONITOR OUT, while the other is an SDI through terminal used exclusively for through output. • Copyright-protected videos are not output from the SDI output terminal.
For details, refer to "SDI/HDMI CONNECTION" (P 92).
Connecting an Amplifier
| Connecting an audio amplifier
Connecting using an audio cable

Connecting a Video Camera or Other Equipment
Connecting a video camera
Connecting via the i.LINK terminal

Connecting via the USB terminal

Memo:
Some video camera models may require an AC adapter instead of batteries to run. For details, refer to the video camera's instruction manual.
Connecting a video deck or other equipment (recording using this unit)

Memo:
- When connecting using an S-video cable, change the setting of "VIDEO INPUT SETTING" to "S-VIDEO". For details, refer to "VIDEO INPUT SETTING" (P 91).
- To record video images played back on this unit to an external device (video deck, etc.), connect the output terminal of this unit to the input terminal of the external device.
Connecting External Devices
Connecting a wired remote control

Using a wired connection enables stable control of this unit from an external device.
Operation is possible using any code (1 to 4) regardless of the remote control code settings of this unit.
Memo:
- There is currently no compatible remote control unit available.
- To create a wired remote controller, refer to "External Control" (P 97).

External operation is enabled by connecting an RS-232C cable to a PC or similar device.
For details on external operation, refer to "External Control" (P 97).
| Connecting using a LAN cable

External operation is enabled by connecting to a PC or similar device using a LAN cable.
For details on external operation, refer to "External Control" (P 97).
Connecting the Power Supply
Connect the supplied power cable to this unit as follows.

1. Connect the supplied power cable to the AC IN terminal of this unit. 2. Connect the other end of the power cable to a power point. 3. Press the [☐/l] button on the remote control or this unit to switch on the unit.
- The power of this unit turns on, and a "HELLO" message appears on the display window.
Note:
- Do not use power cables other than that supplied with this unit. Doing so may cause this unit to malfunction.
Setting and Displaying Date/Time
Set the date/time of the built-in clock as follows. The recording date/time is stored on the disc.
| Setting the date/time
Set the date/time of the built-in clock as follows.
1 Press the [SET UP] button on the remote control unit
• The Settings menu screen appears.

2 Select "SETUP", and press the [OK] button
3 Select "CLOCK SET/DISPLAY", and press the [OK] button
- "CLOCK SET/DISPLAY" menu screen appears.

4 Select "CLOCK SET", and press the [OK] button
• The Clock Set menu screen appears.

5 Set the time and date
- Repeat the steps below to specify the time and date.
① Press the [▲] or [▼] button, select the Clock Set item, and press the [OK] button.

② Press the [▲] or [▼] button, change the setting value, and press the [OK] button.
![graph TD A["SET UP"] --> B[">CLOCK SET/DISPLAY"] B --> C[">CLOCK SET"] C --> D["YEAR 2015 2015"] C --> E["JANWONTH DAY"] C --> F["AVILA MID"] C --> G["ENTER"] H["SET UP"] --> I[">CLOCK SET"] I --> J[">CLOCK SET"] J --> K[">CLOCK SET"] K --> L[">CLOCK SET"] L --> M[">CLOCK SET"] M --> N[">CLOCK SET"]](/content/2026/05/883778/images/cdb2abad5d92a6b8b0888ba051339b04143a7d35dd8bbb348c29096579128939.jpg)
6 After setting is complete, select "ENTER", and press the [OK] button
- Doing so exits date/time setting, and returns to the initial screen.

Memo:
- The value for seconds cannot be set. After setting the minute, press the [SET UP] button according to the time signal.
- To cancel date/time setting, press the [RETURN] button. Doing so cancels date/time setting and returns to the initial screen.
- The year can be set from 2015 to 2037. If "2037.12.31 23:59" is set, the time will change to "2015.1.1 00:00" after one minute.
| Changing the date display style
You can specify the display style of the date as follows.
1 Press the [SET UP] button on the remote control unit 2 Select "SETUP", and press the [OK] button
• The Settings menu screen appears.

3 Select "CLOCK SET/DISPLAY", and press the [OK] button
• The Clock Set/Display menu screen appears.

4 Select "DATE DISPLAY", and press the [OK] button
• The Date Display menu screen appears.

5 Select the date display style.

- Select a date display style from the following items. YEAR.MONTH.DAY : Displays the date in the year/month/day order. MONTH.DAY.YEAR : Displays the date in the month/day/year order. DAY.MONTH.YEAR : Displays the date in the day/month/year order.
6 Press the [OK] button after making a selection
• The date display style will be saved.
Memo:
The date display style will be applied in the following information displays.
- Recording date of the title that is shown in the playback navigation screen (The recording date will be shown in place of the title if the title has not been input).
- Date that is displayed in the title information display screen
| Changing the time display style
You can specify the display style of the time as follows.
1 Press the [SET UP] button on the remote control unit
2 Select "SETUP", and press the [OK] button
- The Settings menu screen appears.

3 Select "CLOCK SET/DISPLAY", and press the [OK] button
- The Clock Set/Display menu screen appears.

4 Select "TIME DISPLAY CHOICE", and press the [OK] button
- The Time Display menu screen appears.

5 Select the time display style

- Select from "12H" or "24H".
12H : Displays the time in AM/PM format.
24H : Displays the time in 24-hour format.
6 Press the [OK] button after making a selection
- The time display style will be saved.
Memo :
- The time display style applies to the following.
- Current time
• Date/time registered on the disc
- Recording date of the title that is shown in the playback navigation screen (The recording date will be shown in place of the title if the title has not been input.)
- Time of recording that is displayed in the title information display screen
Setting the Time Code
You can add a time code, date or time while recording SDI input signals or HDMI input signals with this unit.
Memo :
- Only the date and time can be added during recording of HDMI input signals. If you wish to add the time code during recording, record the SDI input signals.
- If recording is performed with the time code added, the time code will be recorded together with the video. In this case, you cannot hide the time code display on the recorded movie.
| Setting time code input
1 Press the [SET UP] button on the remote control unit
• The Settings menu screen appears.

2 Press the [▶] button, and select "SDI/HDMI CONNECTION"
- The "SDI/HDMI CONNECTION" screen appears.

3 Press the [▲] or the [▼] button, select "TIME CODE INPUT SETTING", and press the [OK] button

4 Select "TIME CODE" or "DATE & TIME"
TIME CODE : When there are multiple time code inputs from the SDI device, such information will be superimposed over the SDI video input.
DATE & TIME : This unit superimposes the current date/time over the SDI or HDMI video input.
Memo :
- Select "OFF" if you don't want to display the time code.
5 Press the [OK] button after making a selection
• The time code setting is saved.
Memo :
- Setting is now complete. If multiple time code inputs are detected from the SDI signals, time code (TC**:**:****) is displayed in case that "TIME CODE" is set. Current date and time is displayed if "DATE & TIME" is set. Examples: 2015.JAN.01 12:34:56
- For details on the "TIME CODE DISPLAY POSITION" settings, refer to "Setting "TIME CODE DISPLAY POSITION" (P 27).
Setting "TIME CODE DISPLAY POSITION"
1 Press the [SET UP] button on the remote control unit • The Settings menu screen appears.

2 Press the [▶] button, and select "SDI/HDMI CONNECTION"
- The "SDI/HDMI CONNECTION" screen appears.

3 Press the [▲] or the [▼] button, select "TIME CODE DISPLAY POSITION", and press the [OK] button

4 Press the [▲] or the [▼] button to select the display position

LOWER : Sets the time code display position to the bottom left.
LOWER : Sets the time code display position to the bottom right.
UPPER : Sets the time code display position to the top left.
LEFT
UPPER : Sets the time code display position to the top right.
CENTER: Sets the time code display position to the center.
5 Press the [OK] button after making a selection
- The time code display position is saved.
Memo:
- Setting is now complete. If multiple time code inputs are not detected from the SDI signals, time code is displayed as "TC----".
- If you have not set a date after selecting "DATE & TIME" and completing the setting, time code will be displayed as "----".
- Time code is not displayed when the monitor is connected to the [SDI OUT THROUGH] terminal.
Dubbing/Importing
Bi-directional dubbing between the HDD and a BD/DVD is possible using this unit alone. Also, data can be imported to the HDD from a video camera by connecting it via i.LINK or USB.
Dubbing from HDD to BD/DVD
High-speed dubbing
Select this option if you want to significantly shorten the time required for dubbing. Make use of a BD/DVD disc that supports high-speed recording.
Dubbing in a specific recording mode
Select this option when you want to specify the recording mode for dubbing. Dubbing can be performed in the recording mode of your preference, such as whether to "maintain a high picture quality" or "save as many titles as possible". For details, refer to "Recording Modes" (P 33).
Memo:
- The image quality will not improve even when a recording mode with image quality higher than that of the original recording mode is chosen.
- Dubbing using a specific recording mode will cause the disc to be re-encoded.
Importing into HDD
Importing data from a BD/DVD to the HDD
You can import titles from a BD/DVD.
![graph TD subgraph BD/DVD A["BD"] --> B["BDMV"] A --> C["BDAV"] end subgraph DVD D["EverioBackup*"] E["AVCHD"] F["DVD-VR"] G["DVD-Video*"] H["EverioBackup (JPEG)"] end subgraph HDD I["DR"] J["AF/AN/AL/AE"] K["AVC"] L["FR"] M["XP/SP/LP/EP"] N["JPEG"] end A -.->|Deterioration-free dubbing| D A -.->|Enc…](/content/2026/05/883778/images/642918c0c93d01bebd11baff71d05a218c353e2ad7d58dd04741fd7334986dea.jpg)
DVD-video*: Discs that are not finalized cannot be imported.
EverioBackup: Data disc containing high-definition videos that are recorded in the MPEG2 format using a DVD writer for Everio.
Importing data from a SDHC/SD to the HDD
Videos captured using a video camera can be imported to the HDD by inserting the SDHC/SD card that the videos are saved on.
Importing data from a video camera to the HDD
Videos captured using a video camera can be imported to the HDD.
This unit supports video camera connections via i.LINK and USB.
Memo:
- For MOV format videos, only videos in the MOV format (HQ mode and SP mode) taken using the JVC ProHD MEMORY CARD CAMERA RECORDER GY-HM series (excluding GY-HM200 and GY-HM170) are compatible. There is no guarantee for importing videos taken on devices by other company.
- For MXF format videos, only videos in the MXF format (HQ mode and SP mode) taken using the JVC ProHD MEMORY CARD CAMERA RECORDER GY-HM series are compatible. There is no guarantee for importing videos taken on devices by other company.
![graph TD A["Video Camera"] -->|Deterioration-free dubbing| B["HDV/DV"] A -->|Encode dubbing| C["HDVI"] A --> D["SDI Terminal"] A --> E["SDI-SDI"] A --> F["L1 terminal"] B --> G["HDV"] B --> H["DV"] C --> I["HDVI(HD)"] C --> J["HDVI(SD)"] D --> K["AVCHD"] D --> L["SD-VIDEO(SD)*"] E --> M["SD-VIDEO(HD…](/content/2026/05/883778/images/aa359f954cc5ab4a907f35d90df7c1c2255001c47cc4670265e021b0148147ff.jpg)
MOV*: MOV format files (recorded in the HQ mode and SP mode) using the JVC ProHD MEMORY CARD CAMERA RECORDER GY-HM series (excluding GY-HM200 and GY-HM170)
MXF*: MXF format files (recorded in the HQ mode and SP mode) using the JVC ProHD MEMORY CARD CAMERA RECORDER GY-HM series
SD-VIDEO(HD)* : SD-VIDEO (JVC Everio MPEG2 TS)
SD-VIDEO(SD)* : SD-VIDEO (JVC Everio MPEG2 PS)
Importing data from a video deck
You can import data to the HDD from an external video deck by connecting it to a composite video or S input terminal. For details, refer to "Recording Using External Inputs" (P 55).
Importing from a LAN-compatible device
Data on devices connected to the LAN terminal can be imported to the HDD.
For details, refer to "Importing Data from a LAN-compatible Device to the HDD" (P 44).
Memo :
- Videos that are copy-controlled cannot be imported.
- Motion JPEG is not supported
Dubbing chart
Dubbing the video data from the HDD
| Content Quality\Dubbing Quality | Format (BD) | Format (DVD) | ||||
| BDMV (HD Quality) | BDAV (HD Quality) | BDAV (SD Quality) | DVD-VR | DVD-VIDEO | ||
| Recording Mode (HDD) | DR (MOV*/MXF*) | High-speed dubbing | High-speed dubbing / Re-encoding | Re-encoding | Re-encodingRe- | |
| DR (Other) | - | High-speed dubbing / Re-encoding | Re-encoding | Re-encoding | Re-encoding | |
| AF/AN/AL/AE | High-speed dubbing | High-speed dubbing / Re-encoding | Re-encoding | Re-encoding | Re-encoding | |
| AVC | High-speed dubbing | High-speed dubbing / Re-encoding | Re-encoding | Re-encoding Re-encoding | ||
| FR | - | - | Re-encoding | High-speed dubbing / Re-encoding | Re-encoding | |
| XP/SP/LP/EP* | - | - | Re-encoding | High-speed dubbing / Re-encoding | High-speed dubbing / Re-encoding | |
EP* : High-speed dubbing to DVD-VIDEO format discs in EP mode title To perform high-speed dubbing of a EP mode title to a DVD-VIDEO format disc, set "HIGH-SPEED DUBBING" (€ P 87) in the settings menu to "4:3" before recording or importing. Only re-encoding will be performed when dubbing a title that is recorded or imported with a setting other than "4:3". MOV*: MOV format files (recorded in the HQ mode and SP mode) using the JVC ProHD MEMORY CARD CAMERA RECORDER GY-HM series (excluding GY-HM200 and GY-HM170) MXF*: MXF format files (recorded in the HQ mode and SP mode) using the JVC ProHD MEMORY CARD CAMERA RECORDER GY-HM series
Memo :
- High-speed dubbing to DVD-VIDEO format discs may not be performed for XP/SP/LP/EP mode titles that are not recorded using the external inputs of this unit. • BD-R supports up to 6X.
Dubbing the picture data from the HDD
| Importing file (HDD) | Media | |
| BDAV (BD-RE) | SDHC/SD | |
| JPEG | √ | √ |
Memo :
- Video images may be distorted in the following situations during reencoding/dubbing when the monitor (TV) is connected to this unit using an HDMI cable, or when the screen resolution is set to 1080p. • Proceeding with dubbing from the menu screen
- Returning to the normal screen after dubbing has finished This is not a malfunction. Change the screen resolution to a setting other than 1080p if you feel that this is annoying. • BD-R supports up to 6X.
Formatting
Unused discs or SD cards may require formatting in some cases.
When the need arises, format the disc or SD card accordingly.
Memo :
- Formatting a disc or SD card erases all existing data from the media. Double-check carefully before formatting so as not to erase important titles.
Format chart
Refer to the following chart for the disc types and format when formatting a disc.
Note :
- If a disc is formatted using an equipment not manufactured by JVC, the disc may not be read correctly even though it corresponds to the chart below. In this case, reformat the disc using this unit, or make use of another blank disc.
Memo :
- BD-R and DVD-R discs can only be formatted once.
- When a disc is re-formatted into another format, remove the disc and load it again.
DVD format chart
| Format VR | Format Video Format | ||
| DVD-RW | Single-sided, single layer (4.7 GB) | √ | √ |
| DVD-R Single-sided, single layer (4.7 GB) | √ | √ | |
| Single-sided, dual layer (8.5 GB) | √ | ||
√ : Format supported.
BD format chart
| BDAV Format BDMV Format | |||
| BD-RE Single-sided, single layer (25 GB) | √ | √ | |
| Single-sided, dual layer (50 GB) | √ | ||
| BD-R Single-sided, single layer (25 GB) | √ | √ | |
| Single-sided, dual layer (50 GB) | √ | ||
√ : Format supported.
Formatting a disc
1 Set the DVD or BD to be formatted on the disc tray. 2 Press the [MEDIA MANAGE] button on the remote control unit.
The Media Management menu screen appears.

3 Select "FORMAT" from "BD/DVD".
A format selection screen appears.
4 Select a format mode from the format selection screen.

DVD: Select a "Format mode" from "VR MODE" or "VIDEO MODE".
BD: Select a "Format mode" from "BDAV MODE" or "BDMV MODE".
Memo:
- When "BDMV MODE" is selected, a "FOR DIRECT RECORDING" or "FOR DUBBING" selection screen appears after "Format mode" is selected.
- To record directly to a BDMV format disc, select "FOR DIRECT RECORDING".
- To use a BDMV format disc for purposes other than direct recording, select "FOR DUBBING".
5 Select "YES", and press the [OK] button in the format confirmation screen

- Formatting starts.
- After formatting is complete, a "THE DISC HAS BEEN FORMATTED" message appears on the monitor, and the normal screen is displayed.
![graph TD A["CONFIRM"] --> B["THE DISC HAS BEEN FORMATTED"] B --> C["OK"]](/content/2026/05/883778/images/b872d8ba8736ddd9f1a07282f97111f1127620fa75bb516112401ac247155f8f.jpg)
Memo:
- To return to the initial screen without formatting the disc, select "DO NOT FORMAT" and press the [OK] button. Alternatively, you can press the [RETURN] button to return to the initial screen without formatting.
Note:
- Do not turn off the power or unplug the power cable when the "FORMATTING DISC..." message is displayed.
- Note that formatting a disc with protected titles erases all the titles from the disc.
Cancel formatting
1 Press the [OPTION] button while formatting

2 Select "STOP", and press the [OK] button
- A confirmation screen to stop formatting appears.
3 Select "YES" on the confirmation screen and press the [OK] button

- Formatting is stopped.
Note :
- Formatting can be stopped if it seems to take a long time (more than two minutes).
- If for any reason formatting cannot be stopped, the confirmation screen for stopping formatting will not appear even if the [OPTION] button is pressed.
Formatting an SD Card
1 Insert the SD card to be formatted into the [SD SLOT]
- With the terminal side facing down, insert the SD card until a "click" sound is heard.

Note :
- Formatting cannot be performed if the SD card is write-protected. In this case, turn off the write-protect lock before inserting the SD card.
2 Press the [MEDIA MANAGE] button on the remote control unit
• The Media Management menu screen appears.

3 Select "FORMAT" from "SD CARD"
- A confirmation screen to execute formatting appears.
4 Select "YES", and press the [OK] button

- Formatting starts.
- After formatting is complete, a "THE SD CARD HAS BEEN FORMATTED" message appears on the monitor, and the normal screen is displayed.
Memo:
- To return to the initial screen without formatting the disc, select "NO" and press the [OK] button. Alternatively, you can press the [RETURN] button to return to the initial screen without formatting.
Note:
- Do not turn off the power or unplug the power cable when the "FORMATTING SD CARD..." message is displayed. Do not remove the SD card as well. Doing so may damage the SD card. - Note that formatting an SD card erases all the titles including protected titles from the card. - Once the formatting of the SD card begins, it cannot be stopped.
Recording Modes
Maximum recording time for each recording mode
You can specify a recording mode according to the intended use. Setting the video to a high picture quality shortens the maximum recording time, while setting to a lower picture quality lengthens the recording time.
Refer to the following table for the maximum recording time in the respective modes. All figures shown in the table are approximate values.
| Recording Mode | Quality | BD (Single-sided, Single Layer) | BD (Single-sided, Dual Layer) | DVD (Single-sided, Single Layer) | DVD (Single-sided, Dual Layer) | HDD (1 TB) |
| DR | HD 1.9 hours 8 hours -- 16 | hours 3.8 hours -- 80 | hours (*1) | |||
| AF 4 hours | 0 hours | |||||
| AN 6 hours | 12 hours -- 2 | 52 hours | ||||
| AL 9 hours | 18 hours -- 3 | 78 hours | ||||
| AE 12 hours | 24 hours -- | 504 hours | ||||
| XP | SD | 5.25 hours | 10.5 hours | 1 hours | 1.7 hours | 220 hours |
| SP | 10.5 hours | 21 hours | 2 hours | 3.5 hours | 444 hours | |
| LP | 21 hours | 42 hours | 4 hours | 7.1 hours | 884 hours | |
| EP 42 hours | 84 hours 8 hours | 14.3 hours | 1774 hours | |||
| DR1 | HD 1.8 hours | 3.6 hours -- 76 hours | ||||
| DR2 | 2 hours 4 hours -- 84 hours | |||||
| DR3 | 2.9 hours | 6 hours -- 124 hours | ||||
| DR4 | 3.9 hours 7.8 hours -- 164 hours | |||||
*1: An estimated figure when HDV is imported. Memo:
- DR mode
Abbreviation for Direct Recording. Videos are recorded in the original picture quality.
- AF/AN/XP/SP mode
Recommended for recording images with fast motion, such as sports videos.
- The AF/AN mode records images at the high-quality HD level.
- The XP/SP modes record images at the high-quality SD level.
- AL/AE/LP mode
Recommended for recording images with slow motion and little contrast, such as dramas.
- AL/AE mode records images at the low-quality HD level.
- LP mode records images at the low-quality SD level.
- EP mode
Recommended for recording images with sharp outlines, such as animation videos, and when the recordable time (remaining time) is limited.
- DR1/DR2/DR3/DR4 mode
Selection is enabled only when you are importing HD movies from the SDI input or HDMI input terminal.
Select DR1 to record in the finest image quality, and DR4 for the lowest quality.
The recordable duration is longest in the DR4 quality, and shortest in the DR1 setting.
- Setting the DR1/DR2/DR3/DR4 recording mode
If the recording mode is changed to the DR1/DR2/DR3/DR4, it may take a little while to process the setting. In the meantime, input signals may not be displayed.
- You can change the recording mode by pressing the [OPTION] button on the remote control unit while playback, dubbing or editing is not in progress.
Press the [OPTION] button on the remote control unit.
Select "RECORDING MODE", and press the [OK] button on the remote control unit.
Select the "RECORDING MODE" to which you want to change, and press the [OK] button on the remote control unit.
There may be cases where it is not possible to record up to the maximum recording time as indicated in the table due to the limitations of the BD standards.
HD picture quality
Using BD enables dubbing to be done with HD picture quality. To dub HD picture quality titles that are imported in the HDD, it is recommended to use BD.
Note:
Dubbing to a DVD cannot be done in HD picture quality.
DR mode
HDV, MOV*/MXF* and SD-VIDEO (JVC Everio MPEG2 TS) titles can be imported using the DR mode.
MOV*: MOV format files (recorded in the HQ mode and SP mode) using the JVC ProHD MEMORY CARD CAMERA RECORDER GY-HM series (excluding GY-HM200 and GY-HM170).
MXF*: MXF format files (recorded in the HQ mode and SP mode) using the JVC ProHD MEMORY CARD CAMERA RECORDER GY-HM series.
FR mode
FR mode is displayed as the recording mode in the following cases.
FR mode during import into HDD: During import of SD-VIDEO (JVC Everio MPEG2 PS) titles via high-speed dubbing. During import of data via high-speed dubbing from DVD-VR discs recorded using other units.
- FR mode during dubbing from HDD When selecting the most appropriate mode automatically between XP and EP according to the remaining memory on the disc.
Importing Data from a BD/DVD to the HDD
Data can be imported from a BD/DVD to the HDD as follows.
- File formats that can be imported Videos: BDMV, BDAV, AVCHD, DVD-VR, DVD-VIDEO, EverioBackup Still Images: EverioBackup, BDAV (BD-RE)
Memo:
- BDMV, AVCHD and EverioBackup titles that are imported using "FULL IMPORT" are combined into one title. This unit does not support combining of titles during the editing operation after import is complete. To combine and import data, select "FULL IMPORT".
- For data that is selected for import via "SEL. TITLE(VIDEO)", titles with the same date are combined.
- Titles of two or more scenes cannot be combined if the recording criteria, such as video size, are different.
Note:
- Only titles that are not copyright-protected can be imported.
- Recognizing the device and importing the files may take a long time depending on the amount of files in the device.
Preparations
1 Set a BD or DVD on the disc tray 2 Press the [DUBBING] button on the remote control unit
- The importing screen appears.

3 Select "DISC⇒HDD" in the importing screen, and press the [OK] button
- A check mark is added to the "DISC⇒HDD" item.
4 Select "NEXT", and press the [OK] button.
- The import selection screen appears.
Memo:
- A recording mode selection appears instead of the import selection screen when DVD-VIDEO is detected. For details, refer to "Importing DVD-VIDEO" (P 37).
Full import
1 Select "FULL IMPORT" in the import selection screen, and press the [OK] button.
- A check mark is added to the "FULL IMPORT" item.
2 Select "NEXT", and press the [OK] button.

- "START" will appear instead of "NEXT" in the menu if the disc is of a format other than "BDAV". In this case, go to step 5.
3 Select "RECORDING MODE", and press the [OK] button.

• A pop-up menu appears.
4 Select the "RECORDING MODE" option.
For details, refer to "Recording Modes" (P 33).
5 Select "START", and press the [OK] button.
- Importing of the titles starts.
- After titles are successfully imported, a "DUBBING IS COMPLETED" message appears on the monitor.
![graph TD A["CONFIRM"] --> B["DUBBING IS COMPLETED"] B --> C["OK"]](/content/2026/05/883778/images/a3dc53c592d41703f6ce09b0d2e77fcb7d3105269e32a9f2b5609185f3035d04.jpg)
Specify a title
1 Select "SEL. TITLE(VIDEO)" in the import selection screen, and press the [OK] button
- A check mark is added to the "SEL. TITLE(VIDEO)" item.
2 Select "NEXT", and press the [OK] button

- If a "BDAV" disc is set, a recording mode selection screen will appear.
- If the disc is of a format other than "BDAV", a screen for creating an import title list will appear. In this case, go to step 5.
3 Select "RECORDING MODE", and press the [OK] button

• A pop-up menu appears.
4 Select the "RECORDING MODE" option.
For details, refer to "Recording Modes" (P 33).
5 Select "NEXT", and press the [OK] button
- A screen for creating the import title list appears.
6 Create an import title list
- Follow the steps below to create an import title list.
① Select "ADD TITLE LIST FOR DUBBING", and press the [OK] button. The Title List screen is displayed.
② Select the titles to import, and press the [OK] button. Titles selected are added to the list.
Memo:
- Press the [MARK] button. A check mark will appear beside the title. All titles with a check mark can be added to the list at the same time.
- Select a title from the dubbing title list, and press the [OK] button to perform the following changes. Delete the selected title from the list.
- Thumbnails may not be displayed during title selection depending on the discs used.
7. Select "START", and press the [OK] button.

- Importing of titles starts according to the sequence in the created title list.
- After titles are successfully imported, a "DUBBING IS COMPLETED" message appears on the monitor.
![graph TD A["CONFIRM"] --> B["DUBBING IS COMPLETED"] B --> C["OK"]](/content/2026/05/883778/images/b191e9d46fe56c1f7ca8b066fdf3b30957405aa69d5cdf4226b685e7a11b9782.jpg)
Note:
- "START" cannot be selected for the following cases:
- A title that cannot be dubbed has been selected.
- HDD memory is insufficient.
- The amount of titles in the HDD has reached the maximum amount.
- A dubbing title list has not been created.
Check "Troubleshooting" (P 114), and operate accordingly.
Importing DVD-VIDEO
When DVD-VIDEO is detected, a recording mode selection screen appears.
Follow the steps below to import DVD-VIDEO to the HDD.
1 Select "RECORDING MODE" from the recording mode selection screen and press the [OK] button, then select "RECORDING MODE" from the pop-up menu.

For details, refer to "Recording Modes" (P 33).
2 Select "START", and press the [OK] button.
- Importing of the titles starts.
- After titles are successfully imported, a "DUBBING IS COMPLETED" message appears on the monitor.
![graph TD A["CONFIRM"] --> B["DUBBING IS COMPLETED"] B --> C["OK"]](/content/2026/05/883778/images/1ddc9426f17ed81b53705bad7b583cfc8c057ebdd2cd80a956f63becea65141b.jpg)
Memo:
- If the first play setting of the DVD-video has been set to top menu or other settings, the title will not playback. If playback does not start, press the play button or playback the DVD-Video.
Canceling importing
To cancel importing before it starts
- Select "CANCEL" from the menu, and press the [OK] button to cancel importing of a title.
- Alternatively, you can press the [RETURN] button to cancel importing and return to the initial screen.
To cancel importing while it is in progress
- Press the [OPTION] button to display the pop-up menu. Select "CANCEL" from the pop-up menu and press the [OK] button. Doing so imports data to the HDD up to the position where you have chosen to stop.
- Importing will also be stopped when the [■] button is pressed to stop playback.
Importing Data from a USB-compatible Device to the HDD
Data on devices connected to the USB terminal can be imported to the HDD as follows.
- File formats that can be imported: AVCHD, SD-VIDEO (JVC Everio MPEG2 TS, PS), MOV*/MXF*, and JPEG. MOV*: MOV format files (recorded in the HQ mode and SP mode) using the JVC ProHD MEMORY CARD CAMERA RECORDER GY-HM series (excluding GY-HM200 and GY-HM170). MXF*: MXF format files (recorded in the HQ mode and SP mode) using the JVC ProHD MEMORY CARD CAMERA RECORDER GY-HM series.
Memo:
- Titles that are imported using "FULL IMPORT" are combined into one title. This unit does not support combining of titles during the editing operation after import is complete. To combine and import data, select "FULL IMPORT". However, titles of MXF files will not be combined.
- For data that is selected for import via "SEL. TITLE(VIDEO)", titles with the same date are combined.
- Titles of two or more scenes cannot be combined if the recording criteria, such as video size, are different.
- When "Recording in DCIM Folder" of the JVC GY-HM890/GY-HM850 series is set to "On", MOV files recorded in the SD card cannot be imported from the USB terminal of this unit. To import using this unit, record with "Recording in DCIM Folder" set to "Off".
For details on how to set "Recording in DCIM Folder" of the JVC GY-HM890/GY-HM850 series, please refer to the instruction manual for the JVC GY-HM890/GY-HM850 series.
- Import of MOV files recorded using JVC GY-HM series SP mode 1080i requires a duration that is about 1.3 times longer than the usual time.
- Import of MXF files may take longer than files of other formats.
- To use an SDXC card, connect an SDXC-compatible USB card reader (sold separately) via USB connection.
- Use a USB card reader with no more than two card slots. This unit may not recognize the SD card if a USB card reader with three or more card slots is used.
Note:
- Turn off the power for this unit and the connecting device if a USB-compatible device is to be connected to this unit.
- Do not unplug the USB cable while importing a title. Doing so may result in loss or damage of the titles.
- Only titles that are not copyright-protected can be imported.
- For MOV format videos, only videos in the MOV format (HQ mode and SP mode) taken using the JVC ProHD MEMORY CARD CAMERA RECORDER GY-HM series (excluding GY-HM200 and GY-HM170) are compatible. There is no guarantee for importing videos taken on devices by other companies.
- For MXF format videos, only videos in the MXF format (HQ mode and SP mode) taken using the JVC ProHD MEMORY CARD CAMERA RECORDER GY-HM series are compatible. There is no guarantee for importing videos taken on devices by other companies.
- Recognizing the device and importing the files may take a long time depending on the amount of files in the USB device.
- If a USB connection is used, this unit will only recognize one device out of all the recording devices. Depending on the video camera, the memory card slot will be recognized but the internal device will not be recognized. Use the following methods to solve this.
- If the internal device is not recognized: Copy the data from the camera's internal memory or HDD onto the SD card.
- If using a JVC camcorder that has two memory card slots: Put the memory card that has the required data in slot A.
- If the target device is not recognized using the USB connection, use the camcorder's BD/DVD writer or a similar device to dub the disc before proceeding with dubbing on this unit. For details, refer to "Importing Data from a BD/DVD to the HDD" (P 35).
- When importing videos from a USB-connected camcorder, data reading from the internal memory of the camcorder may fail. If both the camcorder's internal memory and SD card are available, the SD card may be detected first. To prevent this from occurring, remove the SD card before reading data from the internal memory.
Preparations
1 Connect the USB device (Everio, etc.) to this unit using a USB cable.

Memo:
• After connecting the USB cable, turn on the camera and switch the mode of the camera. (Choose "Connect to a computer" or a similar option. For details refer to the camera's instruction manual.) - "USB RDY" appears on the display window of the unit when a USB device is recognized.
2 Press the [DUBBING] button on the remote control unit.
- The importing screen appears.

3 Select "USB⇒HDD" in the importing screen, and press the [OK] button.
- A check mark is added to the "USB⇒HDD" item.
4 Select "NEXT", and press the [OK] button.
- The import selection screen appears.
Full import
1 Select "FULL IMPORT" in the import selection screen, and press the [OK] button.
- A check mark is added to the "FULL IMPORT" item.
2 Select "START", and press the [OK] button.

- Importing of the titles starts.
- After titles are successfully imported, a "DUBBING IS COMPLETED" message appears on the monitor.
![graph TD A["CONFIRM"] --> B["DUBBING IS COMPLETED"] B --> C["OK"]](/content/2026/05/883778/images/7c7531ce3fe9c36df3d30442e45662905f296eba33e29863643adb4d6e9a3c13.jpg)
Specify a title
1 Select "SEL. TITLE(VIDEO)" in the import selection screen, and press the [OK] button
- A check mark is added to the "SEL. TITLE(VIDEO)" item.
2 Select "NEXT", and press the [OK] button

- A screen for creating the import title list appears.
3 Create an import title list
- Follow the steps below to create an import title list.
① Select "ADD TITLE LIST FOR DUBBING", and press the [OK] button
The Title List screen is displayed.
② Select the titles to import, and press the [OK] button. Titles selected are added to the list.
Memo:
- Press the [MARK] button. A check mark will appear beside the title. All titles with a check mark can be added to the list at the same time.
- Select a title from the dubbing title list, and press the [OK] button to perform the following changes.
- Delete the selected title from the list
- Thumbnails will not be displayed when a title is selected.
4 Select "START", and press the [OK] button.

- Importing of titles starts according to the sequence in the created title list.
- After titles are successfully imported, a “DUBBING IS COMPLETED” message appears on the monitor.
![graph TD A["CONFIRM"] --> B["DUBBING IS COMPLETED"] B --> C["OK"]](/content/2026/05/883778/images/c8c460612acc55ced64bced4f1aaa502e069541178dcf863e27fe1fca072e355.jpg)
Note:
- "START" cannot be selected for the following cases: • A title that cannot be dubbed has been selected • HDD memory is insufficient
- The amount of titles in the HDD has reached the maximum amount • A dubbing title list has not been created
Check "Troubleshooting" (P 114), and operate accordingly.
Canceling importing
To cancel importing before it starts:
- Select "CANCEL" from the menu, and press the [OK] button to cancel importing of a title.
- Alternatively, you can press the [RETURN] button to cancel importing and return to the initial screen.
To cancel importing while it is in progress:
- Press the [OPTION] button. Select "CANCEL" from the Cancel Importing menu, and press the [OK] button. Doing so imports data to the HDD up to the position where you have chosen to stop.
Importing Data from an SD Card to the HDD
Data can be imported from a SD (SDHC) card to the HDD as follows.
- File formats that can be imported: AVCHD, SD-VIDEO (JVC Everio MPEG2 TS, PS), MOV*/MXF*, and JPEG. MOV*: MOV format files (recorded in HQ mode and SP mode) using the JVC ProHD MEMORY CARD CAMERA RECORDER GY-HM series (excluding GY-HM200 and GY-HM170).
MXF*: MXF format files (recorded in HQ mode and SP mode) using the JVC ProHD MEMORY CARD CAMERA RECORDER GY-HM series.
Memo:
- The SD SLOT does not support SDXC cards.
- To use an SDXC card, connect an SDXC-compatible USB card reader (sold separately) via USB connection. (See P37 "Importing Data from a USB-compatible Device to the HDD")
- Titles that are imported using "FULL IMPORT" are combined into one title. This unit does not support combining of titles during the editing operation after import is complete. To combine and import data, select "FULL IMPORT". However, titles of MXF files will not be combined.
- For data that is selected for import via "SEL. TITLE(VIDEO)", titles with the same date are combined.
- Titles of two or more scenes cannot be combined if the recording criteria, such as video size, are different.
- When "Recording in DCIM Folder" of the JVC GY-HM890/GY-HM850 series is set to "On", MOV files recorded in the SD card cannot be imported from the SD SLOT of this unit. To import using this unit, record with "Recording in DCIM Folder" set to "Off".
For details on how to set "Recording in DCIM Folder" of the JVC GY-HM890/GY-HM850 series, please refer to the instruction manual for the JVC GY-HM890/GY-HM850 series.
- Import of MOV files recorded using JVC GY-HM series SP mode 1080i requires a duration that is about 1.3 times longer than the usual time.
- Import of MXF files may take longer than files of other formats.
Note:
- Do not remove the SD card when importing of the titles is in progress or when the importing screen is displayed. Doing so may result in loss or damage of the titles.
- For MOV format videos, only videos in the MOV format (HQ mode and SP mode) taken using the JVC ProHD MEMORY CARD CAMERA RECORDER GY-HM series (excluding GY-HM200 and GY-HM170) are compatible. There is no guarantee for importing videos taken on devices by other companies.
- For MXF format videos, only videos in the MXF format (HQ mode and SP mode) taken using the JVC ProHD MEMORY CARDCAMERA RECORDER GY-HM series are compatible. There is no guarantee for importing videos taken on devices by other company.
- Only titles that are not copyright-protected can be imported.
Preparations
1 Insert the SD (SDHC) card into the [SD SLOT]

Memo:
- "SD RDY" appears on the display window of the unit when an SD card is recognized.
2 Press the [DUBBING] button on the remote control unit
• The importing screen appears.

3 Select "SD⇒HDD" in the importing screen, and press the [OK] button
- A check mark is added to the "SD⇒HDD" item.
4 Select "NEXT", and press the [OK] button
- The import selection screen appears.
Full import
1 Select "FULL IMPORT" in the import selection screen, and press the [OK] button
- A check mark is added to the "FULL IMPORT" item.
2 Select "START", and press the [OK] button

- Importing of the titles starts.
- After titles are successfully imported, a "DUBBING IS COMPLETED" message appears on the monitor.
![graph TD A["CONFIRM"] --> B["DUBBING IS COMPLETED"] B --> C["OK"]](/content/2026/05/883778/images/cc4d7cab553c7975152d88cbd6d06efc117b827c278acb6575ad8da6545135f6.jpg)
Memo:
- Choose "BACK" from the menu and press the [OK] button to return to the previous screen.
Specify a title
1 Select "SEL. TITLE(VIDEO)" in the import selection screen, and press the [OK] button
- A check mark is added to the "SEL. TITLE(VIDEO)" item.
2 Select "NEXT", and press the [OK] button

- A screen for creating the import title list appears.
3 Create an import title list
- Follow the steps below to create an import title list.
① Select "ADD TITLE LIST FOR DUBBING", and press the [OK] button The Title List screen is displayed.
② Select the titles to import, and press the [OK] button. Titles selected are added to the list.
Memo:
- Press the [MARK] button. A check mark will appear beside the title. All titles with a check mark can be added to the list at the same time.
- Select a title from the dubbing title list, and press the [OK] button to perform the following changes.
- Delete the selected title from the list
- When there are files of different formats (AVCHD, SD-VIDEO, MOV*/MXF*) in the SD card, press the [RED] button to select the format you want to display.
MOV*: MOV format files (recorded in the HQ mode and SP mode) using the JVC ProHD MEMORY CARD CAMERA RECORDER GY-HM series (excluding GY-HM200 and GY-HM170)
MXF*: MXF format files (recorded in the HQ mode and SP mode) using the JVC ProHD MEMORY CARD CAMERA RECORDER GY-HM series
4 Select "START", and press the [OK] button

- Importing of titles starts according to the sequence in the created title list. - After titles are successfully imported, a “DUBBING IS COMPLETED” message appears on the monitor.
![graph TD A["CONFIRM"] --> B["DUBBING IS COMPLETED"] B --> C["OK"]](/content/2026/05/883778/images/f9fc1e3965b023a038517728ebf4ec04c936a83de13ad31d280b2a5389b3aec6.jpg)
Memo :
- Choose "BACK" from the menu and press the [OK] button to return to the previous screen.
Note :
- "START" cannot be selected for the following cases. • A title that cannot be dubbed has been selected • HDD memory is insufficient
- The amount of titles in the HDD has reached the maximum amount • A dubbing title list has not been created
Check "Troubleshooting" (P 114), and operate accordingly.
- Thumbnails will not be displayed when a title is selected.
Canceling importing
To cancel importing before it starts
- Select "CANCEL" from the menu, and press the [OK] button to cancel importing of a title.
- Alternatively, you can press the [RETURN] button to cancel importing and return to the initial screen.
To cancel importing while it is in progress
- Press the [OPTION] button. Select "CANCEL" from the Cancel Importing menu, and press the [OK] button. Doing so imports data to the HDD up to the position where you have chosen to stop.
Importing Data from an i.LINK-compatible Device to the HDD
Data on devices connected to the i.LINK terminal can be imported to the HDD as follows.
• Video formats that can be imported: DV and HDV content
Memo:
- Only titles that are not copyright-protected can be imported.
- Devices that have in-built copyright protection such as D-VHS and digital tuners cannot be connected. This unit only allows import from tape media.
- Importing will not be performed if no tape has been inserted into the HDV/DV camera.
- Importing will be cancelled when the mode is changed from HDV to DV or vice versa.
- For camcorders that support both HDV and DV recording, use only one of the modes for recording and playback.
- There is no support for editing using a connected PC.
- Only one i.LINK device can be connected to this unit at a time.
Note:
- Turn off the power for this unit and the connecting device when connecting using an i.LINK compatible device.
- Do not unplug the i.LINK cable while importing to the HDD is in progress. Doing so may result in loss or damage of the titles.
- For example, during full import of HDV content from JVC GY-HD100 via i.LINK connection, the beginning of the image may not be captured if GY-HD100 is not set as follows. (1) Set the [IEEE1394] switch at the rear of the GY-HD100 unit to [HDV] or [DV] according to the recorded content. (2) Set [MENU]/[VIDEO FORMAT]/[PB TAPE] on the GY-HD100 unit to [HDV] or [DV]. (As with (1), set according to the recorded content. Setting to [AUTO] is not allowed.) (3) Check to ensure that the [HDV] or [DV] lamp on the side of the GY-HD100 unit is lit. (Check to ensure that the lamp that is lit corresponds to the setting in (1) and (2).) When importing from a tape that contains data captured in the HDV recording and DV recording modes, change the video camera setting according to each recording mode, check to ensure that the corresponding lamp in (3) is lit, and choose to start import from the current position.
Preparations
1 Connect the device (camera, etc.) to this unit using an i.LINK cable

Memo:
- After the device (camera, etc.) has been connected using an i.LINK cable, turn on the power of the device and switch it to playback mode. (Refer to the device's (camera, etc.) instruction manual for more details.)
- "HDV/DV RDY" appears on the display window of the unit when an i.LINK device is recognized.
2 Press the [DUBBING] button on the remote control unit
• The importing screen appears.

3 Select "HDV/DV⇒HDD" in the importing screen, and press the [OK] button
- A check mark is added to the "HDV/DV⇒HDD" item.
4 Select "NEXT", and press the [OK] button.
- The import selection screen appears.
Imports data from the beginning
You can import videos from the beginning to the end as follows. If the current position is halfway through the tape, import after rewinding the tape to the beginning.
1 Select "IMPORT FROM BEGINNING", and press the [OK] button.
- A check mark is added to the "IMPORT FROM BEGINNING" item.
2 Select "NEXT", and press the [OK] button.

- A recording mode selection screen appears.
3 Select "RECORDING MODE", press the [OK] button, and select from the pop-up menu.
- Select "XP", "SP", "LP", or "EP" from the "RECORDING MODE" option.

Memo:
- HDV contents will be imported in DR mode. For details, refer to "Recording Modes" (P 33).
4 Select "START", and press the [OK] button.
- Importing of the titles starts. - After titles are successfully imported, a "DUBBING IS COMPLETED" message appears on the monitor.
![graph TD A["CONFIRM"] --> B["DUBBING IS COMPLETED"] B --> C["OK"]](/content/2026/05/883778/images/817dd69ed900039e3989fa54a296ef043b7775418034f9f4227ecd9b6246d79e.jpg)
Imports data from current position
You can import videos from the current tape position till the end as follows.
1. Select "IMPORT FROM CURRENT POSITION", and press the [OK] button.
- A check mark is added to the "IMPORT FROM CURRENT POSITION" item.
2. Select "NEXT", and press the [OK] button.

- A recording mode selection screen appears.
3. Select "RECORDING MODE" and press the [OK] button to display the pop-up menu.
- Select "XP", "SP", "LP", or "EP" from the "RECORDING MODE" option.

Memo:
- HDV contents will be imported in DR mode. For details, refer to "Recording Modes" (P 33).
4. Select "START", and press the [OK] button.
- Importing of the titles starts. - After titles are successfully imported, a "DUBBING IS COMPLETED" message appears on the monitor.
![graph TD A["CONFIRM"] --> B["DUBBING IS COMPLETED"] B --> C["OK"]](/content/2026/05/883778/images/23d3d4414e4f9f7aac8f28d199a0ce384787bb24b7af5f88b2f77b2a7347964b.jpg)
Canceling importing
To cancel importing before it starts:
- Select "CANCEL" from the menu, and press the [OK] button to cancel importing of a title.
- Alternatively, you can press the [RETURN] button to cancel importing and return to the initial screen.
To cancel importing while it is in progress
- Press the [OPTION] button. Select "CANCEL" from the Cancel Importing menu, and press the [OK] button. Doing so imports data to the HDD up to the position where you have chosen to stop.
Importing Data from a LAN-compatible Device to the HDD
Data on devices connected to the LAN terminal can be imported to the HDD as follows.
- File formats that can be imported MOV (MPEG2-TS), MXF (MPEG2-TS) • Image resolutions that can be imported (SR-HD2700U) 1920x1080/59.94i, 1920x1080/29.97p, 1920x1080/23.98p, 1440x1080/59.94i, 1280x720/59.94p, 1280x720/29.97p, 1280x720/23.98p (SR-HD2700E) 1920x1080/50i, 1920x1080/25p, 1440x1080/50i, 1280x720/50p, 1280x720/25p
Memo :
- Still image files cannot be imported.
- MOV (H.264) and MXF (H.264) files cannot be imported.
- Files imported via LAN that exceeds a bit rate of 35 M may not play back or dub properly.
Preparations
1 Connect the LAN device (PC, etc.) to this unit using a LAN cable

Memo :
- Execute the network setting. For details, refer to "NETWORK SETTING" (P 95).
- Make use of FTP for file transfer.
- Use the PC as the FTP client, and this unit as the FTP server.
2 Perform FTP transfer
- Importing of the files starts.
Memo:
- Do not unplug the LAN cable while importing to the HDD is in progress.
- You can execute FTP transfer with multiple files selected.
- When multiple files are selected and transferred via FTP, they may not be imported correctly. In this case, transfer the files individually via FTP.
- In the event that an error occurs during FTP transfer, import of the file for which transfer is in progress and those that are not transferred will be canceled.
- In the event that FTP transfer is interrupted at the FTP client, files that cannot be played back on this recorder may be imported. You can delete these files on the Playback Navigation screen of the recorder.
- We do not guarantee all the operations of FTP transfer depending on factors such as the PC environment.
- Make use of an FTP client software for FTP transfer. Examples of FTP client software Windows: FTP client function of Internet Explorer, etc. Mac OS: Cyberduck, etc.
- To import to the HDD, the capacity of the HDD must be twice the size of the transfer files.
The available disk space in the HDD is stated in the Readme.txt (*1) file.
Download the file to check when transferring the files.
(*1): The file is located in the current directory of the HDD in this unit.
- Setting items for FTP communication user (user name): Optional pass (password): Optional mode: Either passive or active port (port number): 21
Dubbing a Title from the HDD to a BD/DVD
Titles stored in the HDD can be dubbed to a BD/DVD.
Memo:
- Disc types that can be used for dubbing with this unit are: BD-RE, BD-R, DVD-RW, and DVD-R.
For details, refer to "Discs that enable both dubbing and playback" (P 13).
- HD content for which the delete scene operation has been applied cannot be dubbed to BDMV. Perform seamless conversion before starting a dubbing operation.
- Contents imported from HDV (DR mode) and HD Everio cannot be dubbed to a BDMV disc. Perform mode conversion before starting a dubbing operation.
For details, refer to "Mode Conversion" (P 83).
Note:
- The following high bit-rate files may not meet the Blu-ray Disc standards when they are dubbed to a BD.
- When a BDAV/BDMV disc is created (high-speed dubbing) by importing content recorded in the JVC GY-HM series (HQ mode or SP mode).
- When a BDAV disc is created (high-speed dubbing) by importing content captured in the JVC GZ-HD7/6 etc FHD mode.
- When a BDAV/BDMV disc is created by importing content that is captured using another video camera at a peak bitrate that exceeds 28.8 Mbps.
- If the disc standards are not met, playback on another player may fail. To ensure that the standards are satisfied, perform high-speed dubbing after converting the recording mode, or perform dubbing by specifying a recording mode.
Dubbing from HDD to BD/DVD
Preparation
1 Set a BD or DVD on the disc tray
Memo:
- A message appears on the monitor in the following cases where a disc cannot be written to. Take the necessary actions according to the message.
- When an incompatible disc type is set
- When there is insufficient space on the set disc
- When a finalized disc is set
2 Press the [DUBBING] button on the remote control unit
• The Dubbing menu screen appears.
3 On this screen, select "DISC↔VIDEO"

- A check mark is added to the "DISC⇔VIDEO" item.
4 Select "NEXT", and press the [OK] button
Memo:
- Dubbing can also be performed from the Playback Navigation screen.
① Select the titles to dub, and press the [OPTION] button ② Select "DUB", and press the [OK] button ③ Follow Steps 3 to 4 of "Preparation"
Dubbing titles
1 Select "RECORDING FORMAT", and press the [OK] button

- Choose a format.
For details, refer to "Format chart" (P 30).
2 Select "RECORDING MODE", and press the [OK] button

- Select "HIGH-SPEED DUBBING" or a recording mode of your preference.
Memo:
• High-speed dubbing: Select this option if you want to significantly shorten the time required for dubbing. Make use of a disc that supports high-speed recording.
- AF/AN/AL/AE
Can be selected for BD-R and BD-RE. Dubbing is done with HD picture quality.
- XP/SP/LP/EP
Dubbing is done with SD picture quality.
• FR
An appropriate mode will be chosen automatically between XP to EP according to the remaining memory on the disc. For details, refer to "Dubbing chart" (P 29) and "Recording Modes" (P 33).
3 Select "NEXT", and press the [OK] button

- A screen for creating a dubbing title list appears.
4 Create a dubbing title list

- Follow the steps below to create a dubbing title list.
① Select "ADD TITLE LIST FOR DUBBING", and press the [OK] button. ② Select the titles to dub, and press the [OK] button.
Memo:
- Press the [MARK] button. A check mark will appear beside the title. All titles with a check mark can be added to the list at the same time.
- Select a title from the dubbing title list, and press the [OK] button to perform the following changes.
- Delete the selected title from the list
- Change the list arrangement
- Change the name of the selected title Select "RENAME TITLE", and press the [OK] button to change the title of the dubbing source. Dubbing of the new title is performed.
- The recording mode and recording time of the selected video title is displayed at the top right corner of the screen.
5 Select "NEXT", and press the [OK] button

Note
- "NEXT" cannot be selected for the following cases: • A title that cannot be dubbed has been selected • Disc memory is insufficient • A dubbing title list has not been created. Check "Troubleshooting" (P 114), and operate accordingly.
Memo:
- Steps 6 and 7 are not applicable for "BDAV" and "DVD-VR" disc formats. Go to step 8.
6 Select a background image for the disc menu

- Select a background image for the disc menu from "Background" or "Still Picture".
- "SELECT FROM DEFAULT BACKGROUND" A default background set is used for the disc menu.
- "SELECT FROM STILL PICTURES" Use a still image on the HDD for the disc menu. The largest size allowed for a still image that is used as the background is 5120 x 3840.
Memo:
- The background image of the disc menu can be selected (only for DVD-Video and BDMV).
- The following sizes are recommended for still images. BD: 1920 x 1080
DVD: 720 x 480 (SR-HD2700U)
720 x 576 (SR-HD2700E)
- When a still image is used, the two vertical or horizontal edges are trimmed based on the side that is smaller than the aspect ratio of the video to be dubbed.
![graph TD A[" "] --> B[" "] C[" "] --> D[" "]](/content/2026/05/883778/images/ffd5e1909b90fb7ace5d03c1ebef5043ed9fab9acc4837c9f63722a035019e81.jpg)
Example of Side-cut Still Image
7 Set the operations for finalize

- Finalize will be performed after dubbing if "ON" has been set for "FINALIZE".
If a BDMV disc is being dubbed, "OFF" cannot be set for "FINALIZE". And once the BDMV disc is dubbed the disc cannot be rewritten.
- If a DVD-Video or BDMV disc is being dubbed, the settings for "FIRST PLAY", "REPEAT" and "RENAME DISC" can be changed.
① Select "FIRST PLAY", and select either "NONE", "TOP MENU" or "TITLE 1"
- "NONE"
A finalized disc will not be automatically played back when it is inserted into another device.
- "TOP MENU"
The disc menu will be displayed automatically when a finalized disc is inserted into another device.
• "TITLE 1"
The first title on a finalized disc will be played back automatically when it is inserted into another device.
Memo:
- "NONE" cannot be selected for "FIRST PLAY" for BDMV.
② Select "REPEAT", and choose either "OFF" or "ON"
• "OFF"
The disc will stop and the menu will be displayed after all the titles are played back.
- "ON"
Repeat playback from the first title will start automatically after all the titles are played back.
③ Select "RENAME DISC", and press the [OK] button.
- A screen for entering the disc name appears.
Finalization is performed using the entered disc name.
8 Select "START", and press the [OK] button.

- Dubbing starts. A progress bar is displayed during the dubbing process.
- After dubbing is complete, a "DUBBING IS COMPLETED" message appears on the monitor.
Memo:
- Choose "BACK" from the menu and press the [OK] button to return to the previous screen.
Cancel dubbing
To cancel dubbing before it starts
- Select "CANCEL" from the menu, and press the [OK] button to cancel dubbing.
- Alternatively, you can press the [RETURN] button to cancel dubbing and return to the initial screen.
To discontinue dubbing while it is in progress
- Press the [OPTION] button. Select "CANCEL" from the Cancel Dubbing menu, and press the [OK] button. Data will be written onto the disc up to the point where import is cancelled.
Memo:
- When dubbing to a BD-R or DVD-R, the disc memory will be reduced as data will still be written onto the disc up to the point where dubbing is discontinued.
Dubbing Still Images from the HDD
Still images stored in the HDD can be dubbed to a BD-RE or an SD card.
Memo:
- Only "JPEG" still image format is supported.
For details, refer to "Dubbing chart" (P 29).
Before dubbing
- Dubbing to a disc: Set the BD-RE for dubbing on the disc tray. • Dubbing to an SD card: Insert the SD card to be dubbed into the [SD SLOT].
Dubbing still images
1 Press the [DUBBING] button on the remote control unit.
• The Dubbing menu screen appears.
2 On this screen, select "DISC/SD↔PICTURE".

3 Select the media to dub to from the media selection screen.
- A checkmark will be added to the selected media.

4 Select "NEXT", and press the [OK] button.
Memo:
- A message appears on the monitor when dubbing cannot be performed in the following cases. When this occurs, replace the disc or SD card with one that is usable.
- When an incompatible disc or SD card is set
- When there is insufficient space on the set disc or SD card
- When an unformatted disc or SD card is set
For details, refer to "Formatting a disc" (P 30) or "Formatting an SD Card" (P 32).
5 Select the still images to dub, and press the [MARK] button

- Pressing the [MARK] button adds a check mark to the selected image. All still images with a check mark are dubbed.
Memo:
- To clear the check mark, select the corresponding still image, and press the [MARK] button.
- Pressing the [OPTION] button displays a pop-up menu.
The pop-up menu enables you to perform the following operations.
BACK: Exits the pop-menu and returns to the initial screen.
SELECT ALL: Selects all still images within the same group.
DESELECT ALL: Clears the selection of all still images within the same group.
Note:
- A message appears if the selected still images do not fit into the disc. Check mark cannot be added to a still image if there is insufficient space on the disc.
6 Select "START", and press the [OK] button

- Dubbing starts. A progress bar is displayed during the dubbing process.
- After dubbing is complete, a "DUBBING IS COMPLETED" message appears on the monitor.
Memo:
- A directory of the following configuration is created in the media, and still images are written with file names ranging from "PIC_0001.jpg" to "PIC_9999.jpg".
![graph TD A["root"] --> B["00JVC"] B --> C["PIC_0001.JPG"] C --> D["PIC_0002.JPG"] C --> E["PIC_0003.JPG"] B --> F["101JVCS"] F --> G["PIC_0001.JPG"] F --> H["PIC_0002.JPG"] F --> I["PIC_0003.JPG"]](/content/2026/05/883778/images/7ffebe12e115de9765682ee3e937060efe22b9a814aedbdf946b5dc3ec112a81.jpg)
Dubbing from the Playback Navigation screen
Dubbing can also be performed from the Playback Navigation screen.
1 Select the still images to dub, and press the [OPTION] button

2 Select "DUB", and press the [OK] button
3 Follow steps 3 to 5 of "Dubbing still images"
Memo:
- Check marks of still images that appear on the Playback navigation screen will remain added to the image on the still image selection screen.
Cancel dubbing
To cancel dubbing before it starts
- Select "CANCEL" from the menu, and press the [OK] button to cancel dubbing.
- Alternatively, you can press the [RETURN] button to cancel dubbing and return to the initial screen.
To discontinue dubbing while it is in progress
Press the [OPTION] button. Select "CANCEL" from the Cancel Dubbing menu, and press the [OK] button. Data will be written onto the disc up to the point where import is cancelled.
Enabling Playback on Other Devices (Finalizing)
DVD-R and DVD-RW discs may need to be finalized before they can be played on other DVD players.
BD-R discs need to be finalized before they can be played on other BD players.
Memo:
- Discs in Video mode become a DVD-Video format with a title menu after finalizing.
- Discs containing DVD-Video data can be finalized by setting the disc operation settings according when the disc is inserted into this unit.
- Recording or editing of the disc will not be possible after it is finalized.
- If a DVD that was recorded using VR mode has been finalized, the disc can only be played back on VR mode compatible devices.
Finalizing
1. Set the BD or DVD to be finalized on the disc tray. 2. Press the [MEDIA MANAGE] button on the remote control unit. - The Media Management menu screen appears.

3 Select "FINALIZE" from "BD/DVD"
4 Select "YES" and press the [OK] button
- The top menu setting screen appears.

Memo:
- To cancel the finalizing operation, select "NO" and press the [OK] button.
5 Setting the top menu items

- Before finalizing, set "FIRST PLAY", "REPEAT", and "CHANGE DISC MENU BACKGROUND" accordingly. Set according to the steps below.
① Select "FIRST PLAY", and select an appropriate first play setting item
- This item is used for setting the disc operation when a finalized disc is inserted into another device.
NONE: A finalized disc will not be automatically played back when it is inserted into another device.
TOP MENU: The disc menu will be displayed automatically when a finalized disc is inserted into another device.
TITLE 1: The first title on a finalized disc will be played back automatically when it is inserted into another device.
② Select "REPEAT", and select an appropriate repeat setting item
- Set the disc action to be taken after all titles have been played back.
OFF: The disc will stop and the menu will be displayed after all the titles are played back.
ON: Repeat playback from the first title will start automatically after all the titles are played back.
③ Select "CHANGE DISC MENU BACKGROUND" to select a background image for the top menu.
- You can register and use a background image of your preference.

Memo:
- The items in "FIRST PLAY", "REPEAT" and "CHANGE DISC MENU BACKGROUND" can also be set in "Dubbing a Title from the HDD to a BD/DVD" (P 45).
6 Select "FINALIZE", and press the [OK] button.

- Finalizing starts.
- After finalization is complete, a "THE DISC HAS BEEN FINALIZED" message appears on the monitor.

Unfinalizing a disc
Only DVD-RW discs that are finalized on this unit can be unfinalized.
After a disc is unfinalized, addition of new titles and editing are possible.
Note:
- All discs except DVD-RW (VR mode) cannot be unfinalized.
To unfinalize a disc
1 Set a DVD-RW disc that is finalized by this unit on the disc tray. 2 Press the [MEDIA MANAGE] button on the remote control unit.
- The Media Management menu screen appears.

3 Select "FINALIZE" from "BD/DVD" 4 Select "YES" and press the [OK] button

- Unfinalizing starts.
- After unfinalizing is complete, a "THE DISC HAS BEEN UNFINALIZED" message appears on the monitor.
Copying the Entire Disc
Copying the entire disc allows all contents on a BD (BDAV, BDMV) or DVD (AVCHD, DVD-Video, DVD-VR) to be copied onto another disc.
Note:
- Contents on a DVD-VR that is not finalized cannot be copied to other discs.
- Content cannot be copied to a formatted BD-R or DVD-R disc. Make use of an unformatted disc.
- To copy to a BD disc, use BD-R or BD-RE discs. To copy to a DVD, use a DVD-R or DVD-RW disc.
- The disc to be copied onto will be formatted when copy is performed. Check that the disc has not been used before or if it is ok to delete data on the disc when using a BD-RE or a DVD-RW. • In the case of BD, volume labels are not copied.
- If an unsupported disc is set, "UNABLE TO IMPORT FROM DISC" or "UNABLE TO DUB ONTO DISC INSERT ANOTHER DISC" will be displayed on the monitor. Use a disc that is supported by this unit.
- For details on discs that are supported by this unit, refer to "Discs that enable both dubbing and playback" (P 13) and "Discs that enable playback only" (P 13).
1 Press the [DUBBING] button on the remote control unit
• The Dubbing screen appears.

2 Select "DISC⇒DISC", and press the [OK] button
- A menu screen for copying the entire disc appears.
Memo :
- During copy of the entire disc, data is temporarily copied to the HDD.
- Only discs that are not copyright-protected can be copied.
3 Set the number of discs to copy using the [ ▲ / ▼ ] buttons
- You can specify up to a maximum of 10 discs.
![JVC SR-HD2700US - Set the number of discs to copy using the [ ▲ / ▼ ] buttons - 1](/content/2026/05/883778/images/a861859beb5941ef5fd17183f63585840403a3a383a29cdba766d09f45349ff1.jpg)
4 Select "NEXT", and press the [OK] button - The disc tray will open automatically.
5 Set the source BD or DVD on the disc tray
6 Select "START", and press the [OK] button

- The disc tray will close automatically. The source BD or DVD will be recognized, and copying to the HDD will proceed.
- The disc tray will open automatically after copying has finished and "READY TO COPY NOW. INSERT THE DISC FOR COPYING" will be displayed on the monitor.
Memo :
- Check the remaining space on the HDD if the copy operation is interrupted.
7 Set a BD or DVD to copy on the disc tray
8 Select "START", and press the [OK] button.

The disc tray will close automatically. BD or DVD will be recognized, and the contents that were copied to the HDD will be copied to the disc.
Memo:
The copy operation will not be performed when the remaining disc memory is not sufficient.
9 Complete the entire disc copying.
After copy is complete, the tray will open automatically, and copy of the entire disc ends.
![graph TD A["CONFIRM"] --> B["COPYING ONTO THE XXX DISC IS COMPLETED"] B --> C["OK"]](/content/2026/05/883778/images/aac5f43743247c64fc975b407bed07a38ec438a8ca7d85f94b1078f361dd42e2.jpg)
Memo:
The screen prompting you to insert a new disc appears repeatedly until this unit has finished copying the number of discs specified in Step 3. When the message appears, set a new BD or DVD on the disc tray, select "START", and press the [OK] button.

- After copy is complete, the data copied onto the HDD will be deleted.
- Select "CANCEL" from the menu, and press the [OK] button to cancel disc copying.

Switching External Input
Pressing the [INPUT SELECT] button on the unit or the remote control displays the following pop-up screen.
You can now use the [INPUT SELECT] button again or the [▲/▼] buttons on the remote control to select an external input (SDI, HDMI, HDV/DV or L-1).
Press the [OK] button to confirm the selected external input option.

Direct Recording to Discs
The video from the external device can be recorded to the optical disc directly.
1 Press the [BD/SD] button on either this unit or the remote control to specify the "BD" as a recording medium. 2 Press the [▲] button on either this unit or the remote control to set a DISC on the disc tray. 3 Format a DISC - For details on formatting, refer to "Formatting" (P 30). 4 Press the [INPUT SELECT] button either on this unit or the remote control to start the video to be recorded. 5 Press the [●] and [▶] buttons either on this unit or on the remote control together to start recording.
Memo:
• Supported discs are BD-R/RE and DVD-R/RW. - Format the BD-R/RE disc to the BDAV or BDMV format. - When recording in the BDMV format, make use of a disc that is formatted using "FOR DIRECT RECORDING". - Menu cannot be created when recording directly to a BDMV format disc. - Format the DVD-R/RW disc to the VR or Video format. - Recording to a single-sided and dual layer DVD-R disc formatted in the DVD-Video format is not possible.
*1 Direct recording is possible if you are using a single-sided and single-layer DVD-R disc.
*2 You can dub DVD-Video format videos temporarily to the HDD before copying them to a single-sided and dual layer DVD-R disc.
- In the case of direct recording in the DVD-Video format, chapters that are assigned during recording will no longer be valid upon finalizing. (Chapters that are assigned in the following conditions will become invalid: in the paused state, when the [MARK] button on the remote control is pressed, or using auto marking during recording) After finalizing, chapters are reassigned automatically at every interval of 5 to 6 minutes.
- During direct recording in the BDMV format, a title will be divided at the point when the pause/cancel operation is executed while recording is in progress.
| Pausing recording
You can pause the process while recording videos to the HDD or a BD/DVD.
1 Select the location to record videos to. 2 Press the [Ⅲ] button on this unit or the remote control.
Memo:
- Titles for which recording is in progress will not be divided when recording is paused. However, they will be divided during direct recording in the BDMV format.
| Resuming Recording
1 While recording is paused, press the [Ⅲ] button on this unit or the remote control.
Memo:
- You can also resume recording by pressing the [●] button on the unit.
- You can also resume recording by pressing the [▶] button while holding down the [●] button on the remote control.
- A chapter is automatically created when recording resumes.
Simultaneous Recording to HDD and BD/DVD
1. Press the [SET UP] button on the remote control to set "SIMULTANEOUS RECORDING" in the Recording Settings menu to "ON". 2. Press the [▲] button on either this unit or the remote control to set a DISC on the disc tray. 3. Format a DISC. For details on formatting, refer to "Formatting" (P. 30). 4. Press the [INPUT SELECT] button either on this unit or the remote control to start the video to be recorded. 5. Press the [●] and [▶] buttons either on this unit or on the remote control together to start recording.
Memo:
- Simultaneous recording is not supported for DVD-Video and BDMV format discs.
Pausing simultaneous recording
You can pause the process while recording simultaneously to the HDD and a BD/DVD.
1. Press the [Ⅲ] button on this unit or the remote control.
Memo:
- Titles for which recording is in progress will not be divided when recording is paused.
Resuming simultaneous recording
1. While simultaneous recording is paused, press the [ ] button on this unit or the remote control.
Memo:
- You can also resume recording by pressing the [●] button on the unit.
- You can also resume recording by pressing the [▶] button while holding down the [●] button on the remote control.
- A chapter is automatically created when recording resumes.
Recording Using External Inputs
Videos from an external input (SDI, HDMI, HDV/DV or L-1) can be recorded to the HDD or a BD/DVD. Videos on an external device that is connected to i.LINK (HDV/DV) or video/S-video input can be recorded to the HDD. BD, DVD can be recorded from the [VIDEO]/[S-VIDEO] or SDI input.
Memo:
- Only titles that are not copyright-protected can be imported.
- Some restrictions on the external input may apply depending on the recording media. For details, refer to “Recordable Media” (P 56).
1 Press the [HDD] or [BD/SD] button to select the location to record the file. 2 Press the [INPUT SELECT] button on the remote control, and select an external input (SDI, HDMI, HDV/DV or L-1). 3 Press the [REC MODE] button and select a recording mode. 4 Press the [●] and [▶] remote control buttons together to start the recording process.
- Recording can also be started by pressing the [●] button on this unit.
5 Operate the external device to output the videos to be recorded to the SDI input, HDMI input, i.LINK (HDV/DV) or the video/S-video input. 6 Press the [■] button on either this unit or the remote control to display the pop-up screen, choose "STOP" and press the [OK] button.
• End the recording.
Memo:
- The REC characters will be displayed continuously on the monitor during DIRECT OUT recording via SDI/HDMI.
- When recording images via a video camera using i.LINK connection, recording may stop if the video camera is loaded with a DV tape while in the shooting mode. In this case, remove the DV tape before recording.
- Recording will be stopped if the maximum recording time has been reached, or if there is insufficient memory in the media.
- Continuous recording can be performed up to the maximum recording time; however, the title is automatically divided during recording. During recording of L-1 input signals to HDD, DVD-Video format disc, or DVD-VR format disc: 8-hour interval. During recording of DV input signals to HDD, DVD-Video format disc, or DVD-VR format disc: 8-hour interval. During recording of SD-SDI input signals and SD-resolution HDMI input signals to HDD, DVD-Video format disc, or DVD-VR format disc: 8-hour interval. During recording of HD-SDI and HDMI input signals that are down-converted to SD resolution to HDD, DVD-Video format disc, or DVD-VR format disc: 8-hour interval. During recording in conditions other than those above: 24-hour interval.
- It takes a little moment to start recording after the button is pressed.
For the recording modes and maximum recording time for each disc, refer to "Maximum recording time for each recording mode" (P 33).
Checking whether SDI or HDMI input signals can be recorded
1 Press the [OPTION] button on the remote control, and select "INPUT SIGNAL"
- A screen showing the details of the SDI or HDMI input signal appears.
2 Check to ensure that "RECORD" is displayed as "POSSIBLE"
- Recording is not possible if it is displayed as "IMPOSSIBLE".
Memo:
- It takes a little moment to start recording after the button is pressed.
- Depending on the settings menu, details of the original signal input may be displayed even after SD conversion.
Recordable Media
| Recording Mode | Recordable Media | |||
| HDD DVD-R/RW | (VR Format/Video Format) | BD-R/RE(BDAV Format) | BD-R/RE(BDMV Format) | |
| DR HDV - | HDV - | |||
| AF (HD) HD- | SDI/HDMI (HD)/HDV - HD-S | DI/HDMI (HD)/HDV HD-SDI/ | HDMI (HD)/HDV | |
| AN (HD) HD- | SDI/HDMI (HD)/HDV - HD-S | DI/HDMI (HD)/HDV HD-SDI/ | HDMI (HD)/HDV | |
| AL (HD) HD- | SDI/HDMI (HD)/HDV - HD-S | DI/HDMI (HD)/HDV HD-SDI/ | HDMI (HD)/HDV | |
| AE (HD) HD- | SDI/HDMI (HD)/HDV - HD-S | DI/HDMI (HD)/HDV HD-SDI/ | HDMI (HD)/HDV | |
| XP (SD) SD- | SDI/HDMI (SD)/DV/L-1 SD-S | DI/HDMI (SD)/DV/L-1 SD-SDI/ | HDMI (SD)/L-1 - | |
| SP (SD) SD- | SDI/HDMI (SD)/DV/L-1 SD-S | DI/HDMI (SD)/DV/L-1 SD-SDI/ | HDMI (SD)/L-1 - | |
| LP (SD) SD- | SDI/HDMI (SD)/DV/L-1 SD-S | DI/HDMI (SD)/DV/L-1 SD-SDI/ | HDMI (SD)/L-1 - | |
| EP (SD) SD- | SDI/HDMI (SD)/DV/L-1 SD-S | DI/HDMI (SD)/DV/L-1 SD-SDI/ | HDMI (SD)/L-1 - | |
| DR1 (HD) HD- | SDI/HDMI (HD) - HD-SDI/H | DMI (HD) - | ||
| DR2 (HD) HD- | SDI/HDMI (HD) - HD-SDI/H | DMI (HD) - | ||
| DR3 (HD) HD- | SDI/HDMI (HD) - HD-SDI/H | DMI (HD) - | ||
| DR4 (HD) HD- | SDI/HDMI (HD) - HD-SDI/H | DMI (HD) - | ||
Simultaneously Recordable Media
| Recording Mode | Recordable Media | |||
| HDD + DVD-R/RW (VR Format) | HDD + DVD-R/RW (Video Format) | HDD + BD-R/RE (BDAV Format) | HDD + BD-R/RE (BDMV Format) | |
| DR - - HDV - | ||||
| AF (HD) | - - - - | |||
| AN (HD) | - - - - | |||
| AL (HD) | - - - - | |||
| AE (HD) | - - - - | |||
| XP (SD) | SD-SDI/HDMI (SD)/L-1 - SD-SDI/HDMI (SD)/L-1 - | |||
| SP (SD) | SD-SDI/HDMI (SD)/L-1 - SD-SDI/HDMI (SD)/L-1 - | |||
| LP (SD) | SD-SDI/HDMI (SD)/L-1 - SD-SDI/HDMI (SD)/L-1 - | |||
| EP (SD) | SD-SDI/HDMI (SD)/L-1 - SD-SDI/HDMI (SD)/L-1 - | |||
| DR1 (HD) | - - HD-SDI/HDMI (HD) - | |||
| DR2 (HD) | - - HD-SDI/HDMI (HD) - | |||
| DR3 (HD) | - - HD-SDI/HDMI (HD) - | |||
| DR4 (HD) | - - HD-SDI/HDMI (HD) - | |||
Recordable Input Signal (SR-HD2700U)
| Input Signal | DOWNCONVERSION(OFF) | DOWNCONVERSION(SD CONVERSION) | DOWNCONVERSION(1440 CONVERSION) | |
| SDI | 1920×1080/59.94i 1920×1080/59.94i | XP to LP: 720×480/59.94iEP: 352×240/29.97p | 1440×1080/59.94i | |
| 1920×1080/23.98p 1920×1080/59.94i - 1440×1080/59.94i | ||||
| 1920×1080/23.98psf 1920×1080/59.94i - 1440×1080/59.94i | ||||
| 1280×720/59.94p 1280×720/59.94p | XP to LP: 720×480/59.94iEP: 352×240/29.97p | 1280×720/59.94p | ||
| 720×480/59.94i | XP to LP: 720×480/59.94iEP: 352×240/29.97p | XP to LP: 720×480/59.94iEP: 352×240/29.97p | XP to LP: 720×480/59.94iEP: 352×240/29.97p | |
| HDMI | 1920×1080/59.94i 1920×1080/59.94i | XP to LP: 720×480/59.94iEP: 352×240/29.97p | 1440×1080/59.94i | |
| 1920×1O80/59.94p - (*1) -- (*1) | ||||
| 1920×1080/29.97p 1920×1080/59.94i | XP to LP: 720×480/59.94iEP: 352×240/29.97p | 1440×1080/59.94i | ||
| 1920×1080/23.98p 1920×1O80/59.94i - 1440×1080/59.94i | ||||
| 1280×720/59.94p 1280×720/59.94p | XP to LP: 720×480/59.94iEP: 352×240/29,97p | 1280×720/59.94p | ||
| 720(1440)×480/59.94i | XP to LP: 720×480/59.94iEP: 352×240/29.97p | XP to LP: 720×480/59.94iEP: 352×240/29.97p | XP to LP: 720×480/ 59.94iEP: 352×240/29.97p | |
| 720×480/59.94p | XP to LP: 720×480/59.94iEP: 352×240/29.97p | XP to LP: 720×480/59.94iEP: 352×240/29.97p | XP to LP: 720×480/59.94iEP: 351×240/29.97p | |
Recordable Input Signal (SR-HD2700E)
| Input Signal | DOWNCONVERSION(OFF) | DOWNCONVERSION(SD CONVERSION) | DOWNCONVERSION(1440 CONVERSION) | ||||
| HDD BD | HDD BD HDD BD | ||||||
| SDI | 1920×1080/50i 1920×1080/50i | 80/50i | XP to LP: 720×576/50iEP: 352×288/25p | 1440×1080/50i | |||
| 1920×1080/23.98p - 1920×1080/50i -- 1440×1080/50i | |||||||
| 1920×1080/23.98psf - 1920×1080/50i -- 1440×1080/50i | |||||||
| 1280×720/50p 1280×720/50p | XP to LP: 720×576/50iEP: 352×288/25p | 1280×720/50p | |||||
| 720×576/50i | XP to LP: 720×576/50iEP: 352×288/25p | XP to LP: 720×576/50iEP: 352×288/25p | XP to LP: 720×576/50iEP: 352×288/25p | ||||
| HDMI | 1920×1080/50i 1920×1080/50i | 80/50i | XP to LP: 720×576/50iEP: 352×288/25p | 1440×1080/50i | |||
| 1920×1080/50p - (*1) -- (*1) | |||||||
| 1920×1080/25p | 1920×1080/50i | XP to LP: 720×576/50iEP: 352×288/25p | 1440×1080/50i | ||||
| 1920×1080/23.98p - 1920×1080/50i -- 1440×108O/50i | |||||||
| 1280×720/50p 1280×720/50p | XP to LP: 720×576/50iEP: 352×288/25p | 1280×720/50p | |||||
| 720×576/40p | XP to LP: 720×576/50iEP: 352×288/25p | XP to LP: 720×576/50iEP: 352×288/25p | XP to LP: 720×576/50iEP: 352×288/25p | ||||
| 720(1440)×576/50i | XP to LP: 720×576/50iEP: 352×288/25p | XP to LP: 720×576/50iEP: 352×288/25p | XP to LP: 720×576/50iEP: 352×288 25p | ||||
Memo: - If the input signal is not being output, setting "FRAME SYNCHRONIZER" to "ON" will enable the signal to be recorded. - For (*1), setting "FRAME SYNCHRONIZER" to "ON" will enable the signal to be recorded. - The default setting for "FRAME SYNCHRONIZER" is "ON". - Recording is performed at the resolutions shown in the table.
(SR-HD2700E only)
- If the SDI/HDMI input signals are in "23.98p/23.98psf", signals cannot be recorded to the HDD. Direct recording to BD-R/RE(BDAV) in "59.94i" is possible.
- If the SDI or HDMI input signals are in "23.98p/23.98psf" and the Input Selection is set to "SDI" or "HDMI", the following buttons are disabled.
[DUBBING], [NAVIGATION], [EDIT], [INFORMATION CORRECT], [SETUP], [PROGRESSIVE SCAN]
To enable these buttons, change the SDI or HDMI signals, or change the Input Selection by selecting other than "SDI" or "HDMI".
- To input "23.98p/23.98psf" signals, set "FRAME SYNCHRONIZER" under "SDI/HDMI CONNECTION" to "OFF" in advance.
About Playing Back
Videos or edited videos stored in the HDD, as well as videos stored in a disc or SD card can be played back on this unit.
The types of media that are playable on this unit are as follows.
• Videos and still images stored in the HDD
• Videos stored on different disc types
- Videos and still images stored on backup discs created using the "Everio Writer"
• Videos and still images stored on SD cards
These videos can be easily played back for viewing using the "Playback Navigation" software that comes with this unit.
For details on the "Playback Navigation" software, refer to "Using Playback Navigation" (P 58).
Memo:
• This unit does not support DivX videos. - If AVCHD files are displayed in thumbnails, black bars may appear on the left and right borders depending on the video resolution. - To display MOV*/MXF* files stored on an SD card using Playback Navigation, make use of list display. Thumbnail display is not supported. Files on the SD card cannot be played back directly. To do so, import them into a HDD. - For details on importing MOV*/MXF* files from an SD card, refer to "Importing Data from an SD Card to the HDD" (P 40).
MOV*: MOV format files (recorded in the HQ mode and SP mode) using the JVC ProHD MEMORY CARD CAMERA RECORDER GY-HM series (excluding GY-HM200 and GY-HM170)
MXF*: MXF format files (recorded in the HQ mode and SP mode) using the JVC ProHD MEMORY CARD CAMERA RECORDER GY-HM series
Display Marks on the Playback Navigation Screen
| Icon Mark | name Explanation | |
 | Protect Mark Indicates protected titles. | |
 | Mode Conversion Preset Mark | Indicates titles for which mode conversion has been preset. |
 | Not Viewed Mark | Indicates titles that have not been viewed or groups containing titles that have not been viewed. |
 | Scene Delete Mark | Indicates titles for which scene delete or chapter delete has been applied. |
 | Group Mark Indicates a group. | |
 | Playlist Mark Indicates a playlist. | |
 | Not Playable Mark | Indicates titles that cannot be played. |
 | Question Mark | Indicates titles of which the thumbnails cannot be displayed. Playback may not be possible. |
Using Playback Navigation
Videos can be easily played back for viewing using the
"Playback Navigation" function available on this unit.
Displaying the Playback Navigation screen
1 Select the location of the playback file
- Press the [HDD] button on the remote control unit Play back videos or still images stored on the HDD.
- Press the [BD/SD] button on the remote control unit. Play back videos or still images stored on a BD/DVD or a SD.
2 Press the [NAVIGATION] button on the remote control unit
- The Playback Navigation screen appears.
Memo:
- Pressing the [BD/SD] button each time switches the media to play back between BD/DVD and SD.
- You can also switch the media to play back by pressing the [HDD] or [BD/SD] button when the Playback Navigation screen is displayed.
- The recording mode and recording time of the selected video title is displayed at the top right corner of the screen.
Operating Playback Navigation
Playing a video/still image
Plays the selected video/still image.

- Select a title to play back, followed by pressing the [OK] or [▶] button to play the selected video/still image.
Memo:
- Select a group and press the [OK] button to display all titles in the group.
Switching between thumbnail and list displays
You can switch between the thumbnail display and list display of a video.
- When the video thumbnail list screen is displayed

Press the [RED] button to display the title list screen.
- When the title list screen is displayed

Press the [RED] button to display the video thumbnail list screen.
Displaying a group/folder
A group/folder screen can be displayed.

Press the [YELLOW] (U model) / [BLUE] (E model) button to display the group/folder screen.
Switching between video and still image displays
You can switch the display between the video thumbnail list screen and still image thumbnail screen.
- When the video thumbnail list screen is displayed

Press the [GREEN] button to display the still image thumbnail list screen.
- When the still image thumbnail list screen is displayed

Press the [RED] button to display the video thumbnail list screen.
Displaying the Option menu
Displaying the Option menu enables you to perform different operations on a selected title/group, including "BACK", "PLAY", "DELETE", "DUB", "GROUP", "UNGROUP", "DO NOT GROUP", "MODE CHANGE", "EDIT", "EDIT INFO" and "OTHERS".
1 Select a title/group, and press the [OPTION] button
- An Option menu appears.

2. Select an operation option, and press the [OK] button.
- Options that cannot be operated are displayed in gray and cannot be selected.
For details on the Option menu items, refer to "Option menu list" (P 60).
Option menu list
- BACK Returns to the previous screen.
- PLAY Plays back the selected title/group. For details on the button operations during playback, refer to "Video Playback Operation" (P 61).
- DELETE Deletes a selected title/group. For details, refer to "Deleting a Title/Group" (P 73).
- DUB Performs dubbing of a selected title/group. For details, refer to "Dubbing/Importing" (P 28).
- GROUP Groups the selected titles/groups. For details, refer to "Grouping" (P 71).
- UNGROUP Ungroups a selected group. For details, refer to "Ungrouping" (P 71).
- DO NOT GROUP Removes the selected titles from a group. For details, refer to "Excluding from a group" (P 72).
- MODE CHANGE Changes the mode of the selected title/group. For details, refer to "Mode Conversion" (P 83).
- CHAPTER LIST Displays the chapters of a selected title.
• EDIT Switches to the menu screen of the sub-items.
- CHAPTER EDIT Switches to the chapter edit screen of the selected title. For details, refer to "Editing a Chapter" (P 78).
- PLAYLIST EDIT Switches to the playlist edit screen of the selected title. For details, refer to "Creating a Playlist" (P 76).
- DELETE SCENE Switches to the delete scene screen of the selected title. For details, refer to "Deleting Scenes" (P 81).
- DIVIDE Switches to the dividing screen of the selected title. For details, refer to "Dividing" (P 80).
• EDIT INFO Switches to the menu screen of the sub-items. - MODIFY TITLE NAME/MODIFY GROUP NAME Switches to the rename screen for the selected title/group name. For details, refer to "Changing the Title/Group Name" (P 73). - MODIFY THUMBNAIL Switches to the thumbnail modification screen of the selected title. For details, refer to "Editing a Thumbnail" (P 77). - CHANGE SHOOTING DATE/TIME Switches to the recording date modification screen of the selected title. For details, refer to "Changing the Shooting Date/Time" (P 82). - PROTECT Switches to the protection screen of the selected title/group. For details, refer to "Turning On Title/Group Protection" (P 74). - UNPROTECT Switches to the screen for turning off protection of the selected title/group. For details, refer to "Turning Off Title/Group Protection" (P 75). Switches to the menu screen of the other-items. • CHAPTER LIST - DETAILS - THUMBNAIL • LIST • VIDEO - PICTURE - GROUP • FOLDER SELECT - CONTENT
- OTHERS
Video Playback Operation

Frequently used button operations
[▶] button
- If the stop position (resume point) is memorized in the selected video, pressing the button plays back the video from this position. The video may not resume playback depending on the media and settings used. For details, refer to "RESUME" (P 86).
- If playback is paused (Still mode), pressing the button resumes playback.
[■] button
- Pressing the button stops playback after memorizing the stop position (resume point).
- Pressing the button again after playback stops clears the memory of the stop position (resume point).
[Ⅱ] button
- Pressing the button stops playback temporarily.
[▶▶] button
- Pressing the button once during playback switches to a playback speed of 1.3 times (with audio sound).
- Pressing the button in the 1.3x playback or fast forward mode fast forwards the video. Pressing the button each time switches the search speed. (5x⇒10x⇒30x⇒60x)
Memo:
- The listed speed for searching and slow motion is an approximate amount.
- Pressing the button in the Still mode forwards the video frame by frame.
- Pressing and holding down the button in the Still mode starts playback in slow motion. Pressing the button during playback in slow motion switches the playback speed. The speed changes each time the button is pressed.
(1/24x ⇒ 1/16x ⇒ 1/8x ⇒ 1/2x)
[◀◀] button
- During normal playback, 1.3x playback, fast forward, or fast reverse, pressing the button fast reverses playback. Pressing the button each time switches the search speed. (1x⇒5x⇒10x⇒30x)
- Pressing the button in the Still mode reverses the video frame by frame.
- Pressing and holding down the button in the Still mode starts reverse playback of the video in slow motion. Pressing the button during playback in slow motion switches the playback speed. The speed changes each time the button is pressed.
(1/24x ⇒ 1/16x ⇒ 1/8x ⇒ 1/2x)
Memo:
- The listed speed for searching and slow motion is an approximate amount.
[▶▶] / [◀◀] button
- Pressing any of the buttons moves the chapter position.
[MARK] button
- Pressing the button enables you to add a chapter mark to a title.
![JVC SR-HD2700US - [MARK] button - 1](/content/2026/05/883778/images/73100aed59c6b2a91076da0ef9440e20b6e8c3246a16b887d10275f0ada2866c.jpg)
button
- During normal playback, 1.3x playback, slow motion playback, fast forward, or fast reverse, pressing the button moves the playback position forward by about 30 seconds. Pressing the button multiple times moves playback to the position equivalent to the number of times pressed multiplied by 30 seconds.
- Normal playback will resume after the position has been moved. If pressed during 1.3x playback, 1.3x playback will continue after the position has been moved. Contents may be played back in the normal mode depending on the type of disc or content.
- Pressing the button in the Still mode moves the current paused position forward by about 30 seconds while maintaining the Still mode.

button
- During normal playback, 1.3x playback, slow motion playback, fast forward, or fast reverse, pressing the button moves the playback position back by about seven seconds. Pressing the button multiple times moves playback to the position equivalent to the number of times pressed multiplied by seven seconds.
- Normal playback will resume after the position has been moved. If pressed during 1.3x playback, 1.3x playback will continue after the position has been moved. Contents may be played back in the normal mode depending on the type of disc or content.
- Pressing the button in the Still mode moves the current paused position back by about seven seconds while maintaining the Still mode.
[HDD] button
- During playback of videos on a "BD/DVD" or "SD", pressing the button stops the current playback and switches to the "HDD" mode. Pressing the button during display of the Playback Navigation screen switches to the Playback Navigation screen for the "HDD" mode.
[BD/SD] button
- During playback of videos on a "BD/DVD" or "SD", pressing the button stops the current playback and switches from "BD/DVD" to "SD" or vice versa. Pressing the button during display of the Playback Navigation screen switches to the Playback Navigation screen for the other media. During playback of videos on the "HDD", pressing the button stops the current playback and switches to "BD/DVD" mode.
Memo:
- The display switches automatically to the SD mode only if the inserted SD card contains playable videos or still images.
| Useful button operations
[PB MODE] button
- Displays the Playback Settings screen, which enables you to modify the settings. For details, refer to "Changing Playback Settings" (P 66).
[AUDIO] button
- Switches the audio channel.
[SUB TITLE] button
- Switches the subtitle display.
[ANGLE] button
- Switches the angle.
Memo:
- Pressing the [AUDIO], [SUB TITLE], or [ANGLE] button has no effect if their selection is not available in the playback video.
Playing Videos on a BD/DVD
Playback starts automatically after a BD/DVD is set.
If the Auto Play feature is disabled, play the title using Playback Navigation.
Memo:
- For details on the button operations during playback, refer to "Video Playback Operation" (P 61).
Playing a disc when Auto Play is enabled
1. Set a BD or DVD on the disc tray.
- Auto Play starts.
Playing a disc when Auto Play is disabled
1. Set a BD or DVD on the disc tray.
2. Press the [NAVIGATION] button.
- The Playback Navigation screen appears.

3. Select a title, and press the [OK] button.
- Playback of the selected title starts.
Memo:
- If the current playback location is "HDD" or "SD", press the [BD/SD] button on the remote control unit to switch it to "BD/DVD".
- Videos can also be played back without starting up Playback Navigation. Pressing the [▶] button starts playback from the stop position (resume point) of the disc. If the stop position (resume point) is not memorized or if the setting for "RESUME" has been set to "OFF", playback starts from the beginning of the disc.
Playing an EverioBackup Disc*
EverioBackup: Data disc containing high-definition videos that are recorded in the MPEG2 format using a DVD writer for Everio.
1. Set the disc on the disc tray.
2. Press the [NAVIGATION] button.
- The Playback Navigation screen appears.
3. Select a title, and press the [OK] button.
- Playback of the selected title starts.
Memo:
- If the current playback location is "HDD" or "SD", press the [BD/SD] button on the remote control unit to switch it to "BD/DVD".
- Videos can also be played back without starting up Playback Navigation. Pressing the [▶] button plays back titles starting from that with the oldest recording date.
Playing Video Discs Created Using a PC
Videos that are created using a PC can be played back using Playback Navigation.
1. Set the disc on the disc tray.
2 Press the [NAVIGATION] button
- The Playback Navigation screen appears.
3 Select a title, and press the [OK] button
- Playback of the selected title starts.
Memo:
- The formats that can be played back are BDAV, BDMV, DVD-Video and DVD-VR (CPRM-compatible).
- If the current playback location is "HDD" or "SD", press the [BD/SD] button on the remote control unit to switch it to "BD/DVD".
- Videos can also be played back without starting up Playback Navigation. Pressing the [▶] button starts playback from the stop position (resume point) of the disc. If the stop position (resume point) is not memorized or if the setting for "RESUME" has been set to "OFF", playback starts from the beginning of the disc.
- Playback may not be possible due to compatibility problems.
Playing Videos on the HDD
Titles stored on the HDD can be played back using Playback Navigation.
You can select a video to play from "Title", "Group", or "Playlist".
Memo:
- For details on the button operations during playback, refer to "Video Playback Operation" (P 61).
Playing titles stored on the HDD
1 Press the [NAVIGATION] button
- The Playback Navigation screen appears.
2 Select the titles to playback, and press the [▶] button
- Playback of the selected title starts.
Memo:
- If the current playback location is "BD/DVD" or "SD CARD", press the [HDD] button on the remote control unit to switch it to "HDD".
- To play back specific titles within a group, select the group, press the [OK] button, and select the titles accordingly.
- Videos can also be played back without starting up Playback Navigation.
Pressing the [▶] button starts playback of the most recently played title.
If there are no recently played titles, playback starts from the title with the most recent recording date.
Playing Videos on a SD Card
Titles stored on an SD card can be played back using Playback Navigation.
You can select a video to play from "Title".
1 Insert the SD card into the [SD SLOT]
- Switch the playback location to "SD CARD" after the SD card is detected by the unit.
2 Press the [NAVIGATION] button
- The Playback Navigation screen appears.

3 Select a title, and press the [OK] button
- Playback of the selected title starts.
Memo:
- Playback navigation displays AVCHD files stored on the SD card in titles, not in scenes (chapters). Titles are grouped such as according to the date, recording mode, or number of scenes. Make use of thumbnail display to display titles. List display is not supported.
- The formats that can be played back are AVCHD and SD-VIDEO. If AVCHD files are displayed in thumbnails, black bars may appear on the left and right borders depending on the video resolution.
- AVCHD files recorded in the 1080p format cannot be played back.
- When there are files of different formats (AVCHD, SD-VIDEO, MOV*/MXF*) in the SD card, press the [RED] button to select the format you want to display.
MOV*: MOV format files (recorded in the HQ mode and SP mode) using the JVC ProHD MEMORY CARD CAMERA RECORDER GY-HM series (excluding GY-HM200 and GY-HM170)
MXF*: MXF format files (recorded in the HQ mode and SP mode) using the JVC ProHD MEMORY CARD CAMERA RECORDER GY-HM series
- Videos can also be played back without starting up Playback Navigation. Pressing the [▶] button starts playback from the stop position (resume point). If the stop position (resume point) is not memorized, playback starts from the beginning of the playable content. If the setting for "QUICK STARTUP" is set to "OFF", the resume point will not be memorized when the power is turned OFF.
For details on the button operations during playback, refer to "Video Playback Operation" (P61).
Playing Still Images (JPEG)
Still images stored on the HDD/BD/DVD/SD card can be played back using Playback Navigation.
Playing still images
1 Select the playback location
HDD: If the current playback location is "BD/DVD" or "SD CARD", press the [HDD] button on the remote control unit to switch it to "HDD".
BD/DVD: If the current playback location is "HDD" or "SD CARD", press the [BD/SD] button on the remote control unit to switch it to "BD/DVD".
SD: If the current playback location is "HDD" or "BD/DVD", press the [BD/SD] button on the remote control unit to switch it to "SD CARD".
2 Set the media
- To play a media other than "HDD", set the media on which the still images are stored.
BD/DVD: Set a BD or DVD on the disc tray SD: Insert the SD card into the [SD SLOT]
3 Select the still images to play, and press the [▶] button
- Images selected are played back in a slideshow.

Memo:
- The slide show plays back images according to the date of the files.
- If folders exist, files inside the selected folder will be played.
- You can specify the "REPEAT", "SLIDESHOW INTERVAL" and "SLIDESHOW EFFECTS" settings in the Playback Settings menu. For details, refer to the "REPEAT" (P 66), "SLIDESHOW INTERVAL" (P 66), and "SLIDESHOW EFFECTS" (P 66) items under "Playback Settings".
Enabled button operations during still image playback
[▶] button
- Pressing the button when a title/group is selected starts playback of the still images in the title/group in a slideshow.
[■] button
- Pressing the button stops the slideshow and displays the Playback Navigation screen.
[Ⅱ] button
- Pressing the button stops the slideshow temporarily.
[◀◀] / [▶▶] button
- Pressing the button displays the previous or next still image.
[⏻/l] button
- Pressing the button ends playback of the still images and turns the power of the unit to "Off".
Memo :
- The display of still images can be zoomed in/out or rotated using the following buttons when the slideshow is paused. • [ ↗ ]/U: [YELLOW], E: [BLUE] button Rotates the still image by 90° in the clockwise direction.
• [ ↗ ]/U: [BLUE], E: [YELLOW] button Rotates the still image by 90° in the anti-clockwise direction.
• [OK]/[GREEN] button Enlarges the still image.
- [RETURN]/[RED] button Reduces the enlarged still image.
- [▲/▼/◄/►] button Moves the display position of the enlarged still image in the direction indicated by the button.
- This unit does not have a still image editing feature. Still images cannot be saved when they are zoomed in or rotated.
- Priority of display is given to the media ("BD/DVD" or "SD CARD") that contains playable still images. If both "BD/DVD" and "SD CARD" contain playable videos, priority of display will be given to the most recently used media.
Changing Playback Settings
Displaying the playback settings menu
1 Press the [PB MODE] button on the remote control unit during playback of a title.
• The Settings Menu screen appears. - The playback settings menu can only be displayed during playback of a title. - Only settings that are supported by the current title being played back can be changed in the playback settings menu. Items displayed in gray cannot be set.
Playback Settings Menu
Audio/subtitle settings

Memo:
- "AUDIO/SUBTITLE" will be displayed only if they are available in the video content. The setting value differs depending on the content. Items that are not available in the content cannot be set.
AUDIO LANGUAGE
CHANGE AUDIO OUTPUT
SIGNAL TYPE (BD-ROM)
• PRIMARY VIDEO • PRIMARY AUDIO • SECONDARY VIDEO • CHANGE SECONDARY VIDEO • SECONDARY AUDIO • SECONDARY AUDIO LANGUAGE
SUBTITLE LANGUAGE
SUBTITLE STYLE
CHANGE ANGLE
|Playback settings

REPEAT
The following items can be set. Items are not displayed if they cannot be set.
| Setting Values Description | |
| OFF Turns off repeat. | |
| TITLE | Repeats playback of the currently played title. |
| CHAPTER | Repeats playback of the currently played chapter. |
| TRACK | Repeats playback of the currently played track. |
| FOLDER | Repeats playback within the currently played folder. |
| ALL | Repeats playback of the entire disc. |
| A-B | Repeats playback of the section between the specified starting and ending points. Pressing the [OK] button specifies the displayed scene as the starting point (Point A). Pressing the [OK] button after forwarding playback specifies the displayed scene as the ending point (Point B). |
CHANGE TITLE
You can change to a different title by entering the corresponding numeric value. Any value that is larger than the number of titles cannot be entered.
CHANGE CHAPTER
You can change to a different chapter by entering the corresponding numeric value. Any value that is larger than the number of chapters cannot be entered.
TIME JUMP
You can move to a specific playback position by entering a time. This is not possible if the specified time is not valid.
SLIDESHOW INTERVAL
The following items can be set. 3SEC/5SEC/10SEC/20SEC/30SEC modes
SLIDESHOW EFFECTS
The following items can be set.
| Setting Values Description | |
| OFF Turns off slideshow effect. | |
| ON | Turns on slideshow effect. “Fade out” and “Fade in” effects can be applied when switching from one slide to another. |
| Video settings

PICTURE QUALITY
The following items can be set.
| Setting Values Description | |
| NORMAL Standard picture quality. | |
| CINEMA Effective when playing movies. | |
| FINE Produces sharp images with enhanced outlines. | |
| SOFT Reduces noise that is prominent in the video image. | |
| USER SETTING Enables the Details setting. For details, refer to “DETAIL SETTING”. |
DETAIL SETTING
The following items can be set.
Choose an option and press [OK] to set the respective values.
| Setting Values D | Description |
| CONTRAST | A value between “-7” and “+7” can be set. |
| BRIGHTNESS | A value between “0” and “15” can be set. |
| SHARPNESS | A value between “-6” and “+6” can be set. |
| COLOR | A value between “-7” and “+7” can be set. |
| GAMMA | A value between “0” and “5” can be set. |
DIGITAL NOISE REDUCTION
The following items can be set.
| Setting Values Description |
| OFF Turns off DNR (Digital Noise Reduction). |
| ON Reduces noise that is prominent in images of lengthy videos. |
PROGRESSIVE OUTPUT
The following items can be set.
| Setting Values Description | |
| AUTO1 Displays video images after they are converted according to the film material. | |
| AUTO2 In addition to the “AUTO1” option, support is also provided for progressive videos recorded at 30 frames per second. | |
| VIDEO Most suitable for video images (TV broadcast, etc.). Select this option when playing videos with significant movements or animated videos. |
Editing
Before editing
This unit mainly edits video images stored on the HDD. To edit video images stored in a disc or SD card, do so after importing them to the HDD.
Data on a finalized disc cannot be edited. To edit a finalized disc, you have to either unfinalize the disc, or do so after importing the data to the HDD.
Memo:
- Only discs that are finalized using this unit can be unfinalized.
Editable items for different media
Items that are editable vary according to the type of media on which the video data is stored. For details, refer to the media chart below.
Media chart
| Editing option HDD | BD-R/ BD-RE (BDAV) | BD-R/ BD-RE (BDMV) | DVD-RW/ DVD-R | SD | HDD/BD- RE/SD picture | |
| Grouping | √ | ---- | ||||
| Changing the Title/Group Name | √ | √ | - | √ | - | - |
| Deleting a Title/Group | √ | √ | *3 | √ | - | √ |
| Turning On Title/Group Protection | √ | √ | -*1 - | √ | ||
| Turning Off Title/Group Protection | √ | √ | -*1 -- | |||
| Creating a Playlist | √ | ---- | ||||
| Editing a Thumbnail | √ | √ | - | √ | - | - |
| Editing a Chapter | √ | *2 - *1, *2 -- | ||||
| Dividing | √ | ---- | ||||
| Delete Scene | √ | ---- | ||||
| Changing the Disc Name - | √ | - | √ | - | - | |
| Changing the Shooting Date/Time | √ | ---- |
Memo:
*1: Supports only the "VR MODE". *2: Supports only dividing and combining of chapters. *3: For BDMV disc (BD-R/BD-RE) created during dubbing, the titles cannot be deleted.
For BDMV disc (BD-R) created during direct recording, the titles can be deleted before finalizing the disc. The titles cannot be deleted after finalization.
For BDMV disc (BD-RE) created during direct recording, the titles can be deleted. (P 73)
Entering Characters
Names can be changed or given to stored videos or groups. You can enter characters while referring to the input on the monitor.
Character input screen
① Function name field ② Screen description ③ Input window
Characters entered appear on the input window.
④ Operation guide 1
The [0]-[9], [*], [#], [PAGE PRV], [PAGE NEXT], [◀] and
[◀] buttons are displayed.
⑤ Operation guide 2
[▲/▼/◄/►], [OK], [RETURN], [OPTION], [BLUE], [RED],
[GREEN] and [YELLOW] buttons are displayed.
⑥ Character input keyboard
A character input keyboard appears during input of character or symbol.
You can enter characters by selecting them accordingly from the keyboard.
| Entering characters
1 Enter characters using the [0]-[9], [*] or [#] buttons 2 After character input is complete, press the [YELLOW] (U model) / [BLUE] (E model) button
Memo :
- Switch between alphanumeric and symbol input by pressing the [ ] button.
- For details on the correspondence between each button and the input characters, refer to the "Character List".
- Press the [ ] button to delete an input character. Press and hold down the [ ] button to delete all input characters.
- Pressing the [RETURN] button calls up the confirmation screen to cancel character input.
To cancel character input and return to the initial screen, select "YES" and press the [OK] button.
To return to the character input screen, select "NO" and press the [OK] button.
- Up to about 20 alphanumeric characters can be displayed on the disc menu of BDMV and DVD-VIDEO. (The number of characters that can be displayed varies with the character.)
Note:
- If you switch the screen display before confirming the input characters, a message will appear on the screen.
To cancel character input and return to the initial screen, select "STOP" and press the [OK] button.
To return to the character input screen, select "BACK" and press the [OK] button.
- If the converted characters exceed the maximum number of input characters, a message will appear on the screen.
Select "OK" and press the [OK] button to delete the excess characters and to input the remaining ones.
Select "RETURN" and press the [OK] button to restore the unconfirmed characters.
- No more characters can be input if the maximum character limit has been reached.
Character List
| [1] | . | , | ? | ! | 1 | - | ( | ) | @ | / | : | _ | ||||||||||||||||||||
| [2] | a | b | c | A | B | C | ä | æ | ä | à | á | ä | ä | ç | Ä | Æ | Å | À | Á | Â | Ä | Ç | 2 | |||||||||
| [3] | d | e | f | D | E | F | è | é | ê | ë | õ | È | É | Ê | È | Đ | 3 | |||||||||||||||
| [4] | g | h | i | T | G | H | I | ì | í | î | ï | ì | í | î | ï | 4 | ||||||||||||||||
| [5] | j | k | l | J | K | L | £ | 5 | ||||||||||||||||||||||||
| [6] | m | n | o | M | N | O | ö | ø | ò | ó | õ | õ | ñ | Ö | ∅ | Ò | Ó | Ô | Õ | Ñ | 6 | |||||||||||
| [7] | p | q | r | s | P | Q | R | S | ÿ | ß | 7 | |||||||||||||||||||||
| [8] | t | u | v | T | U | V | ù | ú | û | ü | Ù | Ú | Û | Ü | 8 | |||||||||||||||||
| [9] | w | x | y | z | W | X | Y | Z | ý | p | Ý | P | 9 | |||||||||||||||||||
| [0] | 0 | . | @ | - | _ | / | : | ! | ? | ( | ) | * | # | + | , | ^ | ; | < | = | > | ¥ | % | & | [ | ] | ' | ` | { | |} | *1 | ||
| [*] | , | . | - | ~ | ! | ? | *1 |
*1: Single-byte space *2: Press the [#] button to return to the previous input character.
Grouping
Multiple titles stored on the HDD can be combined into a group. Memo: ____
- Only video data stored on the HDD can be grouped.
| Grouping
1 Press the [NAVIGATION] button on the remote control unit
The Playback Navigation screen appears.
2 Select the titles or groups to be grouped, and press the [MARK] button
- Pressing the [MARK] button adds a check mark to the selected titles/groups. All titles and groups with the check mark will be grouped together.

3 Press the [OPTION] button on the remote control unit
• A pop-up option list appears.
4 Select "GROUP", and press the [OK] button
• A grouping confirmation screen appears.

5 Select "GROUP", and press the [OK] button
- The selected titles and groups are now grouped together.

Memo :
- To cancel grouping, select "BACK" and press the [OK] button.
- Alternatively, you can press the [RETURN] button to cancel grouping and return to the initial screen.
Ungrouping
1 Press the [NAVIGATION] button on the remote control unit.
• The Playback Navigation screen appears.
2 Select the group to ungroup, and press the [OPTION] button.
• A pop-up option list appears.
3 Select "UNGROUP", and press the [OK] button.
- An ungroup confirmation screen appears.

Memo:
- You cannot ungroup multiple groups at the same time. When multiple groups are selected, the "UNGROUP" item does not appear in the option list.
4 Select "YES", and press the [OK] button.
- All titles within the selected group are ungrouped.

Memo:
- To cancel ungrouping, select "NO" and press the [OK] button. • Alternatively, you can press the [RETURN] button to cancel ungrouping and return to the initial screen.
Excluding from a group
You can select titles and exclude them from a group.
1 Press the [NAVIGATION] button on the remote control unit
- The Playback Navigation screen appears.
2 Select the titles to exclude from the group, and press the [MARK] button
- Pressing the [MARK] button adds a check mark to the selected titles/groups.
All titles with the check mark will be excluded from the group.

3 Press the [OPTION] button on the remote control unit
• A pop-up option list appears.
4 Select "DO NOT GROUP", and press the [OK] button
• A confirmation screen for group exclusion appears.
5 Select "YES", and press the [OK] button
• The selected titles are now excluded from the group.

Memo :
- To cancel, select "NO" and press the [OK] button.
- Alternatively, you can press the [RETURN] button to cancel group exclusion and return to the initial screen.
Changing the Title/Group Name
The saved title/group name can be changed as follows.
Memo:
- A title/group name can be added to video data stored on the HDD, BD-RE, BD-R, DVD-RW, or DVD-R, and the name can be changed.
- For video data stored on a DVD-RW or DVD-R in the Video mode, the title/group name cannot be changed. However, you can change the name if the disc has not been finalized.
1 Press the [NAVIGATION] button on the remote control unit.
- The Playback Navigation screen appears.
2 Select the title/group for which the name is to be changed, and press the [OPTION] button.
• A pop-up option list appears.
3 Select "EDIT INFO", and press the [OK] button.
- An information editing screen appears.

4 Select "MODIFY TITLE NAME" or "MODIFY GROUP NAME", and press the [OK] button.
- A title/group name modifying screen appears.

5 Modify the title/group name.
- The modified title/group name is now saved.
Memo:
For details on the method of character input, refer to "Entering Characters" (P 69).
Deleting a Title/Group
Titles/groups can be deleted. When you delete a group, all titles contained within the group are deleted.
Memo:
- When a title/group is deleted from the HDD, BD-RE, or DVD-RW, the remaining space on the media increases according to the size of the deleted title/group. Deleting a title/group from a BD-R or DVD-R does not increase the amount of available space on the disc.
1 Press the [NAVIGATION] button on the remote control unit.
- The Playback Navigation screen appears.
2 Select the titles/groups to delete, and press the [OPTION] button.
- To delete the entire group, select the thumbnails with the group icon indication.
- Pressing the button displays a pop-up option list.
3 Select "DELETE", and press the [OK] button.
- A confirmation screen for title/group deletion appears.

4 Select "DELETE", and press the [OK] button.
- The selected titles/groups are deleted.

Memo:
- To cancel the title/group deletion operation, select "BACK" and press the [OK] button.
- Alternatively, you can press the [RETURN] button to cancel the deletion operation and return to the initial screen.
- Titles recorded directly to a BDMV disc can be deleted by pressing the [DELETE] button on the remote control when the title is currently being played. During playback of a title, you can also delete it by pressing the [OPTION] button and selecting "DELETE".
Turning On Title/Group Protection
Titles/groups can be protected.
Editing and deletion cannot be performed on protected titles/groups.
- Title/group protection can be turned on for video data stored on the HDD, BD-RE (BDAV), BD-R (BDAV), and DVD-RW (VR).
1 Press the [NAVIGATION] button on the remote control unit
• The Playback Navigation screen appears.
2 Select the titles/groups to be protected, and press the [OPTION] button
• A pop-up option list appears.

3 Select "EDIT INFO", and press the [OK] button
- An information editing screen appears.

4 Select "PROTECT", and press the [OK] button
- If only a single title was selected in step 2, a confirmation screen for title protection will appear.

- If multiple titles or groups were selected in step 2, "PROTECT" and "UNPROTECT" items will be displayed.
5 Select "YES", and press the [OK] button
• The selected titles/groups are now protected.
Memo:
- All selected titles and groups will be protected when multiple titles or groups are selected.
- To turn off the title/group protection, select "NO" and press the [OK] button.
- Alternatively, you can press the [RETURN] button to turn off the protection and return to the initial screen.
Turning Off Title/Group Protection
Protection of a title/group can be turned off.
Titles/groups can be edited and deleted after their protection is turned off.
- Title/group protection can be turned off for video data stored in the HDD, BD-RE (BDAV), BD-R (BDAV), and DVD-RW (VR).
1 Press the [NAVIGATION] button on the remote control unit
• The Playback Navigation screen appears.
2 Select the titles/groups to turn off protection for, and press the [OPTION] button
• A pop-up option list appears.

3 Select "EDIT INFO", and press the [OK] button
- An information editing screen appears.

4 Select "UNPROTECT", and press the [OK] button
- If only a single title was selected in step 2, a confirmation screen for turning off protection will appear.

- If multiple titles or groups were selected in step 2, "UNPROTECT" and "PROTECT" items will be displayed.
5 Select "YES", and press the [OK] button
- Protection of the selected titles/groups is now turned off.
Memo:
- Protection will be turned off from all selected titles and groups when multiple titles or groups are selected.
- If you do not want to turn off the title/group protection, select "NO" and press the [OK] button.
- Alternatively, you can press the [RETURN] button to cancel protection removal and return to the initial screen.

Creating a Playlist
A playlist can be created from the video titles on the HDD.
- Playlists can only be created for titles that are stored on the HDD.
Playlist: Enables you to create a program by selecting chapters from a specific title and editing their playback sequence.
Memo:
- The playlist created comes in handy during playback and dubbing to a disc.
Creating a Playlist
1. Press the [NAVIGATION] button on the remote control unit.
- The Playback Navigation screen appears.
2. Select the title for which a playlist is to be created, and press the [OPTION] button.
3. Select "EDIT", and press the [OK] button.
- The Edit menu screen appears.

4. Select "PLAYLIST EDIT", and press the [OK] button.
- The playlist edit screen appears.

5. Edit the playlist accordingly by selecting chapters from the source title according to your preference.
- Edit the playlist.
For details, refer to "Editing the playlist".

6. Press the [YELLOW] (U model) / [BLUE] (E model) button on the remote control unit.
- A playlist is created.
Editing the playlist
Chapter insertion
① Select the chapter to insert from the thumbnails of the "SOURCE TITLE", and press the [OK] button. ② Select the position to insert the chapter from the "TARGET PLAYLIST", and press the [OK] button.
Chapter deletion
① Select the chapter to delete from the thumbnails of the "TARGET PLAYLIST", and press the [OK] button. ② Select "DELETE", and press the [OK] button.
Entering the playlist name
① Select "TARGET PLAYLIST", and press the [OK] button. ② Enter a playlist name, and press the [OK] button.
Memo:
- For details on the method of character input, refer to "Entering Characters" (P 69).
Note:
- Deleting the original title list will cause the playlist to be deleted as well. Editing the original title list, or changing the recording mode may cause the playlist to be deleted.
Editing a Thumbnail
Thumbnails (index images) can be changed to a still image according to your preference.
Memo:
- Thumbnails of titles stored on the HDD, BD-RE, BD-R, DVD-RW, and DVD-R can be edited. However, thumbnails of titles that are stored on an SD card or finalized disc cannot be edited.
1 Press the [INFORMATION CORRECT] button on the remote control unit.
- An information editing screen appears.
![graph TD A["INFORMATION CORRECT"] --> B["MODIFY TITLE NAME"] A --> C["MODIFY THUMBNAIL"] A --> D["CHANGE SHOOTING DATE/TIME"] A --> E["PROTECT"]](/content/2026/05/883778/images/25201cb683723f97758ced8b160ed7bde8873c994354a493db52e4f408afe640.jpg)
2 Select "MODIFY THUMBNAIL", and press the [OK] button. - A thumbnail modification screen appears. 3 Play the video, and press the [■] button to stop at the scene you want to use as thumbnail display.

Memo:
- For details on the button operations during playback, refer to "Video Playback Operation" (P 61).
4 Select "CHANGE", and press the [OK] button.
- The displayed still image now becomes the thumbnail image.
5 Select "CONFIRM", and press the [OK] button.
- Doing so ends the editing of thumbnails.
Memo:
You can also display the thumbnail modification screen from the Playback Navigation screen.
① Select the title for which the thumbnail is to be changed, and press the [OPTION] button. ② Select "EDIT INFO", and press the [OK] button.
- An information editing screen appears.

③ Select "MODIFY THUMBNAIL", and press the [OK] button.
- A thumbnail modification screen appears.

Editing a Chapter
Creating a chapter mark for a saved title enables you to find a specific scene within the title.
Memo:
- All chapter editing functions can be performed on titles stored on the HDD.
Titles stored in a BD-RE (BDAV), BD-R (BDAV), DVD-R (VR), or DVD-RW (VR) only allow chapters to be divided or combined.
- The chapters of titles that are stored on an SD card or finalized disc cannot be edited.
- Also, protected titles cannot be edited. To perform chapter edit of a title, turn off the protection.
For details on turning off the title protection, refer to "Turning Off Title/Group Protection" (P 75).
Chapter edit functions
• Chapter mark insertion (divide chapter): Divides a chapter by inserting a chapter mark. • Chapter mark deletion (combine chapters): Combines chapters by deleting the chapter mark. • Chapter deletion: Deletes a specified chapter.
Editing a chapter
1 Press the [EDIT] button on the remote control unit.
• The Edit menu screen appears.
2 Select "CHAPTER EDIT", and press the [OK] button.
• The title screen appears.
![graph TD A["EDIT"] --> B["CHAPTER EDIT"] B --> C["PLAYLIST EDIT"] C --> D["DELETE SCENE"] D --> E["DIVIDE"]](/content/2026/05/883778/images/43321916032fddbd09882ad1d6e32e17e7b2f1af5cb714a2ba0692986ae43f39.jpg)
3 Select a title, and press the [OK] button
Memo:
- The chapter edit screen can also be called up from the Playback Navigation screen.
① Select the title to perform chapter edit, and press the [OPTION] button ② Select "EDIT", and press the [OK] button

③ Select "CHAPTER EDIT", and press the [OK] button

- For details on the button operations during playback, refer to "Video Playback Operation" (P 61).
- Frame movement on the Chapter Edit screen can only be performed one frame at a time regardless of the "STILL MODE" (€ P 86) setting.
Chapter mark insertion (divide chapter)
1 Play the video, and press the [III] button to stop at the scene you want to add a chapter mark 2 Press the [MARK] button on the remote control unit
- A chapter mark is inserted into the paused scene.

Memo:
- The chapter is now divided into two parts at the position of the chapter mark.
Chapter mark deletion (combine chapters)
1 Play the video, and press the [■] and [◀/▶] buttons to display the scene for which you want to delete the chapter mark 2 Press the [MARK] button on the remote control unit
- A confirmation screen for deleting the chapter mark appears.

3 Select "YES", and press the [OK] button.
- The chapter mark is deleted from the selected scene.
Memo:
- The chapters before and after the position of the chapter mark are now combined.
- Pressing the [▶▶1 / ◀◀◀] button displays the next/previous page.
Deleting a video chapter
1 Select the chapter for which you want to delete the video from the chapter edit screen. 2 Press the [DELETE] button on the remote control unit. - A confirmation screen for deleting the chapter appears.

3 Select "DELETE", and press the [OK] button.
- The selected video chapter is deleted.
Note:
- Videos cannot be restored once they are deleted.
- Deletion of the video may fail if the length of the chapter is too short.
| Chapter options
Pressing the [OPTION] button on the remote control when the Chapter Edit screen is displayed enables you to perform the following editing operations.
Combining with previous chapter
Combines the selected chapter with the previous chapter.
① Select a chapter, followed by "COMB. W/PREV CH", and press the [OK] button.
• Combines chapters.
Combining with next chapter
Combines the selected chapter with the next chapter.
① Select a chapter, followed by "COMB. W/NEXT CH", and press the [OK] button.
• Combines chapters.
Combining all chapters
Combines all chapters.
① Select "COMB. ALL CHAP.", and press the [OK] button. A confirmation screen for combining all the chapters is displayed. ② Select "YES", and press the [OK] button. • Combines all the chapters.
Dividing
You can select a saved title and divide it into two titles.
Memo:
- Dividing can only be applied to titles stored on the HDD.
- Titles that are protected cannot be divided. To divide a title, turn off the protection.
For details on turning off the title protection, refer to "Turning Off Title/Group Protection" (P 75).
| Dividing
1 Press the [EDIT] button on the remote control unit
• The Edit menu screen appears.
2 Select "DIVIDE", and press the [OK] button
• The title screen appears.

3 Select a title, and press the [OK] button
4 Play the video, and press the [III] button at the scene where you want to perform dividing
5 Select "DIVIDING POINT", and press the [OK] button

Memo :
- For details on the button operations during playback, refer to "Video Playback Operation" (P 61).
- Frame movement on the Chapter Edit screen can only be performed one frame at a time regardless of the "STILL MODE" (P 86) setting.
6 Select "EXECUTE", and press the [OK] button
- A confirmation screen for performing dividing appears.

7 Select "DIVIDE", and press the [OK] button
- Dividing starts.
![graph TD A["DIVIDE"] --> B{UNABLE TO RESTORE THE ORIGINAL DATA ONCE IT IS DIVIDED DO YOU WANT TO DIVIDE?} B -->|Yes| C["DIVIDE"] B -->|No| D["CANCEL"] C --> E["ORIGINAL"] D --> F["DIVIDING POINT"]](/content/2026/05/883778/images/b8aa70166a695ec6a0fdcb97e07afbbd7c65ba50a34bcab0e3bae4ed6f23e606.jpg)
Memo:
- To cancel the dividing operation, select "CANCEL" and press the [OK] button.
- Alternatively, you can press the [RETURN] button to cancel the divide operation and return to the initial screen.
- The dividing edit screen can also be called up from the Playback Navigation screen.
① Select the titles to divide, and press the [OPTION] button.
② Select "EDIT", and press the [OK] button.

③ Select "DIVIDE", and press the [OK] button.

Deleting Scenes
Unwanted scenes of a saved title can be deleted.
Doing so helps to increase the free space on the disc.
Memo:
- Deleting scenes can only be applied to titles stored on the HDD.
- Titles that are protected cannot be deleted. To enable scene delete of a title, turn off the protection. For details on turning off the title protection, refer to "Turning Off Title/Group Protection" (P 75).
- HD content for which the delete scene operation has been applied cannot be dubbed to BDMV. Perform seamless conversion before starting a dubbing operation. For details, refer to "Mode Conversion" (P 83).
Delete Scenes
1 Press the [EDIT] button on the remote control unit.
• The Edit menu screen appears.
2 Select "DELETE SCENE", and press the [OK] button.
- Displays the Title Display screen.
![graph TD A["EDIT"] --> B["CHAPTER EDIT"] B --> C["PLAYLIST EDIT"] C --> D["DELETE SCENE"] D --> E["DIVIDE"]](/content/2026/05/883778/images/66e39854243e7c07420cc1a92e144b1f9126845bbdaa6090aaaa96b34459f321.jpg)
3 Select a title, and press the [OK] button. 4 Edit the delete scene section.
Follow the steps below to edit the section for which delete scene is to be applied.
① Play the video, and press the [■] button at the point where you want to start the delete operation. ② Select "START", and press the [OK] button.

③ Play the video, and press the [■] button at the point where you want to end the delete operation.
④ Select "END", and press the [OK] button.
⑤ To continue specifying other sections to delete, select "NEXT", and press the [OK] button.

⑥ Repeat Steps 1 to 5 to specify the sections to delete.
Memo:
- For details on the button operations during playback, refer to "Video Playback Operation" (P 61).
- Frame movement on the Chapter Edit screen can only be performed one frame at a time regardless of the “STILL MODE” (P 86) setting.
5 Select "EXECUTE", and press the [OK] button.
- A confirmation screen for performing scene delete appears.
6 Select "EXECUTE", and press the [OK] button.
- Scene deletion starts.

Memo:
- To cancel the delete scene operation, select "CANCEL" and press the [OK] button.
- Alternatively, you can press the [RETURN] button to cancel delete scene and return to the initial screen.
Changing the Disc Name
The name of a BD or DVD disc can be changed as follows.
1 Set the BD or DVD for which the disc name is to be changed on the disc tray.
2 Press the [MEDIA MANAGE] button on the remote control unit.
• The Media Management menu screen appears.

3 Select "RENAME DISC" under "BD/DVD", and press the [OK] button.
• A disc name modification screen appears.

4 Modifying the Disc Name
• The new disc name is now saved.
Memo:
- For details on the method of character input, refer to "Entering Characters" (P 69).
Changing the Shooting Date/Time
The date/time of the stored video can be changed as follows.
- The shooting date/time of videos stored on the HDD can be changed.
1 Press the [INFORMATION CORRECT] button on the remote control unit.
- An information correct screen appears.
![graph TD A["INFORMATION CORRECT"] --> B["MODIFY TITLE NAME"] A --> C["MODIFY THUMBNAIL"] A --> D["CHANGE SHOOTING DATE/TIME"] A --> E["PROTECT"]](/content/2026/05/883778/images/fe427dc77a2f8bebdfd70419bf3de927d03d648225c6487609032eb983c770ac.jpg)
2 Select "CHANGE SHOOTING DATE/TIME", and press the [OK] button.
• A thumbnail screen appears.
3 Select the title for which the shooting date/time is to be changed, and press the [OK] button.
- The screen for changing the shooting date/time appears.
4 Change the shooting date/time.
- Perform the following steps to change the shooting date/time.

① Use the [▲] and [▼] buttons to move the cursor to the item you want to change. ② Press the [OK] button to display the pop-up screen. ③ Use the [▲] and [▼] buttons to select a desired value. ④ Press the [OK] button to choose the value. ⑤ Repeat Steps 1 to 4 to change settings for any desired items.
5 Select "ENTER", and press the [OK] button
- The modified shooting date/time is saved.
Memo:
- Alternatively, you can press the [RETURN] button to cancel the shooting date/time modification and return to the initial screen.
- The shooting date/time modification will not be reflected on a title that was dubbed.
- Pressing the [OPTION] button in the playback navigation screen instead of the [INFORMATION CORRECT] button will also display the shooting date/time edit screen.
① Select the title for which the shooting date/time is to be changed, and press the [OPTION] button
② Select "EDIT INFO", and press the [OK] button

③ Select "CHANGE SHOOTING DATE/TIME", and press the [OK] button

Mode Conversion
You can convert HD quality video titles saved on the HDD if they are recorded in the DR, AVC, AF, AN, AL, or AE mode.
Seamless conversion: Seamless conversion can be performed to enable smooth playback of joined scenes after dubbing to a BD. (Titles recorded in the DR recording mode ⇒ seamless)
Recording mode conversion: Enables conversion of recording mode. (Titles recorded in the DR, AVC, AF, AN, AL, or AE mode ⇒ AF/AN/AL/AE/XP/SP/LP/EP)
Memo:
- As seamless conversion does not re-encode video and audio, there is no deterioration in the image quality.
- Re-encoding is performed during recording mode conversion.
- Only titles that are recorded in the DR mode enable conversion to the XP/SP/LP/EP mode.
- To apply "MODE CHANGE" after turning off the power, select "AFTER POWER OFF" for "START METHOD" under the "MODE CHANGE".
Note:
- When seamless conversion is performed, the chapters (excluding joints of scenes) will be combined. To divide the chapters, insert chapter marks after seamless conversion. For details on dividing the chapters, refer to "Chapter mark insertion (divide chapter)" (P 79).
1 Press the [NAVIGATION] button on the remote control unit.
2 Select a title/group, and press the [OPTION] button.
3 Select "MODE CHANGE" from the Option menu, and press the [OK] button.
- The "MODE CHANGE" screen appears.

4 Select a recording mode from "MODE", and press the [OK] button.
5 Select "CONFIRM", and press the [OK] button.
Changing Settings of this Unit
Settings changed in the Settings Menu screen are stored on this unit even when its power is turned off.
Displaying the Settings Menu
1 Press the [SET UP] button on the remote control unit.
• The Settings Menu screen appears.
Memo:
- When playback is in progress, pressing the button stops it and displays the Settings Menu screen.
- The cursor position appears at the position when the screen was last closed.
Setting Menu List
The following items can be set. Items that cannot be set cannot be selected.
SETUP ...... (P 85)
AUTO POWER (OFF) ..... (P 85)
REMOTE CONTROL CODE ...... (P 85)
CLOCK SET/DISPLAY (P 85)
CLOCK SET (P 85)
DATE DISPLAY (P 85)
TIME DISPLAY CHOICE ..... (P 85)
PANEL DISPLAY BRIGHTNESS ..... (P 85)
DIMMER (POWER ON) ..... (P 85)
DIMMER (POWER OFF) (SR-HD2700U) ...... (P 85)
QUICK STARTUP ..... (P 85)
IP ADDRESS SETTING ...... (P 95)
IP ADDRESS (P 95)
SUBNET MASK (P 95)
DEFAULT GATEWAY (P 95)
FTP USER SETTING ..... (P 95)
MAC ADDRESS (P 95)
Memo:
- The highlighted value is the default setting.
SETUP

AUTO POWER (OFF)
You can specify a time for the power of the unit to turn off automatically when it is not being operated.
| Setting Values Description |
| OFF Power does not turn off automatically. |
| 2 HOURS Turns off power after two hours. |
| 6 HOURS Turns off power after six hours. |
REMOTE CONTROL CODE
For remote control units compliant with JVC's products, different remote control codes can be specified for those that are used with this unit.
| Setting Values D | Description |
| REMOTECONTROL 1 | Sets remote control code to 1. |
| REMOTECONTROL 2 | Sets remote control code to 2. |
| REMOTECONTROL 3 | Sets remote control code to 3. |
| REMOTECONTROL 4 | Sets remote control code to 4. |
CLOCK SET/DISPLAY
The current date/time and the display format on the screen can be specified using the "CLOCK SET", "DATE DISPLAY", and "TIME DISPLAY CHOICE" items.
- CLOCK SET
Sets the current date and time.
Memo:
- For details on the setting procedures, refer to "Setting the date/time" (P 23).
- DATE DISPLAY
For setting the date (year, month, and day) display format.
| Setting Values D | Description |
| YEAR.MONTH.DAY | Displays the date in the year/month/day order. |
| MONTH.DAY.YEAR | Displays the date in the month/day/year order. |
| DAY.MONTH.YEAR | Displays the date in the day/month/year order. |
• TIME DISPLAY CHOICE
For setting the time display format.
| Setting Values Description | |
| 12H Displays the time in AM/PM format. | |
| 24H Displays the time in 24-hour format. |
The brightness of the display window can be specified using the "DIMMER (POWER ON)" and "DIMMER (POWER OFF)" control items.
• DIMMER (POWER ON)
For setting the brightness of the display window when the power is turned "On".
| Setting Values Description | |
| BRIGHT Bright | |
| DIMMED1 Slightly dim | |
| DIMMED2 Dim | |
| DIMMED3 Dimmer | |
| OFF Off | |
• DIMMER (POWER OFF) (SR-HD2700U)
For turning on/off the display window when the power is turned "Off".
| Setting Values Description | |
| OFF Turns off the display window. | |
| ON Turns on the display window. |
QUICK STARTUP
For turning on/off the display window during quick startup and standby mode.
| Setting Values Description | |
| OFF Starts up in the normal way. Display window turns off during standby mode. | |
| ON Operation is speedily enabled after turning on the power. (Quick start) Display window turns on during standby mode. |
Memo:
- When "QUICK STARTUP" is set to "OFF" for the purposes of environmental care, the display window turns off during standby mode. To turn on the display window during standby mode, set to "ON".
- Setting to "ON" increases power consumption while the unit is in the standby mode.
BUZZER OUTPUT
The buzzer setting can be specified as follows.
• REMOTE CONTROL SENSOR TONE
For setting whether to sound the buzzer when the remote control sensor receives signals.
| Setting Values Description | |
| OFF Buzzer does not sound when the remote control sensor receives signals. | |
| ON Sounds the buzzer when the remote control sensor receives signals. |
- ALERT/WARNING TONE
For setting whether to sound the buzzer when an operation is completed or when a warning message appears.
| Setting Values Description | |
| OFF Buzzer does not sound. | |
| ON Sounds the buzzer. |
DEFAULT SETTING
Restores the setting values on the setting screen to their factory default values.
| Setting Values D | description |
| YES Restores the | factory default values. |
| NO Returns to the | initial screen without resetting the values. |
Memo:
- "BD-VIDEO RATINGS" and "COUNTRY CODE" settings cannot be reset once they have been specified.
- "DISC SECURITY SETTING" will not be reset if it is protected by password. Otherwise, it will be restored to the factory default value.
PLAYBACK SETTING

BD-/DVD-VIDEO PB SETTING
BD-Video and DVD-Video playback settings can be specified using the "BD-VIDEO RATINGS", "COUNTRY CODE", "AUDIO LANGUAGE", "SUBTITLE LANGUAGE", and "MENU LANGUAGE" items.
• BD-VIDEO RATINGS
For setting the lower age limit for BD-Video ratings.
| Setting Values D | Description |
| NO LIMIT All BD-V | Videos can be viewed. |
| 254 YEAR(S)-0 YEAR(S) | BD-Videos that are subject to the age limit cannot be viewed. |
Memo:
- In order to set the restrictions, password (four-digit number) registration is required.
- The password status becomes unregistered if the restriction setting is disabled. A new password can be registered after setting the age limit again.
- It is recommended that you note down the password in case it is lost or forgotten.
• COUNTRY CODE
For setting the country code.
For details on the country codes, refer to the "Country Code List" (P 110).
Memo:
- If the "BD-VIDEO RATINGS" setting is specified, you will be required to enter the password registered for the "BD-VIDEO RATINGS" in order to change the "COUNTRY CODE".
• AUDIO LANGUAGE
For setting the audio sound when playing back BD-Videos or DVD-Videos. For details on the language codes, refer to the "Language Code List" (P 108).
- SUBTITLE LANGUAGE
For setting the subtitle language when playing back BD-Videos or DVD-Videos.
For details on the language codes, refer to the "Language Code List" (P 108).
- MENU LANGUAGE
For setting the menu language when playing back BD-Videos or DVD-Videos.
For details on the language codes, refer to the "Language Code List" (P 108).
RESUME
The stop position can be stored when playback of a BD-Video, DVD-Video, BDMV, AVCHD, finalized discs, or SD card is stopped halfway.
| Setting Values Description |
| OFF Resume information is not stored. |
| ON Stores resume information. |
Memo:
- Resume information is stored at all times for other discs as well as the HDD regardless of this setting.
- When a HDD title is selected using Playback Navigation, it is played back from the beginning.
- Some discs do not allow playback from the resume point.
STILL MODE
For setting the method for displaying paused images during playback of the HDD or a disc.
| Setting Values Description | |
| AUTO Automatic control. | |
| FIELD Use this setting for moving images or when there is blurring in the “AUTO” mode. | |
| FRAME Use this setting when detailed patterns or designs are not clear in the “AUTO” mode. |
Memo:
- This setting is disabled for programs in the DR mode and during playback of AVCHD videos.
SEAMLESS PLAYBACK
For setting the method for playing back partially erased scenes.
| Setting Values Description |
| OFF Plays back with high accuracy. |
| ON Plays back smoothly. |
Memo:
- SD picture quality is retained during re-encode dubbing.
- For joints of scenes that are 15 seconds or shorter, seamless playback may fail even when it is set to "ON". The same applies during re-encode dubbing in the SD picture quality.
RECORD

XP MODE RECORDING AUDIO
For changing the settings of audio mode during recording in the XP mode.
| Setting Values Description | |
| Dolby Digital Records in “Dolby Digital”. | |
| LPCM Records in “LPCM”. |
HIGH-SPEED DUBBING
Items under "VIDEOMODE RECORDING ASPECT" and "DISC RECORDING AUDIO" can be set to support high-speed dubbing.
For setting the aspect ratio during recording.
| Setting Values Description | |
| AUTO Performs recording in the aspect ratio setting when recording starts. | |
| 4:3 Records at the fixed aspect ratio of 4:3. | |
| 16:9 Records at the fixed aspect ratio of 16:9. |
Memo:
- High-speed dubbing to a DVD-Video disc cannot be performed when there are different aspect ratios in a title. In this case, fix the aspect ratio to 4:3 or 16:9. This setting remains valid during re-encode dubbing.
For details on high-speed dubbing and re-encode dubbing, refer to the "Dubbing chart" (P 29).
For changing the settings of audio to be recorded to the disc when in the AF, AN, AE or AL mode.
| Setting Values Description | |
| AUTO Records “S | Stereo”, “Surround” or “Dual broadcast” audio sounds as they are. |
| FIXED Records “S | Stereo” and “Surround” sounds in “Stereo”. “Dual broadcast” audio sounds are recorded as they are. |
Memo:
- Surround sounds of a title become stereo sounds when re-encode dubbing is performed.
AUTO MARKING
During direct recording to a recording media (HDD or optical disc), you can append chapters by adding a mark at a fixed interval of 10 minutes or 1 hour.
| Setting Values Description |
| OFF Disables addition of chapters. |
| 10 MINUTES Adds chapters at 10-minute intervals. |
| 1 HOUR Adds chapters at 1-hour intervals. |
Memo:
- Regardless of whether "AUTO MARKING" is set to "OFF", "10 MINUTES", or "1 HOUR", you can perform manual marking using the Mark button on the remote control. During manual marking, an on-screen message is displayed regardless of the "ON SCREEN GUIDE" setting under "DISPLAY".
- Operates during recording of SDI Input, HDMI input, L-1 input and HDV/DV input signals.
You can set simultaneous recording to the HDD and a optical disc.
| Setting Values Description | |
| OFF Disables simultaneous recording. | |
| ON Enables simultaneous recording. |
Memo:
- Records to the HDD or the optical disc when "OFF" is selected.
- Performs simultaneous recording to both the HDD and optical disc (if this is supported) when "ON" is selected. Individual recording to the HDD or optical disc will be disabled in this case.
- Deck selection switches automatically to BD during simultaneous recording.
AUDIO

DYNAMIC RANGE CONTROL
For setting the dynamic range compression ratio (ratio between the maximum and minimum volume) during Dolby Digital playback.
| Setting Values Description | |
| AUTO Perform compression only for Dolby TrueHD. | |
| OFF Not compressed. | |
| ON Perform maximum compression. |
Memo:
- Setting to "OFF" may produce the same effects as the "ON" mode for some discs.
- Performing compression allows even the slightest sound to be heard clearly.
- There may be differences in the effect depending on the disc used.
DOWN MIX
For setting whether to output analog audio.
| Setting Values D | Description |
| STEREO Use this | setting when connecting an audio amplifier or TV. |
| DOLBY SURROUND | Use this setting when connecting an amplifier that supports Dolby Surround. |
DIGITAL OUT
Set this item according to the device connected to the digital audio output terminal.
- Dolby Digital
For setting audio output to "BITSTREAM" or "PCM".
| Setting Values Description | |
| BITSTREAM Use | this setting when connecting a device that is able to decode “Dolby Digital”. |
| PCM Audio input | will be changed and output as “PCM”.Use this setting when connecting a device that is unable to decode “Dolby Digital”. |
• Dolby Digital Plus/TrueHD
For setting audio output to "BITSTREAM" or "PCM".
| Setting Values | Description |
| BITSTREAM Use | this setting when connecting a device that is able to decode “Dolby Digital Plus/TrueHD”. |
| PCM Audio input | will be changed and output as “PCM”.Use this setting when connecting a device that is unable to decode “Dolby Digital Plus/TrueHD”. |
• DTS
For setting audio output to "BITSTREAM" or "PCM".
| Setting Values Description | |
| BITSTREAM Use | this setting when connecting a device that is able to decode “DTS”. |
| PCM Audio input | will be changed and output as “PCM”.Use this setting when connecting a device that is unable to decode “DTS”. |
- DTS-HD
For setting audio output to "BITSTREAM" or "PCM".
| Setting Values Description | |
| BITSTREAM Use | this setting when connecting a device that is able to decode “DTS-HD”. |
| PCM Audio input | will be changed and output as “PCM”.Use this setting when connecting a device that is unable to decode “DTS-HD”. |
- AAC
For setting audio output to "BITSTREAM" or "PCM".
| Setting Values Description | |
| BITSTREAM Use | this setting when connecting a device that is able to decode “AAC”. |
| PCM Audio input | will be changed and output as “PCM”.Use this setting when connecting a device that is unable to decode “AAC”. |
Memo :
- Audio sound may not be properly played back if the audio equipment in use does not support "BITSTREAM" output. In this case, set to "PCM".
DV IN AUDIO SETTING
For changing the audio recording settings during DV input.
| Setting Values Description |
| STEREO 1 Records the audio sound during video recording (L1, R1). |
| STEREO 2 Records audio sound that is added later (L2, R2), such as during editing. |
| MIX Records “STEREO 1” and “STEREO 2” sounds. |
BD MIX SOUND
For setting a mixture of BD video secondary audio and operation sounds output.
| Setting Values Description | |
| OFF Outputs main | audio only. |
| ON Outputs a mixture of BD video secondary audio and operation sounds during playback of BD-Videos that contain BD video secondary audio and menu operation sounds. | |
Memo :
- Output is converted to Dolby Digital or DTS according to the main audio when the "DIGITAL OUT" item is set to "BITSTREAM".
DISPLAY

ON SCREEN GUIDE
For displaying operation details.
| Setting Values D | Description |
| AUTO Appears for | five seconds when an operation is performed. |
| OFF Not displayed. | |
BLUE BACK
For setting the screen display when there is no signal input.
| Setting Values Description |
| OFF Displays screen as it is. |
| ON Switches display to a blue screen. |
SCREEN SAVER
For setting whether to use a screensaver.
| Setting Values Description | |
| OFF Screen saver is not used. | |
| ON Screen saver is used. Switches to the burn-in prevention screen when the unit is not operated for more than five minutes. |
OSD LANGUAGE
For setting the language for messages displayed on-screen.
CONNECTION

MONITOR TYPE
For setting the aspect ratio according to the connected monitor.
| Setting Values D | Description |
| 16:9 Set to this value when connected to monitors with 16:9 aspect ratio. | |
| 16:9FULL Choose this setting when a 16:9 monitor is connected to display images without the black borders. | |
| 4:3 PAN&SCAN S | Set to this value when connecting to monitors with an aspect ratio of 4:3. Plays back videos with the left and right edges trimmed off. |
| 4:3 LETTERBOX $ | Set to this value when connecting to monitors with an aspect ratio of 4:3. Plays back videos with a black band at the upper and lower ends. |
HDMI CONNECTION
• VIDEO PRIORITY MODE
| Setting Values Description | |
| SDI/COMPONENT | Set to this value for output at a resolution of “480p” (SR-HD2700U)/“576p” (SR-HD2700E) or higher from the [SDI OUT] or [COMPONENT VIDEO OUT] terminal. |
| HDMI Set to this value when priority is to be given to the “HDMI OUTPUT RESOLUTION” setting. | |
Memo:
- During data output from the [HDMI] terminal, setting to "SDI/COMPONENT" automatically outputs data in the "SDI/COMPONENT OUTPUT" setting. Setting to "HDMI" outputs data in the "HDMI OUTPUT RESOLUTION" setting.
- During data output from the [HDMI] and [COMPONENT VIDEO OUT] terminals, setting to "SDI/COMPONENT" automatically outputs data in the "SDI/COMPONENT OUTPUT" setting. Setting to "HDMI" outputs data at the "576i" resolution from the [COMPONENT VIDEO OUT] terminal.
- When the [SDI OUT] terminal and the [HDMI] terminal are connected at the same time, setting to "SDI/COMPONENT" outputs data from the [SDI OUT] terminal.
• HDMI OUTPUT RESOLUTION
| Setting Values Description | |
| AUTO Automatically selects an appropriate resolution according to the connected device. | |
| 480p (SR-HD2700U) 576p (SR-HD2700E) | Fixes the resolution at 480p or 576p. |
| 1080i Fixes the resolution at 1080i. | |
| 720p Fixes the resolution at 720p. | |
| 1080p Fixes the resolution at 1080p. | |
Memo:
- When the resolution is set to "720p", videos are output at "1080i" other than those recorded at "720p" even though "720p" is shown on the display.
- Depending on the conditions (monitor type 4:3, resolution "720p" and above, aspect "16:9"), the on-screen display from the component output may be cut off. In this case, set "VIDEO PRIORITY MODE" to "SDI/COMPONENT". The on-screen display from the [VIDEO OUT]/[S-VIDEO OUT] terminal may be cut off when "VIDEO PRIORITY MODE" is set to "SDI/COMPONENT". In this case, set "COMPONENT OUTPUT" to "480p" (SR-HD2700U)/"576p" (SR-HD2700E) or below, or set the monitor type to a setting other than "16:9".
- BD-VIDEO 24p OUT
| Setting Values Description | |
| OFF Outputs in the resolution set by “HDMI OUTPUT RESOLUTION”. | |
| ON Outputs 24p elements at 24p. |
Memo:
- 24p playback is possible for commercially available BD-Videos or BDMVs that are recorded in 24p. Content other than BDMVs that is dubbed or recorded on this unit at 24p, as well as 24p content on SD cards are played back at 60p or 60i.
- This is applicable for BD-ROM and DVD-Video titles. This is available when connected to a 24p compatible monitor.
- Elements other than 24p ones are output at 60p (SR-HD2700U) or 50p (SR-HD2700E).
- No video images will be output from the [VIDEO OUT], [S-VIDEO OUT] and [COMPONENT VIDEO OUT] terminals when the output resolution from the [HDMI] terminal is at 1080/24p.
• x.v.Color
| Setting Values Description | |
| AUTO Outputs x.v | Color information with HDMI when video images that include x.v.Color information are played back. |
| OFF Does not output | x.v.Color information with HDMI when video images that include x.v.Color information are played back. |
Memo:
- This is applicable when an x.v.Color compatible monitor is connected.
- Deep Color
| Setting Values Description | |
| AUTO Set to this value when a “Deep Color” device is connected. | |
| OFF Set to this value when the video image is distorted, or colors are unnatural. |
• HDMI RGB OUTPUT RANGE
| Setting Values Description | |
| STANDARD Set to | this value for standard uses. |
| ENHANCED Set to | this value when the black and white parts of the video image are not distinct. |
Memo:
- This is available when connected to a DVI device that only supports RGB input.
- HDMI --> DVI COLOR
| Setting Values D | Description |
| AUTO Value is set | automatically according to the monitor. |
| RGB FIX Use this | setting when video images are not correctly displayed on the monitor. |
Memo:
- This is available when the "x.v.Color" setting is set to "OFF". When the "x.v.Color" setting is set to "AUTO", this setting will be set to "AUTO" automatically.
- Change this setting when no video image appears while connected to a DVI device.
• HDMI AUDIO OUTPUT
| Setting Values Description | |
| OFF Use this setting | if you do not want to send audio output from the HDMI cable. |
| ON Use this setting | to send audio output from the HDMI cable. |
HDMI-CEC
For setting the HDMI-CEC operation from the connected device.
| Setting Values Description |
| OFF Disables HDMI-CEC. |
| ON Enables HDMI-CEC. |
SDI/COMPONENT OUTPUT
For setting the resolution of video output from the [SDI OUT] and [COMPONENT VIDEO OUT] terminals.
| Setting Values Description | |
| 480i(SR-HD2700U)576i(SR-HD2700E) | Sets output to “480i” or “576i”. |
| 480p(SR-HD2700U)576p(SR-HD2700E) | Sets output to “480p” or “576p”. |
| 720p Sets output to “720p”. | |
| 1080i Sets output to “1080i”. | |
Memo:
- When the resolution is set to "720p", videos are output at "1080i" other than those recorded at "720p" even though "720p" is shown on the display.
- This unit does not support component output at "1080p". To output at "1080p", do so via HDMI connection.
- If "VIDEO PRIORITY MODE" is set to "HDMI", the unit will output at "480i" or "576i" regardless of the current setting.
- If "VIDEO PRIORITY MODE" is set to "SDI/COMPONENT", or when an HDMI connection is used, DVD videos and BDMV will be output at "480i" or "576i" even if "720p" or "1080i" has been set.
- The aspect ratio of video/S-video output changes according to the component output setting. As such, there may be cases where the aspect ratio of the video/S-video output is different from the predefined setting of the content.
VIDEO INPUT SETTING
Choose a setting according to the video terminal to be connected when an external analog input terminal is used.
| Setting Values Description | |
| VIDEO Use this setting when connecting via the video (BNC) terminal. | |
| S-VIDEO Use this setting when connecting via the S-video (black) terminal. |
Note:
- Perform "VIDEO INPUT SETTING" after selecting L-1 as the input. If "VIDEO INPUT SETTING" is performed with the input set to other than L-1, the output image may switch from the original input signal to the L-1 input signal. In this case, select L-1 as the input and perform the setting again.
HDCP
For setting the output of copyright-free contents to devices that do not support HDCP.
| Setting Values Description | |
| FIXED Encrypts copyright-free contents during playback. | |
| AUTO Does not encrypt copyright-free contents during playback. |
Memo:
- If "HDCP" is set to "AUTO" while a device incompatible with HDCP is used, images may appear distorted. Operate as follows if the images are distorted. Press and hold the "0" button on the remote control for 5 seconds to set "HDCP" to "AUTO".
SDI/HDMI CONNECTION

For specifying settings related to the SDI and HDMI input/output terminals.
SDI AUDIO INPUT SETTING
Set the destination (Lch, Rch) to which the video/audio of the SD-SDI/HD-SDI input is to be recorded.
| Setting Values D | Description |
| Lch (1ch to 8ch)Rch (1ch to 8ch) | Use this setting to record the digital audio input separately to Lch and Rch. |
| ANALOG Use this | setting to record analog audio signals to Lch/Rch. |
Memo:
- When "EMBEDDED" is selected, you can specify the audio to record to Lch and Rch respectively from the SD-SDI/HD-SDI digital audio input (1ch to 8ch).
- You can also specify to record the same audio input to Lch and Rch.
SDI AUDIO OUTPUT SETTING
Set the channel (Lch, Rch) for outputting the SD-SDI/HD-SDI audio.
| Setting Values D | Description |
| Lch (1ch to 8ch)Rch (1ch to 8ch) | Sets the audio output from this unit (Lch, Rch) individually to a channel from 1ch to 8ch. |
Memo:
- Lch and Rch cannot be set to the same output channel.
HDMI INPUT AUDIO SETTING
For specifying the selection of two audio channels from the HDMI signal input during playback and recording.
| Setting Values D | Description |
| HDMI Use this setting to record the CH1 and CH2 digital audio inputs to Lch and Rch respectively. | |
| ANALOG Use this setting to record analog audio signals to Lch/Rch. | |
Memo:
- In the event of multi channel input, recording is performed with two downmixed channels.
SDI RECLOCK
Setting to "ON" helps to further stabilize the [THROUGH OUT] output.
To output signals as they are, set to "OFF".
| Setting Values Description | |
| OFF Use this setting | if you do not want to use the Reclock feature. |
| ON Use this setting | if you want to use the Reclock feature. |
FRAME SYNCHRONIZER
For specifying the Frame Synchronize mode, which continues recording even when signals are interrupted during recording of SDI/HDMI signals.
| Setting Values Description | |
| OFF Stops recording | when signals are interrupted during recording of SDI/HDMI signals. |
| ON Continues recording | even when signals are interrupted during recording of SDI/HDMI signals. |
Memo :
- Images where the signals are interrupted may be distorted.
TIME CODE INPUT SETTING
You can select whether to add a time code while recording SDI/HDMI input signals with this unit.
| Setting Values Description | |
| OFF Use this setting | if you want to disable time code input. |
| TIME CODE When | there are multiple time code inputs from the SDI device, such information will be superimposed over the SDI video input. |
| DATE & TIME This | unit superimposes the current date/time over the SDI or HDMI video input. |
TIME CODE DISPLAY POSITION
For setting the time code display position.
| Setting Values | Description |
| LOWER LEFT Sets | the time code display position to the bottom left. |
| LOWER RIGHT Sets | the time code display position to the bottom right. |
| UPPER LEFT Sets | the time code display position to the top left. |
| UPPER RIGHT Sets | the time code display position to the top right. |
| CENTER Sets the center. | time code display position to the center. |
DISC SECURITY SETTING
Memo :
- You can protect against changes made to the disk security settings using a password.
![SDI/HDMI CONNECTION > DISC SECURITY SETTING DOWNCONVERSION OFF OVERLAY TYPE SETTING OFF PASSWORD PRESS [0-9] KEYS TO ENTER 4-DIGIT PASSWORD THEN PRESS [OK] PASSWORD INITIALIZATION EXIT SELECT SET UP RETURN](/content/2026/05/883778/images/e3eba81201623599dad0d348a588fb599a25470fa5297f4f7385fd556802f7be.jpg)
- If you do not wish to use a password, press the [OK] or [RETURN] button without entering any value on the password entry screen.
- The password you have specified will not be reset even when the factory settings are restored.
- DOWNCONVERSION
During input of SDI or HDMI signals, you can specify whether to convert to the SD or 1440×1080 resolution before recording.
| Setting Values | Description |
| OFF Does not down | n-convert the SDI or HDMI signals. |
| SD CONVERSION | Converts the SDI or HDMI signals to the SD resolution before recording. |
| 1440 CONVERSION | Converts the SDI or HDMI signals to the 1440×1080 resolution before recording. |
Memo:
- SD conversion
- SDI and HDMI video input signals supported by this unit are as follows. Conversion is not performed for signal inputs that are not supported. Signal inputs that are supported may vary depending on whether "FRAME SYNCHRONIZER" in the settings menu is "OFF" or "ON". (The default "FRAME SYNCHRONIZER" setting is "ON".) For details on the input signal, refer to "Recordable Input Signal" (P 57).
- Conversion is not performed when SD-resolution signals are received. • The aspect ratio for recordings after SD conversion is 16:9.
- SD-SDI appears in the display window of the unit when HD-SDI signals are SD-converted.
• 1440 conversion
SDI and HDMI video input signals supported by this unit are as follows. Conversion is not performed for signal inputs that are not supported. Signal inputs that are supported may vary depending on whether "FRAME SYNCHRONIZER" in the settings menu is "OFF" or "ON". (The default "FRAME SYNCHRONIZER" setting is "ON"). For details on the input signal, refer to "Recordable Input Signal" (P 57).
• OVERLAY TYPE SETTING
For specifying the type of overlay during direct recording of SDI or HDMI input signals using this unit.
| Setting Values Description |
| OFF Disables overlay. |
| CHARACTER Overlays texts. |
Memo:
• Overlay is supported only for SDI and HDMI input signals. - If recording is performed with the overlay type specified, it will be recorded together with the video. You cannot hide the overlaid information from the recorded movie.
• OVERLAY SIZE SETTING
For specifying the size of the overlay object.
| Setting Values Description |
| SMALL Sets the overlay object size to small. |
| BIG Sets the overlay object size to large. |
• OVERLAY TRANSMITTANCE SET
For specifying the transparency of the overlay object.
| Setting Values | Description |
| 0% Overlay object | is opaque. |
| 50% Overlay object | is 50% transparent. |
| 75% Overlay object | is 75% transparent. |
• OVERLAY DISP. POSITION SET
For specifying the position for displaying the overlay object.
| Setting Values Description | |
| LOWER LEFT Displays the overlay object at the bottom left. | |
| LOWER RIGHT Displays the overlay object at the bottom right. | |
| UPPER LEFT Displays the overlay object at the top left. | |
| UPPER RIGHT Displays the overlay object at the top right. | |
| CENTER Displays the overlay object at the center. |
Memo:
- Overlay information can be displayed together with the "TIME CODE" or "DATE & TIME" display under "TIME CODE INPUT SETTING".
• OVERLAY INPUT SCREEN
Selectable when "OFF" is not selected for "OVERLAY TYPE SETTING". (Not selectable when "OFF" is selected.)
A text input screen appears when "CHARACTER" is selected for "OVERLAY TYPE SETTING".
Alphabets and ASCII codes can be used.
The maximum number of characters that can be entered is 25.
- PASSWORD INITIALIZATION
Resets the preset password and restores to the unspecified state.
Memo:
- Entry of the current password is needed in order to perform password reset.
- This item appears grayed out and cannot be selected if a password has not been set.
NETWORK SETTING

For specifying settings related to the LAN terminal.
IP ADDRESS SETTING
For setting whether to obtain the IP address using "DHCP" or to enter it manually using "MANUAL".
| Setting Values Description | |
| DHCP Obtains information from the DHCP server each time the unit starts up. | |
| MANUAL For entering the IP address manually. |
Memo:
- Upon setting to DHCP, "IP ADDRESS", "SUBNET MASK", and "DEFAULT GATEWAY" are grayed out, and input is disabled.
IP ADDRESS
For setting the IP address.
SUBNET MASK
For setting the subnet mask.
DEFAULT GATEWAY
For setting the default gateway.
FTP USER SETTING
- The username and password can be set in the "FTP USER SETTING".
- Select "FTP USER SETTING" and press the [OK] button on the remote control to display the "USERNAME INPUT" screen. Enter the username and press the colored (*1) button on the remote control. This confirms the username and the "PASSWORD INPUT" screen appears. Enter the password and press the colored (*1) button on the remote control. This completes the username and the password settings. *1 U: [YELLOW], E: [BLUE]
- Up to 16 characters can be used for the username and password.
- The username and password are not set at factory default.
- To reset the username and password that have been set, do so using "DEFAULT SETTING" in the "SETUP" menu.
MAC ADDRESS
Displays the MAC address.
CONFIRM
Confirms the network settings that are currently displayed.
Memo :
- The settings are not applied until the confirmation items are selected.
- The default values when "IP ADDRESS SETTING" is set to "MANUAL" are as follows.
IP ADDRESS : 192.168.100.100
SUBNET MASK : 255.255.255.0
DEFAULT GATEWAY : 192.168.100.254
- Perform settings such that the same IP address is not used within the network environment.
- For details, check with the person in charge of setting the network.
Locking the Disc Tray
By turning on the lock for the disc tray, the tray cannot be opened or closed using the [▲] button.
Memo:
- When the [▲] button is pressed while the disc tray lock is turned on, a "LOCKED" message will appear on the display window of the unit for about three seconds.
Locking the disc tray
1 Press the [∅/l] button on the unit to turn "Off" the power
2 Press and hold the [■] button on this unit, then press the [▲] button
- A "LOCKED" message appears on the display window of the unit, indicating that the disc tray is locked.

Unlocking the disc tray
1 Press the [∅/l] button on the unit to turn "Off" the power
2 Press and hold the [■] button on this unit, then press the [▲] button
- An "UNLOCK" message appears on the display window of the unit, indicating that the disc tray is unlocked.
Turning on the Mode Lock
Turning on the mode lock disables all operations using the buttons on the unit and remote control, except for "Play" and "Record".
Memo:
- When a button that is disabled is pressed, a "LOCKED" message will appear on the display window of the unit for three seconds.
Turning on the mode lock
1 Press the [*] button on the remote control for five seconds or longer when in the "Normal Recording", "Stop", or "Normal Playback" mode
- A "LOCKED" message appears on the display window of the unit, indicating that the mode lock is turned on.

| Turning off the mode lock
1 Press the [*] button on the remote control for five seconds or longer when the mode lock is turned on
- An "UNLOCK" message appears on the display window of the unit, indicating that the mode lock is turned off.
Last Function Memory
When the power plug is disconnected from unit or when power failure occurs, your settings for the following functions are kept in the memory. These settings will resume when the unit is turned on again.
• Various setting menus (P 84) - Deck selection: HDD/BD/SD • Recording mode: XP, etc. (P 33) - External input selection: SDI, HDMI, HDV/DV, L-1 (P 55) - Repeat playback of the disc playback settings menu (P 66) Kept for DVD-Video/AVCHD/BDMV and title/chapter only.
External Control
This unit can be controlled using a PC, etc. by connecting them with an RS-232C or LAN cable.
RS-232C Specifications
- Pin layout

| PIN No. | Signal Operation | Direction of signal | |
| 2 TxD | Transmit data | This unit ⇔ PC | |
| 3 RxD | Receive data | This unit ⇔ PC | |
| 5 GND | Signal grounding | ||
Mode : Non-synchronous
Character length : 8 bits
Parity check: Odd
Start bit: 1
Stop bit: 1
Data rate: 9600 bps
- Bit configuration

Memo:
- When using the Serial Command Connector, the cable to be used should be an RS-232C interface cable (straight type, 3 m or shorter).
- During command transmission, a minimum interval of 50 ms is required between each command.
- During command transmission, do not send the next command until the ACK (refer to "System Commands" (P 104)) or response (refer to "Response Commands" (P 104)) for each command is received.
- The recommended maximum waiting time for the ACK or response for each command is as follows. ACK: About 50 ms Response: About 5 seconds
LAN Connection
To use a LAN connection, run the IP settings in "NETWORK SETTING" (P 95).
Connect by specifying 1111 for the port.
During command transmission, a minimum interval of 100 ms is required between each command.
Command Table
| Lower Order → Higher Order ↓ | 0 | 1 | 2 | 3 | 4 | 5 | 6 | 7 | 8 | 9 | A | B | C | D | E | F |
| 0 | Complete | Error | Cassette Out | Not Target | Not Ready | ACK | NAK | |||||||||
| 1 | ||||||||||||||||
| 2 | ||||||||||||||||
| 3 | Play | Stop | ||||||||||||||
| 4 | Still | |||||||||||||||
| 5 | Clear | |||||||||||||||
| 6 | Sense Chapter | Title Sense | ||||||||||||||
| 7 | ||||||||||||||||
| 8 | Chapter Search | Title Search | Date Preset | Clock Preset | ||||||||||||
| 9 | Finalize | Cancel Disc Finalization | Disc Erase | TOP MENU | MEDIA MANAGE | NEXT CHAPTER | PREV CHAPTER | Setup | SET | UP | DOWN | RIGHT | LEFT | Next Title | Prev Title | Remote Data |
| A | Standby On | Standby Off | Eject | FF | REW | Fwd Field Stop | Rev Field Stop | |||||||||
| B | Fwd Shtl | Rev Shtl | Select Preset | Select Sense | Date Data Sense | Clock Data Sense | ||||||||||
| C | Rec | RecPause | ||||||||||||||
| D | Status Sense | TC Data Sense | CTL Data Sense | JVC Status Sense | ||||||||||||
| E | Opt TC Data Sense | Opt CTL Data Sense | ||||||||||||||
| F | Command Target | Rec/Dub Request |
Command
Operation Commands Commands for operating functions such as PLAY and REC on the BLU-RAY DISC & HDD RECORDER
| Command | Description |
| 3A Plays the | selected deck. |
| 3F Stops the | selected deck. Resume will be cleared when this is pressed while in the Stop mode. Rec Request will be cleared. |
| 4F Switches | the selected deck to the Still mode. |
| 56 Clear: Clears the Error status. | |
| 80 Searches | the specified chapter and starts playback from the beginning. |
| 81 Searches | the specified title under “ORIGINAL” or in the “PLAY LIST” by its number and starts playback from the beginning. |
| 8E For setting the date. | |
| 8F For setting the time. | |
| 90 Finalizes | the disc. (BD Deck) |
| 91 Cancels | disc finalization. (BD Deck) |
| 92 For erasing | rewritable discs. |
| 93 Displays/Closes the top menu of a disc. (BD Deck) | |
| 94 Displays/Close the Media Manage Menu. (BD Deck) | |
| 95 Advances | to the next chapter. Functions like the ►►l button on the remote control. |
| 96 Returns to the previous chapter. Functions like the ◀◀◀ button on the remote control. | |
| 97 Displays/Closes the Main Menu, Editing, Library Database Navigation or Dubbing screen. 97 ⇒ 30: Closes the screen. 97 ⇒ 31: Displays the Main Menu screen. 97 ⇒32: Displays the Library Database Navigation screen. 97 ⇒ 35: Displays the Editing screen. 97 ⇒ 37: Displays the Dubbing screen. | |
| 98 Functions as a confirmation key. | |
| 99 Functions as an up key. | |
| 9A Functions as a down key. | |
| 9B Functions as a right key. | |
| 9C Functions as a left key. | |
| 9D Advances to the next title. Functions like the ►►l button on the remote control. | |
| 9E Returns to the previous title. Functions like the ◀◀◀ button on the remote control. | |
| 9F Issues the same codes as the wired remote control via RS-232C. | |
| A0 Power On | |
| A1 Power Off | |
| A3 Eject: Opens/Closes tray. (BD Deck) | |
| AB FF: Functions only during playback. Activates forward search. | |
| AC REW: Functions only during playback. Activates reverse search. | |
| AD Functions as a key for advancing (FWD) a frame. When this command is received during still mode, the unit advances the still picture by one frame (or field) in the FWD direction. | |
| Command Description | |
| AE Functions as a key for reversing (REV) a frame.When this command is received during still mode,the unit reverses the still picture by one frame (or field) in the REV direction. | |
| B5 Fwd Shtl: | Functions only during playback.Activates forward search.B5 ⇔ 30: STILLB5 ⇔ 31: FWD SLOW at the slowest speedB5 ⇔ 32: FWD SLOW at a slow speedB5 ⇔ 33: FWD SLOW at a fast speedB5 ⇔ 34: FWD SLOW at the fastest speedB5 ⇔ 35: 1xB5 ⇔ 36: FWD SEARCH at the slowest speedB5 ⇔ 37: FWD SEARCH at a slow speedB5 ⇔ 38: FWD SEARCH at a fast speedB5 ⇔ 39: FWD SEARCH at a faster speedB5 ⇔ 3A: FWD SEARCH at the fastest speedB5 ⇔ 3B: 1.3x |
| B6 Rev Shtl: | Functions only during playback.Activates reverse search.B6 ⇔ 30: STILLB6 ⇔ 31: REV SLOW at the slowest speedB6 ⇔ 32: REV SLOW at a slow speedB6 ⇔ 33: REV SLOW at a fast speedB6 ⇔ 34: REV SLOW at the fastest speedB6 ⇔ 36: REV SEARCH at the slowest speedB6 ⇔ 37: REV SEARCH at a slow speedB6 ⇔ 38: REV SEARCH at a fast speedB6 ⇔ 39: REV SEARCH at a faster speedB6 ⇔ 3A: REV SEARCH at the fastest speed |
| B8 For setting | the input/output, recording mode, audio language selection and subtitle selection. |
| CA Rec: Starts recording at the selected deck when a Rec Request is received. | |
| CB RecPause: Pauses recording at the selected deck when a “Rec Request” is received. | |
| F0 Command | Target:F0 ⇔ 34: For selecting HDD deck.F0 ⇔ 38: For selecting BD deck.F0 ⇔ 3C: For selecting SD deck. |
| FA Rec/Dub | Request: For issuing approval for recording. This can be cleared using “Stop”. |
80-8F
80 : Chapter Search
| 1st Byte 2nd Byte 3rd Byte | ||
| Chapter Search Hundreds Tens Ones | ||
| ASCII codes (30 - 39) 3* 3* 3* | ||
| E.g. (012) 30 31 32 |
E.g.: When searching the 12th chapter.
81 : Title Search under "ORIGINAL"
| 1st Byte 2nd Byte 3rd Byte 4th Byte | ||||
| Title Search (ORIGINAL) 30 Hundreds | Tens | Ones | ||
| ASCII codes (30 - 39) | 30 3* | 3* | 3* | |
| E.g. (345) | 30 33 34 35 | |||
E.g.: When searching the 345th title, as indicated by the title number on the top right corner of the index, under "ORIGINAL".
81 : Title Search in "PLAY LIST"
| 1st Byte 2nd Byte 3rd Byte 4th Byte | ||||
| Title Search (PLAY LIST) | 38 | Hundreds | Tens | Ones |
| ASCII codes (30 - 39) | 38 3* | 3* | 3* | |
| E.g. (028) | 38 30 32 38 | |||
E.g.: When searching the 28th play list, as indicated by the play list number on the top right corner of the index, in the "PLAY LIST".
8E : Date Preset
| 1st Byte | 2nd Byte | 3rd Byte | 4th Byte | 5th Byte | 6th Byte | |
| Date Preset | Mth (Tens) | Mth (Ones) | Day (Tens) | Day (Ones) | Yr (Tens) | Yr (Ones) |
| ASCII codes (30 - 39) | 3* | 3* | 3* | 3* | 3* | 3* |
| E.g. (09.14.2015) | 30 | 39 | 31 | 34 | 31 | 35 |
E.g.: When setting the date to September 14 2015.
8F : Clock Preset
| 1st Byte | 2nd Byte | 3rd Byte | 4th Byte | 5th Byte | 6th Byte | |
| Clock Preset | Hr (Tens) | Hr (Ones) | Min (Tens) | Min (Ones) | Sec (Tens) | Sec (Ones) |
| ASCII codes (30 - 39) | 3* | 3* | 3* | 3* | 3* | 3* |
| E.g. (12:34:56) | 31 | 32 | 33 | 34 | 35 | 36 |
E.g.: When setting the time to 12 hrs 34 min and 56 sec.
9F
9F : Remote Data The remote control codes for controlling the wired remote controller via RS-232C is as shown in the following table. The codes apply to all three HDD, BD and SD deck unless otherwise stated.
| Code Items Remarks | |
| 01 INPUT SELECT | |
| 03 STOP | |
| 06 F.F/SPEED+ | |
| 07 REW/SPEED- | |
| 0B POWER ON/OFF | |
| 0C PLAY | |
| 0D PAUSE/STILL | |
| 14 FWD SKIP | |
| 15 REV SKIP | |
| 17 AUDIO | |
| 1A Power Off | |
| 1D Power On | |
| 21 TEN KEY 1 | |
| 22 TEN KEY 2 | |
| 23 TEN KEY 3 | |
| 24 TEN KEY 4 | |
| 25 TEN KEY 5 | |
| 26 TEN KEY 6 | |
| 27 TEN KEY 7 | |
| 28 TEN KEY 8 | |
| 29 TEN KEY 9 | |
| 2A KEY * | |
| 2B TEN KEY 0 | |
| 2C KEY # | |
| 31 REC MODE (XP/SP/LP/EP...) | |
| 32 BD/DVD DECK | |
| 34 DUBBING | |
| 37 SET UP | |
| 3C OK/ENTER | |
| 3E ON SCREEN | |
| 44 HDD DECK | |
| 48 MEDIA MANAGEMENT | |
| 80 CURSOR 0°Moves the arrow in the index list to the right. (▶) | |
| 81 MENU BD/DVD Deck only | |
| 82 CURSOR 90°Moves the arrow in the index list to the up. (▲) | |
| 84 CURSOR 180°Moves the arrow in the index list to the left. (◀) | |
| 86 CURSOR 270°Moves the arrow in the index list to the down. (▼) | |
| 87 OPEN/CLOSE BD/DVD Deck only | |
| 8E PROGRESSIVE HDD/BD Deck only | |
| 8F TOP MENU DVD Deck only | |
| 90 MARK HDD/DVD Deck only | ||
| 96 CM SKIP | ||
| AF REV FRAME | ||
| B0-SLOW D | ||
| B1 SHUTTLE-C | ||
| B2 SHUTTLE-B | ||
| B3 SHUTTLE-A | ||
| B4 SHUTTLE-2 | ||
| B5 SHUTTLE-1 | ||
| B6-SLOW B | ||
| B7-SLOW C | ||
| B8+SLOW C | ||
| B9+SLOW B | ||
| BA SHUTTLE +1 | ||
| BB SHUTTLE +2 | ||
| BC | SHUTTLE+A | |
| BD | SHUTTLE+B | |
| BE SHUTTLE+C | ||
| BF+SLOW D | ||
| C0 ANGLE/LIVE CHECK ANGLE (BD/DVD Deck only)LIVE CHECK (HDD/BD Deck only) | ||
| C4 SUBTITLE DVD Deck only | ||
| CC | REC | |
| D3 OPTION | ||
| D4 RETURN | ||
| D5 COLOR KEY BLUE | ||
| D7 COLOR KEY RED | ||
| D9 JOG -1/6 | ||
| DA | JOG +1/6 | |
| DB | JOG +1 | |
| DC | INSTANT REPLAY | |
| DD | EDIT | |
| DE | COLOR KEY GREEN | |
| DF COLOR KEY YELLOW | ||
| E0 NAVIGATION | ||
| E1 L-1 | Y/C INPUT SELECT HDD Deck only | |
| E2 L-1 | COMPOSITE INPUT SELECT HDD Deck only | |
| E3 PLAYBACK SETTING | ||
| E4 DELETE | ||
| E5 INFORMATION CORRECT | ||
| ED | FWD FRAME | |
| F2 MODE LOCK | ||
| F3 HDCP AUTO | ||
B8: Input/Output Selection
| 1st Byte 2nd Byte | |||
| External input selection L-1 VIDEO 30 31 | |||
| External input selection L-1 S-VIDEO 30 39 | |||
| External input selection DV 30 34 | |||
| External input selection SDI 30 36 | |||
| External input selection HDMI 30 38 | |||
B8: Recording Mode Selection
| 1st Byte 2nd Byte | ||
| XP 34 30 | ||
| SP 34 31 | ||
| LP 34 32 | ||
| EP 34 33 | ||
| DR 34 3A | ||
| AF | 34 3B | |
| AN | 34 3C | |
| AL 34 3D | ||
| AE 34 3E | ||
| DR1 | 34 40 | |
| DR2 | 34 41 | |
| DR3 | 34 42 | |
| DR4 | 34 43 |
B8: Simultaneous recording selection
| 1st Byte 2nd Byte | ||
| Simultaneous Recording OFF | 3D | 30 |
| Simultaneous Recording ON | 3D | 31 |
Subtitle Selection
B8: Subtitle Selection
| 1st Byte | 2nd Byte | 1st Byte | 2nd Byte | 1st Byte | 2nd Byte | 1st Byte | 2nd Byte | ||||
| OFF 3C 10 EL 3C 31 | LO 3C 56 | SL 3C 78 | |||||||||
| JAPANESE 3C 11 EO | O 3C 32 LT | T 3C 57 SM | M 3C 79 | ||||||||
| ENGLISH 3C 12 ET | 3C 33 LV | 3C 58 SN | 3C 7A | ||||||||
| GERMAN 3C 13 EU | 3C 34 MG | 3C 59 SO | 3C 7B | ||||||||
| FRENCH | 3C | 14 | FA | 3C | 35 | MI | 3C | 5A | SQ | 3C | 7C |
| ITALIAN | 3C | 15 | FJ | 3C | 36 | MK | 3C | 5B | SR | 3C | 7D |
| SPANISH 3C 16 FO | 3C 37 ML | 3C 5C | SS 3C 7E | ||||||||
| DUTCH | 3C | 17 | FY | 3C | 38 | MN | 3C | 5D | ST | 3C | 7F |
| SWEDISH | 3C 18 | GA 3C 39 | MO 3C | 5E SU | 3C 80 | ||||||
| NORWEGIAN 3C 19 | GD 3C 3A | MR | 3C 5F SW 3C 81 | ||||||||
| FINNISH | 3C | 1A | GL | 3C | 3B | MS | 3C | 60 | TA | 3C | 82 |
| DANISH | 3C | 1B | GN | 3C | 3C | MT | 3C | 61 | TE | 3C | 83 |
| AA | 3C | 1C | GU | 3C | 3D | MY | 3C | 62 | TG | 3C | 84 |
| AB | 3C | 1D | HA | 3C | 3E | NA | 3C | 63 | TH | 3C | 85 |
| AF | 3C | 1E | HI | 3C | 3F | NE | 3C | 64 | TI | 3C | 86 |
| AM | 3C 1F | HR 3C | 40 OC 3C | 65 TK 3C | 87 | ||||||
| AR | 3C 20 | HU | 3C 41 | OM 3C 66 | TL 3C 88 | ||||||
| AS | 3C 21 | HY 3C 42 | OR | 3C 67 | TN 3C 89 | ||||||
| AY | 3C 22 | IA | 3C 43 | PA 3C 68 | TO | 3C 8A | |||||
| AZ | 3C 23 | IE | 3C 44 | PL 3C 69 | TR | 3C 8B | |||||
| BA | 3C | 24 | IK | 3C | 45 | PS | 3C | 6A | TS | 3C | 8C |
| BE | 3C | 25 | IS | 3C | 47 | PT | 3C | 6B | TT | 3C | 8D |
| BG | 3C | 26 | KA | 3C | 4B | QU | 3C | 6C | TW | 3C | 8E |
| BH | 3C | 27 | KK | 3C | 4C | RM | 3C | 6D | UK | 3C | 8F |
| BI | 3C | 28 | KL | 3C | 4D | RN | 3C | 6E | UR | 3C | 90 |
| BN | 3C | 29 | KM | 3C | 4E | RO | 3C | 6F | UZ | 3C | 91 |
| BO | 3C | 2A | KN | 3C | 4F | RU | 3C | 70 | VI | 3C | 92 |
| BR | 3C | 2B | KO | 3C | 50 | RW | 3C | 71 | VO | 3C | 93 |
| CA | 3C | 2C | KS | 3C | 51 | SA | 3C | 72 | WO | 3C | 94 |
| CO | 3C 2D | KU 3C | 52 SD | 3C | 73 XH 3C | 95 | |||||
| CS | 3C 2E | KY 3C | 53 SG 3C | 74 YO 3C | 96 | ||||||
| CY | 3C 2F | LA 3C | 54 SI | 3C | 76 ZH 3C | 97 | |||||
| DZ | 3C 30 | LN | 3C 55 | SK 3C 77 | ZU 3C 98 | ||||||
"Language Code List" (P 108)
Audio Language Selection
B8: Audio Language Selection
| 1st Byte | 2nd Byte | 1st Byte | 2nd Byte | 1st Byte | 2nd Byte | 1st Byte | 2nd Byte | ||||
| JAPANESE 39 11 E0 | 39 32 LT | 39 57 SM | 39 79 | ||||||||
| ENGLISH 39 12 ET | 39 33 LV | 39 58 SN | 39 7A | ||||||||
| GERMAN 39 13 EU | 39 34 MG | 39 59 SO | 39 7B | ||||||||
| FRENCH 39 14 FA | 39 35 MI | 5A | SQ 39 | 7C | |||||||
| ITALIAN | 39 | 15 | FJ | 39 | 36 | MK | 39 | 5B | SR | 39 | 7D |
| SPANISH | 39 | 16 | FO | 39 | 37 | ML | 39 | 5C | SS | 39 | 7E |
| DUTCH | 39 | 17 | FY | 39 | 38 | MN | 39 | 5D | ST | 39 | 7F |
| SWEDISH | 39 18 | GA 39 39 | MO 39 5E | SU 39 | 80 | ||||||
| NORWEGIAN | 39 | 19 | GD | 39 | 3A | MR | 39 | 5F | SW | 39 | 81 |
| FINNISH | 39 | 1A | GL | 39 | 3B | MS | 39 | 60 | TA | 39 | 82 |
| DANISH | 39 | 1B | GN | 39 | 3C | MT | 39 | 61 | TE | 39 | 83 |
| AA | 39 | 1C | GU | 39 | 3D | MY | 39 | 62 | TG | 39 | 84 |
| AB | 39 | 1D | HA | 39 | 3E | NA | 39 | 63 | TH | 39 | 85 |
| AF | 39 | 1E | HI | 39 | 3F | NE | 39 | 64 | TI | 39 | 86 |
| AM | 39 | 1F | HR | 39 | 40 | OC | 39 | 65 | TK | 39 | 87 |
| AR | 39 20 | HU | 39 41 | OM 39 66 | TL 39 88 | ||||||
| AS | 39 21 | HY 39 42 | OR | 39 67 | TN | 39 89 | |||||
| AY | 39 | 22 | IA | 39 | 43 | PA | 39 | 68 | TO | 39 | 8A |
| AZ | 39 23 | E | 39 44 | PL 39 69 | TR | 39 8B | |||||
| BA | 39 | 24 | IK | 39 | 45 | PS | 39 | 6A | TS | 39 | 8C |
| BE | 39 | 25 | IS | 39 | 47 | PT | 39 | 6B | TT | 39 | 8D |
| BG | 39 | 26 | KA | 39 | 4B | QU | 39 | 6C | TW | 39 | 8E |
| BH | 39 | 27 | KK | 39 | 4C | RM | 39 | 6D | UK | 39 | 8F |
| BI | 39 | 28 | KL | 39 | 4D | RN | 39 | 6E | UR | 39 | 90 |
| BN | 39 | 29 | KM | 39 | 4E | RO | 39 | 6F | UZ | 39 | 91 |
| BO | 39 | 2A | KN | 39 | 4F | RU | 39 | 70 | VI | 39 | 92 |
| BR | 39 | 2B | KO | 39 | 50 | RW | 39 | 71 | VO | 39 | 93 |
| CA | 39 | 2C | KS | 39 | 51 | SA | 39 | 72 | WO | 39 | 94 |
| CO | 39 2D | KU 39 | 52 SD 39 | 73 XH 39 | 95 | ||||||
| CS | 39 2E | KY | 39 | 53 SG 39 | 74 YO 39 | 96 | |||||
| CY | 39 | 2F | LA | 39 | 54 | SI | 39 | 76 | ZH | 39 | 97 |
| DZ | 39 | 30 | LN | 39 | 55 | SK | 39 | 77 | ZU | 39 | 98 |
| EL | 39 31 | LO | 39 56 | $L 39 78 |
"Language Code List" (P 108)
Response Commands
RS-232C commands send from the deck.
| Command Description | |
| 01 Complete: Issued by the external recorder upon completing all specified operations by commands. | |
| 02 | Error: Issued by the external recorder when receiving invalid commands in the context. In such cases, commands that are sent will not be accepted. However, a return command will be issued but only to the Status Sense. To clear the Error status, perform command 56 (Clear). |
| 05 Not Target: Issued by the external recorder when specified operations by commands cannot be completed properly. | |
| 06 Not Ready: This command is returned when the command request cannot be executed due to the following conditions.Power is OFFSending of control command is forbidden | |
| 0A ACK: A return command issued when a defined command is received. | |
| 0B NAK: A return command issued when an undefined or possibly nonexistent command is received. | |
| 03 | Cassette Out: Issued upon completing the operation of opening and closing the tray when the HDD/DVD deck is selected. |
System Commands
Commands for acquiring information such as deck status.
| Command Description | |
| 60 Chapter Sense: For acquiring the current chapter number. (*) | |
| 61 Title/Track Sense: For acquiring the current title number under “ORIGINAL” or in the “PLAY LIST”. (*) | |
| B9 Select Sense: For acquiring the status of the inputs, outputs, recording mode, audio language selection and subtitle selection. (*) | |
| BE Date Sense: For acquiring the currently configured year, month and day. (*) | |
| BF Time Data Sense: For acquiring the currently configured hour, minute and second. (*) | |
| D7 Status Data Sense: For acquiring the deck information. (*) | |
| D8 TC Data Sense: For acquiring the total remaining time in the current recording mode when there is a media in the selected deck. (*)Acquires the remaining time in the HDD recording mode during simultaneous recording. | |
| D9 CTL Data Sense: For acquiring the lapse counter when there is a media in the selected deck. (*)Acquires the time lapse counter of the HDD during simultaneous recording. | |
| DD JVC Status Sense: Returns data from the unit. (*) | |
| E8 Opt TC Data Sense: For acquiring the remaining time by recording mode of the BD/DVD deck during simultaneous recording. | |
| E9 Opt CTL Data Sense: For acquiring the time lapse counter of the BD/DVD deck during simultaneous recording. | |
| FB VTR Ind: A command for checking whether the connected device is the external recorder. |
(*): See "Sense" (P 104) for the data format.
Sense
- Chapter Sense
| 1st Byte 2nd Byte 3rd Byte | |||
| Chapter Sense Hundreds Tens Ones | |||
| 60 3* 3* 3* | |||
| E.g. (012) | 30 | 31 | 32 |
E.g.: When the current chapter is the 12th chapter.
• Title/Track Sense under "ORIGINAL"
| 1st Byte 2nd Byte 3rd Byte 4th Byte | |||
| Title/Track Sense (ORIGINAL) 30 Hundreds Tens Ones | |||
| 61 30 3* 3* 3* | |||
| E.g. (345) 30 33 34 35 |
E.g.: When the current title under "ORIGINAL" is the 345th title.
• Title/Track Sense in "PLAY LIST"
| 1st Byte 2nd Byte 3rd Byte 4th Byte | |||
| Title/Track Sense (PLAY LIST) 38 Hundreds Tens Ones | |||
| 61 38 3* 3* 3* | |||
| E.g. (028) 38 30 32 38 |
E.g.: When the current title under "PLAY LIST" is the 28th title.
- Select Sense
| 1st Byte 2nd | Byte 3rd Byte | 4th Byte 5th Byte | 6th Byte | |||
| Select Sense | External input selection | Output selection | Recording mode selection | Audio language selection | Subtitle selection | Simultaneous recording selection |
| B9 | 3* | 3* | ** | ** | ** | 3* |
| E.g. (393031121331) | 39 | 30 | 31 | 12 | 13 | 31 |
E.g.: When the selection status of the video deck is as follows:
External input selection ⇒ L-1 S-VIDEO
Output selection ⇒ Common output (Frame is fixed at 0.)
Recording mode selection ⇒ SP
Audio language selection ⇒ ENGLISH
Subtitle selection ⇒ GERMAN
Simultaneous recording selection ⇒ ON
For the response data format for B9, see "B8 (Select Preset)" (P 101 - P 103).
When the current status cannot be acquired, the value is fixed as "-" (0x2D).
- Date Data Sense
For acquiring the currently configured year, month and day in ASCII codes.
| 1st Byte 2nd | Byte 3rd Byte | 4th Byte 5th Byte | 6th Byte | |||
| Date Sense | Mth (Tens) | Mth (Ones) | Day (Tens) | Day (Ones) | Yr (Tens) | Yr (Ones) |
| BE | 3* | 3* | 3* | 3* | 3* | 3* |
| E.g. (09.14.2015) | 30 | 39 | 31 | 34 | 31 | 35 |
When the current date is not set, the value is fixed as "-" (0x2D).
- Time Data Sense
For acquiring the currently configured hour, minute and second in ASCII codes.
| 1st Byte 2nd | Byte 3rd Byte | 4th Byte 5th Byte | 6th Byte | |||
| Time Sense | Hr (Tens) | Hr (Ones) | Min (Tens) | Min (Ones) | Sec (Tens) | Sec (Ones) |
| BF | 3* | 3* | 3* | 3* | 3* | 3* |
| E.g. (12:34:56) | 31 | 32 | 33 | 34 | 35 | 36 |
When the current time is not set, the value is fixed as "-" (0x2D).
- Status Data Sense: For acquiring the remaining time in the current recording mode in hours, minutes and seconds for HDD/BD/SD.
| D7 STATUS SENSE | 1st Byte 1st | Byte 1st Byte 2nd | Byte 3rd Byte 4th | Byte 5th Byte | |||
| HDD BD SD HDD/BD/SD HDD/BD/SD HDD/BD/SD HDD/BD/SD HDD/BD/SD HDD/BD/SD HDD/BD/SD HDD/BD/SD HDD/BD/SD HDD/BD/SD HDD/BD/SD HDD/BD/SD HDD/BD/SD HDD/BD/SD HDD/BD/SD HDD/BD/SD HDD/BD/SD HDD/BD/SD HDD/BD/SD HDD/BD/SD HDD/BD/SB HDD/BD/BD/BD/BD/BD/BD/BD/BD/BD/BD/BD/BD/BD/BD/BD/BD/BD/BD/BD/BD/BD/BD/BD/BD/BD/BD/BD/BD/BD/BD/BD/BD/BD/BD/BD/BD/BD/BD/BD/BD/BD/BD/BD/BD/BD/BD/BD/BD/BD/BD/BC HDD/BD/BD/BD/BD/BD/BD/BD/BD/BD/BD/BD/BD/BD/BD/BD/BD/BD/BD/BD/BD/BD/BD/BD/BD/BD/BD/BD/BD/BD/BD/BD/BD/BD/BD/BD/BD/BD/BD/BD/BD/BD/BD/BD/BD/BD/BD/BD/BD/BD/B HDD/BD/BD/BD/BD/BD/BD/BD/BD/BD/BD/BD/BD/BD/BD/BD/BD/BD/BD/BD/BD/BD/BD/BD/BD/BD/BD/BD/BD/BD/BD/BD/BD/BD/BD/BD/BD/BD/BD/BD/BD/BD/BD/BD/BD/BD/BD/BD/BD/BD /BD/BD/BD/BD/BD/BD/BD/BD/BD/BD/BD/BD/BD/BD/BD/BD/BD/BD/BD/BD/BD/BD/BD/BD/BD/BD/BD/BD/BD/BD/BD/BD/BD/BD/BD/BD/BD/BD/BD/BD/BD/BD/BD/BD/BD/BD/BD/BD/BD/BD /B HDD/BD/BD/BD/BD/BD/BD/BD/BD/BD/BD/BD/BD/BD/BD/BD/BD/BD/BD/BD/BD/BD/BD/BD/BD/BD/BD/BD/BD/BD/BD/BD/BD/BD/BD/BD/BD/BD/BD/BD/BD/BD/BD/BD/BD/BD/BD/BD/BD/BD, B HDD/BD/BD/BD/BD/BD/BD/BD/BD/BD/BD/BD/BD/BD/BD/BD/BD/BD/BD/BD/BD/BD/BD/BD/BD/BD/BD/BD/BD/BD/BD/BD/BD/BD/BD/BD/BD/BD/BD/BD/BD/BD/BD/BD/BD/BD/BD/BD/BD/BD(1) HDD/BD/BD/BD/BD/BD/BD/BD/BD/BD/BD/BD/BD/BD/BD/BD/BD/BD/BD/BD/BD/BD/BD/BD/BD/BD/BD/BD/BD/BD/BD/BD/BD/BD/BD/BD/BD/BD/BD/BD/BD/BD/BD/BD/BD/BD/BD/BD/BD/BD 1 (Fixed) Fixed / Fixed / Fixed / Fixed / Fixed / Fixed / Fixed / Fixed / Fixed / Fixed / Fixed / Fixed / Fixed / Fixed / Fixed / Fixed / Fixed / Fixed / Fixed / Fixed / Fixed / Fixed / Fixed / Fixed / Fixed / Fixed / Fixed / Fixed / Fixed / Fixed / Fixed / Fixed / Fixed / Fixed / Fixed / Fixed / Fixed / Fixed / Fixed / Fixed / Fixed / Fixed / Fixed / Fixed / Fixed / Fixed / Fixed / Fixed / Fixed / Fixed / Fixed | |||||||
| bit7 1 (Fixed) 1 (Fixed) 1 (Fixed) 1 (Fixed) 1 (Fixed) 1 (Fixed) 1 (Fixed) 1 (Fixed) 1 (Fixed) 1 (Fixed) 1 (Fixed) 1 (Fixed) 1 (Fixed) 1 (Fixed) 1 (Fixed) 1 (Fixed) 1 (Fixed) 1 (Fixed) 1 (Fixed) 1 (Fixed) 1 (Fixed), 1 (Fixed) 1 (Fixed) 1 (Fixed) 1 (Fixed) 1 (Fixed) 1 (Fixed) 1 (Fixed) 1 (Fixed) 1 (Fixed) 1 (Fixed) 1 (Fixed) 1 (Fixed) 1 (Fixed) 1 (Fixed) 1 (Fixed) 1 (Fixed) 1 (Fixed) 1 (Fixed) 1 (Fixed) 1 (Fixed, 1 (Fixed) 1 (Fixed) 1 (Fixed) 1 (Fixed) 1 (Fixed) 1 (Fixed) 1 (Fixed) 1 (Fixed) 1 (Fixed) 1 (Fixed) 1 (Fixed) 1 (Fixed) 1 (Fixed) 1 (Fixed) 1 (Fixed) 1 (Fixed) 1 (Fixed) 1 (Fixed) 1 (Fixed) 1 (Fixed). | |||||||
| bit6 0 (Fixed) 1 (Fixed) 1 (Fixed) 1 (Fixed) 1 (Fixed) 1 (Fixed) 1 (Fixed) 1 (Fixed) 1 (Fixed) 1 (Fixed) 1 (Fixed) 1 (Fixed) 1 (Fixed) 1 (Fixed) 1 (Fixed) 1 (Fixed) 1 (Fixed) 1 (Fixed) 1 (Fixed) 1 (Fixed) 2 (Fixed) 2 (Fixed) 2 (Fixed) 2 (Fixed) 2 (Fixed) 2 (Fixed) 2 (Fixed) 2 (Fixed) 2 (Fixed) 2 (Fixed) 2 (Fixed) 2 (Fixed) 2 (Fixed) 2 (Fixed) 2 (Fixed) 2 (Fixed) 2 (Fixed) 2 (Fixed) 2 (Fixed) 2 (Fixed) 1 (Fixed) 1 (Fixed) 1 (Fixed) 1 (Fixed) 1 (Fixed) 1 (Fixed) 1 (Fixed) 1 (Fixed) 1 (Fixed) 1 (Fixed) 1 (Fixed) 1 (Fixed) 1 (Fixed) 1 (Fixed) 1 (Fixed) 1 (Fixed) 1 (Fixed) 1 (Fixed) 1 (Fixed) 3 (Fixed) 3 (Fixed) 3 (Fixed) 3 (Fixed) 3 (Fixed) 3 (Fixed) 3 (Fixed) 3 (Fixed) 3 (Fixed) 3 (Fixed) 3 (Fixed) 3 (Fixed) 3 (Fixed) 3 (Fixed) 3 (Fixed) 3 (Fixed) 3 (Fixed) 3 (Fixed) 3 (Fixed) 3 (Fixed) 4 (Fixed) 4 (Fixed) 4 (Fixed) 4 (Fixed) 4 (Fixed) 4 (Fixed) 4 (Fixed) 4 (Fixed) 4 (Fixed) 4 (Fixed) 4 (Fixed) 4 (Fixed) 4 (Fixed) 4 (Fixed) 4 (Fixed) 4 (Fixed) 4 (Fixed) 4 (Fixed) 4 (Fixed) 4 (Fixed) 5 (Fixed) 5 (Fixed) 5 (Fixed) 5 (Fixed) 5 (Fixed) 5 (Fixed) 5 (Fixed) 5 (Fixed) 5 (Fixed) 5 (Fixed) 5 (Fixed) 5 (Fixed) 5 (Fixed) 5 (Fixed) 5 (Fixed) 5 (Fixed) 5 (Fixed) 5 (Fixed) 5 (Fixed) 5 (Fixed) 6 (Fixed) 6 (Fixed) 6 (Fixed) 6 (Fixed) 6 (Fixed) 6 (Fixed) 6 (Fixed) 6 (Fixed) 6 (Fixed) 6 (Fixed) 6 (Fixed) 6 (Fixed) 6 (Fixed) 6 (Fixed) 6 (Fixed) 6 (Fixed) 6 (Fixed) 6 (Fixed) 6 (Fixed) 6 (Fixed) 7 (Fixed) 7 (Fixed) 7 (Fixed) 7 (Fixed) 7 (Fixed) 7 (Fixed) 7 (Fixed) 7 (Fixed) 7 (Fixed) 7 (Fixed) 7 (Fixed) 7 (Fixed) 7 (Fixed) 7 (Fixed) 7 (Fixed) 7 (Fixed) 7 (Fixed) 7 (Fixed) 7 (Fixed) 7 (Fixed) 8 (Fixed) 8 (Fixed) 8 (Fixed) 8 (Fixed) 8 (Fixed) 8 (Fixed) 8 (Fixed) 8 (Fixed) 8 (Fixed) 8 (Fixed) 8 (Fixed) 8 (Fixed) 8 (Fixed) 8 (Fixed) 8 (Fixed) 8 (Fixed) 8 (Fixed) 8 (Fixed) 8 (Fixed) 8 (Fixed) 9 (Fixed) 9 (Fixed) 9 (Fixed) 9 (Fixed) 9 (Fixed) 9 (Fixed) 9 (Fixed) 9 (Fixed) 9 (Fixed) 9 (Fixed) 9 (Fixed) 9 (Fixed) 9 (Fixed) 9 (Fixed) 9 (Fixed) 9 (Fixed) 9 (Fixed) 9 (Fixed) 9 (Fixed) 9 (Fixed) 10 (Fixed) 10 (Fixed) 10 (Fixed) 10 (Fixed) 10 (Fixed) 10 (Fixed) 10 (Fixed) 10 (Fixed) 10 (Fixed) 10 (Fixed) 10 (Fixed) 10 (Fixed) 10 (Fixed) 10 (Fixed) 10 (Fixed) 10 (Fixed) 10 (Fixed)10 (Fixed) 10 (Fixed) 10 (Fixed) 10 (Fixed) 10 (Fixed) 10 (Fixed) 10 (Fixed) 10 (Fixed) 10 (Fixed) 10 (Fixed) 10 (Fixed) 10 (Fixed) 10 (Fixed) 10 (Fixed) 10 (Fixed) 10 (Fixed) 10 (FDD) 10 (FDD) 10 (FDD) 10 (FDD) 10 (FDD) 10 (FDD) 10 (FDD) 10 (FDD) 10 (FDD) 10 (FDD) 10 (FDD) 10 (FDD) 10 (FDD) 10 (FDD) 10 (FDD)10 (FDD) 10 (FDD) 10 (FDD) 10 (FDD) 10 (FDD) 10 (FDD) 10 (FDD) 10 (FDD) 10 (FDD) 10 (FDD) 10 (FDD) 10 (FDD) 10 (FDD) 10 (FDD) 11 (FDD) 11 (FDD) 11 (FDD) 11 (FDD) 11 (FDD) 11 (FDD) 11 (FDD) 11 (FDD) 11 (FDD) 11 (FDD) 11 (FDD) 11 (FDD) 11 (FDD) 11 (FDD) 11 (TDD) 11 (TDD) 11 (TDD) 11 (TDD) 11 (TDD) 11 (TDD) 11 (TDD) 11 (TDD) 11 (TDD) 11 (TDD) 11 (TDD) 11 (TDD) 11 (TDD) 11 (TDD) 11 (TDD), 11 (TDD), 11 (TDD), 11 (TDD), 11 (TDD), 11 (TDD), 11 (TDD), 11 (TDD), 11 (TDD), 11 (TDD), 11 (TDD), 11 (TDD), 11 (TDD), 11 (TDD), 11 (TDD), 20 (TDD) 20 (TDD) 20 (TDD) 20 (TDD) 20 (TDD) 20 (TDD) 20 (TDD) 20 (TDD) 20 (TDD) 20 (TDD) 20 (TDD) 20 (TDD) 20 (TDD) 20 (TDD) 20 (TDD) 30 (TDD) 30 (TDD) 30 (TDD) 30 (TDD) 30 (TDD) 30 (TDD) 30 (TDD) 30 (TDD) 30 (TDD) 30 (TDD) 30 (TDD) 30 (TDD) 30 (TDD) 30 (TDD) 30( Fixed) 30 (TDD) 30 (TDD) 30 (TDD) 30 (TDD) 30 (TDD) 30 (TDD) 30 (TDD) 30 (TDD) 30 (TDD) 30 (TDD) 30 (TDD) 30 (TDD) 30 (TDD) 30 (TDD)30 (TDD) 30 (TDD) 30 (TDD) 30 (TDD) 30 (TDD) 30 (TDD) 30 (TDD) 30 (TDD) 30 (TDD) 30 (TDD) 30 (TDD)30 (TDD) 30 (TDD) 30 (TDD) 30( Fixed) 30 (TDD) 30 (TDD) 30 (TDD) 30 (TDD) 30 (TDD) 30 (TDD) 30 (TDD) 30 (TDD) 30 (TDD)30 (TDD) 30 (TDD) 30 (TDD) 30 (TDD) 30 (TDD) 20 (TDD) 20 (TDD) 20 (TDD) 20 (TDD) 20 (TDD) 20 (TDD) 20 (TDD) 20 (TDD) 20 (TDD) 20 (TDD) 20 (TDD) 20 (TDD) 20 (TDD) 20( Fixed) 20( Fixed) 20( Fixed) 20( Fixed) 20( Fixed) 20( Fixed) 20( Fixed) 20( Fixed) 20( Fixed) 20( Fixed) 20( Fixed) 20( Fixed) 20( Fixed) 20( Fixed) 20( Fixed) 20( Fixed) 20( Fixed) 25( Fixed) 25( Fixed) 25( Fixed) 25( Fixed) 25( Fixed) 25( Fixed) 25( Fixed) 25( Fixed) 25( Fixed) 25( Fixed) 25( Fixed) 25( Fixed) 25( Fixed) 25( Fixed) 25( Fixed) 25( Fixed) 25( Fixed)25( Fixed)25( Fixed)25( Fixed)25( Fixed)25( Fixed)25( Fixed)25( Fixed)25( Fixed)25( Fixed)25( Fixed)25( Fixed)25( Fixed)25( Fixed)25( Fixed)25( Fixed)25( Fixed)25( Fixed)25( Fixed)25( Fixed)25( Fixed)/25( Fixed)/25( Fixed)/25( Fixed)/25( Fixed)/25( Fixed)/25( Fixed)/25( Fixed)/25( Fixed)/25( Fixed)/25( Fixed)/25( Fixed)/25( Fixed)/25( Fixed)/25( Fixed)/25( Fixed)/25( Fixed)/25( Fixed)/25( Fixed)/25( Fixed)/25( Fixed)25( Fixed)/25( Fixed)/25( Fixed)/25( Fixed)/25( Fixed)/25( Fixed)/25( Fixed)/25( Fixed)/25( Fixed)/25( Fixed)/25( Fixed)/25( Fixed)/25( Fixed)/25( Fixed)/25( Fixed)/25( Fixed)/25( Fixed)/25( Fixed)/25( Fixed)25( Fixed)25( Fixed)25( Fixed)25( Fixed)25( Fixed)25( Fixed)25( Fixed)25( Fixed)25( Fixed)25( Fixed)25( Fixed)25( Fixed)25( Fixed)25( Fixed)25( Fixed)25( Fixed)25( Fixed)25( Fixed)25( Fixed)-25( Fixed)-25( Fixed)-25( Fixed)-25( Fixed)-25( Fixed)-25( Fixed)-25( Fixed)-25( Fixed)-25( Fixed)-25( Fixed)-25( Fixed)-25( Fixed)-25( Fixed)-25( Fixed)-25( Fixed)-25( Fixed)-25( Fixed)-25( Fixed)-25( Fixed)-25( Fixed-25( Fixed-25( Fixed-25( Fixed-25( Fixed-25( Fixed-25( Fixed-25( Fixed-25( Fixed-25( Fixed-25( Fixed-25( Fixed-25( Fixed-25( Fixed-25( Fixed-25( Fixed-25( Fixed-25( Fixed-25( Fixed-25( Fixed-25( Fixed -30( Fixed -30( Fixed -30( Fixed -30( Fixed -30( Fixed -30( Fixed -30( Fixed -30( Fixed -30( Fixed -30( Fixed -30( Fixed -30( Fixed -30( Fixed -30( Fixed -30( Fixed -30( Fixed -30( Fixed -30( Fixed -30( Fixed -30( Fixed -31( Fixed -31( Fixed -31( Fixed -31( Fixed -31( Fixed -31( Fixed -31( Fixed -31( Fixed -31( Fixed -31( Fixed -31( Fixed -31( Fixed -31( Fixed -31( Fixed -31( Fixed -31( Fixed -31( Fixed -31( Fixed -31( Fixed -31( Fixed -30( Fixed -30( Fixed -30( Fixed -30( Fixed -30( Fixed -30( Fixed -30( Fixed -30( Fixed -30( Fixed -30( Fixed -30( Fixed -30( Fixed -30( Fixed -30( Fixed -30( Fixed -30( Fixed -30( Fixed -30( Fixed -30( Fixed -35( Fixed -35( Fixed -35( Fixed -35( Fixed -35( Fixed -35( Fixed -35( Fixed -35( Fixed -35( Fixed -35( Fixed -35( Fixed -35( Fixed -35( Fixed -35( Fixed -35( Fixed -35( Fixed -35( Fixed -35( Fixed -35( Fixed -35( Fixed -30( Fixed -30( Fixed -30( Fixed -30( Fixed -30( Fixed -30( Fixed -30( Fixed -30( Fixed -30( Fixed -30( Fixed -30( Fixed -30( Fixed -30( Fixed -30( Fixed -30( Fixed -30( Fixed -30( Fixed -30( Fixed -30( Fixed -25( Fixed -25( Fixed -25( Fixed -25( Fixed -25( Fixed -25( Fixed -25( Fixed -25( Fixed -25( Fixed -25( Fixed -25( Fixed -25( Fixed -25( Fixed -25( Fixed -25( Fixed -25( Fixed -25( Fixed -25( Fixed -25( Fixed -25( Fixed -20( Fixed -20( Fixed -20( Fixed -20( Fixed -20( Fixed -20( Fixed -20( Fixed -20( Fixed -20( Fixed -20( Fixed -20( Fixed -20( Fixed -20( Fixed -20( Fixed -20( Fixed -20( Fixed -20( Fixed -20( Fixed -20( Fixed -20( Fixed -25( Fixed -25( Fixed -25( Fixed -25( Fixed -25( Fixed -25( Fixed -25( Fixed -25( Fixed -25( Fixed -25( Fixed -25( Fixed -25( Fixed -25( Fixed -25( Fixed -25( Fixed -25( Fixed -25( Fixed -25( Fixed -25( Fixed -30( Fixed -30( Fixed -30( Fixed -30( Fixed -30( Fixed -30( Fixed -30( Fixed -30( Fixed -30( Fixed -30( Fixed -30( Fixed -30( Fixed -30( Fixed -30( Fixed -30( Fixed -30( Fixed -30( Fixed -30( Fixed -30( Fixed-30( Fixed -30( Fixed -30( Fixed -30( Fixed -30( Fixed -30( Fixed -30( Fixed -30( Fixed -30( Fixed -30( Fixed -30( Fixed -30( Fixed -30( Fixed -30( Fixed -30( Fixed -30( Fixed -30( Fixed -30( Fixed -30( Fixed -30( Fixed-35( Fixed -35( Fixed -35( Fixed -35( Fixed -35( Fixed -35( Fixed -35( Fixed -35( Fixed -35( Fixed -35( Fixed -35( Fixed -35( Fixed -35( Fixed -35( Fixed -35( Fixed -35( Fixed -35( Fixed -35( Fixed -35( Fixed -35( Fixed-35( Fixed -35( Fixed -35( Fixed -35( Fixed -35( Fixed -35( Fixed -35( Fixed -35( Fixed -35( Fixed -35( Fixed -35( Fixed -35( Fixed -35( Fixed -35( Fixed -35( Fixed -35( Fixed -35( Fixed -35( Fixed -35( Fixed -30( Fixed-30( Fixed-30( Fixed-30( Fixed-30( Fixed-30( Fixed-30( Fixed-30( Fixed-30( Fixed-30( Fixed-30( Fixed-30( Fixed-30( Fixed-30( Fixed-30( Fixed-30( Fixed-30( Fixed-30( Fixed-30( Fixed-30( Fixed-30( Fixed -30( Fixed-30( Fixed-30( Fixed-30( Fixed-30( Fixed-30( Fixed-30( Fixed-30( Fixed-30( Fixed-30( Fixed-30( Fixed-30( Fixed-30( Fixed-30( Fixed-30( Fixed-30( Fixed-30( Fixed-30( Fixed-30( Fixed-35( Fixed-35( Fixed-35( Fixed-35( Fixed-35( Fixed-35( Fixed-35( Fixed-35( Fixed-35( Fixed-35( Fixed-35( Fixed-35( Fixed-35( Fixed-35( Fixed-35( Fixed-35( Fixed-35( Fixed-35( Fixed-35( Fixed-35( Fixed-30( Fixed-30( Fixed-30( Fixed-30( Fixed-30( Fixed-30( Fixed-30( Fixed-30( Fixed-30( Fixed-30( Fixed-30( Fixed-30( Fixed-30( Fixed-30( Fixed-30( Fixed-30( Fixed-30( Fixed-30( Fixed-30( Fixed-35( Fixed -35( Fixed -35( Fixed -35( Fixed -35( Fixed -35( Fixed -35( Fixed -35( Fixed -35( Fixed -35( Fixed -35( Fixed -35( Fixed -35( Fixed -35( Fixed -35( Fixed -35( Fixed -35( Fixed -35( Fixed -35( Fixed-35( Fixed-35( Fixed-35( Fixed-35( Fixed-35( Fixed-35( Fixed-35( Fixed-35( Fixed-35( Fixed-35( Fixed-35( Fixed-35( Fixed-35( Fixed-35( Fixed-35( Fixed-35( Fixed-35( Fixed-35( Fixed-35( Fixed -35( Fixed -35( Fixed -35( Fixed -35( Fixed -35( Fixed -35( Fixed -35( Fixed -35( Fixed -35( Fixed -35( Fixed -35( Fixed -35( Fixed -35( Fixed -35( Fixed -35( Fixed -35( Fixed -35( Fixed -35( Fixed-30( Fixed-30( Fixed-30( Fixed-30( Fixed-30( Fixed-30( Fixed-30( Fixed-30( Fixed-30( Fixed-30( Fixed-30( Fixed-30( Fixed-30( Fixed-30( Fixed-30( Fixed-30( Fixed-30( Fixed-30( Fixed-30( Fixed -35( Fixed -35( Fixed -35( Fixed -35( Fixed -35( Fixed -35( Fixed -35( Fixed -35( Fixed -35( Fixed -35( Fixed -35( Fixed -35( Fixed -35( Fixed -35( Fixed -35( Fixed -35( Fixed | |||||||
- TC Data Sense
| 1st Byte | 2nd Byte | 3rd Byte | 4th Byte | 5th Byte | 6th Byte | 7th Byte | 8th Byte | |
| TC Data Sense | Hr (Tens) | Hr (Ones) | Min (Tens) | Min (Ones) | Sec (Tens) | Sec (Ones) | Frame (Tens) | Frame (Ones) |
| D8 | 3* | 3* | 3* | 3* | 3* | 3* | 3* | 3* |
| E.g. (01:23:45) | 30 | 31 | 32 | 33 | 34 | 35 | 30 | 30 |
E.g.: When remaining time for the current recording mode of the selected deck is 1 hr 23 min 45 sec. Frame is fixed as 0.
- SEARCH SPEED
| bit3 bit2 bit1 | bit0 | |||
| STILL 0 0 0 0 | ||||
| x1 0 1 0 1 | ||||
| x1.3 1 0 1 0 | ||||
| SLOW1 0 0 0 1 | ||||
| SLOW2 0 0 1 0 | ||||
| SLOW3 0 0 1 1 | ||||
| SLOW4 0 1 0 0 | ||||
| SEARCH1 0 1 1 0 | ||||
| SEARCH2 0 1 1 1 | ||||
| SEARCH3 1 0 0 0 | ||||
| SEARCH4 1 0 0 1 | ||||
| SEARCH5 1 0 0 1 |
- CTL Data Sense
For acquiring lapse counter of selected deck in hours, minutes and seconds.
| 1st Byte 2nd | Byte 3rd Byte | 4th Byte 5th | Byte 6th Byte 7th | Byte 8th Byte | ||||
| CTL Data Sense | Hr (Tens) | Hr (Ones) | Min (Tens) | Min (Ones) | Sec (Tens) | Sec (Ones) | Frame (Tens) | Frame (Ones) |
| D9 | 3* | 3* | 3* | 3* | 3* | 3* | 3* | 3* |
| E.g. (01:23:45) | 30 | 31 | 32 | 33 | 34 | 35 | 30 | 30 |
E.g.: When time lapse counter is 1 hr 23 min 45 sec. Frame is fixed as 0.
- JVC Status Sense
| 1st Byte | 2nd Byte | 3rd Byte | 4th Byte | |
| HDD/BD/SD | HDD/BD/SD | HDD/BD/SD | HDD/BD/SD | |
| bit7 | 1 (Fixed) | 0 (Fixed) | 1 (Fixed) | 1 (Fixed) |
| bit6 | 0 (Fixed) | 0 (Fixed) | 0 (Fixed) | 1 (Fixed) |
| bit5 | 0 (Fixed) | 1 (Fixed) | 0 (Fixed) | 0 (Fixed) |
| bit4 | 0 (Fixed) | 0 (Fixed) | 0 (Fixed) | 0 (Fixed) |
| bit3 | 0 (Fixed) | Refer to the DISC TYPE table below. | 0 (Fixed) | During dubbing (Including PAUSE) |
| bit2 | 0 (Fixed) | Refer to the DISC TYPE table below. | 0 (Fixed) | 0 (Fixed) |
| bit1 | 0 (Fixed) | Refer to the DISC TYPE table below. | 0 (Fixed) | 0 (Fixed) |
| bit0 | 1 (Fixed) | Refer to the DISC TYPE table below. | During dubbing (Including PAUSE) | 0 (Fixed) |
- DISC TYPE
| bit3 | bit2 | bit1 | bit0 | bit3 | bit2 | bit1 | bit0 | ||
| DVD | 0 | 0 | 0 | 0 | CD | 0 | 1 | 1 | 1 |
| DVD-RAM | 0 | 0 | 0 | 1 | BD-ROM | 1 | 0 | 0 | 0 |
| DVD-R | 0 | 0 | 1 | 0 | BD-R | 1 | 0 | 0 | 1 |
| DVD-RW | 0 | 0 | 1 | 1 | BD-RE | 1 | 0 | 1 | 0 |
| DVD+R | 0 | 0 | 0 | 0 | No disc | 1 | 1 | 1 | 1 |
| DVD+RW | 0 | 0 | 0 | 0 | Unknown | 1 | 1 | 1 | 0 |
When SD deck is selected, the values are fixed as bit3:0, bit2:0, bit1:1 and bit0:0.
Language Code List
| Code Language Code Language Code Language | ||||
| AA Afar HI Hindi OS Ossetian | ||||
| AB Abkhazian HO Hiri Motu PA Panjabi | ||||
| AF Afrikaans HU Hungarian FA Persian | ||||
| AK Akan IG Igbo PI Pali | ||||
| SQ Albanian | IS Icelandic | PL | Polish | |
| AM Amharic | IO Ido | PT | Portuguese | |
| AR Arabic | II Sichuan Yi | PS Pashto | ||
| AN Aragonese | IU Inuktitut | QU | Quechua | |
| HY Armenian | IE Interlingue | RM | Rhaeto-Romance | |
| AS Assamese | IA Interlingua (International Auxiliary language Association) | RO Romanian | ||
| AV Avar | ID Indonesian | RN | Kirundi | |
| AE Avestan IK Inupiak | RU Russian | |||
| AY Aymara | IT Italian | SG | Sango | |
| AZ Azerbaijani | JV Javanese | SA Sanskrit | ||
| BA Bashkir | JA Japanese | SR Serbia | ||
| BM Bambara KL Kalaallisut HR Croatian | ||||
| EU Basque | KN Kannada | SI | Sinhala | |
| BE Belarusian | KS Kashmiri | SK | Slovak | |
| BN Bengali | KR Kanuri | SL | Slovenian | |
| BH Bihari | KK Kazakh | SE | Northern Sami | |
| BI Bislama | KM Khmer | SM | Samoan | |
| BS Bosnian KI Kikuyu | SN Shona | |||
| BR Breton | RW Kinyarwanda | SD Sindhi | ||
| BG Bulgarian KY Kirghiz | SO Somali | |||
| MY Burmese KV Komi ST Southern Sotho | ||||
| CA Catalan, Valencian | KG Kongo | ES | Spanish | |
| CH Chamorro | KO Korean | SC | Sardinian | |
| CE Chechen | KJ Kwanyama | SS Swati | ||
| ZH Chinese | KU Kurukh | SU | Sundanese | |
| CU Church Slavic | LO Lao | SW | Swahili | |
| CV Chuvash | LA Latin | SV | Swedish | |
| KW Cornish | LV Latvian | TY Tahitian | ||
| CO Corsican | LI Limburgish | TA Tamil | ||
| CR Cree LN Lingala | TT Tatar | |||
| CS Czech | LT Lithuanian | TE Telugu | ||
| DA Danish | LB Luxembourg | TG | Tajik | |
| DV Divehi | LU Luba-Katanga | TL | Tagalog | |
| NL Dutch | LG Ganda | TH | Thai | |
| DZ Dzongkha | MK Macedonian | BO | Tibetan | |
| EN English MH Marshallese | TI Tigrinya | |||
| EO Esperanto | ML Malayalam | TO | Tongan | |
| ET Estonian | MI Māori | TN Tswana | ||
| EE Ewe | MR Marathi | TS | Tsonga | |
| FO Faroese | MS Malay | TK | Turkmen | |
| FJ | Fijian | MG Malagasy | TR Turkish | |
| FI Finnish | MT Maltese | TW | Twi | |
| FR French | MO Moldavian | UG Uighur | ||
| FY | Western Frisian | MN Mongolian | UK Ukrainian | |
| FF | Fulah | NA Nauruan | UR Urdu | |
| KA Georgian | NV Navajo | UZ | Uzbek | |
| DE German | NR South Ndebele | VE | Venda | |
| GD Scottish Gaelic | ND North Ndebele | VI | Vietnamese | |
| GA Irish | NG Ndonga | VO | Volapük | |
| GL Galician | NE Nepali | CY | Welsh | |
| GV Manx | NN Norwegian Nynorsk | WA | Walloon | |
| EL | Greek | NB Norwegian Bokmål | WO Wolof | |
| GN Guarani | NO Norwegian XH Xhosa | |||
| GU Gujarati | NY Chichewa | YI | Yiddish | |
| HT Haitian | OC Occitan | YO | Yoruba | |
| HA Hausa OJ Ojibwa ZA Zhuang | ||||
| HE Hebrew OR Oriya ZU Zulu | ||||
| HZ Herero OM Oromo | ||||
Country Code List
| Code Country Name Code Country Name Code Country Name | |||||
| AD Andorra GM Gambia NU Niue | |||||
| AE United Arab Emirates GN Guinea NZ New Zealand | |||||
| AF Afghanistan GP Guadeloupe OM Oman | |||||
| AG Antigua and Barbuda GQ Equatorial Guinea PA Panama | |||||
| Al Anguilla GR Greece | PE Peru | ||||
| AL | Albania | GS South Georgia and South Sandwich Islands | PF | Polynesia | |
| AM | Armenia | GT Guatemala | PG | Papua New Guinea | |
| AN | Netherlands Antilles | GU Guam | PH | Philippines | |
| AO | Angola | GW Guinea-Bissau | PK Pakistan | ||
| AQ | Antarctica | GY Guyana | PL | Poland | |
| AR | Argentina | HK Hong Kong | PM | Saint Pierre and Miquelon | |
| AS | American Samoa | HM | Heard and McDonald Islands | PN | Pitcairn Islands |
| AT | Austria | HN Honduras PR Puerto Rico | |||
| AU | Australia | HR Croatia | PT | Portugal | |
| AW | Aruba | HT Haiti | PW | Palau | |
| AZ | Azerbaijan | HU Hungary | PY | Paraguay | |
| BA | Bosnia and Herzegovina | ID Indonesia | QA | Qatar | |
| BB | Barbados | IE Ireland | RE | Reunon Island | |
| BD | Bangladesh | IL Israel | RO Romania | ||
| BE | Belgium | IN | India | RU | Russian Federation |
| BF | Burkina Faso | IO | British Indian Ocean Territory | RW | Rwanda |
| BG | Bulgaria | IQ Iraq | SA Saudi Arabia | ||
| BH | Bahrain | IR Iran | SB | Solomon Islands | |
| BI | Burundi | IS Iceland | C Seychelles | ||
| BJ | Benin | IT Italy | D Sudan | ||
| BM | Bermuda | JM Jamaica | SE | Sweden | |
| BN | Brunei JO Jordan | SG Singapore | |||
| BO | Bolivia | JP Japan | SH Saint Helena | ||
| BR | Brazil | KE Kenya | SI | Slovenia | |
| BS | Bahamas | KG | Kyrgyzstan | SJ | Svalbard and Jan Mayen Islands |
| BT | Bhutan | KH Cambodia | SK | Slovakia | |
| BV | Bouvet Island | KI | Kiribati | SL | Sierra Leone |
| BW | Botswana | KM Comoros | SM | San Marino | |
| BY | Belarus | KN Saint Kitts and Nevis | SN | Senegal | |
| BZ | Belize | KP | Korea, Democratic People's Republic of | SO | Somalia |
| CA | Canada | KR Korea, Republic of | SR | Suriname | |
| CC | Cocos Islands | KW Kuwait | ST | Sao Tome and Principe | |
| CF | Central African Republic | KY Cayman Islands | SV | El Salvador | |
| CG | Congo, Republic of | KZ Kazakhstan | SY | Syria | |
| CH | Switzerland | LA Laos | SZ Swaziland | ||
| CI | Cote d'lvoire | LB | Lebanon | TC | Turks and Caicos Islands |
| CK | Cook Islands | LC Saint Lucia | TD | Chad | |
| CL | Chile | LI | Liechtenstein | TF | French Southern Territories |
| CM | Cameroon | LK Sri | Lanka | TG Togo | |
| CN | China LR Liberia | TH Thailand | |||
| CO | Colombia | LS | Lesotho | TJ | Tajikistan |
| CR | Costa Rica | LT Lithuania | TK Tokelau | ||
| CU | Cuba | LU Luxembourg TM Turkmenistan | |||
| CV | Cape Verde | LV Latvia | TN Tunisia | ||
| CX | Christmas Island | LY Libya | TO Tonga | ||
| CY | Cyprus | MA Morocco | TP East Timor | ||
| CZ | Czech Republic | MC Monaco TR Turkey | |||
| DE | Germany | MD Moldova | TT Trinidad and Tobago | ||
| DJ | Djibouti | MG Madagascar | TV Tuvalu | ||
| DK | Denmark | MH Marshall Islands | TW Taiwan | ||
| DM | Dominica, Commonwealth of | ML Mali | TZ Tanzania | ||
| DO | Dominican Republic | MM Myanmar | UA Ukraine | ||
| DZ | Algeria | MN Mongolia | UG Uganda | ||
| EC | Ecuador | MO Macau | UM Minor Outlying Islands | ||
| EE | Estonia | MP Northern Mariana Islands | US United States | ||
| EG | Egypt | MQ Martinique | UY Uruguay | ||
| EH | Western Sahara MR Mauritania | UZ Uzbekistan | |||
| ER | Eritrea | MS Montserrat | VA Vatican | ||
| ES | Spain | MT Malta | VC Saint Vincent and the Grenadine | ||
| ET | Ethiopia MU Mauritius | VE Venezuela | |||
| FI | Finland | MV Maldives | VG British Virgin Islands | ||
| FJ Fiji | MW Malawi VI Virgin Islands of the United States | |||
| FK Falkland Islands (Malvinas) MX Mexico VN Vietnam | ||||
| FM Micronesia (Federated States of) MY Malaysia VU Vanuatu | ||||
| FO Faroe Islands MZ Mozambique WF Wallis and Futuna | ||||
| FR France NA Namibia WS Samoa | ||||
| FX France, Metropolitan | NC New Caledonia YE Yemen | |||
| GA Gabon | NE Niger | YT | Mayotte | |
| GB United Kingdom of Great Britain and Northern Ireland | NF Norfolk Island | YU Yugoslavia | ||
| GD Grenada | NG Nigeria | ZA | South Africa | |
| GE Georgia | NI Nicaragua | ZM Zambia | ||
| GF French Guiana | NL Netherlands | ZR | Zaire | |
| GH Ghana | NO Norway | ZW | Zimbabwe | |
| GI Gibraltar | NP Nepal | |||
| GL Greenland | NR Nauru | |||
Using the HDMI Consumer Electronics Control (HDMI CEC)
HDMI Consumer Electronics Control
- By using an HDMI cable to connect this unit with a TV that supports the HDMI CEC standard, this unit and the TV can be linked and operated together.
- HDMI CEC (Consumer Electronics Control) is an industrial standard that allows HDMI devices to be linked and operated among each other by connecting them with an HDMI cable.
HDMI Consumer Electronics Control operations
- Perform the following operations when this unit is turned on, and the TV will switch automatically to the HDMI input that this unit is connected to.
- Playback from HDD, BD/DVD or SD CARD
- Press the [NAVIGATION] or [SET UP] button
- Turning off the power for the TV will also turn the power off for this unit automatically. If HDD, BD/DVD or SD CARD is being used for dubbing, the power will be turned off after dubbing finishes.
Using HDMI Consumer Electronics Control (activating the function)
1. Connect this unit to a TV that is HDMI CEC compatible using an HDMI cable. 2. Change the setting of "HDMI-CEC" to "ON". - Check the monitor (TV) setting if the HDMI CEC function does not work. Memo:
- If you are not using the HDMI CEC function (deactivating), change the setting of "HDMI-CEC" to "OFF".
Note:
- The HDMI CEC function cannot be used if a TV that is not compatible with HDMI CEC has been connected.
- If an HDMI cable is not used for connecting, the HDMI CEC function will not be usable.
Creating a Seamless BD
When titles are imported into the HDD in the HD quality from a video camera, or when edited titles (e.g., after applying scene delete) are dubbed to a disc, seamless playback may not be possible at the joints of scenes. In this case, perform dubbing after executing "SEAMLESS" under the "MODE CHANGE" setting menu. For details, refer to "Mode Conversion" (P 83).
Creating a seamless BD that uses "MODE CONVERSION" (seamless conversion, recording mode conversion)
• Procedures to create a seamless BDMV
| File to import | If you do not want to perform scene delete/chapter delete | If you want to perform scene delete/chapter delete |
| AVCHD Recording mode conversion | - | |
| MOV*/MXF* Conversion not required Seamless conversion | ||
| SD-VIDEO(HD)* HDV | Recording mode conversion after seamless conversion | Recording mode conversion after seamless conversion |
| SD-VIDEO(HD)* : | SD-VIDEO (JVC Everio MPEG2 TS) |
| MOV* : | MOV format files (recorded in the HQ mode and SP mode) using the JVC ProHD MEMORY CARD CAMERA RECORDER GY-HM series (excluding GY-HM200 and GY-HM170) |
| MXF* : | MXF format files (recorded in the HQ mode and SP mode) using the JVC ProHD MEMORY CARD CAMERA RECORDER GY-HM series |
• Procedures to create a seamless BDAV
| File to import | If you do not want to perform scene delete/chapter delete | If you want to perform scene delete/chapter delete |
| AVCHD Conversion | hot required - | |
| MOV*/MXF* Conversion | not required Seamless conversion | |
| SD-VIDEO(HD)* HDV | Seamless conversion Seamless conversion | |
| SD-VIDEO(HD)* : | SD-VIDEO (JVC Everio MPEG2 TS) |
| MOV* : | MOV format files (recorded in the HQ mode and SP mode) using the JVC ProHD MEMORY CARD CAMERA RECORDER GY-HM series (excluding GY-HM200 and GY-HM170) |
| MXF* : | MXF format files (recorded in the HQ mode and SP mode) using the JVC ProHD MEMORY CARD CAMERA RECORDER GY-HM series |
Memo:
- During dubbing to BDMV, the recording mode cannot be specified.
- Do not perform recording mode conversion before seamless conversion. Otherwise, seamless conversion cannot be performed.
- If scene delete or chapter delete is applied to a title, it cannot be dubbed to a BDMV disc without performing seamless conversion.
- For titles that are imported into the HDD in the SD picture quality, you can create a seamless DVD by setting "SEAMLESS PLAYBACK" under the "Setting Menu List" to "ON", followed by performing re-encode dubbing. For details, refer to "SEAMLESS PLAYBACK" (P 86).
Troubleshooting
| Problem Symptom | Action | Reference Page | |
| Power does not turn on The | “HELLO” message remains displayed, and the unit does not start up. | Press the [RESET] button on the front panel. If it does not start up, stop using this unit, unplug the plug from the outlet, and bring it to the local dealers in your area. | (P 16) |
| The cooling fan motor is not working | “FAN LOCKED” is displayed on the display window of this unit. | The cooling fan motor is spoiled. Stop using the unit, remove the power plug from the outlet, and contact the local dealers in your area. | - |
| Power turns off automatically | The “AUTO POWER (OFF)” setting is set to “2 HOURS” or “6 HOURS”. | Change the “AUTO POWER (OFF)” setting of “SETUP” to “OFF”. | (P 85) |
| The temperature of this unit has rose, and operation has ceased for safety purposes. | Place this unit in an area with ventilation if possible, and wait approximately 30 minutes for it to cool down. | - | |
| The power turns on automatically | The “HDMI-CEC” setting is set to “ON”. Change the “HDMI-CEC” setting of “CONNECTION” to “OFF”. | (P 91) | |
| Input cannot be switched i | LINK connection is currently being established. | Cancel importing, or wait until the connection ends. | (P 42) |
| There are no video images on the monitor | Monitor only supports RGB input. Set “HDMI | --> DVI COLOR” in the setting menu to “RGB FIX”. | (P 91) |
| “HDCP ERROR” is displayed. Use a monitor that supports HDCP. - | |||
| Video images may be distorted during reencoding/dubbing when the monitor (TV) is connected to this unit using an HDMI cable, or when the screen resolution is set to “1080p”. | This is not a malfunction. Change the “HDMI OUTPUT RESOLUTION” to a value other than “1080p” (e.g., 1080i) if you find it annoying. | (P 90) | |
| Screen is distorted Video images may be distorted during reencoding/dubbing when the monitor (TV) is connected to this unit using an HDMI cable, or when the screen resolution is set to “1080p”. | This is not a malfunction. Change the “HDMI OUTPUT RESOLUTION” to a value other than “1080p” (e.g., 1080i) if you find it annoying. | (P 29) | |
| There is no audio sound The | “HDMI AUDIO OUTPUT” setting is set to “OFF”. | Change the “HDMI AUDIO OUTPUT” setting of “CONNECTION” to “ON”. | (P 91) |
| The amplifier does not support “BITSTREAM” output. | Use an amplifier that supports bitstream output. | (P 88) | |
| Dubbing cannot be performed | The title to be dubbed is copyright protected. | Titles that are copyright-protected cannot be dubbed. Select a title that is not copyright-protected. | (P 28) |
| A finalized disc has been inserted. Insert a disc that has not been finalized. - | |||
| The disc is not formatted. | Format the disc. | (P 30) | |
| The SD card is write-protected. | Remove the SD card and remove the write protect lock. | (P 32) | |

| Problem Symptom | Action | Reference Page | |
| Dubbing cannot be performed | “NEXT” cannot be selected when a title that cannot be dubbed is chosen. | · Dubbing may start when you return to recording mode selection to change the recording mode.· Some titles cannot be dubbed depending on their recording mode and format. You can distinguish titles that cannot be dubbed by selecting the titles one by one. | (P3 P 33) |
| “NEXT” cannot be selected due to insufficient disc space. | · Dubbing may start when you return to recording mode selection to change the recording mode.· Dubbing may start after reducing the number of titles to be dubbed.· Dubbing may start by switching to a dual layer disc. | (P3 P 33) | |
| “NEXT” cannot be selected as a dubbing title list is not created. | Select at least one content for dubbing. (P P 36) | (P3 P 46) | |
| High-speed dubbing cannot be performed for EP mode titles | Dubbing cannot be performed and “SOME TITLES CANNOT BE DUBBED” is displayed when trying to perform high-speed dubbing of a EP mode title to a DVD-VIDEO mode disc. | Set “HIGH-SPEED DUBBING” in the settings menu to “4:3” before recording or importing in the EP mode. | (P3 P 29)(P P 87) |
| Data cannot be imported | The title to be dubbed is copyright protected. Titles that are copyright-protected cannot be dubbed. Select a title that is not copyright-protected. | (P3 P 28) | |
| The number of titles stored in the HDD has reached the maximum amount. | Delete or combine the titles in the HDD to reduce the amount of titles to less than 500. | (P3 P 73) | |
| The remaining space on the HDD is running out. | Delete the titles in the HDD to increase the remaining space. | (P3 P 73) | |
| “START” cannot be selected when a title that cannot be dubbed is chosen. | · When importing data from a BD/DVD to the HDD, selection of “START” may be enabled after you return to recording mode selection to change the recording mode.· Some titles cannot be dubbed depending on their recording mode and format. You can distinguish titles that cannot be dubbed by selecting the titles one by one. | (P3 P 33) | |
| “START” cannot be selected due to insufficient HDD space or upon reaching the maximum number of titles in the HDD. | Delete unwanted titles from the HDD.Alternatively, format the HDD. | (P3 P 73)(P P 11) | |
| “START” cannot be selected as a dubbing title list is not created. | Select at least one content for dubbing. (P 36)(P P 41) | ||
| Recording is performed in a mode other than the preset mode | If recording is started with an input that is not recordable in the preset recording mode, recording will start after switching automatically to the recordable mode. | Check the preset recording mode and make an appropriate selection before recording starts. | (P3 P 55) |
| The title/group name cannot be changed | Protection of the title/group name is turned on. | Turn protection off for the title/group name. | (P3 P 75) |
| The remote control unit does not work | The battery of the remote control unit has run out. | Change new batteries for the remote control. (P 19) | |
| The remote control code of this unit and the remote control unit are different from each other. | Change the “REMOTE CONTROL CODE” for the remote control to the same number used by this unit. | (P 19) | |
| A “LOCKED” message appears on the display window of the unit. | Disable the “mode lock” setting. (P 96) | ||
| The disc cannot be ejected | A “LOCKED” message appears on the display window of the unit. | Disable the “tray lock” setting. (P 96) | |
| The “READING” message does not disappear from the unit’s display window, and the disc tray does not open when the [▲] button is pressed. | Pressing the [▲] button at the front of the unit for five seconds or longer opens the disc tray. To close the disc tray after removing the disc, press the [○/I] button, and wait until the tray is closed and power is turned off. (If the disc tray does not open after pressing the [▲] button for five seconds or longer, contact the local dealers in your area.) | - | |
| The disc cannot be played | A disc that cannot be played on this unit is inserted. | Confirm that the disc is playable on this unit. (P 13 ) | |
| The region code of the BD or DVD is different from that of this unit. | Confirm that the region number is playable on this unit. | (P 13) | |
| An unfinalized DVD disc that is recorded using another device is inserted. | Use that device to finalize the disc. - | ||
| Output is at “480i” (SR-HD2700U) or “576i” (SR-HD2700E) regardless of the component output resolution setting | The component output setting may be changed to “480i” (SR-HD2700U) or “576i” (SR-HD2700E) after viewing at a setting of 1080/24p using an HDMI connection. | Turn the power off, and turn it on again. - | |
| The aspect ratios of the HDMI output and component output are different | When two monitors are connected respectively to the HDMI output and component output terminals of this unit, the screen aspect ratio of the component output may not be appropriate if “VIDEO PRIORITY MODE” is set to “HDMI”. | When two monitors are connected simultaneously, users are recommended to set “VIDEO PRIORITY MODE” to “SDI/COMPONENT”. | (P 90) |
| Mode Conversion cannot be performed although “SEAMLESS” in the “MODE CHANGE” menu is set to “AFTER POWER OFF” and the power is turned off. | Turning off the power may not start mode conversion even if “AFTER POWER OFF” in “SEAMLESS” is set and mode conversion is interrupted by the power being turned on while mode conversion is in progress. | Cancel mode conversion. (P 83) | |
Frequently Asked Questions on Dubbing
| Problem Symptom Cause Action | Reference Page | |||
| Unable to dub from HDD | “SOME TITLES CANNOT BE DUBBED” is displayed. | Titles that cannot be dubbed at high speed are selected after “HIGH-SPEED DUBBING” has been selected at the recording mode selection. | Select a setting other than “HIGH-SPEED DUBBING” at the recording mode selection.Remove titles that cannot be dubbed at high speed from the dubbing title list. | (P 45)(P 46)Memo(P 116) |
| Titles that are recorded using “XP/SP/LP/EP” mode are selected after “BDAV” has been selected as the disc format. | Change the disc format to DVD-VR or DVD-Video.For BDAV format, change the recording mode to “XP/SP/LP/EP”.Remove titles that cannot be dubbed from the dubbing title list. | (P 29) | ||
| The total recording time of the titles selected in the dubbing title list has exceeded the recordable capacity of the disc. | Select other recording mode at the recording mode selection.Reselect the titles in the dubbing title list such that the total recording time can fit within the recordable capacity of the disc.Change to a dual layer disc. | (P 33) | ||
| The total number of the selected titles in the dubbing title list and the recorded titles on the media to dub to has exceeded the limit. | Reselect the titles in the dubbing title list such that the total number of titles is within the allowable quantity of the media to dub to. | (P 46)Memo(P 116) | ||
| The total number of chapters of the selected titles in the dubbing title list and the recorded titles on the media to dub to has exceeded the limit. | Reselect the titles in the dubbing title list such that the total number of chapters is within the allowable quantity of the media to dub to. | (P 78)Memo(P 116) | ||
| Titles that are copyright-protected are selected. | Titles that are copyright-protected cannot be dubbed. | (P 28) | ||
| An attempt has been made to dub titles with MPEG audio using the BDMV format. | Change the disc format to BDAV.Perform mode conversion of the title. | (P 30)(P 83) | ||
| An attempt has been made to dub EP mode titles, recorded with “VIDEO MODE RECORDING ASPECT” under “HIGH-SPEED DUBBING” in the settings menu set to a setting other than “4:3”, to a DVD-Video format disc. | To dub EP mode titles, use titles that are recorded or imported with “VIDEO MODE RECORDING ASPECT” under “HIGH-SPEED DUBBING” in the settings menu set to “4:3”. | (P 87) |
Memo: When "SOME TITLES CANNOT BE DUBBED" appears after selecting high-speed dubbing, check the following. - Titles that are copyright-protected cannot be dubbed. - Titles that are recorded in a recording mode that does not support high-speed dubbing cannot be dubbed. (When performing high-speed dubbing in DVD-Video format, titles recorded in a mode such as AF mode cannot be dubbed.) - Content for which editing, such as deleting of scene, has been performed cannot be dubbed at high speed using BDMV format. (High-speed dubbing is made possible by performing mode conversion.) • There is a limit to the number of titles and chapters recordable depending on the type of disc and format used. DVD-Video: Maximum 99 titles and 999 chapters (maximum 99 chapters per title) DVD-VR: Maximum 99 titles and 999 chapters (maximum 999 chapters per title) BDAV: Maximum 200 titles and 999 chapters (maximum 100 chapters per title) BDMV: Maximum 99 titles and 99 x 999 chapters
| Problem Symptom | Cause Action | Reference Page | ||
| Unable to import to HDD | “SOME TITLES CANNOT BE DUBBED” is displayed. | • HDD memory is insufficient. | • Delete unwanted titles recorded in the HDD. | (€ P 73) |
| • The amount of titles in the HDD has reached the maximum amount. | • Delete unwanted titles recorded in the HDD.• A maximum of 499 titles are recordable to the HDD. | (€ P 73) | ||
| • Titles that are copyright-protected are selected. | • Titles that are copyright-protected cannot be imported. | (€ P 28) |
Remarks
VIDEO output
When HD-quality contents are output from the [VIDEO] terminal, the resolution will deteriorate.
Colorimetry
Colorimetry bidirectional conversion between SD and HD is not performed.
Image quality
When the video is down converted during playback, the image quality may be lowered. Noise may appear at the bottom of the screen if the video is dubbed from DVC_pro.
Time code
The time code during playback is the time display while playback is in progress, not the time code by each frame. Count up may be discontinuous depending on the playback conditions.
Specifications
General
| Power requirement | |
| SR-HD2700U | : AC 120 V , 60 Hz |
| SR-HD2700E | : AC 220 V - 240 V , 50 Hz / 60 Hz |
| Power consumption | |
| Power on | : 42 W |
| Power off | : 0.5 W |
| Laser specification | |
| For CD | |
| Wavelength | : 779 nm to 789 nm |
| Output | : No hazardous radiation is emitted with the safety protection. |
| For DVD | |
| Wavelength | : 656 nm to 663 nm |
| Output | : No hazardous radiation is emitted with the safety protection. |
| For BD | |
| Wavelength | : 400 nm to 410 nm |
| Output | : No hazardous radiation is emitted with the safety protection. |
| Temperature | |
| Operating | : 5 °C to 35 °C (41 °F to 95 °F) |
| Storage | : -20 °C to 60 °C (-4 °F to 140 °F) |
| Operating position | : Horizontal only |
| Dimensions(W x H x D) | : 435 mm x 70 mm x 351 mm(17-1/10" x 2-6/8" x 13-13/16") |
| Weight | : 5.3 kg (11.7 lbs) |
Input/Output
| HD-SDI/SD-SDI input | : SMPTE 292M-compliant/SMPTE 259M-C-compliant (BNC) |
| HD-SDI/SD-SDI output | : SMPTE 292M-compliant/SMPTE 259M-C-compliant (BNC: switchable between Direct/Monitor) |
| HD-SDI/SD-SDI [THROUGH OUT] output | : SMPTE 292M-compliant/SMPTE 259M-C-compliant (BNC) |
| Video input | : 1.0 V(p-p), 75 Ω (BNC) |
| Video output | : 1.0 V(p-p), 75 Ω (BNC) |
| Audio input | : Max 2 Vrms / 10 kΩ (pin jack) |
| Audio output | : 2 Vrms / 10 kΩ terminated (pin jack) |
| S-video input | |
| Y | : 1.0 V(p-p), 75 Ω |
| C | : SR-HD2700U0.3 V(p-p), 75 ΩSR-HD2700E0.286 V(p-p), 75 Ω |
| S-video output | |
| Y | : 1.0 V(p-p), 75 Ω |
| C | : SR-HD2700U0.3 V(p-p), 75 ΩSR-HD2700E0.286 V(p-p), 75 Ω |
| DV | : 4-pin for HDV/DV IN |
| Remote Input | : φ3.5 mm Jack |
| Serial Command | : D-SUB 9-PIN |
Component video output:
Y : 1.0 V(p-p), 75 Ω
CB/CR, PB/PR : 0.7 V(p-p), 75 Ω
LAN : 10BASE-T/100BASE-TX
Memo :
• Corresponding to copy protection
HDMI input
19-pin type A
HDMI output
19-pin type A
(Deep Color, x.v.Color)
USB terminal
USB2.0
SD slot
SD, SDHC
HDD Deck
1 TB
Recording compression system
Video
MPEG2 (VBR)
H.264/AVC
Audio
Dolby Digital (2 ch)
Linear PCM (2ch, XP mode only)
MPEG1 Audio Layer2 (2ch, recorded in HD-SDI)
BD/DVD Deck
Recording compression system
Video
MPEG2 (CBR/VBR)
H.264/AVC
Audio
Dolby Digital (2 ch)
Linear PCM (2ch, XP mode only)
MPEG1 Audio Layer2 (2ch, recorded in HD-SDI)
Region code
BD : Region *1
DVD : *2
*1: SR-HD2700U: A, SR-HD2700E: B
*2: SR-HD2700U: 1, SR-HD2700E: 2
ACCESSORIES
• Power cord (SR-HD2700U) • Power cord x 2 (for continental Europe, U.K.) (SR-HD2700E) • Infrared remote control unit - "AA" battery x 2 - CD-ROM
Design and specifications subject to change without notice.
Important Notice Concerning the Software
Software License Attached to the Product
The Software embedded in the Product is composed of several independent software components, and in each of such individual components, a copyright of either JVC KENWOOD or a third party subsists.
The Product uses the software component designated in the End-User License Agreement that was executed between JVC KENWOOD and a third party (hereinafter "EULA").
"EULA" covers those corresponding to free software, and, as a condition of
distribution of the software component in executable format which is based on the license granted under the GNU General Public License or Lesser General Public License (hereinafter "GPL/LGPL"), it requires an availability of the source code for the relevant component. For details of the software component covered by "GPL/LGPL", please visit the following website:
URL: http://www3.jvckenwood.com/english/download/gpl/index.html
Please note that we are unable to answer any inquiry relating to the contents, etc. of the source code.
Please note that any software component licensed under "EULA" which is not subject to "GPL/LGPL", and those developed or created independently by JVC KENWOOD shall not be subject to the requirement for provision of the source code.
The software component distributed under "GPL/LGPL" shall be licensed to users without charge, and, therefore, no warranty is given for such software component, either express or implied, within the scope of the applicable laws and regulations. Unless otherwise permitted by applicable laws and regulations or agreed in written form, none of the owners of the copyright or persons entitled to alter or redistribute the software component under the said license shall have any liability for any type of damage or loss resulting from the use of or inability to use such software component. For further details of the conditions of use of such software component or matters required to be complied with, please refer to the relevant "GPL/LGPL".
Users are urged to read the details for the relevant license carefully before using the software component covered by "GPL/LGPL" and embedded in the Product. Since the terms and conditions of individual licenses are provided by parties other than JVC KENWOOD, the original English version will be included.
Important Notice Concerning the Software (continued)
| GNU GENERAL PUBLIC LICENSEVersion 2, June 1991Copyright (C) 1989, 1991 Free Software Foundation, Inc.51 Franklin Street, Fifth Floor, Boston, MA 0211 C-1301 USAEveryone is permitted to copy and distribute verbatim copies of this license document, but changing it is not allowed.PreambleThe licenses for most software are designed to take away your freedom to share and change it. By contrast, the GNU General Public License is intended to guarantee your freedom to share and change free software—to make sure the software is free for all its users. This General Public license applies to most of the Free Software Foundation's software and to any other program whose authors commit to using it (Some other Free Software foundation software is covered by the GNU Lesser General Public License instead). You can apply it to your programs, too.When we speak of free software, we are referring to freedom, not price. Our General Public Licenses are designed to make sure that you have the freedom to distribute copies of free software (and charge for this service if you wish), that you receive source code or can get it if you want it, that you can change the software or up pieces of it in now free programs; and that you know you can do these things.To protect your rights, we need to make restrictions that forbid anyone to deny you those rights or to ask you to surrender the rights.These restrictions translate to certain responsibilities for you if you distribute copies of the software, or if you modify it.For example, if you distribute copies of such a program, whether gratis or for a fee, you must give the recipients all the rights that you have. You must make sure that they, too, receive or can get the source code. And you must show them these terms so they know their rights.We protect your rights with two steps (1) copyright the software, and (2) offer you this license which gives you legal permission to copy distribute and/or modify the software.Also, for each author's protection and ours, we want to make certain that everyone understands that there is no warranty for this free software. If the software is modified by someone else and passed on, we want its recipients to know that what they have is not the original, so that any problems introduced by others will not reflect on the original authors' recoutrations.Finally, any free program is threatened constantly by software patents. We wish to avoid the danger that redistributors of a free program will individually obtain patent licenses, in effect making the program proprietary. To prevent this, we have made it clear that any patent must be licensed for everyone's free use or not licensed at all.The precise terms and conditions for copying, distribution and modification follow.GNU GENERAL PUBLIC LICENSE TERMS AND CONDITIONS FOR COPYING, DISTRIBUTION AND MODIFICATION0. This License applies to any program or other work which contains a notice placed by the copyright holder saying it may be distributed under the terms of this General Public License, The "Program", below, refers to any such program or work, and a "work based on the Program" means either the Program or any derivative work under copyright law that is to say, a work containing the Program or a portion of it, either verbatim or with modifications and/or translated into another language. (Ileoreinfter, translation is included without limitation in the term 'modification') Each license is amended as "low". | Activities other than copying, distribution and modification are not covered by this License; they are outside its scope. The act of running the Program is not restricted, and the output from the Program is covered only if its contents constitute a work based on the Program (independent of having been made by running the Program). Whether that is true depends on what the Program docs.1. You may copy and distribute verbatim copies of the Program's source code as you receive it, in any medium, provided that, you conspicuously and appropriately publish on each copy an appropriate copyright notice and disclaimer of warranty, keep intact all the notices that refer to this License and up the absence of any warranty; and give any other recipients of the Program a copy of this license along with the Program.You may charge a fee for the physical act of transferring a copy, and you may at your option offer warranty protection in exchange for a fee.2. You may modify your copy or copies of the Program or any portion of it, thus forming a work based on the Program, and copy and distribute such modifications or work under the terms of Section 1 above, provided that you also meet all of these conditions:a) You must cause the modified files to carry prominent notices stating that you changed the files and the date of any change.b) You must cause any work that you distribute or publish, that in whole or in part contains or is derived from the Program or any part thereof, to be licensed as a whole at no charge to all third parties under the terms of this License.c) If the modified program normally reads commands interactively when run, you must cause it, when started running for such interactive use in the most ordinary way, to print or display an announcement including an appropriate copyright notice and a notice that there is no warranty (or else, saying that you provide a warranty) and that uses may redistribute the program under these conditions, and telling the user how to view a copy of this license.(Exception: if the Program itself is interactive but does not normally print such an announcement, your work based on the Program is not required to print an announcement.)These requirements apply to the modified work as a whole. If identifiable sections of that work are not derived from the Program, and can be reasonably considered independent and separate works in themselves, then this License, and its terms, do not apply to those sections when you distribute them as separate works. But when you distribute the same sections as part of a whole which is a work based on the Program, the distribution of the whole must be on the terms of this License, whose permissions for other licenses extend to the entire whole, and thus to each and every part regardless of who wrote it.Thus, it is not the intent of this section to claim rights or contest your rights to work written entirely by you, rather, the intent is to exercise the right to control the distribution of derivative or collective works based on the Program.In addition, more aggregation of another work not based on the Program with the Program (or with a work based on the Program) on a volume of a storage or distribution medium does not bring the other work under the scope of this License.3. You may copy and distribute the Program (or a work based on it, under Section 2) in object code or executable form under the terms of Sections 1 and 2 above provided that you also do one of the following:a) Accompany it with the complete corresponding machine-readable source code, which must be distributed under the terms of Sections 1 and 2 above on a medium customarily used for software interchange; or, | b) Accompany it with a written offer, valid for at least three years, to give any third party, for a charge no more than your cost of physically performing source distribution, a complete machine-readable copy of the corresponding source code, to be distributed under the terms of Sections 1 and 2 above on a medium customarily used for software interchange; or,c) Accompany it with the information you received as to the offer to distribute corresponding source code. (This alternative is allowed only for noncommercial distribution and only if you received the program in object code or executable form with such an offer, in accord with Subsection b above).The source code for a work means the preferred form of the work for making modifications to it. For an executable work, complete source code means all the source code for all modules it contains, plus any associated interface definition files, plus the scripts used to control compilation and installation of the executable. However, as a special exception, the source code distributed need not include anything that is normally distributed (in either source or binary form) with the major components (compiler, kernel, and so on) of the operating system on which the executable runs, unless that component itself accompanies the executable.If distribution of executable or object code is made by offering access to copy from a cesgrated place, then offering equivalent access to copy the source code from the same place counts as distribution of the source code, even though third parties are not competed to copy the source along with the object code.4. You may not copy, modify, sublicense, or distribute the Program except as expressly provided under this License. Any attempt otherwise to copy, modify, sublicense or distribute the Program is void, and will automatically terminate your rights under this License. However, parties who have received codes, or rights, from you under this License will not have their licenses terminated so long as such parties remain in full compliance.5. You are not required to accept this License, since you have not signed it. However, nothing else grants you permission to modify or distribute the Program or its derivative works. These actions are prohibited by law if you do not accept this License. Therefore, by modifying or distributing the Program (or any work based on the Program), you indicate your acceptance of this License to do so, and all its terms and conditions for copying, distributing or modifying the Program or works based on it.6. Each time you redistribute the Program (or any work based on the Program), the recipient automatically receives a license from the original licensor to copy, distribute or modify the Program subject to these terms and conditions. You may not impose any further restrictions on the recipients' exercise of the rights granted herein. You are not responsible for enforcing compliance by third parties to this License.7. If, as a consequence of a court judgment or allegation of patent infringement or for any other reason (not limited to patent issues), conditions are imposed on you (whether by court order, agreement or otherwise) that contradict the conditions of this License, they do not excuse you from the conditions of this License. If you cannot distribute so as to satisfy simultaneously your obligations under this License and any other pertinent obligations, then as a consequence you may not distribute the Program at all. For example, if a patent license would not permit royalty free redistribution of the Program by all those who receive copies directly or indirectly through you, then the only way you could satisfy both it and this License would be to refrain entity from distribution of the Program.If any portion of this section is held invalid or unenforceable under any particular circumstance, the balance of the section is intended to apply and the section as a whole is intended to apply in other circumstances. | It is not the purpose of this section to induce you to infringe any patents or other property right claims or to contest validity of any such claims, this section has the sole purpose of protecting the integrity of the free software distribution system, which is implemented by public license practices. Many people have made generous contributions to the wide range of software distributed through that system in reliance on consistent application of that system, it is up to the author/donor to decide if he or she is willing to distribute software through any other system and a licensee cannot impose that choice.This section is intended to make thoroughly clear what is believed to be a consequence of the rest of this License.8. If the distribution and/or use of the Program is restricted in certain countries either by patents or by copyright interfaces, the original copyright holder who places the Program under this license may acid an explicit geographical distribution limitation excluding those countries, so that distribution is permitted only in or among countries not thus excluded. In such case, this License incorporates the limitation as if written in the body of this License.9. The Free Software Foundation may publish revised and/or new versions of the General Public License from time to time. Such new versions will be similar in spirit to the present version, but may differ in detail to address new problems or concerns.Each version is given a distinguishing version number. If the Program specifies a version number of this License which applies to it and "any later version", you have the option of following the terms and conditions either of that version or of any later version published by the Free Software Foundation. If the Program does not specify a version number of this License, you may choose any version ever published by the Free Software Foundation.10. If you wish to incorporate parts of the Program into other free programs whose distribution conditions are different, write to the author to ask for permission. For software which is copyrighted by the Free Software Foundation, write to the Free Software Foundation; we sometimes make exceptions for this. Our decision will be guided by the two goals of preserving the free status of all derivatives of our free software and of promoting the sharing and reuse of software generally.NO WARRANTY11. BECAUSE THE PROGRAM IS LICENSED FREE OF CHARGE, THERE IS NO WARRANTY FOR THE PROGRAM, TO THE EXTENT PERMITTED BY APPLICABLE LAW, EXCEPT WHICH OTHERS STATE IT IN WRITING THE COPYRIGHT HOLDERS AND/OR OTHER PARTIES PROVIDE THE PROGRAM "AS IS" WITHOUT WARRANTY OF ANY KIND, EITHER EXPRESSED OR IMPLIED, INCLUDING, BUT NOT LIMITED TO, THE IMPLIED WARRANTIES OF MERCHANTABILITY AND FITNESS FOR A PARTICULAR PURPOSE, THE ENTIRE RISK AS TO THE QUALITY AND PERFORMANCE OF THE PROGRAM IS WITH YOU SHOULD THE PROGRAM PROVE DEFECTIVE, YOU ASSUME THE COST OF ALL NECESSARY SERVICING, REPAIR OR CORRECTION.12. IN NO EVENT UNLESS REQUIRED BY APPLICABLE LAW OR AGREED TO IN WRITING WILL ANY COPYRIGHT HOLDER OR ANY OTHER PARTY WHO MAY MODIFY AND/OR REDRIBUTE THE PROGRAM AS PERMITTED ABOVE, BE LIABLE TO YOU FOR DAMAGES, INCLUDING ANY GENERAL, SPECIAL, INCIDENTAL, OR CONSOULENTIAL DAMAGES ARISING OUT OF THE USE OR INABILITY TO USE THE PROGRAM INCLUDING BUT NOT LIMITED TO LOSS OF DATA OR DATA BEING RENDERED NACCURATE OR LOSSES SUSTAINED BY YOU OR THIRD PARTIES OR A FAILURE OF THE PROGRAM TO OPERAT WITH ANY OTHER PROGRAMS, I LEVEL IF SUCH HOLDER OR OTHER PARTY HAS BEEN ADVISED OF THE POSSIBILITY OF SUCH IDAMAGES. |
| END OF TERMS AND CONDITIONSHow to Apply These Terms to Your New ProgramsIf you develop a new program, and you want it to be of thegreatest possible use to the public, the best way to achieve thisis to make it free software which everyone can redistribute andchange under these terms.To do so attach the following notices to the program. It is safestto attach them to the start of each source to most effectivelyconvey the exclusion of warranty and each file should have at leastthe "copyright" line and a position to where the full notice is found.come line to give the program's name and a brief idea of whatt.coops?Copyright (C) <years> <name of authorsThis program is free software, you can redistribute it and/ormodify it under the term of the GNU General Public License aspublished by the Free Software Foundation, either version 2 ofthe license, or (at your option) any later version.This program is distributed in the hope that it will be useful, butWITHOUT ANY WARRANTY; without even the implo warranty ofMERCHANTABILITY or FITNESS FOR A PARTICULAR PURPOSE. Seethe GNU General Public License for more details.You should have received a copy of the GNU General Publiclicense along with this program; I not, write to the Free SoftwareFoundation, Inc., 31 Franklin Street, Fifth Floor, Boston, MA 02110-1301 USAAlso also information on how to contact you by electronic andpaper mail.If the program is interactive, make it output a short notice like thiswhen it starts in an interactive mode.Gromovision version 69, Copyright (C) year name of authorGromovision comes with ABSOLUTELY NOW WARRANTY; fordetails type "show."This is free software, and you are welcome to redistribute it undercertain conditions type "show" for details.The hypothetical commands show w' and 'show' should showthe appropriate parts of the General Public License. Of course, thecommands you use may be called something other than 'show'and 'show c'; they could even be mouse clicks or menu items-whatever suits your program.You should also get your employer (If you work as a programmer)or your school, if any, to sign a "copyright disclaimer" for theprogram, if necessary, here is a simple, after the names.Yoyodyne, Inc., hereby disclaims all copyright interest in theprogram "Gromovision" (which makes passes at compilers)written by James Hacker.*signature of Ty Coors 1 April 1989Ty Coors, President of ViceThis General Public License does not permit incorporating yourprogram into proprietary programs. If your program is a subroutinelibrary, you may consider it more useful to permit linkingproprietary applications with the library. If this is what you wantto do, use the GNU Lesser General Public License instead of thisLicense.GNU LESSER GENERAL PUBLIC LICENSEVersion 2.1, February 1999Copyright (C) 1989: 1991 Free Software Foundation, Inc.51 Franklin Street, Fifth Floor, Boston, MA 02110-1301 USAEveryone is permitted to copy and distribute versions copies ofthis license documents, but changing it is not allowed.I this is the first released version of the Lesser GPL. It also counts asthe successor of the GNU Library Public License, version 2, hencethe version number 2.1.] | PreambleThe licenses for most software are designed to take away yourfreedom to share and change it. By contrast, the GNU GeneralPublic Licenses are intended to guarantee your freedom to shareand change free software - to make sure the software is free for allits users.This license, the Lesser General Public License, applies to somespecially designated software packages - typically libraries ofthe Free Software Foundation and other authors who decide touse it. You can use it too, but we suggest: you first think clearlyabout whether this license or the ordinary General Public Licenseis the better strategy to use in any particular case, based on theexplifications to beet.When we speak of free software, we are referring to freedom ofuse, not price. Our General Public Licenses are designed to mavesure that you have the freedom to distribute copies of free software(and charge for this service if you wish); that you receive source code or can get it if you want. It is that you can change the softwareand use pieces of it in new free programs and that you areinformed that you can do these things.To protect your rights, we need to make restrictions that forcedistributors to deny you these rights or to ask you to surencerthese rights. These restrictions translate to certain responsibilitiesfor you if you distribute copies of the library or if you modify.For example, if you distribute copies of the library, whether girlsor for a fee, you must give the recipient's all the rights that wegive you. You must make sure that they, too receive or can getthe source code. If you link other code with the library, you mustprovide complete object files to the recipients, so that they canlink them with the library after making changes to the library andrecomping it. And you must show them these items so they knowthe right.We protect your rights with a two-step method: (1) we copyrightthe library, and (2) we offer you this license, which gives you legapermission to copy, distribute and/or modify the library.To protect each distributor, we want to make it very clear that thereis no warranty for the free library. Also, if the library is modified bysomeone else and passed on, the recipients should know thatwhat they have is not the original version, so that the originalauthors reputation will not be affected by problems that might inenobrided by others.Finally, software patents pose a constant threat to the existence ofany free program. We wish to make sure that a company cannoteffectively restrict the users of a free library by obtaininga restrictive license from a patent holder. Therefore, we insist thatany patent license obtained for a version of the library mustbe consistent with the full freedom of use specified in this license.Most GNU software, including some libraries, is covered by theordinary GNU General Public License. This license, the GNU LesserGeneral Public License, applies to certain designated libraries, anis quite different from the ordinary general public license. We usethis license for certain libraries in order to permit linking thoselibraries into non-free orgn. When a program is linked with a library, whether statically or usinga shared library, the combination of the two is legally speaking acombined work a derivative of the original library. The ordinaryGeneral Public License therefore permits such linking only finentire combination fits its criteria of freedom. The Lesser GeneralPublic License permits more lax criteria for linking other code withthe library.We call this license the "Lesser" General Public License because itdoes Less to protect the use's freedom than the ordinary GeneralPublic License. It also provides other free software developers lessof an advantage over competing non-free programs. | These disadvantages are the reason we use the ordinary GeneralPublic License for many libraries. However, the Lesser licenseprovides advantages in certain special circumstances.For example, on rare occasions, there may be a special need toencourage the wides, possible use of a certain library, so that itbecomes a de facto standard. In achieving this, non free programsmust be allowed to use the library. A more frequent case is thata free library does the same job as widely used non-free libraries.In this case, there is little to gain by limiting the free library to freesoftware only, so we use the Lesser General Public license.In other cases, permission to use a particular library in non-freeprogramme enables a great number of people to use a large bodyof free software. For example, permission to use the GNU libraryin non free programs enables many more people to usethe whole GNU operating system, as well as to variant the GNU Linuxoperating system.Although the Lesser General Public license is less prospective ofthe users' freedom it does ensure that the user of program that islinked with the library has the freedom and the wherewithal to runthat program using a modified version of the library.The precise terms and conditions for copying, distribution andmodification (follow: Pay close attention to the difference between"a work based on the library" & a "work that uses the library". Theformer contains code served from the library, whereas the lattermust be combined with the library used. | 2) You may modify your copy or copies of the library or any portionof it, thus forming a work based on the library, and copy anddistribute such modifications or work under the terms of Section 1above, provided that you also meet all of these conditions:a) The modified work must itself be a software library.b) You must cause the files modified to carry prominent notices stating that you changed the files and the date of any change.c) You must cause the whole of the work to be licensed at nocharge to all three parties under the terms of this license.d) If a facility in the modified library refers to a function or a tableof data to be supplied by an application program that uses thefacility or then as a argument passed when the facility isinvoked, then you must make a good faith effort to ensure that.In the event an application does not supply such function ortable, the facility still operates, and performs whatever part of itspurpose remains meaning.f) For example, a function in a library to compute square rootshas a purpose that is entirely well-defined independentof the application. Therefore, Subsection 2 requires that anyapplication supplied function or table used by this function mustbe optional: if the application does not supply it, the square rootfunction must still compute square roots.These requirements apply to the modified work as a whole. Ifdistinctable sections of that work are not derived from the library,an can be reasonably considered independent and separateworks in themselves, then this license, and its terms, do not applyto those sections when you distribute them as separate works. Butwhen you distribute the same sections as part of a whole which isa work based on the library, the distribution of the whole must beon the terms of this license, whose permissions for other licensesextended to the entire whole, and thus to each and every partregardless of who wrote.Thus, it is not the intent of this section to claim rights or consentyour rights to work written entirely by you rather, the intent iso-treatment right to control the distribution of derivative orcollective works based on the library.In addition, mere agreement of another work not based on thelibrary with the library (or with a work based on the library) ona volume of a storage or distribution medium does not bring theother work under the scope of this license.3) You may opt to apply the terms of the ordinary GNU GeneralPublic License instead of this license to a given copy of the library.To do this, you must alter all the notices that refer to this license sothat they refer to the ordinary GNU General Public License version2, instead of this license. (If a newer version than version 2 of theordinary GNU General Public license has appeared, then you canspecify that version instead if you wish) Do not make any otherchange in these noticesOnce this change is made in a given copy, it is irreversible for thatcopy, so the ordinary GNU General Public License applies to alsubsequent copies and derivative works made from that copy.This option is useful when you wish to copy part of the code of thelibrary into a program that is not a library.4) You may copy and distribute the library (or a portion orderivative of it, unclear Section 7) in object code or executable formunder the terms of Sections 1 and 2 above provided that youaccompany it with the complete corresponding machine-readable source codes, which must be distributed under the terms ofSections 1 and 2 above on a medium customarily used for softwaremerchorage.If distribution of object code is made by offering access to copyfrom a designated place, then offering equivalent access to copythe source code from the same place satisfies the requirementto distribute the source code, even though third parties are notcompelled to copy the source along with the object code. |
| 5. A program that contains no derivative of any portion of the Library, but is designed to work with the Library by being compiled or linked with it, is called a 'work that uses the I library'. Such a work, in isolation, is not a derivative work of the I library, and therefore falls outside the scope of this License.However, linking a 'work that uses the I library' with the Library creates an executable that is a derivative of the I library (because it contains portions of the Library), rather than a 'work that uses the library'. The executable is therefore covered by this License. Section 6 states terms for distribution of such executables.When a 'work that uses the Library' uses material from a header that is part of the Library, the object code for the work may be a derivative work of the Library even though the source code is not. Whether this is true is especially significant. If the work can be linked without the Library, or if the work is itself a library. The threshold for this to be true is not precisely cofince by law.If such an object file uses only numerical parameters, data structure layouts and accessors, and small macros and small inline functions (ten lines or less in lengths), then the use of the object file is unrestricted, regardless of whether it is legally a derivative work. (Executables containing this object code plus portions of the Library will still fall under Section 6).Otherwise, if the work is a derivative of the Library, you may distribute the object code for the work under the terms of Section 6. Any executables containing that work also falls under Section 6, whether or not they are linked directly with the Library itself.As an exception to the Sections above, you may also combine or link a 'work that uses the Library' with the Library to produce a work containing portions of the Library, and distribute that work under terms of your choice, provided that the terms permit modification of the work for the customer's own use and reverse engineering for debugging such modifications.You must give prominent notice with each copy of the work that the Library is used in it and that the Library and its use are covered by this License. You must supply a copy of this License. If the work during execution displays copyright notices, you must include the copyright notice for the I library among them, as well as a reference directing the user to the copy of this License. Also, you must co one of these things:a) Accompany the work with the complete corresponding machine-readable source code for the Library including whatever changes were used in the work (which must be distributed under Sections 1 and 2 above); and, if the work is an executable linked with the Library, with the complete machine-readable "work that uses the Library", as object code and/or source code, so that the user can modify the Library and then relink to produce a modified executable containing the modified Library. (It is understood that, the user who changes the contents of definitions files in the Library will not necessarily be able to recompile the application to use the modified definitions.)b) Use a suitable shared library mechanism for linking with the Library. A suitable mechanism is one that: (1) Uses as run time a copy of the library already present on the user's computer system, rather than copying library functions into the executable, and (2) will operate property with a modified version of the library, if the user installs one, as long as the modified version is interface-compatible with the version on that the work was made with.c) Accompany the work with a written offer, valid for at least three years, to give the same user the materials specified in Subsection 6a, above, for a charge no more than the cost of performing this distribution.d) Distribution of the work is made by offering access to copy from a designated place, offer equivalent access to copy the above specified materials from the same place. | e) Verify that the user has already received a copy of these materials or that you have already sent this user a copy.I or an executable, the required form of the "work that uses the Library" must include any data and utility programs needed for reproducing the executable from it. However, as a special exception, the materials to be distributed need not induce anything that is normally distributed (in either source or binary form) with the major components (compiler, kernel, and so on) of the operating system on which the executable runs, unless that component itself accompanies the executable.It may happen that this requirement contradicts the license restrictions of other proprietary libraries that do not normally accompany the operating system. Such a contradiction means you cannot use both them and the Library together in an executable that you distribute.7. You may place library facilities that are a work based on the Library side-by-sice in a single library together with other library facilities not covered by this License, and distribute such a combined library, provide that the separate distribution of the work based on the Library and of the other library facilities is otherwise permitted, and provide that you do these two things:a) Accompany the combined library with a copy of the same work based on the Library, uncombined with any other library facilities. This must be distributed under the terms of the Sections above.b) Give prominent notice with the combined library of the fact that part of it is a work based on the Library, and explaining where to find the accompanying uncombined form of the same work.8. You may not copy, modify, sublicense, link with, or distribute the Library except as expressly provided under this License. Any attempt otherwise to copy, modify, sublicense, link with, or distribute the Library is void, and will automatically terminate your rights under this License. However, parties who have received copies, or rights, from you under this License will not have their licenses terminated so long as such parties remain in full compliance.9. You are not required to accept this License, since you have not signed it. However, nothing else grants you permission to modify or distribute the Library or its derivative works. These actions are prohibited by law if you do not accept this License. Therefore, by modifying or distributing the Library (or any work based on the Library), you indicate your acceptance of this License to do so, and all its terms and conditions for copying, distributing or modifying the Library or works based on it.10. Each time you redistribute the Library (or any work based on the Library), the recipient automatically receives a license from the original licensor to copy, distribute, link with or modify the Library subject to these terms and conditions. You may not impose any further restrictions on the recipients' exercise of the rights granted herein. You are not responsible for enforcing compliance by third parties with this License.11. If, as a consequence of a court, judgment or allegation of patent infringement or for any other reason (not limited to patent issues), conditions are imposed on you (whether by court order, agreement or otherwise) that contradict the conditions of this License, they do not excuse you from the conditions of this License. If you cannot distribute so as to satisfy simultaneously your obligations under this License and any other pertinent obligations, then as a consequence you may not distribute the I library at all. I or example, if a patent license would not permit royalty-free redistribution of the Library by all those who receive copies directly or indirectly through you, then the only way you could satisfy both it and this License would be to refrain entirely from distribution of the Library. | If any portion of this section is helic invalid or unenforceable under any particular circumstance, the balance of the section is intended to apply, and the section as a whole is intended to apply in other circumstances.It is not the purpose of this section to induce you to infringe any patents or other property right claims or to contest validity of any such claims; this section has the sole purpose of protecting the integrity of the free software distribution system which is implemented by public license practices. Many people have made generous contributions to the wide range of software distributed through that system in reliance on consistent application of that system; it is up to the author/donor to decide if he or she is willing to distribute software through any other system and a licensee cannot impose that choice.This section is intended to make thoroughly clear what is believed to be a consequence of the rest of this License.12. If the distribution and/or use of the Library is restricted in certain countries either by patents or by copyrighted interfaces, the original copyright holder who places the Library under this License may add an explicit geographical distribution limitation excluding those countries, so that distribution is permitted only in or among counties not thus excluded. In such case, this License incorporates the limitation as if written in the body of this license.13. The Free Software Foundation may publish revised and/or new versions of the Lesser General Public License from time to time. Such new versions will be similar in spirit to the present version, but may offer in detail to address new problems or concerns.Each version is given a distinguishing version number. If the Library specifies a version number of this License, which applies to it and 'any later version', you have the option of following the terms and conditions either of that version or of any later version published by the Free Software Foundation. If the Library does not specify a license version number, you may choose any version ever published by the Free Software Foundation.14. If you wish to incorporate parts of the Library into other free programs whose distribution conditions are incompatible with these, write to the author to ask for permission. For software which is copyrighted by the Free Software Foundation, write to the Free Software Foundations we sometimes make exceptions for this. Our decision will be guided by the two goals of preserving the free status of all derivatives of our free software and of promoting the sharing and reuse of software generally.NO WARRANTY15. BECAUSE THE LIBRARY IS LICENSED FREE OF CHARGE, THERE IS NO WARRANTY FOR THE LIBRARY, TO THE EXTENT PERMITTED BY APPLICABLE LAW, EXCEPT IN OTHER WEALTHS, STATED IN WRITING THE COPYRIGHT HOLDERS AND/OR OTHER PARTIES PROVIDE THE LIBRARY "AS IS" WITHOUT WARRANTY OF ANY KIND, EITHER EXPRESS OR IMPLIED, INCLUDING, BUT NOT LIMITED TO, HIM IMPLIED WARRANTIES OF MERCHANTABILITY AND FITNESS FOR A PARTICULAR PURPOSE, THE ENTIRE RISK AS TO THE QUALITY AND PERFORMANCE OF THE LIBRARY IS WITH YOU SHOULD THE LIBRARY PROVE DEFECTIVE, YOU ASSUME THE COST OF ALL NECESSARY SERVICING, REPAIR OR CORRECTION.16. IN NO EVENT UNLESS REQUIRED BY APPLICABLE LAW OR AGREED TO IN WRITING WILL ANY COPYRIGHT ITEMS ORDER, OR ANY OTHER PARTY WHO MAY MODIFY AND/OR REDISTRIBUTE THE LIBRARY AS PERMITTED ABOVE, BE LIABLE TO YOU FOR DAMAGES, INCLUDING ANY GENERAL, SPECIAL, INCIDENTAL OR CONSEQUENTIAL DAMAGES ARISING OUT OF THE USE OR INABILITY TO USE THE LIBRARY INCLUDING BUT NOT LIMITED TO LOSS OF DATA OR DATA BEING RENDERED INCACURATE OR LOSSES SUSTAIN D BY YOU OR THIRD PARTIES OF AT ALIUR OF THE LIBRARY TO OP RATE WITH ANY OTHER SOCI TWARD, IF NOT SUCH HOLDER OR OTHER PARTY HAS BEEN ADVISED OF THE POSSIBILITY OF SUCH DAMAGES. | END OF TERMS AND CONDITIONSHow to Apply These Terms to Your New LibrariesIf you develop a new library, and you want it to be of the greatest possible use to the public, we recommend making it free software that everyone can redistribute and change. You can do so by permitting redistribution under these terms (or, alternatively, under the terms of the ordinary General Public License).To apply these terms, attach the following notices to the library. It is safest to attach them to the start of each source file to most effectively convey the exclusion of warranty, and each file should have at least the 'copyright' line and a pointer to where the full notice is found.<one line to give the Library's name and a brief idea of what it does >Copyright (C)<name of author>This library is free software; you can redistribute it and/or modify it under the terms of the GNU Lesser General Public License as published by the Free Software Foundation; either version 2.1 of the License, or (or your option) any later version.This library is distributed in the hope that, it will be useful, but WITH OUT ANY WARRANTY; without even the implied warranty of MERCHANTABILITIES OR IT CONSIS TO A PARTICULAR PURPOSE. See the GNU Lesser General Public License for more details.You should have received a copy of the GNU Lesser General Public License along with this library; if not, write to the free Software Foundation, Inc., 51 Franklin Street, Fifth Floor, Boston, MA 02110-1301 USAAlso add information on how to contact you by electronic and paper mail.You should also get your employer (if you work as a programmer) or your school, if any, to sign a "copyright disclaimer" for the library, if necessary. Here is a sample, after the names.Yoyodyne, Inc., hereby disclaims all copyright interests in the Library "Hob" (a library for twosking knobs) written by James Rancism Hacker.<signature of Ty Coon>, 1 April 1990Ty Coon, President of ViceThat's all there is to it |
Index
A
AACS 11
AUDIO CABLE 17,21,20
AUDIO LANGUAGE 66, 86, 103
AUDIO/SUBTITLE SETTINGS 66
AUTO MARKING 87
B
BD (BD-R/BD-RE) 12, 13, 30, 45, 68, 107
BD MIX SOUND 89
BD VIDEO DATA 12
BDAV 12, 13, 29
BDMV 12, 13, 29
BD-ROM 13, 66, 107
BD-VIDEO RATINGS 86
BLUE BACK 89
C
CHANGE ANGLE 66
CHANGE AUDIO OUTPUT 66
CHANGE CHAPTER 66
CHAPTER EDIT 60, 78
CHAPTER MARK 19,61,78,79
COMPONENT VIDEO CABLE 17,20
CONNECTION 20, 21, 22, 90
COUNTRY CODE LIST 86,110
D
DATE DISPLAY STYLE 24,85
DEFAULT GATEWAY 95
DETAIL SETTING 67
DIGITAL NOISE REDUCTION 67
DIMMER (POWER ON) 85
DIRECT RECORDING 54
DISPLAY WINDOW 16, 17, 96
Dolby Digital 87, 88
Dolby Digital Plus/TrueHD 88
DOWNCONVERSION 93
DTS 13,88
DTS-HD 88
DUAL DISC 14
DVD (DVD-R/DVD-RW) 12, 13, 28, 30, 35, 45, 52, 63, 68, 82, 107
DVD VIDEO 13,29,35,37,86
F
FINALIZE 13,47,50,68
FTP 44,95
H
HDMI 17,90,91
HDMI AUDIO OUTPUT 91
HDMI CABLE 17,20,112
HDMI OUTPUT RESOLUTION 90
HDMI-CEC 91,112
HIGH-SPEED DUBBING 13, 28, 29, 45, 87
i.LINK 16,21,28,42
IP ADDRESS 95
JPEG 29,37,40,48,65
LAN 22,44,97
LANGUAGE CODE 86,108
PICTURE QUALITY 28, 33, 46, 67
PLAYBACK NAVIGATION 18, 49, 58
PLAYBACK SETTINGS 19, 62, 66, 86
PROGRESSIVE OUTPUT 67
RECORDING MODE 16, 18, 28, 29, 33, 55, 60, 101
REGION CODE 13
REMOTE CONTROL 16, 17, 18, 19, 96
REMOTE CONTROL CODE 19,85
RESUME POINT 61, 63, 64, 86
RS-232C 17, 22, 97
S
SCREEN SAVER 89
SDI 20,55,92
SDI RECLOCK 92
SDI/COMPONENT OUTPUT 91
SEAMLESS PLAYBACK 86
SETTING THE DATE/TIME 23
SIMULTANEOUS RECORDING 54
SUBNET MASK 95
SUBTITLE LANGUAGE 66,86
S-VIDEO 17,20,21,91
T
TIME CODE 26,92
TIME DISPLAY STYLE 25,85
U
USB 16,21,28,37
V
VIDEO CABLE 17,20
VIDEO INPUT SETTING 91
VIDEO MODE 12, 13, 87
VIDEO SETTINGS 67
VR MODE 12, 13
JVC


- SR-HD2700U SR-HD2700E
- INSTRUCTIONS
- FOR CUSTOMER USE
- PLEASE READ THE FOLLOWING BEFORE GETTING STARTED
- SAFETY PRECAUTION
- CAUTION
- NOTICE
- WARNING
- ATTENTION
- NOTE TO CATV SYSTEM INSTALLER
- IMPORTANT SAFETY INSTRUCTIONS
- FAILURE TO HEED THE FOLLOWING PRECAUTIONS MAY RESULT IN DAMAGE TO THE UNIT, REMOTE CONTROL OR DISC/CASSETTE
- DO NOT PLACE THE UNIT
- DECLARATION OF CONFORMITY
- MOISTURE CONDENSATION
- DISCLAIMER OF LIABILITY
- HOW TO USE THIS INSTRUCTION MANUAL
- BEFORE YOU INSTALL YOUR NEW UNIT
- WARNING : DANGEROUS VOLTAGE INSIDE WARNING : TO PREVENT FIRE OR SHOCK HAZARD, DO NOT EXPOSE THIS UNIT TO RAIN OR MOISTURE
- DEAR CUSTOMER, [EUROPEAN UNION]
- IMPORTANT
- MAIN PLUG
- POWER CONNECTION
- NOTE FOR UNITED KINGDOM POWER CORD ONLY
- HOW TO REPLACE THE FUSE
- ABOVE ALL
- EMC SUPPLEMENT
- CABLE LENGTH
- CONTENTS
- GETTING STARTED
- PREPARATION
- DUBBING/IMPORTING
- RECORDING
- PLAYING BACK
- EDITING
- SETTINGS MENU
- OTHERS
- KEY FEATURES
- PROFESSIONAL BLU-RAY DISC RECORDER OF THE HIGH-DEFINITION ERA
- SUPPORTS DIRECT RECORDING TO DISCS
- INTERFACE WITH JVC PROHD MEMORY CARD CAMERA RECORDER GY-HM SERIES
- MOV FORMAT
- MXF FORMAT
- COMPATIBILITY WITH OTHER CONSUMER CAMCORDERS
- DIGITAL INTERFACE THAT ALLOWS FOR CAMCORDER COMPATIBILITY
- CREATE MENU-SUPPORTED BLU-RAY DISCS
- COMPATIBLE WITH DUAL-LAYER 50 GB BLU-RAY DISCS, AND RECORDS UP TO 24 HOURS OF FULL HIGH-DEFINITION IMAGES ON A SINGLE DISC
- AUTHORING MENU ENABLES DISCS TO BE CREATED AND USED INDUSTRIALLY SUCH AS FOR DEMONSTRATIONS
- EQUIPPED WITH EXTERNAL CONTROL RS-232C TERMINAL
- EQUIPPED WITH SDI OUTPUT TERMINAL
- EQUIPPED WITH HDMI INPUT TERMINAL
- HOW TO READ THIS MANUAL
- ABOUT THIS MANUAL
- SUPPLEMENTARY REMARKS IN THE MAIN TEXT
- MEMO
- CONTENTS OF THIS MANUAL
- OTHER PRECAUTIONARY NOTES
- COPYRIGHT PROTECTION
- COPYRIGHTS
- TRADEMARKS
- DOLBY
- STORED VIDEO CONTENT AND COMPENSATION
- DISCLAIMER OF COMPENSATION FOR LOSS OR DAMAGE OF STORED VIDEO CONTENT
- COMPATIBILITY WITH ANALOG SUNSET
- HANDLING PRECAUTIONS
- DO NOT USE THE PLUG OR POWER POINT WITH DUST OR METALLIC OBJECTS ATTACHED TO IT
- MAKE USE OF A POWER POINT THAT ALLOWS THE POWER PLUG TO BE INSERTED OR REMOVED EASILY
- INSERT THE PLUG FIRMLY INTO THE POWER POINT
- DO NOT MAKE USE OF A POWER VOLTAGE OTHER THAN THAT SPECIFIED
- DO NOT INSERT OR REMOVE THE PLUG WITH WET HANDS
- DO NOT TOUCH THE PLUG WHEN THERE IS THUNDER OR LIGHTNING
- DO NOT INSERT ANY FOREIGN OBJECT INTO THIS UNIT
- DO NOT DISMANTLE OR REMODEL THIS UNIT
- REQUEST THE AUTHORIZED DEALER TO INSPECT THE INTERIOR PART OF THE UNIT ONCE A YEAR
- DO NOT CONNECT ANY VIDEO CAMERAS THAT ARE NOT MADE BY JVC TO THE USB TERMINAL
- HARD DISK DRIVE (HDD)
- FORMATTING THE HDD
- SD CARDS
- HANDLING OF SD CARDS
- NOTE
- BD VIDEO DATA
- INSERT THE SD CARD WHICH HAS BD VIDEO DATA STORED ON IT, INTO THE [SD SLOT]
- PRESS THE [MEDIA MANAGE] BUTTON ON THE REMOTE CONTROL UNIT
- SELECT "BD-VIDEO DATA ERASE" FROM "SD CARD
- SELECT "ERASE", AND PRESS THE [OK] BUTTON
- DISCS
- BD RECORDING FORMATS
- BDAV MODE
- BDMV MODE
- DVD RECORDING FORMATS
- VR MODE
- VIDEO MODE
- FORMATTING OF DISCS
- WHEN USING BD-RE OR BD-R DISCS
- WHEN USING DVD-R OR DVD-RW DISCS
- DISCS THAT ARE NOT SUPPORTED
- PRECAUTIONS ON THE USE OF DISCS
- MAINTENANCE OF DISCS
- HANDLING DISCS
- DISC STORAGE
- WHEN THE RECORDING/PLAYBACK LENS IS DIRTY
- PRECAUTIONS WHEN PLAYING A DUAL DISC
- DISC USAGE
- POWER CABLE
- ON-SCREEN DISPLAYS
- STATUS DISPLAY
- EVENT DISPLAY
- ALARM DISPLAY
- SDI TIME CODE DISPLAY
- MENU OPERATION
- NAME AND FUNCTION OF PARTS
- FRONT PANEL
- DISPLAY WINDOW
- REAR PANEL
- REMOTE CONTROL
- CHANGE BATTERIES FOR THE REMOTE CONTROL
- BATTERIES
- REMOTE CONTROL CODES
- CHANGING THE REMOTE CONTROL CODE FOR THE UNIT
- CHANGING THE REMOTE CONTROL CODE FOR THE REMOTE CONTROL
- CONNECTING A MONITOR
- CONNECTING USING AN HDMI CABLE
- CONNECTING USING A COMPONENT VIDEO CABLE
- CONNECTING USING AN S-VIDEO CABLE
- CONNECTING USING A VIDEO CABLE
- CONNECTING USING AN SDI CABLE (BNC)
- CONNECTING AN AMPLIFIER
- CONNECTING A VIDEO CAMERA OR OTHER EQUIPMENT
- CONNECTING EXTERNAL DEVICES
- CONNECTING A WIRED REMOTE CONTROL
- CONNECTING USING A LAN CABLE
- CONNECTING THE POWER SUPPLY
- SETTING AND DISPLAYING DATE/TIME
- SETTING THE DATE/TIME
- PRESS THE [SET UP] BUTTON ON THE REMOTE CONTROL UNIT
- SELECT "SETUP", AND PRESS THE [OK] BUTTON
- SELECT "CLOCK SET/DISPLAY", AND PRESS THE [OK] BUTTON
- SELECT "CLOCK SET", AND PRESS THE [OK] BUTTON
- SET THE TIME AND DATE
- CHANGING THE DATE DISPLAY STYLE
- CHANGING THE TIME DISPLAY STYLE
- SETTING THE TIME CODE
- SETTING TIME CODE INPUT
- SETTING "TIME CODE DISPLAY POSITION
- DUBBING FROM HDD TO BD/DVD
- HIGH-SPEED DUBBING
- DUBBING IN A SPECIFIC RECORDING MODE
- IMPORTING INTO HDD
- IMPORTING DATA FROM A BD/DVD TO THE HDD
- IMPORTING DATA FROM A SDHC/SD TO THE HDD
- IMPORTING DATA FROM A VIDEO CAMERA TO THE HDD
- IMPORTING DATA FROM A VIDEO DECK
- IMPORTING FROM A LAN-COMPATIBLE DEVICE
- DUBBING CHART
- FORMATTING
- FORMAT CHART
- FORMATTING A DISC
- SELECT "YES", AND PRESS THE [OK] BUTTON IN THE FORMAT CONFIRMATION SCREEN
- CANCEL FORMATTING
- PRESS THE [OPTION] BUTTON WHILE FORMATTING
- SELECT "STOP", AND PRESS THE [OK] BUTTON
- SELECT "YES" ON THE CONFIRMATION SCREEN AND PRESS THE [OK] BUTTON
- FORMATTING AN SD CARD
- INSERT THE SD CARD TO BE FORMATTED INTO THE [SD SLOT]
- SELECT "FORMAT" FROM "SD CARD
- SELECT "YES", AND PRESS THE [OK] BUTTON
- RECORDING MODES
- MAXIMUM RECORDING TIME FOR EACH RECORDING MODE
- HD PICTURE QUALITY
- DR MODE
- FR MODE
- PREPARATIONS
- FULL IMPORT
- SPECIFY A TITLE
- SELECT "START", AND PRESS THE [OK] BUTTON
- IMPORTING DVD-VIDEO
- CANCELING IMPORTING
- TO CANCEL IMPORTING BEFORE IT STARTS
- TO CANCEL IMPORTING WHILE IT IS IN PROGRESS
- IMPORTING DATA FROM A USB-COMPATIBLE DEVICE TO THE HDD
- IMPORTING DATA FROM AN SD CARD TO THE HDD
- INSERT THE SD (SDHC) CARD INTO THE [SD SLOT]
- PRESS THE [DUBBING] BUTTON ON THE REMOTE CONTROL UNIT
- SELECT "SD⇒HDD" IN THE IMPORTING SCREEN, AND PRESS THE [OK] BUTTON
- SELECT "NEXT", AND PRESS THE [OK] BUTTON
- SELECT "FULL IMPORT" IN THE IMPORT SELECTION SCREEN, AND PRESS THE [OK] BUTTON
- SELECT "SEL. TITLE(VIDEO)" IN THE IMPORT SELECTION SCREEN, AND PRESS THE [OK] BUTTON
- CREATE AN IMPORT TITLE LIST
- IMPORTING DATA FROM AN I.LINK-COMPATIBLE DEVICE TO THE HDD
- CONNECT THE DEVICE (CAMERA, ETC.) TO THIS UNIT USING AN I.LINK CABLE
- SELECT "HDV/DV⇒HDD" IN THE IMPORTING SCREEN, AND PRESS THE [OK] BUTTON
- IMPORTS DATA FROM THE BEGINNING
- SELECT "IMPORT FROM BEGINNING", AND PRESS THE [OK] BUTTON
- SELECT "RECORDING MODE", PRESS THE [OK] BUTTON, AND SELECT FROM THE POP-UP MENU
- IMPORTS DATA FROM CURRENT POSITION
- SELECT "IMPORT FROM CURRENT POSITION", AND PRESS THE [OK] BUTTON
- SELECT "RECORDING MODE" AND PRESS THE [OK] BUTTON TO DISPLAY THE POP-UP MENU
- IMPORTING DATA FROM A LAN-COMPATIBLE DEVICE TO THE HDD
- CONNECT THE LAN DEVICE (PC, ETC.) TO THIS UNIT USING A LAN CABLE
- PERFORM FTP TRANSFER
- DUBBING A TITLE FROM THE HDD TO A BD/DVD
- SET A BD OR DVD ON THE DISC TRAY
- ON THIS SCREEN, SELECT "DISC↔VIDEO
- DUBBING TITLES
- SELECT "RECORDING FORMAT", AND PRESS THE [OK] BUTTON
- SELECT "RECORDING MODE", AND PRESS THE [OK] BUTTON
- CREATE A DUBBING TITLE LIST
- SELECT A BACKGROUND IMAGE FOR THE DISC MENU
- SET THE OPERATIONS FOR FINALIZE
- CANCEL DUBBING
- DUBBING STILL IMAGES FROM THE HDD
- BEFORE DUBBING
- DUBBING STILL IMAGES
- DUBBING FROM THE PLAYBACK NAVIGATION SCREEN
- SELECT THE STILL IMAGES TO DUB, AND PRESS THE [OPTION] BUTTON
- SELECT "DUB", AND PRESS THE [OK] BUTTON
- FOLLOW STEPS 3 TO 5 OF "DUBBING STILL IMAGES
- ENABLING PLAYBACK ON OTHER DEVICES (FINALIZING)
- FINALIZING
- SETTING THE TOP MENU ITEMS
- SELECT "FINALIZE", AND PRESS THE [OK] BUTTON
- UNFINALIZING A DISC
- TO UNFINALIZE A DISC
- COPYING THE ENTIRE DISC
- SELECT "DISC⇒DISC", AND PRESS THE [OK] BUTTON
- SET THE NUMBER OF DISCS TO COPY USING THE [ ▲ / ▼ ] BUTTONS
- SET A BD OR DVD TO COPY ON THE DISC TRAY
- COMPLETE THE ENTIRE DISC COPYING
- SWITCHING EXTERNAL INPUT
- DIRECT RECORDING TO DISCS
- PAUSING RECORDING
- RESUMING RECORDING
- SIMULTANEOUS RECORDING TO HDD AND BD/DVD
- PAUSING SIMULTANEOUS RECORDING
- RESUMING SIMULTANEOUS RECORDING
- RECORDING USING EXTERNAL INPUTS
- CHECKING WHETHER SDI OR HDMI INPUT SIGNALS CAN BE RECORDED
- ABOUT PLAYING BACK
- USING PLAYBACK NAVIGATION
- DISPLAYING THE PLAYBACK NAVIGATION SCREEN
- SELECT THE LOCATION OF THE PLAYBACK FILE
- PRESS THE [NAVIGATION] BUTTON ON THE REMOTE CONTROL UNIT
- OPERATING PLAYBACK NAVIGATION
- PLAYING A VIDEO/STILL IMAGE
- SWITCHING BETWEEN THUMBNAIL AND LIST DISPLAYS
- DISPLAYING A GROUP/FOLDER
- SWITCHING BETWEEN VIDEO AND STILL IMAGE DISPLAYS
- DISPLAYING THE OPTION MENU
- SELECT A TITLE/GROUP, AND PRESS THE [OPTION] BUTTON
- SELECT AN OPERATION OPTION, AND PRESS THE [OK] BUTTON
- OPTION MENU LIST
- VIDEO PLAYBACK OPERATION
- FREQUENTLY USED BUTTON OPERATIONS
- [▶] BUTTON
- [■] BUTTON
- [Ⅱ] BUTTON
- [▶▶] BUTTON
- [◀◀] BUTTON
- [▶▶] / [◀◀] BUTTON
- [MARK] BUTTON
- BUTTON
- [HDD] BUTTON
- [BD/SD] BUTTON
- USEFUL BUTTON OPERATIONS
- [PB MODE] BUTTON
- [AUDIO] BUTTON
- [SUB TITLE] BUTTON
- [ANGLE] BUTTON
- PLAYING VIDEOS ON A BD/DVD
- PLAYING A DISC WHEN AUTO PLAY IS ENABLED
- PLAYING A DISC WHEN AUTO PLAY IS DISABLED
- PRESS THE [NAVIGATION] BUTTON
- SELECT A TITLE, AND PRESS THE [OK] BUTTON
- PLAYING AN EVERIOBACKUP DISC
- SET THE DISC ON THE DISC TRAY
- PLAYING VIDEO DISCS CREATED USING A PC
- PLAYING VIDEOS ON THE HDD
- PLAYING TITLES STORED ON THE HDD
- SELECT THE TITLES TO PLAYBACK, AND PRESS THE [▶] BUTTON
- PLAYING VIDEOS ON A SD CARD
- INSERT THE SD CARD INTO THE [SD SLOT]
- PLAYING STILL IMAGES (JPEG)
- PLAYING STILL IMAGES
- SELECT THE PLAYBACK LOCATION
- SET THE MEDIA
- SELECT THE STILL IMAGES TO PLAY, AND PRESS THE [▶] BUTTON
- ENABLED BUTTON OPERATIONS DURING STILL IMAGE PLAYBACK
- [◀◀] / [▶▶] BUTTON
- [⏻/L] BUTTON
- CHANGING PLAYBACK SETTINGS
- DISPLAYING THE PLAYBACK SETTINGS MENU
- PRESS THE [PB MODE] BUTTON ON THE REMOTE CONTROL UNIT DURING PLAYBACK OF A TITLE
- PLAYBACK SETTINGS MENU
- AUDIO/SUBTITLE SETTINGS
- AUDIO LANGUAGE
- CHANGE AUDIO OUTPUT
- SIGNAL TYPE (BD-ROM)
- SUBTITLE LANGUAGE
- SUBTITLE STYLE
- CHANGE ANGLE
- PLAYBACK SETTINGS
- REPEAT
- CHANGE TITLE
- CHANGE CHAPTER
- TIME JUMP
- SLIDESHOW INTERVAL
- SLIDESHOW EFFECTS
- VIDEO SETTINGS
- PICTURE QUALITY
- DETAIL SETTING
- DIGITAL NOISE REDUCTION
- PROGRESSIVE OUTPUT
- BEFORE EDITING
- EDITABLE ITEMS FOR DIFFERENT MEDIA
- ENTERING CHARACTERS
- GROUPING
- UNGROUPING
- EXCLUDING FROM A GROUP
- CHANGING THE TITLE/GROUP NAME
- SELECT THE TITLE/GROUP FOR WHICH THE NAME IS TO BE CHANGED, AND PRESS THE [OPTION] BUTTON
- SELECT "EDIT INFO", AND PRESS THE [OK] BUTTON
- SELECT "MODIFY TITLE NAME" OR "MODIFY GROUP NAME", AND PRESS THE [OK] BUTTON
- MODIFY THE TITLE/GROUP NAME
- DELETING A TITLE/GROUP
- SELECT THE TITLES/GROUPS TO DELETE, AND PRESS THE [OPTION] BUTTON
- SELECT "DELETE", AND PRESS THE [OK] BUTTON
- TURNING ON TITLE/GROUP PROTECTION
- TURNING OFF TITLE/GROUP PROTECTION
- CREATING A PLAYLIST
- EDITING THE PLAYLIST
- CHAPTER INSERTION
- CHAPTER DELETION
- ENTERING THE PLAYLIST NAME
- EDITING A THUMBNAIL
- EDITING A CHAPTER
- CHAPTER EDIT FUNCTIONS
- CHAPTER MARK INSERTION (DIVIDE CHAPTER)
- CHAPTER MARK DELETION (COMBINE CHAPTERS)
- DELETING A VIDEO CHAPTER
- CHAPTER OPTIONS
- COMBINING WITH PREVIOUS CHAPTER
- COMBINING WITH NEXT CHAPTER
- COMBINING ALL CHAPTERS
- DIVIDING
- DELETING SCENES
- DELETE SCENES
- CHANGING THE DISC NAME
- CHANGING THE SHOOTING DATE/TIME
- SELECT "ENTER", AND PRESS THE [OK] BUTTON
- MODE CONVERSION
- CHANGING SETTINGS OF THIS UNIT
- DISPLAYING THE SETTINGS MENU
- SETTING MENU LIST
- SETUP
- AUTO POWER (OFF)
- REMOTE CONTROL CODE
- CLOCK SET/DISPLAY
- QUICK STARTUP
- BUZZER OUTPUT
- DEFAULT SETTING
- PLAYBACK SETTING
- BD-/DVD-VIDEO PB SETTING
- BD-VIDEO RATINGS
- COUNTRY CODE
- MENU LANGUAGE
- RESUME
- STILL MODE
- SEAMLESS PLAYBACK
- RECORD
- XP MODE RECORDING AUDIO
- AUTO MARKING
- AUDIO
- DYNAMIC RANGE CONTROL
- DOWN MIX
- DIGITAL OUT
- DOLBY DIGITAL
- DOLBY DIGITAL PLUS/TRUEHD
- DTS
- DTS-HD
- AAC
- DV IN AUDIO SETTING
- BD MIX SOUND
- DISPLAY
- ON SCREEN GUIDE
- BLUE BACK
- SCREEN SAVER
- OSD LANGUAGE
- CONNECTION
- MONITOR TYPE
- HDMI CONNECTION
- HDMI-CEC
- SDI/COMPONENT OUTPUT
- VIDEO INPUT SETTING
- HDCP
- SDI/HDMI CONNECTION
- SDI AUDIO INPUT SETTING
- SDI AUDIO OUTPUT SETTING
- HDMI INPUT AUDIO SETTING
- SDI RECLOCK
- FRAME SYNCHRONIZER
- TIME CODE INPUT SETTING
- TIME CODE DISPLAY POSITION
- DISC SECURITY SETTING
- DOWNCONVERSION
- OVERLAY TYPE SETTING
- OVERLAY SIZE SETTING
- OVERLAY TRANSMITTANCE SET
- OVERLAY DISP. POSITION SET
- OVERLAY INPUT SCREEN
- PASSWORD INITIALIZATION
- NETWORK SETTING
- IP ADDRESS SETTING
- IP ADDRESS
- SUBNET MASK
- DEFAULT GATEWAY
- FTP USER SETTING
- MAC ADDRESS
- CONFIRM
- LOCKING THE DISC TRAY
- UNLOCKING THE DISC TRAY
- TURNING ON THE MODE LOCK
- TURNING OFF THE MODE LOCK
- LAST FUNCTION MEMORY
- EXTERNAL CONTROL
- RS-232C SPECIFICATIONS
- LAN CONNECTION
- COMMAND
- F
- SUBTITLE SELECTION
- AUDIO LANGUAGE SELECTION
- RESPONSE COMMANDS
- SYSTEM COMMANDS
- SENSE
- USING THE HDMI CONSUMER ELECTRONICS CONTROL (HDMI CEC)
- HDMI CONSUMER ELECTRONICS CONTROL
- HDMI CONSUMER ELECTRONICS CONTROL OPERATIONS
- USING HDMI CONSUMER ELECTRONICS CONTROL (ACTIVATING THE FUNCTION)
- CREATING A SEAMLESS BD
- CREATING A SEAMLESS BD THAT USES "MODE CONVERSION" (SEAMLESS CONVERSION, RECORDING MODE CONVERSION)
- REMARKS
- VIDEO OUTPUT
- COLORIMETRY
- IMAGE QUALITY
- TIME CODE
- SPECIFICATIONS
- SD SLOT
- HDD DECK
- BD/DVD DECK
- ACCESSORIES
- IMPORTANT NOTICE CONCERNING THE SOFTWARE
- SOFTWARE LICENSE ATTACHED TO THE PRODUCT
- INDEX
- A
- B
- C
- D
- H
- S
- T
- U
- V
- JVC
Brand : JVC
Model : SR-HD2700US
Category : DVD player