
SWS 5600 - Weather Station SENCOR - Free user manual and instructions
Find the device manual for free SWS 5600 SENCOR in PDF.


| Product Type | Wireless Weather Station |
| Model | SWS 5600 |
| Brand | Sencor |
| Dimensions (Main Unit) | 122 x 118 x 52 mm (W x H x D) |
| Weight (Main Unit) | 227 g |
| Power Supply - Main Unit | 3 x 1.5V AAA batteries (not included) or DC 4.5V / 150 mA adapter (included) |
| Power Supply - Outdoor Sensor | 2 x 1.5V AAA batteries (not included) |
| Weather Forecast Icons | Sunny, Slightly Cloudy, Cloudy, Rainy, Snow |
| Indoor Temperature Range | -10°C to +50°C |
| Outdoor Temperature Range | -20°C to +50°C |
| Humidity Range (Indoor & Outdoor) | 20% to 99% RH |
| Temperature Display Units | °C / °F selectable |
| Memory Records | Max/Min outdoor temperature and humidity (24h and since reset) |
| Time Keeping | Radio controlled clock (DCF77) with manual setting; perpetual calendar up to 2099 |
| Alarm | Daily alarm with snooze (up to 7 times, 5 min interval) |
| Display Brightness | 3 levels (Hi / Lo / Off) via DIMMER button |
| Wireless Sensor Communication | 433 MHz RF; range up to 70 m in open area |
| Low Battery Indicator | For outdoor sensor |
| Cleaning & Maintenance | Wipe with soft damp cloth; do not use solvents |
| Safety Precautions | Avoid direct sunlight, extreme temperatures, water immersion; do not open or repair yourself |
| Spare Parts / Accessories | Batteries not included; AC adapter included; only original accessories recommended |
| Repair Service | Only by authorized service centers; unauthorized repair voids warranty |
| Warranty | 24 months from purchase date for domestic use |
| Compliance | EU Directive 2014/53/EU; CE marked |
Frequently Asked Questions - SWS 5600 SENCOR
User questions about SWS 5600 SENCOR
0 question about this device. Answer the ones you know or ask your own.
Ask a new question about this device
Download the instructions for your Weather Station in PDF format for free! Find your manual SWS 5600 - SENCOR and take your electronic device back in hand. On this page are published all the documents necessary for the use of your device. SWS 5600 by SENCOR.
USER MANUAL SWS 5600 SENCOR
EN INSTRUCTION MANUAL WEATHER STATION
CZ ■ NÁVOD K OBSLUZE METEOROLOGICKÁ STANICE
SK ■ NÁVOD NA OBSLUHU METEOROLOGICKÁ STANICA
HU ■ FELHASZNÁLÓI KÉZIKÖNYV METEOROLÓGIAI ÁLLOMÁS
PL ■ INSTRUKCJA OBSŁUGI STACJA POGODOWA
- Do not use the product until you have read the entire user manual.
- Do not place the device in areas exposed to direct sunlight, extreme temperatures, high humidity, or sudden temperature changes. These conditions may negatively affect measurement accuracy or cause damage to the device.
- Do not expose the device to vibrations, shocks, drops, or mechanical stress.
- Protect the device from sharp objects and other mechanical damage.
- Do not expose the device to excessive pressure, impacts, dust, or direct contact with water or other liquids. This may result in malfunction, electronic damage, or deformation of plastic components.
- The main unit is not intended for outdoor use. Install outdoor sensors only according to the manufacturer's instructions.
- Do not place items producing an open flame (e.g., lit candles) on the device.
- Ensure adequate ventilation around the device – do not cover it.
- Clean the device with a soft cloth slightly dampened with water. Do not use chemical solvents or harsh cleaning agents.
- Cleaning and maintenance should only be performed by adults. This device is not a toy – keep it out of reach of children.
- Never immerse the device in water or expose it to dripping or splashing liquids.
- Do not use the device near strong magnetic fields or electronic jamming devices.
- Remove depleted batteries immediately. Leaking batteries may cause damage.
- Use only new batteries of the recommended type. Ensure correct polarity when replacing them.
- Do not throw batteries into fire, disassemble them, or short-circuit them.
- This device is not intended for use by persons (including children) with reduced physical, sensory, or mental capabilities unless they are supervised or have been instructed by a responsible person regarding the safe use of the device.
- Ensure that children do not play with the device.
- Use the device only with original accessories supplied by the manufacturer.
- Do not attempt to repair or modify the device yourself. Unauthorized tampering may void your warranty and statutory rights.
- All repairs must be carried out by an authorized service center.
1. FEATURES
1.1 Weather Forecast
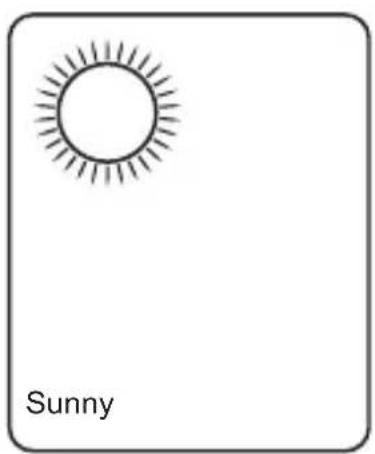
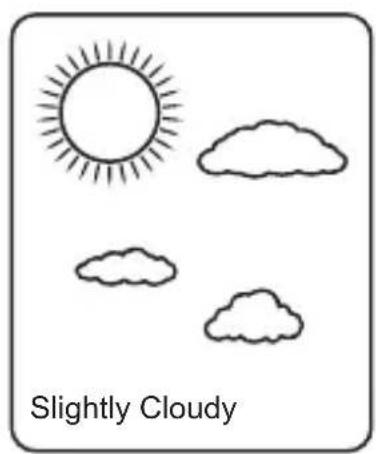
- Sunny, Slightly Cloudy, Cloudy, Rainy and Snow animation
1.2 Time
- Radio Controlled Time
- Perpetual Calendar Up to Year 2099
- Day of week in 8 languages user selectable
- Daily Alarm Function
1.3 Humidity
- Indoor & Outdoor measurable range: 20 \~ 99%
- Outdoor Humidity Record from Start-Up/Reset, and the corresponded time
- 24 Hours Min/Max Display for Outdoor Humidity
1.4 Temperature
- Indoor measurable range: -10 \~ 50°C
- Measures °C / °F user selectable
- Outdoor measurable range: -20 \~ 50°C
- Outdoor Temperature Record from Start-Up/Reset, and the corresponded time
- 24 Hours Min/Max Display for Outdoor Temperature
- Comfort Indicator Bar
1.5 Wireless Outdoor Sensor
- Low-battery indicator for Outdoor Thermo Sensor
- Wall Mount or Table Stand
- One Wireless Thermo Sensor Included
- 433MHz RF transmitting frequency
- 70 meter transmission range in an open area
2. MAIN UNIT APPEARANCE
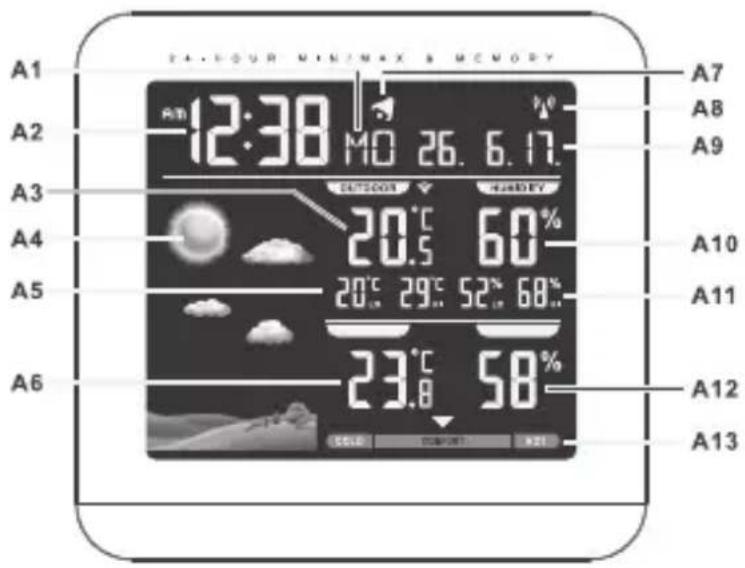
2.1 Part A- LCD
A1: Day of week/Second
A2: Time
A3: Outdoor temperature
A4: Weather forecast
A5: Outdoor temperature memory
A6: Indoor temperature
A7: Alarm icon
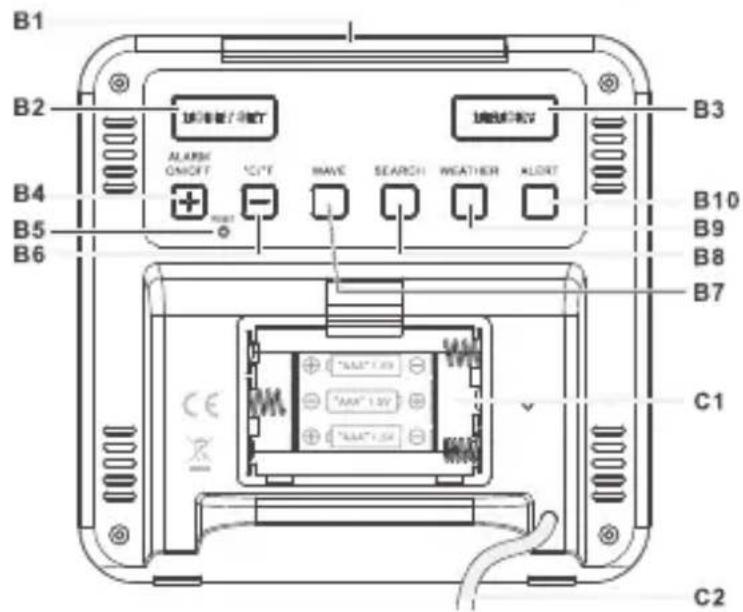
2.2 Part B- Buttons
B1: "SNOOZE/DIMMER" button
B2: "MODE/SET" button
B3: "MEMORY" button
B4: “+/ ALARM ON/OFF” button
B5: "RESET" button
A8: Radio control icon
A9: Date
A10: Outdoor humidity
A11: Outdoor humidity memory
A12: Indoor humidity
A13: Comfort indicator
B6: “-/ C/F” button
B7: "WAVE" button
B8: "SEARCH" button
B9: "WEATHER" button
B10: "ALERT" button
2.3 Part C- Structure
C1: Battery Cover C2: Adaptor plug
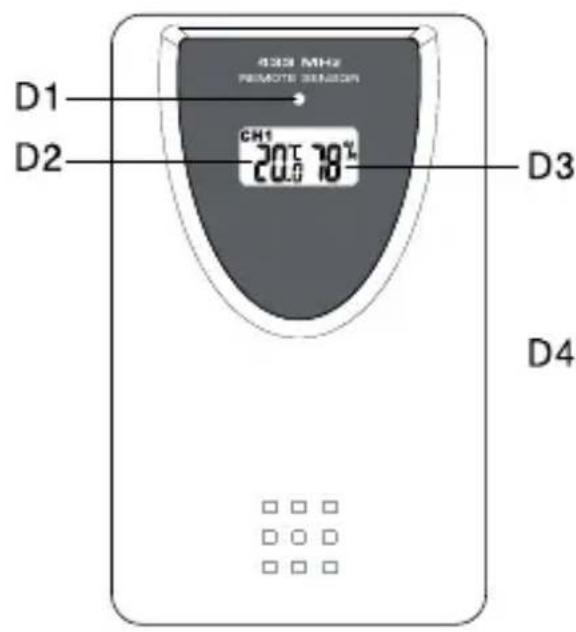
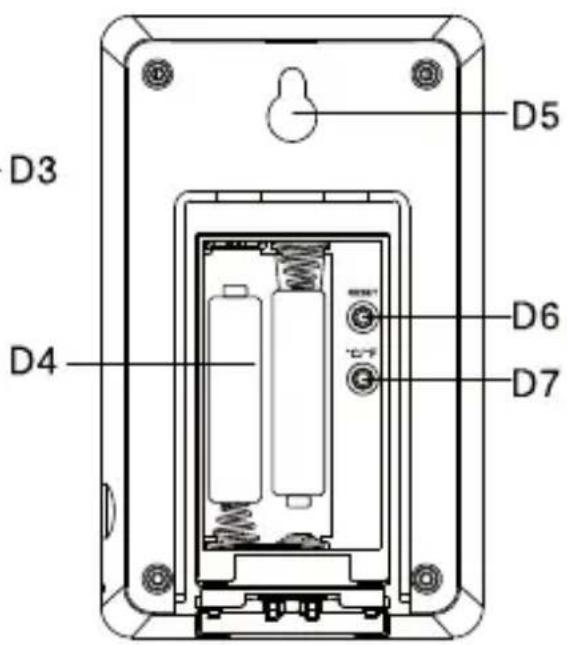
3. OUTDOOR THERMO SENSOR
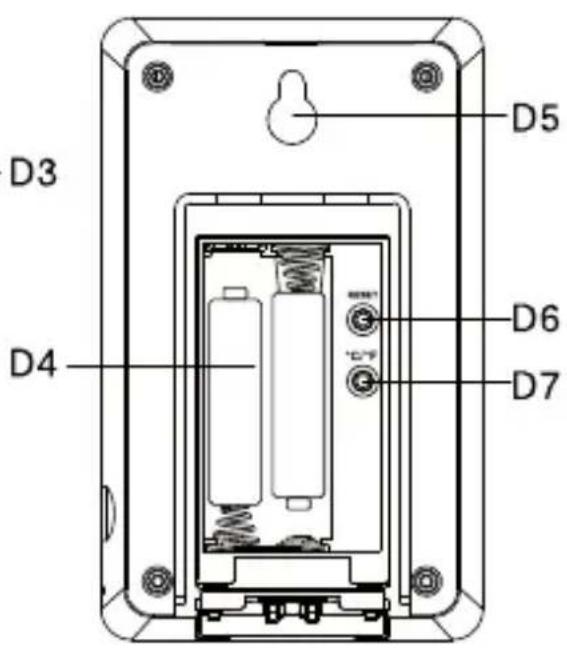
D1: Transmission Indication LED
D2: Outdoor Temperature display
D3: Outdoor Humidity display
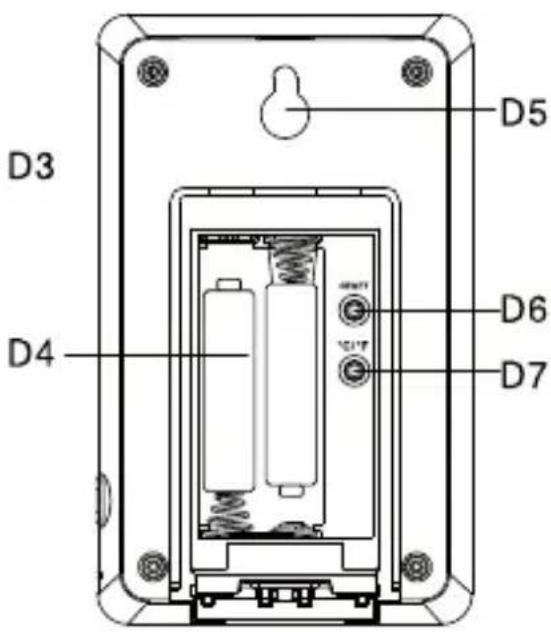
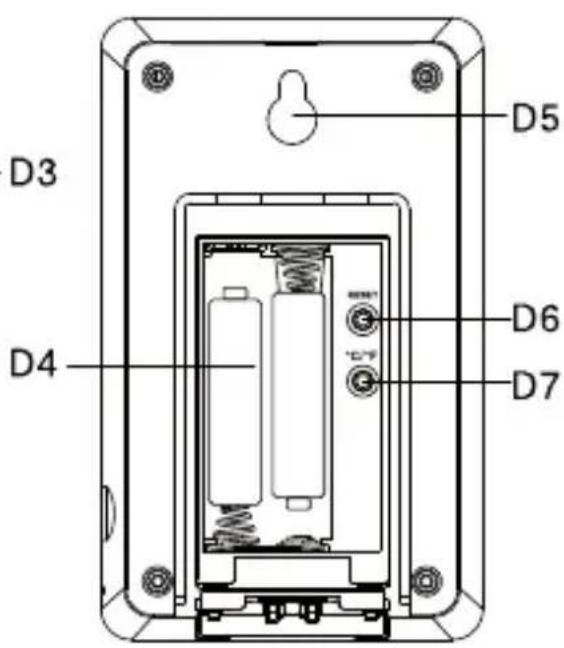
D4: Battery Compartment
D5: Wall Mount Hole
D6: "RESET" button
D7: "C/F" button
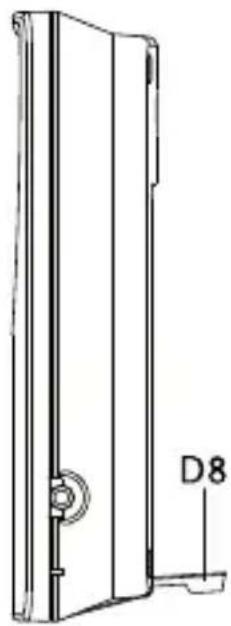
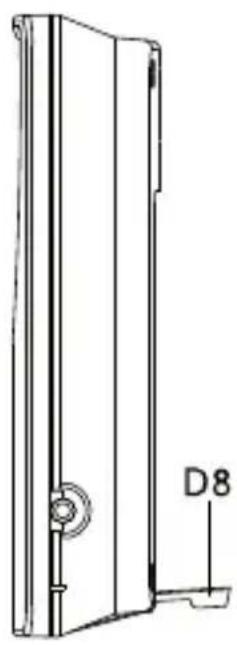
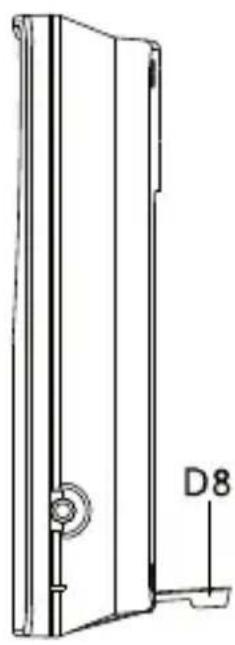
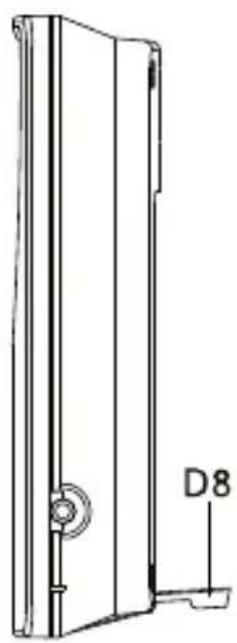
D8: Stand
natural_image
Technical line drawing of a door panel with a labeled dimension D8 (no text or symbols beyond label)4. GETTING STARTED
4.1 Main Unit
Remove battery compartment door and insert 3pcs AAA size battery.
Or connect the power cord to the wall outlet. Before connecting the unit to power, please make sure your local voltage is the same as marked on the adaptor.
Note:
- When powered by battery only, backlight would be off. Press snooze button, backlight will last for around 5 seconds.
- When connecting with the adaptor on the premise that batteries have been installed correctly, this product will switch to the external power supply automatically.
4.2 Outdoor Thermo Sensor
Batteries compartment (D4) of thermo sensor is locating behind the back cover, Insert 2 x AAA batteries observing polarity [“+” and “−” marks]
5. INSTALLATION
Place the main unit on the flat surface.
The remote sensor should be securely mounted onto a horizontal surface.
Note:
Transmissions between receiver and transmitter can reach up to 70m in open area. Open Area: there are no interfering obstacles such as buildings, trees, vehicles, high voltage lines, etc.
6. WEATHER FORECAST FUNCTION
6.1 Operation
- After power on, or holding "WEATHER" button for 3 seconds, weather icon flash on the LCD. Enter the current weather by pressing "-" or "+ "button. Press "WEATHER" button to confirm the setting. The weather forecast may not be accurate if the current weather entered is not correct. The weather station will start the first forecast at 6 hours later after the current weather status is entered.
- The current weather status should be entered again if the altitude of the main unit is changed. (Barometric pressure is lower at higher altitude location. Therefore, altitude change will affect the weather forecast).
6.2 Weather Conditions
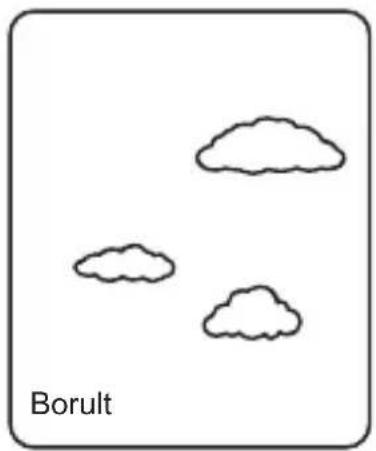
There are totally 5 different weather status animations in the weather forecast.
natural_image
Weather icon set with sun, cloud, and cloudy shapes, labeled 'Slightly Cloudy' below (no other text or symbols)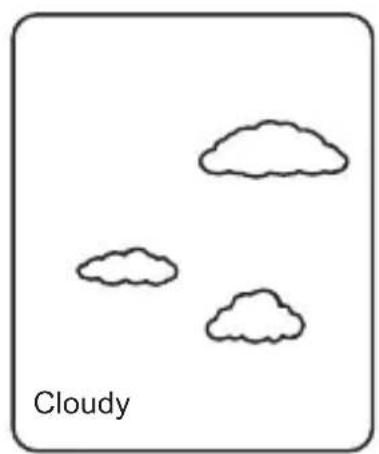
natural_image
Simple line drawing of four clouds with the label 'Cloudy' below (no other text or symbols)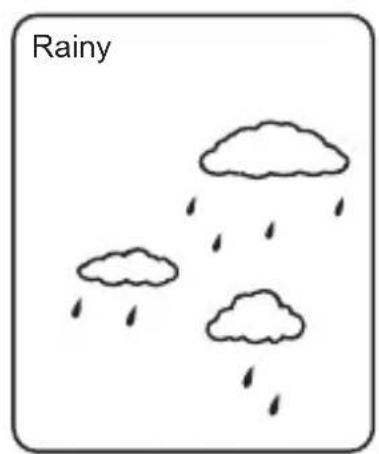
natural_image
Simple line drawing of three clouds with raindrops falling (no text or symbols)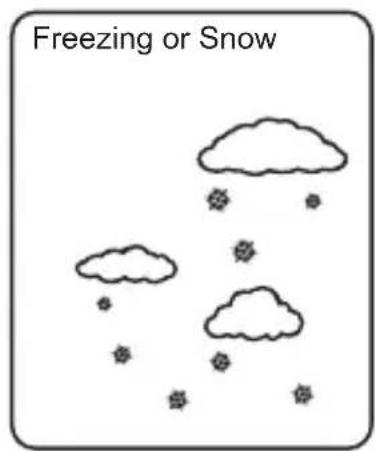
Note:
natural_image
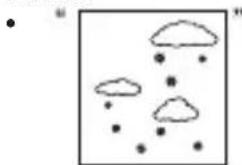
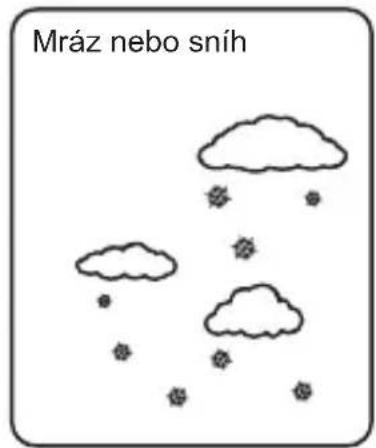
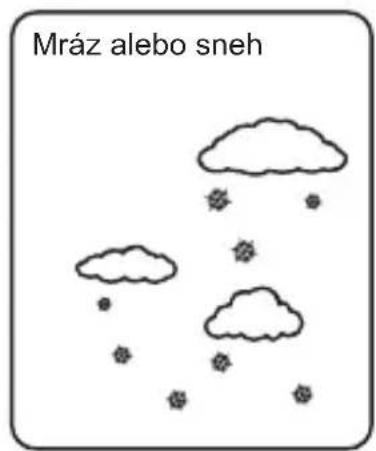
Simple line drawing of three clouds with scattered dots, no text or symbols presentis shown if the weather forecast is Rainy and outdoor temperature (any channel) under 0^ C.
- Frost Alert: “ICE” is shown if the outdoor temperature is between -2^ +3^ .
- If there is any inconsistency of weather forecast between local weather station and this unit, the local weather station's forecast should prevail. The manufacture will not hold responsible for any trouble that may come up due to wrong forecasting from this unit.
7. THERMOMETER
7.1 RF Transmission Procedure
- The main unit automatically starts receiving transmission from outdoor thermo sensor for outdoor temperature & humidity after weather condition setting.
- The outdoor sensor will automatically transmit temperature and humidity signal to the main unit after batteries inserted.
- If main unit failed to receive transmission from outdoor thermo sensor in first 3 minutes after the batteries inserted (“- - . -”display on the LCD), hold “SEARCH” button for 3 seconds to receive transmission manually. RF icon “💡” flashes on the LCD.
7.2 Temperature & Humidity
(1) Past 24 Hours Highest/Lowest Outdoor Temperature and Humidity
• After start up, the unit automatically shows past 24 hours the highest outdoor temperature and humidity record. "HI" show on the LCD
- After start up, the unit automatically shows past 24 hours the lowest outdoor temperature and humidity record. "LO" show on the LCD.
(2) Recorded Maximum/Minimum Outdoor Temperature and Humidity from Start-up/Reset.
- Press "MEMORY" button to view the lowest and highest temperature and humidity record from start-up or reset. "MEM" display on the LCD.
- When viewing the memory record, hold "MEMORY" button for 3 seconds to clear the maximum and minimum record.
- When viewing the memory record, press "MEMORY" button again to check the corresponded time and date for memory highest and lowest temperature & humidity record. The memory record value and corresponded time and date flash. Press "MEMORY" button select to view:
- Time & date for lowest temperature memory record, Time and date for highest temperature memory record, Time & date for lowest humidity memory record, Time and date for highest humidity memory record.
- If the temperature is out of the measurable range, LL.L (beyond the minimum temperature) or HH.H (beyond the maximum temperature) will be shown on the LCD.
(4) Humidity
- The humidity measurable range is 20% \~ 99%. If the current humidity measurement is lower than 20%, the LCD would display 20%.
- For past 24 hours or memory maximum or minimum temperature and humidity record. If the record is lower than 20% , the LCD would display 20% .
Note:
When indoor temperature is lower than 0^ C, indoor humidity indicates “--”
(5) Outdoor Temperature Alert Function
- Press "ALERT" button to select to activate or deactivate outdoor temperature alert function.
- press ALERT button select to:
→ Active outdoor upper temperature alert, the icn"besides outdoor temperature digit would display.
→ Active outdoor upper& lower temperature alert, the icor' 'besides outdoor temperature digit would display.
→ Active outdoor lower temperature alert, the icon"besides outdoor temperature digit would display.
→ Deactivate outdoor temperature alert, alert icon disappear.
- Hold "ALERT" button for 3 seconds to enter outdoor temperature alert setting. Icon "▲" or "▼" beside Temperature's digits flash. Press "+" or "-"button to adjust the setting value, press "ALERT" button to confirm the setting. Setting Sequence as follow: Upper limit of temperature, Lower limit of Temperature.
- When it's alert, the corresponding icon “▲” or “▼” and temperature digit would flash on the LCD. Press any buttons to stop the alert sound, otherwise, it will sound for 2 minutes, and stop automatically.
(6) Comfort Indicator Bar: for the display of pleasant/unpleasant climate.
8. TIME AND ALARM SETTING
8.1 Radio Controlled Clock:
After batteries inserted and main unit finishes receiving the transmission from outdoor sensor, the clock automatically starts to scan the DCF time signal.
Radio Control Icon “(▲)” flashes on the LCD.
| flashes,Indicating now is receiving DCF signal | turns on,Indicating signal received successfully | disappear,Indicating signal reception failed |
- The clock automatically scans the time signal at 3.00 a.m. every day to maintain accurate timing. If reception fail, scanning stops (“(▲)” on LCD disappear)
- The clock can be set to scan the time signal manually by holding "WAVE" button for 3 seconds. Each reception takes about 5 minutes. If receptions fail, scanning stops.
- Stop scanning by holding "WAVE" button for 3 seconds.
“DST” shown on the LCD if it is in Daylight Saving Time Mode.
8.2 Manual Time Setting:
Hold "MODE" button for 3 seconds to enter Clock/Calendar setting mode.
Press “+” or “-” button to adjust the setting and press “MODE” button to confirm each setting.
(By keeping the “+” or “-” button pressed, could accelerate the process and reach the desired value more quickly)
The setting sequence is shown as follow: 12/24 Hour, Time Zone, Hour, Minutes, Second, Year, Month, Day, Day-of-week language.
8 languages can be selected in Day-of-week, they are: German, French, Spanish, Italian, Dutch, Denmark, Russian, and English.
The languages and their selected abbreviations for each day of the week are shown in the following table.
| Language Sunday Mon | day Mon | day Tues | day Wednes | day Thursday | Friday Sat | urday | |
| German, GE SO | MO DI MI | DO FR SA | |||||
| English, EN SU | MO TU WE | TH FR SA | |||||
| Russian, RU | BC | ПН | BT | CP | ЧТ | ПТ | СБ |
| Denmark, DA | SO MA | TI | ON TO FR LO | ||||
| Dutch, NE | ZO | MA | DI | WO | DO | VR | ZA |
| Italian, IT | DO | LU | MA | ME | GI | VE | SA |
| Spanish, ES | DO | LU | MA | MI | JU | VI | SA |
| French, FR | DI | LU | MA | ME | JE | VE | SA |
Note:
- Second adjusted to zero only.
- The time setting mode will automatically exit in 15 seconds without any adjustment.
- The time zone is used for the countries where can receive the DCF time signal but the time zone is different from the German time. When the country time is faster than the German time for 1 hour, the zone should be set to +1. Then the clock will automatically set 1 hour faster from the signal time received.
8.3 Daily Alarm Function:
- Press "MODE/SET" button to select to view:
Time → Time & Day of Week → Alarm Time (“AL” shown on the LCD)
- When viewing the Alarm Time, hold "MODE" button for 3 seconds to enter alarm time setting. Press "+" or "-" button to adjust the alarm time. Press "MODE" button to confirm the setting.
- Press "AL ON/OFF" button to switch alarm on or off. If it is on, " 🎩" shown on the LCD.
- When Alarming, alarm icon “ 🔥” flash. Press “SNOOZE” button to activate the snooze alarm, (“ 🔥” flash on the LCD). The alarm will snooze for around 5 minutes, then it alarms again. This snooze function can be enabled for maximum 7 times.
Except "SNOOZE" button, press any buttons to stop the snooze alarm. Otherwise, the alarm signal sounds for about 2 minutes, and then stops automatically.
9. DIMMER
Press "DIMMER" button to adjust the LED brightness.
10. LOW BATTERY INDICATION:
The low battery icon “■will” appear and indicating that thermo sensor is in low battery status. The batteries should be replaced.
11. PRECAUTIONS
- Use a pin to press the reset button if the unit does not work properly.
- Avoid placing the clock near interference sources/metal frames such as computer or TV sets.
- The clock loses its time information when the battery is removed.
- Do not expose it to direct sunlight, heavy heat, cold, high humidity or wet areas
- The outdoor sensor must not be set up and installed under water. Set it up in away direct sunlight and Rain
- Never clean the device using abrasive or corrosive materials or products. Abrasive cleaning agents may scratch plastic parts and corrode electronic circuits
- If there is any inconsistency of weather forecast between Local Weather Station and this unit, the Local Weather Station's forecast should prevail. The manufacturer will not take responsible for incorrect forecasting from this unit
ADAPTER TECHNICAL SPECIFICATIONS
Manufacturer's name or trade mark, commercial registration number and address:
Model identifier: KCAD-0450150
Input voltage: AC230 - 240V
Input AC frequency: 50Hz
Output voltage: DC4.5V
Output current: 0.15A
Output power: 0.68W
Average active efficiency: ≥49.75%
No-load power consumption: ≤0.10W
DongGuanCity Yang Yuan Electronic Co Ltd Changping town, dongguan city, guangdong province gang hao A area on the second floor of catalpa tai Po industrial estate
TECHNICAL SPECIFICATIONS
Weather Station with Wireless Sensor
Weather Forecast Icon ( Sunny, Partly Cloudy, Cloudy, Rainy, Snowy )
Indoor Temperature and Humidity Reading
Outdoor Temperature and Humidity Reading
Max / Min Memory Records (24 h)
Indoor Temperature Range: -10°C to +50°C
Outdoor Temperature Range: - 20°C to +50°C
Indoor and Outdoor Humidity Range: 20% to 99% RH
Temperature Display with °C / °F Selectable
3 Level Display Brightness: Hi / Lo / Off
Digital Time, Date and Weekday
Alarm and Snooze Function
Radio Controlled Clock by Signal DCF77 ( Manual Setting Possible )
12 / 24 Hours Selectable Format
Color LCD Display
Desktop Placement
Low Battery Indicator for Wireless Sensor
1 Sensor Included
Transmission Between Main Unit and Sensor up to 30 m ( in Open Area )
Sensor Transmission Frequency: 433 MHz
Battery Power: 3 x 1.5 V Type AAA (Batteries Not Included)
Power Adaptor of Main Unit: DC 4.5 V / 150 mA ( Included ), Consumption: 0.68 W
Power of Sensor: 2 x 1.5 V Type AAA ( Batteries Not Included )
Dimensions of Main Unit: ( w / h / d ) 122 x 118 x 52 mm
Weight of Main Unit: 227 g
INSTRUCTIONS AND INFORMATION REGARDING THE DISPOSAL OF USED PACKAGING MATERIALS
Dispose of packaging material at a public waste disposal site.
DISPOSAL OF USED ELECTRICAL AND ELECTRONIC APPLIANCES
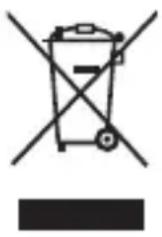
The meaning of the symbol on the product, its accessory or packaging indicates that this product shall not be treated as household waste. Please, dispose of this product at your applicable collection point for the recycling of electrical & electronic equipment waste. Alternatively in some states of the European Union or other European states you may return your products to your local retailer when buying an equivalent new product. The correct disposal of this product will help save valuable natural resources and help in preventing the potential negative impact on the environment and human health, which could be caused as a result of improper liquidation of waste. Please ask your local authorities or the nearest waste collection centre for further details. The improper disposal of this type of waste may fall subject to national regulations for fines.
For business entities in the European Union
If you wish to dispose of an electrical or electronic device, request the necessary information from your seller or supplier.
Disposal in other countries outside the European Union
If you wish to dispose of this product, request the necessary information about the correct disposal method from local government departments or your seller.

This product complies with EU requirements.
FAST ČR, a. s. hereby declares that the radio device type SWS 5600 complies with Directive 2014/53/EU. For full version of the EU declaration of conformity, please refer to the website: www.sencor.cz
Changes in the text, design and technical specifications may be made without prior notice and we reserve the right to make such changes.
The original version is in Czech.
Manufacturer: FAST ČR, a.s., U Sanitasu 1621, Říčany 251 01, Czech Republic, info@sencor.com
Authorized service centers: Visit www.sencor.com for detailed information about authorized service centers.
SENCOR®
EN Warranty conditions
Warranty card is not a part of the device packaging.
This product is warranted for the period of 24 months from the date of purchase to the end-user. Warranty is limited to the following conditions. Warranty is referred only to the customer goods using for common domestic use. The claim for service can be applied either at dealer's shop where the product was bought, or at below mentioned authorized service shops. The end-user is obligated to set up a claim immediately when the defects appeared but only till the end of warranty period. The end user is obligated to cooperate to certify the claiming defects. Only completed and clean (according to hygienic standards) product will be accepted. In case of eligible warranty claim the warranty period will be prolonged by the period from the date of claim application till the date of taking over the product by end-user, or the date the end-user is obligated to take it over. To obtain the service under this warranty, end-user is obligated to certify his claim with duly completed following documents: receipt, certificate of warranty, certificate of installation.
This warranty is void especially if apply as follows:
■ Defects which were put on sale.
■ Wear-out or damage caused by common use.
The product was damaged by unprofessional or wrong installation, used in contrary to the applicable instruction manual, used in contrary to legal enactment and common process of use or used for another purpose which has been designed for.
■ The product was damaged by uncared-for or insufficient maintenance.
The product was damaged by dirt, accident of force majeure (natural disaster, fire, and flood).
■ Defects on functionality caused by low duality of signal, electromagnetic field interference etc.
■ The product was mechanically damaged (e.g. broken button, fall).
■ Damage caused by use of unsuitable media, fillings, expendable supplies (batteries) or by unsuitable working conditions (e.g. high temperatures, high humidity, quakes).
■ Repair, modification or other failure action to the product by unauthorized person.
■ End-user did not prove enough his right to claim (time and place of purchase).
■ Data on presented documents differs from data on products.
■ Cases when the claiming product cannot be identified according to the presented documents (e.g. the serial number or the warranty seal has been damaged).
Manufacturer:
FAST ČR, a.s., U Sanitasu 1621, Říčany 251 01, Czech Republic
info@sencor.com
Authorized service centers:
Visit www.sencor.com for detailed information about authorized service centers.
The original version of the instructions is in the Czech language, other language versions are made by the appropriate translation.
natural_image
Technical line drawing of a door or panel with a labeled dimension D8 (no text or symbols beyond label)4. ZAČÍNÁME
4.1 Hlavní jednotka
natural_image
Simple line drawing of a sun, clouds, and one cloud with label 'Mírně zataženo' below (no other text or symbols)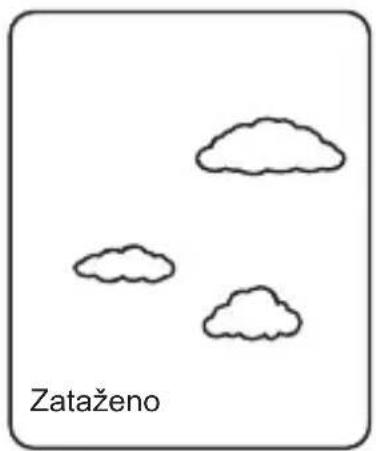
natural_image
Simple line drawing of three clouds with no text or symbols on the clouds themselves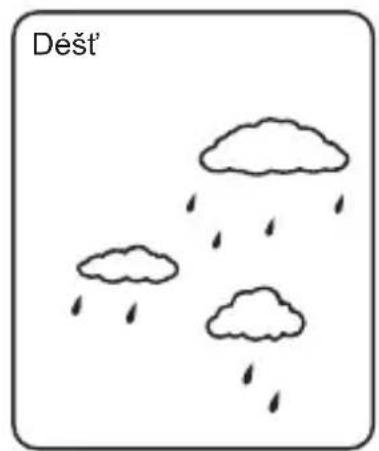
DongGuanCity Yang Yuan Electronic Co Ltd Changping town, dongguan city, guangdong province gang hao A area on the second floor of catalpa tai Po industrial estate
2.1 Čast'A - LCD displej
natural_image
Technical line drawing of a door panel with a labeled dimension D8 (no text or symbols beyond label)4. ZAČÍNAME
4.1 Hlavná jednotka
natural_image
Simple line drawing of three clouds with the label 'Zamračené' below (no other text or symbols)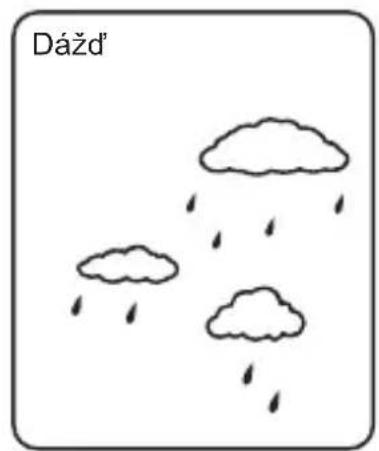
DongGuanCity Yang Yuan Electronic Co Ltd Changping town, dongguan city, guangdong province gang hao A area on the second floor of catalpa tai Po industrial estate
natural_image
Technical line drawing of a door panel with labeled dimension D8 (no text or symbols beyond label)4. ELSŐ LÉPÉSEK
4.1 Főegység
natural_image
Simple line drawing of four clouds with label 'Borult' below (no other text or symbols)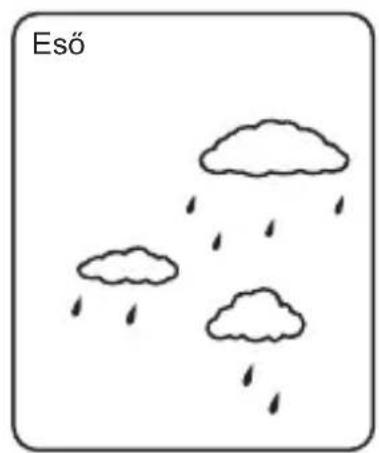
natural_image
Simple line drawing of three clouds with raindrops falling (no text or symbols)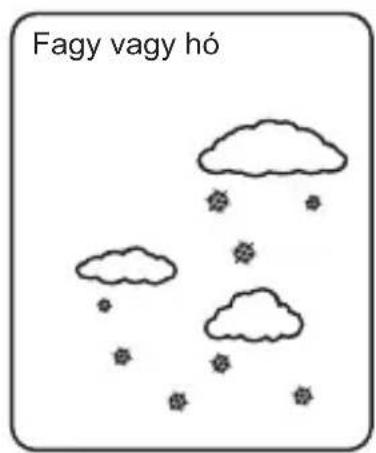
natural_image
Simple line drawing of three clouds with scattered dots inside a square frame (no text or symbols)DongGuanCity Yang Yuan Electronic Co Ltd Changping town, dongguan city, guangdong province gang hao A area on the second floor of catalpa tai Po industrial estate
natural_image
Technical line drawing of a door panel with labeled dimension D8 (no text or symbols beyond label)4. ZACZYNAMY
natural_image
Simple line drawing of a sunny, cloudy, and cloud shapes with label 'Pochmurno' below (no other text or symbols)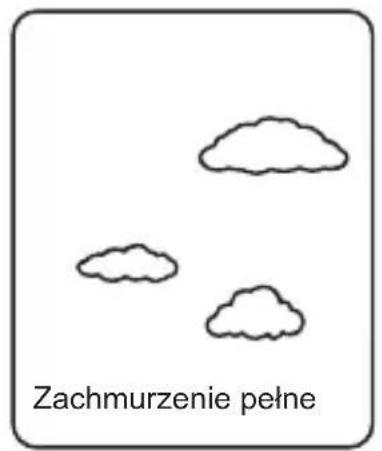
DongGuanCity Yang Yuan Electronic Co Ltd Changping town, dongguan city, guangdong province gang hao A area on the second floor of catalpa tai Po industrial estate
- EN INSTRUCTION MANUAL WEATHER STATION
- FEATURES
- Weather Forecast
- Time
- Humidity
- Temperature
- Wireless Outdoor Sensor
- MAIN UNIT APPEARANCE
- Part A- LCD
- Part B- Buttons
- Part C- Structure
- OUTDOOR THERMO SENSOR
- GETTING STARTED
- Main Unit
- Note:
- Outdoor Thermo Sensor
- INSTALLATION
- WEATHER FORECAST FUNCTION
- Operation
- Weather Conditions
- THERMOMETER
- RF Transmission Procedure
- Temperature & Humidity
- Humidity
- Outdoor Temperature Alert Function
- TIME AND ALARM SETTING
- Radio Controlled Clock:
- Manual Time Setting:
- Daily Alarm Function:
- DIMMER
- LOW BATTERY INDICATION:
- PRECAUTIONS
- ADAPTER TECHNICAL SPECIFICATIONS
- TECHNICAL SPECIFICATIONS
- Weather Station with Wireless Sensor
- INSTRUCTIONS AND INFORMATION REGARDING THE DISPOSAL OF USED PACKAGING MATERIALS
- DISPOSAL OF USED ELECTRICAL AND ELECTRONIC APPLIANCES
- For business entities in the European Union
- Disposal in other countries outside the European Union
- SENCOR®
- EN Warranty conditions
- Warranty card is not a part of the device packaging.
- This warranty is void especially if apply as follows:
- Manufacturer:
- Authorized service centers:
- ZAČÍNÁME
- Hlavní jednotka
- Čast'A - LCD displej
- ZAČÍNAME
- Hlavná jednotka
- ELSŐ LÉPÉSEK
- Főegység
- ZACZYNAMY
Brand : SENCOR
Model : SWS 5600
Category : Weather Station