
Loki CinemaScope - Projector Barco - Free user manual and instructions
Find the device manual for free Loki CinemaScope Barco in PDF.


| Brand | Barco |
| Model | Loki CinemaScope |
| Category | Video projector |
| Product Type | Professional cinema projector |
| Resolution | 2560 x 1600 (WQXGA, 1.6:1 DMD) |
| Aspect Ratio | 2.35:1 (CinemaScope), 4:3, 16:9, and custom |
| Throw Ratio Range | 0.5 to 7.7 (depending on lens) |
| Lens Options | Multiple lenses including FLDX UST (0.38:1) and standard barrel lenses |
| Light Source | Laser phosphor (estimated high brightness) |
| Color Processing | Barco P7 Realcolor |
| Image Adjustments | Scheimpflug, digital zoom/pan, warping, masking, keystone correction |
| Lens Safety Cable | Included as standard safety feature for overhead mounting |
| Connectivity | HDMI, SDI, Ethernet, RS232, IR control |
| Power Consumption | Approximately 1500W (typical for cinema projectors) |
| Dimensions (W x D x H) | Approximately 600 x 500 x 250 mm (without lens) |
| Weight | Approximately 30 kg (without lens) |
| Cooling | Forced air ventilation (grilles on sides and rear) |
| Mounting | Ceiling mount or table mount with optional rigging frame |
| Operating Temperature | 0°C to 40°C (estimated) |
| Regulatory Compliance | CE, FCC, RoHS (indicated by manual markings) |
| Accessories Included | Safety cable kit, lens instruction, user manual |
Frequently Asked Questions - Loki CinemaScope Barco
User questions about Loki CinemaScope Barco
0 question about this device. Answer the ones you know or ask your own.
Ask a new question about this device
Download the instructions for your Projector in PDF format for free! Find your manual Loki CinemaScope - Barco and take your electronic device back in hand. On this page are published all the documents necessary for the use of your device. Loki CinemaScope by Barco.
USER MANUAL Loki CinemaScope Barco
natural_image
Line drawing of a projector with ventilation grilles and central hub (no text or symbols)安装手册
Barco Fredrikstad AS
Habornveien 53, N-1630 Gamle Fredrikstad, Norway
Support.fre@barco.com
www.barco.com
Registered office: Barco NV
President Kennedypark 35, 8500 Kortrijk, Belgium
www.barco.com/en/support
www.barco.com
变更
3059 Premiere Parkway Suite 400
30097 Duluth GA, United States
电话:+1 678 475 8000
中文版本——商标
图像 1-1 Loki 投影机

限用物質含有情況標示聲明書 (Declaration of the Presence Condition of the Restricted Substances Marking)
Building 329, Doncastle Road
Bracknell RG12 8PE, Berkshire, United Kingdom
1.10 联系信息
Barco 联系信息
注册办公地址:President Kennedypark 35, 8500 Kortrijk, Belgium
联系地址:Beneluxpark 21, 8500 Kortrijk, Belgium
联系地址(台湾):
Barco Fredrikstad as
Habornveien 53, N1630 Gamle Fredrikstad, Norway
电话:+476930 4550
President Kennedypark 35, B-8500 Kortrijk
生产地信息
生产地在产品上的产品编号标签中说明。
生产日期
natural_image
Top-down technical drawing of a circular mechanical component with concentric rings and mounting holes (no text or symbols)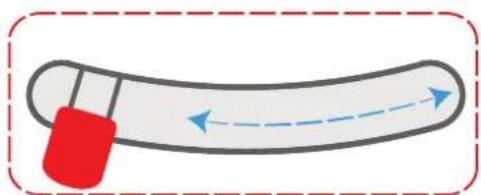
natural_image
Simple diagram of a curved object with directional arrows, no text or symbols present图像 2-2
安装镜头
natural_image
Technical line drawing of a projector with visible internal components and mounting base (no text or symbols)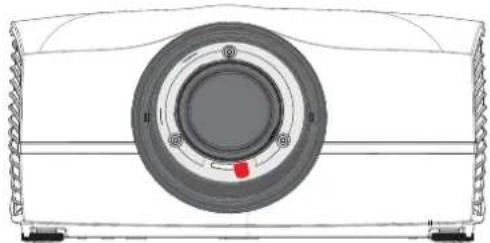
natural_image
Technical line drawing of a mechanical component with concentric rings and mounting brackets (no text or symbols)图像 2-3
natural_image
Technical line drawing of a mechanical component with central circular feature and mounting holes (no text or symbols)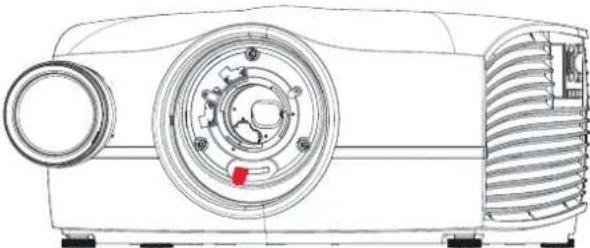
natural_image
Technical line drawing of a projector with internal components and mounting base (no text or symbols)图像 2-4
2.4 用户手册
何时校准镜头
2.5 Installing the lens safety cable
When to use the lens safety cable
The lens safety cable must be used in any circumstance where the projector is mounted above people. Do this to secure the mounted lens in the lens holder.
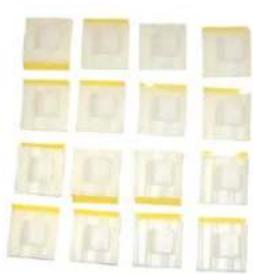
Content of the lens safety cable kit (R9801196)
• Safety Cable (750 mm, ∅3 mm)
• Cable clamp M4 (U-bolt)
- Shackle 7x70 mm
- 20 x Cable clip (16x16 mm, ∅4 mm)
natural_image
Grid of 16 identical yellow and white plastic or paper samples arranged in 3 rows (no text or symbols visible)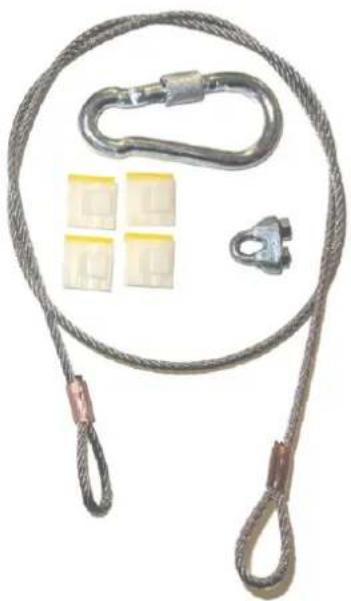
natural_image
Coiled rope with attached metal chain, four yellow plastic clips, and a separate clamp (no text or symbols)图像 2-7
How to install the lens safety cable
- Ensure that the safety cable and its accessories are in good condition (not damaged)
- Paste four cable clips on the lens body between motor block and lens flange as illustrated (reference 1). Orient the open side of the clips towards the front of the lens.
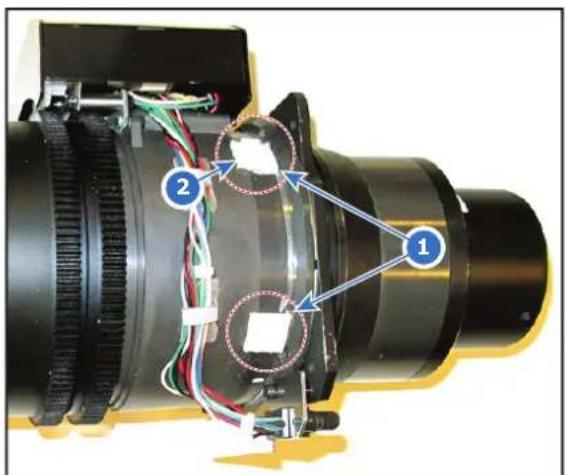
图像 2-8
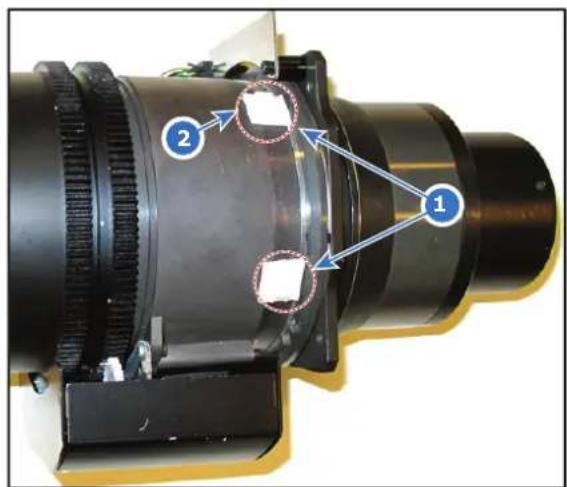
图像 2-9
-
Snap the first loop end of the safety cable into one of the following clips and let the loop end point downwards.
-
Configuration A: Use the upper clip on the side of the cable bundle (reference 2, 图像 2-8).
-
Configuration B: Use the upper clip on the non-wired side (reference 2, 图像 2-9).
-
Slide the rest of the cable around the lens counterclockwise. Click the cable into every clip it passes in this loop.

备注:确保缆绳通过镜头和缆束之间。
- Slide the cable through the loop end at the beginning of the cable to create a lasso..
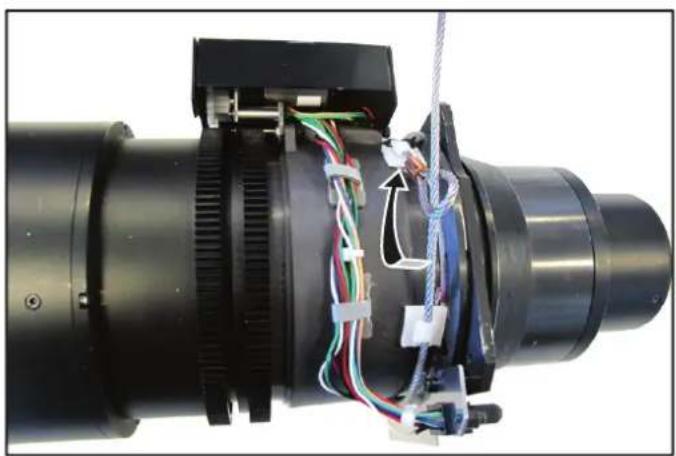
natural_image
Close-up of a mechanical assembly with visible wiring and components (no text or symbols)图像 2-10 Example of configuration A
- Pull the lasso tight around the lens body and install the U-bolt on the lens holder, with the open ends oriented outwards (reference 3). Make sure that both a part of the loop end and the outgoing part of the safety cable are placed in the enclosure.
镜头
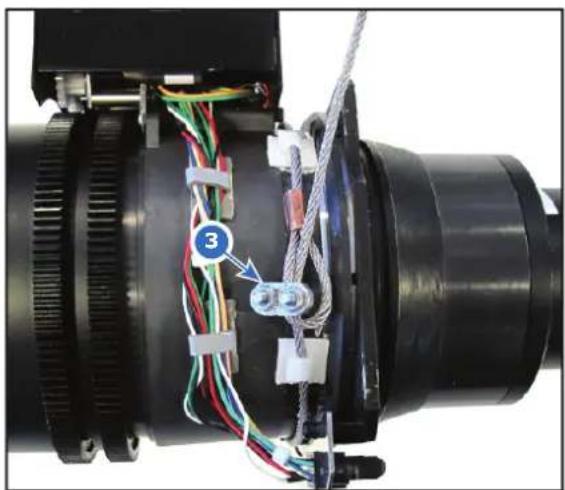
natural_image
Close-up of a mechanical assembly with colored wires and connectors, no visible text or symbols图像 2-11 Example of Configuration A
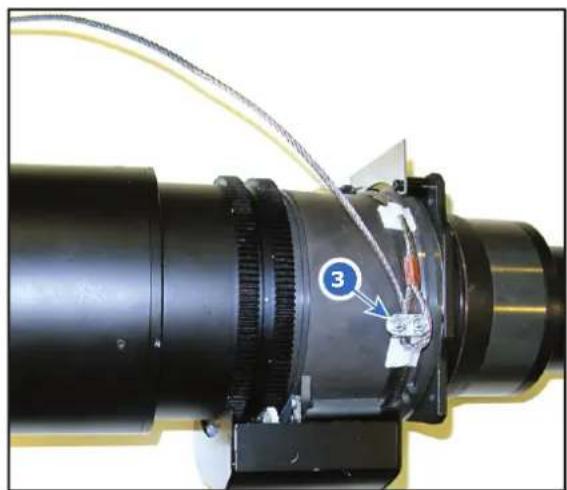
natural_image
Close-up of a mechanical device with labeled component 3, showing internal gears and wiring (no readable text or symbols beyond labels)- Close the U-bolt and tighten it.

-
Place the shackle through the free loop end of the safety cable.
-
Connect the shackle on the truss or rigging frame.

小心: The safety cable is mounted as backup so that the drop distance is as small as possible. Keep the possible drop distance of the lens as short as possible!
How to mount the cable to a short barrel lens
- Paste two cable clips on both sides of the lens as illustrated (reference 1). Orient the open side of the clips towards the outside of the lens.
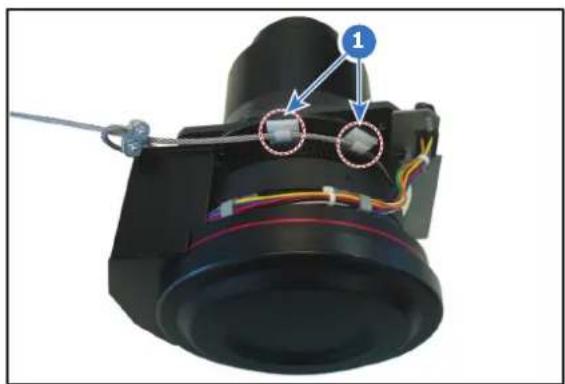
natural_image
Close-up of a mechanical component with colored wires and a numbered annotation (1), no readable text or symbols present.图像 2-13
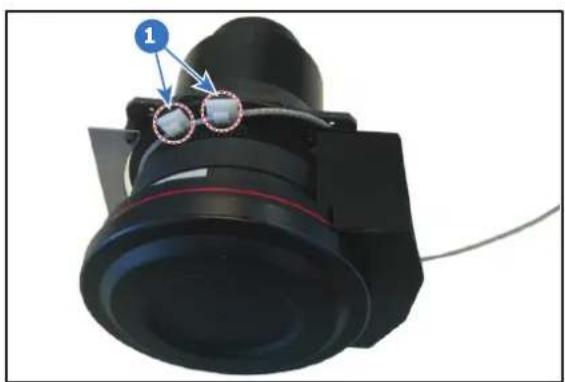
natural_image
Close-up of a black mechanical component with a blue circular annotation and red border, no visible text or symbols.图像 2-14
- Paste two extra cable clips on the motor block of the lens. Orient the open side to the outside of the lens.
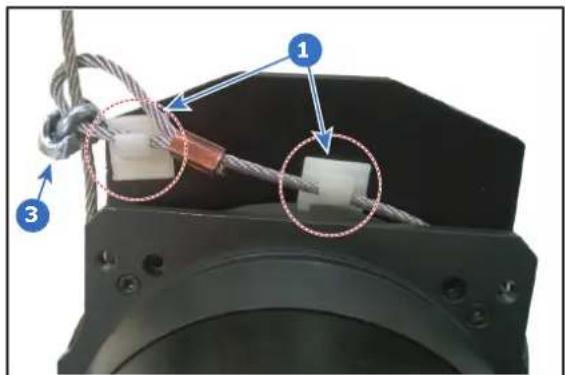
图像 2-15
-
Carefully slide the safety cable through the cable clips. Make sure the cable is placed between the motor block and the cover plate.
-
Slide the cable through the loop end at the beginning of the cable.
-
Mount a U-bolt on the cable, with the open ends oriented outwards (reference 3, 图像 2-15). Make sure that both a part of the loop end and the outgoing part of the safety cable are placed in the enclosure.
-
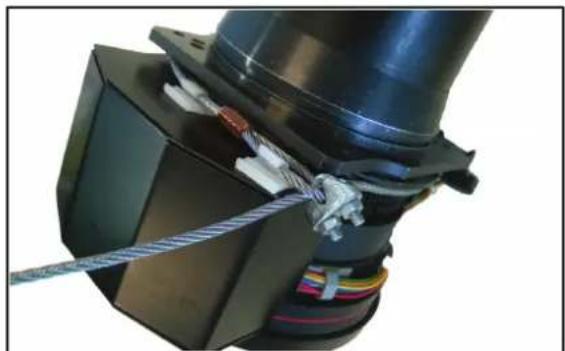
Close the U-bolt and tighten it.

The result should look similar to the following example.
natural_image
Close-up of a mechanical assembly with coiled wires and a black component (no visible text or symbols)图像 2-16
-
Lead the cable end with the shackle around rigging frame bar or truss bar
-
Snap the shackle to the straight part of the cable.
Secure the shackle by screwing the safety ring of the shackle over the open end.
2.6 准备 FLDX 镜头 (0.38:1) UST
概述
镜头可能朝向的位置如下:朝上和朝右。
- F90 镜头:朝上和朝右
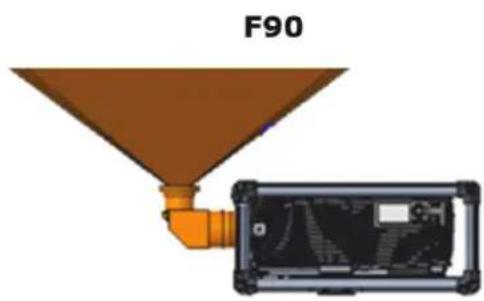
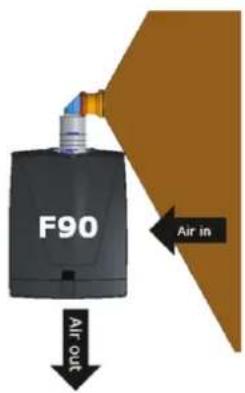
图像 2-17
natural_image
Close-up of a black optical instrument with green and black components, no visible text or symbols图像 2-19
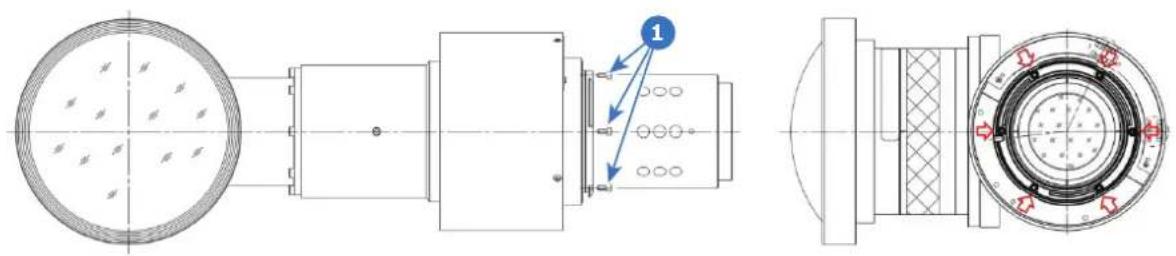
natural_image
Technical line drawings of mechanical components, showing front and side views with no visible text or symbols.图像 2-20
图像 2-22
A 参照标记
natural_image
Diagram of a device emitting a yellow cone-shaped light source (no text or symbols)natural_image
Simple diagram of a device with a rectangular base and a vertical structure, no text or symbols present.D
m = 311
natural_image
Technical line drawing of a mechanical assembly with green component and mounting holes (no text or symbols)图像 2-26 支撑板
natural_image
Technical line drawing of a mechanical assembly with a central circular component and mounting base (no text or symbols)图像 2-27 安装镜头
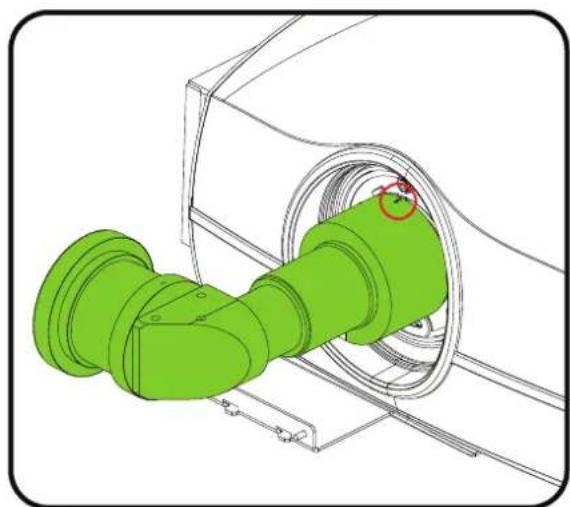
natural_image
3D technical illustration of a green industrial pipe fitting with a circular component inserted, no text or symbols present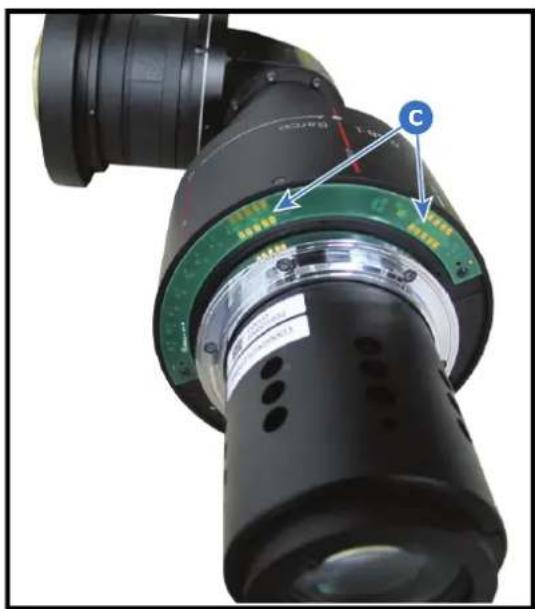
图像 2-28 接触点
natural_image
Diagram showing a mechanical assembly before and after transformation, with no visible text or symbols.图像 2-29 安装第二块基板
natural_image
Diagram showing a mechanical assembly before and after transformation, with no visible text or symbols.图像 2-30 安装第三块基板
natural_image
Technical illustration of a mechanical assembly before and after modification, showing pipe connection and component alignment (no text or symbols)图像 2-31 安装夹具支架
图像 2-32
图像 3-4
安装到天花板上
图像 3-5
line
| Projection distance (m) | Image height (m) | Screen diagonal (m) | | ----------------------- | ---------------- | -------------------- | | 0.5 | 0.5 | 1.0 | | 1.0 | 1.0 | 1.5 | | 2.0 | 2.0 | 2.5 | | 3.0 | 3.0 | 3.5 | | 4.0 | 4.0 | 4.5 | | 5.0 | 5.0 | 5.5 | | 6.0 | 6.0 | 6.5 | | 7.0 | 7.0 | 7.5 | | 8.0 | 8.0 | 8.5 | | 9.0 | 9.0 | 9.5 | | 10.0 | 10.0 | 10.5 |图像 3-6
3.8 Scheimpflug(视轴)调整
什么是 Scheimpflug?
flowchart
graph LR
    A["Circle object with numbered point 1"] --> B["Grid with 9 squares"]
    B --> C["Grid with 9 squares, labeled F"]
图像 3-9
flowchart
graph LR
    A["Top view of circular component"] --> B["Arrow pointing to a central node"]
    B --> C["Arrow pointing to a grid of 12 gray blocks labeled 'F'"]
    C --> D["Arrow pointing to a grid of 12 gray blocks labeled 'F'"]
    style A fill:#f9f,stroke:#333
    style D fill:#bbf,stroke:#333
图像 3-10
flowchart
graph LR
    A["Circle with numbered point 3"] --> B["Grid of 3D shapes"]
    B --> C["Final Shape labeled F"]
图像 3-11
图像 5-11
图像菜单
6
natural_image
Close-up of a koala with visible facial features and open mouth, surrounded by foliage (no text or symbols)图像 6-15 原图,未进行数字变焦
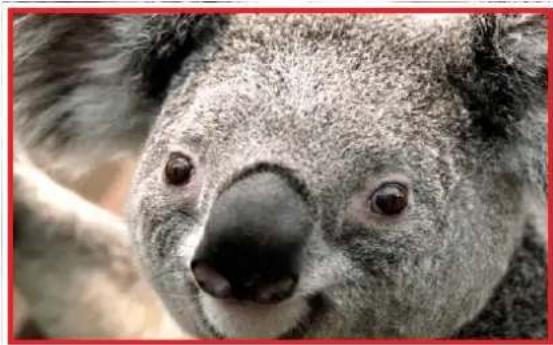
natural_image
Close-up of a koala's face showing its eyes and mouth (no text or symbols visible)图像 6-16 以数码方式放大的图片
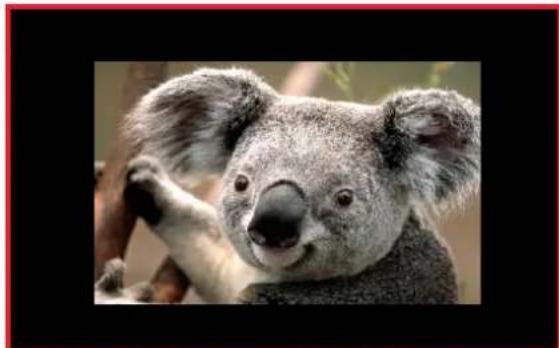
natural_image
Close-up photo of a koala with its face and open mouth, no visible text or symbols图像 6-17 以数码方式缩小的图片
6.7.2 数字平移
数字平移
natural_image
Close-up of a koala with textured skin and large eyes, partially visible in the background (no text or symbols)图像 6-18 原图,未进行数码平移
图像菜单
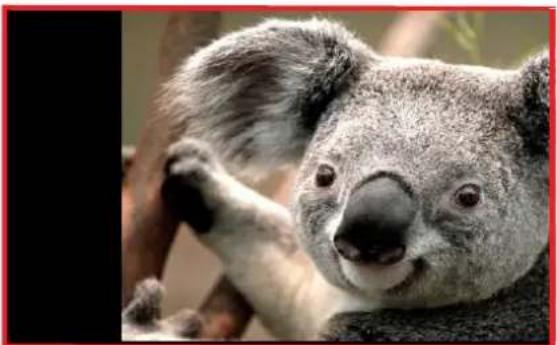
natural_image
Close-up of a koala interacting with its face, showing its mouth and whisker (no text or symbols visible)图像6-19 图片水平平移
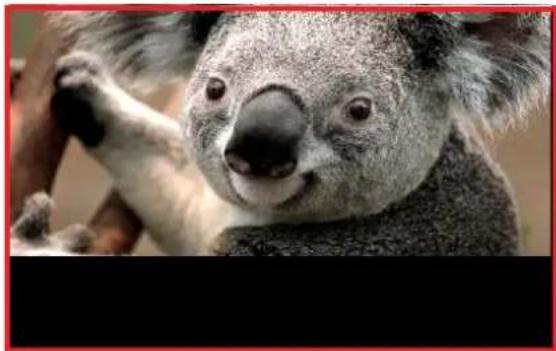
natural_image
Close-up photo of a koala with visible facial features and whiskers (no text or symbols)图像6-20 图片垂直平移
6.8 高级图像调整
6.8.1 P7 Realcolor
目的
图像 6-38
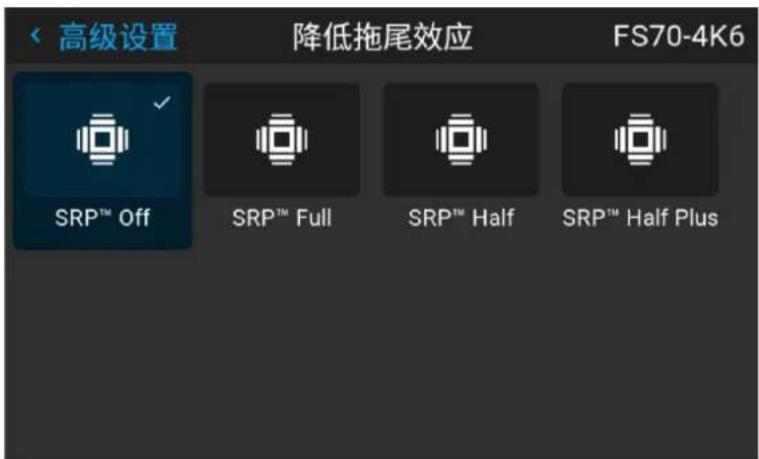
图像 6-39
图像 6-41
natural_image
Scenic mountain lake with red boats reflected in calm water, snow-capped peaks in background (no text or symbols)natural_image
Scenic lake view with snow-capped mountains reflected in calm water, two small boats on the water and a red boat on the shore (no text or symbols visible)natural_image
Scenic mountain lake landscape with red-roofed buildings and reflective water under dramatic cloudy skies (no text or symbols visible)natural_image
Scenic mountain lake with snow-capped peaks reflected in calm water, two small boats on the water (no text or symbols visible)natural_image
Highway traffic scene at sunset with multiple cars driving, no visible text or signage图像 8-8 方向菜单
natural_image
Diagram of two air conditioners connected via a double line, showing fan arrangement (no text or symbols)图像 8-9
如何设置正确的方向
从菜单中选择方向
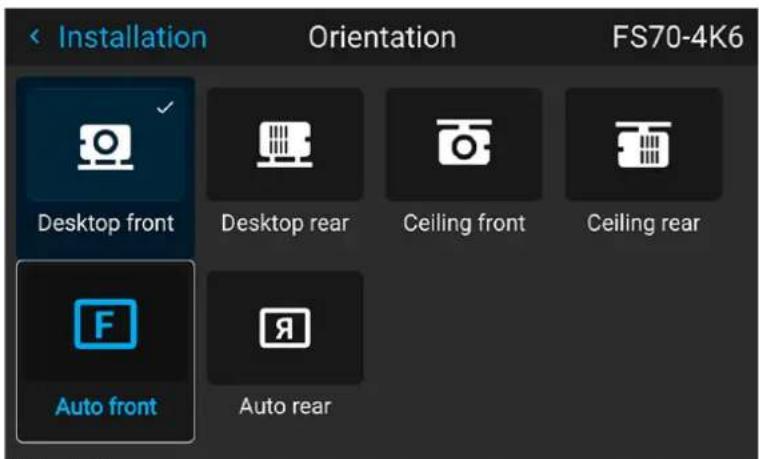
图像 8-10
显示方向菜单
Input signal (Source): 4:3
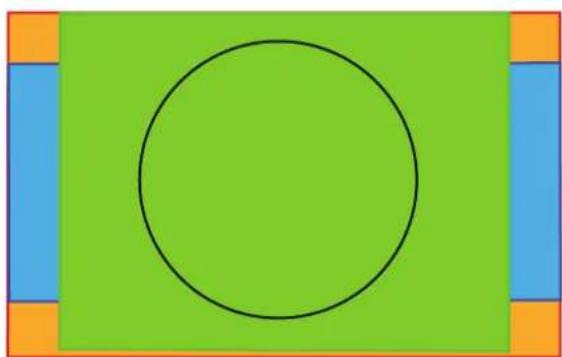
natural_image
Simple geometric diagram with a black circle centered on a green rectangle, flanked by blue rectangles and orange corner markers (no text or symbols)DMD Capacity: 1,6 : 1 (2560 x 1600 pixels)
Screen: 2,35 : 1 (Cinemascope)
图像 8-11
1:1
此模式可逐像素精确渲染源信号
Input signal (Source): 4:3
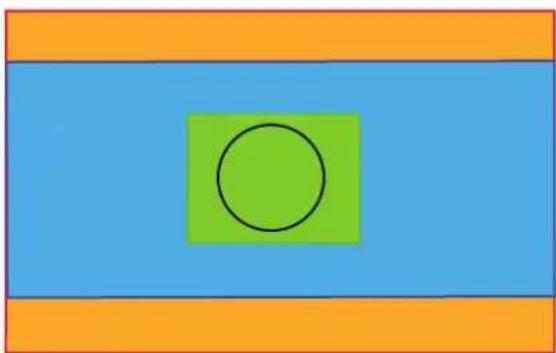
natural_image
Simple geometric diagram with a green circle centered inside a blue rectangle, surrounded by orange borders (no text or symbols)DMD Capacity: 1,6 : 1 (2560 x 1600 pixels)
Screen: 2,35 : 1 (Cinemascope)
图像 8-12
填充屏幕
Input signal (Source): 4 : 3
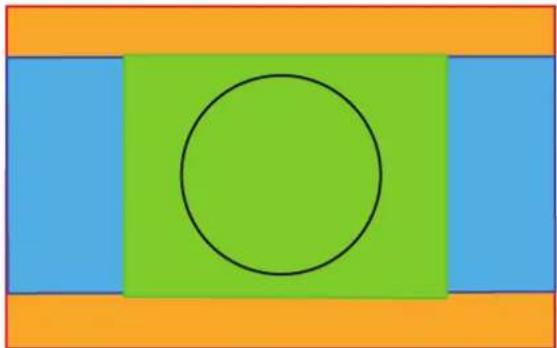
natural_image
Simple geometric diagram with a black circle centered within a green rectangle, surrounded by blue and orange horizontal bands (no text or symbols)DMD Capacity: 1,6 : 1 (2560 x 1600 pixels)
Screen: 2,35 : 1 (Cinemascope)
图像 8-13
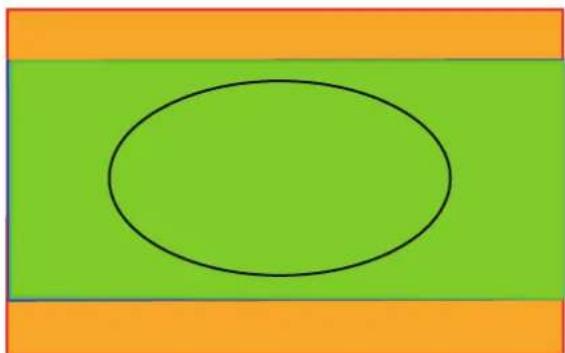
拉伸
Input signal (Source): 4:3
natural_image
Simple diagram with a black oval inside a green rectangle, surrounded by orange horizontal bands (no text or symbols)DMD Capacity: 1,6 : 1 (2560 x 1600pixels)
Screen: 2,35 : 1 (Cinemascope)
图像 8-14
进入方法。
进入菜单/安装/缩放
菜单更改当前用户的密码。
Distorted Picture
Ideal Picture
图像 8-16
8.6.2 变形 - 开/关
关于变形开/关
natural_image
Two cows grazing on a rocky stream surrounded by green grass (no text or symbols visible)图像 8-21 变形轮廓示例
如何调整图像?
- 在主菜单中,选择安装/变形/屏幕尺寸。
显示“屏幕大小”菜单。
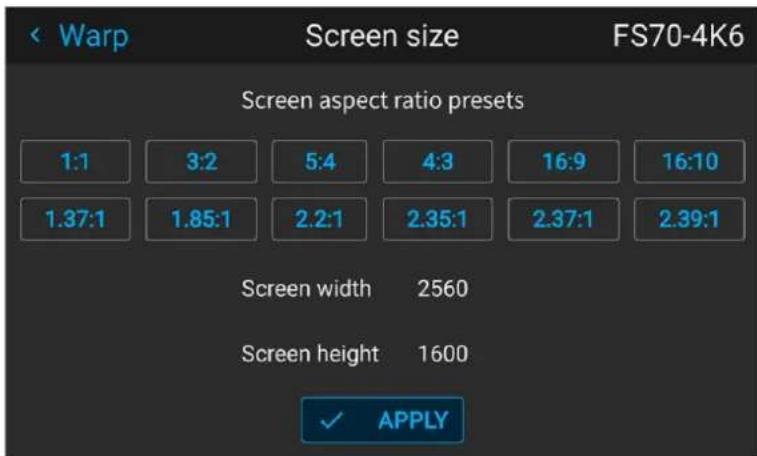
图像 8-22
natural_image
Exterior view of a large cargo aircraft with visible tailings and landing gear (no signage or text)图像 8-24
natural_image
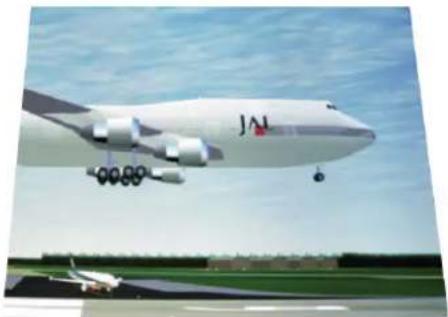
JAL Airplane in flight over a runway with another aircraft visible below (no text or symbols on the plane)如何调整图像。
natural_image
Pure geometric diagram with grid lines and dots, no text or symbols present图像 8-32 对称弯曲校正
非对称弯曲校正
natural_image
Pure geometric diagram with grid lines and dots, no text or symbols present图像 8-35 非对称弯曲校正
- 对必须校正的图片的每一侧重复该步骤。
在弯曲变形程序中定义角度和线性(长度)
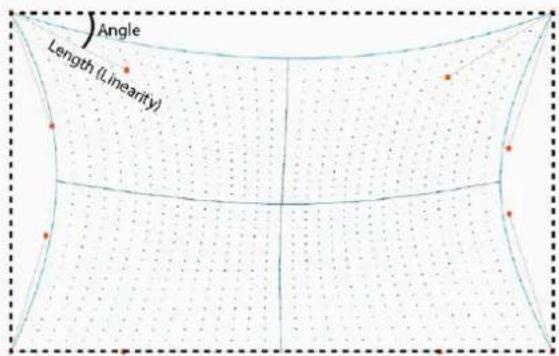
图像 8-36

图像 8-45
蒙版调整。
natural_image
Two vertical dark gray bars separated by a single vertical line (no text or symbols)图像 8-48
黑度调整程序
natural_image
Pure black rectangle with a vertical gray stripe on the left edge (no text or symbols)图像 8-51
如何执行 RGB 调整
bar
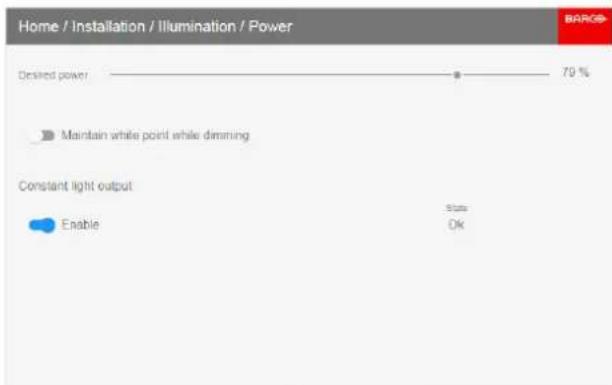
| Lighting Type | Constant light output (%) | | :--- | :--- | | IR LED | 64 | | LED | 42 | Home / Installation / Illuminated / Power Enable图像 8-59 输出功率已调整
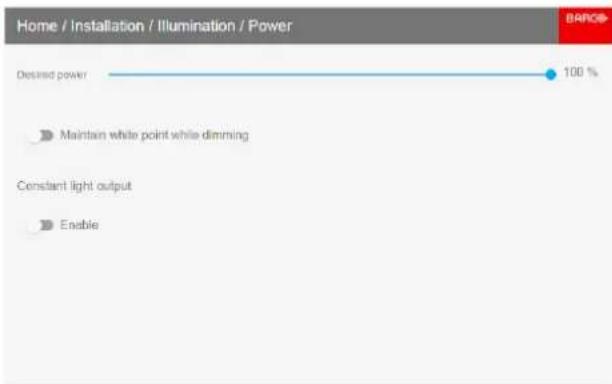
图像 8-60
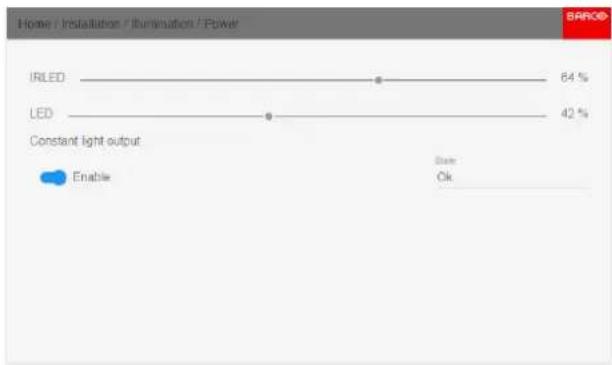
图像 8-61 CLO 已启用
图像 10-4 通信菜单,远程控制
屏幕中会显示远程控制菜单。
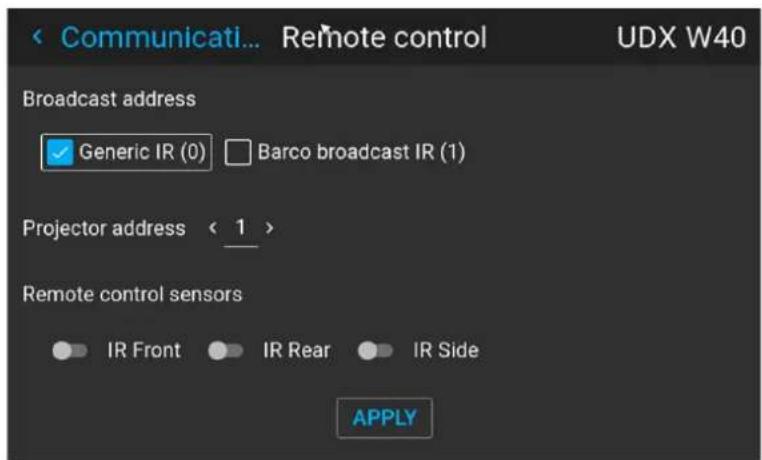
图像 10-5 远程控制菜单示例
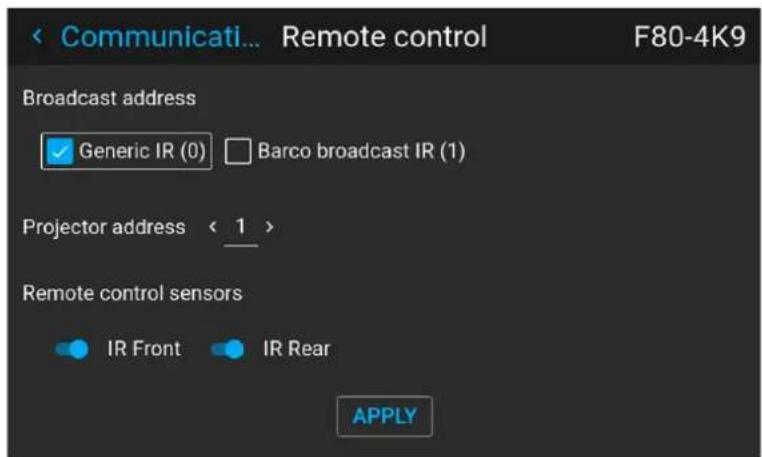
图像 10-6 远程控制菜单示例
图像 10-7 通信菜单,远程控制
屏幕中会显示远程控制菜单。
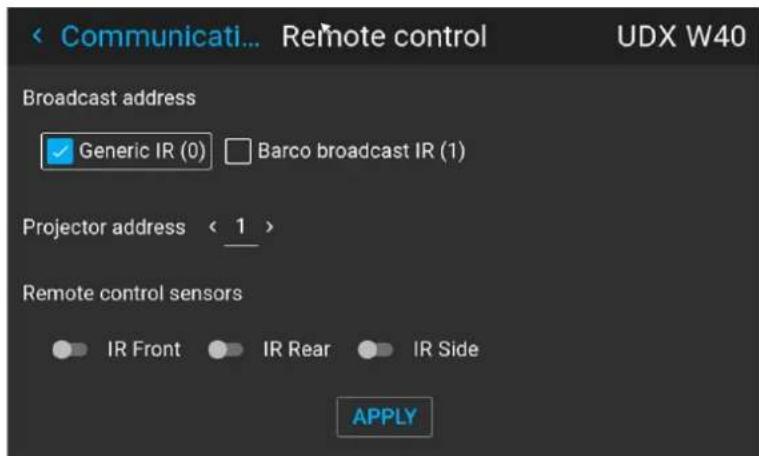
图像 10-8 远程控制菜单示例
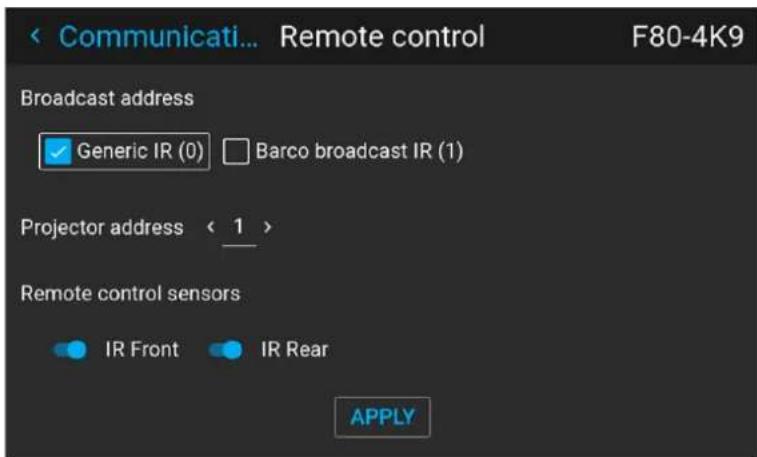
图像 10-9 远程控制菜单示例
图像 10-10 通信菜单,远程控制
屏幕中会显示 IR 控制菜单。
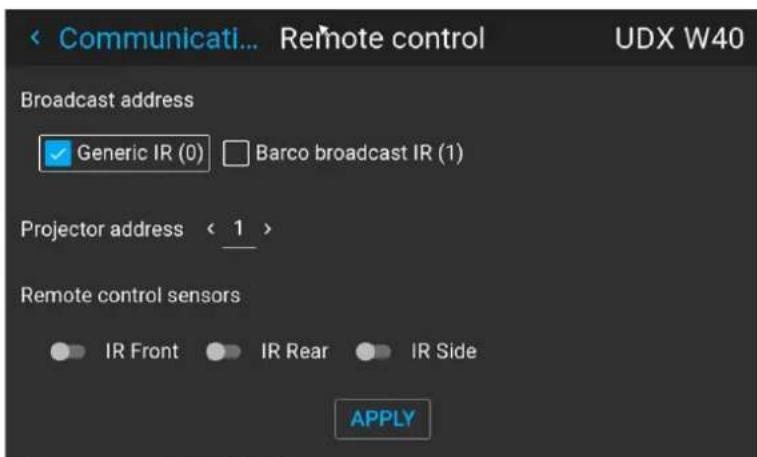
图像 10-11 IR 控制菜单示例
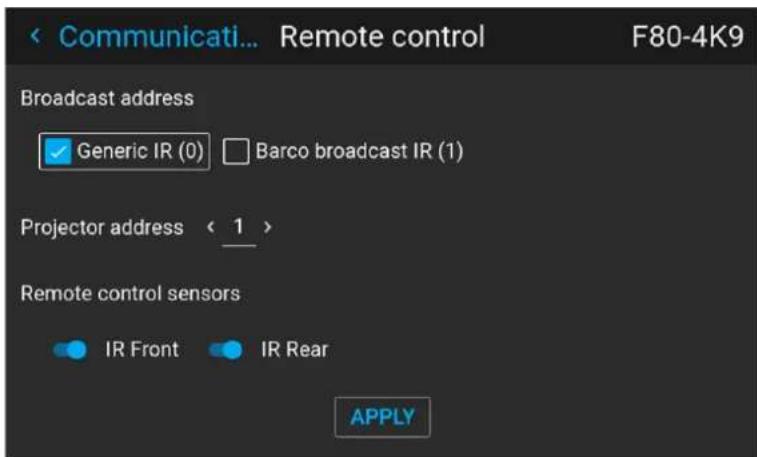
图像 10-12 远程控制菜单示例
图像 10-21
设置背光模式
图像 10-31 背光菜单示例
图像 11-3 状态菜单中的第二页示例
在“状态”页上可以看到哪些内容?
图像 13-2
美国市场
line
| Throw Ratio | Hazard Distance [m] | | ----------- | ------------------- | | 0.5 | 0.4 | | 1.3 | 0.8 | | 2.1 | 1.2 | | 2.9 | 1.6 | | 3.7 | 2.0 | | 4.1 | 2.3 | | 4.9 | 2.6 | | 5.3 | 2.9 | | 5.7 | 3.2 | | 6.1 | 3.5 | | 6.9 | 3.8 | | 7.3 | 4.1 | | 7.7 | 4.4 |- 变更
- 中文版本——商标
- 联系信息
- Barco 联系信息
- 联系地址(台湾):
- 生产地信息
- 生产日期
- 安装镜头
- 用户手册
- 何时校准镜头
- Installing the lens safety cable
- When to use the lens safety cable
- Content of the lens safety cable kit (R9801196)
- How to install the lens safety cable
- How to mount the cable to a short barrel lens
- 准备 FLDX 镜头 (0.38:1) UST
- 概述
- 安装到天花板上
- Scheimpflug(视轴)调整
- 什么是 Scheimpflug?
- 图像菜单
- 6
- 数字平移
- 数字平移
- 高级图像调整
- P7 Realcolor
- 目的
- 如何设置正确的方向
- 1:1
- 填充屏幕
- 拉伸
- 进入方法。
- Distorted Picture
- Ideal Picture
- 变形 - 开/关
- 关于变形开/关
- 如何调整图像?
- 如何调整图像。
- 非对称弯曲校正
- 在弯曲变形程序中定义角度和线性(长度)
- 蒙版调整。
- 黑度调整程序
- 如何执行 RGB 调整
- 设置背光模式
- 在“状态”页上可以看到哪些内容?
- 美国市场
Brand : Barco
Model : Loki CinemaScope
Category : Projector